Wasso Posted May 3, 2015 Author Posted May 3, 2015 Bummer mate! All I can say is I feel your pain and was happy to be a small part of the humiliation of Phoenix. I really hope this comes together for you mate and Emerald sort things out for you. I presume you have told Phoenix to do one!! Sent from my Zed using Nangkang tyres front, RE040's rear Not yet, but will be doing so. Thing is they've spent some time at least making a mockup set of headers. I'll need to offer something in materials as I'm refusing to go back based on timeframe and incompetence (I do seem to find these sort of traders oh so well). I'm sure that we will succeed it's just one of those headaches that turns into a migrane! Being positive and the support from Bob and Chris being petrol heads just makes the process less painful. Oh and Darren - keep your phone handy, we may require your services fairly soon on the fuel side Ahahahaha lots of people need my services but I have a mammoth task of getting my 240 ready before June How could you?! Man that's just unacceptable putting yourself before others. Don't worry I'm sure there's a guide out there. Quote
Wasso Posted May 3, 2015 Author Posted May 3, 2015 Yes I forgot to say, the Prop was a blinding success. Cheers Bob for keeping your ears to the ground Quote
Adrian@TORQEN Posted May 3, 2015 Posted May 3, 2015 @ Ian / Chris, I'm not an expert, but how safe is the solution for the propshaft bracket? We're talking about serious power here, if that fails, might cause serious damage to whoever is inside the car at that moment in my modest view. Worth adding some lateral reinforcement / support on it? Quote
Wasso Posted May 3, 2015 Author Posted May 3, 2015 It's fine Adrian, if the fixings already on the prop were heavy duty, then yes. But they're not and as recommended by the prop guy who seriously knows his cheese, said a simple fixing will be perfectly fine. It's about 4mm thick the fixing point where as the actual arms on the prop are 2mm so we are actually over compensating. It won't move trust Chris. 1 Quote
Keyser Posted May 3, 2015 Posted May 3, 2015 I think I see where you are going but ...................... The guy that built and balanced the prop shaft actually said "there is no strain on the center joint" in fact they often balance them using only 2 zip ties to keep that joint steady. Also you will notice the original carrier is made of a lot thinner metal than the bracket I made and if you swing on it the original starts to give way before the new brackets (I know I tried ) so if it does fail it won't be my bracket that gives. When you say lateral support - given that it's a tube I assume you mean forwards and backwards as the new one is a solid mount at an angle it can not move up, down, left or right - you cannot support it forwards and back or at least it would be pointless given that like most prop shafts it has a slider which would simply slide all the way out if backwards force was applied, this is also true of a standard 350. However I have the added bonus of not having to sit in the car so although I appreciate your concern I should be OK 1 Quote
Adrian@TORQEN Posted May 3, 2015 Posted May 3, 2015 Ha ha, well, Uncle Chris you're safe, let's hope for the best for Ian! 2 Quote
Keyser Posted May 3, 2015 Posted May 3, 2015 Ha ha, well, Uncle Chris you're safe, let's hope for the best for Ian! That's the one he won't be driving it anytime soon anyway 1 Quote
Wasso Posted May 3, 2015 Author Posted May 3, 2015 You may jest Chris from what I'm about to say, but I implicitly trust your work. If there's something I'm not comfortable with you know I'll say. To be fair Chris has been fairly courteous, "Ian, okay to use the HAMMER" of course 1 Quote
Adrian@TORQEN Posted May 3, 2015 Posted May 3, 2015 Ha ha ha How are we on the budget side, has the Phoenix failure increased it or we're still within the £16k? Quote
Wasso Posted May 3, 2015 Author Posted May 3, 2015 Ha ha ha How are we on the budget side, has the Phoenix failure increased it or we're still within the £16k? It could bring the price in a bit. The exhaust and headers work was priced at £2,800 - so we are hopefully looking at a saving. But I'll not tempt the devil and wait for the fat lady to sing! 1 Quote
Ebized Posted May 3, 2015 Posted May 3, 2015 OK I'll let you off Ian - I know all too well this project management malarky can be more stressful than anything with just one 'party' fecking up the schedule, so good to hear you have got someone else on board to help get it completed Quote
Wasso Posted May 3, 2015 Author Posted May 3, 2015 Cheers Colin, but to be fair if it wasn't for Chris and Bob with their knowledge of their locale, I'd be left in deep shite. I'm one of the nature "never give up" until I'm of course totally defeated. Not one of these half hearted "give up" chaps. Took enough planning so I must finish even if it kills me. Quote
parello9 Posted May 3, 2015 Posted May 3, 2015 wow no wonder your pi**ed! just when it was coming abit more together Just think of your smile when you finally get to drive it 1 Quote
Bodyboarder81 Posted May 3, 2015 Posted May 3, 2015 ..... And I'm getting fed up with my car after being off the road for 2 weeks !! Fair play to you , it'll be great when it's done . Can't wait to just hear it to be honest Quote
Cal Posted May 3, 2015 Posted May 3, 2015 2 months without mine hasn't been pleasant... I admire your patience! Hope Emerald are more capable in sorting your requirements, the Shed boys just need to use the hammer more Quote
Wasso Posted May 3, 2015 Author Posted May 3, 2015 Its been since January for me, but I don't mind as the wait should be worth all the pain and cost. Quote
Elliot350 Posted May 3, 2015 Posted May 3, 2015 Who are you using for the exhaust system and decats/cats now? Be nice to see this finished can't wait to get started on my bhp part of my zed! Quote
andy james Posted May 4, 2015 Posted May 4, 2015 When the Zed Shed boys have done their stuff Ian you are going to have one awesome sounding machine! Can't wait to hear the V8 burble! Quote
HoundDog Posted May 4, 2015 Posted May 4, 2015 Nice to see you got patience must be very frustrating but just wait till its finished. WOW Quote
Keyser Posted May 6, 2015 Posted May 6, 2015 So after the lack of success we have had with the Zorst and the fact that we can get the stock headers in we just need to get from them to the back - so I thought I'd see what I could do Bit of ply A manifold Soon had a flange made Don't worry about it being wood - he will only notice when he starts the car - and that won't be any time soon OK OK Used the template to make these - I will soon be welding them onto this 2.5" (64mm) pipe I picked up today. Then I just have to bend/weld/beat/twist/swear/curse and get them to come out at the bottom of the Zed in other news - I dropped the power steering pipe off with the lads down at Thread and Pipe to have a custom high pressure hose made up from the LS PS pump to the OEM 350 rack - that should be ready for collection tomorrow Got some oil and fuel rated hose ready for the low pressure side and picked up some rad hose for the heater matrix connections (I love shopping when its not my money ) Other than that we test fitted the Emerald loom which seems to be a good start, this will hopefully be going up to them to be modified for this later edition engine but first I needed to know what I had so I can work out what I need. Starting here pulled it off the car and started to trace the wires but ............. O yes the good old changing colour wire routine No worries just strip the lot ended up looking like this But at least I know where every pin on the ECU starts and finishes - just need to trace and label the Aux and the relays now That's all for now Zed Shed Signing Off 3 Quote
Ebized Posted May 6, 2015 Posted May 6, 2015 And you play scrabble too - you're a sucker for punishment Quote
Wasso Posted May 6, 2015 Author Posted May 6, 2015 OMG what have you done with my loom Trust, I'm sure there's trust somewhere in all of this. Looking smart...... When will you take delivery of the "machine" Quote
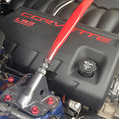
Adrian@TORQEN Posted May 6, 2015 Posted May 6, 2015 What happened to your engine bay, Ian? :cry: Wire tuuuuuuuuck alert! Quote

Recommended Posts
Join the conversation
You can post now and register later. If you have an account, sign in now to post with your account.