


ilogikal1
-
Posts
4,733 -
Joined
-
Last visited
Content Type
Profiles
Forums
Events
Gallery
Store
Everything posted by ilogikal1
-
Lies. And it's not even close.
-
Don’t believe the narrative. https://www.ucsf.edu/news/2020/09/418611/time-restricted-eating-doesnt-work-weight-loss
-
I think we all know the answer to this. However, he’s merely arguing semantics for the sake of it. I do agree that the car was in the care of the garage when it was re-stolen (his point). Which is entirely irrelevant to the OP for all of the reasons you’ve already stated. More than once. But mostly because from his perspective the car was in the care of the insurance company regardless of what they did with it. As you’ve said. More than once.
-
Expectation: Leonardo da Vinci's Mona Lisa. Realisation: Tracey Emin's Over and Out.
-
I also thought UK Z’s had an 80 litre tank actually. Either way, the gauge is more of an estimate than an actual reading due to the way it works, shape of the tank and movement of the contents. It’s mostly related to the shape of the tank more than anything, unless it’s a cube (which most aren’t) on a flat plane (which depends on where the car is), it’s going to give a false reading one way or another. You also need to account for over a decade’s worth of gunk that’ll be sitting in your tank, effectively reducing the volume of fuel it can hold too (albeit not by that much!).
-
@ZMANALEX is worth a try. Nuts, beaten to it by the man himself by mere seconds.
-
I’m scared, Dan. I’m scared that Col has lost the plot and will end up in a ‘Teg with too many digits in the price tag…
-
For eyelids, only one thing looks any good - fortunately it's really cheap; clicky.
-
He's maintained that engine for 20 years. That old motor has had 17 new bottom end rebuilds and 14 top end rebuilds in it's time...
-
Okay.
-
-

When Your Pension Pot is Imminent (sort of) (Porsche Content, Mibees)
ilogikal1 replied to The G Man's topic in Other Cars
Just? JUST?? Daniel, it has TWO badges as well! -
Yes, they do a glossifier top coat as well as single-stage gloss black these days.
-
You may have already considered it, but Plastidip could be a viable non-permanant alternative. I'm surprised no one else has mentioned it yet, but Zippypooz is your man for all things wrapped.
-
I'm warning you now, if ou've spent £12k on a f**king 'Teg, we can't be friends anymore.
-
That’s seatism, you seatist! You're going to make us wait to find out, aren’t you??
-
https://www.daqua.co.uk/divessels.htm I went for the 11 Litre DI vessel filled with MB-115 resin In a lovely twist of coincidence, this 6 year old post includes me talking about both the DI filter and the Sidekick. But there's more useful information here too.
-
Yep, I'd highly recommend them to anyone who lives in a hard water area for sure - avoid the in-line ones though, they tend to be a false economy, and go for a tank instead. Much easier to rinse with filtered water and just walk away, especially on hot days.
-
I used to have the Sidekick myself - mostly useful for those water trap areas, door shuts and such. Got rid of mine when I got my DI filter and stopped drying the car at all. Now I've gone back to towel drying (temporarily) I really miss my... DI Filter actually. Drying is effort.
-
Nissan looked at the cost of meeting emissions regulations in UK and Europe and at their mounting debts and thought sod that. They won’t have got anywhere near looking at sales of the ‘70 (or the Supra) before it was already a complete non-starter. When (if) Nissan’s financial situation sufficiently improves for them to reconsider spending that kind of money to bring the Z here, then, and only then, will they look at sales volumes. And will probably then think sod that again. Also, by then, you won’t be able to buy petrol powered cars in the UK, because the UK government never changes its plans…
-
Possible? Yes. Likely? No. They couldn't "have" one dealership import the cars either. Any dealership wishing to import one would have to do so independantly. Otherwise Nissan are selling the car in a market they have many reasons, two of which being poor sales and high cost, not to sell a car in but at exceptionally low volumes and exceptionally high cost. Speaking of - why would they ship a car over a country without any intention of ever selling it there when they just invite the press to place where the car is for the cost of an email or two instead. Or - what Dan said.
-
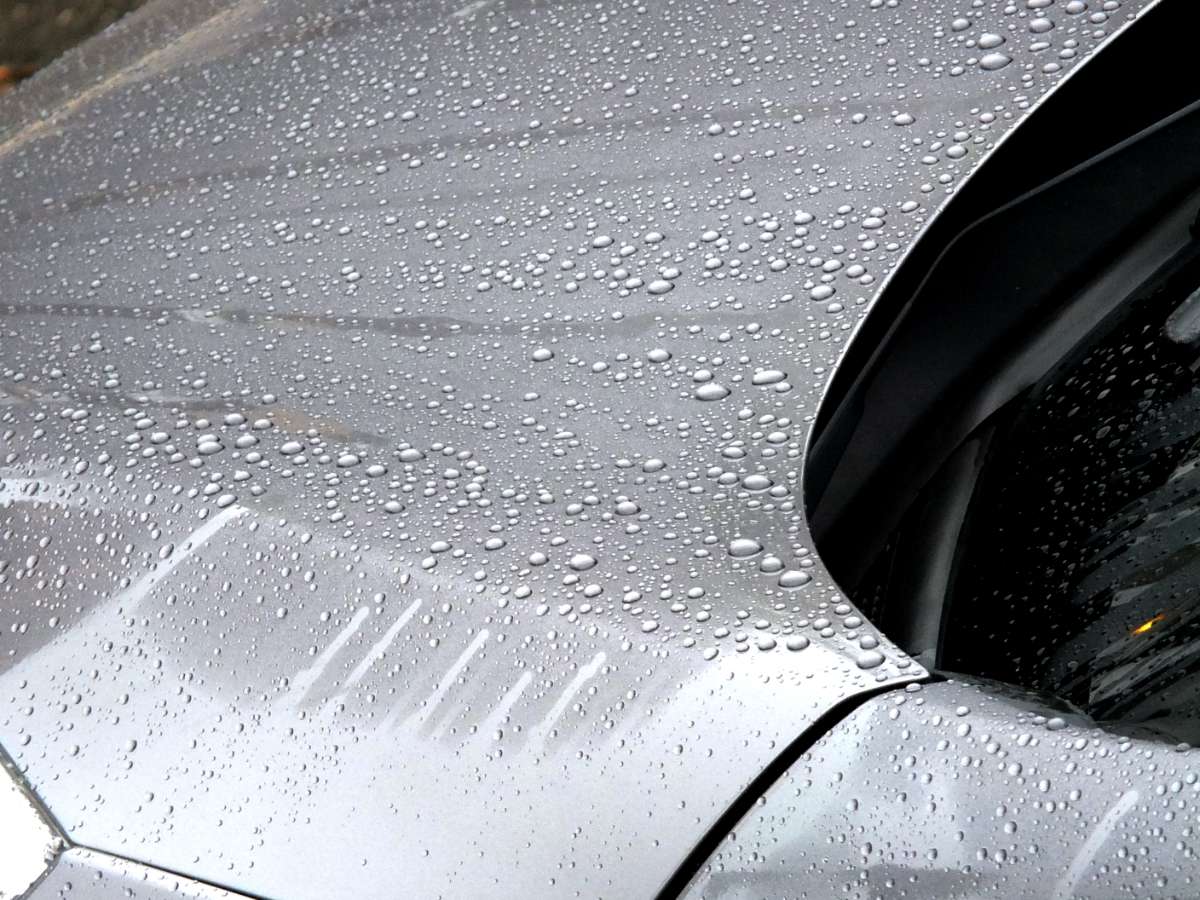
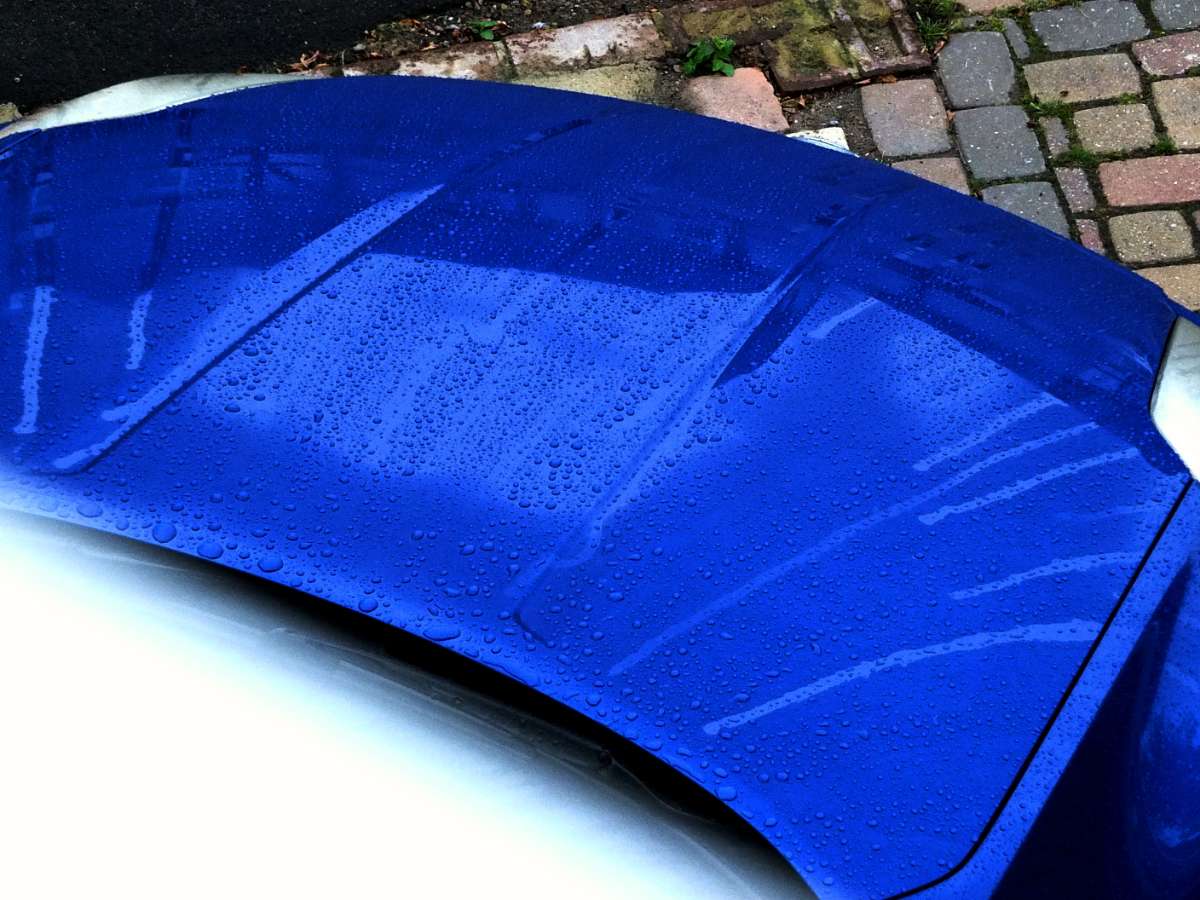
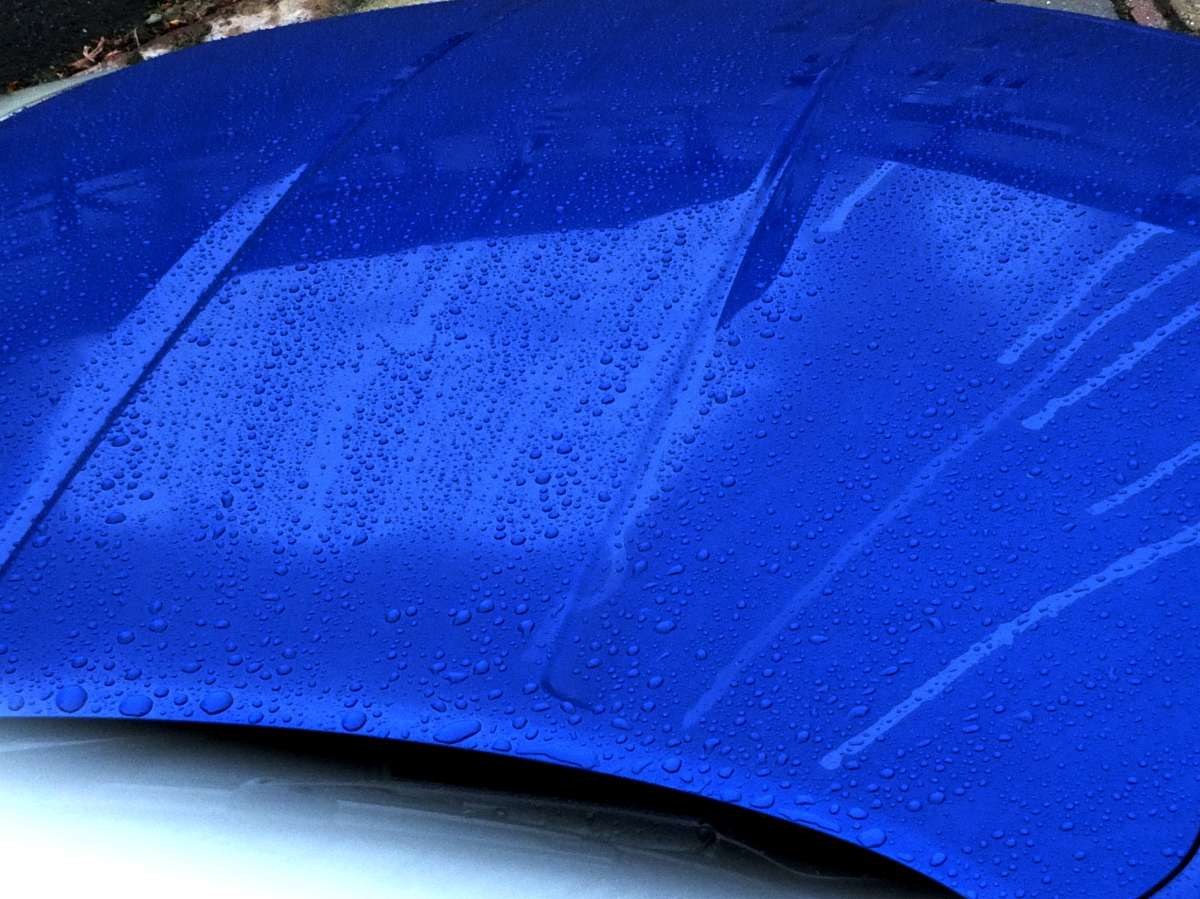
I threatened pictures if it rained. It rained. Here be pictures. There's currently not much between Hydropel and Lockdown - still marginally more sheeting from Hydropel, but that's about it. When (not if) it rains again I might get some better pictures. I might not. You'll have to make do with what you get. If anything.
-
Nissan: We’re definitely not taking it to Europe for emissions and cost reasons. Renault: But… we want you to. Nissan: Oh, okay then, we will. Seems legit.
-
I really should pay more attention, y'know. Here's hoping that the durability is at least adequate - it's not a faff to apply by any means, but I'm still hoping durability can be measured in months rather than days! I'm alright with hijacking. In the right context, that is... Anyway. Short version to address your query: I've not used Water Block. But to address your issue; try a different applicator if you were using the supplied one and focus on spreading it as thinly as is humanly possible as that's what made the biggest difference with Fusso. Fusso (and possibly KoG actually, I don't remember) did spread a lot further than even I expected it to, so prime suspect for me would be too much product, followed by leaving it a touch too long. Longer version, which eventually explains the above in a verbose manner: I have used Fusso a few times and found it fussy to use - easy to over apply and and **** to remove where it had been. If you can get it thin enough, it was was fine (except when used in direct sunlight but not allowed to bake on, then it became a **** again). QD helped, but applying more wax helped more - I found it was best to apply to two panels then return to the first, apply again and buff straight away before repeating on the second panel was the best way. Then I discovered that the applicator that comes with it is s**t. Switching to a better quality applicator - I'm told a finer pores are the key here, but [shrug] - made it easier to spread more thinly, and thus it was easier to remove (although still not the easiest wax to work with). Fusso looks and acts just like FK1000P, marginally less durable though not by much - never lived up to the 12 month promises! More fussy to use. Twice the cost for half as much wax, too. But the bigget difference was the lack of shark on the tin. Deal breaker. I'm sticking with the shark. I've also used King of Gloss, but only once. Wasn't blown away by it - it wasn't any better than FK pink wax, for example - and no idea on actual durability. It was okay to use (with a good applicator). Dusty at times though. All in all, I would use either again but I would buy neither. I'm in no rush to try any of the rest of the range.


