stu1986 Posted December 7, 2012 Share Posted December 7, 2012 Hi all While my car is in the bodyshop having a few bits done and the headlights were already removed I thought Id do a little project on them, I was looking for another set to practise on but after I found out the price for them I decided to bite thew bullett and go for it on my own ones so here goes...... Before The Headlight lens was then split for the main unit by placing in the oven to soften up the mastic The Headlight lens was then split for the main unit by placing in the oven to soften up the mastic The Headlight lens was then split from the rest of the shell Holes were drilled in the appropiate places The rest of the shell was dismantled and sprayed satin black Once complete the shell was rebuilt White LEDs were prepared using resistors and heatshrink LEDs were then placed in the holes drilled and glued into place A simple test to make sure they were all still working using a battery The lens was screwed back together LEDs on with Lens I also purchased some Super bright LED Sidelights and some LED Indicators with resistors that will be fitted Front and rear The Headlights are now ready to be put back together, I will be having to brightness's on the lights 100% when the lights aren't on, and once they are on they will dim down to around 25% More updates coming soon!! Quote Link to comment Share on other sites More sharing options...
Jay Posted December 7, 2012 Share Posted December 7, 2012 That looks very sexy indeed........wish dreamzcustoms were still running as I would be asking them to do my headlights. Quote Link to comment Share on other sites More sharing options...
stu1986 Posted December 7, 2012 Author Share Posted December 7, 2012 That looks very sexy indeed........wish dreamzcustoms were still running as I would be asking them to do my headlights. Do it yourself much more fun Quote Link to comment Share on other sites More sharing options...
richt Posted December 7, 2012 Share Posted December 7, 2012 Looks good. Quote Link to comment Share on other sites More sharing options...
Jay Posted December 7, 2012 Share Posted December 7, 2012 That looks very sexy indeed........wish dreamzcustoms were still running as I would be asking them to do my headlights. Do it yourself much more fun Dont trust myself dude Quote Link to comment Share on other sites More sharing options...
DoogyRev Posted December 7, 2012 Share Posted December 7, 2012 They look great Quote Link to comment Share on other sites More sharing options...
glrnet Posted December 7, 2012 Share Posted December 7, 2012 Very nicely done indeed Quote Link to comment Share on other sites More sharing options...
LRF4N Posted December 7, 2012 Share Posted December 7, 2012 Looks good mate. Make sure you get before and after pics of them on the car. Black internals tend to neaten up the front on any car/colour Quote Link to comment Share on other sites More sharing options...
stu1986 Posted December 7, 2012 Author Share Posted December 7, 2012 I will do mate Quote Link to comment Share on other sites More sharing options...
Dblock Posted December 8, 2012 Share Posted December 8, 2012 Look great Quote Link to comment Share on other sites More sharing options...
evilscorp Posted December 8, 2012 Share Posted December 8, 2012 Quote Link to comment Share on other sites More sharing options...
Sam Mcgoo Posted December 8, 2012 Share Posted December 8, 2012 Very nice. Quote Link to comment Share on other sites More sharing options...
Keyser Posted December 8, 2012 Share Posted December 8, 2012 Like that Quote Link to comment Share on other sites More sharing options...
Flex Posted December 8, 2012 Share Posted December 8, 2012 That's very star trek! Me like! 1 Quote Link to comment Share on other sites More sharing options...
stu1986 Posted December 9, 2012 Author Share Posted December 9, 2012 Thanks for all the comments, hoping to get the lights bonded back together and fitted on Monday, I'll get some pictures of the whole car then what she looks like back from the Bodyshop Quote Link to comment Share on other sites More sharing options...
Beavis Posted December 9, 2012 Share Posted December 9, 2012 That looks very sexy indeed........wish dreamzcustoms were still running as I would be asking them to do my headlights. Do it yourself much more fun :smile: Dont trust myself dude + Dont forget your Scottish Look very nice Quote Link to comment Share on other sites More sharing options...
Jay Posted December 9, 2012 Share Posted December 9, 2012 Get back in your box Beavis lol Quote Link to comment Share on other sites More sharing options...
steve-r Posted December 10, 2012 Share Posted December 10, 2012 Hats off to you for having ago at this mod. I really like this one but like jay has mentioned I don't think id have to balls to try it in fear of melting down my headlights into goo Quote Link to comment Share on other sites More sharing options...
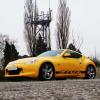
stu1986 Posted December 17, 2012 Author Share Posted December 17, 2012 UPDATE - 17/12/2012 Now everything has been done it was the final stages of getting the lights back together. One the car was back from the body shop it was time to fit them and do the wiring The wires for the two sides went into a grommet to go into the cabin on the left hand side (looking from the front) Wires them came out in the drivers footwell The LEDS would come on once the ignition was active I them spiced in to on of the blue wires going to the fuse box I then placed an inline blade fuse just in case and was then all sorted I know its not to everyones taste but I like it For more pictures of my car what she looks like now go to my car thread http://www.350z-uk.c...0z-lots-of-pics Quote Link to comment Share on other sites More sharing options...
Kev T Posted December 17, 2012 Share Posted December 17, 2012 Cool ! Quote Link to comment Share on other sites More sharing options...
Wasso Posted December 17, 2012 Share Posted December 17, 2012 I have to say that looks mighty impressive and very OEM. Grand job there fella. Quote Link to comment Share on other sites More sharing options...
spursmaddave Posted December 17, 2012 Share Posted December 17, 2012 Very nice Quote Link to comment Share on other sites More sharing options...
LRF4N Posted December 17, 2012 Share Posted December 17, 2012 Looks the business mate good work Woulda kept the badge myself. Perfect chance to get a shiny black badge would set the front end off Quote Link to comment Share on other sites More sharing options...
sparky370z Posted December 17, 2012 Share Posted December 17, 2012 Very cool dude. Fancy doing mine. Or post up a idiots guides. They look awesome. Would look pukka on my black zed Quote Link to comment Share on other sites More sharing options...
ChrisS Posted December 17, 2012 Share Posted December 17, 2012 Looks like you'd have a lot of customers if you set up as a trader on here. 1 Quote Link to comment Share on other sites More sharing options...

Recommended Posts
Join the conversation
You can post now and register later. If you have an account, sign in now to post with your account.