Wasso Posted May 25, 2012 Author Posted May 25, 2012 Ahh well done fella, I missed a mod HEL Braided hoses and Motul RBF 600 Fluid fitted very soon after my RING trip as a result of cooking my brakes. I also have HEL Braided Clutch as well Not sure if I've even added the SuperPro eccentric lower compression arm bushes and ARB bushes to the list. I keep fitting things but forget to put them on here. Quote
BulletMagnet Posted May 25, 2012 Posted May 25, 2012 Not sure if I've even added the SuperPro eccentric lower compression arm bushes and ARB bushes to the list. I keep fitting things but forget to put them on here. Mount a big whiteboard in the garage listing every mod you plan to do and then make a big red tick mark when done Quote
Wasso Posted May 26, 2012 Author Posted May 26, 2012 Not sure if I've even added the SuperPro eccentric lower compression arm bushes and ARB bushes to the list. I keep fitting things but forget to put them on here. Mount a big whiteboard in the garage listing every mod you plan to do and then make a big red tick mark when done The long list is almost done, only a few low value mods to do, then there's some very expensive mods. Example: Low value: Braide the rest of the engine bay Tint windows Replace wheel nuts when news wheels are ordered Expensive: Supercharger + add on's Wheels + Tyres Motordyne Back box So the list is almost complete, just need a job now so that I can continue spending Oh and I don't have a garage which is a pain in the a$$. Quote
rothers2901 Posted May 26, 2012 Posted May 26, 2012 Mate always had full appreciation for your Z and the effort taken. It's just got better,Good work. Quote
Neilp Posted May 26, 2012 Posted May 26, 2012 Ian, you would be ashamed of the colour of my engine bay The dirtiest part of your engine bay is still cleaner than my cleanest part Quote
Wasso Posted May 26, 2012 Author Posted May 26, 2012 Mate always had full appreciation for your Z and the effort taken. It's just got better,Good work. Cheers Rothers it's not for the will of trying. Ian, you would be ashamed of the colour of my engine bay The dirtiest part of your engine bay is still cleaner than my cleanest part Well there's a few dirty bays out there. It's a huge job to clear the crap, and I had to remove a number of items in order to get a good clean. Used some engine bay cleaner courtesy of DoogyRev which worked a treat. I can actually put my hand up and say my bay is now cleaner than Shire's, I had a moan at him at Wales for not keeping on top of things. Problem for me is once you start you've got to keep going. In fact I'll be giving her a quick dust over in the engine bay tomorrow. More painting and polishing today for plenums and struts. Quote
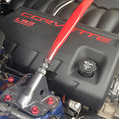
taffyjason Posted May 26, 2012 Posted May 26, 2012 what did you use to polish the plenum chamber? Quote
Wasso Posted May 26, 2012 Author Posted May 26, 2012 what did you use to polish the plenum chamber? A multitude of weapons and hours of elbow grease. Wet and Dry 120, 180, 240, 440, 600 Drill : 120, 180, 320 flap wheels Dremmel : varying light grit wheels Them move onto.... Drill : 3 sized polishing mops, with 3 varying cutting and polishing compounds Bench machine : 8" polishing mops, again 3 wheels for cut, cut and polish then finish with polish. Back onto drill and dremmel with felt ends and polishing mops. Let's just say it takes a long time and very frustrating as you need to bring the levels of grit evenly, ensuring all previous levels of abrasion are removed. The bench machine polisher is my favourite as you get amazing results, only problem is my machine gets hot with lots of work. Quote
taffyjason Posted May 26, 2012 Posted May 26, 2012 my dad has a workshop for his business, i might see what i can steal Quote
Wasso Posted May 26, 2012 Author Posted May 26, 2012 my dad has a workshop for his business, i might see what i can steal Note: you'll probably spend about 30hrs on your first one, as it's a fine art completing each cycle, knowing when to move onto the next grit and so on. You'll also find that you'll become impatient and want it shining like no tomorrow. You must avoid that feeling as you'll only have to retrace steps back to before getting ahead of yourself. A bench polisher and compounds are a must for getting the best results. I invested over £200 for the equipment. Quote
glrnet Posted May 26, 2012 Posted May 26, 2012 Or you can get it powder coated for £80 and no effort my dad has a workshop for his business, i might see what i can steal Note: you'll probably spend about 30hrs on your first one, as it's a fine art completing each cycle, knowing when to move onto the next grit and so on. You'll also find that you'll become impatient and want it shining like no tomorrow. You must avoid that feeling as you'll only have to retrace steps back to before getting ahead of yourself. A bench polisher and compounds are a must for getting the best results. I invested over £200 for the equipment. Quote
Wasso Posted May 26, 2012 Author Posted May 26, 2012 Or you can get it powder coated for £80 and no effort my dad has a workshop for his business, i might see what i can steal Note: you'll probably spend about 30hrs on your first one, as it's a fine art completing each cycle, knowing when to move onto the next grit and so on. You'll also find that you'll become impatient and want it shining like no tomorrow. You must avoid that feeling as you'll only have to retrace steps back to before getting ahead of yourself. A bench polisher and compounds are a must for getting the best results. I invested over £200 for the equipment. Tut tut Mr G, now that's just lazy. But to be fair results can look pretty nice Quote
DannyBoy Posted May 26, 2012 Posted May 26, 2012 Or you can get it powder coated for £80 and no effort my dad has a workshop for his business, i might see what i can steal Note: you'll probably spend about 30hrs on your first one, as it's a fine art completing each cycle, knowing when to move onto the next grit and so on. You'll also find that you'll become impatient and want it shining like no tomorrow. You must avoid that feeling as you'll only have to retrace steps back to before getting ahead of yourself. A bench polisher and compounds are a must for getting the best results. I invested over £200 for the equipment. But would you not then have a powder coated plenum rather than a polished one? DB Quote
BulletMagnet Posted May 27, 2012 Posted May 27, 2012 Not sure if I've even added the SuperPro eccentric lower compression arm bushes and ARB bushes to the list. I keep fitting things but forget to put them on here. Mount a big whiteboard in the garage listing every mod you plan to do and then make a big red tick mark when done Oh and I don't have a garage which is a pain in the a$$. Use fridge in kitchen as whiteboard... Quote
Wasso Posted May 27, 2012 Author Posted May 27, 2012 Not sure if I've even added the SuperPro eccentric lower compression arm bushes and ARB bushes to the list. I keep fitting things but forget to put them on here. Mount a big whiteboard in the garage listing every mod you plan to do and then make a big red tick mark when done Oh and I don't have a garage which is a pain in the a$$. Use fridge in kitchen as whiteboard... I'd need a bloody great big fridge Quote
Wasso Posted May 27, 2012 Author Posted May 27, 2012 Some mod developments Red Brembo callipers will be fitted on Tuesday, along with my new engine start button. Which should hopefully look like this.... You may notice the number 7 on the package as I was a lucky winner at Wales and also took ownership of a new suede steering wheel both courtesy of EPR Racing Also to potentially add on Tuesday time permitting is one of those auto close mirror units from cookbot Quote
Wasso Posted May 28, 2012 Author Posted May 28, 2012 Had an opportunity to fit the above today, although encountered some issues with the calipers. 1. They have been spray painted rather than powder coated. 2. There is minimal or NO lacquer on them what so ever. They are going straight back to Godspeed for correction. So the calipers were not fitted. The auto fold mirrors therefore were dropped as well, due to the amount of time fitting the engine start button. Now, this is one piece of kit that really does look oem when fitted. Fits perfect, starts every time and looks nice. Quote
evilscorp Posted May 28, 2012 Posted May 28, 2012 shame about the calipers, did the paint flake off on you while installing, hope you didnt waste much time Quote
Wasso Posted May 28, 2012 Author Posted May 28, 2012 shame about the calipers, did the paint flake off on you while installing, hope you didnt waste much time There was a small amount of brake fluid that dripped onto the caliper, it instantly started stripping itself. Now if you drip brake fluid on the oem brembo's nothing happens as their is plenty of lacquer. I then took my finger nail to the paint, it clearly was not lacquered before leaving their depot. So they will be going back and a morning wasted. Quote
Will370z Posted May 28, 2012 Posted May 28, 2012 Starter button looks great, perfect for the cockpit and doesnt look out of place Very nice. Bad luck with the calipers Quote
Wasso Posted June 2, 2012 Author Posted June 2, 2012 Godspeed have accepted taking the callipers back. It turns out there was NO lacquer on the callipers "We use gloss paint and this didn't require lacquer" So they will re-do all of them with lacquer this time. I shall update when they return Quote
GT4 Zed Posted June 2, 2012 Posted June 2, 2012 Nice one but i thought you were going to get them to PC it rather than paint? That said if they use high temp paint and lacquer it should be alright but i know what i will prefer. Quote
KC350Z Posted June 2, 2012 Posted June 2, 2012 Looking will have acloser look at meet next week Quote

Recommended Posts
Join the conversation
You can post now and register later. If you have an account, sign in now to post with your account.