


G1en
-
Posts
882 -
Joined
-
Last visited
Content Type
Profiles
Forums
Events
Gallery
Store
Everything posted by G1en
-

Time limited recently but can now say ''hi''.
G1en replied to Ojai's topic in Introductions & Welcome Messages
Welcome along where are you from? -
Welcome along. Rare car too!
-
To be fair, most 10 year old performance cars come with a degree of uncertainty that could bite you in the ass. Just enjoy it buddy and if you can save a bit up, replace the “weaker” areas when you can. I have done the clutch/fly/slave and upgraded at same time. Gearbox in the HR is the uprated one anyway. Not done the gallery gaskets yet but oil pressure is fine. Just keep an eye on things. Enjoy it!
-
1. Rob350 2. G1en@waxandshine Also, not to miss an opportunity, if anyone wants to stock up on any cleaning/detailing products i can offer a 20% discount with code forum20 just choose collection aswell and i will bring along with me on the day.
-
Its that old saying, you cant go wrong putting your money into bricks and mortar. And med-long term it still seems true. I wonder how many People (esp down south) are “on paper” millionaires now purely on the back of their house price. I also watched something about Gold prices shooting through the roof over the same period. just think if you bought a gold house back in the seventies
-
I think its an add up type chart Stu. Not sure of the proper name. So you only measure the difference (additional) colour for the number. Ie Q1 2017 red starts at 26 finishes at 43 = 17TWh Then blue starts at 43, finishes at 75 = 32TWh although i could be completely wrong i think thats how we did it in the queens finest GCSE exams.
-
Welcome along even in standard trim, better looking than 99% of everything else on the roads
-
Great car, best colour, welcome Scott
-
Welcome Ben. Congratulations
-
Obviously Rob, the speedo gauge is faulty as its showing 77mph. Its a great milestone. The only downside is the car is now worth half what it was last week
-
Black 350Z now mine....and lovin' it
G1en replied to Stafford_Mart's topic in Introductions & Welcome Messages
Welcome along -
Welcome along
-
Welcome Paul good luck with the search
-
Will the rear fit a HR? And is it Ibisu black?
-
Good choice Stu Revolt shares many of the same ingredients as sex panther. Banned in 9 countries 60% of the time it works EVERYTIME!
-
Welcome Ian 8k should get you an average later HR model or a near immaculate earlier model. There isnt a massive difference in real world terms but i have the HR which i am glad i went with as its “slightly” better in several areas although many will argue its not worth the extra £. The decision is yours
-
19th good for me
-
Obligatory New User Post
G1en replied to BlackBerkshireZ's topic in Introductions & Welcome Messages
Welcome along doing your first mod is kinda like the pringles slogan. -
Welcome along
-
Hopeful to be new owner tomorrow....
G1en replied to 350Will's topic in Introductions & Welcome Messages
Welcome along That car looks a good deal on the face of it. As you have read the guides, they will give you a good idea of the common faults but the more expensive fixes are rust, have a good look underneath and around arches, clutch/fly/csc, ask when/if it was last replaced and banana arms/ bushes, check for knocking sounds or vauge steering. Good Luck -
Welcome along Steve
-
Can do 28/29 this month or 18/19 25/26 next month.
-
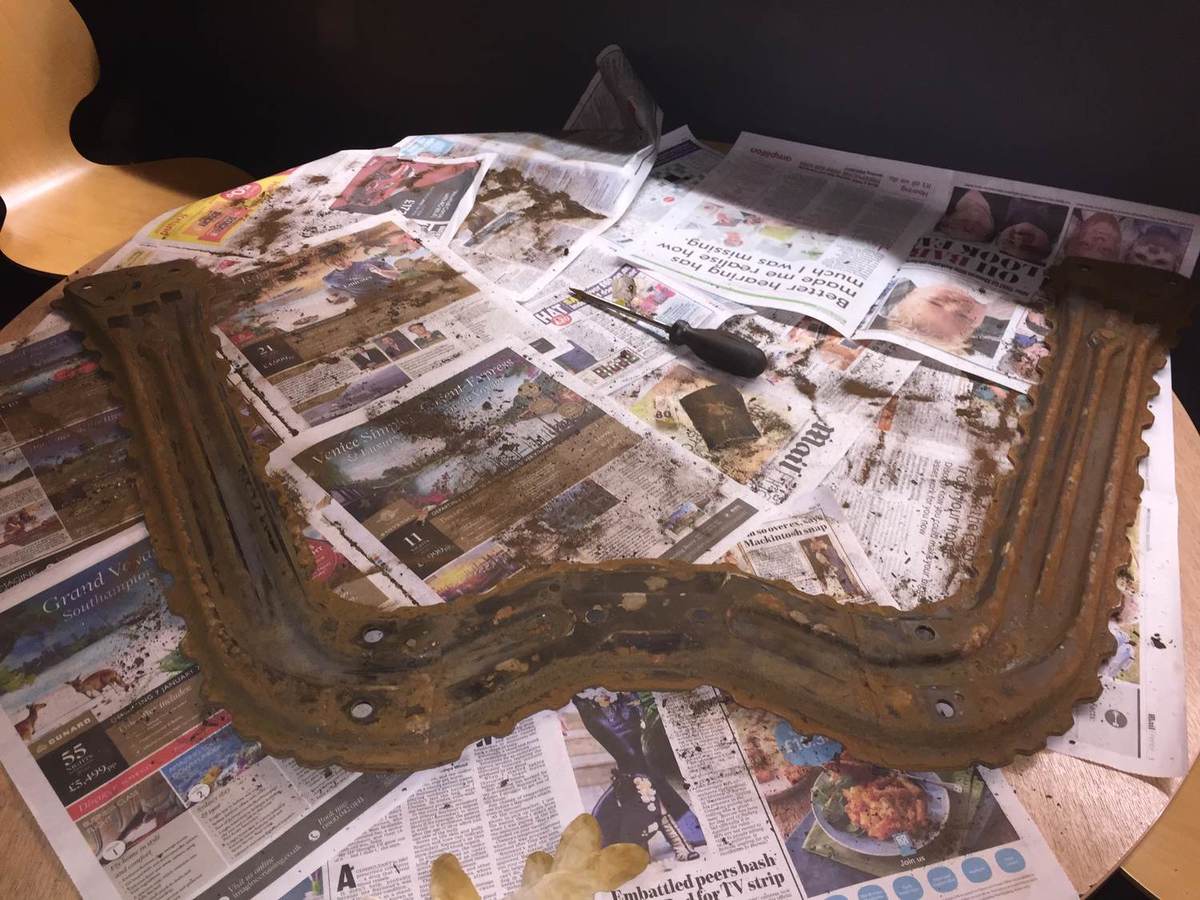
Get a look underneath the car to check the condition of the w brace. Basically as a rule of thumb: if its been on the car over 5 years it will need replacing. If the cars been used in the rain it will need replacing. If the cars been driven over the winter months it will definitely need replacing. If the car has spent any time on the coast you may struggld to find any of it still attached to the car. Ok the above is tounge in cheek but heres mine last year from 2008 car. it was in decent shape by comparison to some, a sand down, hammerite primer, hammerite satin black, 2 coats por-15 and 2 coats of bilt hamber underseal later and it should be good for another few years fingers crossed. Just for reference i undersealed the whole car recently and there was hardly any rust/corrosion on rest of vehicle so it shows what a bad design the oem brace is.
-
Welcome along that aerial wont last long....
-
I would be up for it, date permitting. Give the zed a good blast before winter hibernation.


