Search the Community
Showing results for tags 'detailing'.
Found 3 results
-
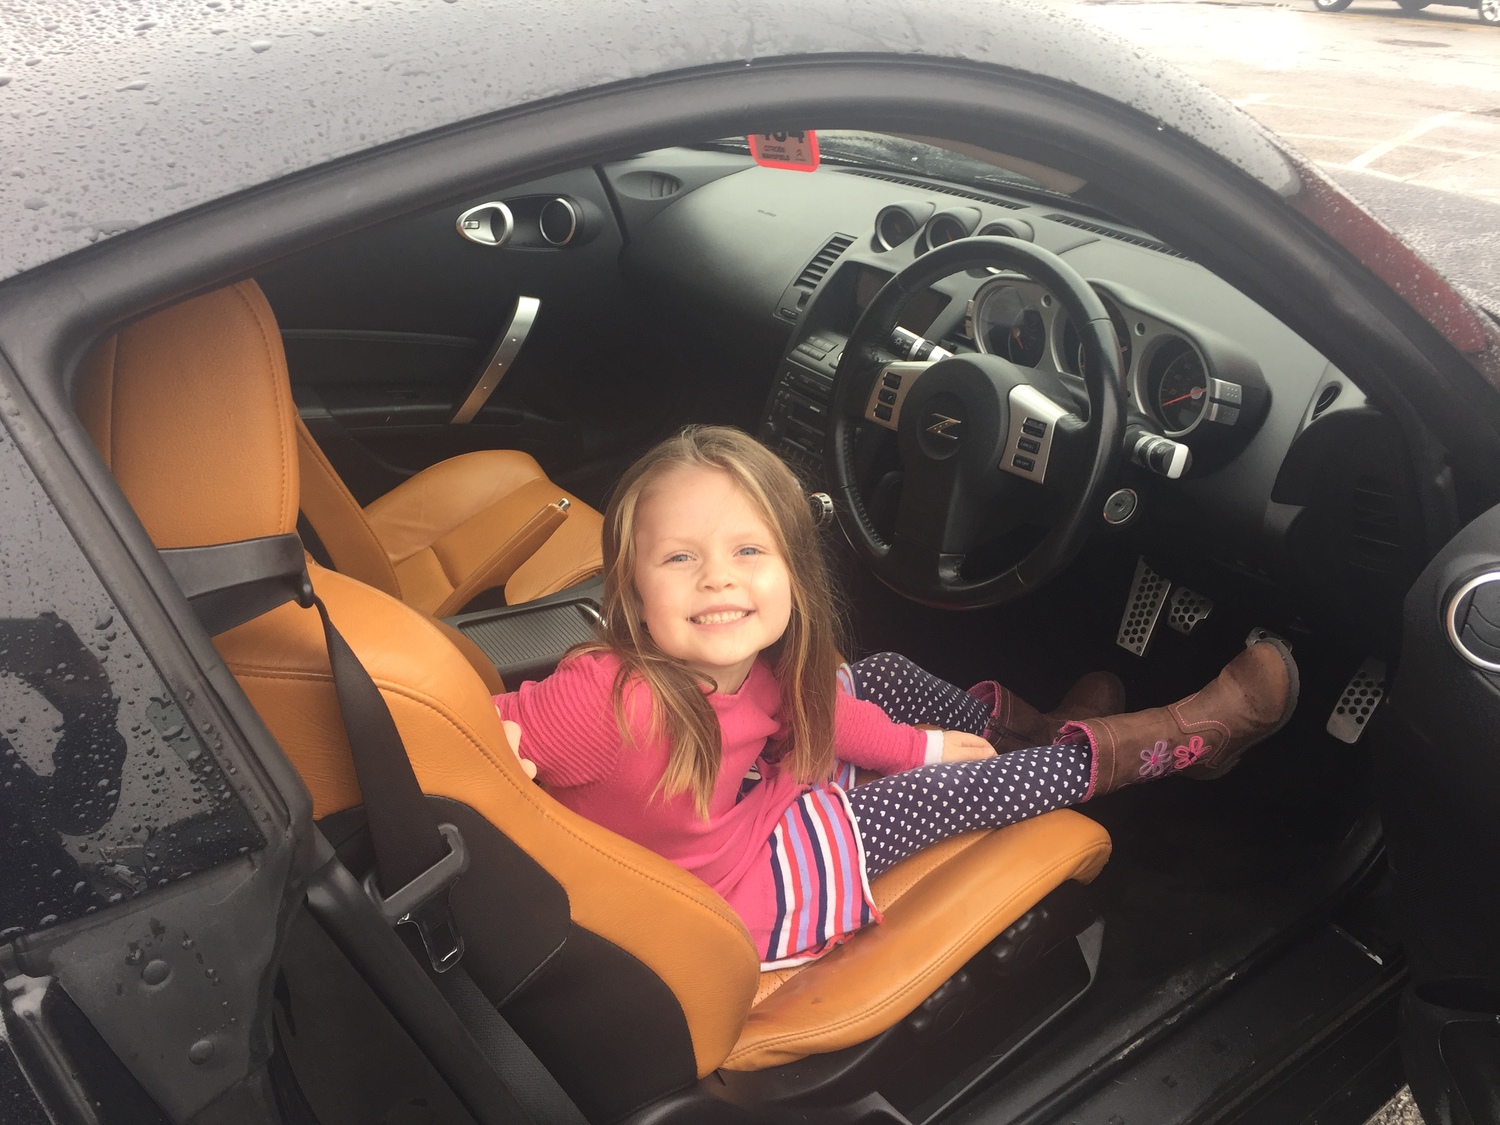
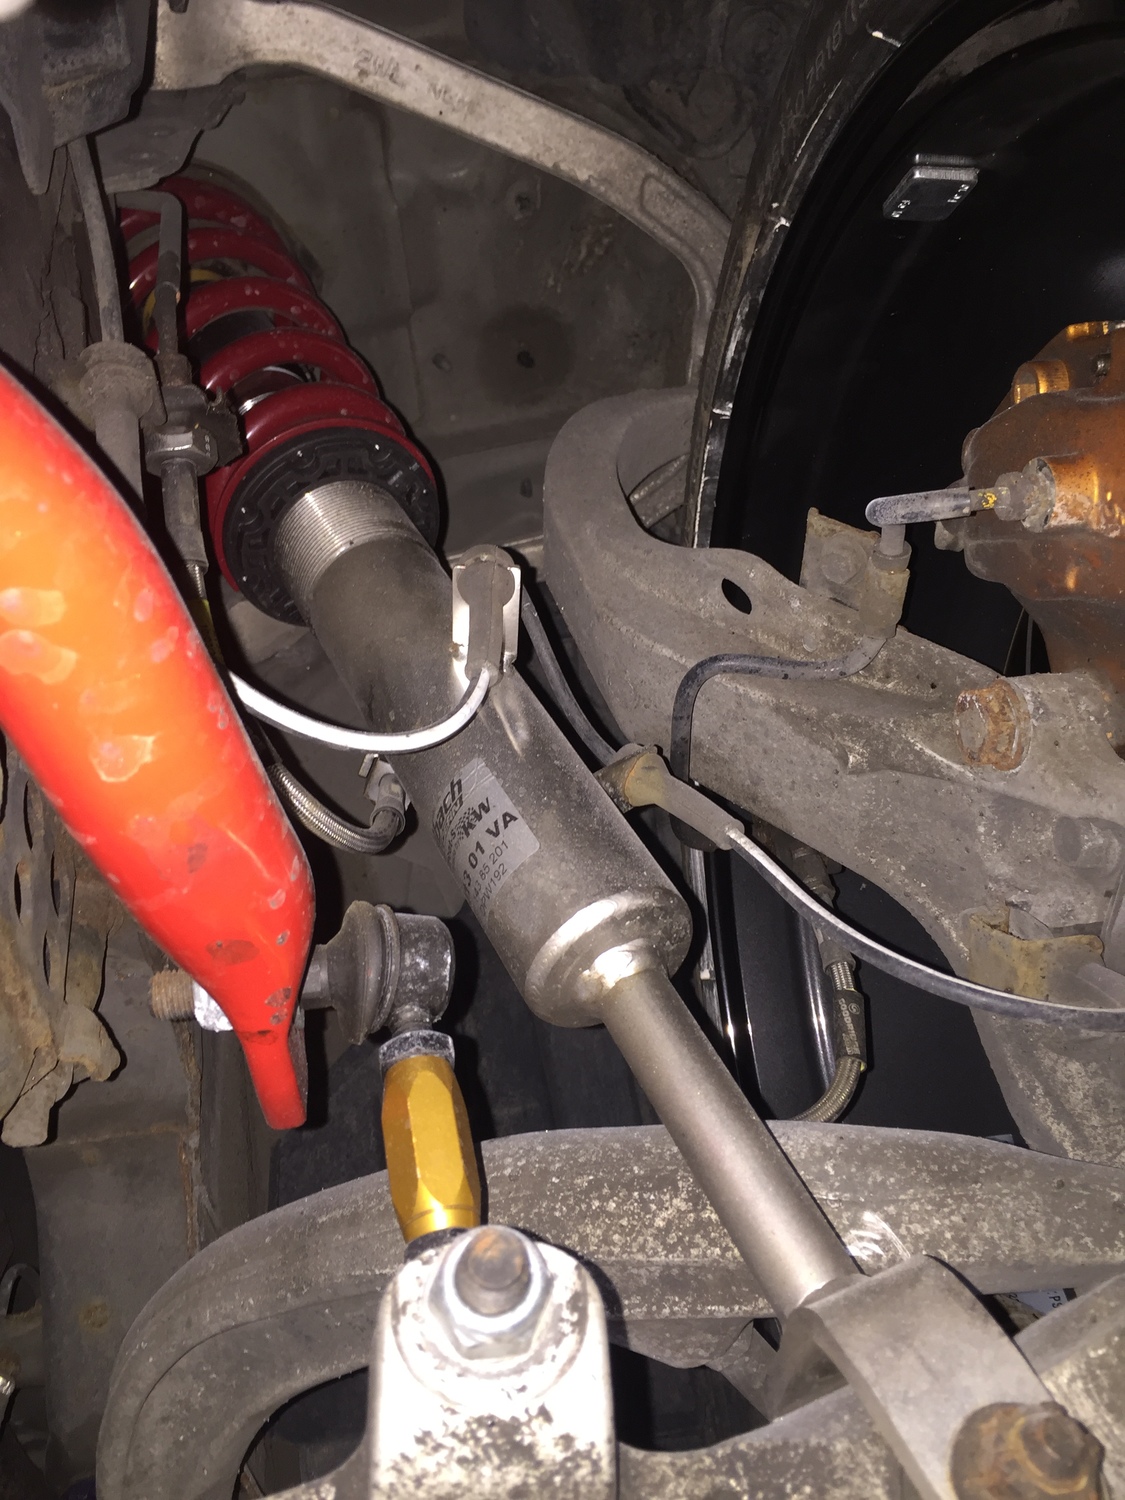
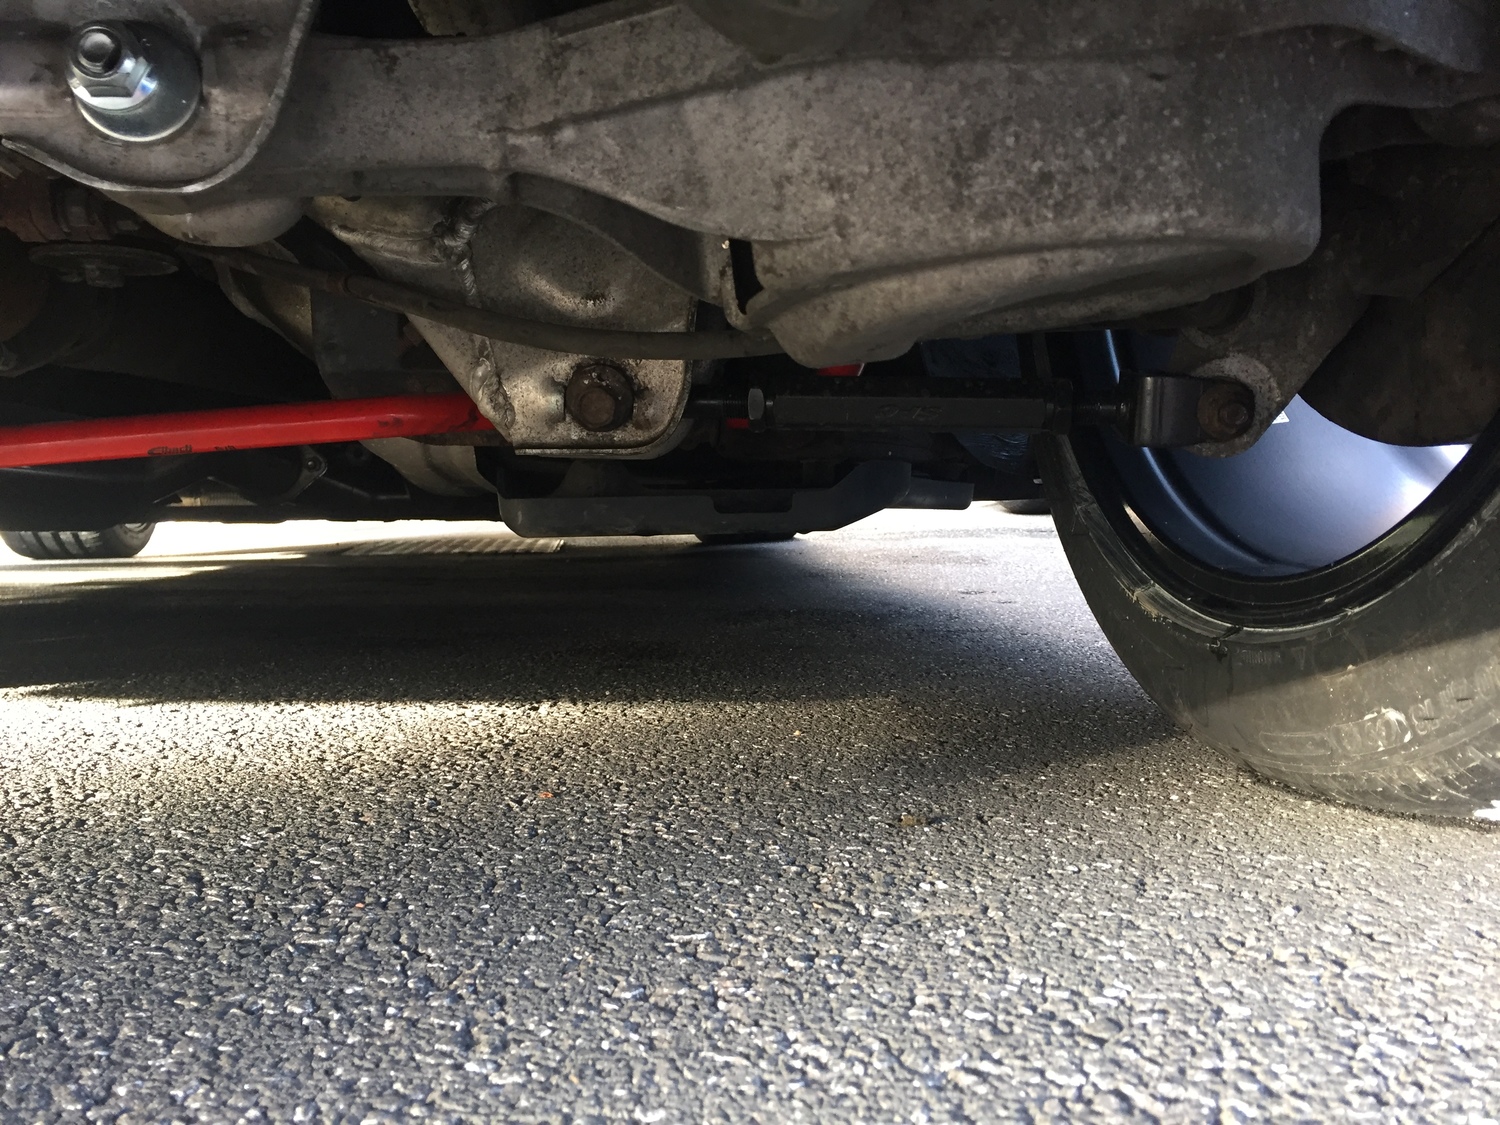
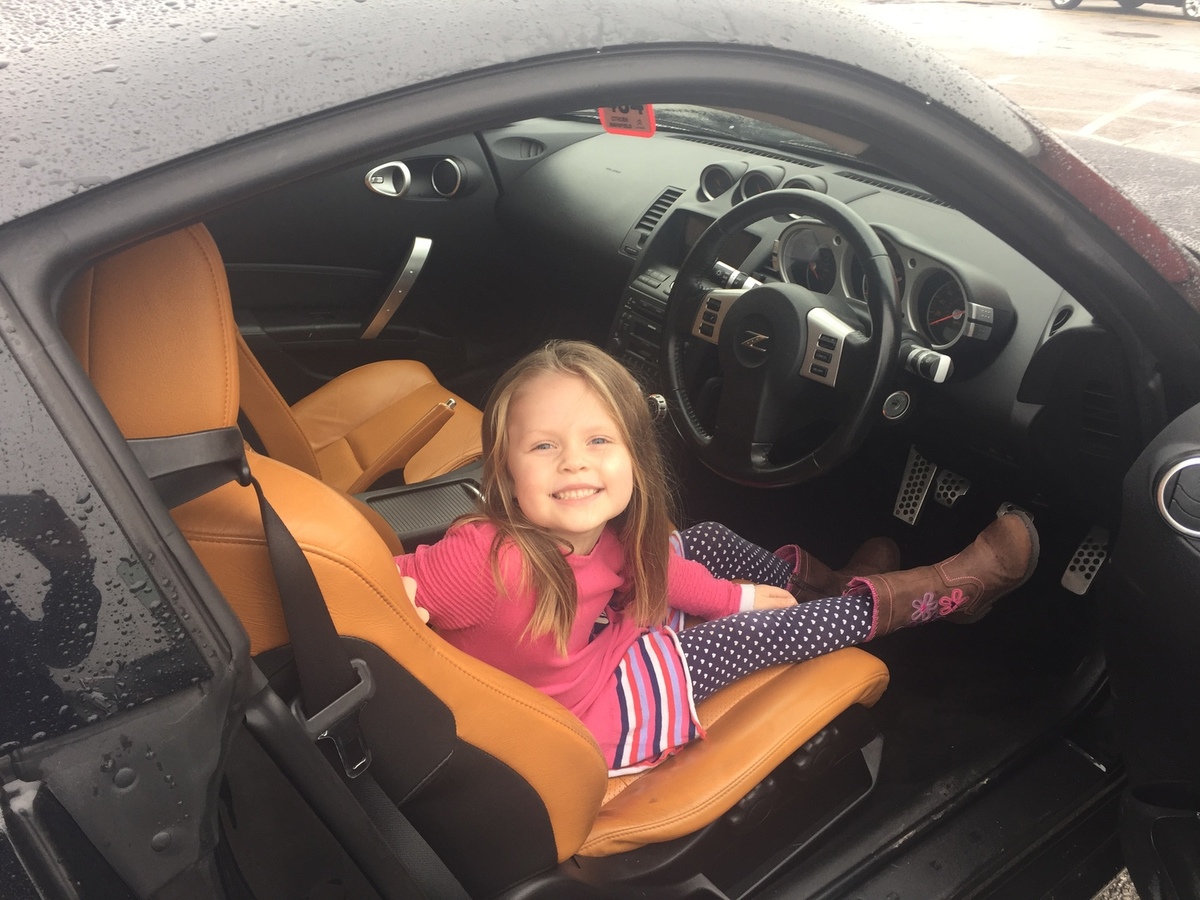
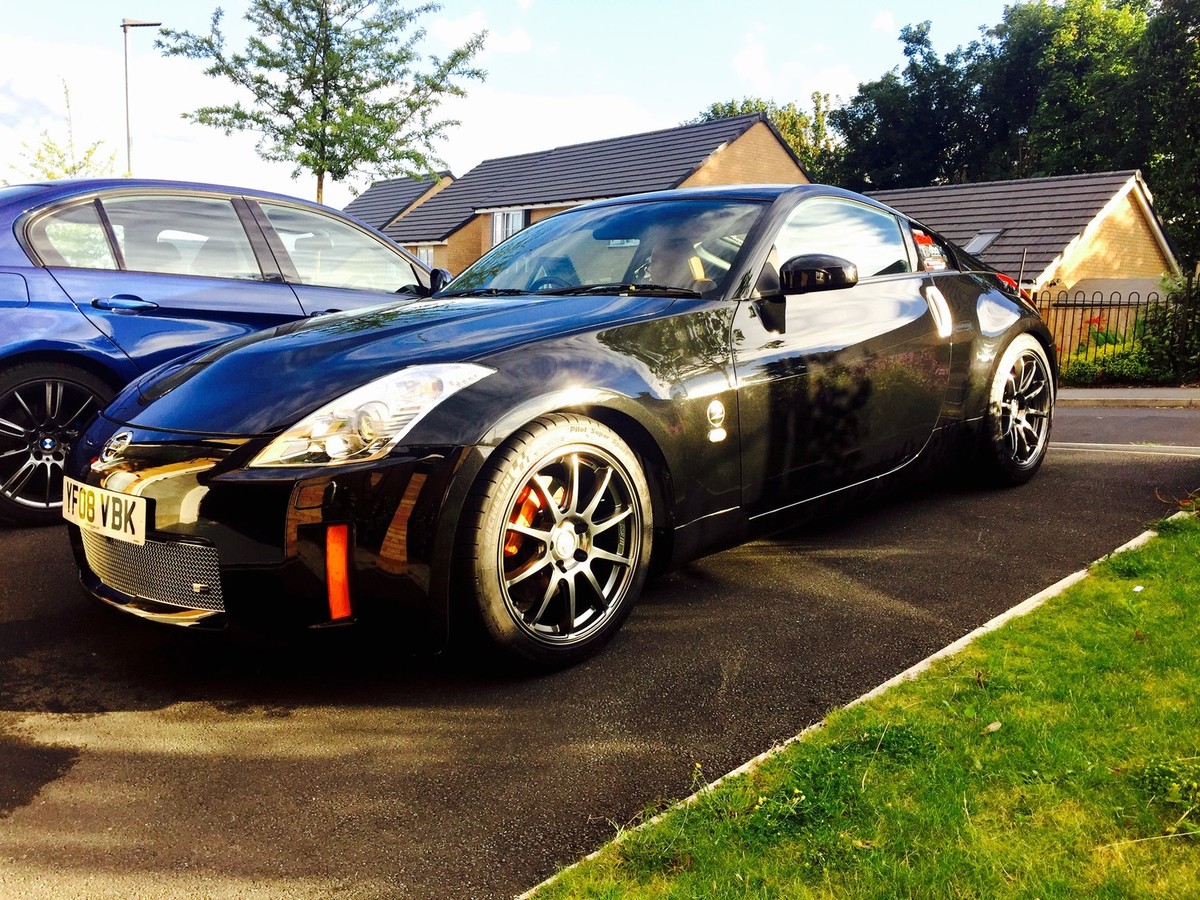
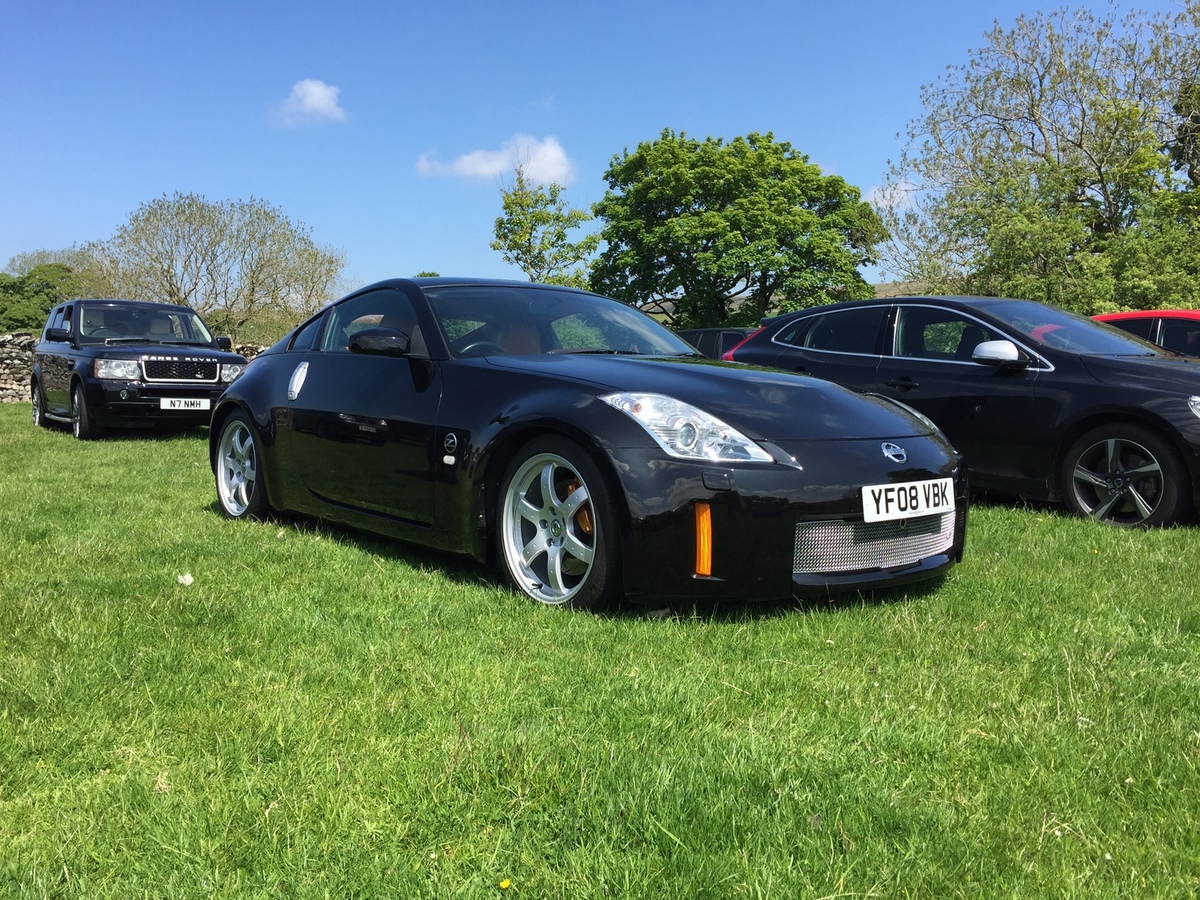
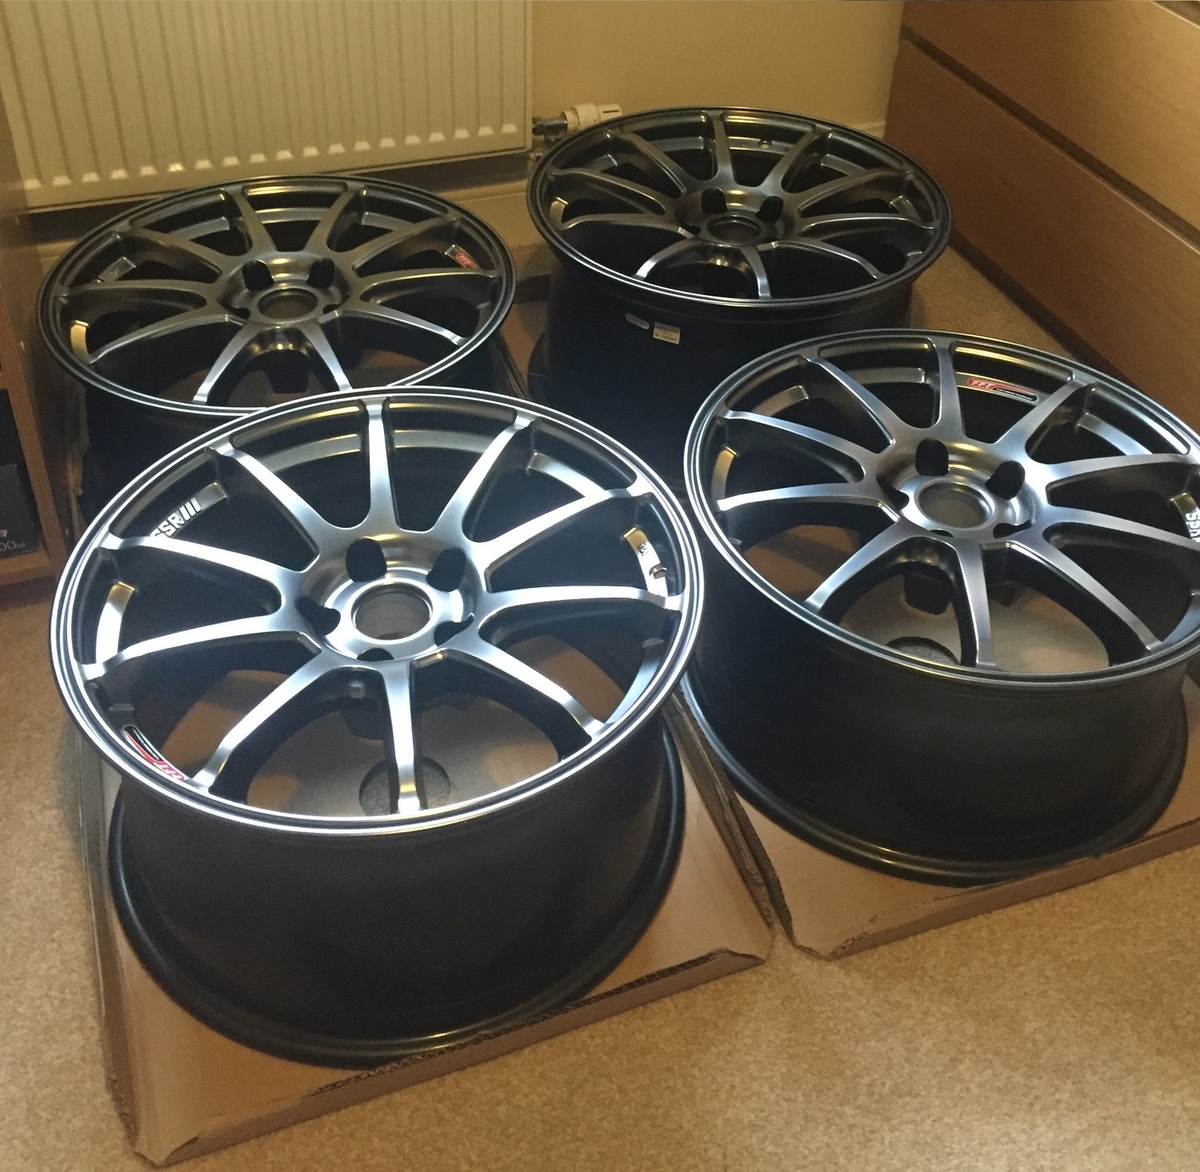
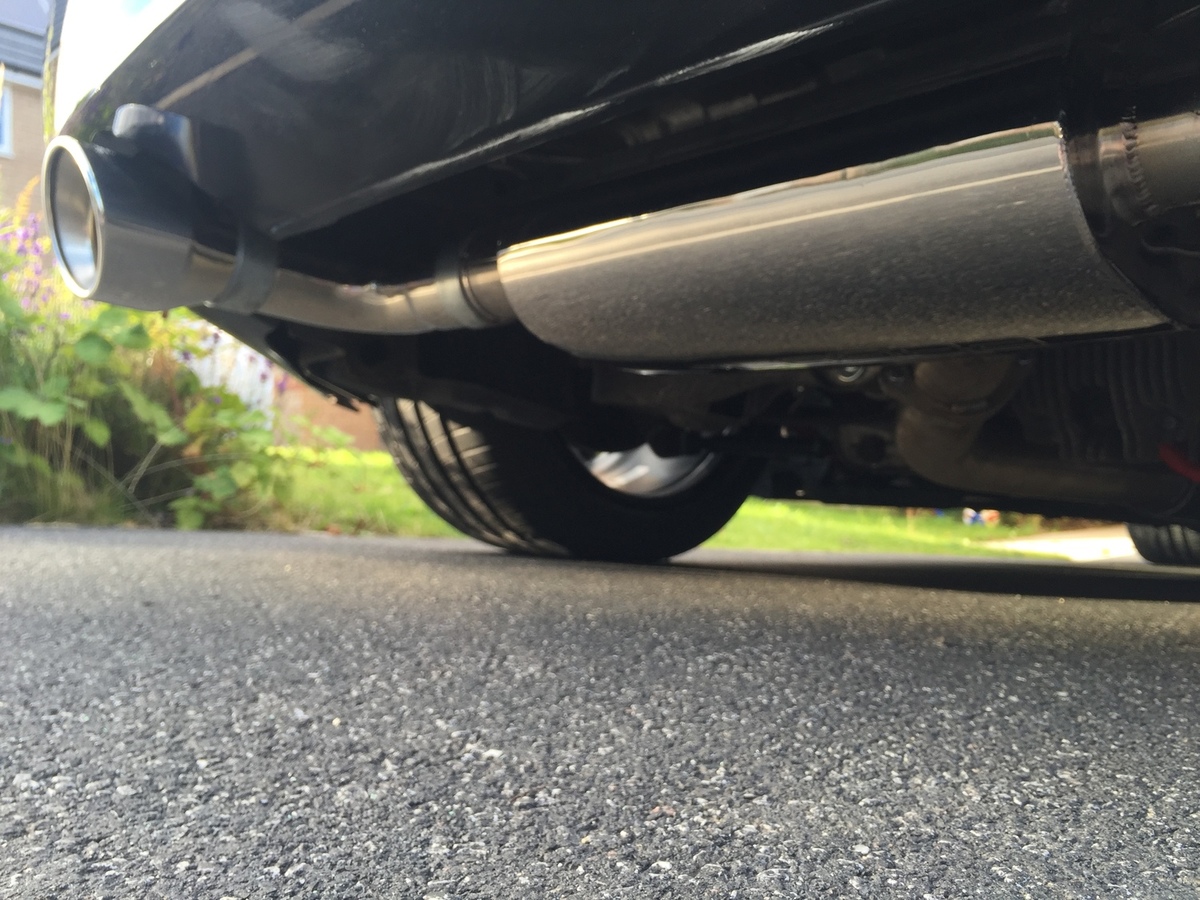
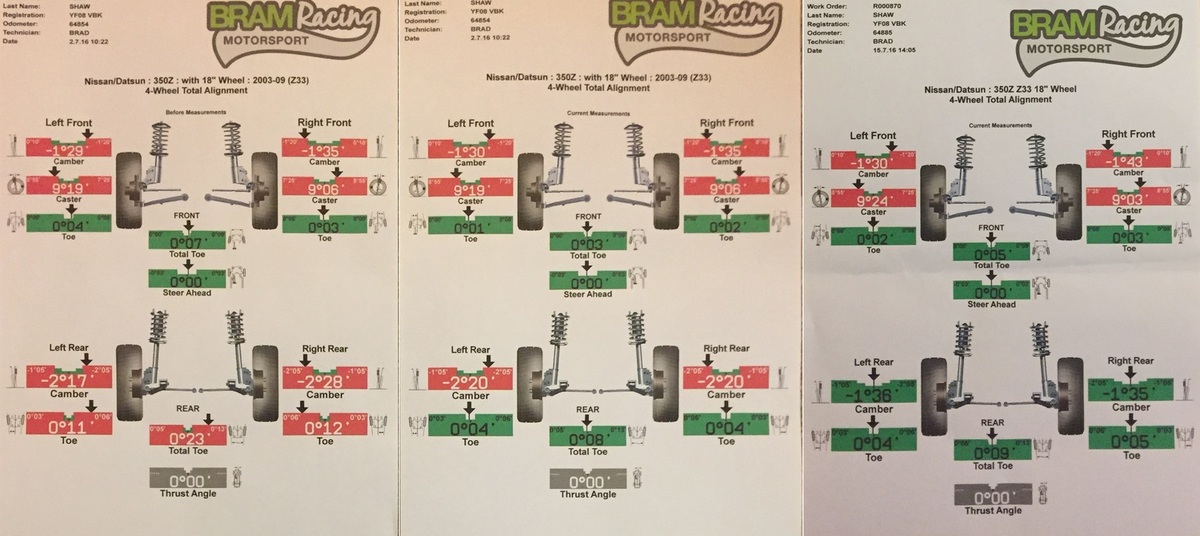
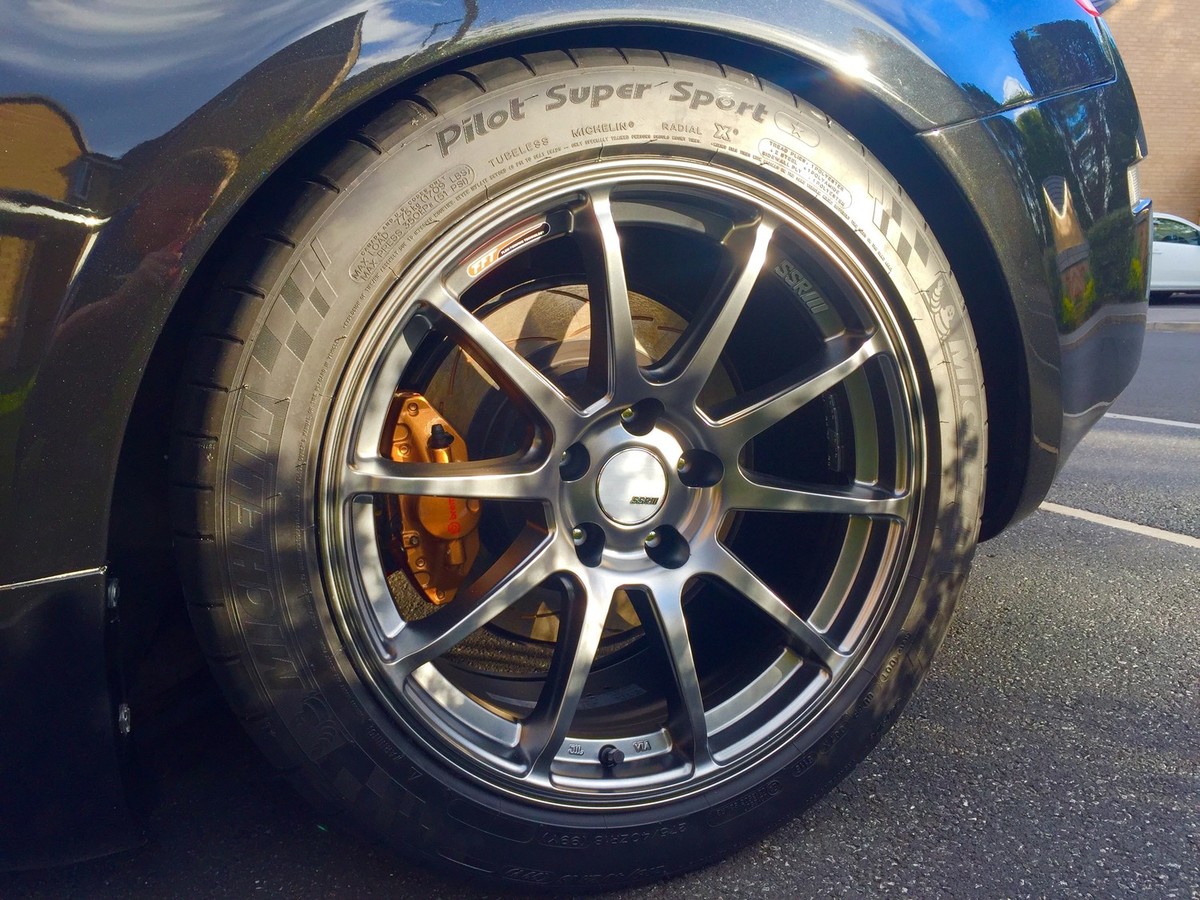
**WARNING** The following scenes contain a chronic case of Zeditus, this infection has no known cure. If you find yourself spending money you can't justify and lying to the other half, the chances are its also too late for you. Right, with seemingly 1000's spent over the last 14 months I thought I best put up a build thread to document it all, I bought my 350z HR in Feb 2016. I had 10k to spend on a second "weekend" car and after looking at various options I came to the conclusion that this was the best bang for buck. I also love the look of the 350, much more than the 370. I borrowed 6k for upgrades at the same time which is when I got in touch with Mitz at the cougar store. The smart side of my head says I should have bought a newer 370 with the 16k but after reading all the build threads and upgrade threads on here I decided to stick with the car I like more and make it better, a 370 beater in fact. I had been looking since December and after being beaten to 4 previous 350's I couldn't wait around for ever so bought what was a very average example of an 08 plate. No mods, what sealed the deal was the leather seats were in very good condition and it had a full dealer service history meaning that the previous 3 owners probably didn't abuse it. After seeing a few with bolsters caved in, my whole decision on this car was sold on the seats, that probably sums me up. I always forget to take pics at the right time so only pick I have when I collected it is below showing that I got the approval of my daughter to boot. Anyway, onto the mods, I will try and do this in some kind of order. So as I said, Cougar store was the very first port of call and Mitz and Andy have now had the pleasure of my company at least 6 times, prob more. The first thing was a full P3 service inc new belts, plugs, and all oils. Mitz also showed me the condition of the belts and plugs which had never been changed to date, just shows even a fully stamped service book doesn't show the whole picture. Then it was booked in for the start of what would be a never ending wish list emptying my bank account faster than my Nigerian Prince Uncle who just needed some funds to initiate my inheritance. First on the list was a cat back Cobra exhaust system, new DBA T2 discs, Hawk Pads, Braided brake lines and Eibach Pro street S coilover suspension. The coilovers are a mid budget offering but are stainless steel bodied so should in theory withstand what the british roads throw at them, they are adjustable in height, I have them set at maximum height which is still around a 25mm drop, but they are fixed damping so it doesn't give me any chance to f+*k up the handing. After driving on them a year now I can recommend them to anyone thinking of going coilovers. The exhaust transformed the sound of the car as anyone will tell you, the brakes didn't give me any noticable improvement over OEM but at least I wasn't planning to track the car.....yet After the work above, it was best to get the geo sorted and this is where I realised the limitations (almost none) of oem alignment. As the car had dropped the camber was more negative. I decided to buy adjustable rear arms and toe bolts (again eibach) but couldn't justify the 450 quid or so of front adjustable arms so left them, it may be something I do in future but after years of playing forza and Gran Turismo in my head some negative front camber is always good. The shots below show the first alignment check, after the coilovers then after the rear adj arms. It is running around -1.3 all round now which seems to suit me and I am happy with. At some point in same period I also got the eibach front and rear anti-roll bars installed with whiteline drop links, again at the cougar store. Its at this point, my recollection of what was done when goes a little hazy, in a whirlwind of sex, drugs and blowing money on the zed. (minus the sex and drugs, well there might have been some sex, my wife is expecting our second child, unless its something to do that personal trainer that comes round every day when I leave for work or the window cleaner I pay every month but never have clean windows...hmmm.) anyway I had ordered as part of my original 6k upgrade budget a set of new wheels from Adrian at Torqen which had to be ordered in from Japan. They were SSR GTV02 in phantom silver. I had a month of back and forth e-mails with Adrian as the colour wasn't available, then the size, then the width, anyway I think in the end they made a set for us, the colour has since been superceeded meaning that these could be the only set in the uk! they are flow formed so fairly light, not as light as the rays but only a kg heavier I think and they are 18x8.5 22off fronts and 18x9.5 22off rear which is what I wanted for the oem+ look. a more visually appealing look but without compromising ride and handling. This is when they arrived. Before I had these fitted I have forgot to mention, the car came with the GT4 wheels on but with these being too heavy for my liking I bought a set of rays from Rickdon on forum to use in the 3 months or so before getting the ssr wheels. My original intention was to keep them as a second set but with little room in garage and funds running low I sold them onto another forum member. I only have one pic with them on the car and its below when me and the brother climbed the Yorkshire peaks on a glorious day. When I pulled into the carpark, the attendant said, wow, stunning car mate. Makes you love the zed even more. Just remembered I fitted a zunsport front grill which I think transforms the front end look of the car. Back to the wheels, when funds allowed I kitted them out with what's commonly known as Ekona approved rubber. After reading enough threads to realise I didn't want to be on the receiving end of one of Dan's verbal bashings, (no offence intended) I got the MPSS booted up and on the car. I also had the skirts resprayed and the rear arches rolled and resprayed, there was the start of a little arch rust on lips so needed doing anyway. turns out I probably could have got away without rolling the arches even with 275/40 tyres but its all done in case I go wider or more aggressive wheels in future. 245/40 on fronts for info. I don't know how long a post needs to be before computer says no, so I will continue this on next post, If you are still reading, please take a good look at yourself, even the Cats looking at me in disgust as I type this, but seriously, thanks for reading, part 2 to follow shortly. ps. Thanks to Dan for helping me figure out why the pics would not load and helping me out


- 267 replies
-
- 8
-

-
- waxandshine
- hillclimb
- (and 2 more)
-
I was a drive thru car wash user until I got the Zed a couple of years ago and started to learn about washing with care. I have learnt tons from watching lots of short vids, but I think this pulls all the basics into one place and minimises the need for reading lots of guides/threads on day 1. Regular readers will know I'm a fan of AMMO vids/products, I know detailing provokes lots of different opinions on different techniques and different products, but I honestly think most people would agree that if you can follow the simple steps outlined in this video and experiment with any half decent products, you'll be able to keep your paint spot on with minimal fuss. It's kind of long, but it only needs one watch really to absorb the messages. I wish this was made when I started to learn, as it basically is the regular wash I've gotten into a routine of doing. This is a wash only vid, it's not correction or anything advanced, personally, I think it's worth a sticky in the detailing forum (do you?) as it's something that pops up semi-regularly. If people could please post up a couple of their favouritst, 5 star products and the jobs they use them for, it could be a heck of a resource.
-
Due to a variety of circumstances I shan’t bore you with, an opportunity presented itself for me to spend time at a local detailing company. The detailer in chief, John, would be spending some time showing me around a DA, pads, polishes, and also a glimpse into the world of nano-ceramic coatings. This post covers having a go at working on my car and both the familiar and new steps in doing a one stage correction. I should say now that I have enhanced the images in this post, not to remove blemishes and defects but to increase contrast and definition to show the defects in my paint. One of the first things I learnt is that it’s not always easy to capture the look and real world 'feel' of paint with a camera.