

Azurez33
-
Posts
790 -
Joined
-
Last visited
Content Type
Profiles
Forums
Events
Gallery
Store
Everything posted by Azurez33
-
Breakfast and lunch would be best 😂
-
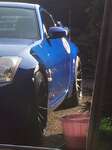
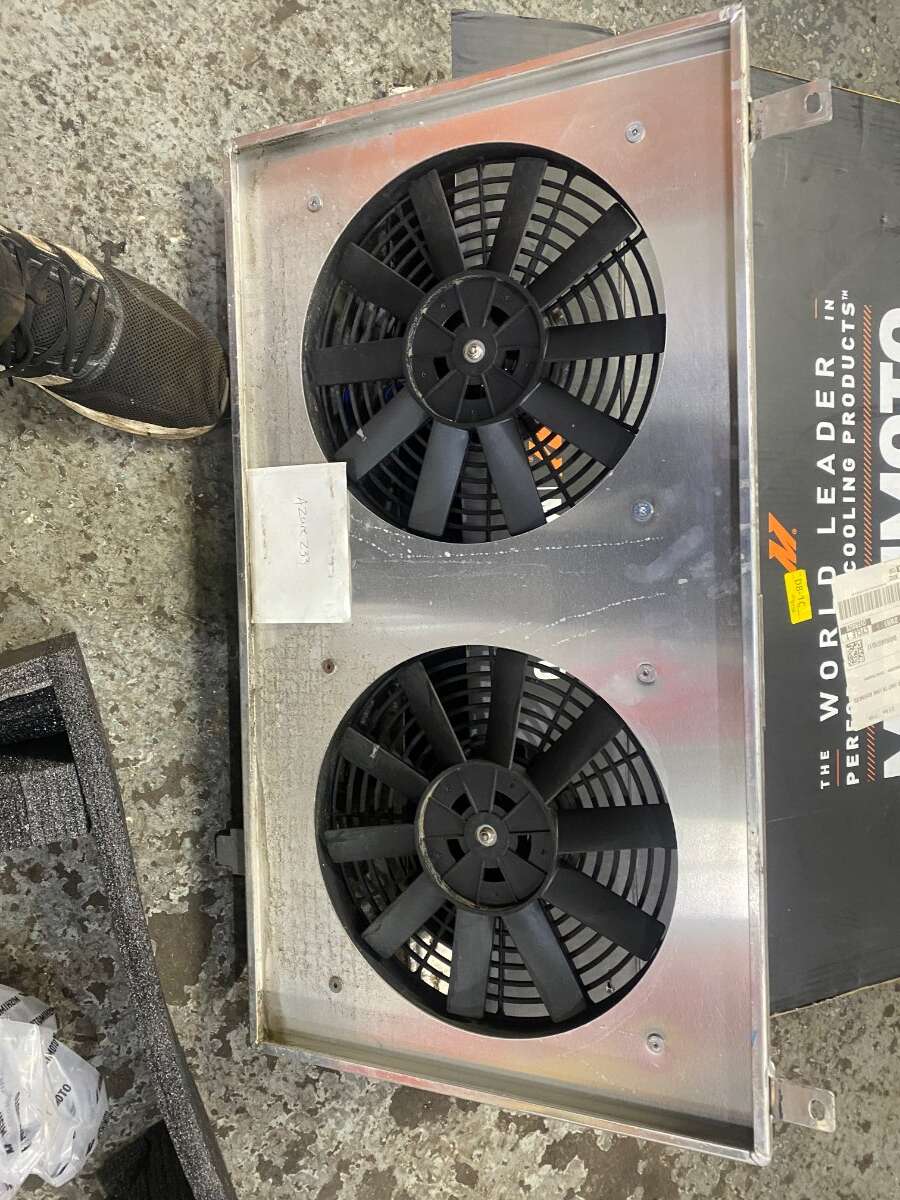
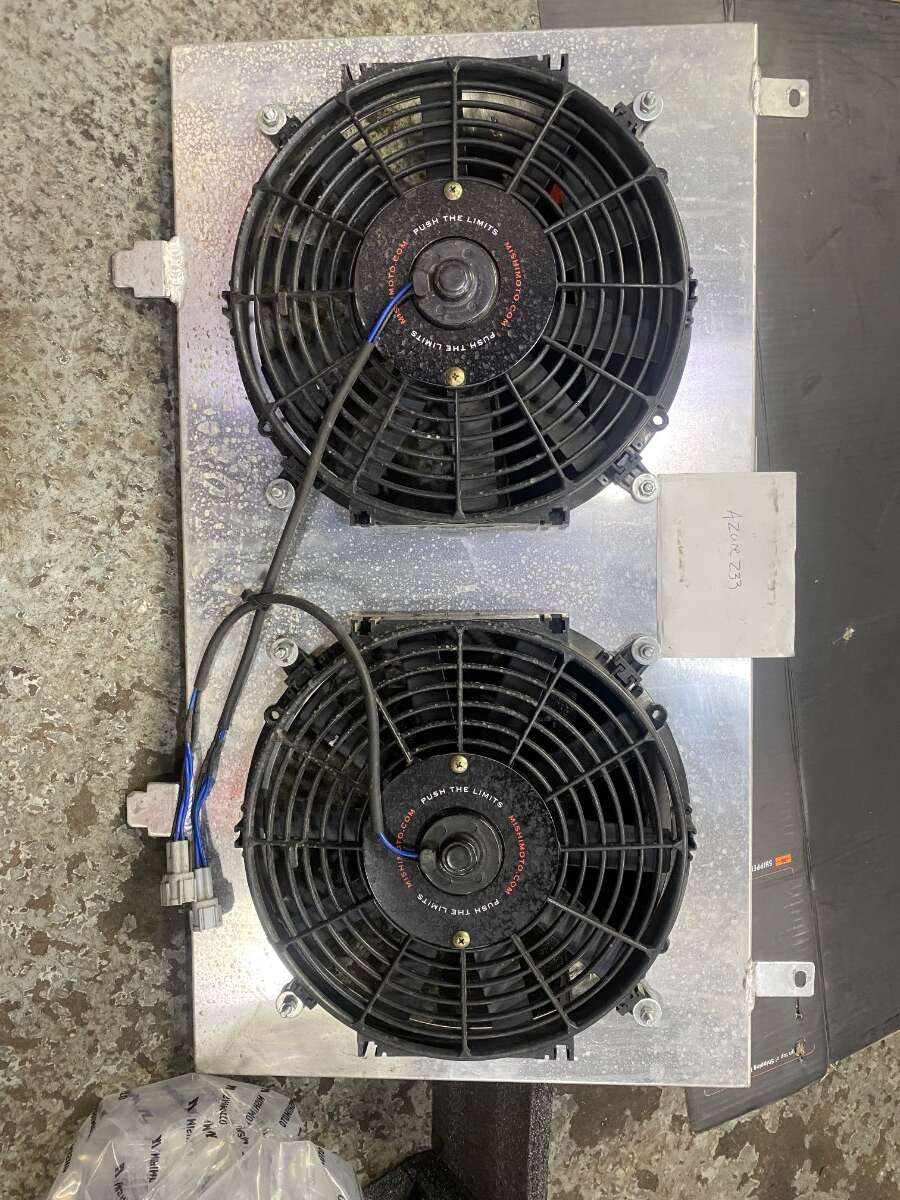
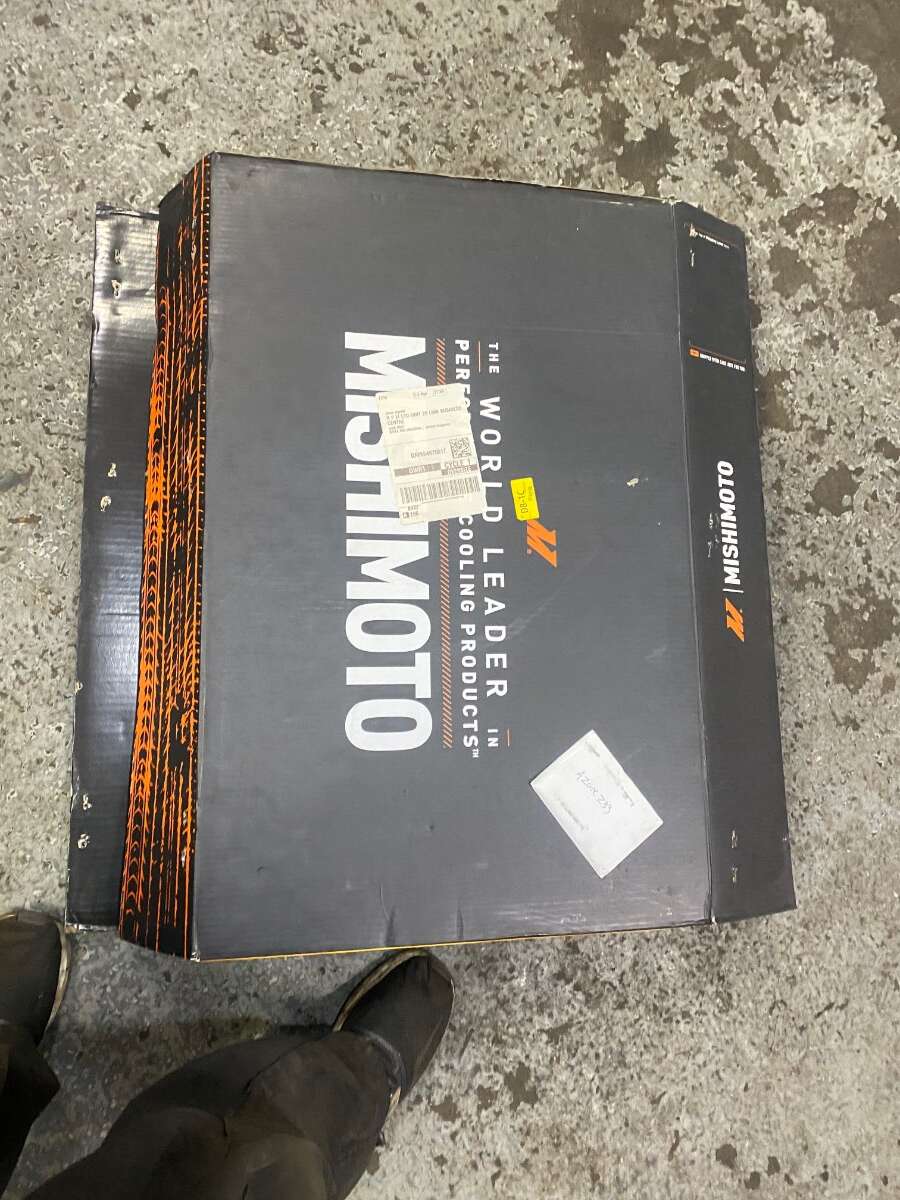
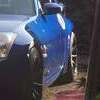 For sale- mishimoto fans- bought them two years ago from tarmac sportz- done about 6000 miles can prove all this if needed- lifetime warranty what more should I say? Can arrange delivery for extra! but tbh they are pretty good for what they are! Only swapping as gone back to Oem fans with my koyorad! £140
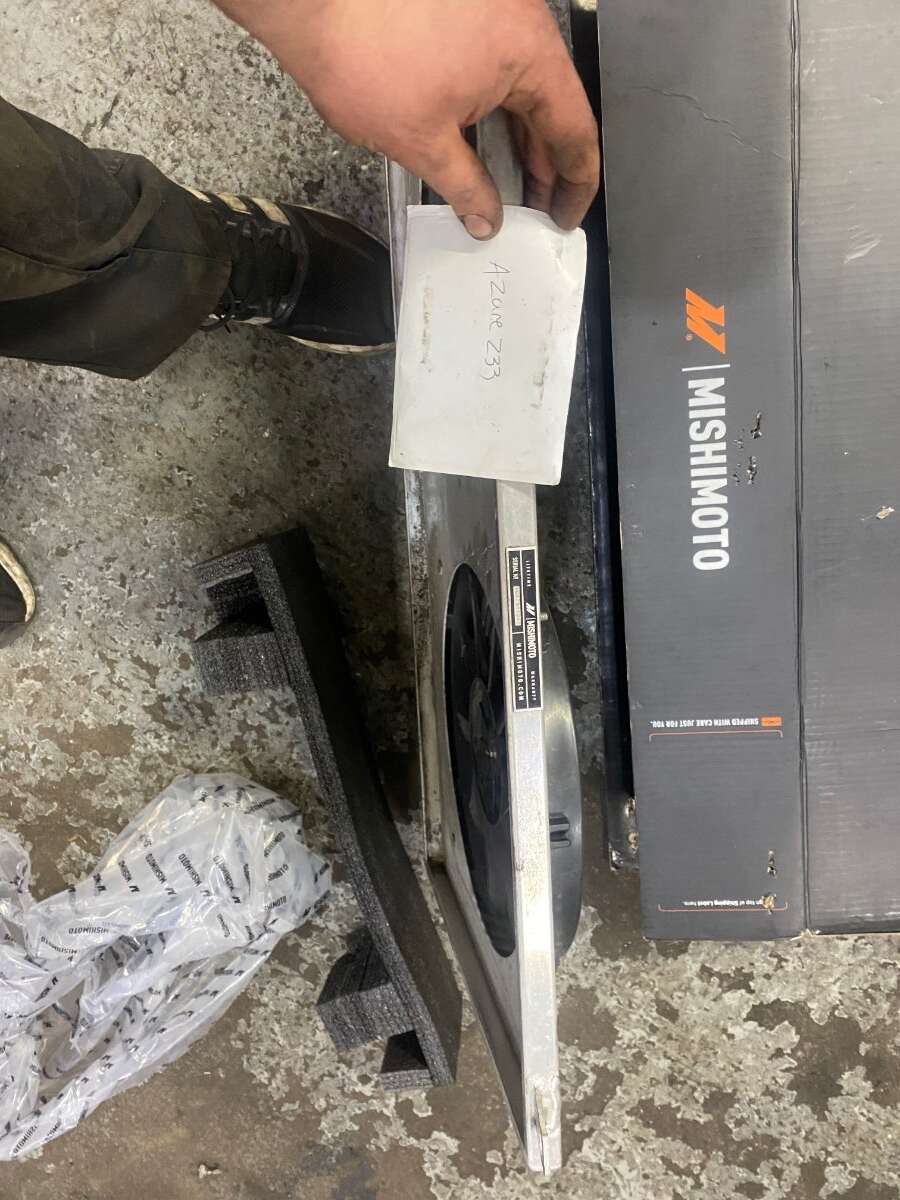
-
1) davey_83 2) Justthejedi 3) MattJ 4) Phil T + Jules 5) Andy_Muxlow 6) SHEZZA 7) Monkey1983 8. HEADPHONES 9. StormtrooperZ 10.Azurez33 +1 Myself and monkey are currently working out when we will join aha
-
You’re too kind Andy! In some ways I wish it still looked like this but will have to wait for further updates 😂
-
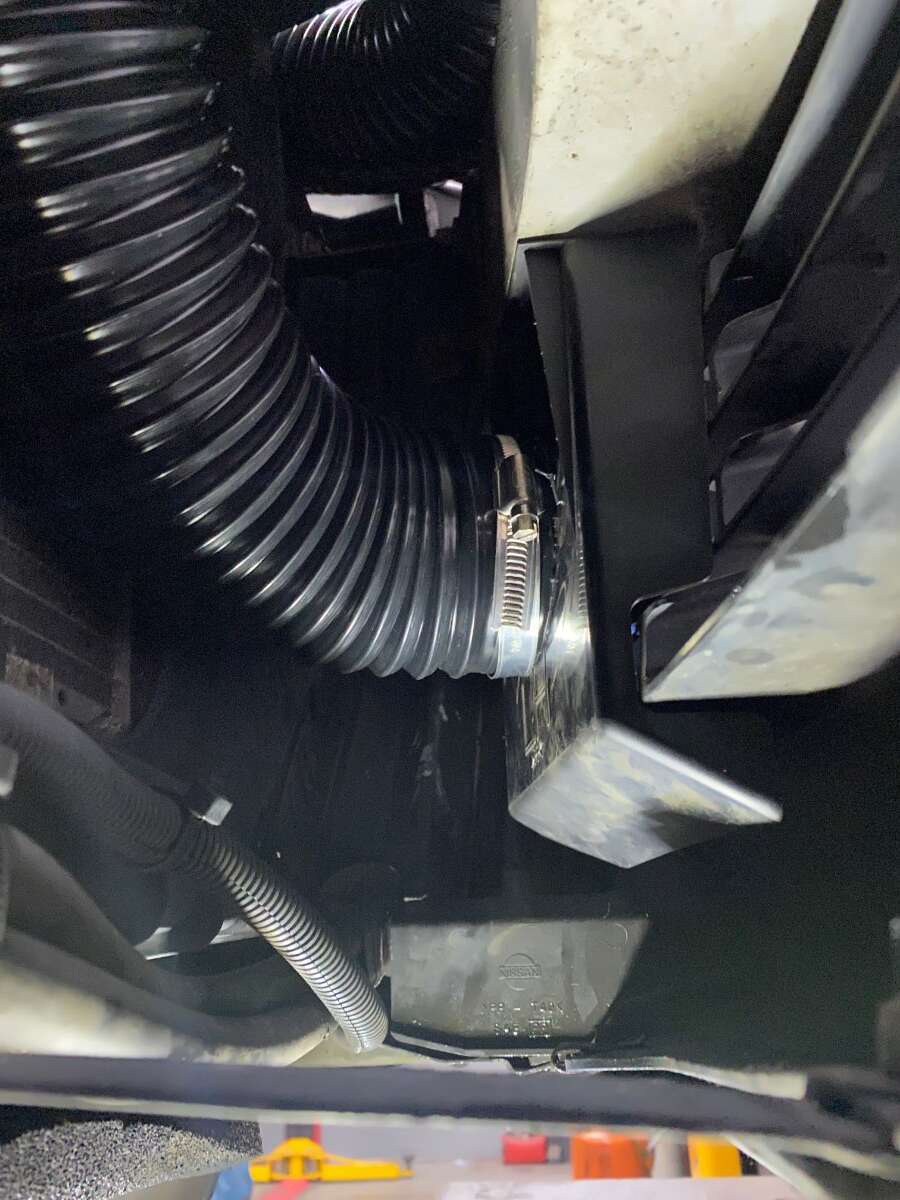
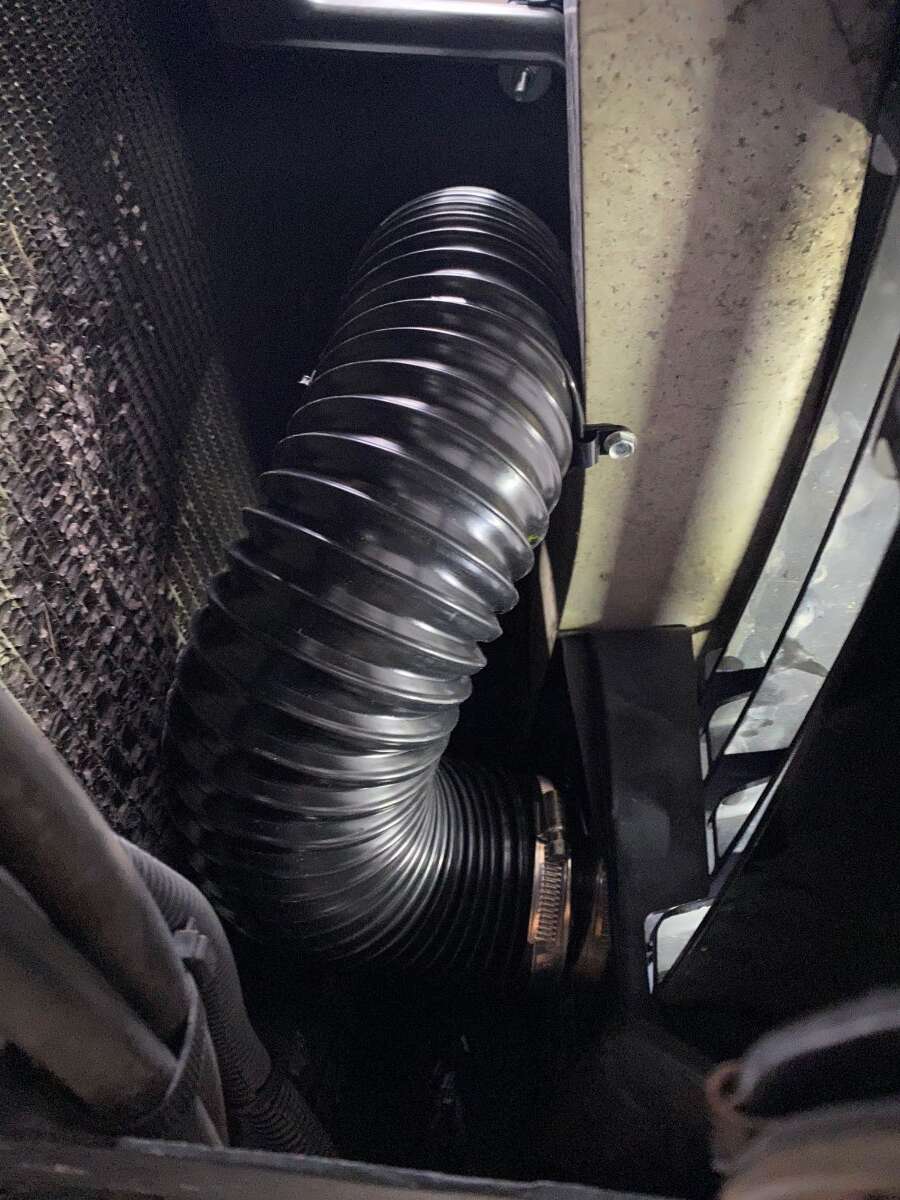
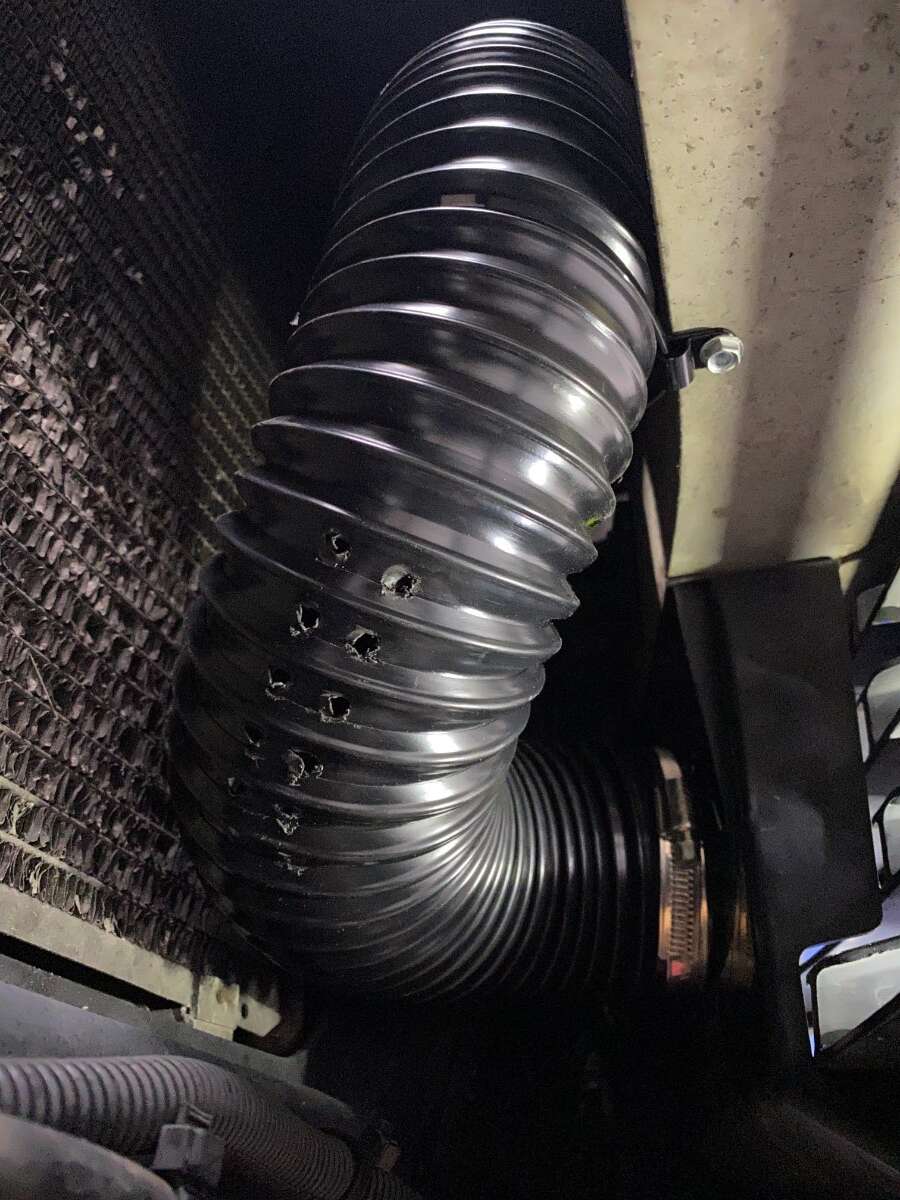
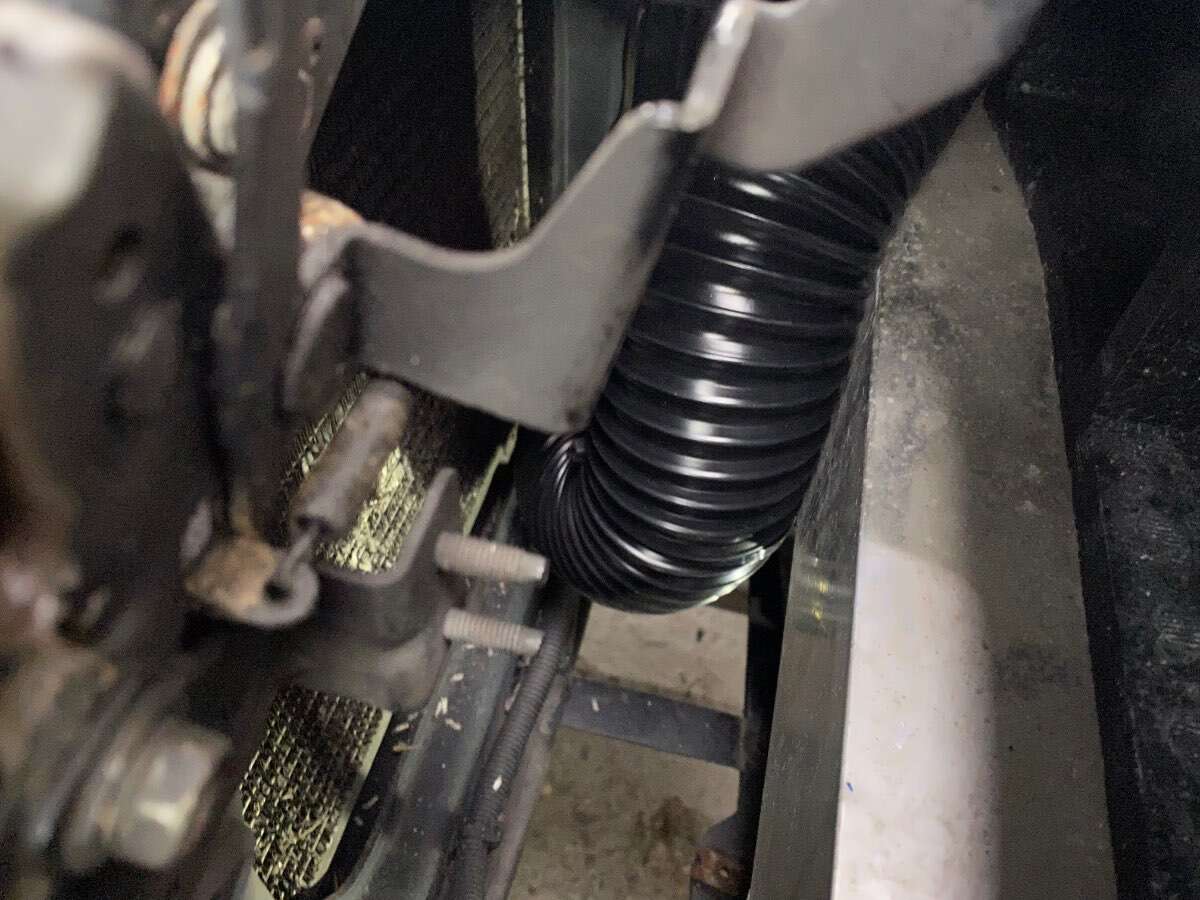
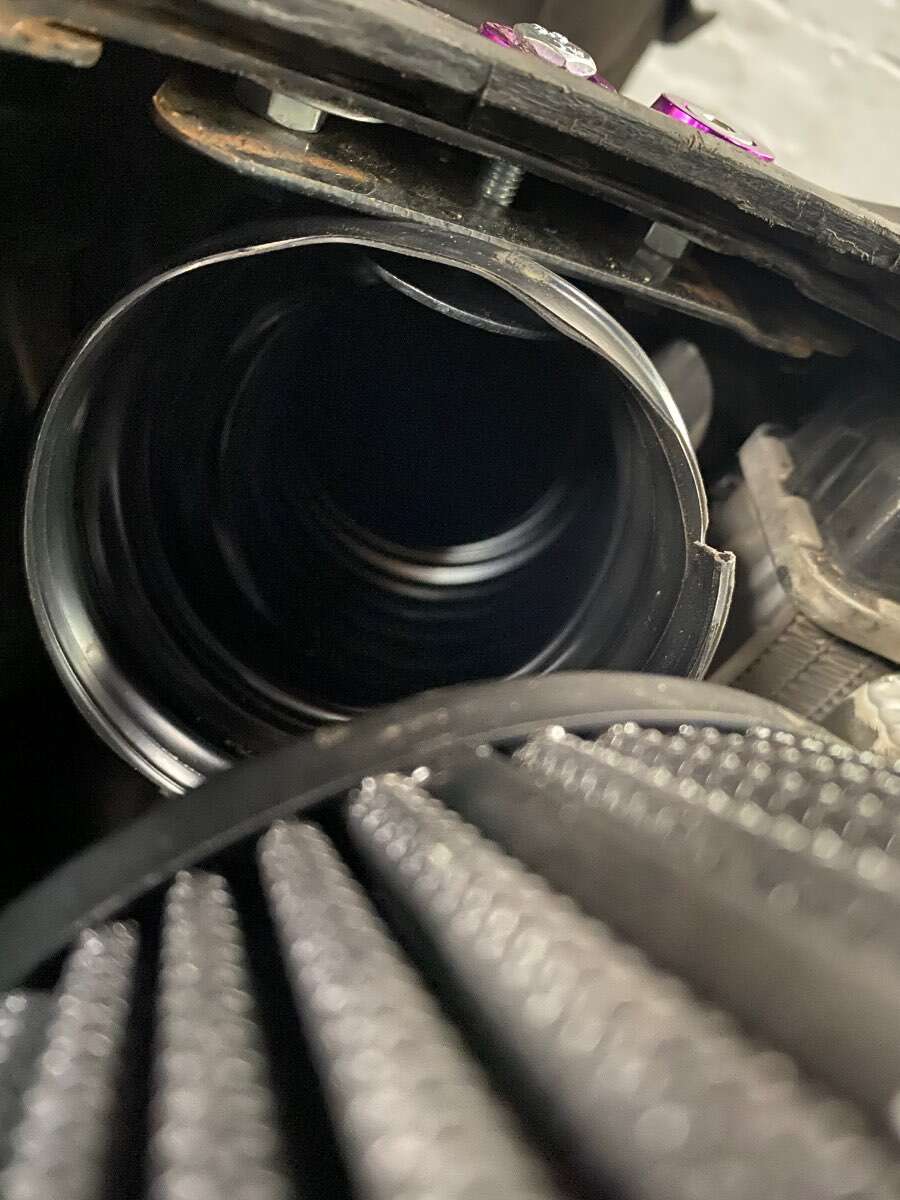
Connected both ends of the congraluted pipe up and had to try and route the pipe in a way to make sure it wasn’t too straight so it’d suck in as little water as possible, not that it would as the filter is a way away from primary entry, also pricked a number of water drain holes too, used a tech screw and p clip along with a cable tie to mount eh pipe bend behind the crash bar! And this is the final result

-
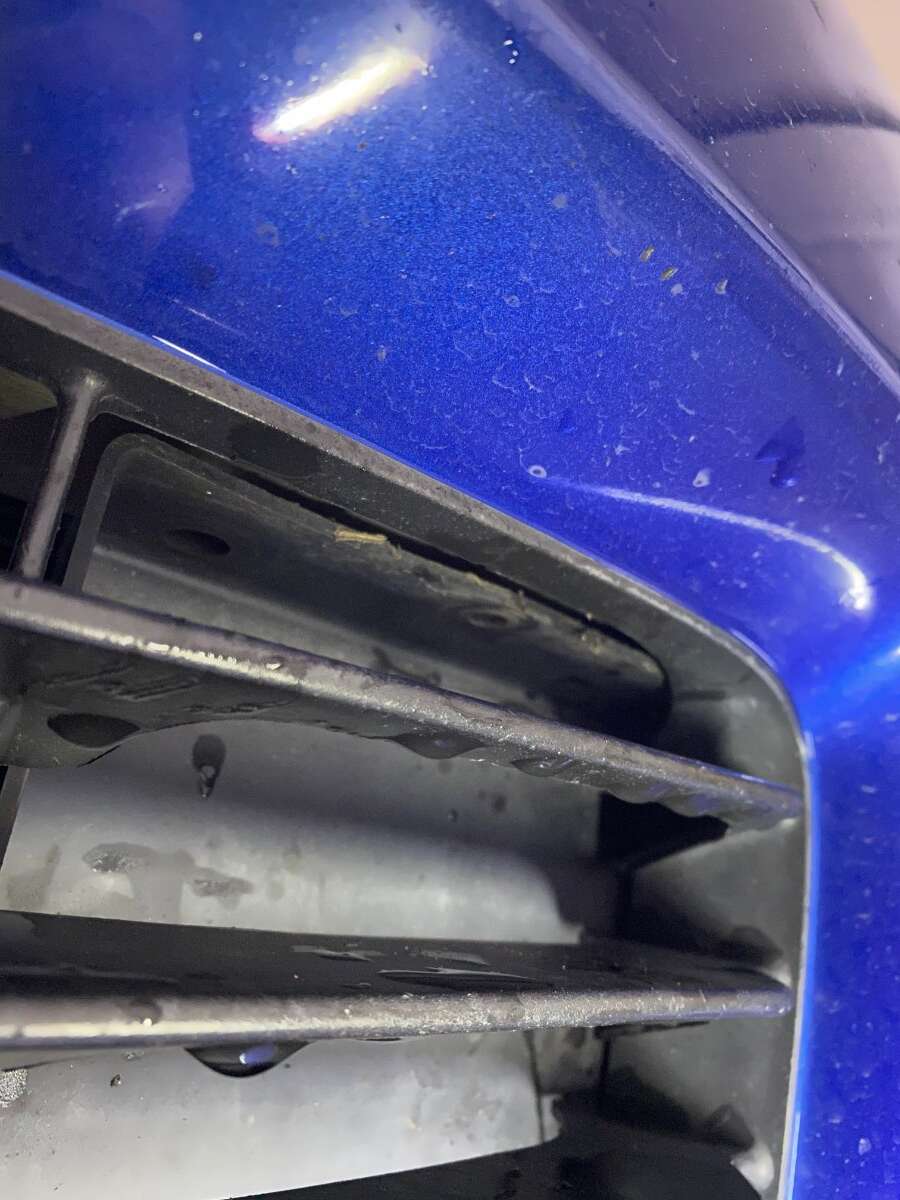
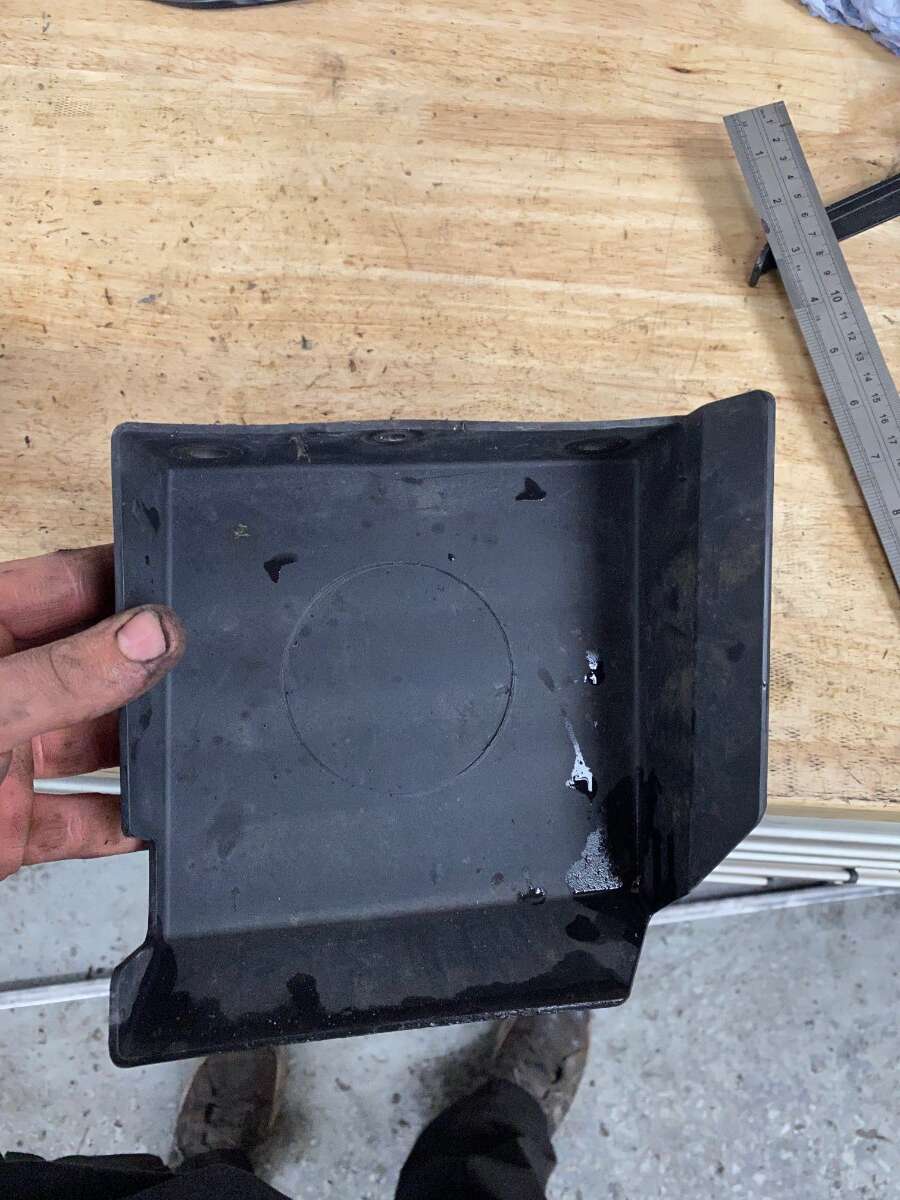
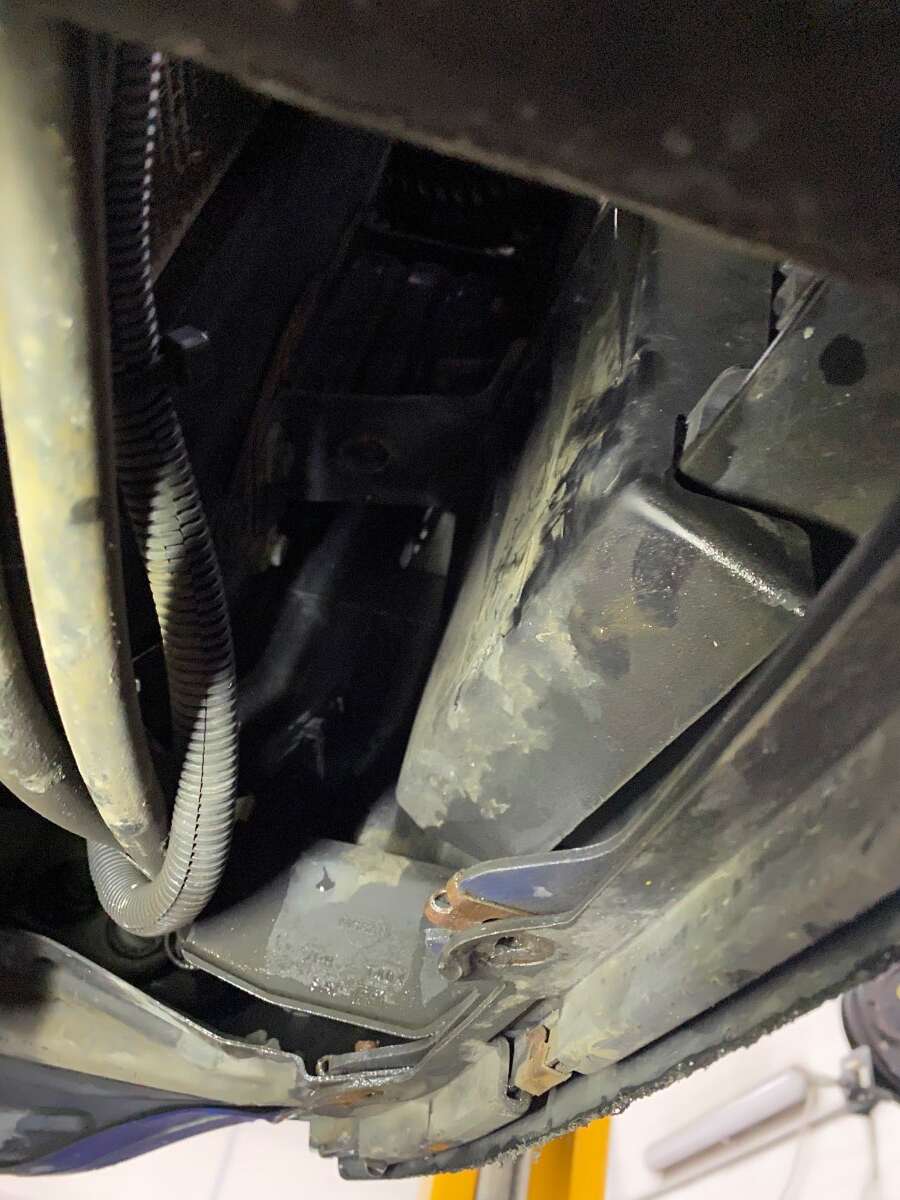
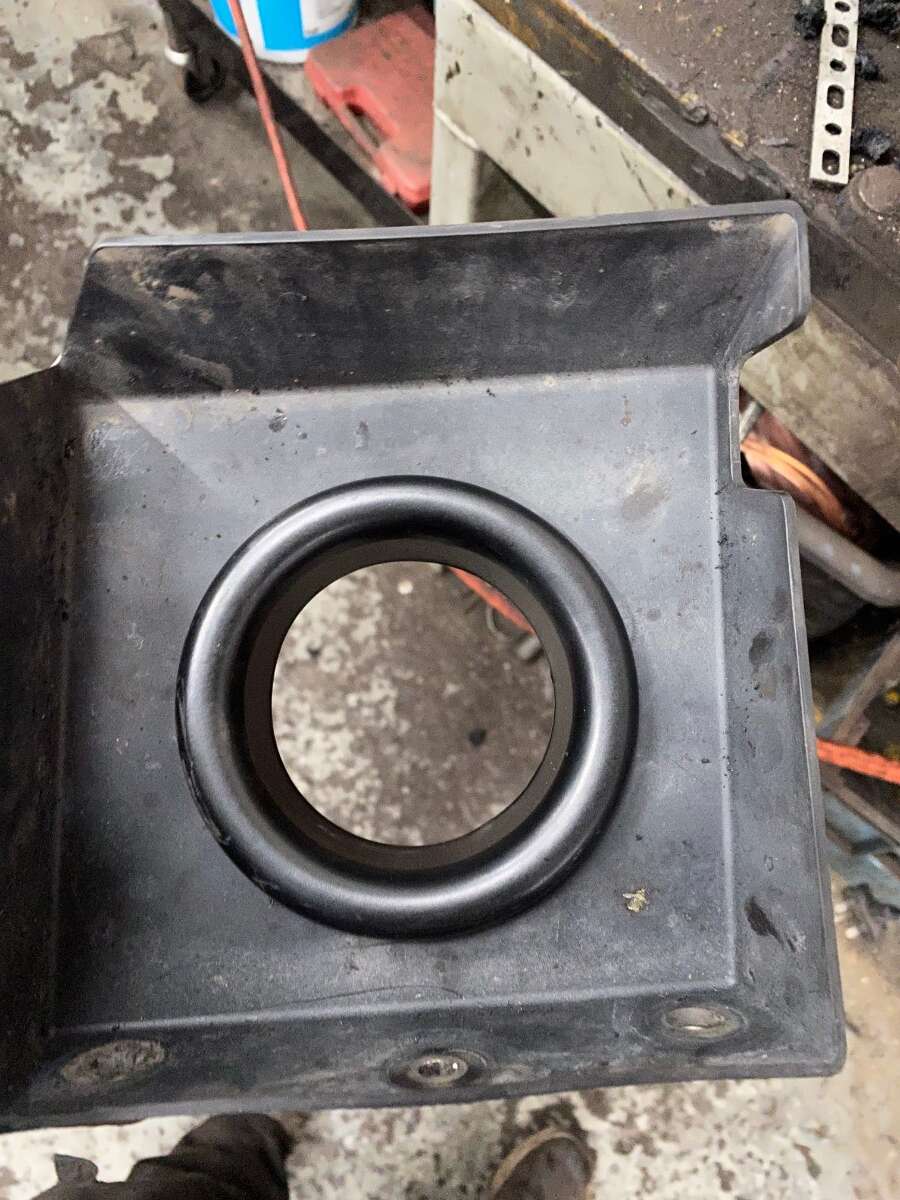
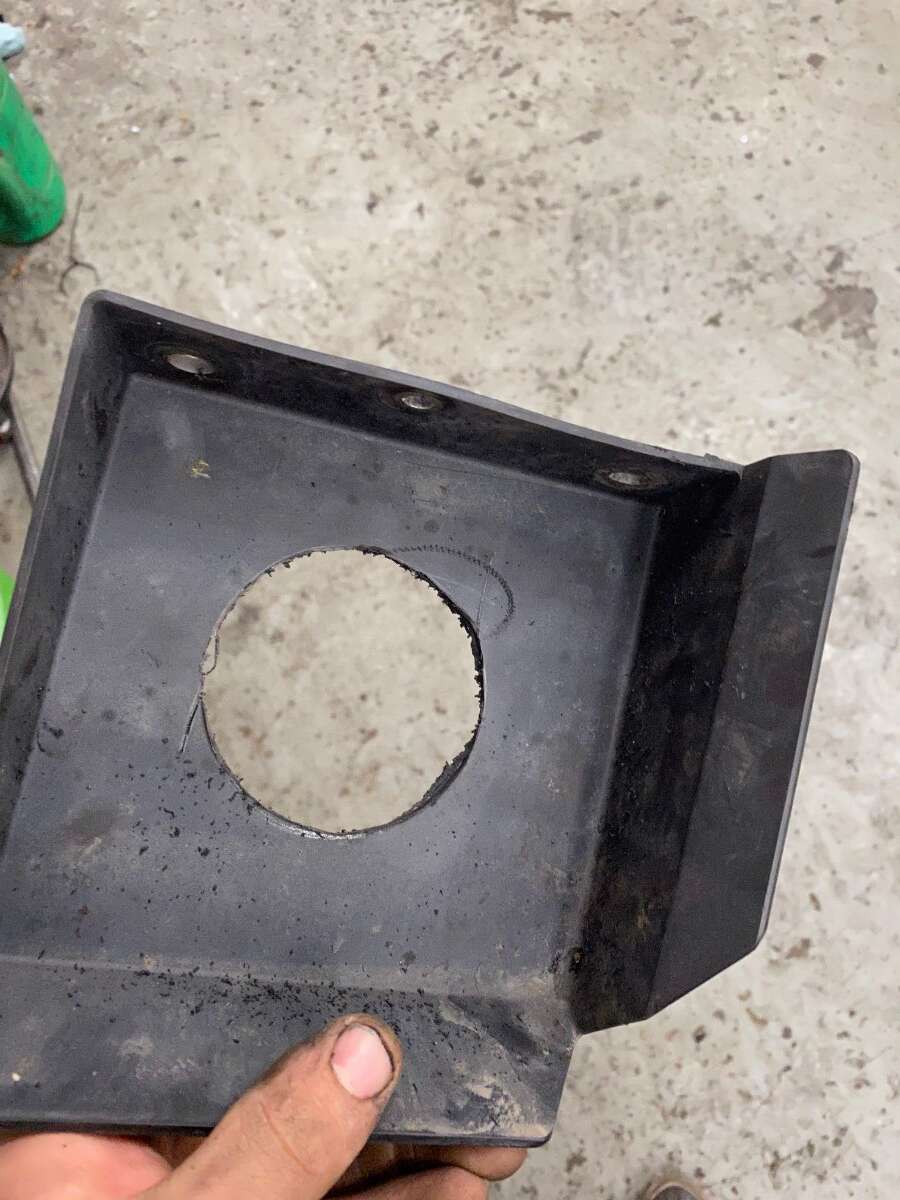
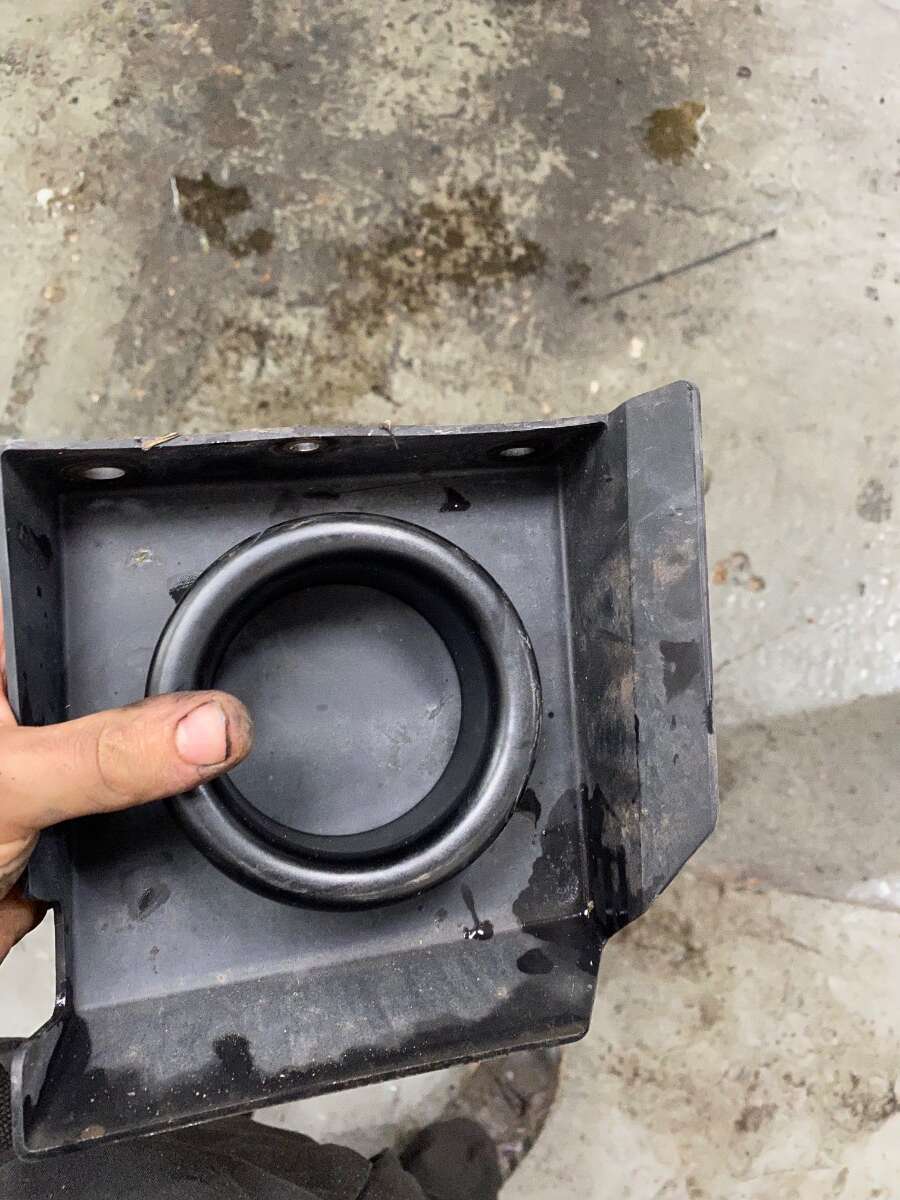
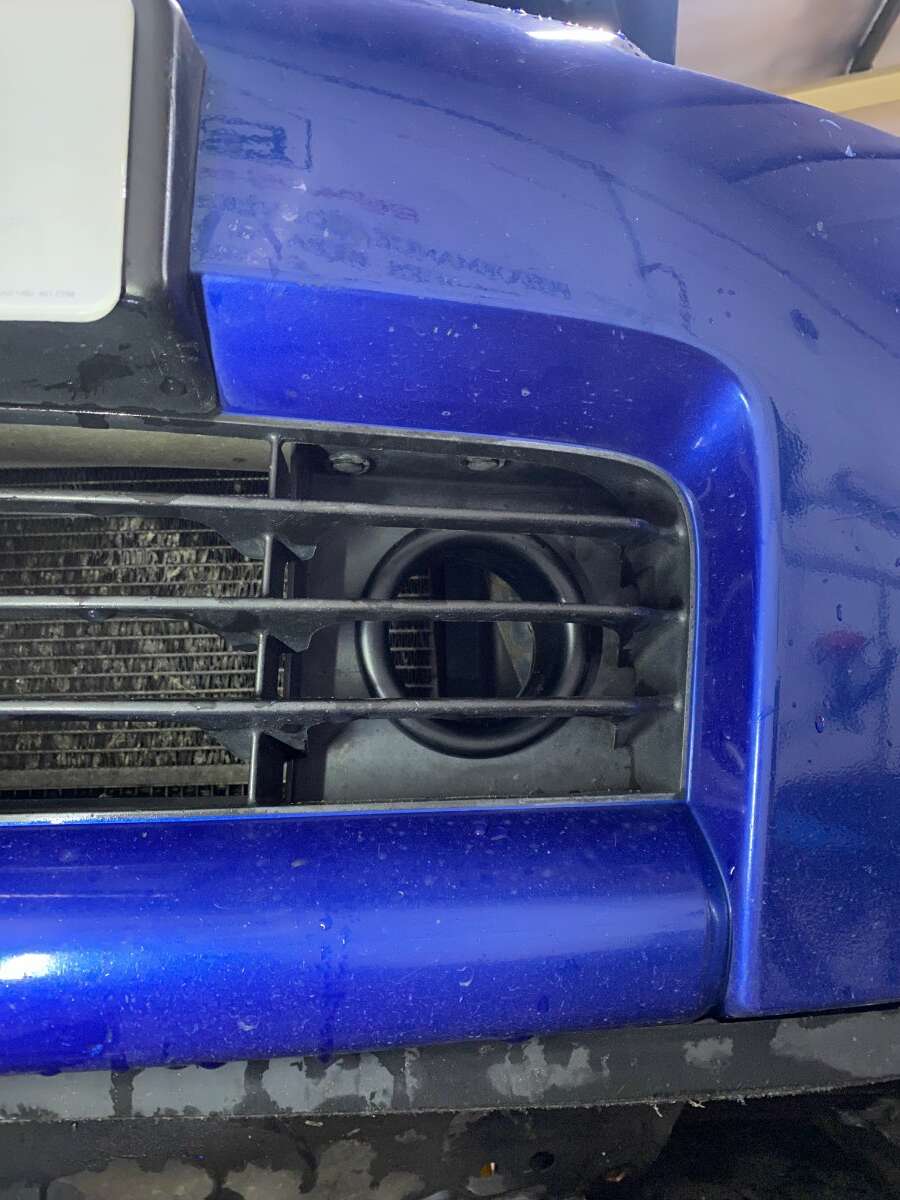
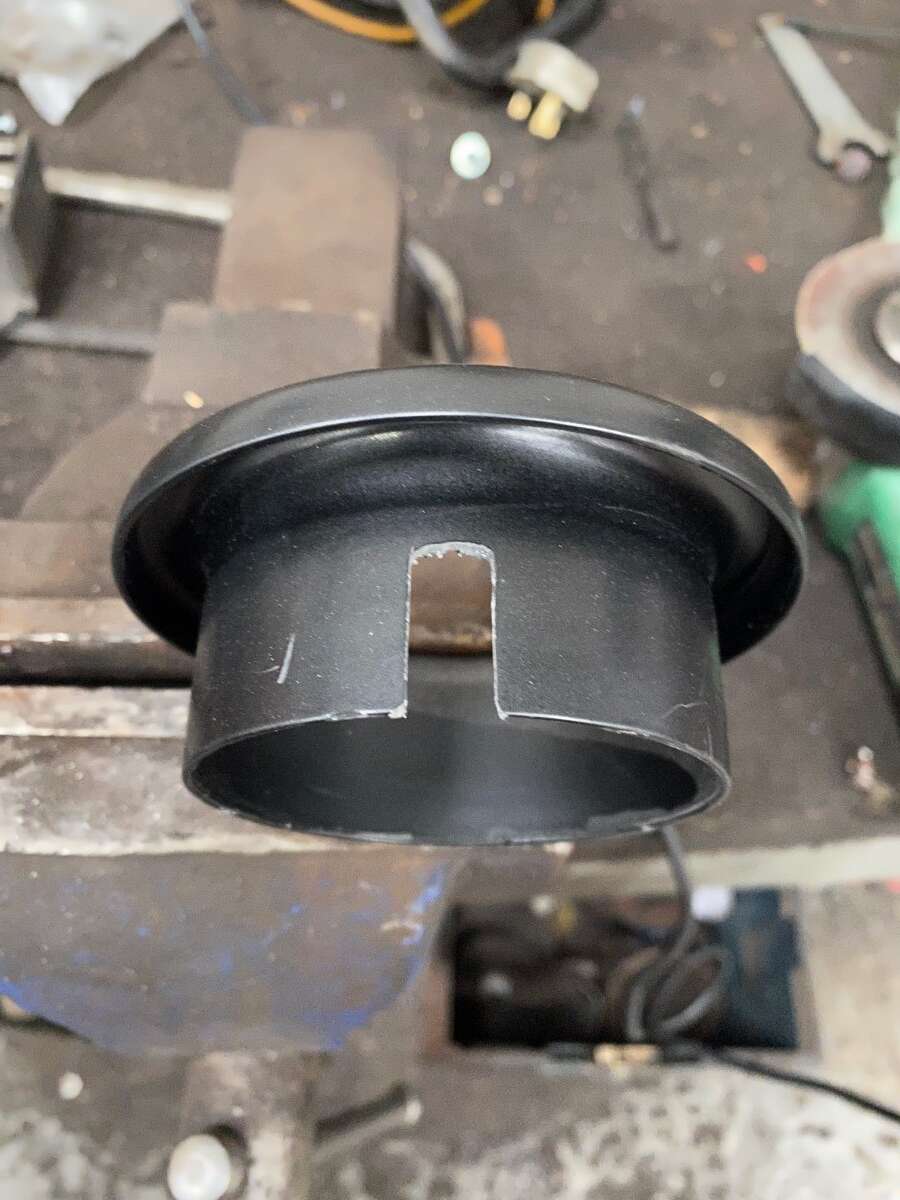
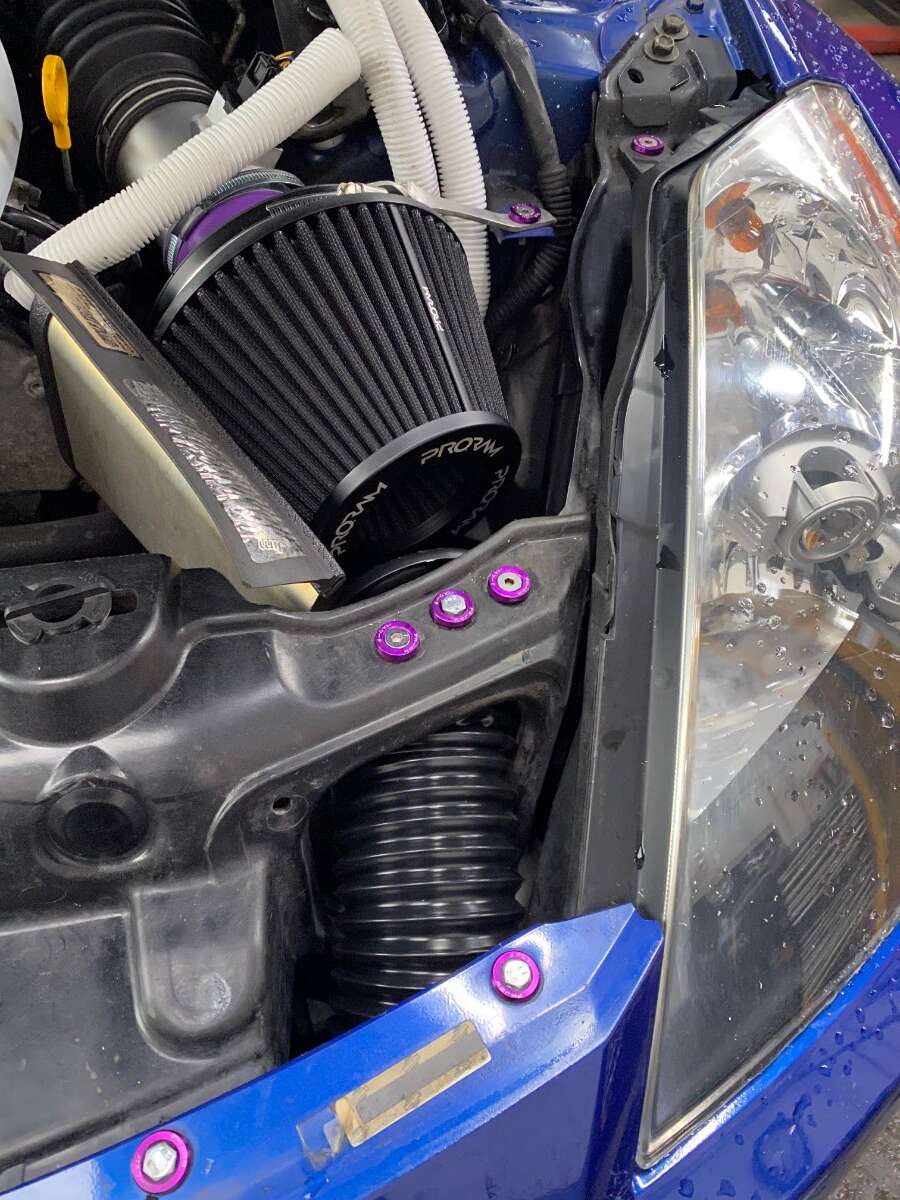
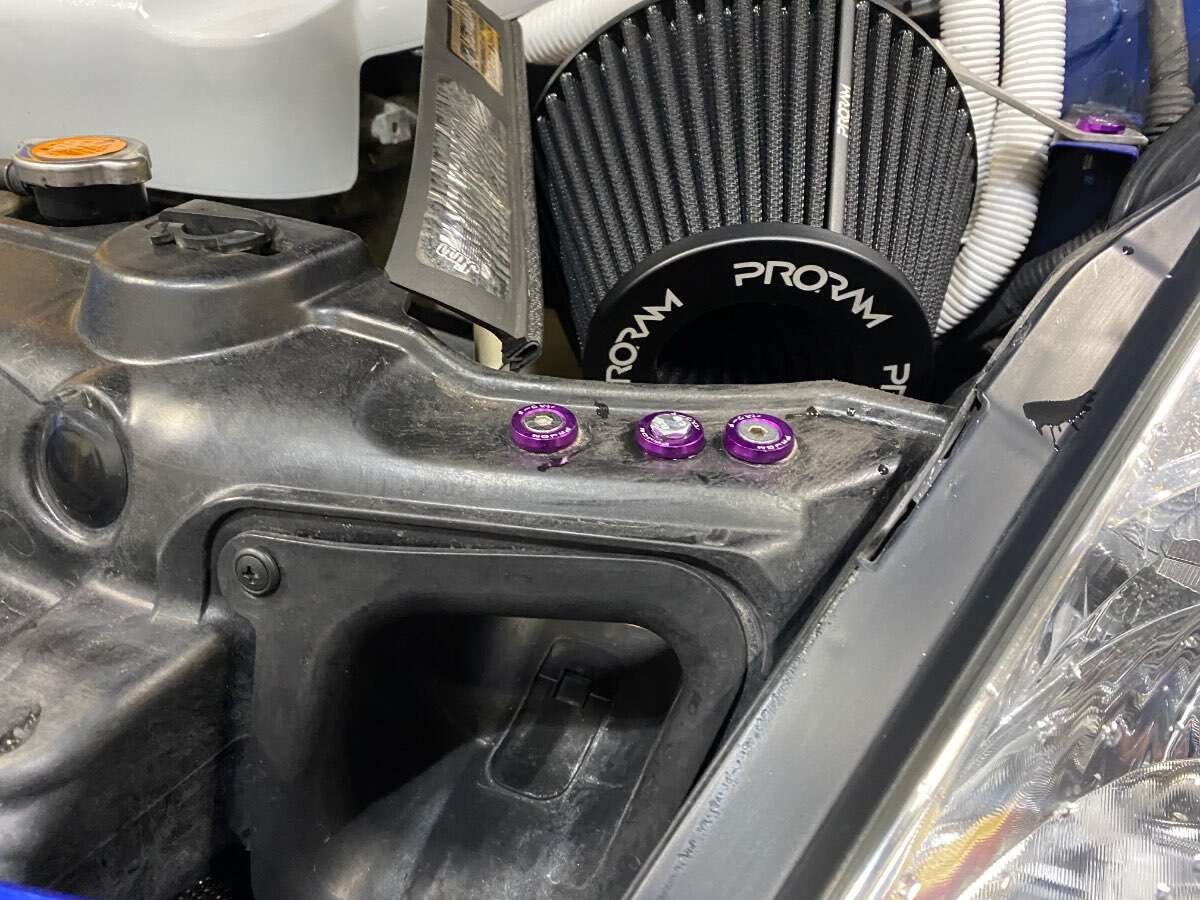
I then needed somewhere to install the primary stack where It wouldn’t be an eyesore and would look neat- so I chose to use this air Chanel guide on the passenger side as it was removable and easy to get to! looked really smart once installed! used a sharp knife and dremmel to remove the waste and just slotted it through- had to remove the three body trim clips and it came straight out
-
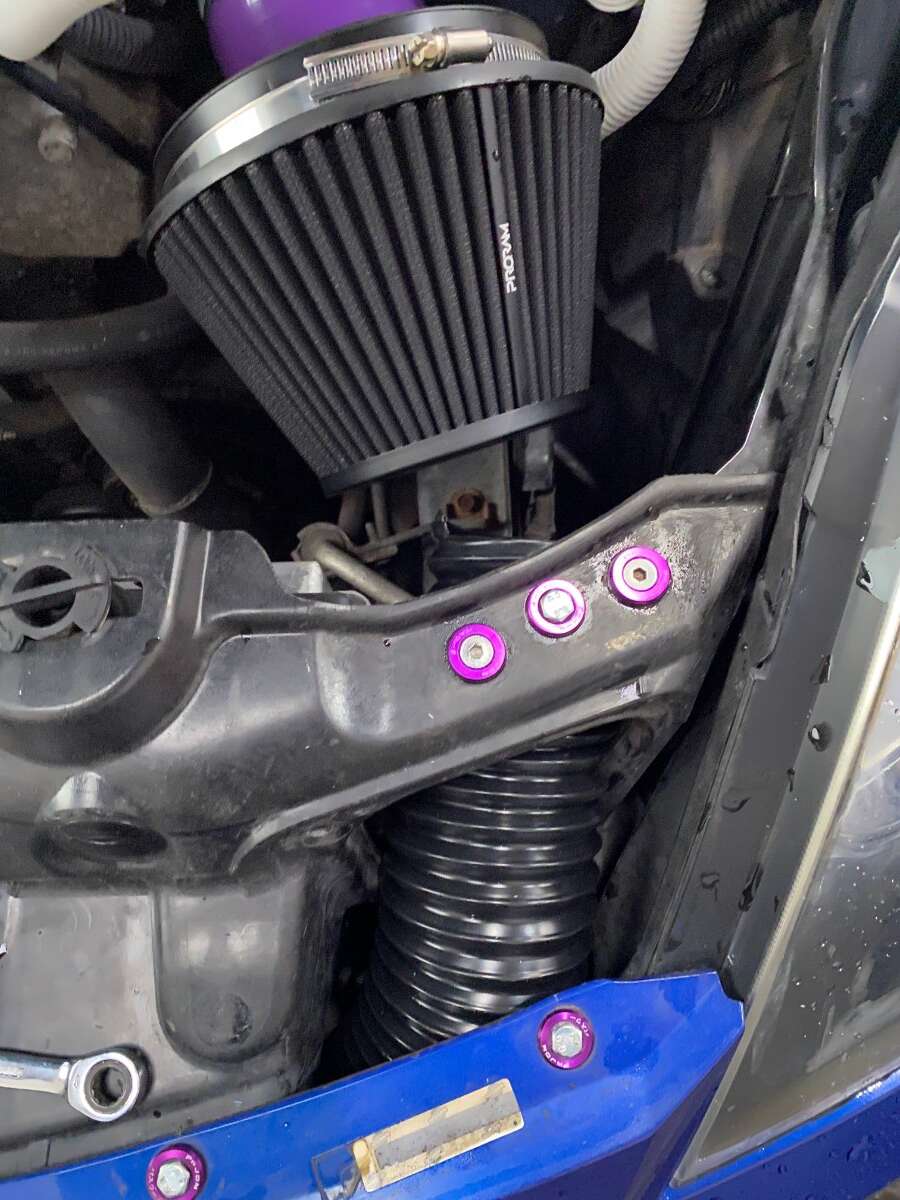
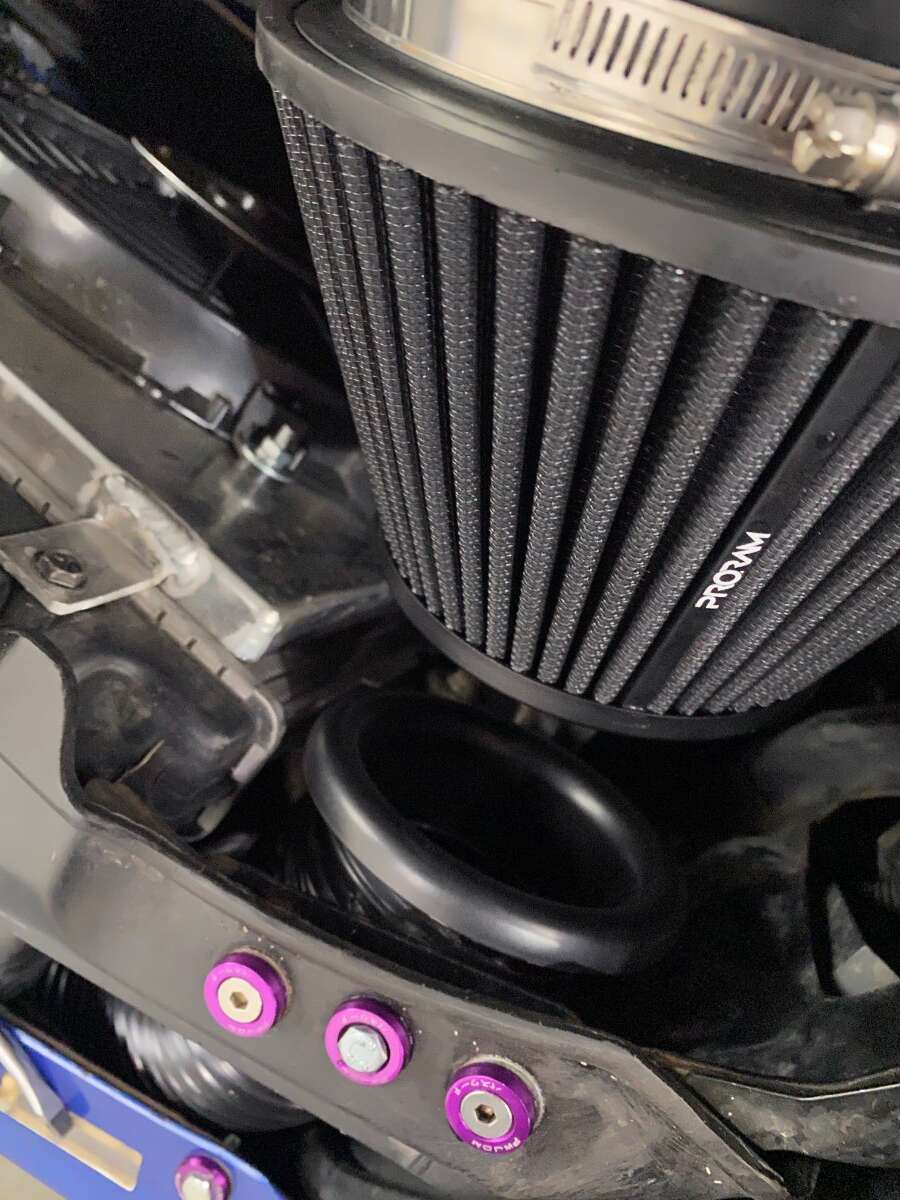
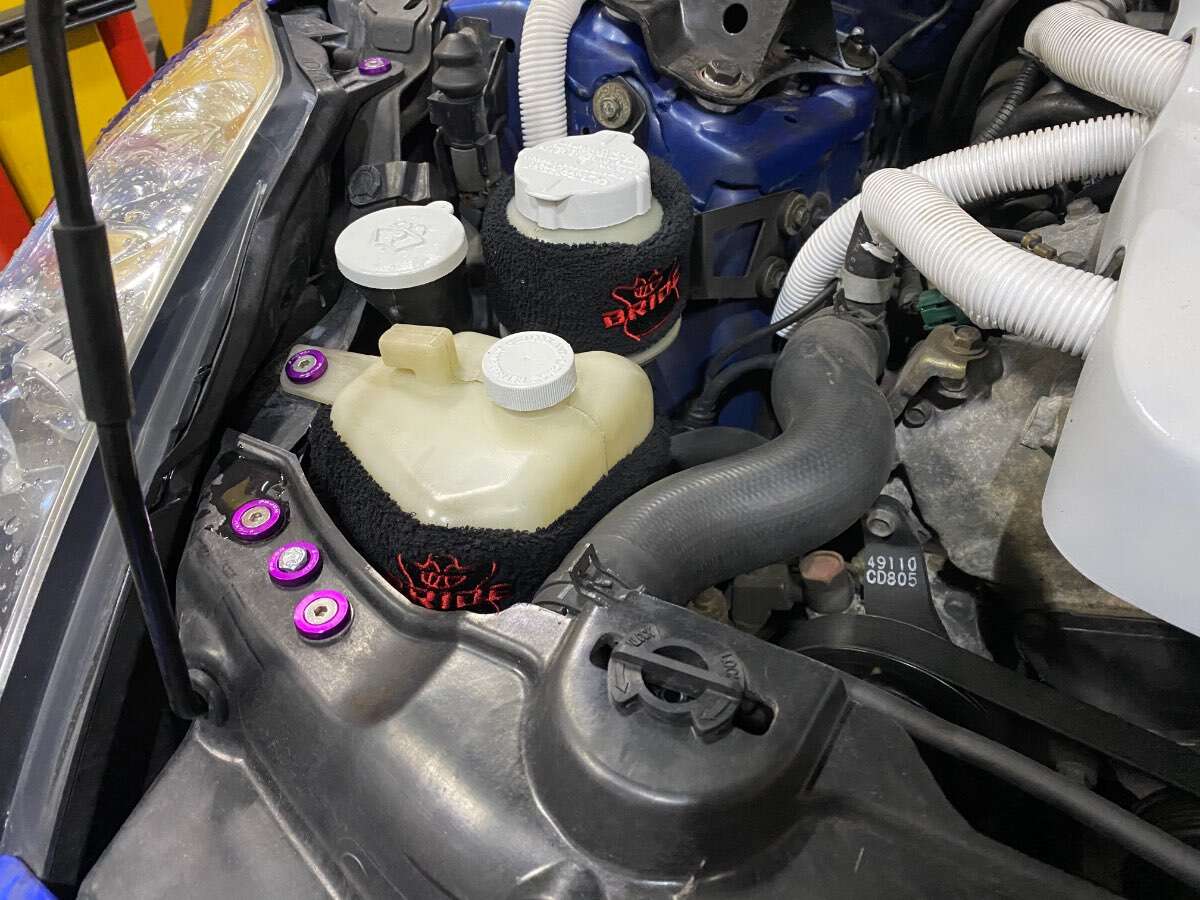
Following on- Staying on the subject, whilst replacing a fair bit of the intake system I felt it necessary to fit some cold air ducting as the z has a habit of sucking in hot air 😂 So whilst ordering the cone and stack from Ram air I also ordered some air ducting with dual velocity stacks! The idea buying two stacks with the ducting was so I could have a solid mount as the ducting pliable it’s also liable to move around if not secured efficiently! so I cut the little segment here- removed the Oem intake shroud, and fitted the pipe work here, utilising a washer and long nut and bolt through the slam panel like so
-
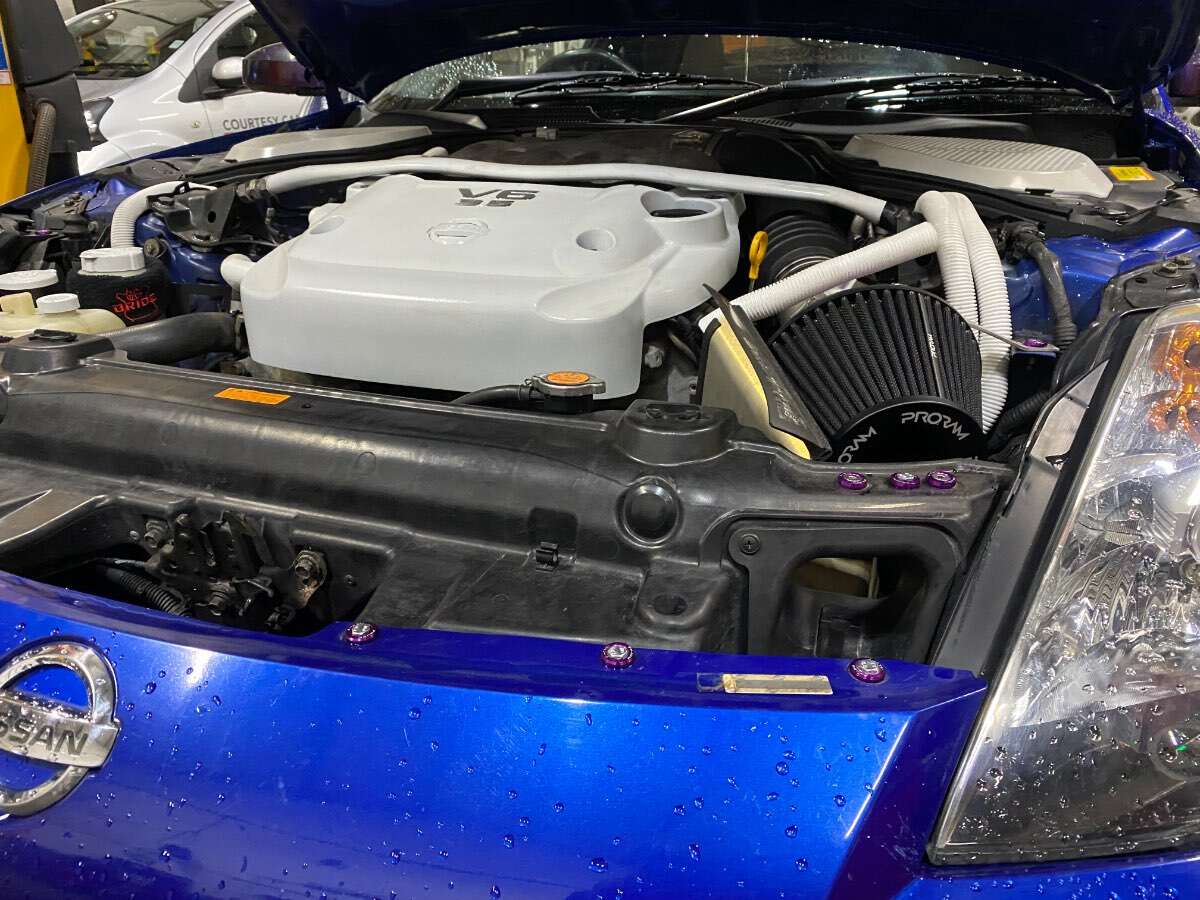
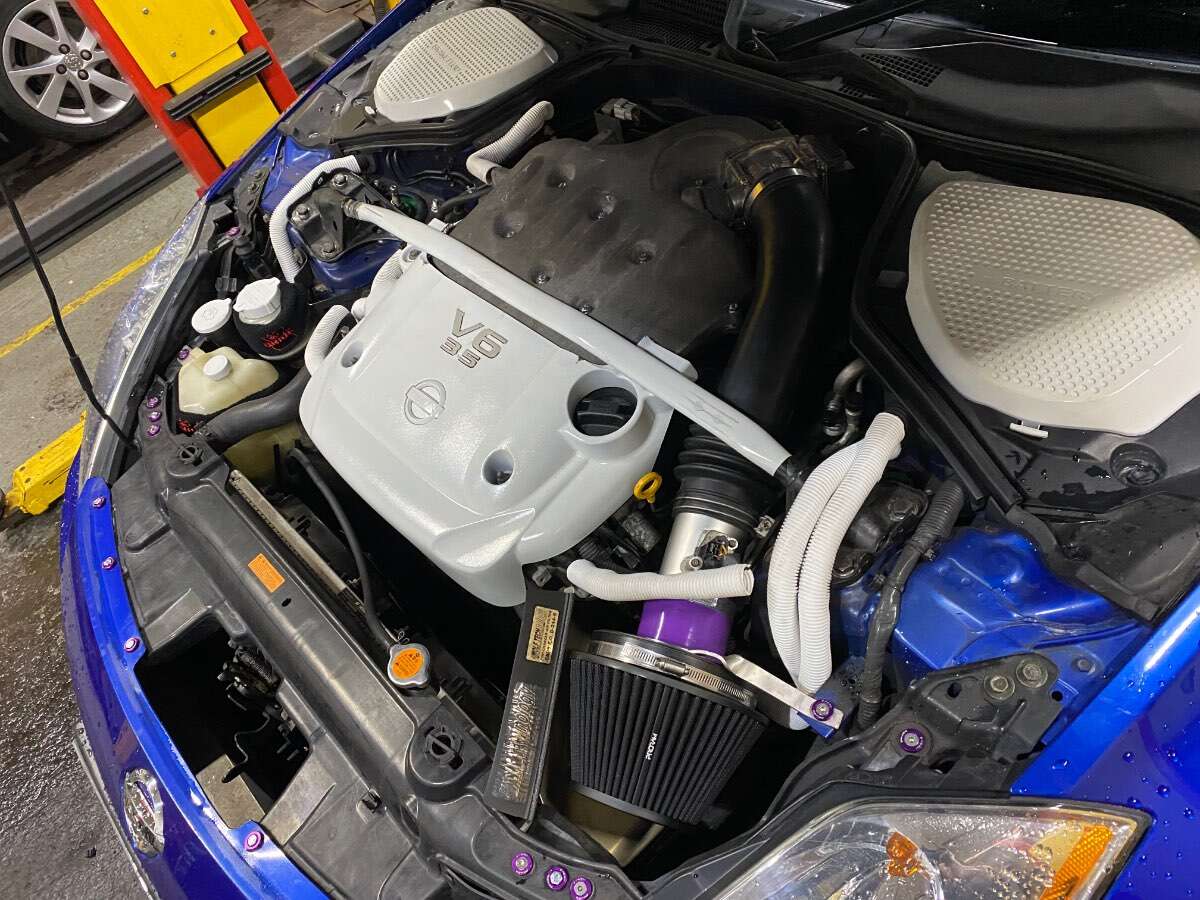
Moving on- continuing with some engine upgrades! After speaking to the nice team at Japfest and also getting a discount code I decided to get a nice new Ramair filter! 76mm with a velocity stack! it’s very pretty! Aswell as this I had also bought a nice new cnc aluminium maf housing, along with a silicone joiner so I could keep everything look clean and fresh! I have as you can see kept my jwt heat shield and my own fabricated filter bracket! Aswell as painting the expansion caps! The science behind the velocity stack speaks for itself really! Getting prepped for being mapped at Horsham!
-
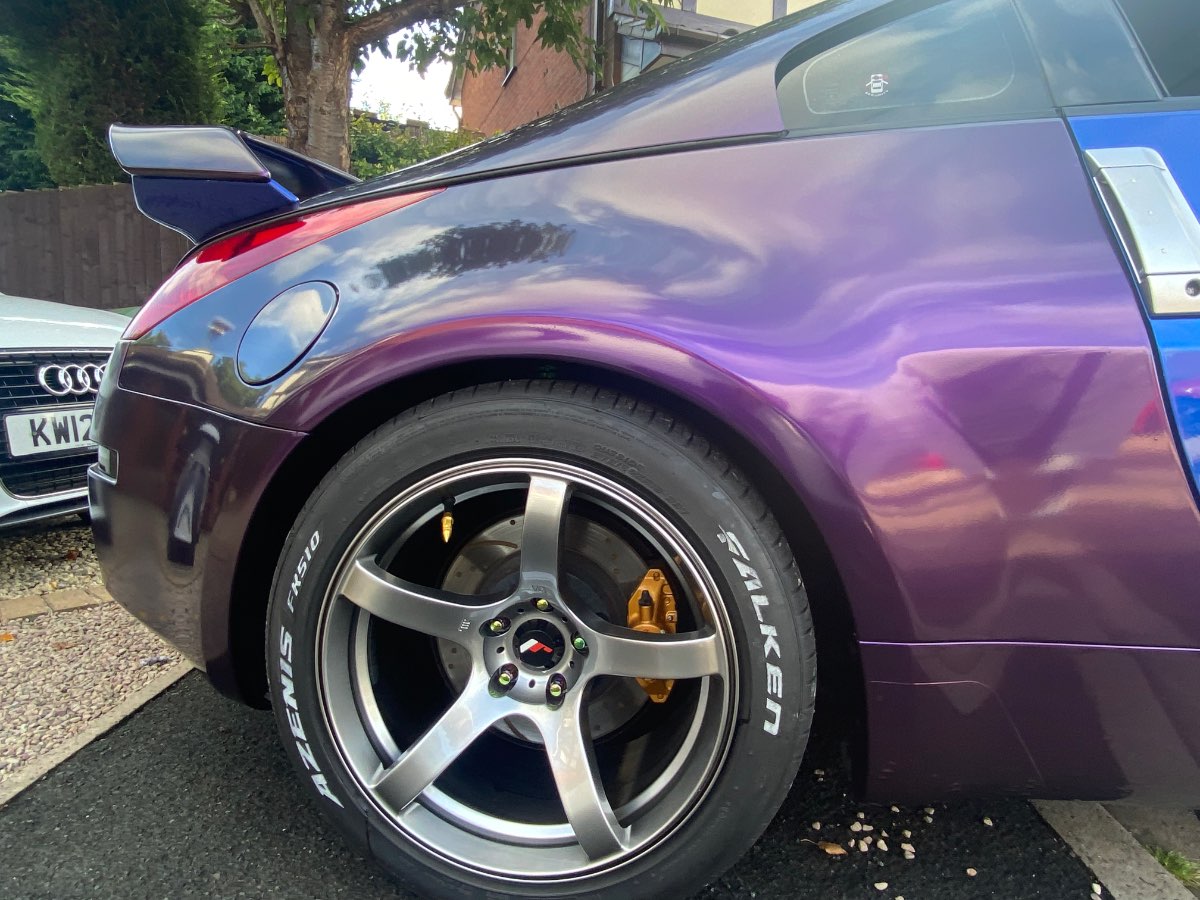
This wouldn’t cause any issues on an mot mate, unless it’s caused the bumper to flick out which I doubt it would just looking at it here. you can buy a new set of front wings £175 of eBay and most of the guys say they fit really well for an eBay buy, depends how bothered you are about it!
-
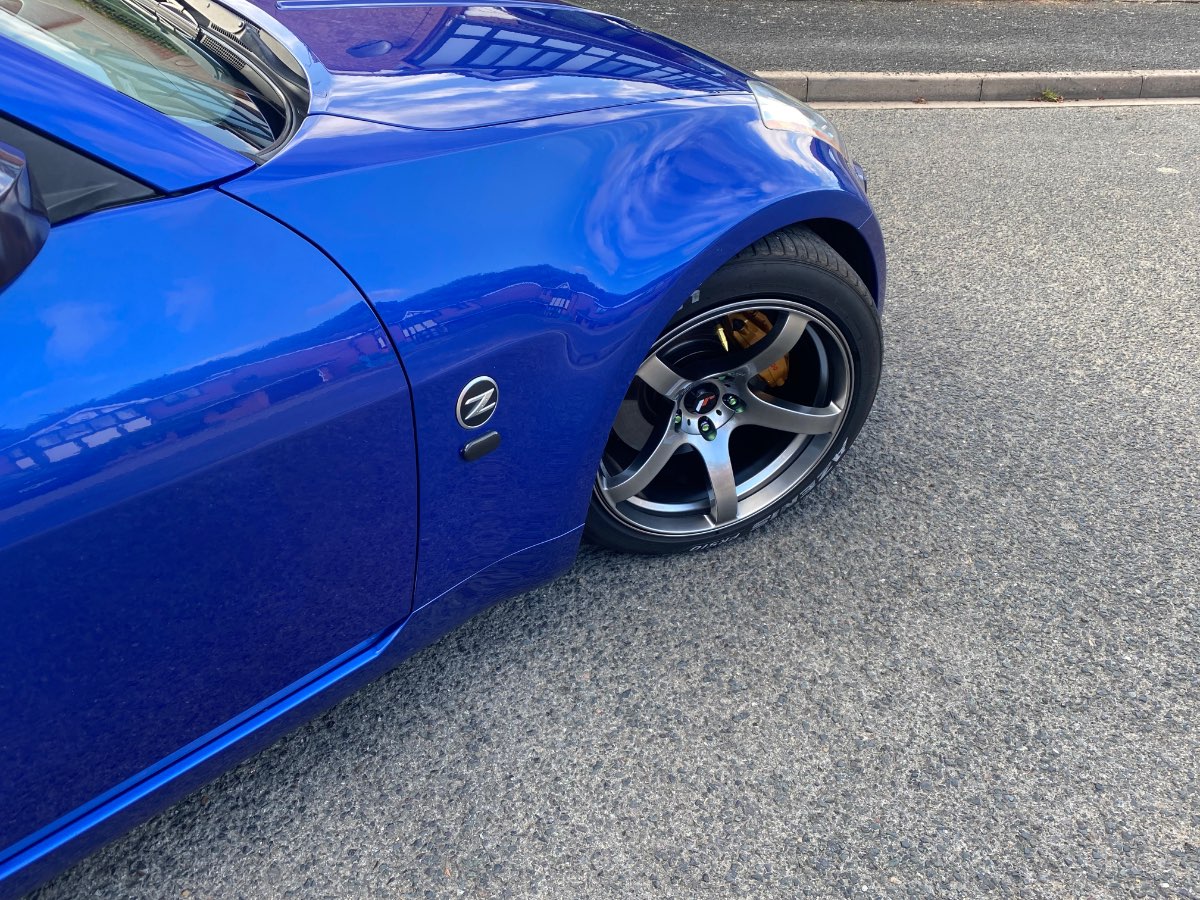
Jr32s cost me £700 new but I’m good friends with the local dealer, should be £800 new, the fitment is bang on

-
Bump
-
Or just mask off around it and try some window tint in a can
-
I might have a bloke looking for one of these in this condition, someone rolled a van down a hill into his pride and joy and they wrote it off
-
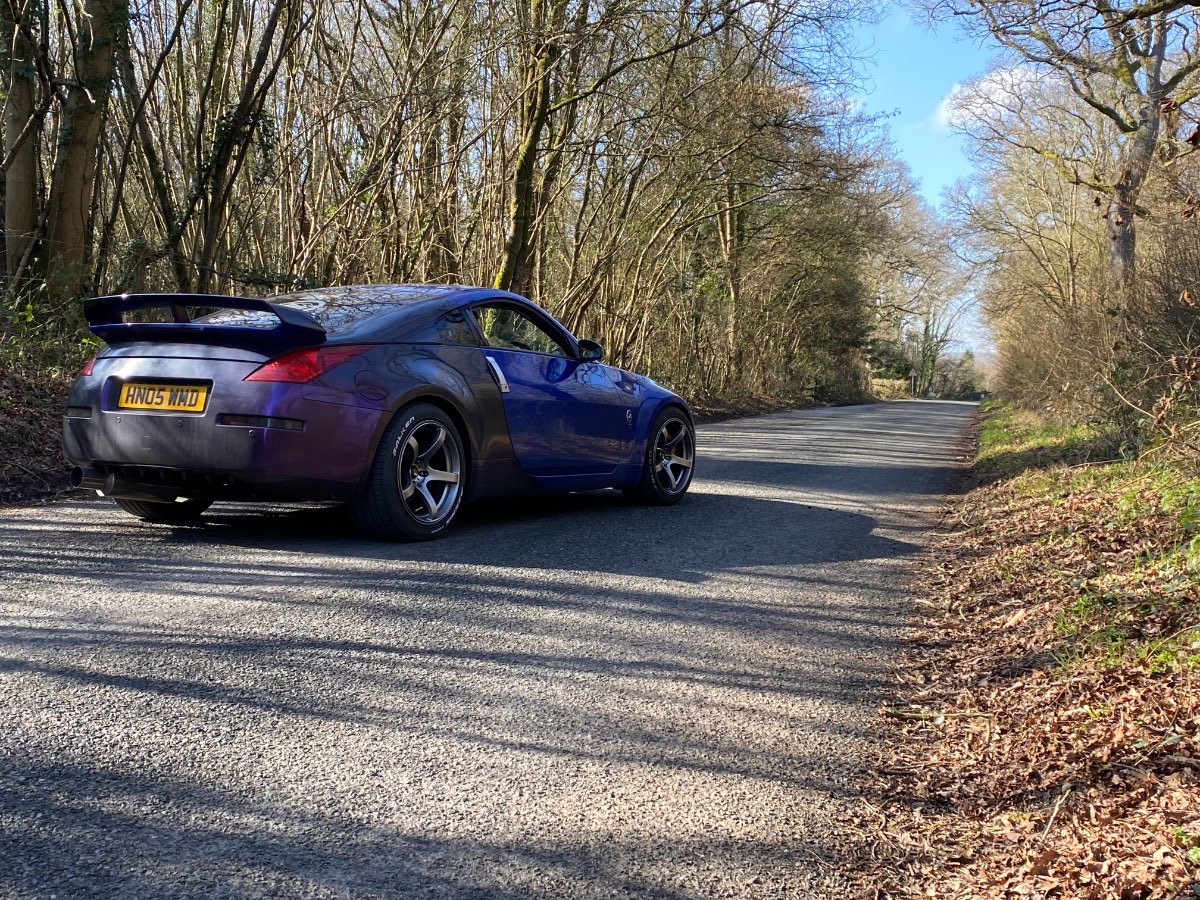
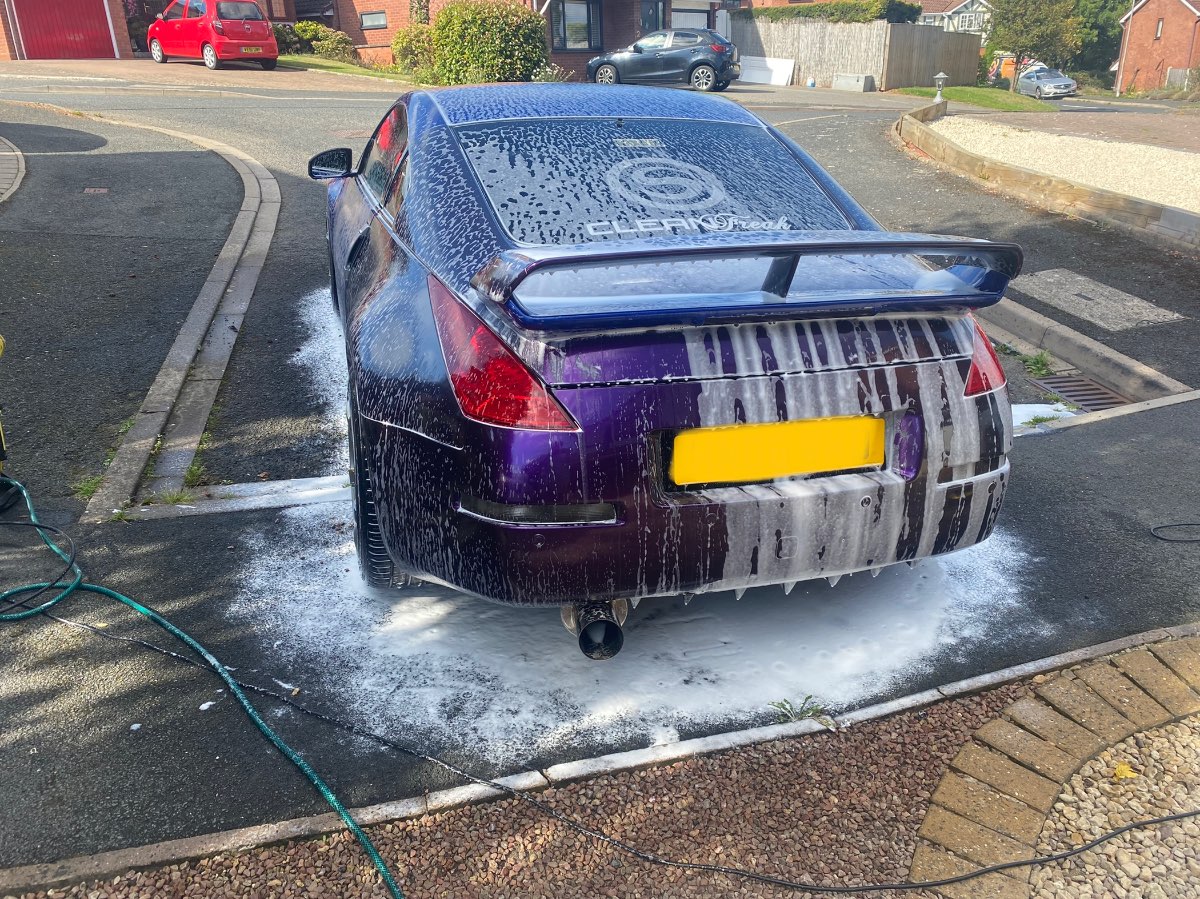
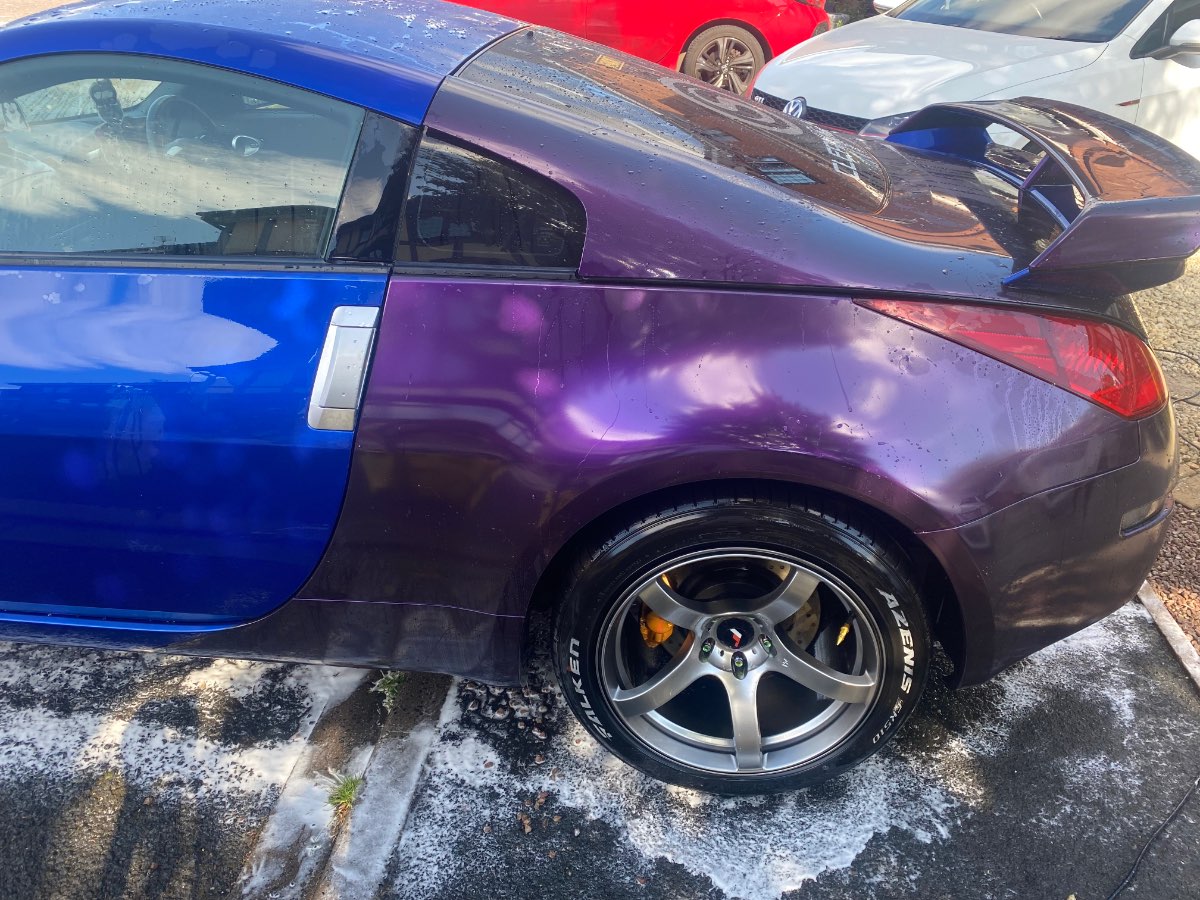
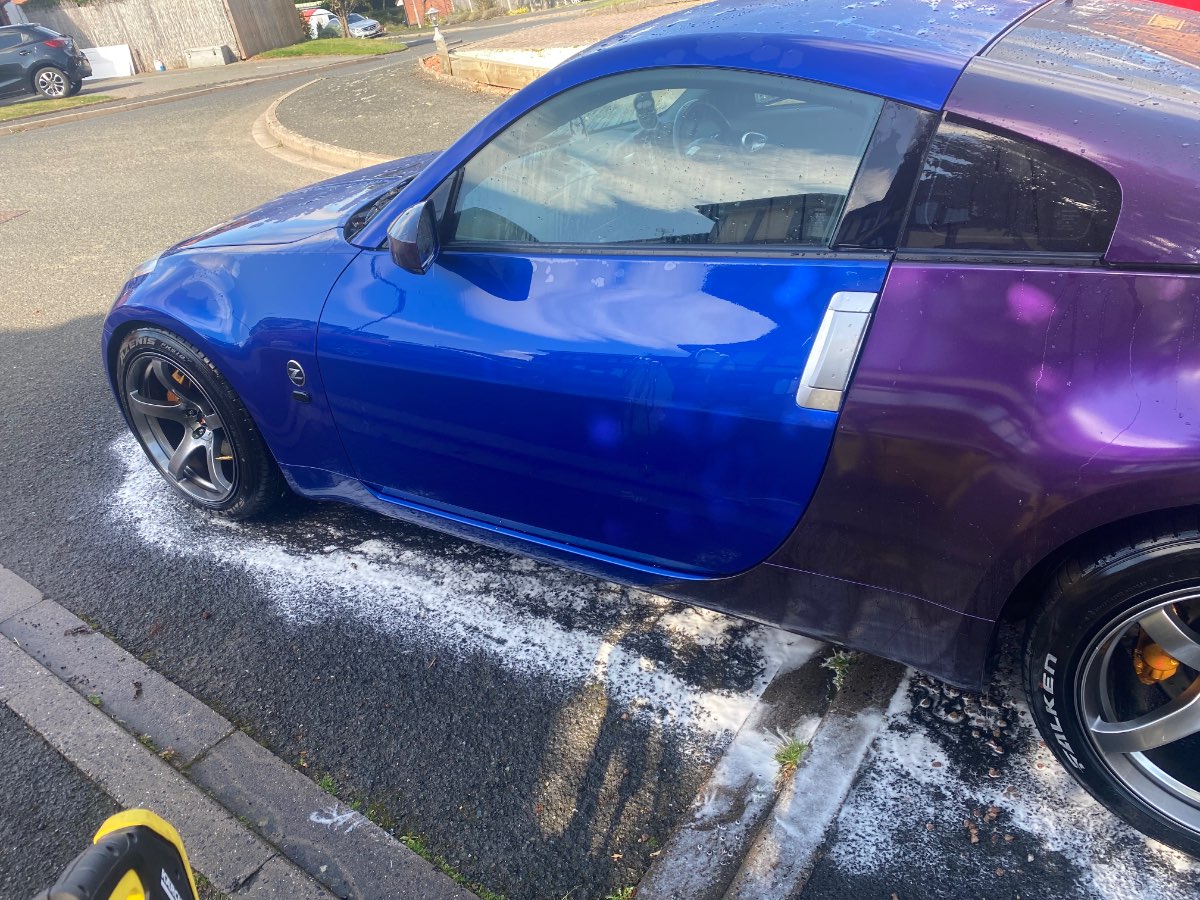
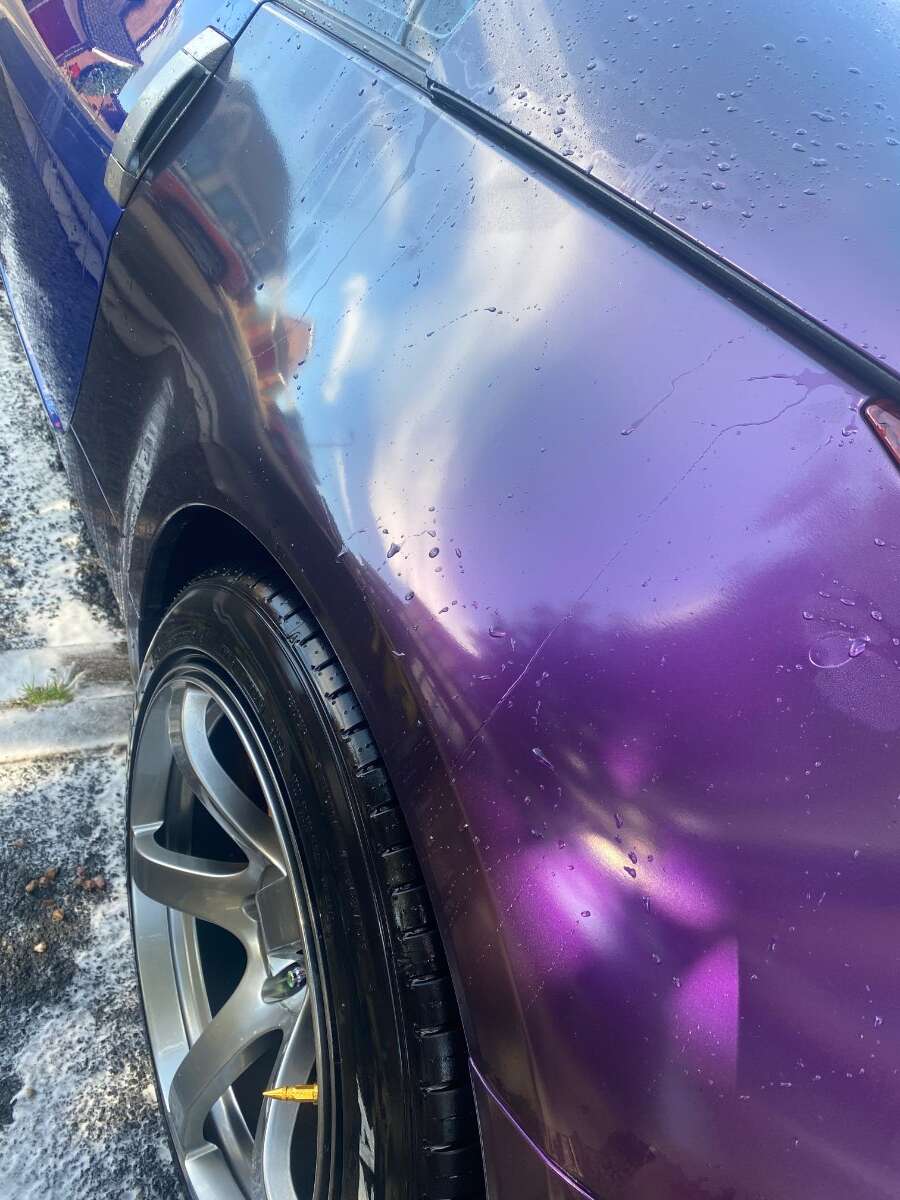
Oh dear I’m double posting 😂- always nice when the roads are quiet! but shame I didn’t wash it till later “we’re on the road to nowhere”
-
Thanks for the thread revival, I’m now even more annoyed that murica got interlagos fire… what a beautiful colour 😭
-
Would a packet of hobnobs change that? 😂 have you tried it out yet? I’m debating getting the titanium isr but need to sell mine to fund it
-
You know it! Oh sweet! Don’t forget about the washer haha! Oh god they do go nice and mushy when they’re old. Out of all the nice colours you could have you went for silver haha! will look nice either way mate 🙂
-
Thanks mate, definitely getting there but always something else! yep still no issues and I really appreciate how easy they are to clean! did you order any in the end?
-
Welcome! god that’s a bit of a change up! good to see you’ve chosen well she looks nice! lots of great info to be shared here! As mr muxlow mentioned bigger wheels or spacers would be good to fill the arches! as you’re going the mishimoto route I’m currently selling a second hand mishimoto fan shroud- should still have the lifetime warranty. Just message I’f interested hopefully not breaking any forum rules here! Hopefully see you at jdm combe
-
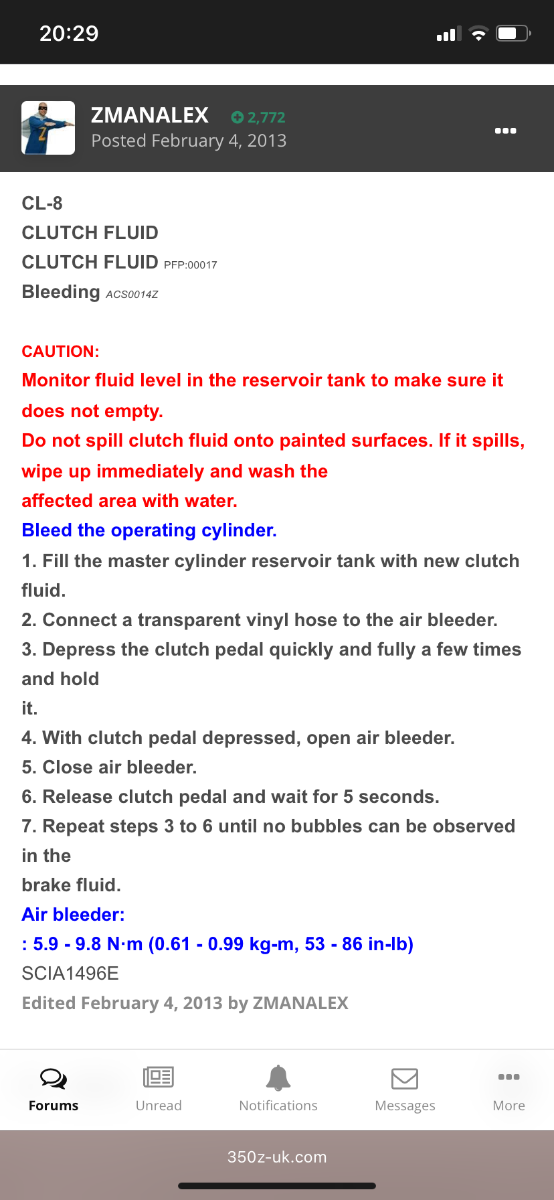
So the procedure is as follows- This is also exactly how it appears in the workshop manual- But you can Definitely trust @ZMANALEX regardless, it does take time, it is a faff but if you follow it to the letter and it’ll be done in the best possible time haha! This was also followed up by a full 3 stage wash, and a polish and seal, now having a large portion of the car wrapped does present a problem of not being able to polish it and protect it the same, still waiting on my wrap detailer- Bring on the next exciting part- a trip down to @Jez @ H-Dev to get it mapped! and also wanted to bed the clutch in first!
-
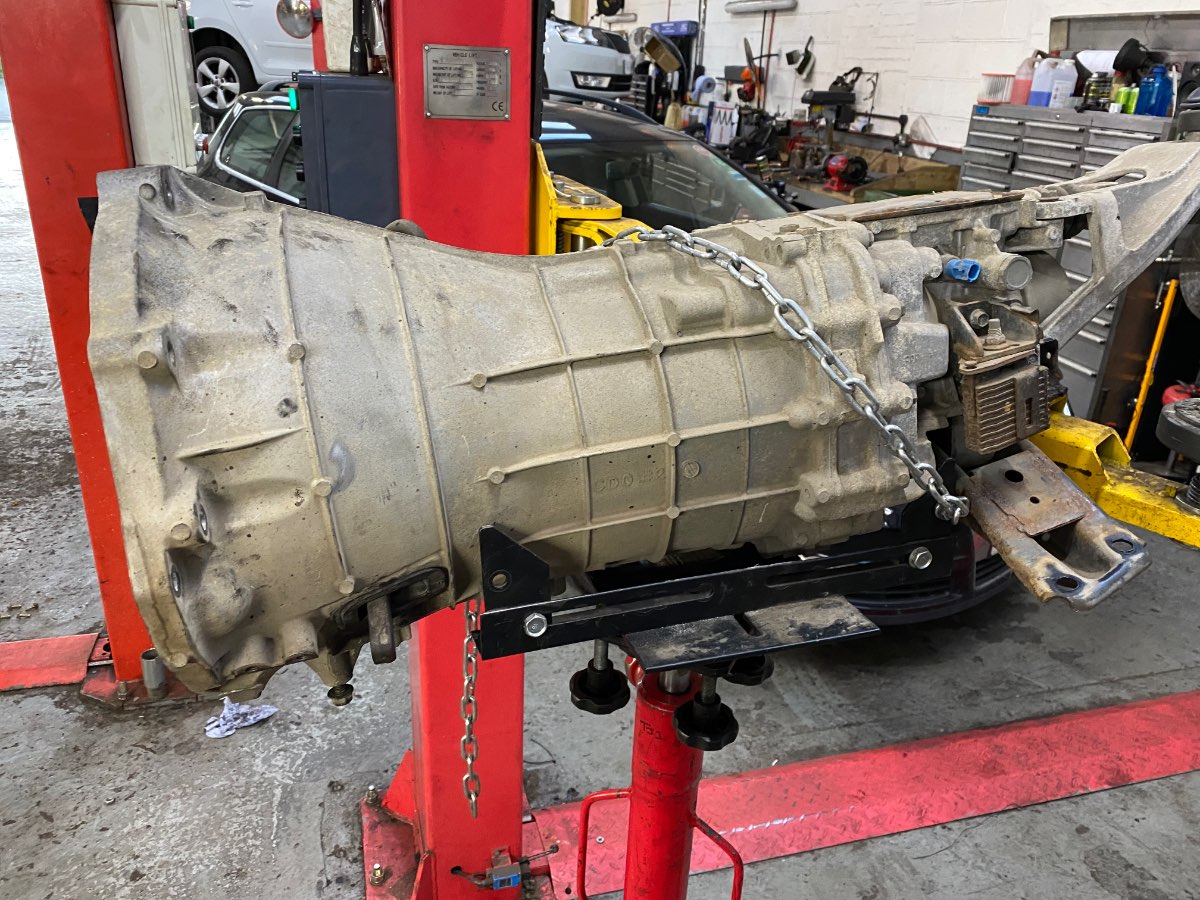
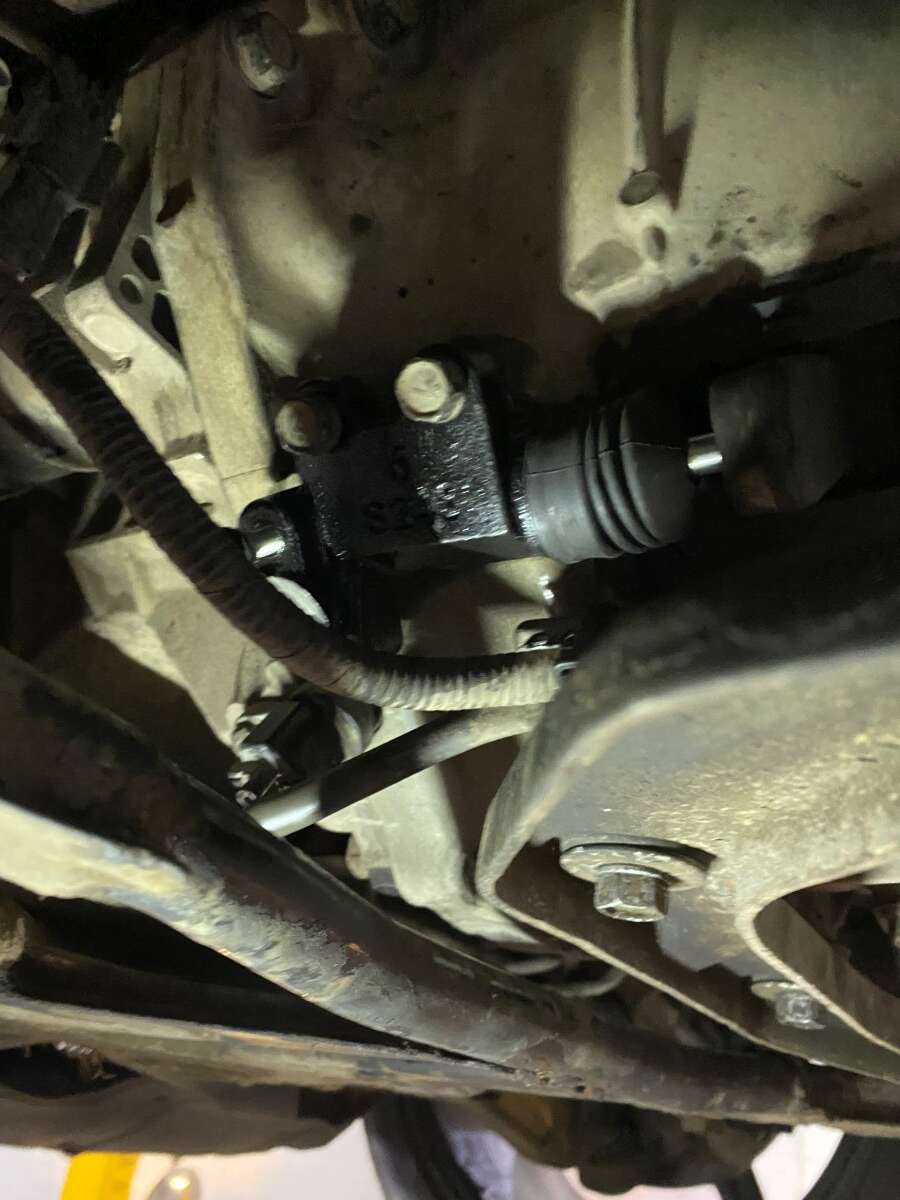
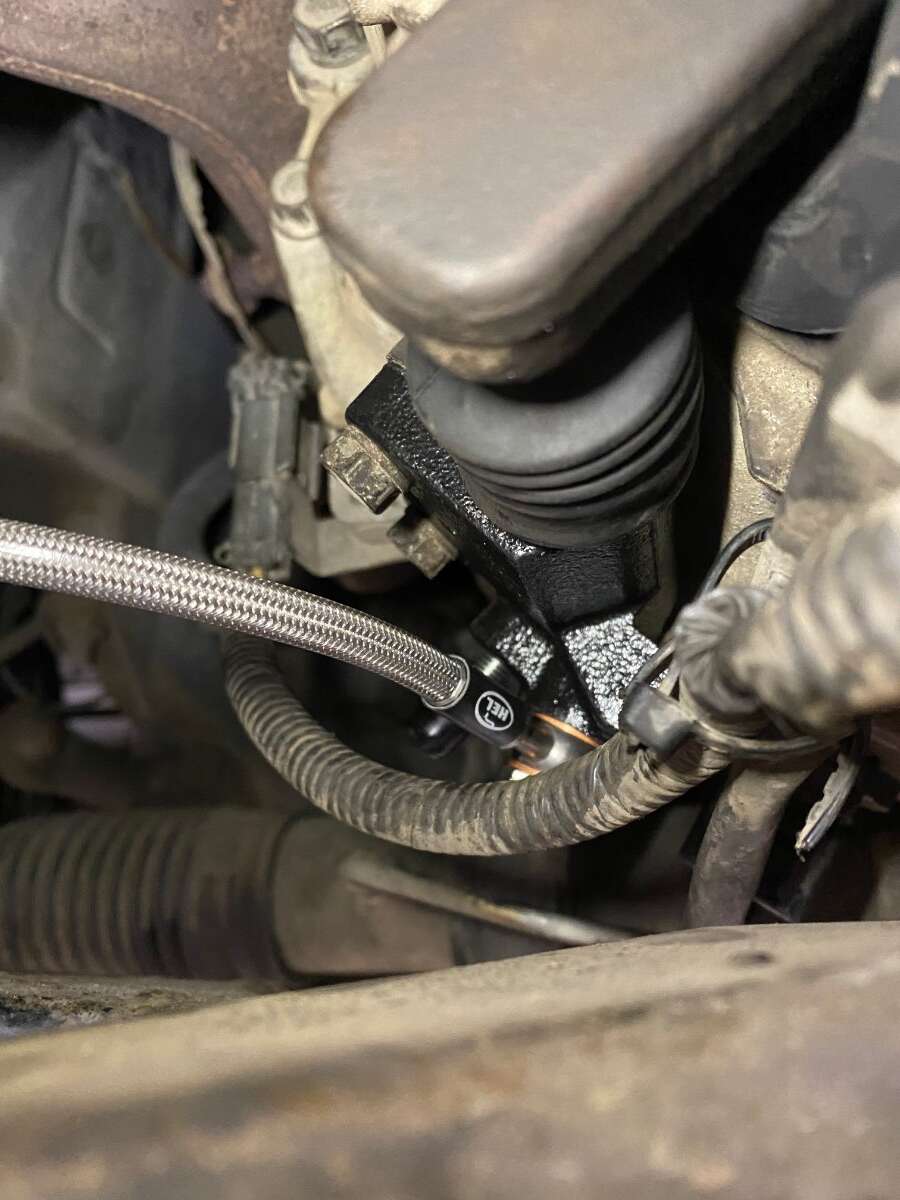
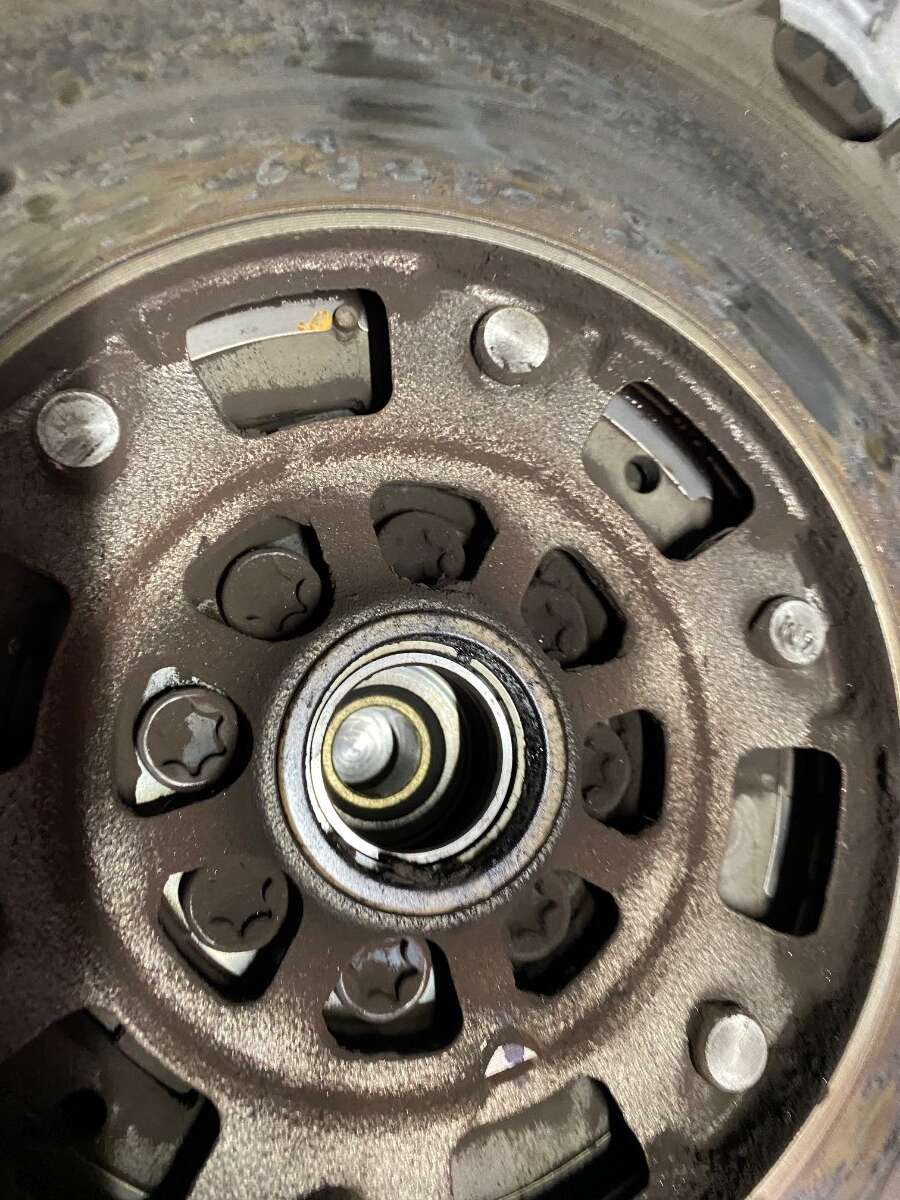
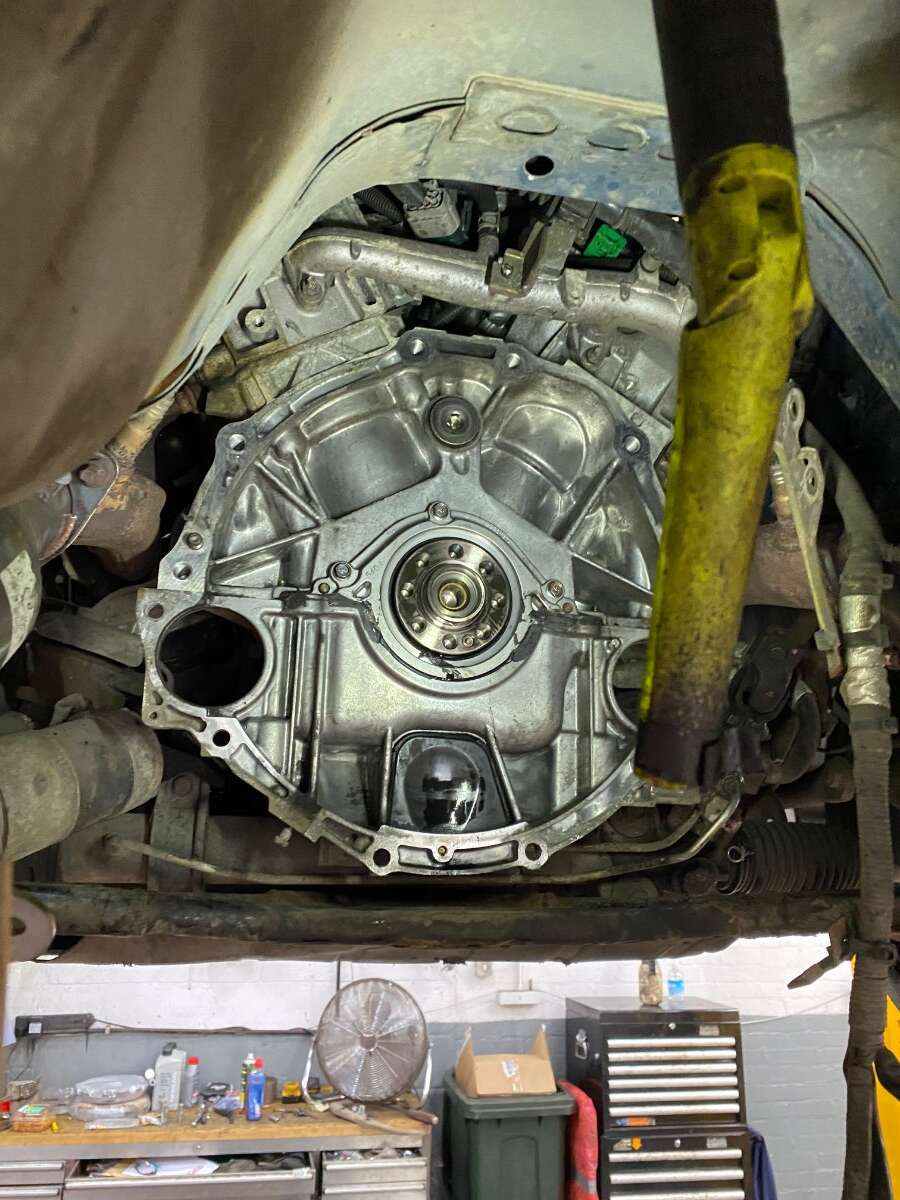
Usually at work get stressed doing boxes on certain stuff as there’s a clock and a customer involved but I didn’t have that here as I really enjoyed the job due to the Japanese have some sort of method not cackhanded things made to be awkward for the sake of it. Pilot bearing in, new flywheel on and bolts threadlocked and torqued, friction and pressure plate aligned and torqued on- important thing to remember is to clean off all components as some oil residue will be left over from machining. Box ready on the Jack ( yes some of you lot will be like we don’t get a Jack and a ramp- to you I’ll say I’ve done one on a drive and I know it’s not fun!) a bunch of bolts sensors plugged in and the starter and gear surround + nob later- we are ready for the worst bit of the entire job, do not think that you’re close to finishing because you’re not- Mr Masujiro Hashimoto has another surprise! Yes replacing the clutch slave is one two bolts and replacing the banjo and fitting the braided line but that’s the enjoyable bit here’s for the next bit!
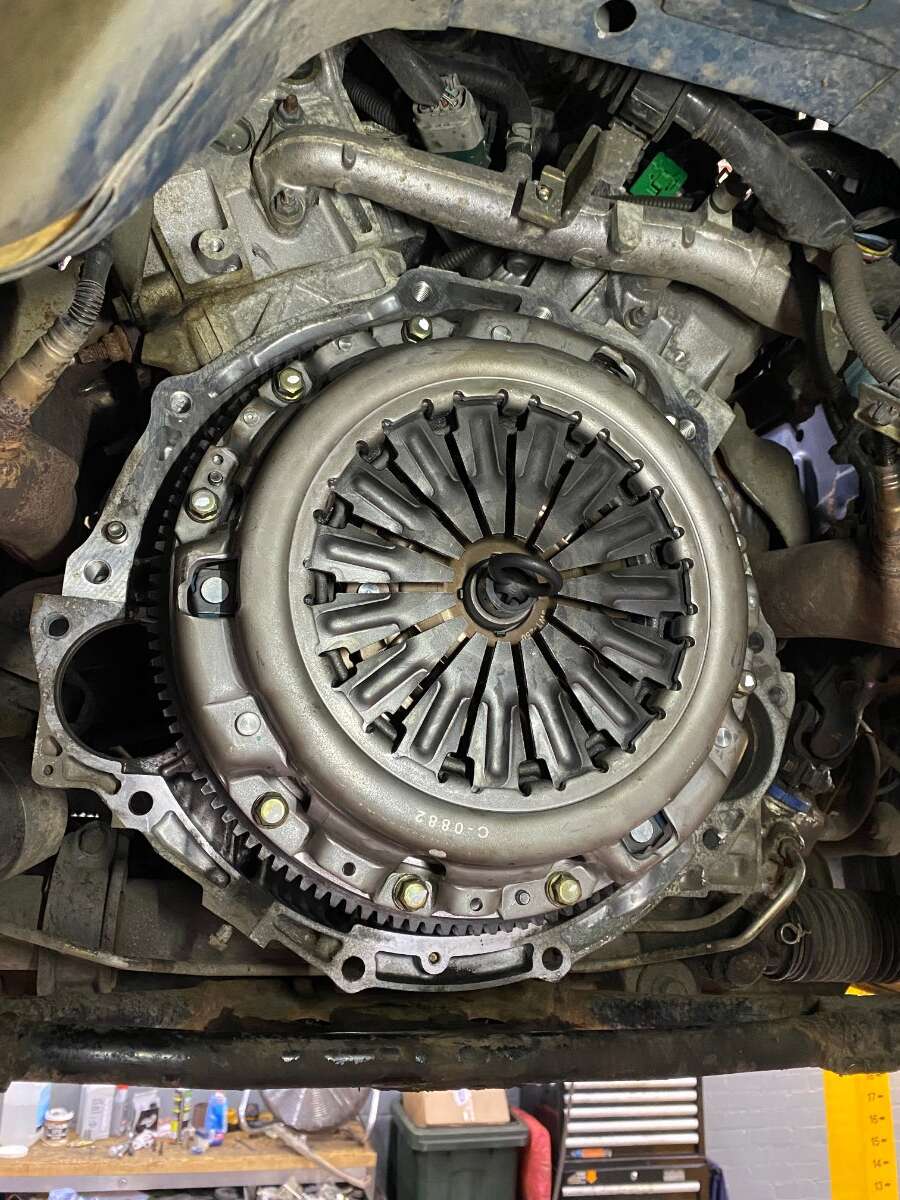
-
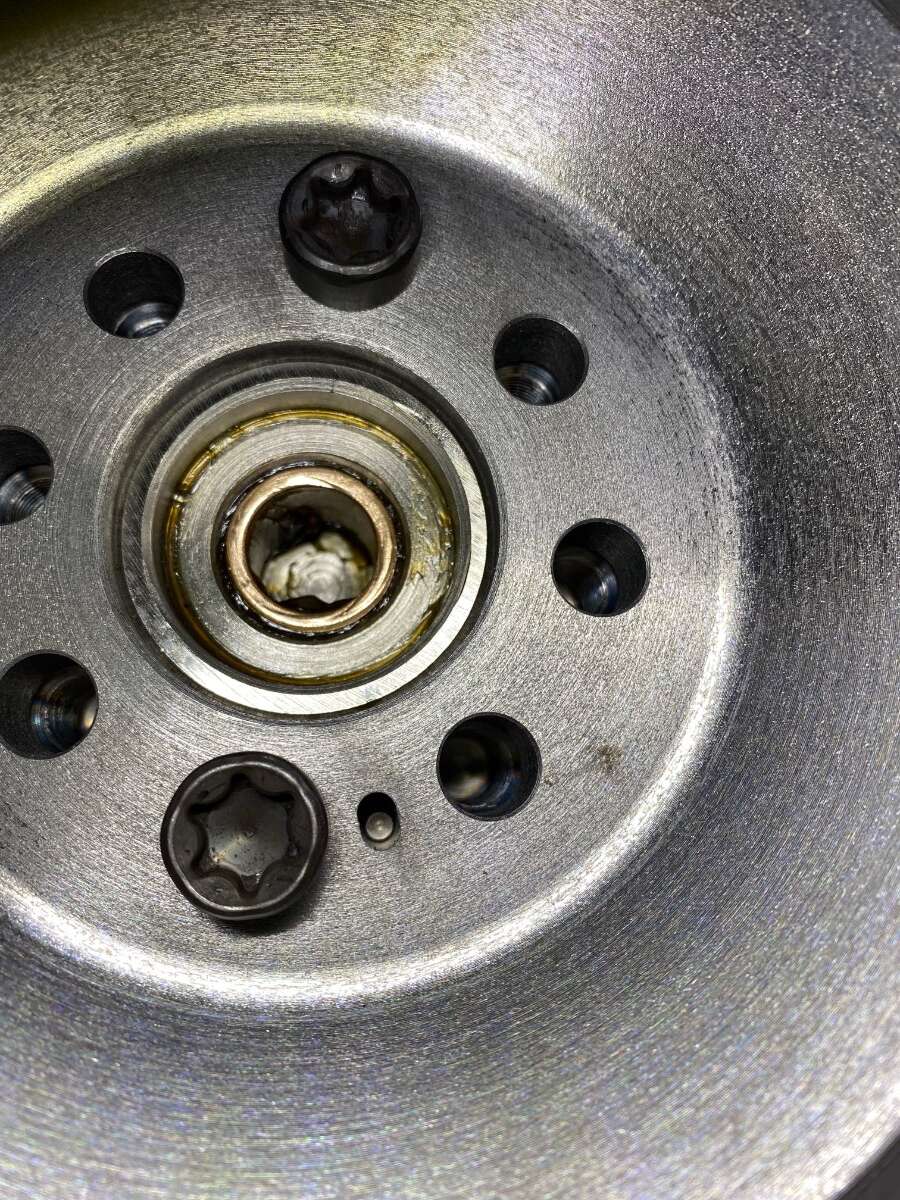
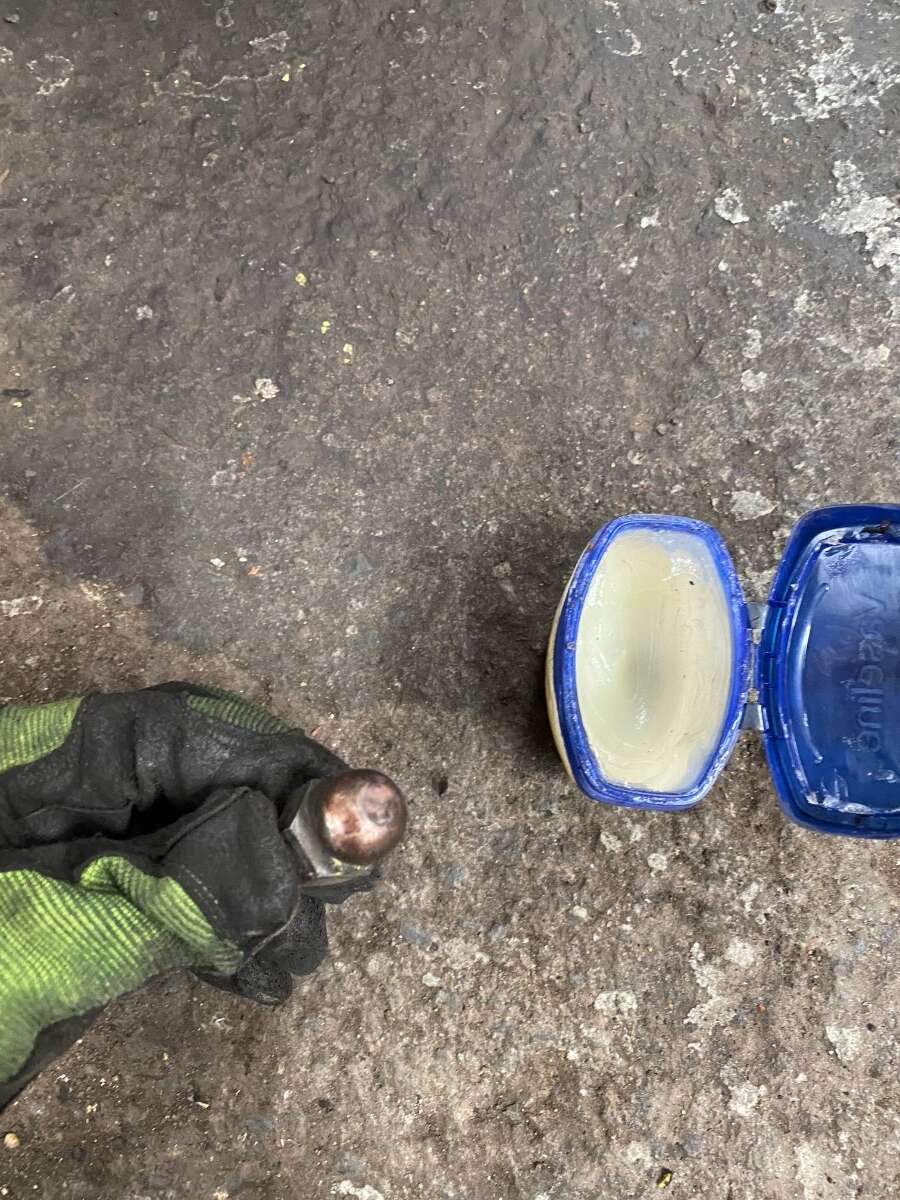
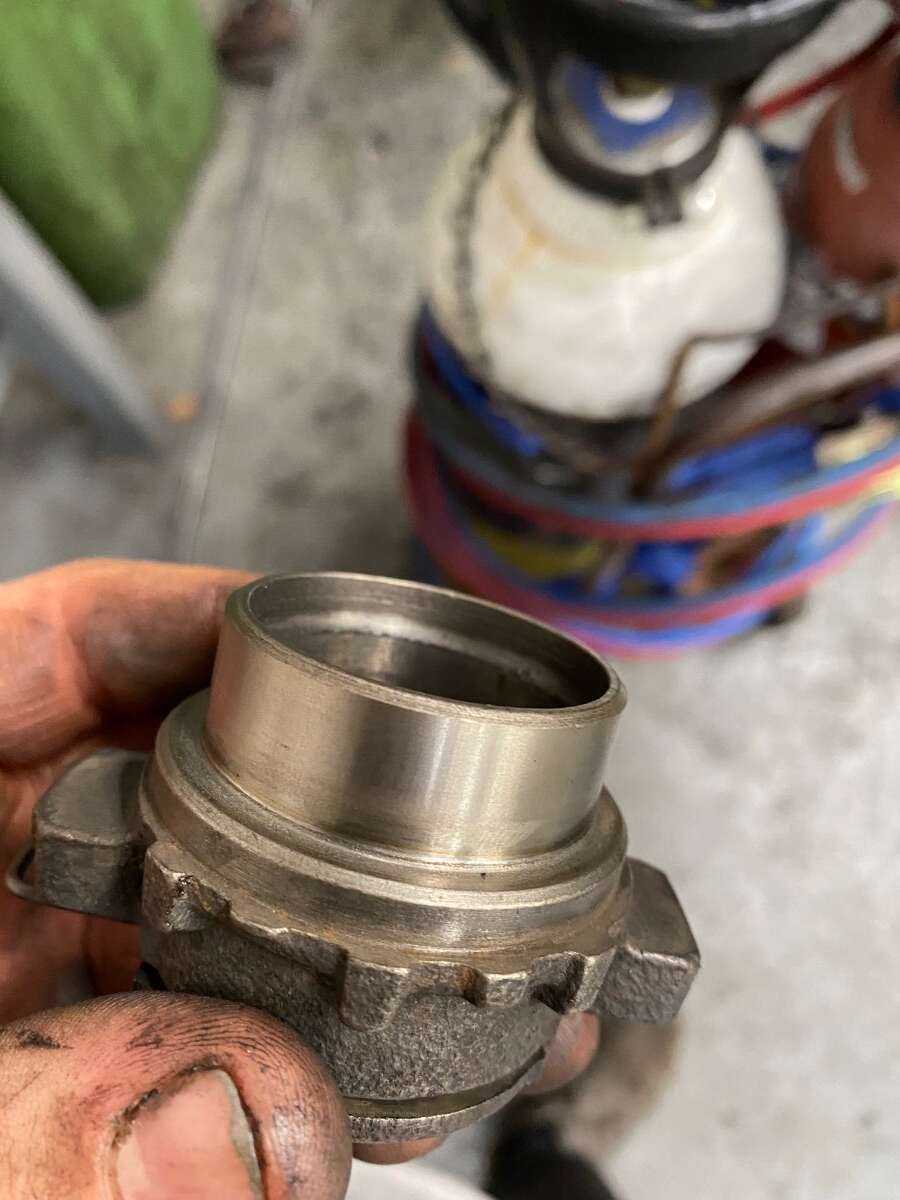
For the pilot bearing, do not lose hope! And don’t just say oh I’ll leave the old one in because if you’ve been given a new one you might aswell just do it! 1000% the best way to do this is to pack the hell out of it with multipurpose grease as much as you can, bare with me- get a sock and extension, believe it was either an 8mm or 10mm whatever that fits perfectly into the inside of the pilot bearing, pack out the inside of the socket with blue roll as much as you can, push it into the inside of the pilot bearing then **** it with a hammer. obviously the idea is that the only thing to move in this situation is the grease and the pilot bearing so don’t worry, keep going and once it moves you’ll have it out soon enough! then just clean out some of the grease, but leave some haha
-
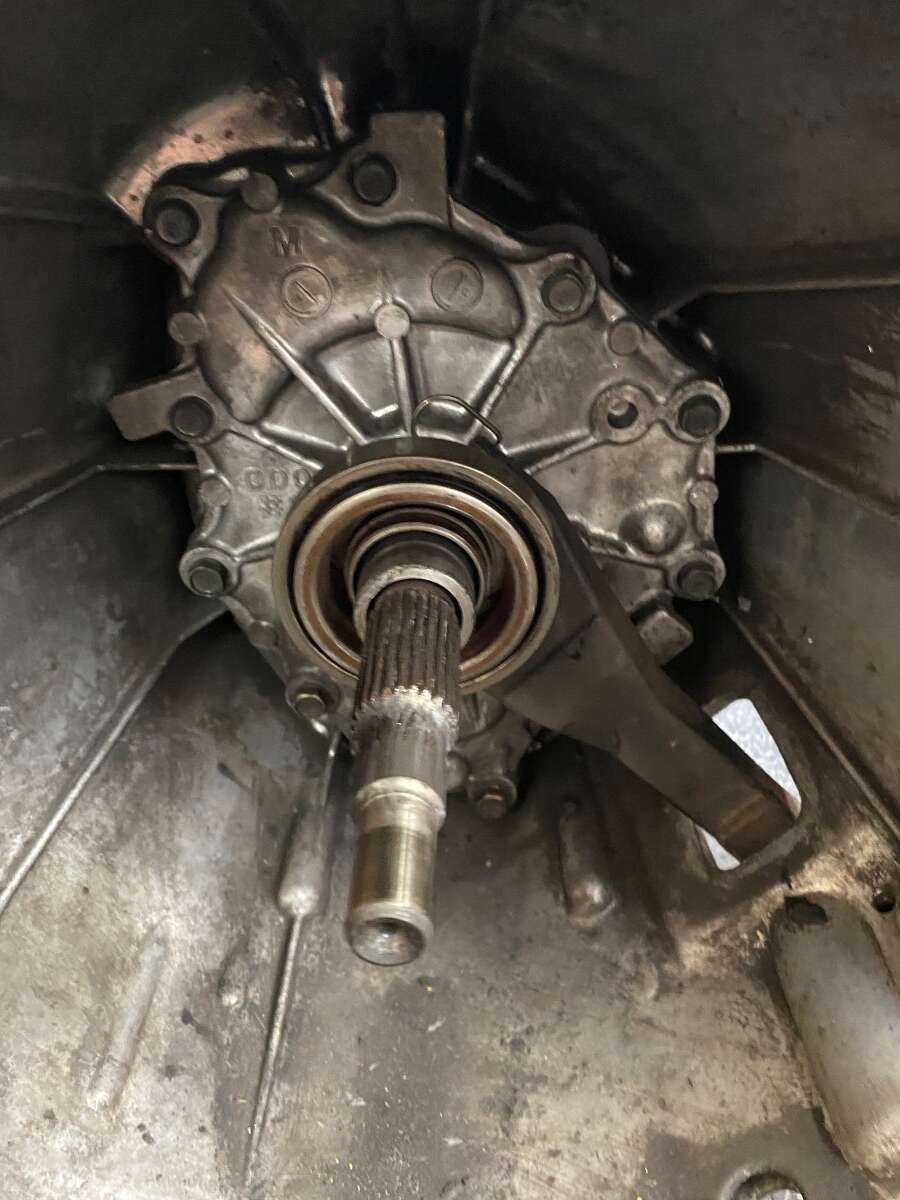
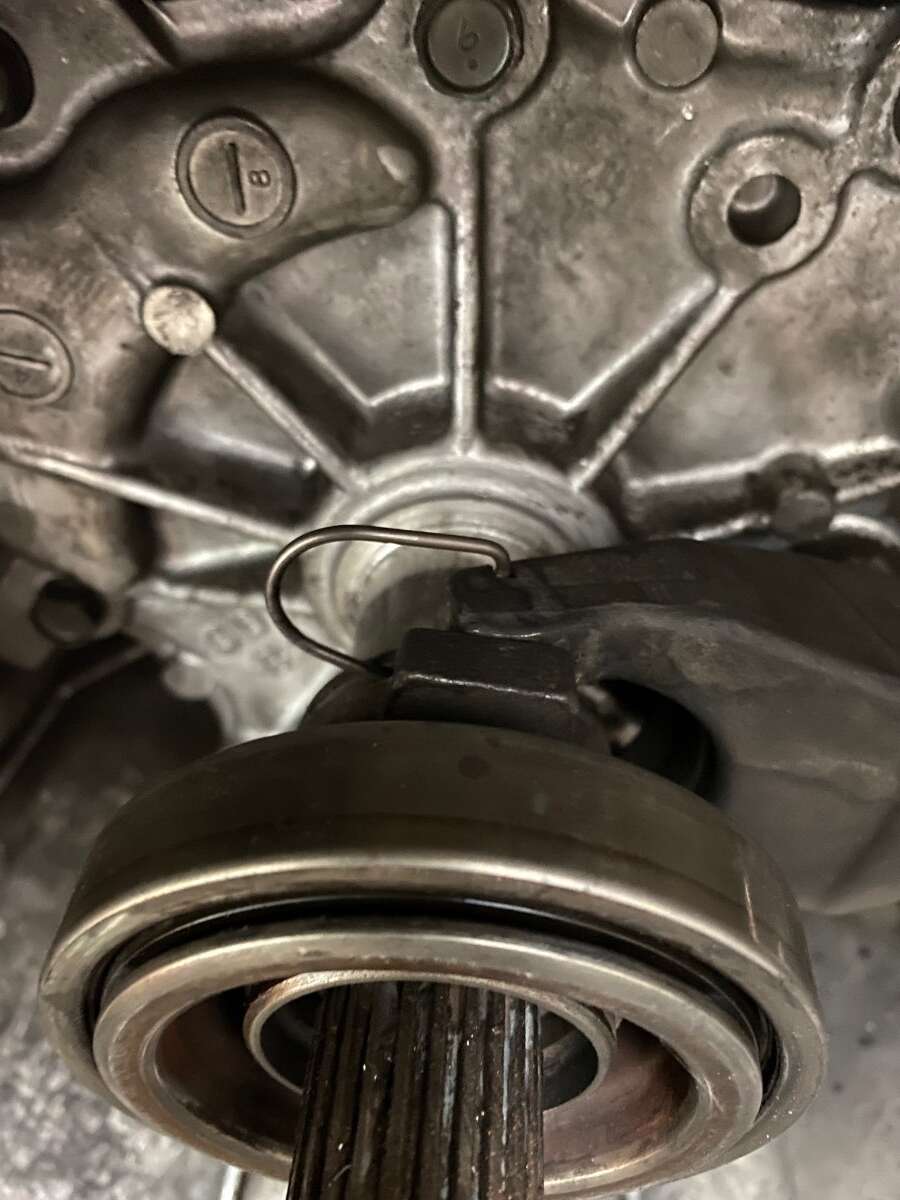
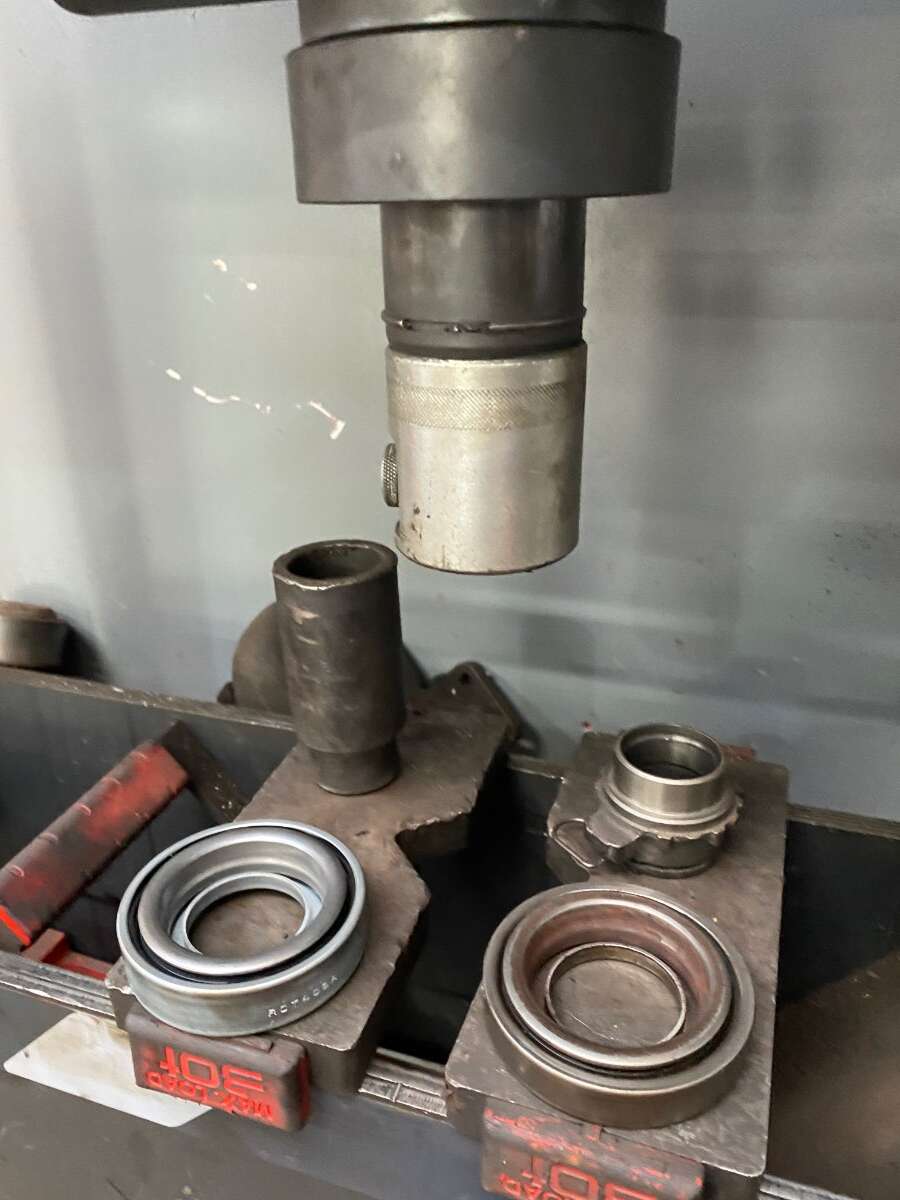
Whilst I’ve got some time- continuing the clutch job, Did the sensible thing offer each component up to check the fitment is right as last thing we want is to have to take it all back out 😂 If you can lubricate it do it, just use your brain, Clevis pivot, the tip of the input shaft, the sleeve for the release bearing, and for the love of god use plenty of lube replacing the pilot bearing! we will get to this stubborn pri ck in a second. so I always picture things before they come off so you have a reference for refit. gave the engine side a mighty good cleanup as it’s good practice, and make sure to clean the box out as it’ll have debris and filth from the last clutch. replace the release bearing, I had trouble with mine so I had to persuade it with the press haha! Always lube the collar/ shaft it runs on inside the box. As you’ve got the box out you could the crank seal but I didn’t want to disturb anything I didn’t need to but you could always preempt this.
-
We Defintely need to get some more numbers if we are to beat last years turnout!
-
SOLD,SOLD SOLD,SOLD ENKEI RPF1 18"B SATIN BLACK (STUNNING)!!!!
Azurez33 replied to SPAXY's topic in 350z Parts For Sale
They are some fine a s s wheels! I would offer a swap but I think I’d be sad that I couldn’t have both!

