


Silverthorn
-
Posts
474 -
Joined
-
Last visited
Content Type
Profiles
Forums
Events
Gallery
Store
Posts posted by Silverthorn
-
-
@Payco cheers mate
 Likewise. When are yours going on?
-
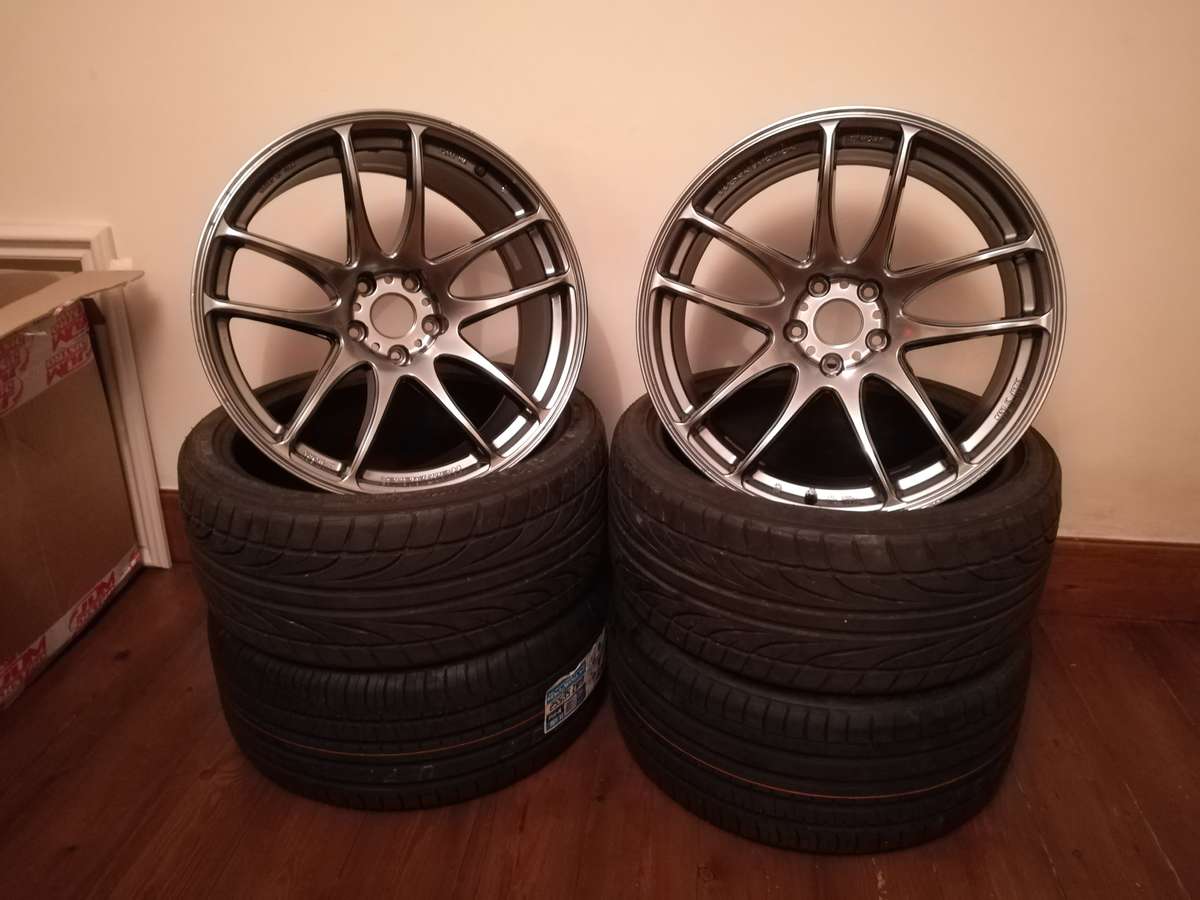
Getting fitted Friday!

Top notch service from Jdmdistro, wheels arrived quickly and are exactly how described so 10/10 in my books.
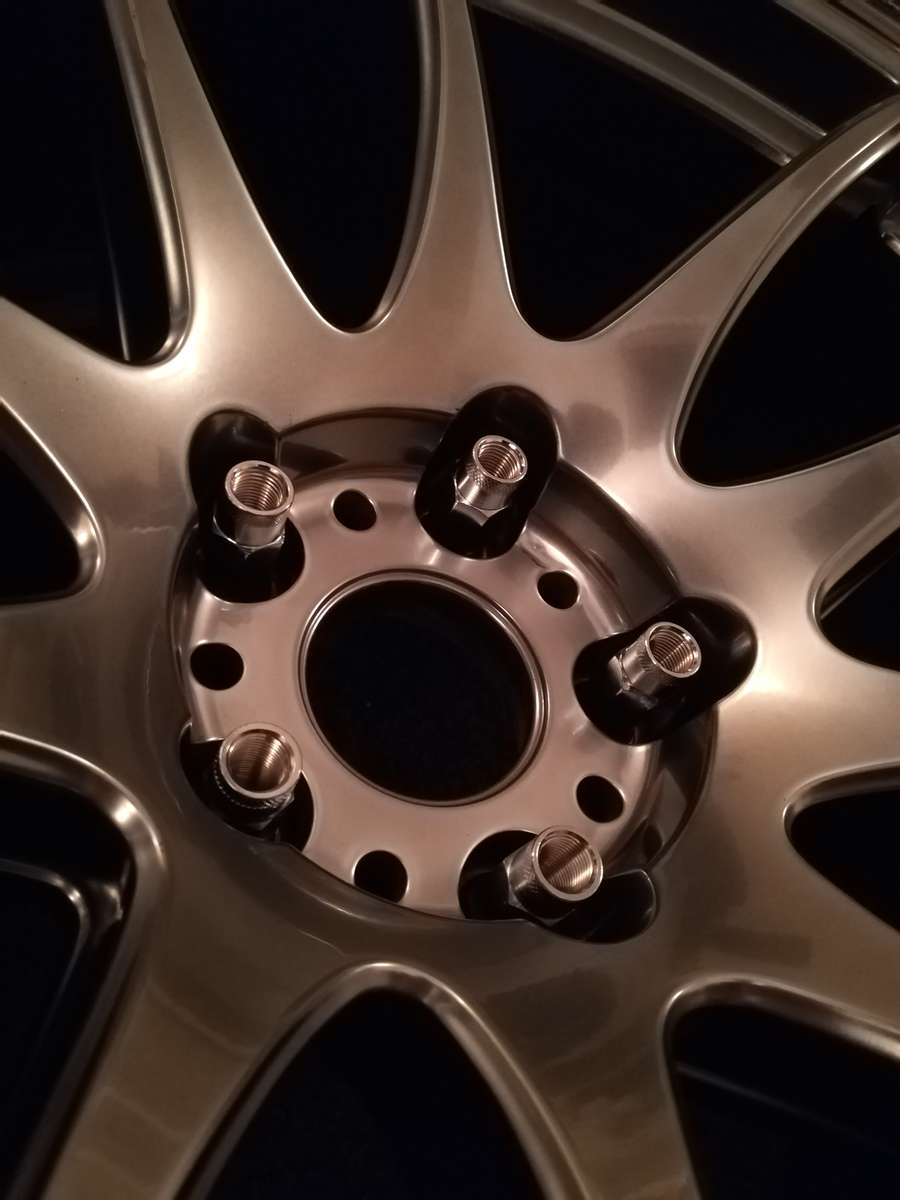
Just remembered I've got some unused polished wheel nuts as well so dug those out... Just gets better and better

-
 1
1
-
-
Hi all,
Just wondering if anyone can shed any light on any true coilovers kits for the 370z that are worth considering?
Ive got BC BRs with custom spring rates at the minute and want to move over to true coilovers so that I can get adjustable toe arms for the rear as well as installing a stanceparts air cup kit front and rear.
I'm aiming for relatively high spring rates so I may end up swapping the stock springs to custom springs depending on what comes as standard with the new coilovers. They'll need to be slightly shorter with helper springs to accommodate the air cup kit anyway!
At the minute I'm considering the K Sport coilovers https://www.torqen.uk/nissan/370z/suspension/coilovers/1361-370z-ksport-kontrol-pro-true-coilover-kit-cns340-kp.html
Or ISC coilovers https://www.torqen.uk/nissan/370z/suspension/coilovers/10246-370z-isc-suspension-street-sport-series-n1-coilover-n029-s.html
Ive also been considering Scale Suspension but I'm not too sure if I fancy paying the shipping and import tax... https://scalesuspension.com/shop/en/nissan/272-nissan-370z-09-z34-innovative-series.html#/lock_ring_color-blue/custom_springs_color-original_color
Any advice or comments from people with experience with either would be awesome!
Cheers
-
I'd take the fuse out and keep it out personally. The last thing you want is the steering lock to completely fail as you'll be shafted with repair bills. Not worth the risk whatsoever...
No help with regards to the light though I'm afraid.

-
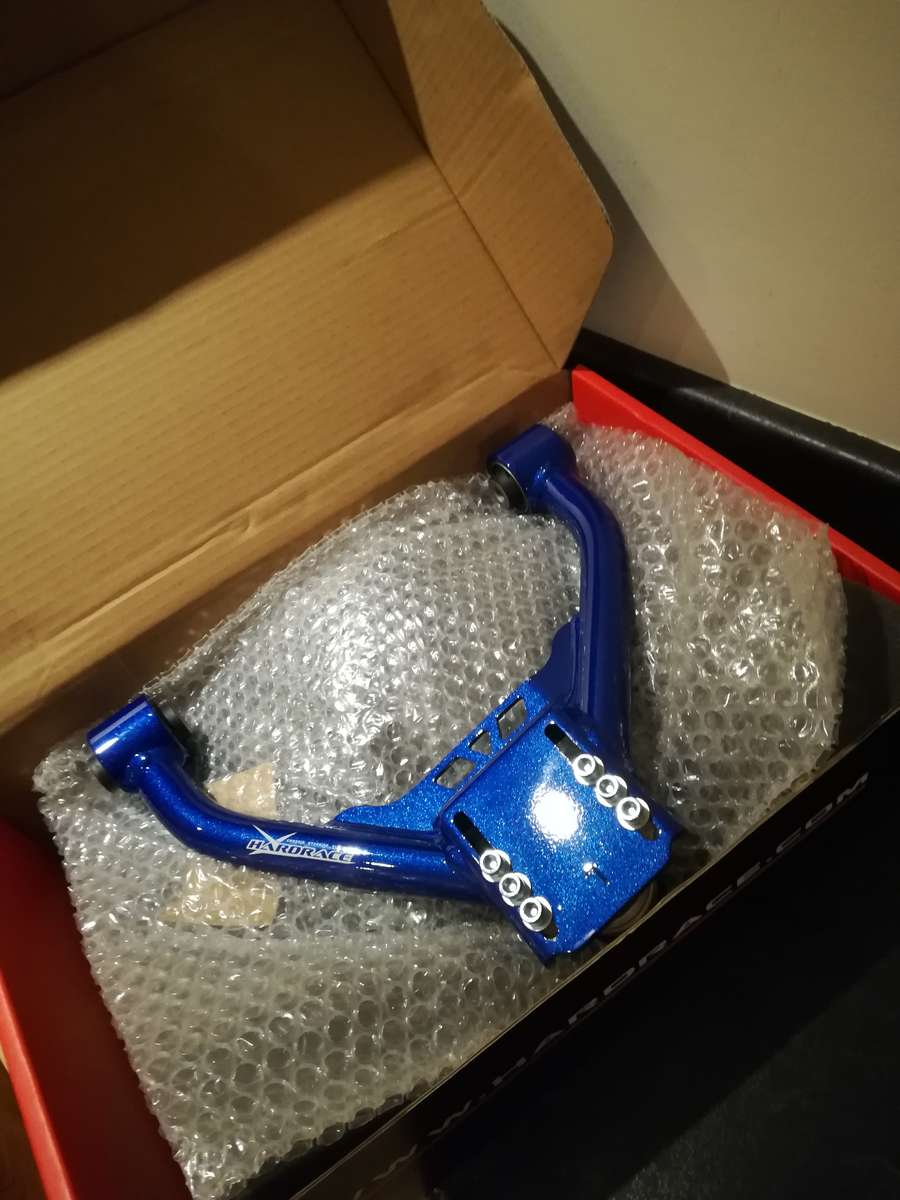
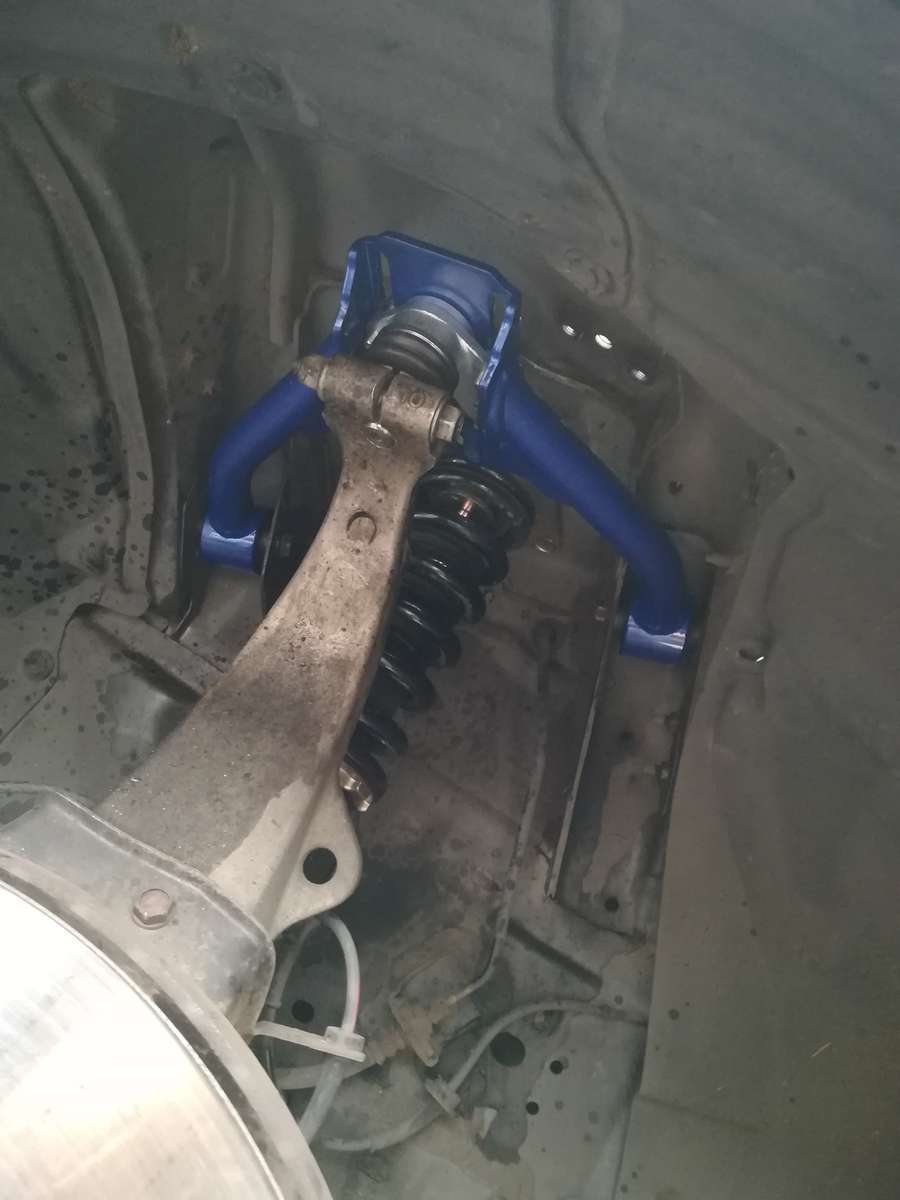
@dave_7 I purchased the control arms from H Tune mate. They were on a black friday sale at the time so I think I only paid around £275 ish - Bargain!
I went with the Hardrace arms as they're nice and easy to adjust and give a large range of camber adjustment - I can go from about 1 or 2 degrees of positive camber all the way to negative 6!
Also they are quite easy to make reference measurements with a steel rule due to the simplistic design and flat face. I've read about a few people complaining about their difficulty with adjusting their upper control arms unless they're the SPL style arms and I didn't fancy forking out SPL money as I couldn't justify the cost.
I think as long as they're easy to adjust while on the car then that's all that matters imo. Some are very fiddly and would be infuriating if you were making adjustments once in a while.
-
@nissanman312 they're up for £1000 ono including tyres mate
Tyres are Achilles ATR Sport 2s. 245/35 front and a 275/35 rear
Wheels won't be available till my new ones arrive so that'll be around the 9th of Feb or so
-
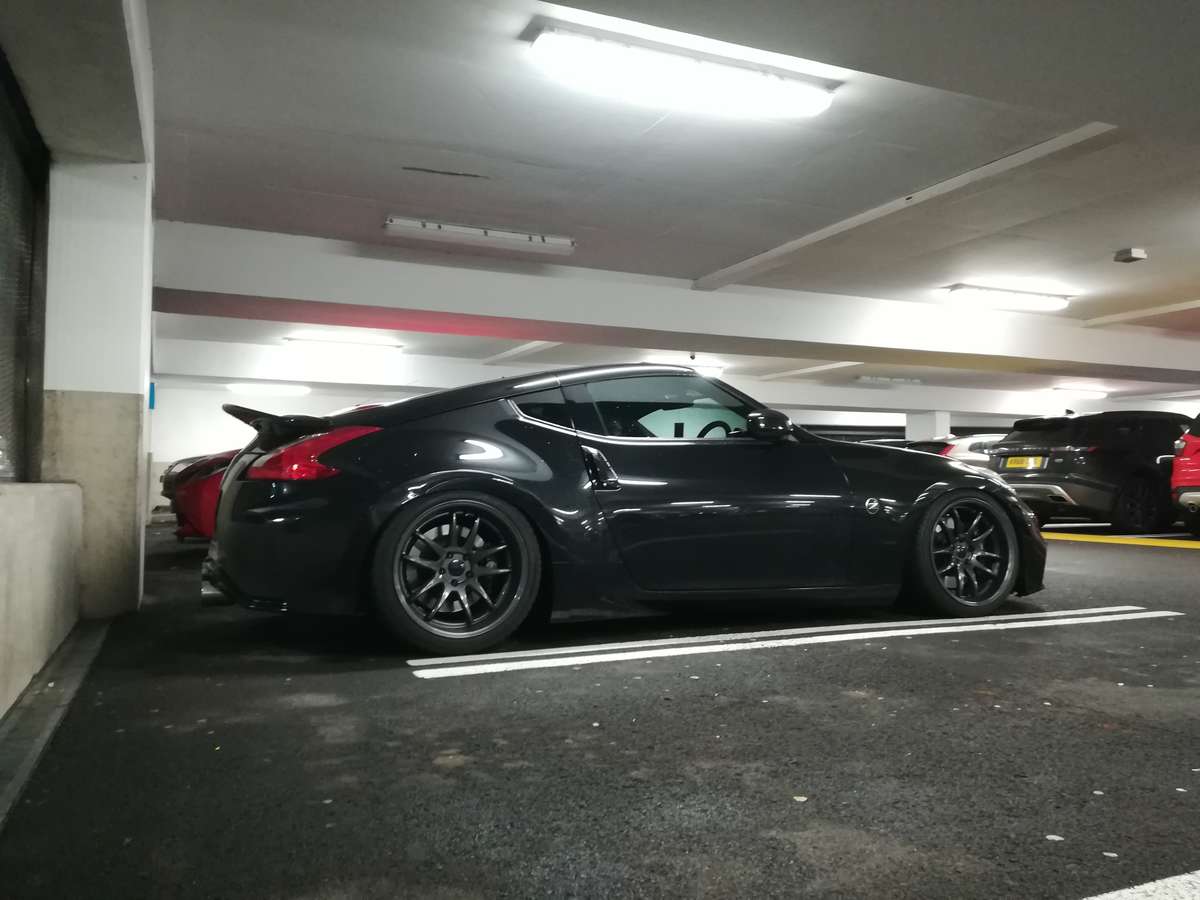
As some may have seen on Facebook, the wheels are up for sale already
 I've got myself some Work Kiwamis in GT Silver arriving. Specs of the new wheels are:
19 x 10.5 et12 square
I can't wait!
Ive also changed spring rates from the stock 10kg front and 8kg rear over to 16kg front and 12kg rear. Much better imo as the BC's were still a tad too soft for my liking!
Hardrace adjustable upper control arms also installed the other day
-
2
-
-
1. andy James + 1 PAID
2. glrnet PAID
3. Shire + 1 PAID
4. Andy_Muxlow PAID
5. Nso93-paid
6. SHEZZA PAID
7. TEEJAY +1 PAI
8. Liamm56 +1 PAID
9. cs2000 PAID
10. Trott + 1 PAID
11. 14N PAID
12. wvSTUwv +1 PAID
13. ShortPaul +1 PAID
14. Jay84 Paid
15. Panman +1 PAID
16. grigiux +1 PAID
17. jamesmac PAID
18. Valy - PAID
19. XSuperDan - PAID
20. Paul K +1 - Paid
21, Silverthorn - PAID
-
2
-
-
@Nso93 No problem mate! Glad you're happy with the exhaust. Looks awesome!
-
1
-
-
6 hours ago, Payco said:
Lots of shows. Nearest to you would be Simply Jap at Beaulieu unless you are going to Japfest or coming up to the Ace meet in June ?,
Thanks guys
I'll be at Japfest this year. I'll see you there!
-
1
-
-
They look AWESOME!!!

Any plans for any car shows this year? I'd love to see these in person!
-
@davidv10 Agreed! Black internals look soo much better than the stock mirrored finish imo

-
1. 14N
2. Andy_Muxlow
3. Buster
4. SHEZZA
5. Kingsley
6. Amyzed
7. davey_83
8. Panman
9. glrnet
10. G1en@waxandshine
11. andy James
12. Killick.z
13. Scott370z
14. Bradley
15. Valy
16. Liviu
17. Nso93
18. Silverthorn
19.
20.
-
1
-
-
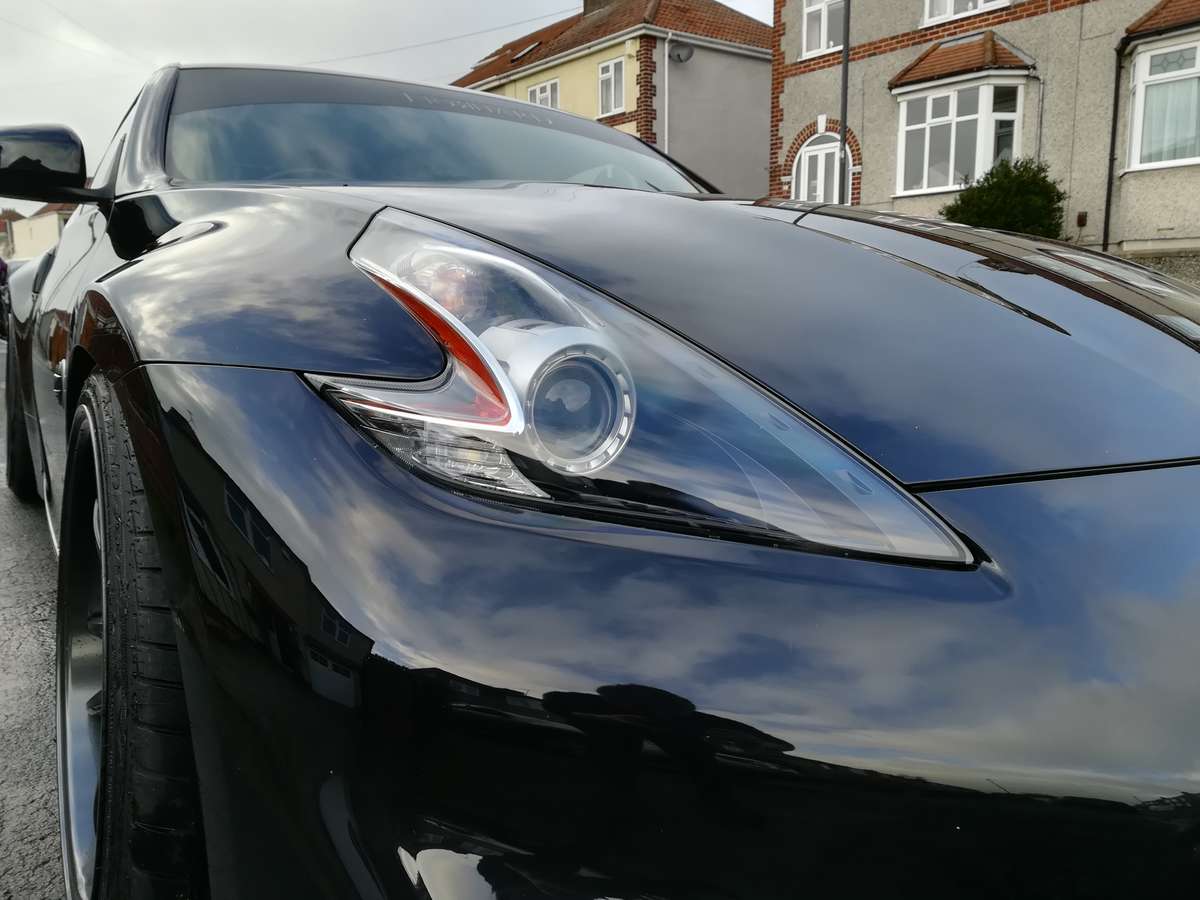
@14N Cheers mate! It's my second time splitting a set of headlights now so it wasn't anywhere near as daunting as it was the first time!
I was quite tempted to paint the silver plastic rings and the orange piece all black but I'm extremely glad i didn't. Much prefer the OEM Nismo look
-
1
-
-
Very common across all manual 370's.
New gearbox oil and some molyslip can help aid selecting gears but you'll never get rid of the problem. Just something you have to get used to
-
@Payco Those wheels get me every time!
Words cannot describe how envious I am of you. They're gorgeous wheels!
Cannot wait to see them once you get them fitted
-
Looking very good there mate! Great minds must think alike
I done mine just the other day as well
-
On 28/12/2018 at 16:01, sipar69 said:
To just enjoy the latest Z, having spent recent months getting it how I want it. I find I’m always looking ahead to the next opportunity to blow more cash, so going to try and kick that habit and just enjoy what I have.
Words of wisdom
I'm exactly the same. I've spent thousands in the past few months getting the car how I want it and I haven't actually used it as much as I'd hoped. Don't get me wrong, I've still got a tonne of stuff planned, but my priority will definitely be leaning toward spending my cash on European roadtrips, car shows and the like.
-
1
-
-
@HEADPHONES I'll be popping out to get some more photos some time soon! I'll be sure to put them up on here once i have
")
-
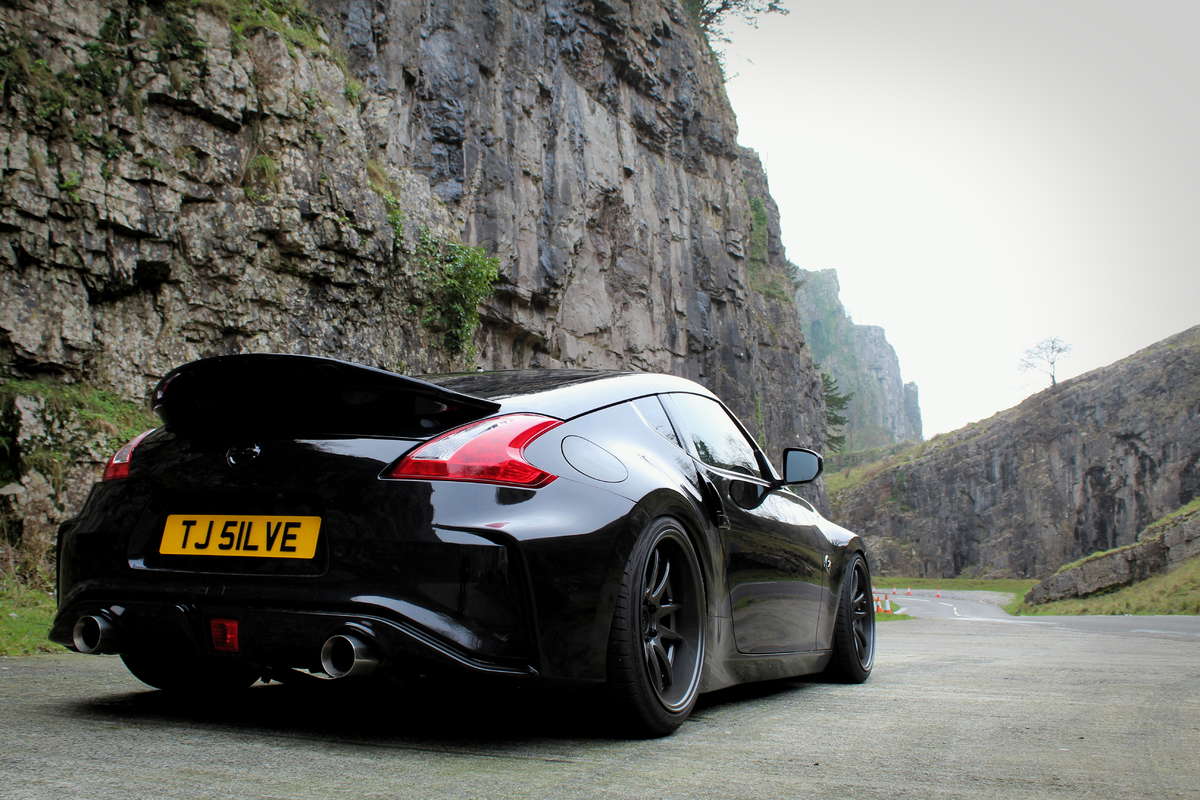
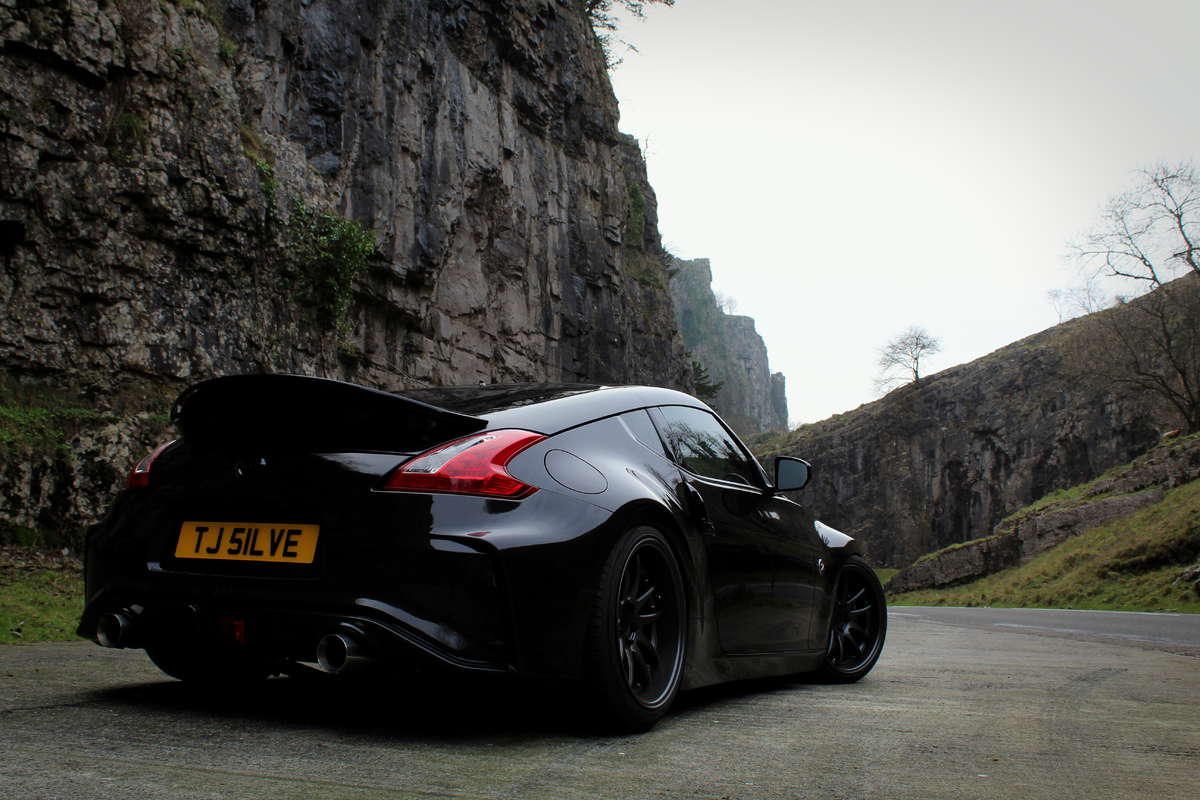
As some may have already seen. Popped down to Cheddar Gorge on Christmas Eve for some photos since my car was finally clean and we had some clear skies. Not a soul in sight so it was perfect to take a few photos!

-
12
-
-
@nissanman312 Cheers mate!
The process overall is relatively simple. I just took the bumper off, then disconnected the headlights and pulled them out as well. From memory there is 4 10mm hex bolts and some plastic push clips holding each headlight in. Once the headlight is out you can remove the Phillips screws (6 in total i think) holding the plastic lens to the headlight body then heat the sealant holding the two together. Some people put the headlight in the oven but i didn't fancy that as i didn't want to risk melting the headlight so i just used a heat gun. 5 or 10 minutes or so of heating the sealant and it'll be soft enough for you to pull the two apart. Plastic trim removal tools are really helpful during this!
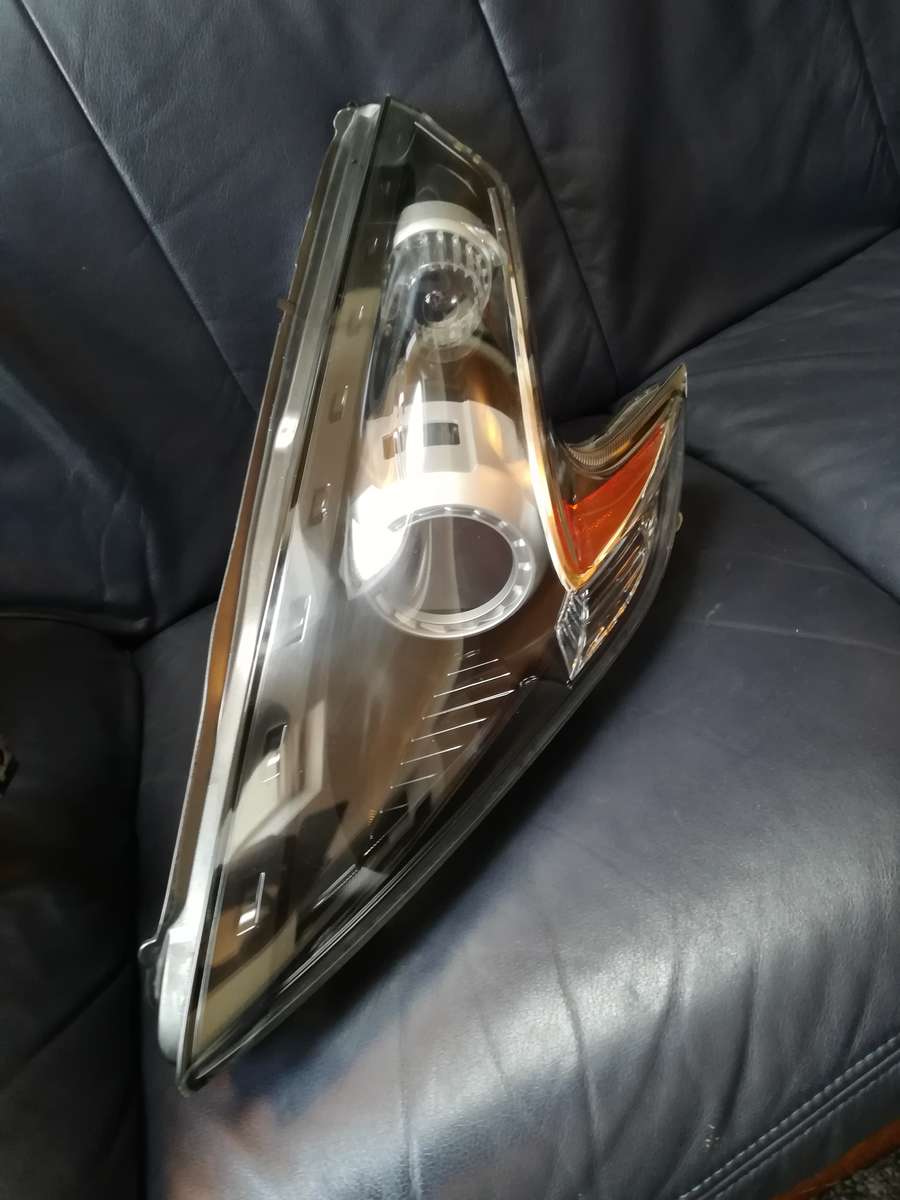
Once the headlight is in two pieces you have to separate the piece shown in the picture below from the headlight plastic lens as they are fixed together. They're held together by a bunch Phillips screws as well.
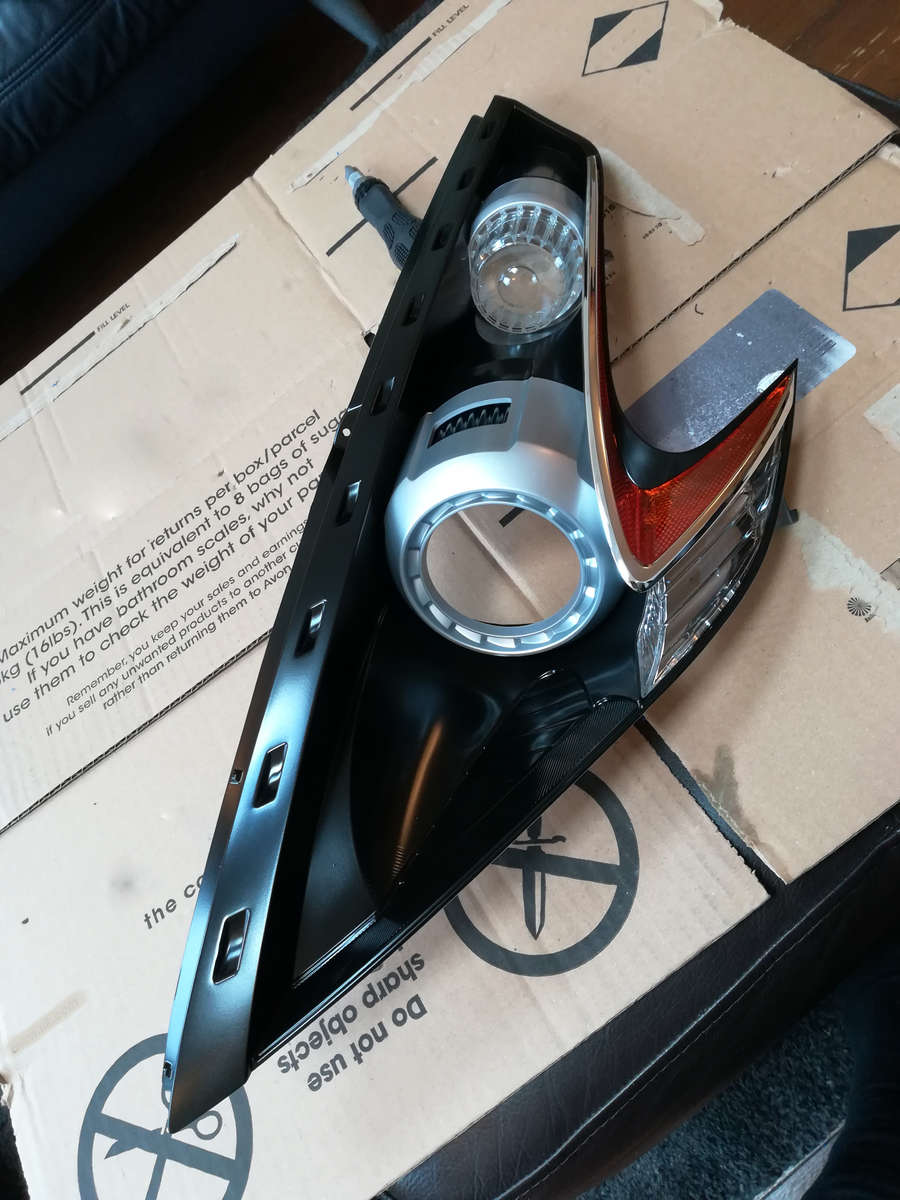
Once you've got that apart you can start stripping it down in to its individual components. It's all very self explanatory once you get the headlight off the car really so it's quite straight forward.
Then just paint it all up and pop it back together! For paint i just used one 300ml can of Halfords Plastic Primer and one 300ml can of Halfords Satin Black. I didn't use any lacquer as i didn't want the headlight internals to be shiny at all.
For putting it back together i re-used the original sealant as well as topping it up with some black silicone sealant in the places where there wasn't as much sealant as others. On mine the top and bottom of the headlight had plenty of sealant, whereas around the indicator there wasn't very much.
Once the old sealant has been reheated and the extra sealant has been added you can just pop them back together. I got the headlight most of the way back together before the sealant went a bit stiff so i had to reheat again before i could close all the gaps.
Then it's just the case of popping all the Phillips screws back in and job done!
My apologies for the overly lengthy and poorly explained description of all off that so hopefully it kind of makes sense.
This first half of this video is quite helpful to see how the headlight removal and how the headlight goes together.
-
3
-
-
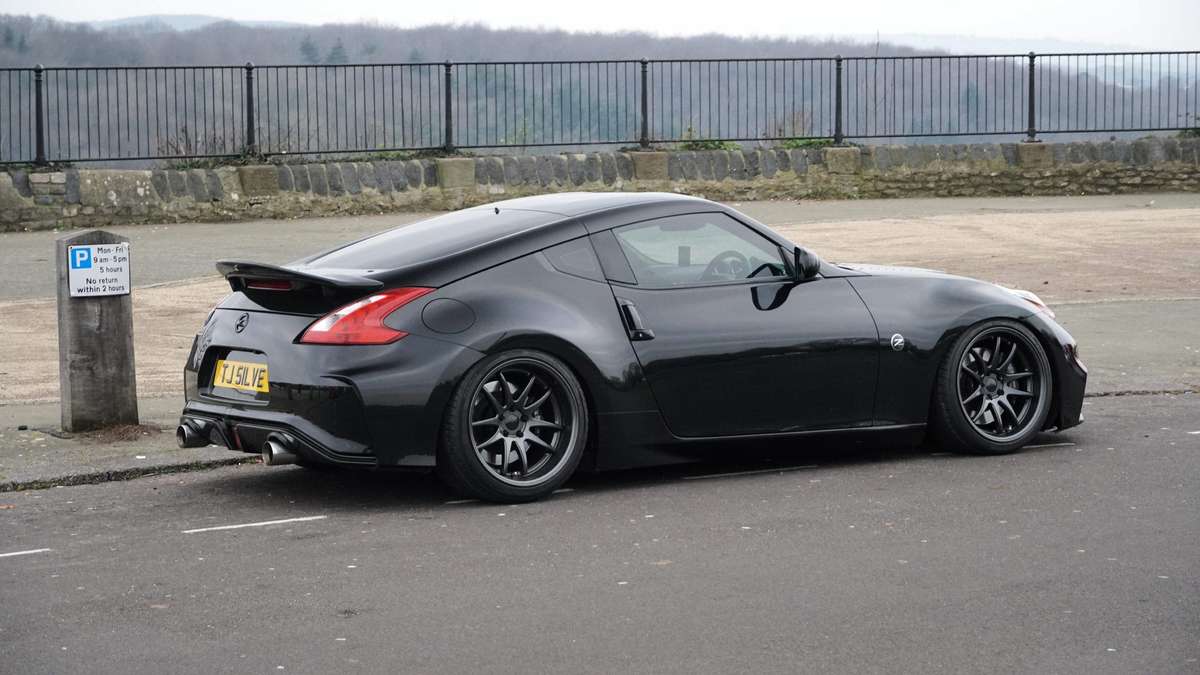
Popped down Cheddar Gorge today for some photos since i knew it'd be nice and quiet as it's Christmas Eve. It's nice to have some half decent photos of the car when it isn't soaked or stupidly dirty
Very happy with how the car has progressed this year! Can't wait for 2019 though! Got quite a few good bits and pieces planned

-
6
-
-
I paid £396 + VAT for my MK2 Nismo front bumper direct from Nissan, so £475 total. If you have a local dealer that may be a cheaper option as you can collect the bumper from the dealer, I'm not too sure what Torqen's postage prices are like so i can't say either way.
If you need the little red trim pieces for the bottom of the bumper, those are £21.96 + VAT each from Nissan also.
-
1
-
-
Painted my headlights today. They look sooo much better now the shroud is black inside!
Very easy job overall. Took me about 3 hours spread out over 2 days from removing them from my car to fully installed again. I'm very surprised more haven't done it to be honest.
Hardrace adjustable front upper control arms installed the other day also. Just waiting to install my stiffer springs for my BC's over Christmas and then it's time for an alignment, again

-
4
-
370z True Coilover Options
in Suspension
Posted
@Adrian@TORQEN I had considered fortune auto, but by the time I add swift springs the price point starts getting very close to the £2k mark. At which point I think I'd rather have some 326power coilovers instead.
I'd like to budget around the £2250 mark for the complete suspension setup and once I've bought the air cup kit, that will leave with around £1350 ish hence my choices listed above. I'd love to go all out and buy the best of the best but my car will never see a track so imo its rather pointless
Thanks for your suggestions though. I've personally not really heard of either ISC or K Sport so that's what's really putting me off at the minute... I'll keep hunting