

ballistic
-
Posts
387 -
Joined
-
Last visited
Content Type
Profiles
Forums
Events
Gallery
Store
Everything posted by ballistic
-
Yea i think it did the works iirc. The owners labour of love. You joining us tonight?
-
@350z NoobFace LondonBeen sending it around Insta. Will see if people bite. Did you get that roof wrap done then?
-
@350z NoobFace London I also think the location is ok, for now at least. If we get the numbers up then maybe we can change in the future. @Loadmaster You dont have to be on time, leaving at 7 will avoid all that I think we should just stick to the time and location for now. Lets try to get something established first and go from there. Please spread this around on your social medias etc:
-
@350z NoobFace London Sorry, yea i meant Fri 9th. Ive edited my post. Im happy to switch to Sat if everyone wants to, i know what @Loadmaster means about Fri eve M25 traffic. I just want to get a regular thing going.
-
Second Friday of the month coming up next week! Whos down for another one: Fri 09/07/21 7:30pm Yellow (Plaza) Car Park @350z noobface? @Loadmaster? @JinShim? @GranTurismoEra, fancy making the trip down?
-
Awesome. Looks fantastic, looks like the gamble paid off.
-
huh, theres one 20 mins from me. Didnt even know these existed lol
-
Thats too bad, but priorities and all that i guess. But, havnt you gone from one money sink to another @350Butcher I appreciate the kind words. Thats the intention, although im tempted to fit a spoiler, not sure which style.
-
Lol i was thinking, shall i msg Ian... Hows your build going man?, any updates? I was following but i think ive lost it.
-
I had them a while and have forgotten the offsets TBH, sorry. Though im sure the info is out there, and above should help? Thanks for the comments guys.
-
followed ya. keep it up
-
Taken after the Zed Bluewater meet
-
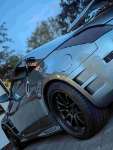
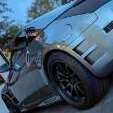
No major changes recently. Bought and painted some fiberglass eyelids some months back. I couldn't make my mind up if i wanted to fit them or not, but they turned out nice so thought i would fit em and see how they look. Pretty happy with it, very aggressive. Some pics of how it stands currently Some other plans for the near future. An additional APS component + remap. And some other bits n bobs.
-
Had a good time on Friday night. Couple of Zeds turned up and we met another meet (Throttle ctrl). Hopefully we can up the numbers for the next one! Took a couple pics:
-
thanks for the confirmation. I will head down for 7:30 - 8. Coming from Woodford area.
-
Im gonna try join you. Hopefully its still going on, if not we can resurrect it
-
Looking good. I have the same thoughts about the rear on my Z, thinking bumper tuck. Btw what front splitter is that?
-
Is this back up and running? If so whens the next one?
-
Project JDM Whore *Power Enterprise TT Build*
ballistic replied to Ian's topic in Member Build Projects
Looking good It looks like you went back and tidied up around the heater surrounds. Suede seems like one of those things that looks better in person too. Planning on doing the door cards too i guess? -
Project JDM Whore *Power Enterprise TT Build*
ballistic replied to Ian's topic in Member Build Projects
How difficult was wrapping the material? What kind of adhesive did you use? I havnt done it before so its a bit daunting -
Project JDM Whore *Power Enterprise TT Build*
ballistic replied to Ian's topic in Member Build Projects
@Ian With you on the plastics, im tempted to do a similar thing but with leather skins and brushed metal finish wrap as im not a fan of carbon fibre. In the process of checking it out. Looks good, interested in the finished product. -
If you have or intend to have other mods and gloss black bits, then gloss black is fine. If not, white i reckon
-
That second pic makes it look like shelves around a bed, u sleepin in there davey boy?
-
Hi everyone! 370z 40th Anniversary owner here!
ballistic replied to Kazbatt370z's topic in Introductions & Welcome Messages
Ive seen mine (WV2 code) listed as 'silverstone' among other names, fancy i know But its basically gun metal grey, always use the code if you need touch up -
Hi everyone! 370z 40th Anniversary owner here!
ballistic replied to Kazbatt370z's topic in Introductions & Welcome Messages
Nice colour, gun metal ftw

