Vlad Posted February 1, 2014 Posted February 1, 2014 Looking great, David! Love steering wheel! 1 Quote
Tinyflier Posted February 1, 2014 Author Posted February 1, 2014 Very nice, gear knob sits fine on the gaiter Thanks for the earlier advice about the gaiter! The MOMO knob is quite a bit shorter than OEM (and a LOT lighter!) so the net effect is to shorten the throw of the gear shift, David Quote
lmc Posted February 1, 2014 Posted February 1, 2014 Looking good Anymore pics of the carbon intake ( from a distance) Quote
Tinyflier Posted February 1, 2014 Author Posted February 1, 2014 Looking good Anymore pics of the carbon intake ( from a distance) If you want one even further away let me know and I'll take one tomorrow. Quote
lmc Posted February 1, 2014 Posted February 1, 2014 Looking good Anymore pics of the carbon intake ( from a distance) If you want one even further away let me know and I'll take one tomorrow. Thats brilliant thanks just wanted to see what it looked like in the engine bay 1 Quote
Tinyflier Posted February 15, 2014 Author Posted February 15, 2014 Today we went from this: to this: David Quote
mattross1313 Posted February 15, 2014 Posted February 15, 2014 Did you spray or wrap those? Look REALLY good. I tried to wrap mine last weekend but it didnt go so well Quote
Tinyflier Posted February 16, 2014 Author Posted February 16, 2014 (edited) Did you spray or wrap those? Look REALLY good. I tried to wrap mine last weekend but it didnt go so well Is wrapped in satin black vinyl. I tried doing it myself and made a complete pig's ear of it several times! Quick visit to Boss Dog in Dorking and they did it in about 20 min and of course made it look stupidly easy although definitely a bit fiddly. When I tried I started from the top and worked down, the guy doing it "simply" laid the vinyl over the front and did all the trimming around the switch assembly first then when that was done then he worked on the sides, top and bottom. I think also I used too much heat whereas he was quite sparing with his heat gun. Only cost me £20! Edited February 16, 2014 by Tinyflier Quote
glrnet Posted February 16, 2014 Posted February 16, 2014 That's handy to know David, they are only round the corner from me and I wondered if they were any good. Quote
Tinyflier Posted February 16, 2014 Author Posted February 16, 2014 My worry was whoever was going to do it would be using a scalpel right next to my newly trimmed wheel - the guy doing this small wrap was VERY careful! Def recommend them Graham. David Quote
Tinyflier Posted February 23, 2014 Author Posted February 23, 2014 To pick up from the previous teaser picture of my new cam covers. At my latest service (which included a spark plug replacement), the technicians at Abbey noted that I had oil leaks into spark plug wells 3 & 5 ie both covers were weeping (so was I when they told me…) I was pleasantly surprised to be told that, despite what I have read, Abbey can remove and replace the spark plug well gasket (obviously as well as fitting new perimeter cam cover gaskets) and make the covers completely oil tight as a result. The labour costs are slightly increased to effect the repair but even so the total cost is considerably less than having to source complete new cam cover units. A passing comment from Scott at Abbey that I might consider having the covers repainted, morphed into having them hydro dipped to a carbon fibre effect finish and the ghastly standard plenum cover refinished in satin black - whoever in Nissan thought that a rough surface aluminium casting would look good in the engine bay needs to be taken out and dealt with! Didn’t they look at the engine bay after their long term durability testing and see how horrid the plenum becomes? I did flirt with the idea of having the plenum hydro dipped but thought a) the standard surface texture might not take nicely to that treatment and as I have a carbon fibre top engine cover I was concerned the "weave" might not match across both items, so I opted simply to have the plenum painted in satin black. Scott not only contacted the hydro dippers for me (which included sending images of the parts concerned to the dippers to be sure they knew what was involved) and negotiated the price but also arranged for some of their in stock (non leaking!) rocker covers and a plenum to be packaged up and sent off for treatment. This meant the time Abbey actually needed to work on my car was only that to replace the units concerned and I didn't have the hassle of packaging and delivery to contend with. My u/s covers will be repaired and put back as replacement stock. The work was carried out in Abbey's usual efficient way, Mark having collected my car from home leaving me with a replacement car and swapped them back when the works were completed. OK so you cannot see much of the rocker covers now that they are in situ but subtle glimpses of the refinished cam covers I think actually enhances the end result. Anyway I am happy with the end result and to be honest that is all that matters! Oh yes and new compression arm bushes (SuperPro) were fitted at the same time. Once again top marks to the guys at Abbey for providing a fantastic level of service. 2 Quote
Stutopia Posted February 23, 2014 Posted February 23, 2014 Bay is looking well mate. Do you mind if I ask where you got the carbon intake pipe? Looks sweet! Quote
GMballistic Posted February 23, 2014 Posted February 23, 2014 Looks great. Love all the carbon fibre parts & the dipped "look a like" parts. Quote
Tinyflier Posted February 23, 2014 Author Posted February 23, 2014 Bay is looking well mate. Do you mind if I ask where you got the carbon intake pipe? Looks sweet! Carbon intake pipe was from Redline Styling Looks great. Love all the carbon fibre parts & the dipped "look a like" parts. Thanks! The only dipped parts are the cam covers - rest are all deliciously real carbon goodness.. David Quote
Tinyflier Posted May 11, 2014 Author Posted May 11, 2014 Core strut brace as supplied by Mark - slightly different from his standard product in that I chose not to have the 350Z cut out and Mark had it powder coated for me before I then had it hydro dipped. After dipping - trial assembly Fitted 1 Quote
14N Posted May 11, 2014 Posted May 11, 2014 Been waiting to see this since Mark told me you were having it dipped. Looks great, really sits nicely in your bay with the other carbon parts 1 Quote
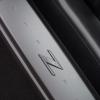
Tinyflier Posted July 26, 2014 Author Posted July 26, 2014 Just fitted carbon fibre sill plates as supplied by TarmacSportz - delicious weave on them - pictures don't do them justice. David. Before - aluminium trimmed plates. After - pure carbon fibre loveliness... 1 Quote
GMballistic Posted July 26, 2014 Posted July 26, 2014 Really like the carbon fibre ~ very cool. Surprised though that you covered the aluminium kick plates with these as it might have been more sensible to swap with someone for the standard kick plates plus some cash your way. Either way though as long as you're happy. Quote
Tinyflier Posted July 27, 2014 Author Posted July 27, 2014 Really like the carbon fibre ~ very cool. Surprised though that you covered the aluminium kick plates with these as it might have been more sensible to swap with someone for the standard kick plates plus some cash your way. Either way though as long as you're happy. The CF plates replaced the aluminium OEM units, which are now in a box ready for me to sell on! David 1 Quote

Recommended Posts
Join the conversation
You can post now and register later. If you have an account, sign in now to post with your account.