


Keyser
-
Posts
9,958 -
Joined
-
Last visited
Content Type
Profiles
Forums
Events
Gallery
Store
Posts posted by Keyser
-
-
55 minutes ago, mattross1313 said:
Which is what when it's at home?
What @Ebized Said - Come on Matt get with the program

-
 1
1
-
-
I like that colour Colin

-
I fully agree with what's been said and hats off to the guys n gals that step up and organise (I should do more) @andy james is awesome to have in my area and does loads of event stuff we keep saying we will meet up and get something else going and he does the Breakfast meets
I try and give you all something to read by tinkering in the Zed Shed
As an additional point - It will be the annual Zed Shed BBQ soon and if you put your name down and don't attend then ...........................
More food for me and @buster

-
 3
3
-
5
-
-
Is that slave cylinder plastic?
great work as always
-
So this happened today ...........................
I popped into my local scrap yard hoping to buy a bit of plate steel for the top of the new welding table, I wanted something the same size and about 6-8mm thick,
They don't have that light wait stuff
 but they did get me a piece bigger than I needed and a LOT thicker than I needed -
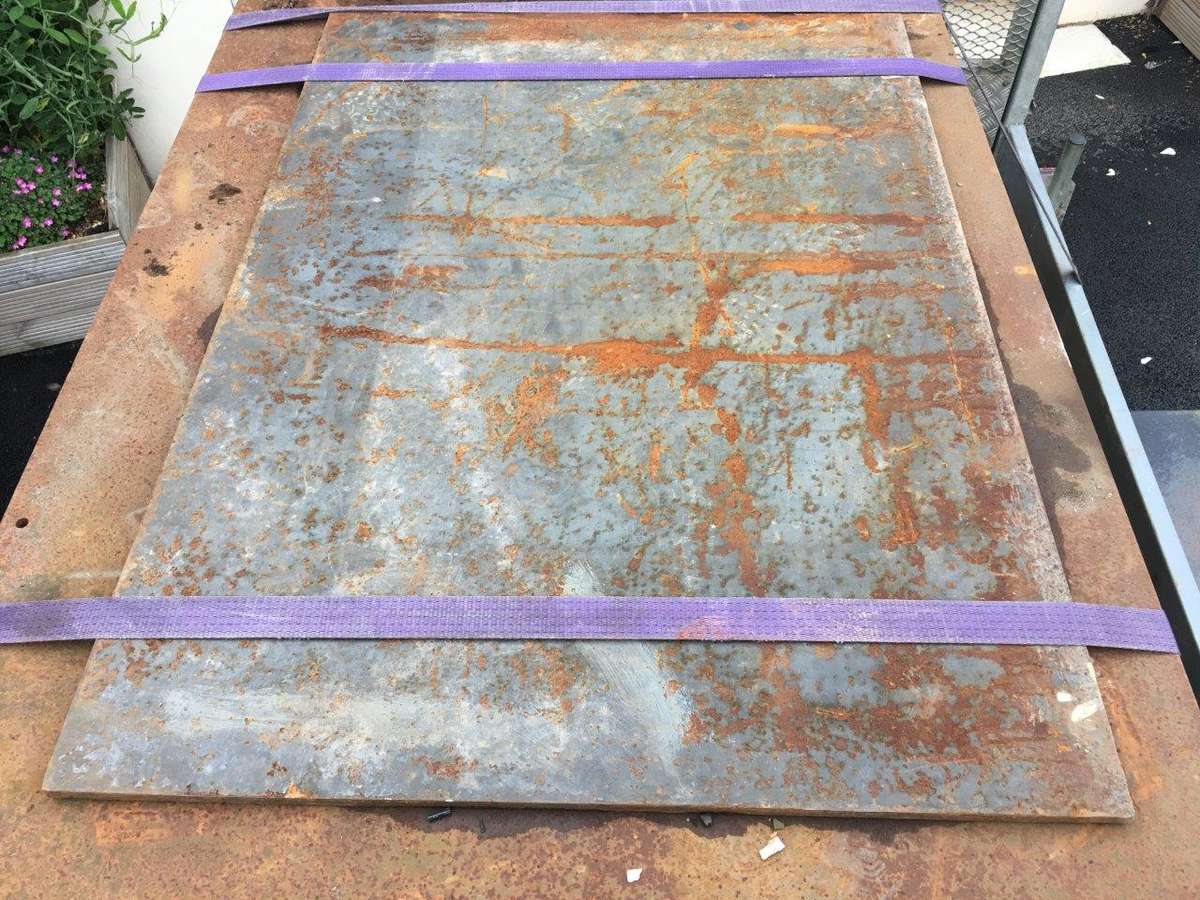
It's like 12mm thick!!! This table will have it's own gravity
However they asked why I wanted it as I usually get small light weight stuff, I told them I was building a welding table - "Ahh you want a welding table" they say "we have one even has a vice on it" Now I have been looking at getting another vice for my welding table and they are expensive I actually want an old one as they are better IMO they can take the abuse, any way they show me this table and it's huge but they are asking less than I would be paying for a new vice. I nip home measure the garage work out where I can fit it (after a complete change of plan for the table I'm building and all my current tools stand setups). I let them know I'll take it and pop over to Tim's as he happens to have access to his dad's plant trailer which I borrow and I now have this outside The Zed Shed II
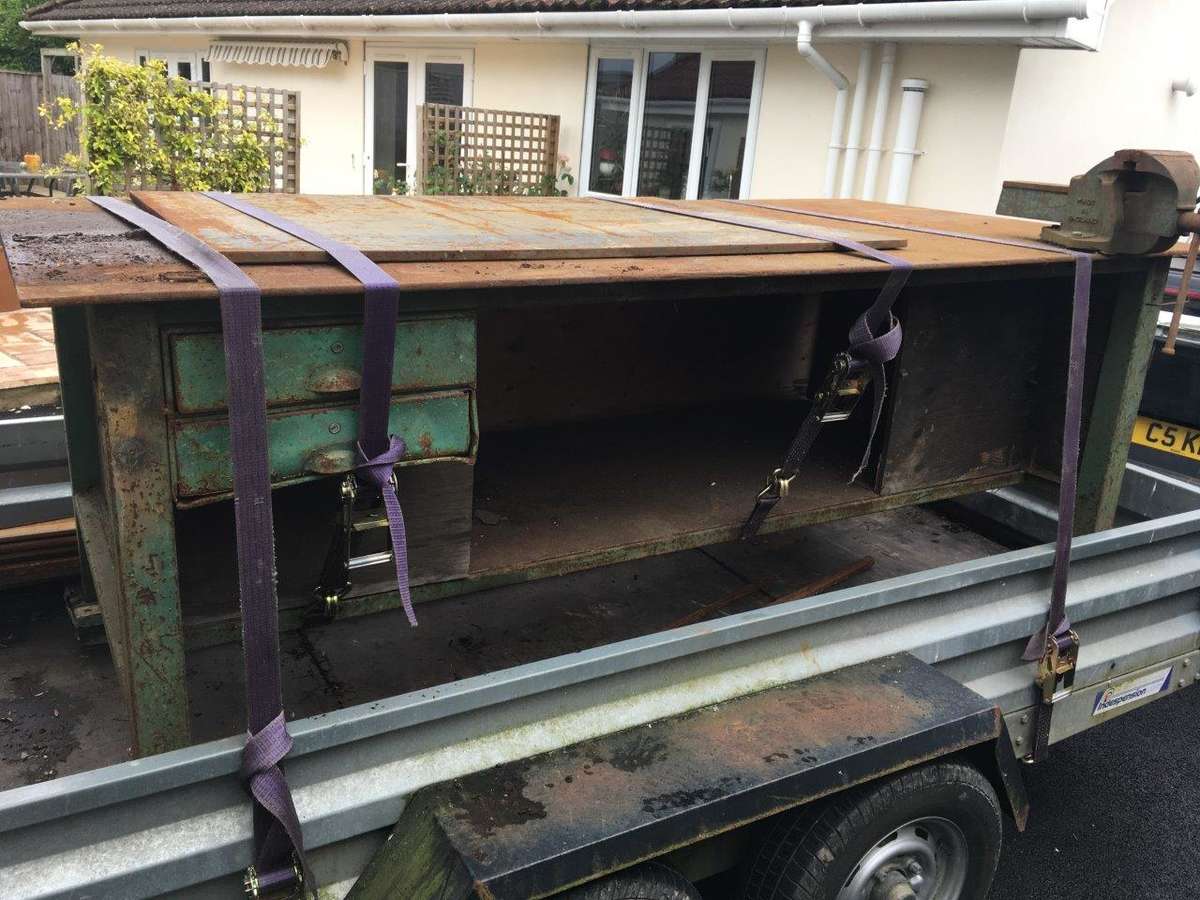
With vice

As an added bonus it also had this -
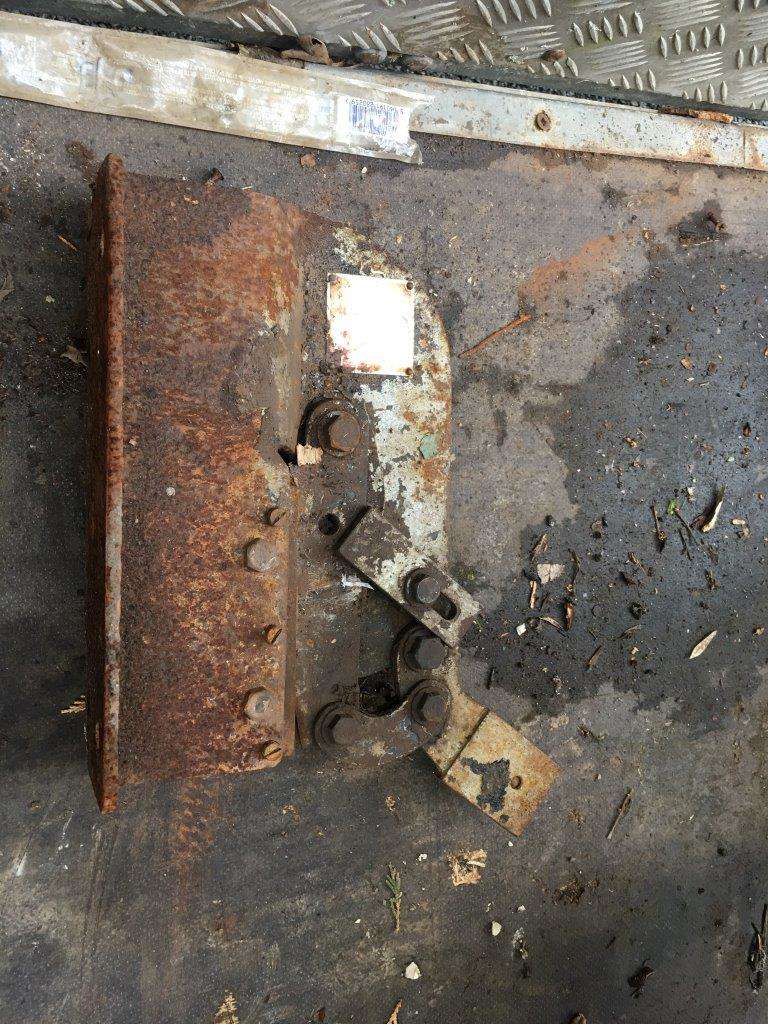
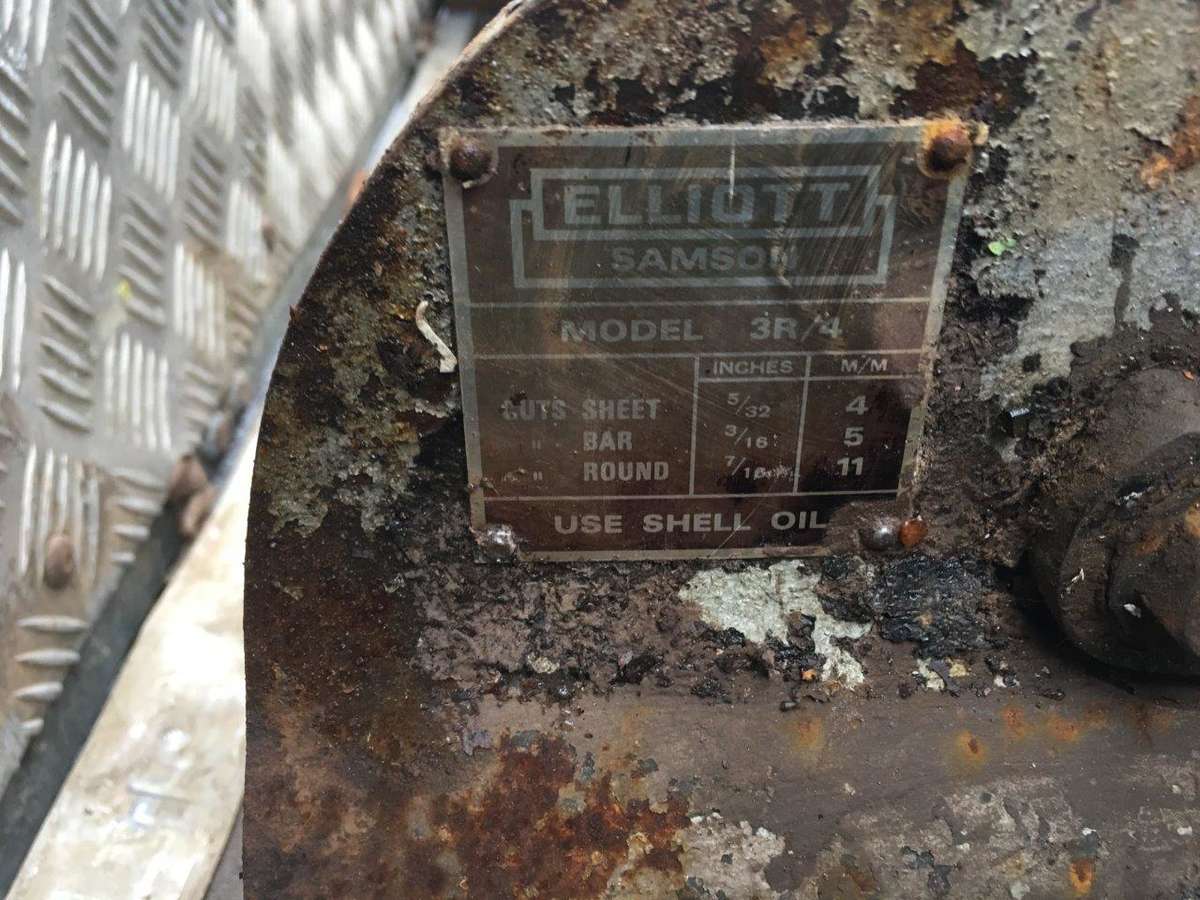
No handle but I can sort that
Most people are asking - How are you going to get it off - Simple I have no idea
I'll work something out I'm sure
")
Keyser Maximum Effort
-
5
-
-
21 minutes ago, ATTAK Z said:
I'm pretty sure the Ford colour was called Canterbury Green
Far to reserved for me
-
2 minutes ago, rabbitstew said:
Ah, good point, it may well do thinking of it.
Maybe colour scheme & style of wheels can help that. Go for an old Ford colour etc.
Did Ford ever do a Lime Green Pop then ???
-
2
-
-
2 hours ago, LRF4N said:
How do you even find all these random cars
The new shell looks in good nick, not worth using that instead?
eBay, Gumtree and keep my ear to the ground so to speak - Wait until you see what I picked up today
It will be the main car now my "old" shell will become the donor.
1 hour ago, rabbitstew said:Good idea on finding a better shell. That Ford Pop I used to own was similarly missing the bottom 5 inches all around from rot.
I do wonder though if your Pop will end up looking more like a scaled up Legends car, rather than a Ford Pop when its finished?
Yup it seems common on them they go at the bottom and along the roof gutter/drip tray, you can literally buy the bottom 6"s of a pop in replacement panels,
but not the gutter strip - no one makes them.
Yup I worry it may end up looking like a Chrysler PT Cruiser more than a legend or a Pop for that matter - they have huge arches where I intend to widen the body at the back, the front may need huge arches though - only time will tell.
-
10 minutes ago, veeg33 said:
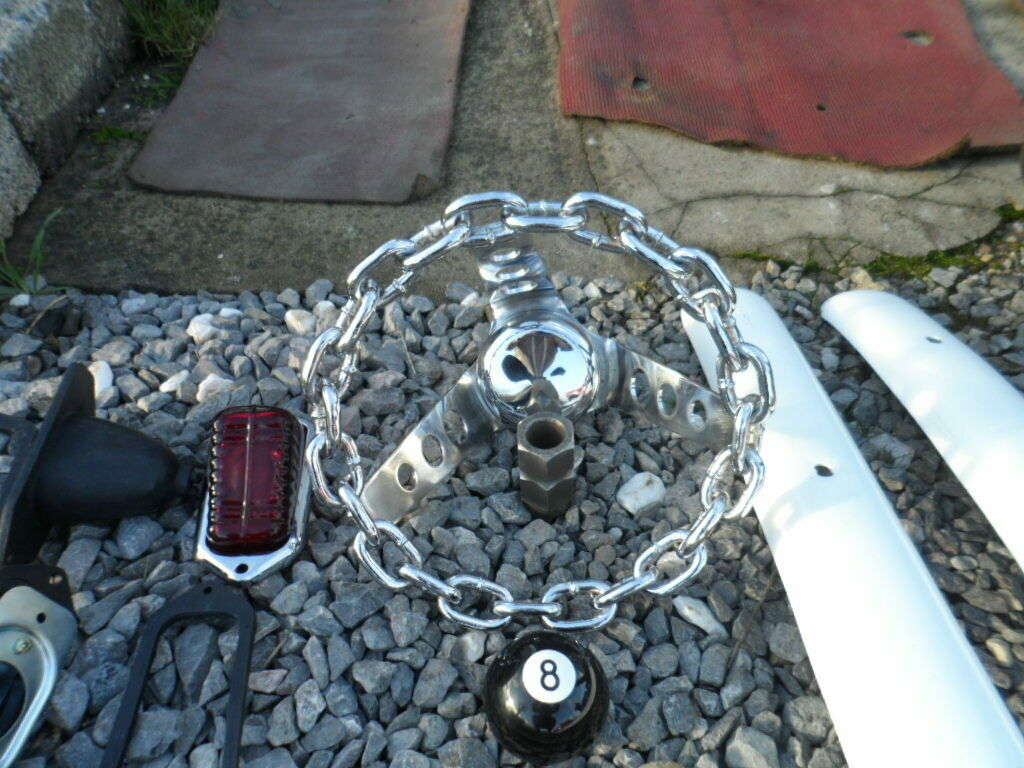
That steering wheel is ace!!
")
Make me an offer - it would great in a Z
-
And in Other News -
The Radical came in to have the manual shift put back in ready for the next track day in a couple of weeks,
I also had a Doh! moment -
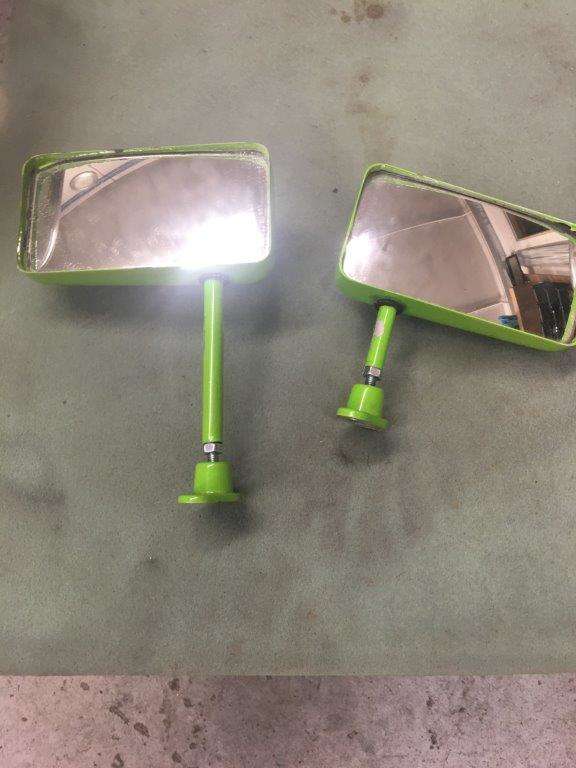
I was in a hurry to roll the Radical off the trailer between rain showers on Saturday and forgot to remove the "fuel pods" which are two 20l fuel can carriers that hook onto the either side of the trailer, this promptly snapped both wing mirrors off!!

Don't worry I already feel enough of a muppet for doing it!!!!!!!!!!!!!!!!
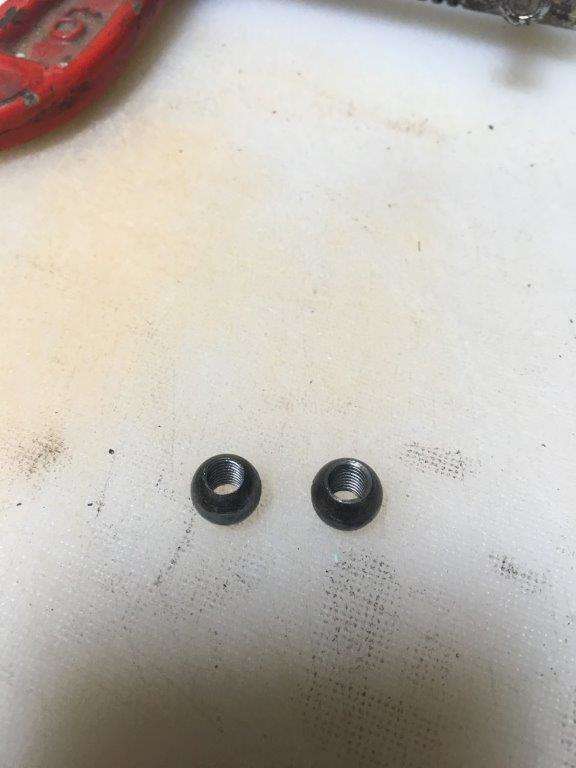
Anyway they are like motorbike wing mirrors on stalks so it's a ball bearing with a threaded bar coming off it that bolts to the bottom of the stalk - that's what snapped so .....
Drill and tap holes in a ball bearing -
Take an M6 bolt,
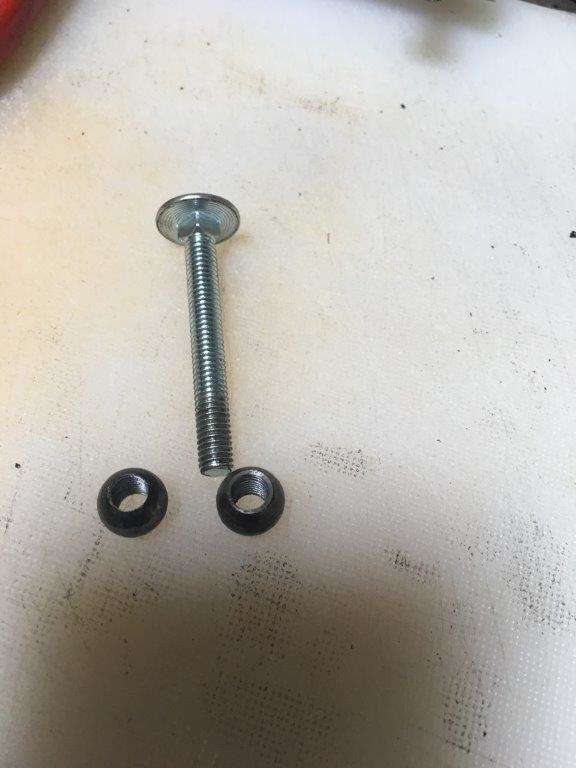
cut in half, weld together and sand down
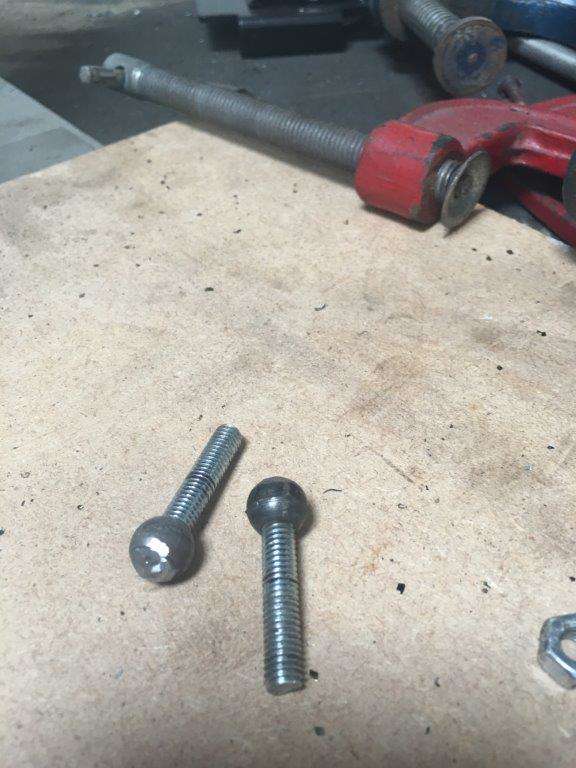
Job done
I used M6 as the originals were M5 and they go into aluminium stalks which I had to drill the broken stud out of so I re-tapped 1mm oversized.
In other, other news -
I started to strip down the old chassis table as it is now finished with and in the way,
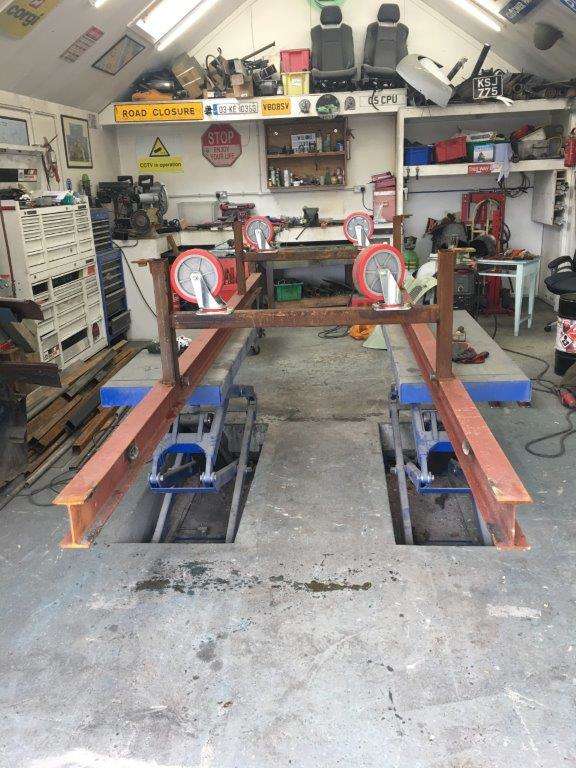
Time to up cycle
I cut it into lengths and welded them back together
Added some legs
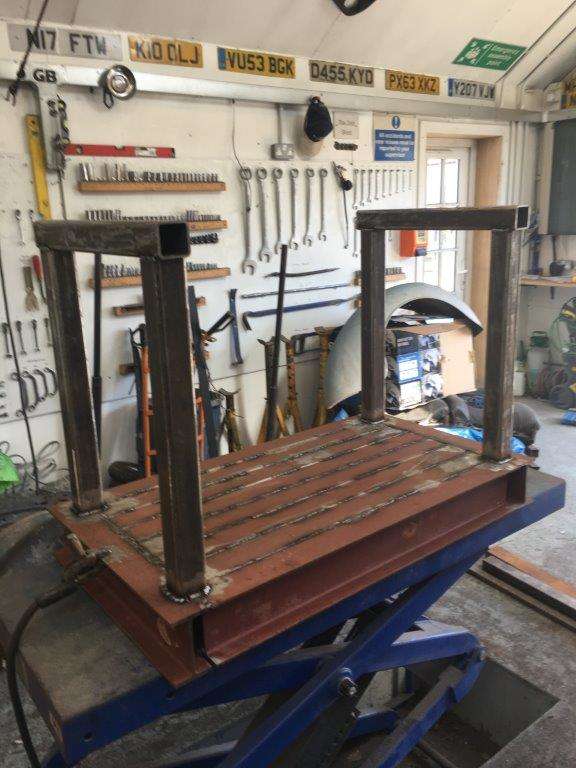
Then tried to work out a design for the wheels
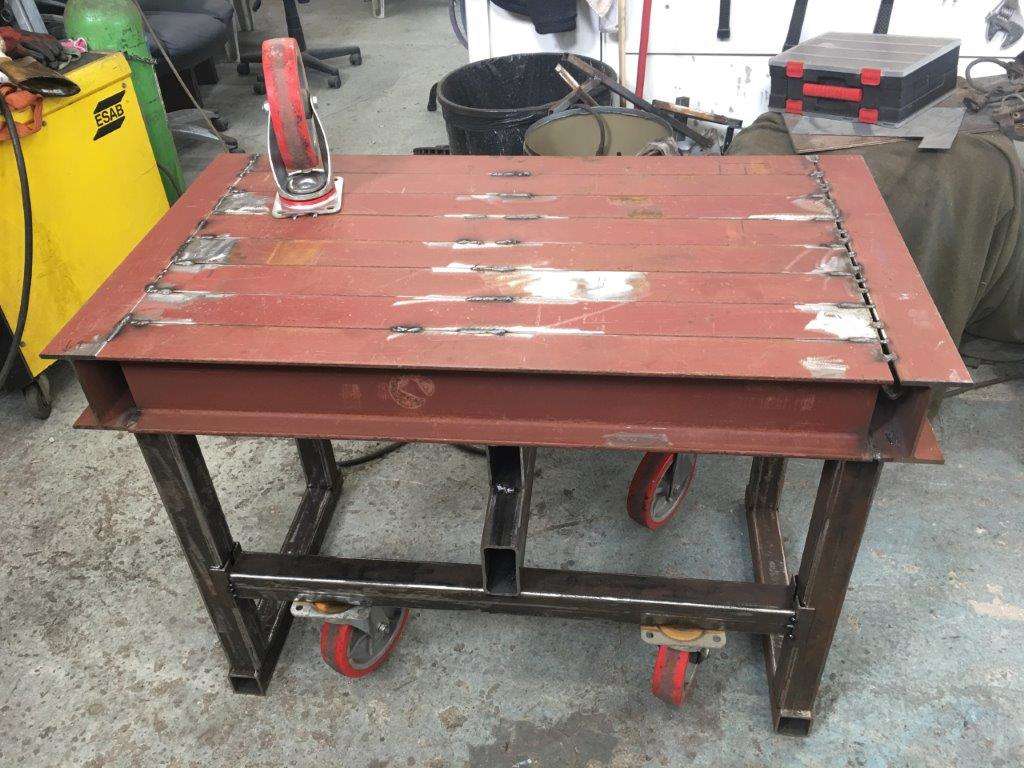
Everything was tacked and the concept seems to work but one of my welds broke and the wheels came off
This is still a work in progress but so far it is all recycled material, if it works I will show you what it is for as it is supposed to be more than just a welding table
Keyser Maximum Effort
-
5
-
-
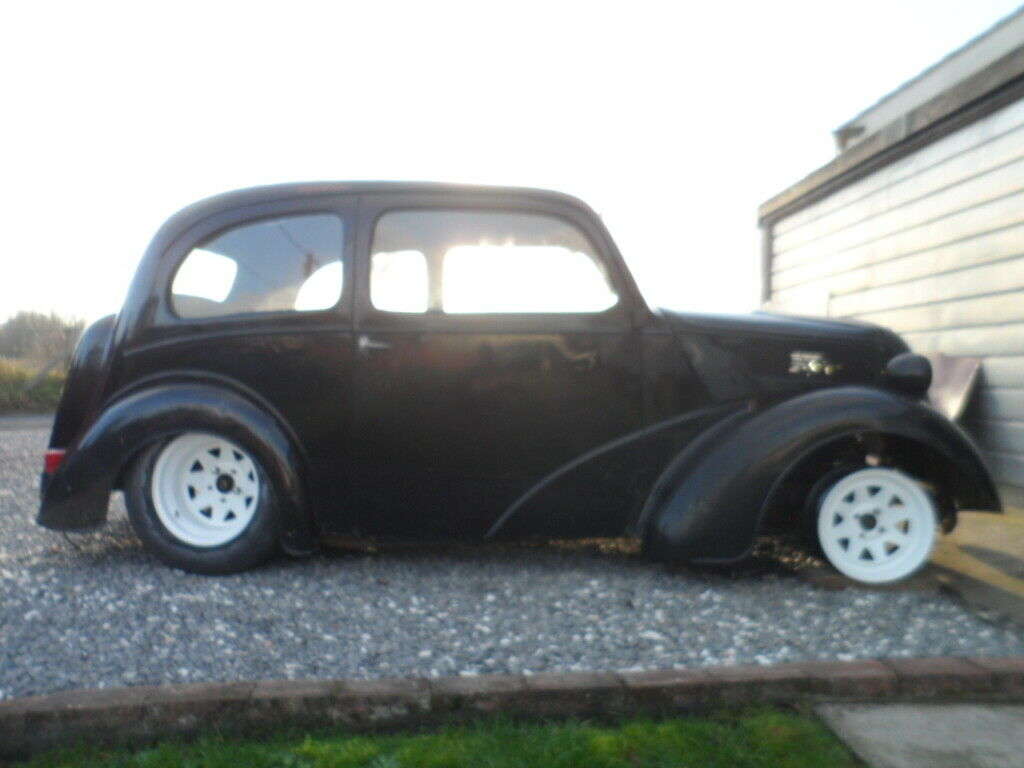
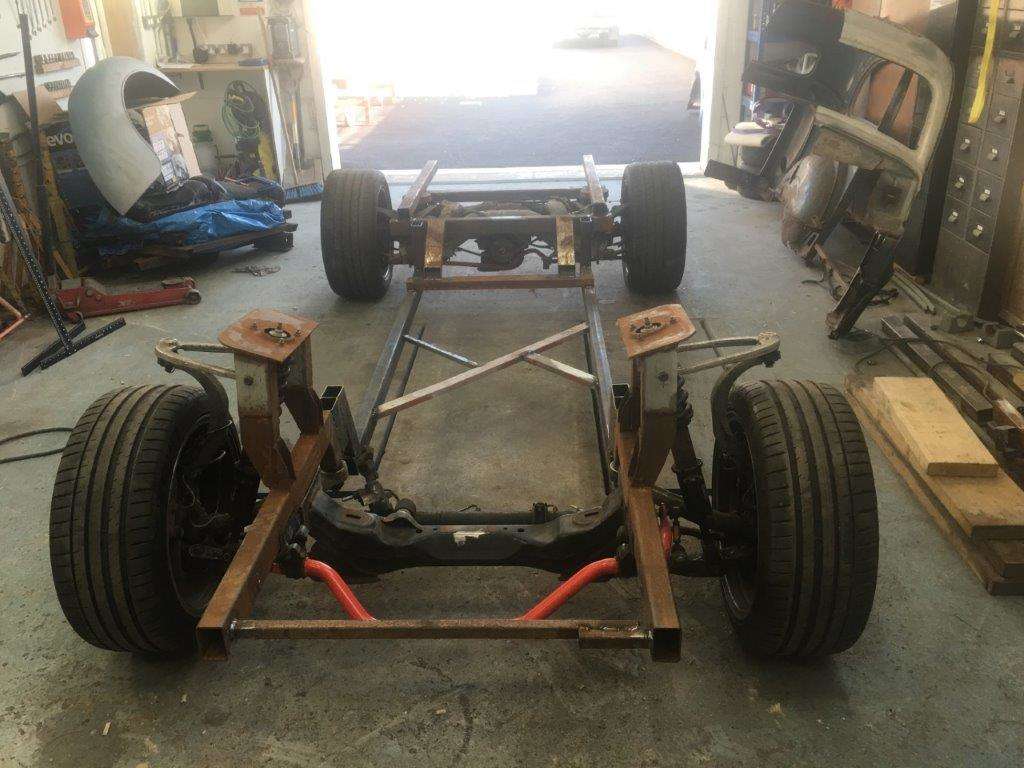
Just a quick update on Plan X
I thought I'd see how well the Pop shell would fit on the new chassis -
Almost just need to weld it in place
So problems to be overcome -
It needs lengthening and widening - to be expected.
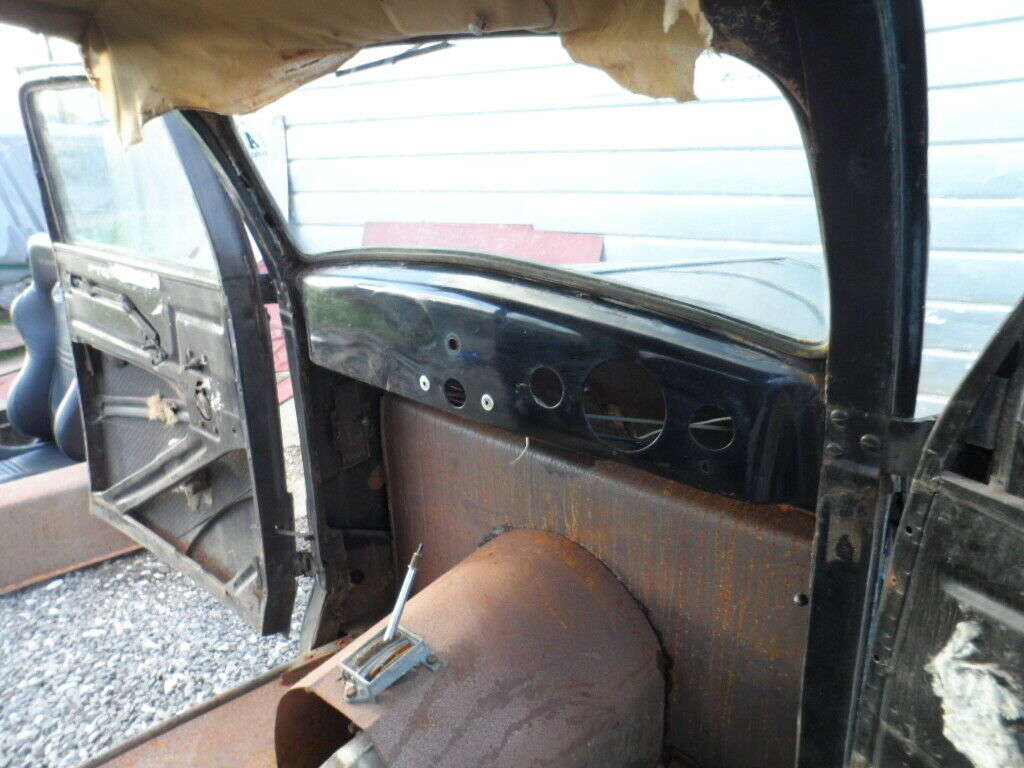
The bottom 3" to 6" of the shell are missing -
The inner and outer sills are missing - I'm learning how the Pop shells work now
The rear arches that came with my shell are not a good fit
They are fibre glass 2" extended arches and apart from poor fitment (which I can sort) the biggest problem is I don't like them

They are too rounded. more designed for the classic Rod look - not the look I actually want
So I started looking up replacement parts and was into 3 figures in just wings and sills so I started looking for alternatives, Given what I'm trying to do the best solution would be a donor car (plan x) then I can cut and shut panels to lengthen and widen as well as replace the metal lost to tin worm.
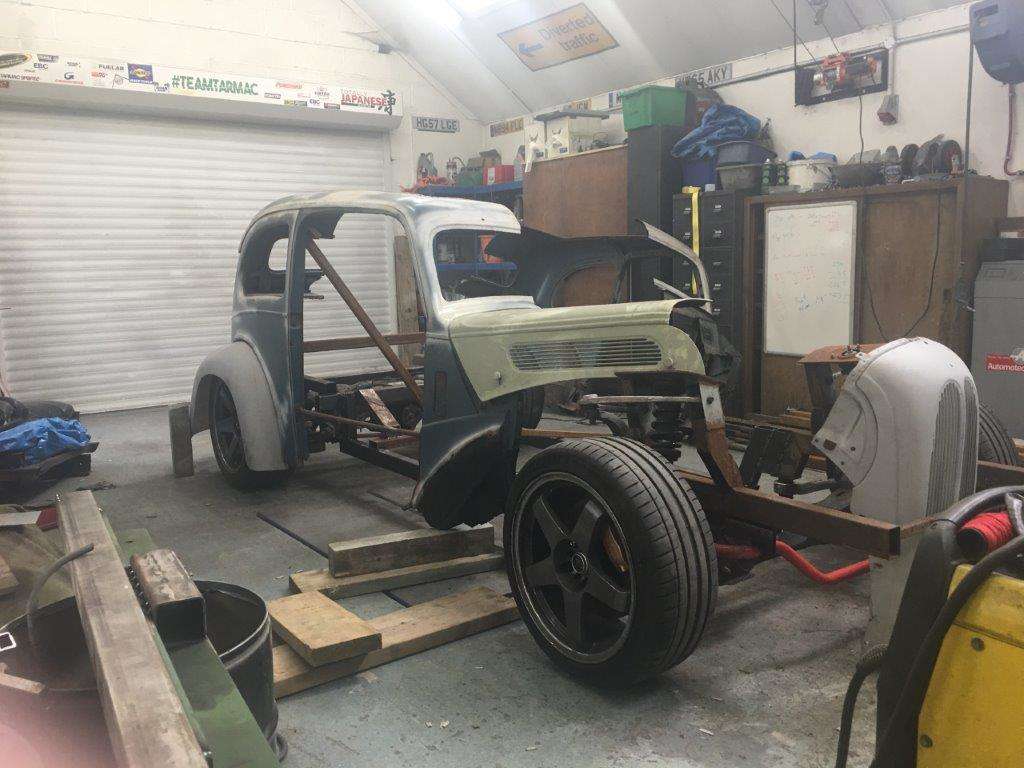
This weekend I collected it
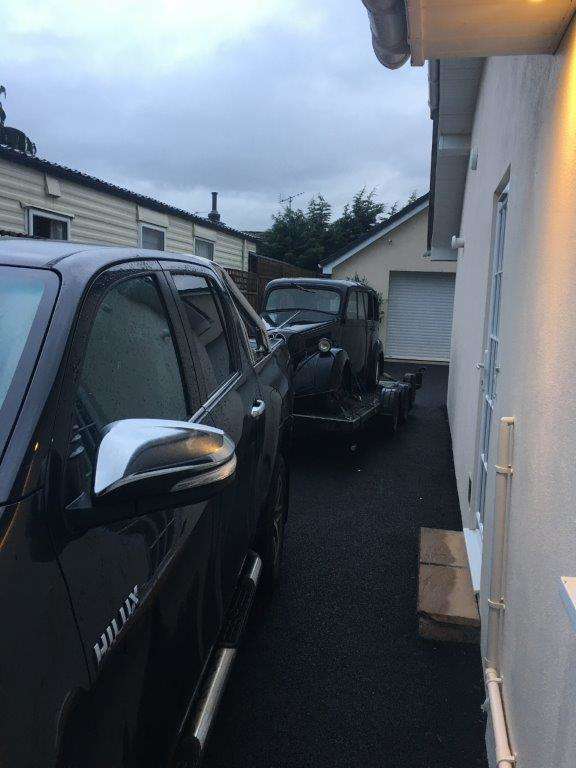
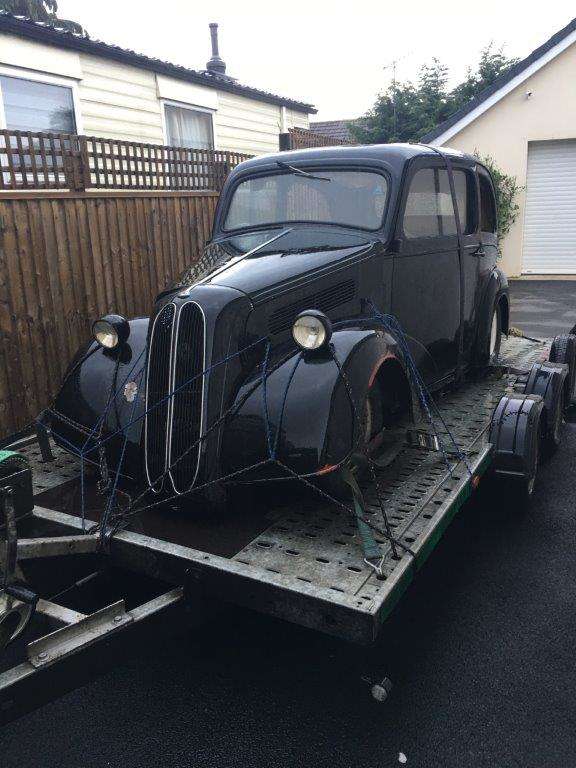
Few pics from the advert -
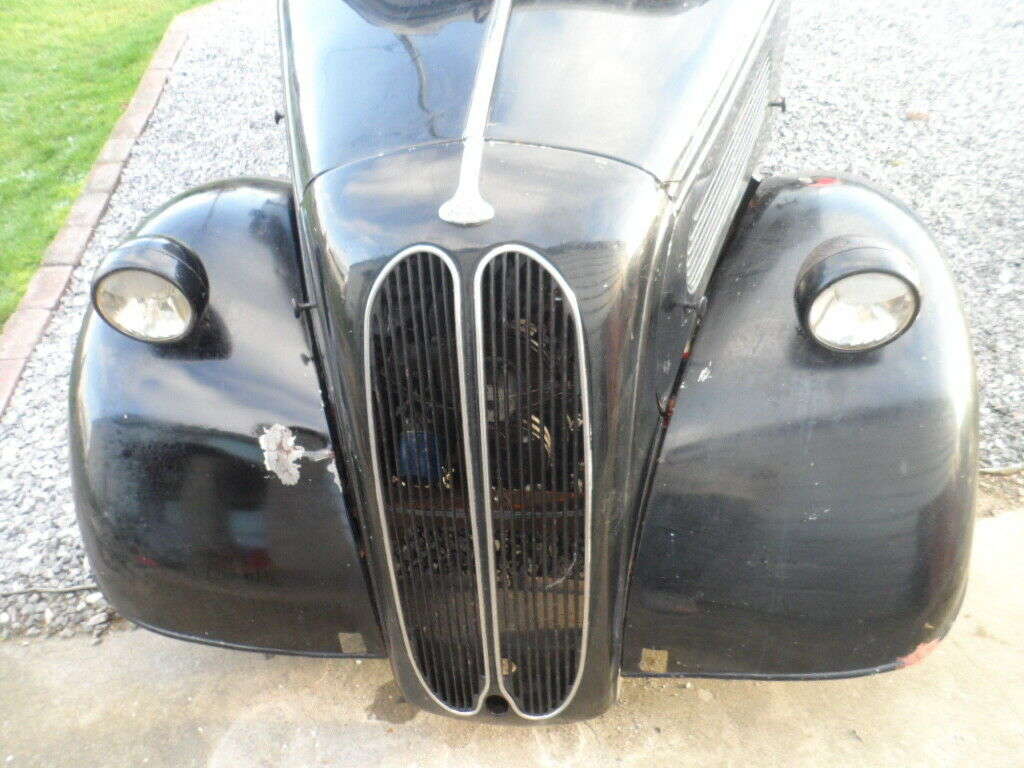
Yes I found another "unfinished project"
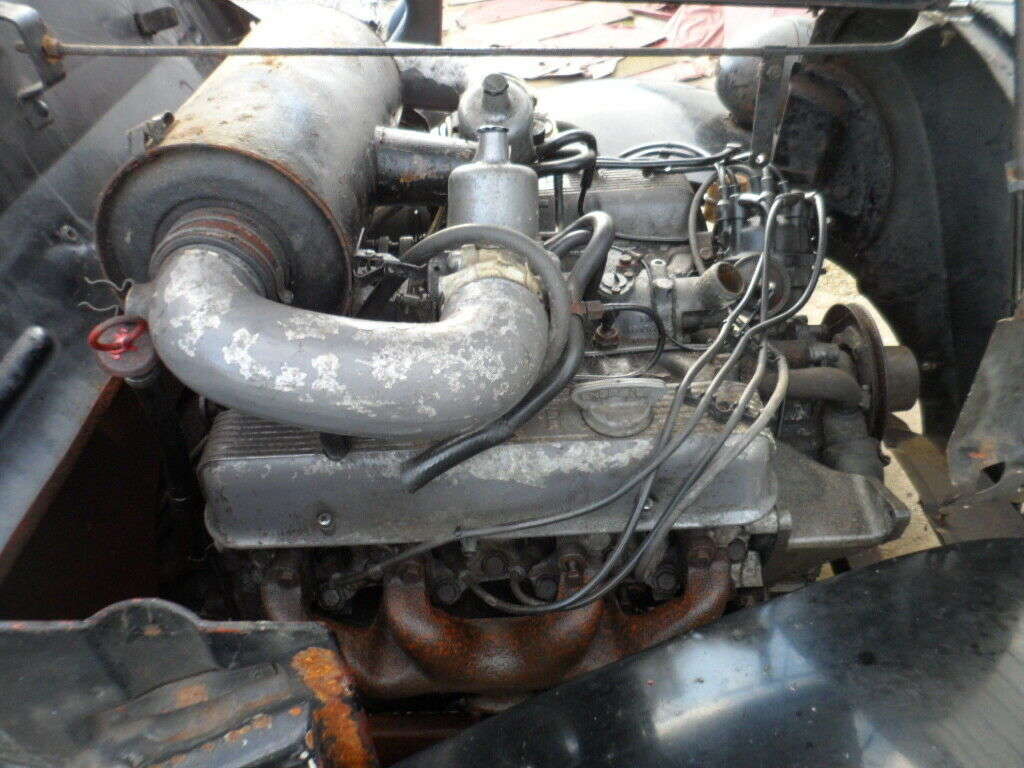
It has been modified by a garage (not that it matters) and has the standard narrowed Jag rear, rover V8 and Triumph Spitfire front end all of which will be back on eBay soon along with that steering wheel
It also came with spares -
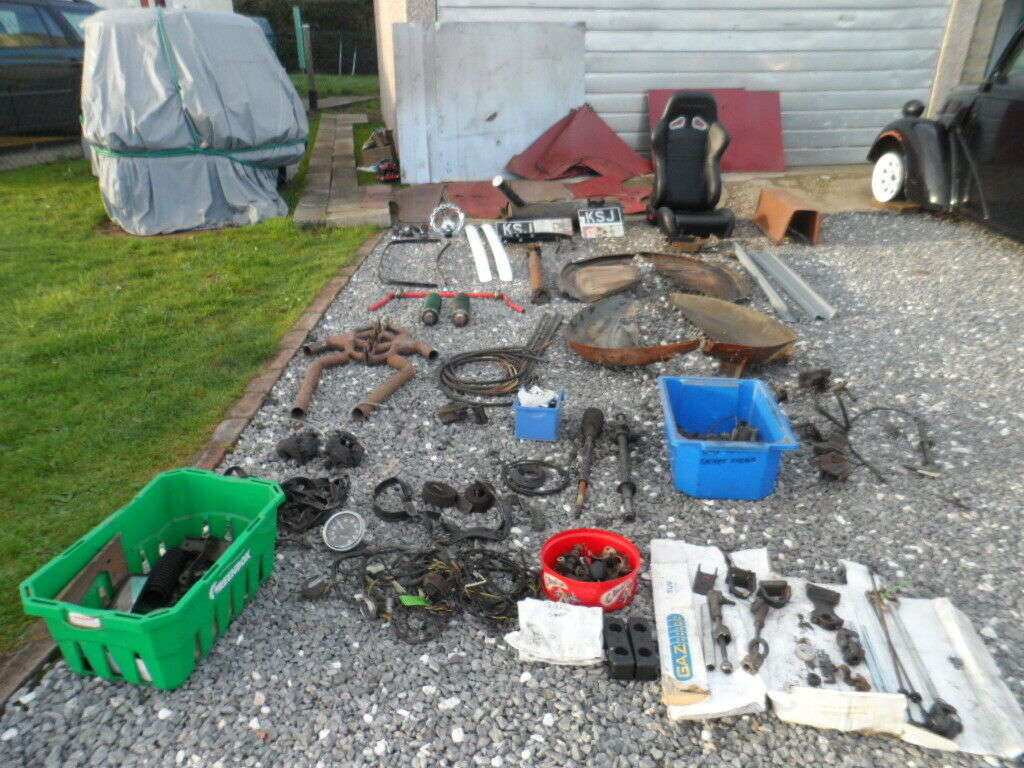
And a log book
The best bit is that the body is in way better condition than mine! Apart from some dents and scratches, most likely from storage and transportation the metal work is pretty good for a 64 year old car!!!!!
So I'm going to strip it down and cut it up then use the panels from the blue one to make up the difference - well that's the plan at least
More Soon.....................
Keyser Maximum Effort
-
4
-
-
17 hours ago, Ian said:
Z-Shed (Not @Keyser fake one :P)
Ahh but yours is hyphenated mine was The Z Shed now The Z Shed II, and the dress requirement here does not include mankini's unlike your original Z Tent
Nice to see the garage coming along mate
Great things are expected
-
1
-
-
30 minutes ago, LRF4N said:
Don’t think there enough letters in the alphabet to cover all your plans
Don't be silly
A through Z
A1 through Z1
Then we do Roman numerals if that's not enough I'll switch to hexadecimal
-
1
-
 1
1
-
-
1 hour ago, Ebized said:
Hope Mrs K knows what you are doing behind the scenes
Shhhhhh - she must never know!!!!
But lets just say Plan "X" is coming to fruition - tune in Sunday/Monday for more on that

-
9 hours ago, rabbitstew said:
Jesus, at this rate you will have it finished before I get my mini back off the ramps!
Don’t believe it for a minute, some bits are quick but as soon as I get to lining the bodywork up you can spend days on one bit and it won’t look like anything’s been done.
I’m also working on plan X behind the scenes, more on that if it happens
-
2
-
-
So I stopped eating crayons long enough to do a couple of hours last night and another 2 tonight
This is the progress .................
Lined up the chassis rails
Welded them up - I still didn't fully complete the welds in case it has to come off again
The back so far
Bit of bracing
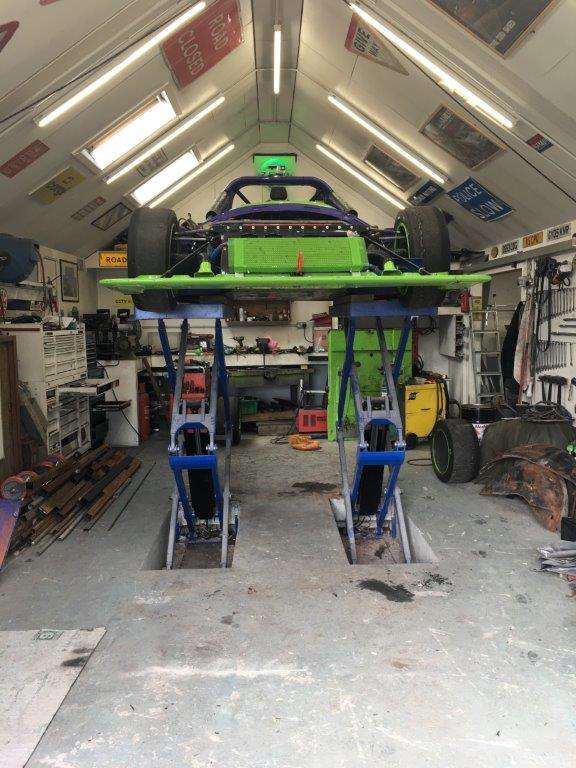
Then I took it off the chassis table ...............
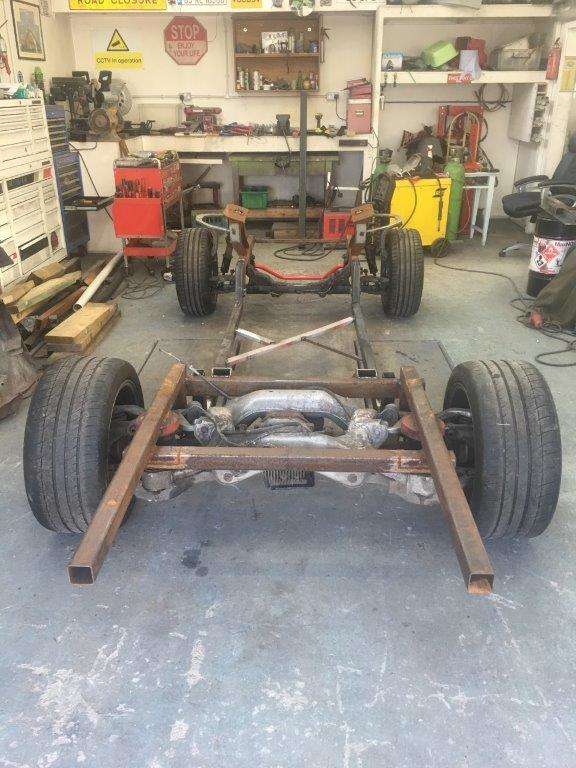 What have I done ??!!!??
So now I have to see how hard it is going to be and how much modification it will take to get the Pop shell to fit over this strange contraption
Stay tuned
Keyser Maximum Effort
-
8
-
-
 along and congrats on the purchase
-
2 hours ago, andybp said:
Yea but who's the really odd looking crayon eater on the lathe
I'd explain it to you on you're level but I ate all the crayons
-
3
-
-
1 hour ago, mattross1313 said:
Just found this on eBay, even has a puzzled looking chap on the front cover!
Happy bidding


Best post ever mate
Absolutely in stitches brilliant just brilliant - Now can you send me a copy?
-
3
-
1
-
-
Moving swiftly onto other news -
The Radical went out on it's first track day of the season a few weeks back, but I don't think I told you all how it went??
True to form from last year it broke down on the way back from noise testing
The clutch started slipping, so I stripped the multi-plate in the pits - nothing bad in there, stripped the slave cylinder down, nothing wrong in there HMMM
So went to bleed it back up with Tim and the master cylinder packed up (stopped pumping) so stripped that down after getting it out through the reservoir filler hole!!!
That was the problem, it seems the rubber seal had rolled back and eventually jammed so it was not doubt stopping the fluid returning causing the clutch slip and now doesn't pump either, luckily Merlin Motor Sport who are at Castle Combe stock the reconditioned Girling master cylinders as they are used on loads of cars
We got that fitted what a PITA but did it by 12 and had the afternoon on track
Ran her on maps 1 and 2 only (200 and 225HP approx respectively) she ran fine and temps are well down on last year
Only problem is the paddle shift is not smooth enough and catches a lot of false neutrals, The plan is to reconnect the manual shift and see if it is a gearbox issue or the paddle shift system, I think it's the paddle shift and we made need to play with the engine kill delay time to get it a bit slicker.
And what you've all been waiting for (or not) the Pop Z build ............................
I will be 100% honest with you here I have spent a lot of time doubting myself for the last 2 week, every time I look at what I'm trying to do I think "Yer this aint gonna work" or "I have no idea how to do this"
However with a lot of encouragement from Mrs Keyser (she just wants me out of the house
) and other people I have spoken to I am going to carry on in my attempt to pull it off - or my attempt to just waste a load of money and take some strange shaped bits of metal down the scrap yard
To that end the chassis table was brought back into the Zed Shed II and I started to line things up - it was at this point I realised I had a list of measurements but not 1 very important one - The height difference for the front and rear chassis rails
But I'm a 350z-uk forum member and you lot are great, I sent a diagram to @ZMANALEX who kindly offered to climb under one of his shells and take the measurement - Thanks Alex
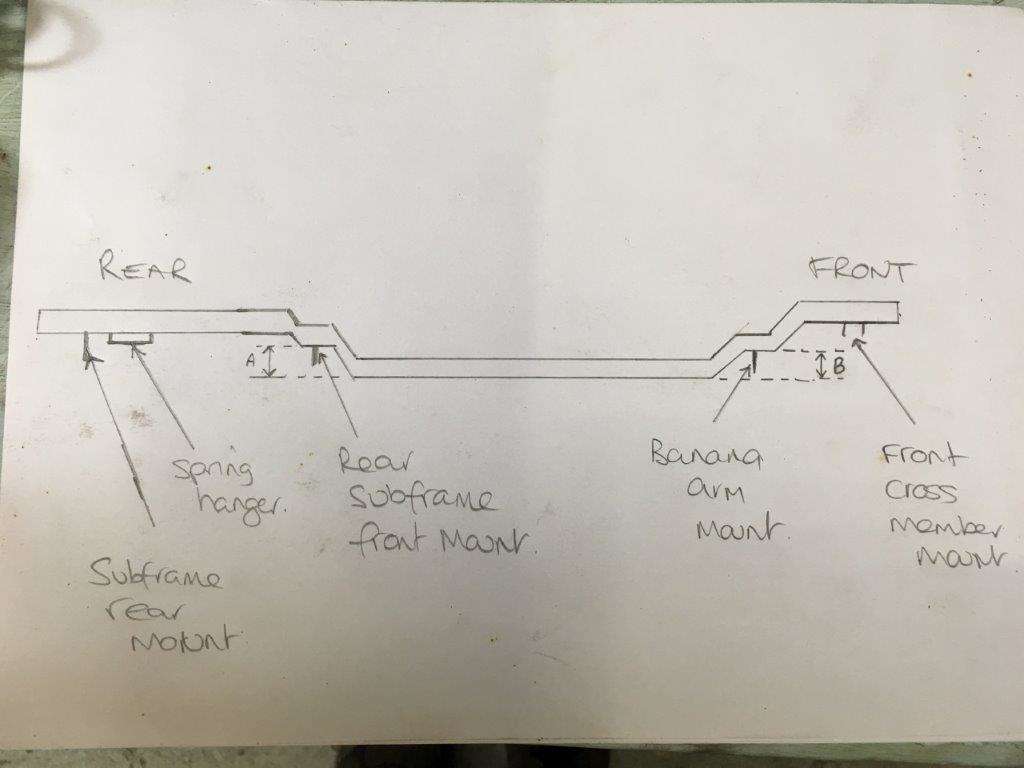
I needed measurements for "A" and "B" on the diagram.
@andy james replied to my text and offered to bring his car round the next morning to be measured, he would have come sooner but was on the other side of the country when I text him
Thanks Andy
But what do you know @gg2040uk said she could pop over that evening and let me take her measurements Ohh Err
So lastly Thanks Maz
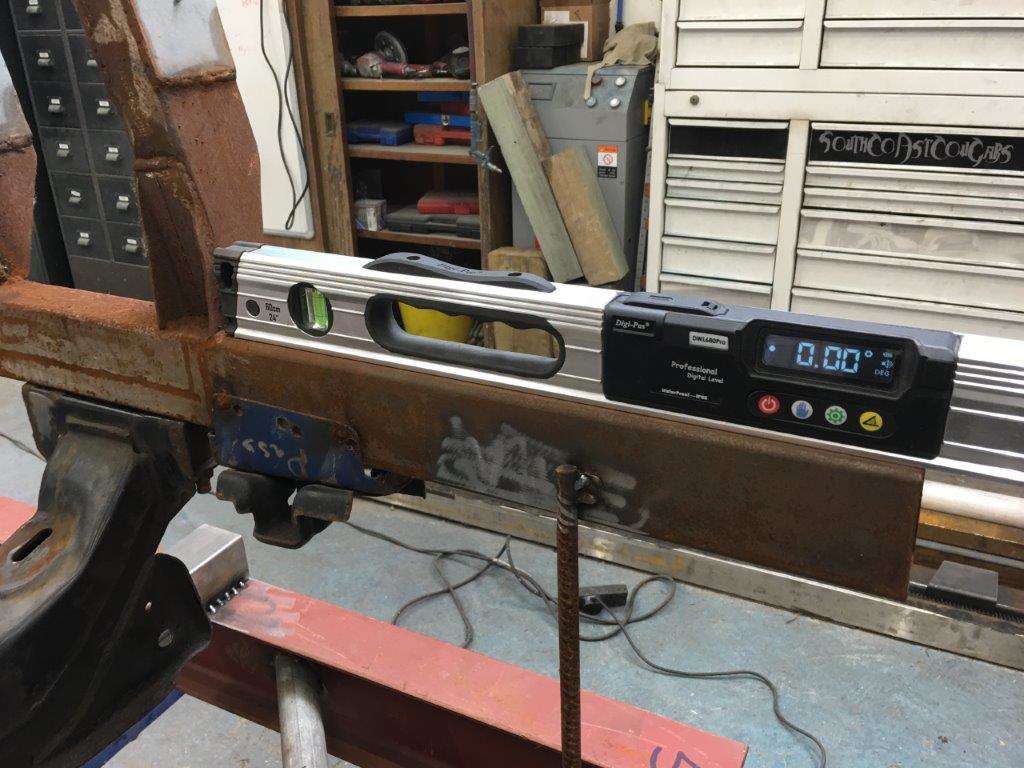
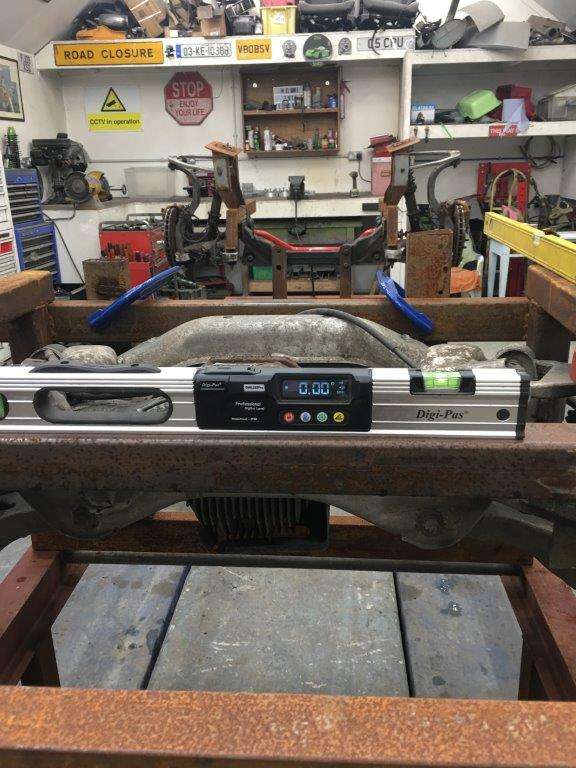
With the measurements written down it was back to trying to line up the front and rear "subframe carriers" get them at the right height and the hardest thing getting it square!!! Aghhhhh - Well I can tell you after 3 days WE (huge shout out to my long suffering wife) got it square - well inside 0.25% which I am happy to live with as we should be able to get that out with the normal tracking adjustments (I hope)
SO that means that this update is BORING!
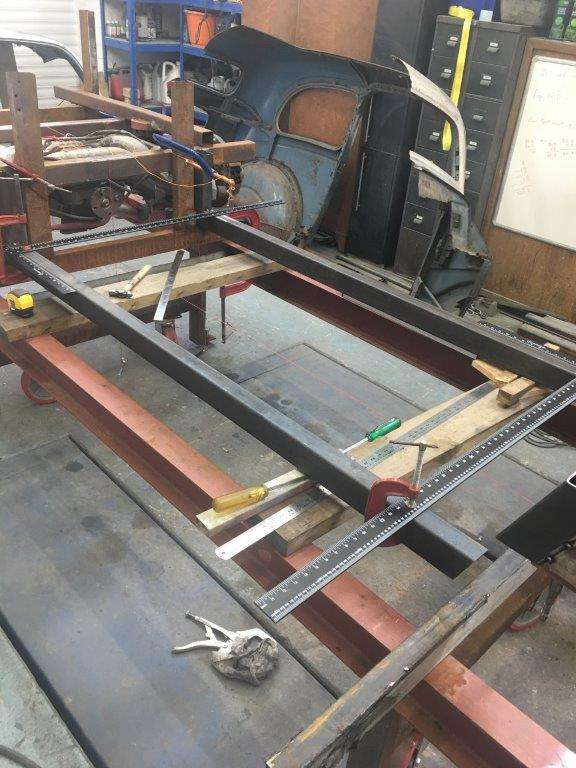
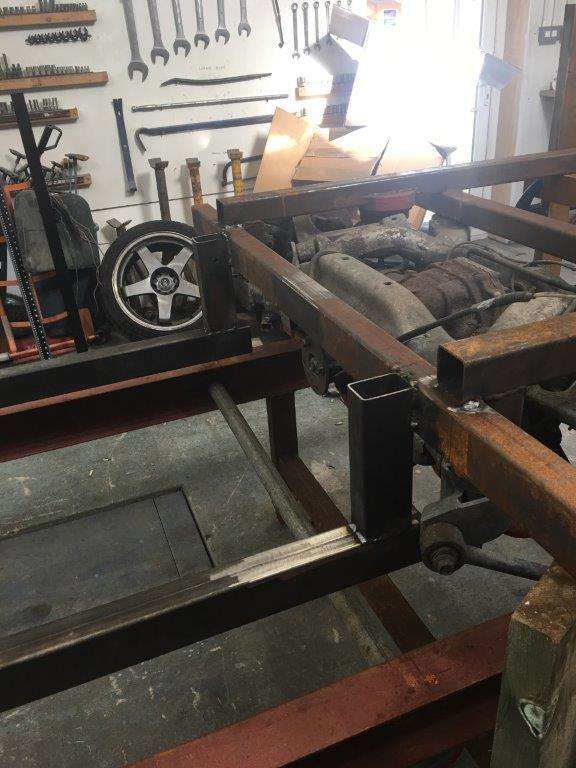
First problem was that the front cross-member mount was not strong enough, not accurate enough and I had no set points to measure from, so we needed to create something to use as a datum.
Started with a piece of box and got that bang on,
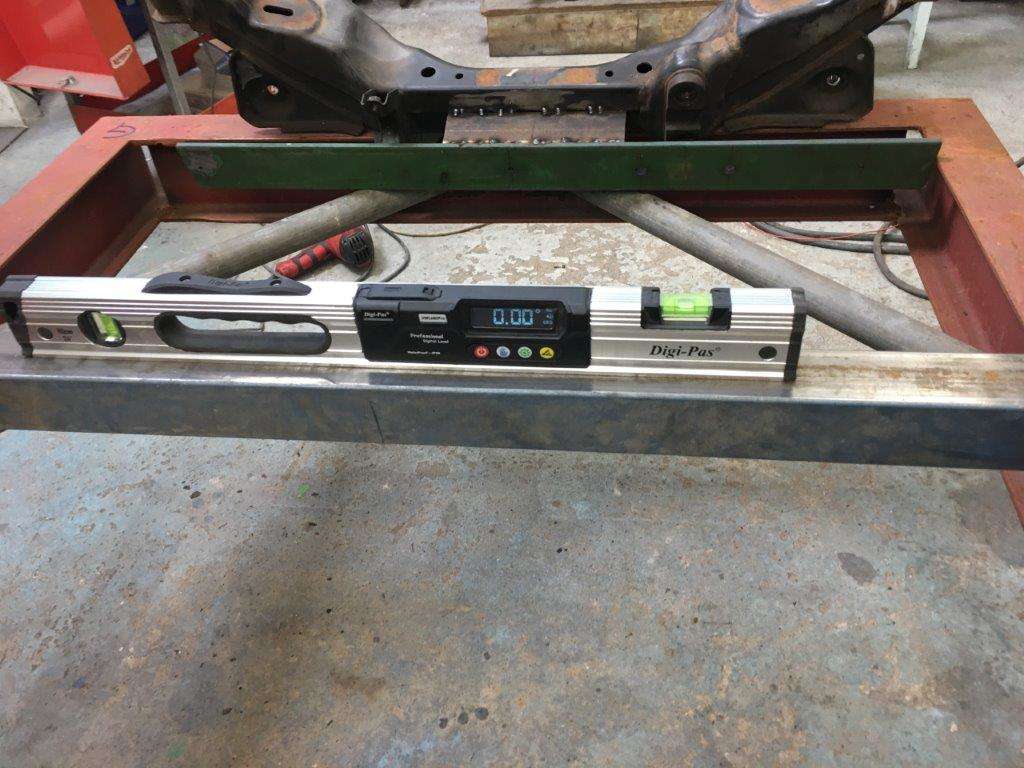
Please note the centre line - that's important as well!
Then added a sturdy cross-member mounted it to the box section.
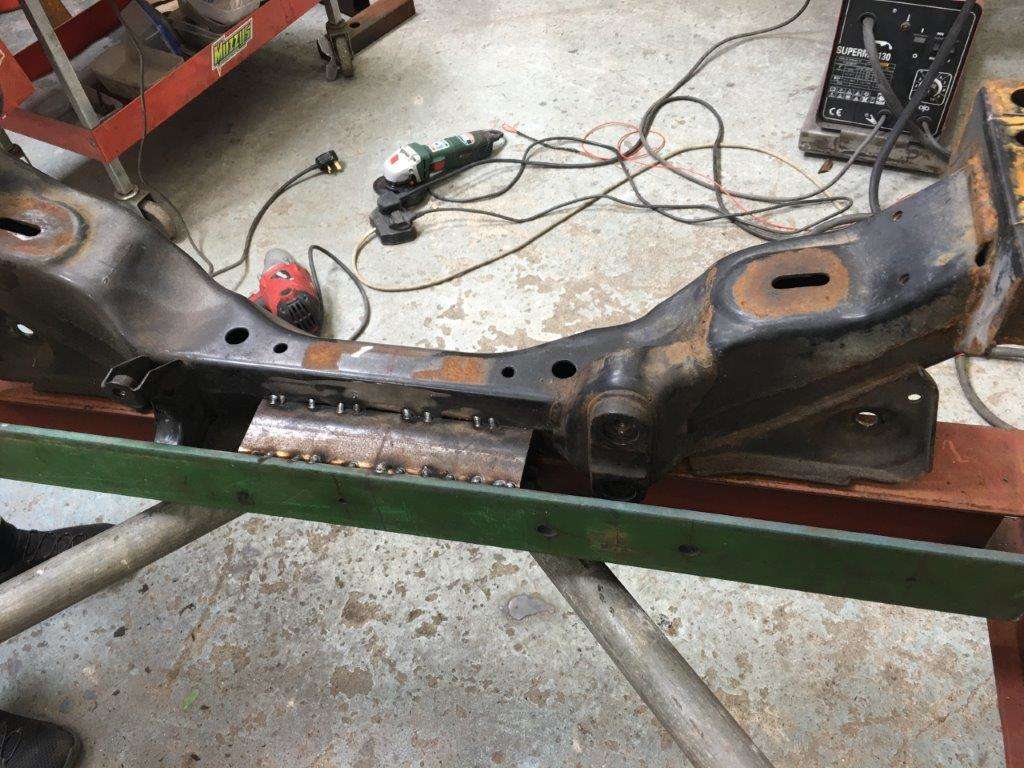
New centre line added you can just see it in the pic. The angle iron is now the new datum
That got us to here
lots of tack welds as I didn't want it to move!
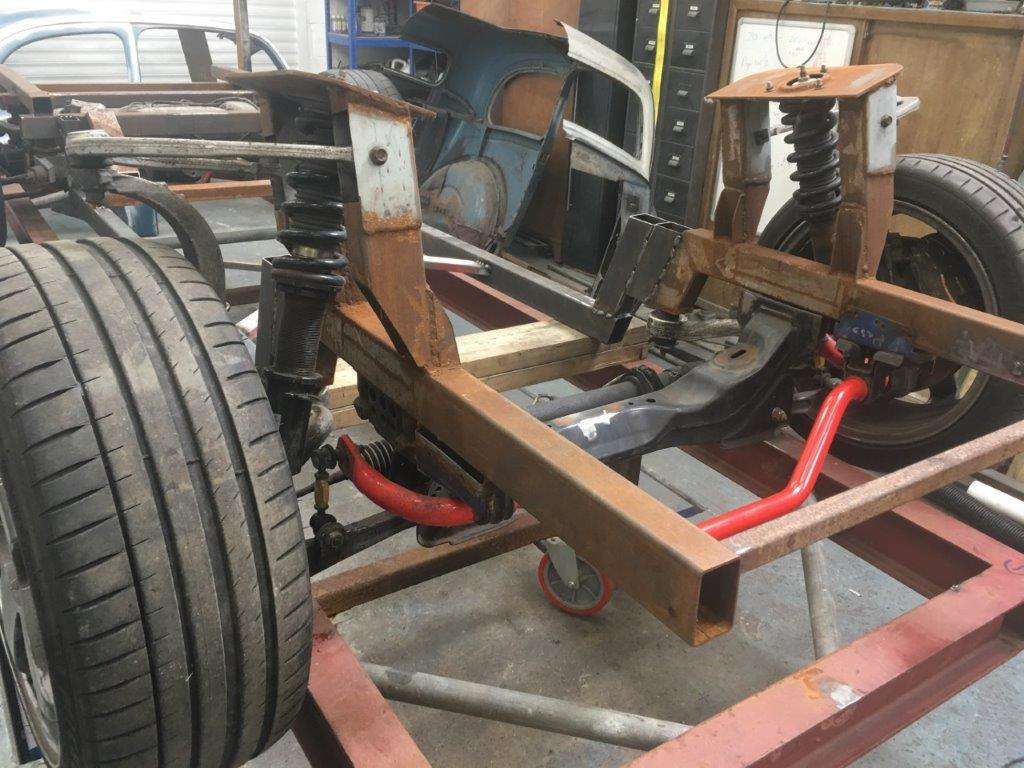
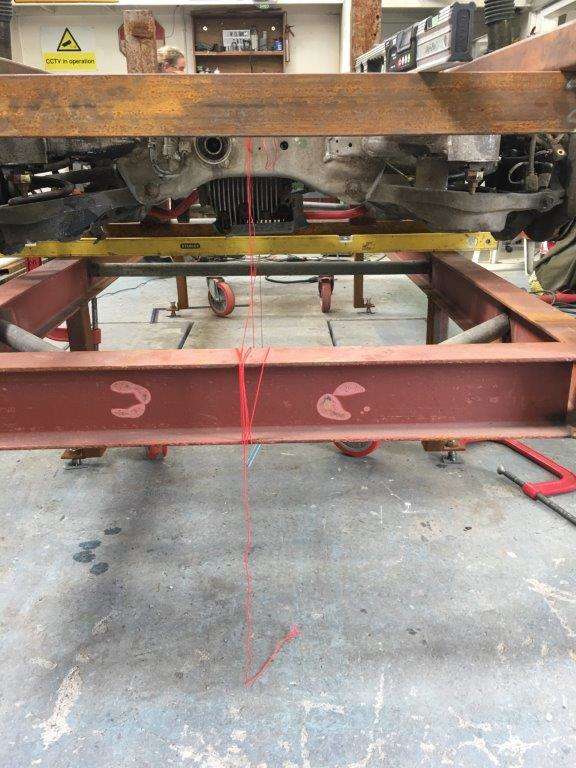
Then added my chassis rails and got those spot on
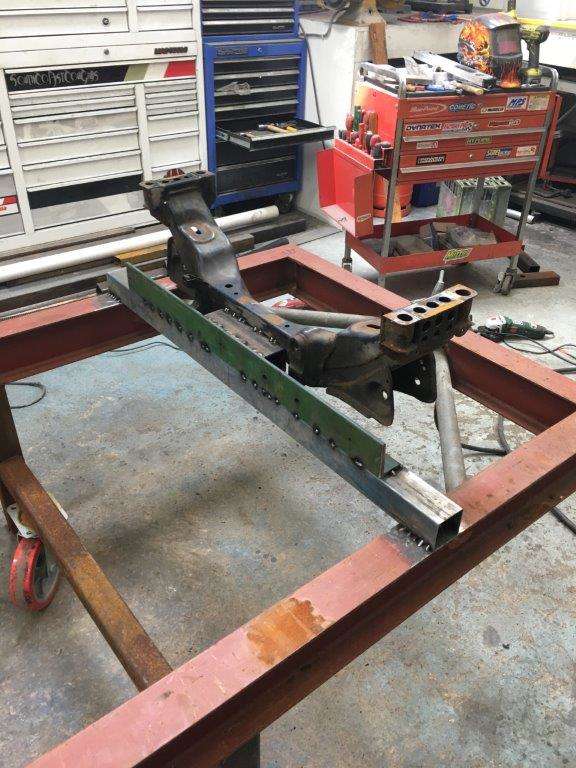
followed by rear frame alignment
Then onto the ever important centre line
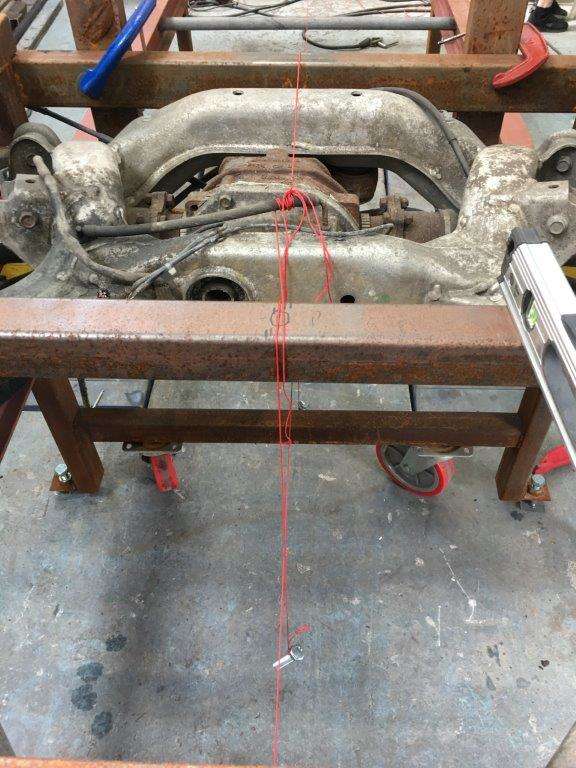
Using some home made plumb bobs we got everything in a straight line, but It took me ages to work out how to be sure it was all square, I understand that you measure the 2 sides and when they are equal measure the angles for square but I have nothing to measure a straight line from - after some head scratching I stumbled upon a YouTube video and he lines up his newly made suspension using plumb bobs but the bit I got from him was, you drop a plumb bob to just above the floor from a known point, you mark the floor with an "X" then do the same on the other side and at the back, you can now measure the "X"'s and if they are the same in length and diagonals then you are square
Guess what - Yup miles out
same length either side but out by 11mm in the diagonal.
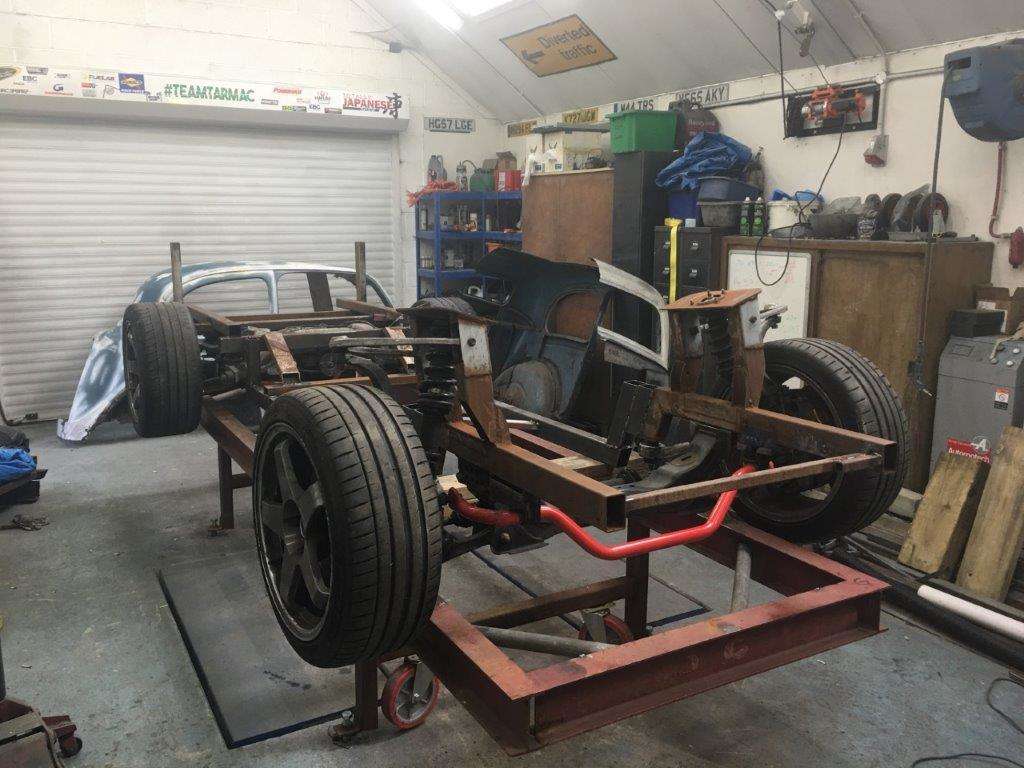
After hours of little adjustments I got it down to 3mm in a measurement of 2.5M given that the pen line is 1mm thick I can live with that, I had also had enough after 3 days of trying to get the sodding thing all lined up!!!! I time lapsed it all so if I'm feeling particularly bored and mean I'll post it up at some point and you can join me in my pain!!!!
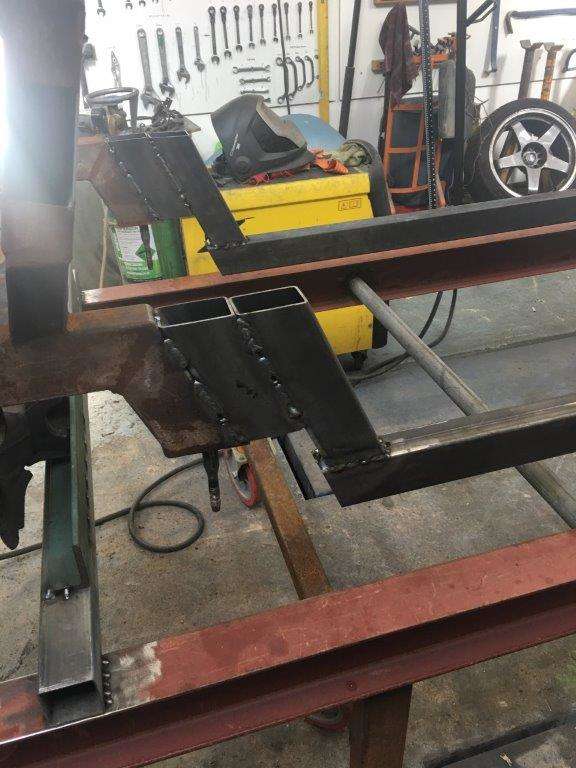
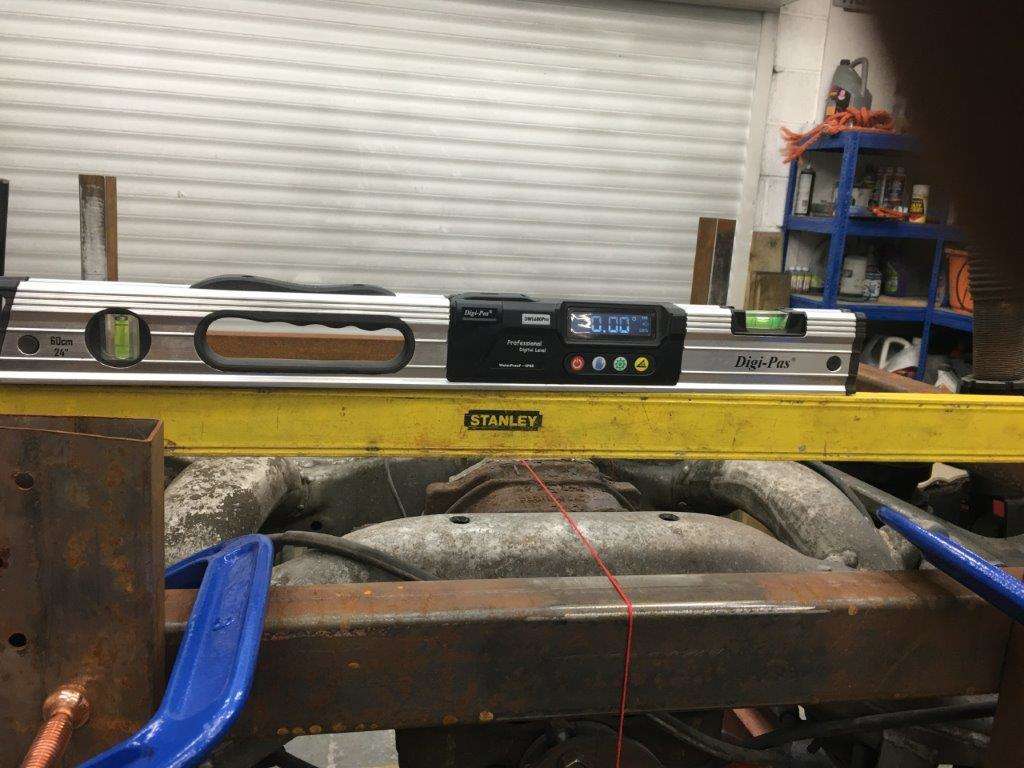
Anyway after all that we clamped it off and I have started to design and fabricate the main chassis rails -
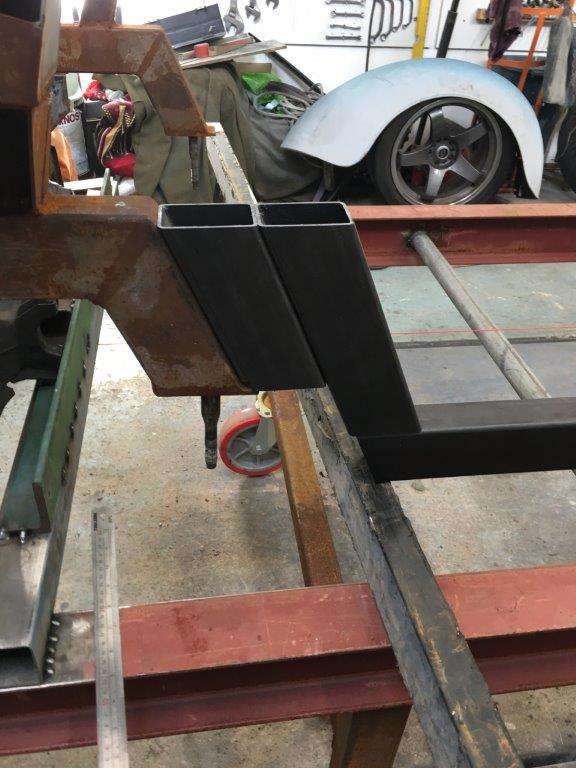

Something like that seems to work - of course I'm making this up as I go as I can't find the book I need -
"How to put a 1955 ford popular 103E body on a hand made Nissan 350z Chassis and running gear for Dummies"
If you see a copy can you drop me a link please?
That's it for now hopefully more soon
Keyser Maximum Effort
-
8
-
-
Hi all,

Been a while, sorry about that but things have been happening in the Zed Shed II despite taking a weekend out to celebrate my youngest daughters 21st - Amongst other things we went to Alton Towers - I attempted to be the oldest Kid in the park
Of course like everything I get involved in it went wrong when the roller coaster we were on broke down and stopped leaving us stranded
That and a few other things have slowed me down so time to bring you up to speed -
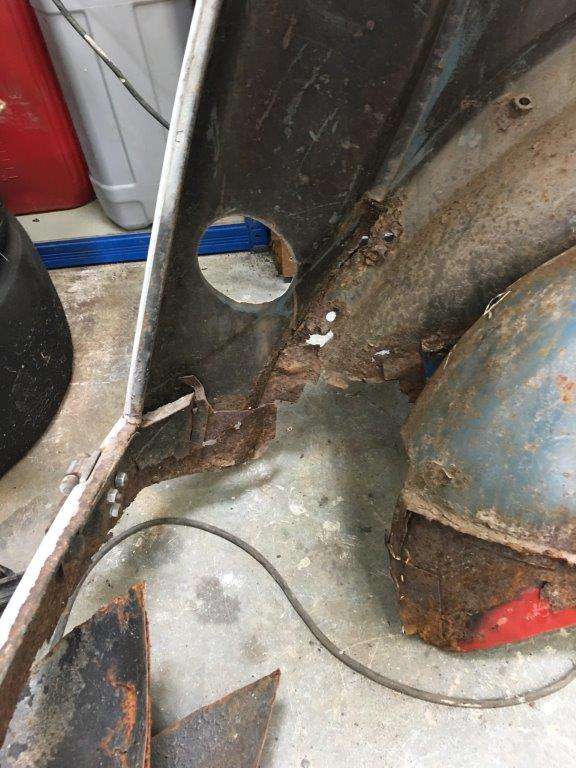
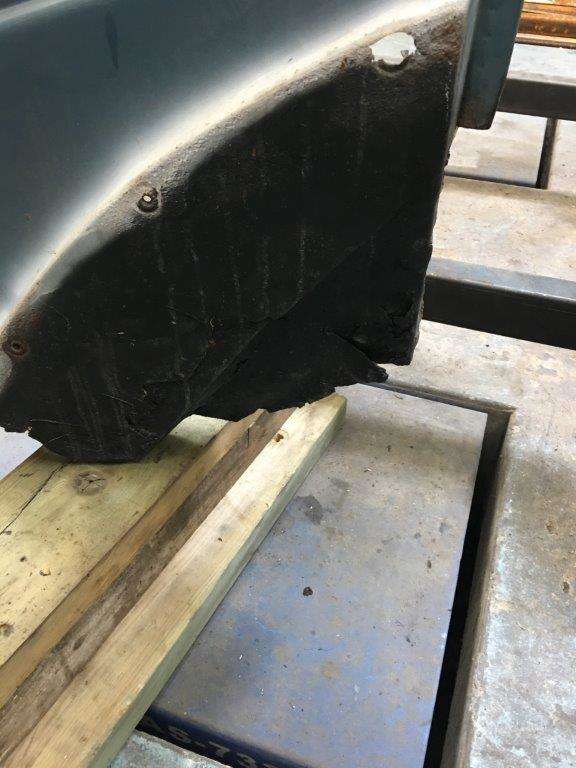
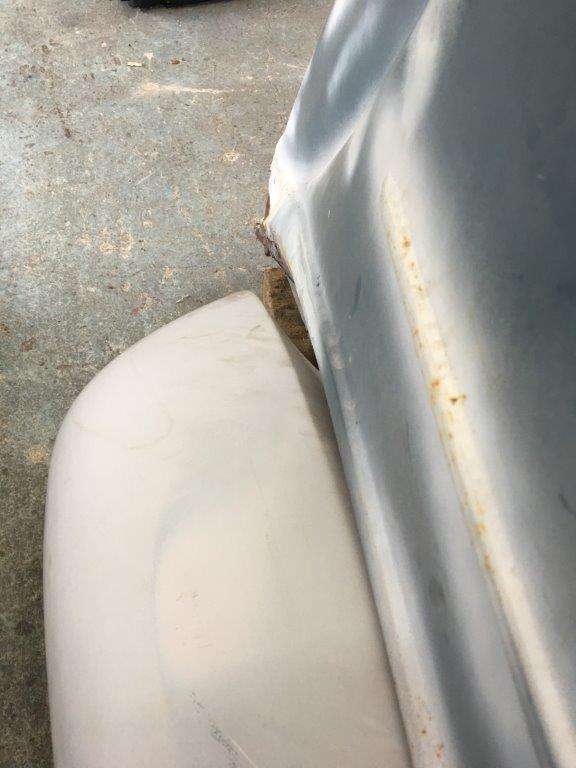
The Barn find - I did a bit of an inspection on the "good shell" and found a problem in the engine bay
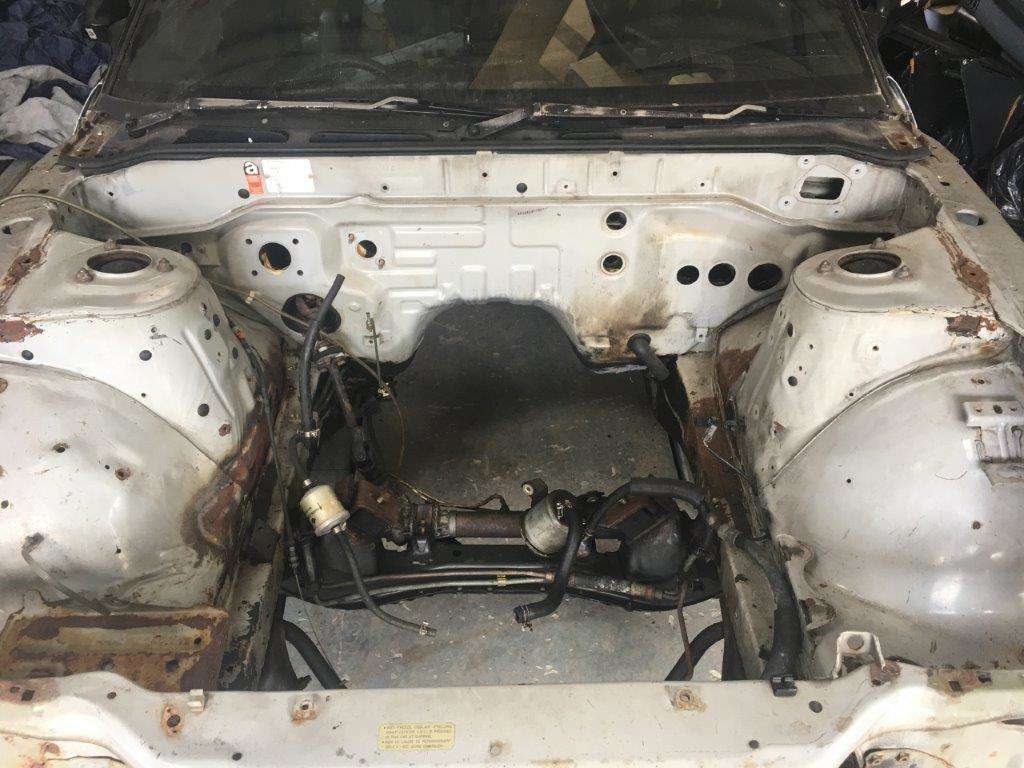
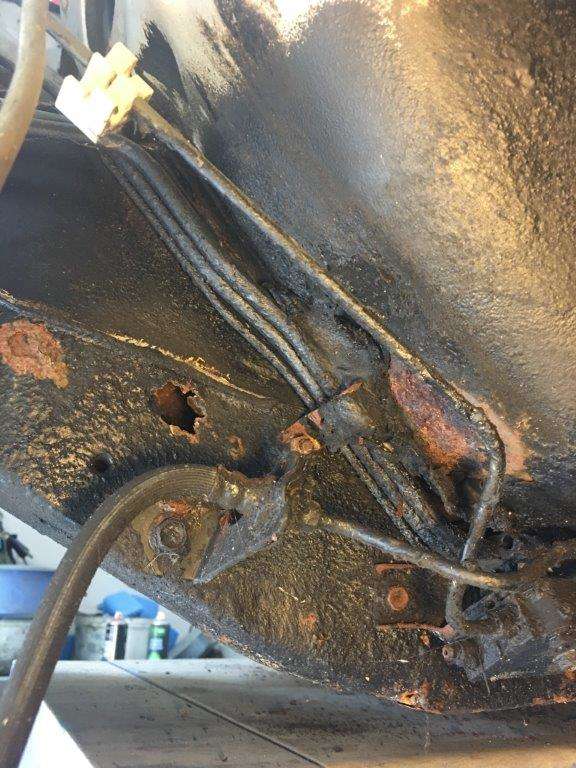
The drivers side inner wing has a huge patch, why? well it seems that it has had a bump at some point as the front inner wing is still creased
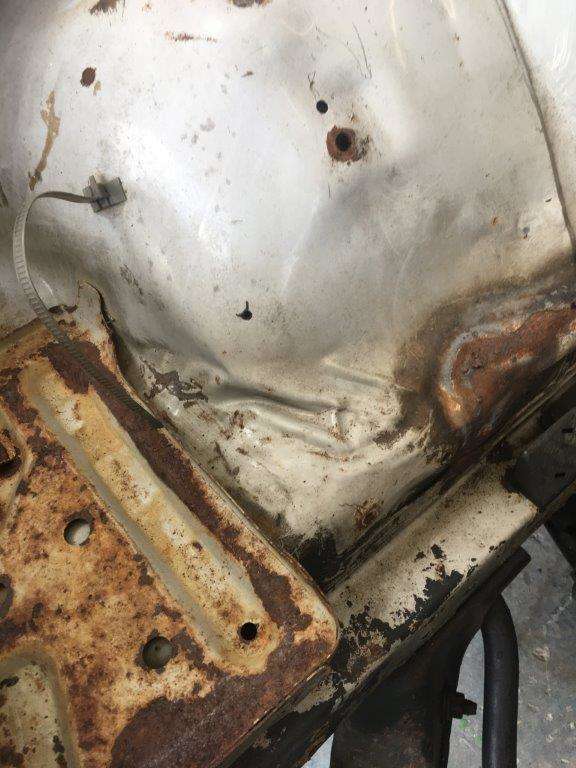
It has been repaired and the front has had a new replacement part welded in, I also found that the chassis leg on the same side (probably caused by the same bump) is badly rusted
Anyway I had a word with my mate as I bought it from him, remember it was in a dark barn and the bonnet was tied down so I didn't see this when I bought it, we have been mates for years and he tells me he had no idea it had been bumped. Anyway we had a chat and he agreed a small rebate was in order and I decided that I had enough on my plate with Pop Z and more than enough rust in that to be getting on with!
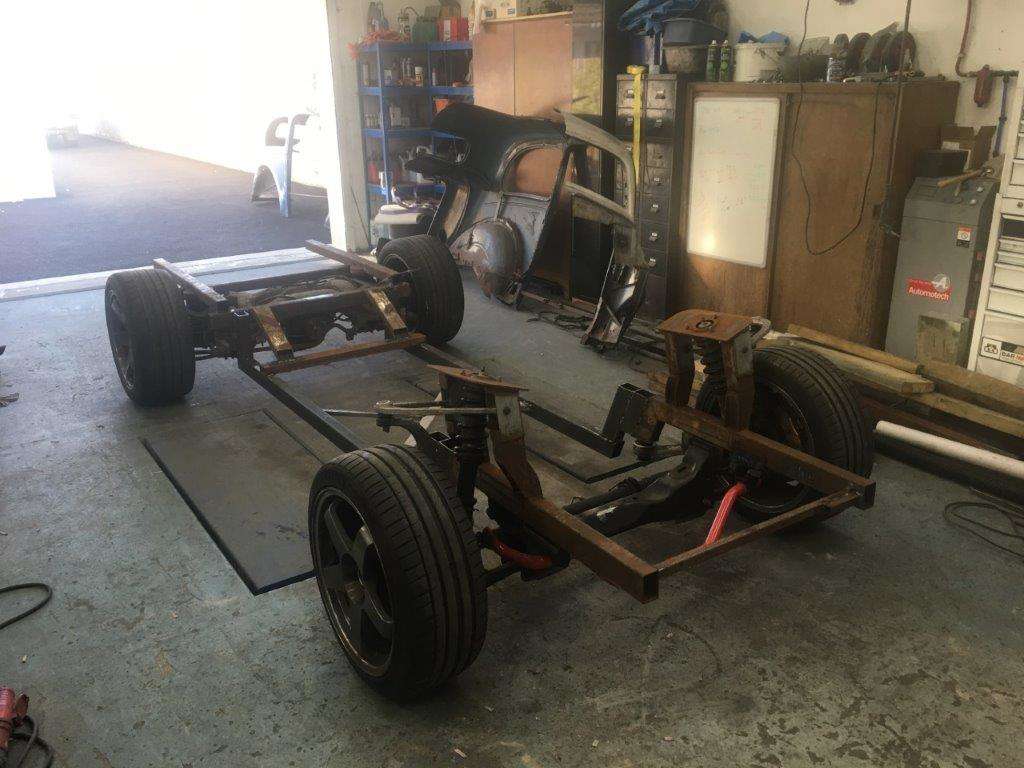
So a shout out to @docwra who has some involvement in the SXOC and gave me a bit of help and advice, leading me to joining the SXCO and placing an advert for the complete barn find, one of the members from just down the road from me got in touch as he has a road going 200SX that he is working on and wants a track 200 as well, a deal was struck and he came and collected the lot
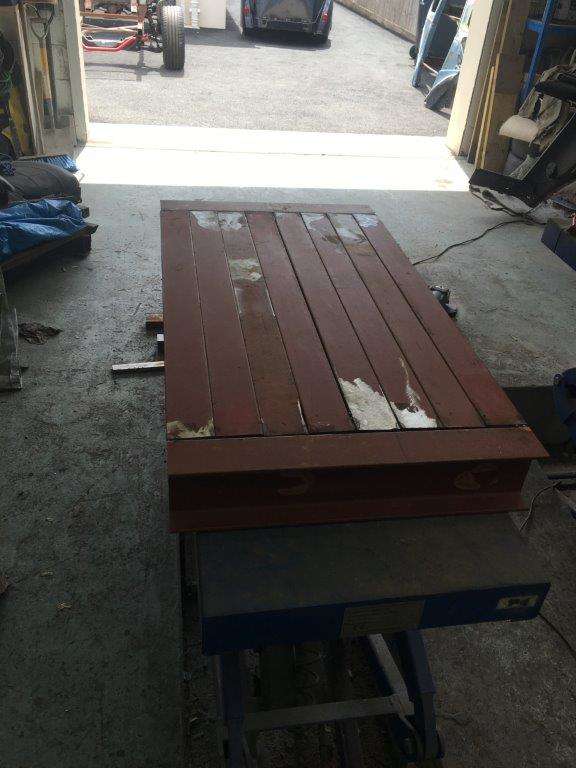
So the garage is back to this now -
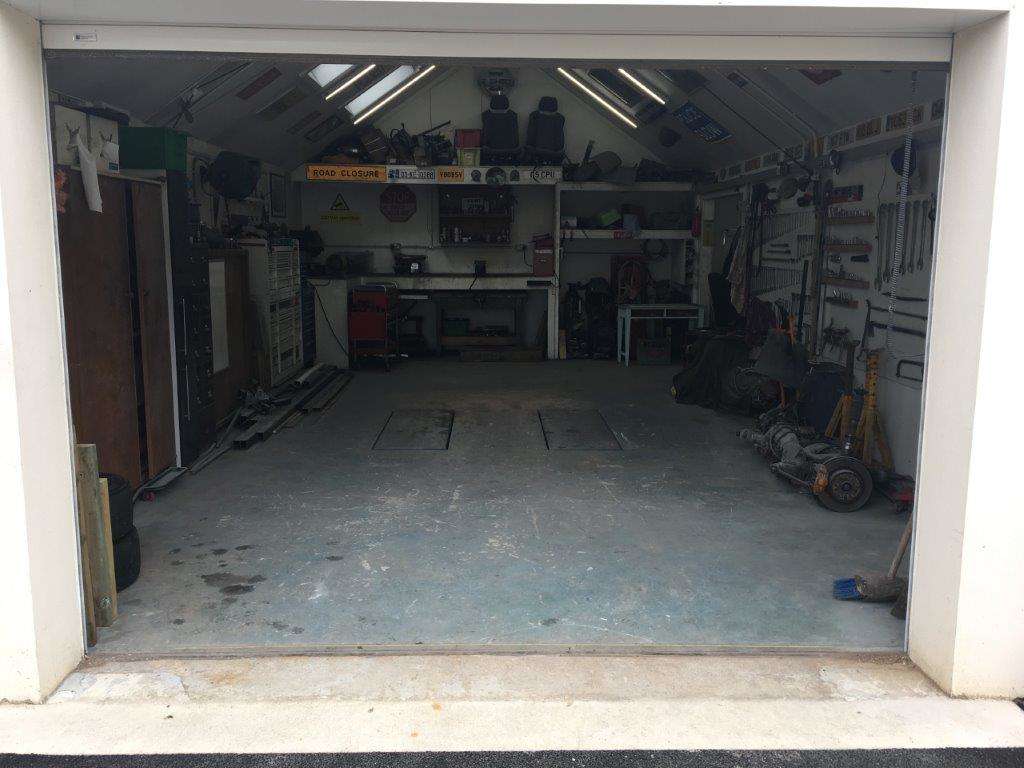
Keyser Maximum Effort
-
2
-
-
Nice write up as always mate and congrats on the trophy
-
1
-
-
-
Nice work mate, it’s coming along a treat.
Good luck with the bush
-
1
-
")
R53 Mini Cooper S cheap old shed project
in Other Cars
Posted
I'm sure cost is/was a factor, more and more parts are plastic, I did the thermostat on an Astra and the complete assembly that feeds the heater holds the thermostat and the temp sensor is all plastic.
That's the first clutch cylinder I've seen that's plastic, maybe I should try something newer than a 55 Pop