


drfeelgood73
-
Posts
196 -
Joined
-
Last visited
Content Type
Profiles
Forums
Events
Gallery
Store
Everything posted by drfeelgood73
-
Found that delivery within uk will be £12 with express 48h delivery.. Jontte has first dibs so just waiting to see if they are happy with the p&p to Finland
-
Hi guys..have just been finding p&p costs. Dibs order.. 1.Jontte 2.Rasco 3.supersarbs 4.350jimbobz 5.yorkie 6.jimmy7.farrow Will pm reply in turn with p&p costs
-
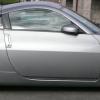
Hello everyone, just starting to get rid of some bits that i don't use as i am unfortunately parting with the car. Hopefully someone on here gets a good deal.. This is the aluminium under tray which i got through the forum a few years ago. Going to ask for £50+ p&P for it,Hopefully someone close will get it to save postage costs.. If anybody is interested I will get a cost for delivery once i know location.
-
slight mistake on tyre size... they are 35/19's.... Thanks guys, really love the car, but too many hobbies...cant justify 3 cars and a track car..... well...thats a lie... i can... the better half cant...lol
-
Ok...guys ... Aliveboy was the first to pm me their details...so they are getting sent out tomorrow to him....
-
Hi guys, mentioned before about selling up and debating whether to put back to original and sell as is...thought i would give selling it as is a go first... Its a 55 plate Uk Gt spec in GM which was registered in JAN 27th 06 just before the tax change in March so has the lower tax band. It has 91500 on the clock. Here is a list of all thats been done to it.... BERKS HFC’S INVIDIA DUAL EXHAUST GT SPEC H FRAME CHASSIS BRACE ALUMINIUM/ POLY BUSH GEAR BOX MOUNT LIGHT WEIGHT FLY WHEEL EXEDY CLUTCH AND BEARING NEW SLAVE CYLINDER SS CLUTCH LINE BLACK DIAMOND DISCS ALL ROUND AND PADS SS BRAKE LINES EIBACH SWAY BARS UPRATED DROP LINKS MAGNETIC SUMP PLUG ALUMINIUM Z UNDERTRAY POLY BUSHED 60% EIBACH TOP CAMBER/CASTOR ARMS EIBACH REAR CAMBER ARMS HKS LS + COILOVERS ALUMINIUM PLENUM SPACER K&N ALUMINIUM TUBE POP CHARGER AND FILTER BRAND NEW NGK IRIDUM PLUGS ROCKER COVER GASKET CHANGE EIBACH 20/25 MM WHEEL SPACERS ANTERRA LIGHT WEIGHT RACE ALLOYS MICHELIN PSS 275/45/19 GOODYEAR ASSY 2 245/45/19 ORIGINAL OEM WHEELS USED AS WINTER TYRES WITH GOODYEAR WINTER RUBBER ON REARS 2 NEW BRIDGESTONE 225/45/18 RE050A AS SPARES ONCE THE 40’S RUN OUT TEIN BONNET DAMPERS IPOD MOD FOR OEM BOSE ELECTRIC MIRROR MOD FRONT WHITE LED MOD ROLLED ARCHES WIRELESS TYRE PRESSURE MONITOR REAR VID CAMERA CONNECTED TO CRASH DVR INTERNAL WITH CUBBY ON/OFF BUTTON ENGINE OIL WITH HIGH FLOW FILTER / GEARBOX OIL & MOLYSLIP /DIFF OIL CHANGED (08/07/15) QUICK SHIFTER SILICONE HOSES NEW SERPENTINE BELT 1500 MILES AGO BRAND NEW MATS ALL ROUND LITTLE BIT OF CARBON WRAPPING INSIDE FRONT LIP CORNER WEIGHTED FOR MYSELF / CAMBER SET FOR FAST ROAD USE I have clay barred / washed and waxed this car on a regular basis / changed all the fluids every year and has been garaged when not in use. Will have had it 3 years in October and never had a problem with it.... I had every intention of tracking this car in the sprints, but would have been put into a class where i would need a supercharger or twin turbo upgrade to compete....Did have a quaif diff fitted but sold that and put original back in... It originally came from Stoneacre down south, so the chassis is in excellent condition.... Have now moved onto an MNR project which means i wont have time for this.... and it is a shame to keep her sitting doing nothing... If i cant sell it as whole i will eventually get round to putting her back to standard once i get space in the garage and sell the bits seperately... £8500.00
-
who ever pm's me their delivery details first shall receive....
-
Hi Guys, Just replaced my rocker seals and put in new plugs... From previous threads i realise some guys might want new plugs but moneys tight just now.. Whoever wants them i have a full set of Denso IKH16 Iridium Power plugs.... Only done 6k miles... will work straight away or a little thread clean for the obsessed... I will post them to you... anybody who gets them ...just put a fiver in a local charity box of your choice....job done
-
Big thanks to Adrian... sent me out the rocker kit in good faith, as i was working away and couldnt make transfer immediately...arrived pretty darn quick... Its great to have someone like this to call upon... Big thanks again...
-
No problem...need to get the jeep fixed and out of the garage first.... will post here first all the bits anyway....eventually...
-
Got a new project in mind...more track orientated..... .... light weight pulleys...new belts....silicone hoses....... tyre pressure montoring system....
-
Forgot to add light weight fly wheel and exedy clutch ....new slave cylinder....braided clutch line.... bonnet dampers.... built in front and rear cameras with dvr.... aluminium z undertray........ and the list goes on...lol Would rather sell as is, but yes...would get more by splitting....
-
Hi Guys, Looking at selling and wondering what kind of price to expect.....also Just wondering what the best way forward is with selling ... Whether to put back to standard or sell with all the mods on it... Spec just now.. Invidia duel exhaust Berk HFC's GT Spec Chassis brace 'H' Quaife diff Eibach sway bars Uprated drop links HKS LS+ Coilovers Eibach top arms with camber and castor adjustment Rear camber arms poly bush kit Eibach wheel spacers Anterra Race wheels 19" ...michelin rubber Plenum spacer K&N Filter..Air box with ss pipe short shifter Braided brake lines Uprated discs and pads billet gearbox mount white led front Front lip Still have all the original parts i took off... Its a 55 plate.. GT GM.....first registered feb 06...so its the cheaper tax band.... Thanks
-
Hi, Got an OEM rear spoiler in GM ...really good condition.... plastic retainers and metal captive nuts as well..... if interested can send you some pics....
-
Rocker cover grommets - no need to replace entire RC
drfeelgood73 replied to RobPhoboS's topic in 350Z Technical
Hi, has the group buy been set up... Interested in the kit asap.... -
you can adjust a bit more until the slack is off, and the clutch still returns as normal,as long as you can feel i have my pedal just level with brake.... but i have put on a new clutch and flywheel, so there may be a little difference in adjustment between us.... i glued a piece of plastic onto the blue block to take up the space to make the switch, or you can adjust the switch length more... i managed about 2 threads on the switch before it became tight...there is a little slack in the wires behind which you need to tease a little bit so you can adjust it without over twisting...
-
As above.... you may find you go out one day and cant change gear .....i adjusted mine a lot to past the return spring point and added in a spacer for the cruise control switch, and suffered this about a day later.... re-adjusted so the clutch just returns normally by itself and all was well......
-
Anybody interested in these..... http://www.ebay.co.uk/itm/350Z-GT-SPEC-CHASSIS-BRACES-/301505885502?pt=UK_CarsParts_Vehicles_CarParts_SM&hash=item463326b53e
-
Lol.... Took me more than 10 mins to jack the car up and get onto the stands....never mind coating that rusted clip holding the join together with wd40 before prizing it off..... but yes changing the slave and hose was only 5 mins after that....
-
It sounds it, but only took just over an hour...... after reading all the problems others have had as well.... suppose you could have pressure bled it.... and I didn't find a sticky in the guides on here....only links to people with tales of woe when attempting......
-
My zed has been done by envy -- video --
drfeelgood73 replied to Bodyboarder81's topic in Car Detailing
Absolutely stunning......... Well spent beer tokens -
So there i was in the garage pretending to be tidying up but in fact planning what to do to the car next when I remembered about the braided clutch line and new slave cylinder gathering packet dust on the shelf. So I decided to change all the fluids and do the clutch at the same time as I think 4000 miles is enough before changing the fluids anyway. I just thought I would give a quick run through of the slave cylinder change out and bleed. Having read through all the how to do it and you tubes there was , I decided to go for it..... This is the sequence I did it in and I had my old man to help..... Definately 2 man job..... Changing the slave and line is pretty easy, 2 bolts for the slave and a little fiddle for the hardline nipple connection to the rubber line to the slave..... Found this to be easy, the nipples and connectors on this locate easily , and you can tell through finger touch alone that it is seated. This where the fun begins....... I took an accumulation of info and basically messed around for what was easy for me.... Tools and equipment required: 8 mm spanner open end 10 mm spanner open end Torch x 2 ( one inside the cabin and one in engine bay) Long nose pliers Long wide tip flat nose screwdriver Crow Bar 200ml plastic syringe Clear plastic tubing to attach to syringe 20 inches Extra tubing 10mm about 8 inch long *** When refitting connections be sure to clean off fluid from it and immediate area as it will be easy to spot leaks in the system later*** 1) Jack car up so you can easily get underneath the slave cylinder....Put on axle stands 2) Disconnect the clutch pedal from master cylinder rod attachment inside cabin....held by pin and retaining clip.... long nose pliers and fingers 3) Disconnect the hard line from master cylinder......10mm open spanner 4) Remove reservoir lid, and place cloth under master cylinder as best you can 5) Take syringe connected to 20 inch flexi pipe and fill with new fluid, attach to opened bleed nipple on slave cylinder ( 8mm spanner), hold the piston rod fully into the cylinder and SLOWLY push fluid through line. The other person should be watching with torch and when there is a steady stream of fluid and no air, you need to close the bleed nipple whilst kerping a slight oressure on the syringe.... *** Once you start to fill from syringe be careful not to move it in such a way that any air gets pushed through instead of fluid*** At this point now you have fully filled the hardline from the slave to the master cylinder.... 6) Push end of 10mm clear flexi plastic tube into the hardline connection port on master cylinder. Make sure reservoir is full of fluid. 7) Use syringe and slowly put fluid into the flexi pipe you have just fitted to master, let it run down pipe until there is about 3inches of fluid in it. Leave in master and put other end into an empty container so that the pipe is in more a vertical than horizontal position. 8) Push clutch rod in the cab SLOWLY towards the firewall using the large flat blade screwdriver. When released pull clutch pedal fully out so rod can return a bit more. ( I put a piece of rubber insulation tape on the end of screwdriver to give me more purchase on the rod attachment as the end is rounded. The other person should watch at master cylinder and will see fluid and air come out through fluid in pipe, as the fork is pushed. When the fork is released it will suck the fluid back in along with whatever fluid you had previously put in flexi pipe. Repeat this again until you are sure there is no air in master cylinder. You should now have the flexi pipe attached to the master with a littke fluid in tge pipe at the master....if there is no fluid in the flexi, fill with more fluid and reoeat purge process. *** We have now fully filled the master cylinder and the hard line all the way to , and including the slave cylinder*** 9) Remove plastic flexi from master and connect hardline back into it and tighten. 10) Pressurise system using clutch rod in cabin....Slowly pushing to firewall.... 8 times.. *** This is a good time to check all your connections for leaks*** 11) While person in cab has the rod pushed to the firewall as much as they can after the 8th time, other person to hold in piston at slave and open nipple for 1 second and tighten... Person in cab will feel fork move. Repeat 3 times.... *** Keep pressure on fork in cabin when opening bleed nipple on slave as this will stop any air being sucked back in. The pressure on the slave piston is to make sure the fluid fills and doesn't create an air pocket in the cylinder. Do not open bleed nipple for longer than a second as you want to close it whilst under positive pressure being created in the system from the cab*** A clear plastic tube connected to the bleed nipple can let you see when just fluid is being released.....but since we have filled everywhere prior this will be minimal.... Now it is a case of pressurising from the cabin until the clutch fork at the slave is pushed out enough that on its return it pushes the rod in the cab against the pedal back towards its normal position. THIS IS WHERE I HAD TO ADAPT AND THINK A LITTLE... I could see that the slave was wanting to push the fork on the clutch but I could not gain enough pressure inside the cab on the master to do this. I have fitted a new sports clutch not long ago and the spring tension was too much... maybe with a normal or older clutch it would be easier. This is where the crow bar comes in.... Push back the fork on the clutch with the crow bar using the cross member as leverage to its full extent.... Person in cab then pressurise system using the screwdriver in the cab..... this might take 3 or 4 goes to get it right as it takes a bit of effort to hold the clutch fork. *** Keep an eye on reservoir and top up if necessary*** You will know inside the cab when it is right as the clutch pedal moves back to its normal position as the rod is pushed back against it when the person underneath lets the clutch fork push back against the slave piston and you will feel the tension as you move the clutch pedal in against the rod..... 12) Connect pedal back to rod assy in cabin ....long nose pliers for clip....fingers for pin 13) Fit reservoir cap *** KEEP A BUCKET OF SOAPY WARM WATER FOR FLUID SPILLS OR SPLASHES ON PAINTWORK, AS BRAKE/CKUTCH FLUID ABSORBS WATER AND THIS WILL DILUTE IT...*** Hope this helps someone...even just a little bit....
-
I am up in Banff, happy to travel up to inverness or down past Aberdeen, or equivalent across country, just give me a bit of notice.... any excuse to get a good drive....
-
Just wondering if anybody has had any problems with these..... Full story.... Booked her in for MOT on Thursday, passed with no problem... I had spent the previous day going round and checking everything and re-torquing up all the bolts..... I have been away for a while and not really had a decent run in her till after the MOT. The wife has been running around in her while I have been away but not much use and def not giving it the welly. Normal driving it is perfect, but as soon as you start doing a bit of spirited driving and start using a bit more pressure on the brakes from 50 to 70 the juddering starts So I whipped off the wheels and removed the discs...... and they are warped.... I fitted these all round with the pads just a year ago and have only done 4k in them..... bedded them in properly as per zmans sticky.. These have been fantastic brakes and I have been really impressed with them, but only 4k.....and gone already..... starting to wish I had gone the dba route...
-
Hi guys, I have had this problem in the past and they are pretty much related to adjusting the clutch pedal. I adjusted my pedal down to slightly below the brake pedal and noticed a fantastic improvement initially. But after a few hundred miles the pedal started sticking half way down and I had to use my toe to return it. This was caused by taking the pedal too far down on adjustment past the natural return point of the spring. Adjusting it back by 1 thread fixed it. Then when I changed the clutch and put on a light weight fly wheel, the problem returned, but the pedal was lower than previously adjusted. So I adjusted out again by another thread and ran it for a few hundred miles and adjusted back down again....problem solved. You just need to make sure your adjustment doesn't take out the return tension of the spring.....especially in older cars where the tension may not be as good as from new.... But I also agree that the slave cylinder can be a problem as well......
