


Mack
-
Posts
292 -
Joined
-
Last visited
Content Type
Profiles
Forums
Events
Gallery
Store
Everything posted by Mack
-
Happy Birthday mate!
-
+1 I had the same issue after hitting a badger. He sells them for a good price and importantly the fixings kit.
-
I wish I did mine ages ago, and I hope someone finds this guide useful. Looks great combined wtth a stubby and Likwidart badge.
-
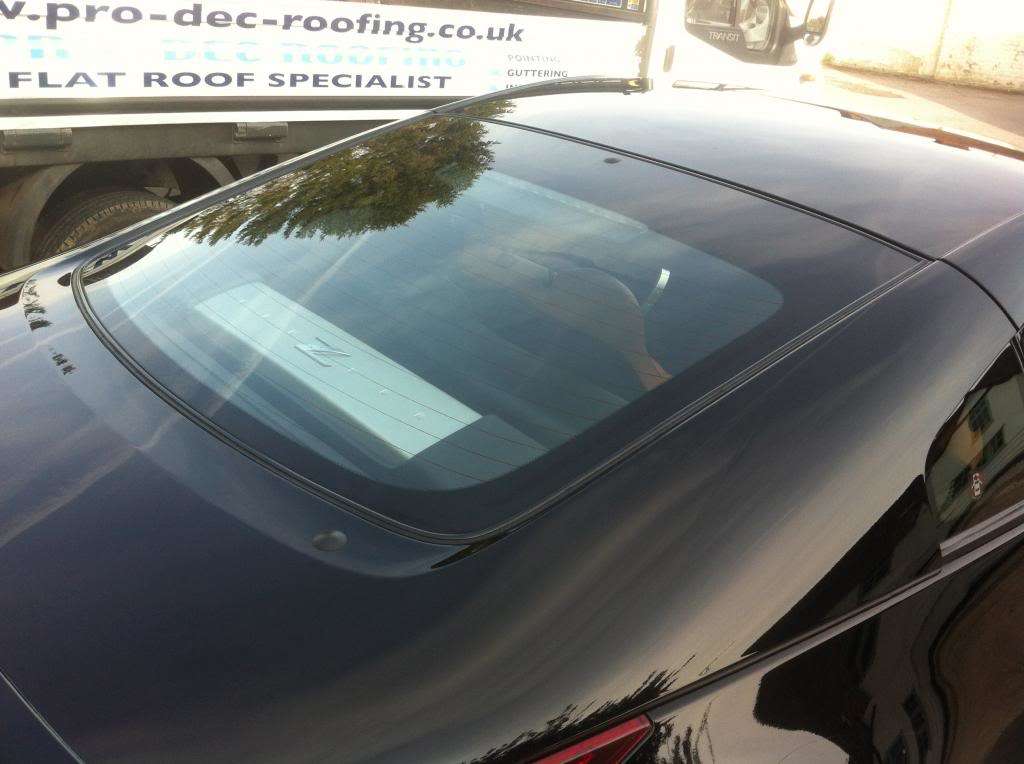
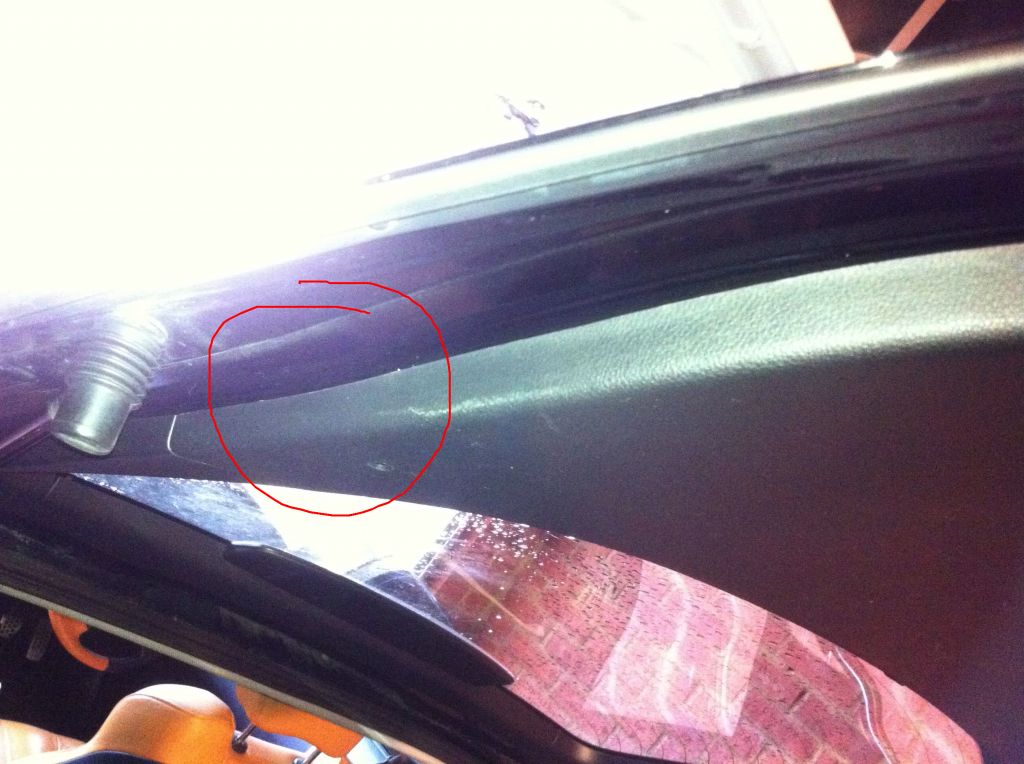
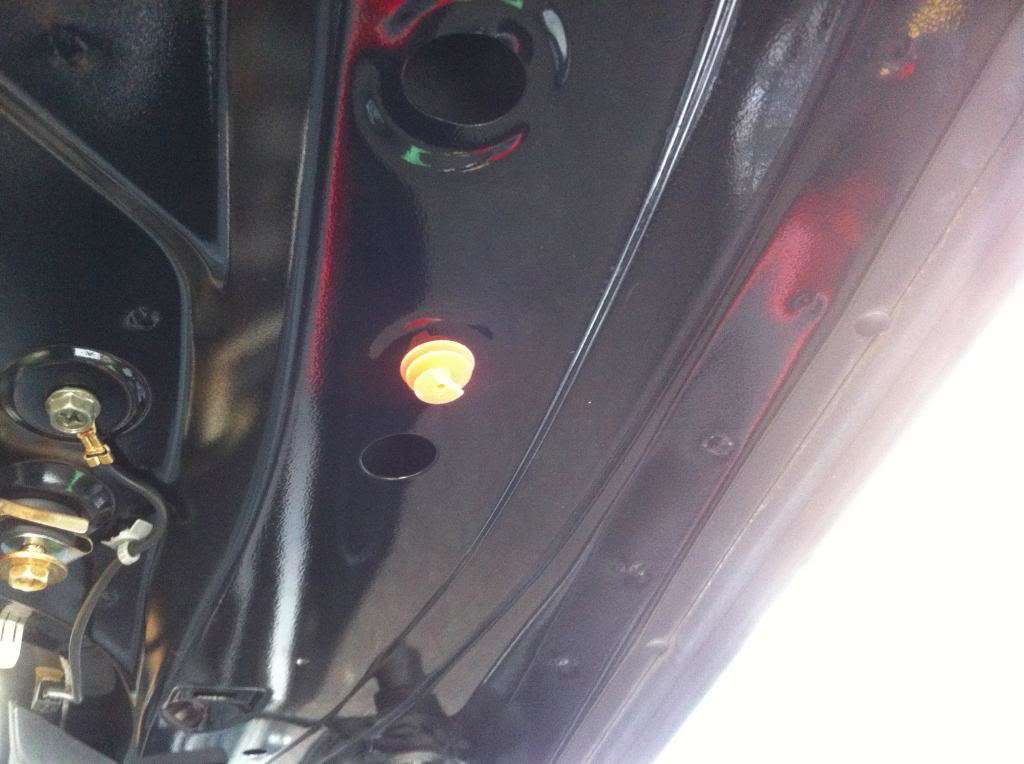
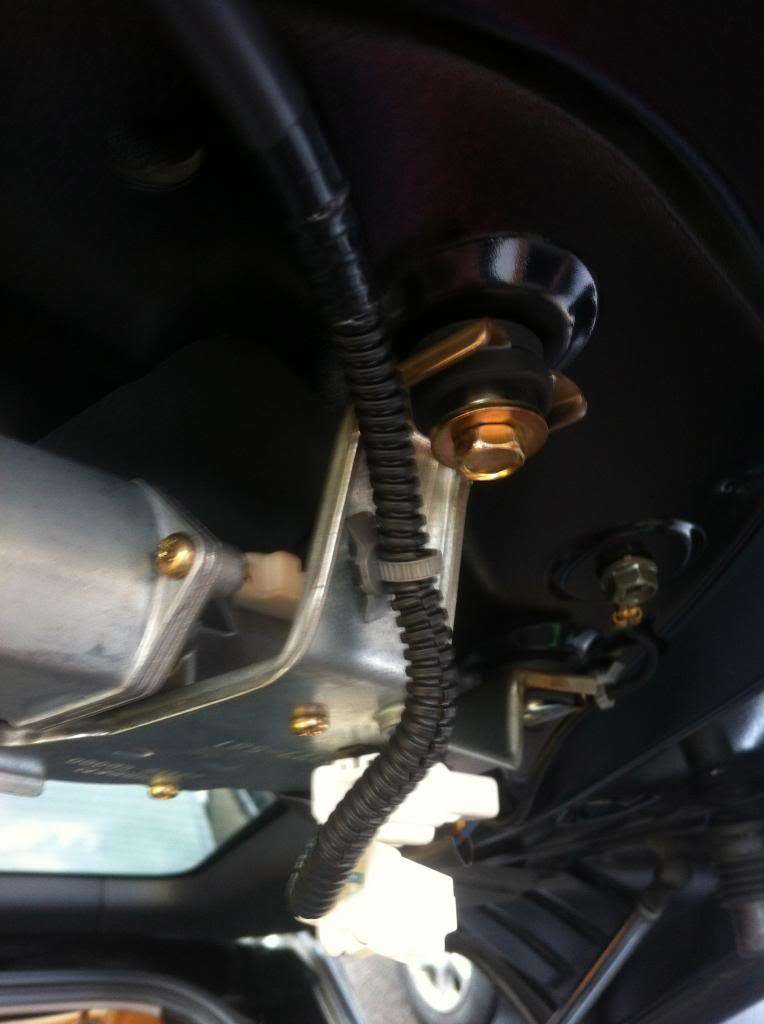
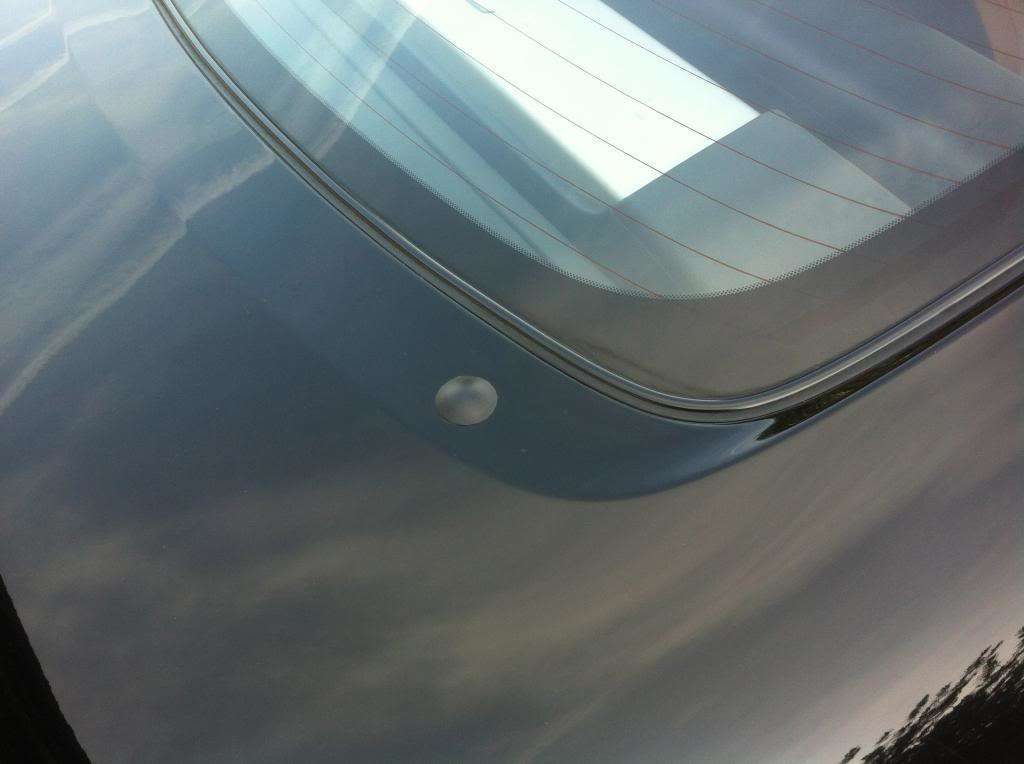
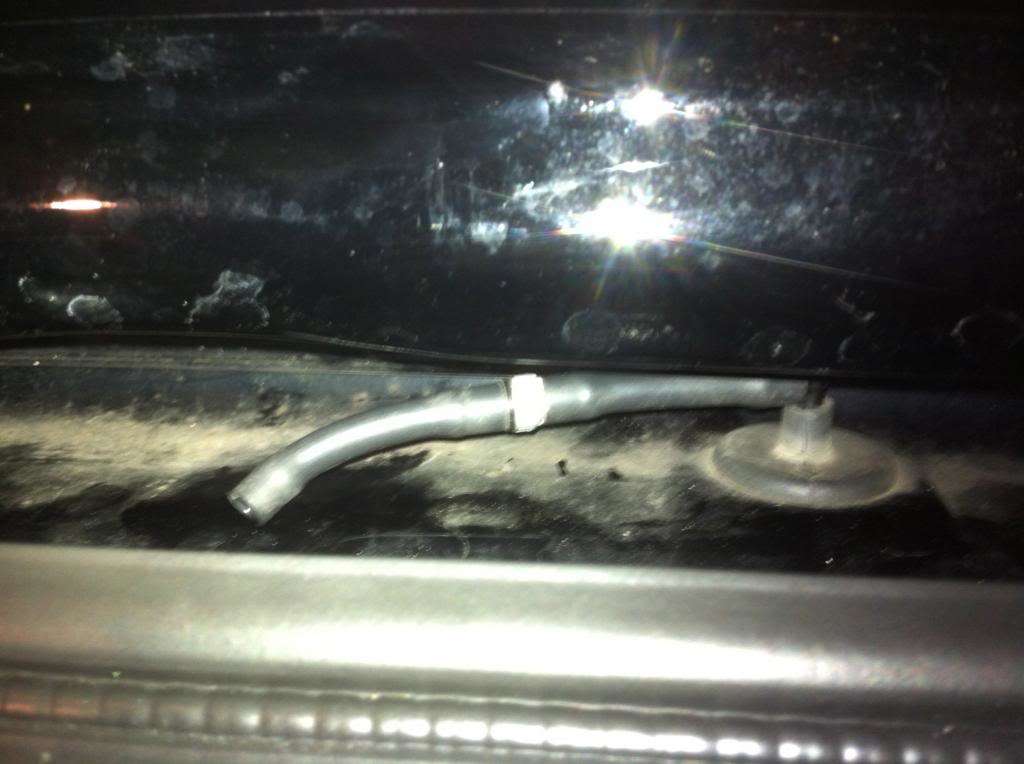
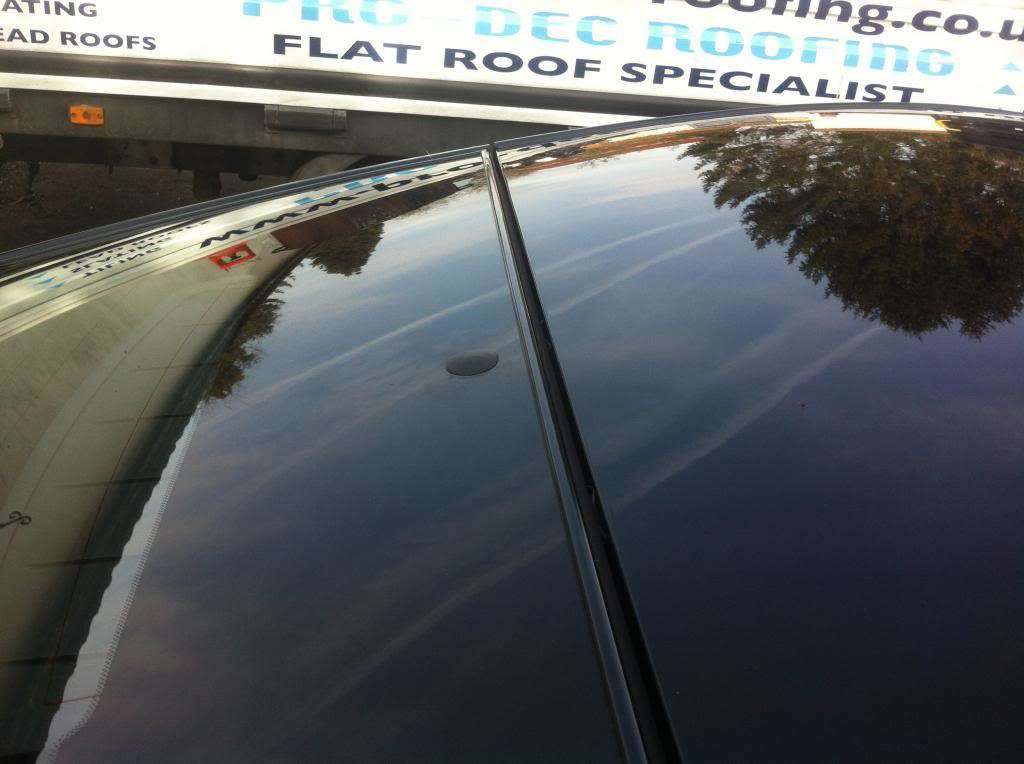
This is my first guide. If I have missed something or you know a better way please post and I will update the guide. As always do this at your own risk, this guide shows what I have done and theres no guarantee I'm correct. Whats the benefit? 1) It makes the rear end look very sleek. 2) Small weight reduction which has helped my "double tap boot" problem. (While your at it you can also remove the boot weight) 3) Can be just as easily reversed. Whats the downside? 1) You loose use of the rear wiper and if you wish, the spray nozzle. Personally I haven't missed it. The rear window can also be treated with Rainex to repel water. 2) If your car is not black you will end up with a small black spot on the boot lid from the grommet. Because the grommet is rubber I don't think it can be sprayed. If you must have the same colour you will need to find an alternative. What parts do it need? Whats the cost? This mod is about as cheap as it gets. You will need a 25mm grommet and if you wish to also remove the spray nozzle a a 22mm grommet. Halfords Blanking Grommet 25mm (Code HFX321) £1.79 http://www.halfords....tegoryId_255229 Halfords Aerial Grommets 19, 22 and 24mm (Code HFX215) £1.79 http://www.halfords....tegoryId_255229 I haven't been able to find the 22mm seperately. Total Cost: £3.58 Optional: If the wiper grommet leaks it will leak into the boot, it seams water tight on its own but just to be sure I put some black silicone sealant on it. Granville Black Silicone Sealant 40g £4.99 http://www.halfords....catalogId=10151 The spray nozzle is not a problem if it leaks, it is on the wet side of the boot seal where rain water drains away. It is also set into the glass so its not going to rust. What tools do I need? 1) Spanners to remove the wiper and motor. 2) Possibly a flat bladed screw driver and old bit of shammy to get the trim off. 3) Some gaffer tape to secure the resulting loose plug and stop it rattling. 3) If removing the spray nozzle a pair of self grip pliers (mole grips) and an old piece of shammy. What do i do? 1) Pop open the cap covering the nut on the rear wiper and undo the nut. 2) Remove the wiper. I found trying to pull the wiper straight off didn't work. Instead I rotated the wiper with the threads all the way round and kind of unscrewed it. 3) Open the boot 4) Remove the plastic boot trim. Its held on my plastic poppers so it just needs to be pulled off. Start here: Get your fingers under the plastic and give it a pull. Once you have unpopped the first popper move down and unpop the next. If you can't get enough leverage use you screw driver with the shammy to protect you paint work and lever it off. WARNING: Keep moving your hands close to the next popper otherwise you risk damaging the boot trim. Remove the boot trim and put it somewhere safe. Some of the poppers may break like this: Using the screw driver and shammy gently leaver them out being careful not to damage them further. On refitting they can be rotated slight so the undamaged part holds fine. If you badly break them probably PM ZMANALEX for replacements. If you are removing the spray nozzle use the same method for the upper trim. 5) Unplug the wiper cable You may need to gently snip the cable tie holding on the wiper wire. 6) Undo the bolts holding on the wiper motor and remove from the car. At this stage you may also want to remove the boot weight. 7) Fit the 25mm Grommit into the hole. Just push it on from the outside with some sealant if desired. Make sure its fitting snugly. Should look like this: 8) Remove the spray nozzle if desired. Pull the sprayer flexible pipe off. It just pops off. The white section is a one way valve. You can refit it the other way around to stop screen wash leaving the car. I haven't personally tried it but in theory it should work. If you accidentally spray anyway it won't get into the car. I then taped the loose end to the boot to stop it rattling. Use the grips with the shammy to protect the sprayer grip if from the outside. You want just enough force to hold it firmly. Give it a pull and wiggle and it will pop out. 9) Fit the 19mm Grommit to the hold in the same way as the 25mm one. Should look like this: 10) Refit the boot trims: Remove any of the poppers stuck in the tailgate metal and fit them into the boot trim. Then just line them up and push them back on. Once I had a few of them on I just used the bottom of my fist to bang them in. Job done, Like the new look? Changes: Updated with correct grommet size for spray nozzle hole
-
Great video, made my day!
-
Looks like a full stall with a wing drop (the early stage of a spin) with the aircraft remaining stalled all the way to the ground. It could be one of many things, or a combination of factors. I've heard rumours the aircraft was carrying vehicles which may have broken free and rolled back during climb out. Such an aft centre of gravity would make the aircraft unflyable. From friends who fly the 747 care has to be taken balancing the aircraft, by pumping fuel between the main tanks and tanks in the tail to keep the centre of gravity within limits. Another cause could be crew disorientation. The "black boxes" (which are actually day glow orange) should reveal the cause. Once they have entered the stall the only way to recover is to reduce the angle of attack, (the angle between the wing and the airflow) by pitching the nose down until the angle of attack is reduced and the aircraft will start flying again. Sometimes reducing thrust is the only way to get the nose down, this is because the engines are mounted below the wing, applying thrust causes the nose to pitch up. Ether way in this case, once the aircraft had entered the full stall I think the altitude would be insufficient to complete a recovery.
-
Thanks Gudzy and Paddy
-
I think that may well generate lift! By the way, where I'd you get the Z badge from?
-
Ill take offers on all the above. If tyres fail to sell they will be drifted!
-
Just an update if its useful to anyone. I found the positive battery terminal was loose, very loose. It could be lifted off! The whole battery was loose, the rear nut was missing. I've secure the battery and cables, ill wait to see if the fault comes back.
-
I forgot to add I recently had a bizarre problem that might be related. A few weeks ago I left my car in a locked car park over night, I went down to pick it up and found the car completely dead. No signs of life when trying to unlock and even when turning the key. I hadn't left the lights on but I guessed maybe the boot light had drained the battery or the battery had given up. I went and got a ticket for the car and went to call a friend to get a jump start. Not thinking for a moment I went to lock the car using the blipper and it responded normally, the harzard lights flashed and the car locked. So I unlocked it via the blipper and got in. The car started normally with no problems however I noticed the following: All the stored radio stations has been lost Both trip mileages had reset to zero I see the workshop manual references problems with the starting system as a possible cause of the P0340 error.
-
Ive seen the recall notice, it looks like for US 350Z's manufactured in 2003. Ill give the dealer a call tomorrow.
-
After an enthusiastic drive I stopped the car. Shortly after I had to move my car. When I tried to start it the MIL light plus the slip and Traction control lights came on. The car started but took about 2 seconds of cranking to fire. Later the MIL light remained on but the car started and drove normally. Ive plugged in my ODB2 reader and its showing code 0340. The workshop manual shows it to be Cam Shaft Position Sensor (Phase) in Bank 1. I reset the code and again it came on when restarting the car shortly after a drive. Today however It came on while I was driving. Im going to take a look at it tomorrow for any obvoius wiring damage. Has anybody else had this problem? And will driving the car (gently) with the light on do any damage?
-
All Items located 10 mins drive from Stansted airport, any questions / inspection welcome. Payment via PayPal (+4%), bank transfer or in person. Sensible offers considered. All items can be collected or postage arranged. Genuine OEM 350z rear Nissan Logo. Replace your badge or paint for a project. Some very slight marks but virtually unnoticeable when fitted. £15 delivered. 2 x sets of Energy suspension front and rear poly bushes: Included with the energy suspension master kit I purchased on here, for some reason it includes enough bushes for 2 cars. Rears (21mm) £20 delivered, fronts TBA as im still trying to figure out which models they fit. Champion EON 3 703 Spark plugs: These are NOT for the Zed, I bought them for a Mondeo and never fitted them. Check Halfords for other cars they will fit £15 delivered. Front and rear Anti roll bars from a GT4 350z Some surface rust especially on the rears. £20 each. Front tyres: Vredestein Giugiaro Design Ultrac 225/45/18 Standard 350z front size, 5+ mm tread £100 ono collected. Rear Tyres: Avon ZZ3 245/45/18 Standard rear size 3mm tread £50 ono collected. Sold Items: Genuine OEM 350z rear logo Compression Rod bushes Cats
-
Is the stereo a straight fit into a UK 350z or is an adapter needed?
-
Are these forged wheels? How much to they weight?
-
Bushing kit recieved and complete, There's a hell of a lot of bushes! Thanks for a straight forward trade
-
When mine eventually goes I'm going the same way
-
Depends what you want. If your looking for a nice shiney exhaust but need to justify the expense to the missus then here's your chance. The back box alone costs £500 from Nissan. If you looking for a quick fix you can buy this: http://www.ebay.co.uk/itm/Exhaust-Pipe-Connector-Sleeve-Joiner-2-3-8-60mm-Clamp-On-Including-Clamps-/111026647582?pt=UK_CarsParts_Vehicles_CarParts_SM&hash=item19d9b4321e I've got one fitted to my car, it does the job and passed the MOT. The pipes have to be cut and bent a little to make it fit and I recommend using better clamps. I think eventually its going to have to be replaced but its done 6 months so far.
-
Sump spacer is the one also an oil pickup spacer to go with it. More oil for track days. Ill PM Tarmac
-
Im looking for a 350z DE sump spacer, Can collect if near Stansted or can pay postage and payment via Paypal.
-
How many miles on the camber arms?
-
Check your PM's
-
Trouble removing nuts from ball joints, for ball joint change. Please help
Mack replied to Jon T's topic in 350Z Technical
Borrow or buy an impact gun, that will get it off. I bought one for this specific purpose. -
I feel your pain, my 350z has had all 3 panels on the right side keyed
