M1 6RYF Posted October 1, 2015 Posted October 1, 2015 I have owned the Zed since Aug 15, so I have not had the car for that long. I have already noticed I have the modding bug, therefore, I might as well start a build thread. I don't expect this thread to be very impressive but it's a way to get better at using the forum and bloody upload pictures (near impossible). Anyway, I bought a 2005/6 350z on a 55 plate. purely because I didn't want to spend £505 a year on tax. I also thought it would leave me some spare cash for a few mods. I decided against a GT spec purely to save some cash. I didn't want the leather seats or Bose because I planned to get some after market seats and sound system. My initial plans are as follows: Spacers Lowered on springs Stubby ariel Bucket seats Aftermarket wheel Some sort of bodykit I'd say just the bog standard things people want to do. I have decided to go for aesthetics first and power at a later point. I'd like to get used to 280bhp before I consider improving. The first thing I did was 25mm spacers on the rear and 20mm on the front, which, i was pretty pleased with, i'd say it completely changes the looks of the car. Next, I decided that i didn't like the blanking plate for the heated seats that I don't have. So I put switches in. They currently are redundant but I have plans for them. They are carbon fibre dipped jet style switches. Once opened and turned on they light up blue. I managed to get myself a cheap Japspeed K1 from a fellow member which i was advised against if i valued my hearing. I ignored the crowd and wondered how bad could it actually be. Its bloody loud without the bungs in but i have grown to enjoy it. I would like to get some HFC's and a Y pipe but i don't think i would be able to handle the noise. I prefer the response of the exhaust with the bungs in, but i don't think it looks very nice at all, so they had to come out! The bungs are below After the exhaust, I went on eBay to see what small mods i could do with out breaking the bank, whilst saving up for some lager mods. I fancied a new gear knob and like Blox knobs but I wondered if i could find something cheaper. This is what i found and decided on £15 from Ebay including delivery, I thought it was a bargain and love the feel and weight. I considered a short shifter but like i said, that will come during my 'performance phase' At this point my logbook arrived and my private plate had to go on. I think it changed the look of the car quite a bit. 2 Quote
GMballistic Posted October 1, 2015 Posted October 1, 2015 Great start and good luck with the rest of your plans. 1 Quote
M1 6RYF Posted October 1, 2015 Author Posted October 1, 2015 I bought the Zed as a hobby to try different things. I thought I'd give painting ago. I started by sanding the plastics down and applied 3 coats of plastic primer. The only annoying part was letting the primer dry for 24 hours before putting the paint on. So 24 hours later, the primer was dry and ready to be painted. I gave the primer a quick 'key' and off I went. In hindsight, I should of gone for a darker metallic blue but after all the work i have put in, i will atlas trial it in the car. Once the paint had dried, it seemed very flat and matt. I bought a can of clear lacquer to add a shine to the paint. This is how the paint came out. I personally thought, once it was in the car it looks very nice, I also think it is a colour that looks a lot different and better in the flesh. I painted the centre console, driver and passenger side switch panels and the panels that provide air to the doors. I am pretty happy with the finish, I think i'd happily pay for the finish I managed to create. Further painting plans include: The rear strut brace plastic Door sills Engine bay parts 1 Quote
M1 6RYF Posted October 1, 2015 Author Posted October 1, 2015 Before I painted my interior, I tried vinyl wrapping, I liked the B pillars but didn't do very well on the interior. For a first attempt, I was pretty happy with the B pillar. I thought this driver side switches turned out very well, until i tried to do the pocket. Quote
M1 6RYF Posted October 1, 2015 Author Posted October 1, 2015 I plan to get a double din head unit, but this will do for now I have ordered a Samsung 7 inch tablet and a OB2 adapter to put in the cubby. I have also ordered a reverse camera too install. Quote
parello9 Posted October 1, 2015 Posted October 1, 2015 spray the bungs matte black and then pop em back in! thats what i done and you dont notice them as much! 1 Quote
M1 6RYF Posted October 1, 2015 Author Posted October 1, 2015 I bought a few parts to start 'bringing' underneath the bonnet but decided to leave that for a while. I have installed the oil catch can but I sold the hoses to another member. I need to take a photo of the catch can installed. The catch can is unbaffled and was only £15 to buy off Ebay. I had to buy some blue hose to go with it because it came with some garden hose lol. Don't make the same mistake as me and buy cheap hose. It seems to close under vacuum. Quote
M1 6RYF Posted October 1, 2015 Author Posted October 1, 2015 spray the bungs matte black and then pop em back in! thats what i done and you dont notice them as much! Thanks for that, such a good idea! Any photos? Quote
chirag1988 Posted October 1, 2015 Posted October 1, 2015 Damn Mitch, you really want a double din don't you build coming along nicely Quote
parello9 Posted October 1, 2015 Posted October 1, 2015 had a quick look through my old build thread this is not the best photo though lol Quote
monkeybrain1234 Posted October 1, 2015 Posted October 1, 2015 Nice fighter jet switches - what are you going to connect them to?? Quote
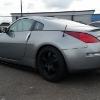
M1 6RYF Posted October 1, 2015 Author Posted October 1, 2015 Next on my list was to lower the Zed, I fancied some coilers but decided to go cheap! I bought some Apex springs off Ebay due to wanted 30mm drop. If i could of found some springs to drop 40mm, I would of gone with them. A quick before picture I need to take a better after picture, but this is all i have got for now. This picture was taken just after the springs were installed. About 5 miles and 20 mins later, I noticed a considerable difference. Because I haven't installed adjustable camber arms yet, I have noticed slight negative camber. I don't mind the camber but I think it could do with a wider spacer just to push it out a little more. I plan on getting some aftermarket alloys very soon. I would preferably like some 19" Rota Grid style alloys in black or a combat grey. I have also just bought a few body parts from Tarmac Sportz to install so hopefully I can get them put on when they arrive. Quote
M1 6RYF Posted October 1, 2015 Author Posted October 1, 2015 Damn Mitch, you really want a double din don't you build coming along nicely Yeah I really want a double din. Don't know what happened there. Please can a mod delete the repeated post 1 Quote
M1 6RYF Posted October 1, 2015 Author Posted October 1, 2015 had a quick look through my old build thread this is not the best photo though lol Thanks for the pic, it looks really good! I shall definitely be doing this. Quote
Bodyboarder81 Posted October 1, 2015 Posted October 1, 2015 Nice fighter jet switches - what are you going to connect them to?? Hearing aid switch Good progress 1 Quote
M1 6RYF Posted October 1, 2015 Author Posted October 1, 2015 Nice fighter jet switches - what are you going to connect them to?? I haven't decided yet. Any suggestions? I have thought about a few things, such as; Amp kill switch, some sort of lights, wether that be under car lights or something. 1 Quote
glrnet Posted October 1, 2015 Posted October 1, 2015 Damn Mitch, you really want a double din don't you build coming along nicely Ha ha, multiple posts deleted Quote
a2orry Posted October 1, 2015 Posted October 1, 2015 Good start being me I'm going to recommend you back to the start with the spacers by the look of pictures you have fitted them over the top of alloy corrosion the white powdery stuff left behind when you take the wheel off . Take them back off and give the disc a good clean medium grade sand paper works a treat. Quote
M1 6RYF Posted October 1, 2015 Author Posted October 1, 2015 Good start being me I'm going to recommend you back to the start with the spacers by the look of pictures you have fitted them over the top of alloy corrosion the white powdery stuff left behind when you take the wheel off . Take them back off and give the disc a good clean medium grade sand paper works a treat. I noticed that, thanks for the advice! Definitely needs sorting! Quote
a2orry Posted October 1, 2015 Posted October 1, 2015 It's not just so it looks clean it's to make sure the spacers are bolted to a perfectly flat surface I'd even say get rid of eny corrosion that may be on the wheels too. Quote
M1 6RYF Posted October 1, 2015 Author Posted October 1, 2015 I have already experienced a spacer not being correctly bolted on. Over time the wheel almost came off! Quote
a2orry Posted October 1, 2015 Posted October 1, 2015 I wouldn't have expected that hope everything was OK. Quote
GMballistic Posted October 2, 2015 Posted October 2, 2015 Nice fighter jet switches - what are you going to connect them to?? I haven't decided yet. Any suggestions? Oil slick release from the rear, front machine guns and a passenger ejector seat ~ standard equipment on the rare "007 350Z GT" model. Quote
M1 6RYF Posted October 7, 2015 Author Posted October 7, 2015 So it's time for a little update. I apologise for the short posts but I am using my tablet. Anyway, I receceived these parcels. Can anyone guess where they came from? Quote
M1 6RYF Posted October 7, 2015 Author Posted October 7, 2015 I had to fight with the bumper. Unfortunately, the bumper had a crack in it and a few of the screw holes snapped prior to me owning the car. The undertray was also a bit worn. I think i will need to replace it soon. Luckily the crack was under the bumper so it can not be seen. I drilled 2 small holes and secured the small crack with a cable tie lol. Hopefuly that will stop the small crack spreading. Hardly worth a new bumper at the moment. Quote

Recommended Posts
Join the conversation
You can post now and register later. If you have an account, sign in now to post with your account.