davey_83 Posted February 22, 2022 Posted February 22, 2022 Very nice work fella, loving the updates. How you getting on with your billet front lower arms now? 1 Quote
Azurez33 Posted February 23, 2022 Author Posted February 23, 2022 22 hours ago, davey_83 said: Very nice work fella, loving the updates. How you getting on with your billet front lower arms now? Thanks mate, definitely getting there but always something else! yep still no issues and I really appreciate how easy they are to clean! did you order any in the end? Quote
davey_83 Posted February 23, 2022 Posted February 23, 2022 Literally always something else ay. Yeah ordered them back when we were chatting after my MOT and the OE inner bushes are now shot, so these are going in. Yeah they do look a treat to keep clean at least. I went for the silver ones. Quote
Azurez33 Posted February 23, 2022 Author Posted February 23, 2022 You know it! Oh sweet! Don’t forget about the washer haha! Oh god they do go nice and mushy when they’re old. Out of all the nice colours you could have you went for silver haha! will look nice either way mate 🙂 Quote
Azurez33 Posted March 6, 2022 Author Posted March 6, 2022 Moving on- continuing with some engine upgrades! After speaking to the nice team at Japfest and also getting a discount code I decided to get a nice new Ramair filter! 76mm with a velocity stack! it’s very pretty! Aswell as this I had also bought a nice new cnc aluminium maf housing, along with a silicone joiner so I could keep everything look clean and fresh! I have as you can see kept my jwt heat shield and my own fabricated filter bracket! Aswell as painting the expansion caps! The science behind the velocity stack speaks for itself really! Getting prepped for being mapped at Horsham! 1 Quote
Azurez33 Posted March 6, 2022 Author Posted March 6, 2022 Following on- Staying on the subject, whilst replacing a fair bit of the intake system I felt it necessary to fit some cold air ducting as the z has a habit of sucking in hot air 😂 So whilst ordering the cone and stack from Ram air I also ordered some air ducting with dual velocity stacks! The idea buying two stacks with the ducting was so I could have a solid mount as the ducting pliable it’s also liable to move around if not secured efficiently! so I cut the little segment here- removed the Oem intake shroud, and fitted the pipe work here, utilising a washer and long nut and bolt through the slam panel like so Quote
Azurez33 Posted March 6, 2022 Author Posted March 6, 2022 I then needed somewhere to install the primary stack where It wouldn’t be an eyesore and would look neat- so I chose to use this air Chanel guide on the passenger side as it was removable and easy to get to! looked really smart once installed! used a sharp knife and dremmel to remove the waste and just slotted it through- had to remove the three body trim clips and it came straight out Quote
Azurez33 Posted March 6, 2022 Author Posted March 6, 2022 Connected both ends of the congraluted pipe up and had to try and route the pipe in a way to make sure it wasn’t too straight so it’d suck in as little water as possible, not that it would as the filter is a way away from primary entry, also pricked a number of water drain holes too, used a tech screw and p clip along with a cable tie to mount eh pipe bend behind the crash bar! And this is the final result 1 Quote
Azurez33 Posted March 6, 2022 Author Posted March 6, 2022 6 hours ago, HEADPHONES said: Really nice fit and finish there You’re too kind Andy! In some ways I wish it still looked like this but will have to wait for further updates 😂 Quote
davey_83 Posted March 7, 2022 Posted March 7, 2022 Absolutely love that!!!! and the new filter looks spot on, really impressed with the new pro ram. 1 Quote
Azurez33 Posted March 7, 2022 Author Posted March 7, 2022 13 hours ago, davey_83 said: Absolutely love that!!!! and the new filter looks spot on, really impressed with the new pro ram. Haha thanks mate, however I have to confess it doesn’t currently look like this 😂the filter is top notch and really impressed too! Looks mega! Quote
Monkey1983 Posted March 7, 2022 Posted March 7, 2022 15 minutes ago, Azurez33 said: Haha thanks mate, however I have to confess it doesn’t currently look like this 😂the filter is top notch and really impressed too! Looks mega! Wait till you see what he’s done ! 2 Quote
Andy_Muxlow Posted March 8, 2022 Posted March 8, 2022 That looks like a great job done there buddy. Cant wait to see this in person now, to see how it looks. 1 Quote
Azurez33 Posted March 8, 2022 Author Posted March 8, 2022 12 hours ago, Andy_Muxlow said: That looks like a great job done there buddy. Cant wait to see this in person now, to see how it looks. Thanks Andy, I was quite happy with how it all came out! Why do I feel like I’m going to disappoint everyone now 😂😂 1 Quote
Azurez33 Posted March 8, 2022 Author Posted March 8, 2022 A pre warmer for a future update, stripped and repaired the Oem fans, using a great guide on here. Stripped out the motor coils and contacts which is what usually seizes! due to the build up in scuzz stopping the contacts moving up and dow the sliders. Also I decided to take off the worn edges off the points. Little hint- use the paper clips to hold back all four then when it’s time to refit the winding the Center spindle will locate and the brushes will be in the rough position so the contacts can be released! Remove the paper clips and locate the winding and rest of the motor, and it should just clip back in, then fold back over the metal lip to encapsulate the motor- I also lined it with a bit of silicone to give it a weather seal! Reconnect the motors to the fans and happy days! - mishimoto fans are currently for sale! Quote
Azurez33 Posted March 8, 2022 Author Posted March 8, 2022 A very fun and picturesque drive down to Horsham developments with my other half to get mapped! swiftly followed by Jdm castle coombe! Photo was only the first 3 runs, I was quite happy that for an old girl she started off at 270bhp before the initial map, after the next three runs she made it back to her days of new at 285.4bhp, Jez also printed me off a joke one too! Considering the only real performance mods I’ve made being the exhaust system, Intake and plenum spacer I’d say that’s pretty much what I expected- he did also map in some pops and bangs but it does that already I think due to the single and sports cats! but does make for some smiles when doing so! so thanks @Jez @ H-Dev Onwards and upwards- oh the golf made 280 odd on normal fuel so about 300 on decent fuel with super boost and a crazy amount of torque 🤦♀️ 1 Quote
HEADPHONES Posted March 8, 2022 Posted March 8, 2022 Engine looks like it's still pulling strong 1 Quote
Azurez33 Posted March 9, 2022 Author Posted March 9, 2022 22 hours ago, HEADPHONES said: Engine looks like it's still pulling strong I was quite happy with it to be fair mate, me and Jez had a long discussion on the engine itself and the basis of if you want to actually get some power out of it then just FI it, don’t waste money on cams and headers as it’s not worth the hassle for the reward 😂 Quote
Azurez33 Posted March 9, 2022 Author Posted March 9, 2022 So…. Castle coombe photo dump! Being a mk5 prelude owner x2 I do have a bit of favouritism, as the mx5 it speaks for itself 😂 Some amazing cars there! Quote
Azurez33 Posted March 9, 2022 Author Posted March 9, 2022 Unfortunately due to timing issues I was supposed to get my freshly coated plenum back in time for Jdm coombe- but either way here it is- done by a mate of mine- illusion purple, looks really nice in the different lights, it’s not really solid purple a bit of a trick colour- based on the last picture I was going for. Since I had the plenum off about 3 times in that week I didn’t really want to have to swap it over again for atleast a couple of months 😂😂 really happy with how far the engine bay has come on! Quote
Azurez33 Posted March 24, 2022 Author Posted March 24, 2022 This now gets difficult as a fair few have now seen my current level of progress first hand! But still got to update the thread! Sticker time! Bought some of these at Japfest and the main one is advertising for my wrappers Signs central! At this point I am very happy with how it looks but there’s always a want for more. Quote
Azurez33 Posted March 24, 2022 Author Posted March 24, 2022 A few shots from Wheels on Wednesday at the weekend with @Monkey1983 the weather was alright for once! Quote
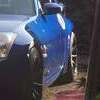
Azurez33 Posted April 15, 2022 Author Posted April 15, 2022 Finally after a long couple of days and a week of hell I’ll finish alt try to update this further- So- banana arms- for a while now they’ve been creaking like hell! So I bought a polybush power flex front kit from a nice chap on here! Removing the passenger side arm was absolute hell due to the bush being completely seized onto the bolt and not budging an inch! so with the help of a mallet two pry bars and frustration of a full working day I managed to pull the arm off and the bush stayed well attached! this was obviously part of the issue! after using the oxy and an air chisel I managed to get it moving and then drop off as I shouted Victorious jeers! managed to clean up all the bolts and put a bit of lube in so next time it’ll slide off! With the help of a trusty pneumatic press I blasted the one sides bush out, using a wire wheel to polish the inside out so there wasn’t any issues putting the new bushes in! A quick few finger fulls of vaseline on the new polybushes they popped in without any issues and then pushed the centre sleeve done aswell! when doing this it’s important to make sure the cone for the balljoint is reseated correctly as otherwise it’ll knock or you won’t get the nut back on 😂 once the arms back on then refit the w brace whilst cleaning and lubing the threads available. boom no more creaking suspension Quote
Azurez33 Posted April 15, 2022 Author Posted April 15, 2022 A day out with my work colleague and his scooby fwiends, so it was rude not to tag along- freshly cleaned and ready for caffeine and machine! lovely grounds but not what o was expecting! Quote

Recommended Posts
Join the conversation
You can post now and register later. If you have an account, sign in now to post with your account.