

Lewis Schwier
-
Posts
316 -
Joined
-
Last visited
Content Type
Profiles
Forums
Events
Gallery
Store
Everything posted by Lewis Schwier
-
Have you got a build thread?, would love to see it!
-
Xpel * Gtechniq *
-
Been following DSD for a while now, saw your car on their Instagram and thought that looked neat. Daytona Blue looks so damn good when it’s been detailed
-

NSM 350z Build...My 2nd 350z!
Lewis Schwier replied to Lewis Schwier's topic in Member Build Projects
Thank you! I'm Cambridgeshire based. Forum discount available of course LD Luxury Detailing on all platforms. -
NSM 350z Build...My 2nd 350z!
Lewis Schwier replied to Lewis Schwier's topic in Member Build Projects
Thank you! Yep been loving it, can’t wait to get back on the road -
NSM 350z Build...My 2nd 350z!
Lewis Schwier replied to Lewis Schwier's topic in Member Build Projects
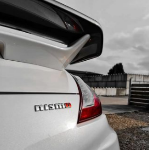
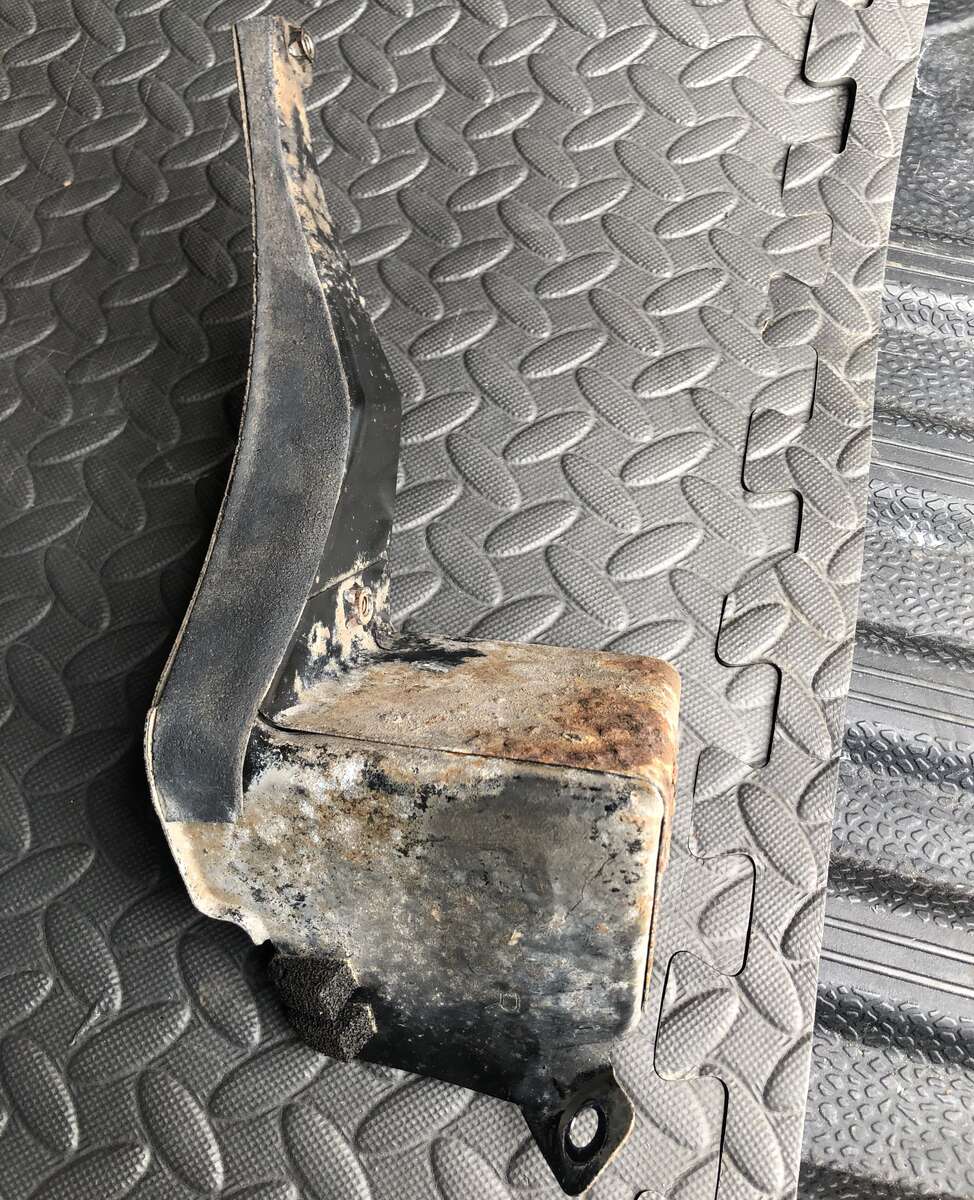
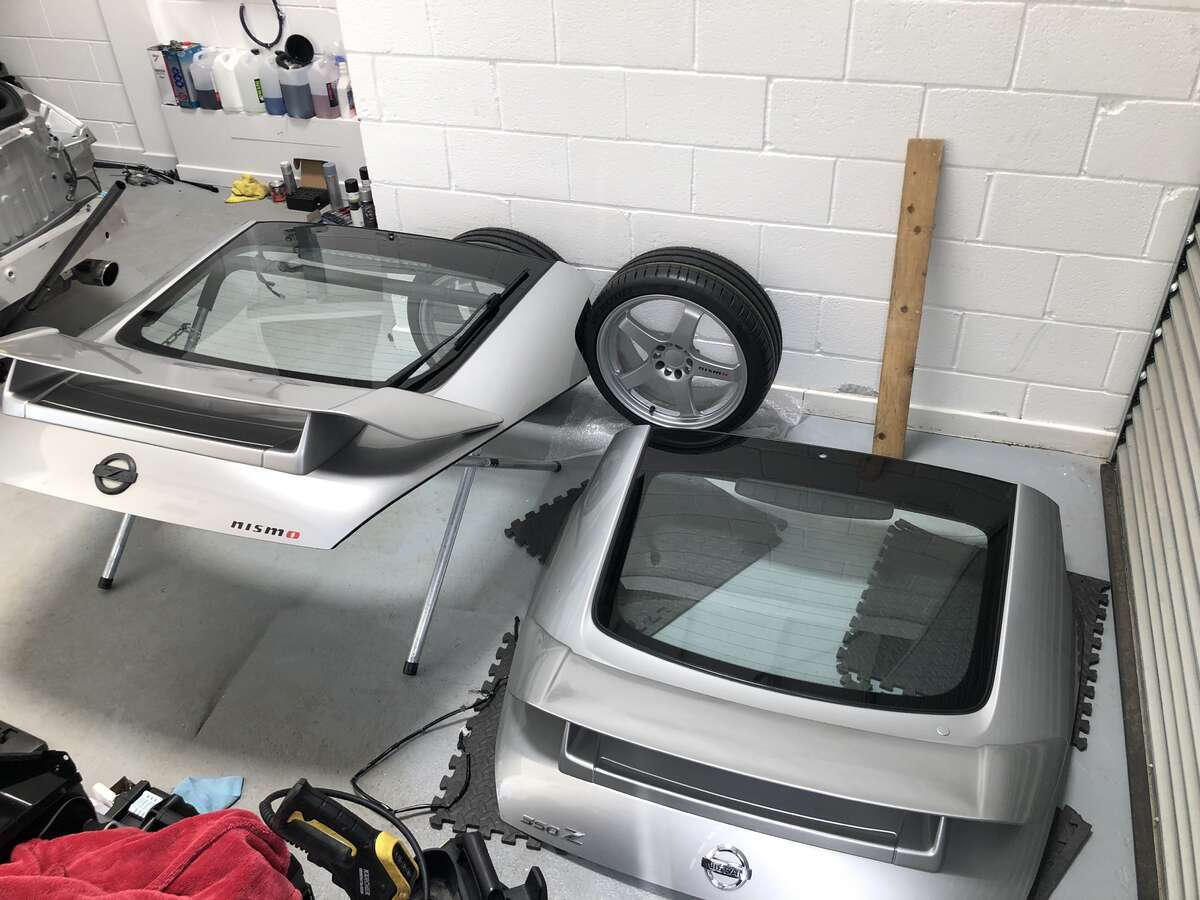
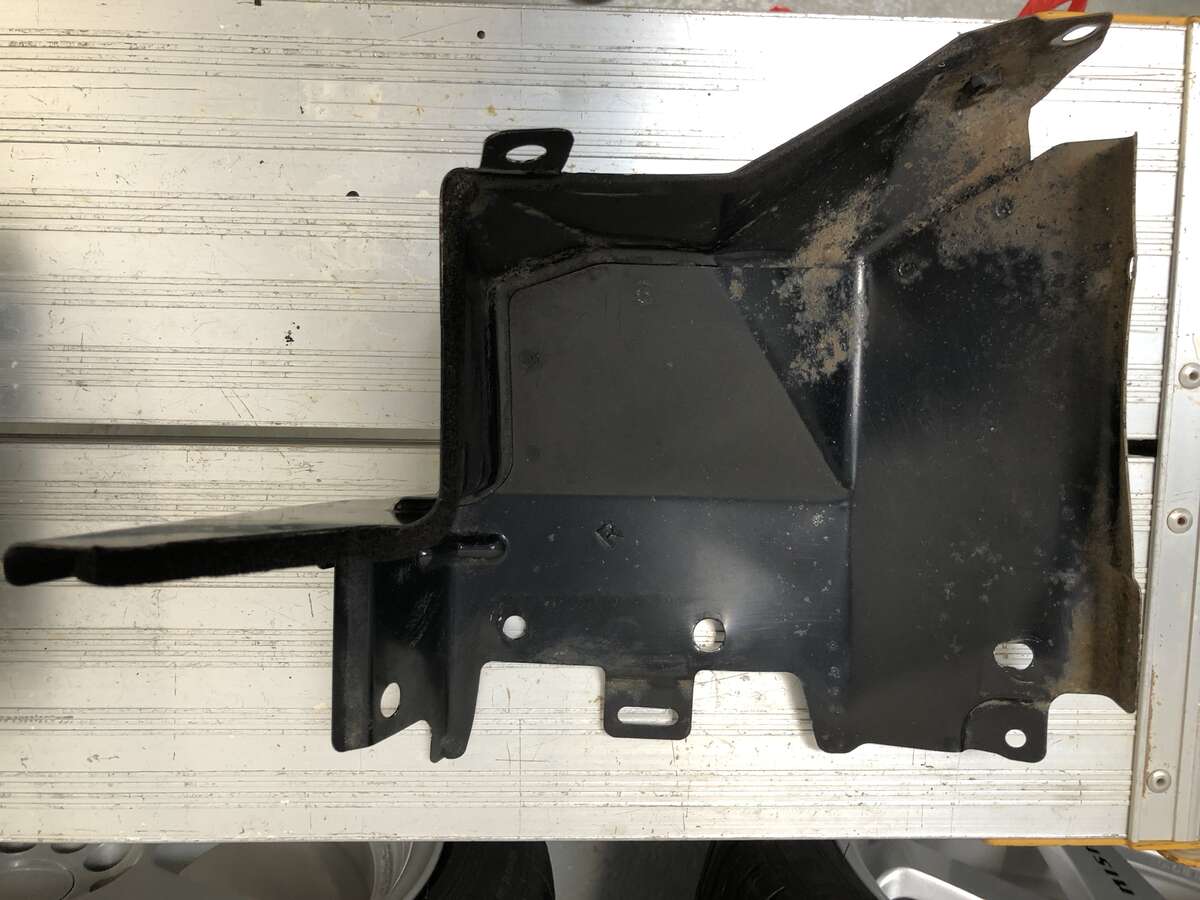
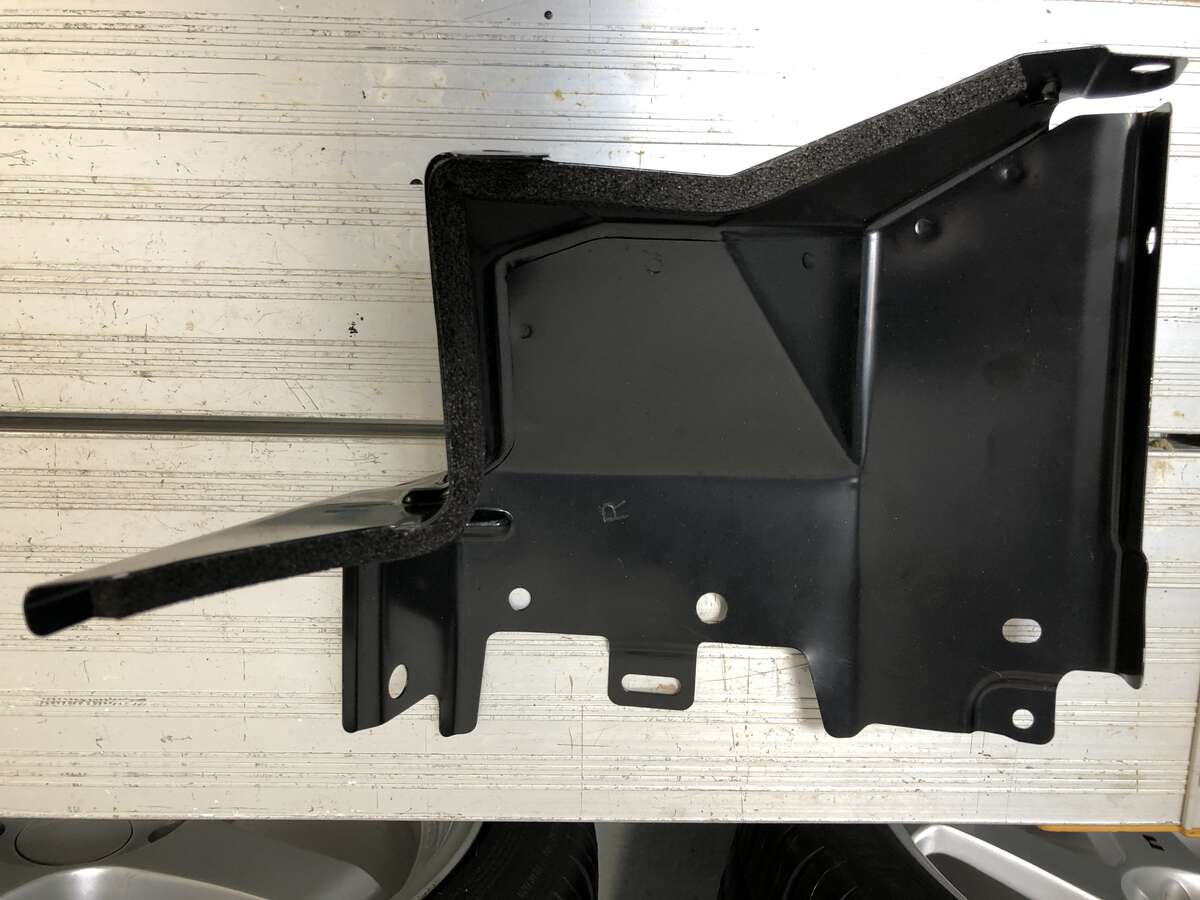
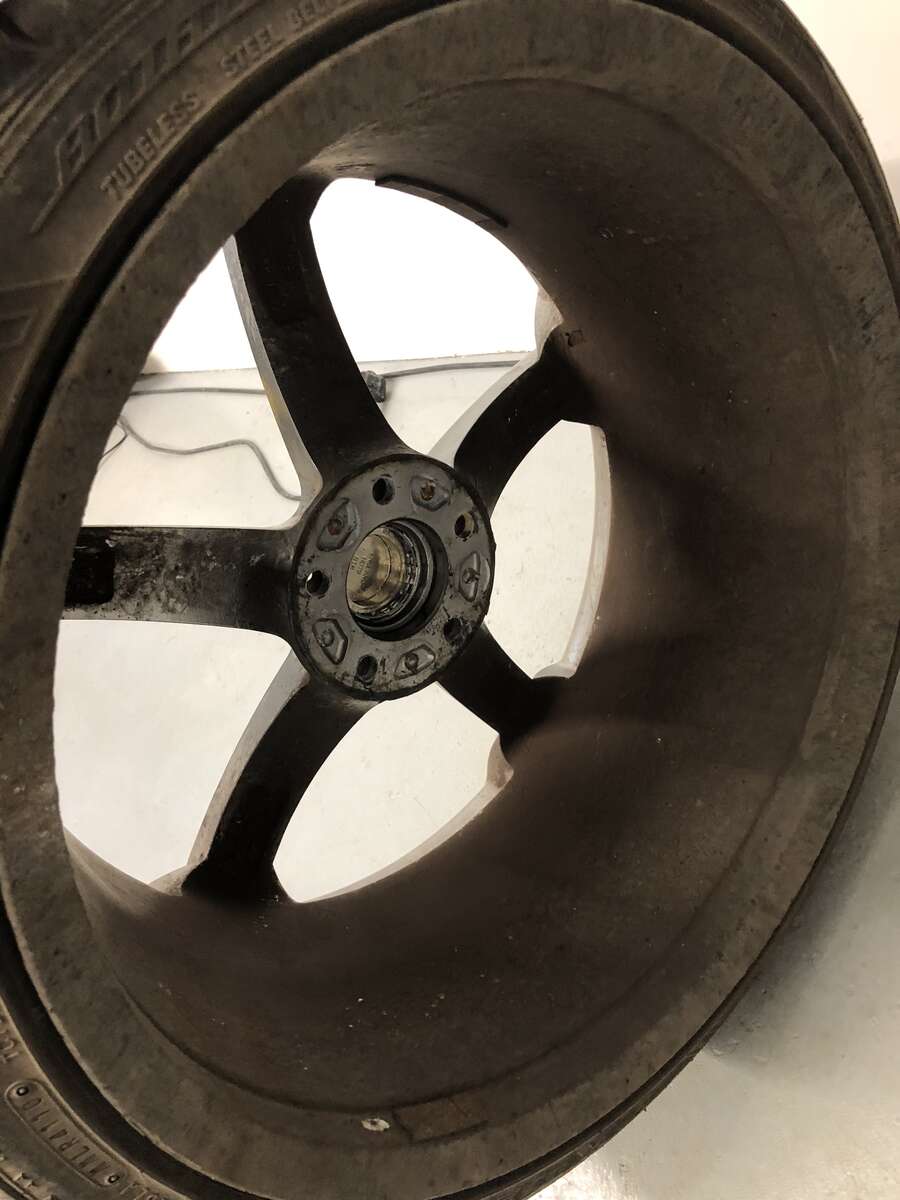
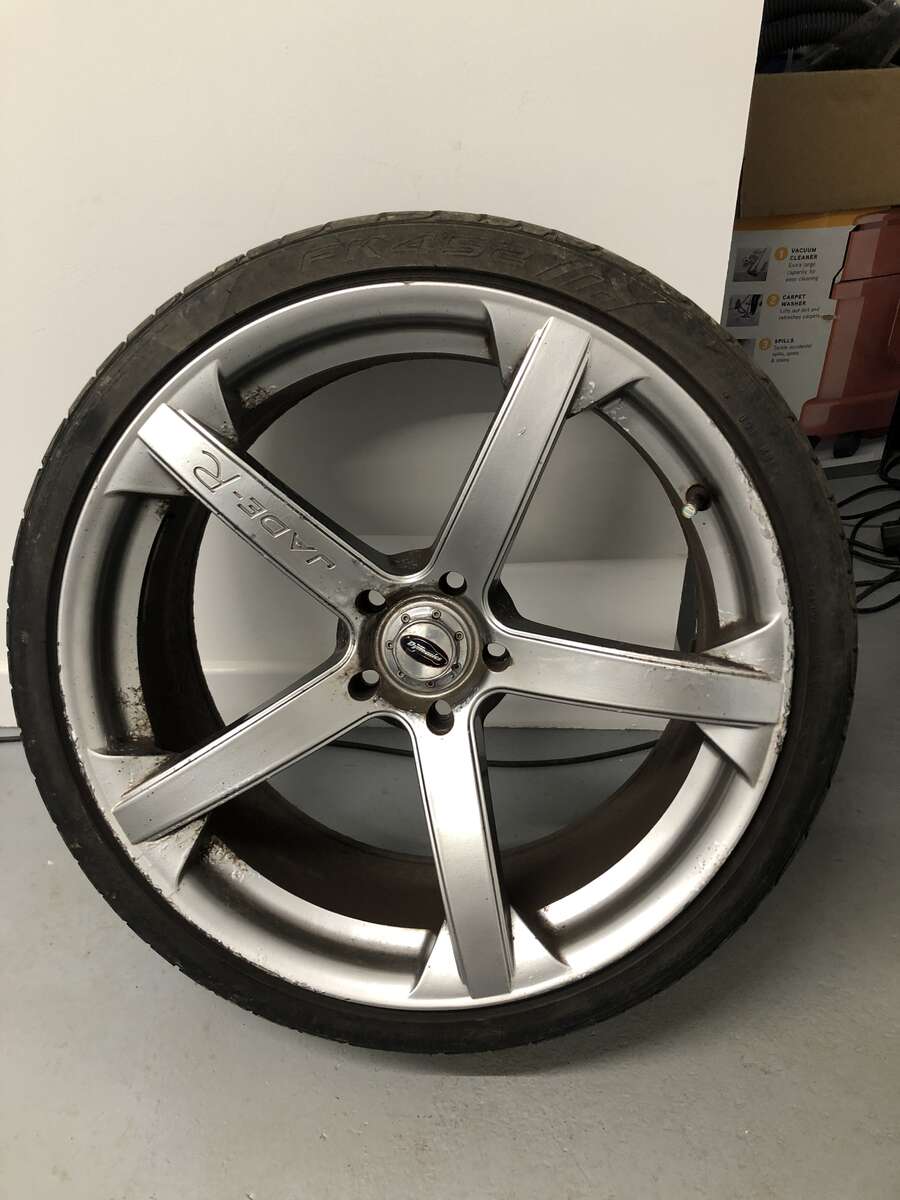
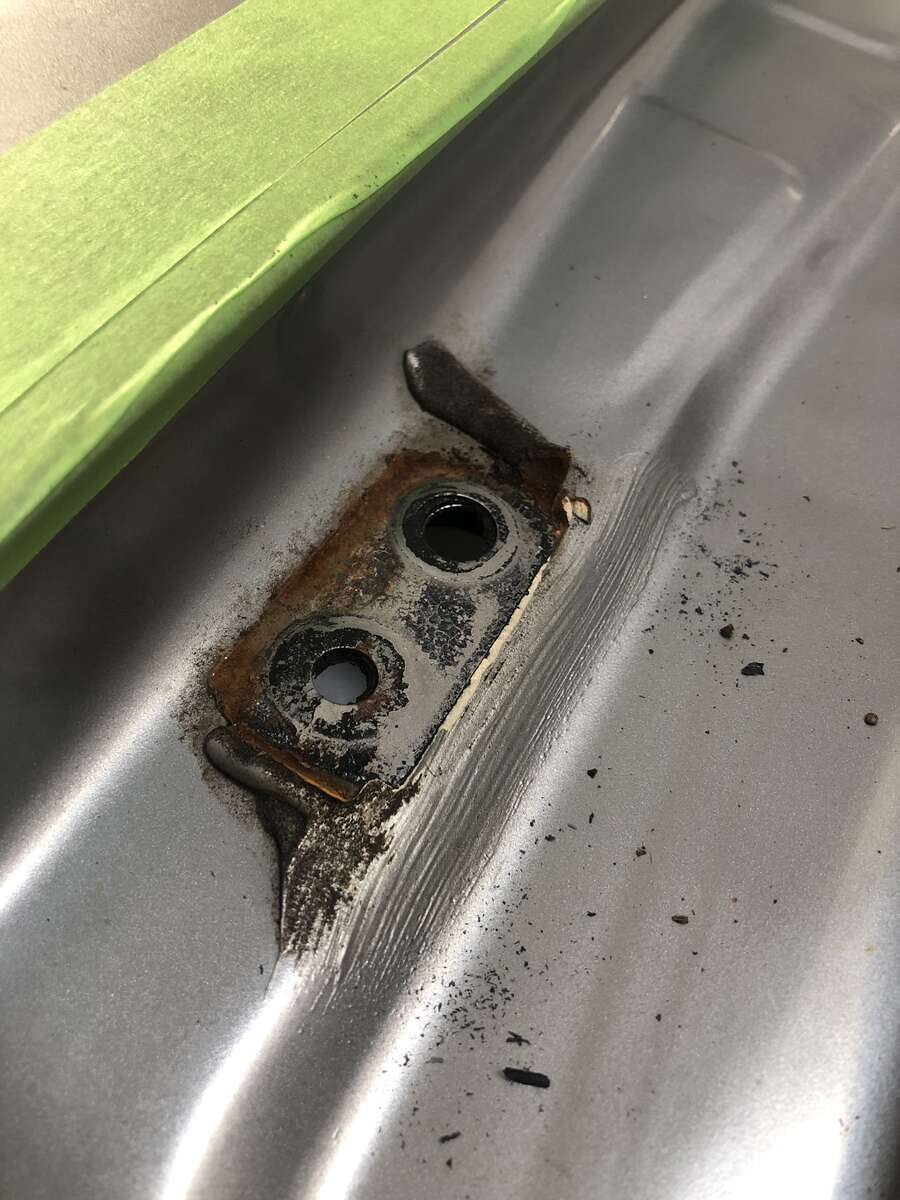
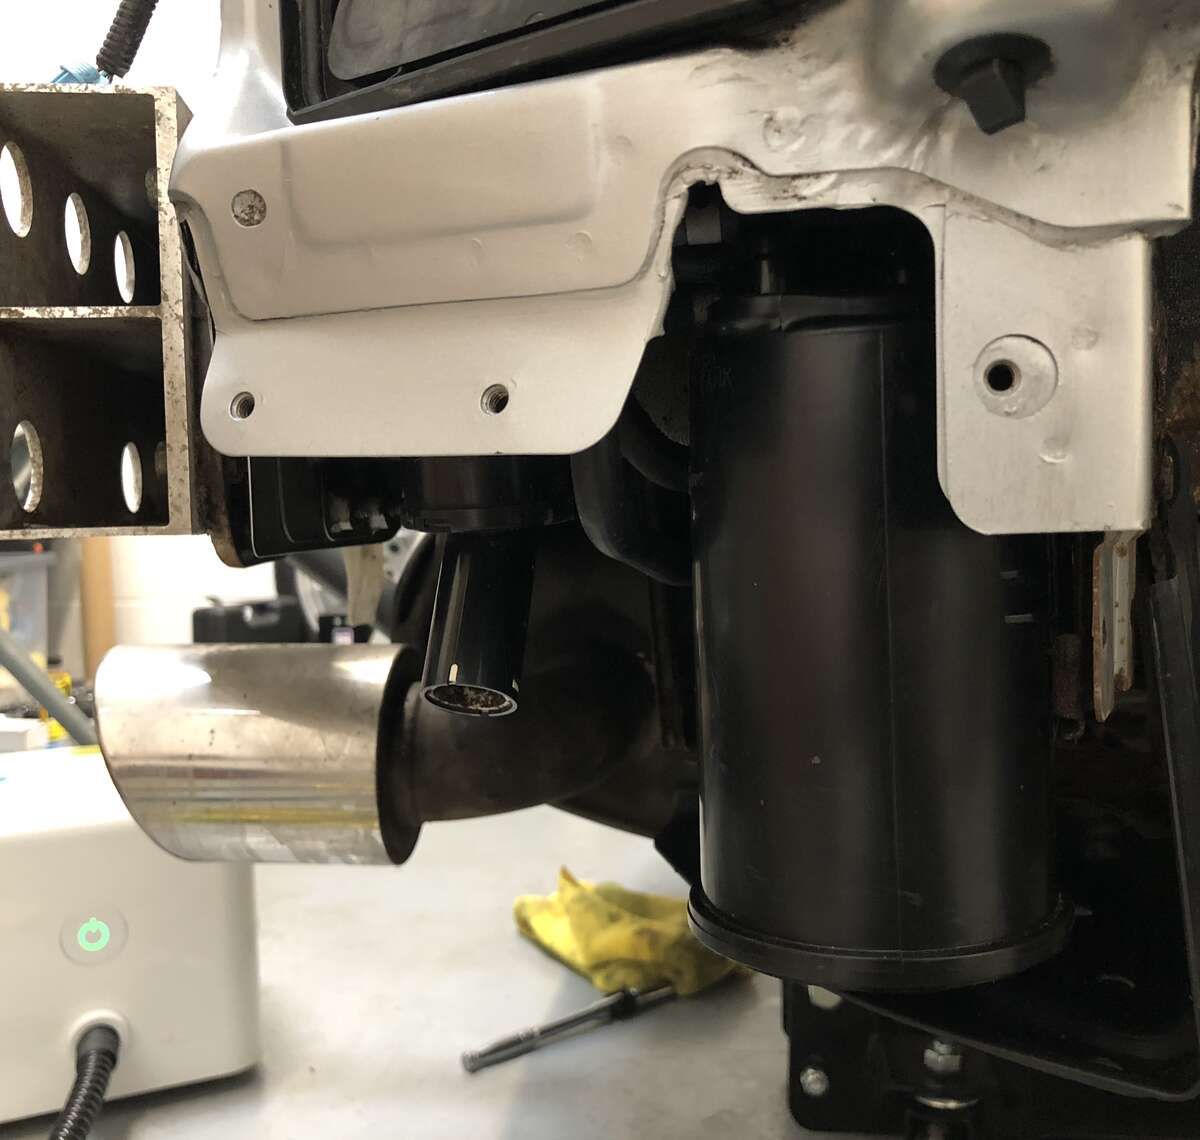
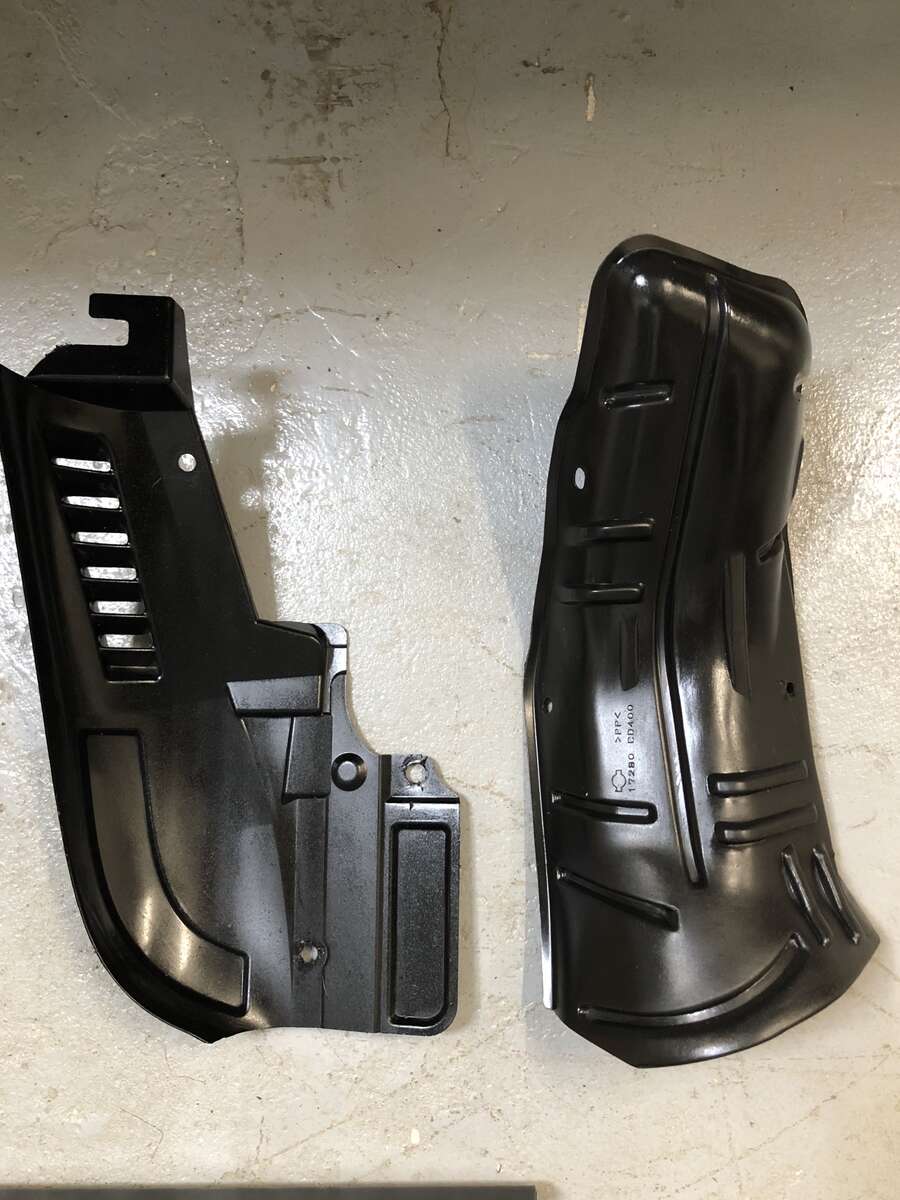
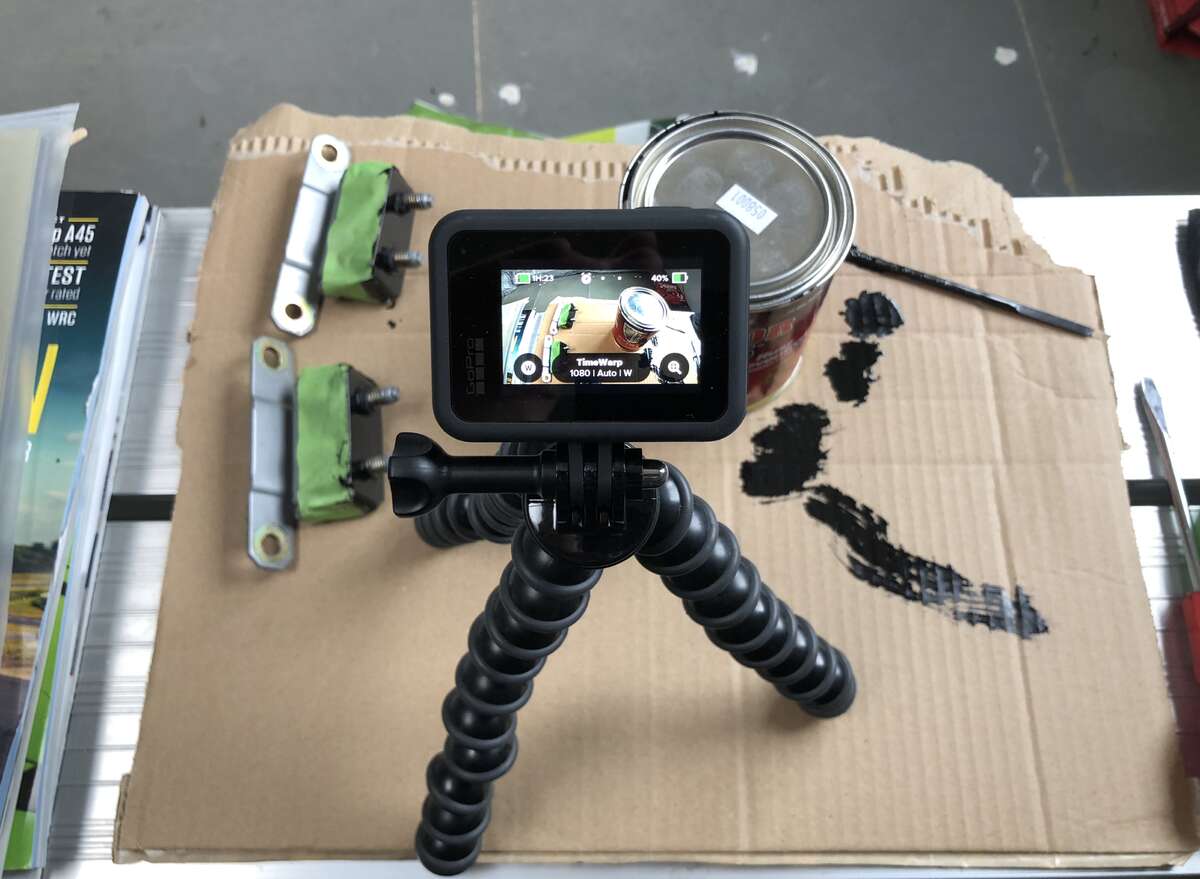
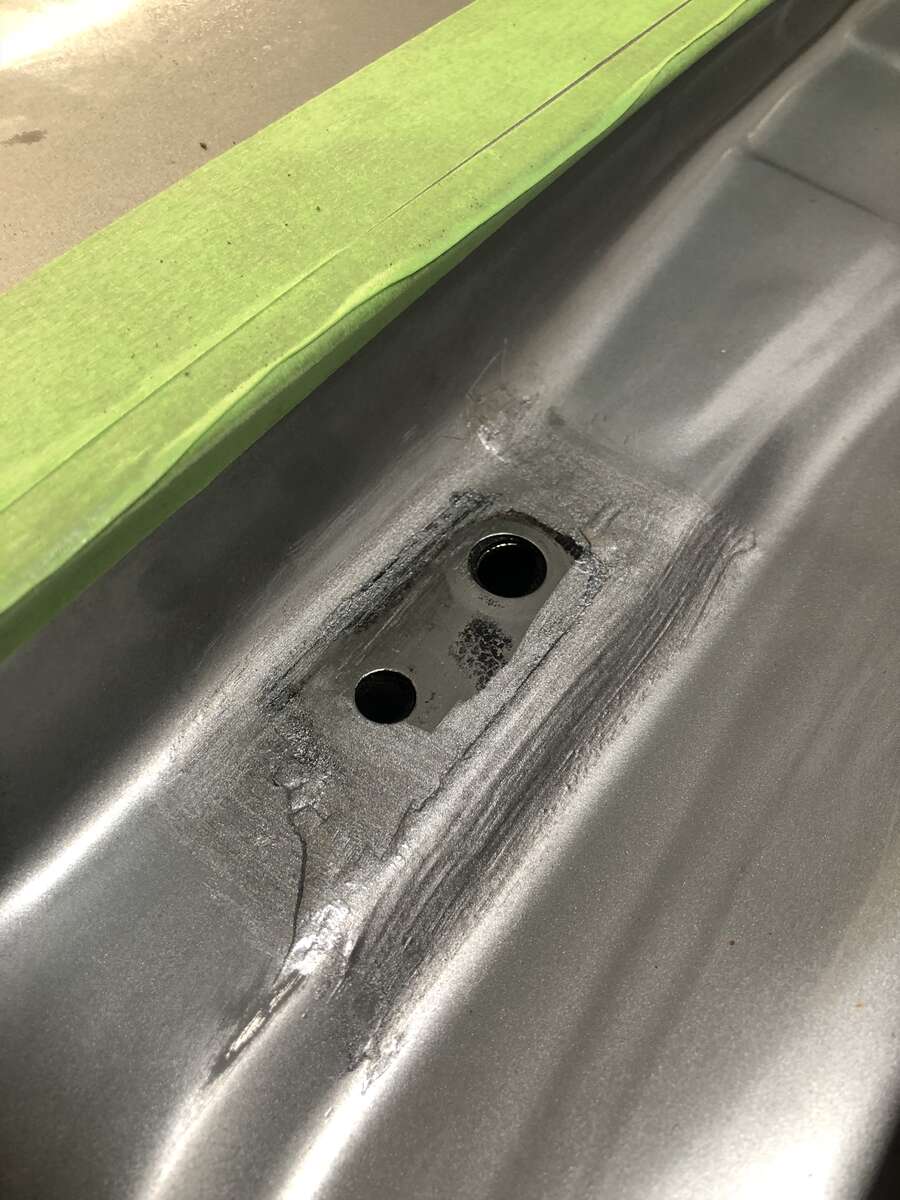
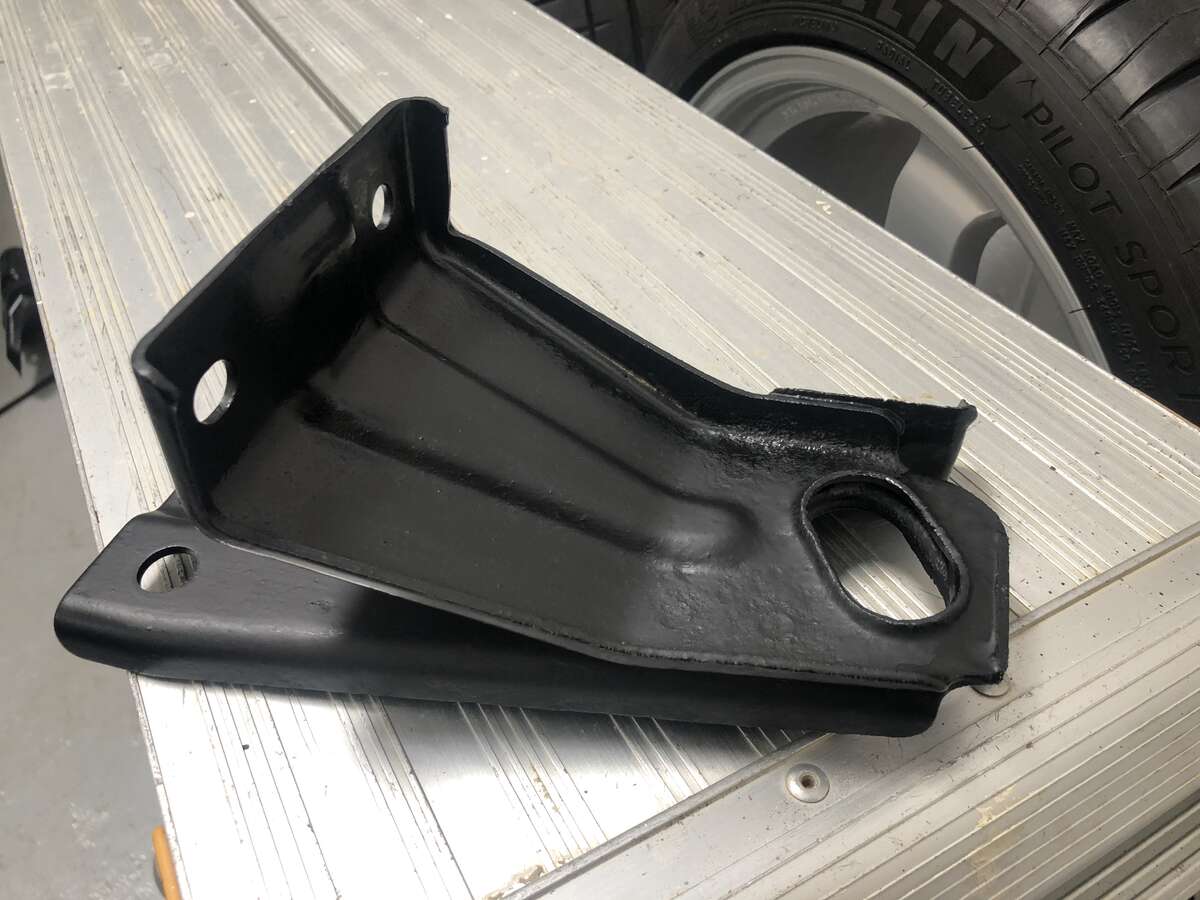
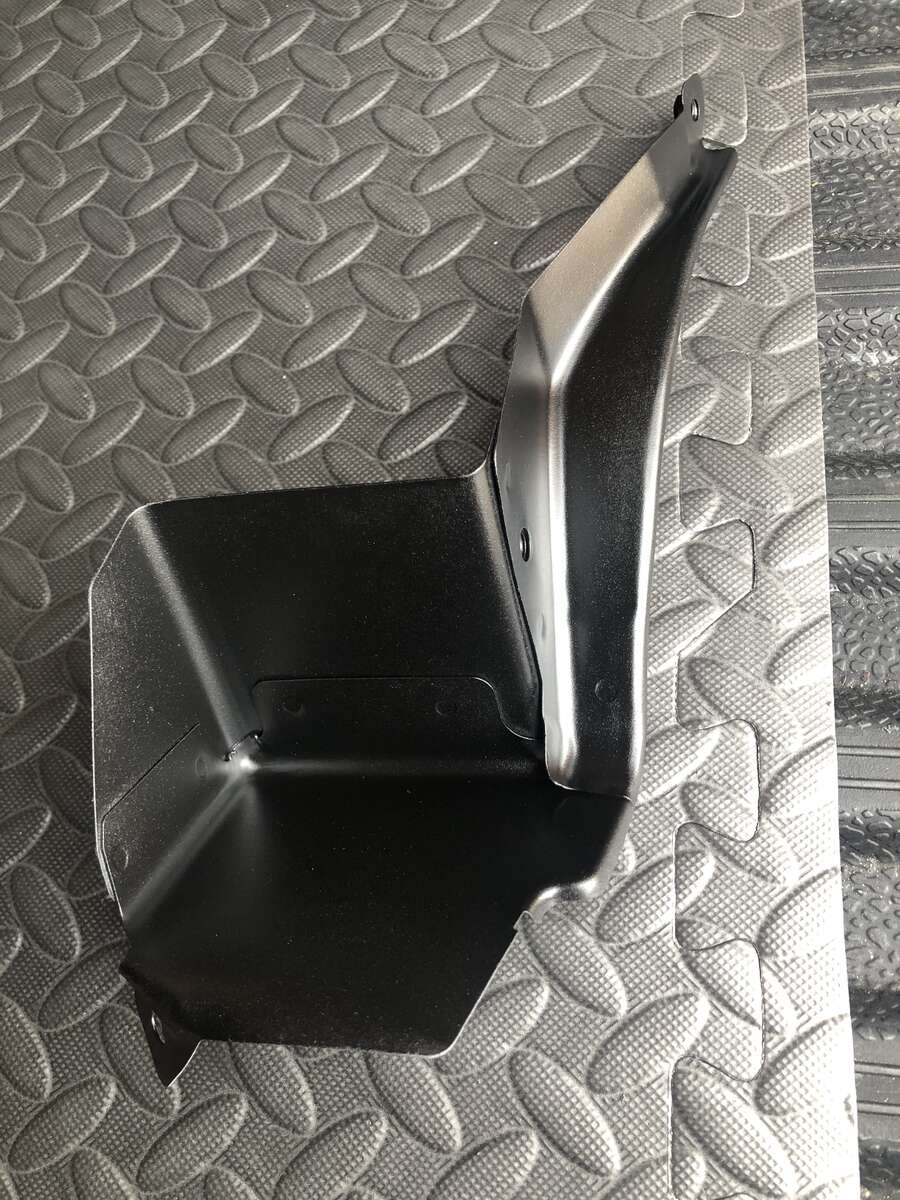
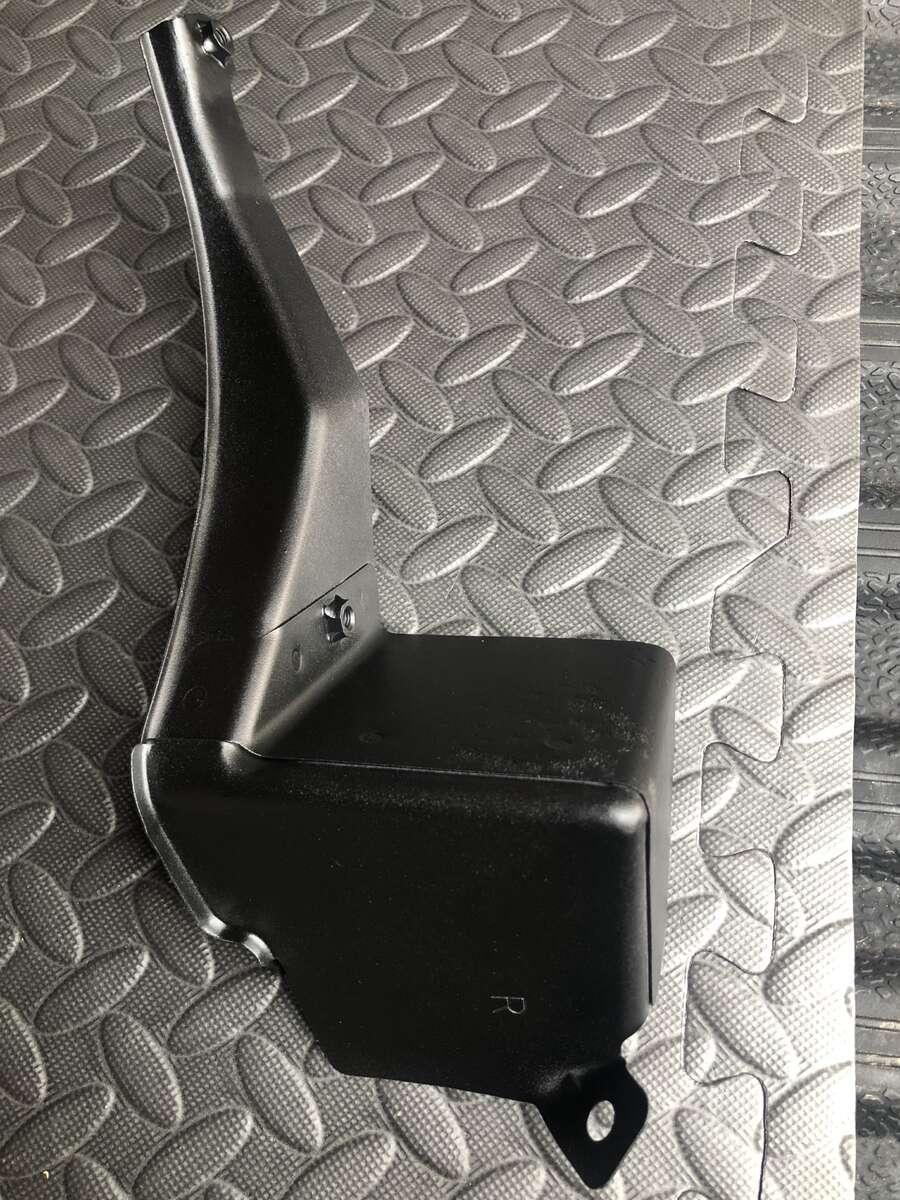
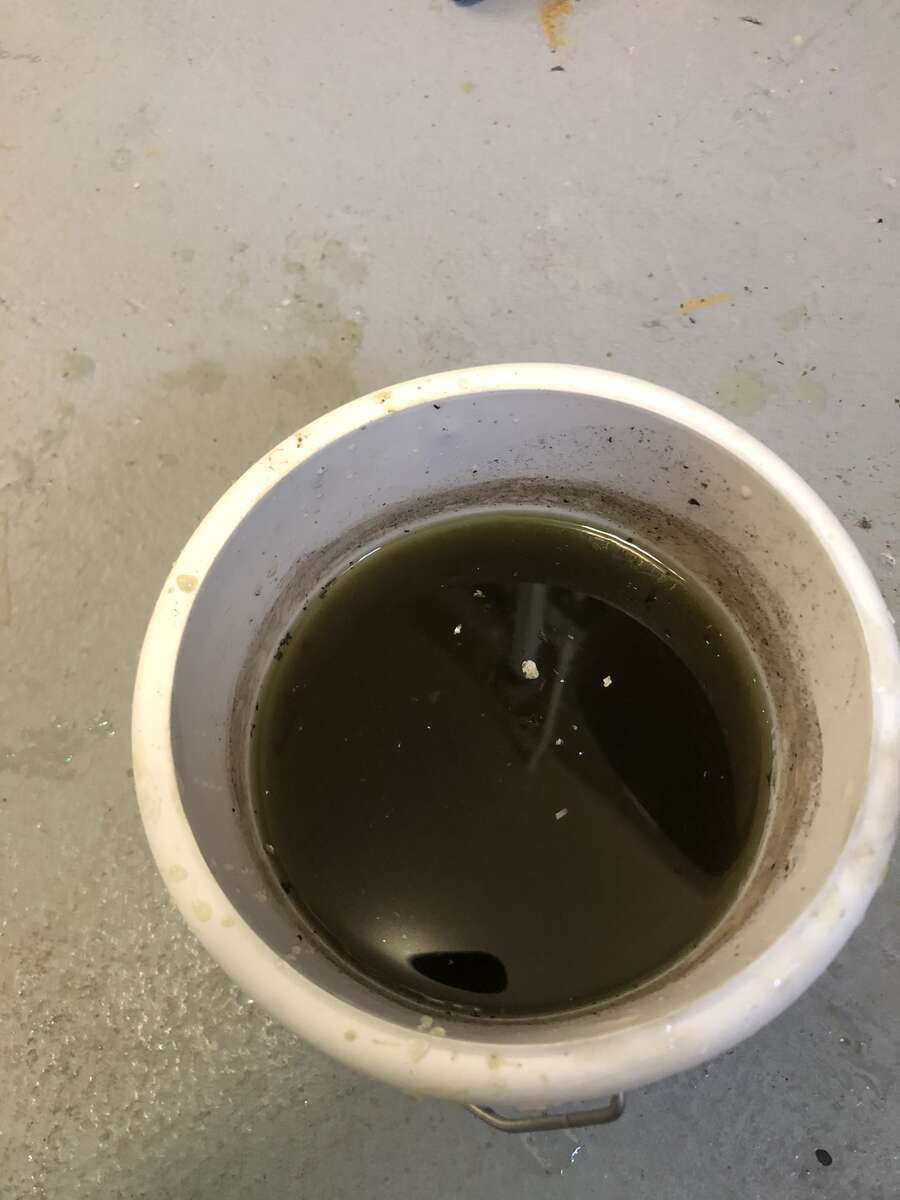
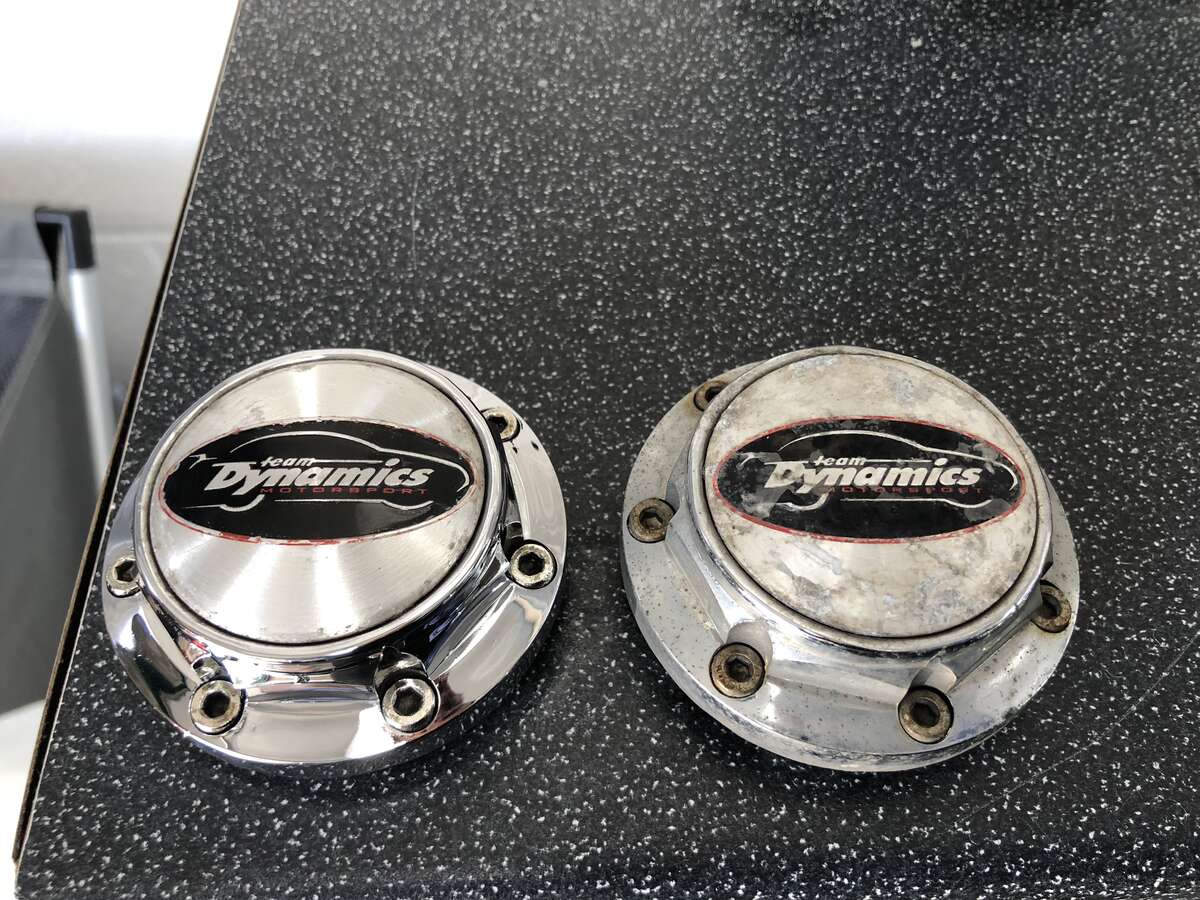
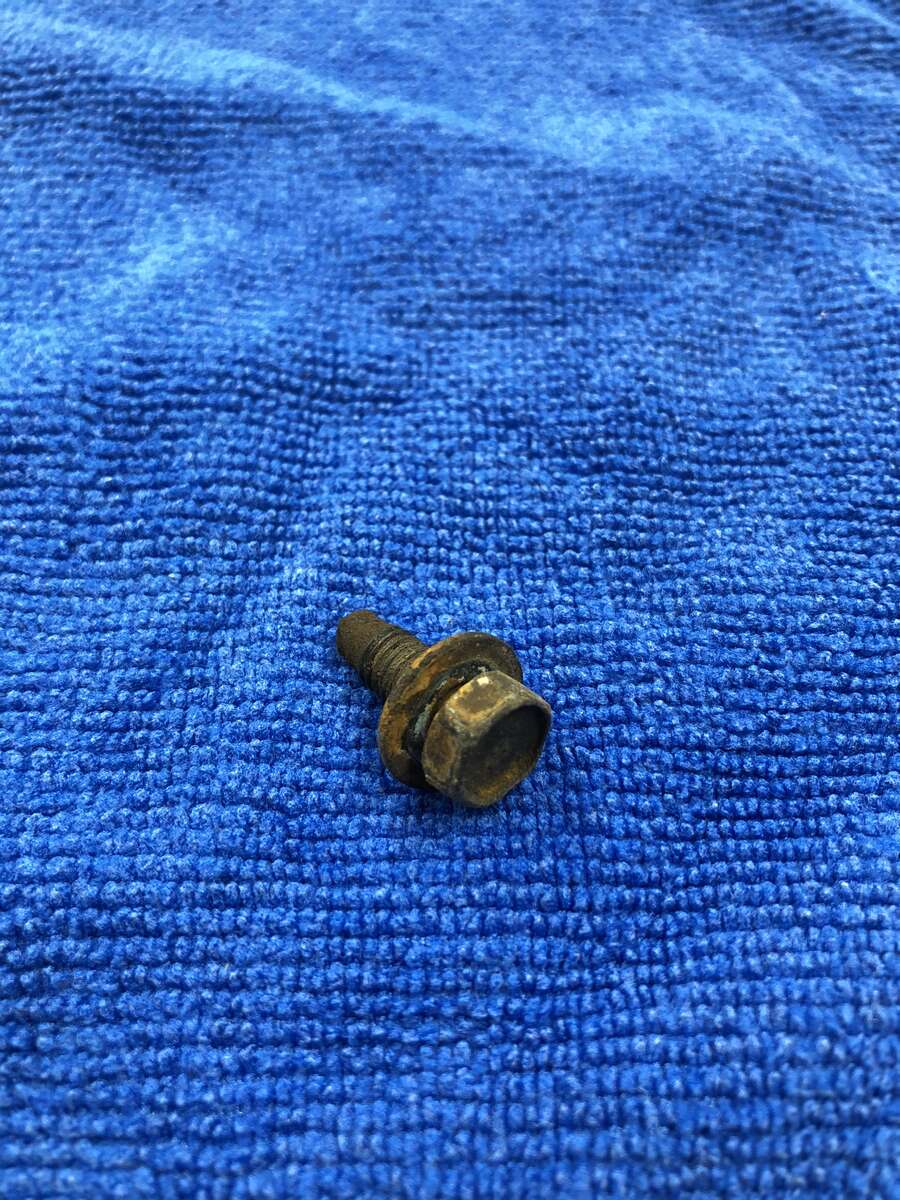
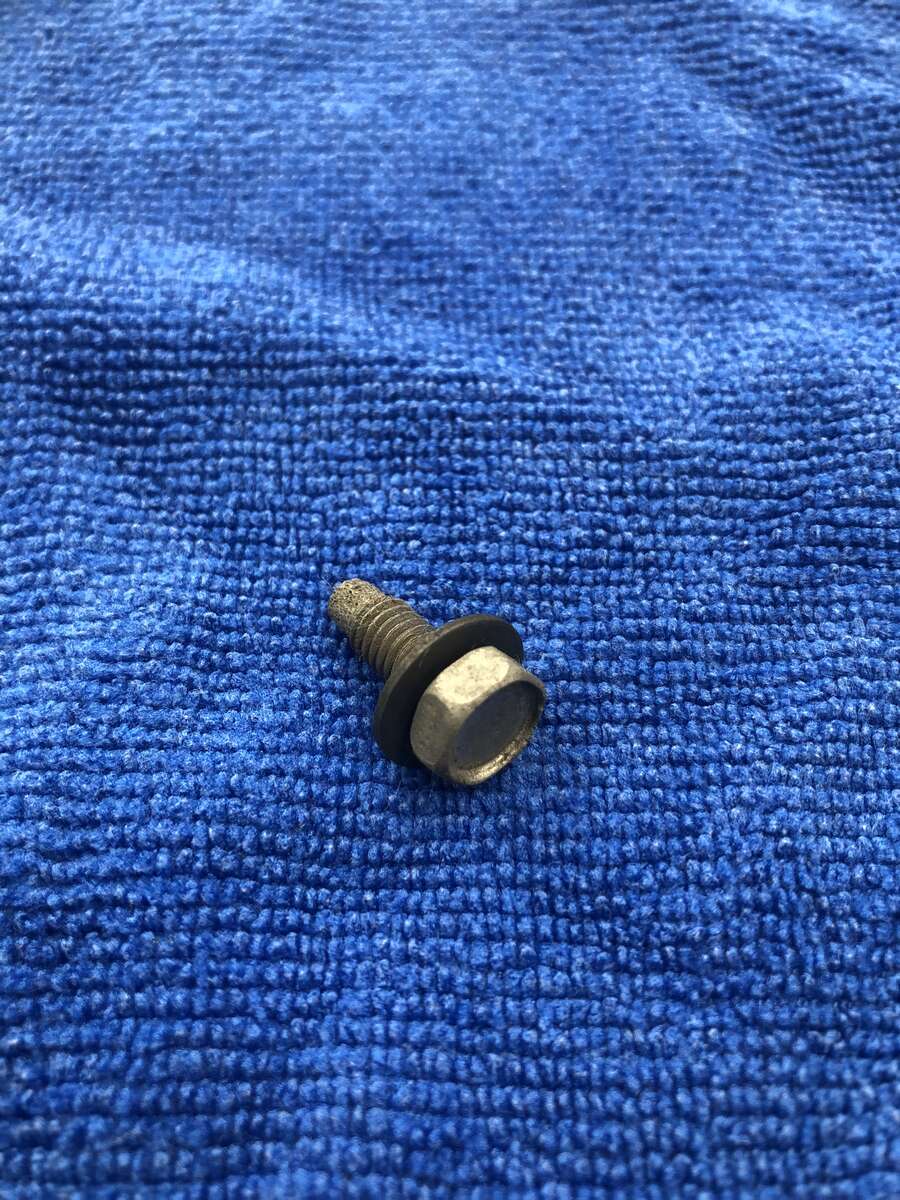
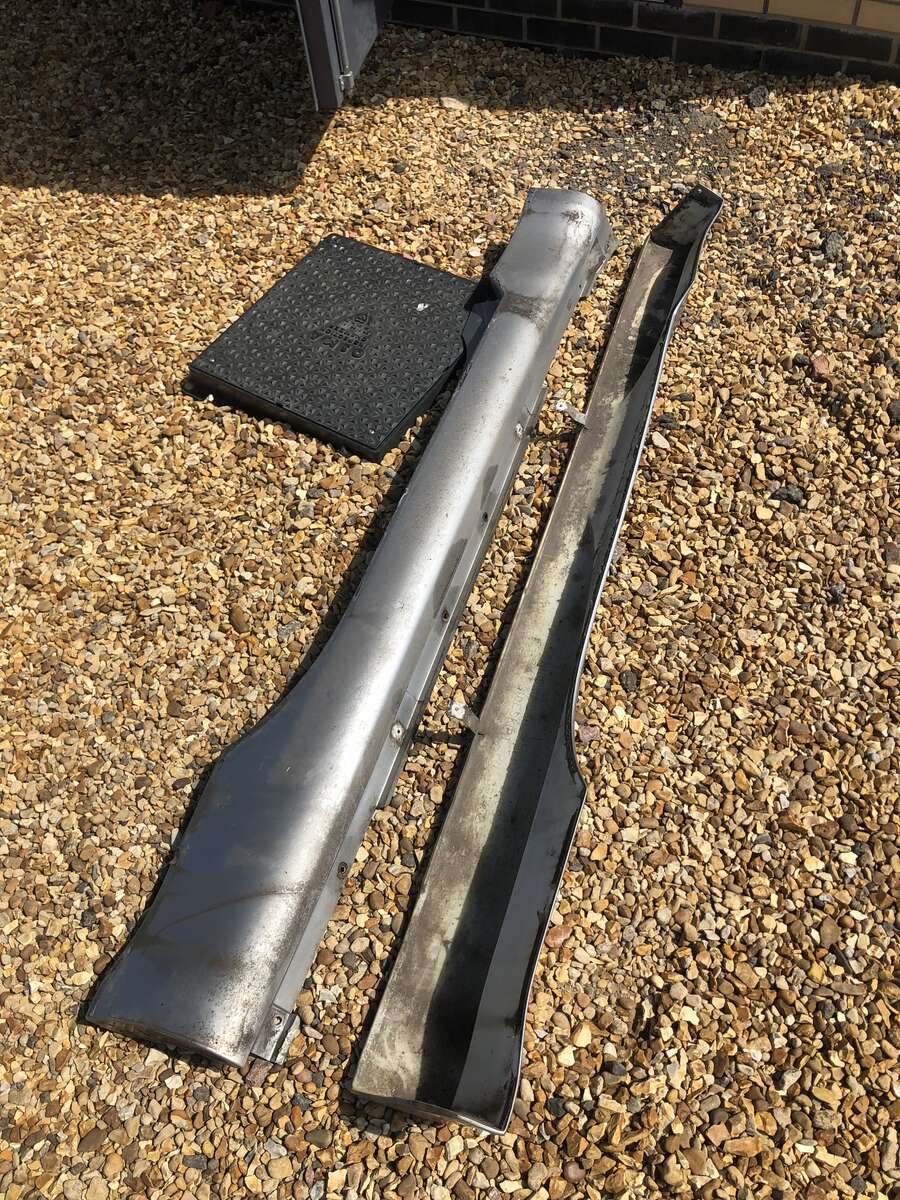
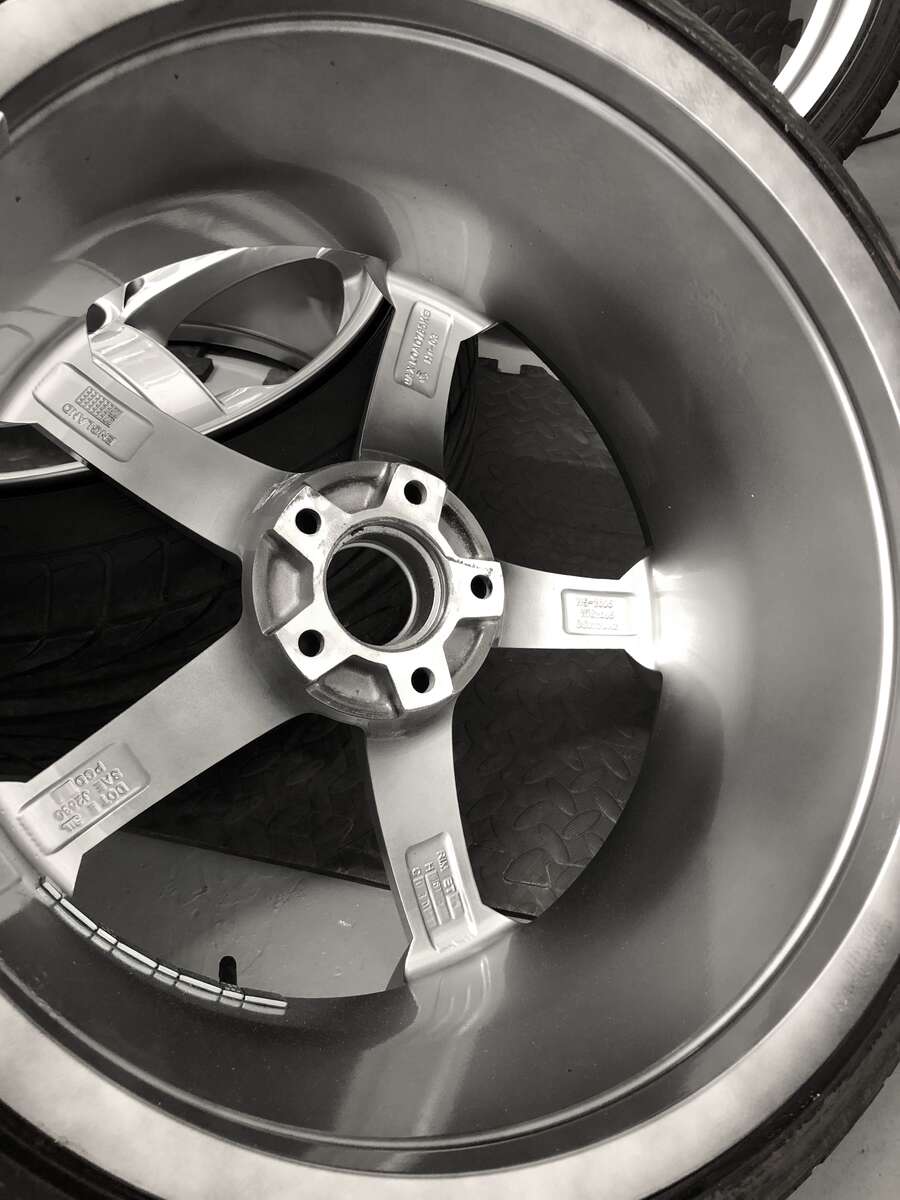
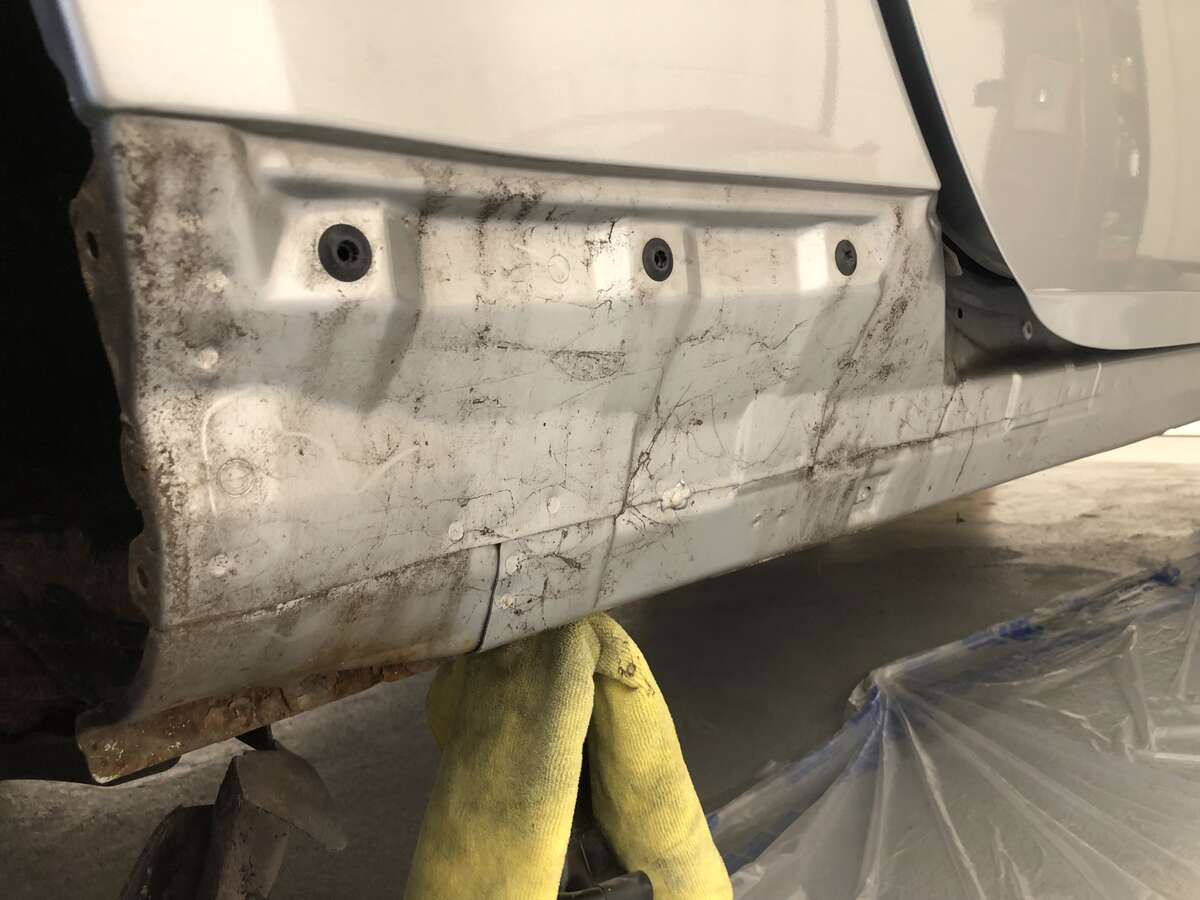
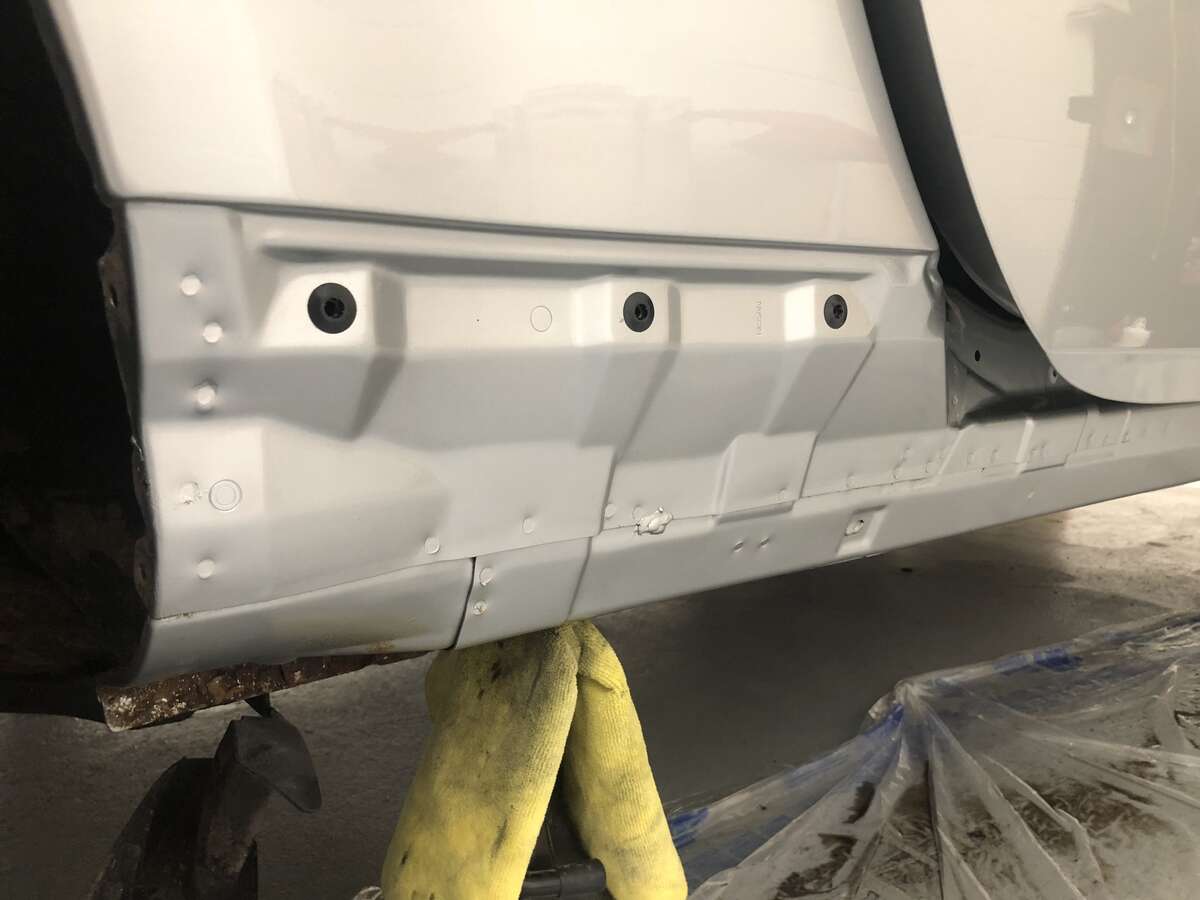
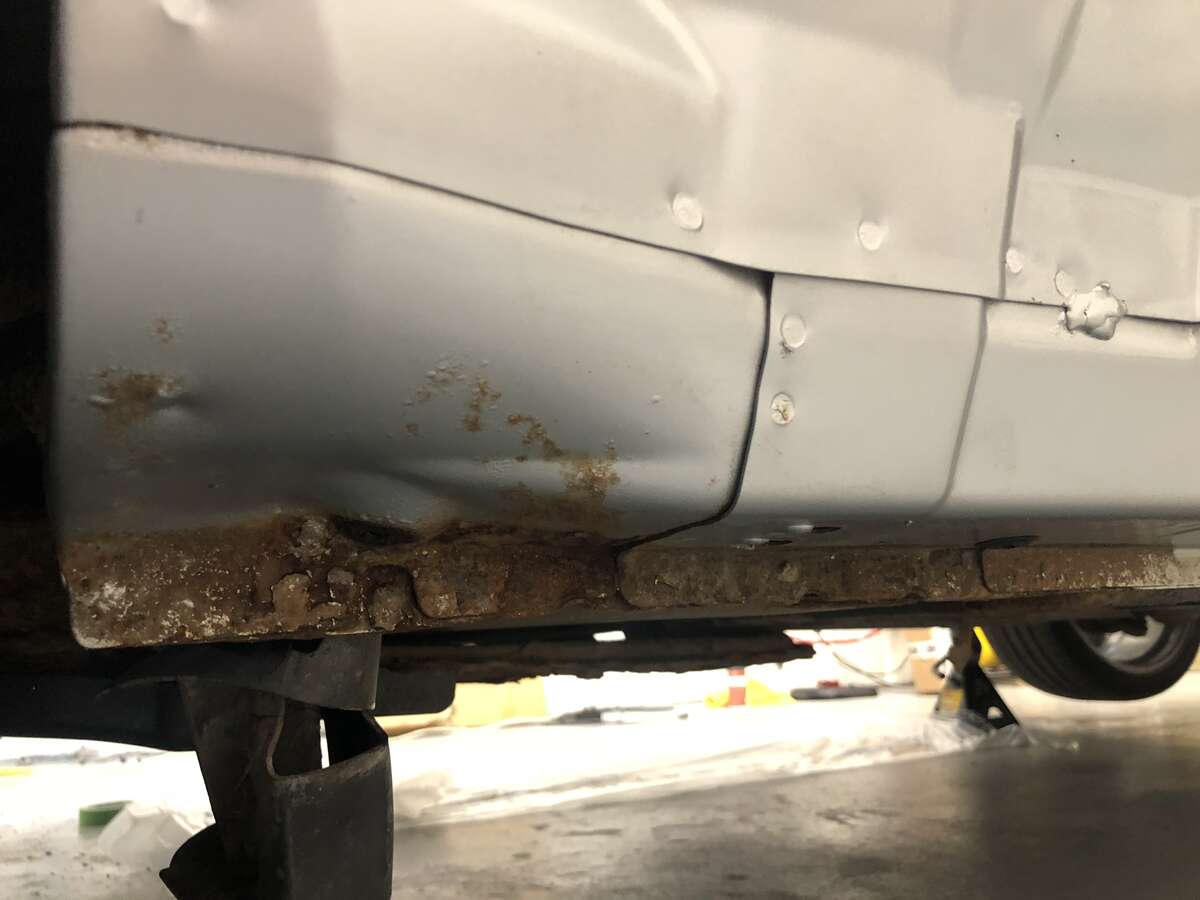
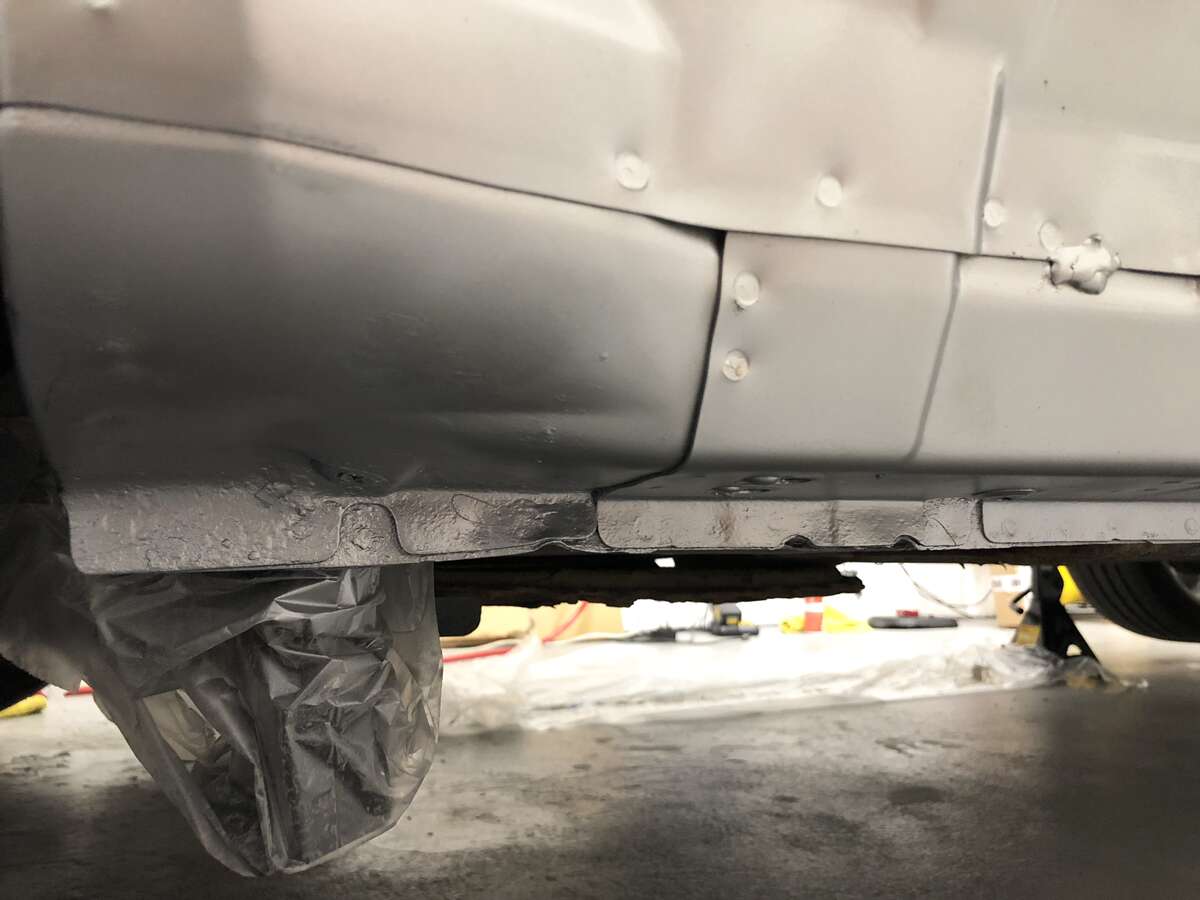
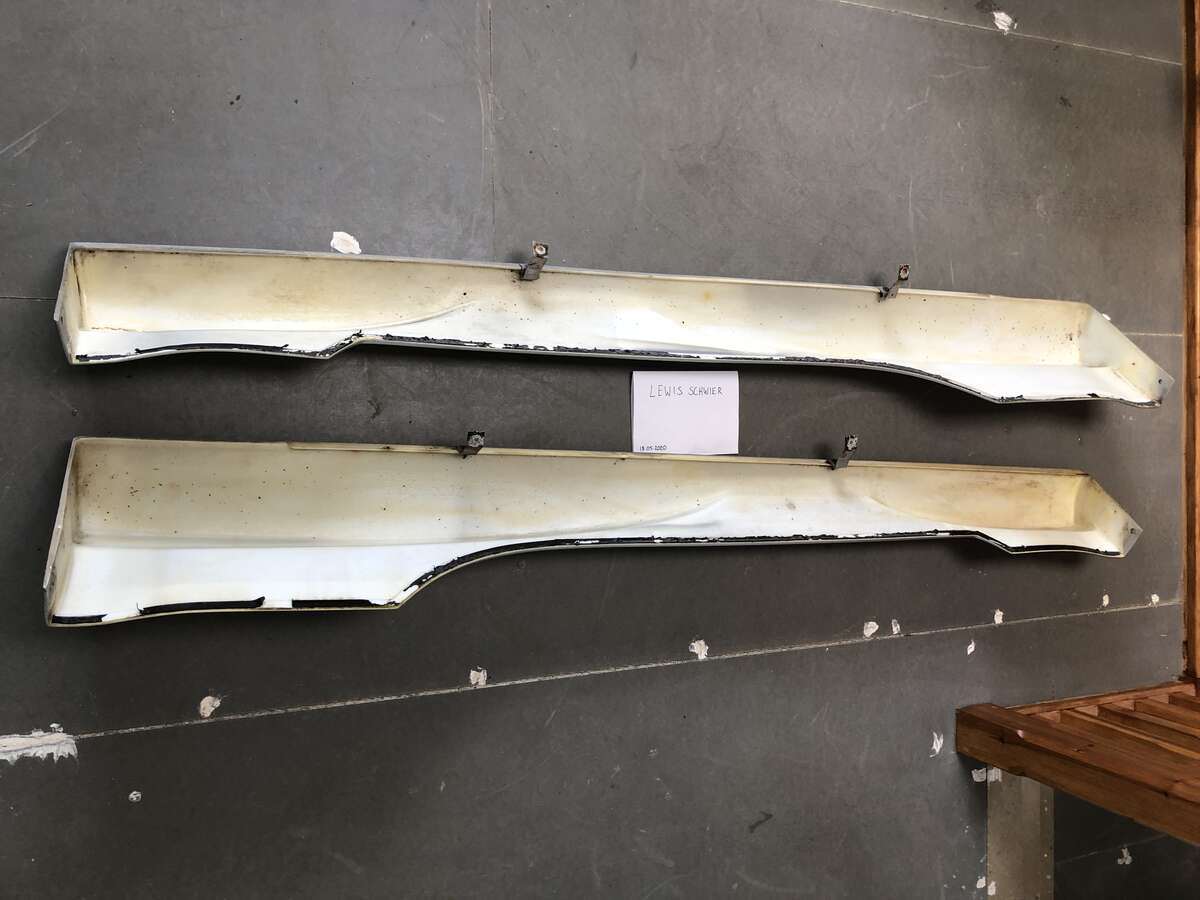
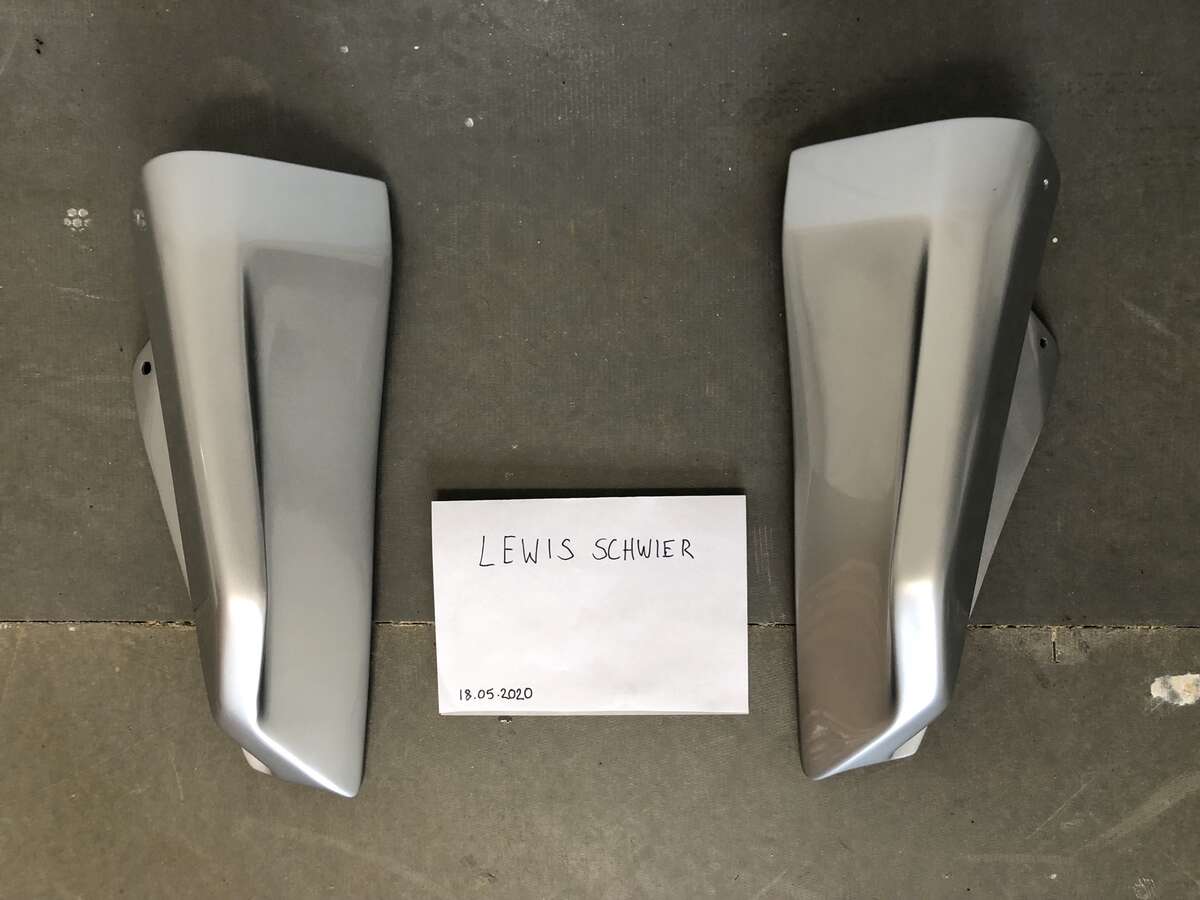
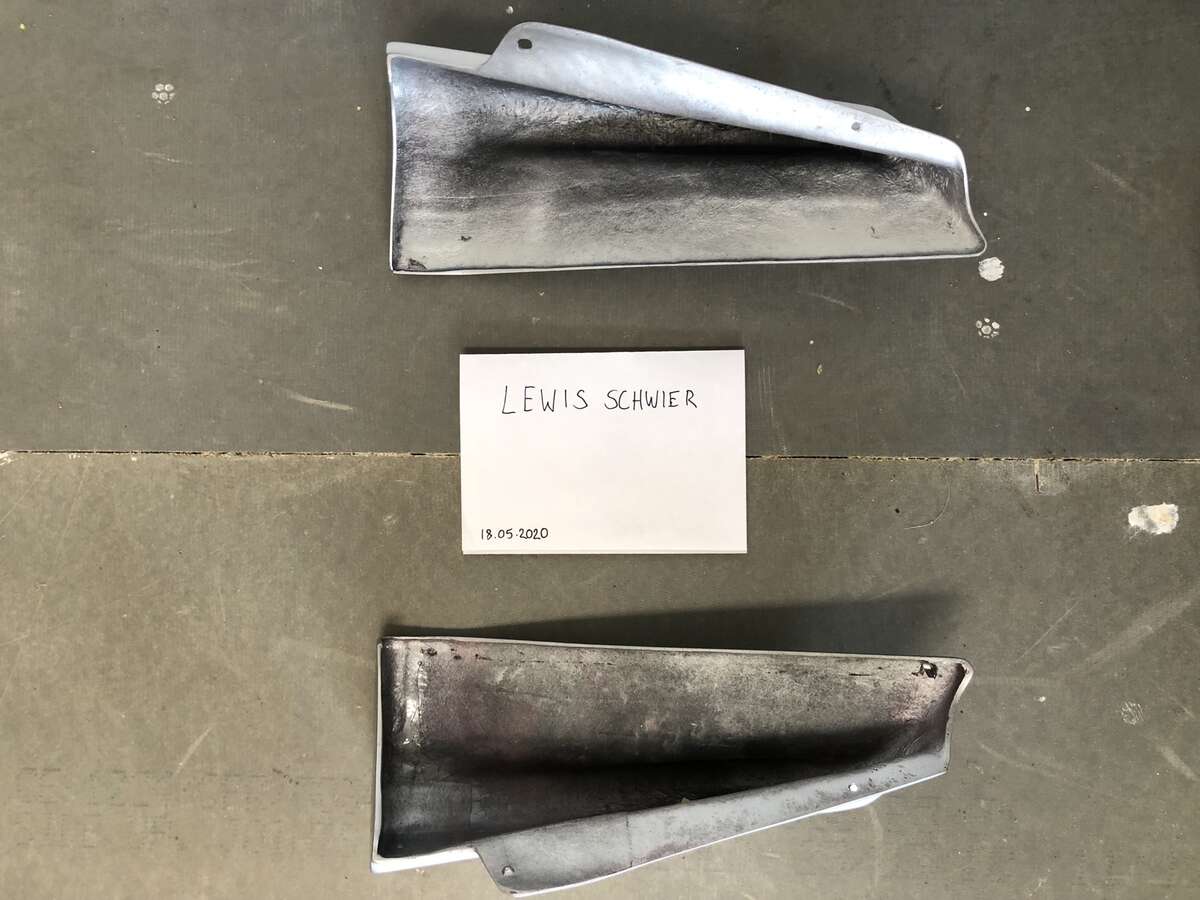
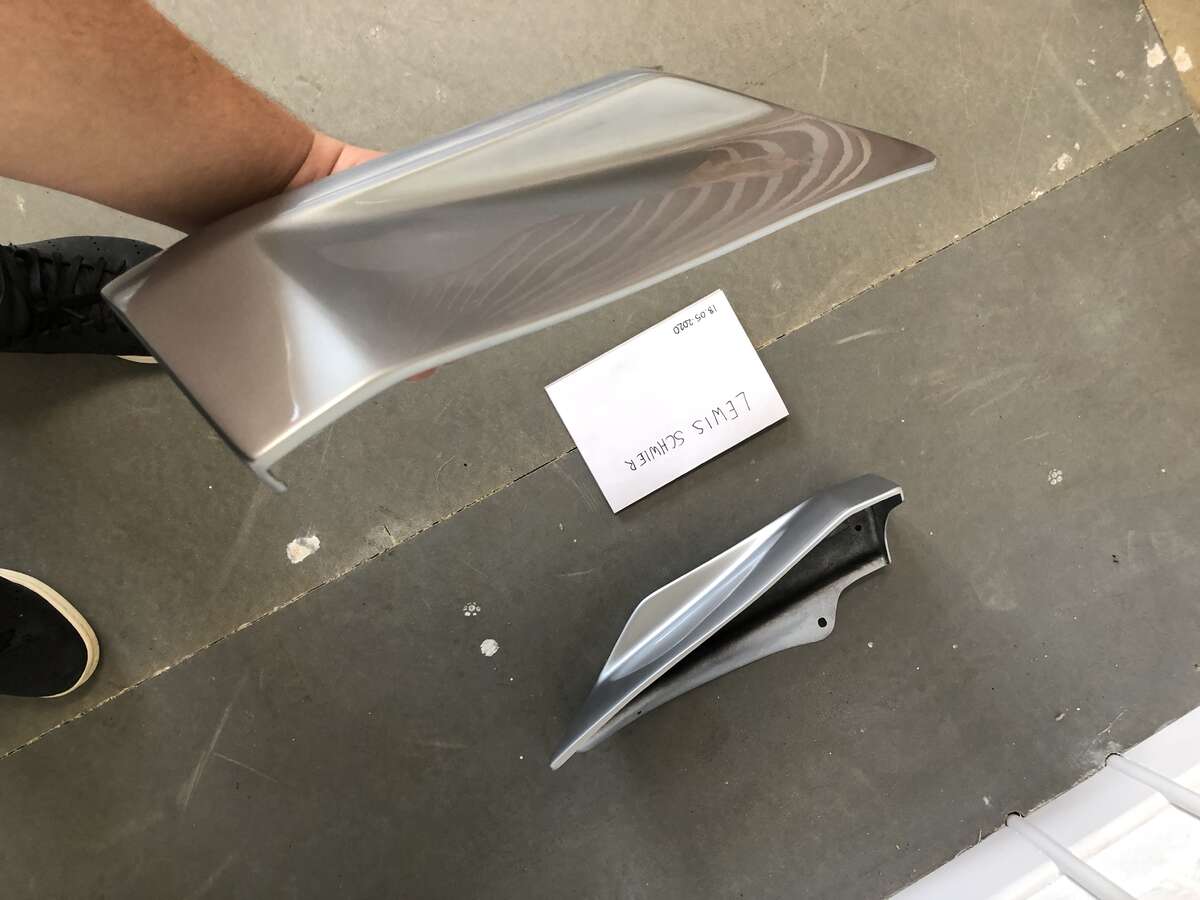
Coming into the final phases now, all ready to fit back together! Side Skirts taken apart, front lip off too. Wheels, spats & side skirts sold. Original side skirts are at the paint shop as they have been damaged from poorly the fitted aftermarket extensions. Here is some satisfying before and after photos when I got the wheels refurbished. New owner was very happy to say the least! Centre caps were a bit worse for wear but I did my best to try to save them, new owner put his own centre caps in anyway I think. Cleaned under the side skirts, used Bilt Hamber Surfex HD with Hog Hair Brush and steam cleaner. Then proceeded to remove the rust from the lower sills. Used a wire wheel to grind rust away down to the metal, smoothed with sanding block, degreased then used grey primer and KY0 Silver to finish off, very pleased with the results! Have also refurbished every bolt that I have taken off the car (probably around 30-40 at this point) I let them sit in a bowl of Bilt Hamber Detox-C. Wasn't expecting miracles as some bolts seemed too far gone but miracles I got! Couldn't believe how good the product was! Left over night and pretty much stripped all the rust off every bolt leaving them looking like new. Rear arch liners and fender guards removed, now after seeing how must dust rust removal creates when using the wire wheel I decided to leave the wheels arches for another day, the whole underneath needs doing at some point so no point making a mess in my unit, anyway breaking down the fender guard supports and arch liners gave me access to clean the fuel filter neck and other areas I couldn't before. Arch liners, cleaned, de tarred and coated with trim coating. All the rear arch liner supports and fender guards themselves were badly corroded along with the bolts that held in place the arch liners which are connected to the supports, so much so that I had to hack saw them off and drill out. Dismantling these rear sections just makes you realise how badly designed they are. 1. Why are plastic arch liners held in by plastic retainer clips in most areas and then metal bolts in others. 2. The fender guards and lower arch liners sit flat which allows build up of everything that the wheels flick up causing bad corrosion and rusting. Anyway rant over have now made so that arch liners are only held in by plastic retainers to avoid having to hack saw rusted bolts off again. Drivers side fender guard was replaced (thanks Adrian) and the passenger side fender guard and all supports were sent off to be sandblasted. They were then painted (Grey Primer and Satin Black) on the bits that sit flat I gave a base coat of POR-15 Rust prevention paint to give good protection. Here are a few before and after photos of a couple of the bits that were done (weather strips to be added) Onto another unexpected purchase, which means more work! The original tailgate had a smart repair that was done really badly, also the Nismo V1 Spoiler is a replica which has also been painted horrendously. So the plan was when fitting the NSM kit I was to buy a new carbon v1 spoiler as I mentioned in the last update and also get the tailgate re painted. BUT was browsing on Facebook 350z Buy & Sell page as you do and found someone selling a tailgate with a Genuine Nismo V1 spoiler on it, in KY0 Silver too! So snapped at that as I knew it would ultimately save me a bit of money in the long run. So travelled up to S****horpe to collect. The weight difference between my old tailgate with the rep spoiler and the new one with genuine I couldn't quite believe! Only good to have a bit of weight saving right So that is where I am now, new tailgate ready to go on, hinges have been taken off, sanded down and painted. As you can see Nissan smooth over the edges of the hinges to stop them corroding as they do sit in a water channel after all. So needed to cut out with Stanley knife once bolts were removed. Quick sand down and lick of paint to tidy up, far from perfect but not bothered as you can't see this once the tailgate is on, plus will need resealing once hinges are back on. Cheeky little time lapse! Will put up first episode of vlog on YouTube once car is back together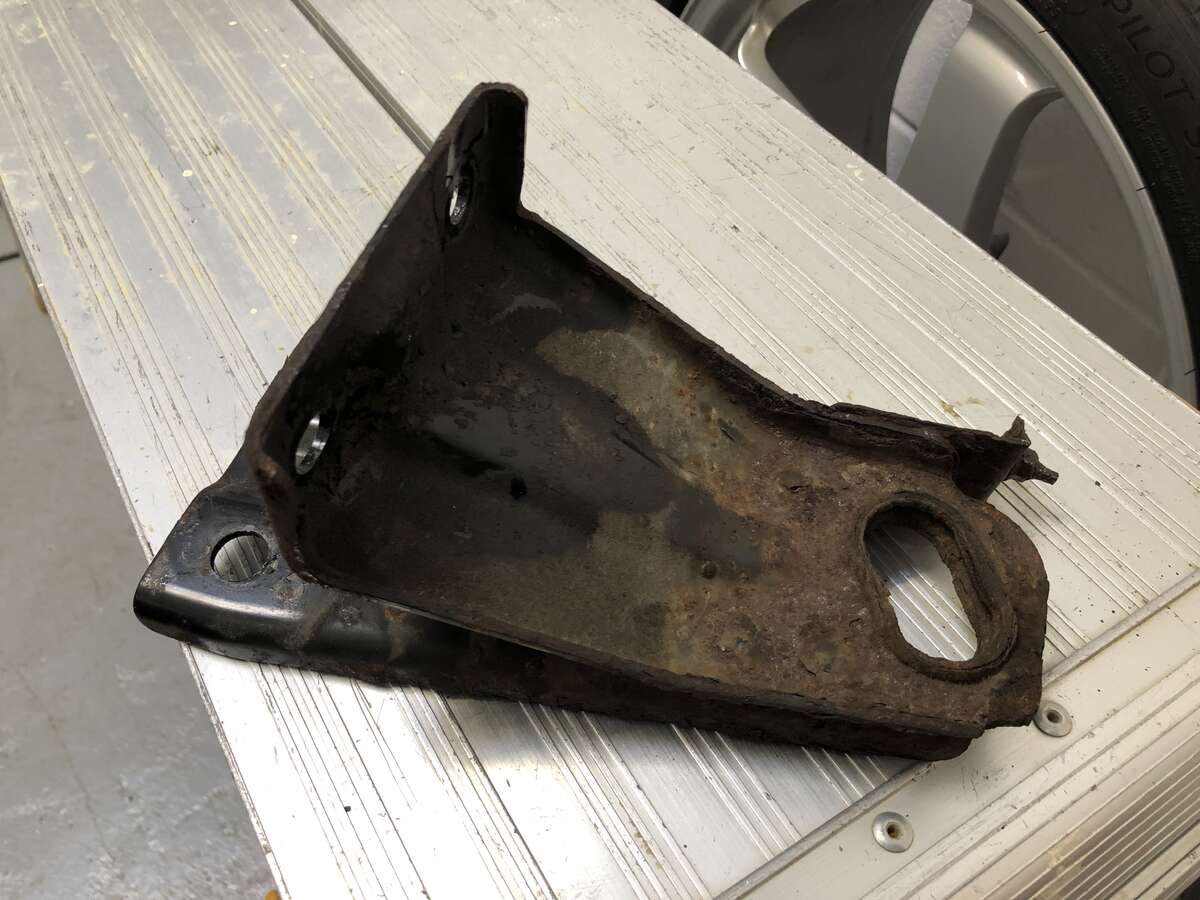


-
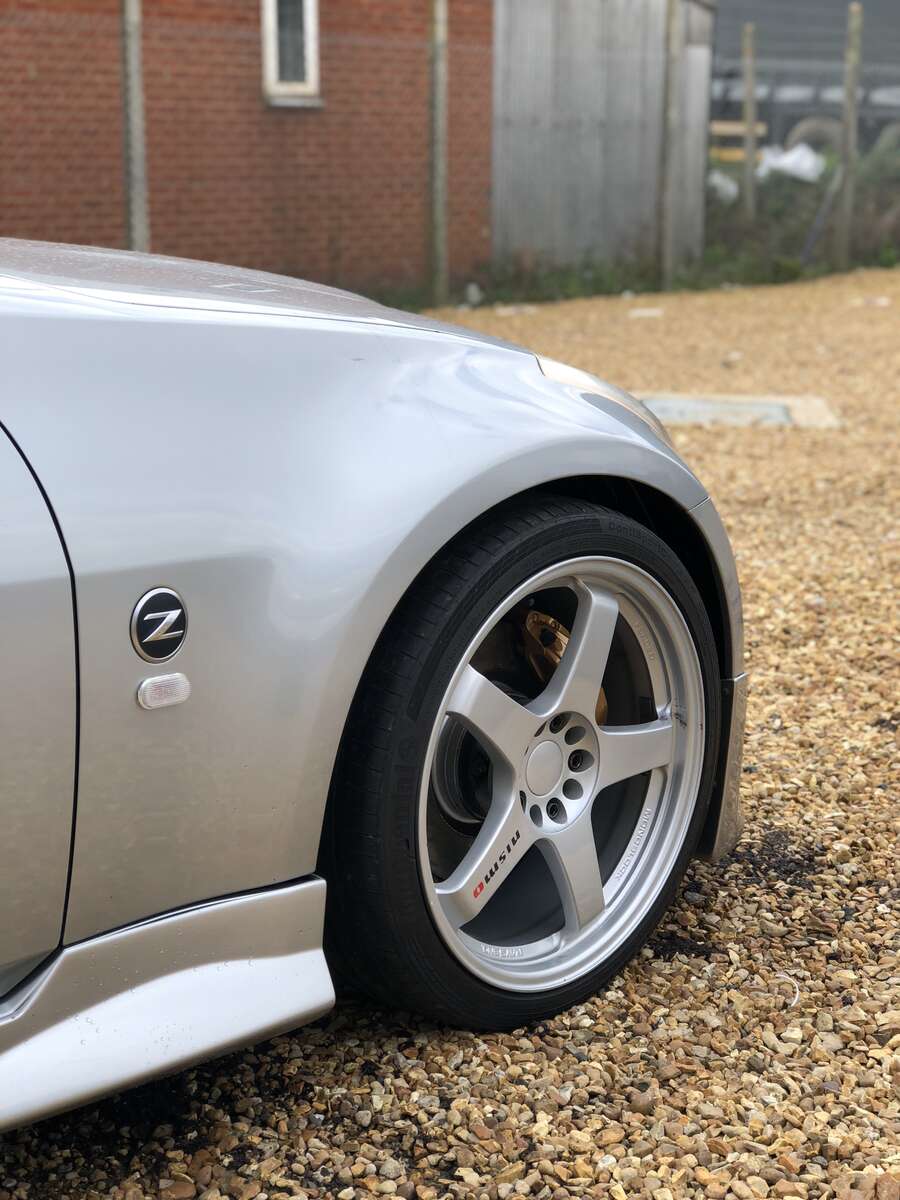
Welcome, very nice zed! I agree with the other either original spec or if you don't want to pay out for Diamond cut refurb you can go full silver like me (still looks good )
-
Guide I went off when I first used the product
-
Looks like marring to me, very easily done when trying to polish by hand. Also those swirl marks can be caused by a number of things also. Marring specifically can be caused by various things, dirty/damaged cloths (do not wash with fabric softener!), poor prep work, dusty environment, over application, under application. Like ilogikal1 said when buffing off its a good idea to spiritz the buffing cloth with some QD.
-
Yeah I see what your saying, exactly what I was thinking of when I thought of waxes and sealants and how long they last. Yeah that is why the video is so pointless in a sense. Both brands have wipe on wipe off products as well as spray on rinse off for a reason lol. Yup spot on, couldn’t of said it any better. Why they have proved to been so popular with people!
-
In terms of the video it is very strange, doing a test but not using correctly or how the manufacturers explain how to use - however you want to put it lol Don’t quite get what he was trying to achieve, maybe to see if you could use the product in a different way?
-
Most definitely would be over application or using it on a hot/sunny day. Even when used the correct amount compared to any other products that provide some sort of protection and or hydrophobicity you are using a lot for how long it lasts.
-
Got to take these tests with a pinch of salt because Prep work will be the difference between a product lasting for 1 week compared to 3 months. And also the conditions and contaminates of real world driving compared to just running a mitt and some shampoo over the same section over and over is worlds apart, very unrealistic. These spray on rinse off products have become very popular over the last year or so, it’s very smart marketing that caters to enthusiasts. They’ve taken two main things most people care about time & water behaviour and created a product that is super quick to apply and gives paintwork great beading which people love. My personal opinion is that it’s a bit of a gimmick and is not good value for money if applied how the manufacturer says, you use a ridiculous amount each time and it does not last. Most the time these products will smear. I’ve had a good few cars in which have had these products used on them and you can see it in patches under the studio lights.
-
Love this build, very clean, track focused. Bodywork looks great, stance is awesome
-
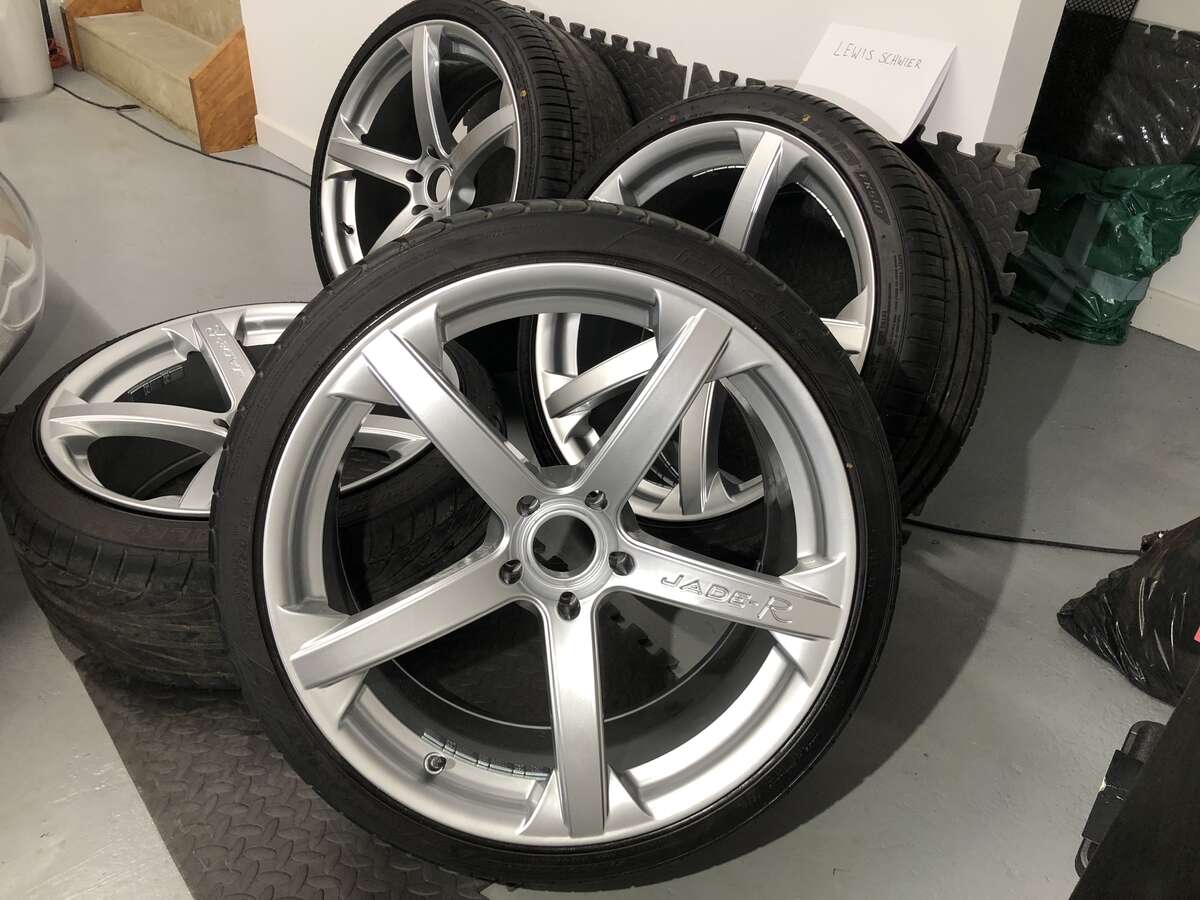
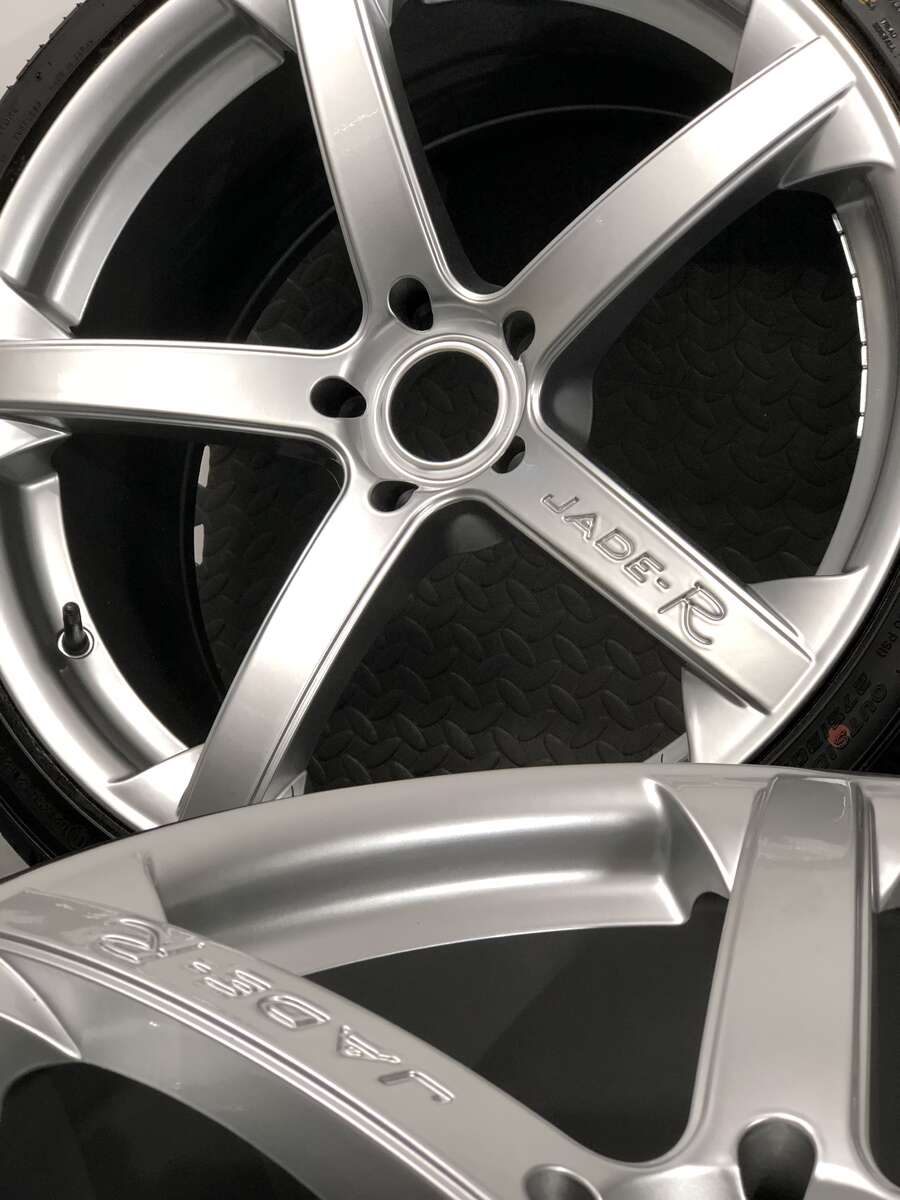
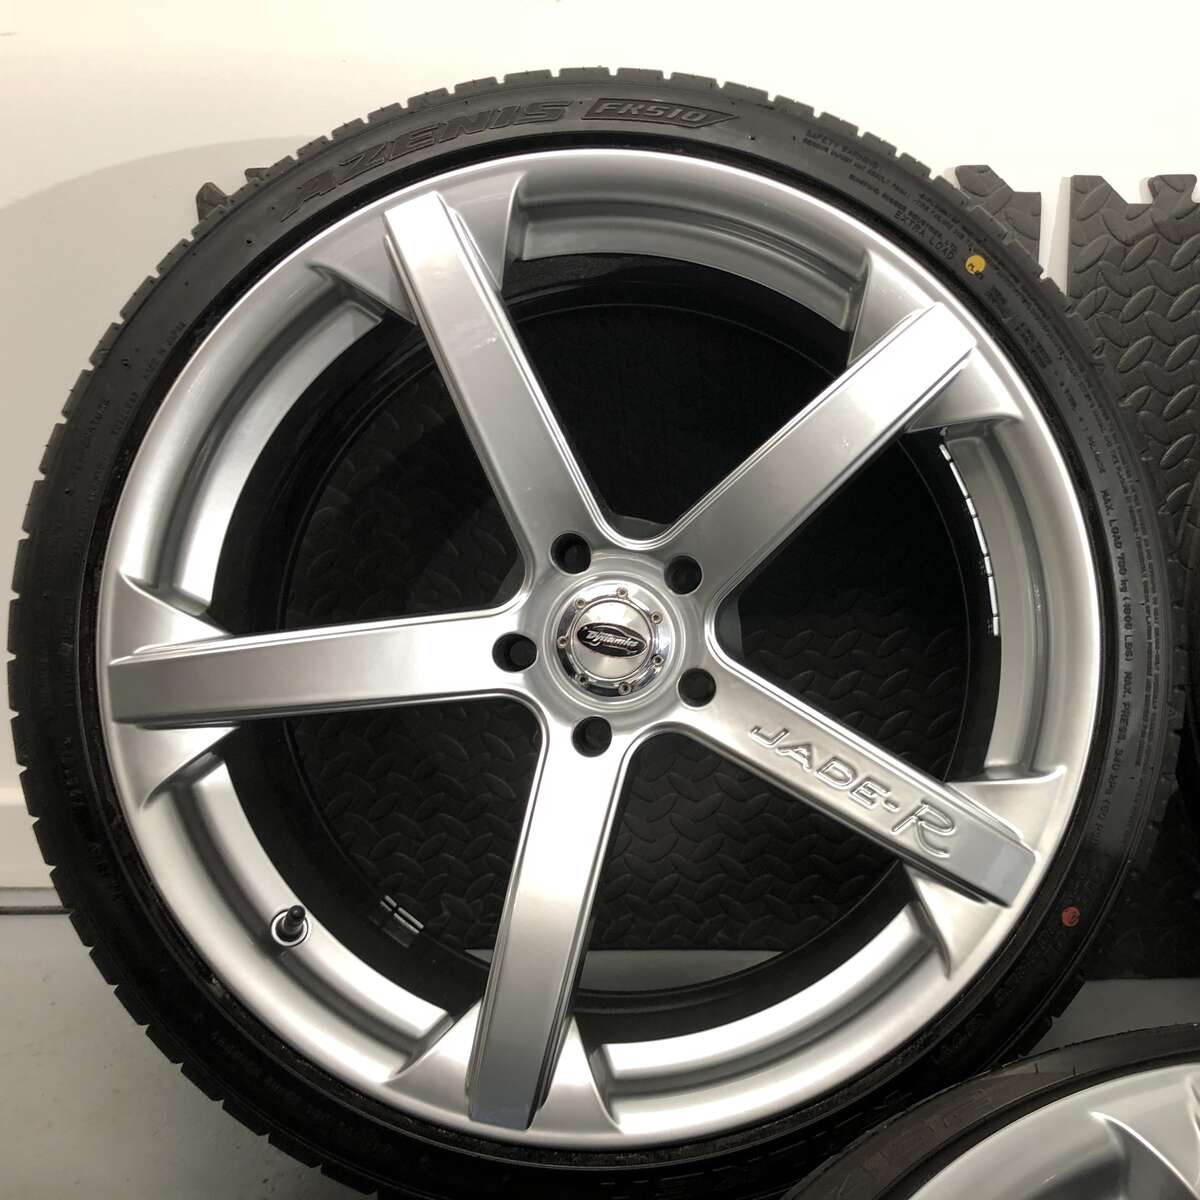
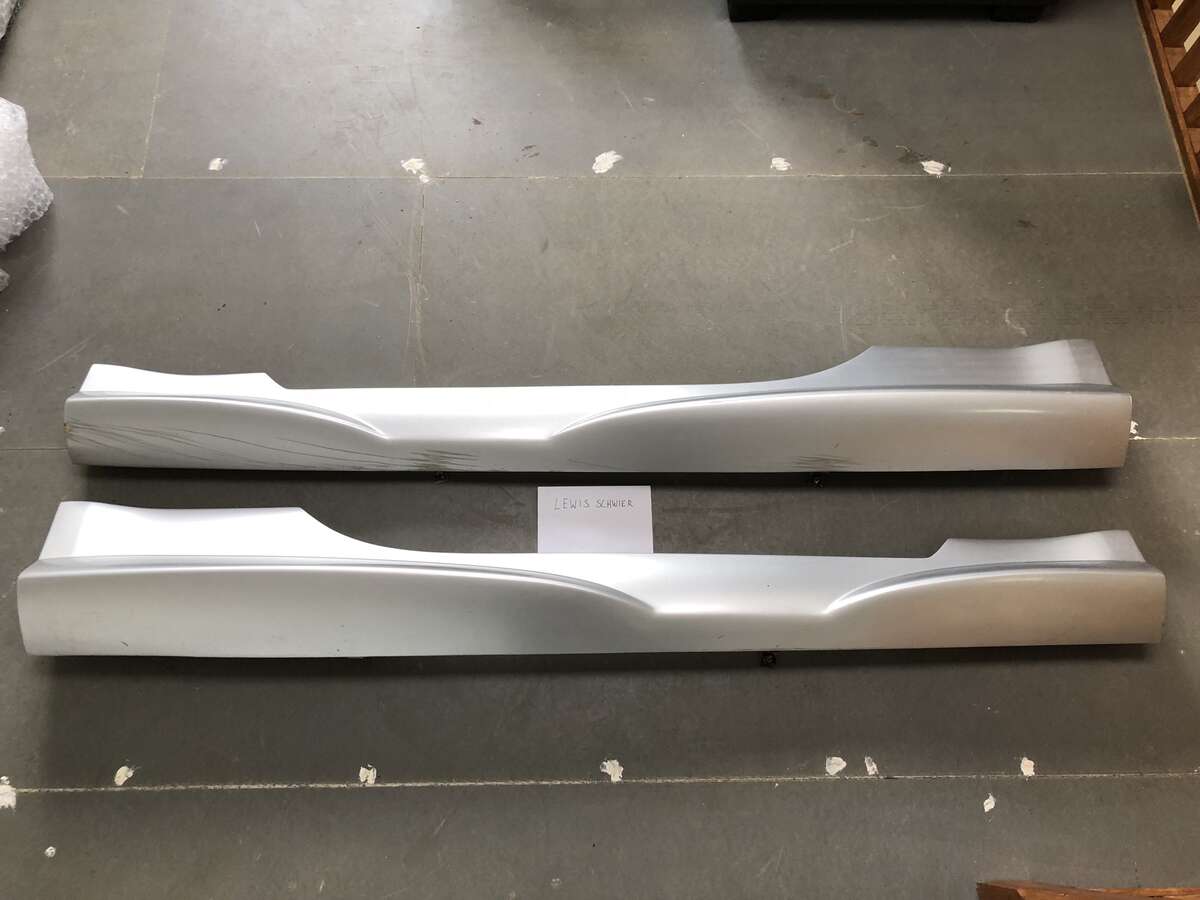
Jade-R Wheels, Side Skirts & Rear Spats
Lewis Schwier replied to Lewis Schwier's topic in 350z Parts For Sale
SIDE SKIRTS & REAR SPATS SOLD -
Newbie here - 350z HR
Lewis Schwier replied to AndyG350z's topic in Introductions & Welcome Messages
I am not, plan to be in the future -
Newbie here - 350z HR
Lewis Schwier replied to AndyG350z's topic in Introductions & Welcome Messages
Welcome, lovely spec! I was also a bit sceptical about spacers but I spoke to a race engineer and he assured me there would be no difference. I went with 20mm all round and have been very happy since. Bought mine from Torqen -
Jade-R Wheels, Side Skirts & Rear Spats
Lewis Schwier replied to Lewis Schwier's topic in 350z Parts For Sale
WHEELS SOLD -
Jade-R Wheels, Side Skirts & Rear Spats
Lewis Schwier replied to Lewis Schwier's topic in 350z Parts For Sale
Look a lot better in person imo. Rear spats are provisionally sold.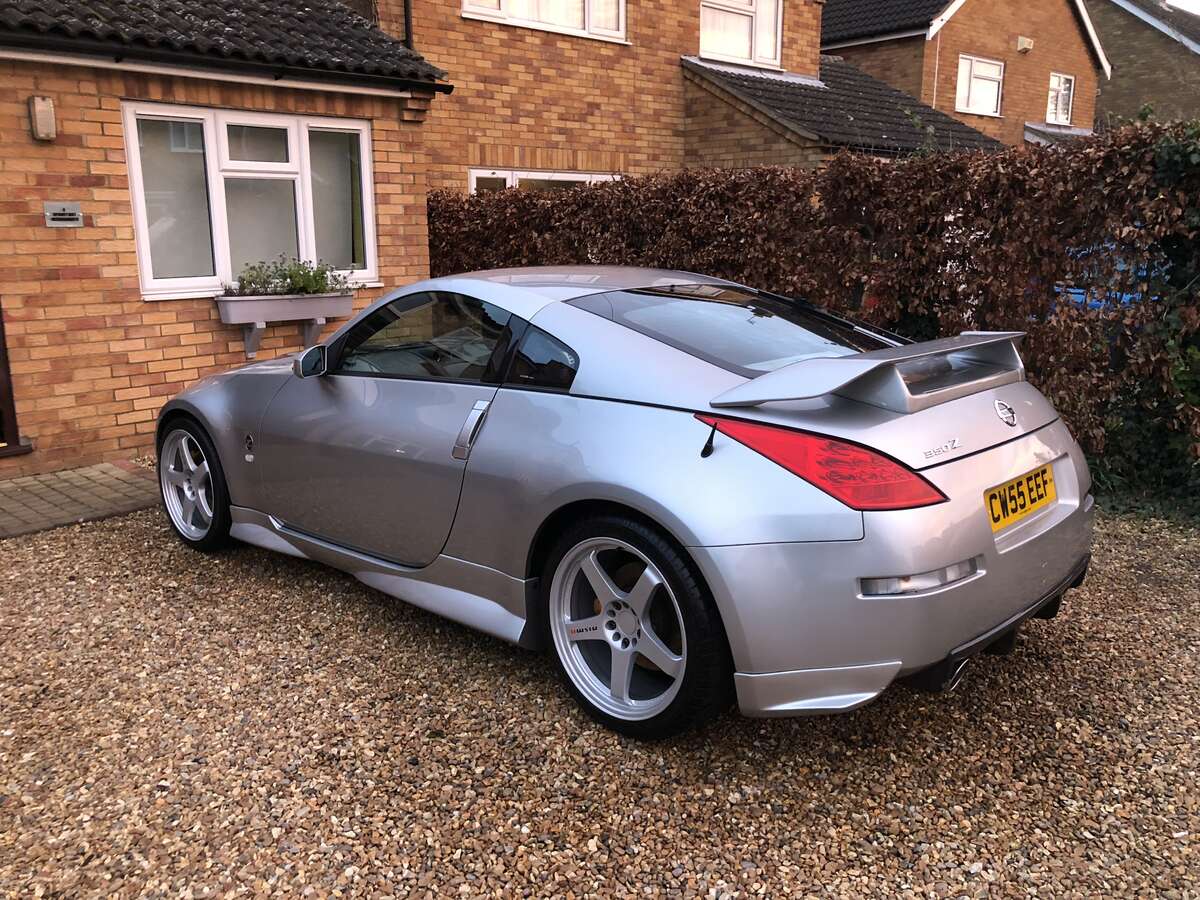
-
FOR SALE: Located in Ely, Cambridgeshire. Refurbished Team Dynamics Jade-R 20inch Wheels with Falken tyres. Front - FK425 245-35-20 (Loads of tread left) Back - FK510 275-30-20 (Practically New) £550 3D Carbon Side Skirts, great condition, would need repainting, currently finished in KY0 £80 V1 Nismo Rep rear spats, painted in KY0 £40 Wheels come with centre caps but they are a bit worse for wear

-
NSM 350z Build...My 2nd 350z!
Lewis Schwier replied to Lewis Schwier's topic in Member Build Projects
Place Microfibre cloth on floor mat below pedals. Spray pedals with APC, I used Bilt Hamber Surfex this time around. Agitate with Hog Hair brush or old tooth brush would do the job. Then spray water to rinse off. All residue should fall onto the microfibre cloth so it doesn’t run down onto your floor mats. Then wipe pedals dry with clean microfibre. -
In terms of paintwork would be silly not to get the car detailed and ceramic coated and maybe PPF’d. In terms of the underbody Japanese cars do tend to rust very easily but again you can seal the underside to prevent this. Whatever you’ve been reading does seem to be maybe over exaggerating but they do definitely suffer with rust over time.
-
NSM 350z Build...My 2nd 350z!
Lewis Schwier replied to Lewis Schwier's topic in Member Build Projects
https://www.ebay.co.uk/itm/03-04-05-06-07-08-Nissan-350z-Rear-Wiper-Delete-Plugs-Hatch/202802041886 -
Yup, going to replace them all. Don't enjoy driving in the wet, so if its raining I wouldn't make the conscious decision to go out . Obviously if I get caught out in it, thats different story.
-
No cracking on them, car isn’t driven in the winter and never in the wet... Yup I may have to replace them all, shame as this will knock my build back

