Lewis Schwier
-
Posts
316 -
Joined
-
Last visited
Content Type
Profiles
Forums
Events
Gallery
Store
Everything posted by Lewis Schwier
-

NSM 350z Build...My 2nd 350z!
Lewis Schwier replied to Lewis Schwier's topic in Member Build Projects
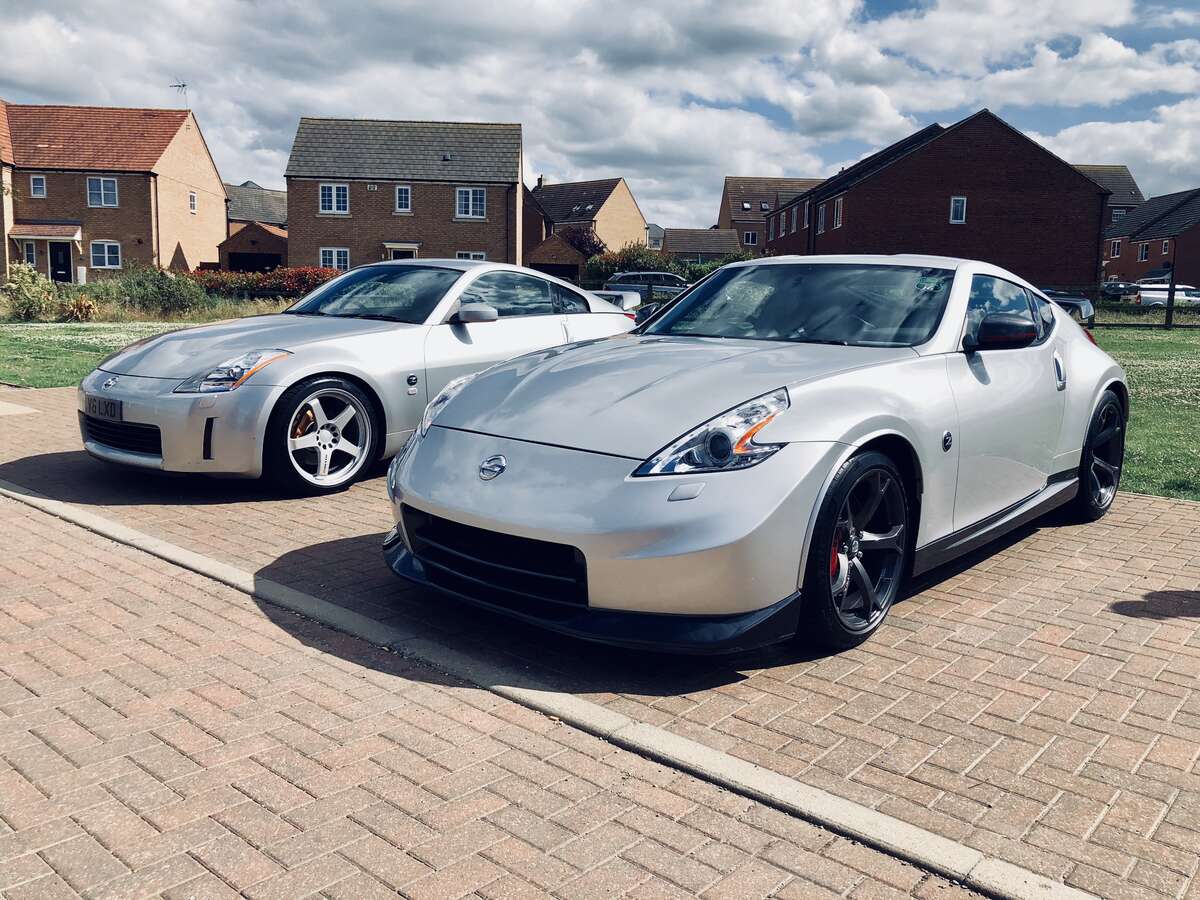
Completely agree, always hear people bang on about how the interior is dated..well obviously it’s a 15 year old car. To me the interior has character and is very individual unlike interiors now a days which is shared across all models. Thank you! -
NSM 350z Build...My 2nd 350z!
Lewis Schwier replied to Lewis Schwier's topic in Member Build Projects
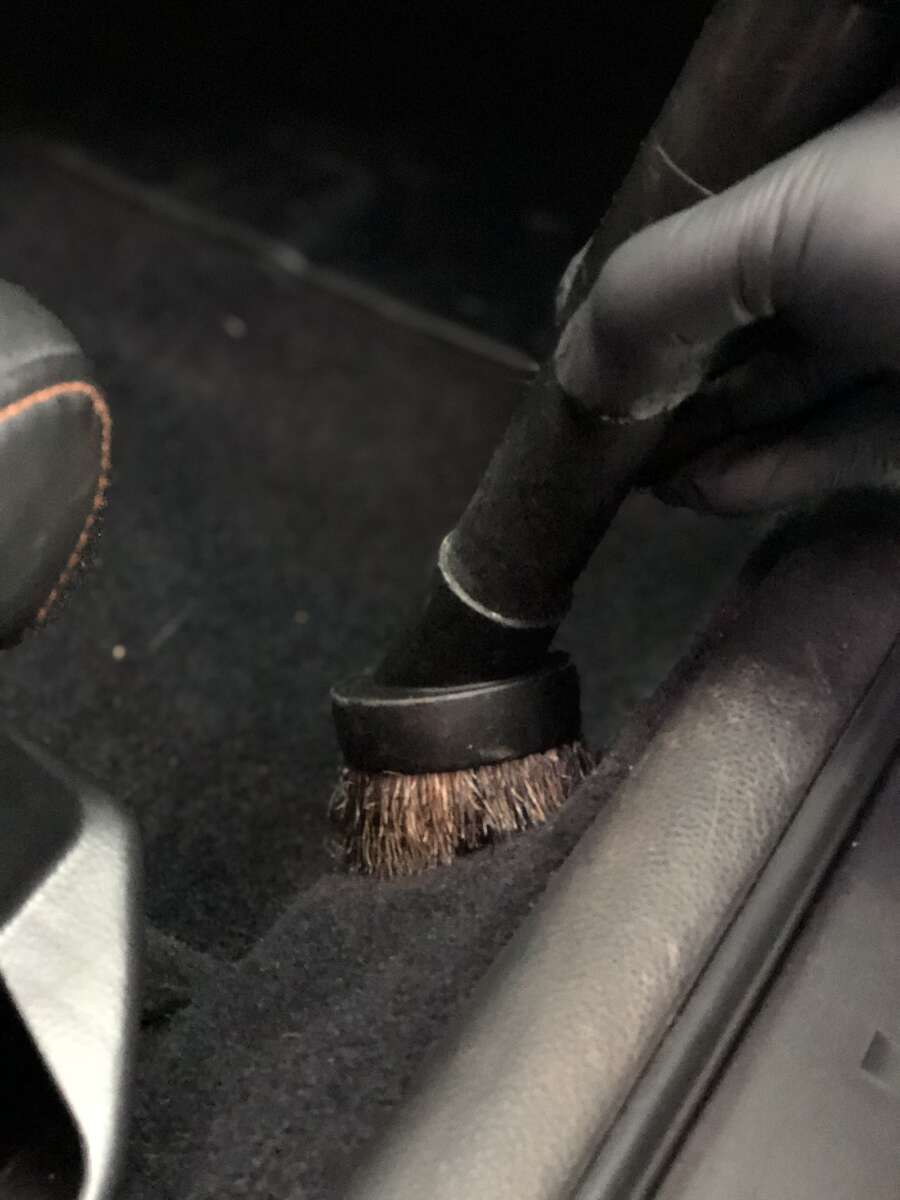
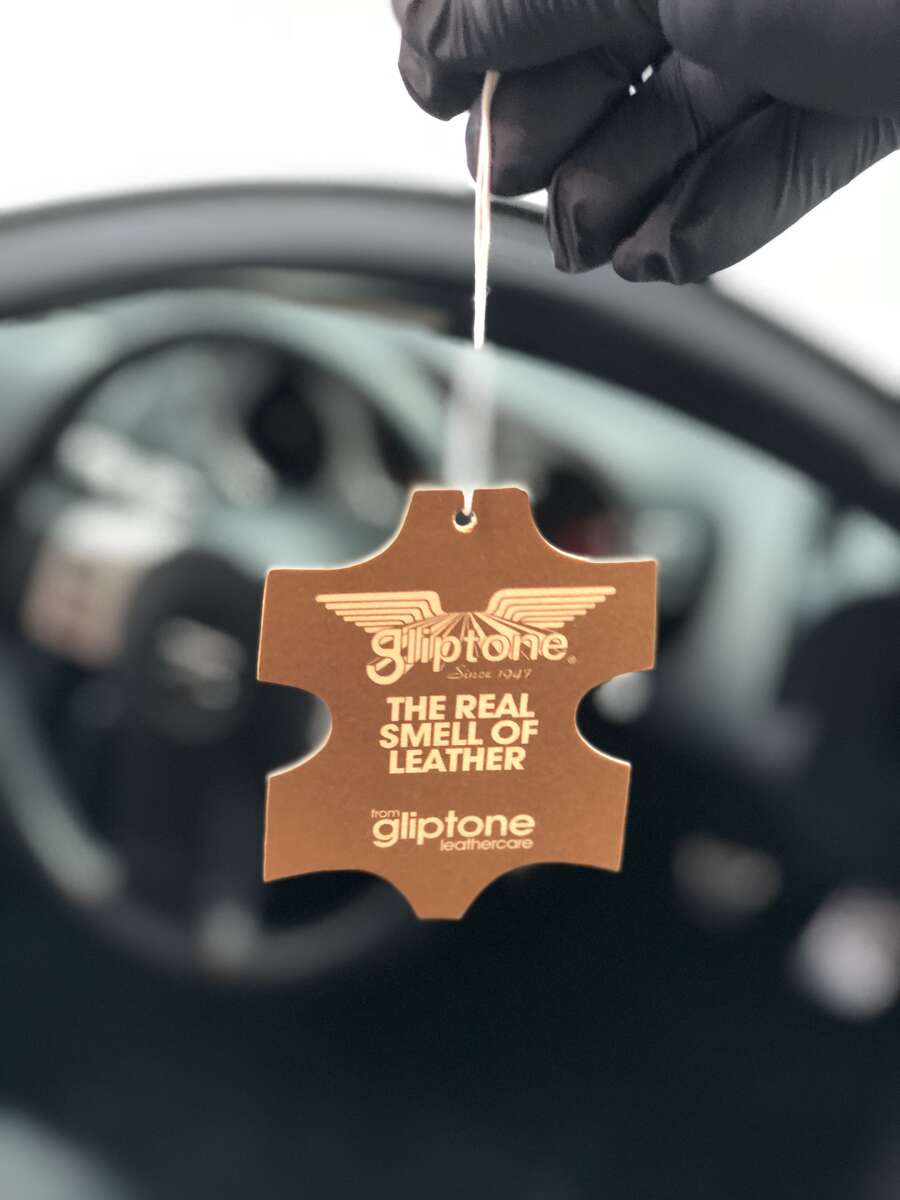
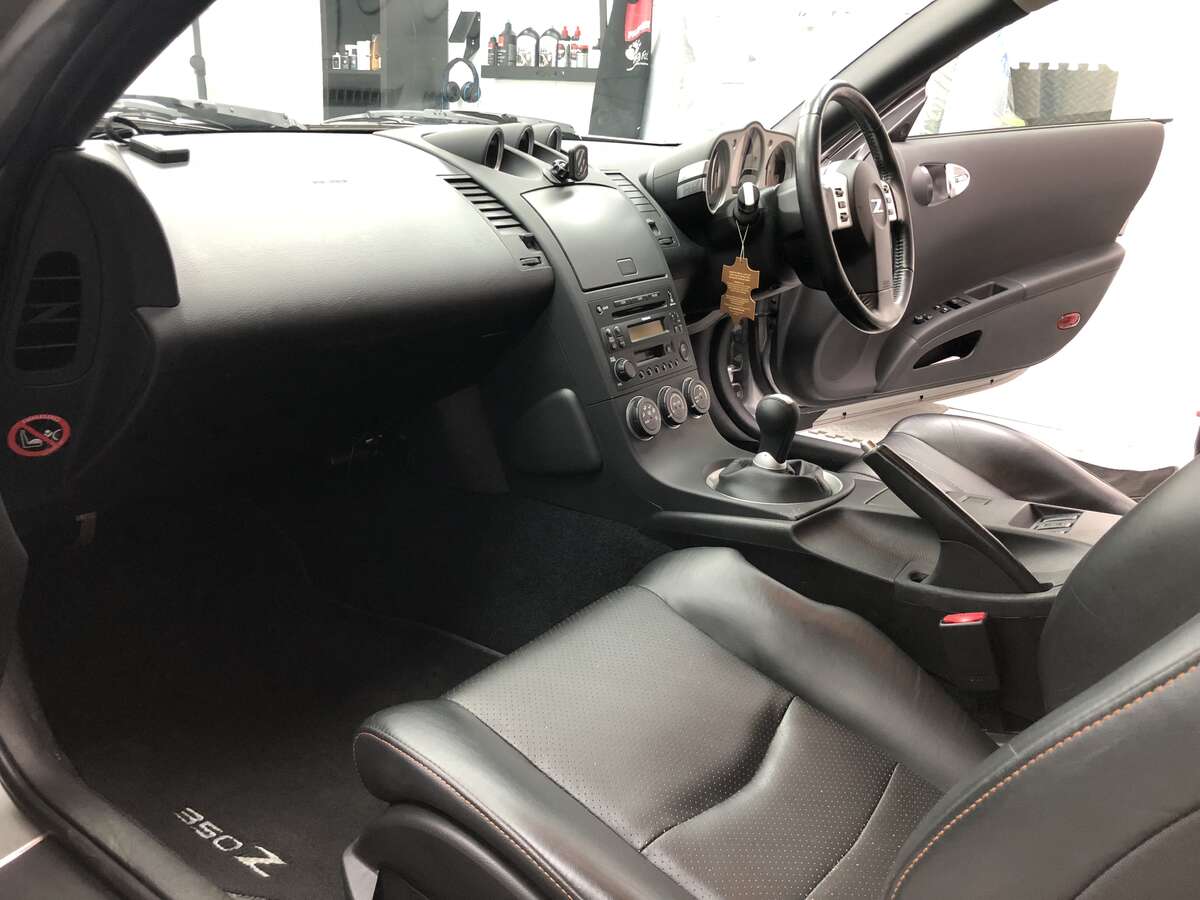
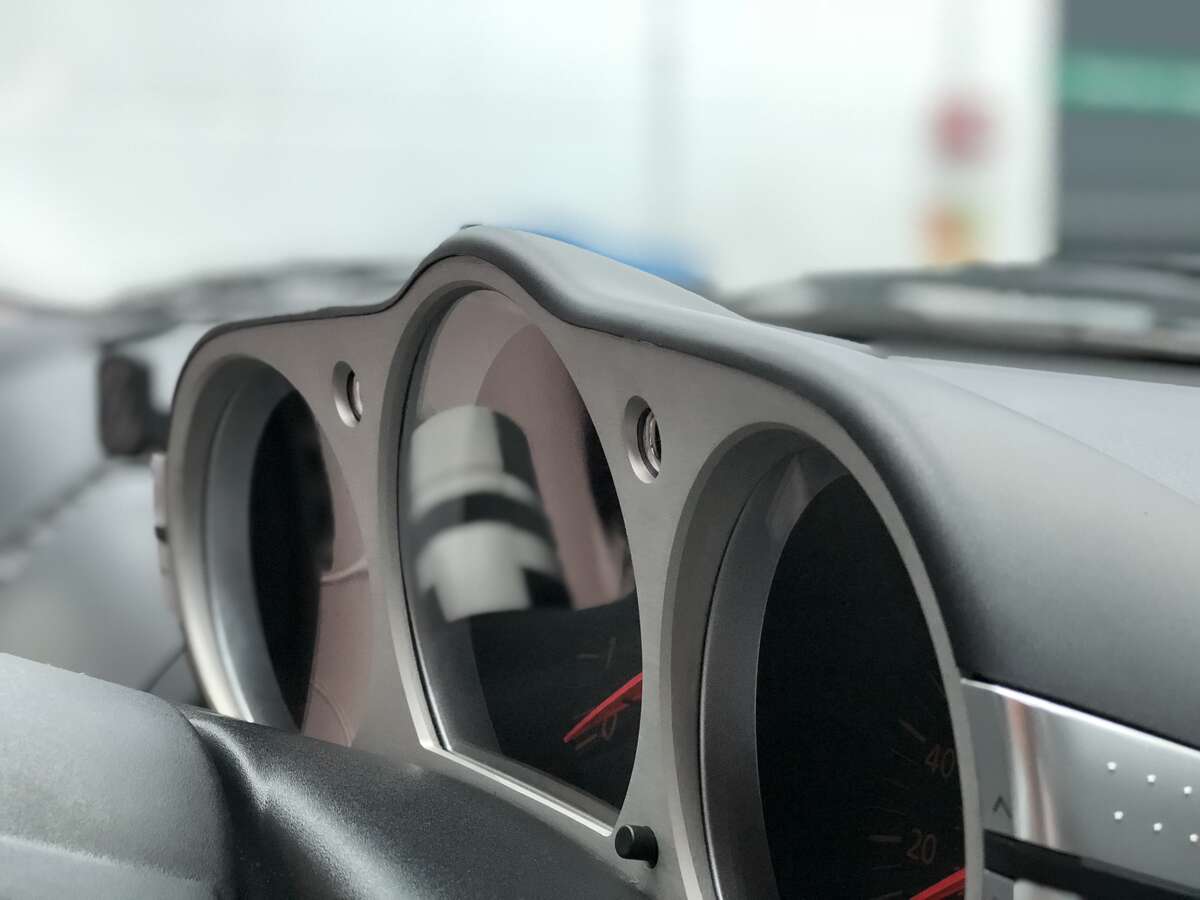
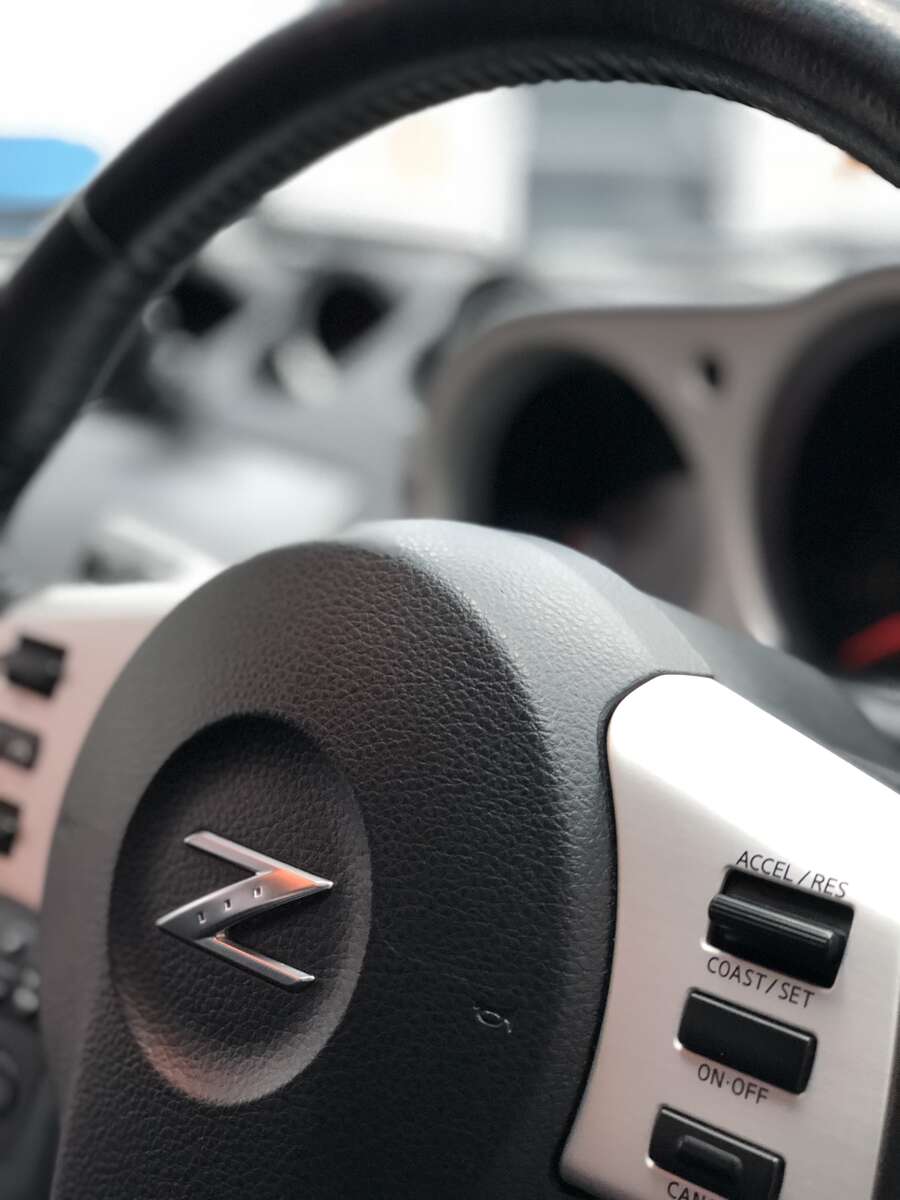
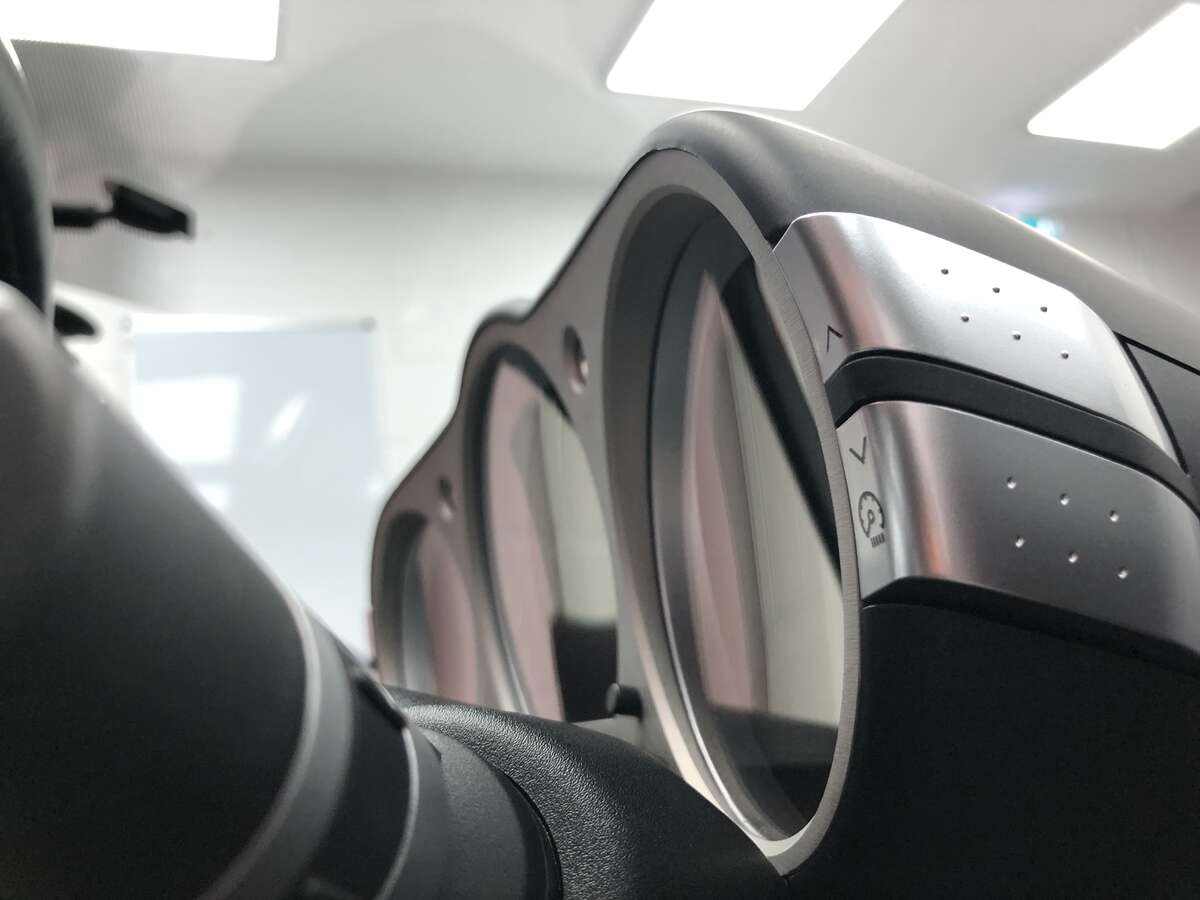
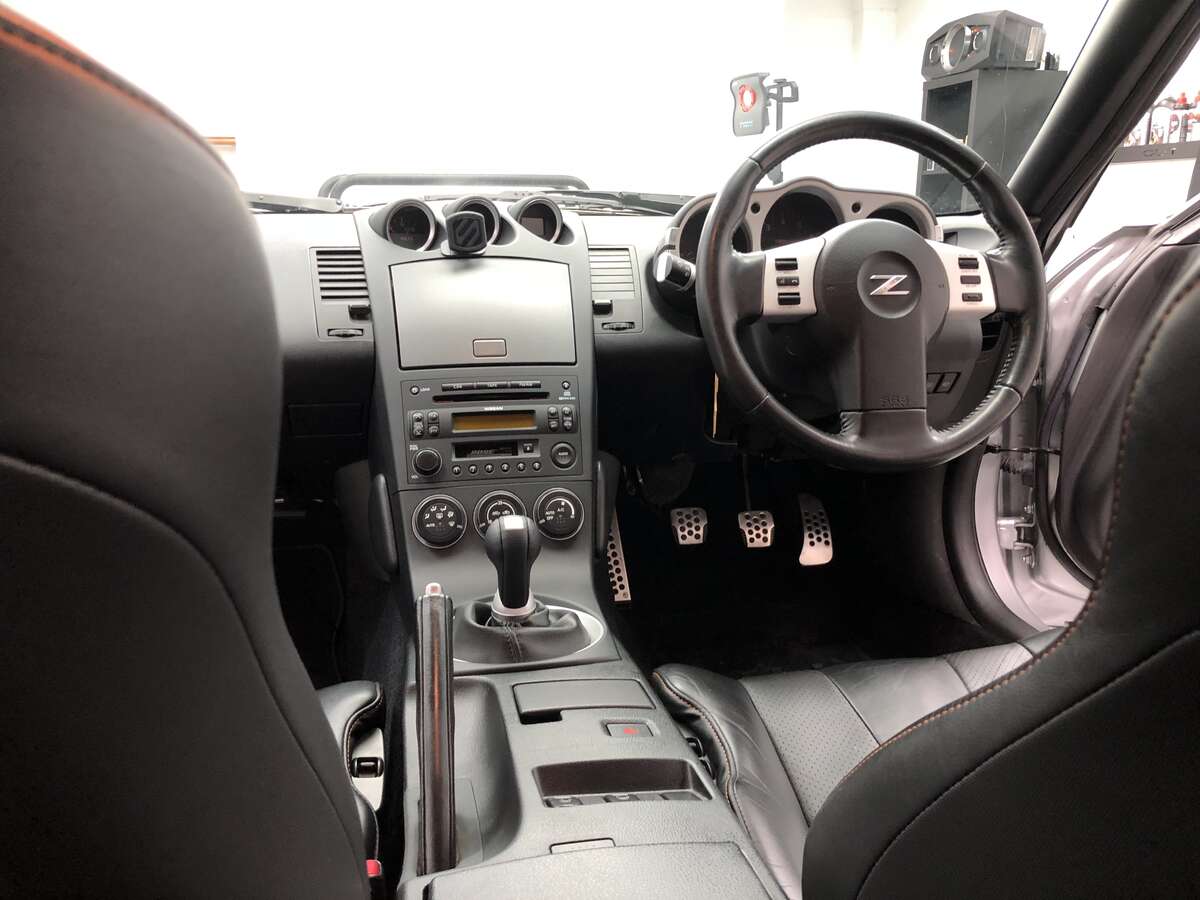
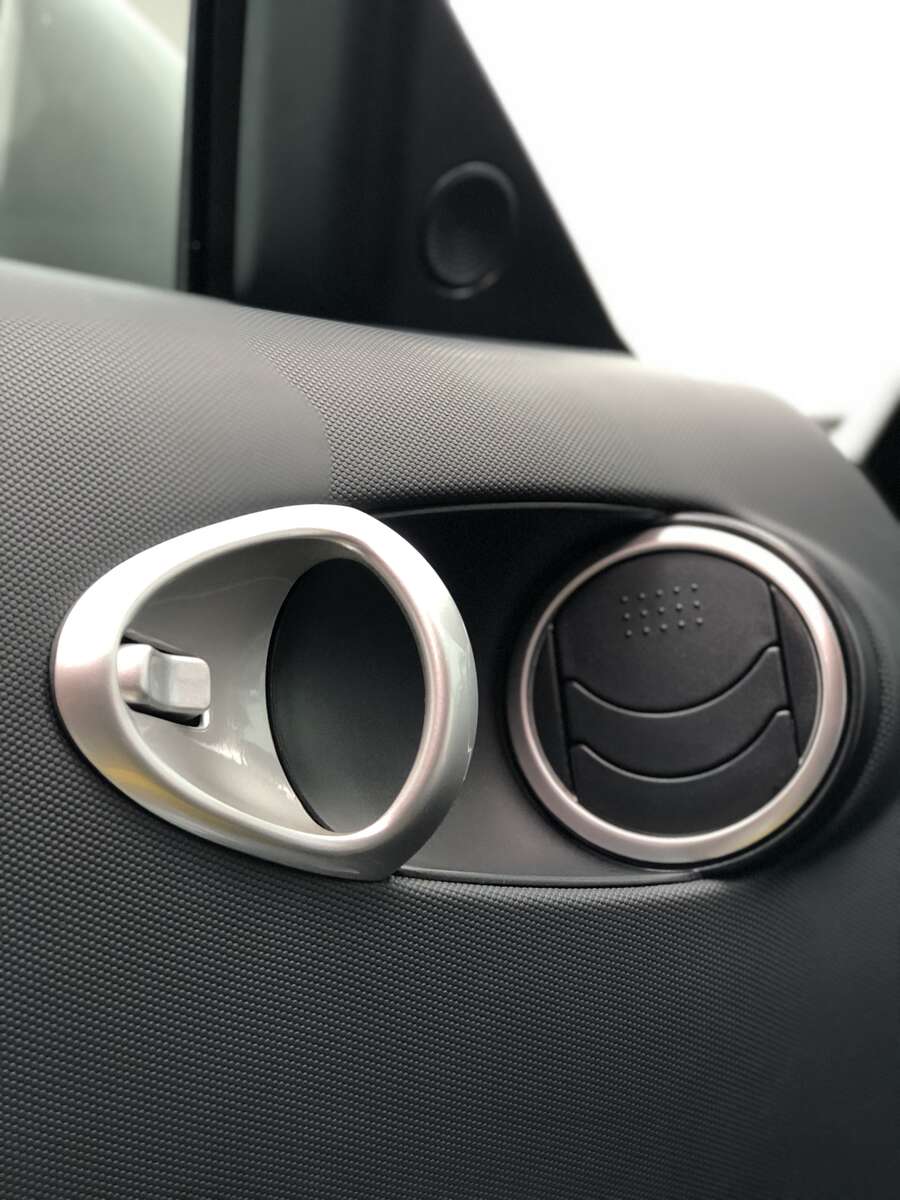
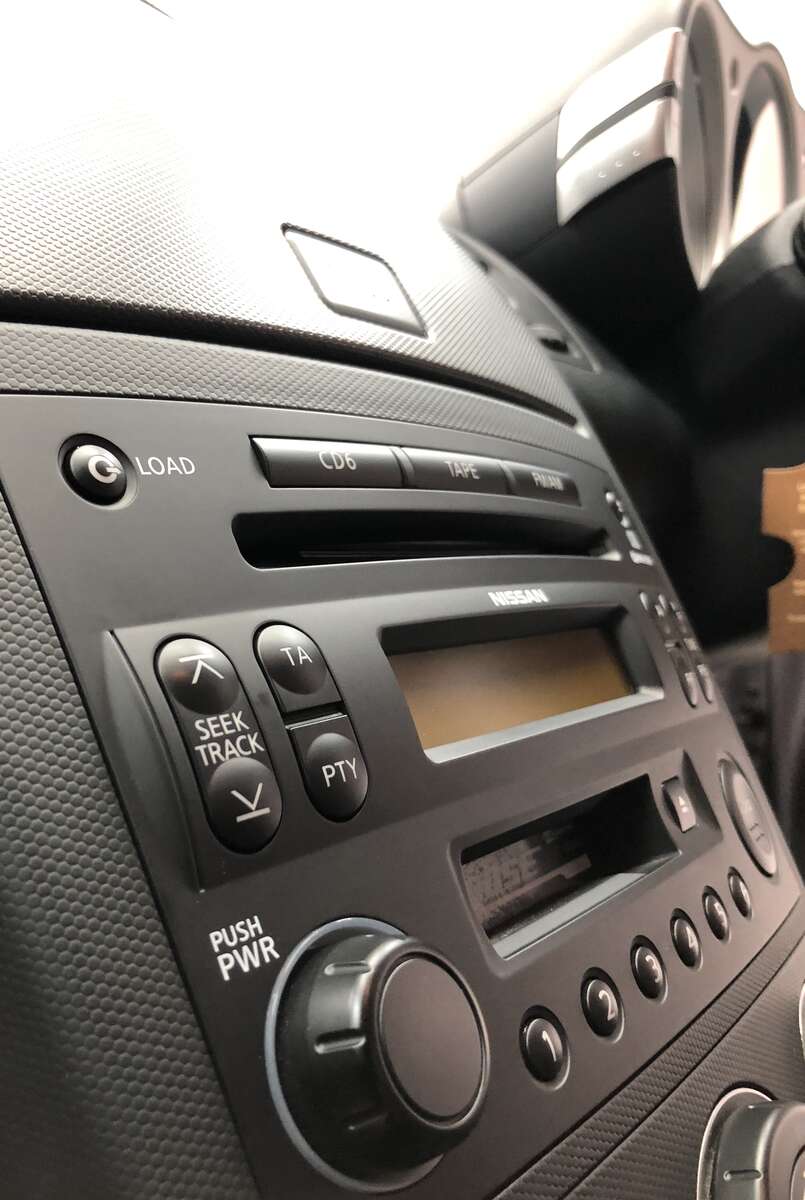
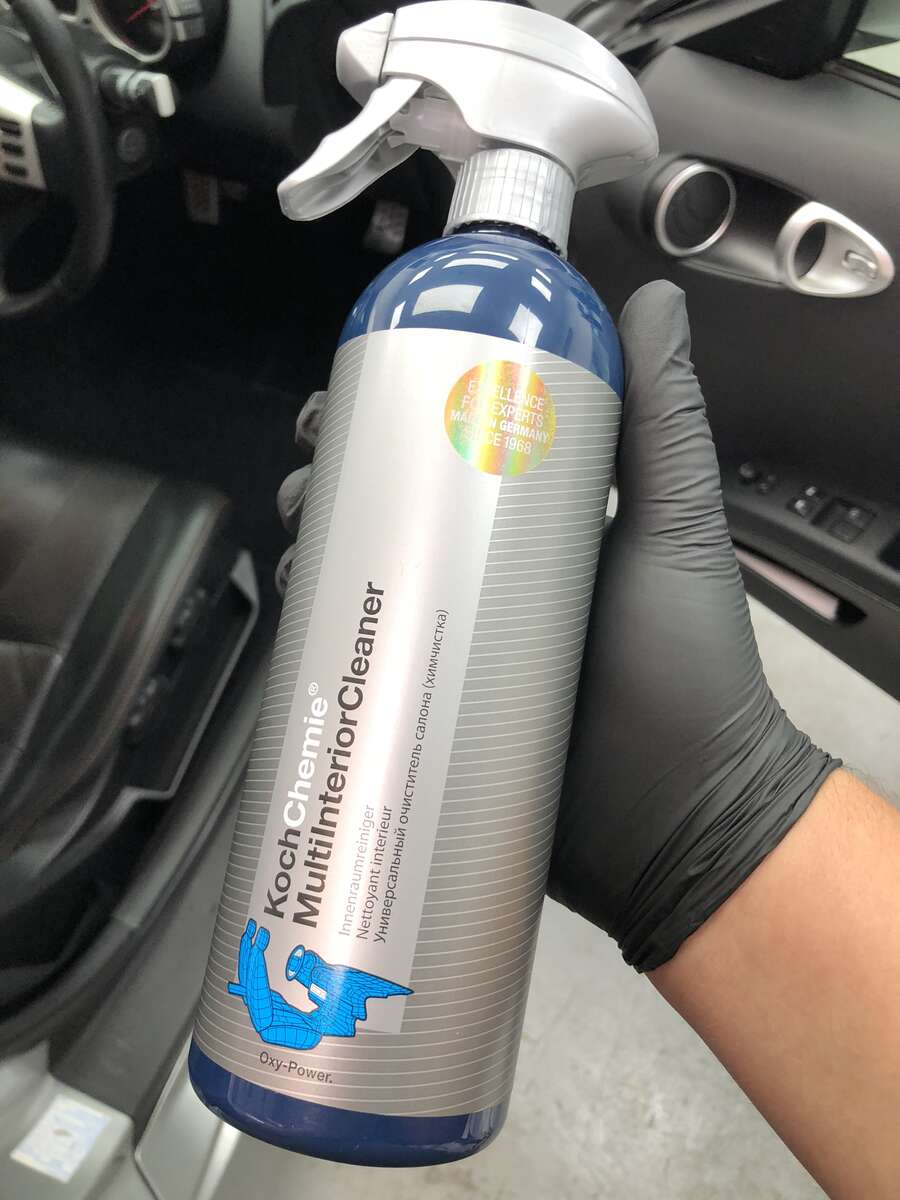
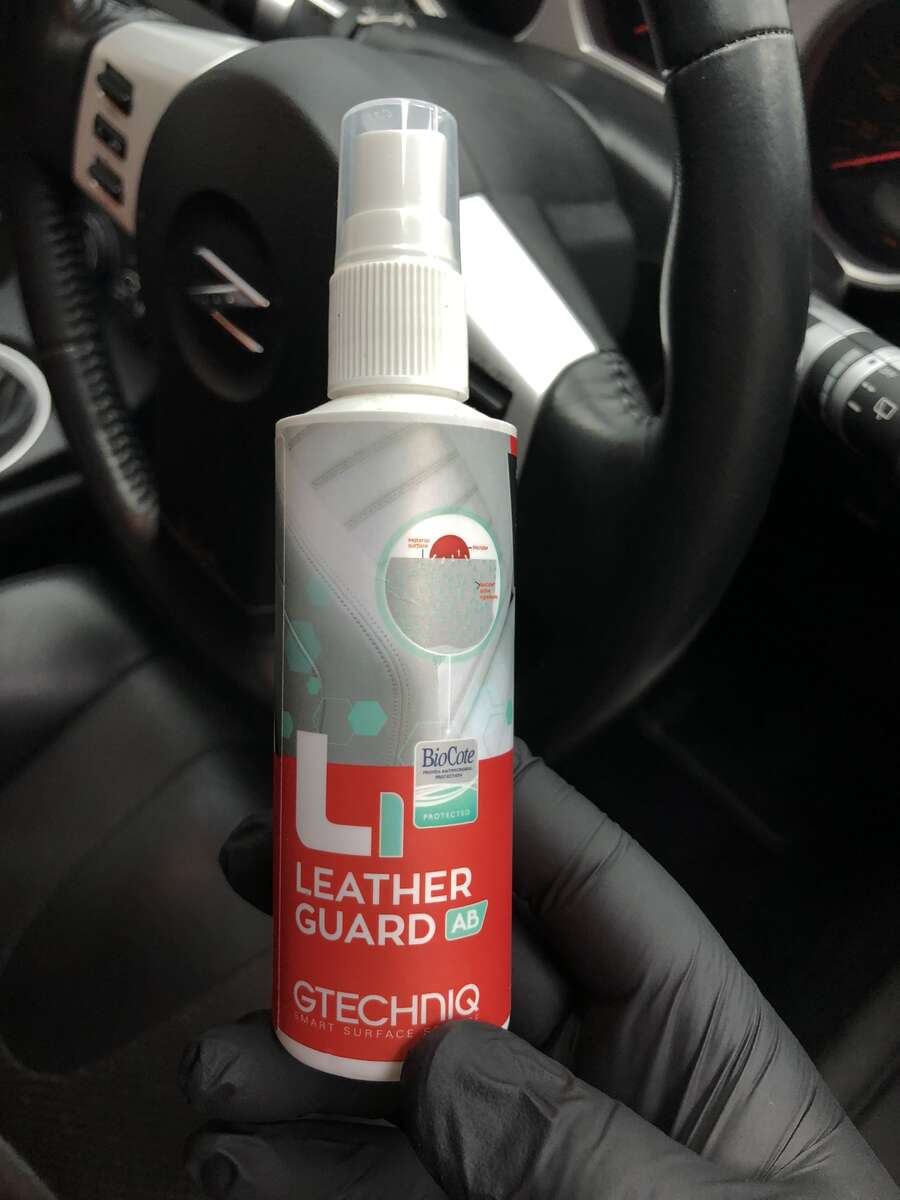
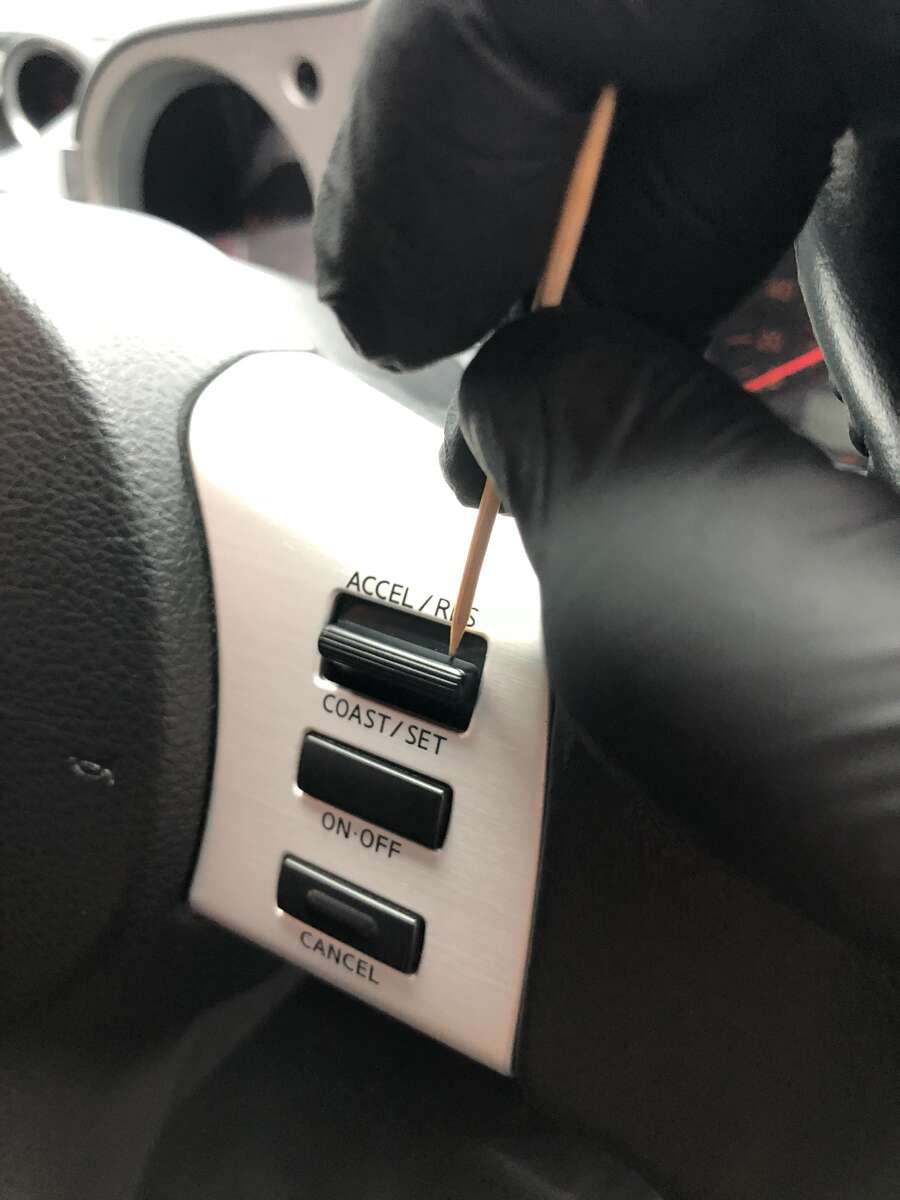
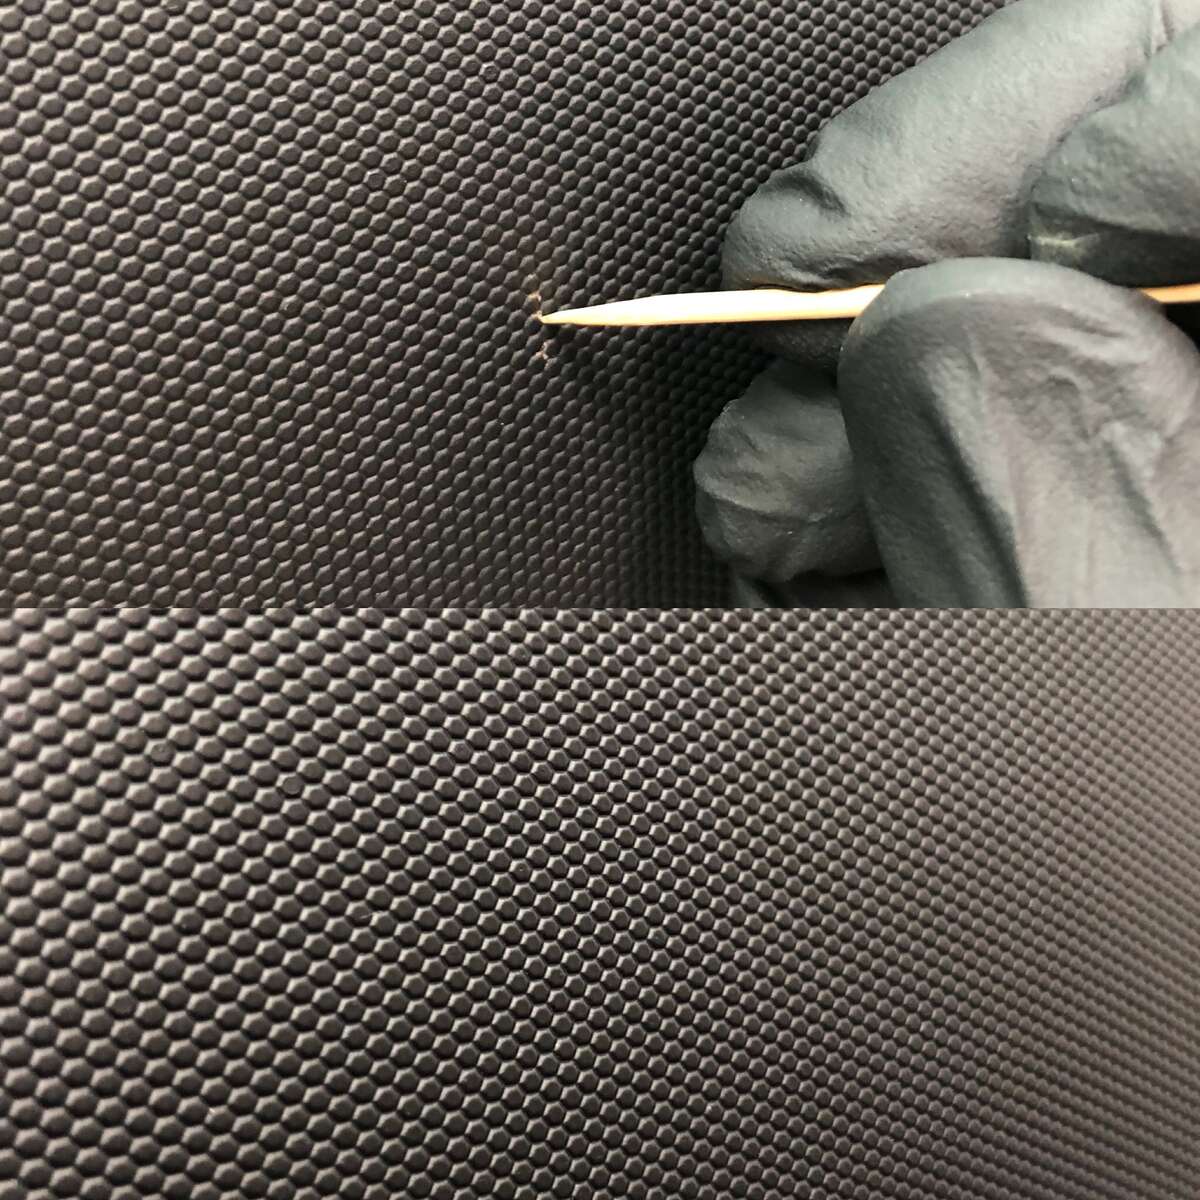
Managed to do my interior 'properly' minus taking the seats out which I will do another time. Interior was probably the worst part about the car when I got it, one of the first things I did was give it a good vacuum and wiped all the surfaces down. Then at a later date I gave the steering wheel and seats a deep clean. So yeah at surface level it wasn't that bad meaning I've only driven it a handful of times since doing the previous cleaning but today I spent time really focusing on the small details. Interior is now looking and smelling fresh, about 90% to where I want it to be, like I said taking the seats out will make up that other 10%. Work completed: All carpets and surfaces vacuumed All surfaces wiped down with anti-bac solution Headliner Steam Cleaned Steam used to kill bacteria within ventilation system All plastics cleaned with KochChemie MultiInterior cleaner 'Tooth pickery' carried out Steering Wheel & Seats deep clean using Hog Hair brush and Angel Wax Heaven for Leather Leather treated with Gtechniq L1 Leather Guard Final quick vacuum New Air Freshener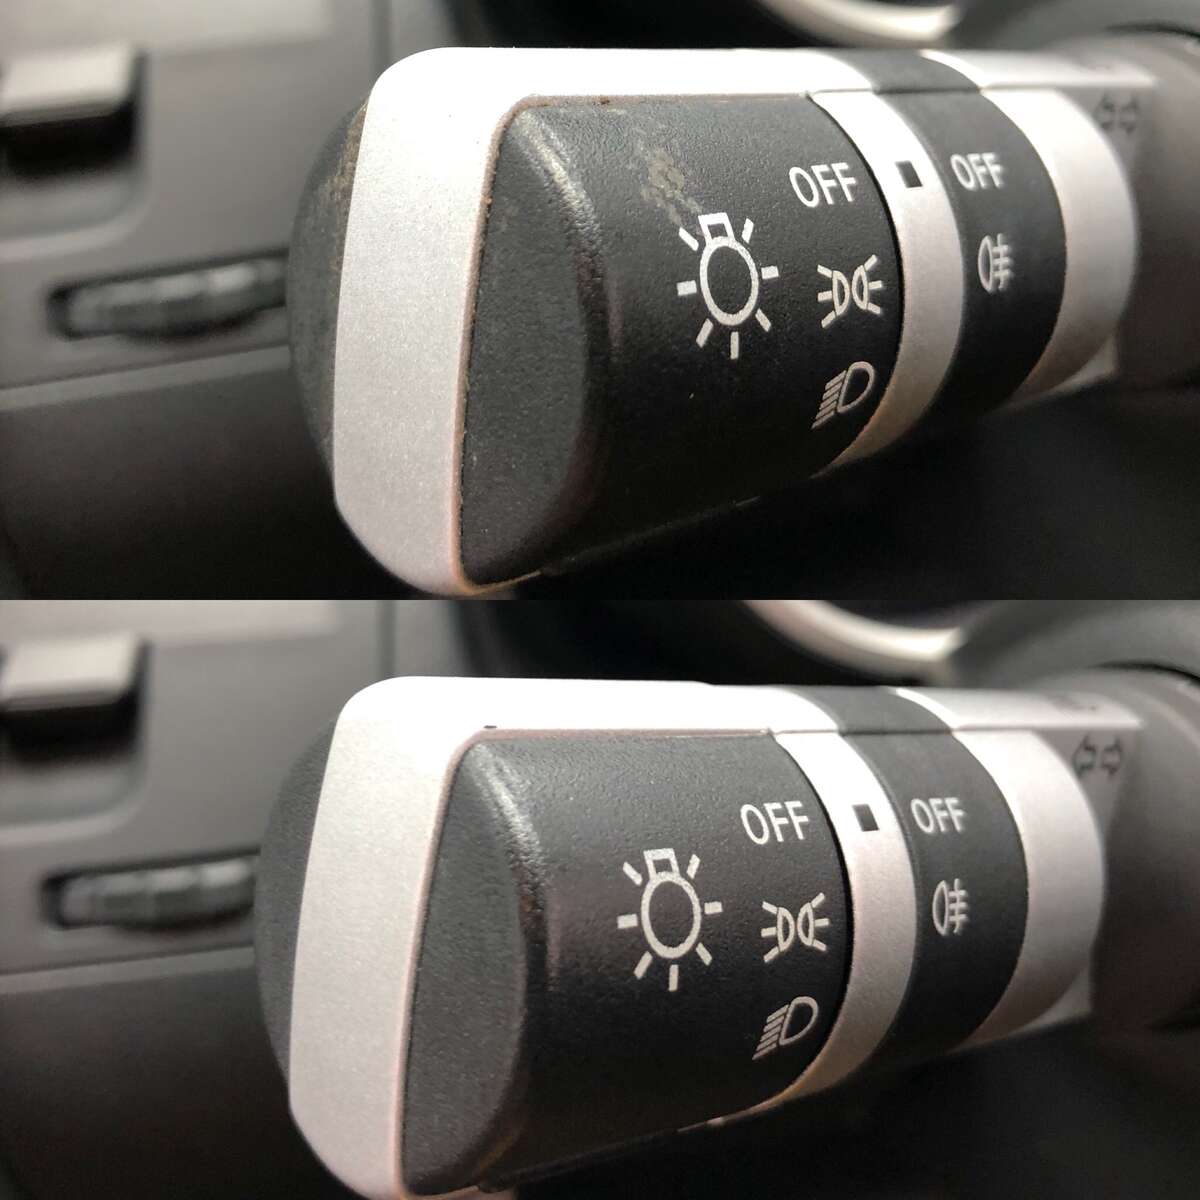


-
Brutha from another Mother
-
Newbie in Cambridge + pics
Lewis Schwier replied to Seb350z's topic in Introductions & Welcome Messages
Always good to see another local Z in the area! Can't wait to get my hands of this when the time comes -
Did you ever sell these?
-
The Brothers were out at the weekend!
-
370Z Nismo Mk1 - Fast road/track build
Lewis Schwier replied to dave_7's topic in Member Build Projects
Some lovely shots as usual! In terms of your spacers I was just speaking to a lad yesterday that had a Nismo, Mk2 mind you but he had loads of problems with his Eibach spacers. He changed to the Z1 Motorsport spacers with the extended nuts and he said it cured the problems completely. Also might be worth using some 3in1 anti-seize copper grease, will help them not get as stuck. -
From peoples real life experiences with the Eagle F1 the MPS4S has better wear rate, so I’ll stick by my original statement. That’s the only thing these tyre reviews do not cover its wear rate, that’s why the website has a summary section based on what people have found after x amount of miles using each different tyres.
-
I spent a lot of time looking into this when I was making my decision on what Tyre to go for. From what I found is that the wear rate on the MPS4S is considerably better then the Eagle F1. Although the Michelin’s are more money nothing can compare. You pay for what you get essentially. You can find the MPS4S in the sizes you are after but you do have to look thoroughly.
-
NSM 350z Build...My 2nd 350z!
Lewis Schwier replied to Lewis Schwier's topic in Member Build Projects
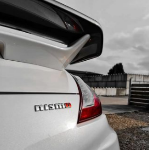
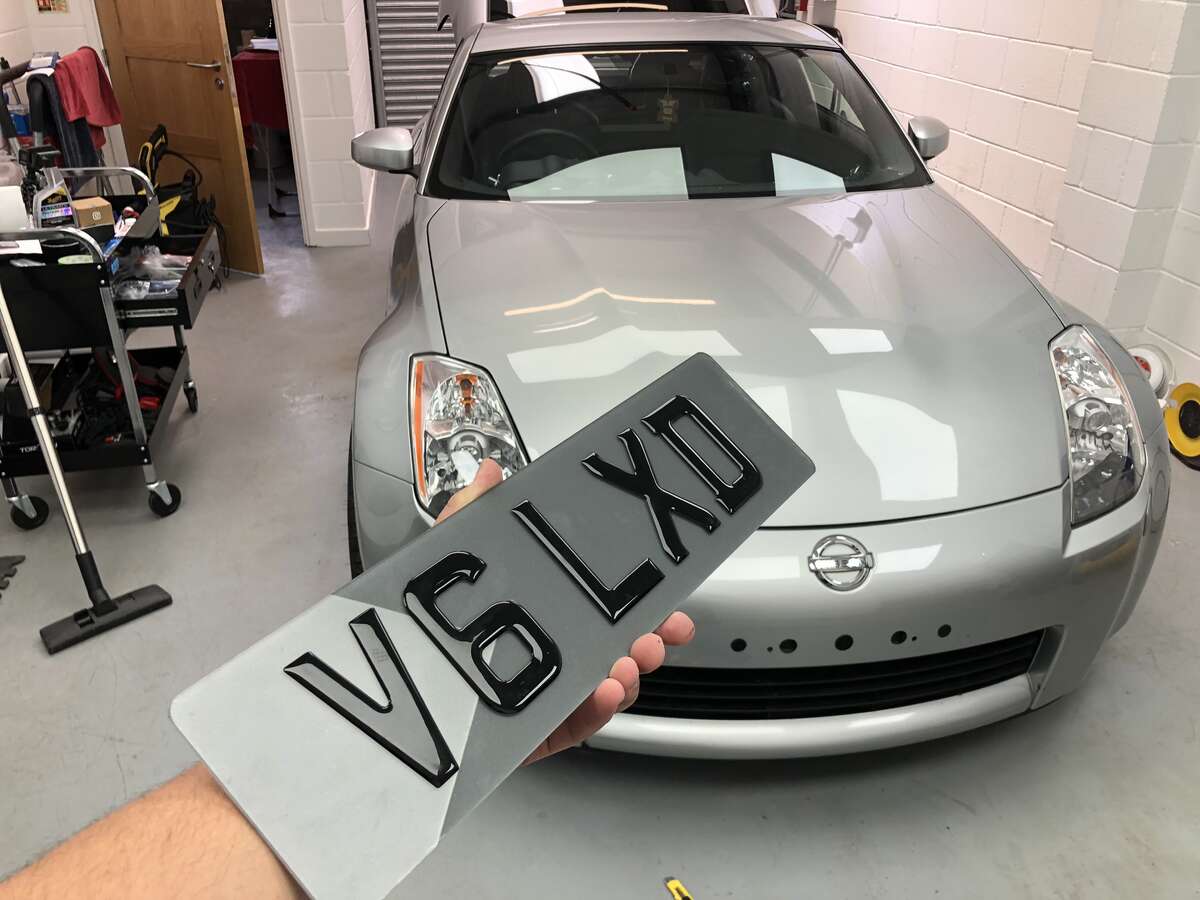
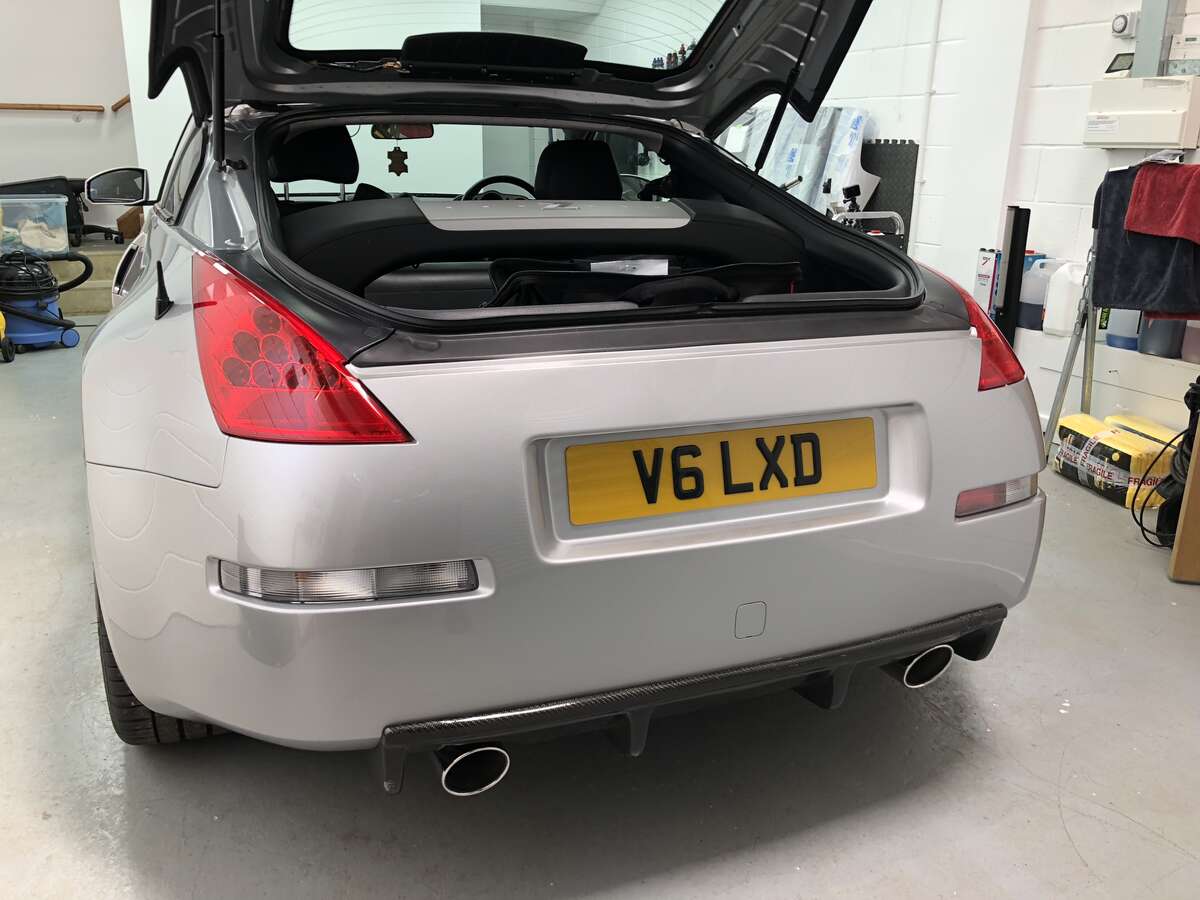
Plates on! Enjoyed my first drive since being freshly detailed, missed driving it so much! Decided to use heavy duty Velcro for the front plate, cut circles out to match the two big holes in the front bumper, looks alright!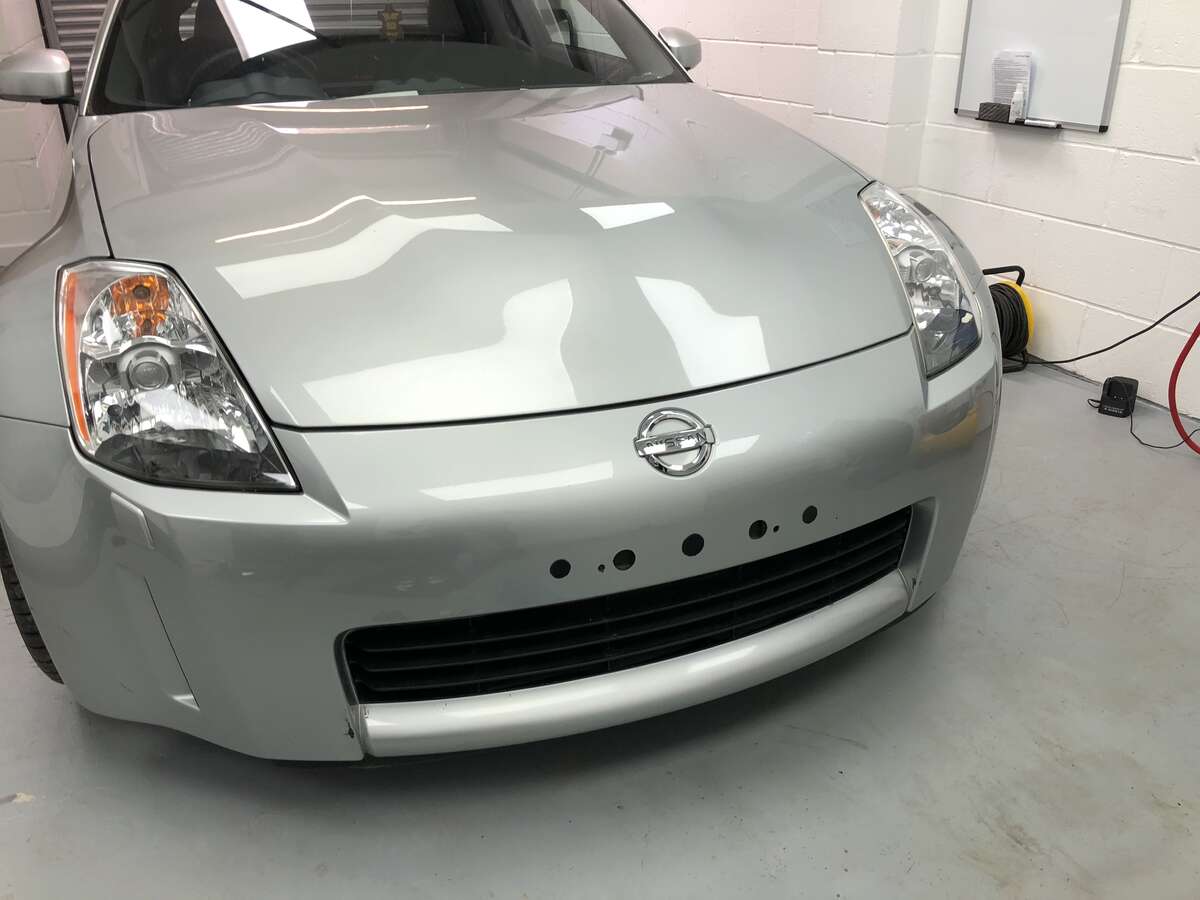
-
To die for!
-
54 plate between Stretham and Haddenham
Lewis Schwier replied to BOINC UK's topic in Spotted or Flyered
Have you got a photo of yours? -
370Z Nismo Mk1 - Fast road/track build
Lewis Schwier replied to dave_7's topic in Member Build Projects
Always good to see another MK1 Nismo pop up as they are so rare to see! Lovely car, some amazing upgrades! I bet the car feels so planted. Very nice actions shots there -
I ended up going with MPS4S all round. 245/35 up front and 275/35 on the rear.
-
54 plate between Stretham and Haddenham
Lewis Schwier replied to BOINC UK's topic in Spotted or Flyered
Yep same! I also put a post out on the Facebook to try and find out who it is but no luck -
NSM 350z Build...My 2nd 350z!
Lewis Schwier replied to Lewis Schwier's topic in Member Build Projects
If my car goes missing at the Torqen meet I'll know where to look Thanks for the sticker, complementing it perfectly -
NSM 350z Build...My 2nd 350z!
Lewis Schwier replied to Lewis Schwier's topic in Member Build Projects
Thanks @davey_83 for the kind words as always! Yep so worth it, now all the hard work is done all it requires is basic maintenance washes and it will come out looking like this every time! Yep the DE headlights still look good, I have got some facelift ones I bought but waiting to put those on when the Bodykit goes on. Haha it’s amazing what an iPhone can do these days. The rear splitter was something I decided to keep on as I just couldn’t imagine the mess that was lying underneath, just like the rest of the bodykit that was on it, it has been poorly fitted. -
NSM 350z Build...My 2nd 350z!
Lewis Schwier replied to Lewis Schwier's topic in Member Build Projects
Thank you, yes! So looking forward to driving it -
Haha I’m flattered! Love an arch clean, mega job! What a difference. Also is always a good sight to see when your summer wheels are fitted Sorry I couldn’t make it today, Car was still in the unit. All done now though, looking forward to meeting up
-
NSM 350z Build...My 2nd 350z!
Lewis Schwier replied to Lewis Schwier's topic in Member Build Projects
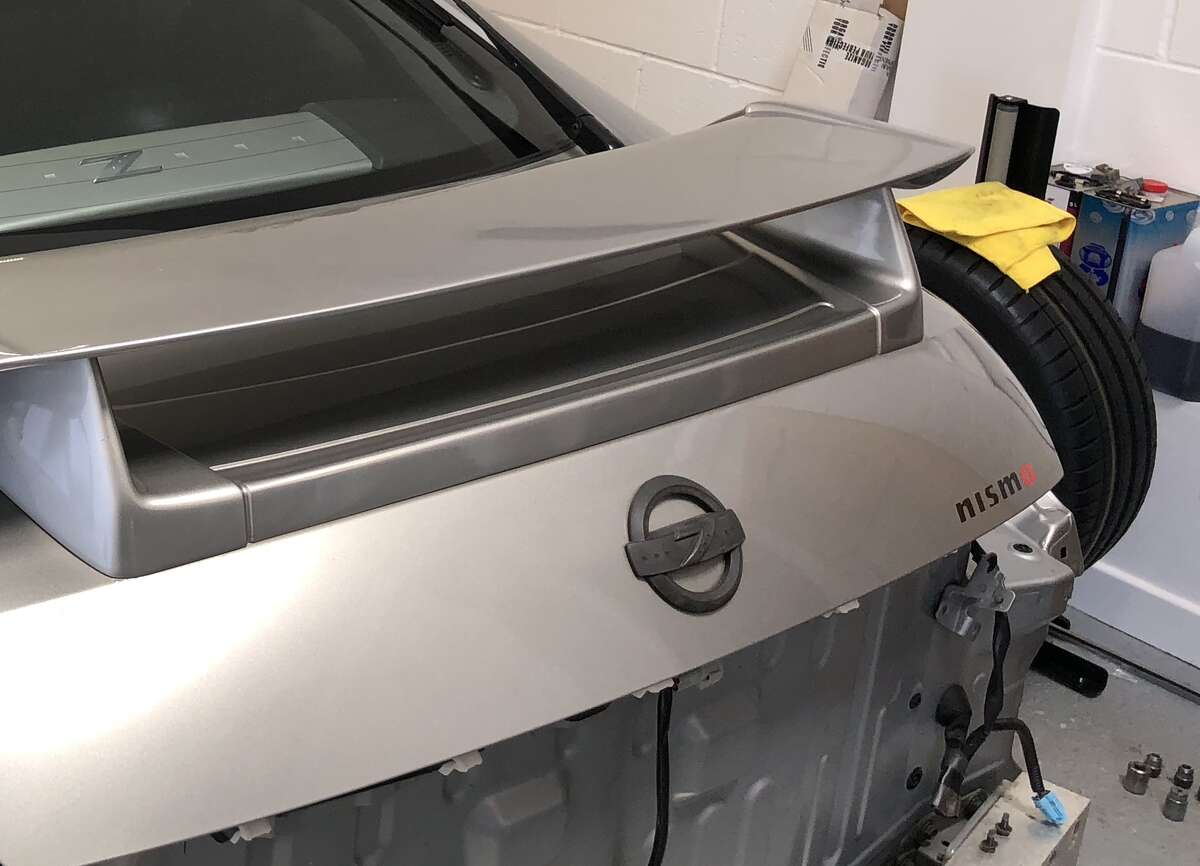
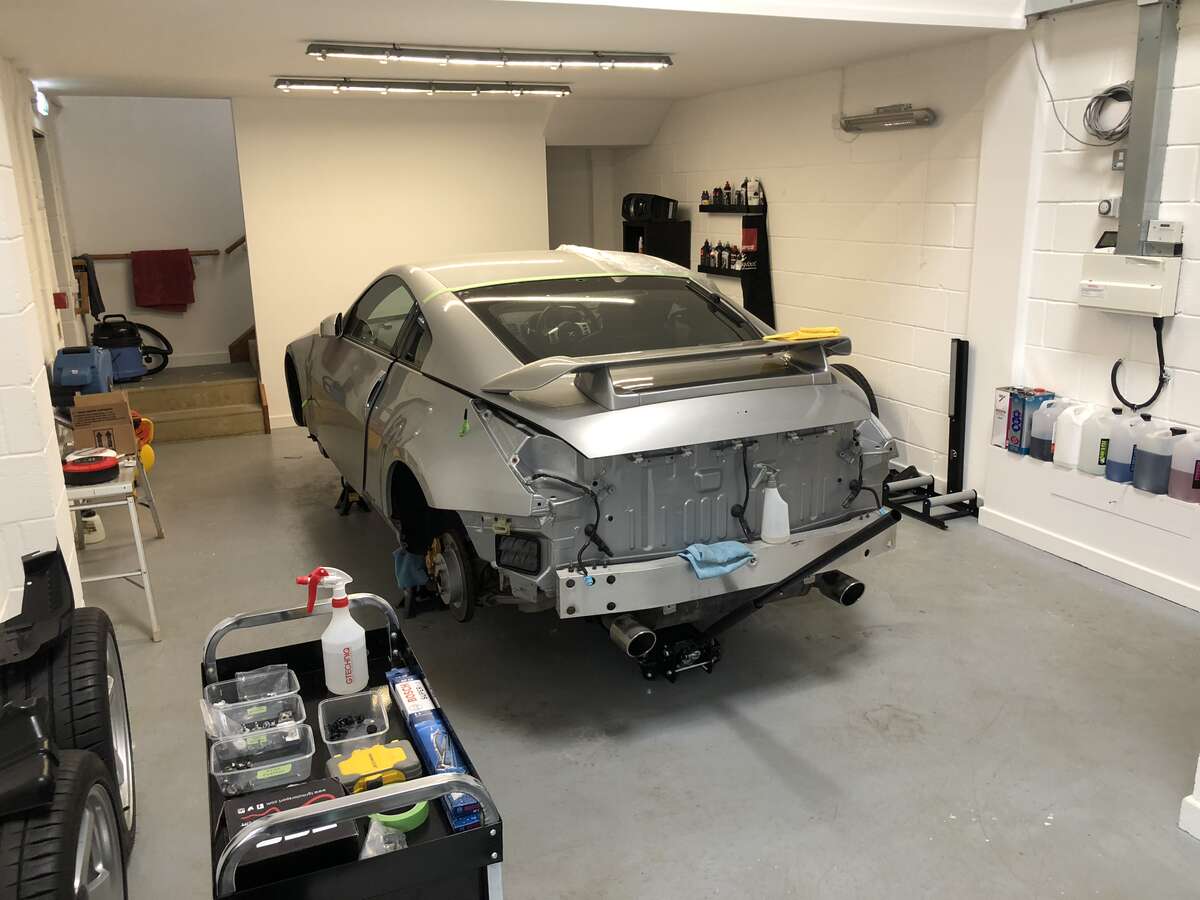
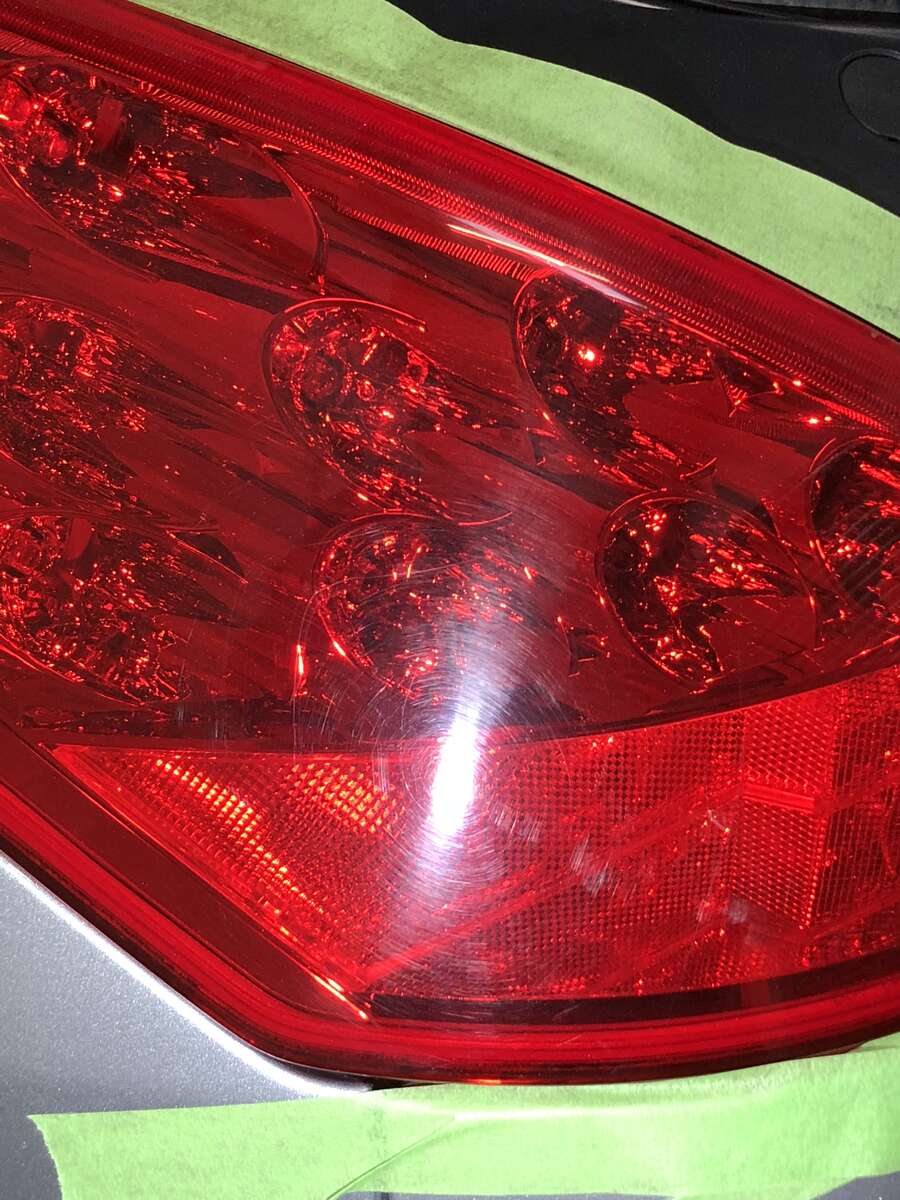
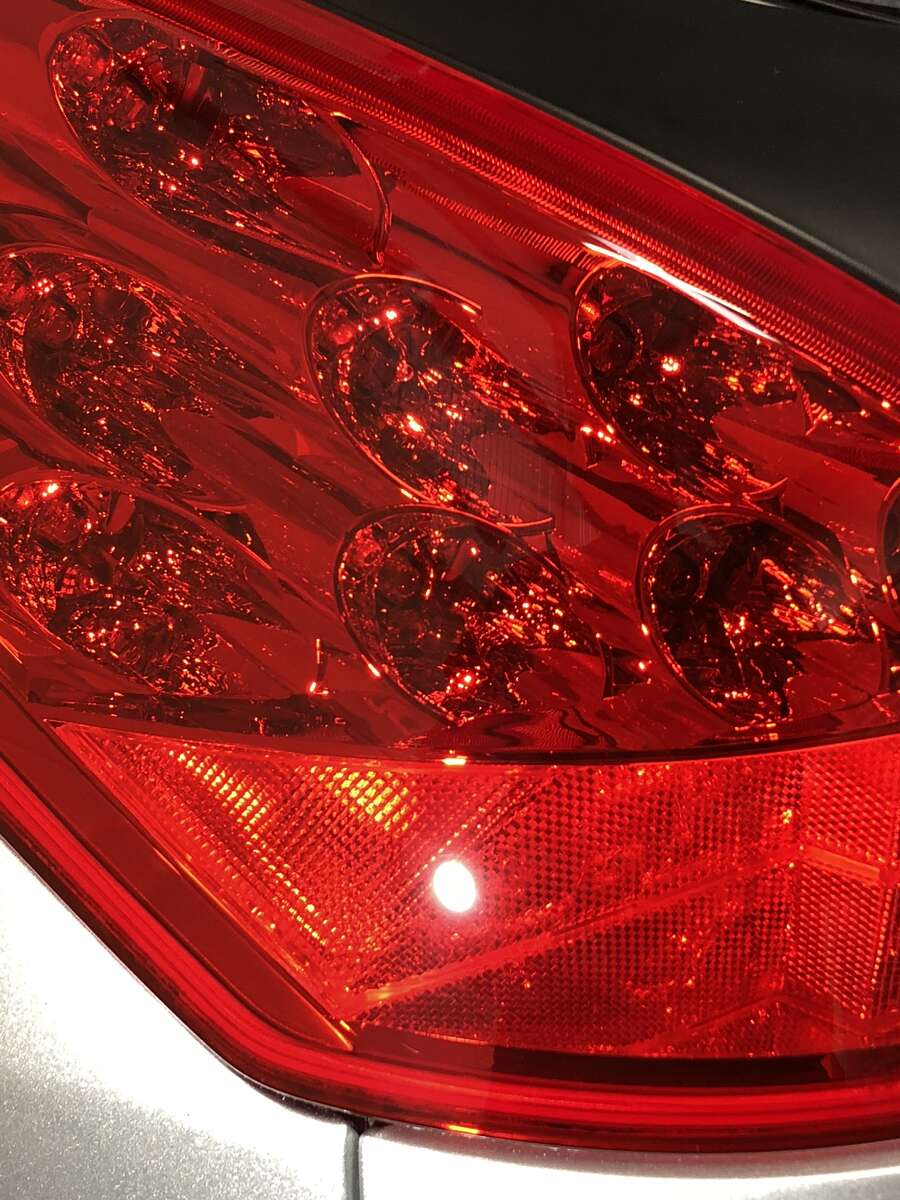
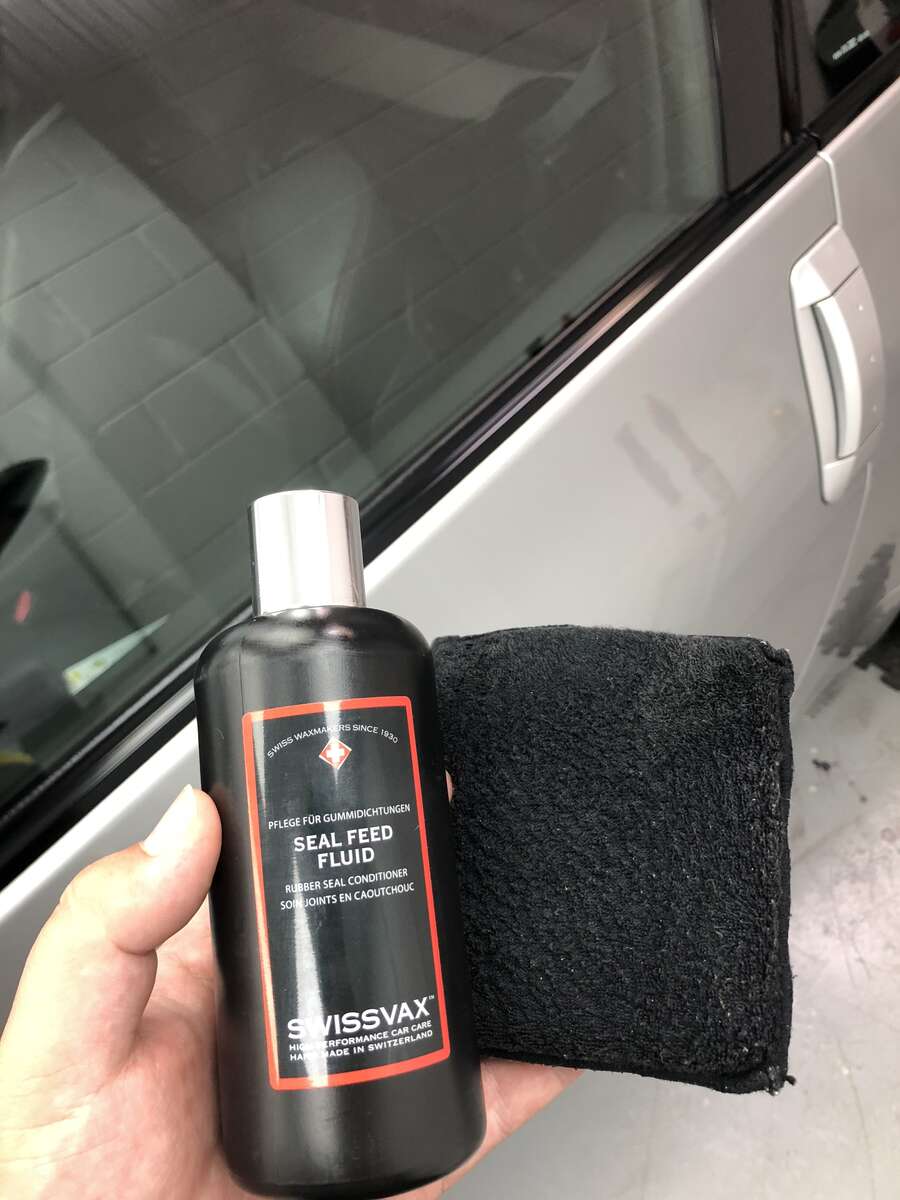
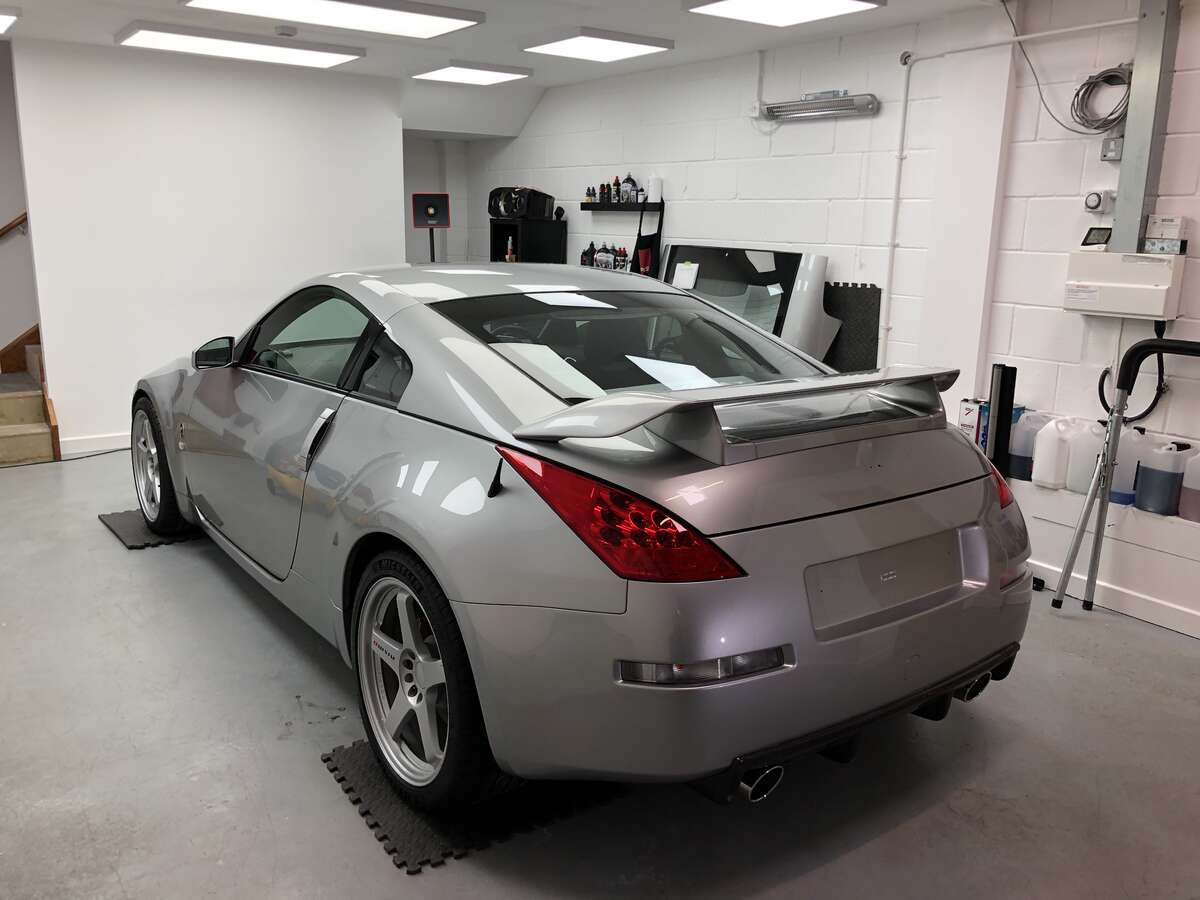
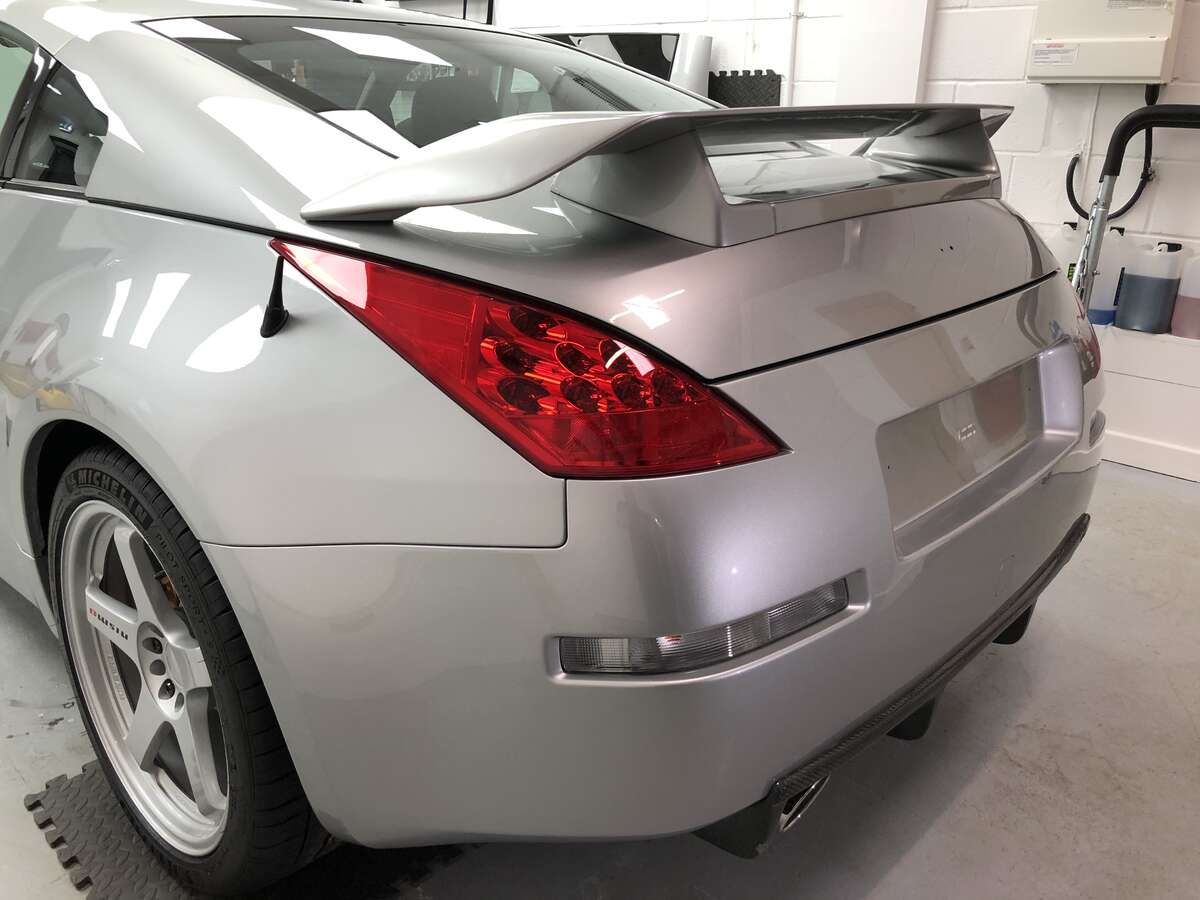
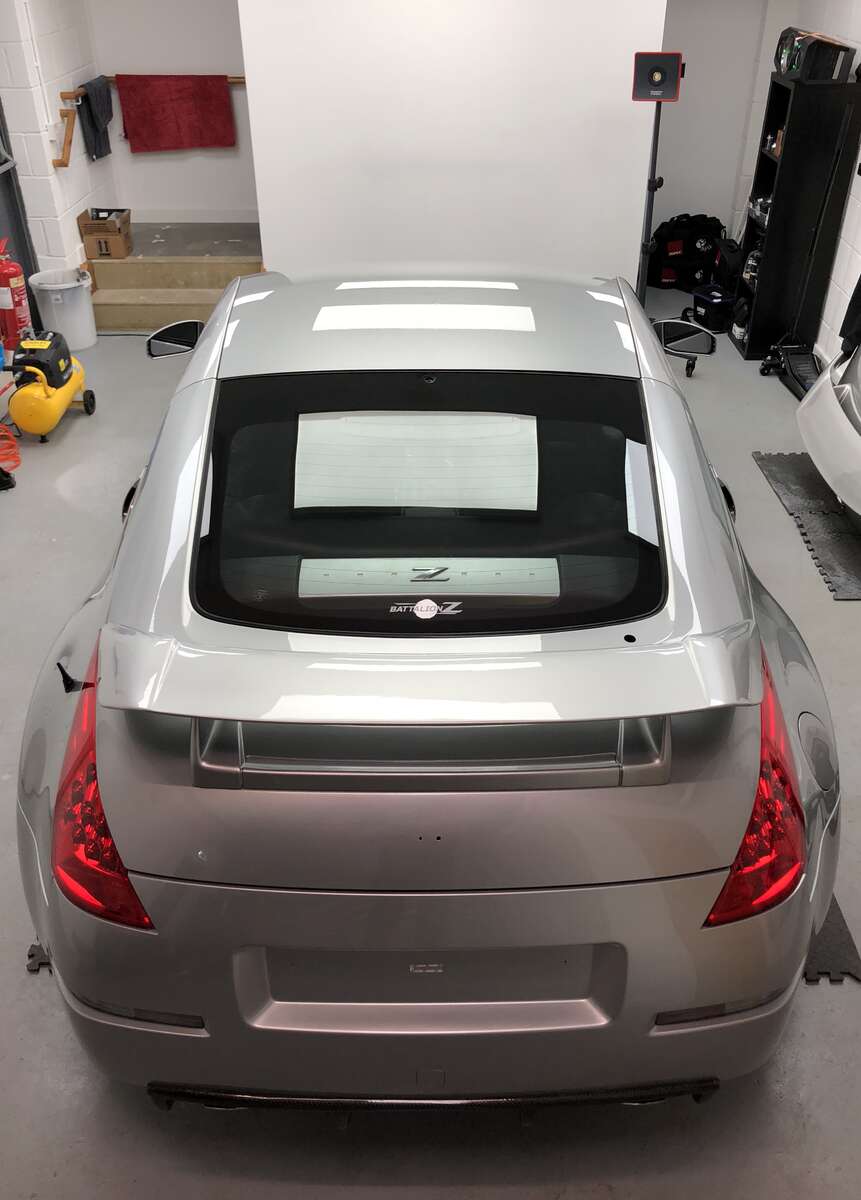
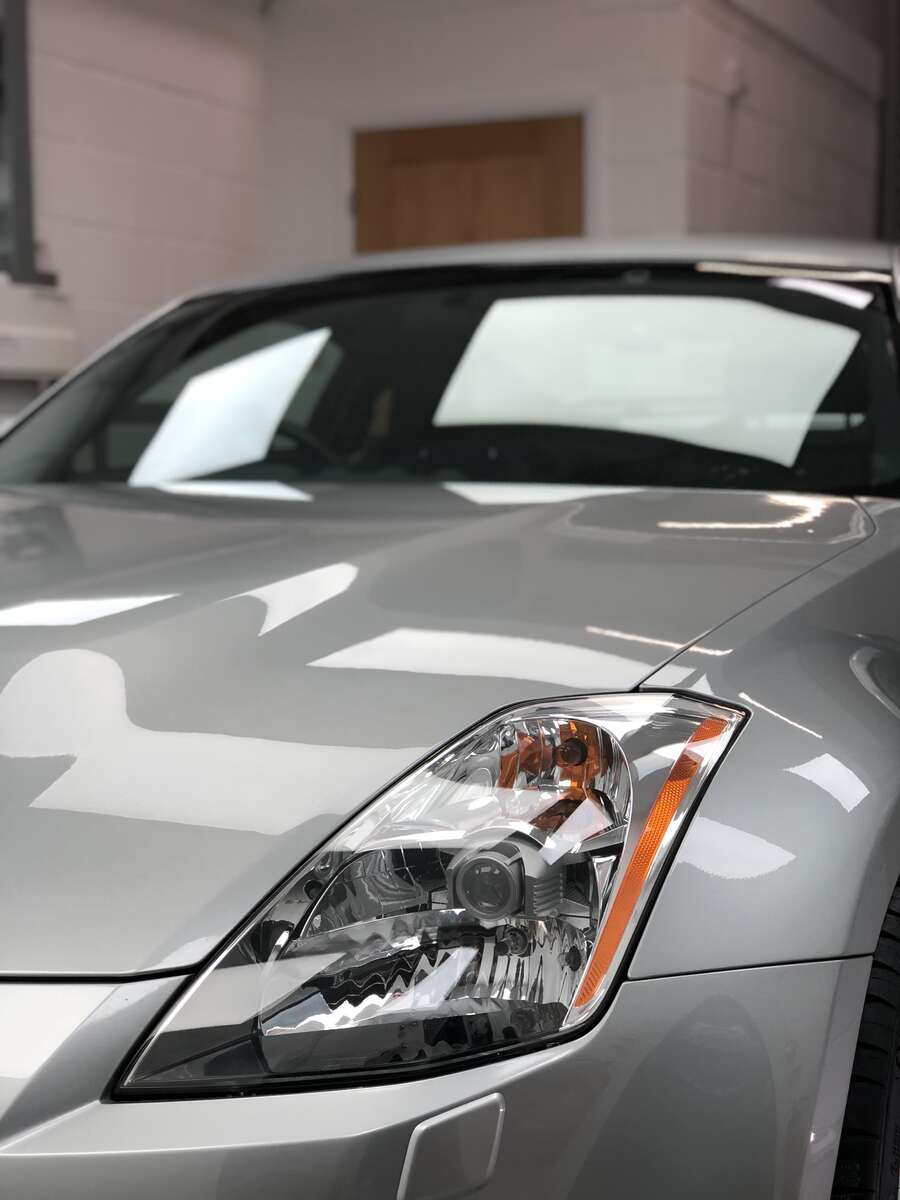
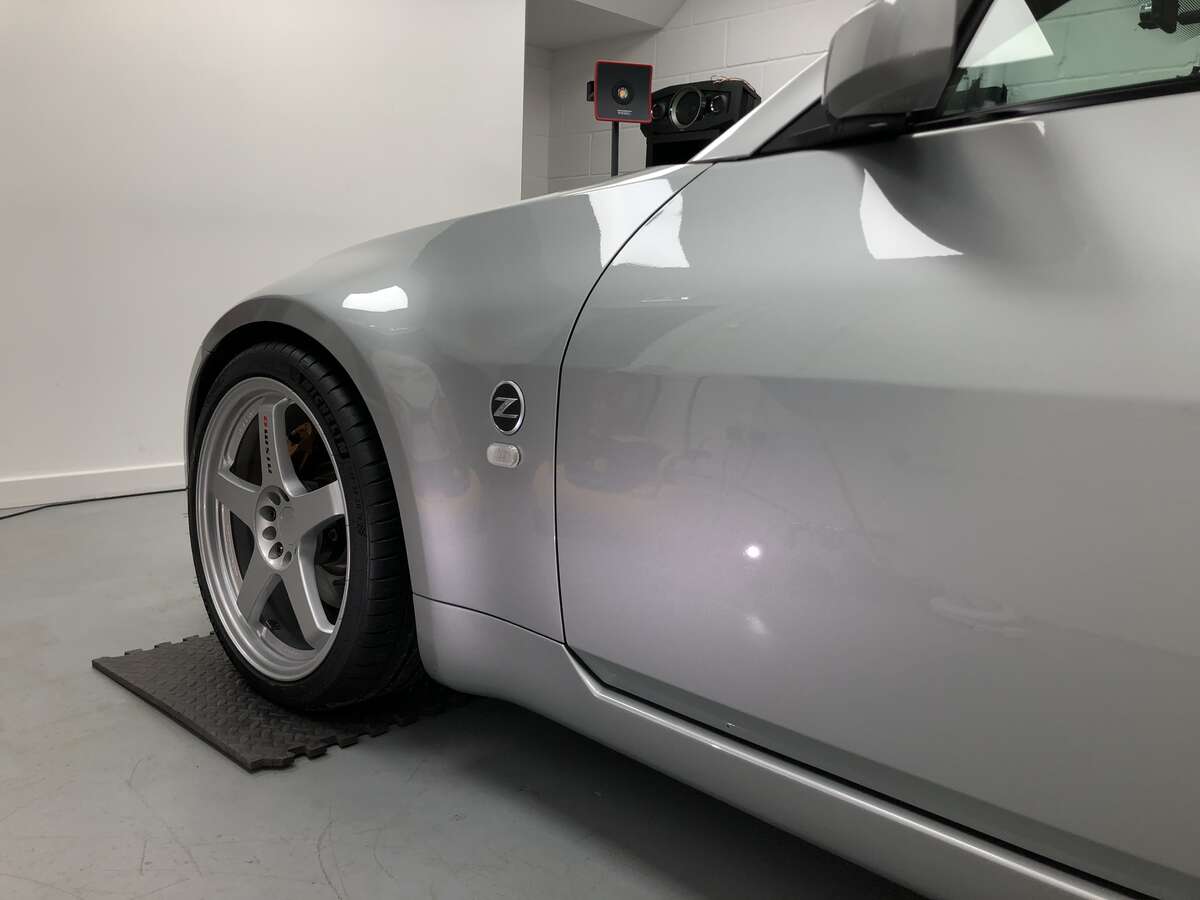
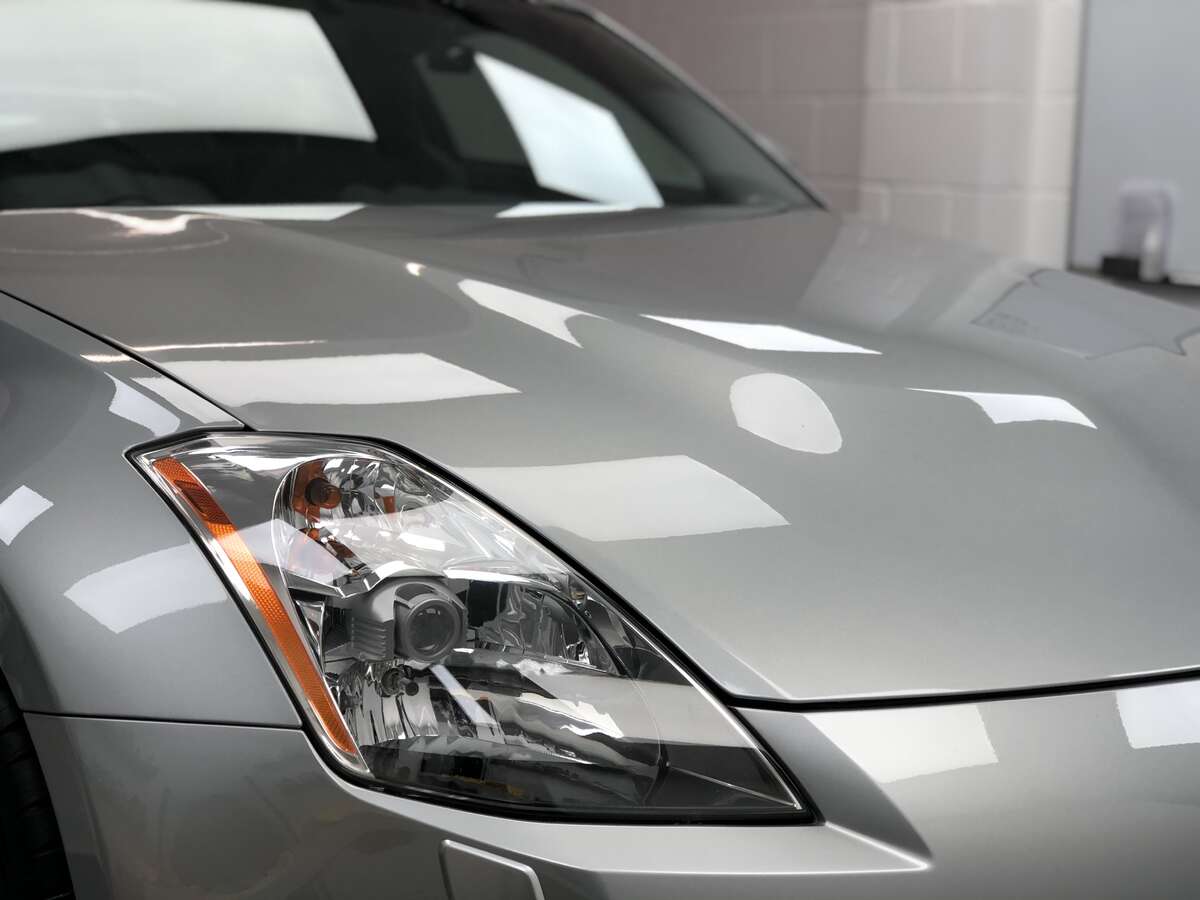
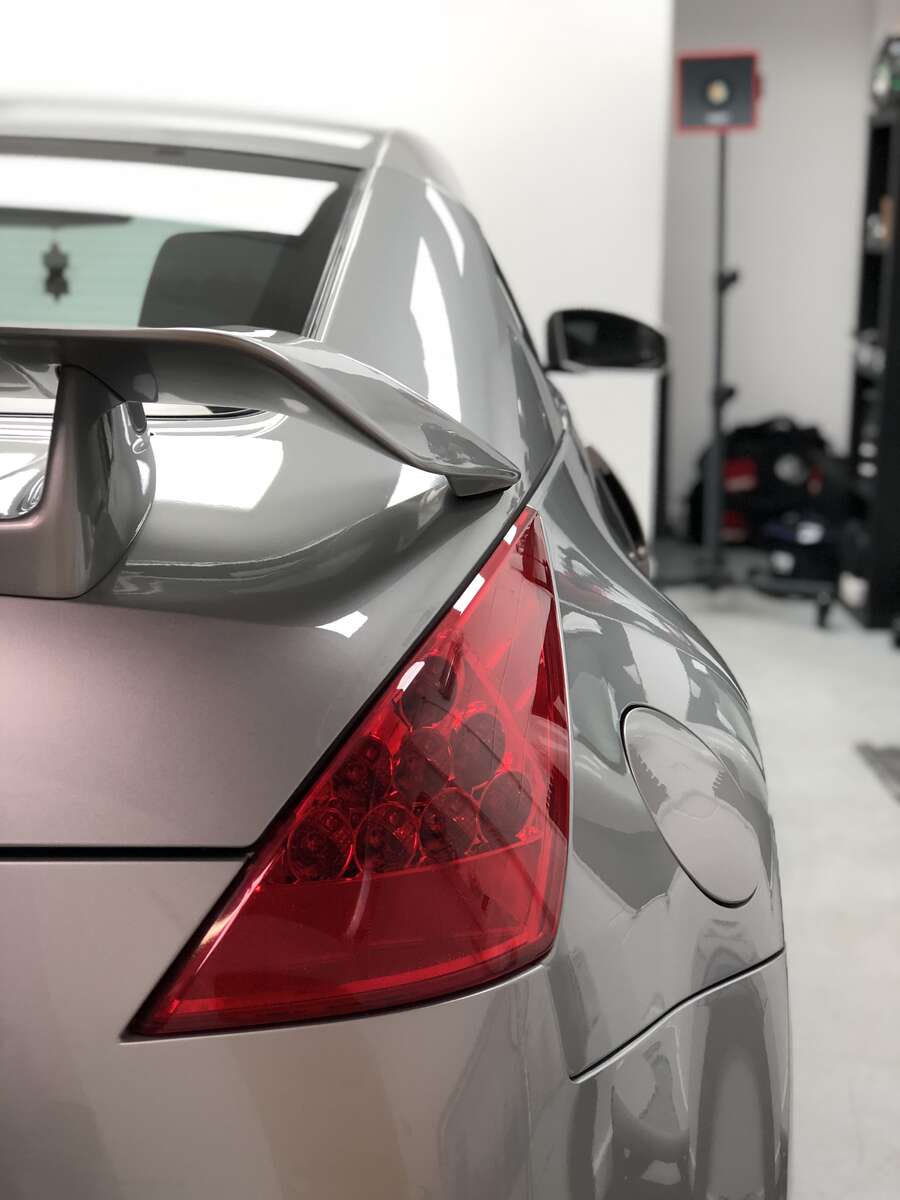
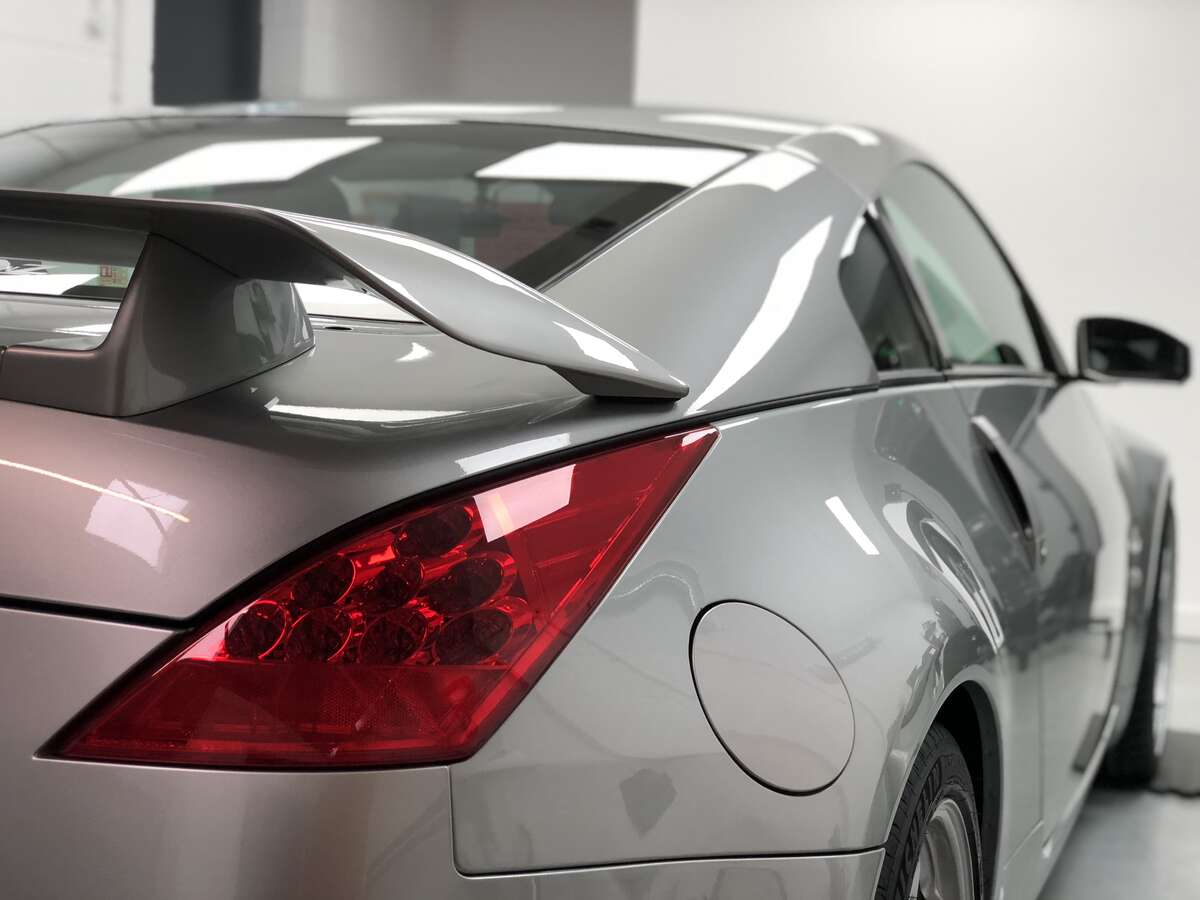
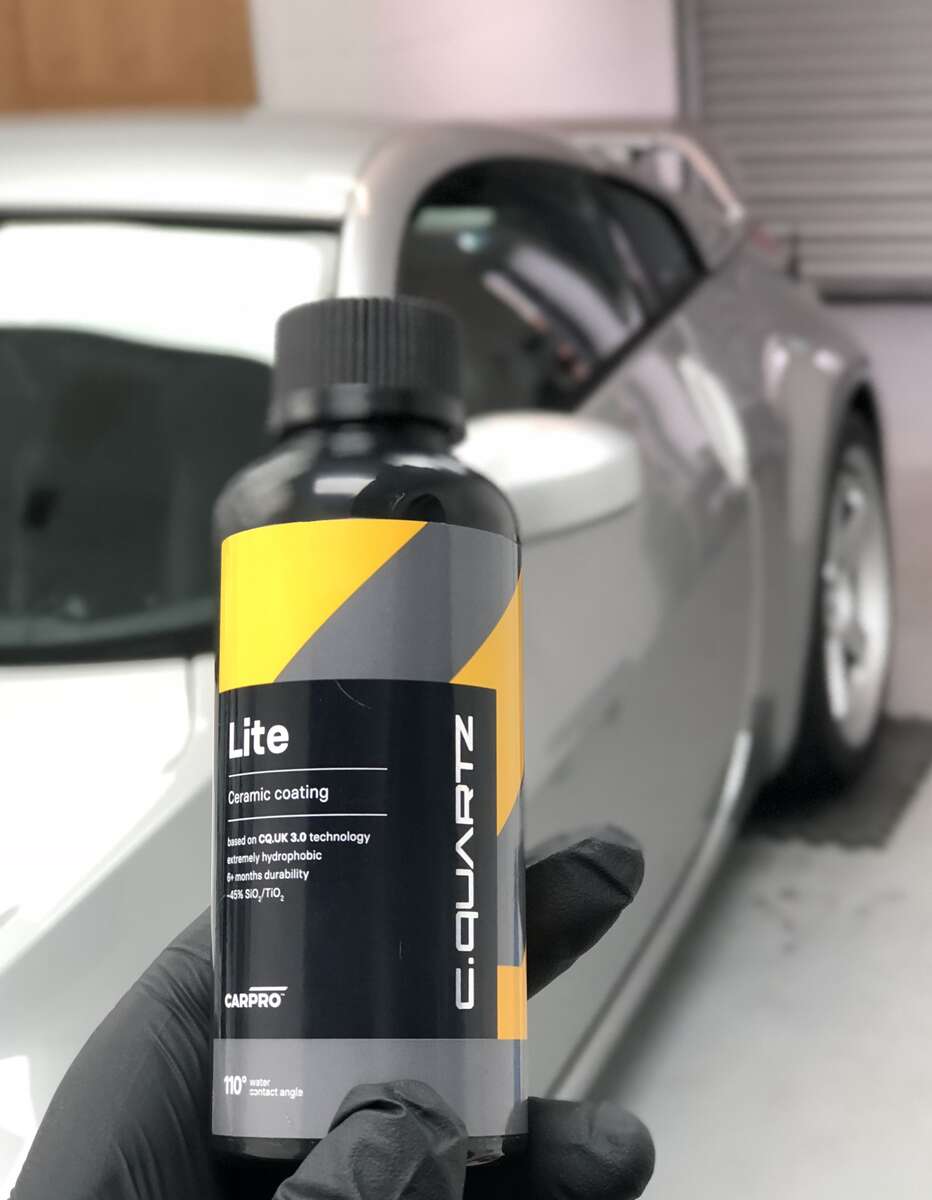
So this will be the last update for a while! Happy and sad at the same time haha Its been a long 9 weeks and I've really missed driving the car, but have throughly enjoyed making the most of lockdown and working on my car to the extent I have. So side skirts finally came back from the paint shop so they were fitted back to the car followed by the wheels, rear bumper and rear lights. The side of the rear bumper that sagged down before (DS) still wasn't perfect despite me replacing the broken clip, better then before but not perfect, hopefully this is something that can be sorted by the body shop once new body kit is fitted. Same with the DS side skirt, just me being very very picky but fitment wasn't 100%. Little pieces of trim also fitted back. Another quick clean up then I was ready to go onto the final stage of detailing. Rear Lights were cut and refined, had not cut these as knew it would be easier once back on the car, yellow Rupes pad with Koch-Chemie H8 followed by Gyeon Primer. Onto the paintwork refinement, now this is where all the hard work ties in and for me is the most rewarding stage, although the Medium Cut I had done before had refined down really well, it never fails to surprise me just how much gloss you can achieve by a further refinement even when you think you could get away with not doing another step (obviously I would never actually not refine unless it was just a single stage detail). So the original plan was always to use a wax to finish off instead of a ceramic coating as with the future plan of the NSM bodykit going on and painted it would need to be detailed again after that anyway. So I have some Angel Wax Fifth Element that I was looking forward to using so I thought it would be great to use Gyeon Primer to refine and leave it on the car overnight as it creates a nice layer of SI02, a perfect base for the wax to go onto. So thats what I did....but I had ran out of time and my car needed to be out of my unit as I had the electrician coming in the next day Managed to polish the glass with CarPro Ceri Glass and coat with Carbon Collective Platinum Glass as well. So car was refined, glass coated, wheels coated, ready to lay down some wax but was now outside...not ideal. JUST MY LUCK it rained of course So the car was dusty and car had water spotted in places. So got the car back in once electrician was done and gave it a quick wipe down with Meguiar's Wash & Wax. Now I could of then taken the water spots out with water spot remover then gave it a coat of wax and it would of been fine. But it didn't feel right plus there was a chance I had marred the paint whilst wiping it down. So decided to refine it all over again, by this time I had changed my mind and wanted to use a light ceramic instead of wax so no primer was needed. So Rupes White (diamond) polish was used. I then treated all the rubber seals with Swissvax Seal Feed (great product nothing else on the market quite like it). Then wiped down the car with IPA to prepare for coating. Car Pro CQuartz Lite was my product of choice, a 'light ceramic' that has great hydrophobicity and will last 6+ months, just what I need. Just need to fit my front window wipers and the plugs for the wiper delete on the back, plates on then MKS Customs is coming over and wrapping the front lip black then the car is completely finished. Phase 1 COMPLETE. Car looks mega now, such a good feeling when its your own car. Nice to be in my customers shoes for once thats for sure! Enjoy the finished photos, any questions please feel free to ask away!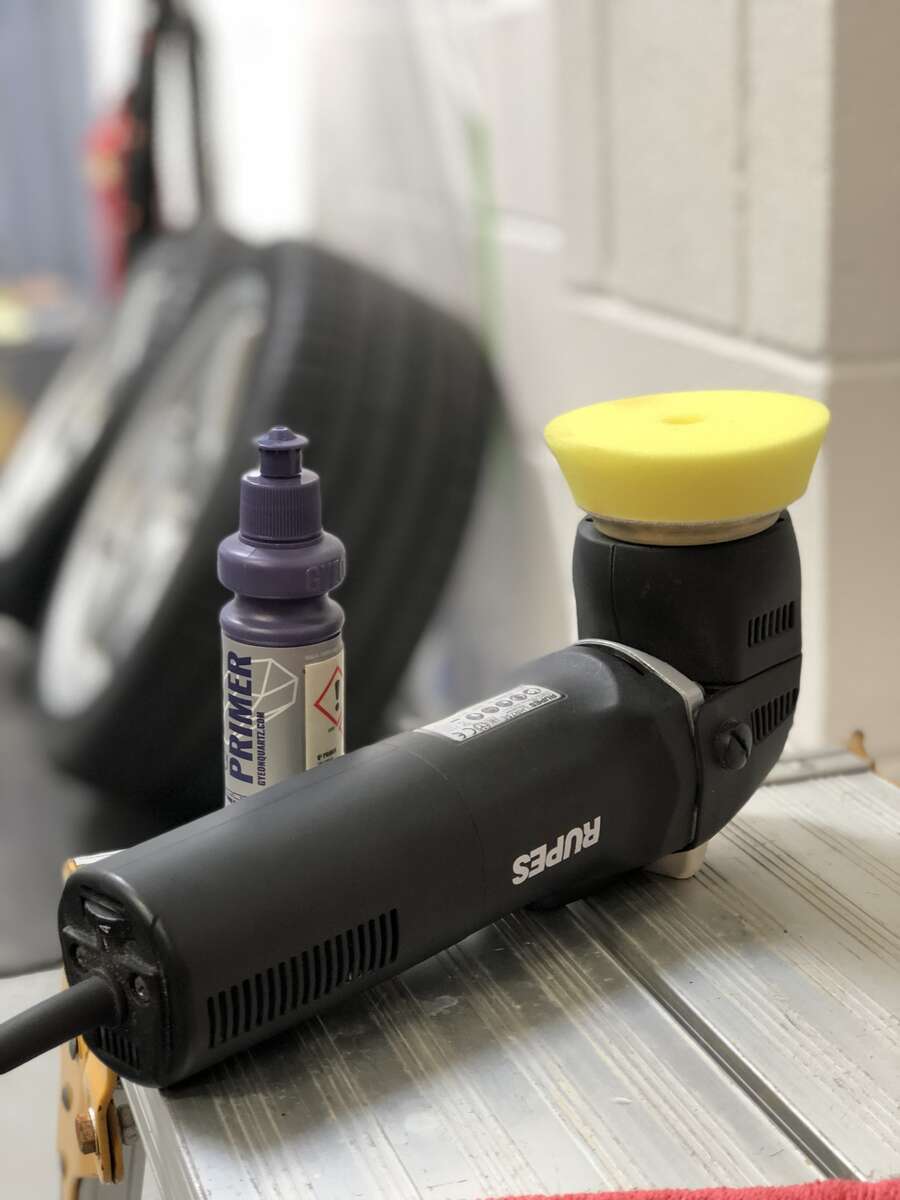


- 97 replies
-
- 11
-

-
54 plate between Stretham and Haddenham
Lewis Schwier replied to BOINC UK's topic in Spotted or Flyered
What colour? this is down the road from me (wasn't me as car has been in my unit for 9 weeks) but intrigued -
3rd time lucky not going to Mod this one....
Lewis Schwier replied to Humpy's topic in Member Build Projects
How good does it look with the roof down! modded really nicely. Great purchase -
NSM 350z Build...My 2nd 350z!
Lewis Schwier replied to Lewis Schwier's topic in Member Build Projects
Thank you. I used Hammerite Silver spray paint, also used one of those spray gun triggers that goes over the top of the can so you can get a better even coverage. I made sure I sanded off near to all the rust so it would last. Then two coats of Hammerite, 4 hours drying time between each. I know there is better products out there then Hammerite but I had a can to use up. -
NSM 350z Build...My 2nd 350z!
Lewis Schwier replied to Lewis Schwier's topic in Member Build Projects
Yup hopefully! Yes agree with you with the front hubs but painting the hubs wasn’t on the list at all, was lucky to be able to find the time to do the rears. Need to get my car out the way, got customers cars booked in! -
NSM 350z Build...My 2nd 350z!
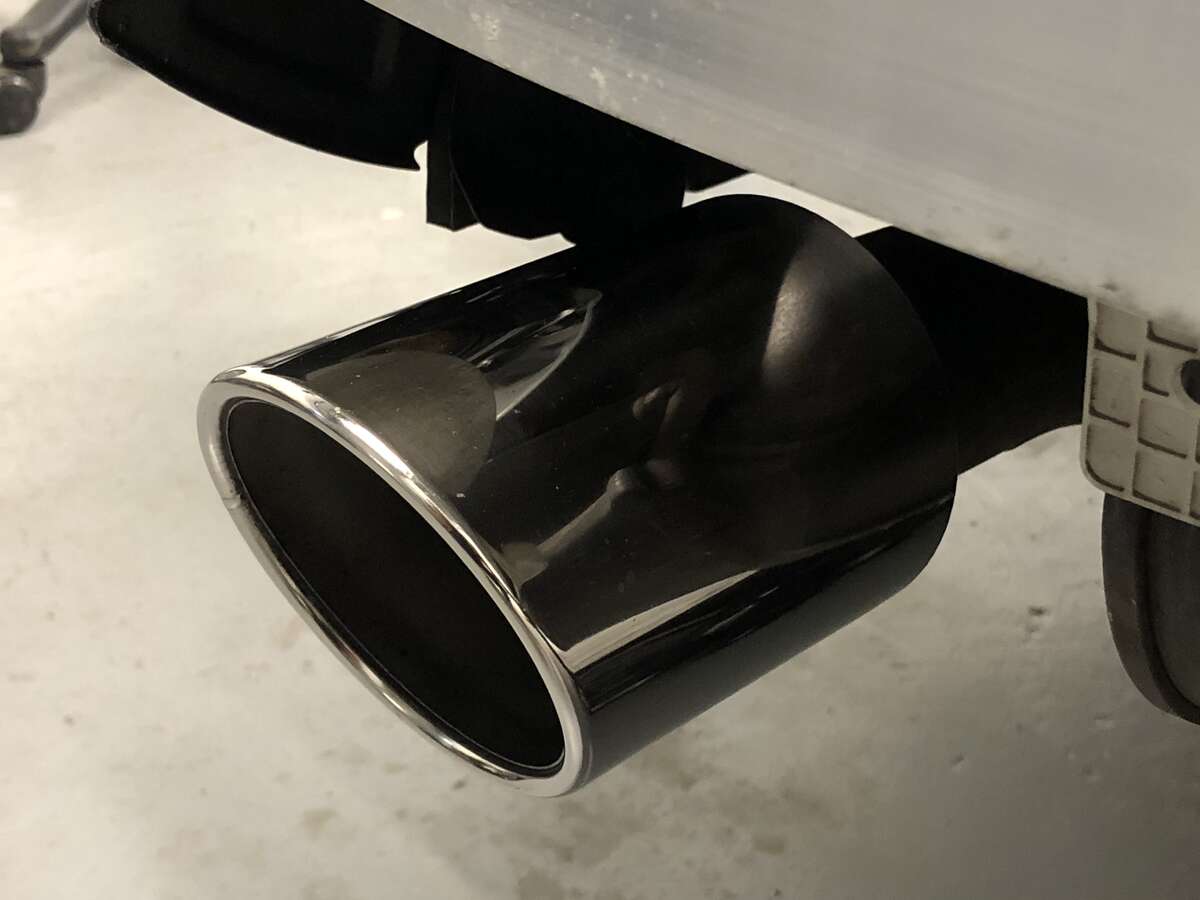
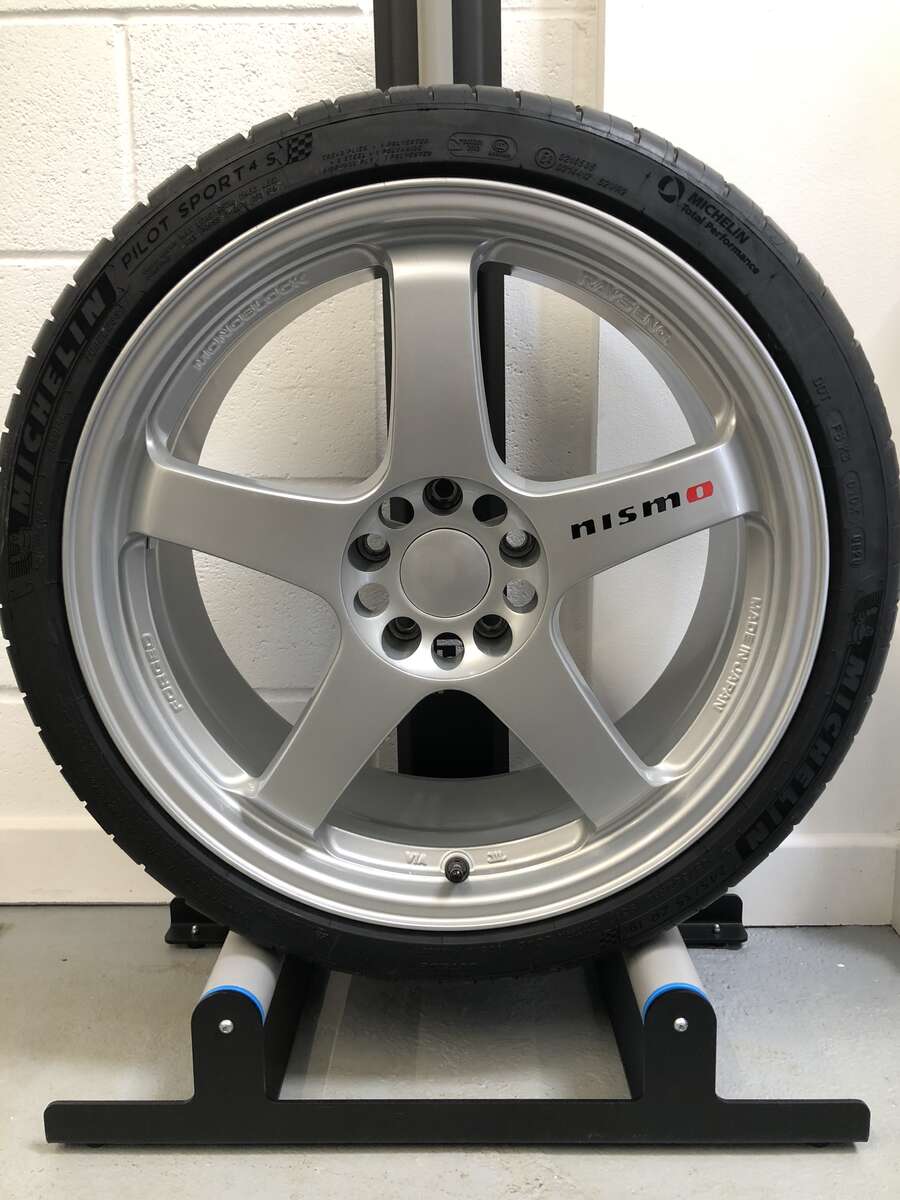
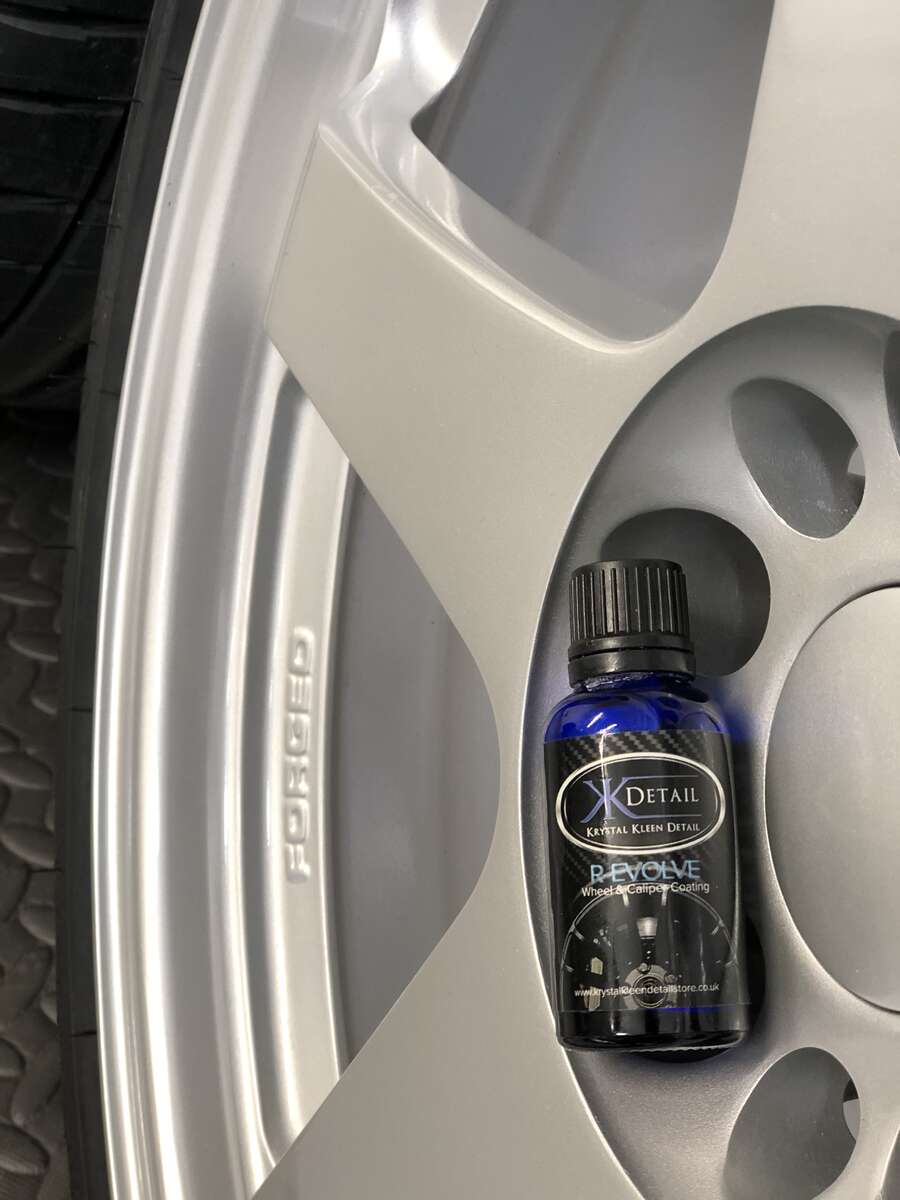
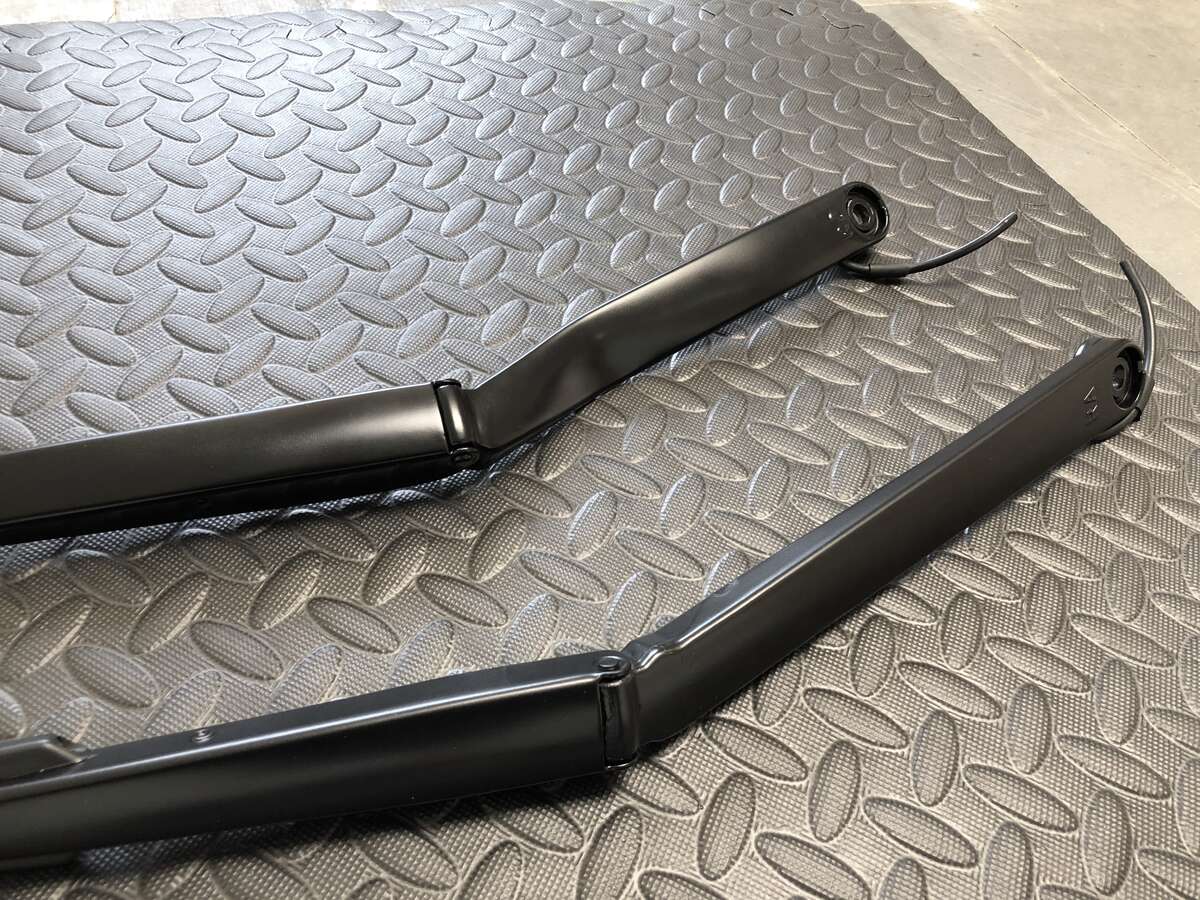
Lewis Schwier replied to Lewis Schwier's topic in Member Build Projects
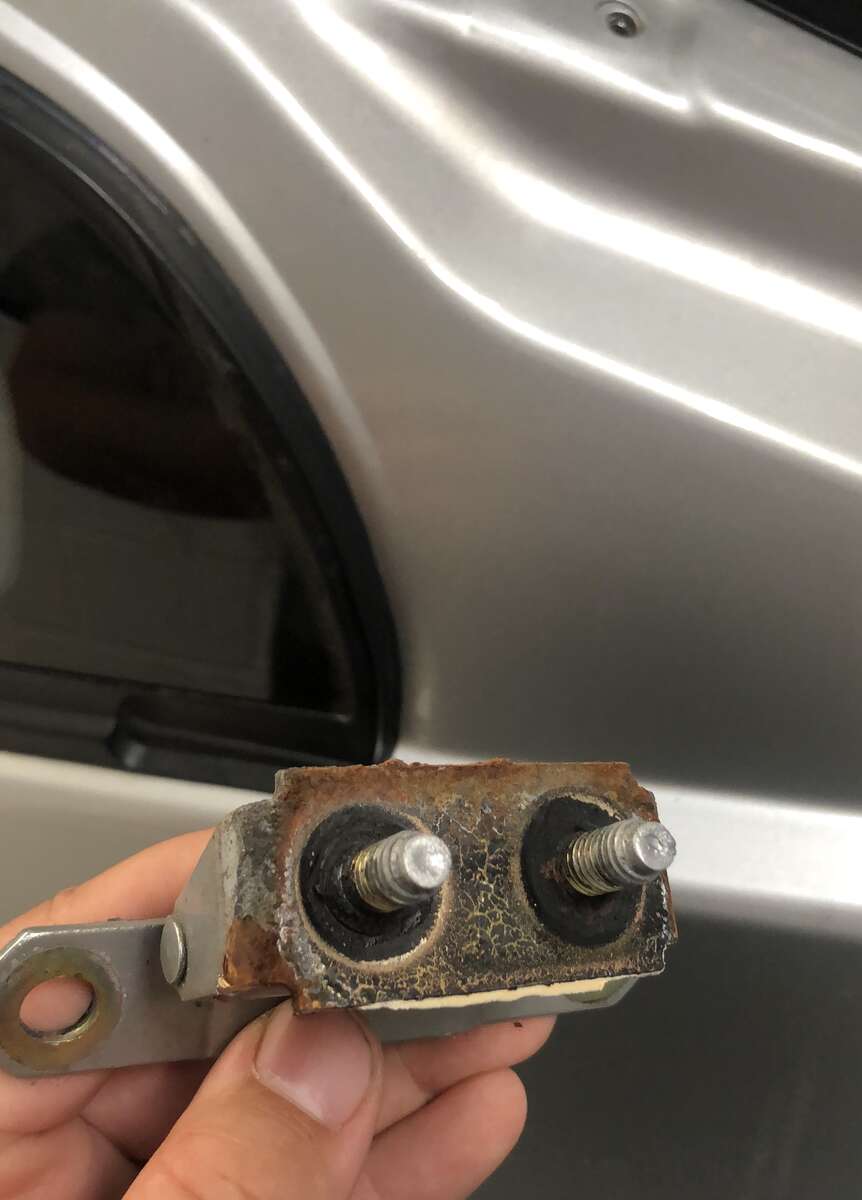
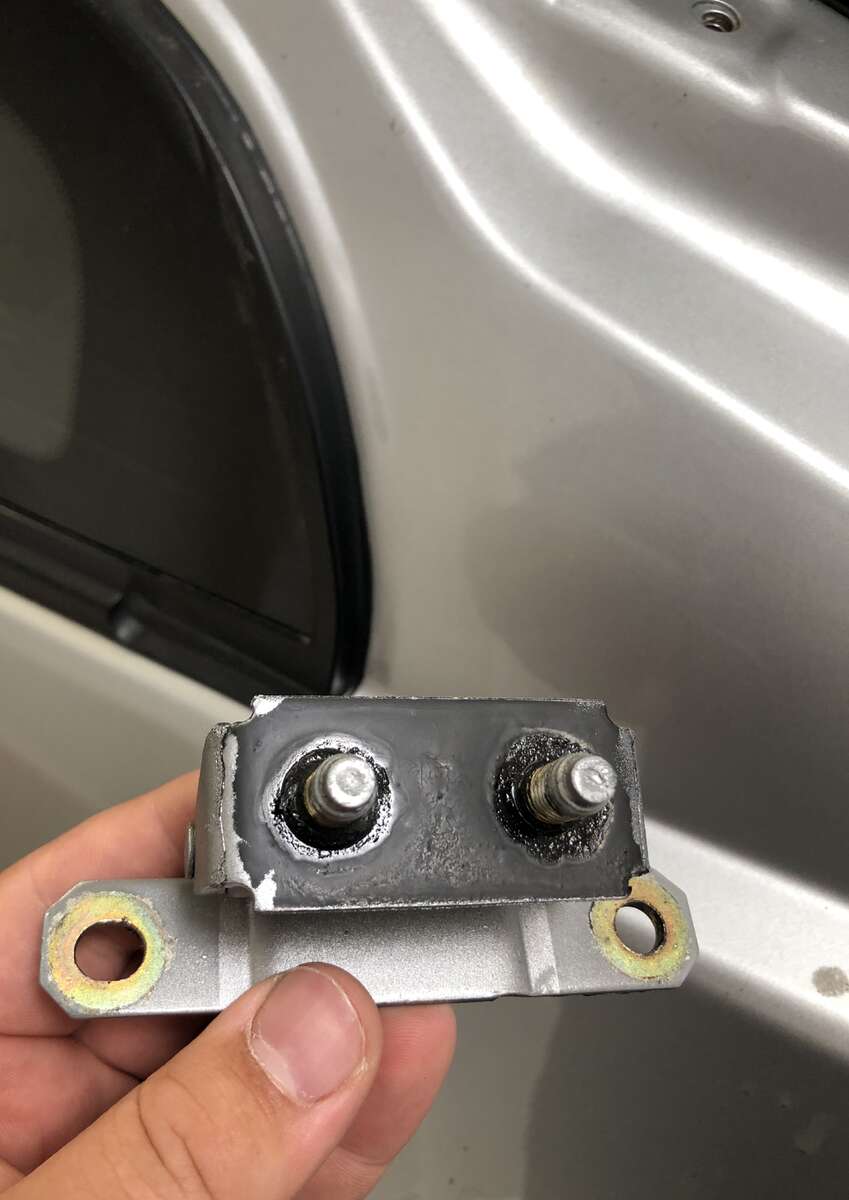
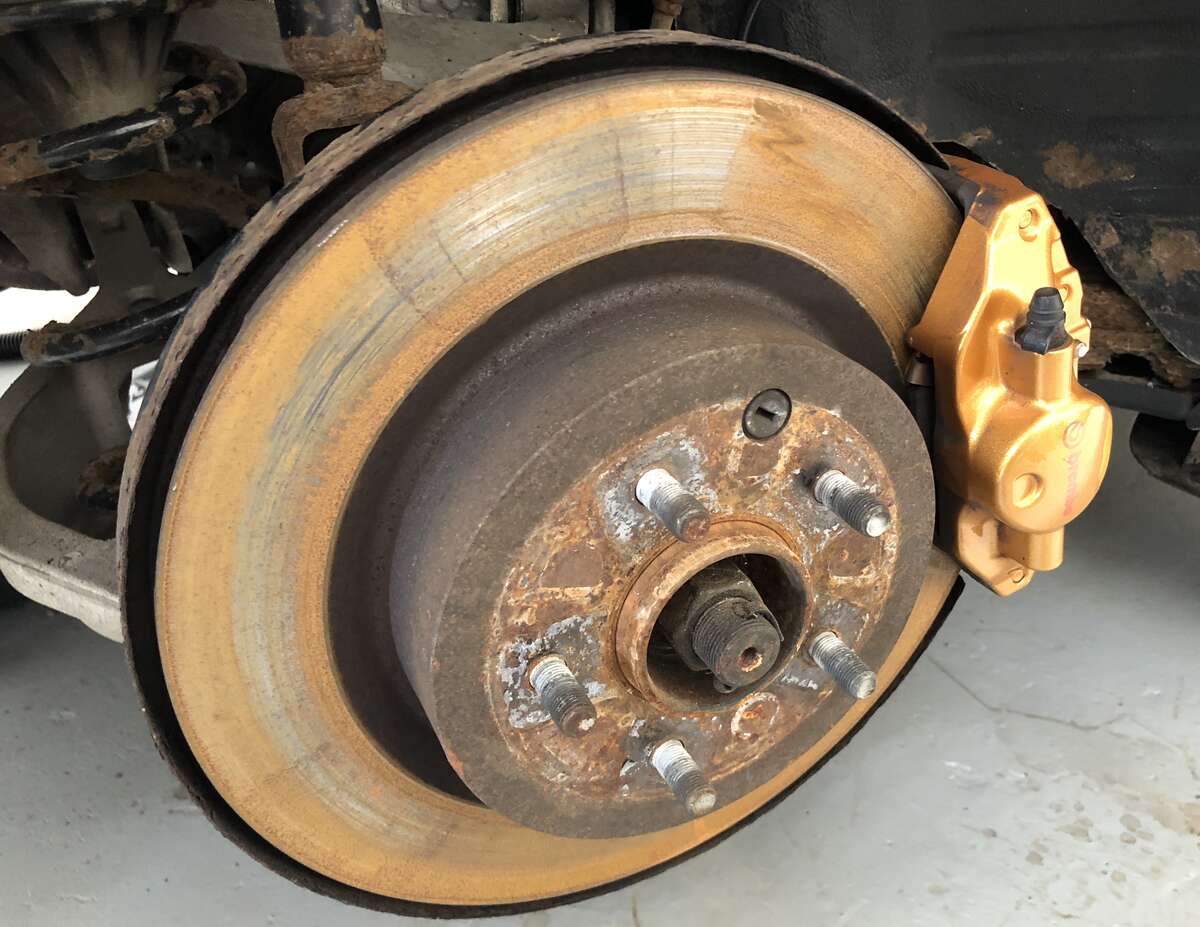
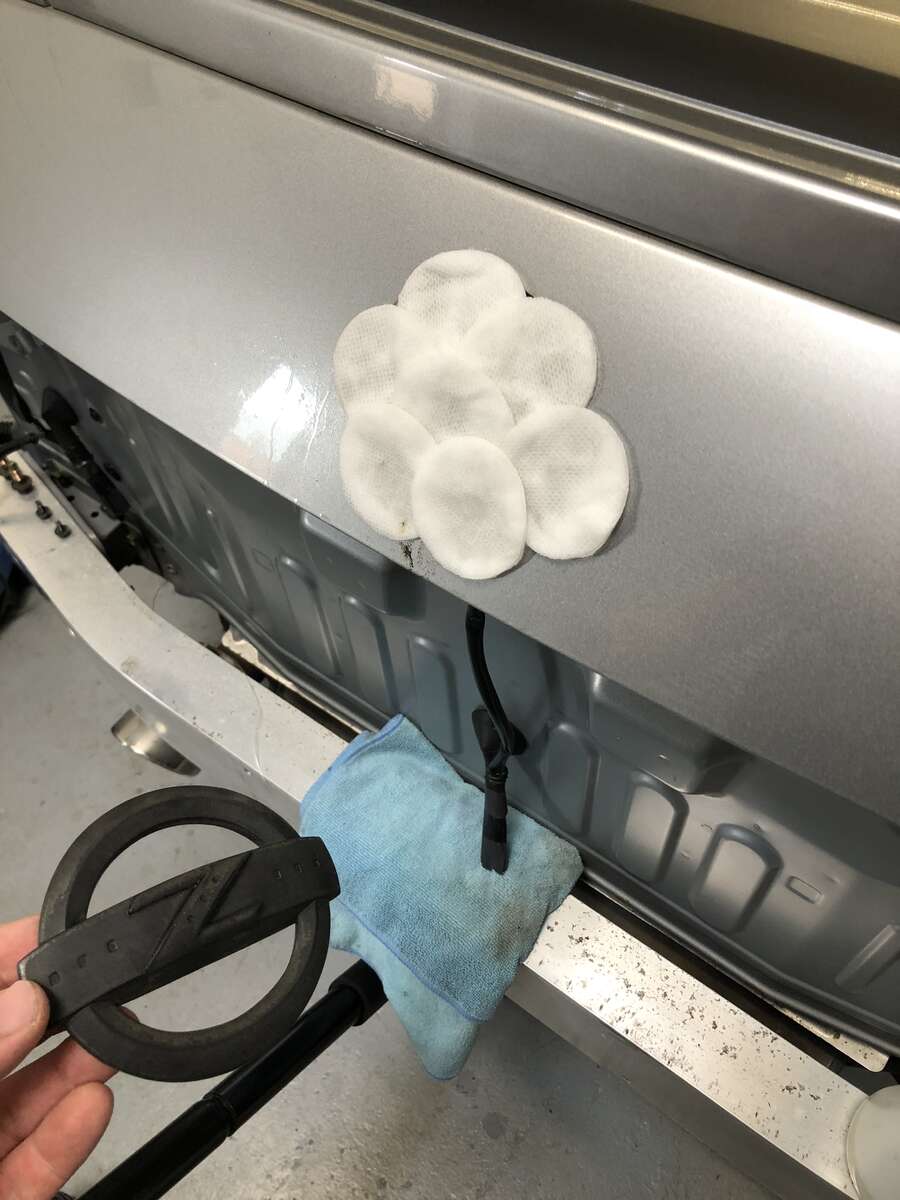
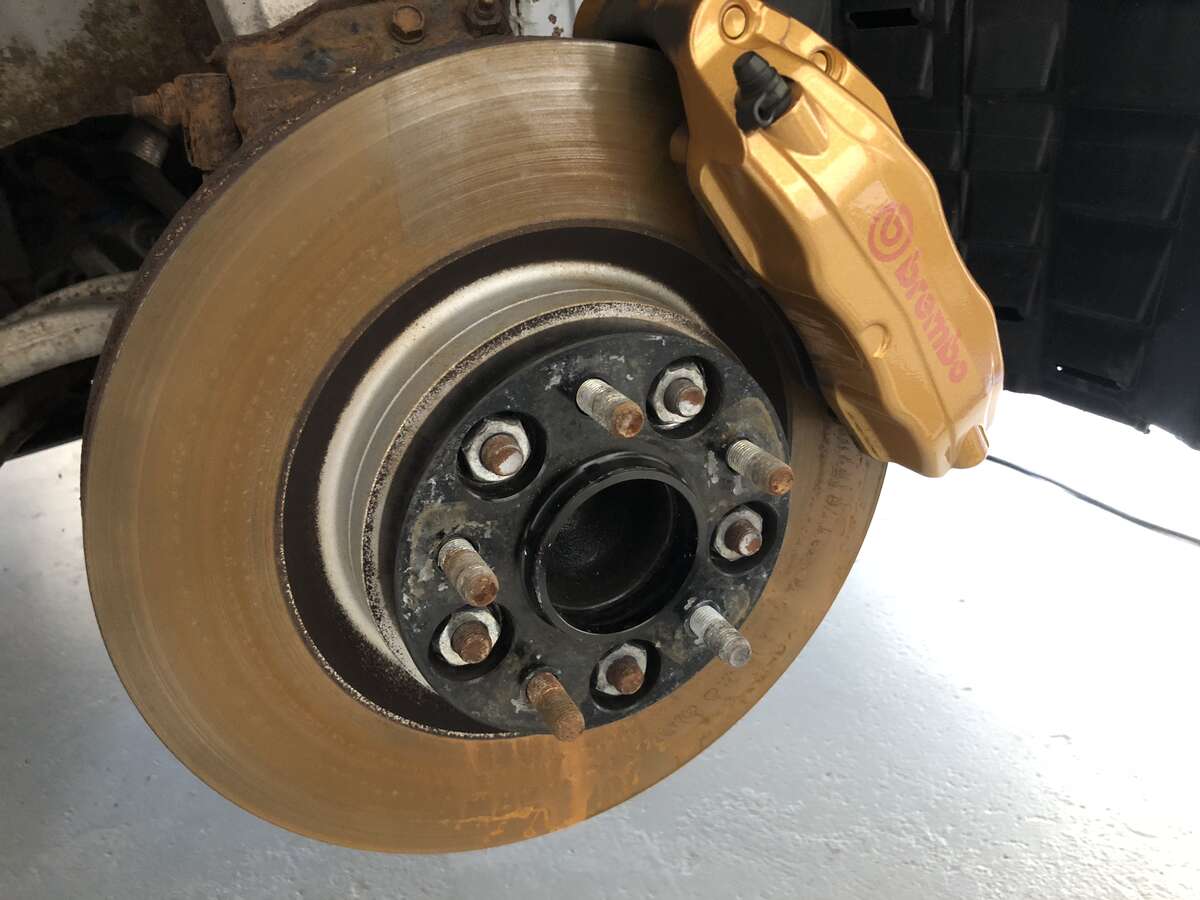
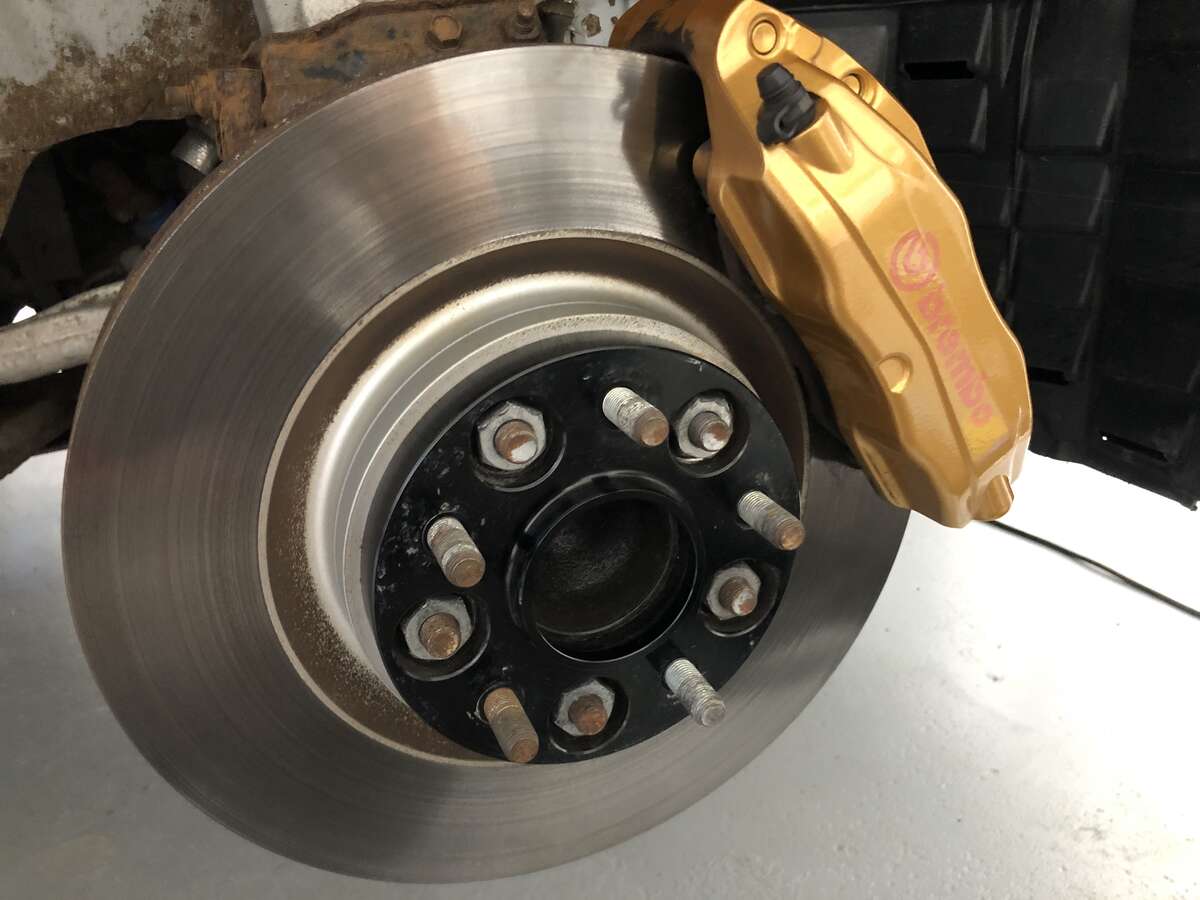
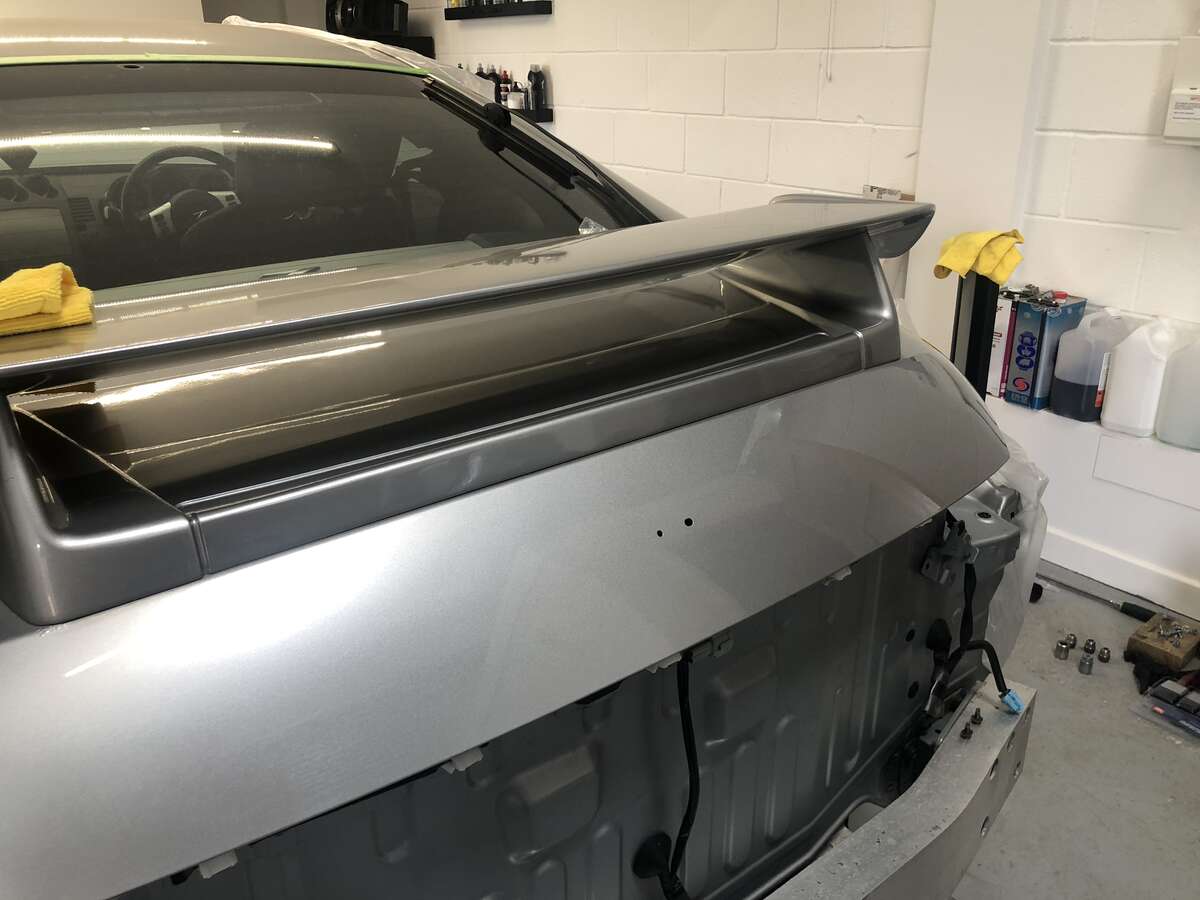
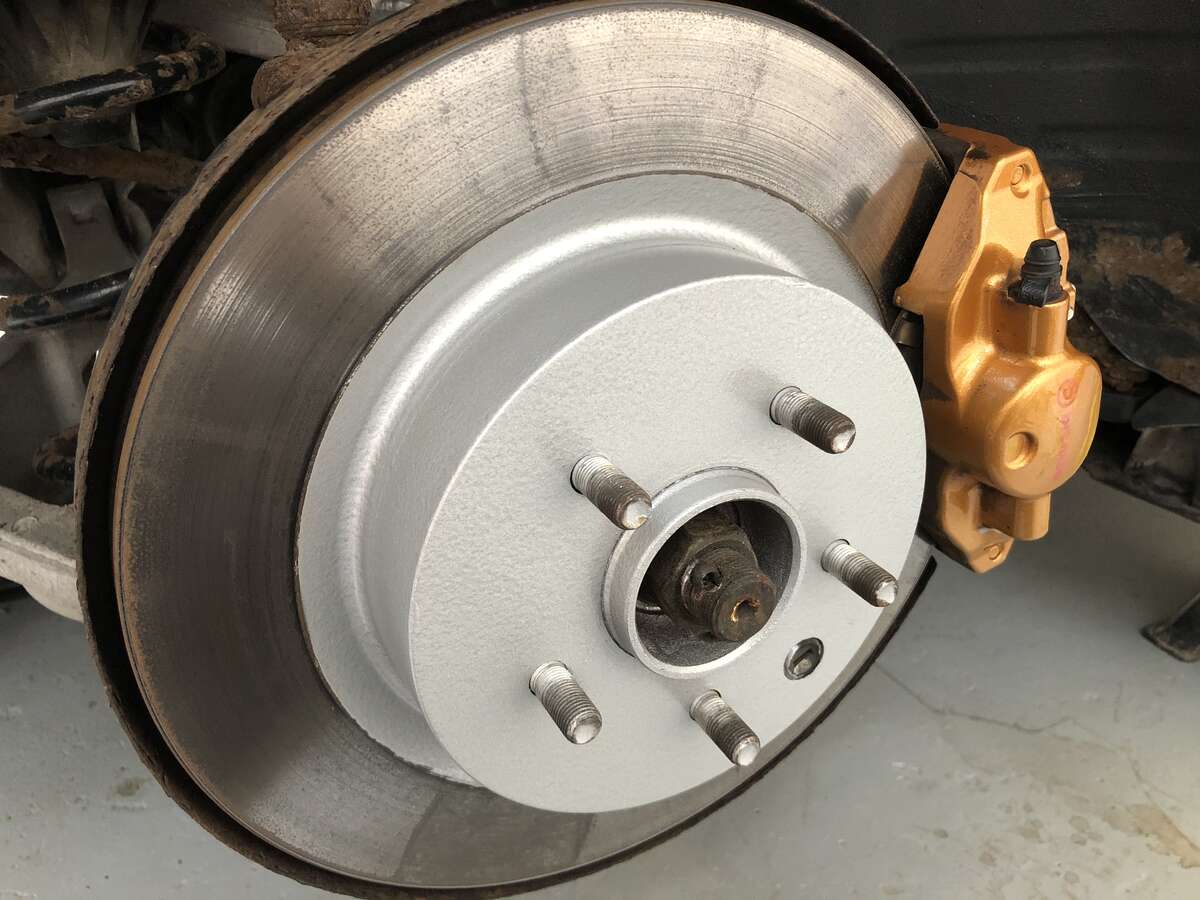
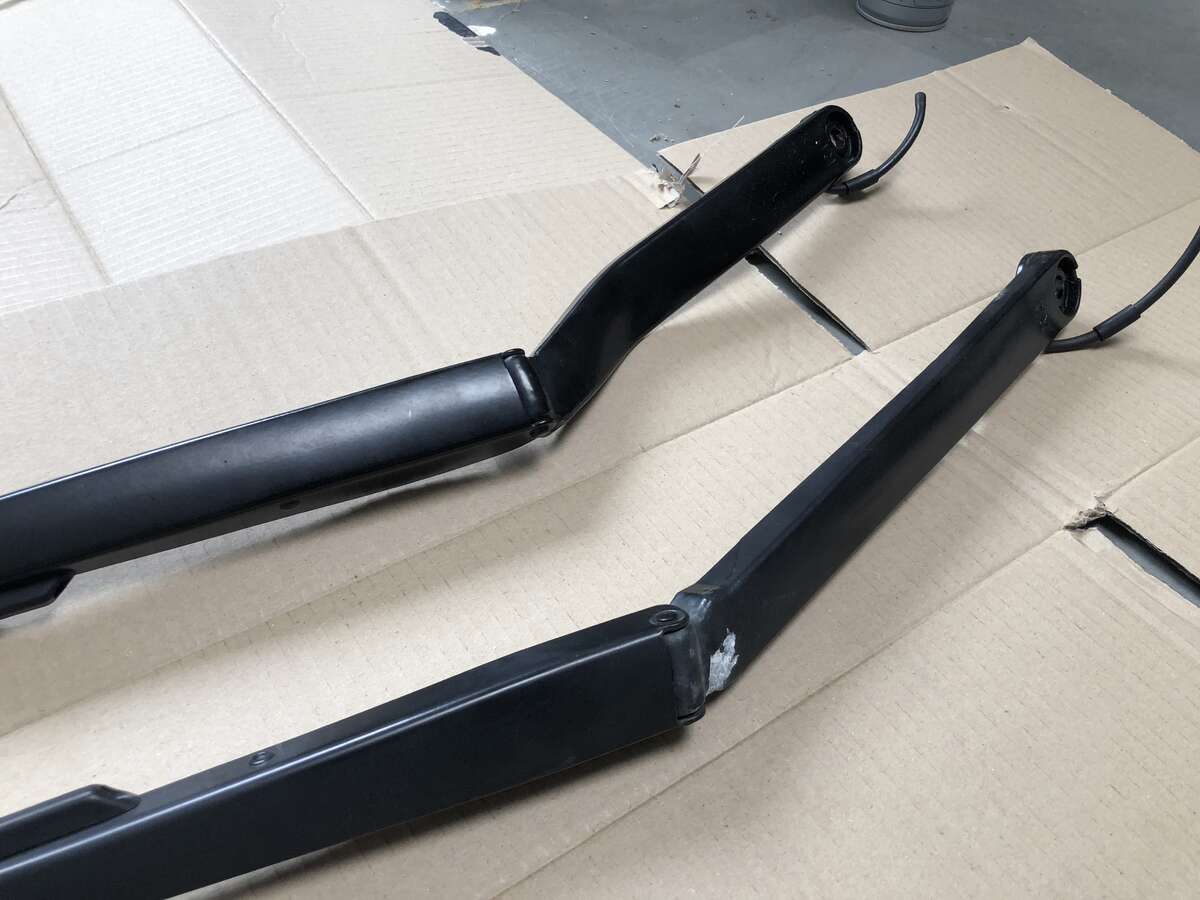
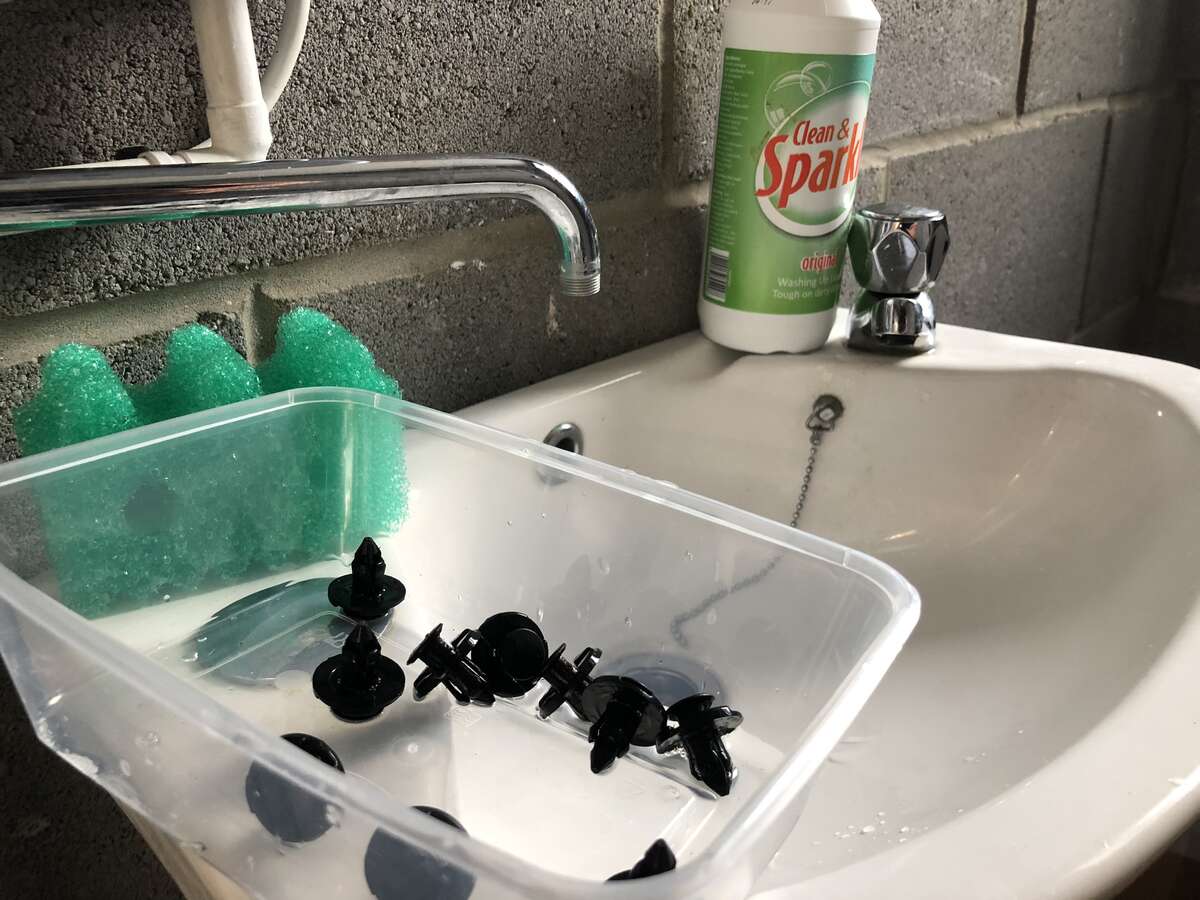
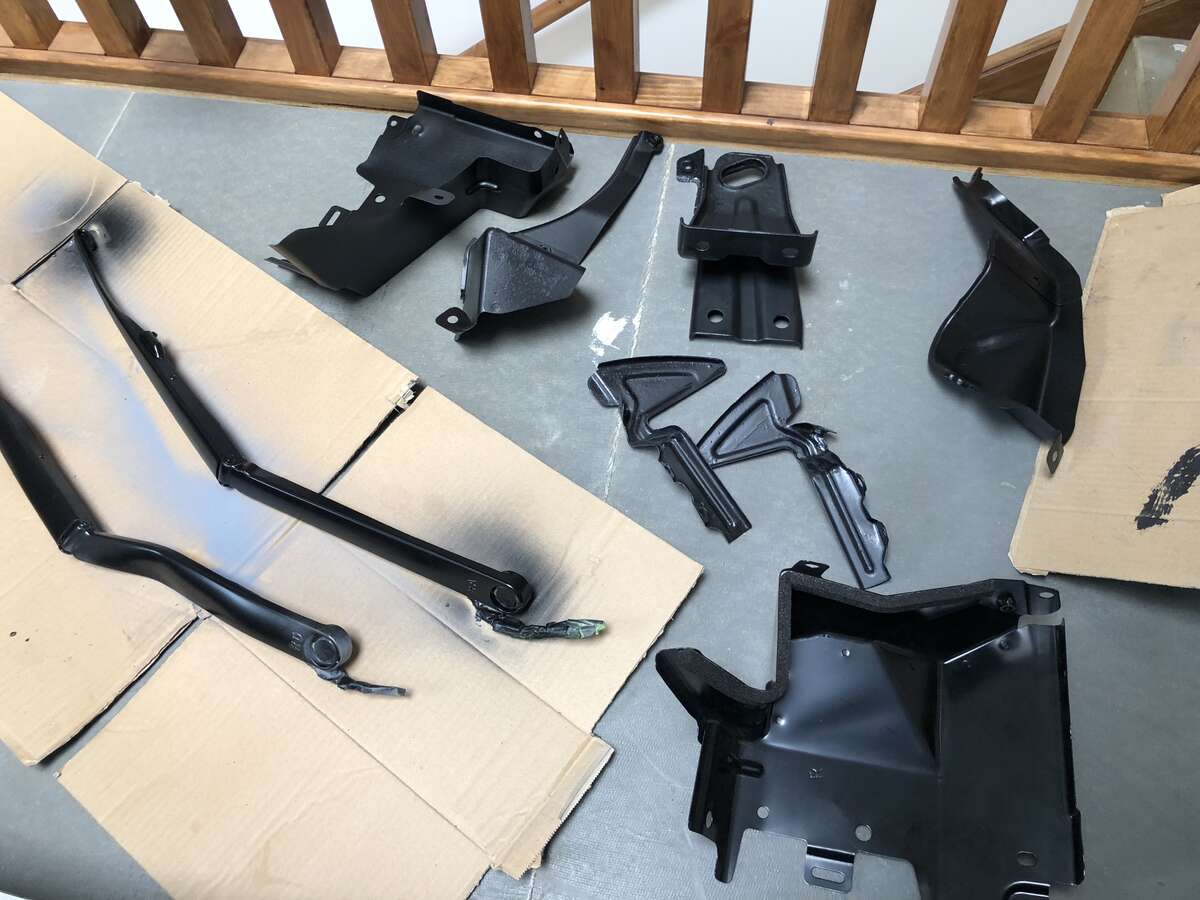
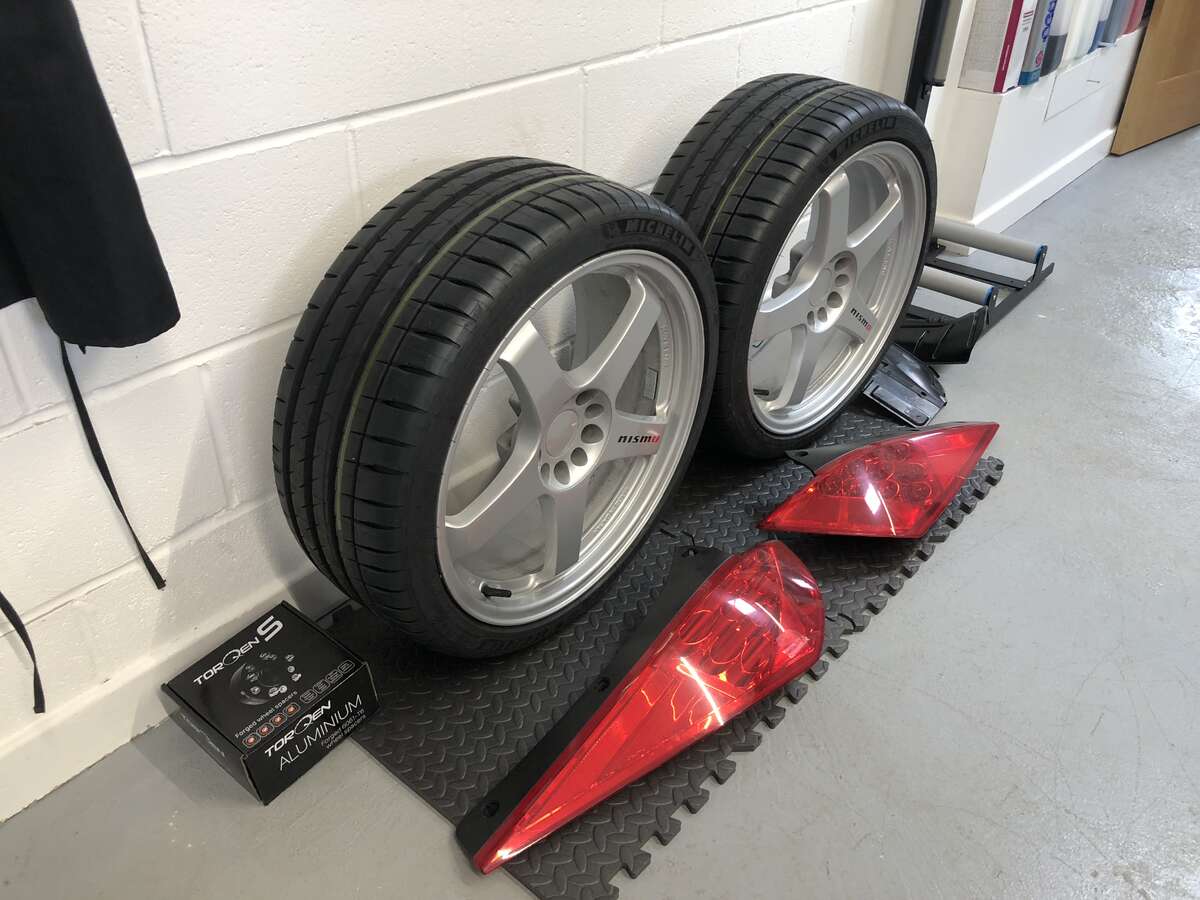
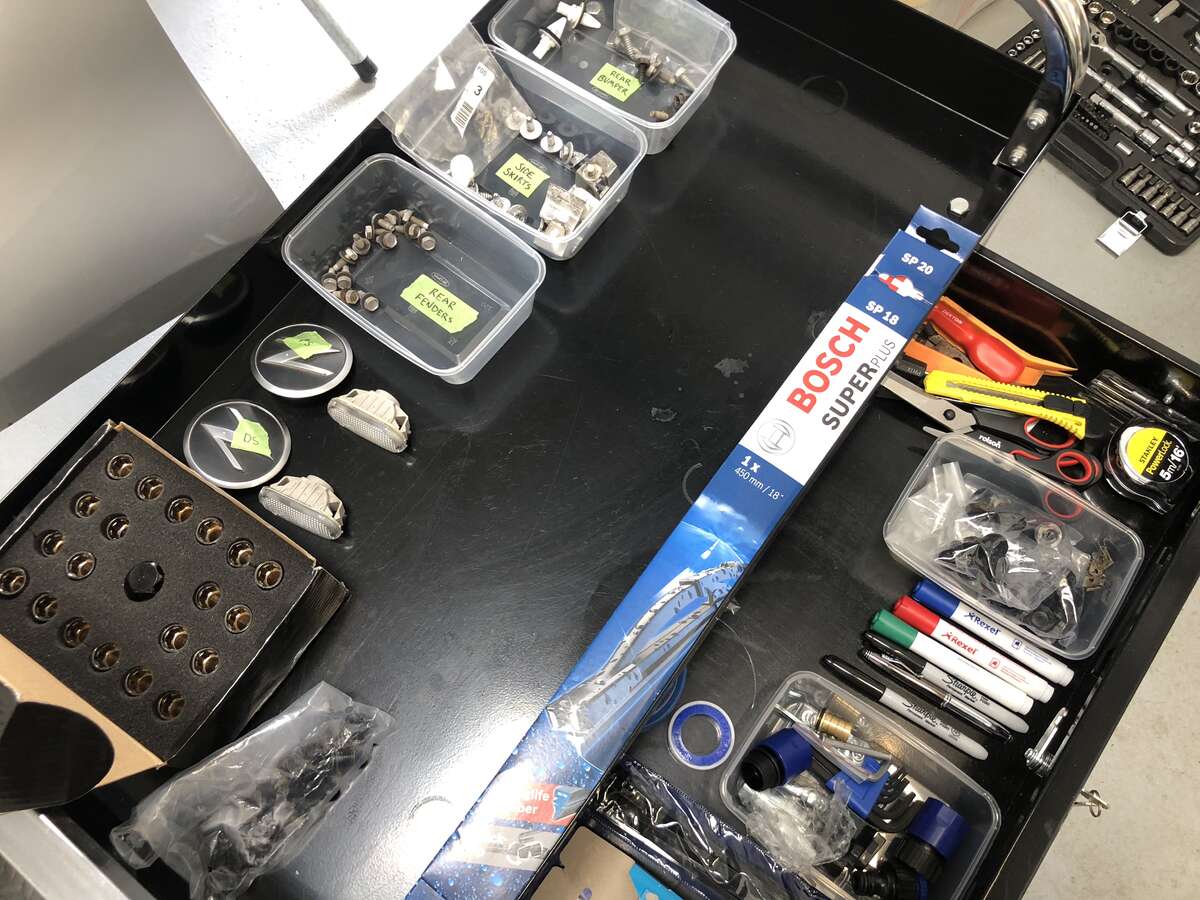
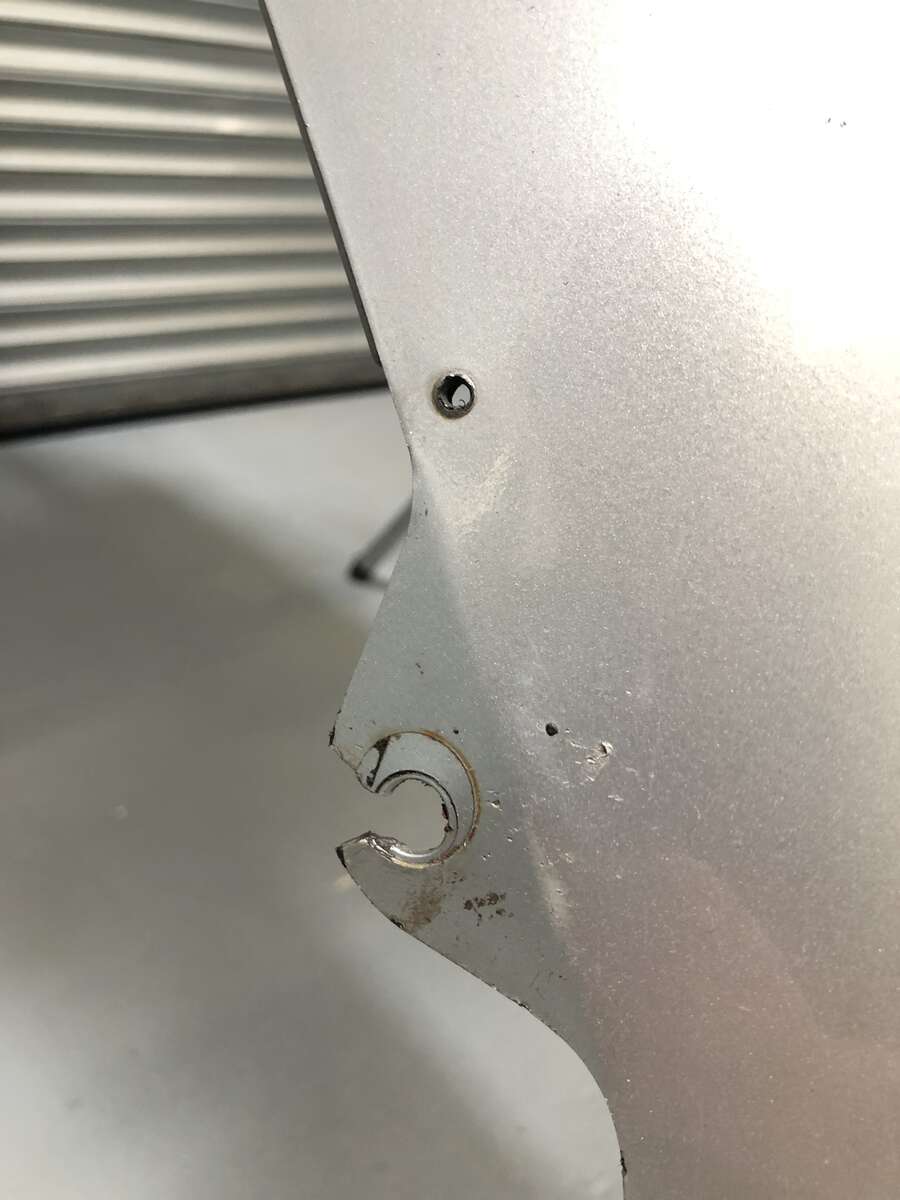
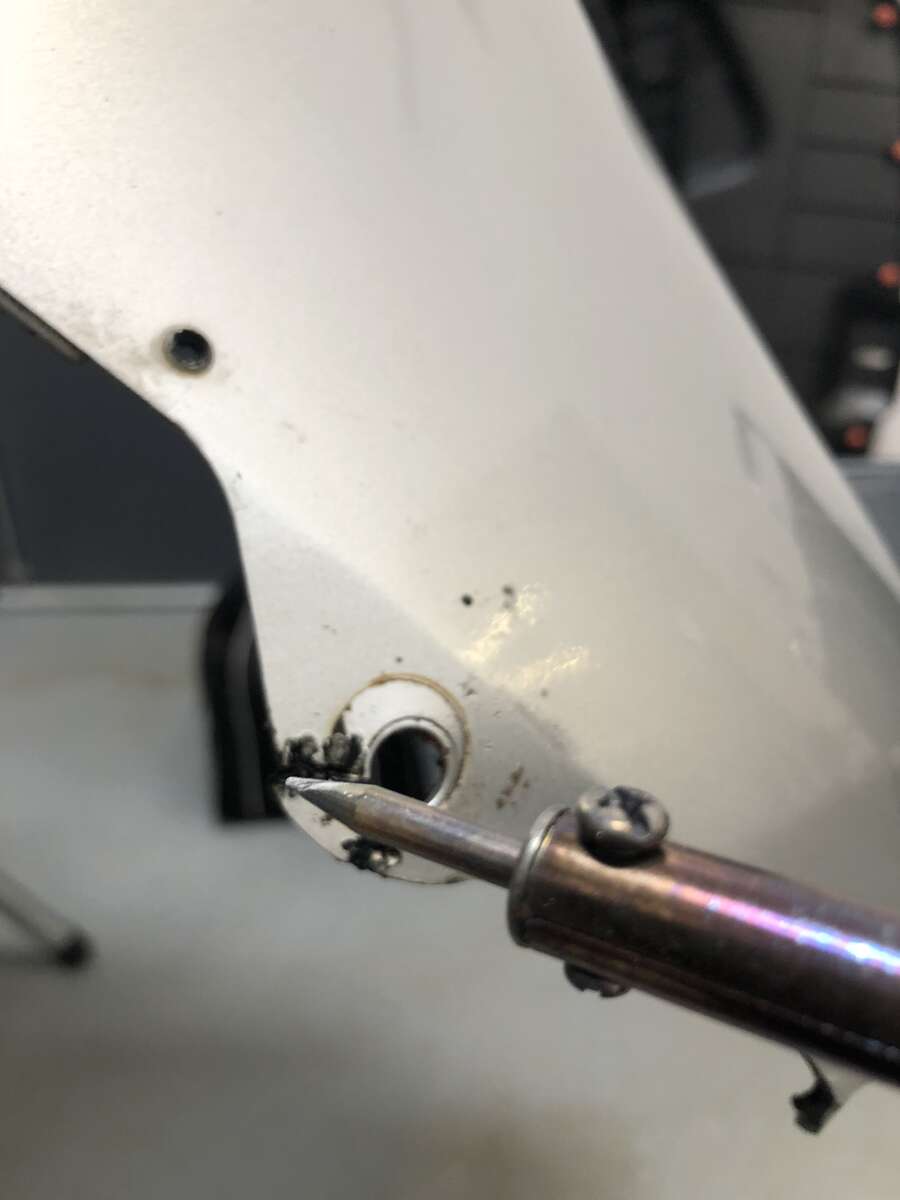
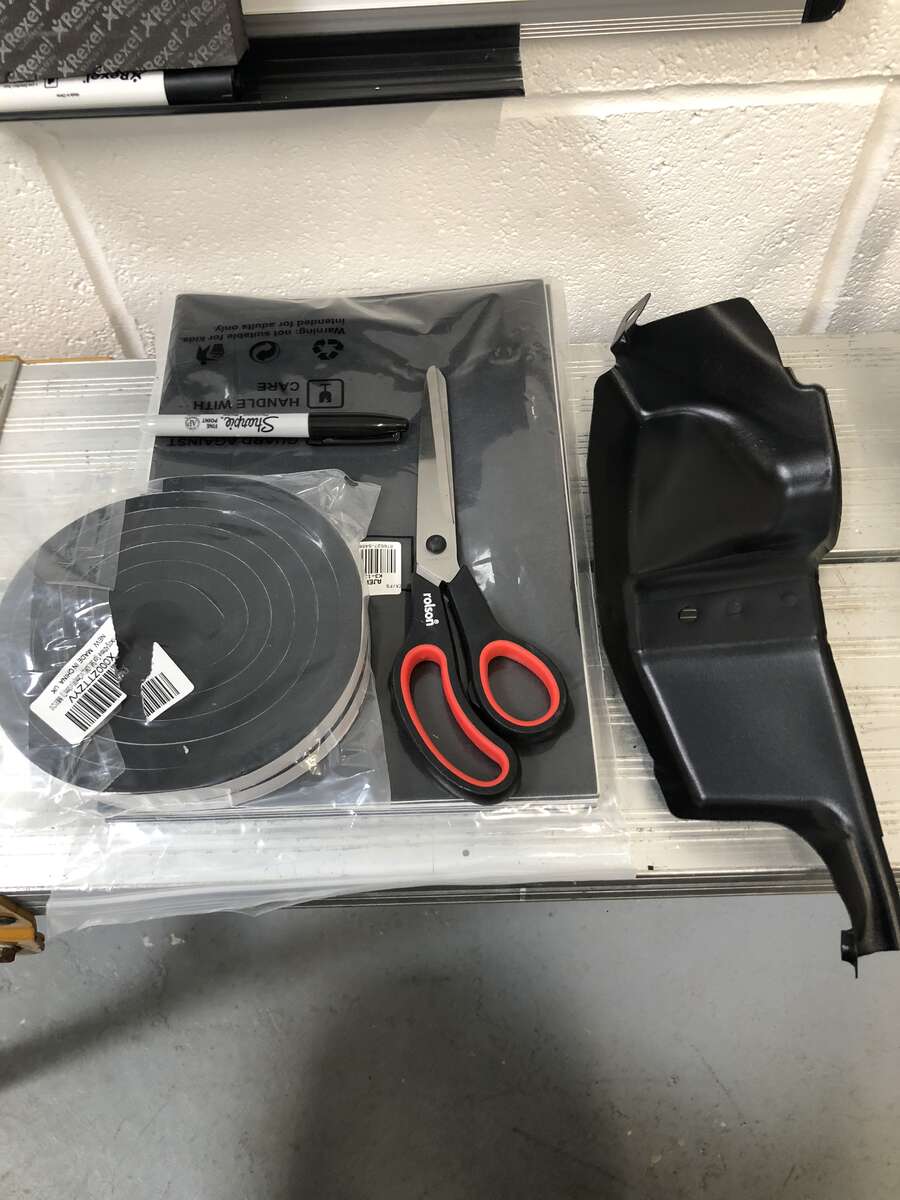
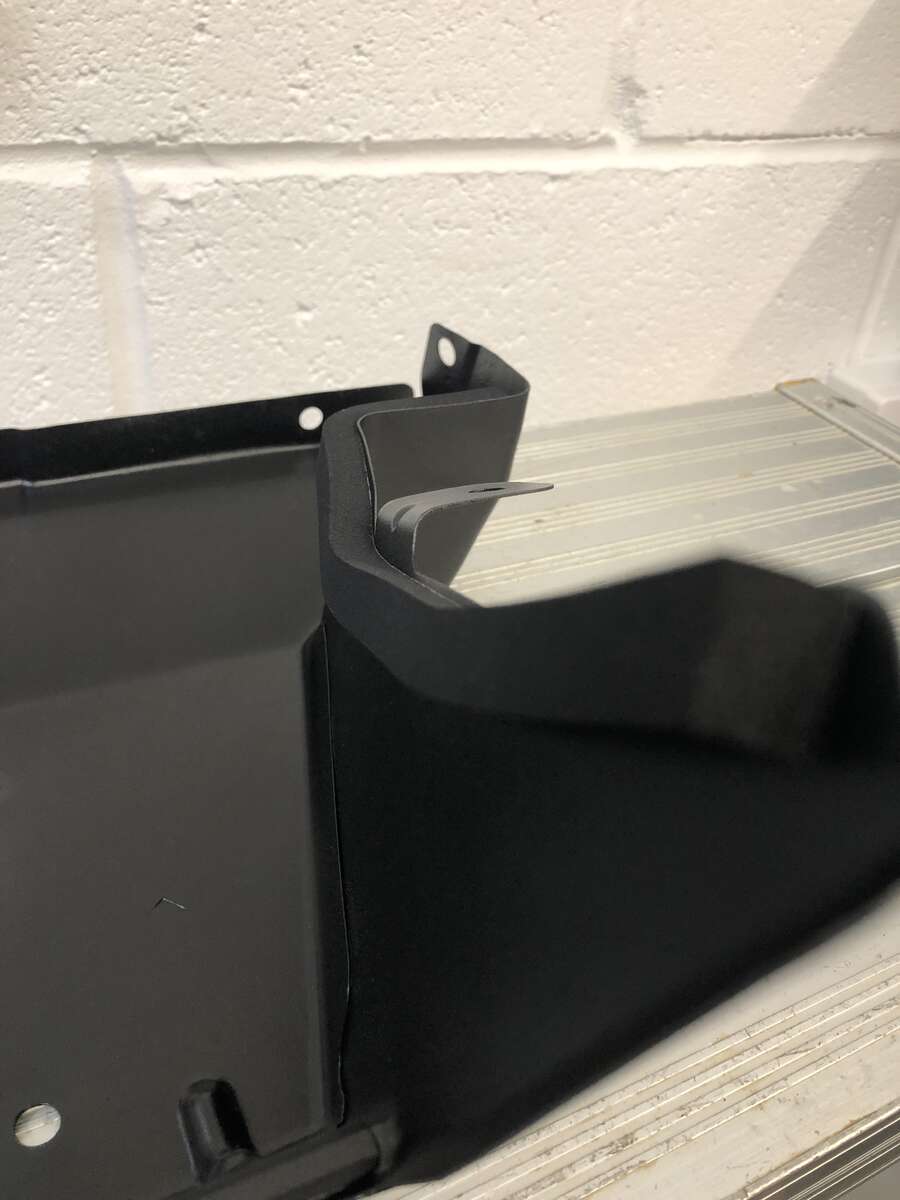
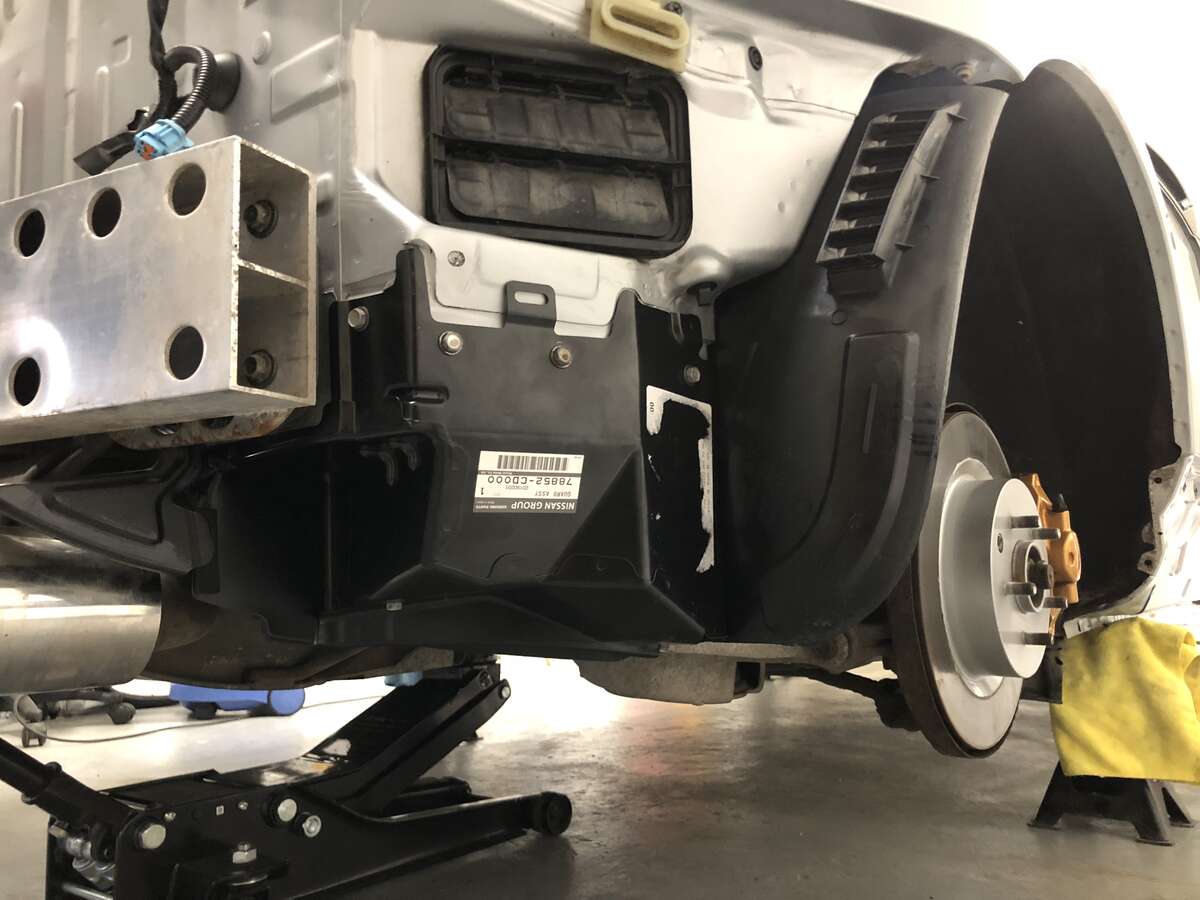
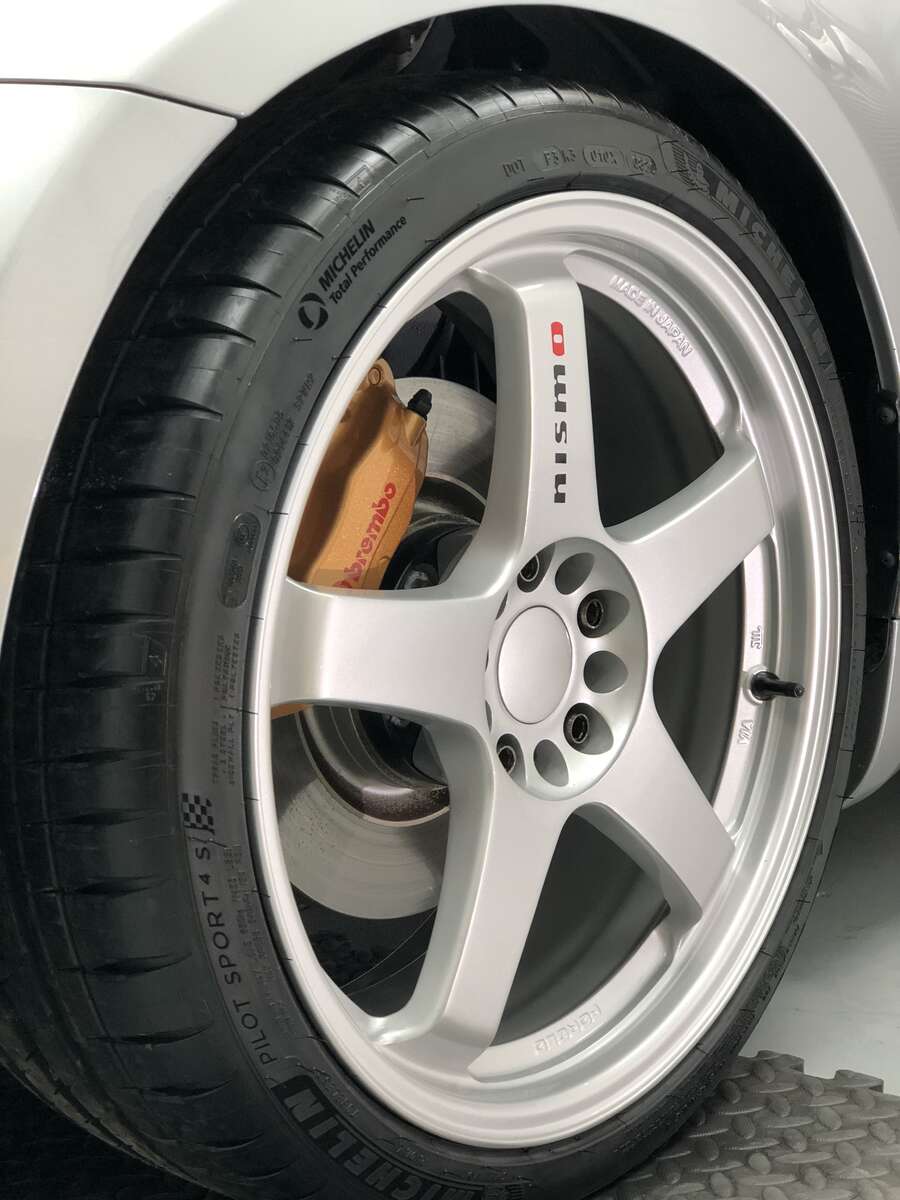
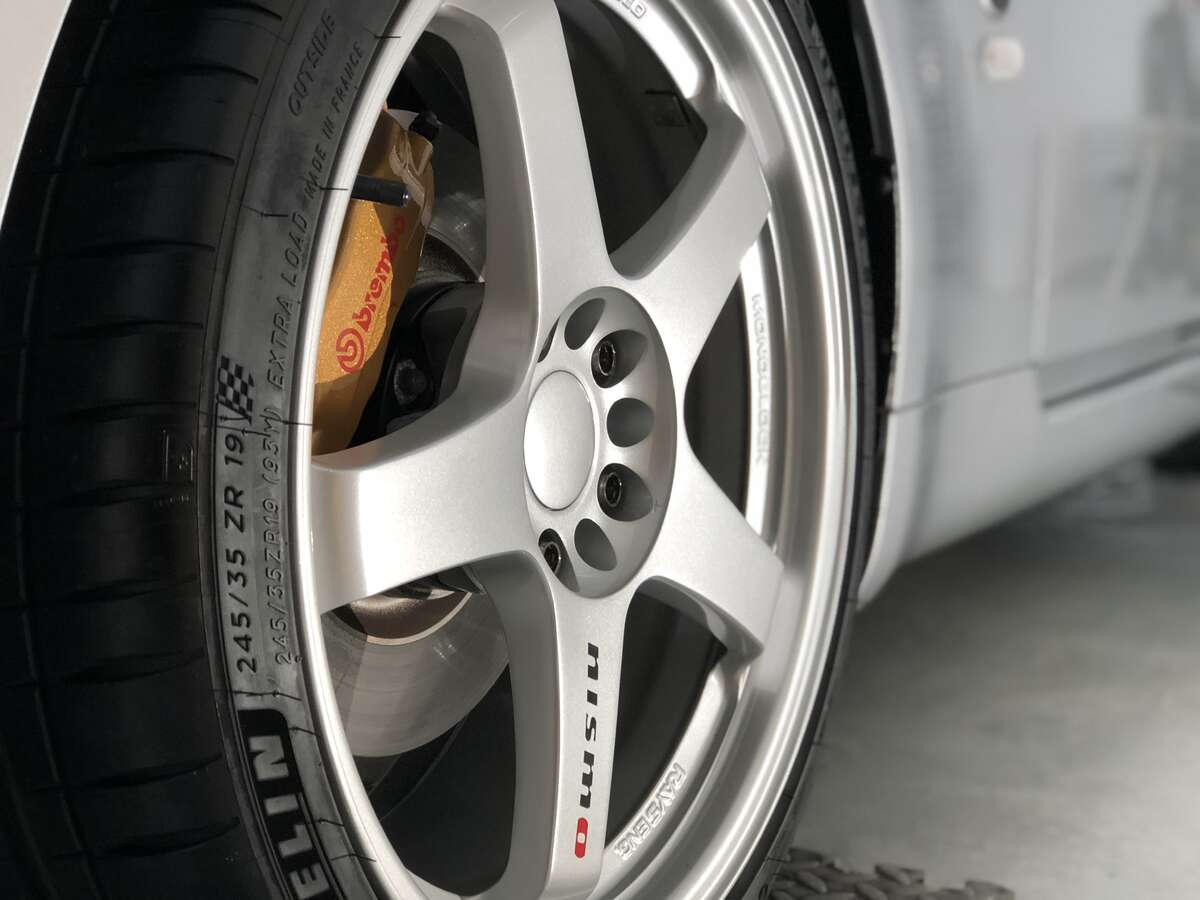
New tailgate now on, cleaned up the hinges, have also sealed them now too. De badged the rear, also had to wet sand out a deep mark where you could see the previous owner had damaged the paint by de badging the original. Makes me cringe when I see people do it in correctly. So a bit of heat with the heat gun to soften the glue, then using fishing wire take the badge off using even pressure so you have 'a clean slice through' and you're not pulling one side of the badge away from the surface as the other side will go the opposite way and dig into the paintwork, this is where the damage is usually done. The using Tar and Glue remover and some cotton pads let the product soak into the left over residue, once soaked its as easy as peeling off, no need to scrape, scratch and rub unnecessarily. Once done the surface is machine polished to take away any ghosting if any. Window wiper stalks refurb was completed (after running out of paint previously haha), all ready to go back on. Rear Brake hubs sanded down and painted, as you can see they were pretty bad! Front Hubs were okay so just cleaned those up using some wire wool. Rear spacers to go on the back. Cleaned the plastic retainers up that were okay to re use. Bought a packed of new ones as a few of they snapped when taking off the car due to how old they are. So now finally now all the dirty work was done, safe to say my unit was probably the worse state its ever been in! A massive clean up was needed, so I spent a whole day cleaning and organising things to be ready for things to be put back together and paintwork to be refined. All new weather stripping for the rear fender guards and brackets. Some plastic welding on the bottom of the bumper and side skirts, not very neat but has done the job (will not see it anyway) Rear arch lining and fender guards re assembled. Looking so much better now, well worth doing! Is solid now, no rust, no missing bolts or retainers. Final part of the detailing has been started. Wheels cleaned, decontaminated and ceramic coated. Also as you can see I ended up going for a new set of Michelin Pilot Sport 4s all round Exhaust tips also polished So car should be done today, Bumper, side skirts and wheels are going back on, paintwork is being refined and waxed. Then just the little bits and its ready to be back on the road! Can't wait