Hodaka Posted January 7, 2016 Posted January 7, 2016 Soo... I've finally decided to stop being lazy and actually start a build thread! I guess I'll start with a bit of background about myself to put it into context. I got my driving license in 2012, and bought myself a 04 plate BMW Z4 3.0i roadster. It was a great car, but I'm a bit of an impulse buyer and didn't really do my homework beforehand. I got the SMG version, which caused nothing but issues during the entire duration of my ownership. Apparently the SMG is well known to be problematic, especially at the mileage I bought it at. In retrospect, I probably should have sussed that the previous owner didn't really care about his car as well. For example he used water instead of windscreen wash. Anyhow thousands of pounds of repairs later, the car started popped into neutral randomly when shifting, had loud clunks etc... The mechanic I used said that the part he suspected could only be bought from BMW as part of a larger assembly, and the parts alone would be around £3,500. I don't think he was BSing me, as he had been advising me to sell it for quite a while, and even on this occasion he said his personal opinion is to call it a day. So I did, and the search for my next car began. When looking for my first car, I had also looked (online) at the 350z. Don't kill me, but I wasn't actually that big a fan of it. Saying that, I saw a listing come up nearby, so I decided to go take a look. Good thing I did - as I fell in love with it as soon as I saw! Impulses kicked in again, and I had bought it a week later (July 2014). Really need to learn to control my impulses! The zed I bought was an 04 plate with about 58,000 miles on the clock. As far as I'm aware, the car was completely stock, which was how I planned to keep it. And that sums up the beginnings of my journey with my zed. Just a quick note - It's been a while since I've done some of these mods, but I will try to provide as much information where possible and/or provide links to threads/pages I found useful. I'm still clueless about cars, but I have definitely gained a wealth of knowledge on here and it's my hope that some of my word vomit will help others Quote
Hodaka Posted January 7, 2016 Author Posted January 7, 2016 (edited) Months went by owning the zed, and I was really enjoying it... a lot. I then discovered a magical place with a wealth of information and inspirational projects/pictures. Here's a link in case you're interested, I highly recommend it - http://www.350z-uk.com/ I started visiting the forums more and more, and became a member in February 2015. Reading other peoples' posts made me really want to modify my own car, but having no experience/knowledge about anything car-related always held me back. In March however (didn't take long), I decided to take the plunge and get the roof wrapped in gloss black, and add tints to the windows. A simple mod, but I absolutely loved the way it transformed the look of the car. The company I used was called Dino Tints and I believe it was around £250 for the roof wrap and tints all around. The work was carried out in a day. They can come to you, but the weather looked grim on the day I had the work done so they collected/dropped off the car. I was hooked. Edited January 7, 2016 by Hodaka Quote
Hodaka Posted January 7, 2016 Author Posted January 7, 2016 (edited) I spent the following few months browsing the forums and looking for the next thing to do. I ended up getting myself the following: JWT Pop Charger from Tarmac Sportz RDX Stubby Aerial from Tarmac Sportz Aluminium Vent Trims from Asad So first on was the aerial. If you've spent any time on these forums, you'll know this is pretty much a mandatory mod. Everyone on here loves a short one! The old aerial took a little persuasion to remove but it was done! The first mod that I actually did anything. So proud of myself Before After Next up was the pop charger. I found this guide on my350z, which came in very handy! The only issue I faced was screwing in the heatshield to the air duct. The air duct plastic is very soft, so I ended up holding the drill bit in between my fingers and drilling the hole that way. Needless to say, it was a pain! I only bothered screwing in 1 screw, much like the OP in the guide. I took the car for a drive after fitting the pop charger and it made a noticeable change to the noise inside the cabin. Much deeper/throatier than before, which sounded great! Also loved the hiss it makes! Edited January 7, 2016 by Hodaka Quote
Hodaka Posted January 7, 2016 Author Posted January 7, 2016 (edited) If you are actually reading this (if you are, wow! ), you'll know that I wasn't initially keen on the 350z. One reason for this was the interior - I especially disliked the centre console area. I decided I'd try and do something about it to the best of my ability. So I ordered the following: Nismo knob from eBay - Seller called "japex_trading" Gear knob & handbrake gaiter from eBay - Seller called "j-f-customs" Gloss black vinyl from Vinyl Warehouse Second hand Pioneer AppRadio 2 - From "ebsop" on here Stereo harness for the above with steering wheel controls I followed this guide and proceeded to remove the centre console. I also removed the area surrounding the handbrake (I don't know what it's called) using another guide, which I have lost. It was pretty easy though other than disconnecting the cable underneath... After opening her up, I found a mess of wires that one of the previous owners had added for an ancient aftermarket GPS: So I went ahead and removed everything I can, including the bluetooth adapter: I wanted to wrap the plastics, but didn't want the bubbly texture that's on them, so proceeded to sand down the surfaces. I'm 100% sure I did something wrong here, as it took me 8 hours or so to do... After the top layer was sanded off, I was left with a felt-like material: I wiped it down with IPA and used 3M Primer 94 along the edges, then used a heat gun to stick on the vinyl. I'm afraid I didn't take many pictures as I didn't have the intention of writing it up, so that's about it for this one. I also had a load of guides I used, but I've lost all of them Anyway few hours later, I had installed and put everything back together. I do intend to do something about that centre cubby "button", and also need to remove the wrap from the ash tray. Before After I don't have any space to work at home, so all of this was done in the office car park. I started after work on Friday, and by the time I was finished it was 2pm on Saturday. I was absolutely knackered! Good thing the wife was away at a conference, else I would have been in a world of trouble! Edited January 7, 2016 by Hodaka 2 Quote
Hodaka Posted January 7, 2016 Author Posted January 7, 2016 A few days later, the reverse camera I ordered from eBay showed up. I bought it from a seller called "chenwenjiaoeb09" and it cost £13.50. Here's what came in the box: I followed parts of this guide and stripped the boot and installed the camera. The only thing I did differently is to run the wires down the centre of the car, rather than along the door. This was just because I had experience taking that section apart. Again, apologies as I didn't really take many pictures. Stripped boot The bits in the office Bad photo, but the reverse camera in action I've since had the camera installed for over 1/2 a year and have had no issues at all, other than the clip on the camera snapping off 2 weeks ago. I plan to try and fix it, and failing that will just order another one considering it's cost! Quote
Hodaka Posted January 7, 2016 Author Posted January 7, 2016 In one of my previous posts, I mentioned that I had bought aluminium vent trims from Asad. I finally got around to installing it! I first bent the aluminium into a slight curve to match the curvature of the plastic around the plastic. I then wiped the vent plastic with IPA to degrease it, then brushed on some 3M Primer 94 again to aid adhesion. The aluminium trim has some double-sided tape on the back, so I just peeled off the cover and stuck it on. Before After Quote
Hodaka Posted January 7, 2016 Author Posted January 7, 2016 Next up, the rear end of the car needed doing! I quite fancied myself a Strosek-Style Spoiler so I dropped Chris @ Tarmac Sportz a PM. A couple of days later ( thanks Chris for the super fast delivery as always ) my new spoiler had arrived: Nothing much to report here really - got it painted and fitted: Before After Love it Quote
chirag1988 Posted January 7, 2016 Posted January 7, 2016 Good start to the build Hodaka! Looking forward to the progress Quote
Hodaka Posted January 7, 2016 Author Posted January 7, 2016 I had now dabbled in wrapping, and had some vinyl left over. I'd seen some people paint/wrap the centre section of their front bumper, so I thought I'd give it a go. I repeated the same process again, i.e. IPA wipe down & 3M Primer 94 application prior to the wrap. This one took me 2-3 hours to do, as I'm a novice, but I was very pleased with the outcome. Always love a cheap mod Before After Quote
Hodaka Posted January 7, 2016 Author Posted January 7, 2016 (edited) Good start to the build Hodaka! Looking forward to the progress Thanks! This is long overdue so got a bit of catching up to do in terms of updates! Edited January 7, 2016 by Hodaka Quote
GappySmeg Posted January 7, 2016 Posted January 7, 2016 Welcome fella, lovely looking car! Anyhow thousands of pounds of repairs later, the car started popped into neutral randomly when shifting, had loud clunks etc... The mechanic I used said that the part he suspected could only be bought from BMW as part of a larger assembly, and the parts alone would be around £3,500. I don't think he was BSing me, as he had been advising me to sell it for quite a while, and even on this occasion he said his personal opinion is to call it a day. Pretty much true... that's why you can buy M3s with SMG for ridiculously cheap. A recon SMG pump can be had for a grand... but then you've got to fit the bugger! 1 Quote
GappySmeg Posted January 7, 2016 Posted January 7, 2016 Also, I've just bought the same camera as you, also to go with a Pioneer head-unit... might be asking a few questions this weekend Quote
Hodaka Posted January 7, 2016 Author Posted January 7, 2016 Next up, emblems. My front/rear emblems were looking super worn, so I decided it was time to go ahead and replace them. I ordered myself some super black front/rear emblems as well as the 350z lettering, again, from Asad. I'd never done this before (in fact, I hadn't done anything to cars before my zed), so did some research. The tools people used seemed to vary. Some people used dental floss, others used fishing line and one even used a knife Obviously I passed on using a knife, but I found that dental floss is too weak to do the job and snapped. Luckily I had prepared some fishing line as well and succeeded using that. Using masking tape, mark up how the emblem currently sits Fully marked up rear Rear after replacement I was very glad to finally rid myself of the worn emblems Note to anyone doing this: If you have issues removing the emblems/lettering, some people seem to use a hairdryer / heat gun to gently heat up the adhesive first. I did have a little trouble, but just used a back and forth "sawing" section, which seemed to work. Once you take off the old emblems/lettering, you'll be left with residue from the adhesive. It goes without saying but do your best to clean it off, prior to sticking the new one on. I personally used some watered down IPA Quote
Hodaka Posted January 7, 2016 Author Posted January 7, 2016 Also, I've just bought the same camera as you, also to go with a Pioneer head-unit... might be asking a few questions this weekend It's been a while and I have a super bad memory, but of course! Let me know and I'll do my best to help. Quote
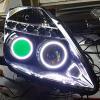
Hodaka Posted January 7, 2016 Author Posted January 7, 2016 So one day while browsing around the forums, I noticed a post by AliveBoy in the swap shop sub forum. He had sold his car but still had a set of clear reflectors, which he was willing to swap for something "cool". As a bonus, he lived very close to me. I messaged him and met up with him shortly after. I gave him £10 for the reflectors (he didn't want it, but I thought it only fair) and some Japanese curry paste and the deal was done One reflector had a super minor issue, which was 2 cracks running along it. No biggie for my set up though as you'll see later. I'd seen a post by dErZ about DIY daylight running lights, so decided to give it a go. Before Drilled 5x 5mm holes Test fitting some LEDs And soldered some resistors to the LEDs Prepped some wires Soldered the components together and sealed with silicon Testing the circuit Got myself some Fly Eye Comparison to see if I actually like the look Which I did, so I wrapped both The adhesive wasn't great, so for the corners I just used some superglue to hold it down, as noone will see that bit anyway. Friend helping me out with installation as I'm inept Bumper removed, tapped into the sidelight and fed both DRLs off it After installation (DRL off) After installation (DRL on) At night (front) At night (side) My first bit of proper DIY. Was extremely happy with the results! Notes: The plastic used in the backing for the reflector was super soft, so careful when drilling if you do this These DRL actually failed after a couple of months - it's just a guess, but I'm assuming it's because of the fluctuations in voltage/current? I did use a different value for the resistors from the guide linked above so it could be down to that. I'm actually about to install version 2 today, so I'll post about that later. Be aware about the legality of it as I believe strictly speaking you can't have side facing lights. Quote
Hodaka Posted January 7, 2016 Author Posted January 7, 2016 Next up, footwell lights! Coming soon... I'm off to install my new DRL now 1 Quote
davey_83 Posted January 7, 2016 Posted January 7, 2016 great work and lovely feeling being able to do stuff yourself!! dash looks MEGA now too. any pics of the exhaust? david Quote
Hodaka Posted January 12, 2016 Author Posted January 12, 2016 great work and lovely feeling being able to do stuff yourself!! dash looks MEGA now too. any pics of the exhaust? david Yeah definitely do enjoy the DIY process Yep, I'll upload those shortly. I plan to right a few more updates tonight! Quote
ZEUS Posted January 12, 2016 Posted January 12, 2016 Great write up Hodaka, really enjoyed reading that. 1 Quote
Hodaka Posted January 12, 2016 Author Posted January 12, 2016 One day during my daily internet / forum crawl, I came across a thread where someone had installed some DIY footwell lights. It went on about pulling the dome light out, taking the cover off the A-pillar etc... These were all things I've never done before, but I was pretty intent on doing it so I carried on researching. I found a few articles I thought were useful so took note of those. These included: Info on the entire process A useful pic of how to solder the wires - I soldered it a bit differently, but this was what gave me the insight into how to do it Some useful Q&A BCM related info 1 BCM related info 2 First thing I did was to buy the LED light strips. As you have probably seen from my previous posts, I have the orange seats (I forget the name... wasn't it named after a breed of horse?). I therefore wanted to get some amber lights, but couldn't find any that were reasonably priced. I therefore settled for red as a starting point. I planned to set it up so that I can replace the strip easily if I liked them. FYI I bought it from a company called Lighting Ever. Good service and the product seemed to be of good quality. I did originally plan to use a relay as that seems to be the safer method, but decided against it in the end partly due to laziness and partly as I wasn't confident in wiring a relay in. It's worth noting that I have replaced all the interior lights with LEDs as well. First things first, I disconnected the battery (wound down the windows first) and took out the dome light housing: I then soldered 2 sets of wires to the housing. This is so that each footwell light can be operated independently from each other. As you can see, I did it to the connectors to the bulbs themselves, rather than where the guy in the 2nd thread (in the list above) did. It's exactly the same part of the circuit, just physically it's a different location. I liked the idea of soldering it onto here as there's convenient holes you can stick the wires through Each wire was several meters long as it had to go from the dome lights, across the head liner, down the A-pillar and into each footwell. I personally went down the driver's side, so the wires for the passenger side was a bit longer. I then taped it together using electrical tape every 10cm or so, just so it's tidy. Although I'm still bad at these things, I do like to try and keep things tidy to the best of my abilities. Feeding this wire through the head liner was an absolute PITA as I didn't have much in terms of tools as I was at the office. So what I ended up doing was feed some thicker wire (17A) with a loop at the end through the head liner. After a lot of struggling I managed to see the end of the wire near the top of the A-pillar. It was a bit too far for my fingers to reach, so I made this using a paper clip Carefully wiggling it around, I managed to hook it onto the 17A wire and pull it through: I then taped dome light wires to the 17A wire, and pulled it through from the dome light housing area to the A-pillar: I then ran it down the A-pillar and cable tied it to keep it tidy. I had no idea what the other wires were for (dome light power + side air bags?) so was very careful not to disturb anything. From the bottom of the A-pillar, I fed it straight down to the footwells. My plan for the night was to just sort out the driver's side, as feeding the wires through to the passenger side would require me to pull out the centre console. It was getting late and this definitely wasn't something I was up for, especially as the wife was getting a bit annoyed by this stage! I stripped the end of the driver's side wires and crimped some male bullet connectors. I then cut some of the LED strip, put on the connector thing (shown to the right of the LED strip above) and crimped the female connectors to that. After I connected it all up, the driver's side was lighting up as planned. Next I had to attach it somewhere to the top of the footwell. I peeled back the double-sided tape on the rear of the LED strip and tried to find a suitable place annnnnnd... somehow managed to short the circuit! Having read about blowing the BCM, this is where I sh*t myself. Luckily I replaced the fuse and all was well. Not wanting to do any further damage, I decided to call it a day. I taped up the remaining connectors to insulate them from one another, and stuck the LED strip to the side of the seat just to keep it out the way until I thought of a better solution. Mmmmm... try hard boy racer red. Anyhow the LED strip stayed there for quite a while. I felt a bit self-conscious each time I got out the car at night So it was time to research again! I found some housing specifically made for housing LED strips, but they seemed to be made of aluminium. Considering I wanted it purely for insulting the strip, it deemed it unsuitable. After a bit more brainstorming, I decided that I could try using some PVC (?) tubing they use to aerate aquariums. I checked the width of the LEDs (which turned out to be 8mm) and ordered some PVC tubing from eBay. I think I got the 8mm/10mm (inner/outer diameter). After the tubing arrived, I squashed them slightly to make them oval and inserted the LED strips. I then taped it up best I could to insulate any exposed parts: Pretty good solution for £3! Now that I could be confident it was properly insulated, I just cable tied them to what I could: I then fed the passenger side cable from the driver's side footwell, into the centre console and through to the passenger side. I then just repeated the rest of the process to finish it off: As I say, I wasn't a fan of red, but was super pleased with the results. Notes Female/male connectors - I'm sure this is something which is obvious to anyone who's done any DIY electronics, but after doing these projects I came to the conclusion that it's best to use the female connectors to the "live" side of the circuitry. This will help prevent unintentional shorts as the metal isn't sticking out. So in this project, stick the male connectors on the LED strips, and the female connectors to the wires from the dome light. BCM - Make sure you read the stuff about the BCM and understand the risks you take by doing this project. Quote
Hodaka Posted January 12, 2016 Author Posted January 12, 2016 Great write up Hodaka, really enjoyed reading that. Thanks Zeus! Quote
Hodaka Posted January 12, 2016 Author Posted January 12, 2016 (edited) I'd been aware for a while that my clutch was worn. The biting point was super high and this was confirmed by West Way Nissan (where I bought it from. I dislike them now, but that's another story) as well as the garage I now use (TGM Sport in Fleet). TGM said that it'll need replacing in the near future, but for now it should be ok. I decided I'd start looking for when I needed to replace the clutch. Again, the impulses kicked in and I decided to just go for it. A quick PM to Ewan@CMS and a few days later, the Xtreme Organic Clutch & SMF arrived: What can I say... I'm super weak to pretty things. Speaking of pretty, I always wanted an Invidia Gemini. So I dropped Adrian@Torqen a PM, and less than a week later that had arrived as well. I got it delivered straight to the garage so I don't have a pic, and I'm sure you're all aware of what it looks like, but here it is again: This was then all fitted: First time I've seen the underside of my car. As soon as I started the car... wow... such a difference in exhaust note. And the clutch... All I can say is that I was over the moon Although I took this recently (so it shows other stuff), this is what the exhaust looks like fitted: And of course, the obligatory video: Revs showing the SMF Sound of the exhaust (should have taken it in landscape...) Edited January 12, 2016 by Hodaka 1 Quote
Hodaka Posted January 12, 2016 Author Posted January 12, 2016 Cool build, you've been busy Thanks! Yeah, I'm new to modding but am loving it 1 Quote
Hodaka Posted January 12, 2016 Author Posted January 12, 2016 This one's a quick one (and actually happened before my footwell light installation), but my car didn't come with floor mats. Something little, but it really bothered me! Luckily, I noticed Ian was selling his old ones so I nabbed them! So glad I now have mats! Notes for anyone buying mats - I didn't know this for ages but there's a little plastic peg under the drivers side seat that you can attach your mat onto. Quote

Recommended Posts
Join the conversation
You can post now and register later. If you have an account, sign in now to post with your account.