EzeePzee
-
Posts
235 -
Joined
-
Last visited
Content Type
Profiles
Forums
Events
Gallery
Store
Everything posted by EzeePzee
-
Intermittent heater controls - anyone else had this?
EzeePzee replied to iwanprice12's topic in 350Z General
Ok, so jumping on an old thread here, but my post is relevant (ish!) Has anyone experienced LEDs failing on the heater controls, so that they don't light up correctly? I've replaced 4 or 5 of the surface-mount LEDs inside mine now (changed colour of a few - just because!) but it seems odd for quite so many of them to fail... I've got 1 still out I think (which lights up the dial indicator - the bit that rotates) one one of them now but it looks a little bit more tricky to replace as it is at 90 degree's to the PCB. Thanks in advance! -
Wow that is a lovely car! I’ve been looking at 240zs recently, bit of a pipe dream really. You’ve got a good one there, keep it!
-
Hi All, new member from Berkshire
EzeePzee replied to zeebez's topic in Introductions & Welcome Messages
Welcome! I’m just down the road in Basingstoke and I work in Bracknell, so May we’ll see you about :-) -
EzeePzee’s 2004 350Z APS TT Project Thread
EzeePzee replied to EzeePzee's topic in Member Build Projects
Having fitted the lip today, I've updated the September post, above, and added a few photos too. -
EzeePzee’s 2004 350Z APS TT Project Thread
EzeePzee replied to EzeePzee's topic in Member Build Projects
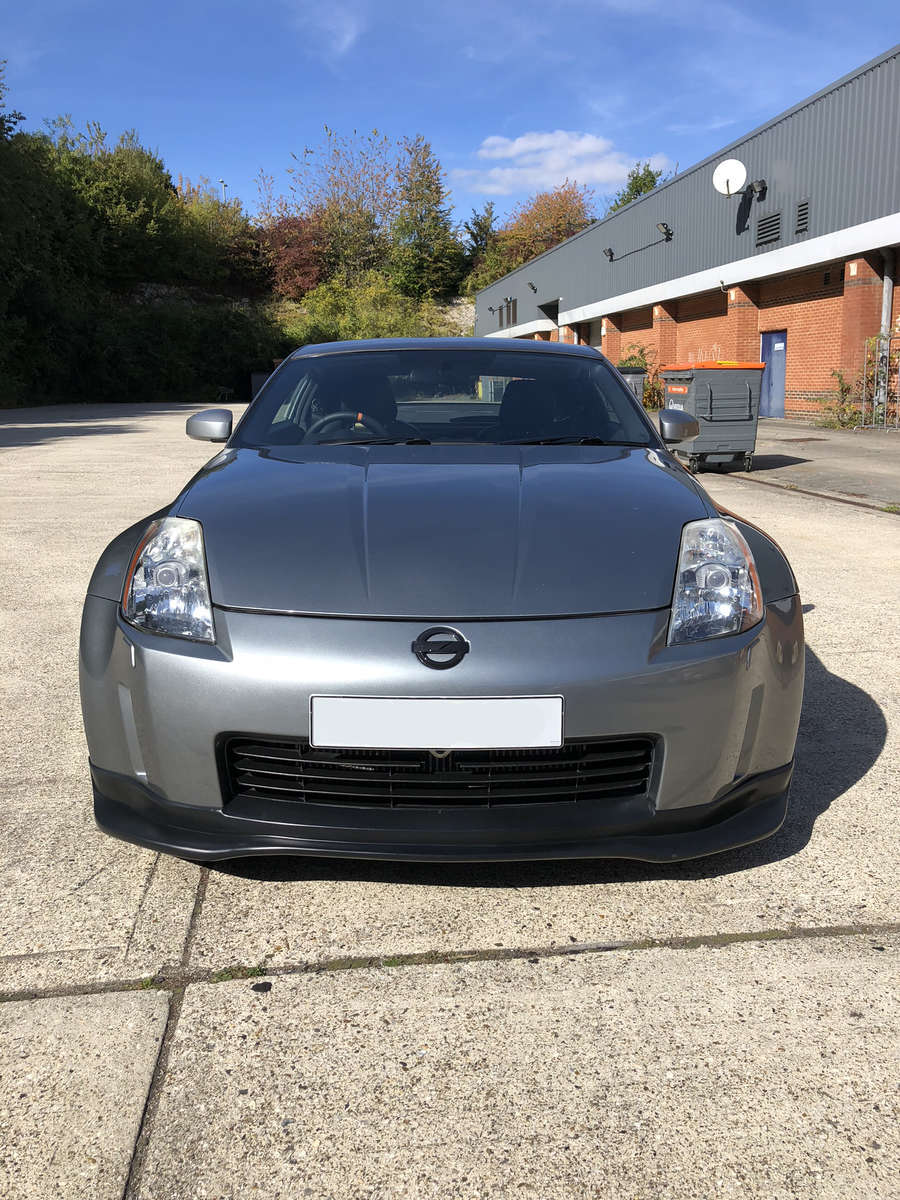
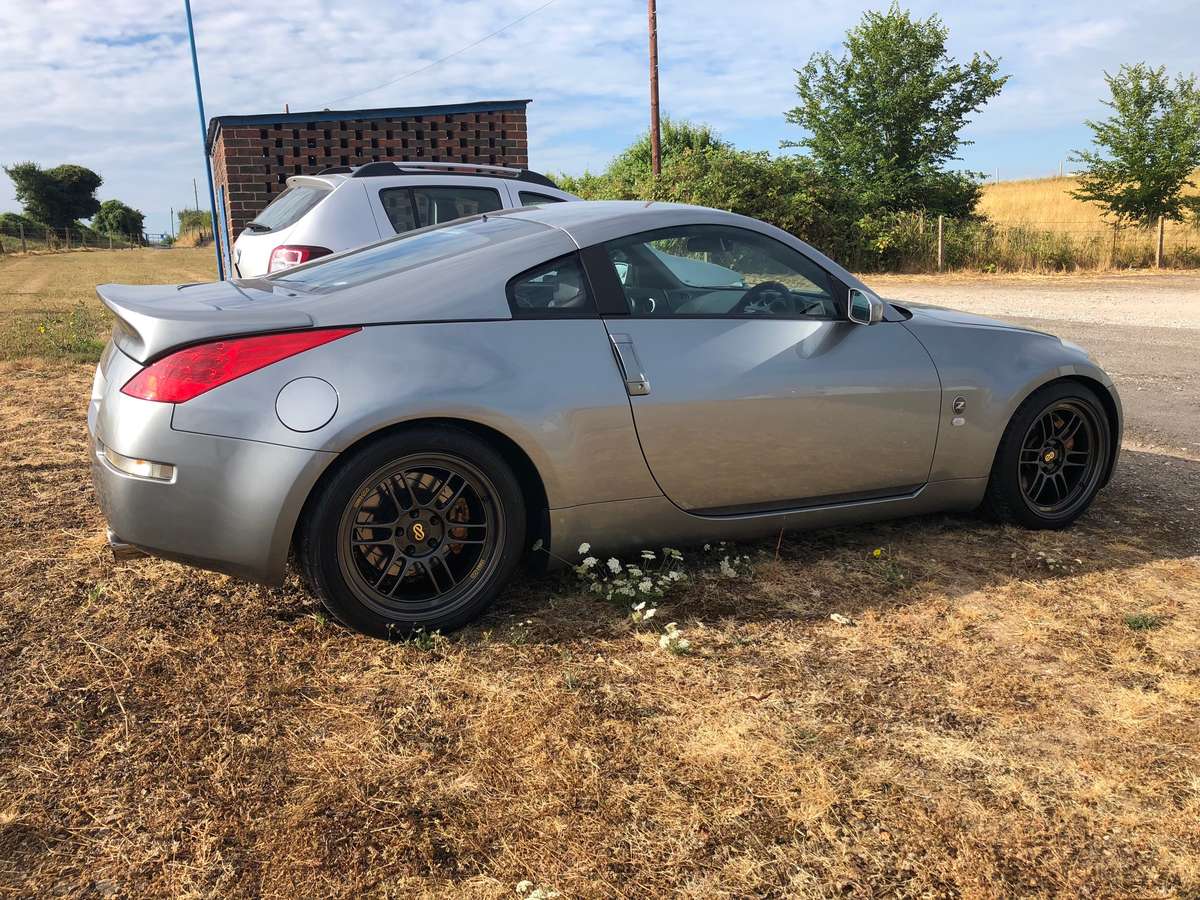
Month 10: Sept 2018 Completed This Month: Sell Muteki blue wheel nuts that were swapped out previously Sell mine FRP lip Purchased Tarmac Sport GT style PU lip = £60 total spend A quiet one this month, mainly due to family, work and house commitments (Decorating, extension building etc) - but a few updated nevertheless. Having trial-fitted the cheap mines style lip I purchased, I wasn't happy with the work required and so I sold it on for the same price I paid for it. I also managed to sell my SR48 wheel nuts that I'd replaced with the wheel refurb back in July. The money from both of these sales was directed straight back at the TS GT style lip instead - which I'm pleased to say is a much better fit and being PU should withstand a few more knocks here and there. Fitting the lip was relatively straight forward. A couple of screws in each wheel arch, a couple on the top front of the lip, and a bit of heat on the lip to bend it to fit nicely against the bumper. I took a slightly different approach to most other guides in that I marked where the lip needed to be heated, removed it from the car and used a g-clamp and a bit of wood to bend to shape whilst it was off the car. This meant I didn't have to worry about damaging the paintwork on the bumper itself. I did use a bit of black silicone sealant along the top edge of the lip to finish it off too. Very pleased with how it looks! Photos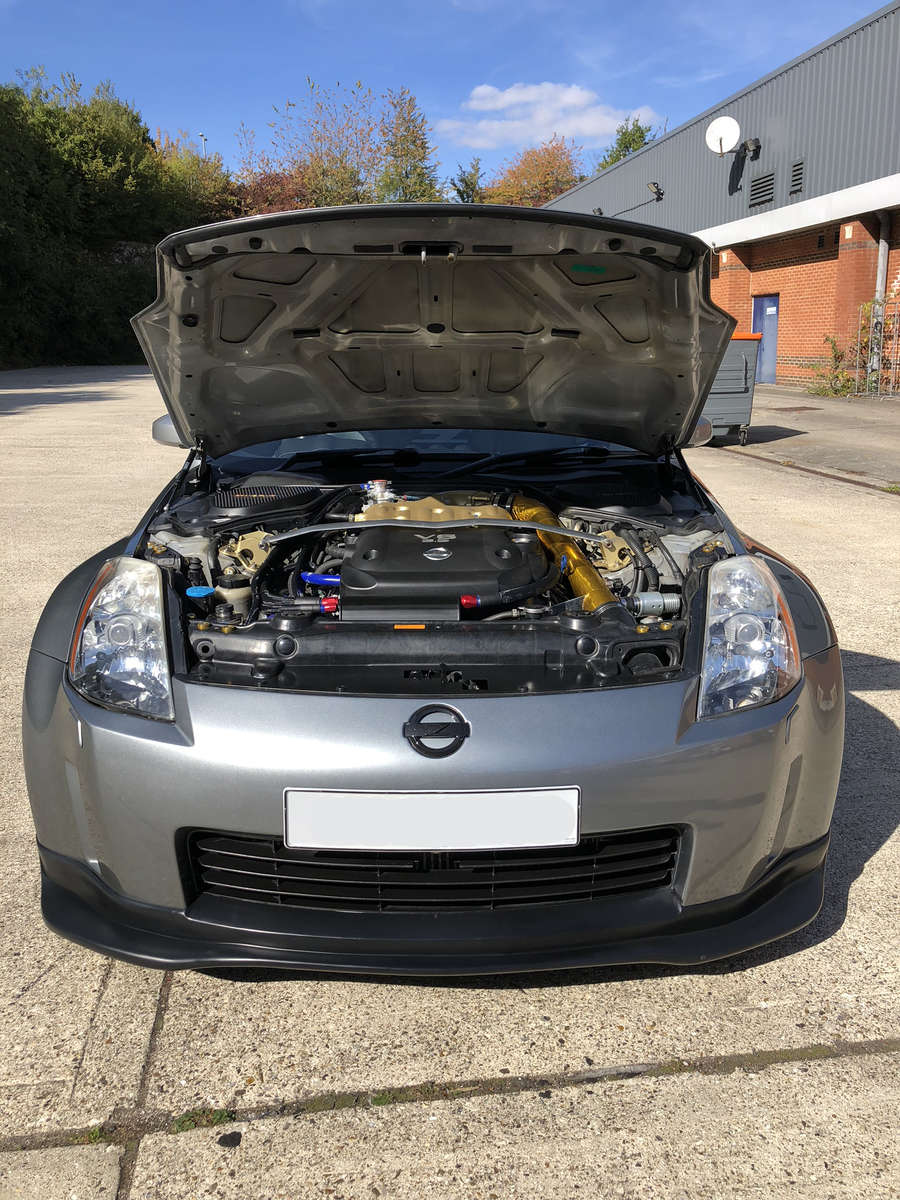
-
Just a quick shout out to Chris and the gang at Tarmac for sorting me out with a very pleasant and smooth transaction, and super quick delivery as part arrived just on 30hrs after ordering :-) Haven’t opened or looked to fit it yet, but very much looking forward to getting the front lip/spoiler onto my car Thanks Chris!
-
Are these still available, and any bank holiday deals??? :) Ive got a 2004 DE but seems an M22 thread. Cheers
-
EzeePzee’s 2004 350Z APS TT Project Thread
EzeePzee replied to EzeePzee's topic in Member Build Projects
Month 9: Aug 2018 Completed This Month: Clutch slave cylinder, HEL braided hose and new fluid Wiper arm & motor lubrication Dump valve service Mines style front lip (purchased only, not fitted) = £180 total spend So a bit of a boring month this one. Something that was on my mind was that the clutch slave cylinder wasn't performing to it's best, so I took the car to Horsham Development who are just up the road from me to get it swapped out. Whilst there, I opted for a HEL braided line to be fitted along with the obvious requirement for fresh fluid. Pedal feels so much better now I actually drove the car in heavy rain for the first time this month, and one thing I noticed was that the wiper arms and mechanism was a bit noisy. So a quick removal of the scuttle panel and some decent spray lubricant and problem solved. I also took the opportunity to clean under the panel whilst it was off, cleaning the bottom edge of the glass and pulling out and old leaves and debris. I took a punt on a mines-style front lip too - buying it for a very low price with the aim to do a temporary fitment and see if I could get in and out of my driveway without causing too much damage. So far, I've not got around to fitting it, but I have thrown some black paint onto it at least. Finally, with the hot weather I noticed that the car dump valve (APS high capacity dual port recirc/dump valve) noise wasn't what I recall, with more of a turbo flutter noise than the usual single whoosh I'm accustomed to. Believing this to be a DV adjustment problem (ie not dumping enough and leaving too much air/boost in the system) I decided to pull the valve out of the car, strip it down and regrease before refitting. This has made a significant different and with a slight drop in pre-load on the spring I think it's back to optimal. For future months, I'm not 100% sure what I have planned now having completed the majority of my to-do list. These are at least on the "maybe" list: Sparco R100 seats + rails Headlight upgrade to facelift Front splitter install Rear spoiler swap Diff whiteline bush kit (current bushes are beginning to show their age and need replacing) HR bonnet Spats Respray to touch up the minor marks Nothing here is urgent, so I'll be taking my time to make sure it's what I want to do before doing it. Photos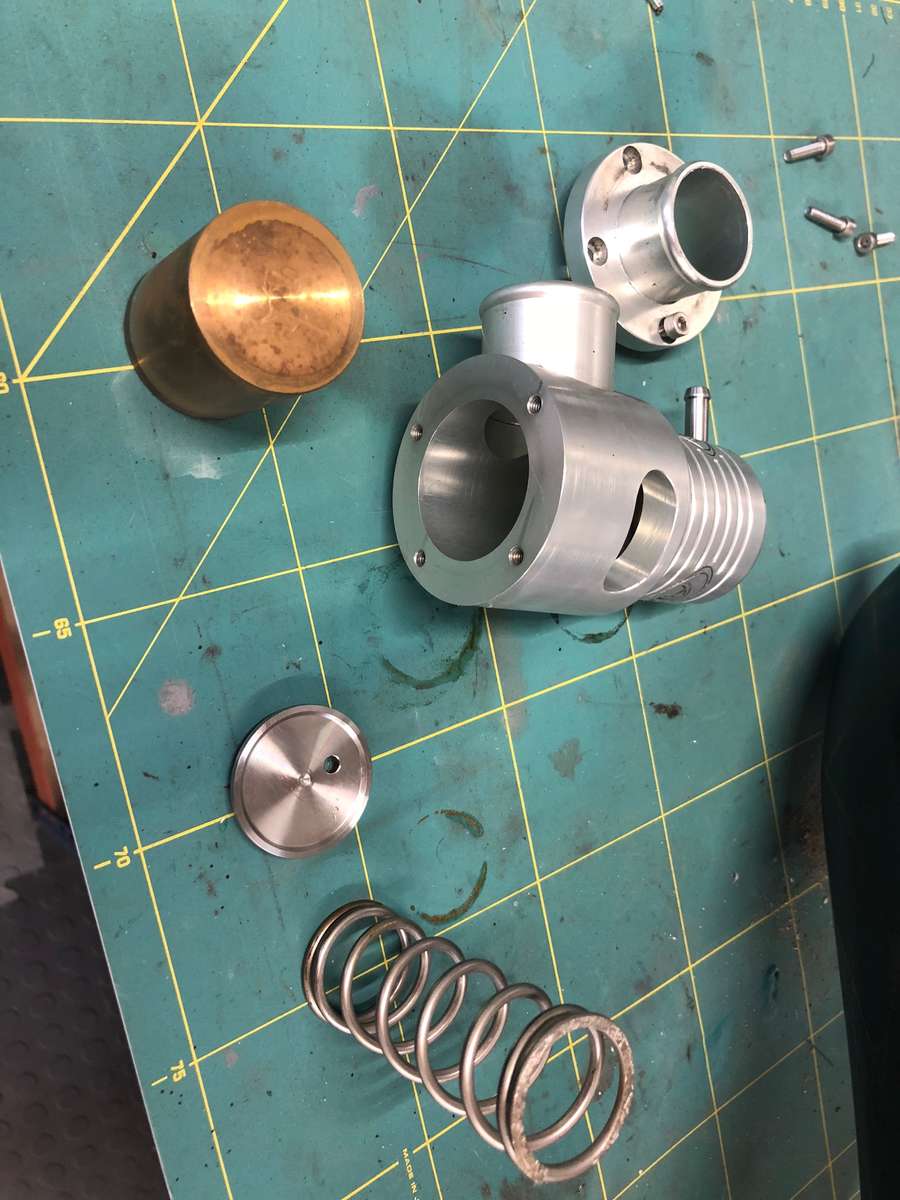
-
Azure blue 2004 single turbo Z £27k spent - £10,450 ono
EzeePzee replied to rasco's topic in Zeds For Sale
How have I not seen this around? I live in Basingstoke too and have my TT 350Z, would have been good to have met up! Looks a cracking car mate, good luck with the sale. Sounds like a bargain :-) -
May be interested depending on price and condition
-
Same question here please. And a link to website/price would be good too.
-
I have loosened the adjustment so far, to lower the pre load and make the valve easier to open. The boost level on the car peaks at 0.8 bar (11.5psi) as is recommended by APS (turbo kit) and mapped by Abbey. It has peaked slightly higher in this hot weather but otherwise been pretty constant. The compressor stall noise may not be anything “major” to worry about if I take the world of google to be gospel, but if it is at all possible to reduce its occurrence then I’d be happier. I spoke to Jez @ Horsham today whilst getting my slave cylinder replaced, and I may give Abbey a call to see what they think too - given that they mapped and know the car they may be able to advise further. I may also get a second pair of eyes involved so I can reset the valve to weakest setting and see what difference it makes.
-
350z parts spats, boot divider, diffuser +++lots more
EzeePzee replied to jimmy.farrow7's topic in 350z Parts For Sale
Is that price posted on the spats? -
So I’ve adjusted it about 1-1.5 turns of the adjustment, hasn’t made a massive difference. Car idles ok. When I rev the engine in neutral, at top rpms it still does the flutter, which suggests to me it still needs to be adjusted softer. Is that right? What I don’t understand is why I need to adjust this all of a sudden.. nothing has really changed on the engine...?
-
I run Motordyne ART pipes on my APS True dual exhaust system. Sounds mint
-
Thanks dude. Don’t have replacement springs in mine but it is adjustable so may mark where it’s set at and give it a tweak.
-
Hi All, I’ve noticed recently that the noises from my APS Twin turbo 350z seem a bit inconsistent, and wondering if anyone can advise. I get the “flutter” noise more than I’d expect tbh, and I understand that this could be an indication of turbo cavitation and lead to premature wear. Ive also noticed a lag in power delivery when doing 60-70mph in 5th or 6th gear on the motorway. Power delivery in lower gears is amazing though, so no issues there. At 60-70mph revs are between 2.5-3k I think, so maybe I just need to drop it a cog or two? Car produced reasonable figures when with Abbey Motorsport when on the dyno back in April (385bhp) and hardly done many miles since then. However weather is very hot of late so that may have some impact.. Should I be concerned? Should I try adjusting the APS dual-vent dump valve, or am I worrying about nothing? Cheers!
-
EzeePzee’s 2004 350Z APS TT Project Thread
EzeePzee replied to EzeePzee's topic in Member Build Projects
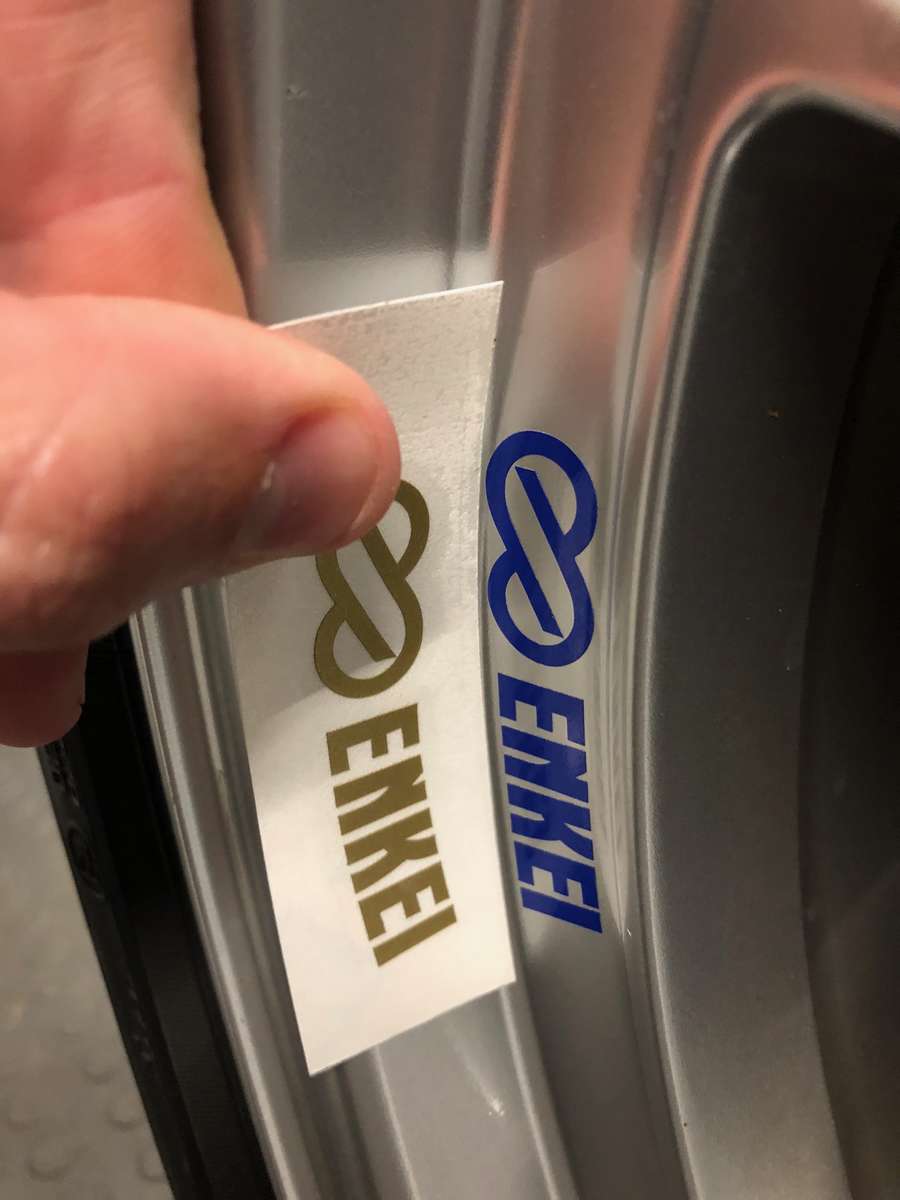
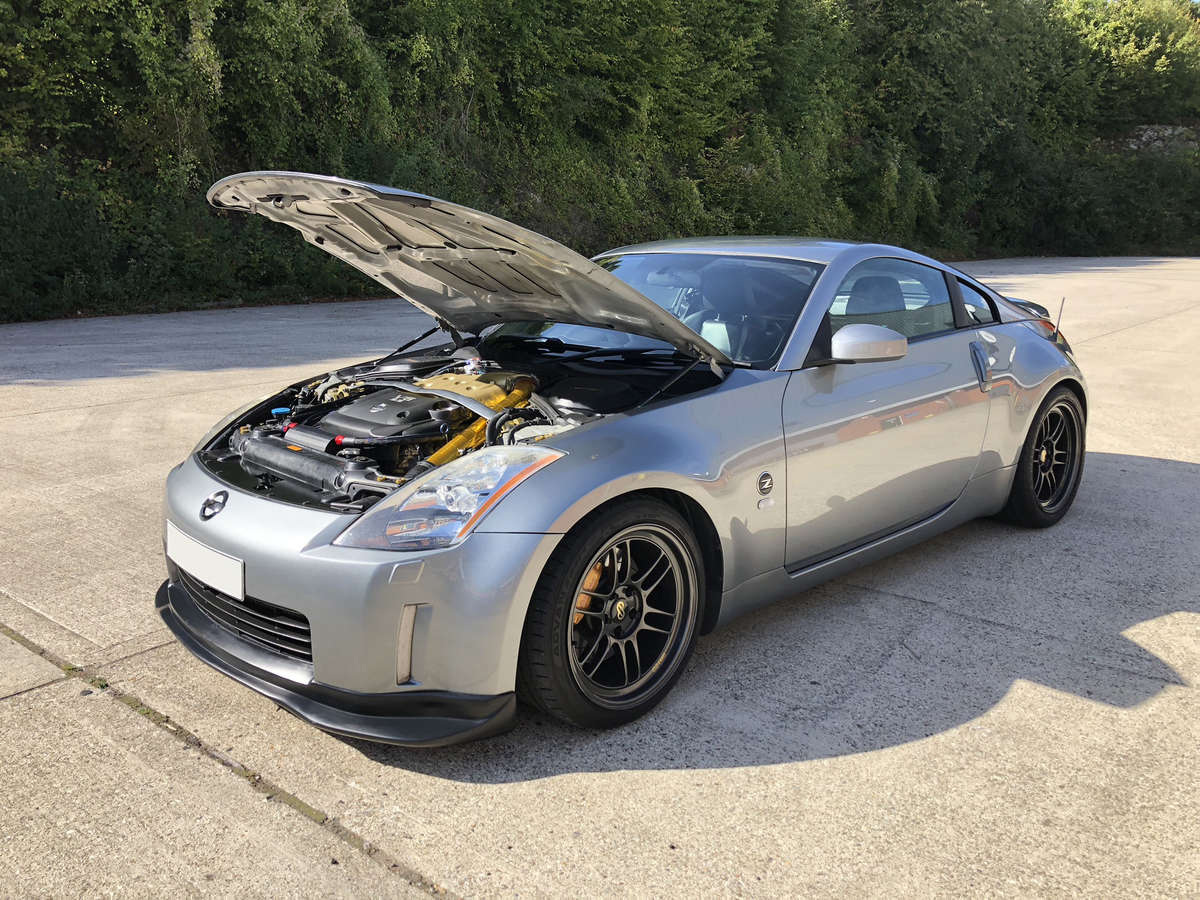
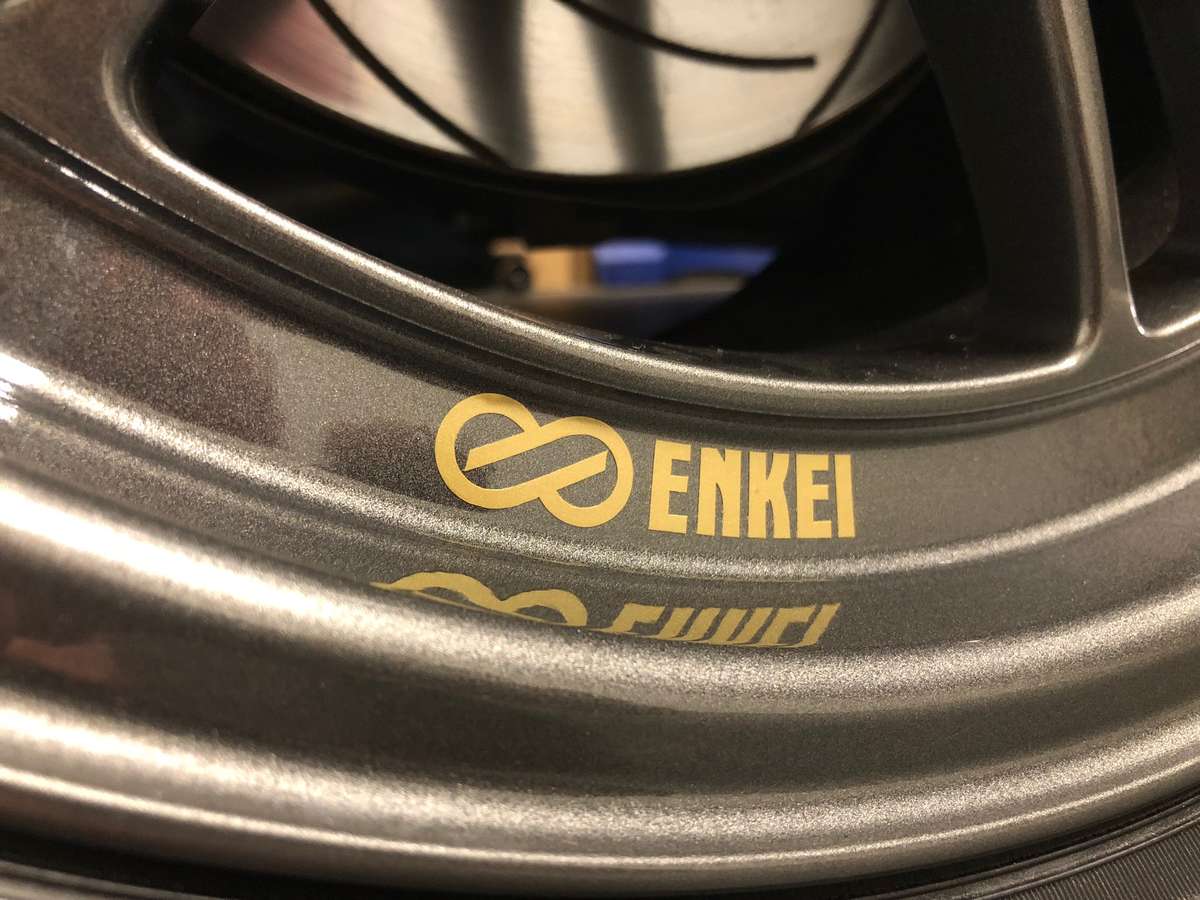
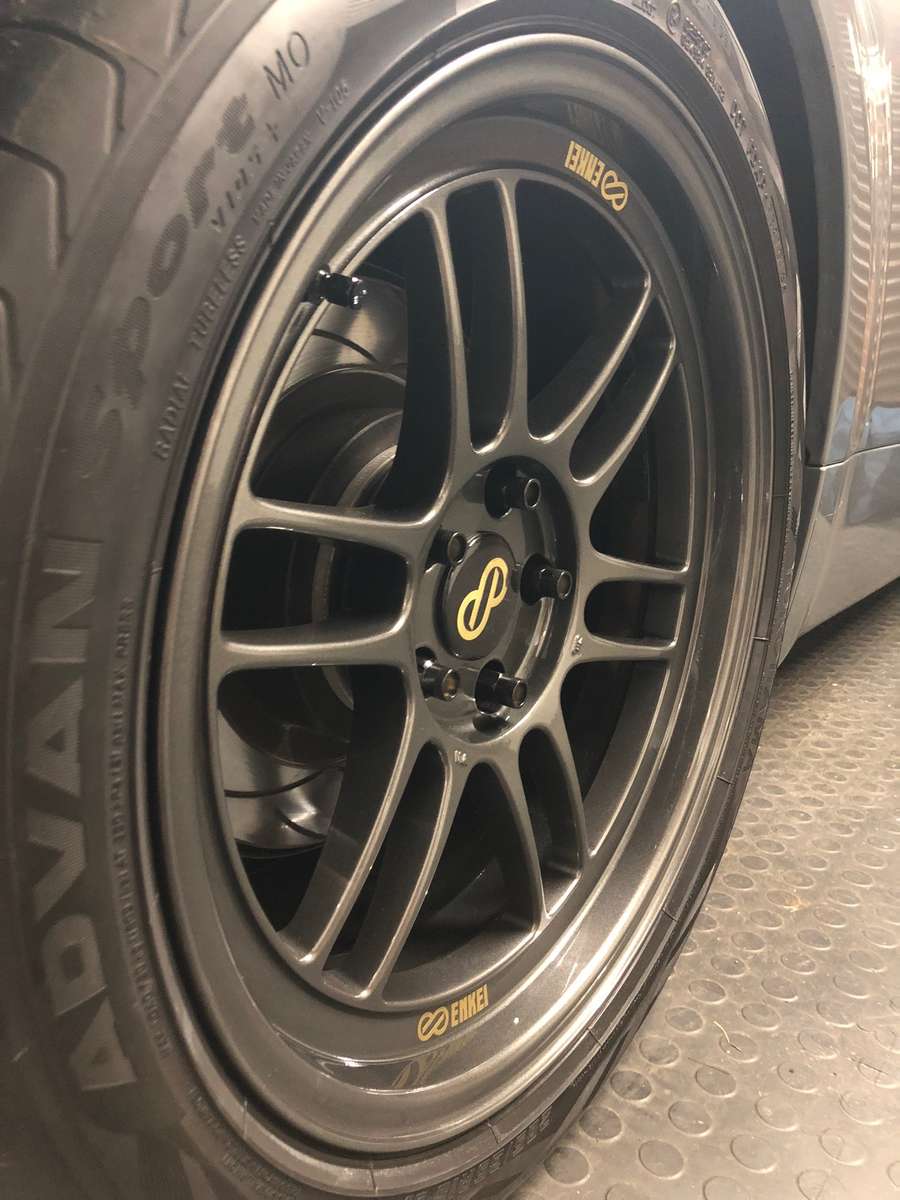
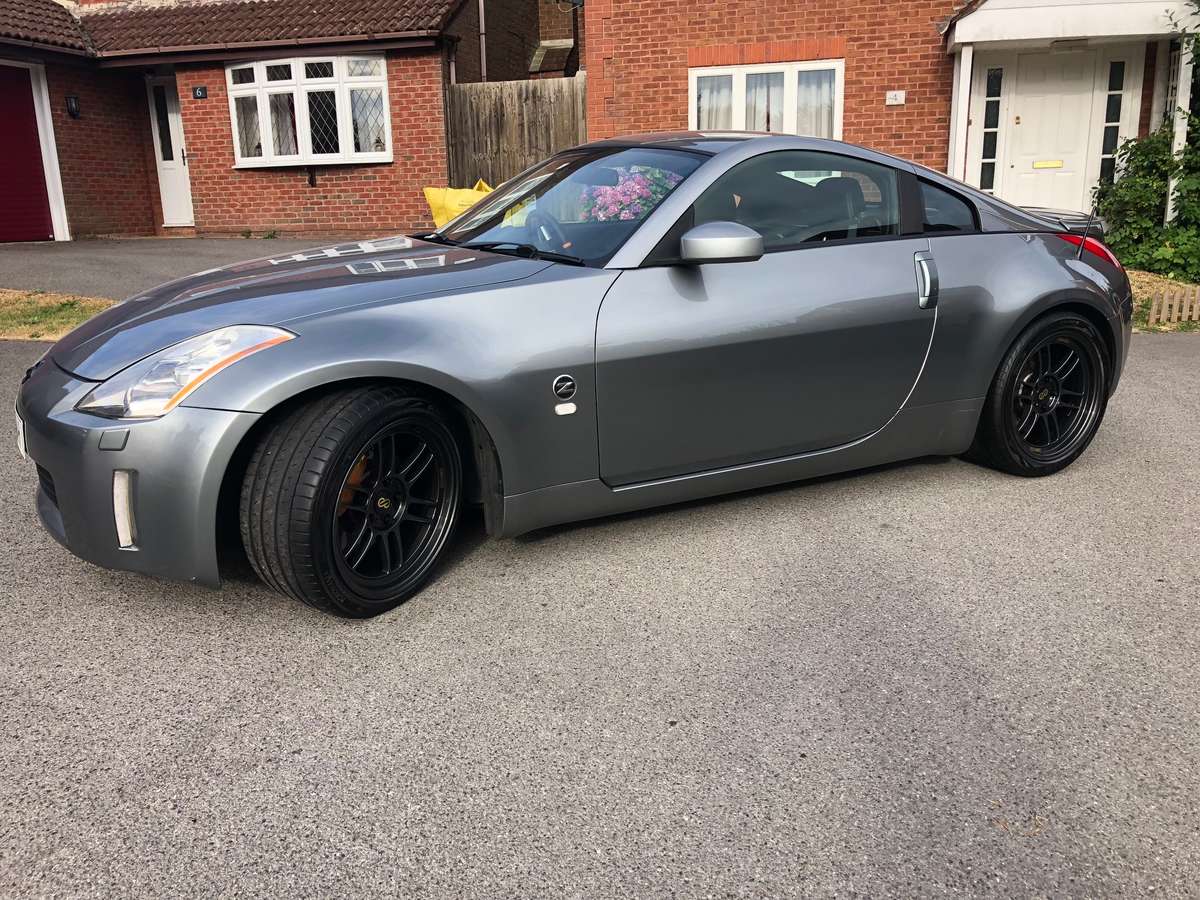
Month 8: July 2018 Completed This Month: Refurbished Enkei RPF1 alloys in Dark Anthracite Added Enkei decals to wheels Installed black Volks metal tyre valves Installed new Muteki black wheel nuts & lockers = £300 total spend So the first major cosmetic change is complete! After a painful wait for the car to go in, July finally saw the car to go MyAlloys in Basingstoke for a full refurb. The wheels were not in bad condition before hand, with only minor kerb rash. However, I wanted a colour change and I am super happy with the finished result. Colour chosen was "Dark Anthracite" which I think really goes well with the WV2 paint on the bodywork. Whilst the wheels were being refurbished, it made sense to get the replacement Enkei decals ready. When the car was returned, I installed my custom centre caps and the decals, and I feel they finish the wheels off perfectly. Once on, the wheels were properly cleaned with Bilt Hamber Auto wheels, and sealed with Poorboys wheel sealant. Finger crossed this keeps them in mint condition. I hope you like as much as I do! Photos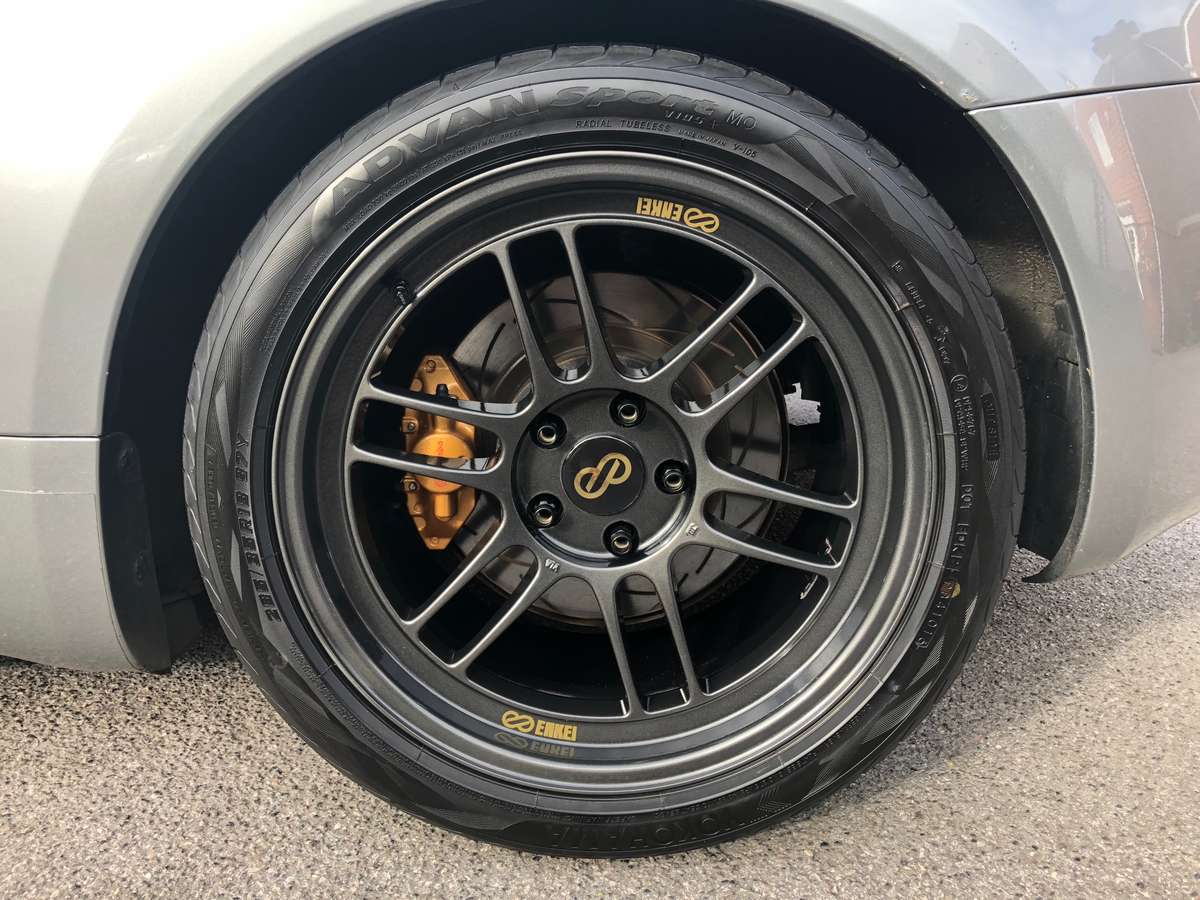
-
So by the sounds of it then, a 255/35 and a 275/35 combo would be OK.. trying to understand if that’s much of a stretch on the fronts or not, but seems to be ok from guides online. Just don’t know if there is any benefit from doing it or not, or if there is a big tyre price / availability difference.
-
Is that on a 10j rim?
-
Thanks. is there a “requirement” to stagger the width to the rears? How big does this need to be?
-
Anyone?
-
Hi guys, Currently got some Enkei RPF1 alloys on my 350z, 10J in each corner. Tyres are 265/35/18 and 285/35/18 at the rear. Is there a better tyre width choice, or should I stick with the above? I thought about looking at 255/35 and 275/35 options on the same rims, but not sure if there is any benefit, or perhaps it may be detrimental dropping the width of tyres..? i presume it’s wise keeping the staggered front-to-back config, but don’t know how critical this is as I’ve not driven the car with any other tyres on. Note that I always use decent tyres, no budget. Currently have Yoko Advans on and always like Michelin or Goodyear’s too. Thanks
-
Hi folks, as per title, looks like mine has fallen off (?!?!) or been nicked (less likely as the car is always garaged) so need a replacement towing eye cover for the front bumper on my 2004 DE. let me know if you’ve got one - thanks Paul
-
EzeePzee’s 2004 350Z APS TT Project Thread
EzeePzee replied to EzeePzee's topic in Member Build Projects
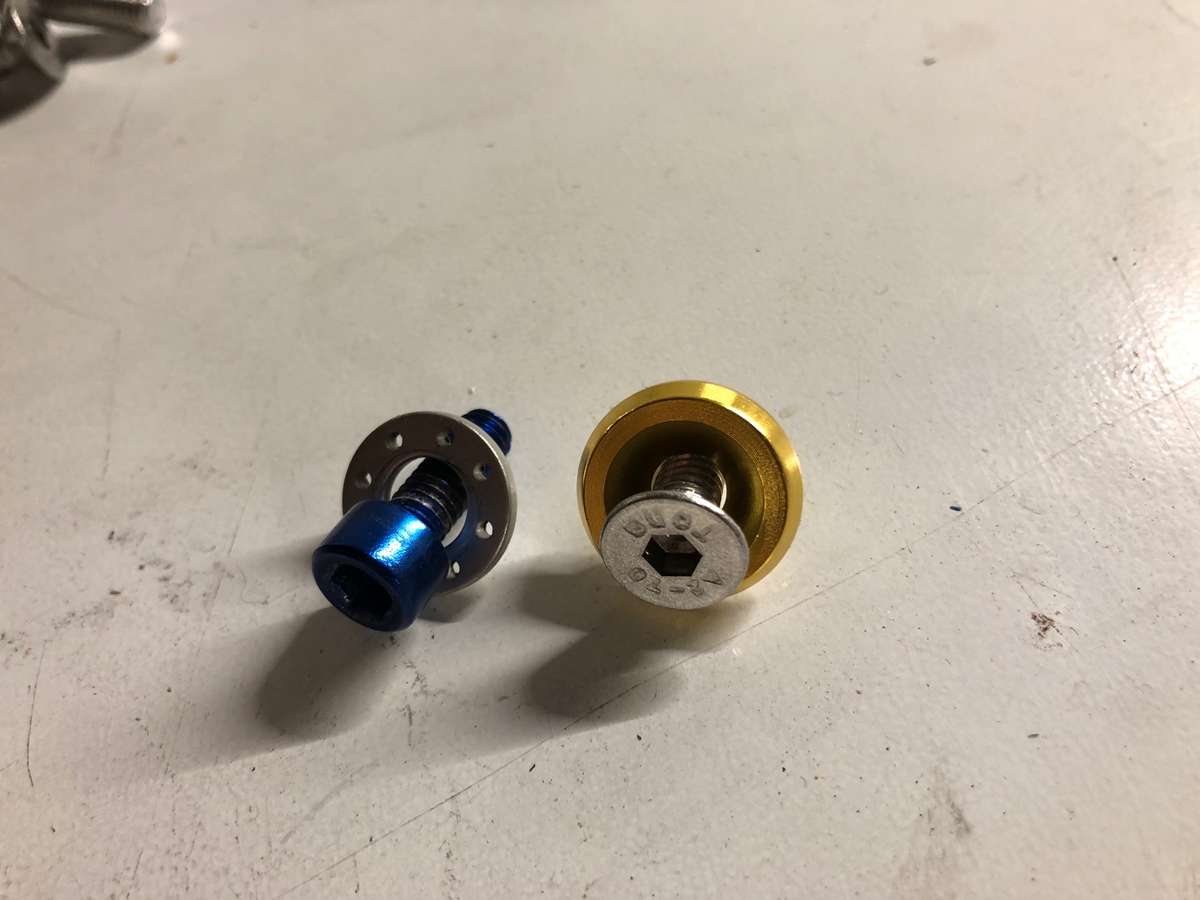
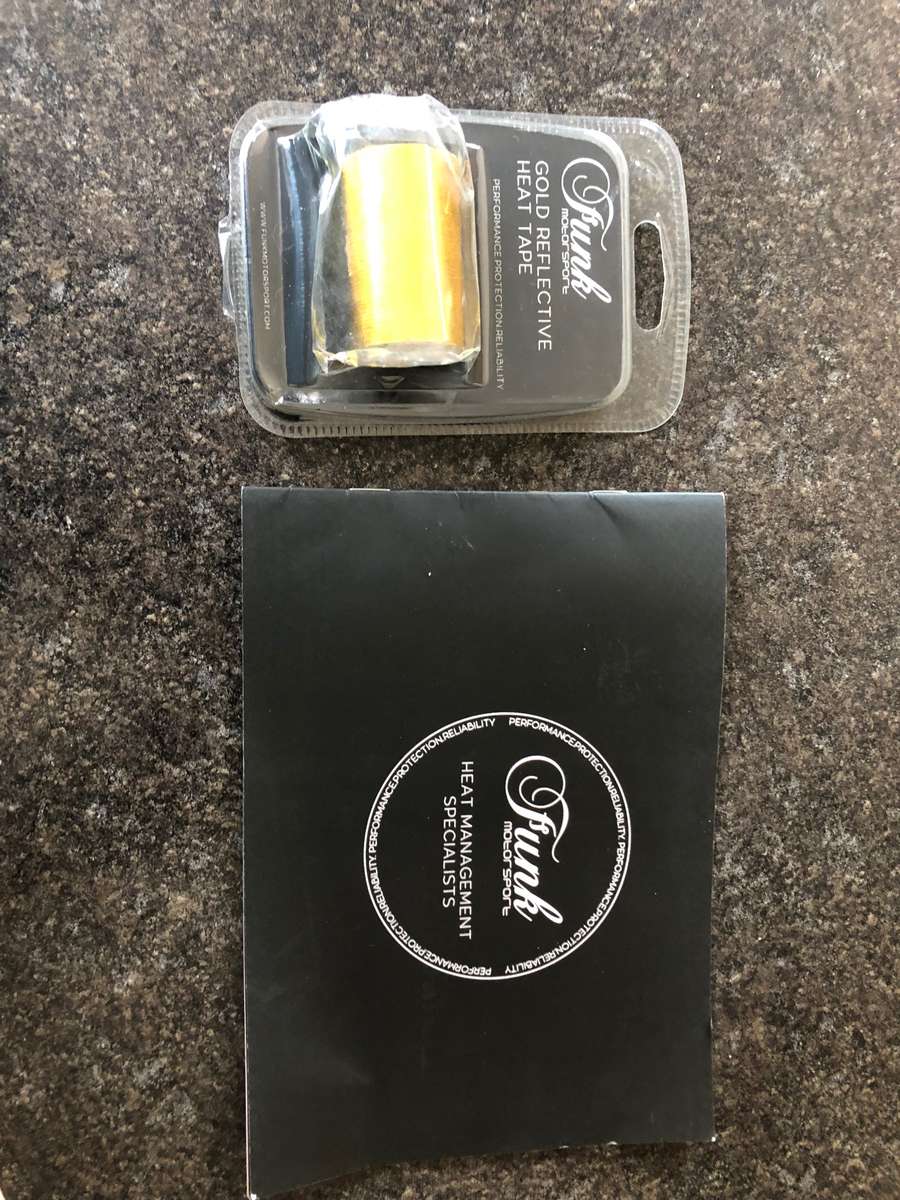
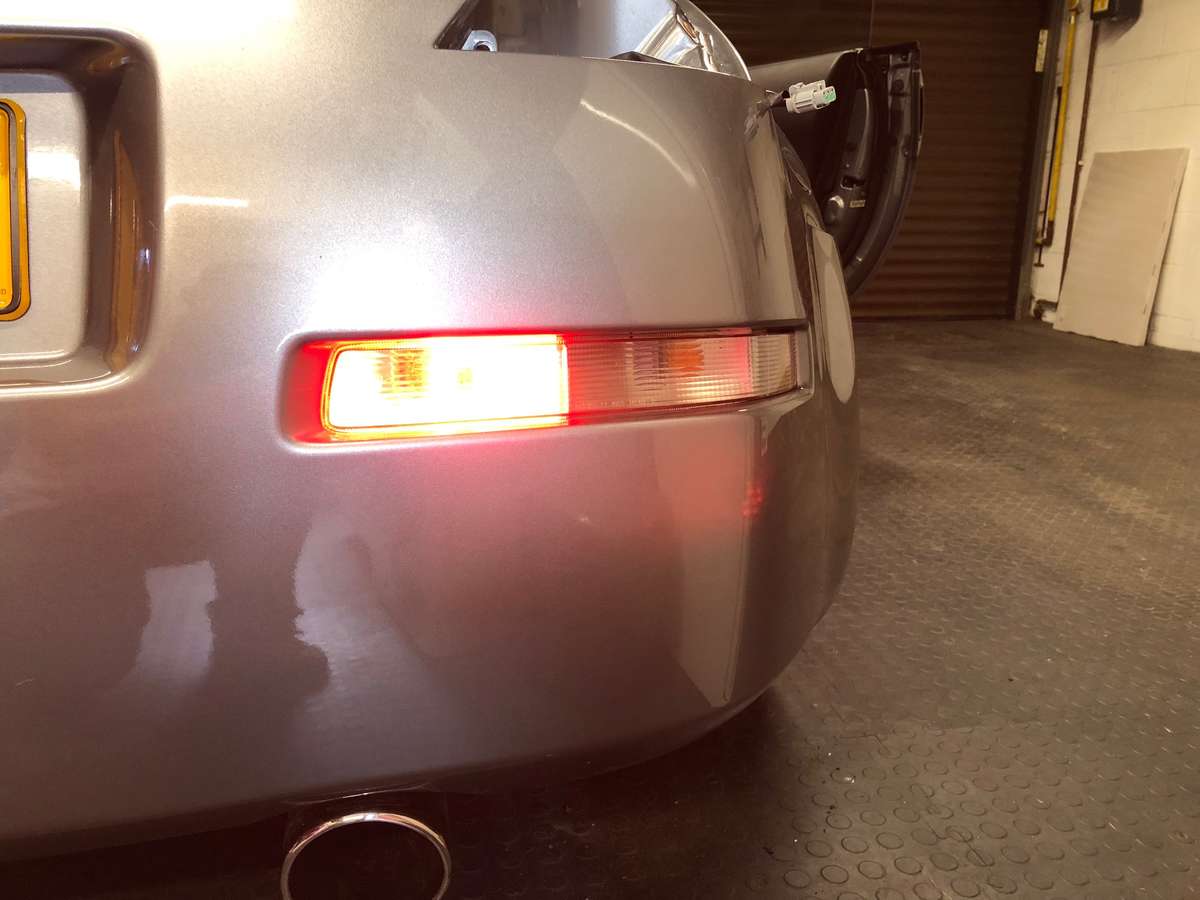
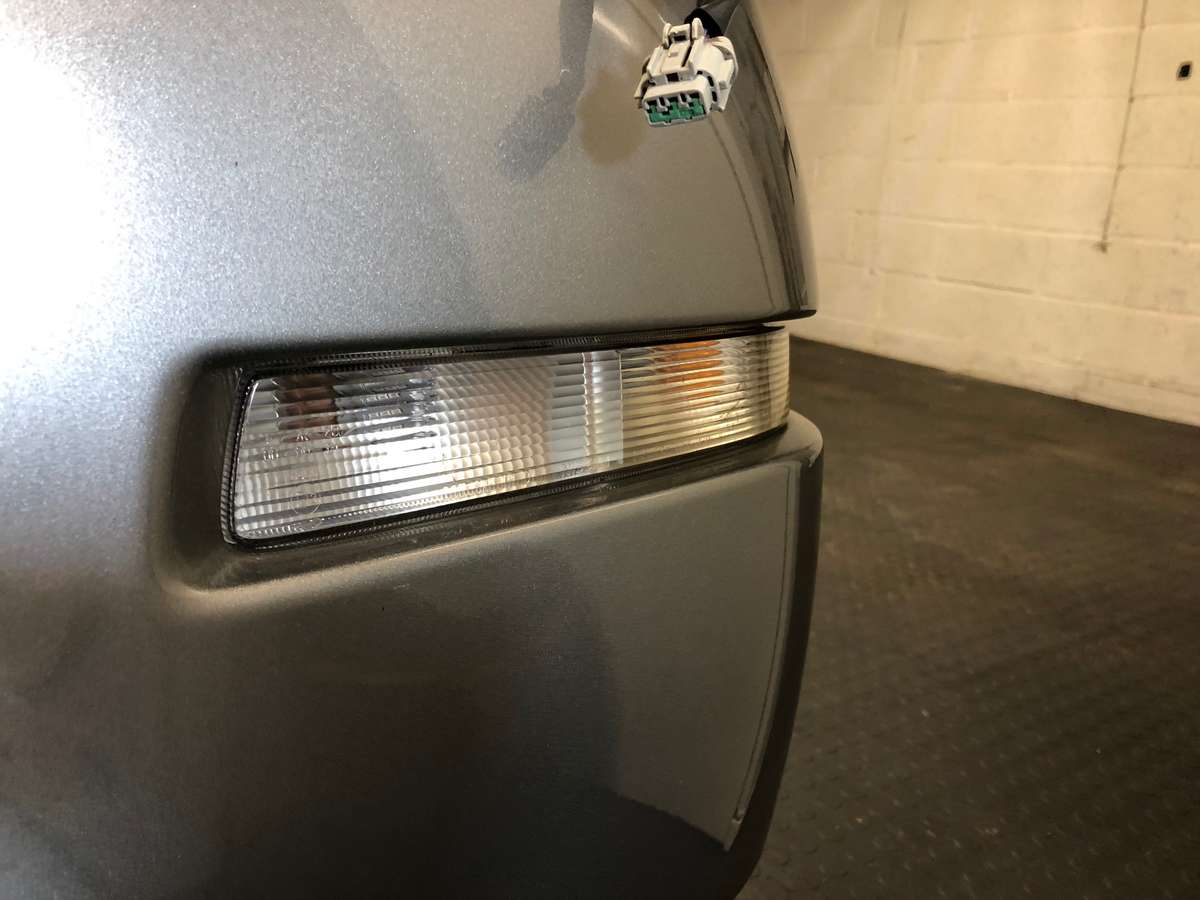
Month 7: June 2018 Completed This Month: Replaced blue engine bay dress up bolts with gold Finished heat reflective tape on intake pipe Clear fog light LED conversion = £50 total So not a massively exciting month on the modification front at least, but some well overdue tidy-up jobs have been completed. First, replacing the rather badly mismatched engine bay dress-up bolts and washer (Well, currently all bar the plenum bolts anyway) to at least have a bit of consistency with the colour theme throughout the car. The blue samco hoses still upset my OCD somewhat, but I'll hopefully get around to them at some point soon. The previous owner felt there was some value in using some gold heat reflective tape on the metal intake pipe, but apparently ran out half way through the job. I'm not convinced that it gives massive value, but at the cost of a few pints, I finished the job off with some Funk Motorsport heat reflective tape that seems to get some good reviews. (I wasn't going to buy any unbranded tape given that it probably poses more of a fire risk than heat reflective quantities!) Finally, another OCD-satisfying job was to remove the red lens from within the rear bumper light cluster, and then install a high-quality red LED bulb. I managed to locate an Osram LED bulb that does the job very well indeed. Next month - well this is the next big month really! The Enkei RPF1's go in for a refurb, and will be coming out gloss black. I've also had some bespoke Enkei rim logos created, again in a colour that goes with the theme, and these will get added once the wheels are back on the car. I'll also be installing the black Muteki nuts and locking wheel nuts that were purchased last month.