-
Posts
213 -
Joined
-
Last visited
Content Type
Profiles
Forums
Events
Gallery
Store
Posts posted by GrahameJ
-
-
It's not easy, but can be done with brute force and ignorance

-
 1
1
-
-
I fit winter tyres and carry on through the winter.
It's got a good heater

-
 1
1
-
-
Hi Blade, you should be happy with your choice.
I have MisteirR Zeta-S fitted to my Zed, and they are a big improvement over stock.
Mine are set up at stock ride height, and I have cleared every speed bump encountered without problems so far,
and at much greater speed than you can even think about on stock suspension.

You should also find that overall handling is much improved too.
-
It clearly does depend on Postcode because some of the prices you guys are being quoted are much higher than what I've been quoted.
25 - driving for 8 years with 6 years ncb - no points/claims - KT postcode and it's coming up as £550ish for the year...
I think that's true, I live in the BB postcode area - one of the top cash for crash areas in the UK.
Admiral renewal quote is: £823 - with 15+ years ncb - no points/claims and I'm double the age of most posters in this topic!

-
Thanks Tarmac!
As I'll be fitting the lip on my own, the instant bond of the 3M tape may make things easier.
I plan to then apply SIKAFLEX bond along the join to smooth the join and fill any gaps (I guess SIKAFLEX is similar to Tiger seal).
Once set I can then paint it - hopefully

-
 1
1
-
-
Thanks for the guide.

3M VHB tape is available in various thicknesses, any idea which is best for the job?
- 0.4mm
- 0.6mm
- 0.8mm
- 1.1mm
- 1.6mm
- 0.4mm
-
Dibs on the Nismo Lip please:
350z 03-05 Nismo-Style PU Front Lip (1 available) £75
-
-
Order a stubby then, I got one off TarmacSportz whilst my car was on the way here from Japan.

-
-
The air duct connects to the stock hole in the radiator housing, so you can run a stock airbox if you want.
That is how I have fitted mine.
-
Worked wonders on my old high mileage (185,000 miles at that point) Mercedes C240 V6 petrol engine, improving idle, smoothness, throttle response and mpg.
Prior to this any hope of kick down working under acceleration required the throttle pedal being flat on the floor.
After the clean it drove like new again.
-
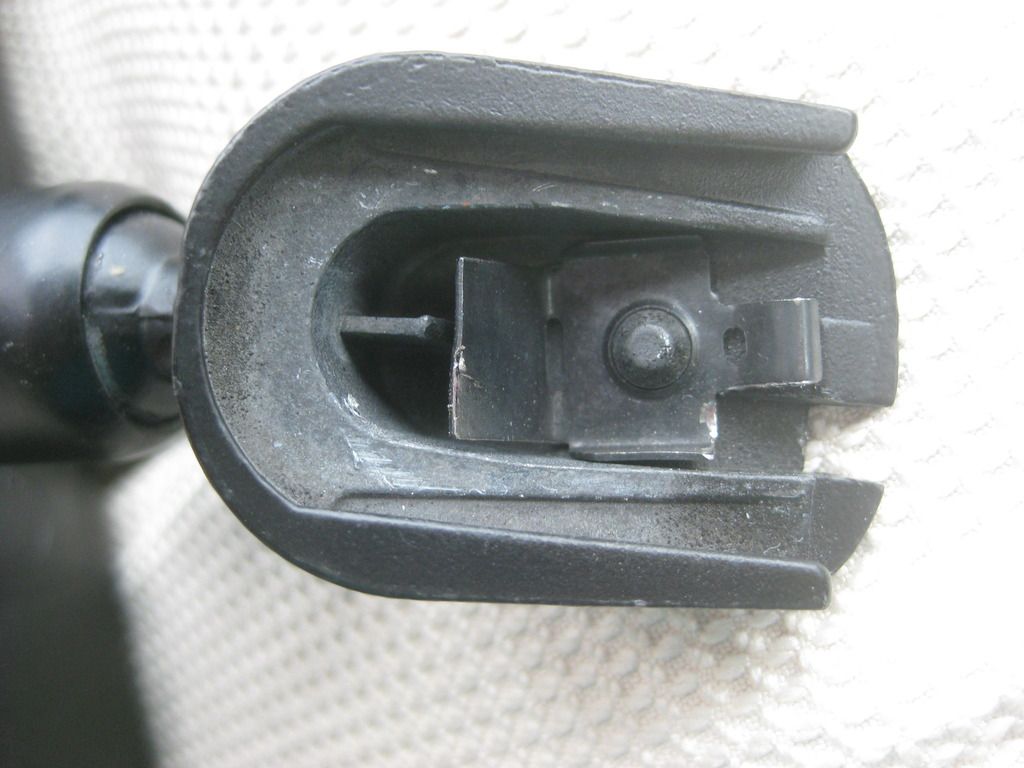
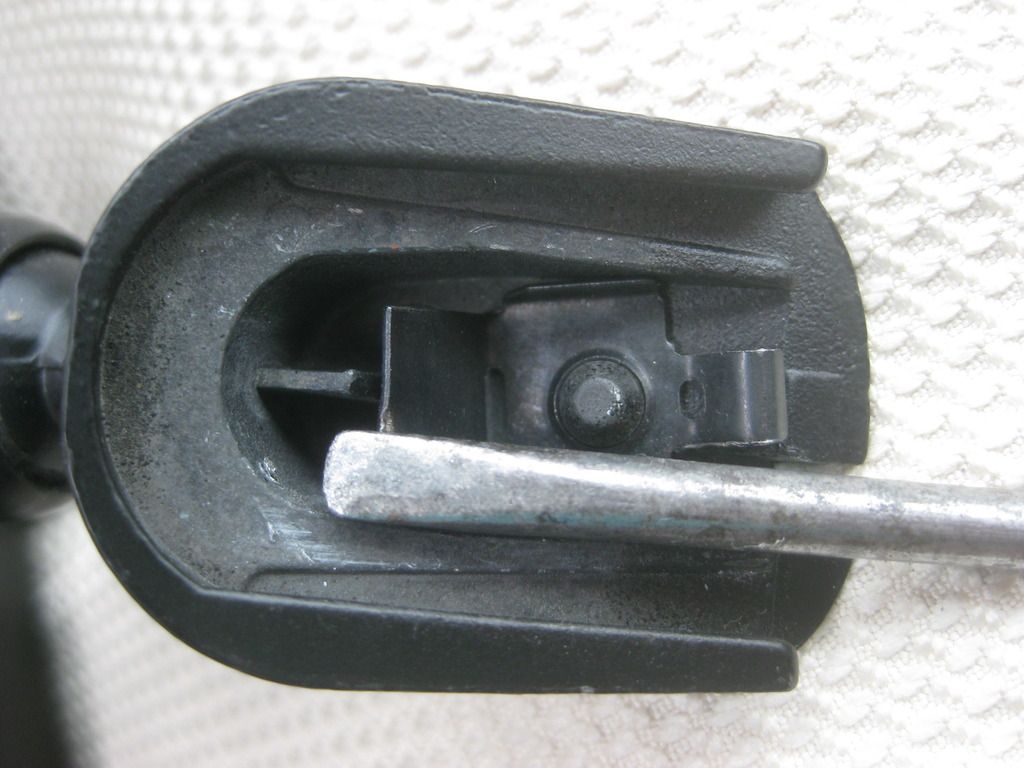
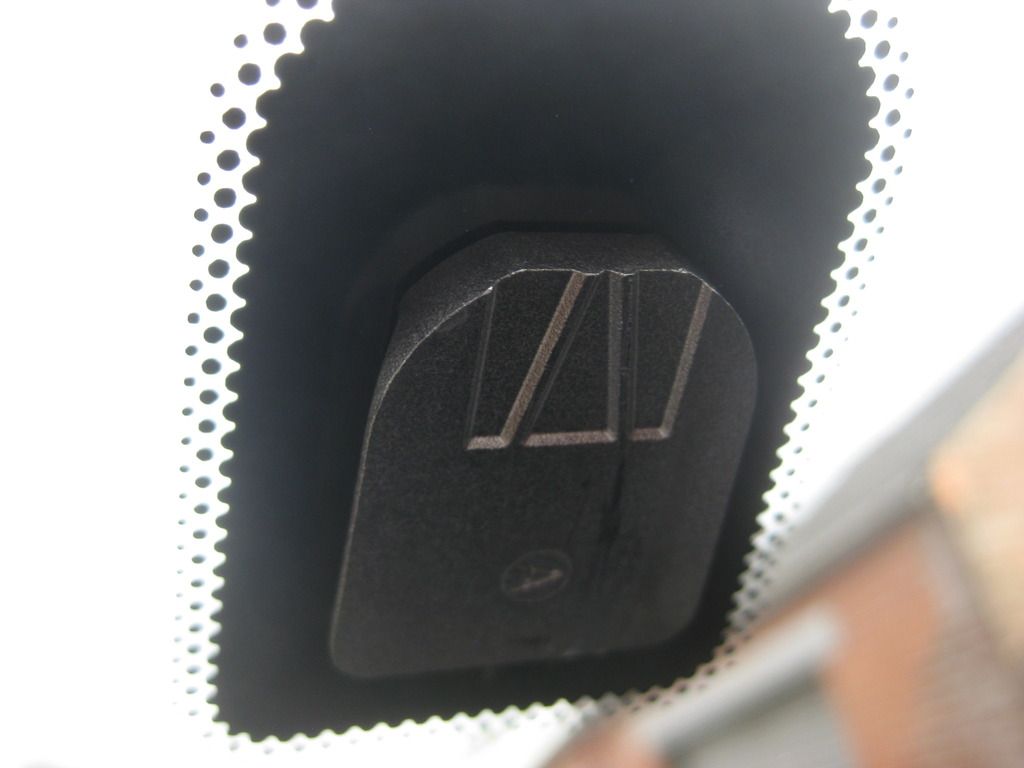
The solution is to use a 4mm screwdriver to push back a clip inside the mirror stem, through the hole at the bottom of the stem, allowing the mirror to be slid upwards off the mount bonded to the windscreen.
In practise this did not quite work, but after using the screwdriver, a gentle tap with a hide mallet upwards got mine off

The clip on mirror:
Screwdriver in the slot:
Bonded windscreen mount:
-
 1
1
-
-
Anybody got a definitive answer for removing the rear view mirror?
From the US sites it seems that a screwdriver needs to be pushed up in a slot at the base of the mirror mount, followed by pushing the mirror up.
My car is a base model, and does not appear to have a screw as shown in the pdf instructions above.
It hasn't budged with the Initial attempts I have made prodding with a screwdriver.

-
-
Maybe ask Quaife if their LSD will fit?
https://shop.quaife.co.uk/nissan-350z-viscous-diff-replacement-quaife-atb-helical-lsd-differential
-
The plenum runs a lot cooler with the thermal gaskets.
I can now rest my hand on the Plenum without it burning.
I agree that a good cold air supply is required, and my next efforts will be to increase the inlet scoop area on my cold air intake.
-
They will do of you've got them already, but when it comes to me to replace them.look at the Scholl range.

Thanks!

I'll get some of the Poorboy's glaze and wax ordered and give it a try.
-
Nice film
 voted
voted-
 1
1
-
-
Black Hole will work on any colour car just as well as White Diamond will, but Black Hole smells better...

It's possible to get depth on metallic silver but it relies heavily of polishing to do so. Flat silver is another story altogether though!
So far for Blade Silver -
- Glaze - Poorboy's Black Hole
- Wax - Poorboy's Natty's Paste Wax Carnauba
And the recommended polish is???
I've got Farecla G3 and G10 left over from when I originally tried to repair my key scratched door if they will do?
- Glaze - Poorboy's Black Hole
-
My thoughts when I bought silver!!

Back JDM cars are quickly snapped up by domestic buyers, so I had to justify getting Blade Silver.
-
II didn't take that many photos, but posted these on the H-Dev spacer group buy thread:
http://www.350z-uk.com/topic/108925-h-dev-plenum-spacer-group-buy/page__st__60
I've also got a cold air intake, on which I am about to make the grille scoop bigger:
http://www.350z-uk.com/topic/108701-air-intake/page__st__20
What did you want a photo of?
-
- "By far the cheapest, great wet look finish with depth will be obtained with by polishing and topping Poorboys Black Hole with Nattys Paste Wax. Nothing will give you a deeper finish."
What about a glaze for use on silver cars before the wax?
I'm sure if I have a go at polishing, it will not be perfect, and I will need all the help I can get.
Anything at Halfords suitable?
- "By far the cheapest, great wet look finish with depth will be obtained with by polishing and topping Poorboys Black Hole with Nattys Paste Wax. Nothing will give you a deeper finish."
-
- "On the nwp site the promo picture also I see a thermal tb spacer, however that's not mention in the plug n play uprated tb kit."
That would not be difficult - Aramid insulated gasket sheet material is available in various thicknesses and can be found on EBay.
It's what Motordyne use, and I made up my own gaskets when fitting the H-Dev plenum spacer, for the throttle body, and between the lower plenum and manifold.
It has made a big difference to the plenum temperature.

- "On the nwp site the promo picture also I see a thermal tb spacer, however that's not mention in the plug n play uprated tb kit."


Polyurethane Lips Installation Guide and tips
in Tarmac Sportz
Posted · Edited by GrahameJ
Here's what I did.
1) Sand and prep the lip, including the inside surface that fits the bumper.
2) Clamp the centre of the lip to the bumper
3) Fasten the ends of the lip to the wheel arches using a couple of self tapping screws, which leaves a gap that needs moulding in
4) Wearing a pair of thick leather gloves and using a heat gun, mould the lip to fit. A self tapping screw holds it in place while it cools.
The observant may notice where this back street bodger got the heat gun too near the existing paint on the bumper, which bubbled slightly.
This is why you should not paint the lip before applying it to the car.
5) The heat gun I used from Screwfix
At this point I let the lip cool off completely, before removing it ready to apply the 3M VHB tape and SIKAFLEX sealant to bond the lip to the bumper.
As it was blowing a 20mph wind outside, I changed plans and decided to spray the lip in my garage, so coated the lip in plastic primer, silver top coat, followed by clear coat and let it dry.
6) The following day I applied the 3M VHB tape to strategic points on the lip
7) I also applied the SIKAFLEX PU adhesive sealant on the bumper where I had drawn a line the previous day
8) I then refitted the lip using the self tapping screws, and this time just gently warmed the bumper whilst applying pressure to ensure it was as good a fit as I could get, and that the tape was stuck.
I then wiped off any excess sealant using panel wipe.
9) 24 hours later, once the sealant and tape had cured, I used a small artist's brush to cover up any exposed sealant with silver paint, and refitted my grille.
I also added a small badge to the grille to remind me which lip version of lip I had bought from Tarmac;)
In the sun today, and you can see I left the stainless self tapping screws in place