

andybp
-
Posts
1,355 -
Joined
-
Last visited
Content Type
Profiles
Forums
Events
Gallery
Store
Posts posted by andybp
-
-
23 minutes ago, Keyser said:
Ouch I mean I hope these breaks were accidental but seems you have done a fair bit of damage to that hand over time.
maybe you should take up origami as a hobby

Yea all accidental working on cars except the thumb which I owe to the grip on an SLR and an idiot officer falling over me in the dark

-
 1
1
-
-
I did say it wasn't a perfect fit mine was the same just loosened the rubber mount bent the mounting a bit pushed it through the rubber mount and re-tightened the mount
also I had to trim the diff cover
")
-
31 minutes ago, Keyser said:
I'm going to attempt to do as much of this conversion as possible without buying any of the conversion kits, I will still need some specialist parts made such as the propshaft, I'll probably go for the ready made clutch upgrade but will see how much I can save if I DIY that as well, the rest we will just make up as we go

So if anyone spots and obvious mistakes or has any constructive criticism to offer please don't be shy post it up
Banter is obligatory on this thread so if you aren't up to it don't follow
I had to start somewhere so I put the engine on the hoist and tried it -
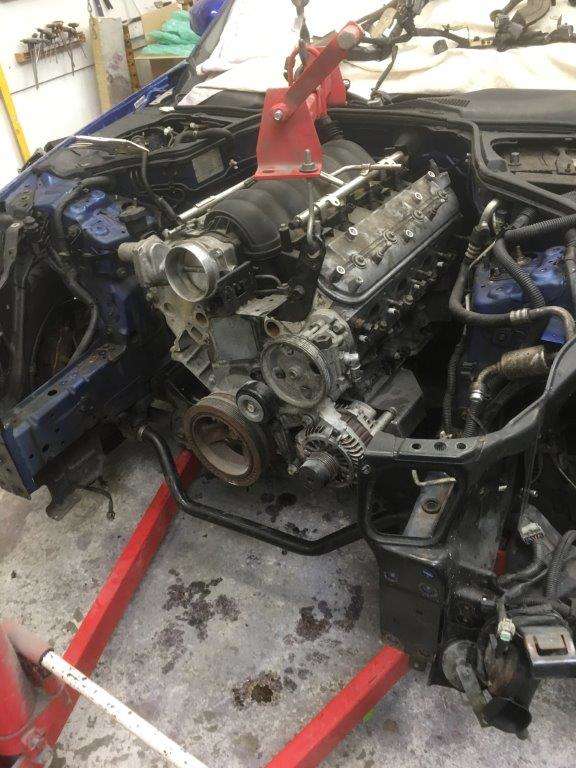
Not even close
Needs to be further back and lower, but with the sump on it can't do either which was to be expected as all the kits come with a new sump and modified oil pickup. I removed the sump put the gearbox on and tried again.
I got everything as close to needed as possible, bear in mind there has to be a few compromises, then started on the engine mounts.
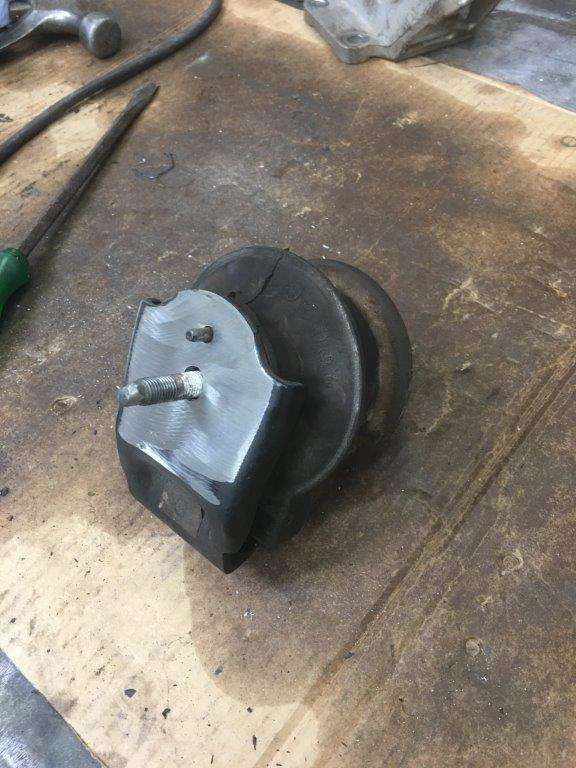
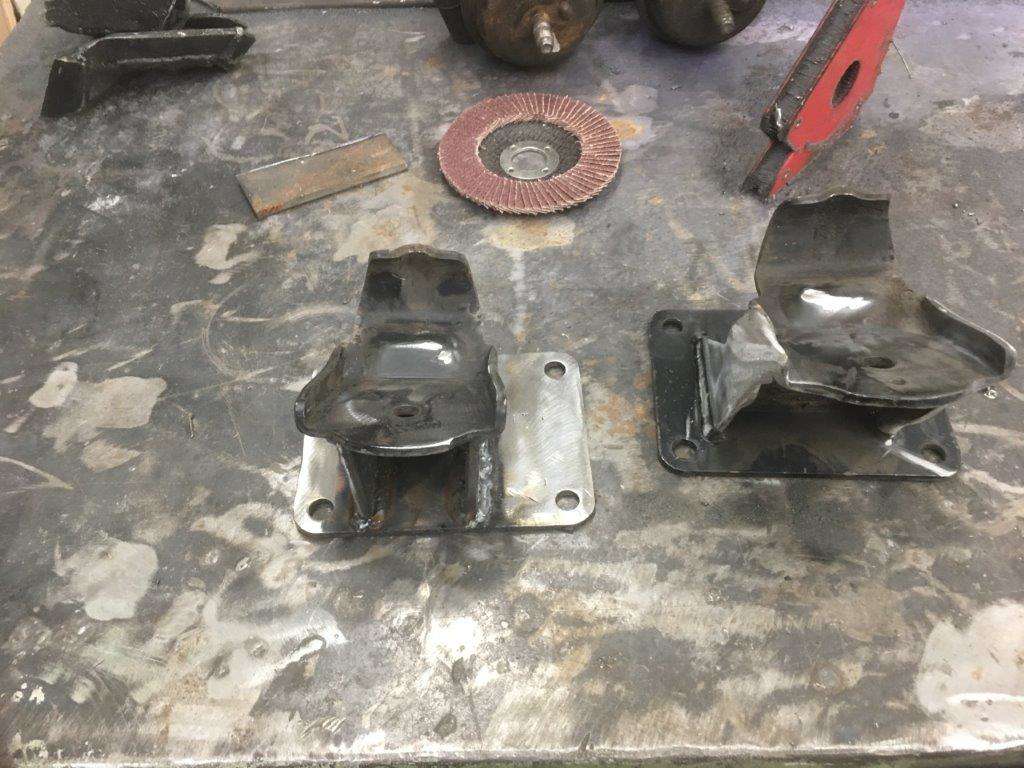
Original 350z Mount - used because A. I have them and B. I can always use the upgraded version later if needed and it should be a 1 for 1 swap.
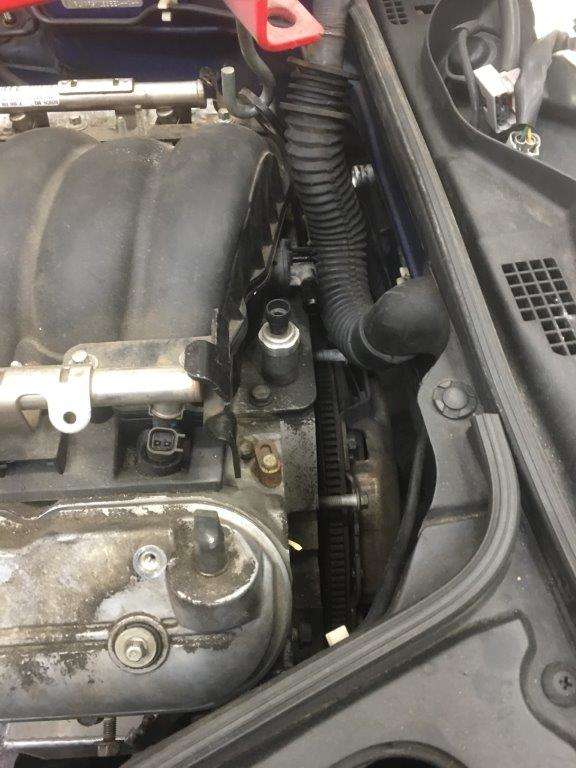
I also got this with the engine -
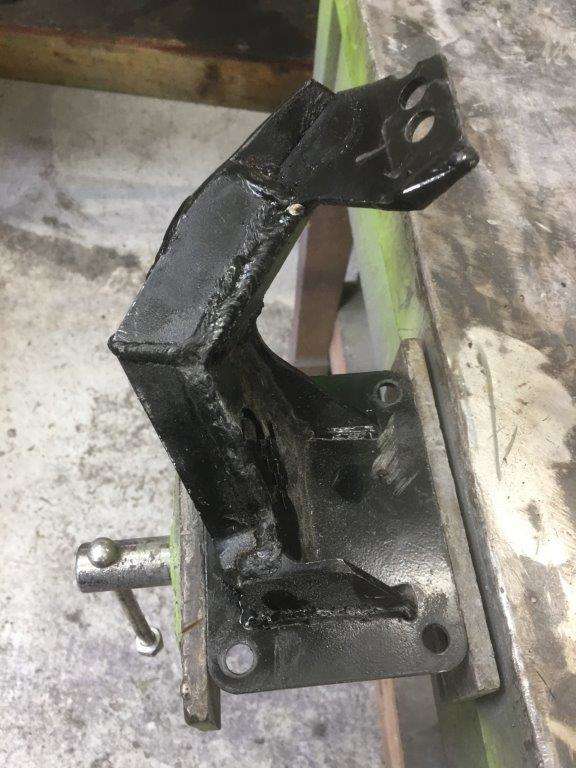
They came with the engine which was going to be put into a BMW, I cleaned it up as I want the plate that fits on the engine (this could easily be made but why waste what I have)
For the other side I had similar but as the distance is more I kept some of the metalwork.
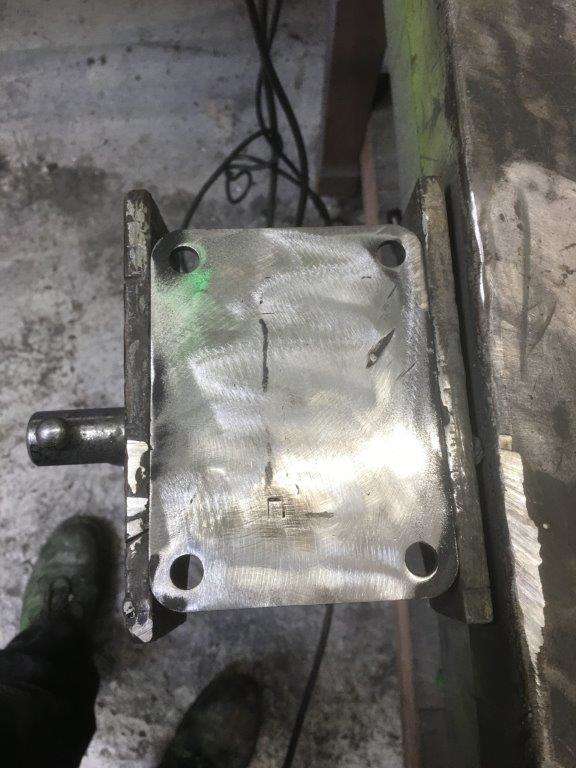
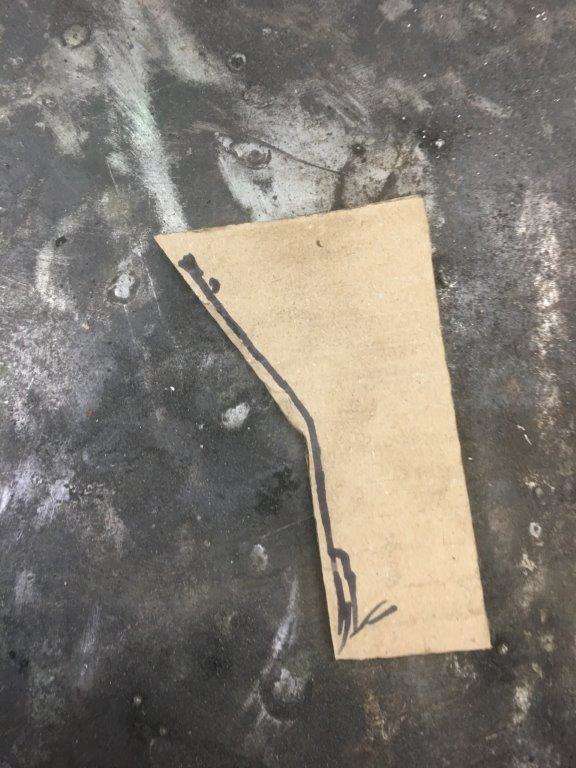
clean up the 350 engine mount top plates
Make a template
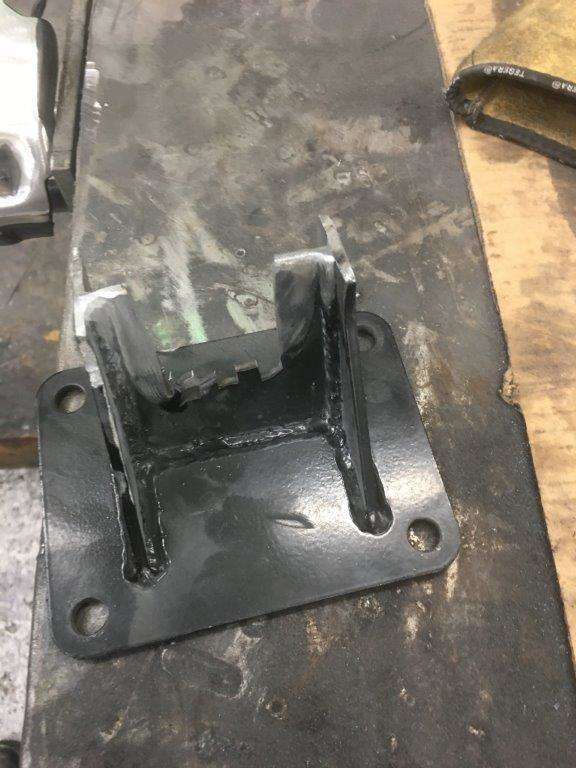
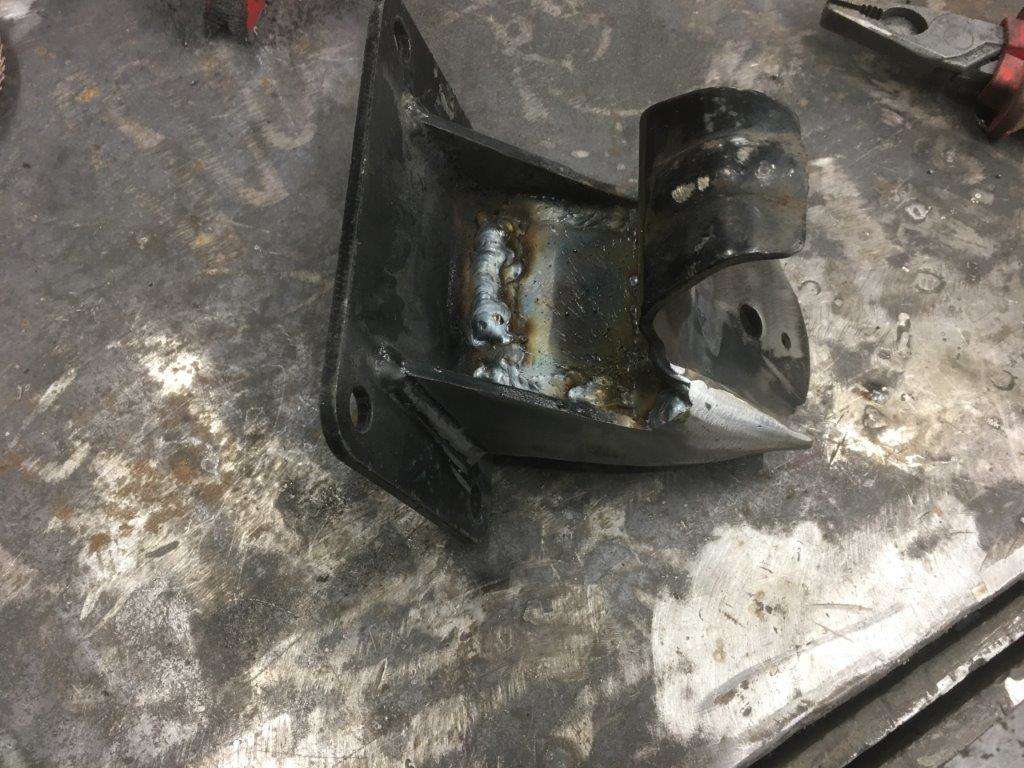
weld the up -
Drivers side

Passenger Side
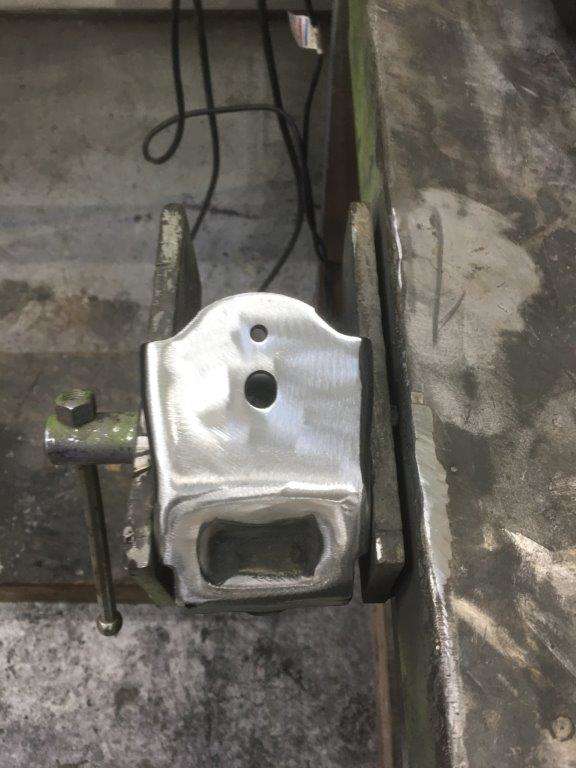
The all important fitted
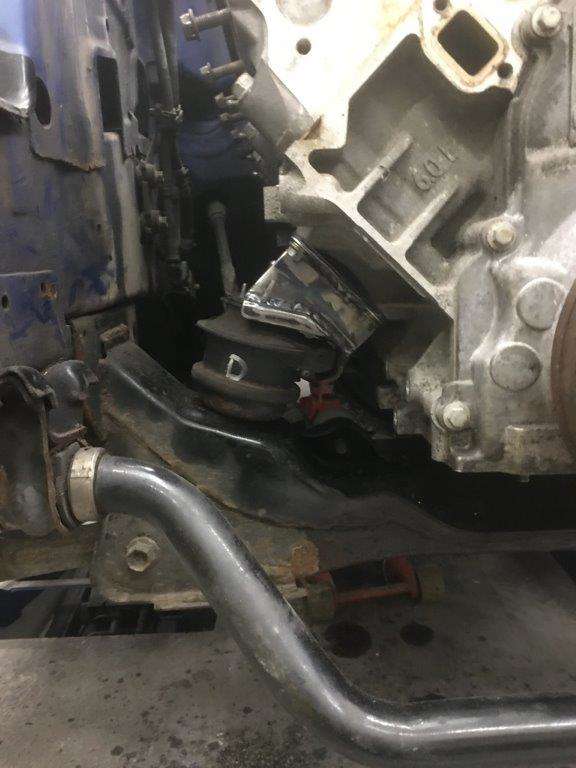
Happy with that, I now have to make a gearbox mount to replace the trolley jack
More Soon.
Keyser
Maximum Effort
Knowing how long seemingly small jobs can take , I'm very impressed how quick you got that in

are you going to cut and weld the sump or buy it, when I did the v8 Capri I cut it off turned it around and rewelded it but I was pretty poor back then
-
 1
1
-
-
1 hour ago, Keyser said:
@andybp Twice!!! Ouch!!!!
So sense does not come with age then!! Can I call you pops now I know you are that much older than me
@evilscorp - Noted - I'll start a proper build thread for the conversion in the correct place as well
In my defence I was only 19 then the fact that I've also broken every finger and my thumb on that hand since individually I have no excuse for

Yes you can call me pops but not daddy as that would seem wrong
-
2
-
-
59 minutes ago, Keyser said:
@andybp I thought I was older actually - when I was 19 centurion was a rank not a tank
I'm the big 50 this year

Is that a rover V8 you are adapting for the Capri ???
actually young man I'm 53 in march
and yes a rover v8 into capri with twin 3" cherry bombs as an exhaust no big surprise I used to get pulled a lot in that car
broke my hand twice in one week putting the engine in that by hand of course I'm paying for such stupidity now
-
1
-
-
1 hour ago, Keyser said:
surely you remember since we are about the same age
-
Buy a conversion kit

when I were a lad 19 I believe I did this with a drill a jigsaw and a welder so we'll have no more talk about buying a kit
-
I've been using one for about 6 yrs on and off it's a bit tinny and raspy not a perfect fit but near enough no rust so far. good for the money
-
This project is still ongoing if a little slowly
I have made a new controller which is slightly more compact ( just for you @cs2000 ) and has proper connectors unlike the prototype sorry I only have this picture
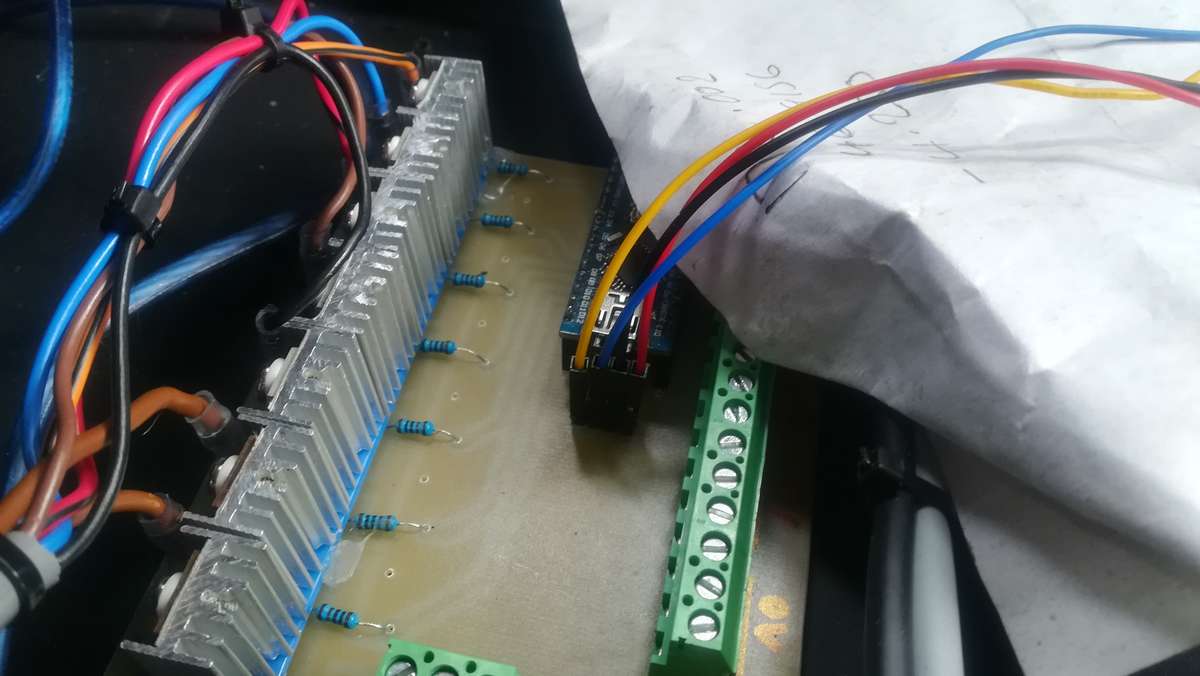
and have devised a way to and fitted the rear level sensors
hopefully I will get these wired into the controller on sunday as I'm working tomorrow

-
2
-
1
-
-
I hate it just because it's called a Jimny
-
You had to go over the top didn,t you
Well done that man
")
Now I have to come down some time and play with you Hmm that doesn't sound right but you know what I mean.
-
1
-
-
Thought they were illegal ?
-
3 hours ago, Keyser said:
You can defo get a V8 in there, I have a V8 itch to scratch but the LS400 is not that powerful the 430 3uz engine is around 300HP which makes it worthwhile IMO of course the big thing with a V8 is the Torque.
You can get 200 + out of the standard engine but not those torque figures.
Then you have the rear axel to think about, depending on who you listen to they are not great above 250HP others say more.
The good old LS conversion in the USA seems to use Ford diffs. Not so easy to find here.
Then you need to change the LS400/430 from auto to manual, adapters are available but add £3000 for the plate clutch and gearbox.
Nothing that can't be done just have to look at how much it costs for what you will get I'm doing man maths on it at the moment so it becomes justifiable
Still reading up on what you can do to these, seems to be a good base car if the front arms have not rusted out - will look at that when I get her on the ramps.
does your one have the socket for the hairdryer ?
maybe you will need this sign

-
3
-
-
6 hours ago, cs2000 said:
Haha that was a brilliant end to the video. Its the kinda thing that braided lines are meant to stop (if i understood the failure mode right). Could you get some braiding and braid the line yourself?
Otherwise, looks brilliant, nice and slow and controllable!
Im guessing this hose wouldn't be correct?
300 mm 1/8 inch BSP and meant for carrying gas. I dont know if you wanted male or female though. It seems like googling "airbrush hose" gets you the right things, i think
if you look on the sealey site it's listed as a grease gun hose so probably stick with the current nylon airline for now
-
1
-
-
13 hours ago, Keyser said:
Well that sucks, liked the video though
Look forwards to seeing the Mk2
actually that was the mk2 the mk1 worked fine but I had to go and tweak it
-
1
-
-
1 hour ago, LRF4N said:
That 1uz engine sounds awesome. Pick up an old LS400 for under a grand and pinch the motor
Not sure it would fit but I love the idea.
-
1
-
-
It's a little bit one step forward 2 steps back at the moment
I thought I was being clever with a bit more Ghetto Rigging, trying to use flexible hoses to go from the front struts to the body but hoses with the right fittings 1/8"Bsp and about 12" long are like hens teeth
except for grease gun hoses. Damn I'm good
")

at least I thought I was being clever watch the video and see
so it seems grease gun hoses will hold 4500 psi of pressure as long as it's not air as it seeps through the inner core and blows apart the rubber outer scaring the crap out of me
so back to the drawing board.
-
2
-
-
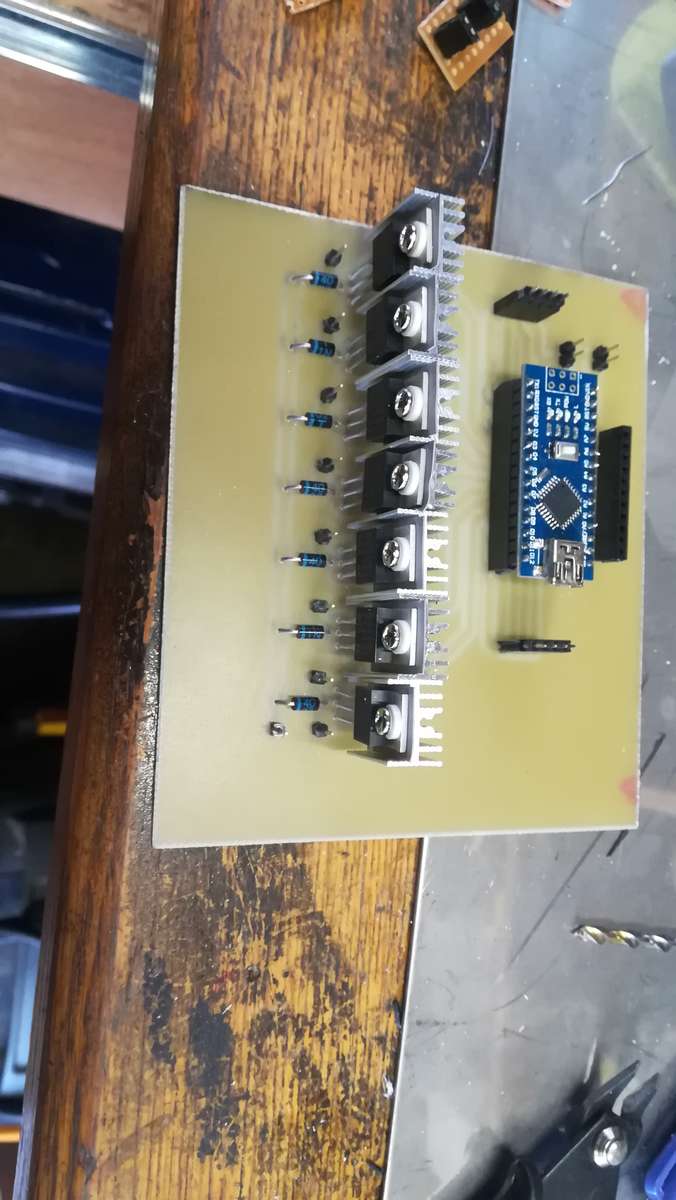
This is a little preview of my controller needs a little editing but not far off
-
4
-
-
11 minutes ago, Daisyduke said:
Pics or it all means nothing. Lol
Harsh but true

-
2
-
-
Just now, Keyser said:
Yes but apart from all that circuit board nonsense - is it done yet ??
It goes up and down and I've driven it with no problems and the ride is great but no I wouldn't consider it done
-
1
-
-
8 hours ago, cs2000 said:
Looks good mate. if you need any assistance on the PCB layout or arduino coding, give me a shout
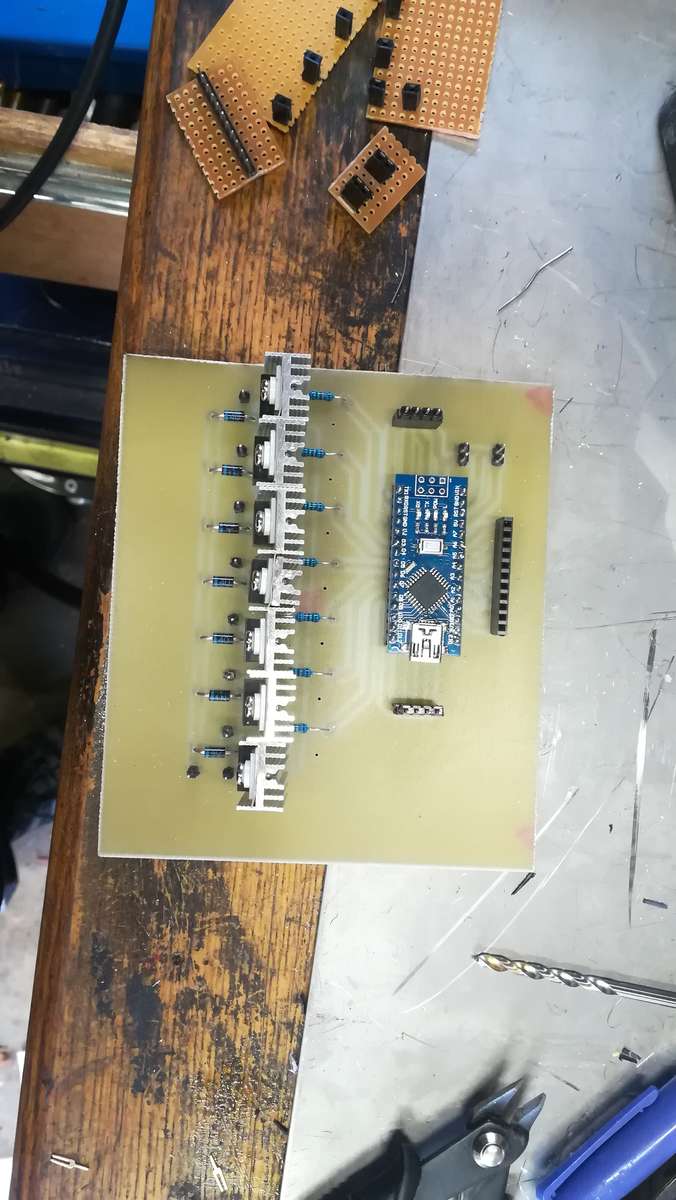
I know that PCB is a one off prototype, but im sure i could get that smaller if i built it in Eagle and had it printed over at JLCPCB, but for a rev 1.0 design, it does what it needs to do by the looks of it!
As a pressure based system the arduino code is pretty much sorted I just need to write the code for the 2.4" touchscreen the only problem is that I haven't decided on the control philosophy and how the controls will work once I add the height sensors
As for the PCB as you said it's a prototype and I've already started designing the rev 2 board in Eagle but it's always good to know there's someone I can run it by
or the code for that matter.
-
1
-
-
9 hours ago, Daisyduke said:
I have decided for you.
Do this
Or get something like this
https://rover.ebay.com/rover/0/0/0?mpre=https%3A%2F%2Fwww.ebay.co.uk%2Fulk%2Fitm%2F263868498704
Cut the end tanks off. Mount them near the trumpets and duct air to it.
4 hours ago, Bakkums said:Sasha Anis did this: Cold air intake itb
the problem with most of your suggestions is that there just isn't the clearance it's hard to show in photo's but it's really tight.
just look at the engine bay in sasha's 350 and how much standard stuff is missing and I'm pretty sure his bonnet wasn't standard either
but feel free to keep the suggestions coming as I'll be back on it soon, as I have just sorted out the electronics issues I've been having with the airride
-
new controller / driver pcb is finished though I haven't tried it yet. should get a chance tomorrow after work.
-
4
-
-
22 hours ago, Jake.Lowther said:
Ah fair enough it stopped most of your heating issues then?
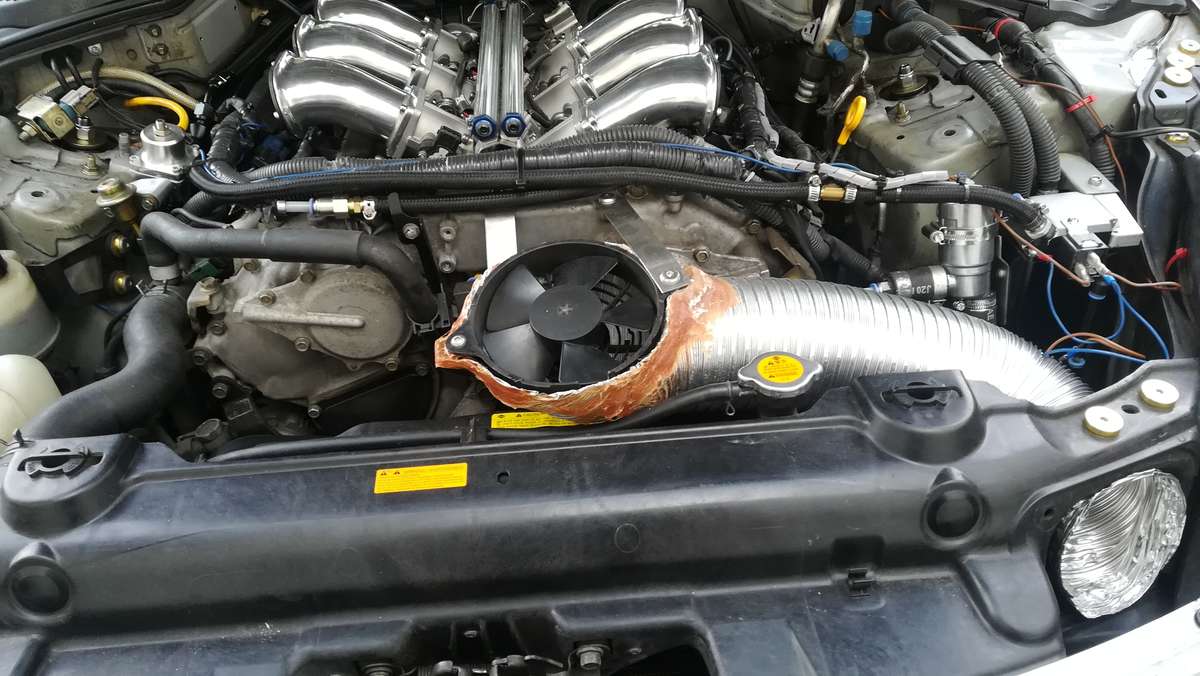
picture as promised please bear in mind this is a temporary bodge to try to see what works and it has made a big difference 5-10 Deg
-
2
-
LS2 V8 into 350z - Zed Shed Style. **Cancelled ** (TINKERING)
in Member Build Projects
Posted
Bloody awesome