

andybp
-
Posts
1,355 -
Joined
-
Last visited
Content Type
Profiles
Forums
Events
Gallery
Store
Posts posted by andybp
-
-
Just now, Jake.Lowther said:
Ah fair enough it stopped most of your heating issues then?
No but it's getting better
")
-
7 minutes ago, Jake.Lowther said:
May be a stupid suggestion but what about small mini ducted fans with some ducting pipe bringing cold air from outside into the bay, could be discreetly installed wouldn't have to go right to the intake trumpets.
Would lower the temps a small amount, anything creating air flow in the bay will bring the air temps down. Like the old BMWs had belt powered cooling fans.
already done it, it's a bit of an aluminium ducting and fibreglass bodge right now using a motorbike cooling fan but it makes quite a difference I'll post up a pic tomorrow if I remember
-
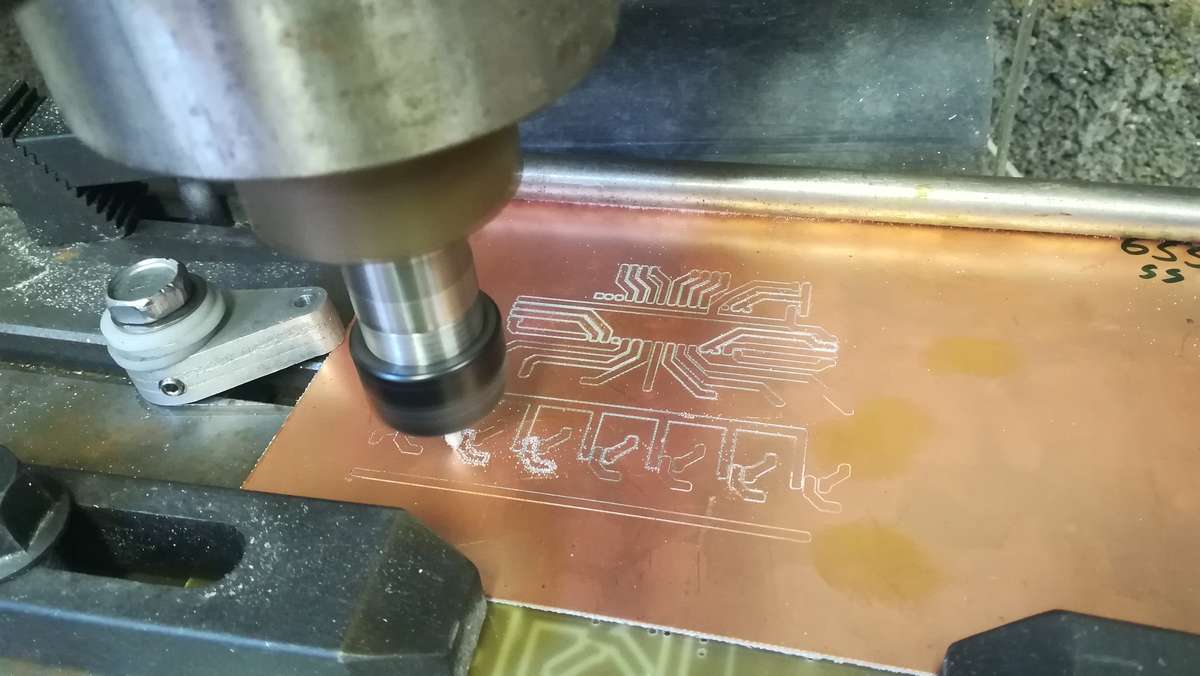
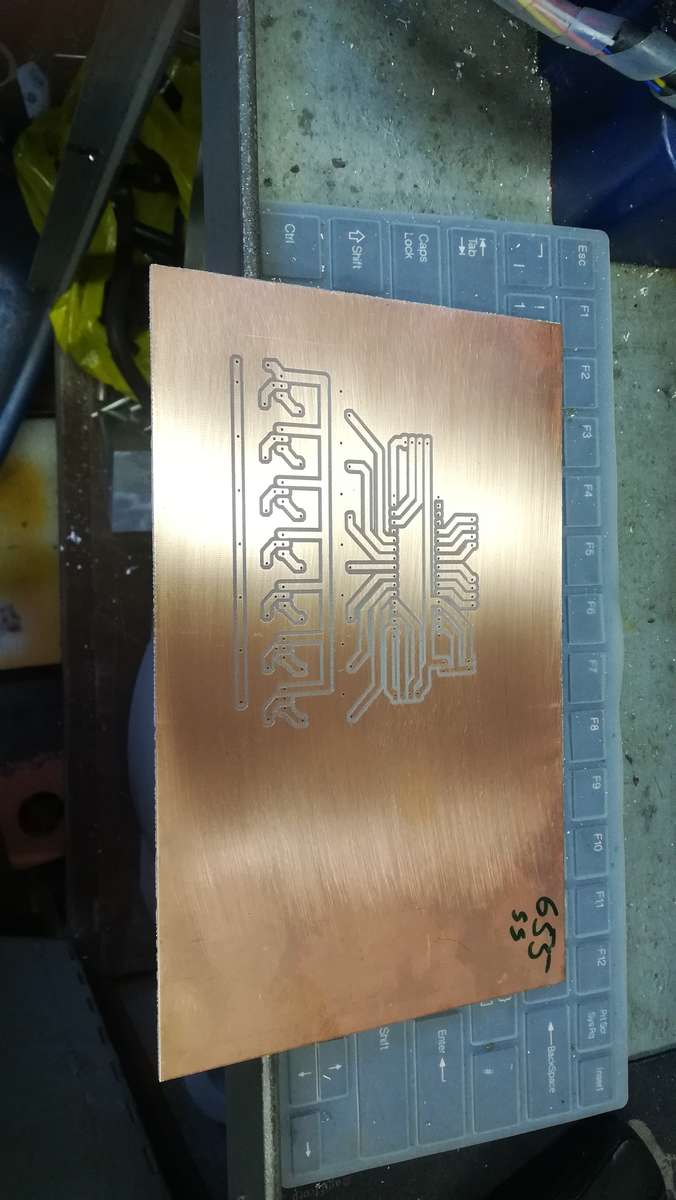
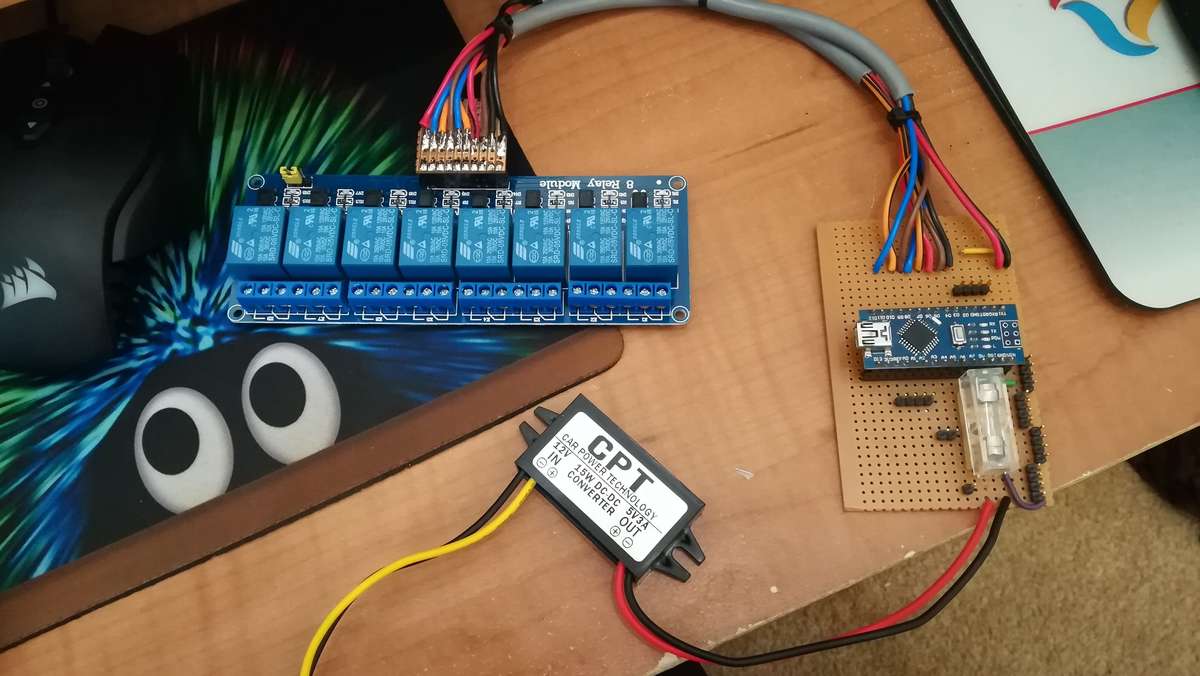
made the pcb and started building the new controller this evening
hope to get this finished tomorrow evening
-
 2
2
-
-
3 minutes ago, cs2000 said:
Looks amazing! Hope you get the air leaks sorted, then we need some propper external photos and videos too. Is the pump loud?? I always imagine them sounding like a garage air compressor!
all seems to be holding air now. controller is temperamental ,same emf issues but I have designed a new one just need to make the pcb.
The compressor is a bit noisy hopefully will be a bit quieter when everything's back together lots to do yet
-
16 hours ago, Daisyduke said:
That looks like it would raise the front so high.
What does the min and max height look like?
Awesome work
not sure on max height but as it's set up now it pretty much sits on the floor at it's lowest in fact it is right now as the air has pretty much all leaked out

hope to get that sorted tomorrow
-
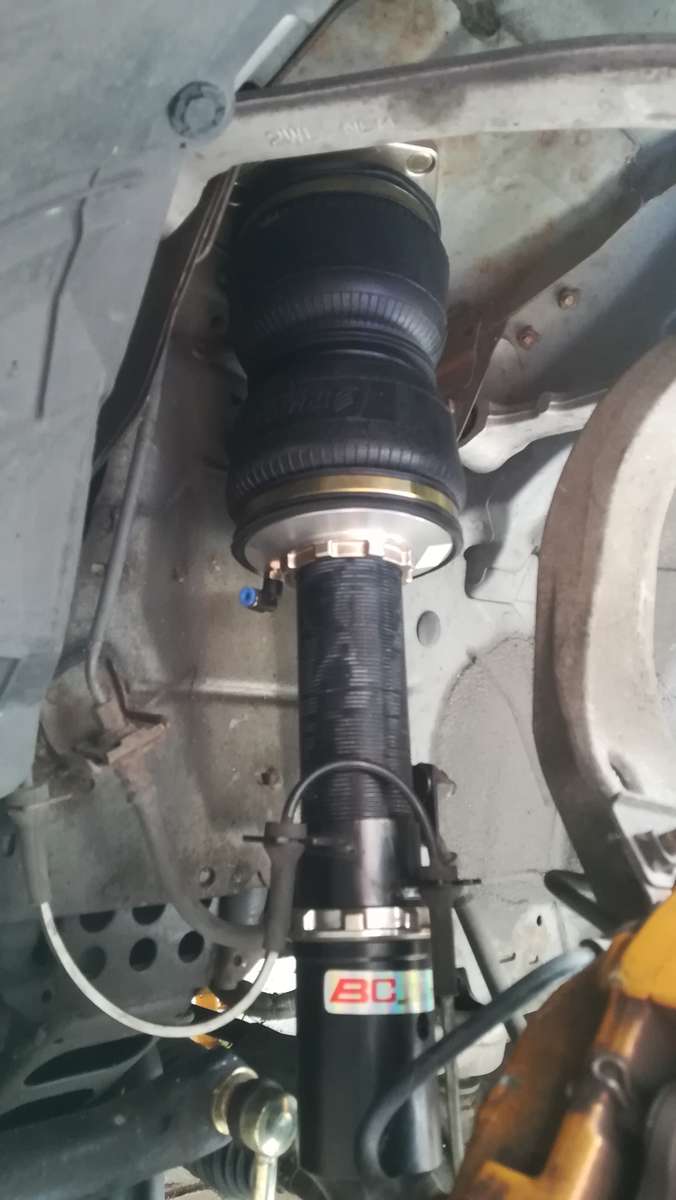
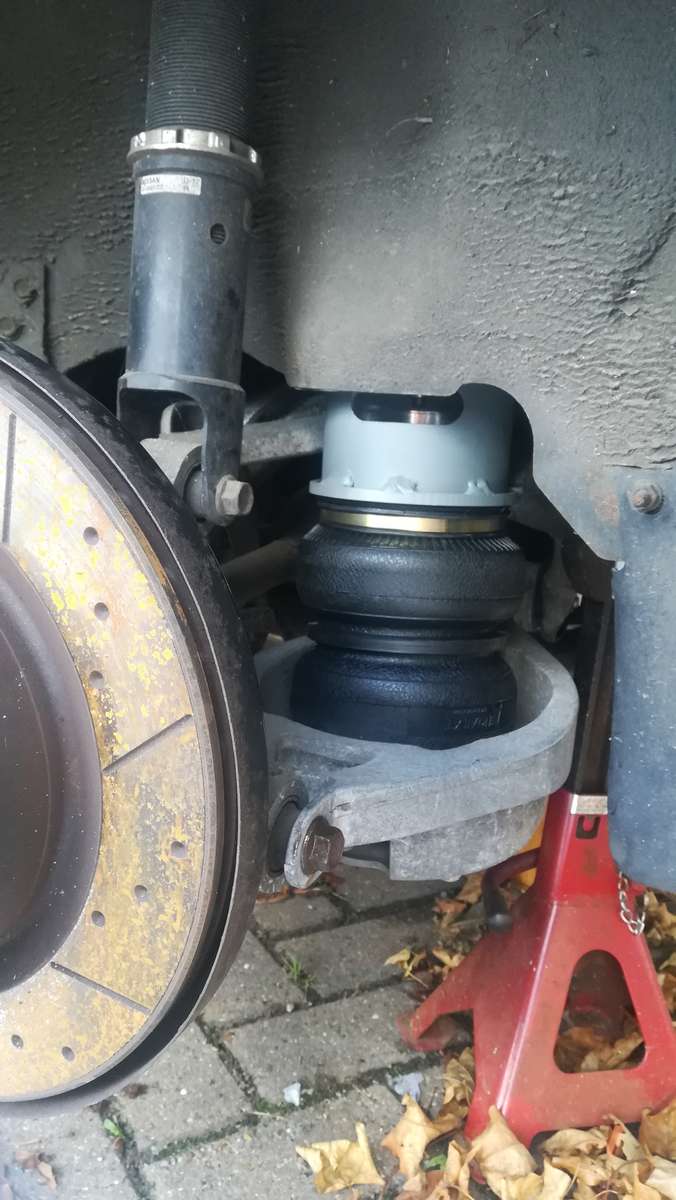
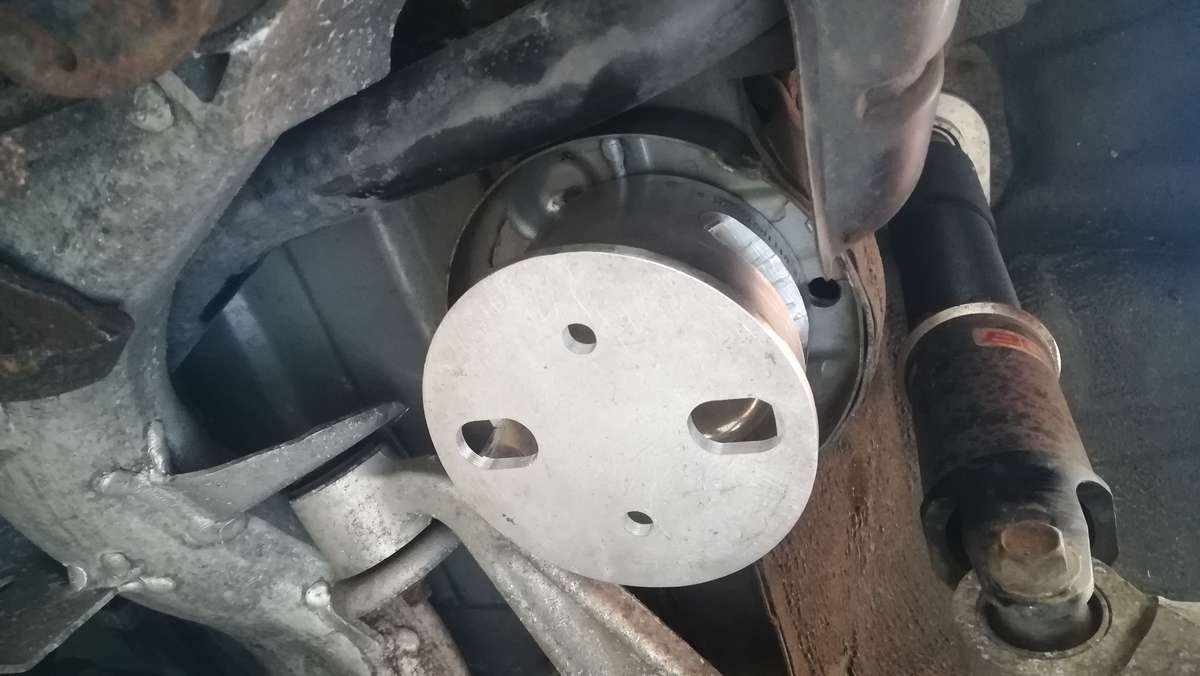
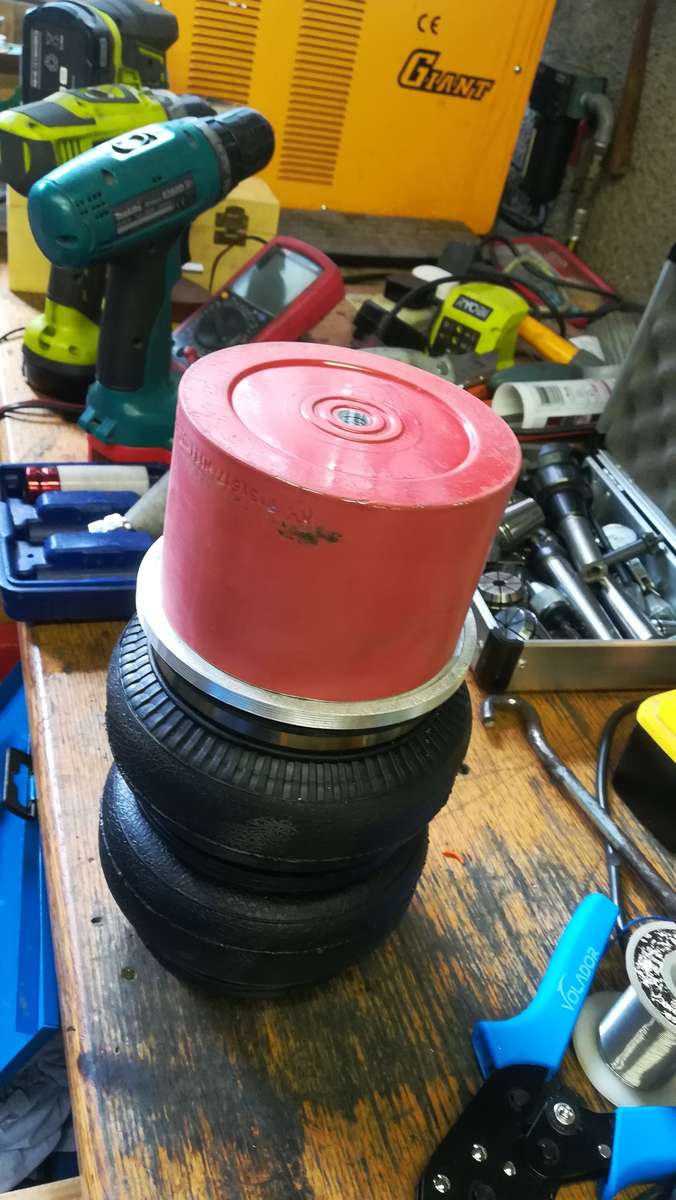
got the fronts connected up today had a few air leaks but still got a few issues I don't think I fitted the top o-ring properly so will have to strip them out again tomorrow as the fronts only hold air for about 2 hrs then the Z's on the floor the rear are good been up for 2 days
This is the front installed
-
3
-
-
29 minutes ago, Bakkums said:
 Any updates
No not much lately been concentrating on the air ride although I do have air ducted in from the original air intake to the front of the engine which has dropped air temps. I'll get back to it once i get the suspension sorted
-
1
-
-
Well I've got the rear all up and running but it's taken most of the weekend as I had lots of problems with the electronic side of things turns out it was back emf from the valve block causing spurious problems which shouldn't have happened as they are all driven from mechanical relays which are immune from such issues unfortunately the electronics driving the relays seems somewhat sensitive anyway I've frigged it for now and will build my own, I have managed to get the front coilovers removed and fitted with air springs and back on today but I need to route the airlines before I can try them
So that's my excuse for a lack of pictures, I've been too busy trying to get it to work will try and get some pics tomorrow.
-
1
-
-
5 hours ago, cs2000 said:
Im absolutely loving this topic. Any chance you could write up a guide and parts list once complete? I know its likely to be pretty "full on" but at literally 2k cheaper than commercial options, im willing to give it a read. As for your incentive, you could whip up a few sets of brackets on your CNC machine and sell them with the guide so people to copy your system
I have the same coilovers as you and am literally fed up of smashing every speed bump in sight to the point where i barely use the car unless i 100% know theirs no speed bumps along the route!
sure I can sort something out for you once I'm happy with the setup. Going to make a custom pcb for the electronic side when I get a chance and do away with all the relays I only mention this as I know you're partial to an arduino
-
I'm not sure but I think you may have been having a pop at me if so it was probably well deserved
and the result is excellent in fact when I get a chance I may infringe upon your copyright (c)
")
Nice work and no fingers in the photo's
-
 1
1
-
-
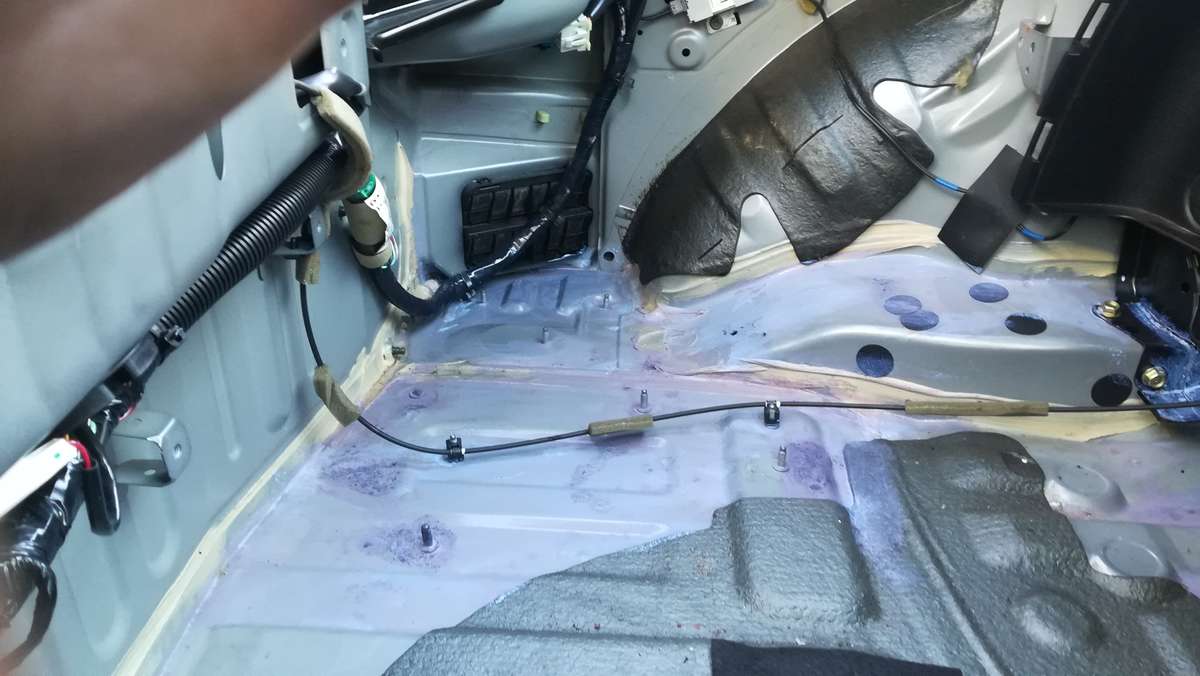
The bolts arrived today from Adrian@TORQEN so the rear bags are now fitted as are the rear airlines.
I've decided to get everything working on the rear first before fitting the front then if I desperately need the car I just need to replace the rear springs though hopefully it won't come to that as I hope to have it back on the road monday/tuesday as long as nothing goes wrong also I've set it up as a pressure based system for now until I can get the height sensors fitted
-
1
-
-
On 10/08/2018 at 20:48, Daisyduke said:
Loving this.
Bet kits would fly out if you had the time to produce them.
If you look at the amount of time it's taken planning and researching finding the suppliers programming my cnc and making everything it would work out pretty costly but to actually just produce kits.
brackets 4 for height sensors,2 for the compressor ,2 for the tank, 1 for the electronics and 1 for the valve block
2 rear spring spacers
4 air springs
4 height sensors
1 compressor
1 tank
1 valve block
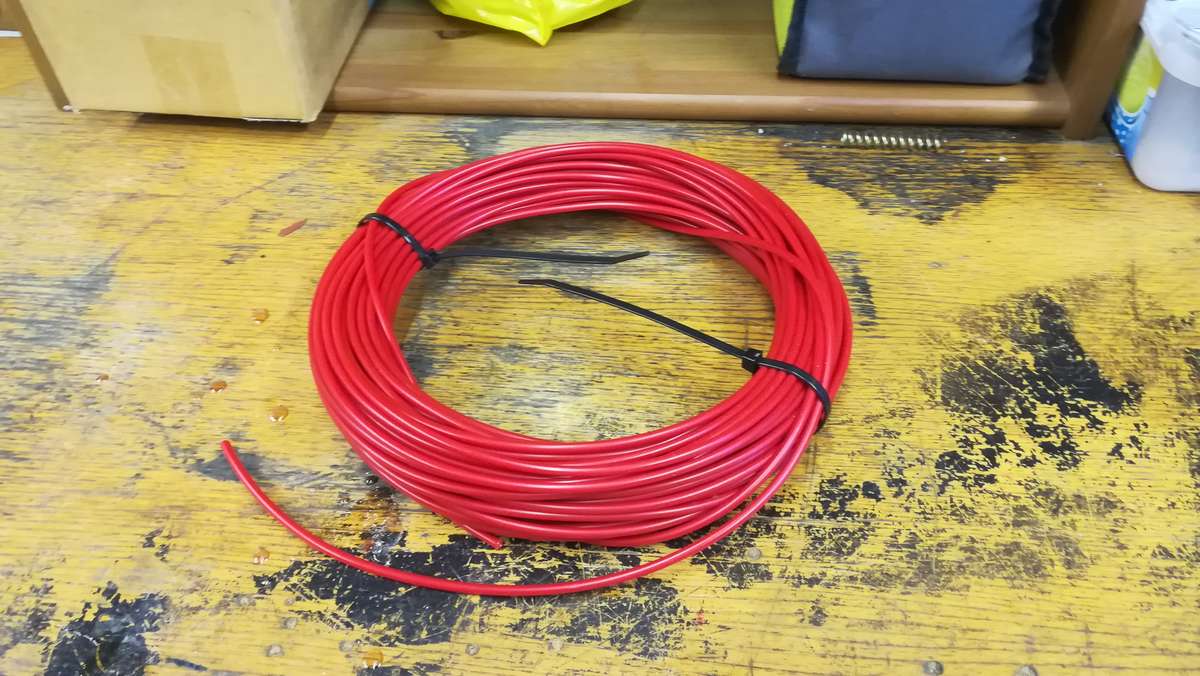
airlines and fittings
wiring
connectors (bloody expensive for what they are)
electronics
hardware (nuts and bolts)
and a set of suitable coilovers
the electronics and wiring, brackets and rear spring spacers are the only things that need to be made the rest is just bought in from various suppliers
would probably cost approx £2000 less than commercial electronically managed setups or if like me you already had suitable coilovers £2500-£2700 less
but I don't charge myself for labour
-
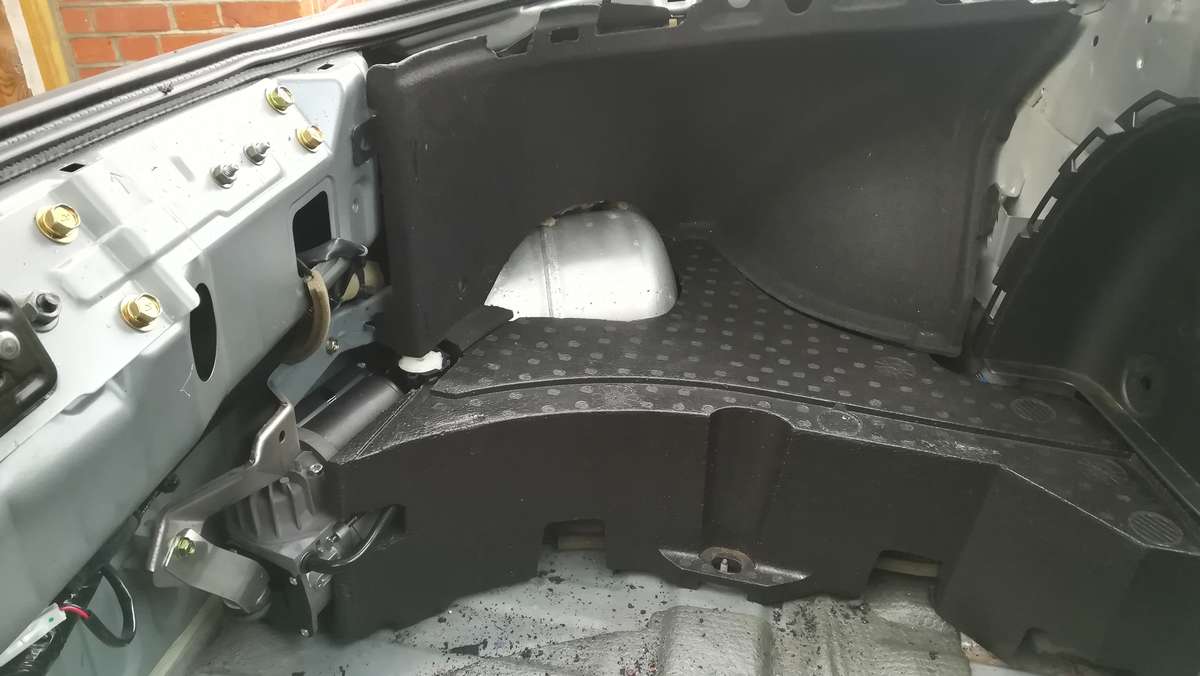
No bolts yet so got on with installing the compressor and tank, first I took out most of the rear trim and passenger side polystyrene that makes the spare wheel well
as shown in this photo with my finger in it (just to make Keyser feel like he's not the only one)
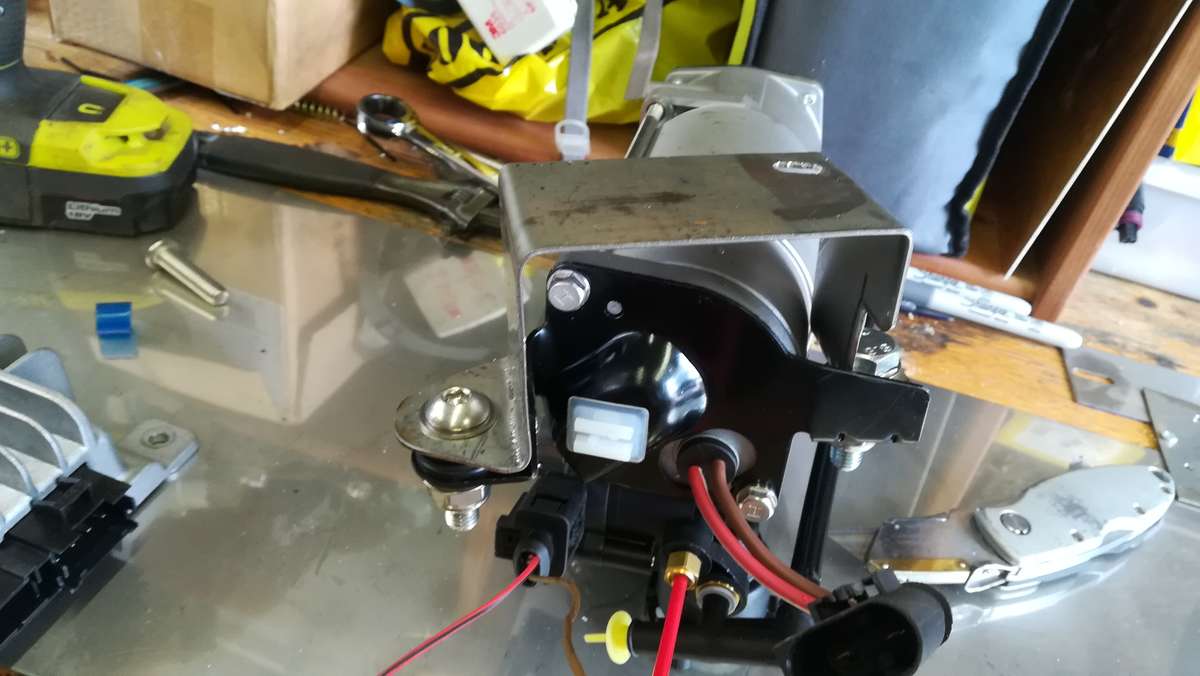
also removed the bose amp which won't go back and treated the surface rust then I made up a bracket with rubber mounts for the compressor
and here it is fitted also showing the tank location
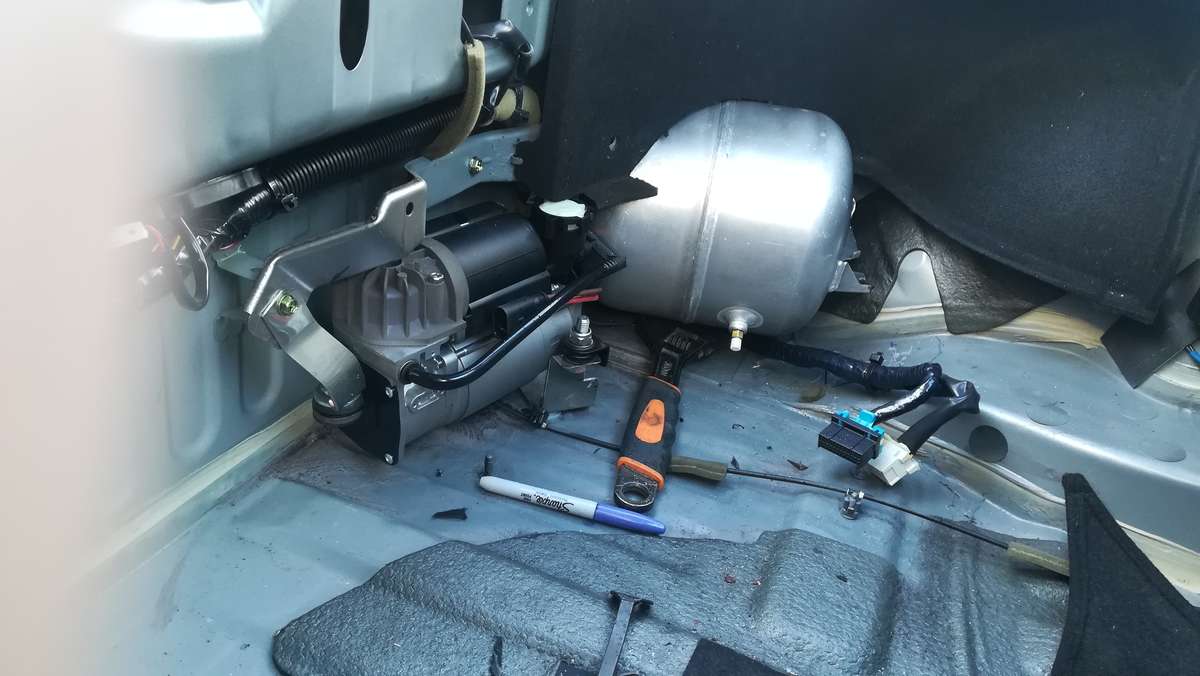
and here it is all fitted.
The missus is going to make me a new carpet if she can't modify the old one to fit the tank
-
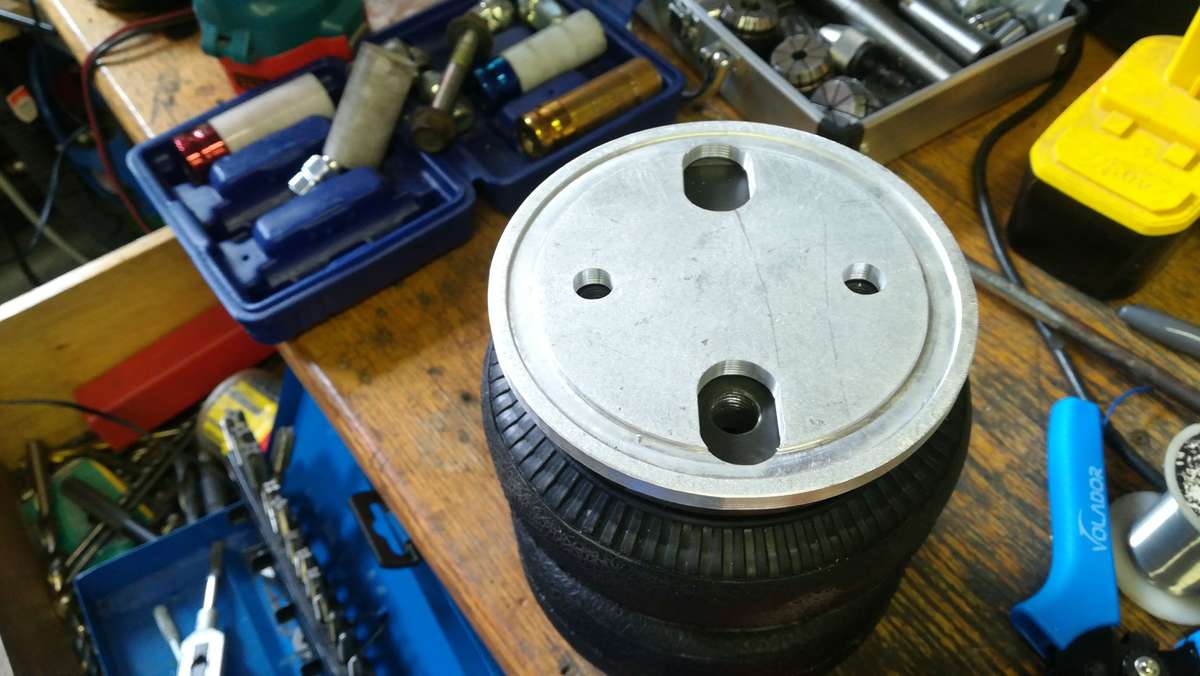
This is the top spring mount I was talking about with the three locating tabs that will locate my spring spacer
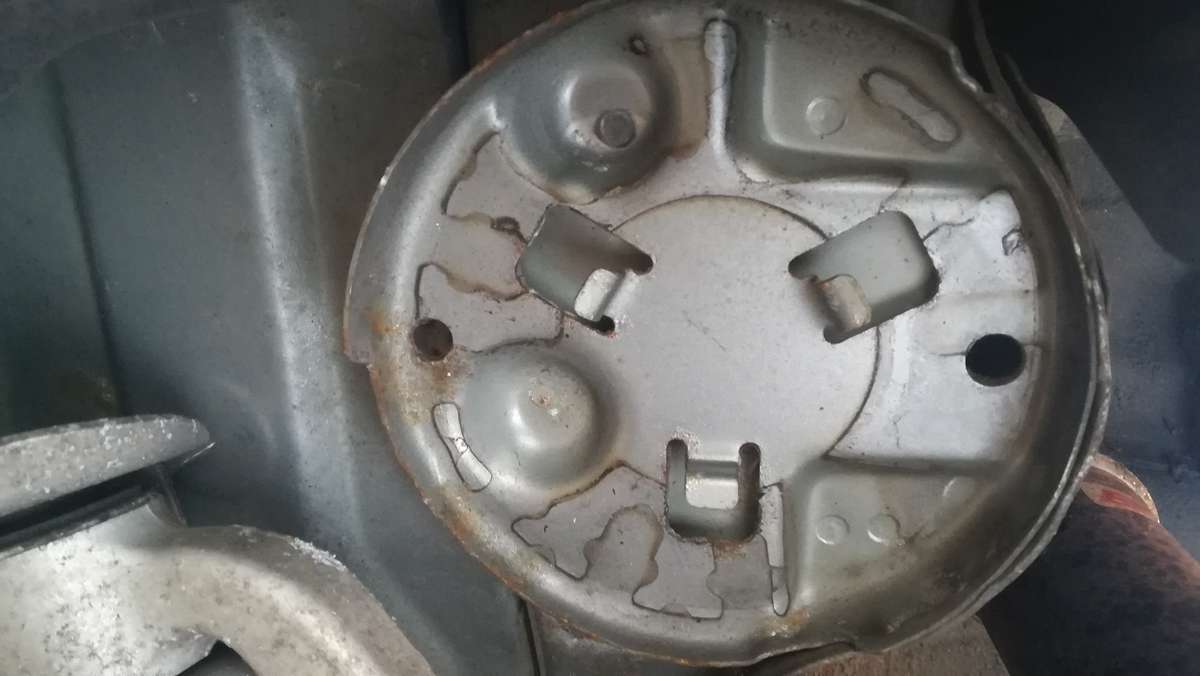
people usually drill a hole in the middle and use a Nutsert for fixing not sure why because if you drill the hole you can get a nut in over the top and a spanner to hold it, it's tight and fiddly but not too bad
I put a stud in mine , easier than trying to get a bolt in afterwards
here it is with the spacer in
all finished and fitted to the springs
I can't actually fit any of this yet as the inner adjustable bolts on the spring bucket/arm sheared off both sides oh I laughed (
 ) then used the phrase "you're taking the p!**" to the local Nissan dealership when he said the bolts would be £21 + vat each and that's without the nuts which I also needed and I'd have to wait till Tuesday luckily we have some Excellent and helpful traders on here thanks Adrian@TORQEN both nuts and bolts for what Nissan wanted for 1 bolt
I can't start on the front till I get my nuts and bolts for the rear and can get it off axle stands anyway it's been raining all day so I got on with the electronics and some of the programming oh I also got my height sensors
It's coming along
-
3
-
-
6 hours ago, scobie140 said:
Loving the forward planning by giving yourself access holes
 I'm forever cursing designers who make stuff but don't consider access for maintenance when at work.
That's the thing that's taken so long not the actual work ,all the planning, measuring, test fitting and trying to think of everything

-
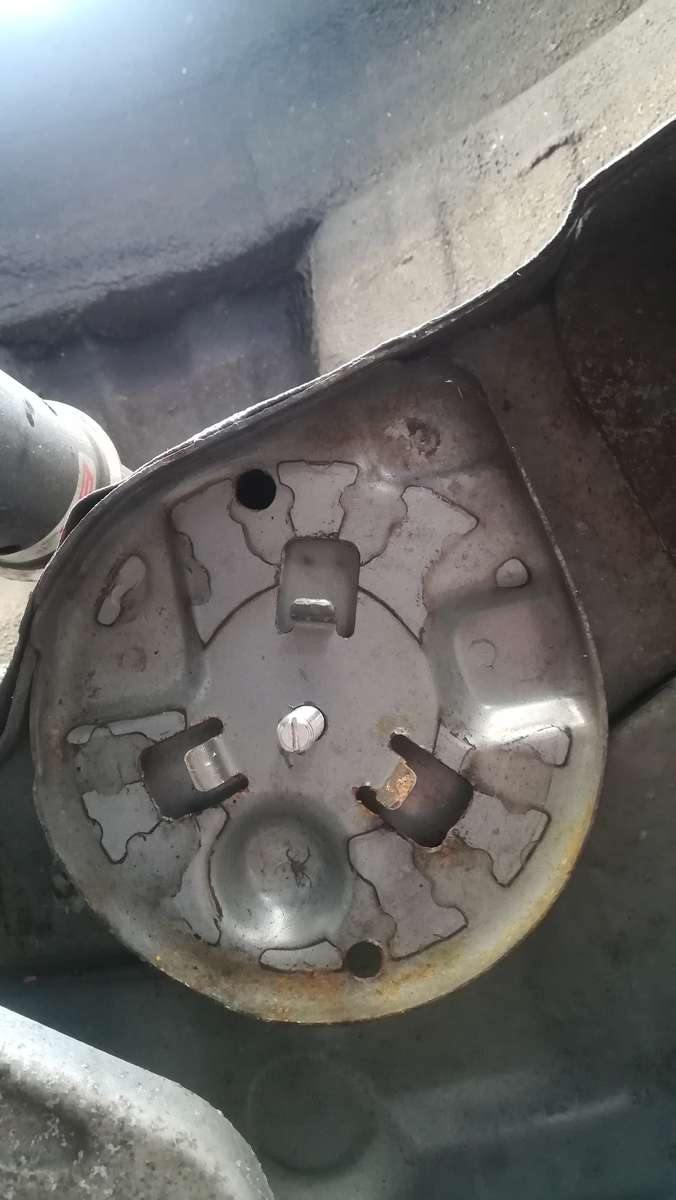
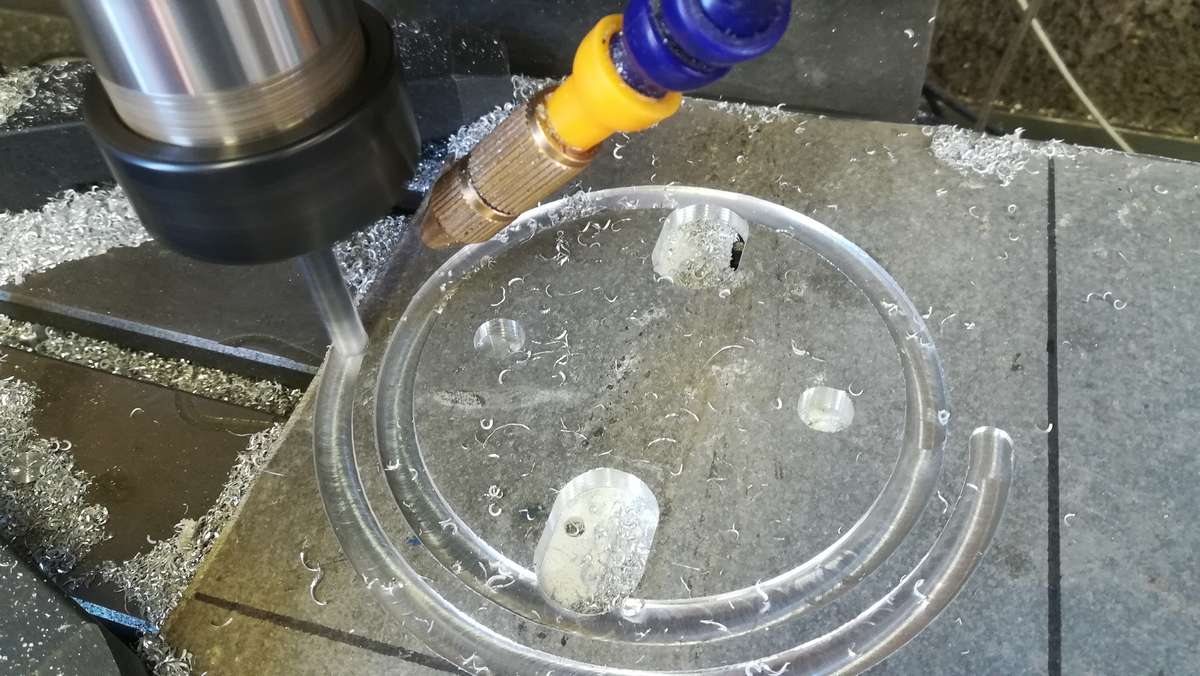
Got the rest of the machining done today it looks like I've just machined a lot of random holes into it
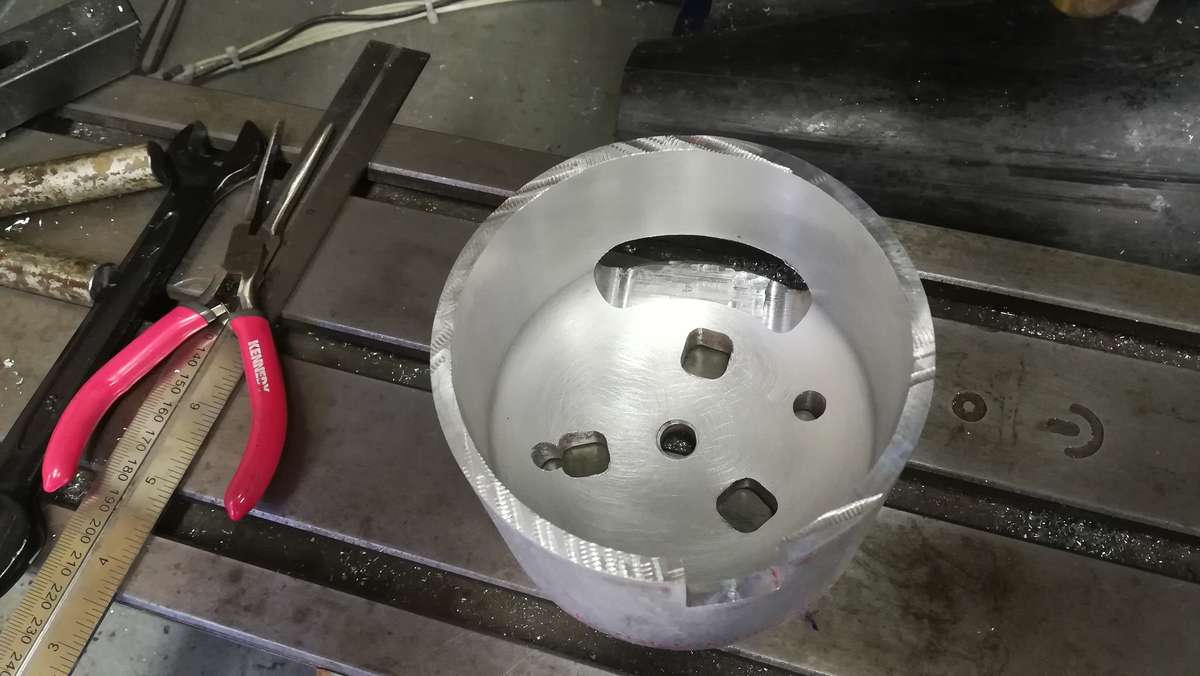
the cutout in the rim at the bottom of the first picture is where the airline will go in and will face inwards towards the diff
the three square holes in a triangular pattern will locate in the tags in the top of the 350 spring mount and will prevent the whole thing from turning
the hole in the center is for the top fixing bolt which will be done up with a spanner through the slot which is easier to see in the second picture and will face outward for easy access
the other two holes are for an allen key to tighten the cap head bolts which will fix the spacer to the airspring
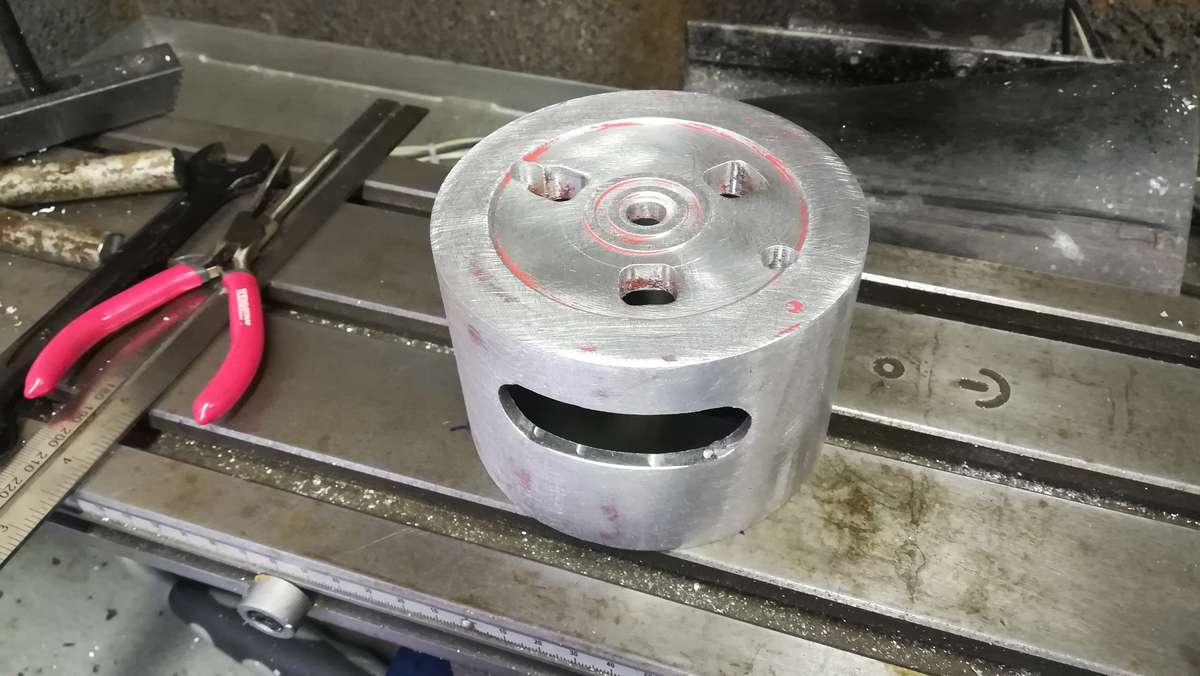
Just need to weld the spacers to the base plate as seen in the next picture sitting as it will on top of the airspring

-
2
-
-
I've had a reasonably successful weekend between decorating
I have a new relay card to replace the incorrect one I was sent but I had to go with standard mechanical relays, not the end of the world, also got started on the rear air spring spacers so far all it's cost me is my time as I have used some items I had lying around, two fire extinguishers and some 6mm ally plate

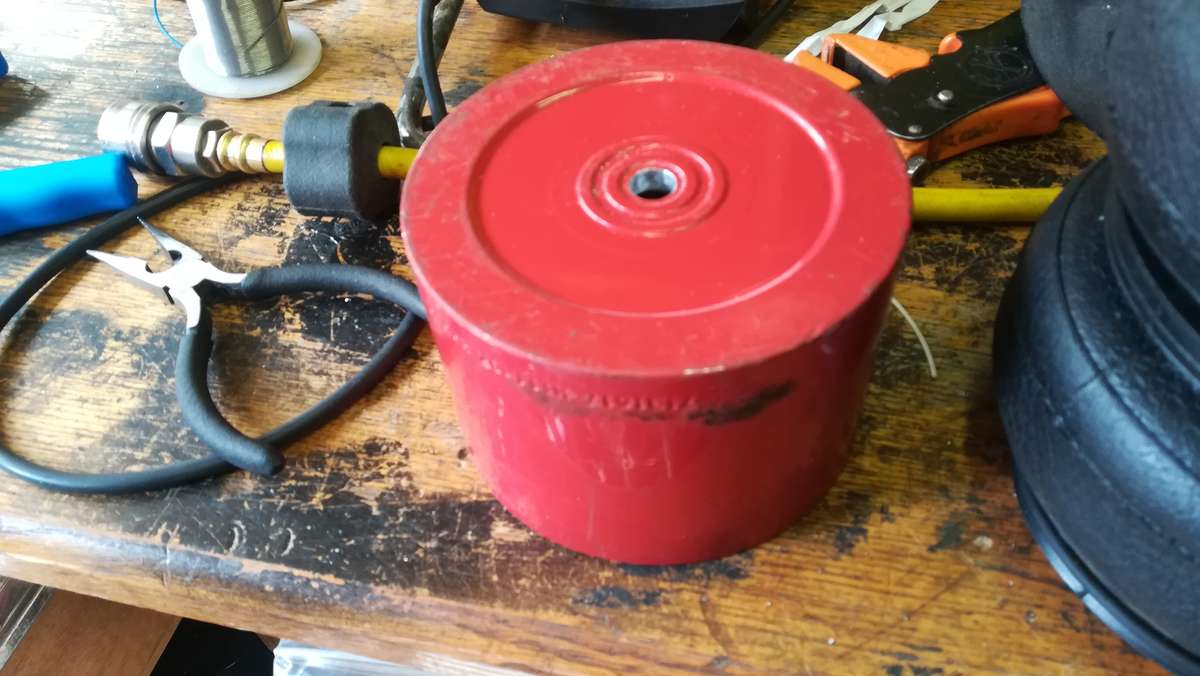
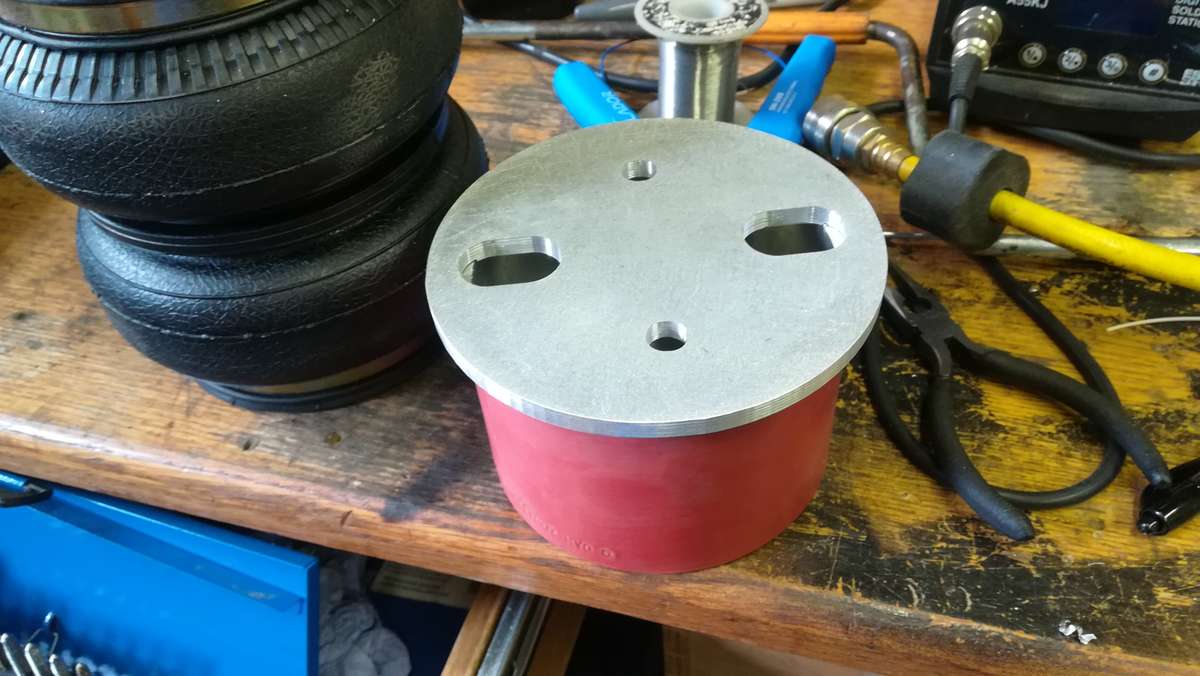
should get the rest of the machining done and welded together tomorrow
-
3
-
-
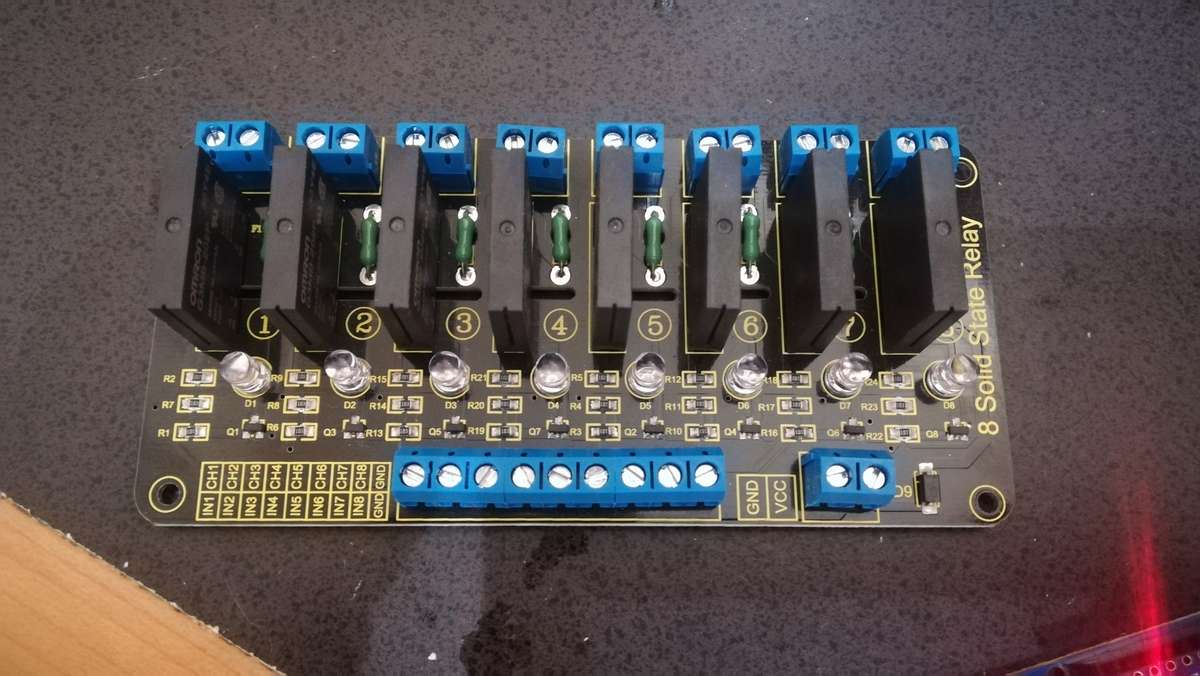
1 hour ago, andybp said:
they are each rated at 250 vac at 2 Amps the solenoids in the valve block should draw about 500 mA, I will also use one of these channels to switch a 40 A relay for the compressor
cost about £15 for the 8 Channel board
Damn that's the first spanner in the works I thought something seemed wrong when I answered this post, they sent me the wrong board these relays will only switch A/C so that will be going back
and guess what they don't have any of the DC ones that's what happens when you rely on other people I think I'll just make my own.
-
6 hours ago, Keyser said:
Ahh the ingredients have arrived just need the chef to put it together and cook it up now
What power can the solid state relay handle?
they are each rated at 250 vac at 2 Amps the solenoids in the valve block should draw about 500 mA, I will also use one of these channels to switch a 40 A relay for the compressor
cost about £15 for the 8 Channel board
-
1
-
-
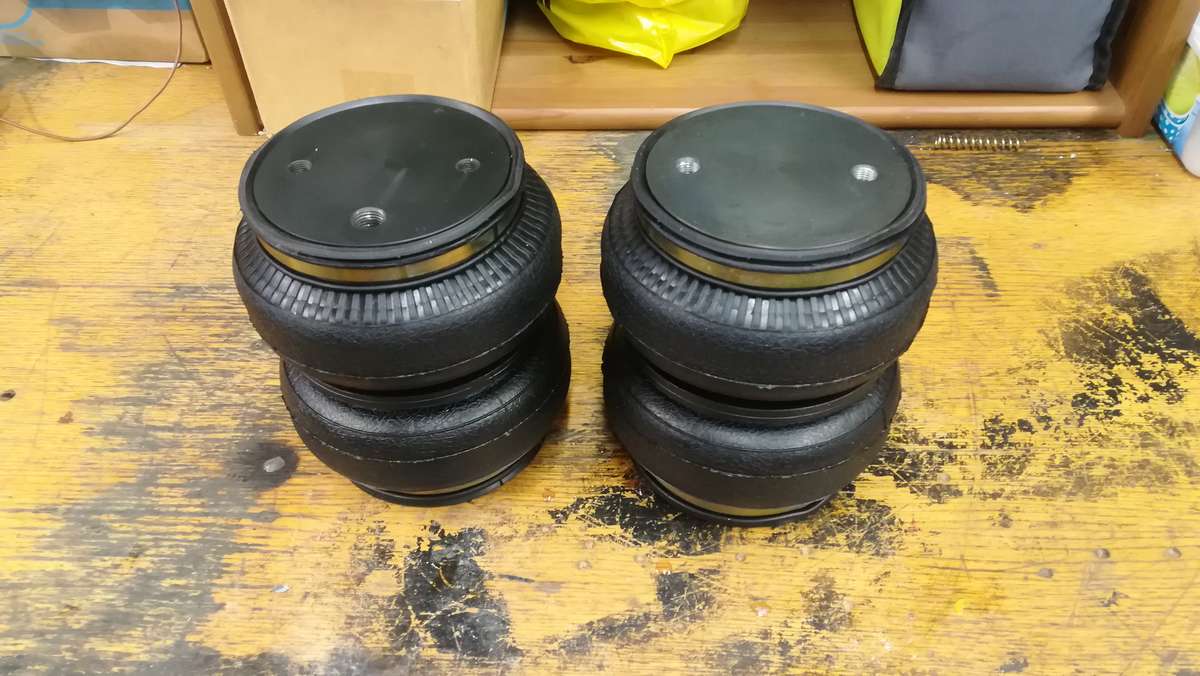
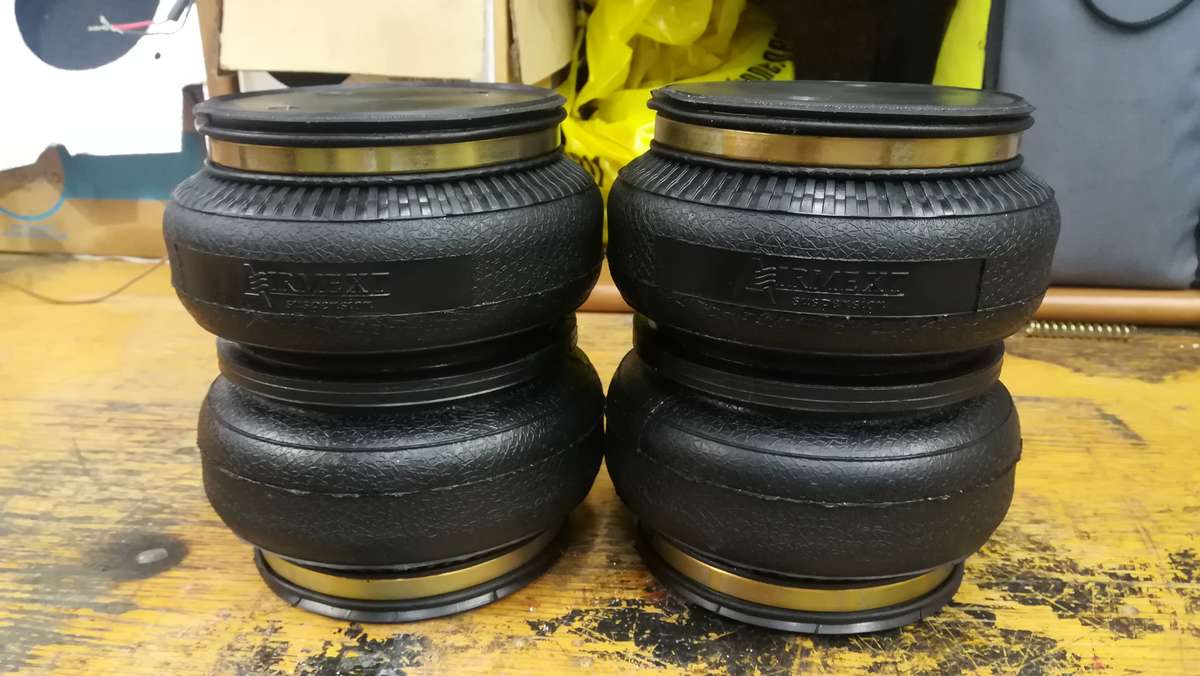
Time for an update with some pictures this time
so far it's just a pile of bits
pipework
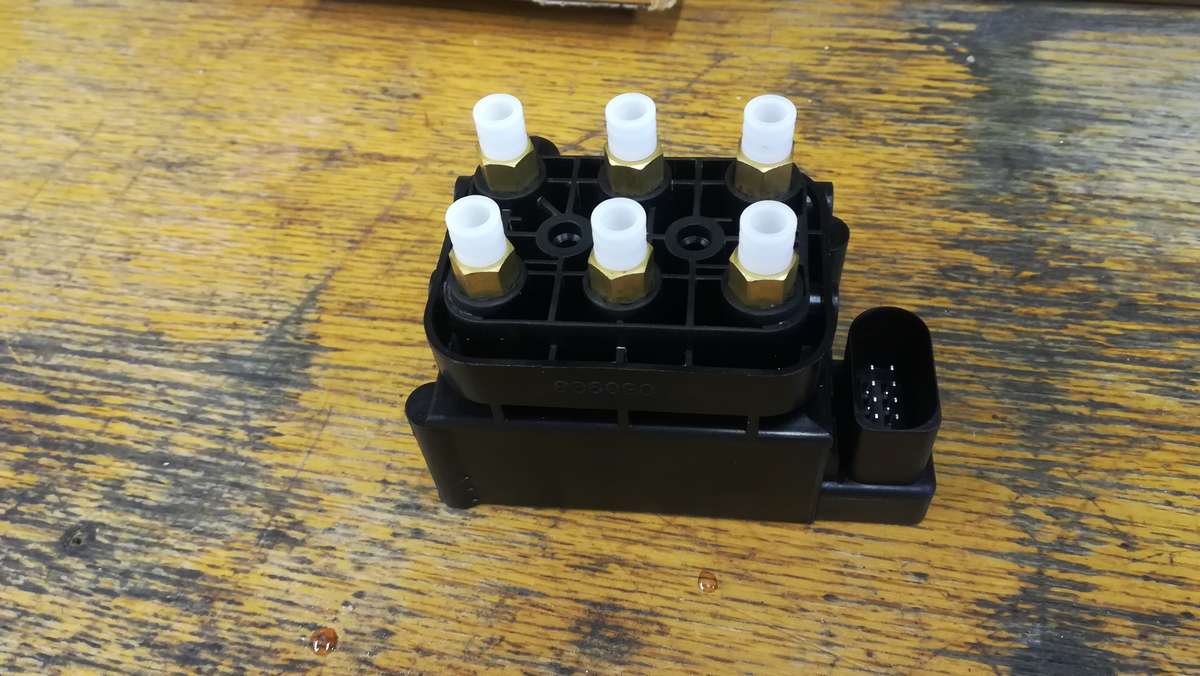
valve block (audi)
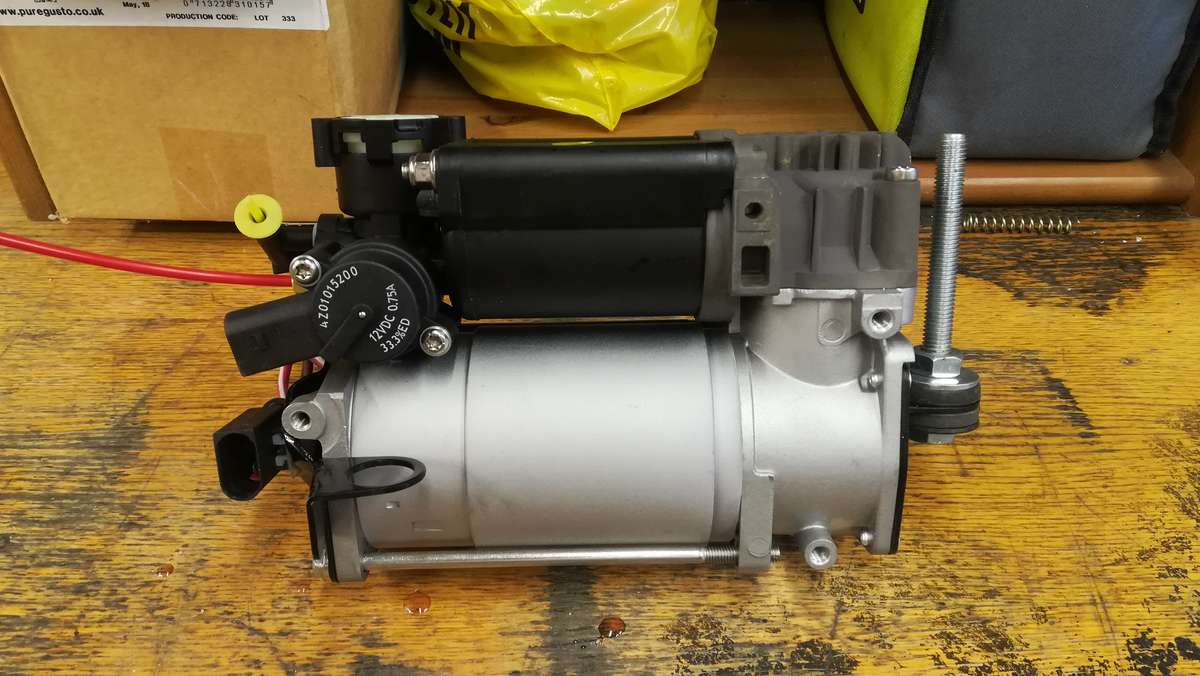
compressor with built in exhaust valve
Front springs which should screw onto my BC coilovers
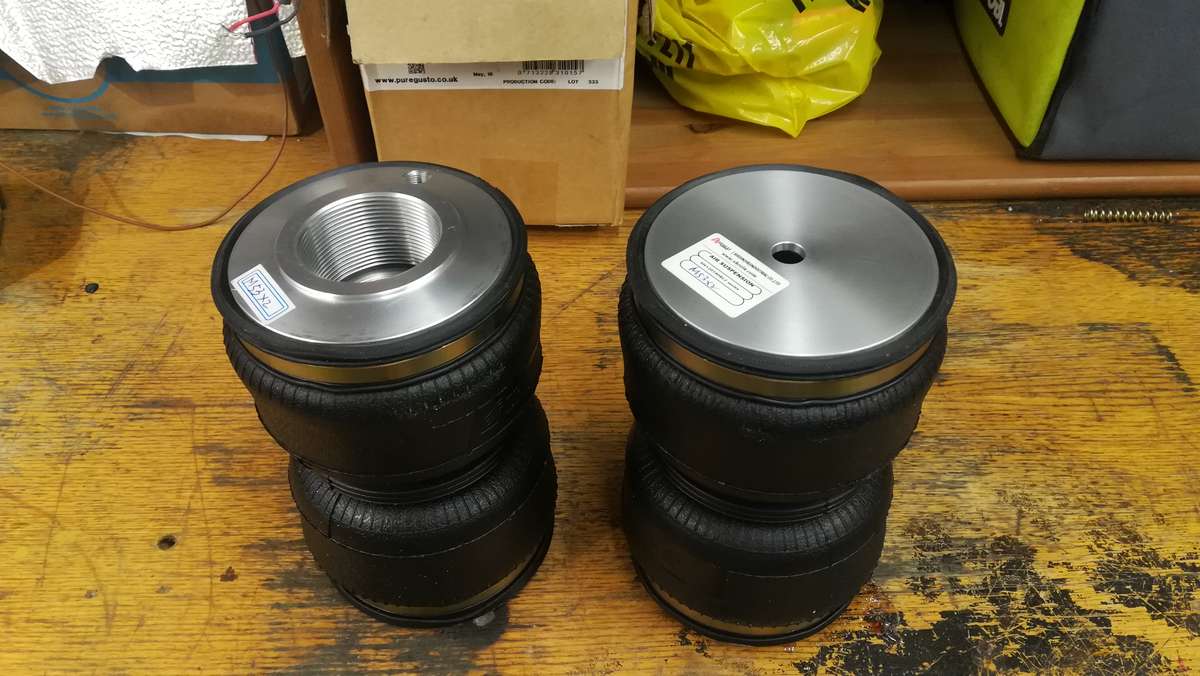
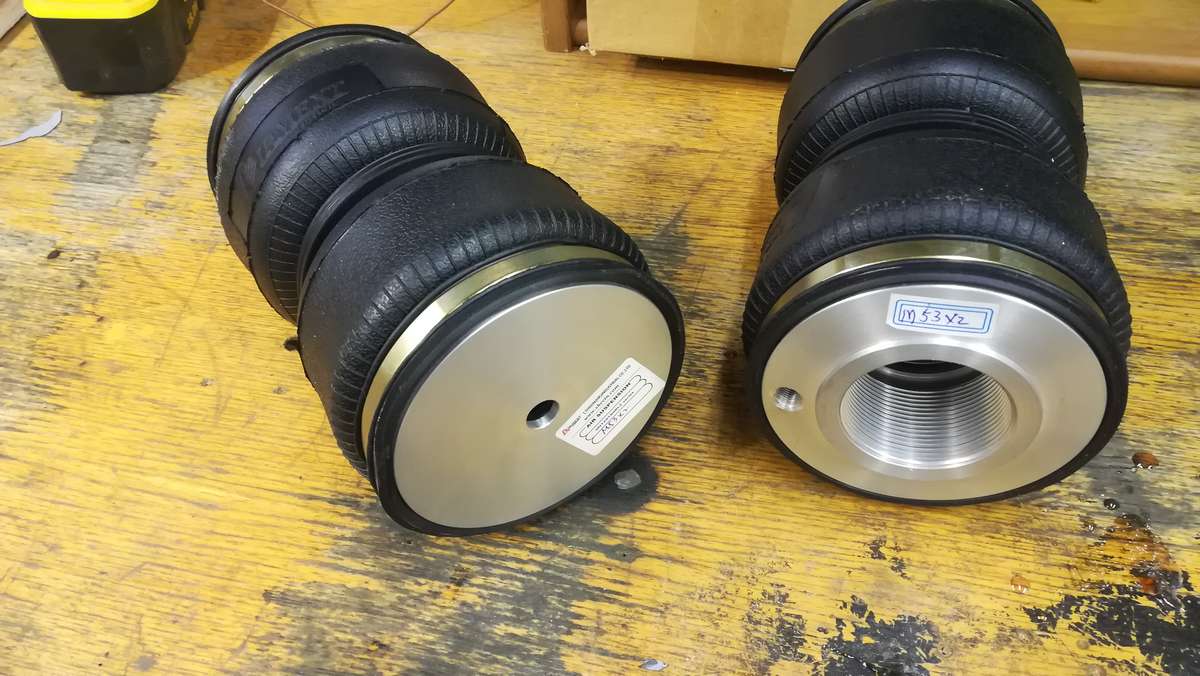
Rear springs I need to make up some adapters to mount these
and the electronics
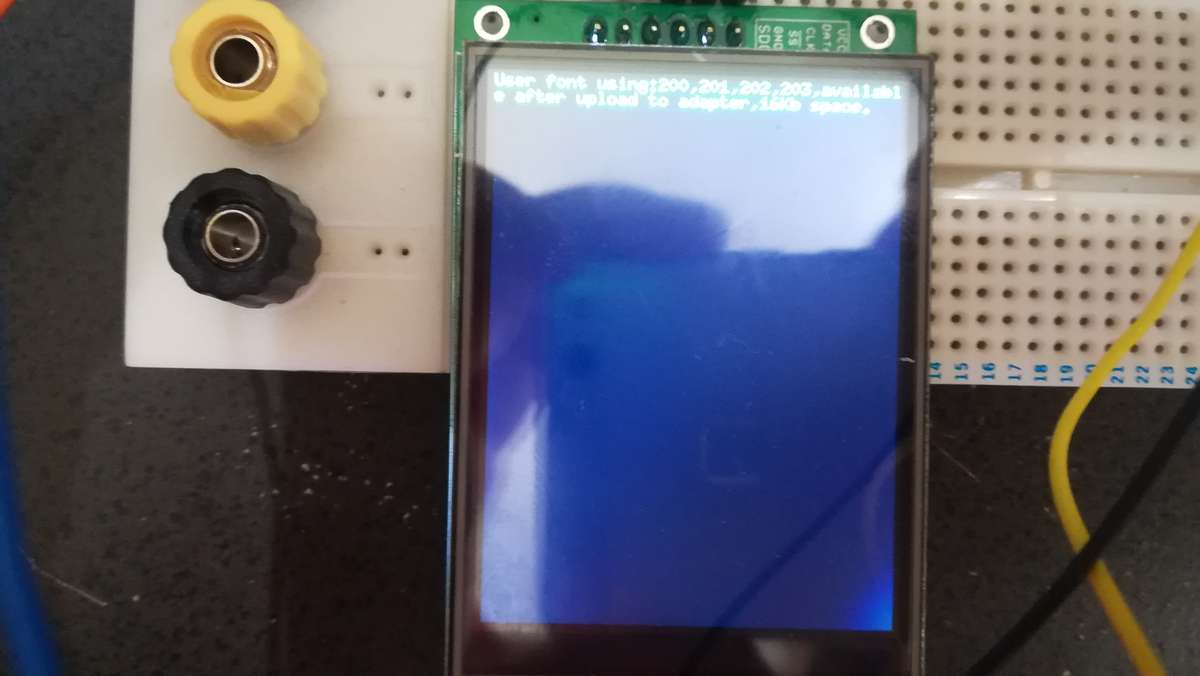
2.4" touchscreen
arduino uno R3
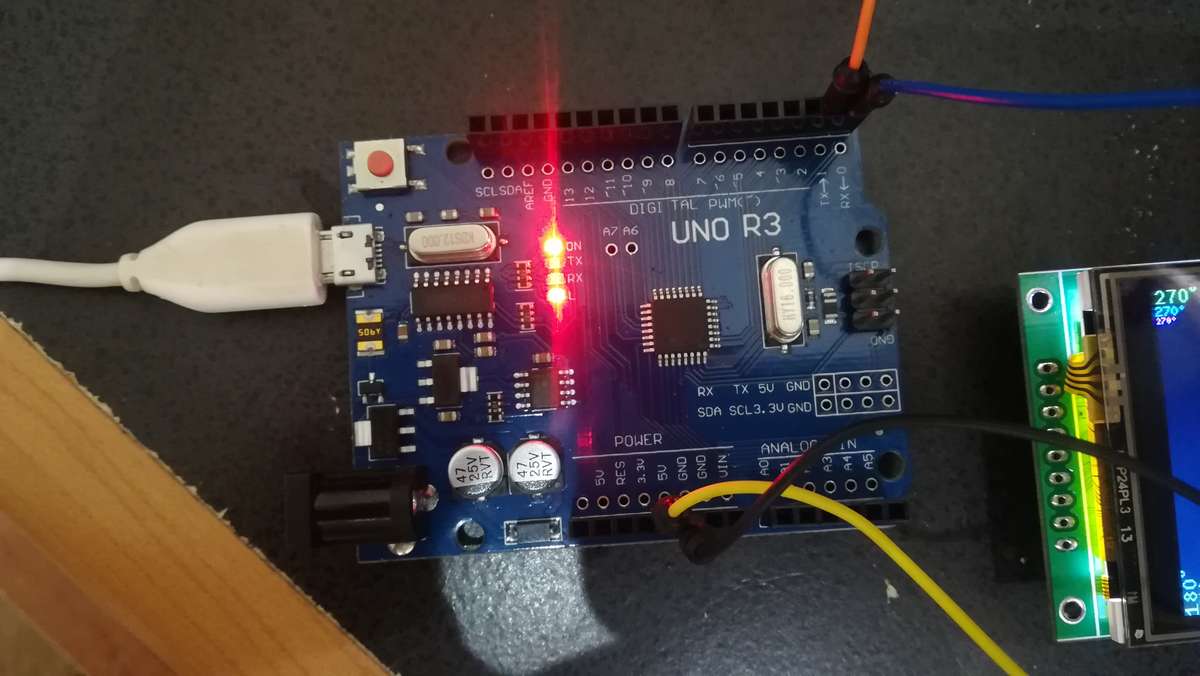
and finally an 8 channel solid state relay card
Throw all this and another few bits into a 350Z and stir add salt and pepper to taste
-
3
-
-
4 minutes ago, san marino blue said:
Thanks for the links.
Really what I needed to start making a few decisions.
I hadn't considered a single turbo.
I'll certainly take a look at that
I'm not ruling out a supercharger either, the Jag ones can be bought cheap enough.
No thought gone into this yet, so that might be a stupid idea, but worth considering all the same
What you say is pretty much what I thought.
I know space is tight, it always is on these cars.
I'm going into this with no expectation of it being easy and certainly not a straight bolt in, slam the bonnet and annoy the local 911 brigade.
I think, hope, this will give me a turbo car at a reasonable price.
As Z dedicated has said, it is fool hardy to expect to do this job on a pittance, but I do think with some ingenuity, engineering,, time and patience I could build something very good at an affordable price, using decent bits
My next move will be to remove the front of the car and see exactly what space I have and what I can reasonably get in there.
I know I need to keep my air tracts short and as balanced as possible, both sides, so this will come into play.
Once I have decided on what turbos will actually fit, I think getting everything else in there will just be big, infuriating, Tetris
luckily I have a garage the size of a barn, so space isn't a problem.
Any other advice really appreciated
the superchargers fitted to the jags/mercs are all eaton and quite big similar to what stillen used and means major bonnet mods but they are available pretty cheap 2nd hand
-
the biggest problem will be squeezing it all in, twin turbo's and pipework is pretty tight this is one of the better documented builds which shows a lot of the issues you will face and he started with a second hand tt kit
and what he ended up with was very impressive
single front mount turbo kits are simpler although the pipework is still a pain or my choice which was rearmount
which is the most DIY able but none of them are what I would call easy or straight forward
-
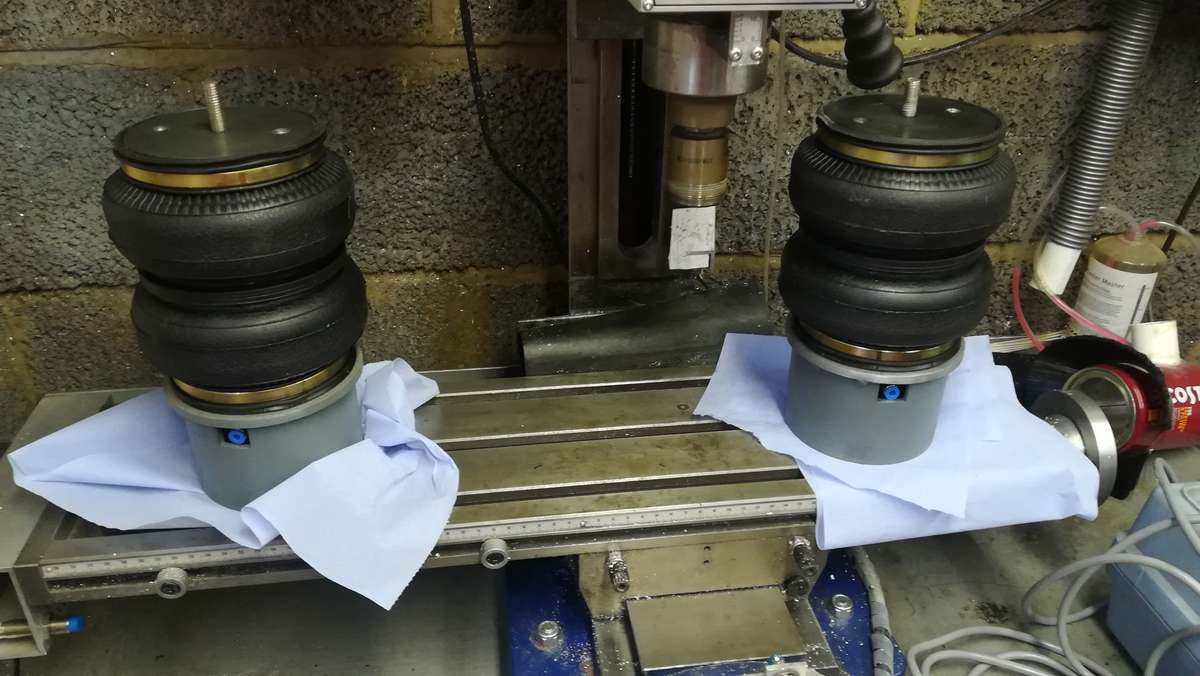
My air springs arrived in the country today and will be delivered monday hopefully, I already have the compressor with built in exhaust valve, the valve block with built in pressure sensor also the air line and all of the electronic goodies for the controller writing the code for the controller is giving me a headache but I'll get there this heat is making it really hard to concentrate all I really need for now is the tank and height sensors which I haven't ordered yet
-
1 minute ago, DoogyRev said:
this is the Kent you think I live in . .

however this is the Kent I actually live in . . .
https://www.district.kent.bc.ca/lik-photo-gallery-5.html
wow I'm so jealous I could almost cry if I wasn't a man, god damn it

OBX Individual Throttle Bodies
in Performance
Posted
have considered it but it'll be a pig of a job with the engine in