Hi all, checking in again after a pretty dormant time with the Z. Since the last update I have both moved house with my new fiance and been planning our wedding, so time and funds have been short. However, with Japfest coming this year, I wanted to do some things to really fix the tiredness the car is showing.
The poor old girl is 15 years old now (!) and some aspects of the car were showing that, plus I need to tidy up some mods hastily done for last year’s Japfest. Lesson to self, don't rush a job, you'll only end up doing it twice!
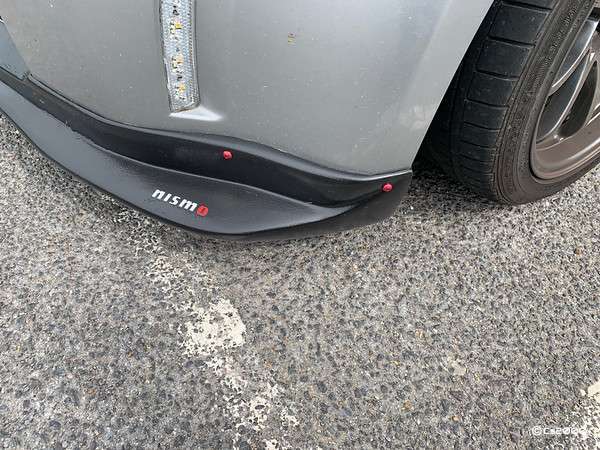
First order on the agenda, fix up the front lip! This was originally bought close to 4 or maybe even 5 years ago from Tarmac, I was never really interested in the hassle of making it fit, so it stuck around in my storage locker and then in the loft until last year when the week before Japfest 2018 I decided to paint it black and add it onto the car. Pro tip, don't rush paint prep! Less than 12 months later, the paint had badly cracked and was literally flaking away from the lip due to a lack of sanding and surface prep, likely I had some oils still on the plastic part. The old riv nuts were drilled out and new Pro Bolt anodised bolts put back in, secured to the car with the proper items for this job, rubber well nuts. It was repainted in black Plastidip with a clear over the top.
We all know plastidip will never give a smooth surface like paint, but it looks a hell of a lot better then destroyed flaking nasty paint! so i'm happy with it!
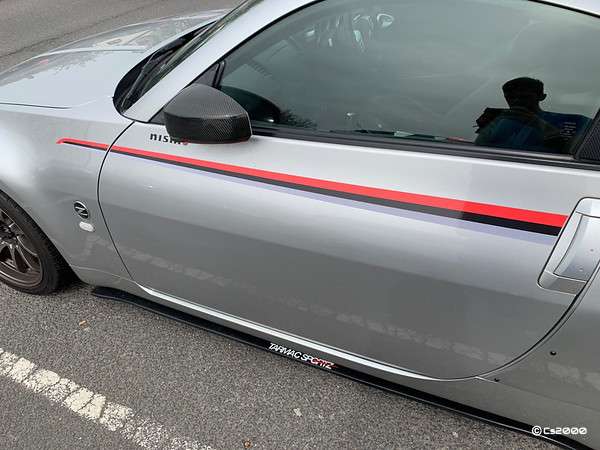
Next item was to replace my Nismo side stripes. The old eBay specials were badly faded and showing their age. A new eBay special kit was ordered and replaced like for like. Minus me messing up one cut and having to pay for a second set of stripes. Doh!
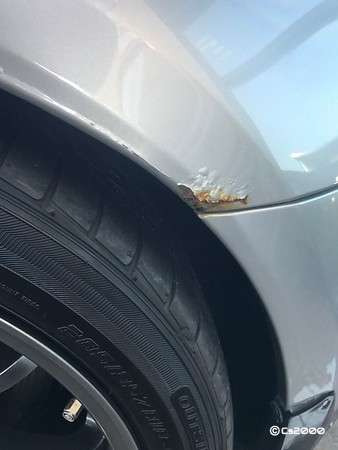
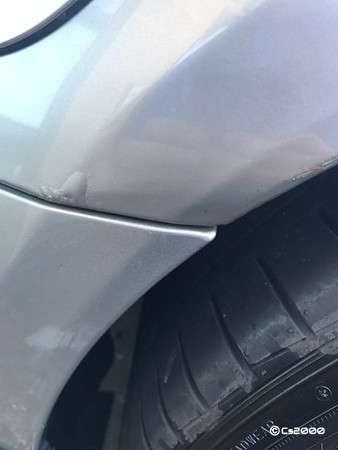
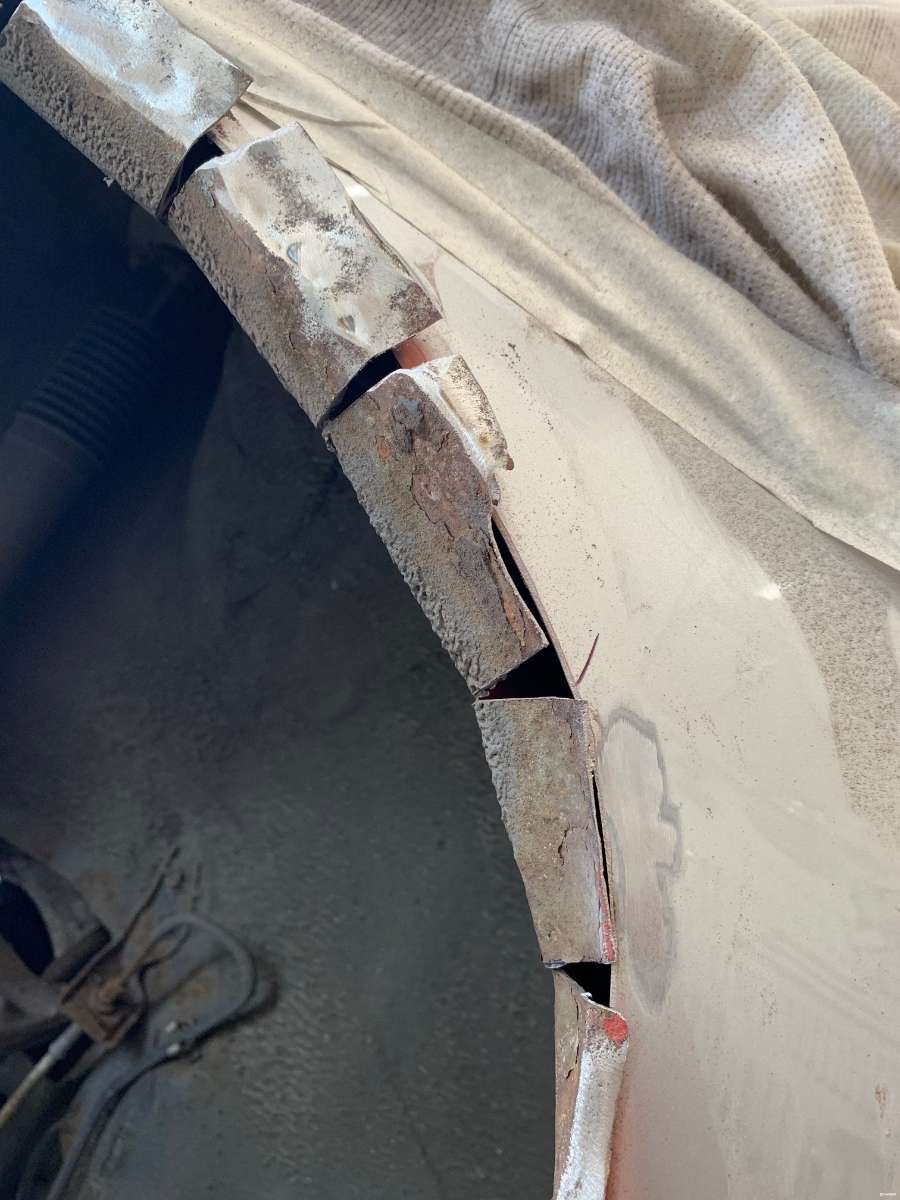
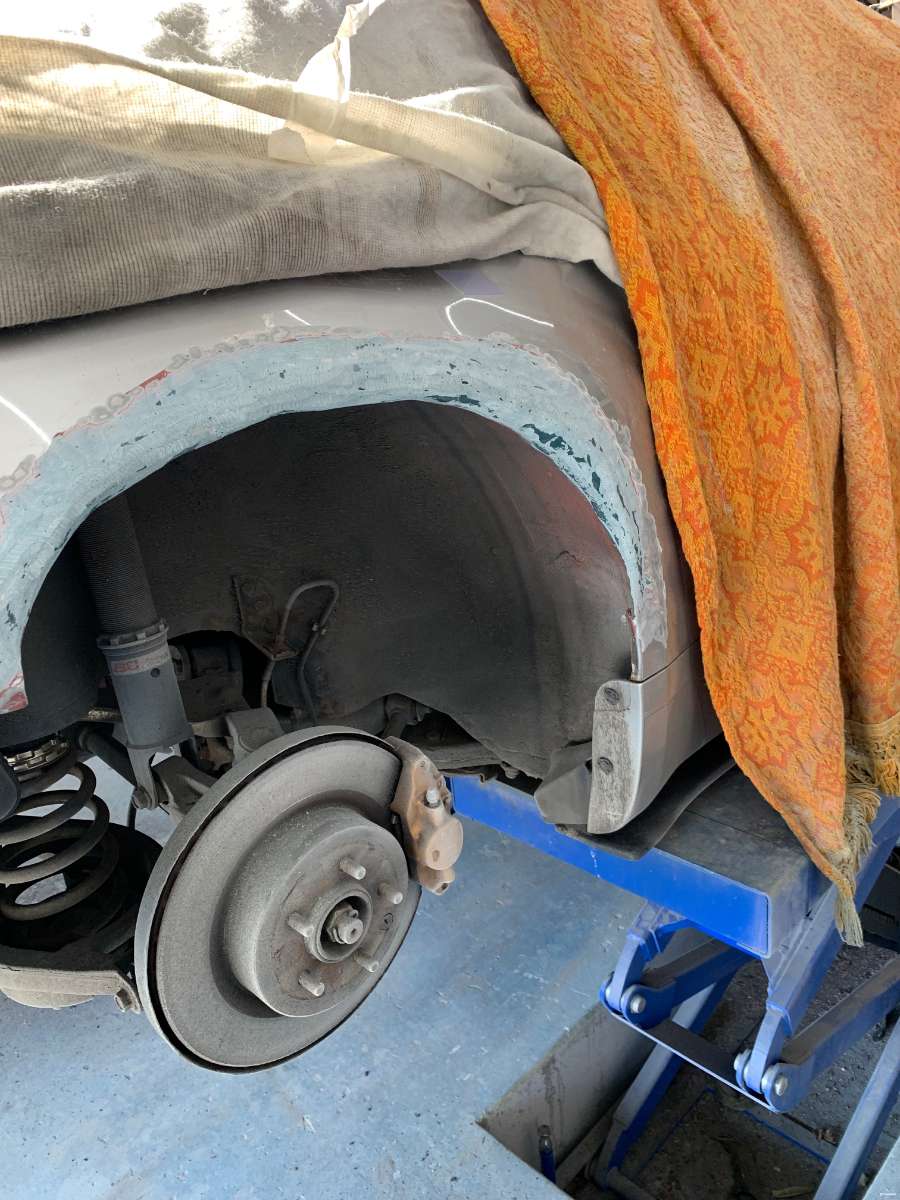
And lastly, the most expensive of all of these mods. Like all of these cars (it seems) they seem to rust on the rear arches where the bumper joins the car, plus some self-inflicted wounds from a low wall and just general rusting metal in the old wheel arch lip. These photos were taken in 2017 for reference, the rot had crept much further than that by this time (2019)
Passenger side rear of rear arch
Drivers side rear of rear arch
I had spoken to various body shops over the rear with the answers ranging from
"We can only sand it, fill it and paint it" - this option wont last 6 months as the rust isn't cured, its just painted over
"You need an entire new rear quarter panel and inner wheel arch skin" - Discussion stopped there, I don't even want to KNOW what the cost of that work would have been
"Sure, we can cut it out, weld in and shape a new piece and paint it, that's £1k per side" - The cars only worth perhaps 4k at best, I'm not spending half the value of the car on this!
So I just kept putting it off, I was sure there MUST be another way.... Then some money and time came up, so I got in touch with everyone's friend, @Keyser
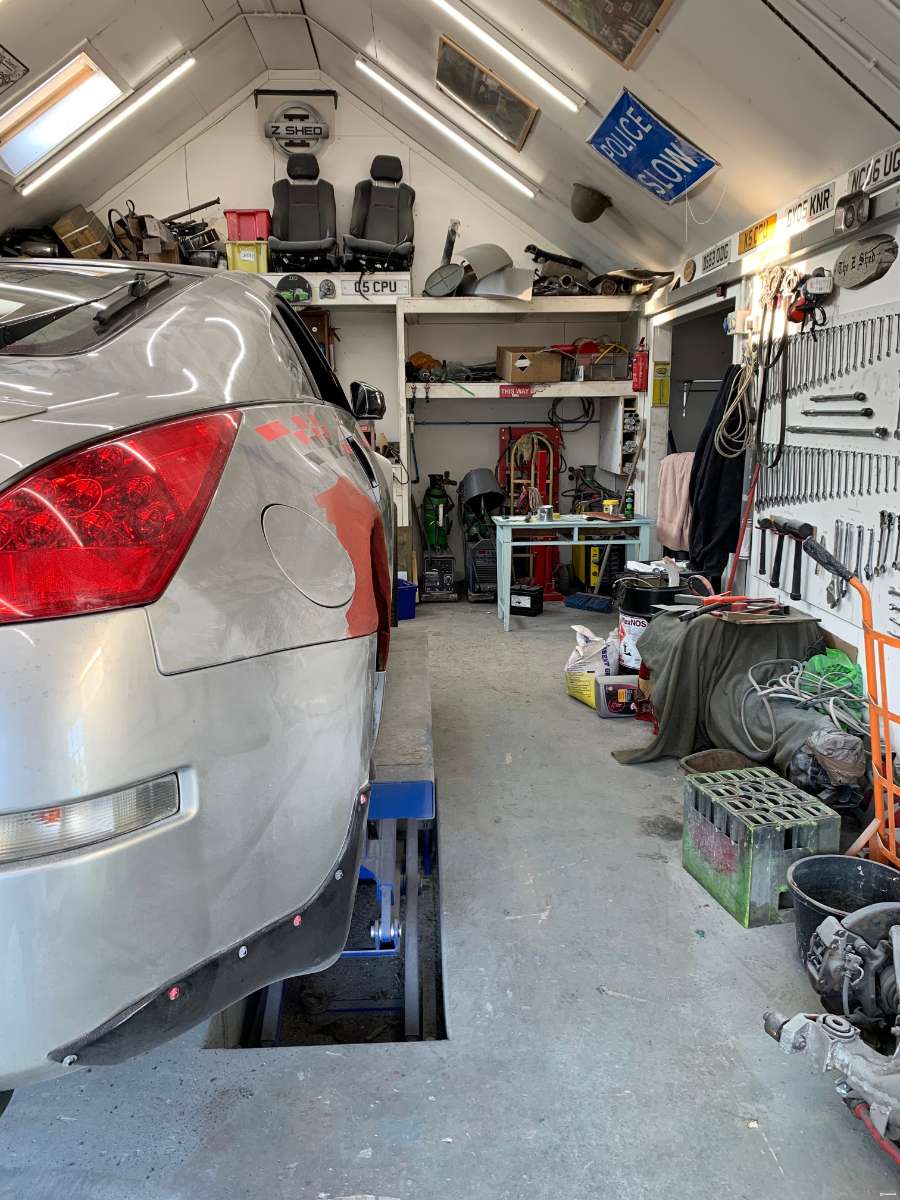
I had found that Chris over at Tarmac Sportz did some 15mm wide over fenders. These seemed a good plan as I didn't like the super dooooooper wide 50mm versions, that's not my look, but these were more tasteful. So with a few PM's, a few TXT messages and a few weeks of time, I made the pilgrimage to the most sacred of places. The Zed Shed II (Long live the Zed Shed I).
Chris had, as usual been an amazing guy and armed only with my paint code, fully prepped, primer'd, painted and lacquered the new panels, and we were just hoping the fitment would be at least acceptable. Despite being the Zed Shed, Chris didn't have any Z's to test the panels on!
One funny note I’d like to add in relation to our forum names and out actual first names.
Cs2000 - Chris
Tarmac Sports - Chris
Keyser - Chris
This made communication a little difficult at times!
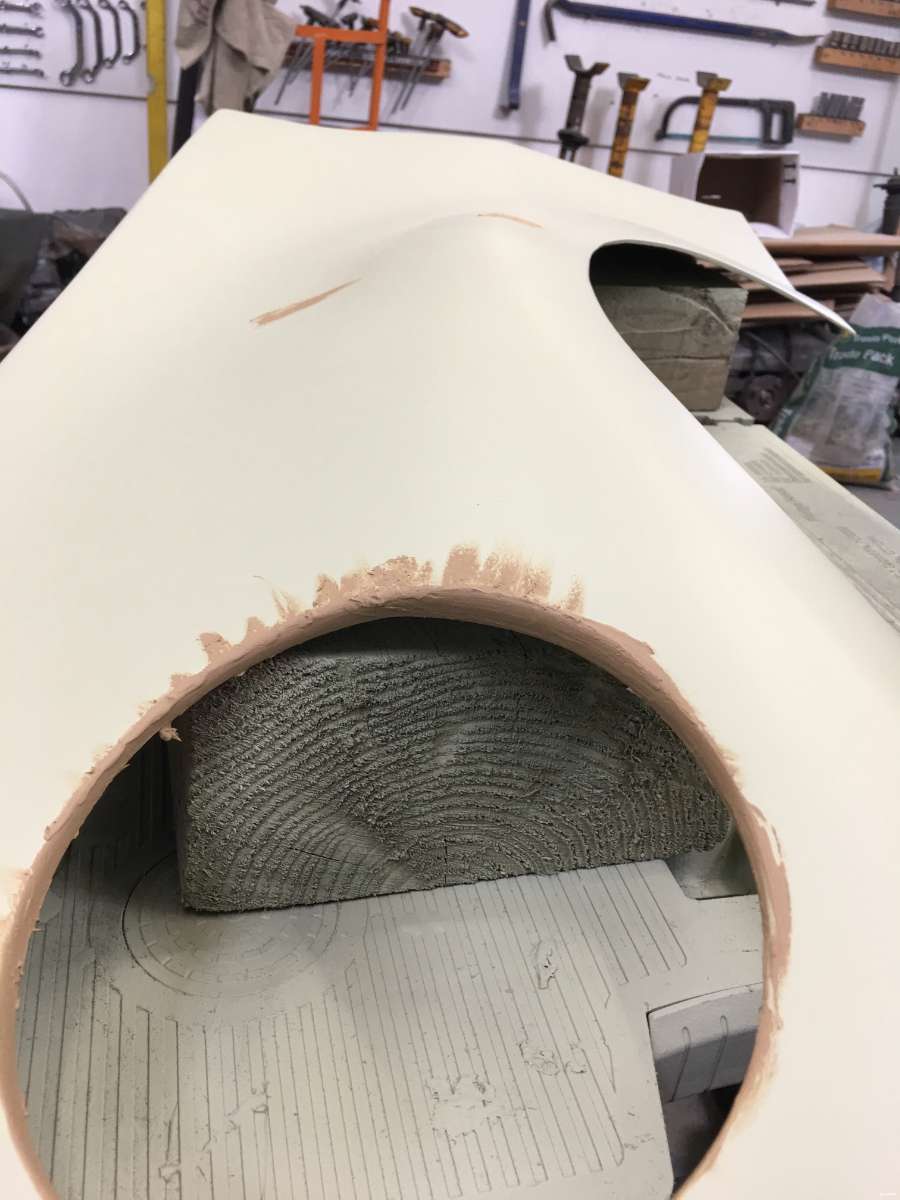
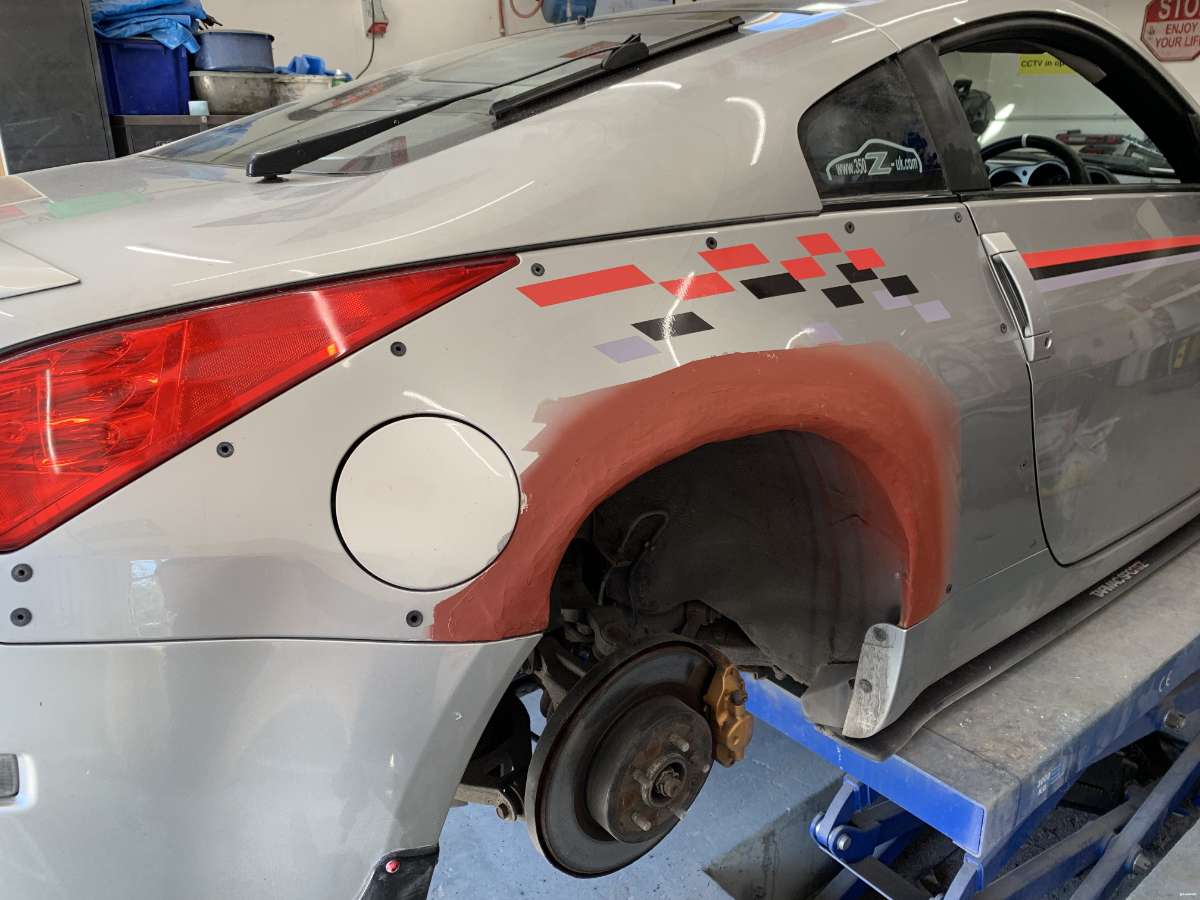
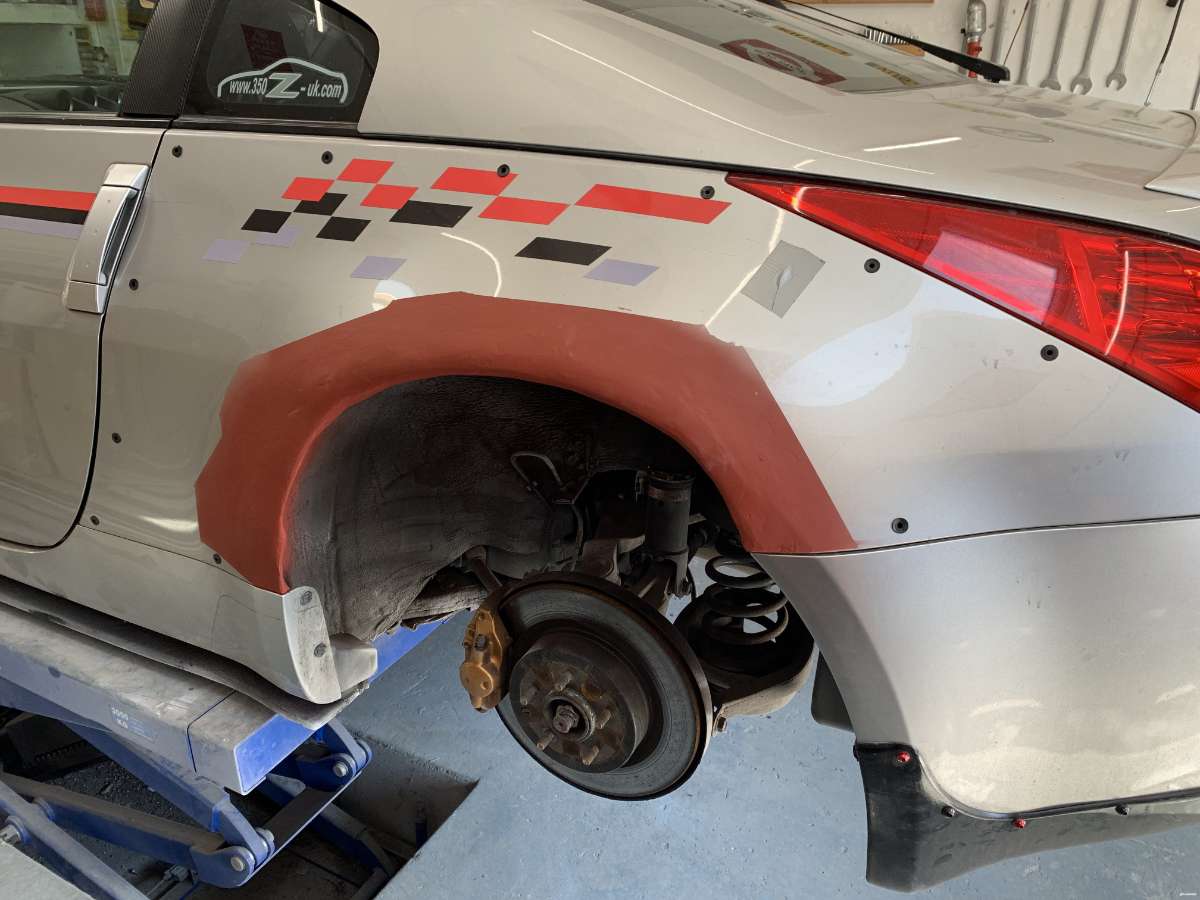
Anyway! before i arrived, i was sent these teaser shots of the current state of play. Primer'd and some body filler
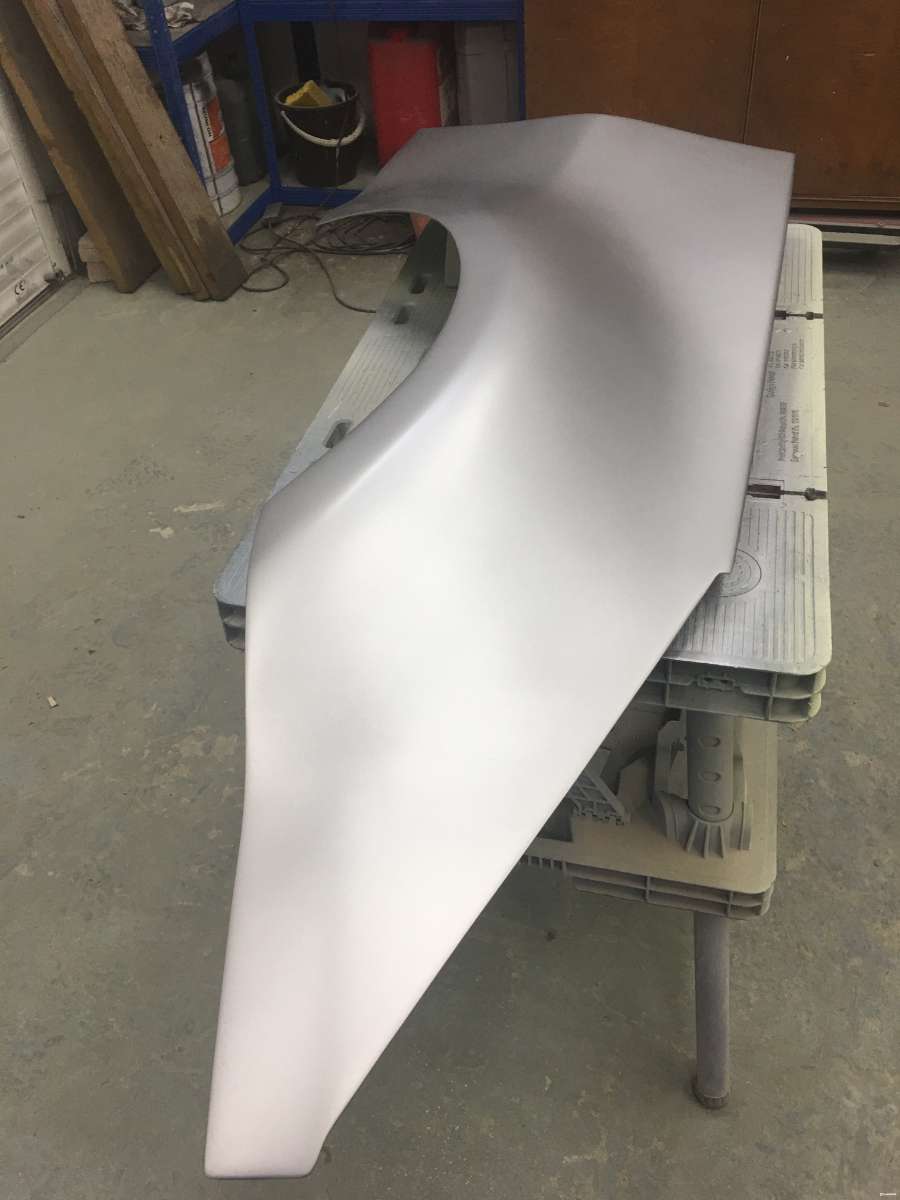
Painted, but no clear yet
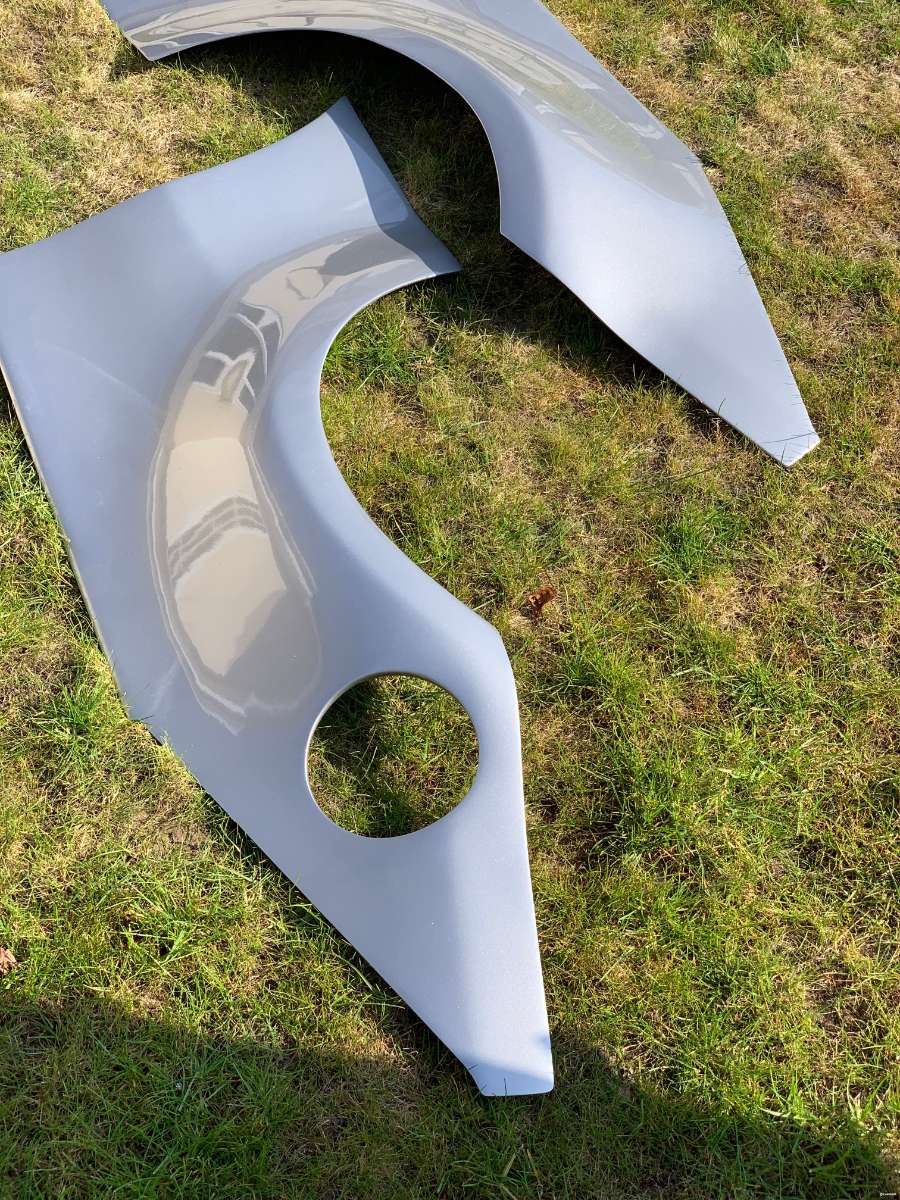
Clear coated
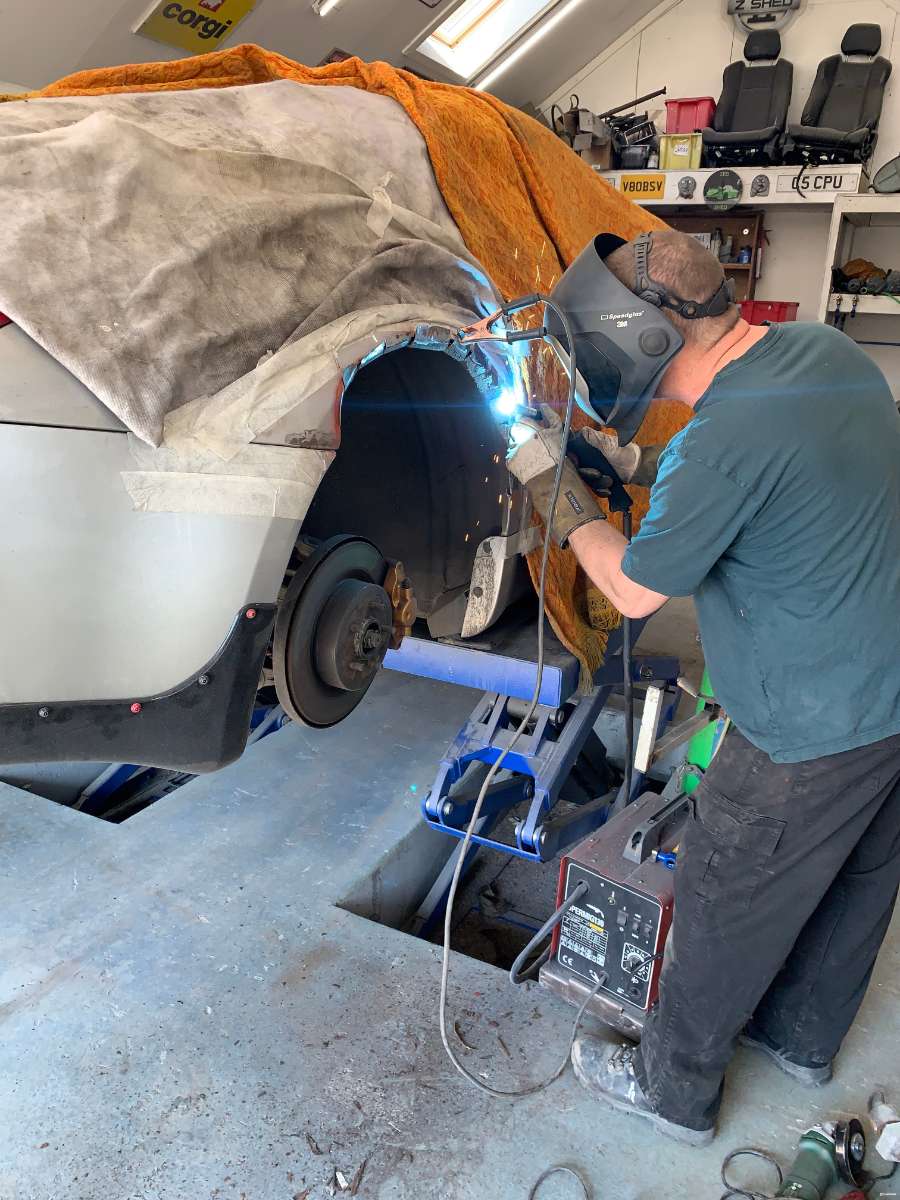
The day came, and I pulled onto the hallowed ramps for two days of incredibly dirty work!
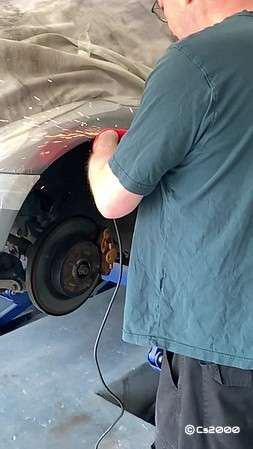
After 47 cups of coffee for braveness, Keyser draws first blood....
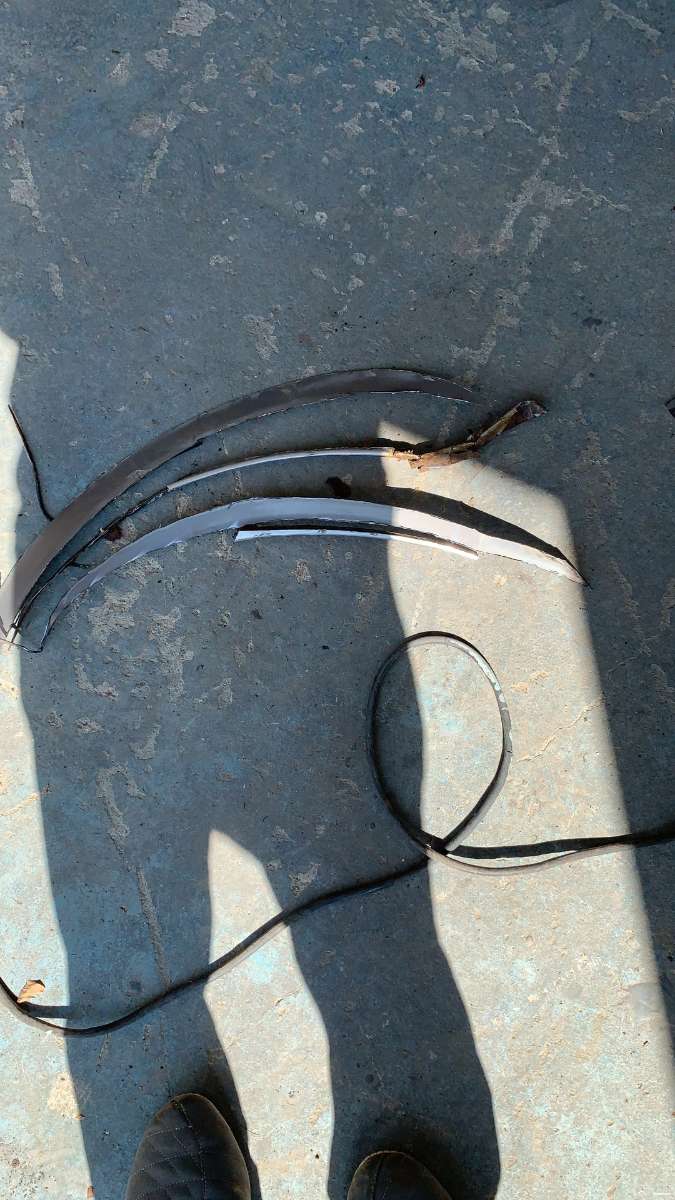
The Z fought valiantly, but she could not withstand Keyser's almighty angle grinder!
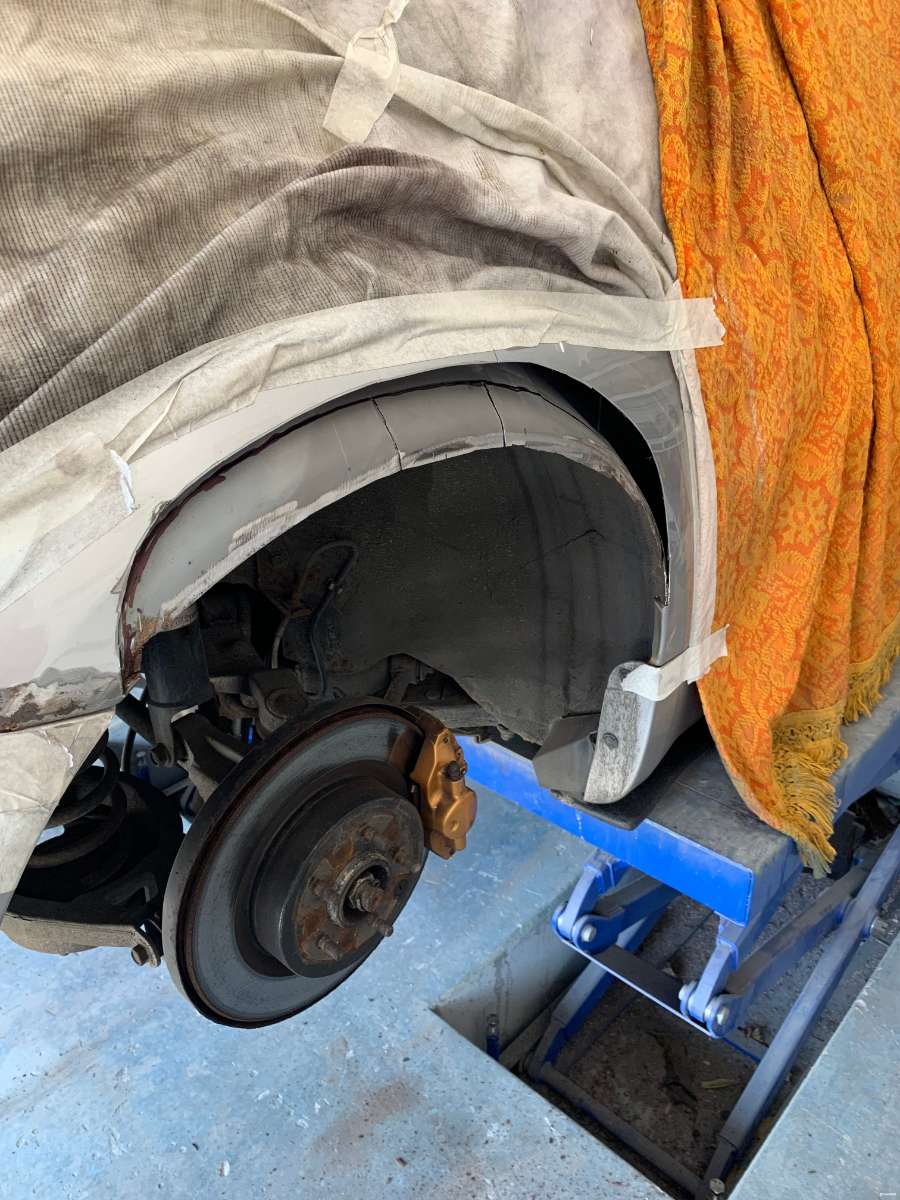
Before too long, she had relented and we could move in to survey the damage. OMG, rust! rust everywhere! There were large patches of rush even on the inner skin, towards the rear section where the bumper clips are, it was basically made entirely of rust. As much of the rust was removed as possible with the angle grinder, you can see the bare metal towards the front of the arches, which was treated in the next steps.
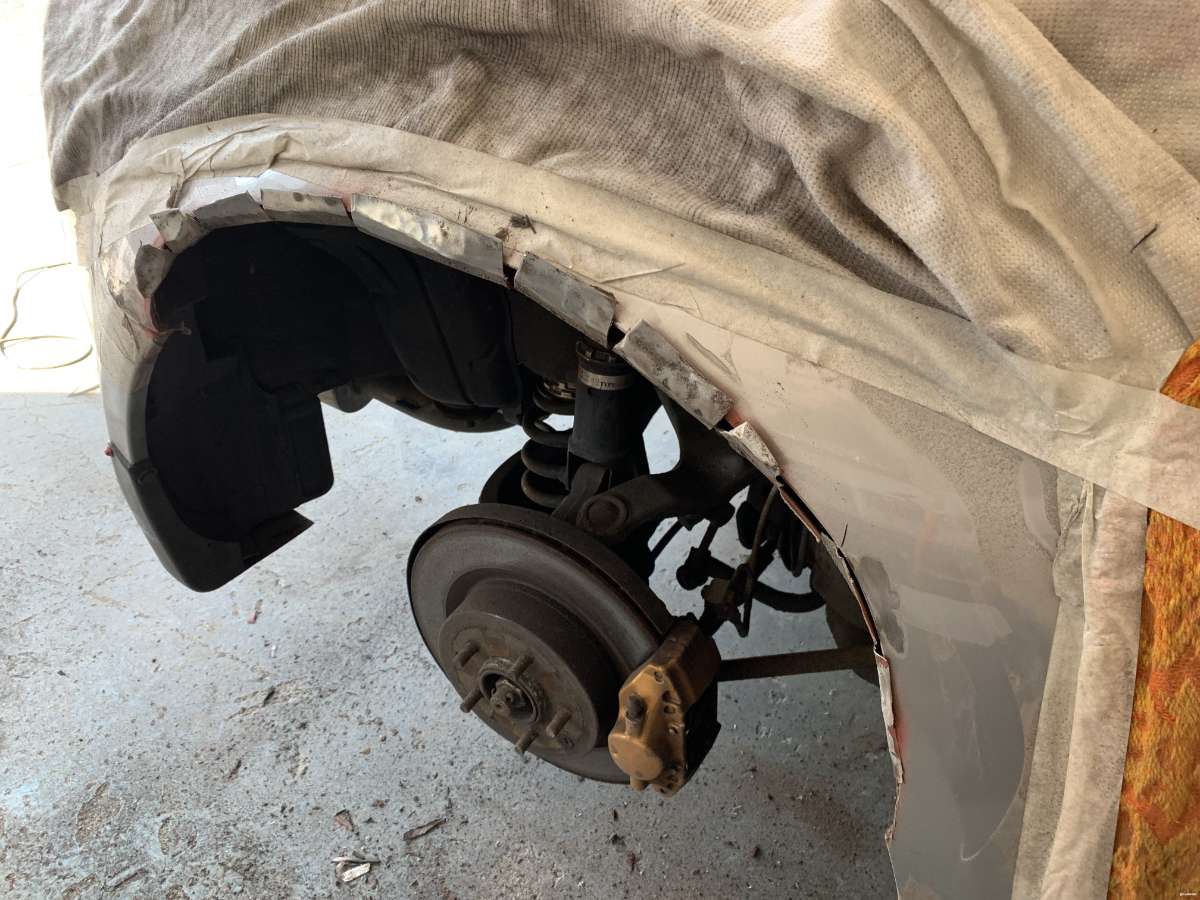
The red paint is weld through primer. Anywhere where rust or paint was removed was sprayed with a super thick coat of primer to keep the now bare metal from rusting again. We then went to watch Tarmac Sportz's video staring Bob, formerly of Zed Shed fame to see what to do next. Chris and Bob being the old mates that they are, Chris decided to could do it better! Since we don't need to keep the same smooth arch line, Chris realised he could do less "fingering" as he kept referring to it, and that would give an easier time when it came to filling the gaps. Less gaps, less issues. These fingers were cut into the inner skin, then persuaded to bend with some pipe grips and then further persuaded with varying sizes of hammers!
Until eventually they were flat enough that we were happy with them, this is part way...
And done. You can see in some places there was just no metal to work with, so Keyser had some more coffee whist he thought of the next attack plan.
Bob/Tarmac used rivets to hold the metal fingers to the outside of the body. Again, aesthetics aren't important here as this is all covered up. The name of the game here is just rigidity and then waterproofing. Keyser thought all that riveting sounded like too much manual labour, so he did what he does and whipped out a power tool, this time it was the welder. I wish I’d have gotten some more images of this, but I didn't want my eyeballs to melt out of my head or be seeing stars for a week from the arc flash. As you can see in the earlier photo, in some spots there’s just no metal to work with, but Keyser managed some very gentle edge welds and we got every single finger welded back to the car with no warping of the outer skin!
These welds were then angle ground down a touch and given two thick coats of weld through primer. More because it was the only primer that came to hand rather than needing its weld-through-ability. Side note, that rust hole where the bumper attaches went clean through to the inner arch
htt
I skipped a photo here, but Keyser then applied two coats of pre-mixed fibreglass paste to basically fill up all of the holes and cover up all of the welds.
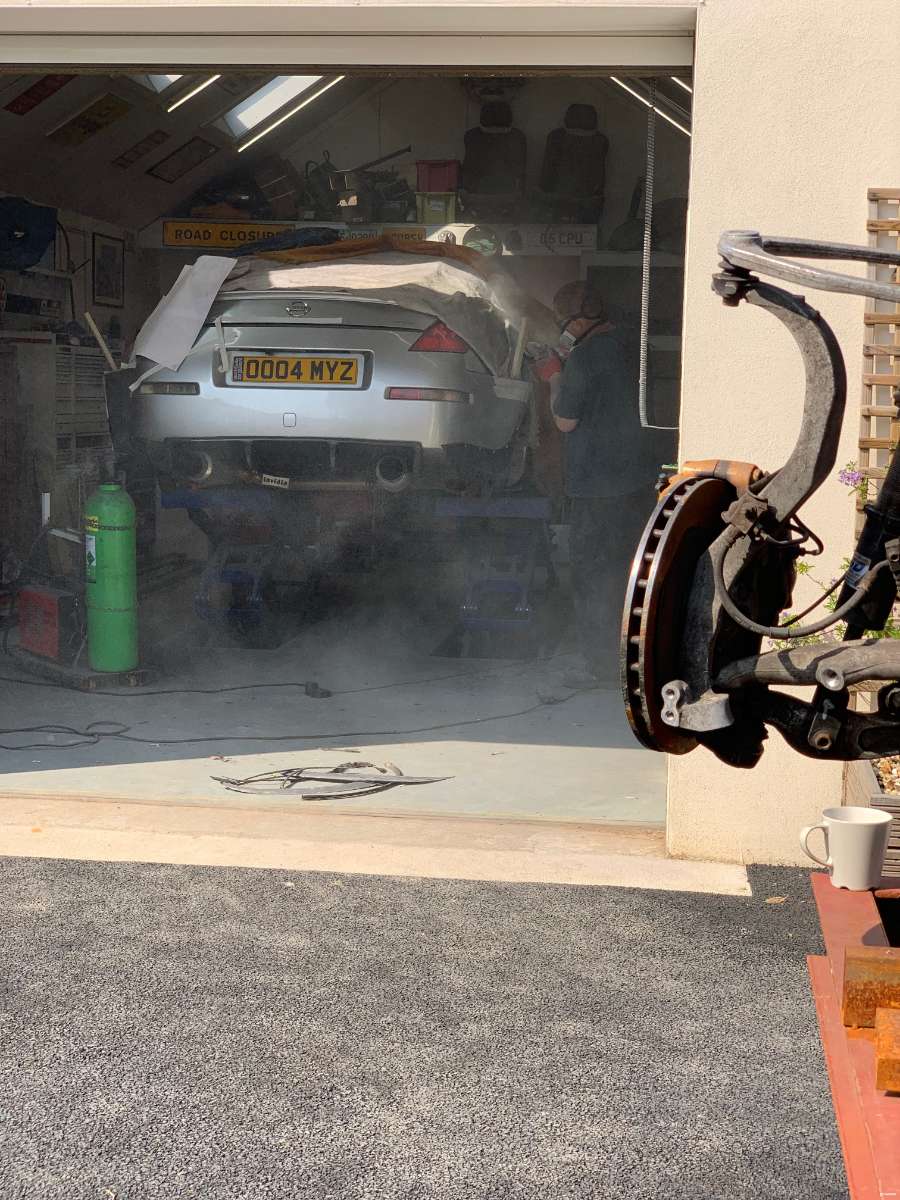
After this, I retreated for fear of contracting some horrific disease from fibreglass dust. But Keyser donned the dust proof mask and sanded it all back with the flap wheel on a second angle grinder (one of 6 angle grinders under his ownership I'm told!) Notice the 350z suspension on the side of the shot, that the suspension destined for his ford Pop build, for now at least!!
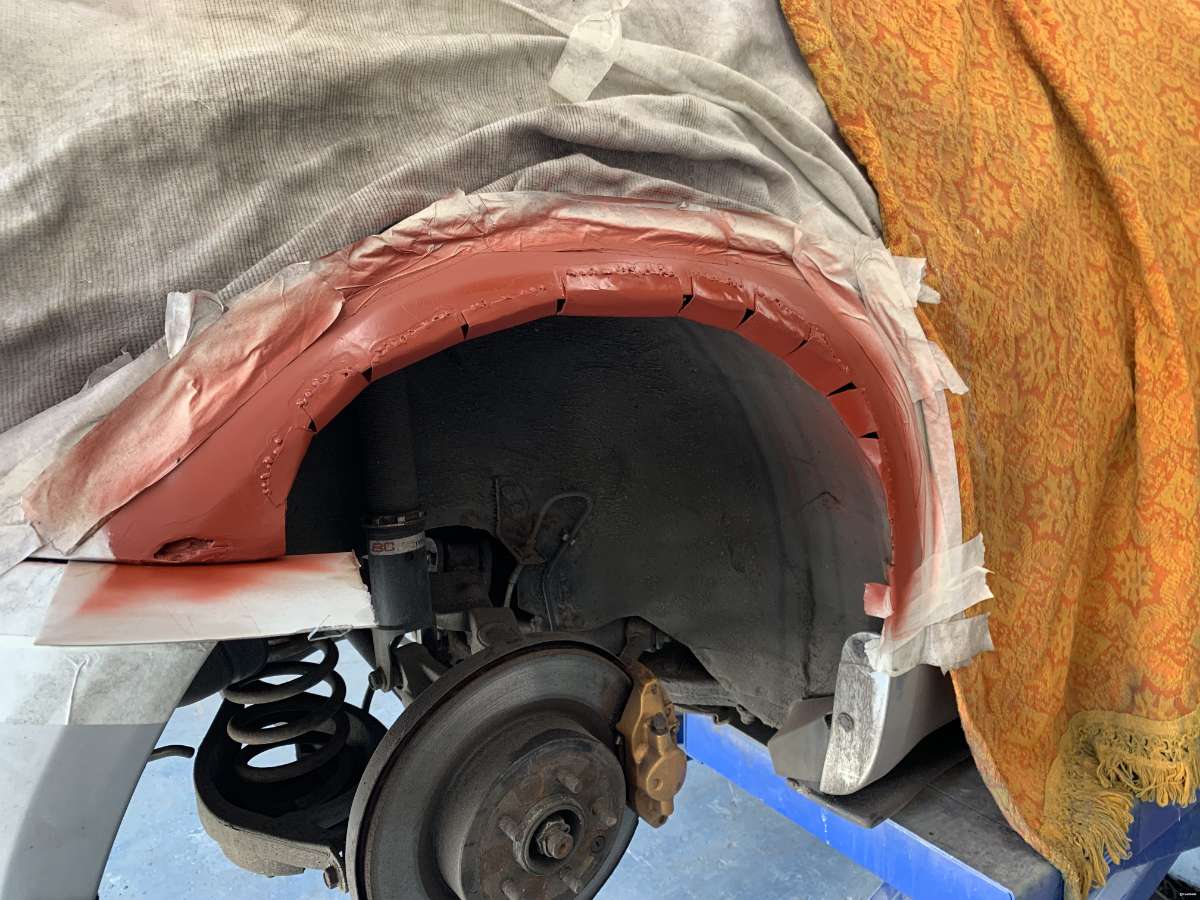
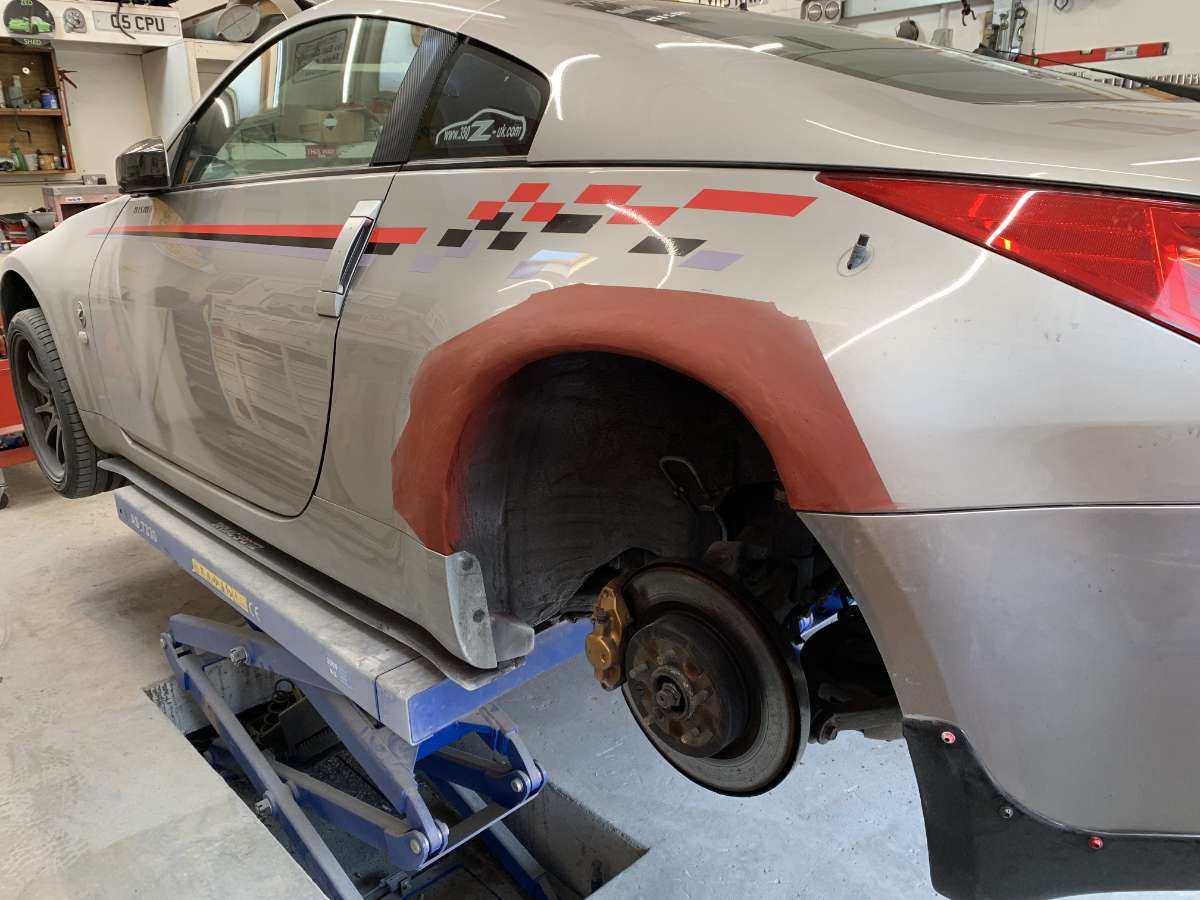
After much sanding, we had this, a nice, smooth and most importantly, waterproof again wheel arch
Yes, this is the other side of the car, but it matters not! We then sprayed over another two thick coats of primer to protect the fibreglass
And a shot of the new arches as they stood after day 1. We obviously did the same to both rear arches
After a very long and filthy day of work, we stopped for the day to allow everything to fully harden, knowing that fitting fibreglass body pieces is never really simple we didn't feel like starting this on day 1. Time for bed.
And you join us back on day 2! At this stage, we decided two pairs of hands weren't enough, so we asked Mrs Keyser to come and assist us ! After the new panel was placed against the car and we urmm's and ahh'd for a while, we decided we'd best start drilling some holes and see what happens. So, no turning back now. (like I could easily turn back from my primer red arches! haha)
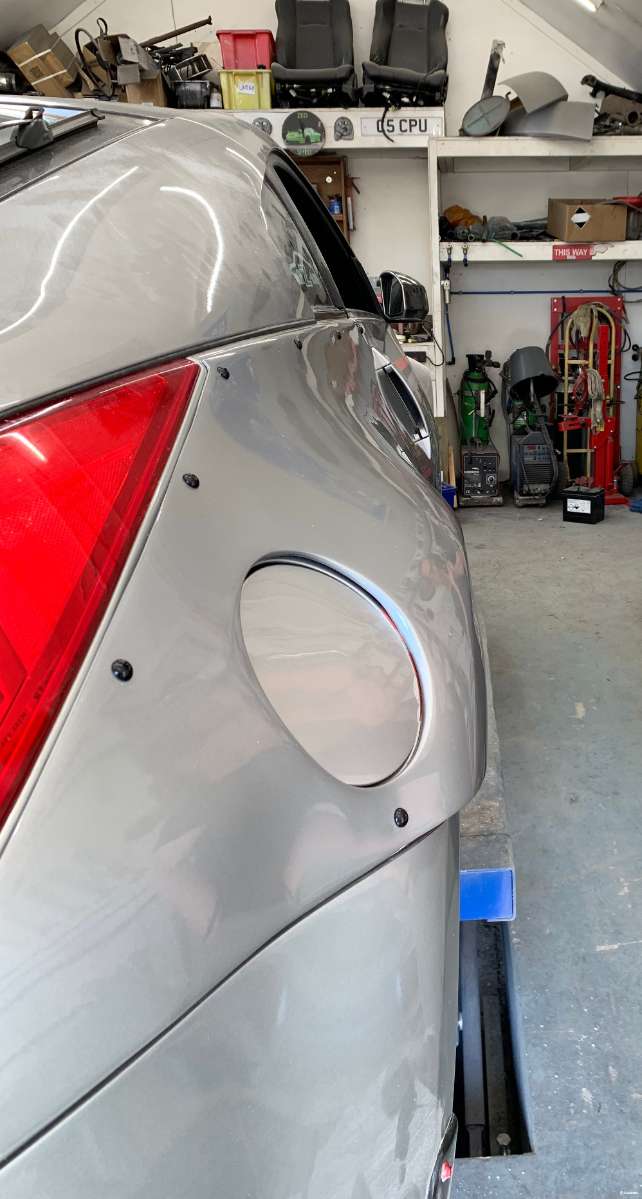
Many MANY more test fits of the panel, screwing in and then removing bolts one or two at a time, we finally had a good (and thanks to Mrs Keyser, an even) distribution of well nuts installed in the side panel. Don't mind the little nick on the filler cap, the flap wheel on the angle grinder bit it! Thats being fixed later.
And Boom! just like that, the panel was bolted down! In all reality, this was probably 60-90 mins of work. The filler cap hole could really do with a slight amount of over-sizing to make fitment easier. But I hear these panels are loved by the guys doing drifting where the finish isn't all that important. The love the fact they can get wider arches, and bolt them on and off again when they inevitably get smashed up! But we ended up with a really good fitment.
After a slight detour into the boot to remove the stubby (didn't want to cut a hole in fully painted panels, so it was a necessity) Mrs Keyser measured the well nut holes matched the other side, Keyser drilled them all out and I popped them into the body.
Side number 2 bolted in place pretty quickly due to the fact you don't have to work around the filler cap on this side.
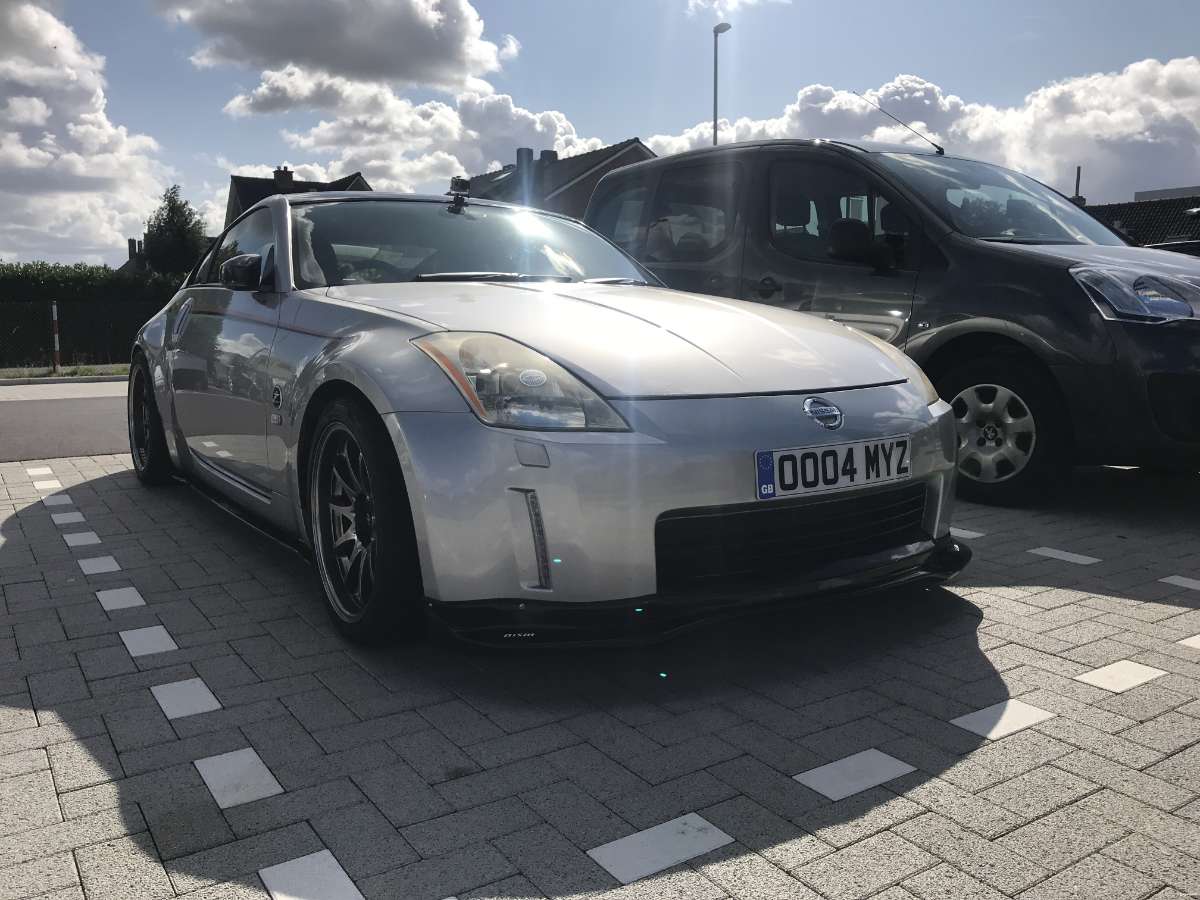
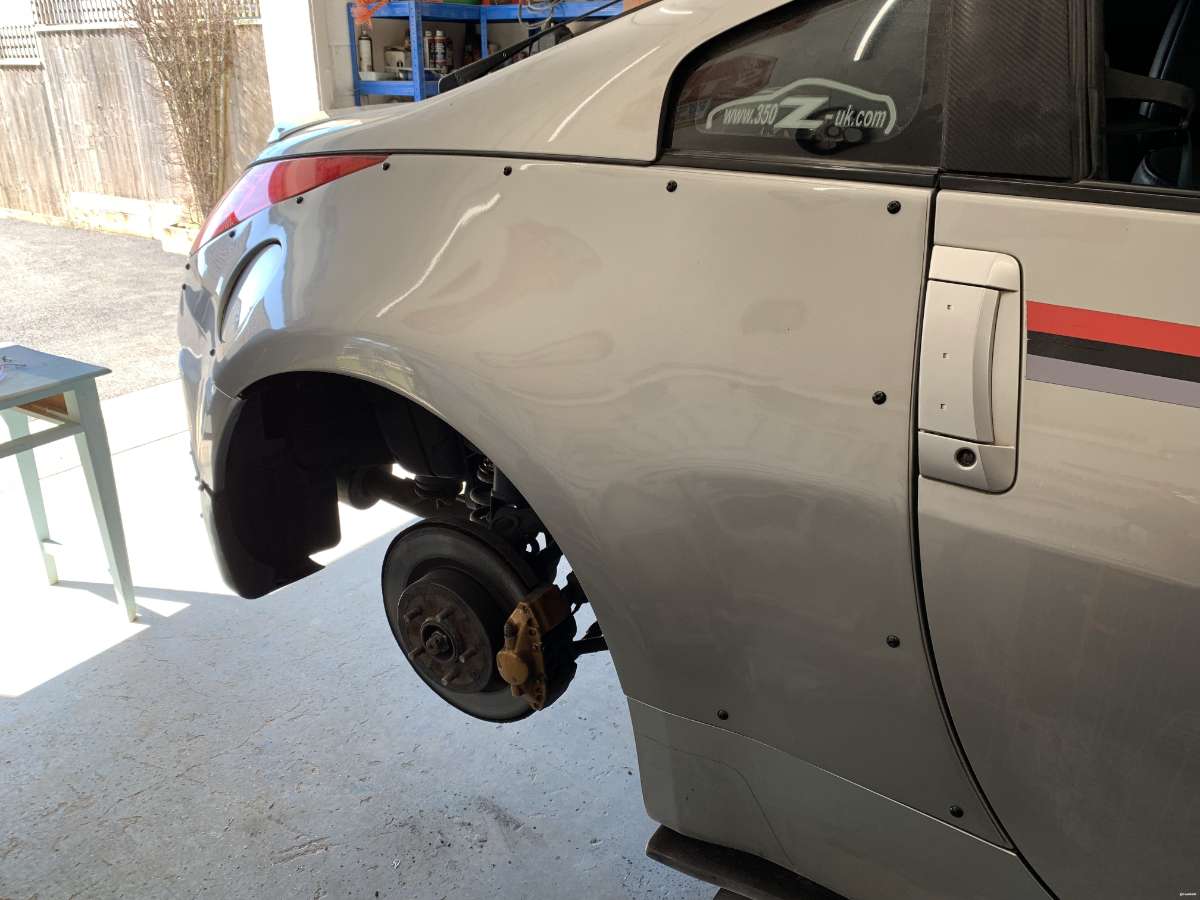
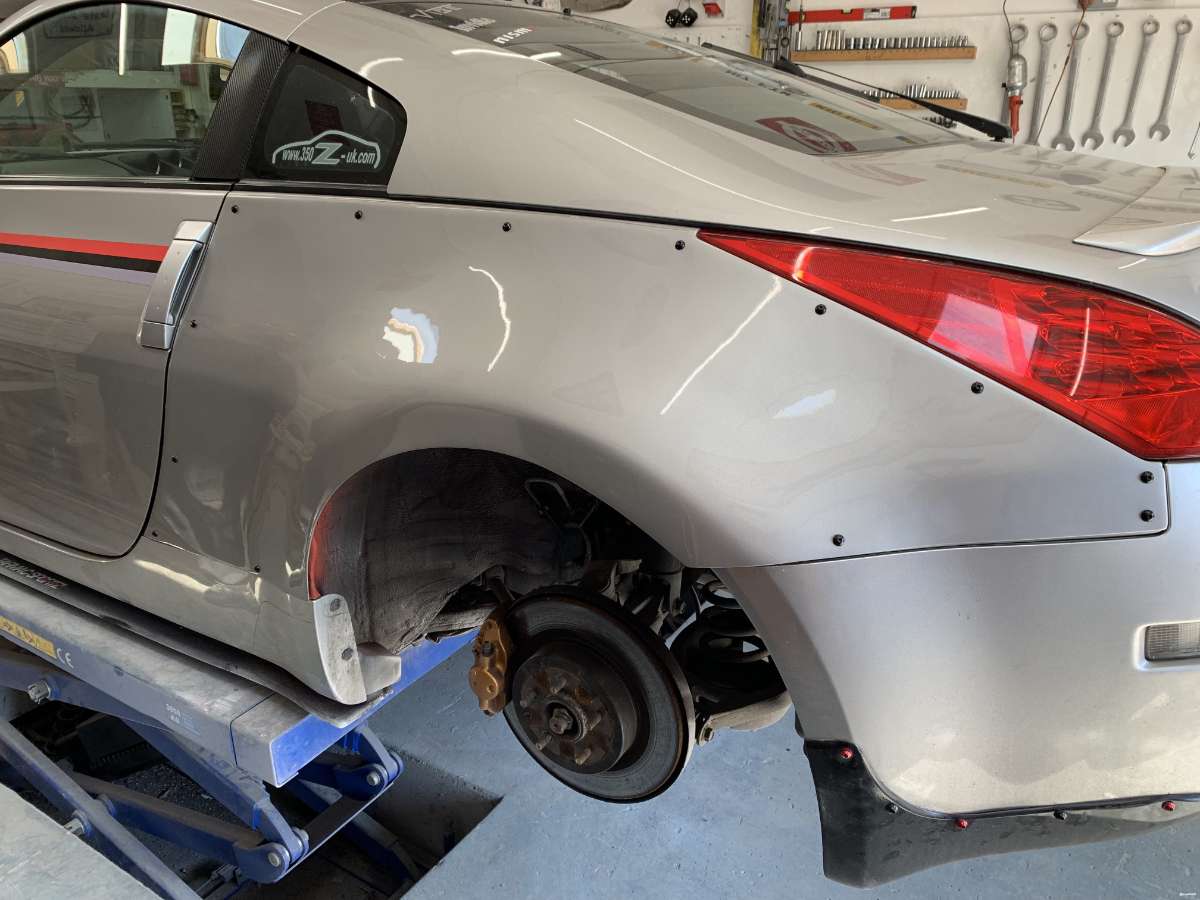
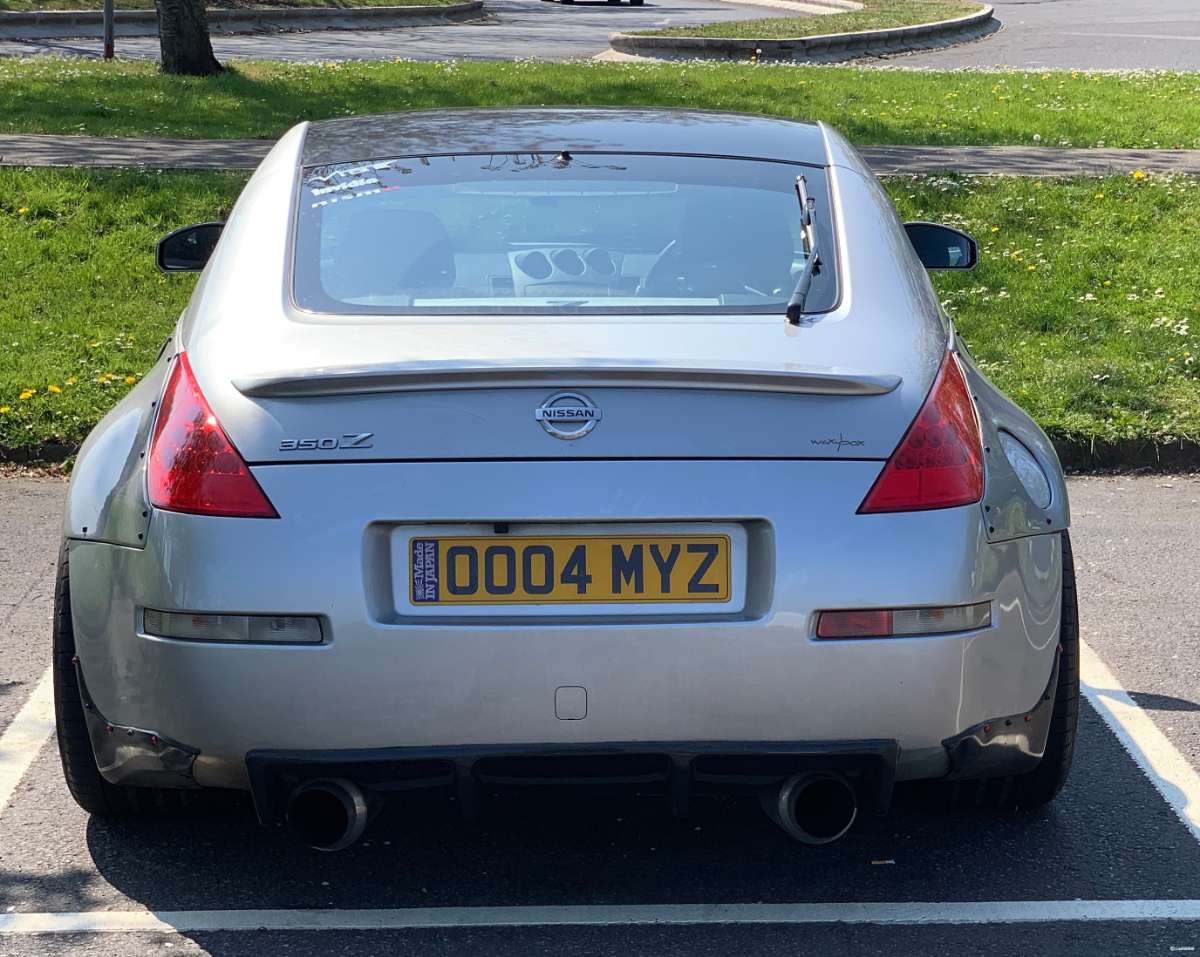
So that was job (almost) done, time for another side shot, clearly showing the 15mm extension at work. Note what i said earlier here around the filler cap. It could do with some further trimming to make it sit 100% flat, but we were loathed to do this as the pieces were fully painted before there were test fitted on a car.
I enthusiastically bolted on the new 15mm JR spacers, popped the wheel onto the studs and... they didn't fit! Turns out, with my wheel offset, the OEM wheel studs were fouling the back face of the wheel. Rather that cut down the OEM studs, we decided to enlarge the secondary holes on the JR wheels (they're multi-fitment wheels) to allow the OEM studs to fit into the unused holes. This was done in a matter of minutes, but was a perfectly successful fit no casualties!
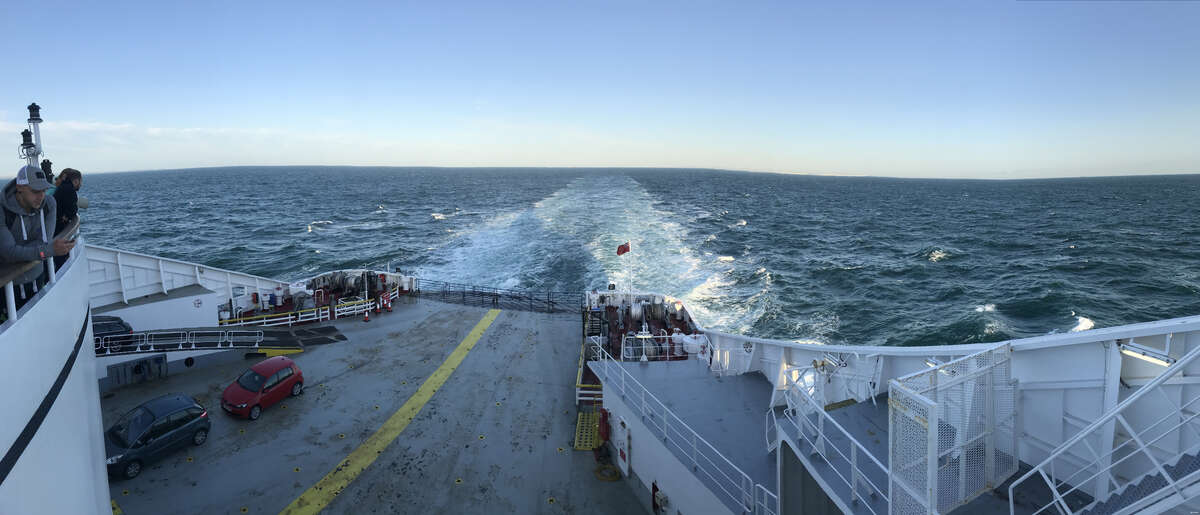
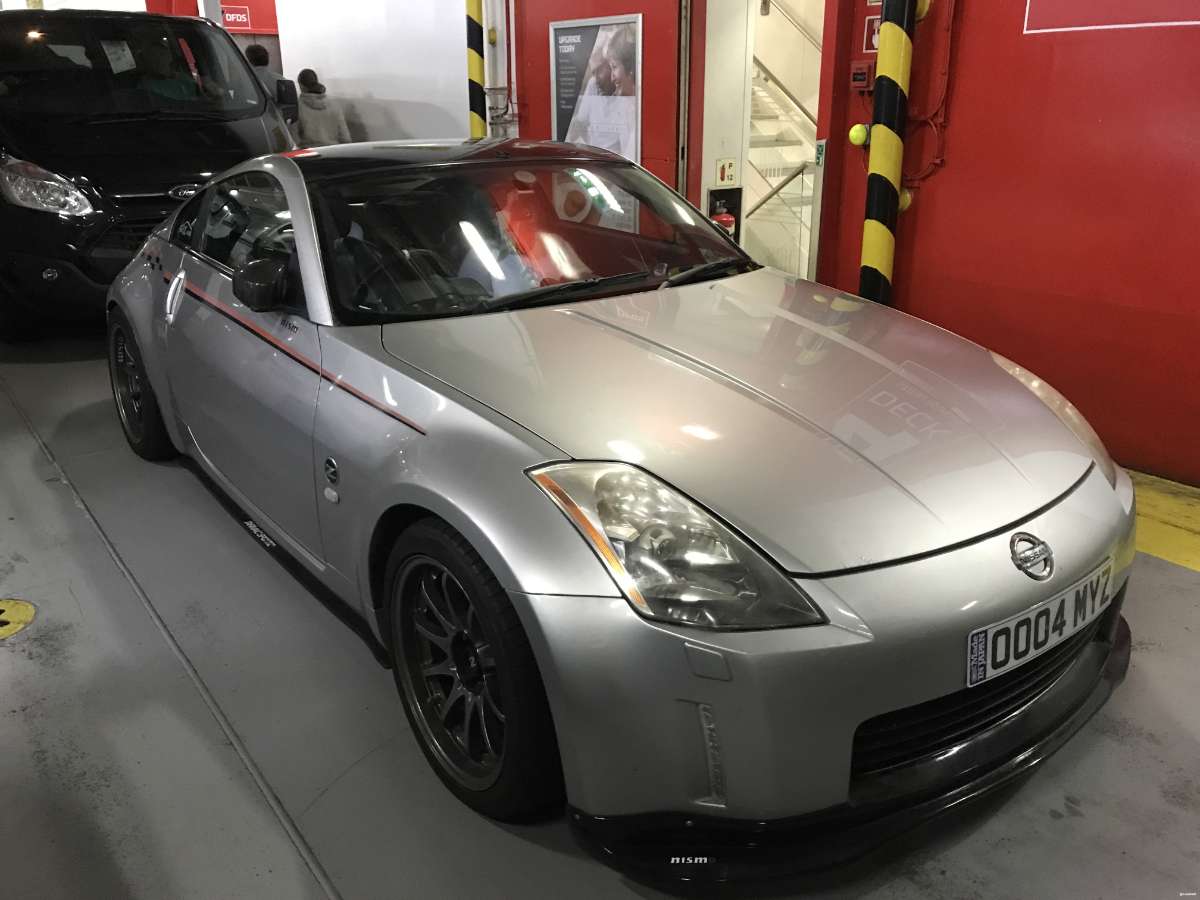
And with that, she was rolled out of the Shed, very quickly jet washed as the car had literally turned white with fibreglass dust!
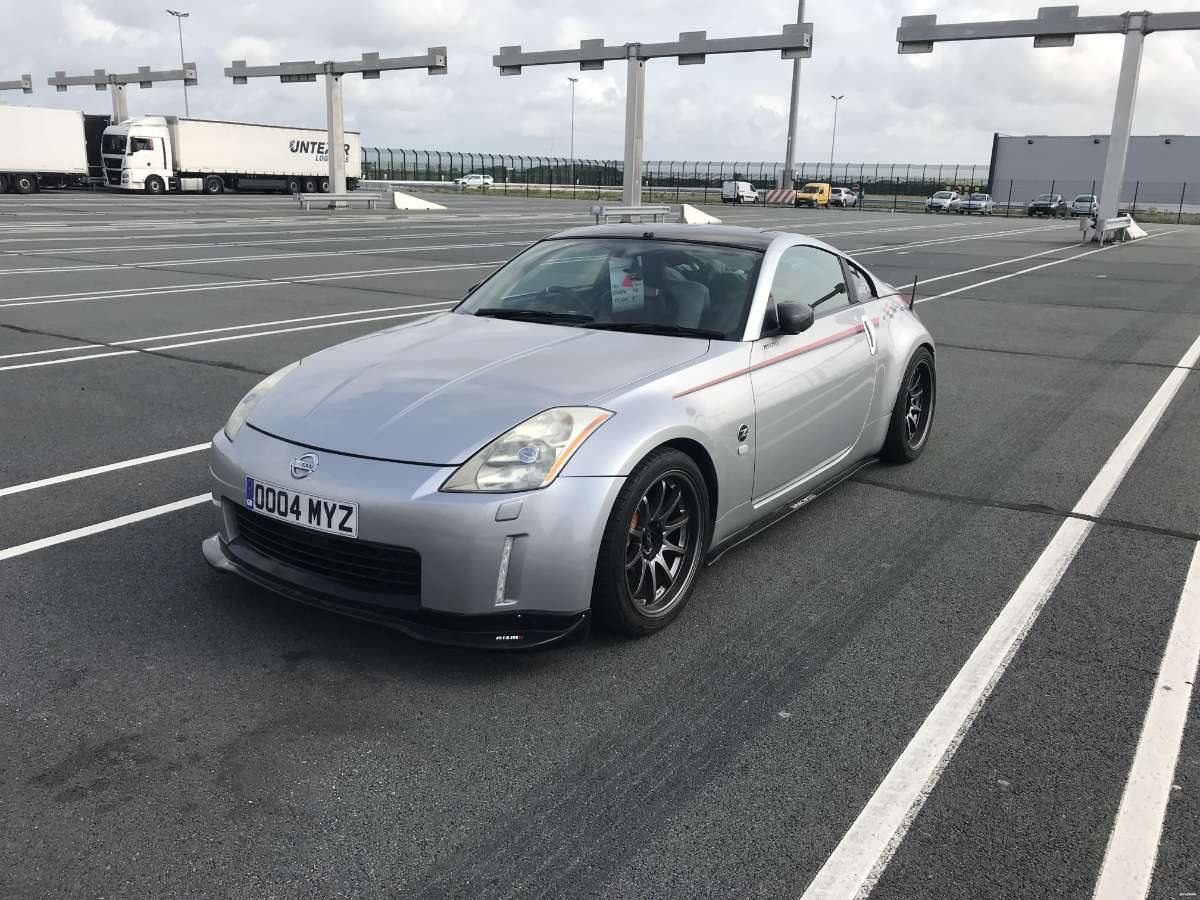
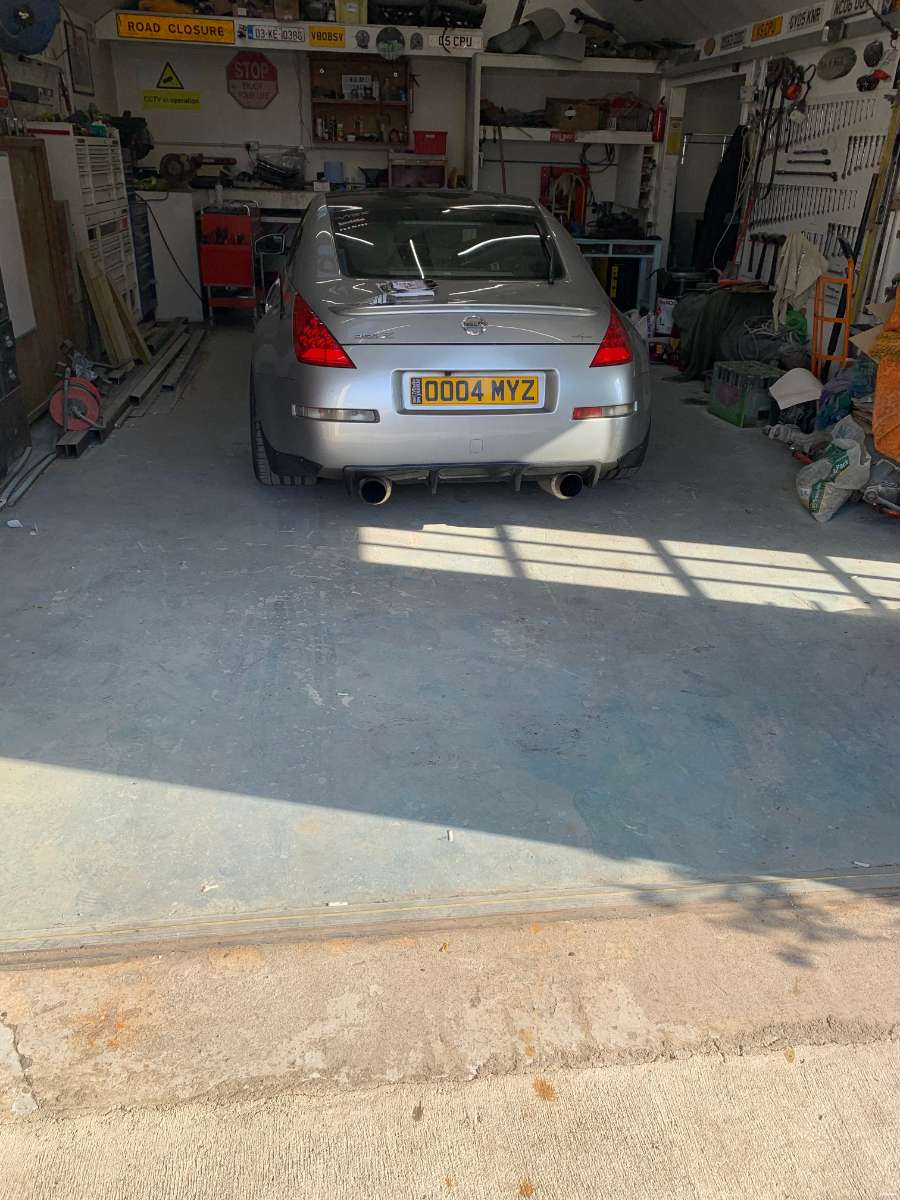
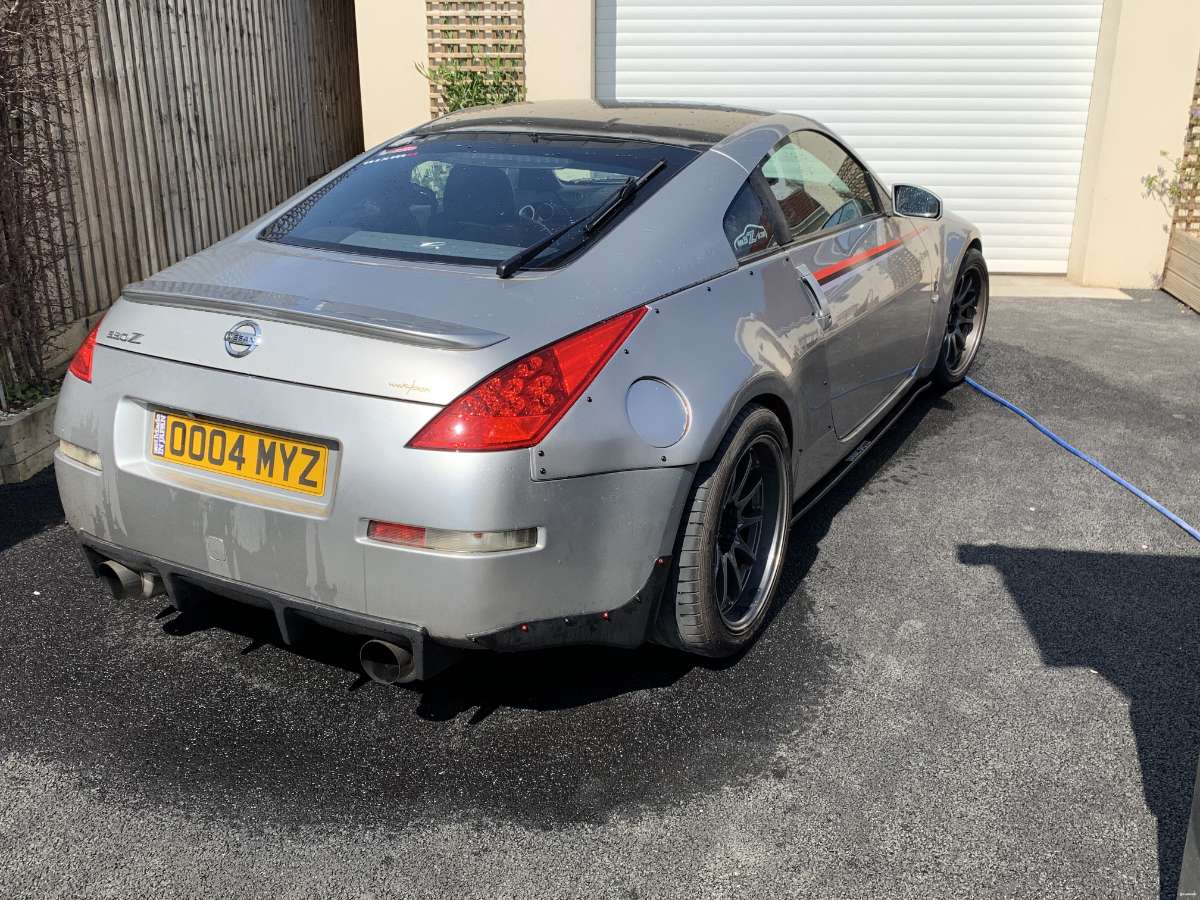
After a little coffee break and a chat, I began the long drive home. But couldn't resist an ass shot in a service station on the way back!
I also have had to order yet another set of Nismo side stripes since my 4-5-week-old stripes are now covered by the new wings!
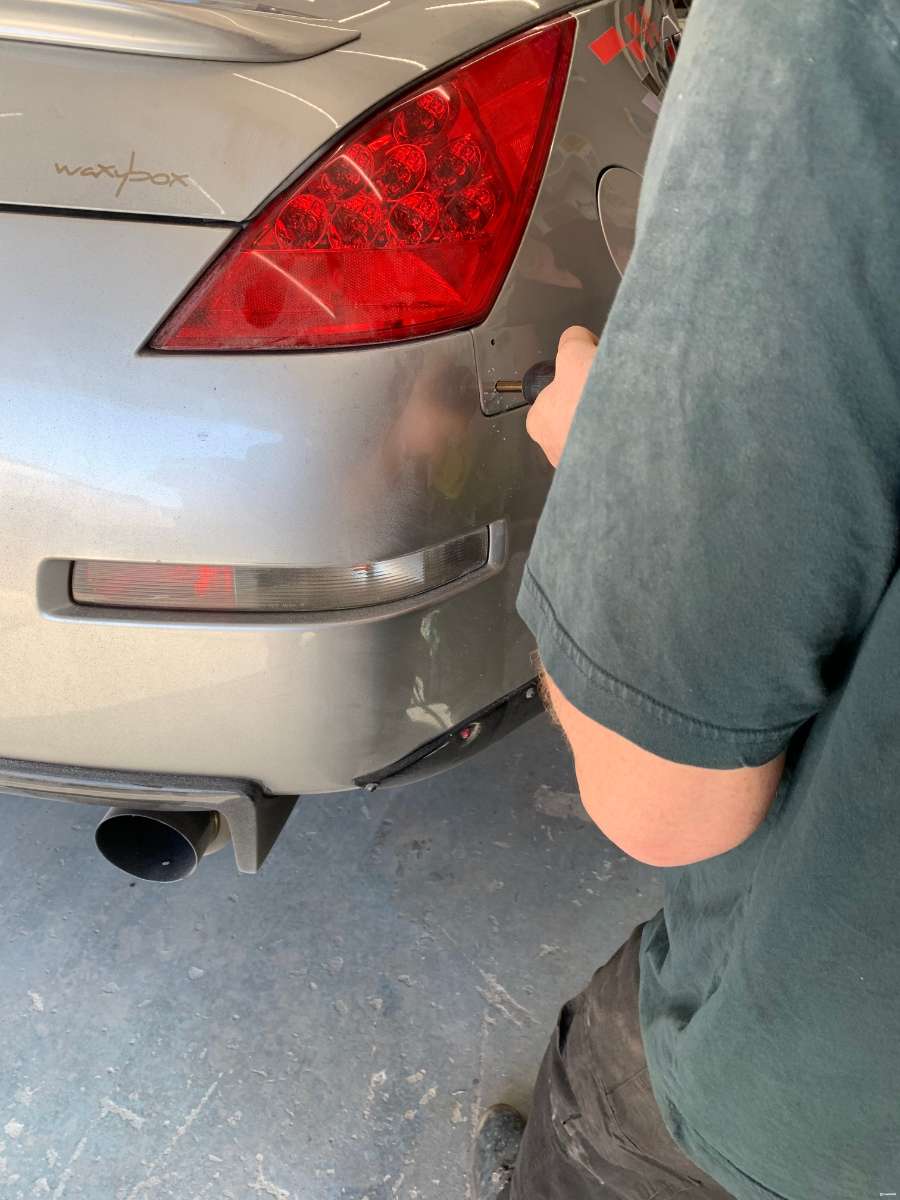
As for what's next? Under suggestion from Keyser, I ordered some truck bed liner to spray inside of the wheel arches to both make them black again, but also to restore the semi protective rubbery coating that's in the wheel arches from factory. To do this I needed to unbolt the new panels which was nice and easy and spray it in
But Pro-Tip. Don’t do this on a windy day! I ended up with a rubbery black over spray literally all over the doors, boot and bumper, even though I had masked up, the wind whipped up the particles and dumped them everywhere, which I found 3 days after id sprayed!!!
So, how do you remove paint that’s cured on top of existing paint without removing the existing paint…. meguiars shampoo and a good scrub? Fail. “Sticky Stuff Remover”? Fail. Allow wheel cleaner spray? Fail. So, I had to consult the internet, as my next thought was carb cleaner. It would have 100% gotten it off in seconds, but I know that’s basically paint thinner, soooo perhaps a little too aggressive! What ended up working was a microfibre and a can of petrol originally destined for the lawn mower. Soak a spot on the cloth, rub it in and with some elbow grease the black spray started to lift. The solvents in the fuel lasted for about 5-10 seconds, even though the cloth was still wet with fuel, so I kept adding more and eventually removed the mess.
To clean-up any fuel or oily residue still on the paint, the areas were sprayed with a wax and grease remover, then cleaned off, then sprayed with wheel cleaner and cleaned off and finally some meguiars shampoo and washed as normal. Yes, my wax coat is now shot, but since the day before Japfest the car is being DA compounded, polished and waxed, I would already be destroying my wax coat anyway, so I’m not bothered.
Just want to say a massive thanks to @Keyser as he worked his ass off. Taking both a weekend out of his personal time, and working on the hottest two days we have had so far this year. I’m sure he would rather have been on the beach or something. Mrs Keyser kept us supplied with drinks and measurement/levelling advice too and @Tarmac@TarmacSportz for getting the parts out quickly and the moulds being relatively good.
I know my car is "nothing special" compared to some of the stunners on this forum. But I love her! and having an amazing community like this around these cars, chock full of brilliant product supplier and genuinely nice people makes this club the best one I’ve ever been in by miles.
I hope some people at Japfest notice this subtle but very work intensive mod. It was actually done 2 weeks before the show, but has been kept under wraps because.....well I don't know, I wanted it to be ! haha. Feel free to come and say hi if you see me around the car
Anyway, until next time !
Oh and @Keyser. Maximum effort