

Voodoo Vix
-
Posts
769 -
Joined
-
Last visited
Content Type
Profiles
Forums
Events
Gallery
Store
Everything posted by Voodoo Vix
-
Has anyone fitted one of these with an OEM front bumper, the bodyshop are having issues fitting it as the bracket is sticking out through the grill.
-
Welcome
-
Welcome
-
Welcome
-
Welcome
-
If its bad they put large boards on the grass so cars don't slide when driving to their stands, which they did last year as it rained all week, although on the day we only had a shower in the morning and the sun came out
-
JapFest 2014 - who else is off today to detail/clean their Zed?
Voodoo Vix replied to The Bounty Bar Kid's topic in Meets
Looks great Dip Supra was done last night and no doubt re-done when we get there tomorrow morning, being on Meguiars stand she needs to be clean lol -
New to the forum, not so new to the Zed scene..
Voodoo Vix replied to G-girl.'s topic in Introductions & Welcome Messages
Welcome -
If anything they damage the seatbelts as the extra weight affects the retraction of them which will eventually cause an MOT fail lol
-
Welcome
-
Welcome, I used to live in Bexleyheath, but now in Strood
-
New to Z forum and a new owner
Voodoo Vix replied to J4YPS's topic in Introductions & Welcome Messages
Were you driving in the Lordswood/Walderslade area at about 8:45 on Wednesday, if so "Hi" I was in the black zed coming up to the mini roundabout, only saw you at the last minute lol -
Try Sly at Kaizer Motor Company in Kent his details are on the forum, lots of us use him and would highly recommend
-
Look great
-
They are going to be hard to keep on top of but as I don't drive daily I'm hoping they won't get too bad, I've also kept my other Rays for the winter! Chroming would probably cost a lot of money to get them done properly. The bolts I had re-chromed but they weren't cut back to bare metal so were cheapish to do, as to have them cut back, cleaned, prepped and chromed properly was about £6 plus VAT per bolt and nut and with 80 of them I was looking at a lot of money, so to do the wheels would probably cost almost as much as they're worth lol They can be anodised but they tend to look dull from the ones I've seen, but will be having a look at alternatives at keeping them polished, it's handy having a boyfriend in the business to help me out lol
-
Thanks guys, it was hard work but well worth it, so pleased with the results, dropping her off at the bodyshop today Lol yep 80 in total
-
New potential future zed addict
Voodoo Vix replied to zeek's topic in Introductions & Welcome Messages
Welcome -
Thanks guys, and well done for reading it, I assumed people would just look at the pics, hope it wasn't too rambling lol
-
Looks great BBK
-
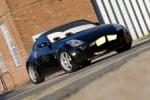
Wheels I had every intention of doing this the "sandpaper route" but as I had a birthday coming up I asked Mike for a metal polishing kit (as I could then re-do the wheels as needed together with the plenum, throttle body, air intake and strut brace, which are already polished, as needed), which he thought was hilarious as he never thought he would buy something like that for anyone, particularly his girlfriend lol But, I am pleased (and relieved), to say he did get me one which consisted of: [Pasted from the Polishing Shop web page] Instructions Rigger Gloves FFP1 Dust Mask- Better quality dust mask. Vienna Lime Powder- Cleaning 1 off Standard Taper for 4" Mops 1 off Long taper 2" and smaller mops 4 off felt cones 1/4"x1/2"(6mm x 12mm) 4 off felt cones 3/8"x1/2"(10mm x 12mm) 4 off felt cones 1/2"x1" (12mm x 25mm) (felt can be used for abrasive and polishing work, ideal for very awkward areas) For Polishing: 1 off 4"x1" G loose mop (100mm x 25mm) 1 off 2"x1" G loose mop (50mm x 25mm) 1 off 1 1/2"x1" G Loose mop (38mm x 25mm) 1 off 1"x1" G Loose Mop (25mm x 25mm) 1 off 4"x1" 2 section white mop close stitch (100mm x 25mm) 1 off 2"x1" white mop (50mm x 25mm) 1 off 1 1/2"x1" white mop (38mm x 25mm) 1 off 1"x1" white mop (25mm x 25mm) 1 off 4"x1" 2 section sisal mop (100mm x 25mm) 1 off 2"x1" sisal mop (50mm x 25mm) 1 off 11/2"x1" sisal mop (38mm x 25mm) 1"x1" sisal mop (25mm x 25mm) 600 Gram Bar P164 Menzerna Polishing Compound General finishing compound 600 Gram Bar 439T Menzerna Polishing Compound Medium cutting & colouring compound 600 Gram Bar 523LBZ Menzerna Polishing Compound Grey heavy cutting compound For Abrasive Work: 1 off 4"x1" section colour mops (100mm x 25mm) 1 off 2"x1" Colour mop (50mm x 25mm) 1 off 1 1/2"x1" Colour mops (38mm x 25mm) 1 off 1"x1" Colour mop (25mm x 25mm) 1 off 450gram 300grit abrasive compound Those of you who read the "shopping list" above will note the "scrap of carpet", this was purely to protect the wheels when they were laid down so they weren't scratched up on the floor when being worked on/moved around. As the wheels had been acid dipped all the surface corrosion had been removed but this left really bad pitting. Unfortunately for us that meant that they took a LOT of sanding! Mike had taken them to work and started with 80 grit on them to cut them back and then work his way up through the grit grades He also used 240, 300, 500 grits. This was then sprayed with primer. As the lips were to be polished, we went for a flat silver, which was then sprayed and lacquered. Then it was my turn. As I was starting of on a clean-ish surface (a surface with the equivalent of around 500 grit), I could jump to the first stage of polishing (rather than using the cutting compound), which is the white sisal mop and grey compound (which still has a little cut). Next I used the white stitched mop with the green compound Stay with me, we are nearly there! For the final polish I used the loose cotton mop with the blue compound. Up close the finish isn't perfect (and is still pitted) but in time I will take them to be machine polished where the pits can be taken back. The wheels were then given a couple of coats of Poorboys Wheel Sealant and the rim screws were torqued to 25nm using threadlock. I then took the wheels to see Sly who fitted the tyres and did the alignment (a great job as usual, thanks Sly!!) Here is a sneaky peak, as she is going to Xquisite Automotive for some TLC tomorrow, and will have their work in progress pics before her final reveal
-
I'm a complete novice when it comes to polishing/painting but get massive satisfaction from doing things myself rather than just paying someone else to do it (not that there's anything wrong with that and I have had some help below). I've learned a lot from doing this and although it was hard work I don't regret a minute of it and hope it will be of some use to other's on here, even if it's just for upkeep purposes than from scratch. So here's a list of stuff of what I used: Various grades of steel wool Toothbrush Autosol Coke Vinegar Numerous microfibre cloths Paint stripper (I attempted to use Nitro Mors) Scrap of carpet Mains powered drill Polishing Kit (here http://www.thepolish...shing_Kits.html, the New Combi-Light 37pc kit) - If you don't have a polishing kit you can use various grades of sandpaper but for the price, I really would recommend the kit! Poorboys Wheel Sealant Thread lock This does not include the paint and materials which Mike used at work, this list was purely for my preparation, polishing and finishing. Here are the wheels which I started off with: 19x8.5 and 19x10.5 Volks GT-C's which had previously been powder coated black. Thankfully they had no tyres which meant they were lighter to move around (although not much!) but it did mean that I needed to be extra careful with the exposed rims. Preparation Stripping the powder coat off the wheels was never going to be an easy task but I had read that paint stripper would work, thankfully instead of wasting money Mike had some in his garage so I gave it a go with some Nitro Mors, a paintbrush, a scraper, some elbow grease and an awful lot of patience (of which generally I am quite short of). Well it may work for paint, but not for powder coat, after an hour, this was as far as I got! I therefore gave up on the paint stripper idea and decided to get them acid dipped (we did try sandblasting but it didn't work very well on the powdercoat). I contacted Wicked Wheels in Guildford and spoke to Kevin who was extremely helpful and arranged to take the wheels down to him (with rim screws removed) so that they could be dipped which was a much quicker process (and cheaper considering the amount of paint stripper I would have had to use). The following week Mike went and collected them and was greeted with these Now the powder coat is finally gone I can inspect the wheels to make sure that it hasn't caused any cracks/fracturing due to the temperatures they have to be baked at. Thankfully, they are all clear of any damage (other than pitting after all the surface corrosion was removed), so I was free to carry on with the next steps. Polishing Rim Screws Before polishing the rims, I decided to clean up the rims screws, as I couldn't get replacements; Rays only supply them if they are the ones refurbishing the wheels. I had read somewhere that the phosphoric acid in coca cola and malt vinegar were good cleaners and helped with surface rust so I thought "what the hell, I've got nothing to lose" (other than £2 on a bottle of coke and 80p for vinegar lol). So I put the first 20 from this wheel Into some coke for 24 hours (anymore and apparently it can pit the metal) \ and then sat down in the garage with various grades of steel wool, a wire brush, toothbrushes, Autosol and soft cloth and this was the result Saying I was pleased is an understatement, but I still had 77 to go! Unfortunately as you will see from the work on the wheels below I quickly ran out of time for getting the bolts done so took them to a plating company, to get the re-chromed. They are vastly improved, but not perfect, in time I will get them completely stripped back and redone. Here is the finished result
-
Welcome
-
Love the colour
-
Welcome
-
Collect Z tomorrow, can't sleep
Voodoo Vix replied to NismoMan's topic in Introductions & Welcome Messages
Welcome
