Husky
-
Posts
14,070 -
Joined
-
Last visited
Content Type
Profiles
Forums
Events
Gallery
Store
Everything posted by Husky
-
bored at 2am by any chance stew?
-
freebees to let you sample. His cunning marketing plan to lure in a new customer base. nothings free
-
remember this is vista the wont need a service pack one.....
-
sorry for ignorance as i should probably know this but, transport wax?
-
no more fish gills then? looks lovely and subtle (for a carbon peice ayway)
-
-
cant see at work but saw the title. eek!
-
yes master shire. engine bay clean we will
-
im going to use it and i cant be bothered having to find it again. thought others would benefit too hey you cant criticise with the random stuff you post up when your bored at work
-
3.5L V6 drill = OMFG
-
bose is nothing special, took some readings at work of other bose systems in audi's etc and it returned a poor result for sound reproduction compared to other brands, found to have a very limited bass capability. one bass fits all kind of thing (a big spike in the graph). wish id got the zed done now
-
can i have one
-
brilliant idea,
-
pmsl stop being a sissy, you could get a free bumper or two out of it
-
yeah i was undecided about that but wanted to add something to the pic, ill throw it up without it tonight and you can decide then
-
im being picky but now im not on the laptop and have a bigger screen and in daylight i think its a tad yellow
-
exactly its the sun reflections or flash that can be annoying so best not to have them and then you can put your own in anyone got a green screen handy
-
oh tempting me now. i may even be tempted to go as far as finding the backdrop first then taking a pic of the car with the right lighting and and easy to erase backdrop
-
oh i like that one mate im tempted to actually do some on my own car at some point if only there were somewhere to get a good pic in coventry
-
some tips put contributed in postings after. (Hot water no thanks, i dont reccomend this, it is someone elses writing) Wasn't sure if i could add some more suggestions here. I personally use halfords spray paint cans and they come with a "O" shaped spray pattern, Now there is nothing wrong with this but I spent a little more money on another can of paint from a more expensive source which gives a "|" spray pattern. This lays down a more fine spray and gives a much better coverage and seems to be less prone to orange peel effect. You can removed the nozzle from the can and apply it to any other can, this allows you to get away with possibly using a cheaper paint. But a general rule of thumb is don't scrimp on the paint, buy quality rather then cheap. OK This next tip Can potentially be dangerous as using any other method of warming a can of paint is not "normally" reccommended. Ok basically on most cans it will say "shake for x minutes" mine say shake for FIFTEEN minutes!!! So what I do is I shake the cans for a minute and then place them into a bowl of HOT water. NOT BOILING as you need to be able to place you hands in the water. The hot water warms the can and the paint imroving the spray quality. Once I have left them in the water for 10-15 minutes, which gives plenty of time for surface prep and work area prep, I take them out and shake them for a furthur minute or two. Make sure that the can is dry and spray onto some nearby paper or card before you begin spraying your masterpiece. Ok one final tip before I go. When you are sanding an area it can sometimes be difficult to tell if you have got all the scratch and pits out to give a smooth surface. So heres what you do. Once you have sprayed your final layer of primer and before it dries give it a light dusting of the final top coat so as to discolor the area you are painting. This should almost immediately show you where any missed dents, high spots or scratches are. Once the paint is dry you can then start to sand down again with a high grit sand paper and you will be able to clearly see the areas that are problematic or need "special" attention. Once this is done if you need to you can re-apply a primer coat and then prep and spray your top coat when you are ready. And remember people Black is probably one of the worst colours for showing paintwork damage or irregularities I hope this helps some people with spraying.
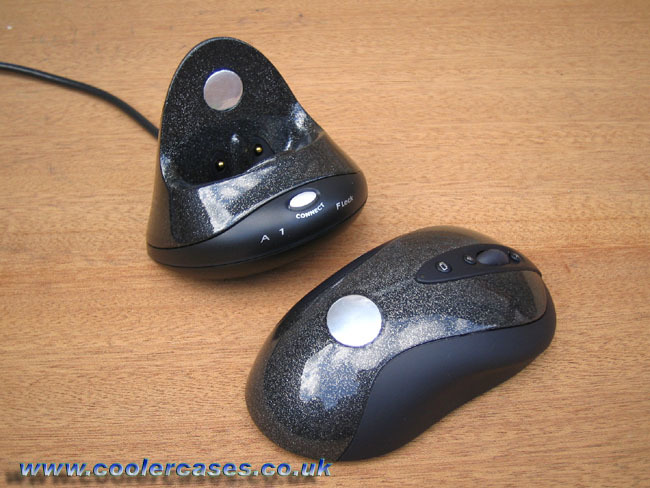
-
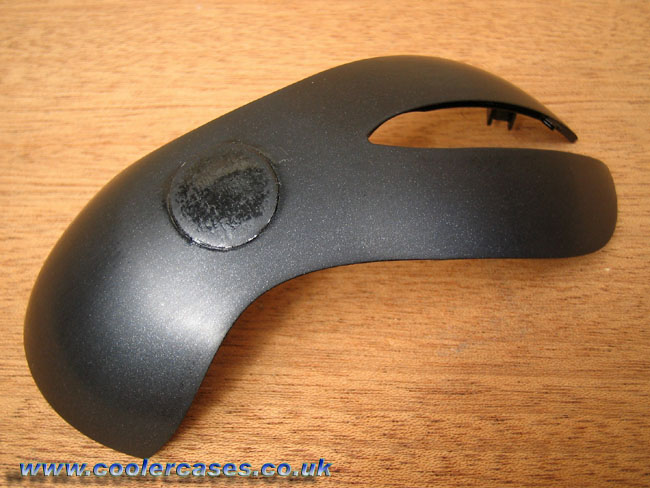
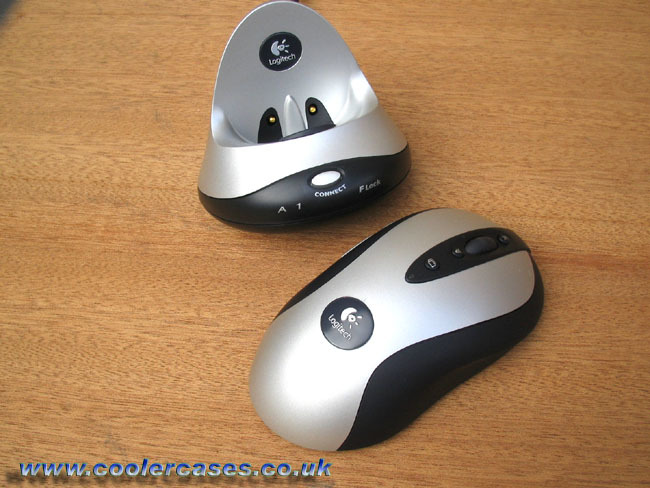
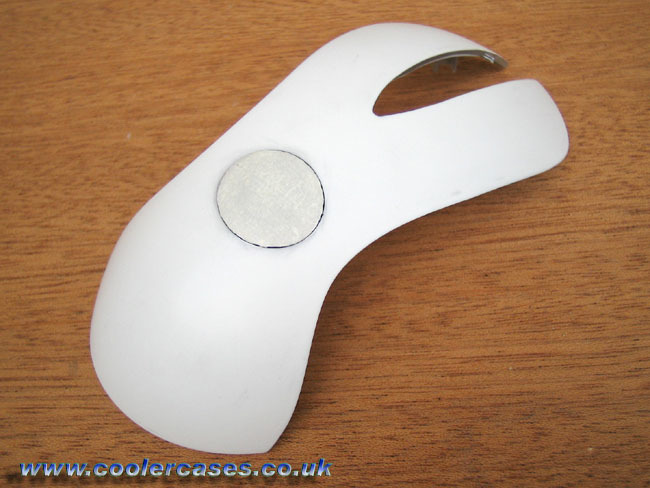
You will see the orange peel effect disappear and the paint will become totally smooth with a very fine haze caused from the wet n dry paper which can then be buffed away using something like T Cut Paint Restorer followed a week to two later once the paint has totally cured by a premium car polish or wax such as Turtlewax Alternatively, once you have sanded down the orange peel effect on the final coat of paint you can go straight onto applying a couple of coats of clear lacquer for added protection which I've done in this case as a mouse tends to get some heavy handling which will also need sanding down followed by T Cut and wax as above. As you can see I've used a Glitter Lacquer, which is basically normal lacquer with glitter flake for that extra bling effect followed by a couple more coats of just clear lacquer Anyway, it's a lengthy process and can be quite costly once you have bought all the bits and pieces but you have to agree the end result is well worth it no matter how small the job. Finally, here is the completed mouse and charger unit all back together.

-
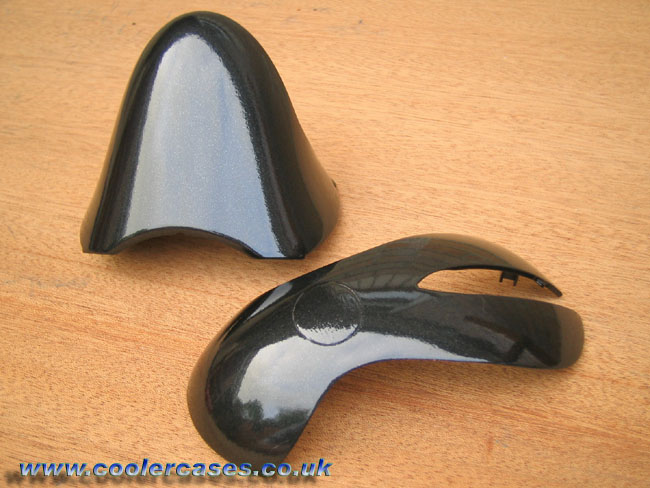
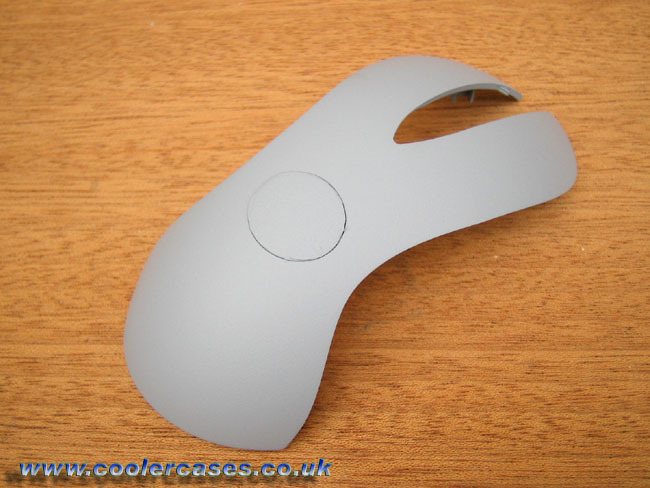
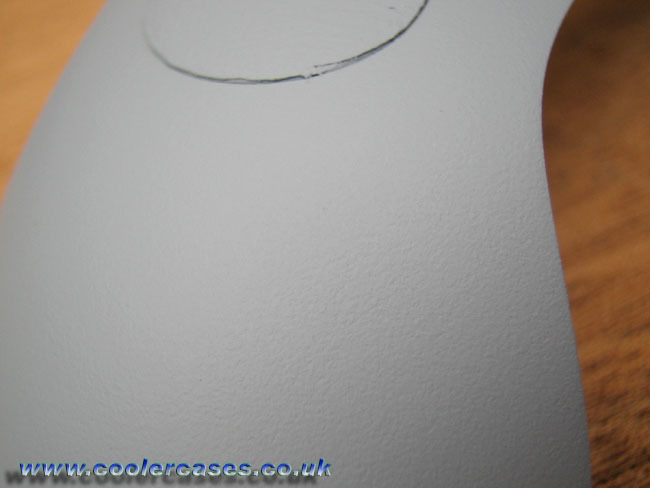
Allow the primer 24 hours to dry then you may want to very gently rub down again with your bucket of soapy water and the finest wet n dry you can get your hands on 1500 - 2000 grit. This isn't entirely necessary on small pieces such as this but on larger things like case side panels etc. I would recommend it. Anyway, your now ready for the first coat of paint which is arguable the most important. Again, it needs to be a very fine waft applied in the same method as the first coat of primer. Its so tempting at this point to just blast away with the spray can and drown the piece but be strong and resist the temptation as you will inevitably cause runs and ruin all the previous hard work. Leave around 15 to 30 minutes and then apply a slightly thicker coat which you will see starts to give a more shiny appearance but don't go over the top........you can keep on building up with more and more thin layers until you are satisfied an even overall coat is applied. This is the result of five coats (not including primer) Now, a lot of people think the jobs done but no matter how well you have applied the final coat of paint it will still have that orange peel look to it on closer inspection so you need to let it dry for a least 24 hours, 48 preferably and again using your bucket of soapy water and finest grit wet n dry paper (at least 1500 grit) you can rub down once more making really really sure to keep it wet and frequently rinse down again so as not to cause any deep scratching form stray bits of grit etc.


-
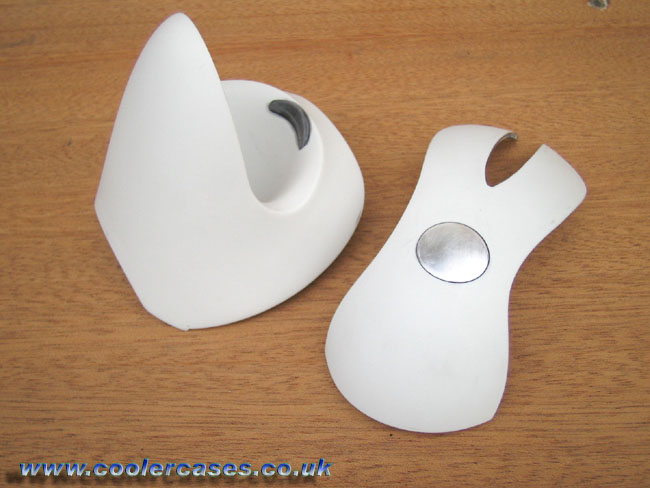
When both bits where sanded smooth they were dried using a clean cloth making sure not to touch either bit as the oils from your fingers can cause the paint/primer not to adhere properly. So in a ventilated room I applied the first coat of primer. Holding the can approx 10 to 12 inches away from the piece spraying in even strokes. Couple of word of warning here!. 1] Always follow the directions on the tin. 2] Test spray a piece of card first just to make sure the nozzle isn't clogged and the paint comes out evenly. 3] Don't try and cover the subject in one go - its far better to apply a few thinner coats (leaving 5 to 15 mins between coats) rather than one thick coat as your more likely to get runs in the paint. Some people may only apply one coat of primer but I prefer to use two - the first being a very slight waft of paint barely covering the piece so you are still able to see the plastic colour showing through followed by a second slightly thicker coat approximately 5 to 15 minutes later.
-
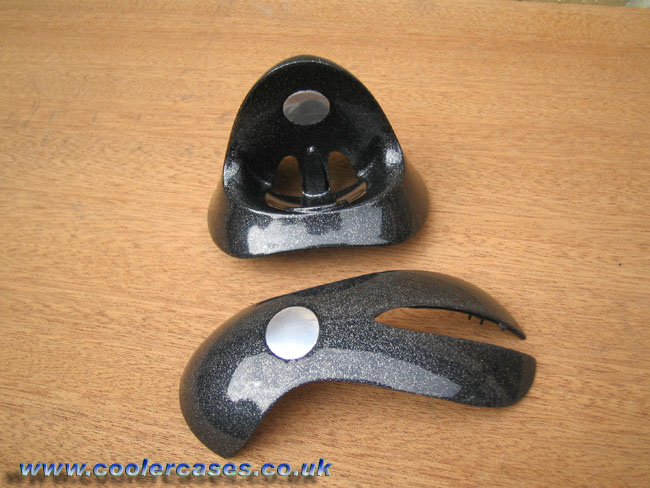
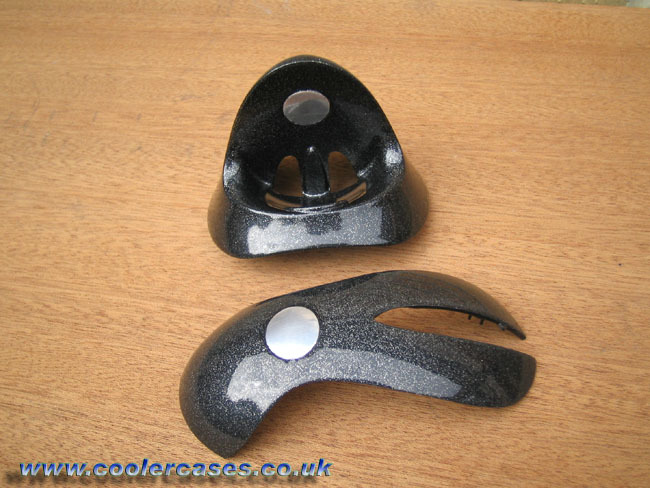
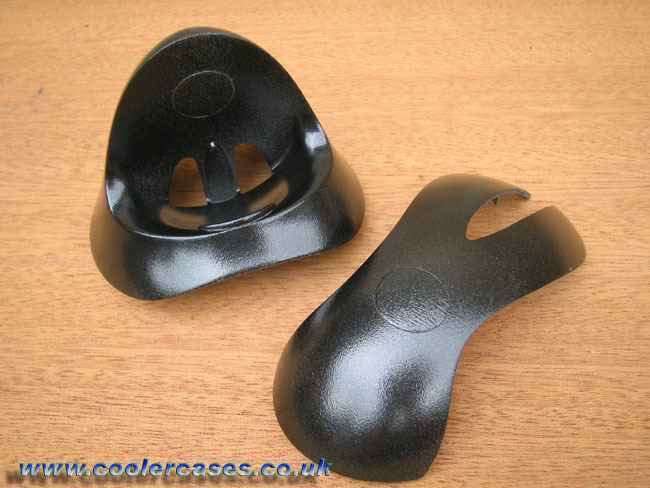
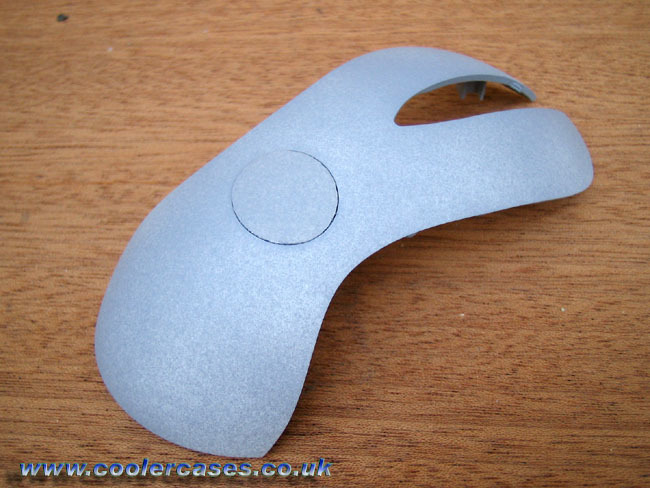
An area that doesn't get touched on to often is spray painting, which when done right can look really smooth and professional but on the other hand if a few basic steps aren't followed you can end up with a finish that looks a bit like orange peel or even worse full of runs. So to help get the most from those little tins of coloured spray I've put together a small guide that should help you on your way to getting really good results no matter what it is your painting. On this occasion the victim is a Logitech Mouse and charger unit. Preparation is everything to getting a good finish so no cutting corners here! First of all you need to get the piece rubbed down and in this case, the remaining worn silver paint off so with a little washing up liquid added to a bucket of water and using 800 grit wet n dry paper I gently rubbed till I was down to the original bear plastic making sure not to let the paper dry out and frequently rinsing the piece to ensure no large bits of grit or debris get between the two that could cause deep scratching. A general guide to wet n dry paper is as follows 240 to 600 grit - For smoothing body filler / bondo and metal 800 to 1500 grit - For preparing body filler/bondo metal for paint 1200 to 2000 grit - For sanding between coats of primer/paint I also took this opportunity to sand the Logitech logo down which turned out to be aluminium so I polished it and using masking tape, masked it up and trimmed the remaining tape with a craft knife.

-
found this, although not a car part the process i imagine would be similar. http://coolercasesuk.co.uk/showthread.php?t=161 incase the link goes dead i've pasted it below (seeing as ill be using it soon i dont want it going walkies)