Husky
-
Posts
14,070 -
Joined
-
Last visited
Content Type
Profiles
Forums
Events
Gallery
Store
Everything posted by Husky
-
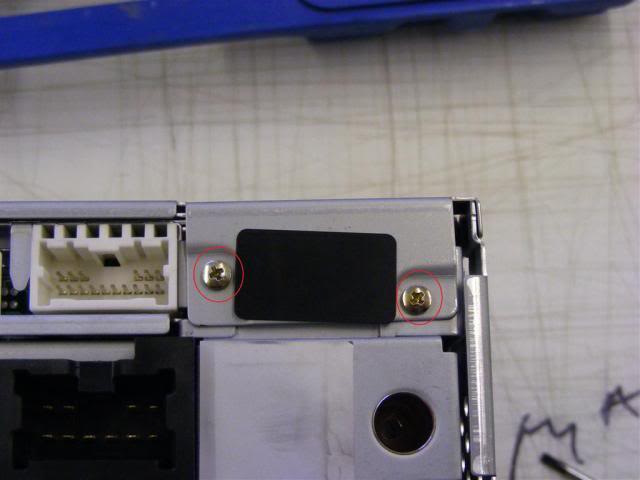
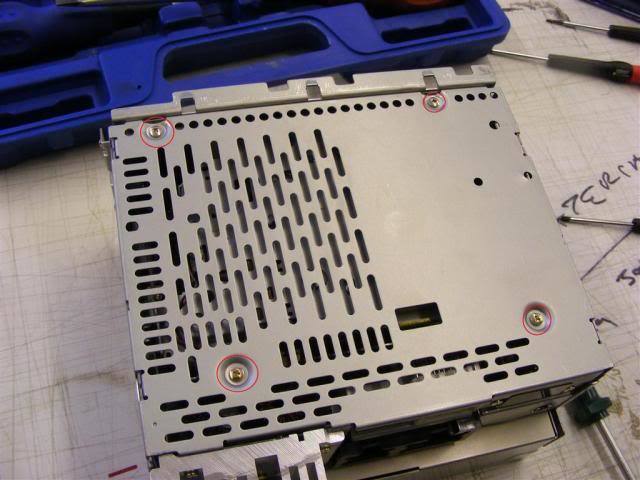
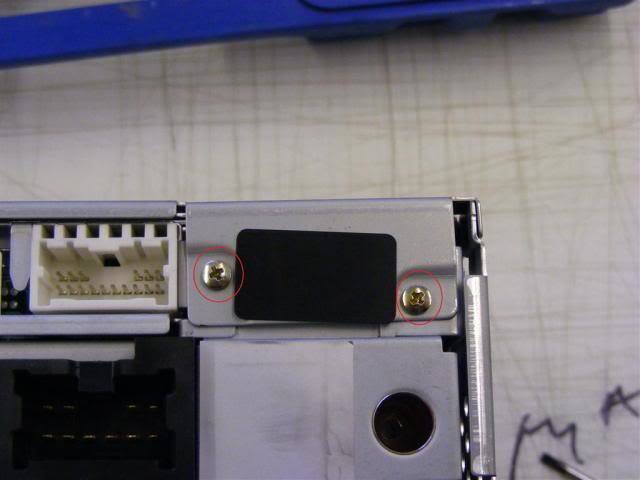
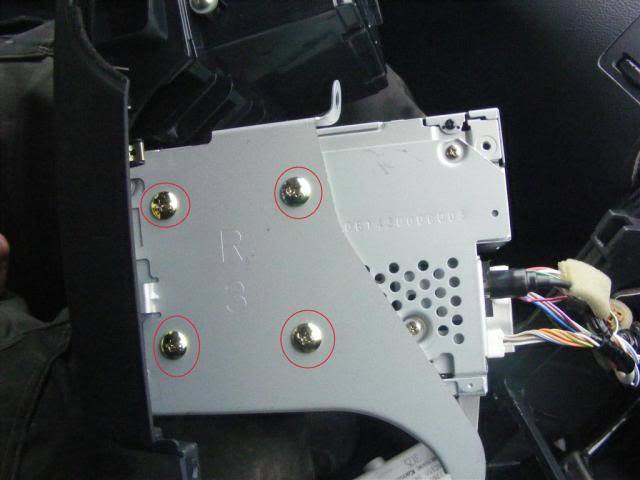
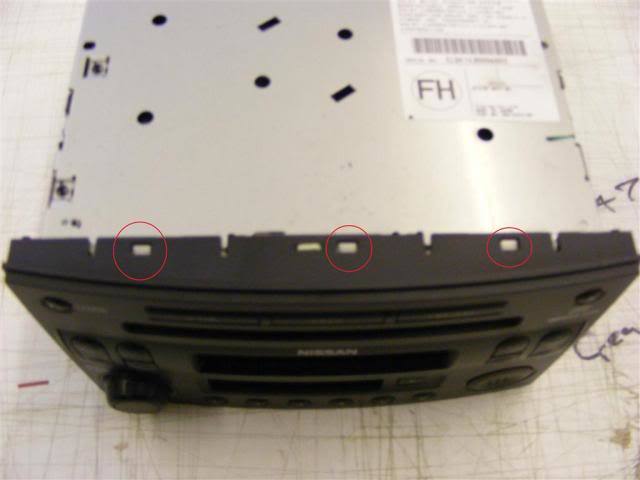
15) The front should come away as shown, place it out the way so it doesn't get damaged. 16) Turn the stereo over and remove the 4 screws shown. emake sure to keep track of where each screw came from as they may be different lengths and sizes. 17) Remove the two shown from the back of the unit.

-
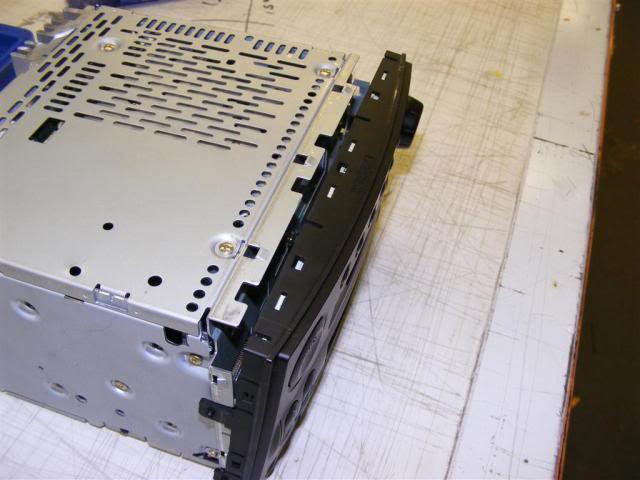
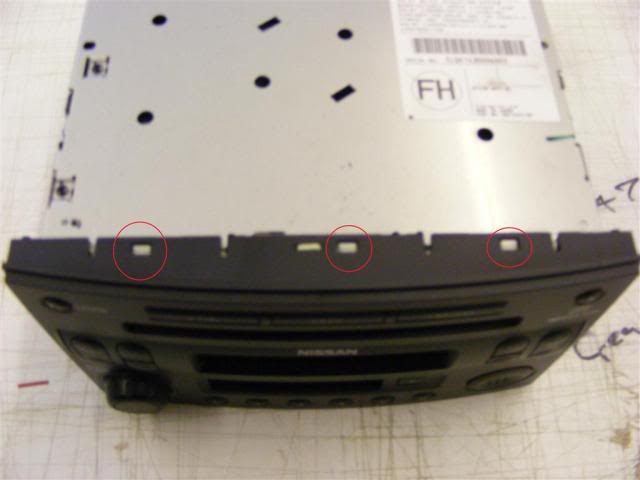
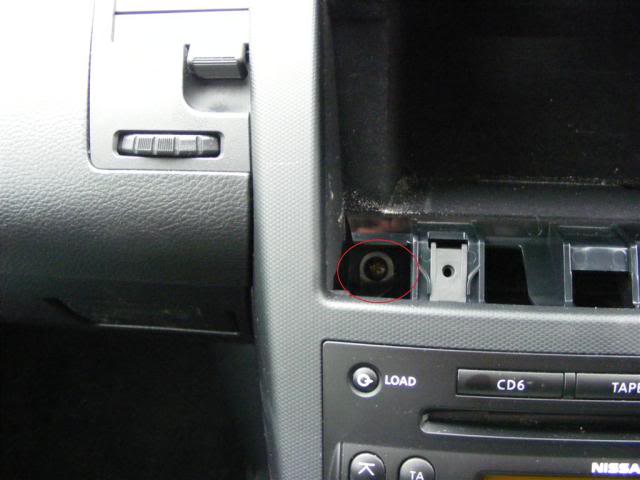
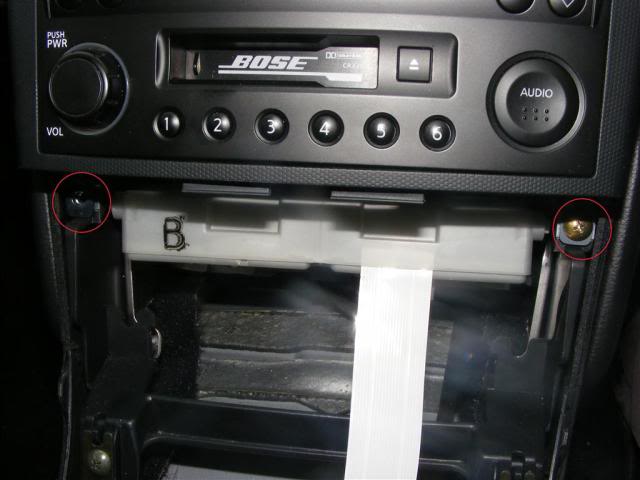
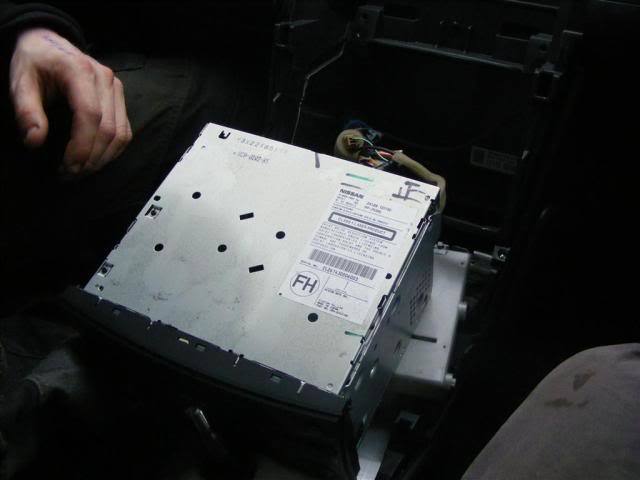
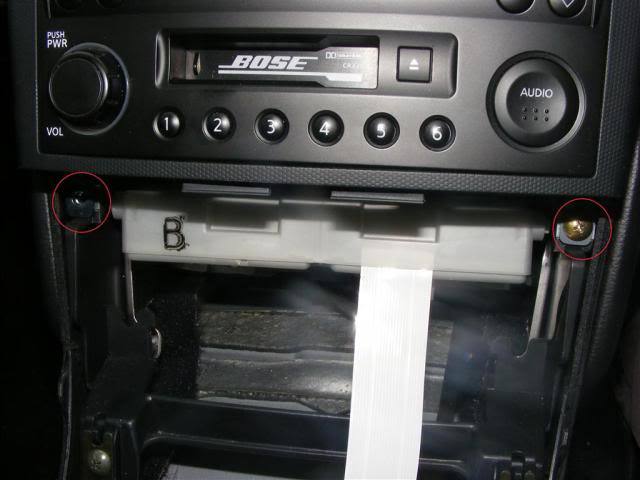
before pulling the centre console out any further i suggest you tape a rag in place over the gear shift thread as it can damage the face of the stereo. 9) Now with a little power you should be able to pull the whole centre console toward you, be careful not to snap the tab behind the triple gauges. There is a connector going into the right hand side of the triple gauge, unplug this by pressing the tab in and gently pulling on the plastic of the connector (do not pull on the wires). 10) Pull the whole centre console toward you, revealing 8 screws, 4 on either side, holding the stereo in place. Remove these. 11) placing the plastic trim to the side you will be left with the stereo on its own still wired into the car. 12) Remove the wiring connectors from the back by using a small flat bladed screw driver to press the tabs in on the connectors, they should slide out easily when pressed correctly (you may need to flip the stereo upside down to access them). Disconnect the aerial connector gently using a pair of pliers so you don't pull on the cable. 13) Take the stereo inside to work on it in an open and well lit area. DISMANTLING THE STEREO TO ACCESS THE TAPE DECK 14) With the head unit in front of you release the plastic tabs which hold the front face panel on.
-
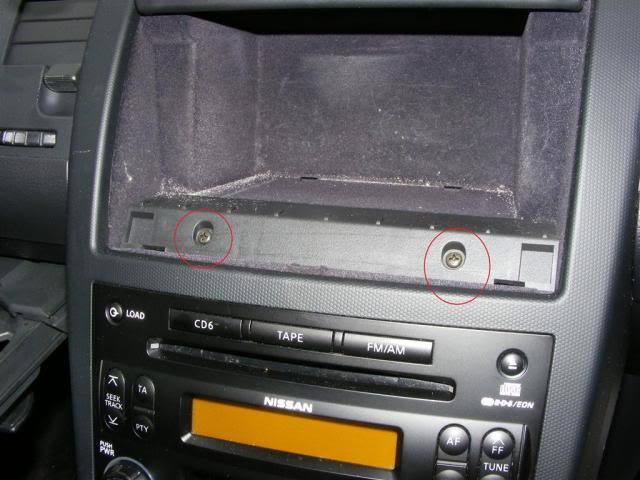
7) Remove the two small black screws shown 8) now remove the two that retain the centre console down the sides.


-
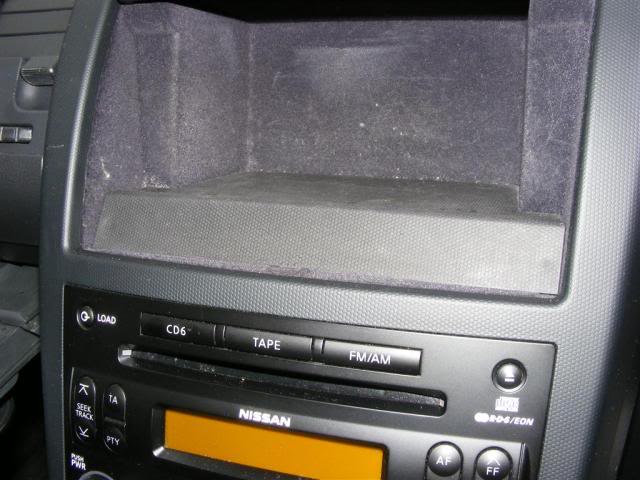
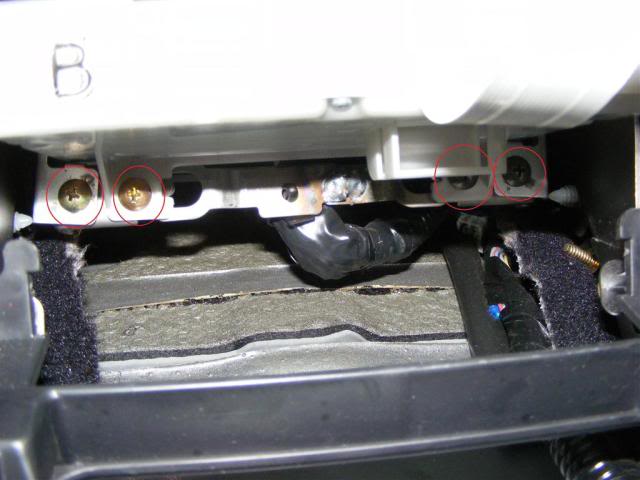
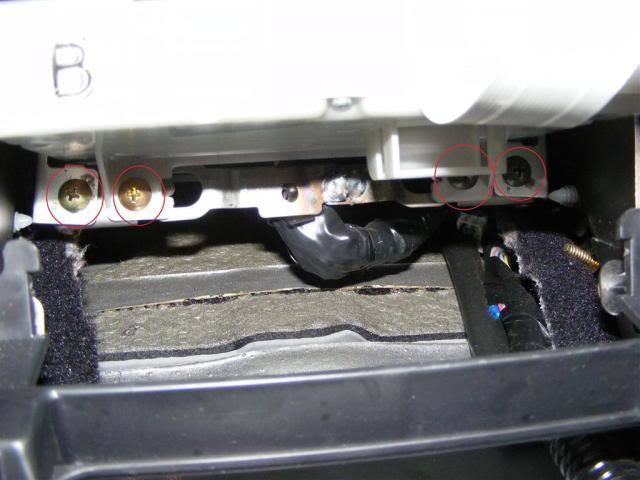
4) Unscrew the two lower screws which retain the centre console 5) Remove the four lower screws from under the white box... this loosens the white box and lower section of centre console. 6) Open the cubby hole and remove the rubber lower mat
-
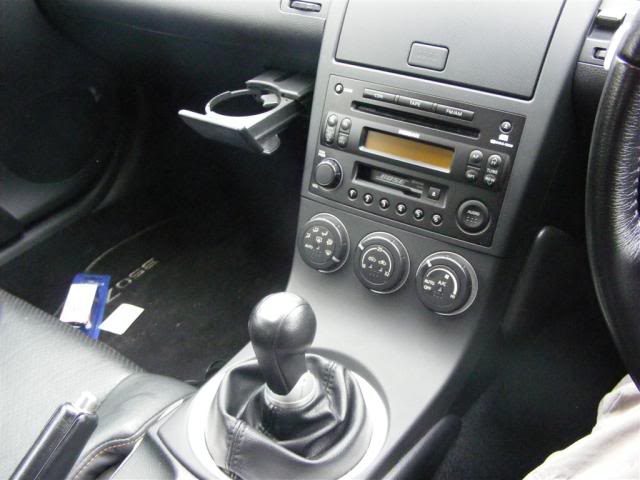
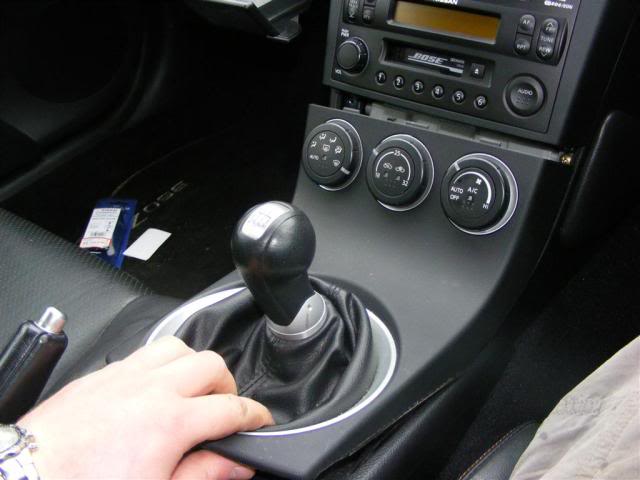
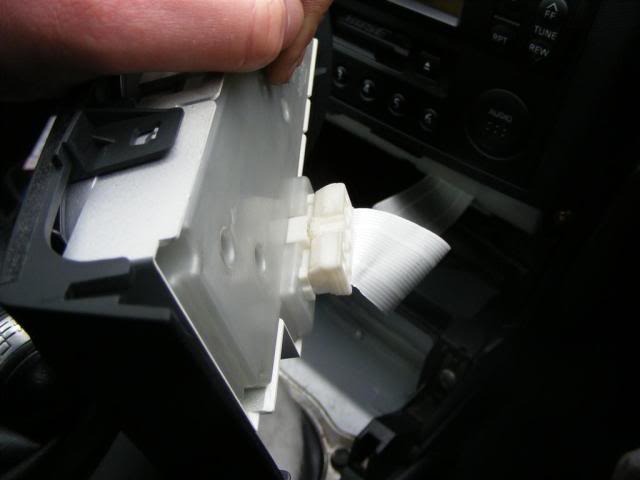
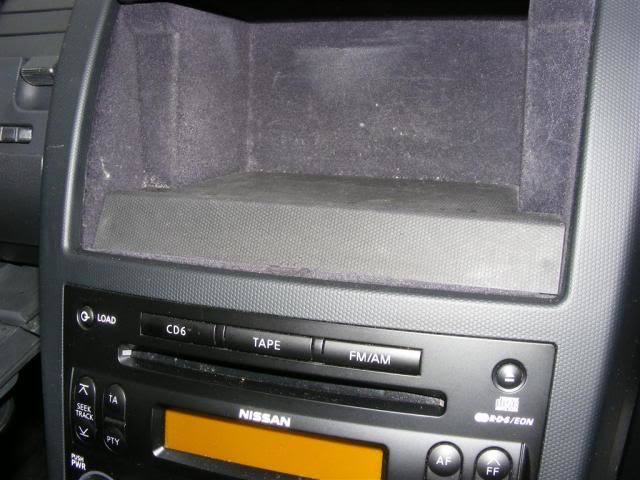
I know it seems like we have 50 guides for this same mod but when I came to do it i found i needed to bounce about different threads all over the place and half way through build threads which just got confusing. So I have compiled the relevant information here in an easy to read guide. Credit to the original posters and if you want to see the original threads they are listed at the bottom. Also the pictures are posted in this thread as attachments so the links cant go dead. TOOLS AND MATERIALS small flat bladed screw driver Philips head screw driver soldering iron solder flux Wire strippers common sense good quality phono lead OR phono end and suitable cable cable tie (optional) REMOVING THE HEAD UNIT 1) Head Unit 2) unscrew the gear knob and pull the surround up and backwards. 3) Unclip the white ribon from the heater control unit.


-
repost viewtopic.php?f=29&t=47097&hilit=wetsuit
-
I have 3 Vauxhalls on my drive I decided to clay my new Corsa and cannot believe how bad it really was, shocking in fact. There was the normal black tar spots but there was something all over it that took me ages to clay off and then I used the purple haze for the finishing results. The pictures do not do it justice. i think they have a delivery coating of some kind for shipping. not entirely sure though
-
ah well the best stuff came out ages ago anyhow
-
eek im not a fan
-
can you support me stew? im good at opening beer and shovelling snow!
-
Tanabe medallion touring y-pipe back exhaust
Husky replied to Tarmac@TarmacSportz's topic in Tarmac Sportz
no you ruddy well did not!! we were pi**ed and watched all the youtube vids available for 350z exhausts, a wild night that one! -
some jobs going in Jaguar Land Rover or Become a landscape gardener
-
Tanabe medallion touring y-pipe back exhaust
Husky replied to Tarmac@TarmacSportz's topic in Tarmac Sportz
I'm all moist always loved them, such a good choice! -
like this one... a fiver and its yours
-
he probably did something wrong, maybe broke something.
-
im using the tail though!
-
-
hahaha epic doesnt look as good as i thought as a targa though
-
looks the very same to me
-
im only lowered 13mm and 17mm with no issues, if you plan on really lowering the car check out the guys in the US for the sizes they get away with. there is a site (i cant remember the name of it) that shows you pictures for each combination of sizes.
-
backs 295 30 r19 10.5 wide 22 offset fronts 265 30 r19 9.5 wide 22 offset
-
265 works fine on 9.5 wide rims. I have them on my fronts
-
http://cgi.ebay.co.uk/ws/eBayISAPI.dll? ... 256wt_1139 brilliant, especially liked the answer to this question. Q: i don't really need a wet suit...i'd really like an aquarium! have you got any of those?! A: No aquariums, but I do have a dead squirrel floating in a bucket, will that do?
-
lies, i reckon you failed on the keyboard question.
-
He only did decals - schoolboy stuff! these were early days, that stuff was top class back then!!