Husky
-
Posts
14,070 -
Joined
-
Last visited
Content Type
Profiles
Forums
Events
Gallery
Store
Everything posted by Husky
-
I took them off because its not winter and I have a meet tomorrow
-
yeah basically like that, except mine arent really "shagged" just need a touch up. The other reason is that I'm going to be supplying these wheels soon so i need my set to be perfect. And potentially might go for 20's depending on what five axis are looking for in the UK demo car we shall see.
-
best stuff is 3M carbon Dinoc vinyl
-
because I really don't have the time to get the car up on stands and take all the wheels to a refurb then bring them all back again etc. i'm just being lazy
-
whats fail?
-
epic
-
Amazingly low mileage! sad that someone would drive it so little, but good for you his current or previous cars dont have it listed http://www.pistonheads.com/gassing/prof ... =0&f=0&t=0 and again in his car history thread which is quite thorough there is no mention of the zed http://www.pistonheads.com/gassing/topi ... 6090&mid=0 he's a salesman so be prepared for a fight on your hands if you want discount also he deals with cars as a business so should (hopefully) know his way round them, His business?--> http://carsourcing.com/ pictures are too low quality to be able to make anything useful about the condition of the car out but looks good from what you can see check there are no clicking sounds from the rear axle, there are no clunks from underneath when braking, the gearbox is nice and smooth, the boot opens and stays up correctly without falling on your head, the leather isn't overly worn. not too sure on this statement though "and rare 'Sunset Orange' Colour" those rusty ones are common :P
-
Arseholes
-
:pmr35lee:
-
Having just sat through an advert for Kerry Katona:The Next Chapter I am sincerely hoping that any truth in your theory is unfounded............if found to be related to that vacuous piece of human wastage I think I'd actually put my own head into the mower. ........I bet she spent all day yesterday telling everyone how she's practically Irish. We will get a DNA test done bud, it's the only way to be sure we aren't related
-
rims about 825 quid (will still need refurb) front tyres are good condition 175 quid rear tyres aren't worth mentioning but i'd leave them on for you. That's £1000
-
i've heard of six degrees but i was meaning blood! im not saying i want your blood like some vampire sucking wierdo with big teeth, not that i have anything against big teeth, I knew someone once with big teeth and they were normal, i'm not implying that people with big teeth may not be normal, infact, i'm sure they can be just like normal people, that is unless they are ginger.
-
you think i copuld somehow prove i'm related to you ricey? not that i want to be related to you but it was more a thought to how many people are you related to that you dont even realise? not that there is anything wrong with being related to you, i'm sure we all need a certain amount of weird in our blood from ricey lineage...
-
i forgot all about that tbh. i probably will, and i'll make sure to add 50 pictures just to **** them off
-
im in such a bad mood i think i might sell them and buy 20's instead to cheer myself up. anyone want a set of wheels with tyres
-
Did the Bose aux in mod yesterday. I found the guides a bit confusing so remade them here viewtopic.php?f=27&t=47176 Also I took a picture of the gear knob as I realised I'd missed it out in this thread. And to finish, today I added some feature to the wheels with the help of some chav **** driving recklessly after I had spent an entire day cleaning them all. not in a good mood today.
-
lights in what way do you mean: as in removed and lights put in its place? or lights put in behind it? or a clear strip put in and lights put behind that?
-
take out your spare wheel and the boot mat. put one wheel under the strut bar put one behind the passenger seat and then get the pass seat as far back as possible put one on the passenger seat put one over the strut bar that should do it. if you find it hard to get the one behind the passenger seat you can st them side by side on the passenger seat. I got my 295's +265's in the zed so it is definately possible with normal sizes. just watch you dont scuff your door handle like i did
-
oh, and im going to take it apart today to see if i can just cut the power to the motor, you cant really hear it going round when its on but it bugs me anyway that its spinning, should reduce electrical noise and the sound of the tape deck going round will be gone. Also I may have forgotten to reattach the triple gauges Also i'm going to hook up a power supply for my phone in there
-
cheers guys, there was me looking for an early night but this took waaaay longer than i expected to write This should reduce background noise, they can always be joined back up again at a later date if you wanted to break out the tape collection.
-
dude!!! gutted, you were 3 mins away from me i was bored and would have gone for a pint. if your free tomorrow give me a shout
-
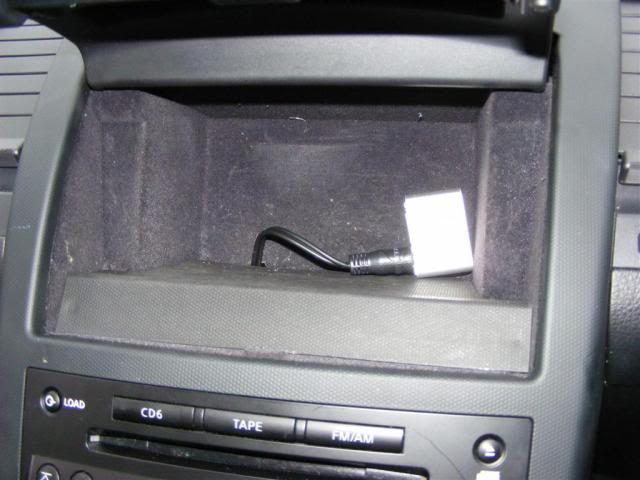
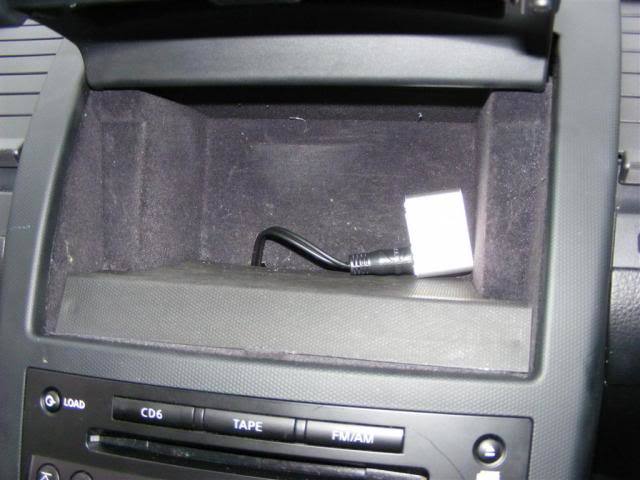
REASSEMBLY 34) Run the cable out of the rear hole where the small black plastic cover came out of. 35) Now reassemble the unit using the guide in reverse making sure to use the correct screws in each location. 36) you now need to put the stereo back into the car, again follow the guide in reverse, when you do this you need to thread the newly added cable into the centre cubby through one of the two small square holes in the back of it. if the cable is too big you can get creative with a knife, drill or soldering iron to enlarge it. Also you may wish to cut a small notch in the rubber mat that lines up with the hole to allow the mat to seat properly with the cable present. when reassembling REMEMBER the connector for the triple gauges The completed mod: HEADUNIT ERROR RESOLUTION When you first turn the ignition on the stereo will load up and most likely encounter an error. Allow it to finish its start up routine. turn the ignition off and remove the keys. Hold the tape eject button for 60 seconds. release the button and turn the ignition on again. select "tape" and attach a device for test. END This guide was rewritten by me referenced from the following threads: viewtopic.php?f=9&t=33982&start=30 viewtopic.php?f=9&t=29312&hilit=alexz&start=75 viewtopic.php?f=9&t=29312&hilit=alexz&start=120 viewtopic.php?f=27&t=34534&hilit=ipod+hack Credit goes to Sparky350z AlexZ Dcash5 R35LEE The majority of the pictures were supplied by AlexZ

-
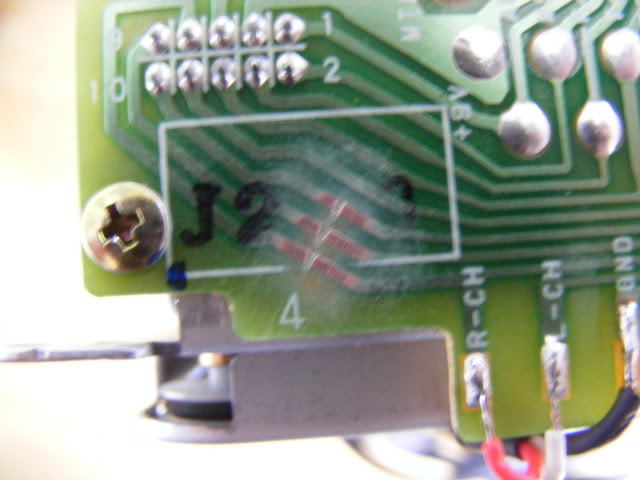
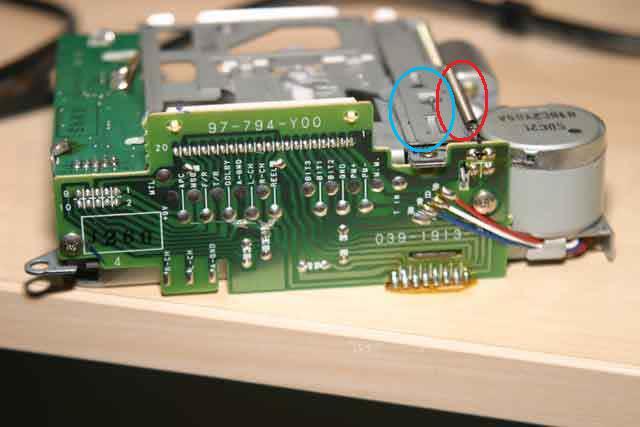
31) Use a sharp blade to cut these three tracks, make sure you do not cut any other tracks in the process. INFO: By cutting these tracks you will disable the tape playing ability of your head unit. If you never plan to listen to a cassette again, then go ahead and cut these. These lines were originally cut to reduce noise, however many people have left them intact and had no issue. It is your choice. 32) Now remove the spring circled in red in the below picture. also remove the metal slider circled in blue. This removes the need for a tape to be present INFO: Again, removing these will disable your tape player, if you do not remove these you will need to trick the player into thinking a tape is present by either: once fully installed use a pen or similar in the tape slot to push/engage the mechanism until it locks in like it would with a tape being pushed in. OR, find an old cassette, pull out all the tape so it's empty, then leave it in the slot. The bay door will remain slightly open with a tape in, which some find unappealing. All three methods achieve the same goal, tricking the unit into thinking a working tape is present. 33) Slot the tape deck back into position being very carefull to line up the connector underneath correctly, do not bend any pins. Replace the four screws on the tape deck.
-
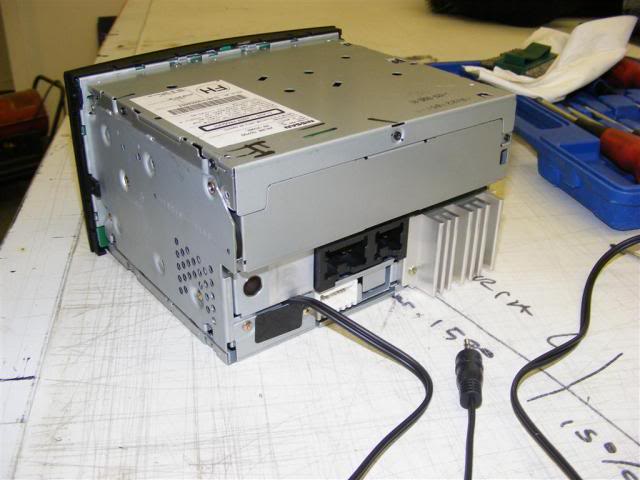
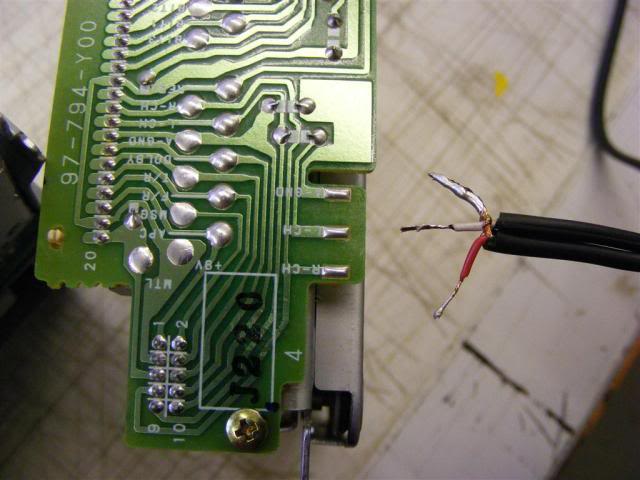
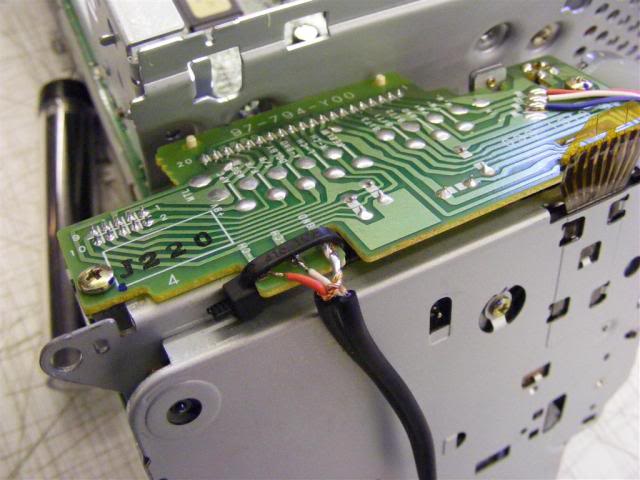
21) With those screws removed you should be able to gently pry the bottom cover off. 22) The large silver section in the picture below is the tape deck, this needs removed. Unscrew the 4 screws shown and take the deck out being careful not to bend any of the connector pins. SOLDERING YOUR AUDIO CABLE ON 23) Cut your audio cable to give a nice clean end to work with. 24) strip back the outer coating, i recommend a pair of these as they do least damage to the wire and make life easier, well worth the money. 25) You will then find two separate cores, most likely red and white, wrapped in grounding copper. Extra info! If your cores are not coloured use a multi meter to buzz out the different wires to the sections of the jack. the gnd is the bottom section of the jack (the sleeve) the left channel is the tip the right is the middle section (ring) 26) Wrap the Grounding copper together into one wire and pull to the side. 27) Use the stripping tool to strip a section from the tip of each of the red and white wires. 28) now you need to use your soldering iron to tin the wires. for a much better tinning job use soidering flux on the wire before applying heat soldering flux link 29) The finished job should look as below. 30) Line the wires up as shown in the above picture. One at a time place the tinned wire ontop of the solder pad and aply a small amount of heat to make the join. once complete make sure none of the wires touch. you can, if you wish, place a cable tie over the join.


-
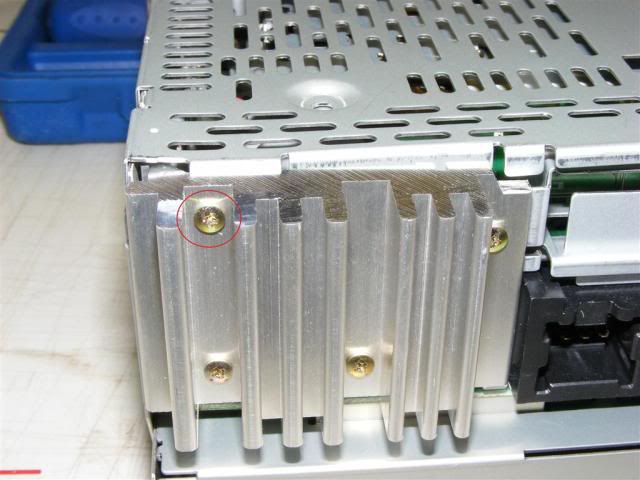
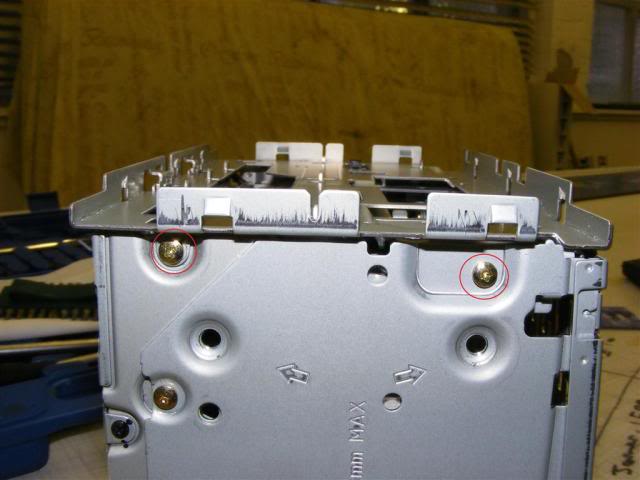
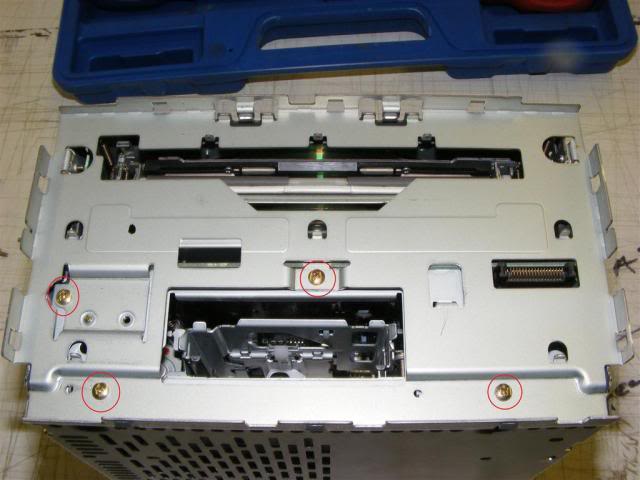
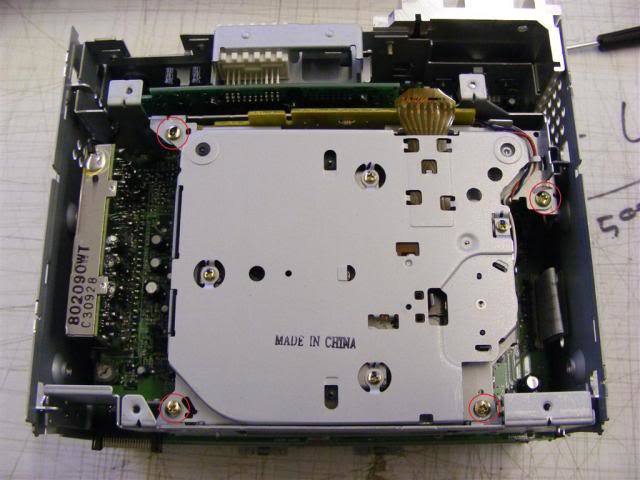
18) Remove this screw located in the heat sink. 19) Remove these two screws from each side ( four screws in total) 20) Remove the four screws from the front as shown