GizmoGold Posted September 11, 2016 Share Posted September 11, 2016 (edited) I thought it was about time for me to start a log of everything I've done and plan to do I'm expecting my ideas to constantly change, so I have no idea how it's going to look in the end! I've always wanted a 350z, but I could never justify buying one =/ But I went to see one that was for sale a year ago, just to get out the house, and I instantly knew I needed one! So the next day I went to view my one and bought it straight away Here's a pic the day I picked it up: Its a 2006 350Z GT. Firstly, I've always been obsessed with Gremlins and Gizmo has been my username for 10+ years, so this lil guy is where I got my name. My first change was to replace the R/C aerial, with something that looks miles better! Picked it up from Redline Styling. My second mod was to add the carbon bonnet struts. They've actually ended up being really useful for when doing bits under the bonnet! The next step was obviously to remove the annoying arch gap, so along came the 20/25mm TORQEN S spacers! (Sorry for the state of my wheels! Need to get them off one day soon and get them sparkling!) Although the spacers removed a lot of the arch gap, I still wanted to shrink it a bit more. Which is why I went for the Tein S-Tech springs I've fitted the Bridge style gear gaiter from Team Tarmac, a purple gear knob from Kode, a D1 Spec Throttle Controller from TORQEN and a Brodit phone holder for until I get a new stereo. I've replaced the OEM wheel nuts with some pretty blue ones from Tarmac Sportz and I got a cheap deal on Z centre caps from eBay. I couldn't decide whether I was going to stick with the twin exit exhaust or swap to a single, but in the end I couldn't say no to the ISR Performance Single Exit Exhaust from Tarmac Sportz. I've currently done a bumper tuck with cable ties, but once I have some spare time I'll be replacing these with screws to remove the centre sag. I need to redo the plastidipping, but I love the lower section being black. The bumper has a few scuffs, so in the next year it'll be replaced with something special. I've had my private plate for a few years now, so couldn't wait to put in on the Z! Here is the current state of my engine bay: I've started replacing the bolts with the purple washers and fitted a JWT popcharger (both of which came from eBay). The Rare JDM harness cover came from TORQEN and I've also recently fitted a Mishimoto Rockstar Compact Oil Catch Can. The next modification, which I had to save for last as I think it's totally changed the look of my car, is the Team Tarmac Project Louvre Z! I was lucky enough to be the first to get it fitted and I couldn't thank Matt enough for the time/effort he put into them! Also for spending all day getting the fit to be perfect! I also currently have a graveyard of Z parts in my flat waiting for me to fit them! My current to do list is: - Pearlescent headlight tint - Satin Black Handles - Smoothed/Painted Rear Strut Cover - Painted Front Strut Cover - MTEC Grooved and Dimpled Brake Disks Edited September 11, 2016 by GizmoGold 3 Quote Link to comment Share on other sites More sharing options...
FiddyZed Posted September 11, 2016 Share Posted September 11, 2016 Love the louvres - the fit looks soo good but sounds like it was hard work getting them on? whats the view like from the inside? The way it stands at the moment looks spot on! 1 Quote Link to comment Share on other sites More sharing options...
andy james Posted September 11, 2016 Share Posted September 11, 2016 You have Zeditus and it will only get worse. Good luck. 1 Quote Link to comment Share on other sites More sharing options...
veilside z Posted September 11, 2016 Share Posted September 11, 2016 Looking good. Well done buddy 1 Quote Link to comment Share on other sites More sharing options...
Andy_Muxlow Posted September 11, 2016 Share Posted September 11, 2016 Great thread Gizmo. The car looks great. 😊 Sent from my iPad using a hammer and chisel... 1 Quote Link to comment Share on other sites More sharing options...
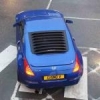
GizmoGold Posted September 11, 2016 Author Share Posted September 11, 2016 We originally tried fitting it with 3M tape, but when Alex's was being fitted mine was in the sun and one side decided to pop up So in the end we decided to go for tigerseal, which worked perfectly! Heres a pic of the view from inside: I took this a while ago and have added small rubber strips under a few of the blades because they would rattle against the glass if I ever went 80mph+ 1 Quote Link to comment Share on other sites More sharing options...
GizmoGold Posted September 11, 2016 Author Share Posted September 11, 2016 I blame all you guys for the Zeditus! Every meet/show I go to I end up coming home with new ideas! 2 Quote Link to comment Share on other sites More sharing options...
FiddyZed Posted September 11, 2016 Share Posted September 11, 2016 We originally tried fitting it with 3M tape, but when Alex's was being fitted mine was in the sun and one side decided to pop up So in the end we decided to go for tigerseal, which worked perfectly! Heres a pic of the view from inside: I took this a while ago and have added small rubber strips under a few of the blades because they would rattle against the glass if I ever went 80mph+ Looks good - I thought it'd really impair your rear view! Hmmm to get or not to get... :ninja: 1 Quote Link to comment Share on other sites More sharing options...
GizmoGold Posted September 11, 2016 Author Share Posted September 11, 2016 We originally tried fitting it with 3M tape, but when Alex's was being fitted mine was in the sun and one side decided to pop up So in the end we decided to go for tigerseal, which worked perfectly! Heres a pic of the view from inside: I took this a while ago and have added small rubber strips under a few of the blades because they would rattle against the glass if I ever went 80mph+ Looks good - I thought it'd really impair your rear view! Hmmm to get or not to get... :ninja: Haha do it! =p 1 Quote Link to comment Share on other sites More sharing options...
Stuggerz Posted September 11, 2016 Share Posted September 11, 2016 Best colour lol Good build thread Chris. Bout time u did one lol Amazing zed btw 1 Quote Link to comment Share on other sites More sharing options...
GizmoGold Posted September 11, 2016 Author Share Posted September 11, 2016 Best colour lol Good build thread Chris. Bout time u did one lol Amazing zed btw Thanks! Just gotta catch up and compete with your bay now! 1 Quote Link to comment Share on other sites More sharing options...
GizmoGold Posted September 12, 2016 Author Share Posted September 12, 2016 So Gizmo just passed her MOT with the following advisories: - Chip in windscreen (no rush to replace this) - Anti-roll bar linkage has slight play (I guess it's time to upgrade them any suggestion?) - Valve stem on both front tyres is slightly damaged (Refusing to replace the tyre until I've had everything I can out of them) Most importantly, the garage loved the louvre and even parked it next door on the owners drive so it was kept safe until I collected it 1 Quote Link to comment Share on other sites More sharing options...
Jk-boi Posted September 12, 2016 Share Posted September 12, 2016 Proper smart that mate! ðŸ‘🻠Best colour Z 1 Quote Link to comment Share on other sites More sharing options...
GizmoGold Posted September 12, 2016 Author Share Posted September 12, 2016 Proper smart that mate! í ½í±í ¼í¿» Best colour Z Thanks! Quote Link to comment Share on other sites More sharing options...
Jakeswheelbarrow Posted September 14, 2016 Share Posted September 14, 2016 Love the plasti dip on the front bumper Quote Link to comment Share on other sites More sharing options...
GizmoGold Posted September 14, 2016 Author Share Posted September 14, 2016 Love the plasti dip on the front bumper Thanks, it's such an easy thing to do and I love how I can peel it off and start again whenever it gets too chipped/worn 2 Quote Link to comment Share on other sites More sharing options...
GizmoGold Posted September 25, 2016 Author Share Posted September 25, 2016 I recently got some purple rimblades and I was amazed how easy they were to fit! Here's a few pics: I also fitted a few stickers which I've had lying around for a few months: My dad got a new van the same day, so here he is posing away: I got bored this eve and decided to go try play with the camera...I need to decide on the best time to take photos and also start using my tripod because 3/4 of the pics were blurred =/ 2 Quote Link to comment Share on other sites More sharing options...
Stuggerz Posted October 7, 2016 Share Posted October 7, 2016 Amazing pics those purple rims blades really suit. Best colour zed btw 1 Quote Link to comment Share on other sites More sharing options...
ralosc Posted October 8, 2016 Share Posted October 8, 2016 Love the colour. And the louvres! 1 Quote Link to comment Share on other sites More sharing options...
GizmoGold Posted October 10, 2016 Author Share Posted October 10, 2016 Thanks both! It's now been a year since I first bought the Z Got a few mods waiting to be done, but I just started an MSc so that's going to be priority whilst assignments are due! The mods are: - Black handles - Smoothed/Painted rear strut cover - Painted front strut - Painted engine bay (strut will match the theme) - Front brakes being replaced with grooved,dimpled disks (rears already done) - Final one will be a surprise Quote Link to comment Share on other sites More sharing options...
veilside z Posted October 11, 2016 Share Posted October 11, 2016 (edited) Edited October 11, 2016 by veilside z Quote Link to comment Share on other sites More sharing options...
OliverB Posted October 21, 2016 Share Posted October 21, 2016 Looks great! Will be keeping an eye on this one. Was had pressed between a blue and a red zed, but saw a red that I couldn't refuse in the end! Quote Link to comment Share on other sites More sharing options...
Mopedmark Posted October 21, 2016 Share Posted October 21, 2016 looking good Quote Link to comment Share on other sites More sharing options...
TT350 Posted October 21, 2016 Share Posted October 21, 2016 Great modding so far. Quote Link to comment Share on other sites More sharing options...
GizmoGold Posted October 25, 2016 Author Share Posted October 25, 2016 Thanks all! I may have let one of the mods out the bag by just posting asking for help But there's a BGW on the way =p (I know they're basically marmite to everyone on here, but I love them and that's all that matters ) Quote Link to comment Share on other sites More sharing options...

Recommended Posts
Join the conversation
You can post now and register later. If you have an account, sign in now to post with your account.