


Andy
-
Posts
3,492 -
Joined
-
Last visited
Content Type
Profiles
Forums
Events
Gallery
Store
Everything posted by Andy
-
viewtopic.php?f=129&t=33735
-
Big thanks to the mods & admin for building & maintaining such a good site
-
-
But that would have meant going back upstairs to get my keys No worries, was only following your instructions
-
You can only gain access to one of the screws each side and the back piece of trim has to come off to get to the other one which in turn means the wheel coming off.
-
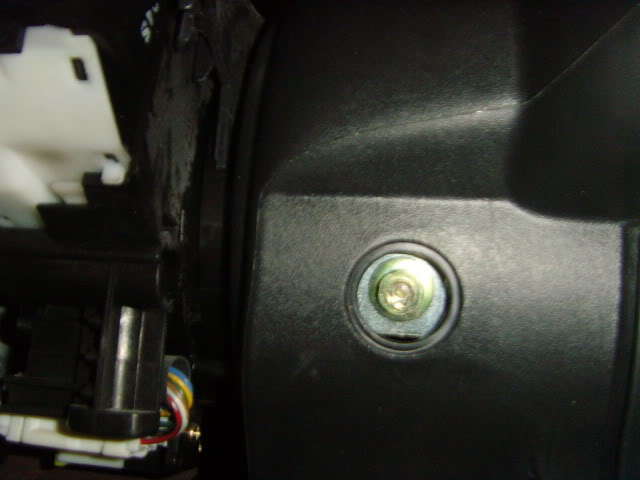
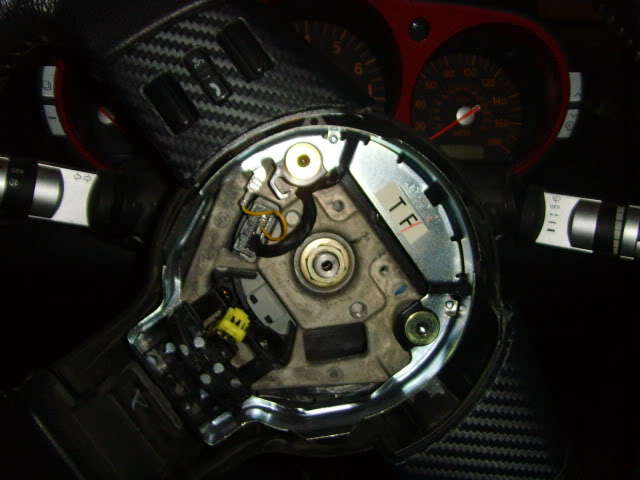
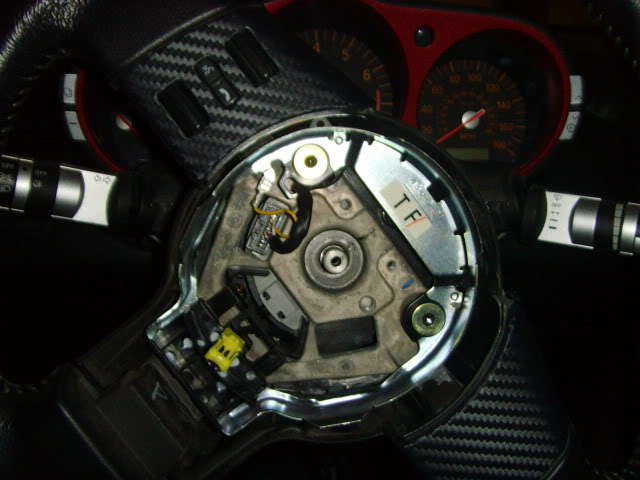
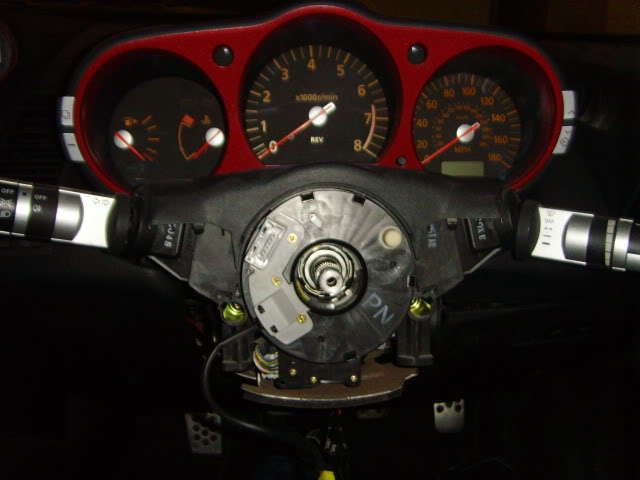
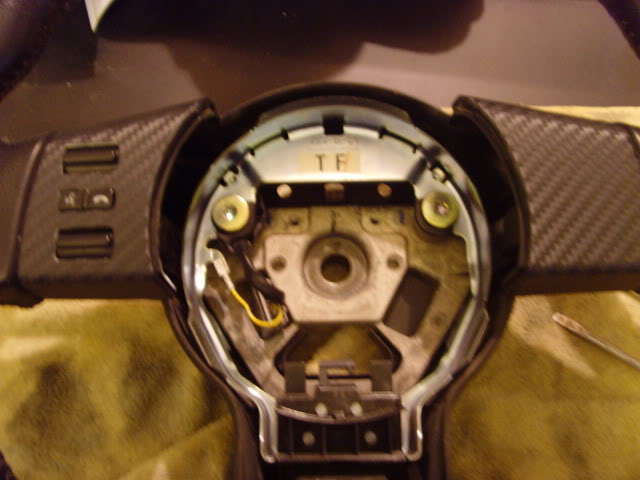
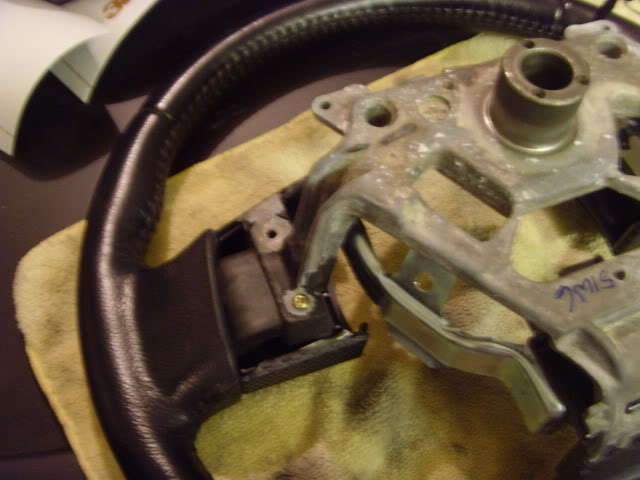
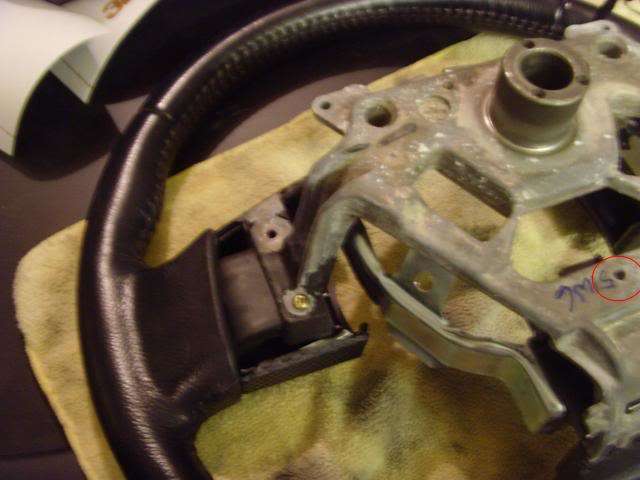
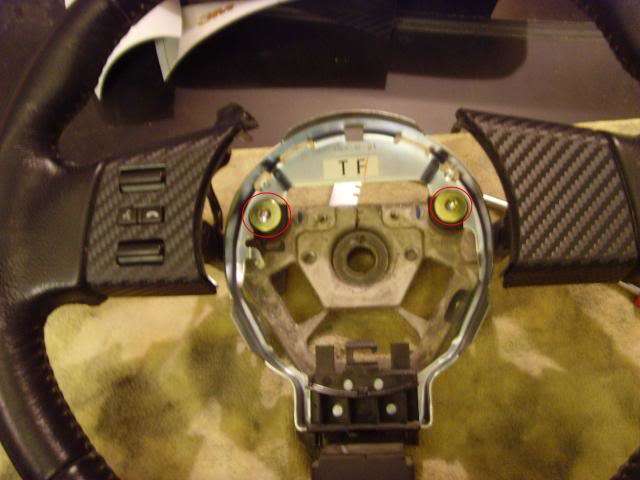
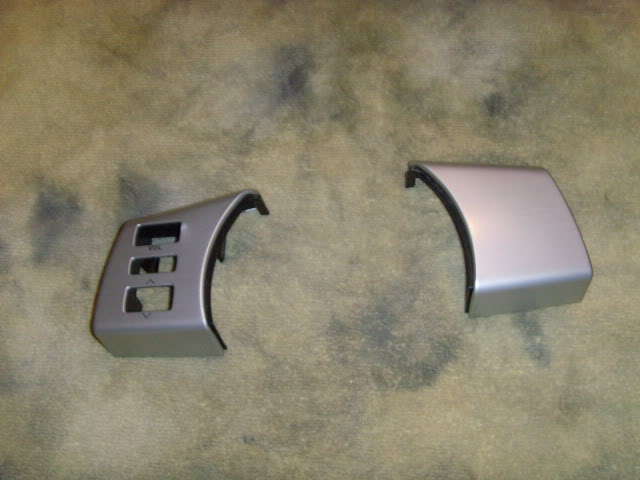
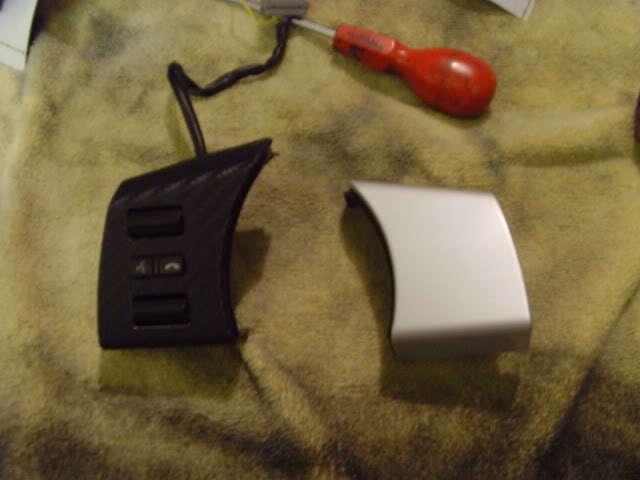
Quick update....I removed the steering wheel and carboned the oem silver button surrounds Below is my How To post cut & pasted in here Not sure if there is a how to but couldn't find one recently when looking. I followed Chris I's steps that he posted up on a previous thread of mine so thought I would add some pictures as well. My photos are a bit random as well as I only thought about taking pics when putting it all back together. Firstly, disconnect the battery & pump the brake pedal a few times to get rid of any surpless power that could be lurking in the system. Next, remove the two clips, one each side of the steering wheel to expose the bolts. They have a tamper proof head but most mutli screw bit sets will have the right screw driver bit with a center hole in it to remove these. Once these two bolts are undone and removed, the center of the steering wheel (the airbag) will be loose. GENTLY pull this towards you and you will see a yellow connector at the bottom rear of the airbag which you need to unclip by pulling the middle black piece out. Once the actual airbag is removed, you will see the pic below. Next, I got a black marker pen and marked on the center thread and on the surrounding metal piece (attached to the steering wheel) I just made two small marks so that I could line up the wheel again when I came to refit it. You also now need to unclip the yellow cabled female crimp and the grey loom plug. Note how the cables are run to these items so you can reinstall them with the wiring the same way. After that, I undid and removed the center retaining bolt. Once this is off, the wheel can be taken off...it might need a slight wiggle and a techincal tap from behind. From here, it depends what you want to do with the wheel, either put it to one side if you are swapping it with a new one or the below shows how to strip it down for one reason or another. Once the wheel is off, by placing it face down, you can remove the back plastic cowling by simply undoing the two screws (one each side) holding it on. If you want to remove the horn assembly then undo the single screw at the back (shown in red circles below) and the two larger bolts from the front (Be careful with these front bolts as they have springs below them to allow for the rebound action when you push the horn. If you want to remove the front button surrounds then these will come off by simply undoing two more screws (again, one each side) once the rear plactic cowling has been removed. They are shown below just to the bottom left of center in the pic. Once the two screws are undone, the front plastic trims will pull off. I took mine off to trim them in carbon
-
My photos are a bit random as well as I only thought about taking pics when putting it all back together. Disclaimer.......this is just how I did mine, I accept no responsibility for airbags going off or lose of steering or any other situations arising from following the steps below. ------------------------ Firstly, disconnect the battery & pump the brake pedal a few times to get rid of any surpless power that could be lurking in the system. Next, remove the two clips, one each side of the steering wheel to expose the bolts. They have a tamper proof head but most mutli screw bit sets will have the right screw driver bit with a center hole in it to remove these. Once these two bolts are undone and removed, the center of the steering wheel (the airbag) will be loose. GENTLY pull this towards you and you will see a yellow connector at the bottom rear of the airbag which you need to unclip by pulling the middle black piece out. Once the actual airbag is removed, you will see the pic below. Next, I got a black marker pen and marked on the center thread and on the surrounding metal piece (attached to the steering wheel) I just made two small marks so that I could line up the wheel again when I came to refit it. You also now need to unclip the yellow cabled female crimp and the grey loom plug. Note how the cables are run to these items so you can reinstall them with the wiring the same way. After that, I undid and removed the center retaining bolt. Once this is off, the wheel can be taken off...it might need a slight wiggle and a techincal tap from behind. From here, it depends what you want to do with the wheel, either put it to one side if you are swapping it with a new one or the below shows how to strip it down for one reason or another. Once the wheel is off, by placing it face down, you can remove the back plastic cowling by simply undoing the two screws (one each side) holding it on. If you want to remove the horn assembly then undo the single screw at the back (shown in red circles below) and the two larger bolts from the front (Be careful with these front bolts as they have springs below them to allow for the rebound action when you push the horn. If you want to remove the front button surrounds then these will come off by simply undoing two more screws (again, one each side) once the rear plactic cowling has been removed. They are shown below just to the bottom left of center in the pic. Once the two screws are undone, the front plastic trims will pull off. I took mine off to trim them in carbon Once you are done and want to put the wheel back together, it is basically retracing your steps and going back in the order you undid things in. Just make sure the wheel is tightly secured and you line up the two marks you made earlier on so the wheel is not crooked when aligned straight with the wheels. Also remember to plug the airbag cable back in, the yellow female crimp back in and the grey loom wire. There may be another loom wire for Z's with cruise control but I am only guessing at this. Once all done, reconnect the battery and all should be good. If you are fitting an aftermarket wheel, you may need resistors etc but this How To is just for removing and refitting an oem wheel. Hope this helps

-
Final price dependant, I am very interested
-
Ah ok, I haven't got the whole panel piece. As above, R35LEE or ZMANALEX will be your best bet
-
I'm such a loser
-
You have a PM
-
Do you mean this part? If so, I have a brand new one available.
-
Good news mate, pleased you got it all in and running well. The cable situation is a nightmare. I moved the white plastic aircon control box off its brackets and dropped it down and it gives you a little more space. Is still tight though!
-
Still my favourite Z rear, looks awesome with the carbon against the Azure. Nice work mate
-
Electrical faults can be a pain to track down! Seems too much of a coincidence that since the headunit has gone in you are having issues though. Good luck with it
-
Yeah, things can get a bit cramped behind there! Have you had the unit out again to see if there is anything obvious? Might be worth getting a meter on the battery as well when the car is running/not running to see if it is charging ok.
-
Is there a possibility that you have used a permanent live instead of an ignition live somewhere and something (headunit maybe) is staying on when the car is off, hence draining the battery??
-
+1, cracking job there!
-
I love this stuff but agree, sharp angles etc are a nightmare. I've done a few bits in my Z to cover up scratched panels that were damaged inthe bodyshop.
-
Not sure on the Dotz but they won't fit oem wheels as the wheel side center bore is too big.
-
I can't remember on the oem unit but it is normally a buttom with TMC or TC on it for the traffic control. P.S. Like what you did with the station thing
-
Yeah, I wasn't impressed at all! Car seems fine now though luckily.
-
More of a word of warning than anything else!! Went to jump my Z yesterday and my friend who's car we were using, had some trouble working out the difference between red & black and + & - so when connecting the leads to his car, it managed to blow the main 20 amp engine fuse. No biggie I thought, will just swap it out and off we go. However, turns out that this fuse is built into the whole assembly and once this fuse pops, you're looking at the harsh reality of £56+vat from your local stealer for a whole new fuse & surrounding fitted pieces. I myself am going to rewire it all I think and put in a quick release positive terminal with volt meter etc so I don't have to worry about this again. Thought it was worth sharing this info as I haven't come across it before so take care when you are jumping your Z's and make sure you have a friend helping who has a higher IQ than my pet cat This is the piece & fuse I am talking about.
-
All I did was get a long bolt with the same thread as the black fastener piece of the actual towing eye and some nuts. I fed the new bolt through the hole and secured it at the back with two nuts, tightening one onto the other so they cannot come loose. I then did the same on the front so the bolt was secured in place then simply twisted the actual towing eye on. Had to adjust it slightly so it was horizontal and stuck out enough/not too much and had to make sure the nuts were wide enough so as to not be pulled through the towing eye hole when tightened. It could do with another bolt tightened onto the actual towing eye piece as well to make sure that is secure but I didn't have enough available. Will try and get some pics when I get 5 mins as the battery died on my camera earlier. I have no idea if it will be strong enough to actually tow the car using this method but in all honesty, mine is more for aesthetics and will just have to risk it if I do need a tow.
-
Try member ZMANALEX, he is in Scotland too. Bugger about the person not leaving a not, not impressed.