

cs2000
-
Posts
2,628 -
Joined
-
Last visited
Content Type
Profiles
Forums
Events
Gallery
Store
Everything posted by cs2000
-

Tarmac Sportz Customer Exhaust Video's thread
cs2000 replied to Tarmac@TarmacSportz's topic in Tarmac Sportz
So were only allowed to post 2 videos in one post, so here is the continuation of the above This video was taken today after putting around 500 miles on the new system, and having a remap done at Abbey Motorsports. The popping/banging noise was added in as part of the tune and happens on slight throttle application under low loads Lastly, for comparison, this is the original Powerflow catback system that was on the car. -
Tarmac Sportz Customer Exhaust Video's thread
cs2000 replied to Tarmac@TarmacSportz's topic in Tarmac Sportz
OK, so video 1 here is the Z with a freshly fitted Berks HFC and Invidia N1, just leaving Kaizer motors Again, on the way back after having exhaust fitted, making some noise under the Thames Estuary (Dartford) -
Haha yes mark just a bit! The torque improvement Is definitely noticible, plus j was running winter tyres Gear 3 and 4 feels so quick now, loving it. I am very impressed with marks work at Abbey, but I forgot to ask if they had any abbey Motorsport stickers
-
This. Sound? Probably not the one that will get you the most power. (e.g Pop charger) Power? Probably doesn't look that good (e.g Stillen) Looks? Probably wont sound that good (e.g any old eBay tat) Personally I have the stillen intake. You get less noise than the pop charger, but it gives decent returns if you are going in for a remap.
-
ZLED's do some good ones, probably the best you can buy, but they dont come cheap. I did put an order in, but canceled it due to the cost.
-
Next instalment! Today was ANOTHER early star meeting the boys from Abbey down on their farm, I think we all know where this is going! Some pics from the day are below. Who is that peeking from under a rather sorry looking Skyline shell... The patient is on the table Errr, yeah that's good right... lol (just a random picture from one of the dyno runs) Panorama of the dyno room. Pro tip. If you're going to stand and watch, make sure you have a coat! those fans move a LOT of air! Final dyno sheet, power was pulled back in a bit in the end from the picture I showed earlier. A package also turned up on Friday from Jack @ Royal Steering Wheels, My old wheel was functional, but it just didn't look much, and was starting to wear in a few spots, but come on, the car is 12 years old :shock:. I went for the following from Jack. Re-profiled + Flat bottom, Perforated leather on sides, Nappa leather top/bottom section + White centre band at 12 o'clock, BLACK stitching. The total cost was £195.00 plus £100.00 deposit as I went for the exchange option, I just need to return my old wheel to him, and he will refund me the deposit. Very please with the new feel! The journey still isn't over, next order has been placed with Chris at Tarmac, so more next time.
-
Try using the search next time mate, but for now http://www.350z-uk.com/topic/106961-350z-headunit-replacement-guide-with-links-to-parts/
-
You have a PM, looking forward to these.
-
Try the guides section in the forum, or search... http://www.350z-uk.com/topic/106961-350z-headunit-replacement-guide-with-links-to-parts/
-
The 6 LED versions are fine, just look for ones with no big metal heatsink on the rear
-
Brave brave man. I've done mine too, but only got it to about a 45 drug angle, bought a roller to finish it off. I did end up cracking the paint however as both my arches have rust spots and the cracks started there, but I was using a heat gun on the other areas and they're fine Honestly, it's not THAT hard, you just need to take it slow, and use heat. As for corrosion, general advice to to clean the lip well, do the rolling and then re-seal the newly formed lip with something like silicon so you don't get water sat in there.
-
Any more of these available?
-
Correct, now gone to MikeyM. Donation proof was sent via PM Mods, please lock
-
Hey guys, I have a set of 4 5mm wheel spacers available here. They were supplied by Chris at Tarmac Sportz just in-case they were required for my wheels. Turns out they're very muich not required! I got these for free thanks to Chris, so I don't want anything for them. All I ask is that you make a donation to the club for whatever you think these are worth. Send me a PayPal screenshot of you having done this, and il send you the spacers, sound fair? Club donation link is below, or in the banner above, top right. https://www.paypal.com/cgi-bin/webscr?cmd=_xclick&business=accounts%40350z%2duk%2ecom&item_name=350Z%2duk%2ecom%20Donation&no_shipping=0&no_note=1&tax=0¤cy_code=GBP&lc=GB&bn=PP%2dDonationsBF&charset=UTF%2d8
-
Haha yeah, but I think you guys are a bit special For most people, they may at the very most do it each time they changer a car.
-
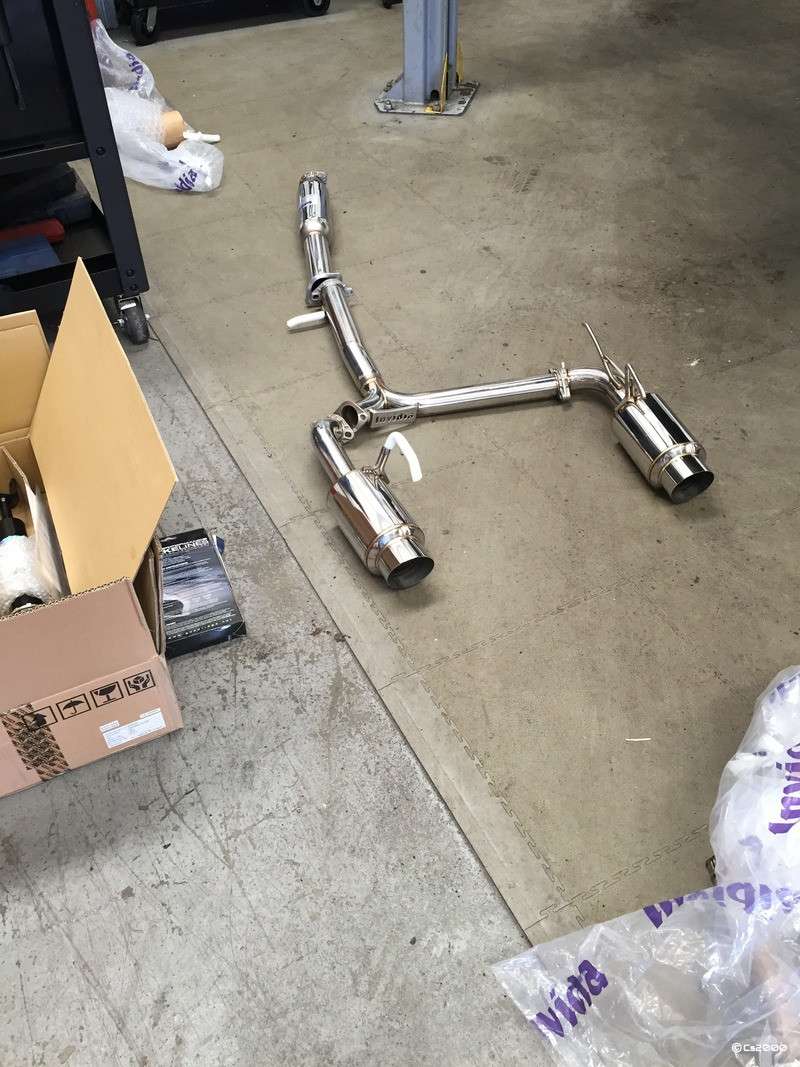
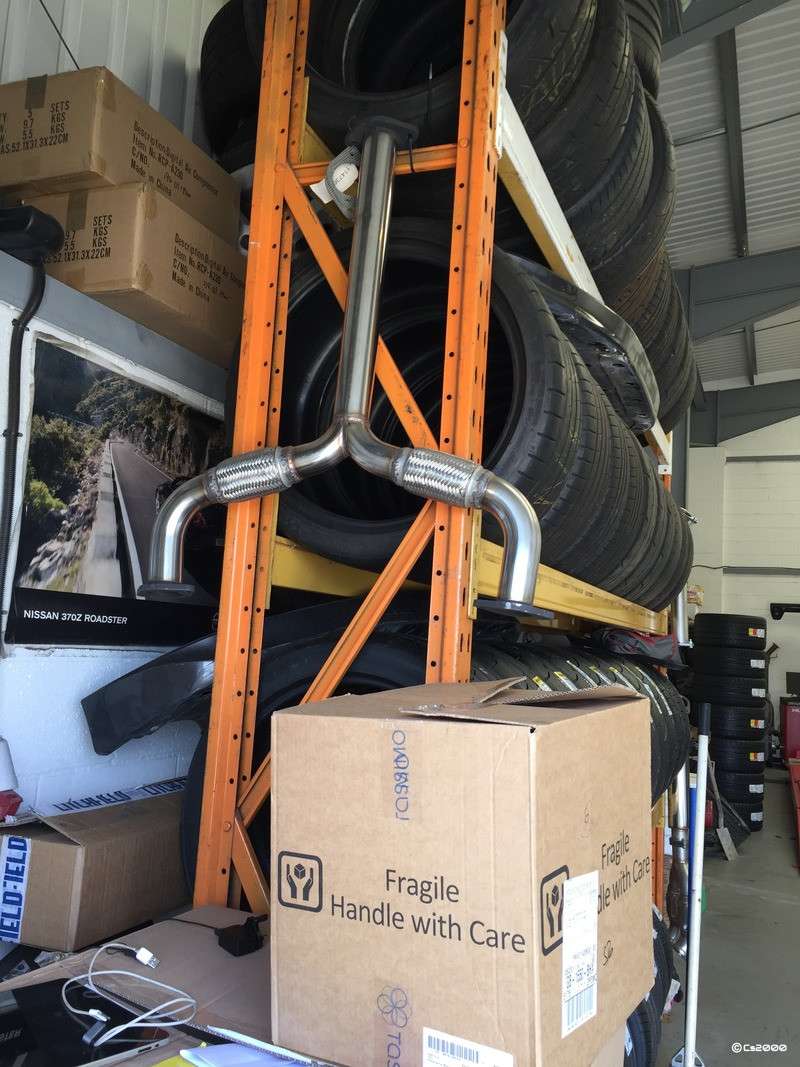
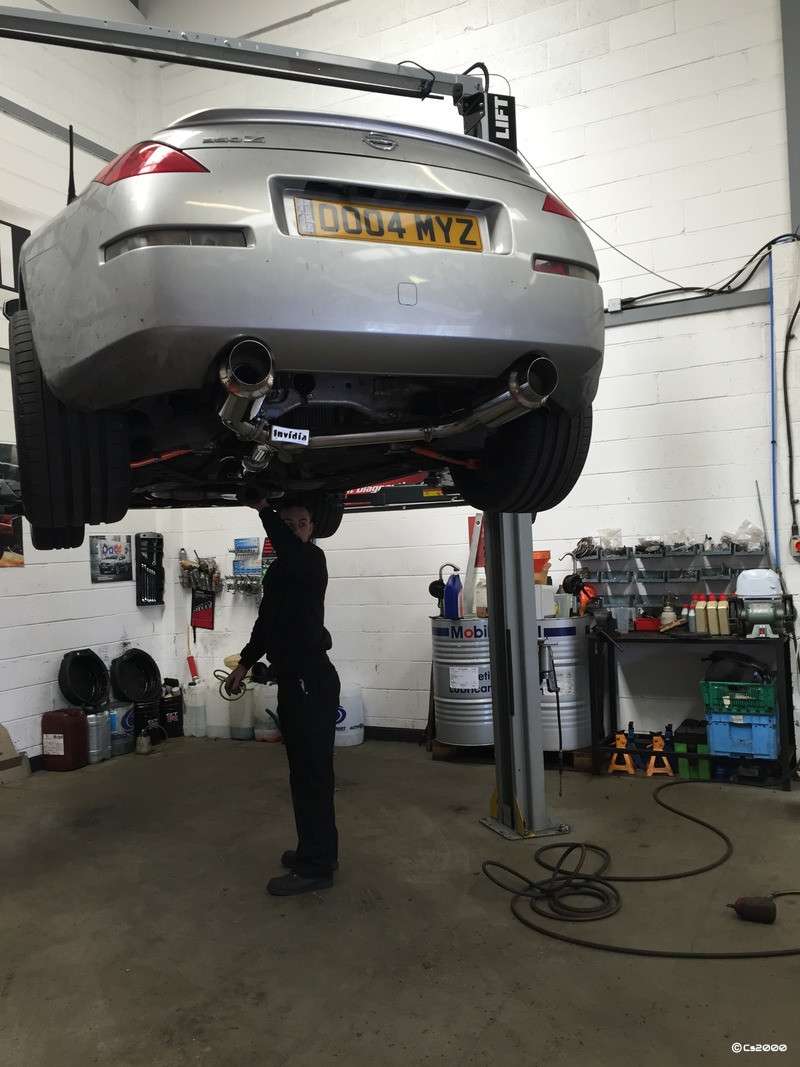
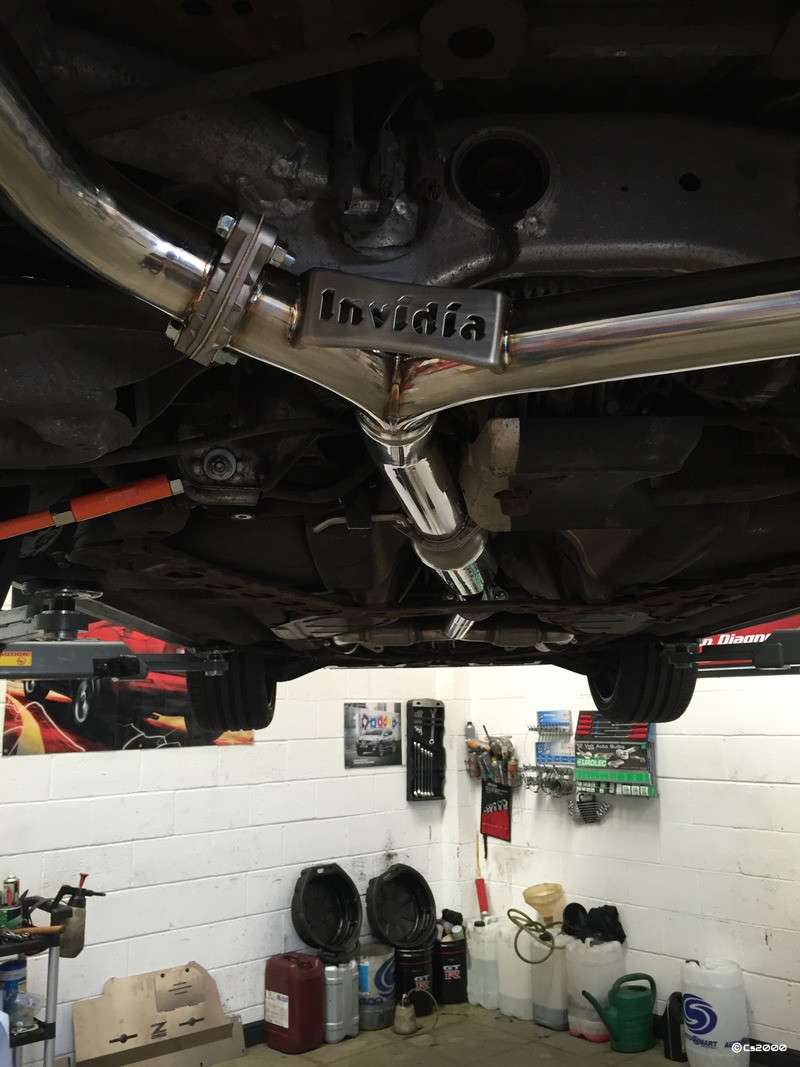
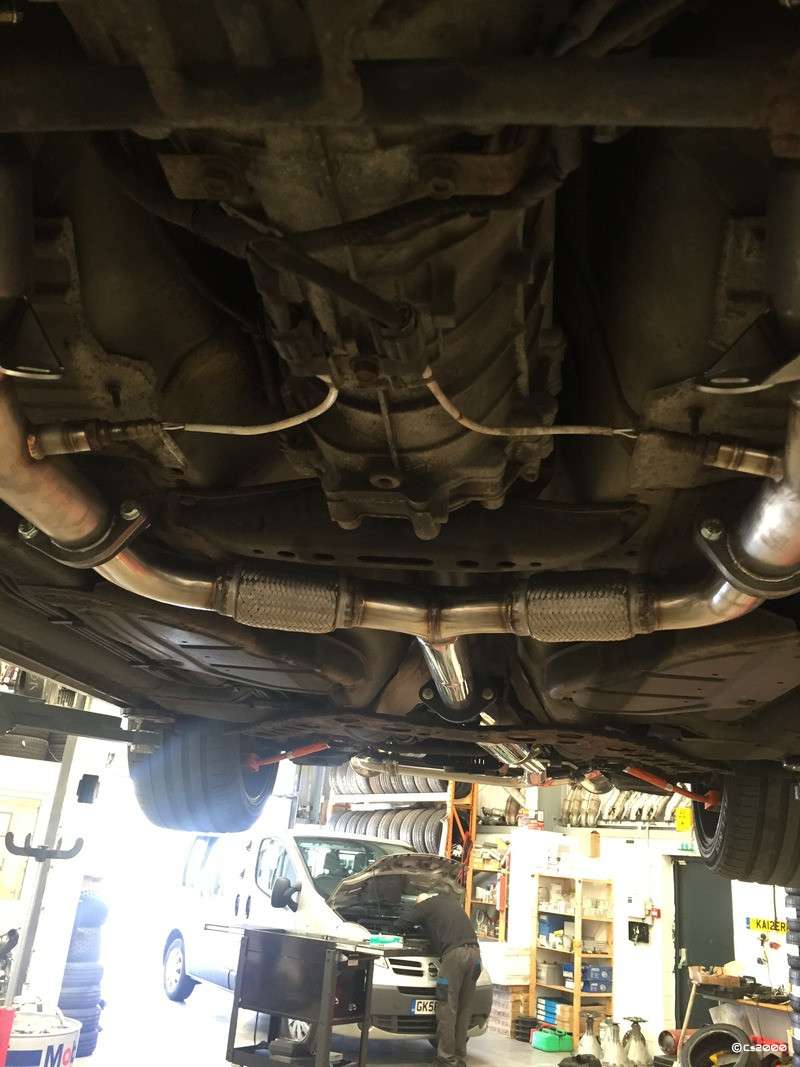
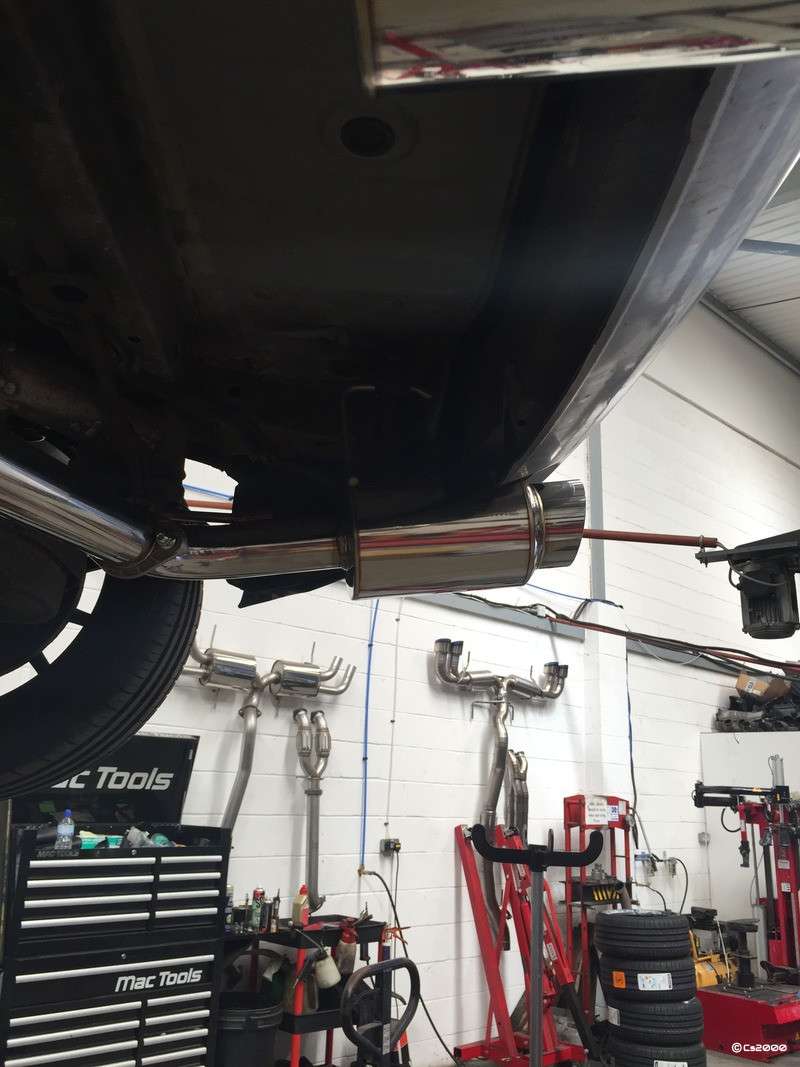
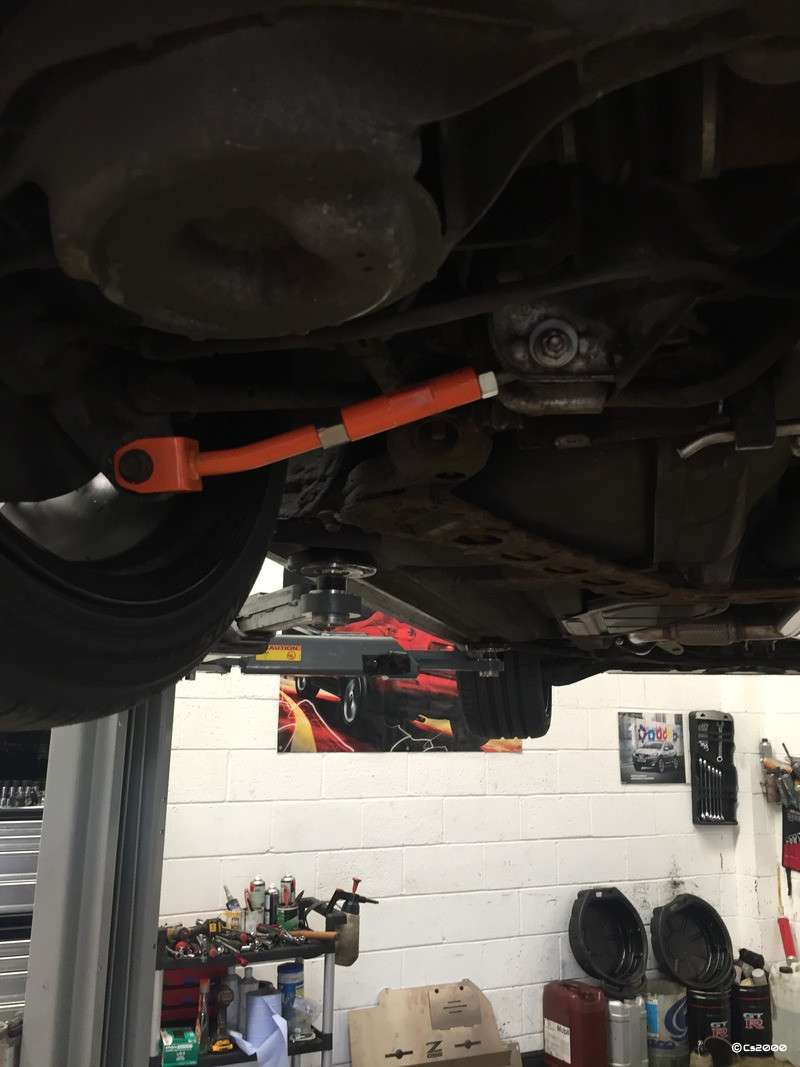
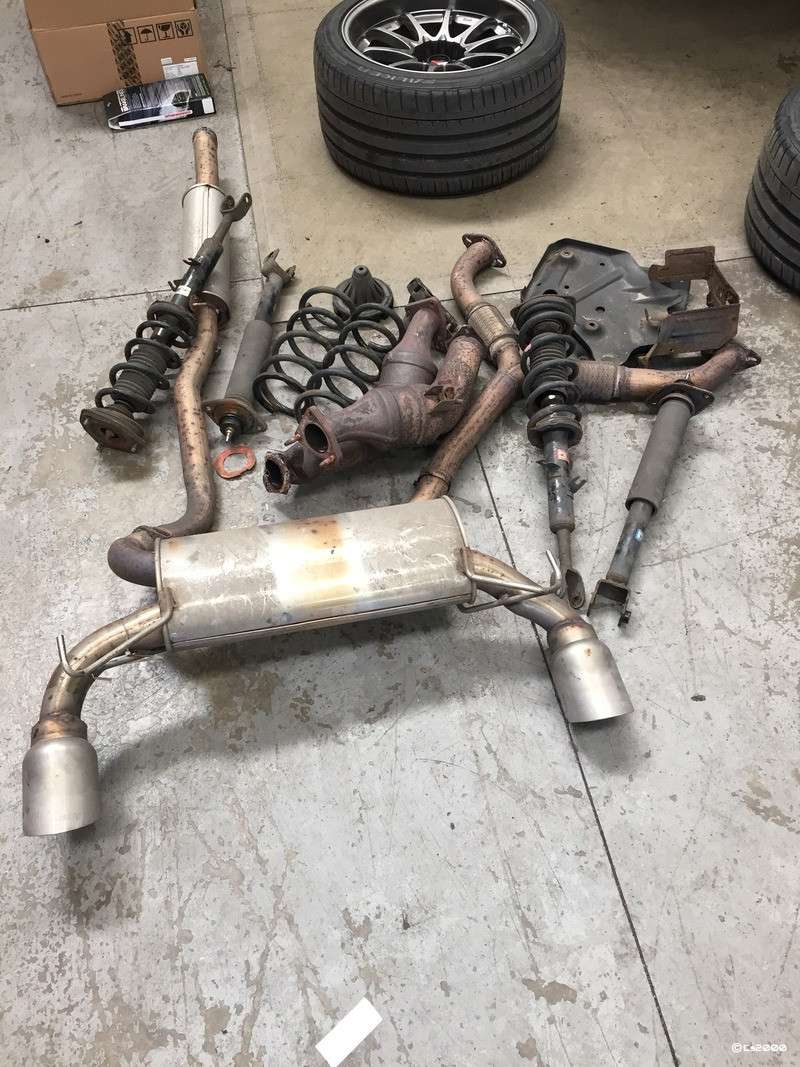
Wednesday was a very long day at Kaizer! So the job list was as follows; Berks HFC's Invidia N1 Exhaust BC Coilovers P3 Service The service I believe was done first, boring so I didn't get any pictures, but next came the exhaust. The bolts on the old one put up a bit of a fight but eventually it all came off, we unpacked the N1 and this is what we saw. Where's the Y Pipe??? SO off to Tarmac's website and I saw this This would be fine, except the previous owner already fitted a Powerflow Cat Back system, so I didn't have the stock Y pipe. Damnit. Somehow, however, Sly has a Y pipe from Clark Motorsports just hanging around, literally. So yeah, SOLD! http://www.350z-uk.com/topic/90183-new-y-pipe-available-from-cms/ New system mounted up on the rear The CMS Y pipe bolted up to the N1 The N1's tips actually fit in the standard exhaust holes with no mods I also fitted the Drift Works camber arms on the rear, and Sly supplied the Eibach Toe bolts I didn't get any pictures of the coilovers being installed, but it took the guys literally about 45 mins from start to finish! The pile of bits removed from the Z There is only one thing missing really in the box with the Invdia N1, this is a set of ear defenders! Seriously, that, combined with the Berks HFC is absolutely ridiculous! I have tried to fit the silencers that come in the box but they don't fit so I need to do some investigation on this. Just wanted to say a big thanks to Sly, he fitted me in with very short notice, and of course thanks to James and Ashton as they spent literally the whole day working on my car with only a couple of tea breaks haha. They also didn't mind me standing around like an anxious parent watching them work and asking questions! More next time.
-
Hey all, Due to me needing some more clearance in my arches, I have ordered an arch roller to roll the inside lip up. I know there are companies that do this for a fee, but Arch Enemy wanted 100 for 2 arches. Having done it before, I know that as long as you use heat, and your arches aren't already damaged, and you take it slow, its relatively easy to do it yourself. Just wondered if anyone else wanted to borrow mine after I'm done with it, its kinda a one shot deal isn't it? When you've bought it, you use it once, and then what... hence my offer. Obviously, if anyone does want to borrow it, any damage you do to your car/paint is on your head, I'm just loaning the tool. When it arrives and its all done il stick some pictures up.
-
Youd also think Nissan would be able to sell you the O rings that seal the spark plug holes in the rocker covers so you could have a cheap fix for the common fault of oil getting into that chamber, but youd be wrong and find out they make you buy the entire rocker cover, or that they wouldn't charge you £35.00 EACH for a brake bleed nipple, but again....
-
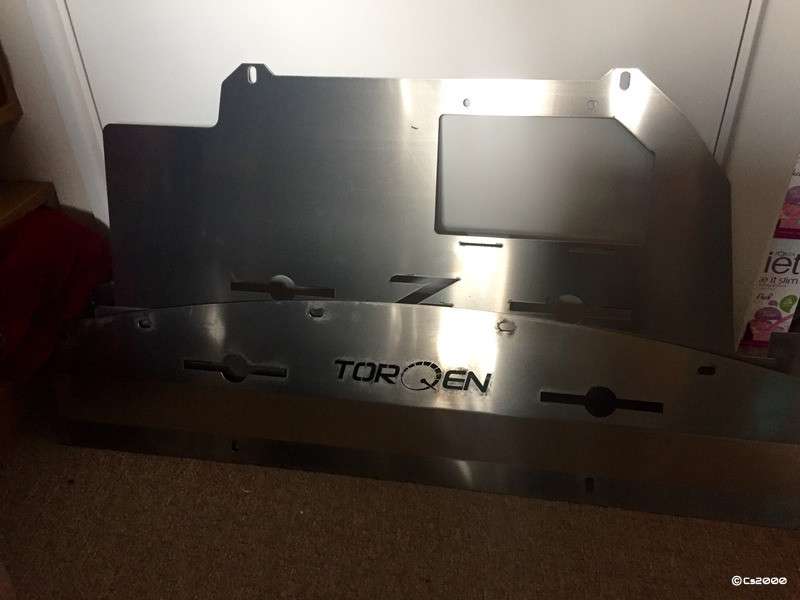
Have a look at the logo on the undertray, is there any U Glad to hear you liked the undertray Installation instructions and pics are available here: http://www.350z-uk.com/topic/97969-torqen-10-350z-370z-torqen-undertrays/ Haha yeah I realised as soon as id submitted it and corrected it before I thought anyone noticed, but you were quick in there Quality is great. I did see those instructions and they helped, but things like, what do you use to hold the little trap door up?? I ended up using 10mm panel clips as I couldn't figure out what I was supposed to do Other than that, perfect.
-
Site looks much better than the old one. Good work.
-
This weekend was a testing one.... First job was nice and simple, get rid of the old pastic undertray which was 95% cable ties, and replace it with a Torqen 350z metal one. Yes I know its a crappy picture, but its a very well made piece of kit. Having new bolts and clips is a life saver, but it could do with some proper instructions. It all comes together easily enough however when you're under the car. Il get some pics when she is next off of the ground, probably Wednesday. Next, I ditched the idea of arch extensions as actually the car has settled since I had it jacked up fitting the wheels and there is only a few mm of tyre tread showing which can be adjusted easily in camber, but i decided to fit some camber arms to the rear. First job was to undo the bolts on the wheel side, no worries with a 2ft breaker bar as they were copper greased. Next, get off the toe bolts.... Had the car on axel stands, wasn't enough clearance for the 2ft breaker bar to turn, tried to slide the 4ft bar in from a different angle, no luck. I trued using heat, and penetrating sprays to no luck. I then caved in, went and bought an air compressor and a 350lbft rattle gun to try and get the bugger off. Yeah, it didn't even shift a mm. So i resorted to jacking up the car with two jacks to the max they would both go and managed to get clearance for the 2ft bar. Using my feet, and someone else to support the other side of the car so it wouldn't move, it turned then the little **** snapped off! This was 3:30 on a Sunday, as we all know, shops close at 4. I have a garage appointment with Sly on Wednesday so I physically HAD to get this working. I ended up racing to B&Q and getting the bolt that was the same thickness, but another cm or so longer and some Nyloc nuts. Currently the toe angle is all over the place on both rear wheels but it is secured with two bolts which should get me to Sly's so he can replace them with two proper toe bolts. In the end, we did get the arms swapped out, so the camber can be adjusted back into spec when lowered on the coilovers, the only casualty was two toe bolts, and having a temporarily very unstable car, squirms all over the place due to the hugely out of spec alignment! Looking at the sheared bolt, I don't think Godzilla himself could have got this little bugger off, it looks to have well and truly rusted all the way through the bolt and both on the front and rear so I think it was always going to snap, it had no copper grease on it either which didn't help matters. The trials and tribulations continue Wednesday. Stay tuned...
-
Cool - do you remember what actually comes cable-wise? There's an HDMI output and two USBs on the AVIC F70 DAB I have - are the HDMI and USB cables supplied? You don't get a HDMI cable, but you do get 2 USB extensions, a male to female one so you can either stick a SB dick straight into it, or a iPhone cable. Personally, I have iPhone cable in USB1 and a USB stick in USB2
-
The cables in the box with the headunit are long enough to run along the centre console and come up in the cubby you don't need any extrensions.
-
No worries mate, glad I could be of assistance. A proper guide on busters RCA mod is now available here http://www.350z-uk.com/topic/107583-how-to-busters-rca-headunit-volume-fix-guide/
-
Thanks for the comments Yep, assuming you bought the pioneer patch lead (which was the one I linked to in my other thread, youre good to go. Yes, it is a must to be honest. Others who havnt done it have either had to put the volume of the headunit up to full to get anything decent out of it, or but inline boosters at £18.00 each, and you need two. The mod is MUCH cheaper as the only thing you will likely have to buy is heatshrink. Yes, the sub still works. If I'm honest, I'm not 100% sure how or why, but trust me it does. No chance of blowing the speakers unless you turn the volume up WAY past the level that would be considered loud, the sound would distory way before then anyway, same principle as any speakers TBH. Reverse camera is ideal to do at the same time, but it isn't part of this mod per-se.
