


Keyser
-
Posts
9,958 -
Joined
-
Last visited
Content Type
Profiles
Forums
Events
Gallery
Store
Posts posted by Keyser
-
-
Morning,
Quick update before work

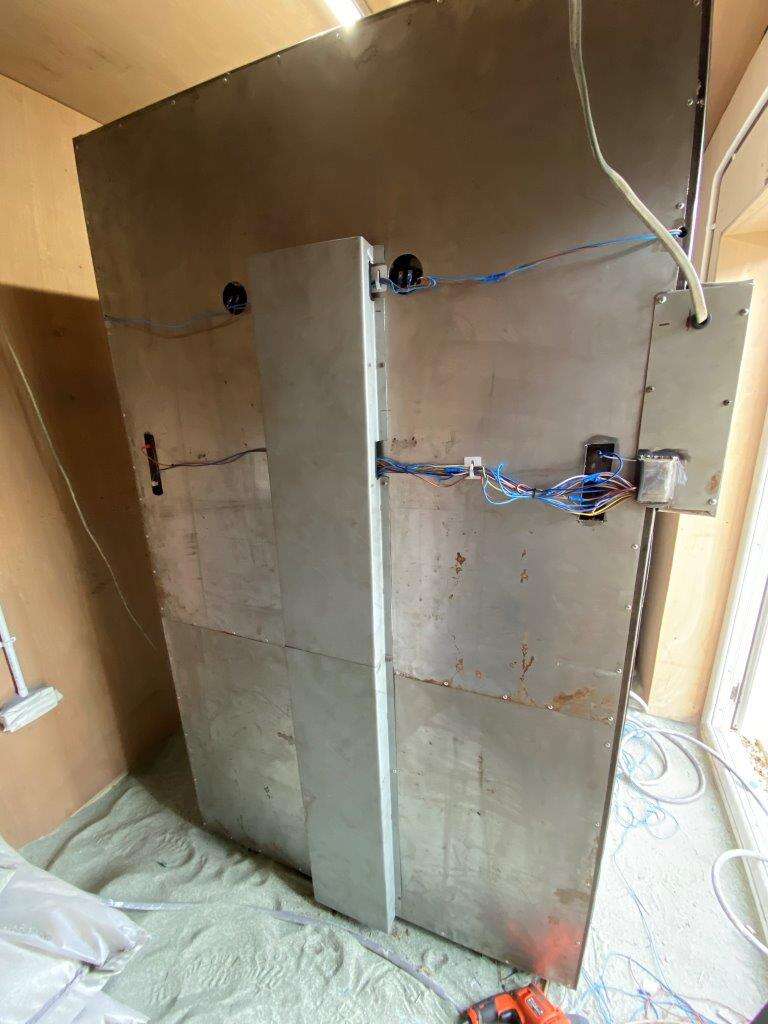
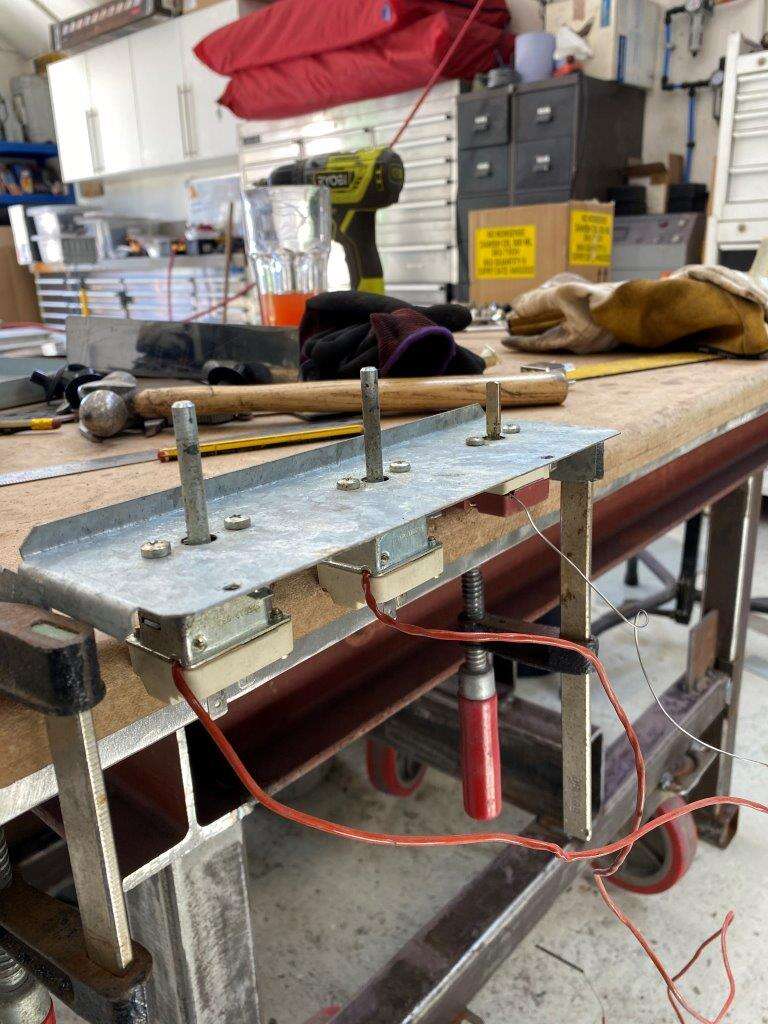
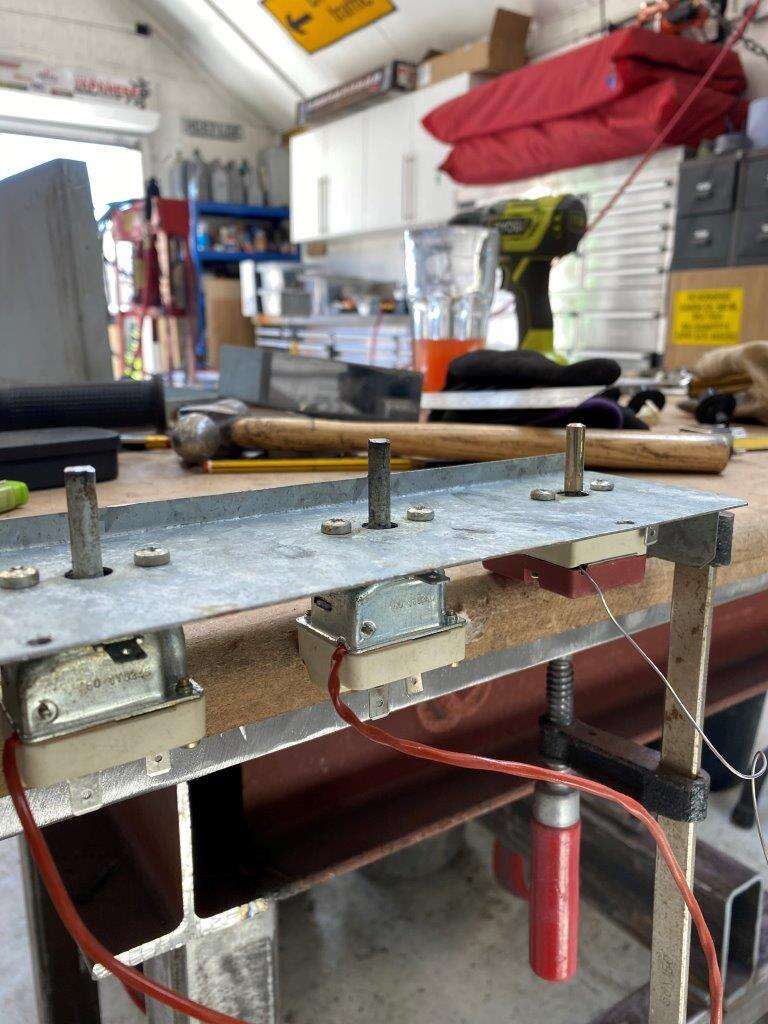
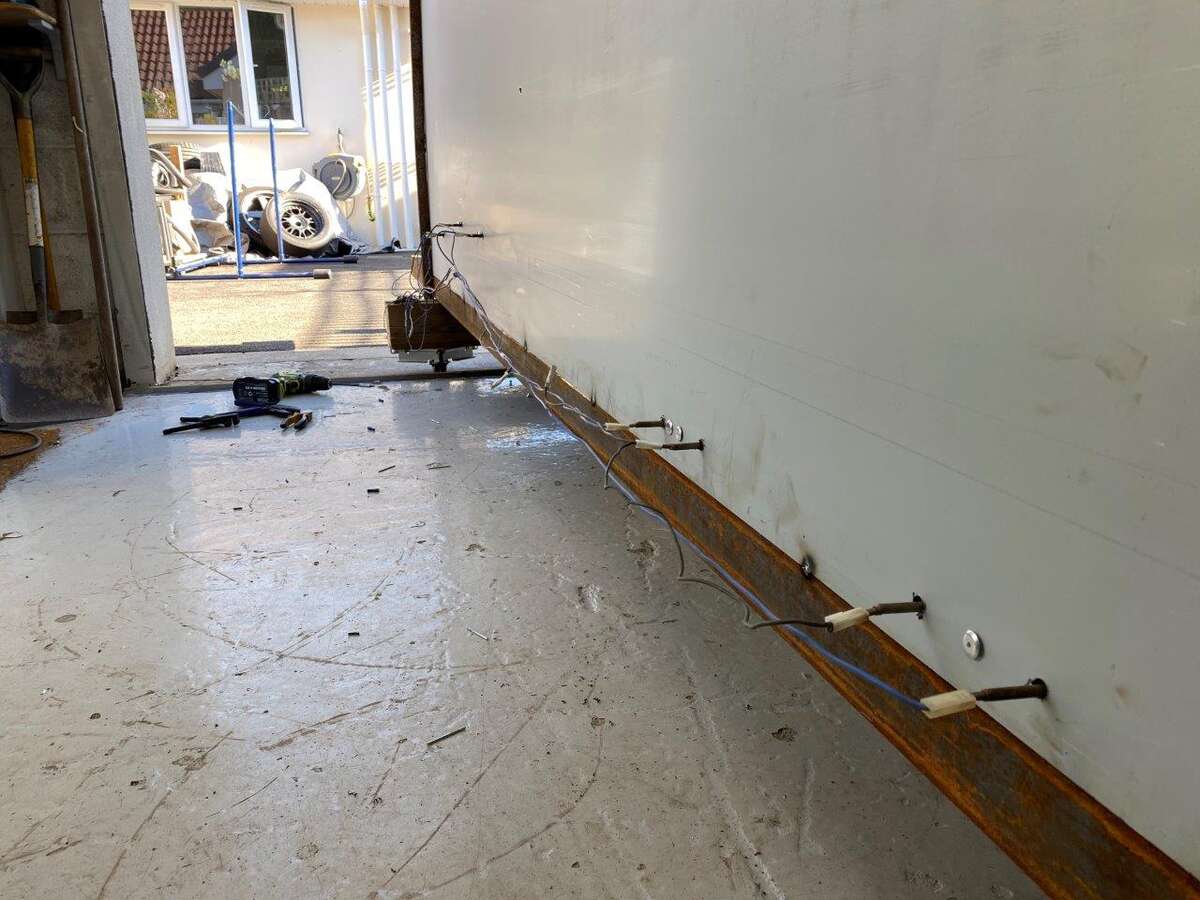
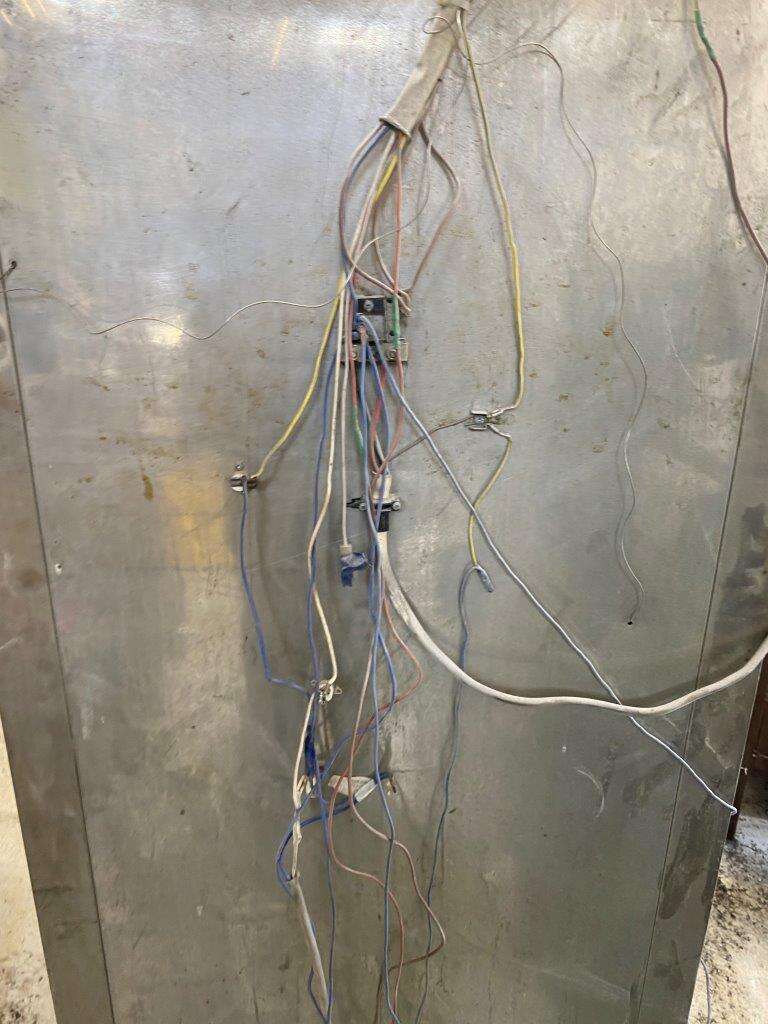
Onto the wiring then
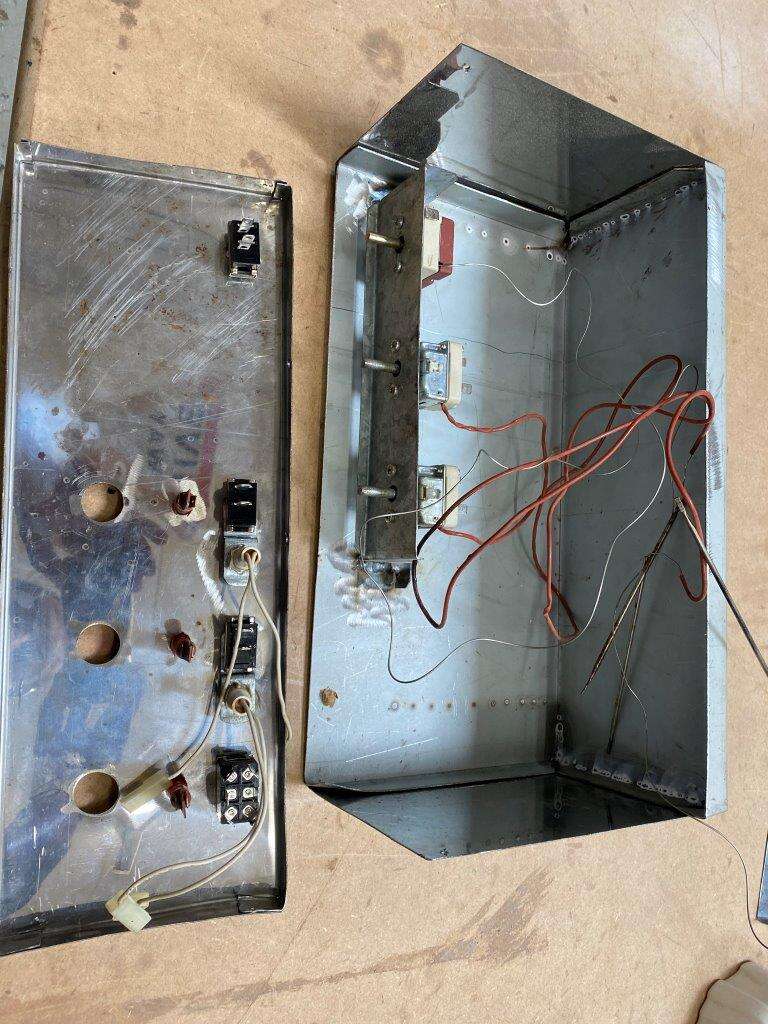
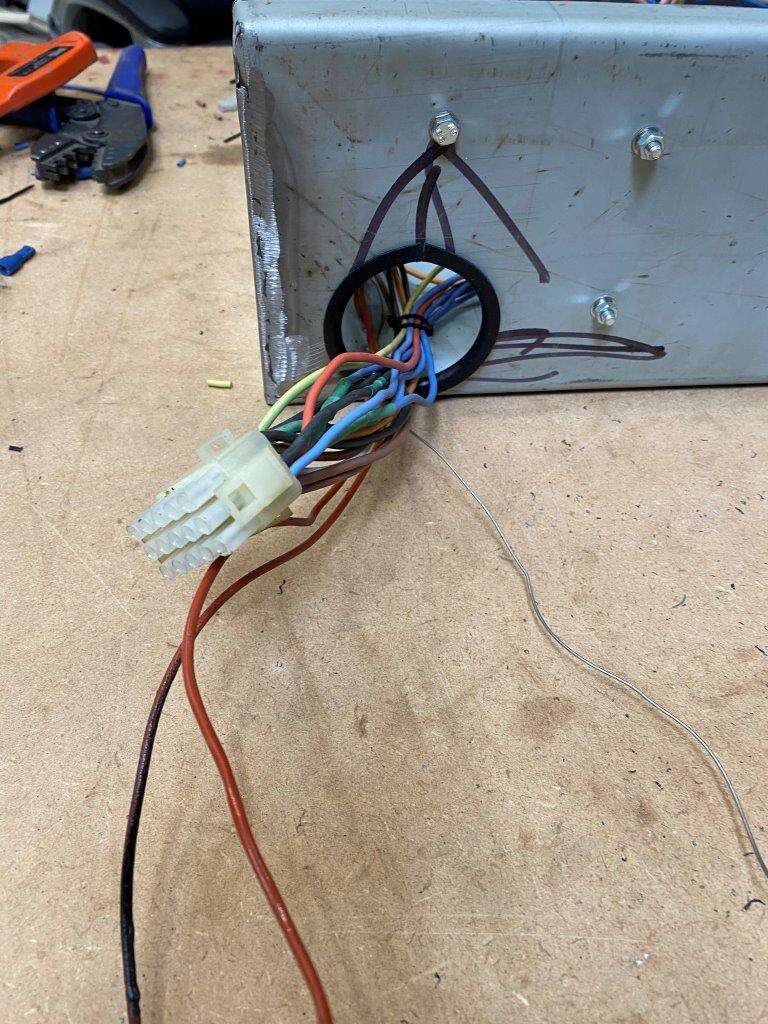
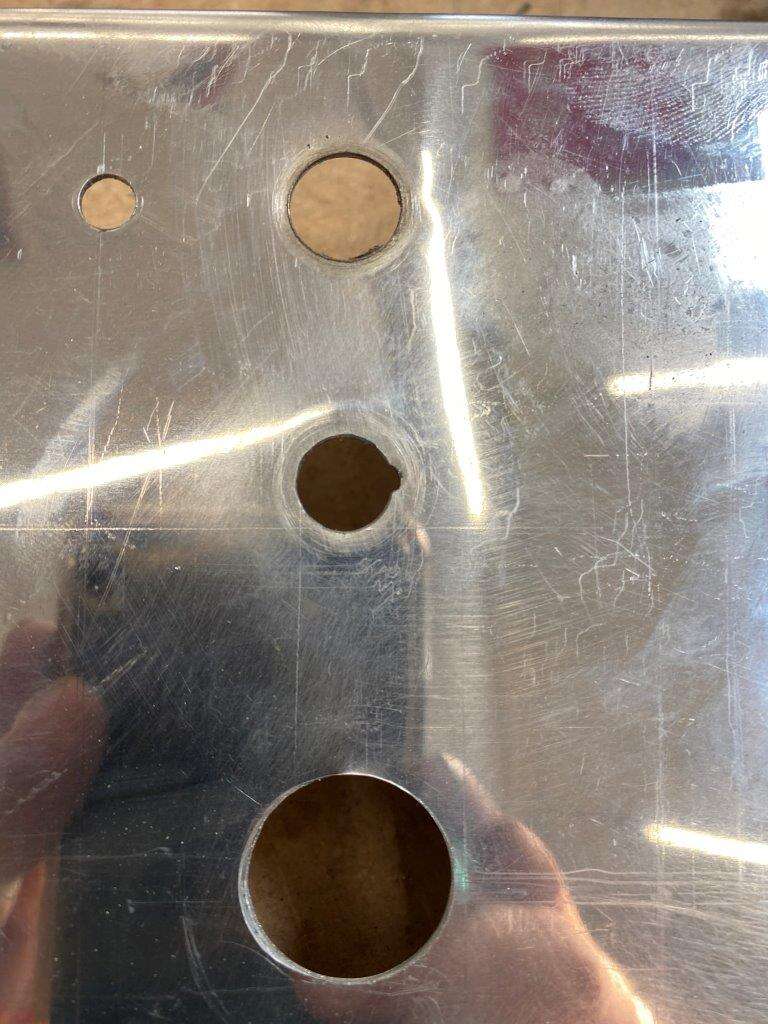
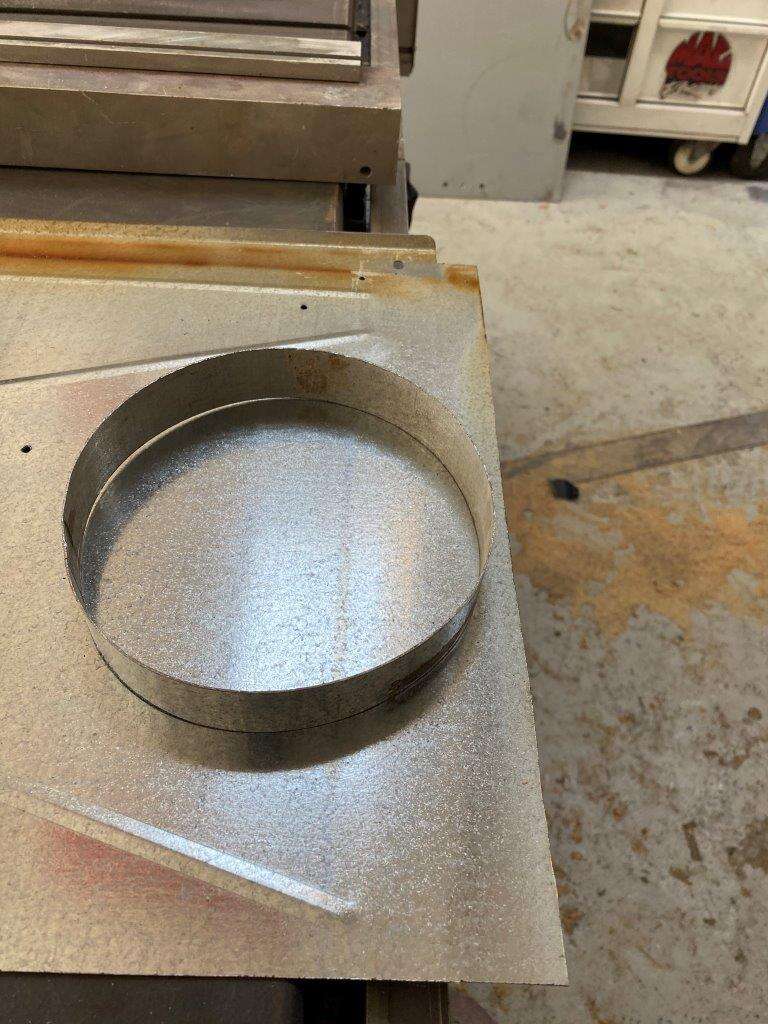
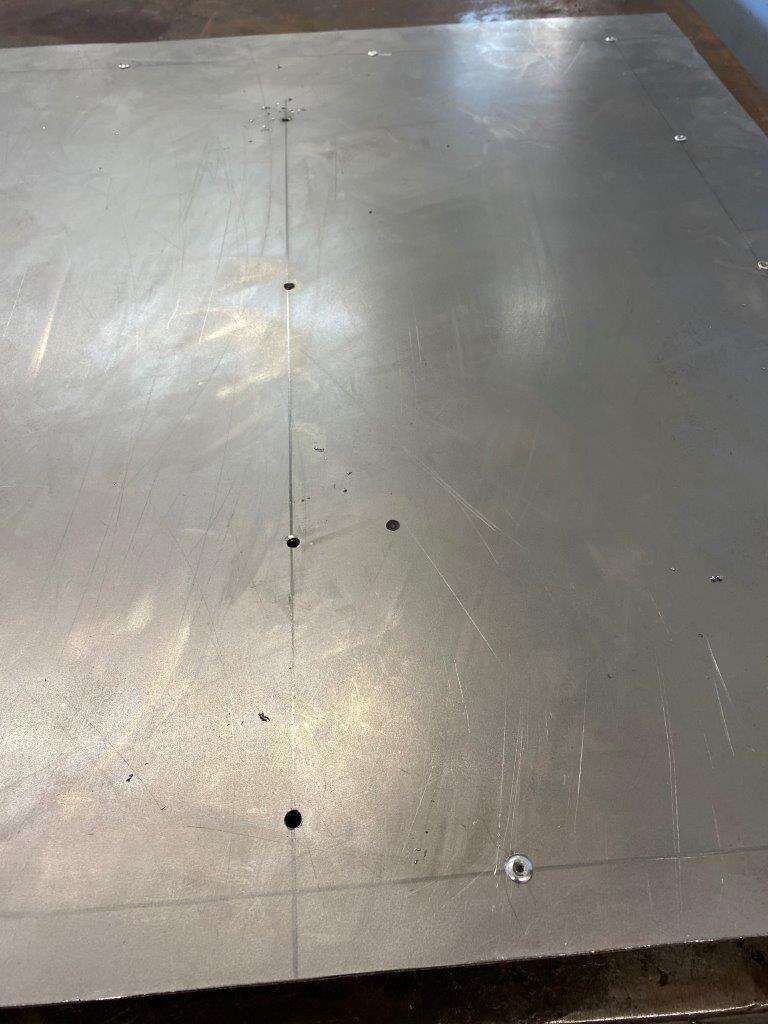
Started with a hole for the cables
Started laying in wires
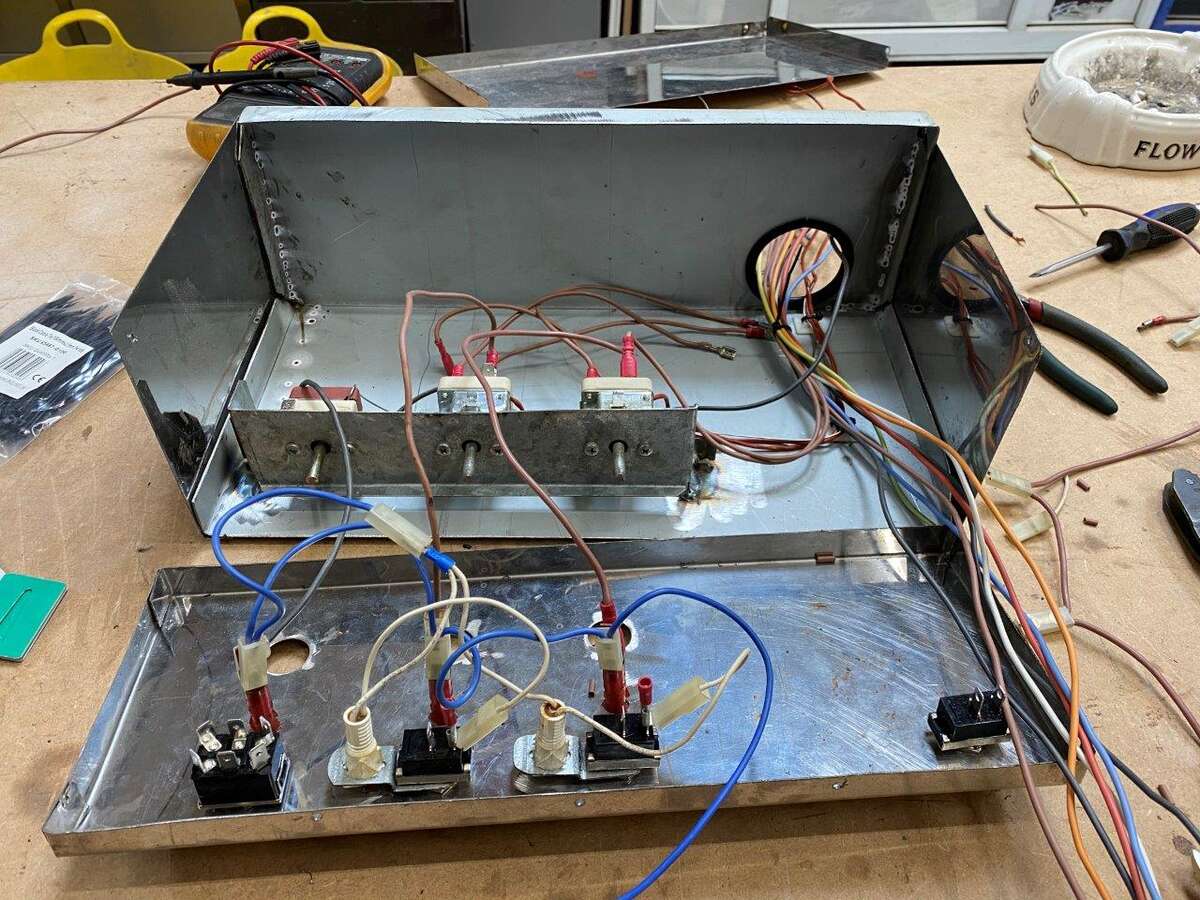
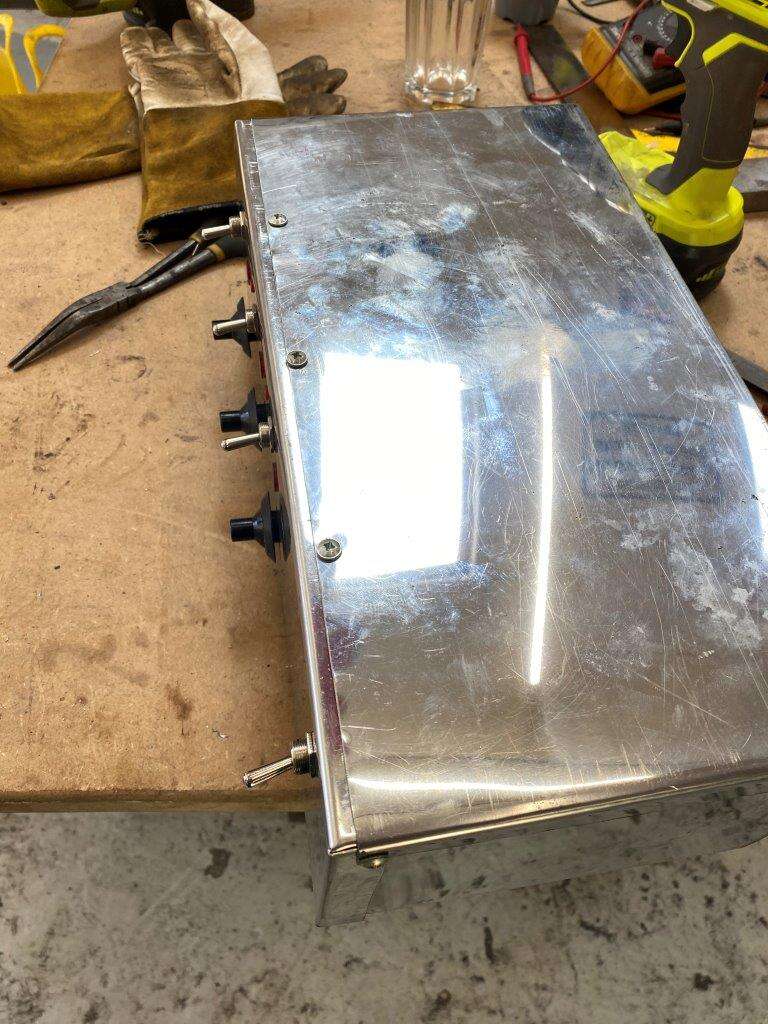
Took a while but got all the switches wired up in the end

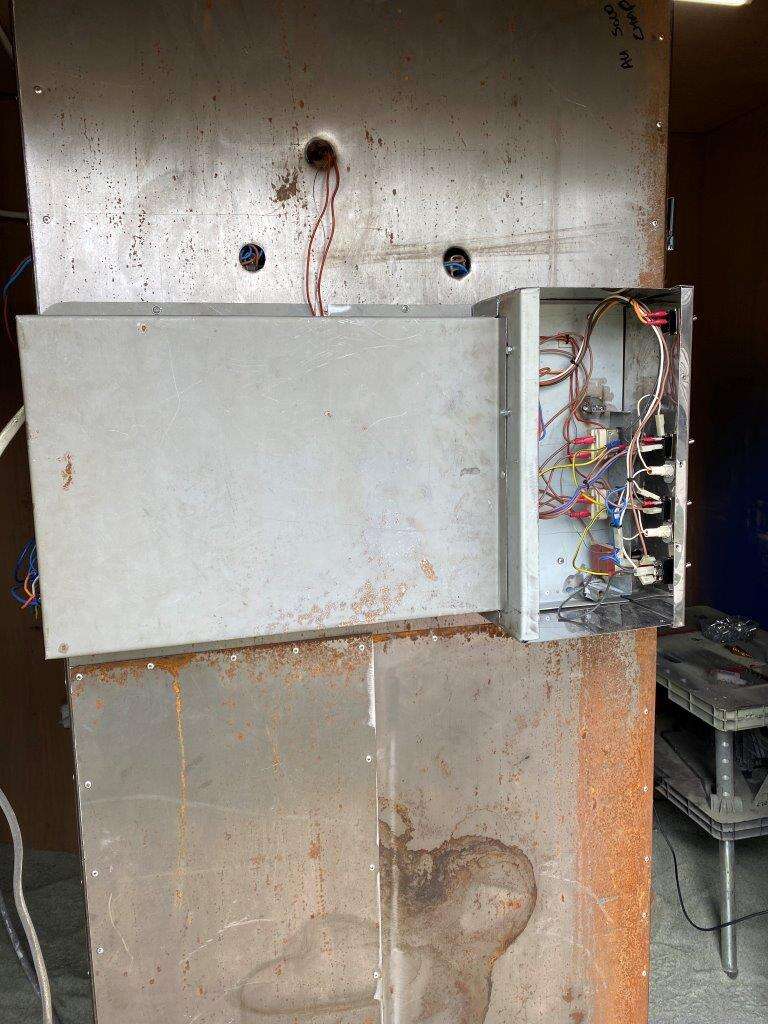
I used a plug from the Smeg so the control box can be removed if required
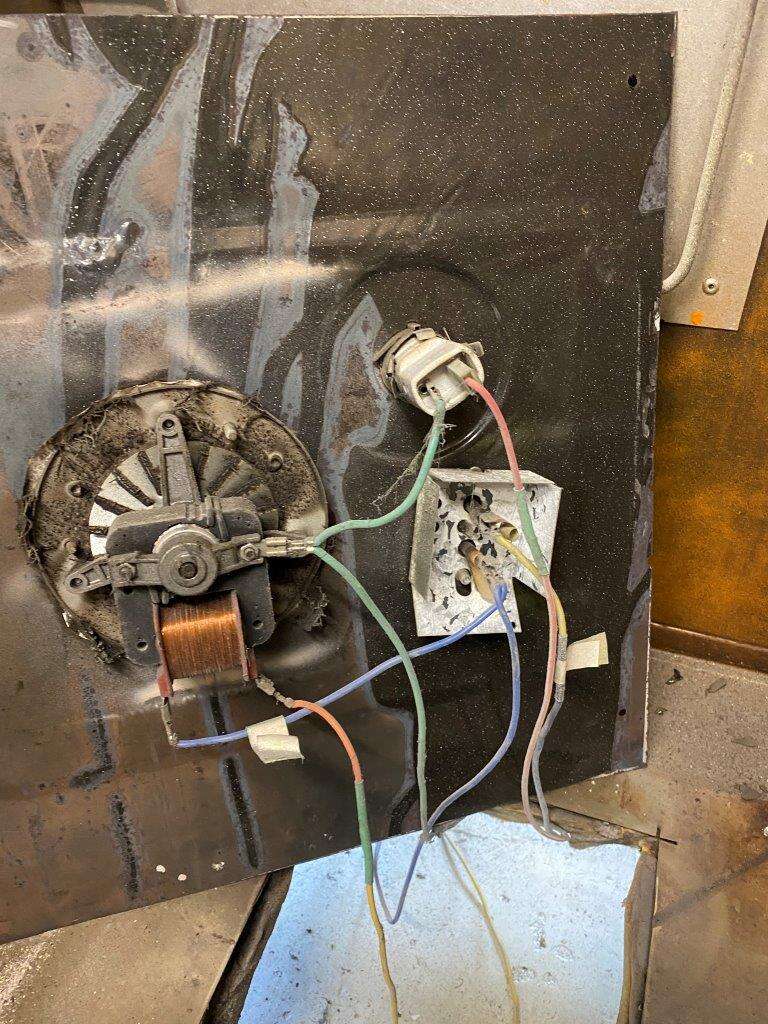
Mounted it onto the oven
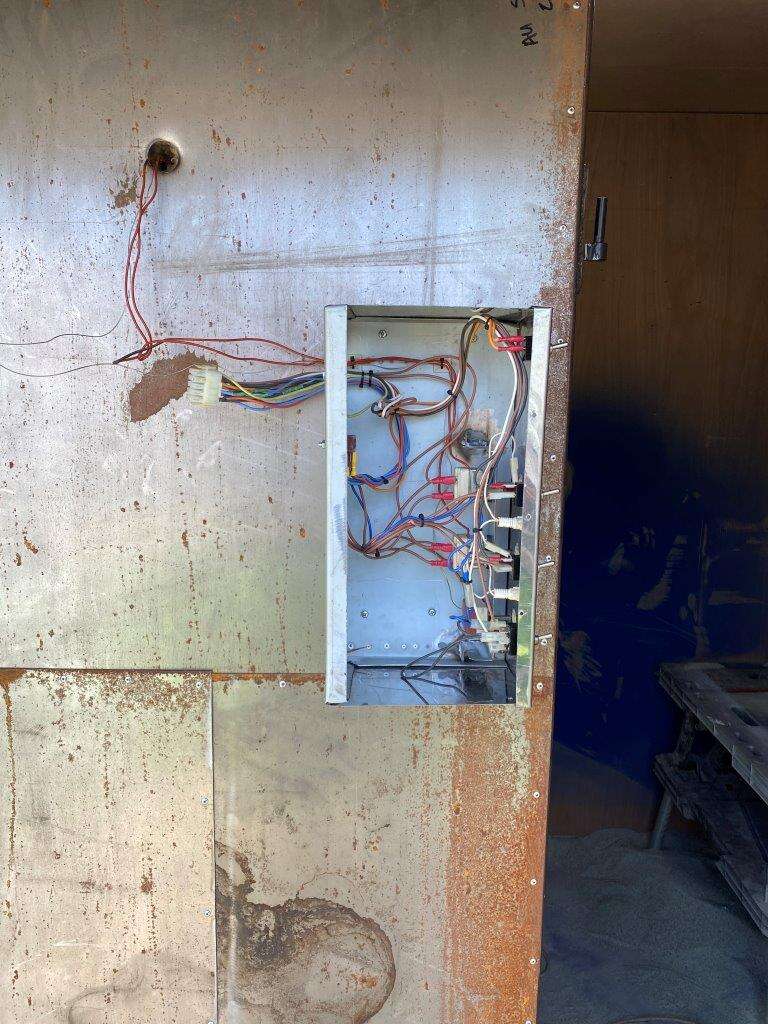
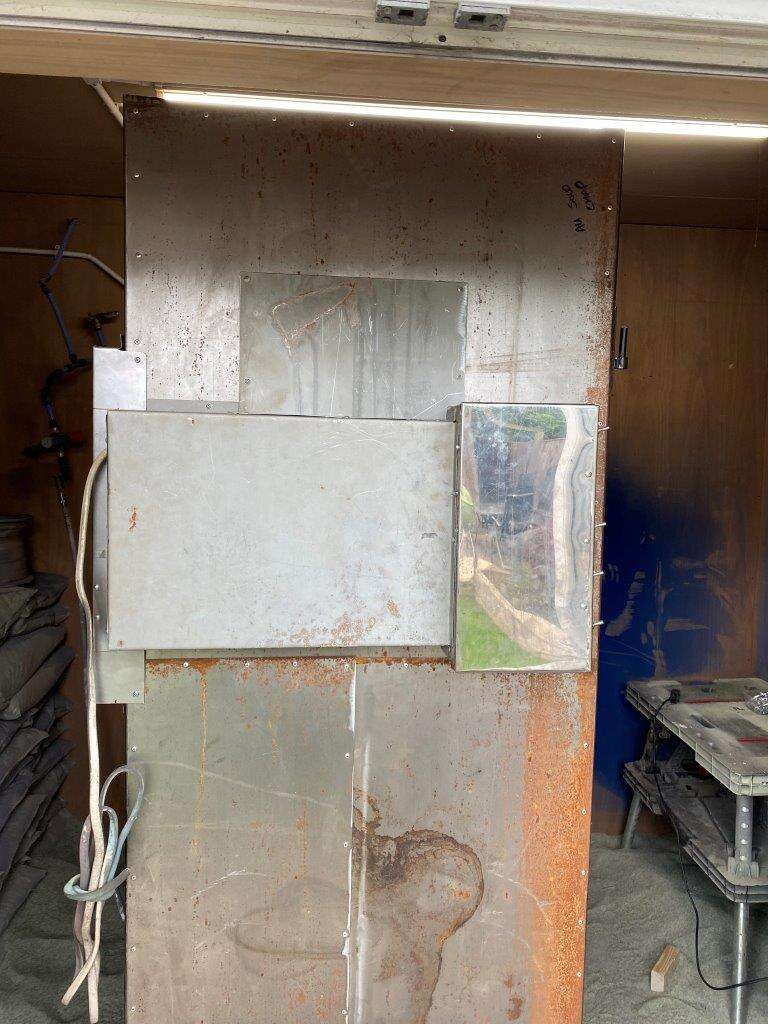
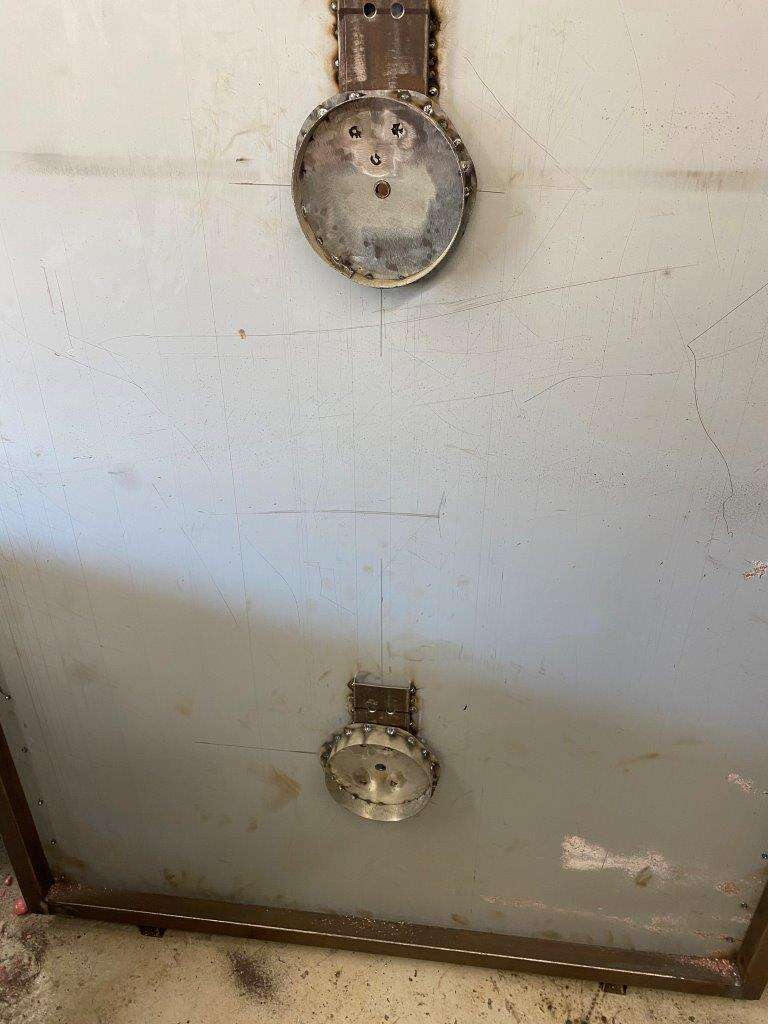
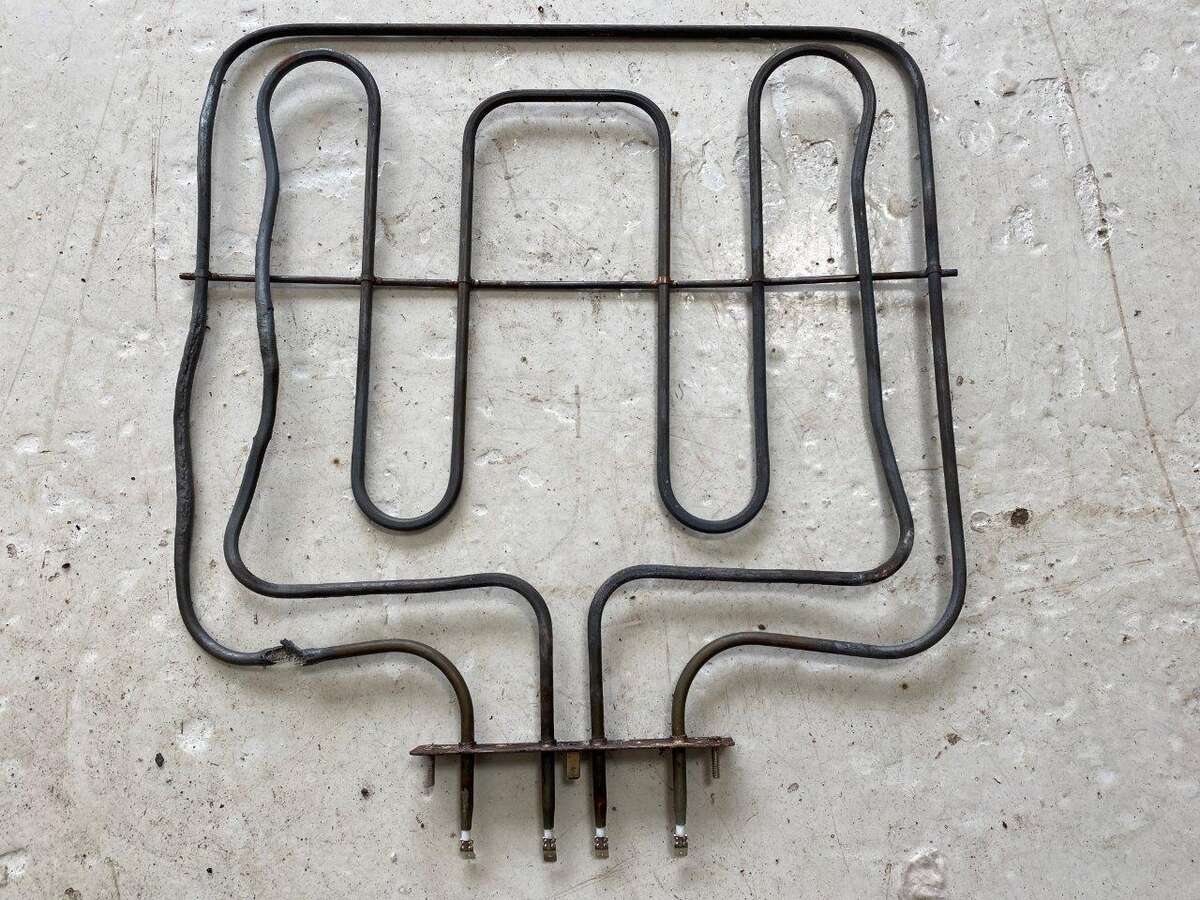
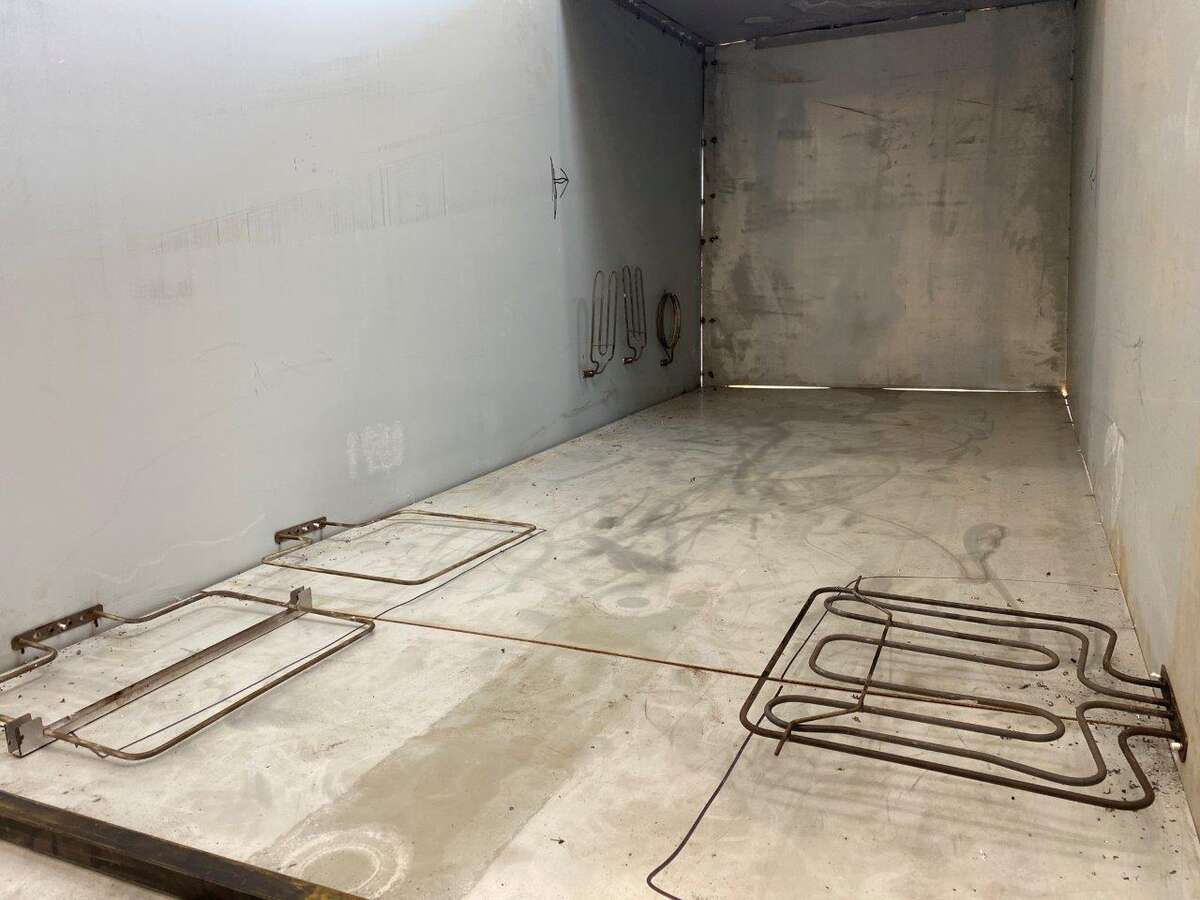
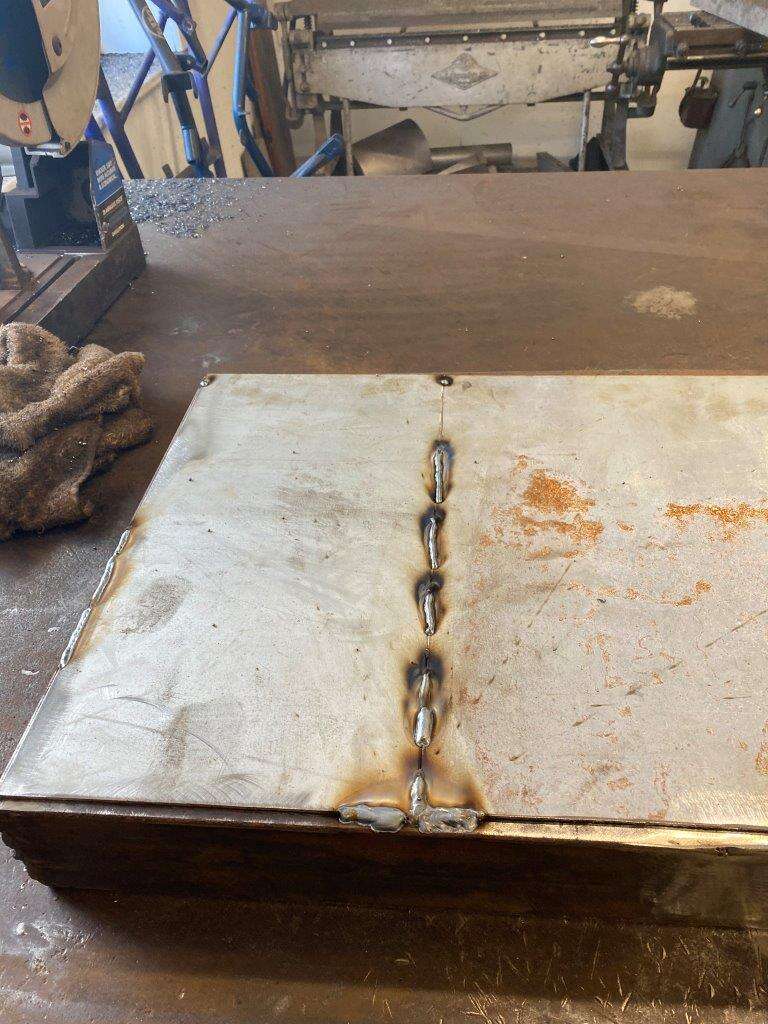
Put the elements in and ran the wiring round
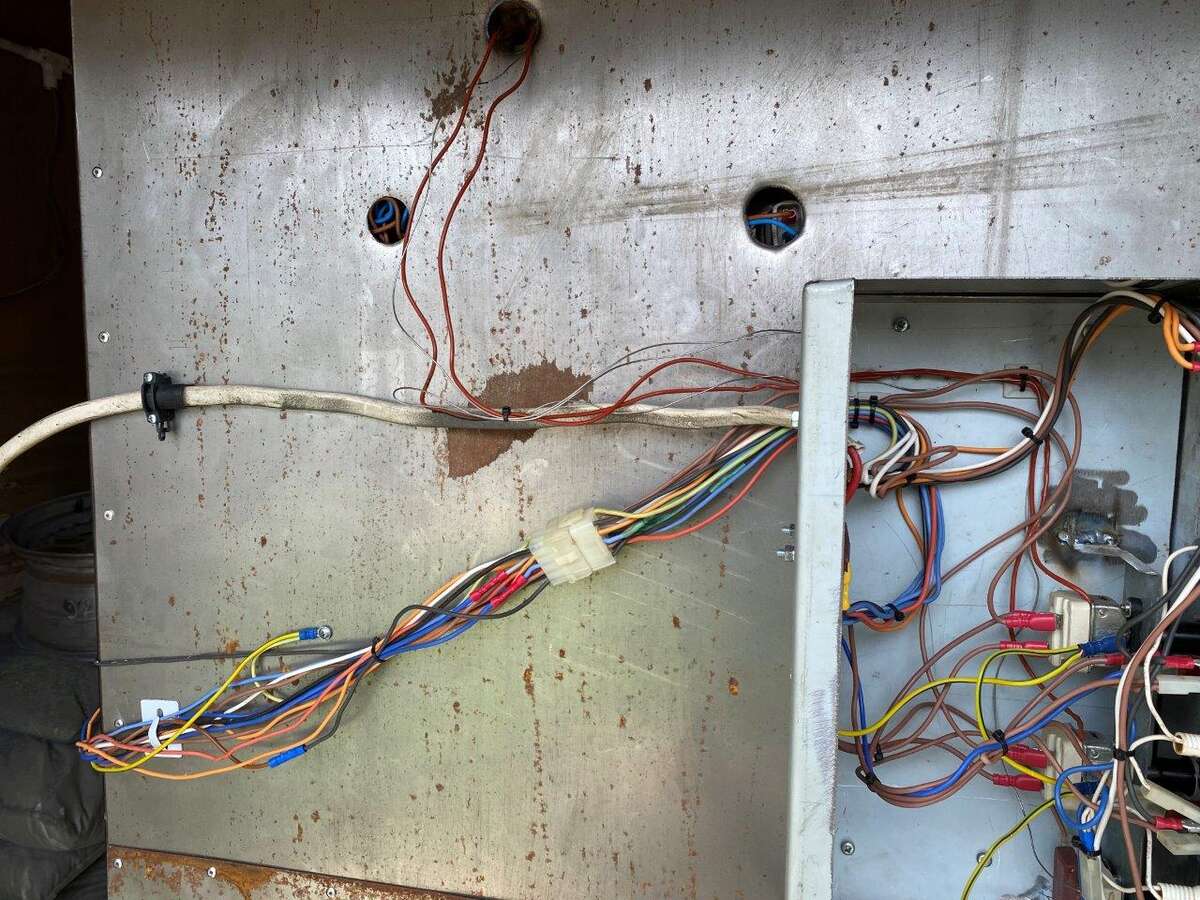
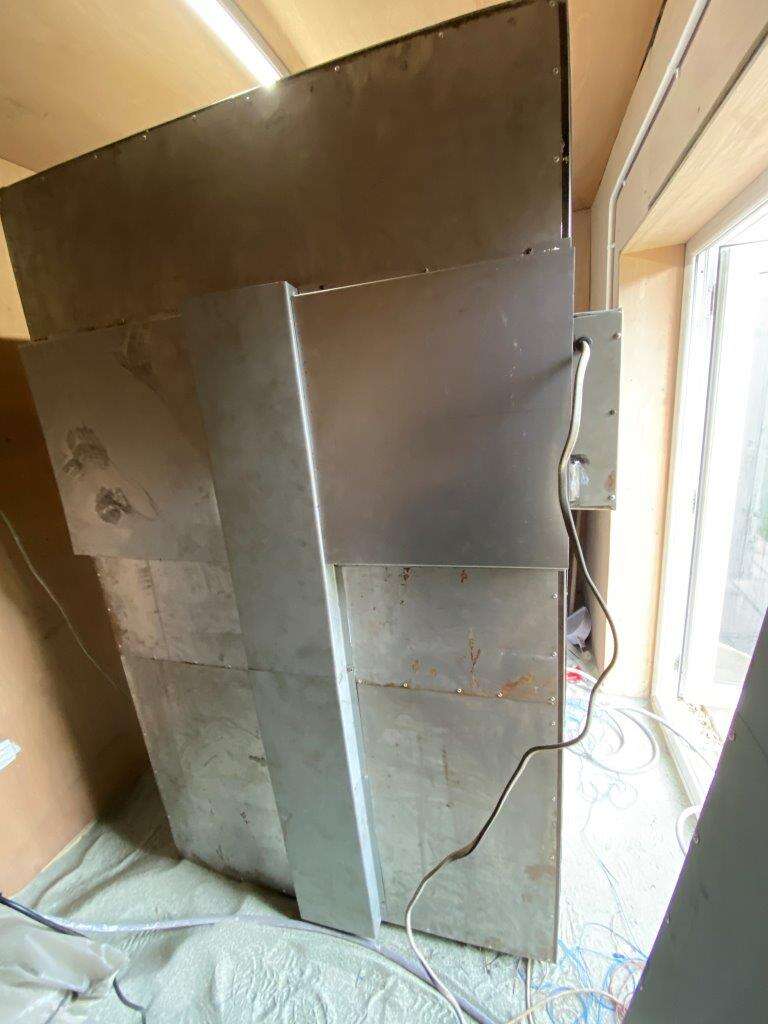
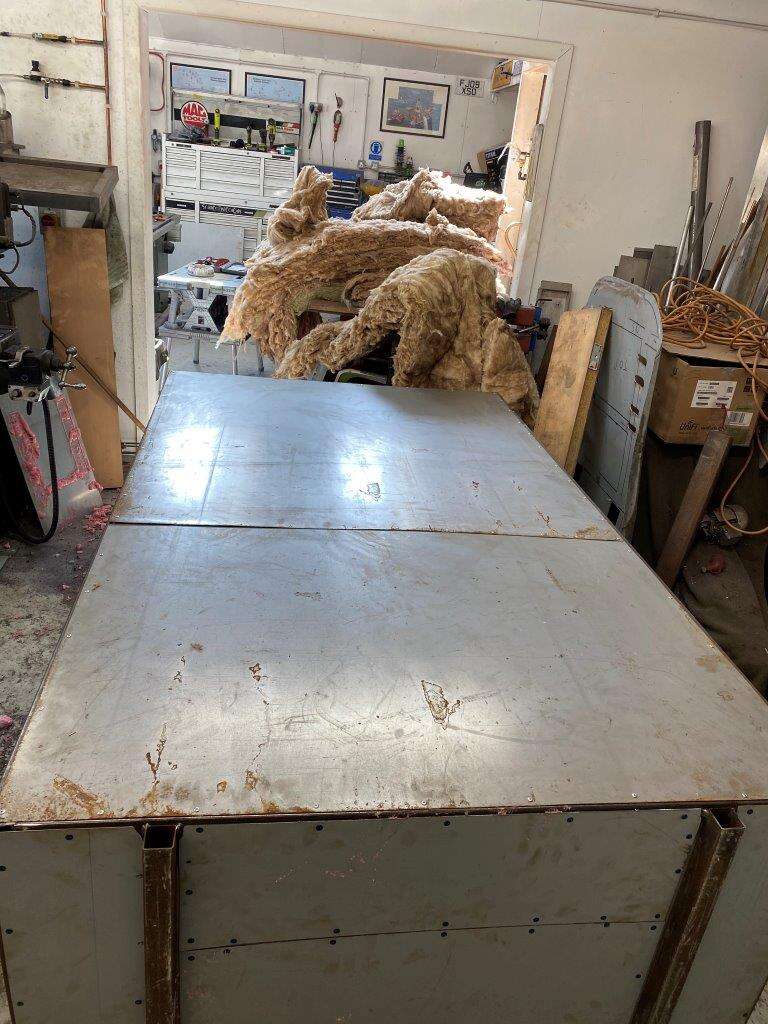
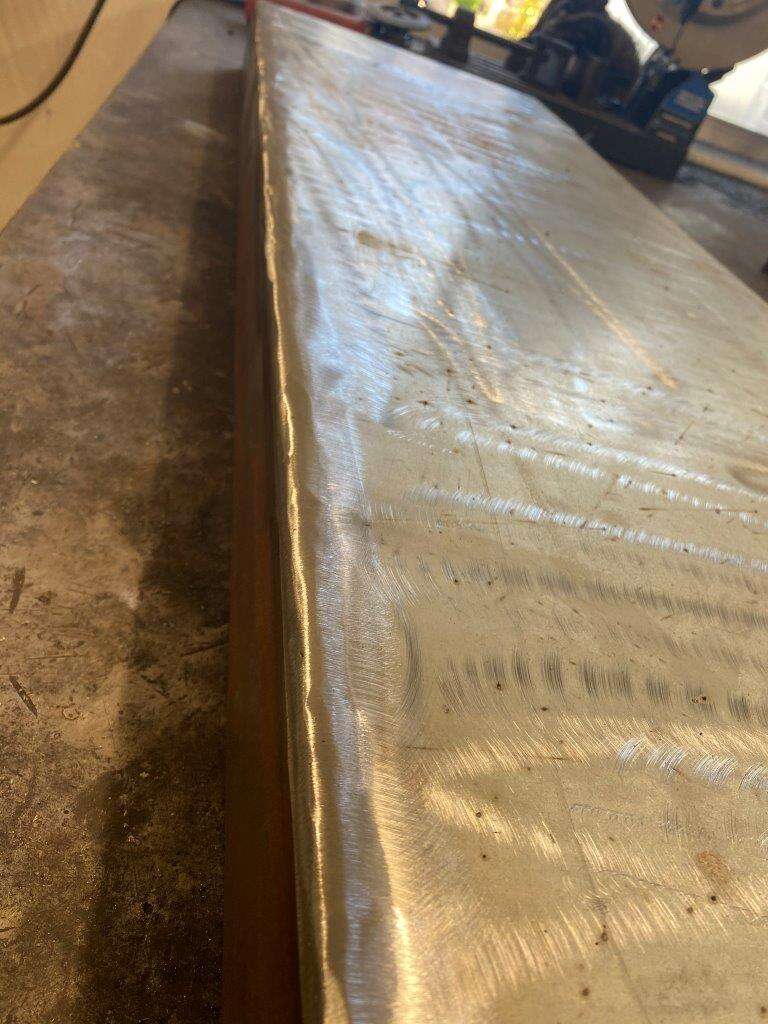
The back looks like this now
Made up some covers
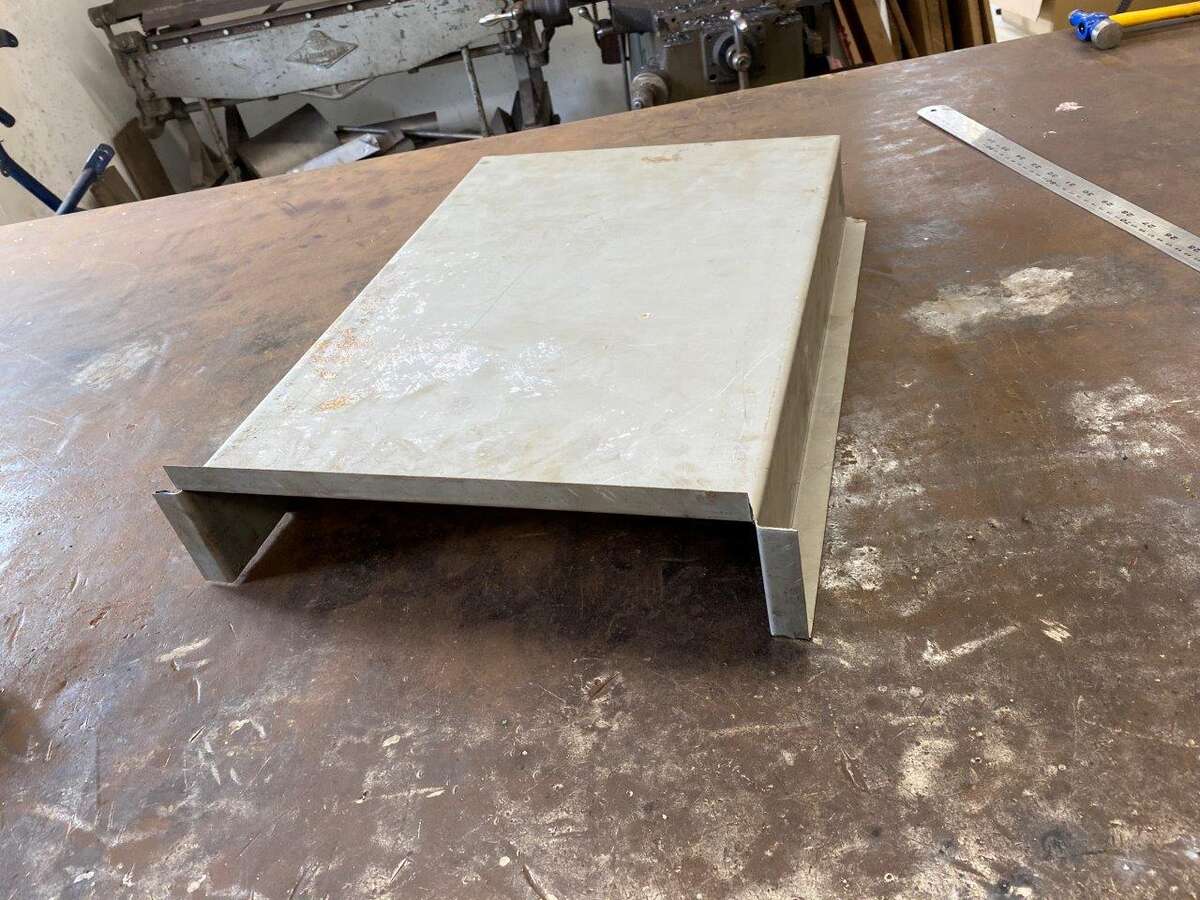
To make it all safe and secure

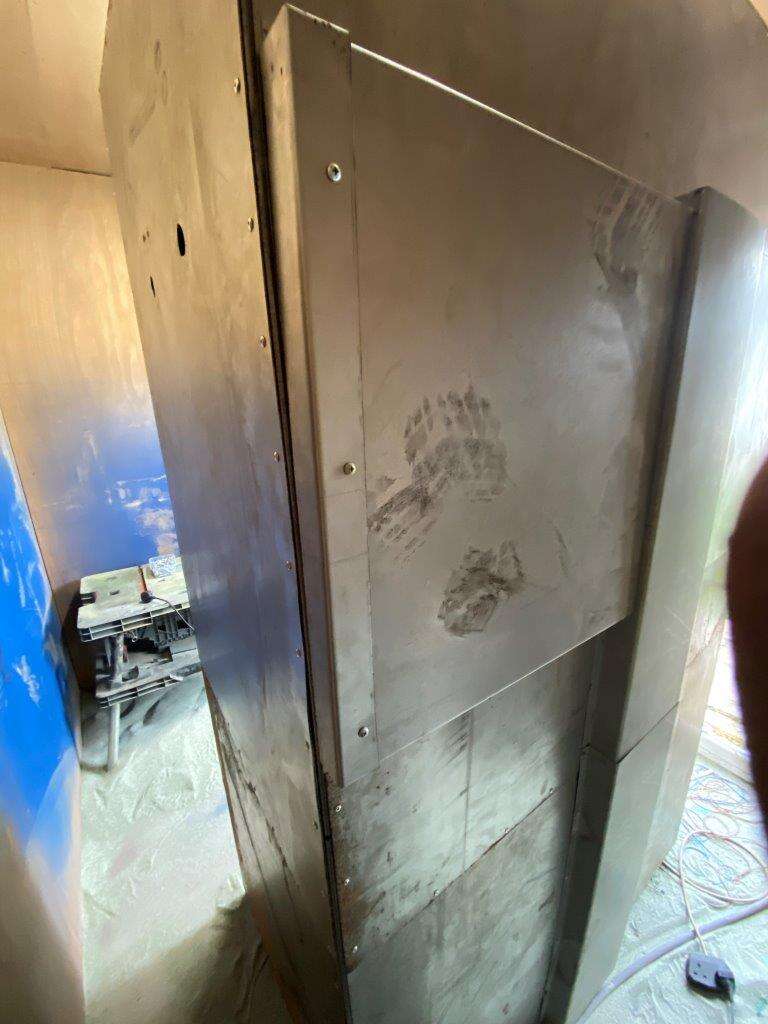
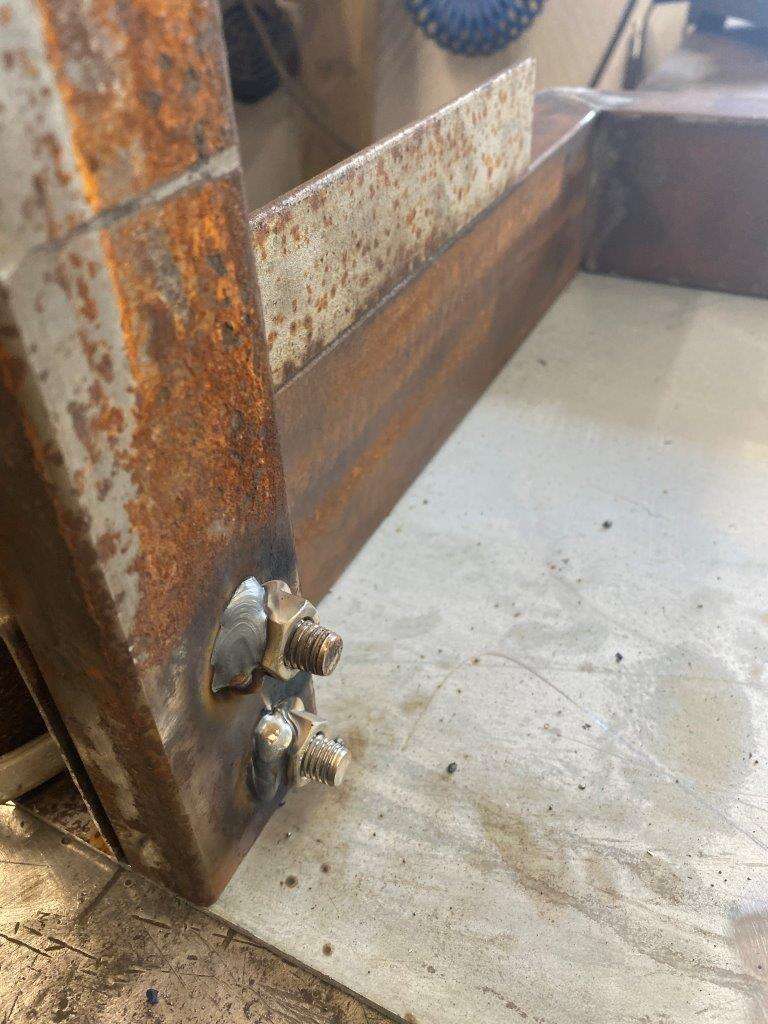
End plate
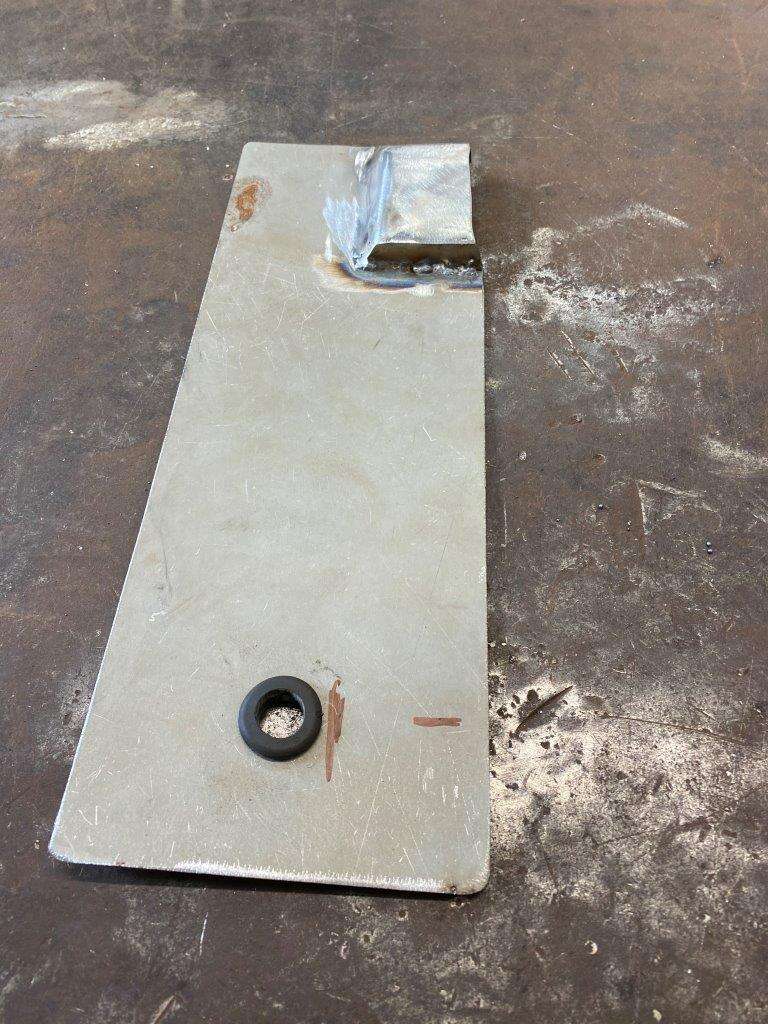
Fits here
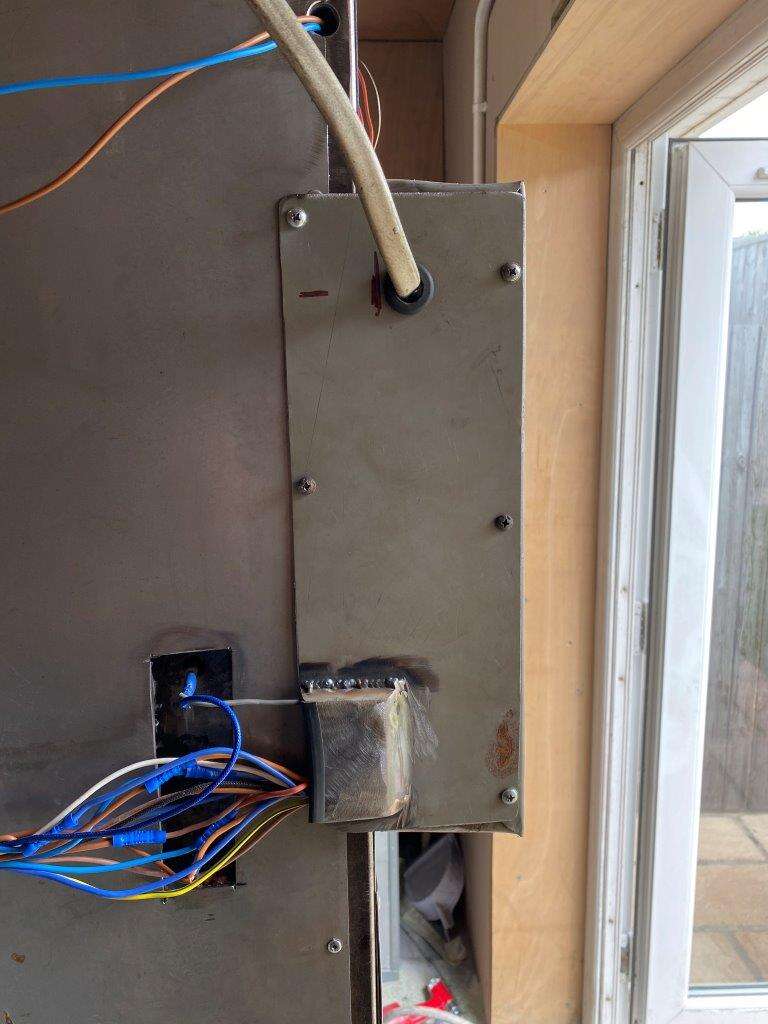
More covers
Go here
And finally 2 more
Some end covers
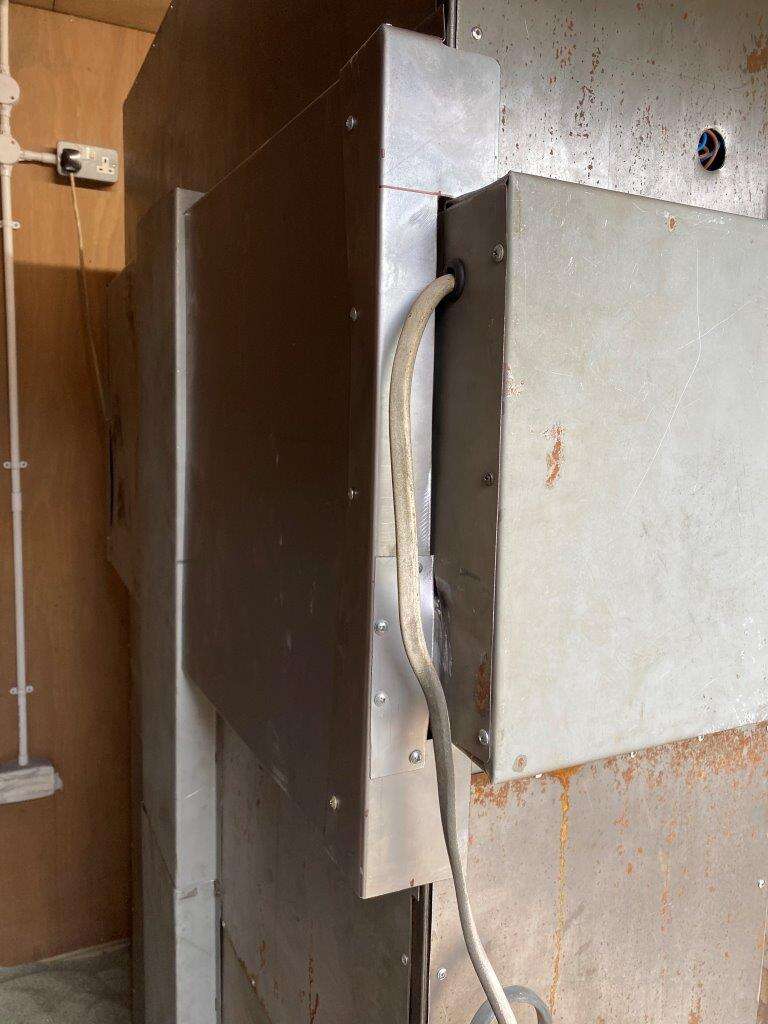
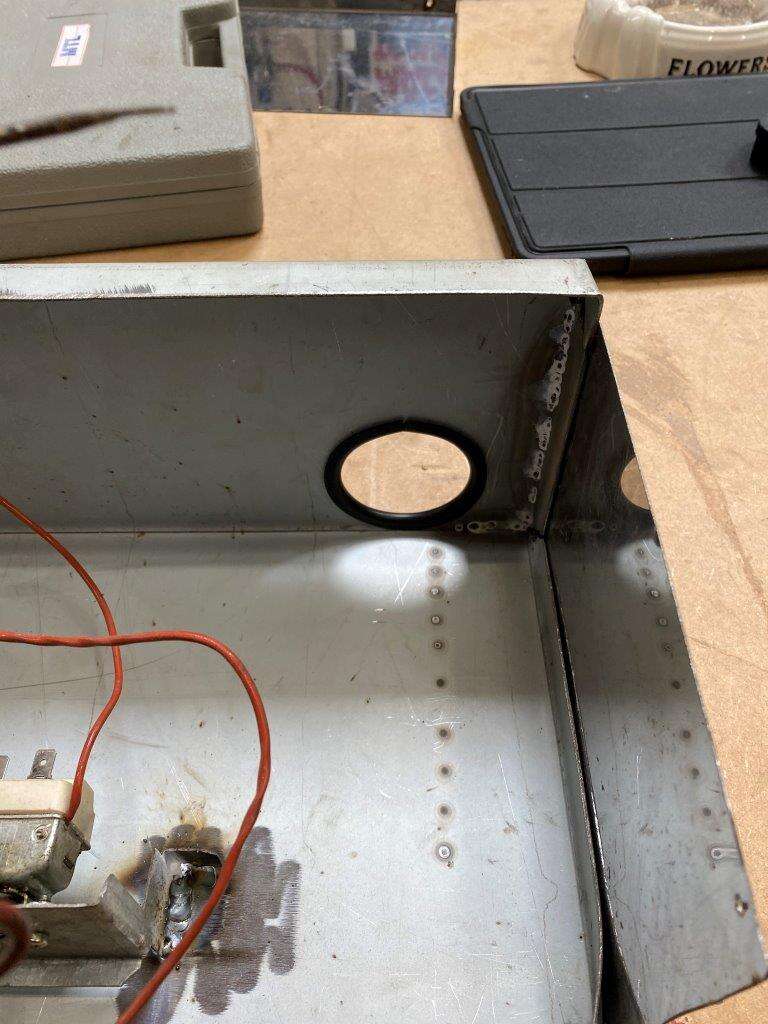
That just left the light access holes
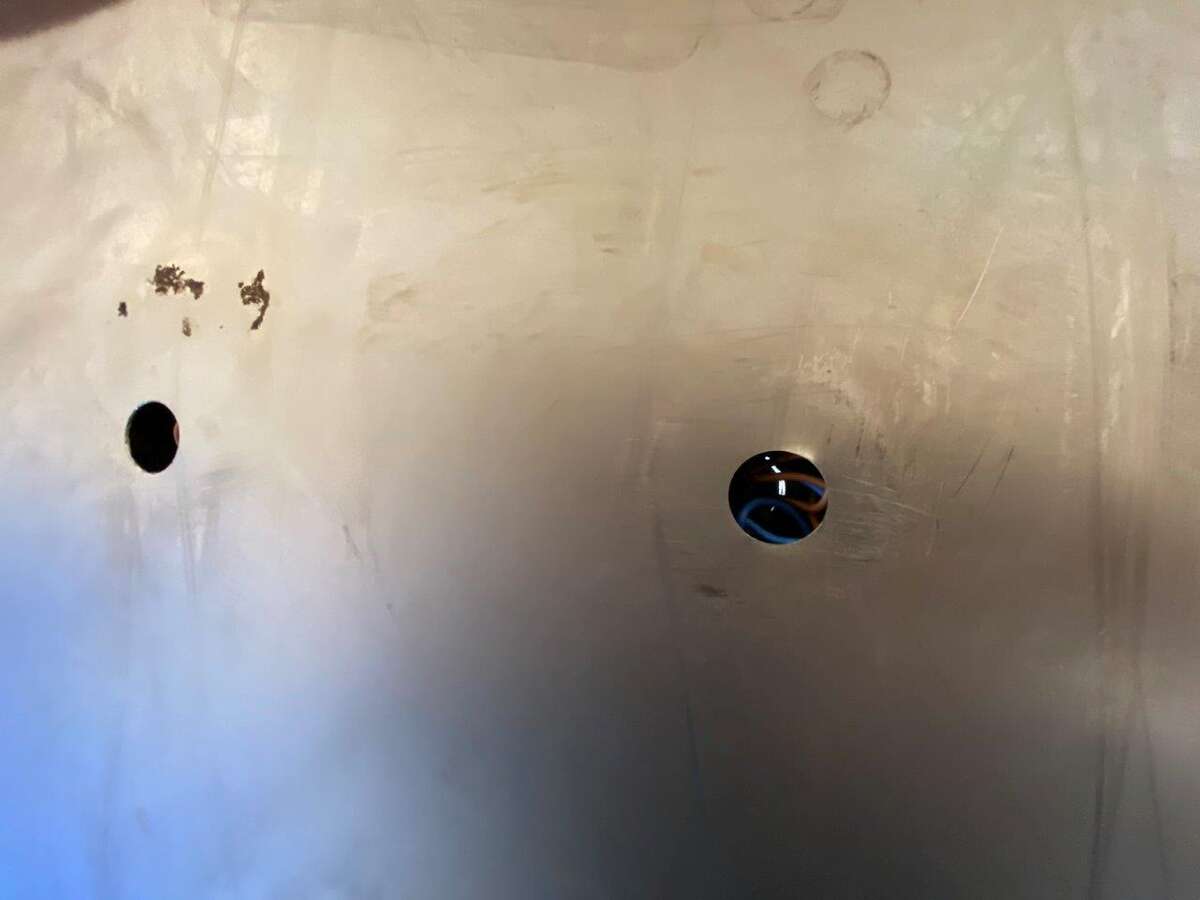
Cover for them
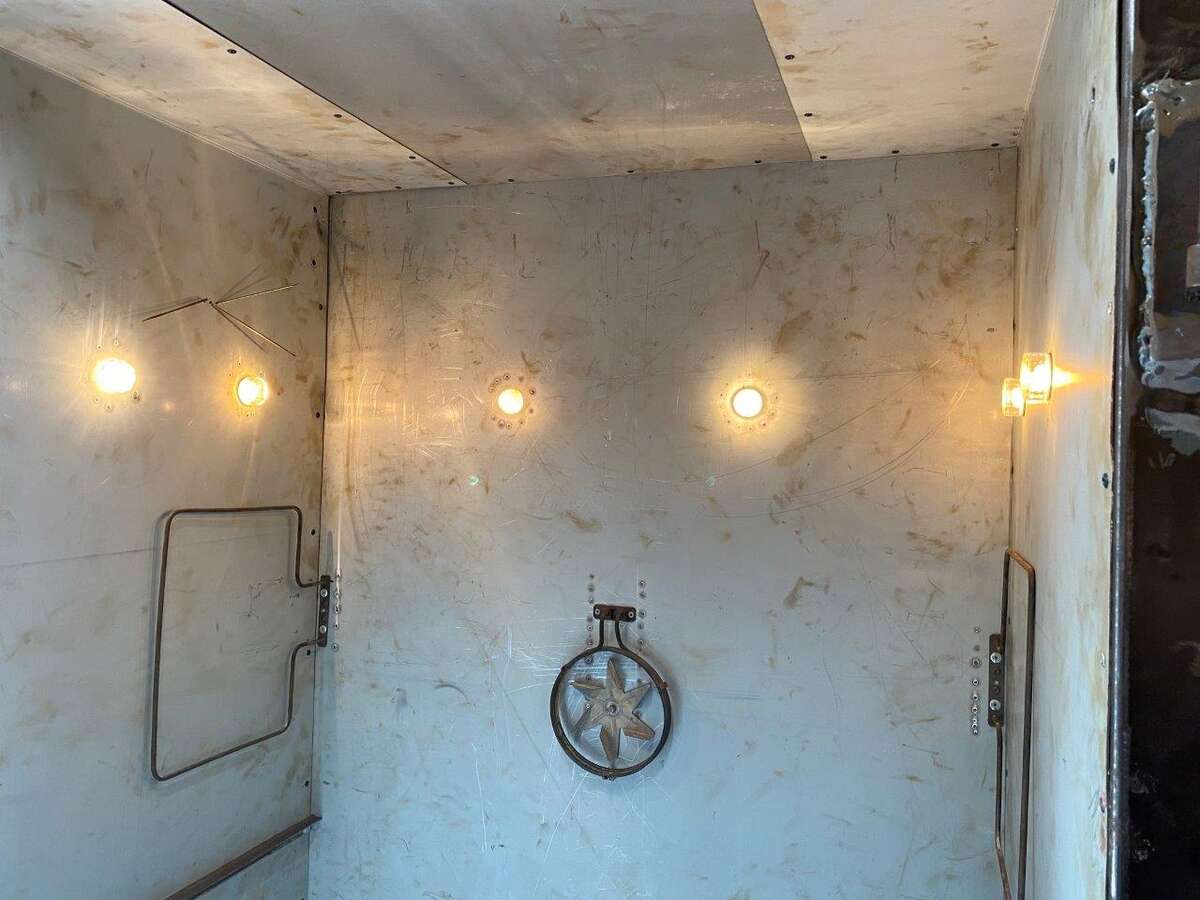
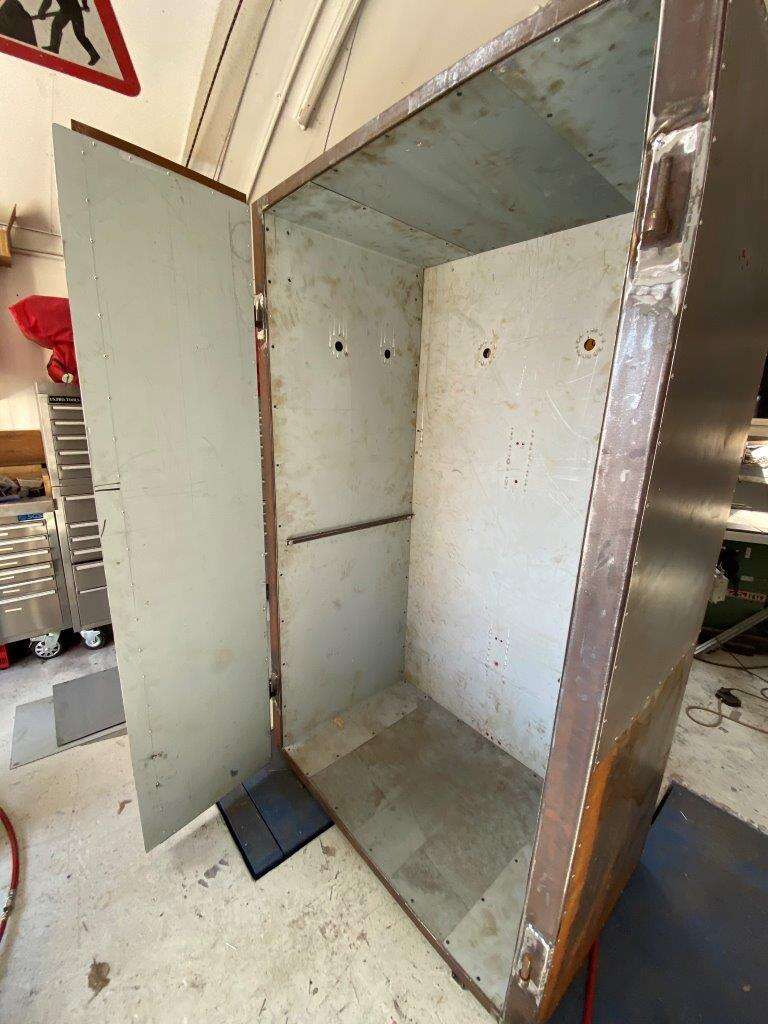
Inside looks like this
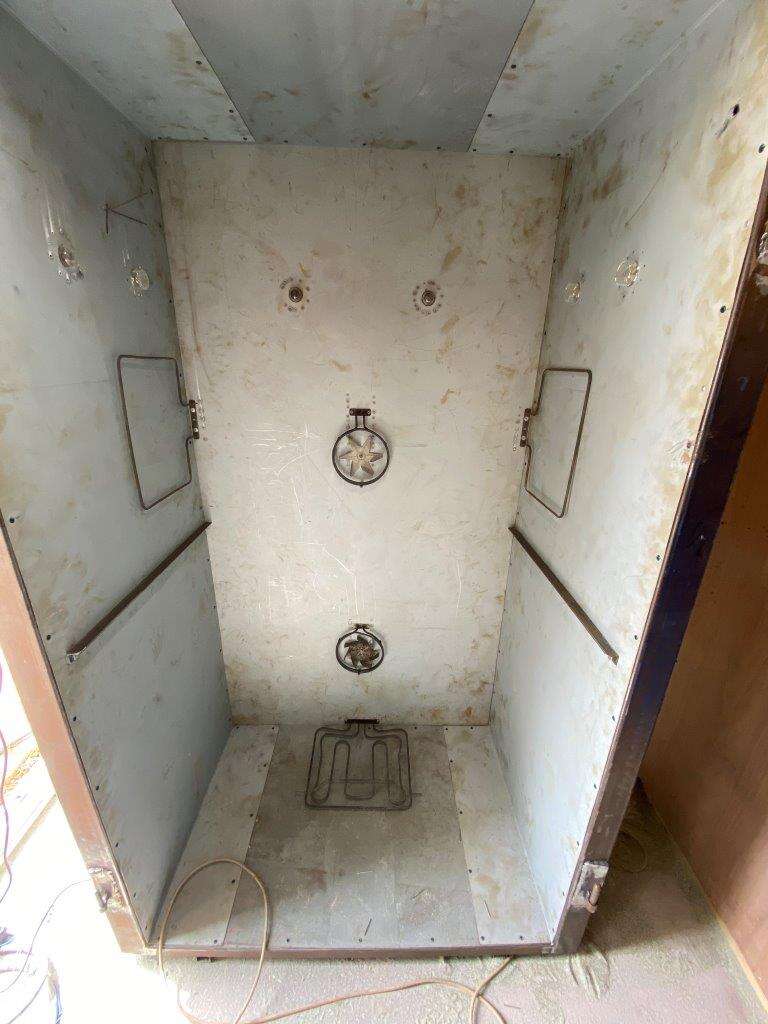
And the lights work
Just need to make the middle shelf some covers for the fans – if I decide I need them? put the doors on and add the thermostat and it’s ready

I recon another day should finish it off so that’s planned for Saturday as I’m booked solid for work this week, then I can powder coat the shelf from the lathe – remember how this started?

Then I can get back to The Bug, I need to put that together so before I can get the Radical in.
Be Safe
Keyser - “Always borrow money from a pessimist. He won’t expect it back.” – Oscar Wilde
-
 6
6
-
 1
1
-
-
Don’t give me any more projects I have 3 on half and 2 more waiting to start not to mention I need to get the Radical in ASAP if we are to have any chance of a track day this year!!Anyway…….
Morning all, Managed to get some time in the Zed Shed over the weekend, Saturday morning was spent finishing a job for work (the paid kind) and tidying up then back to the powder coat oven – I really need to get this finished but the little bits take so long
 but I’ve put so much time and effort into it now I’m not going to cut corners and spoil it at the end!
 Today I have the new control panel for you, on the first attempt at a powder coat oven I just cut the front of the Rangemaster oven down and bolted it to the top, it saved time as the mounts for the switches are complicated and I couldn’t be bothered to trace all the wiring so I even kept the clock which you have to set every time you turn it on or the elements won’t turn on
this time I wanted to do it properly.
This is the old one just wacked on the top

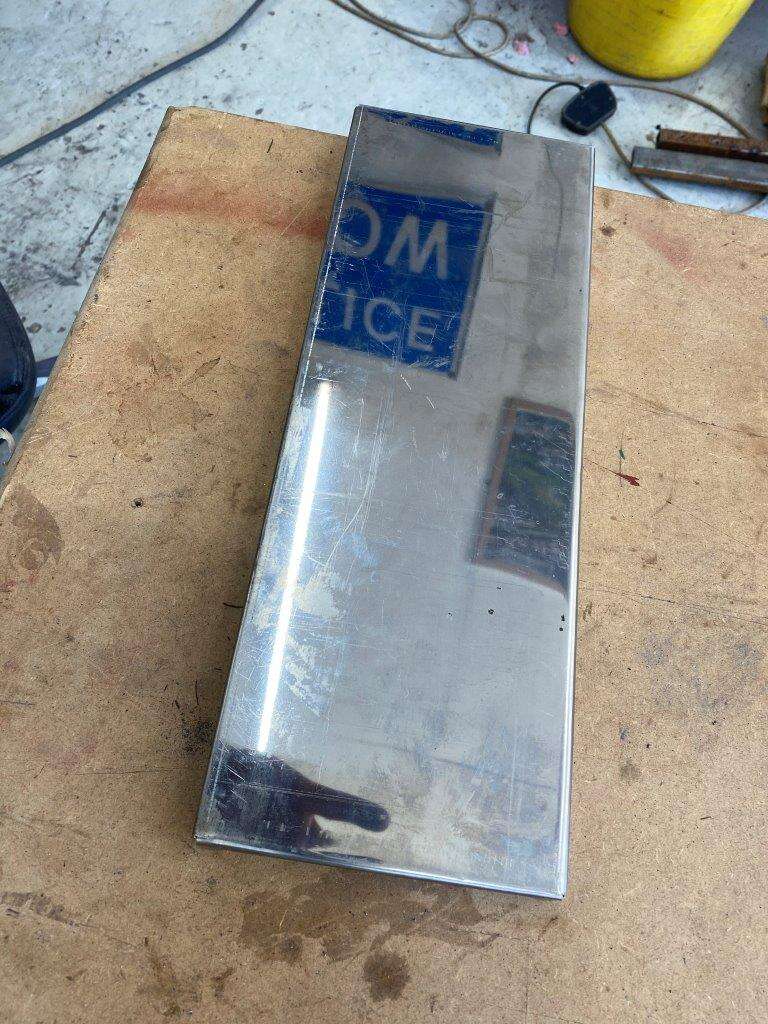
There was a draw in the Smeg and it was shiny so that seemed like a good reason to repurpose it
cut a section out and bent it into a box of sorts 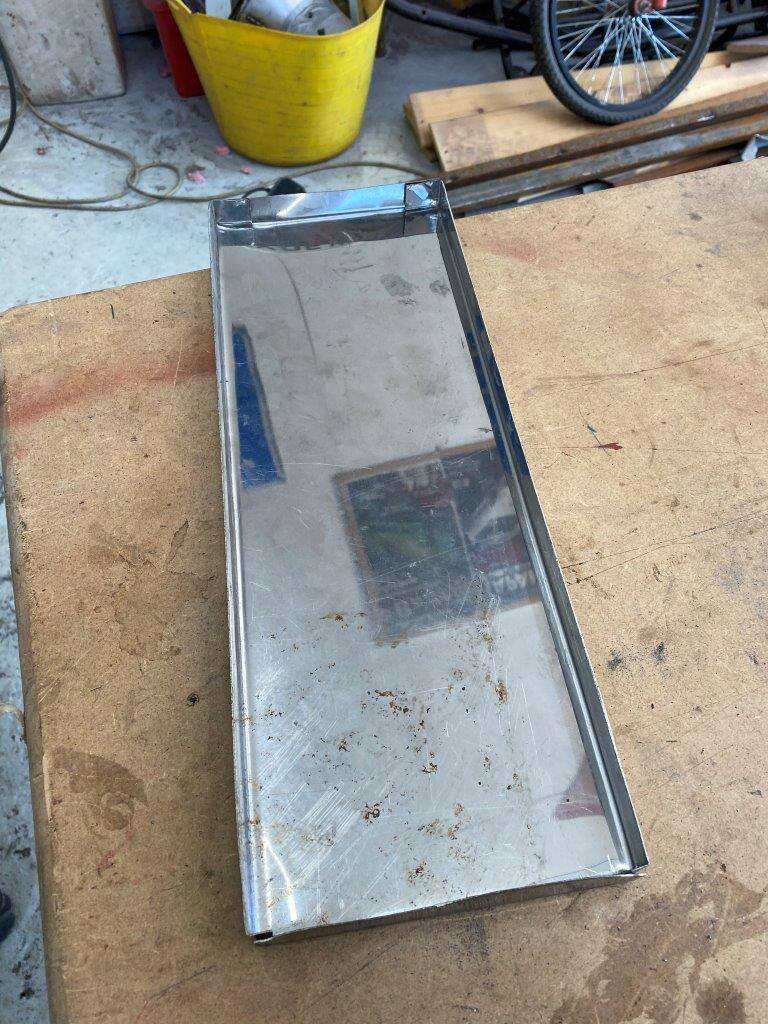
MMM Shiny!
Made a back from an off cut
Then some carefully spaced hole drilling
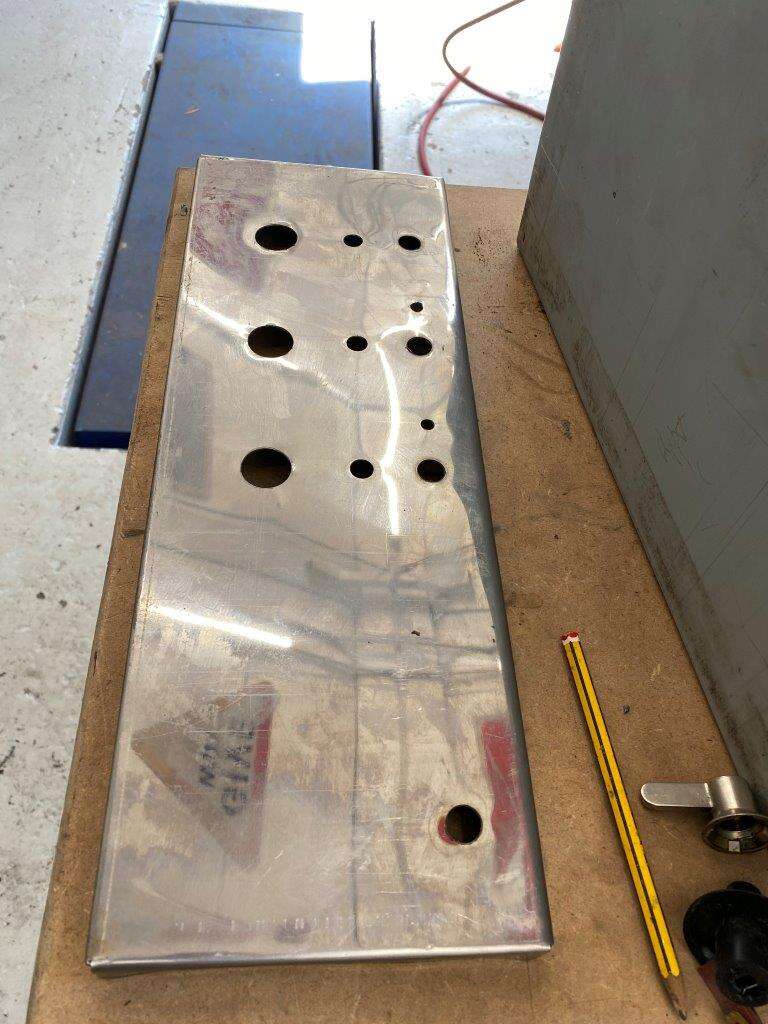
Then I had to sort out a discrepancy in thermostat controls, they come from two different ovens, so of course they are not the same length
Nothing an angle grinder can’t solve
Next I made these trendy tags up
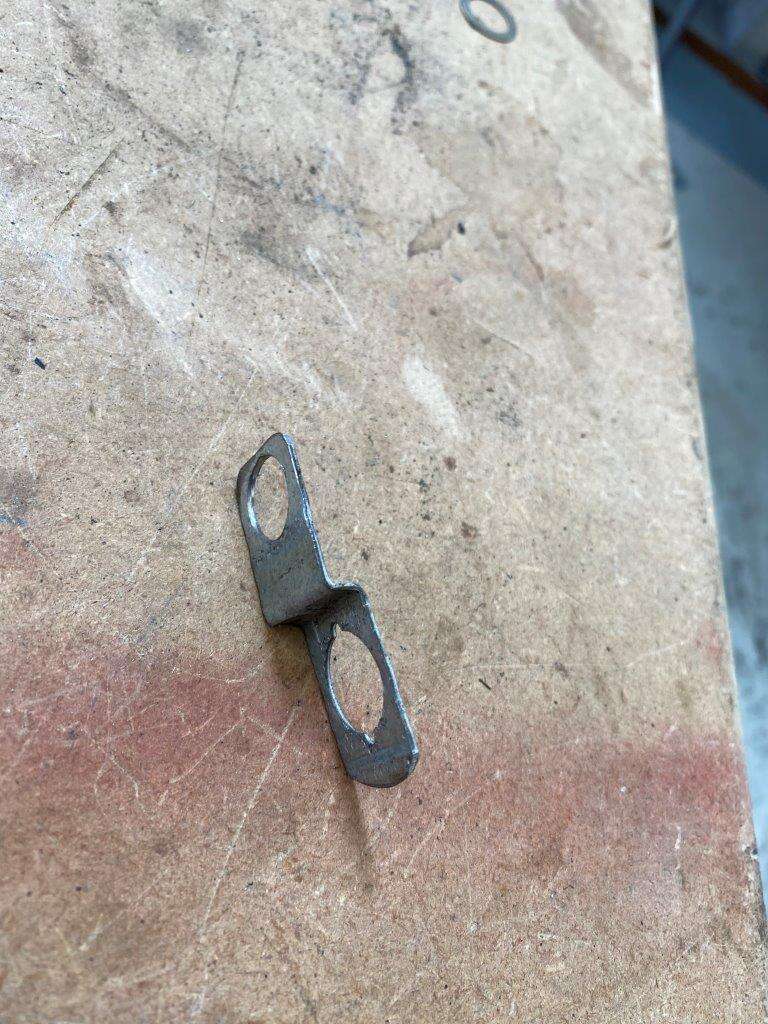
They let me reuse the lights from the Smeg on my new switches
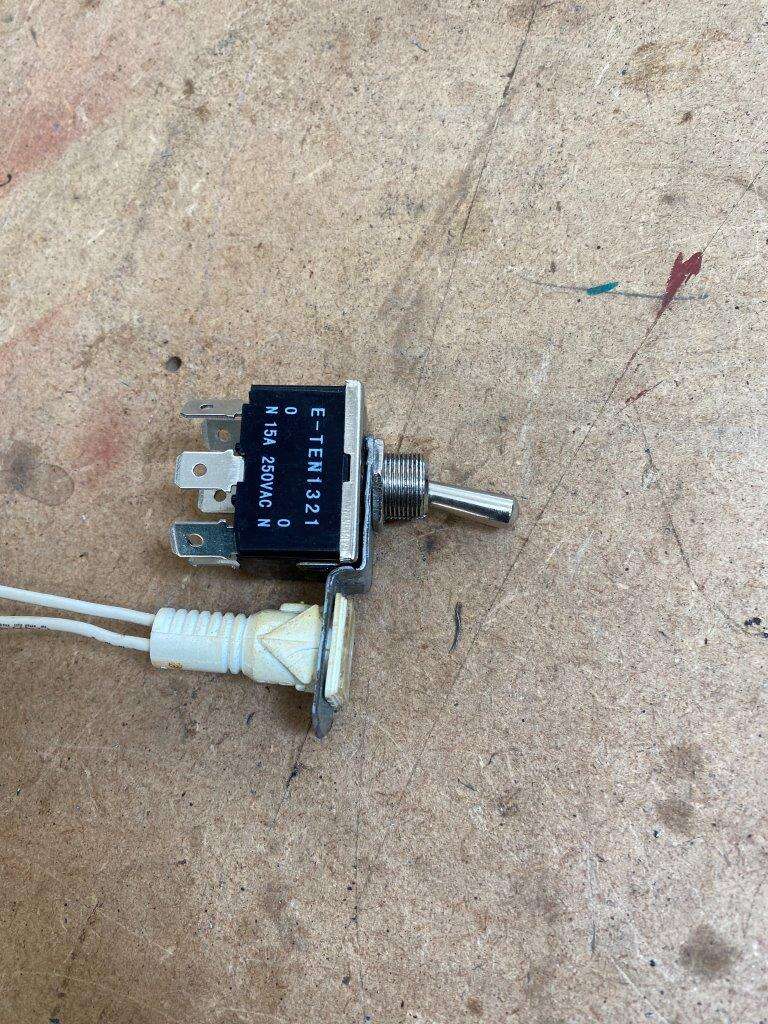
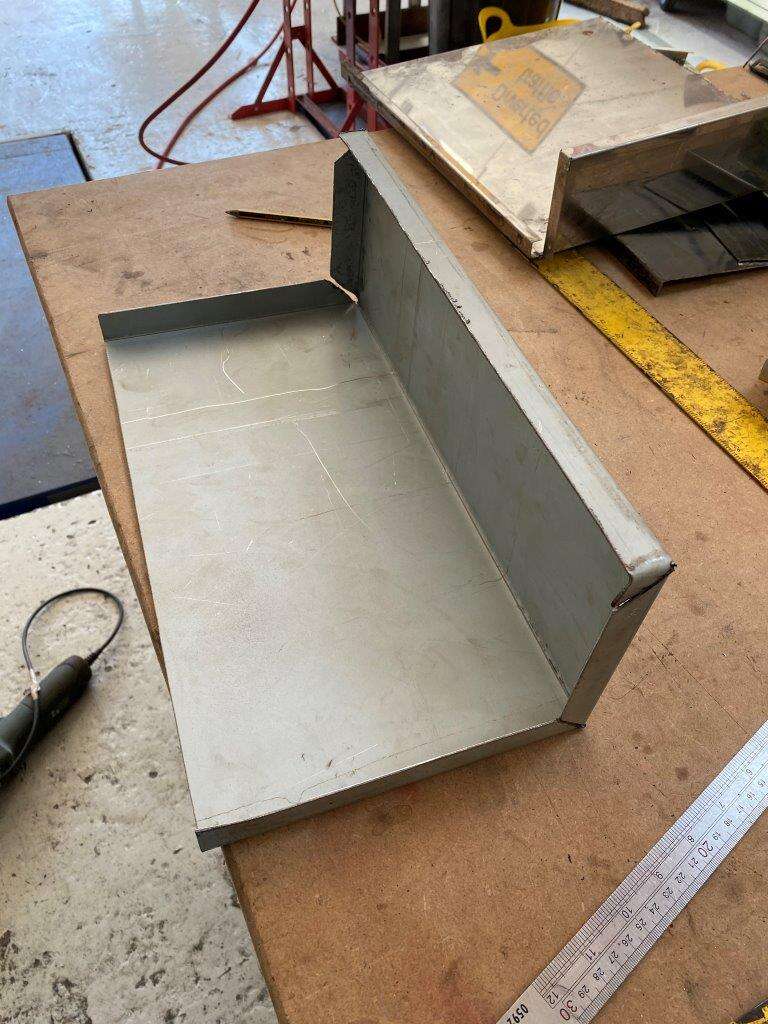
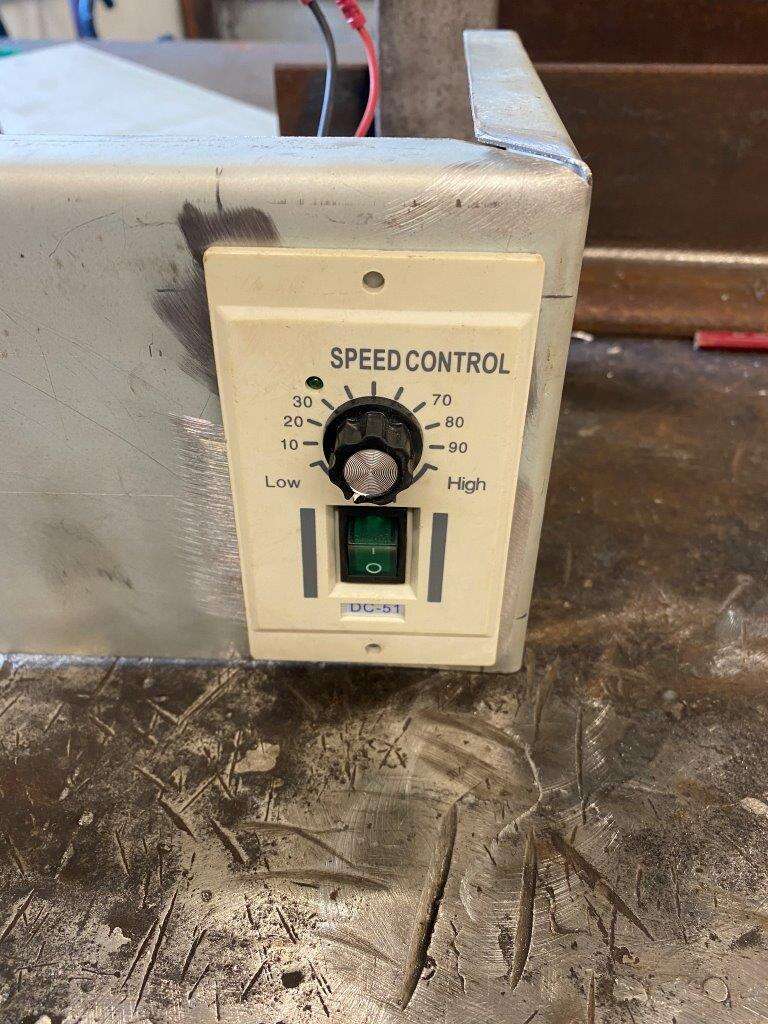
Then I mounted the thermostat switchs in the back part of the housing
- I said they were complicated - well for a switch they are

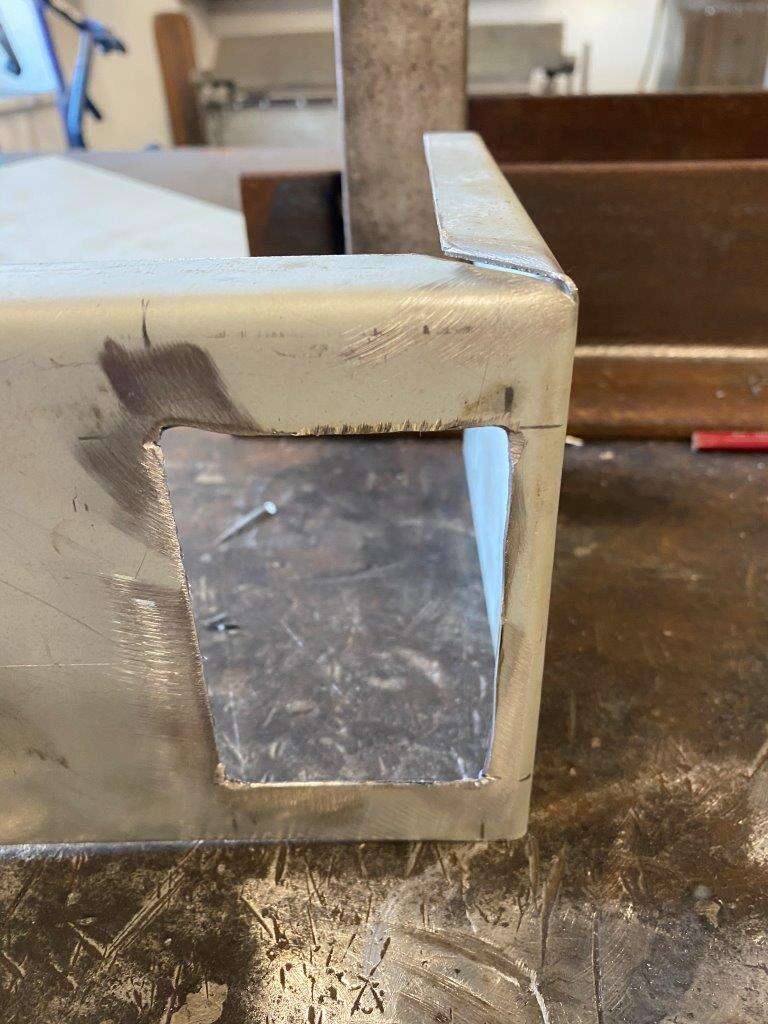
Had to add notches for the lights etc
Tac welded some end plates in
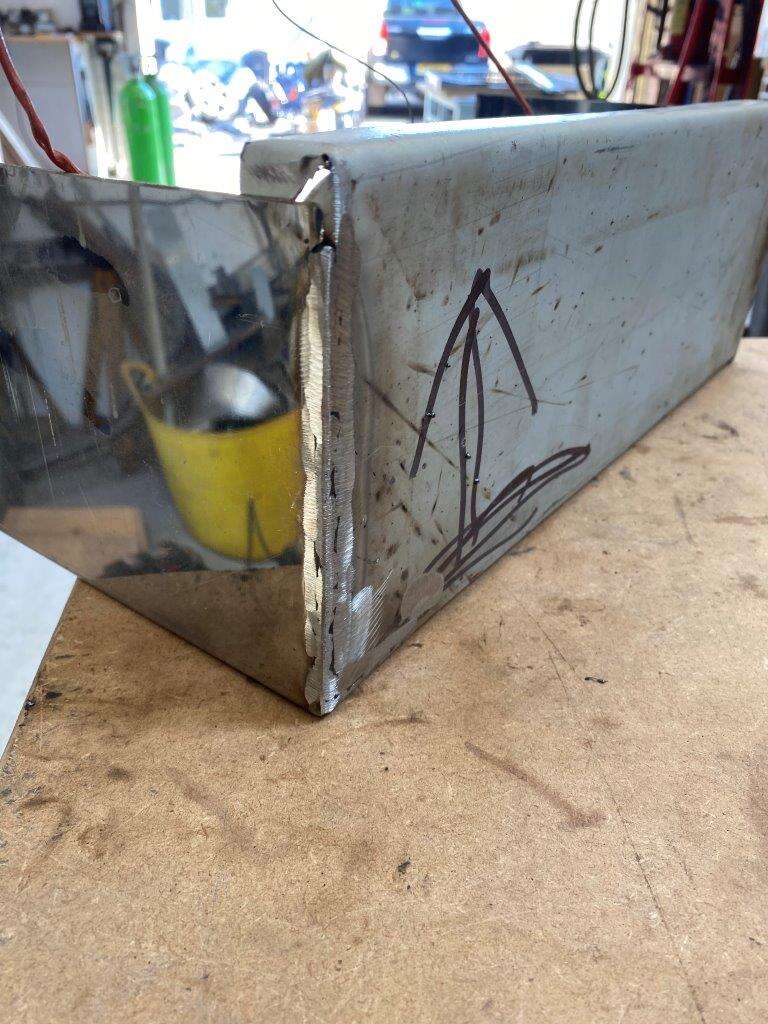
Made a top
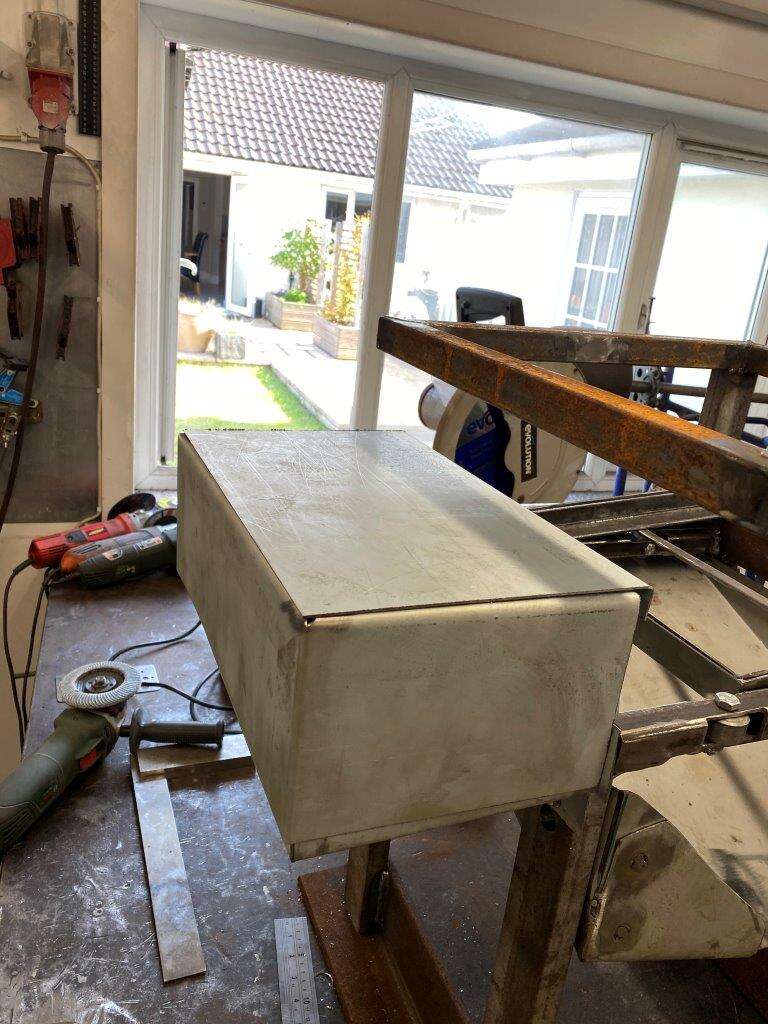
To give us the final control box
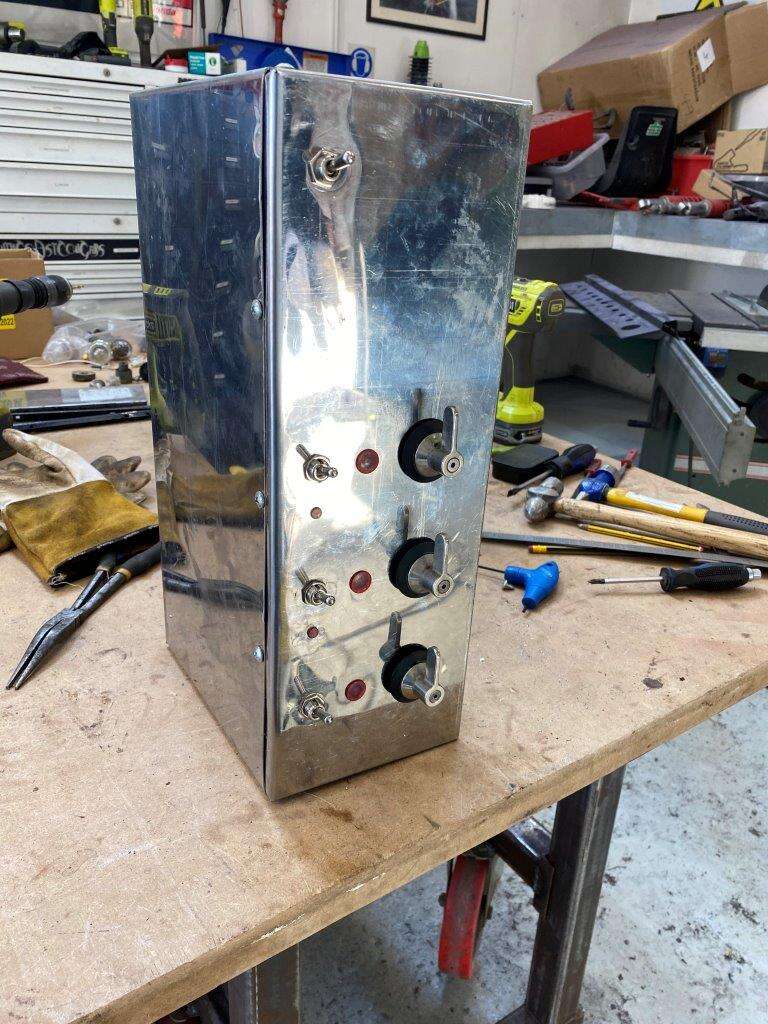
Even has space for expansion in case I need more elements at a later date and it's shiny
Just need to wire it now

Hopefully a bit more tomorrow.
")
Have fun
Keyser - You know that moment when you get up in the morning, you're full of energy and you can't wait to get to work? Me neither! - Anonymous
-
4
-
-
Sneaks back in as if nothing happened
Morning all
Well work came back with a vengeance, we are as busy now as we were on the first week of lockdown!
All the work that has been on hold for the last month or two is kicking off and everyone wants in NOW! Add to that a new project (work project not fun project) has snowballed into something bigger than we were expecting and needs to be ready by the 1st of July and I’m back on 12 hour days!
I have not managed even an evening in the Zed Shed this week, the good thing is if I’m working hopefully I’ll have some money to carry on with my nutty builds, the bad news is no time to either do them or post on here about them!
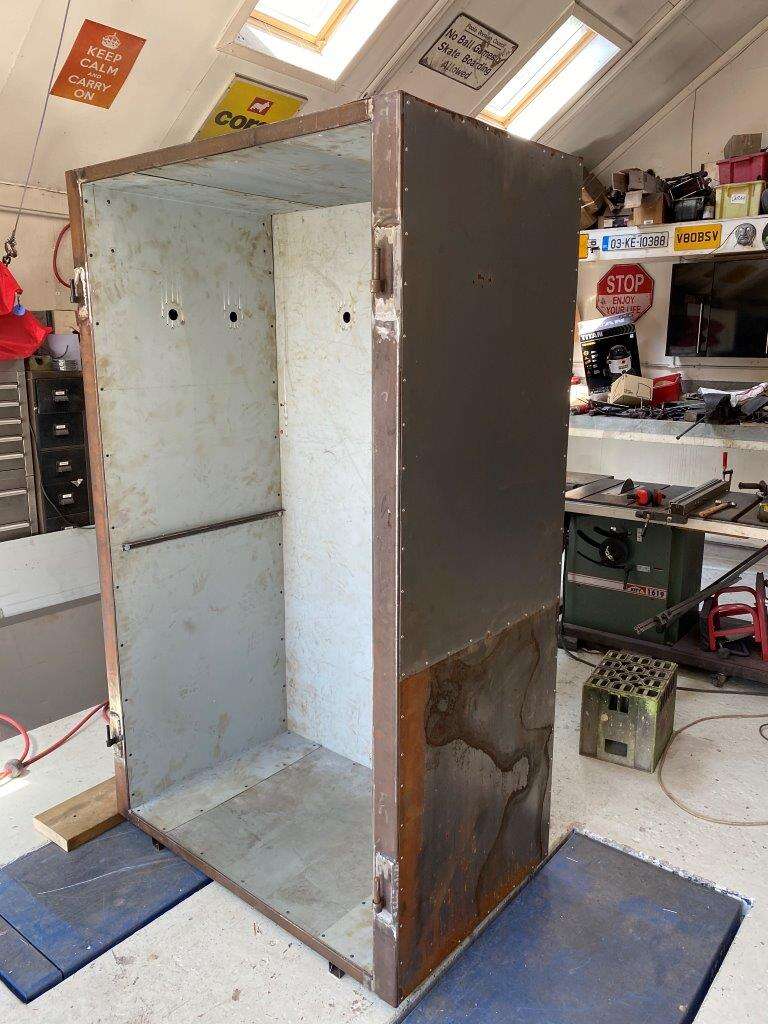
Here is an update from the end of last week,
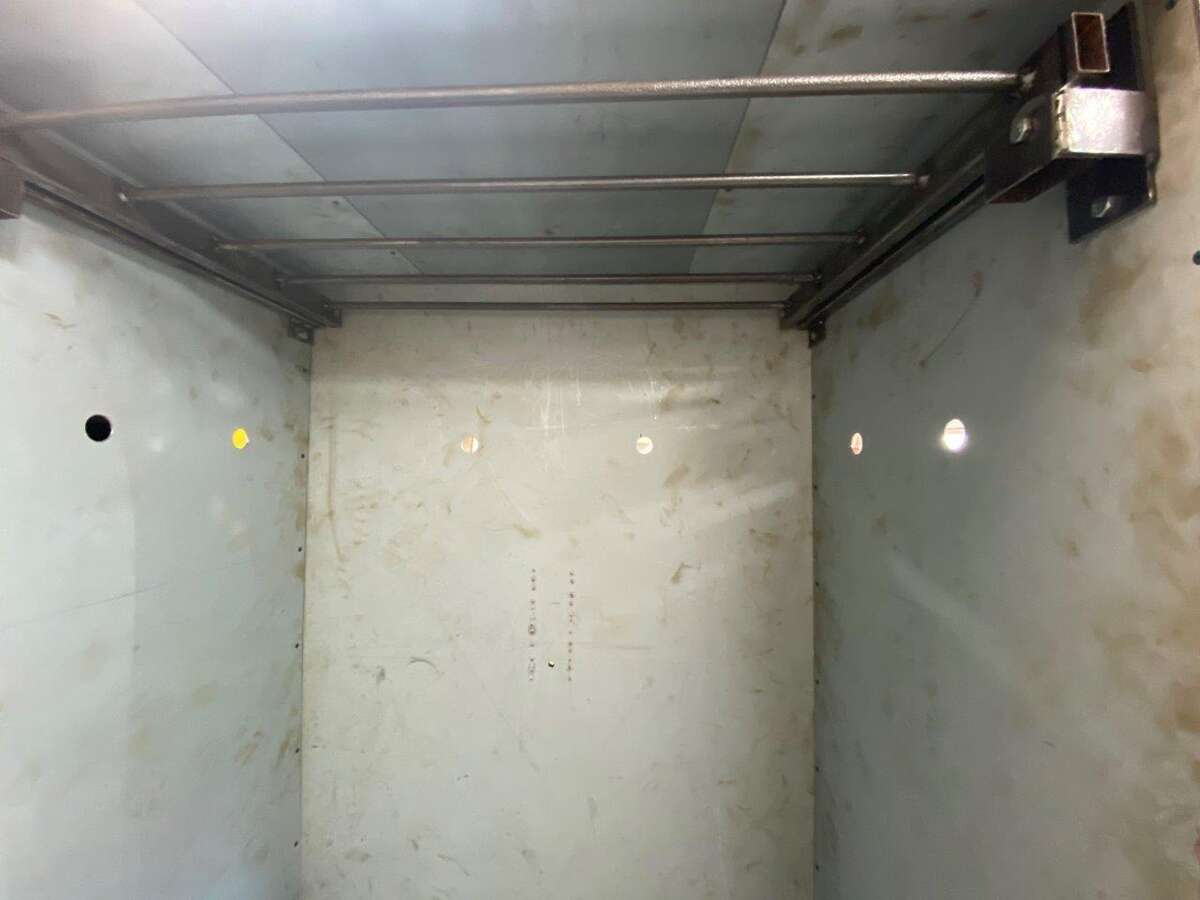
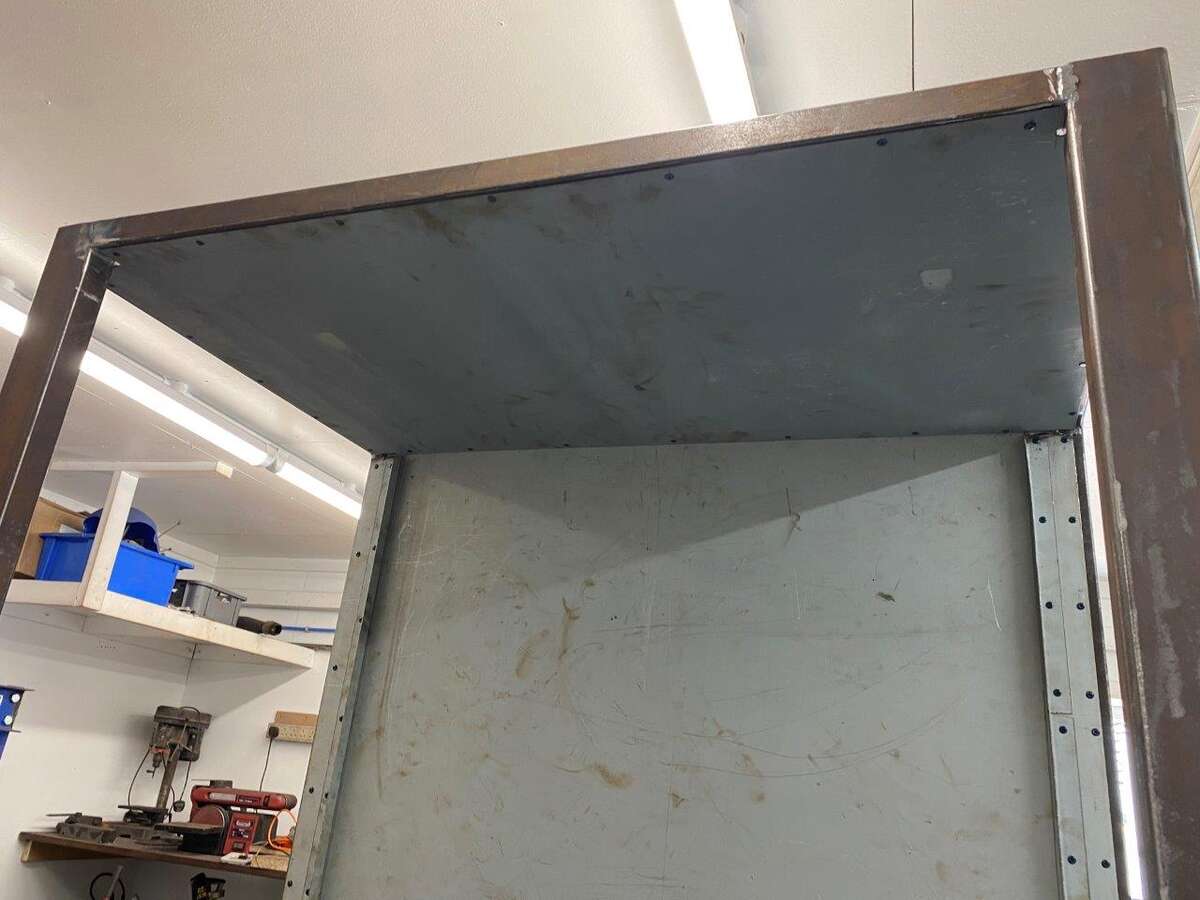
I welded some support tags onto the inside to give the top shelf extra strength
Cleaned these bits of previously used angle iron
And put them in the oven for a middle shelf

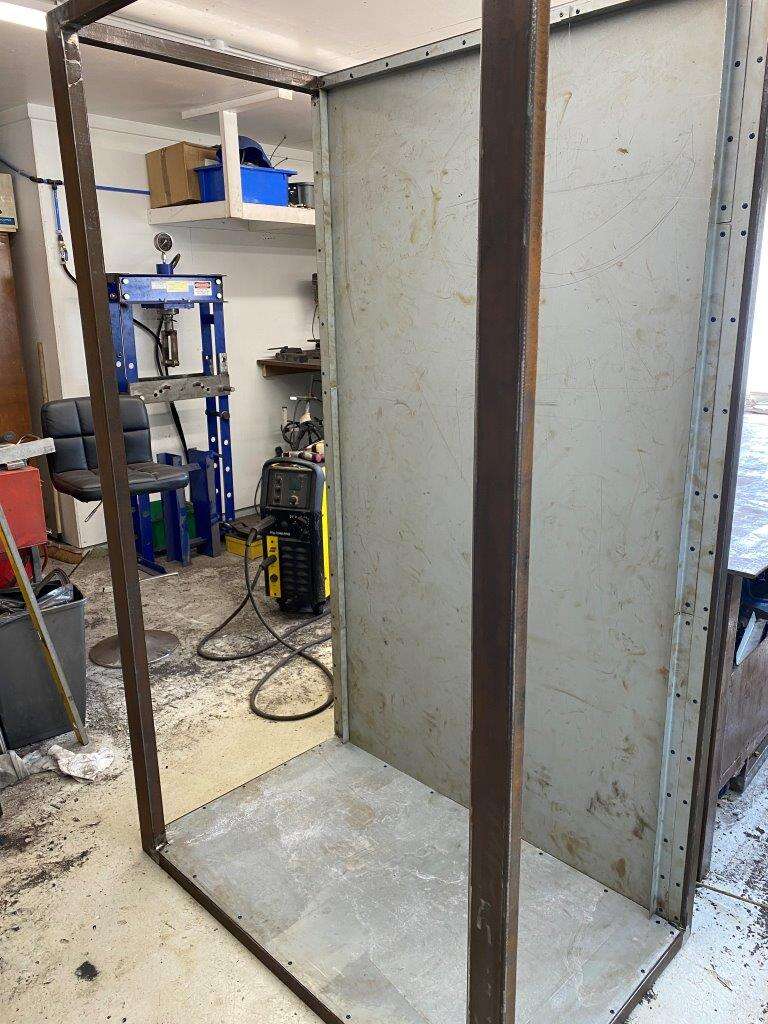
Again, supported to the frame
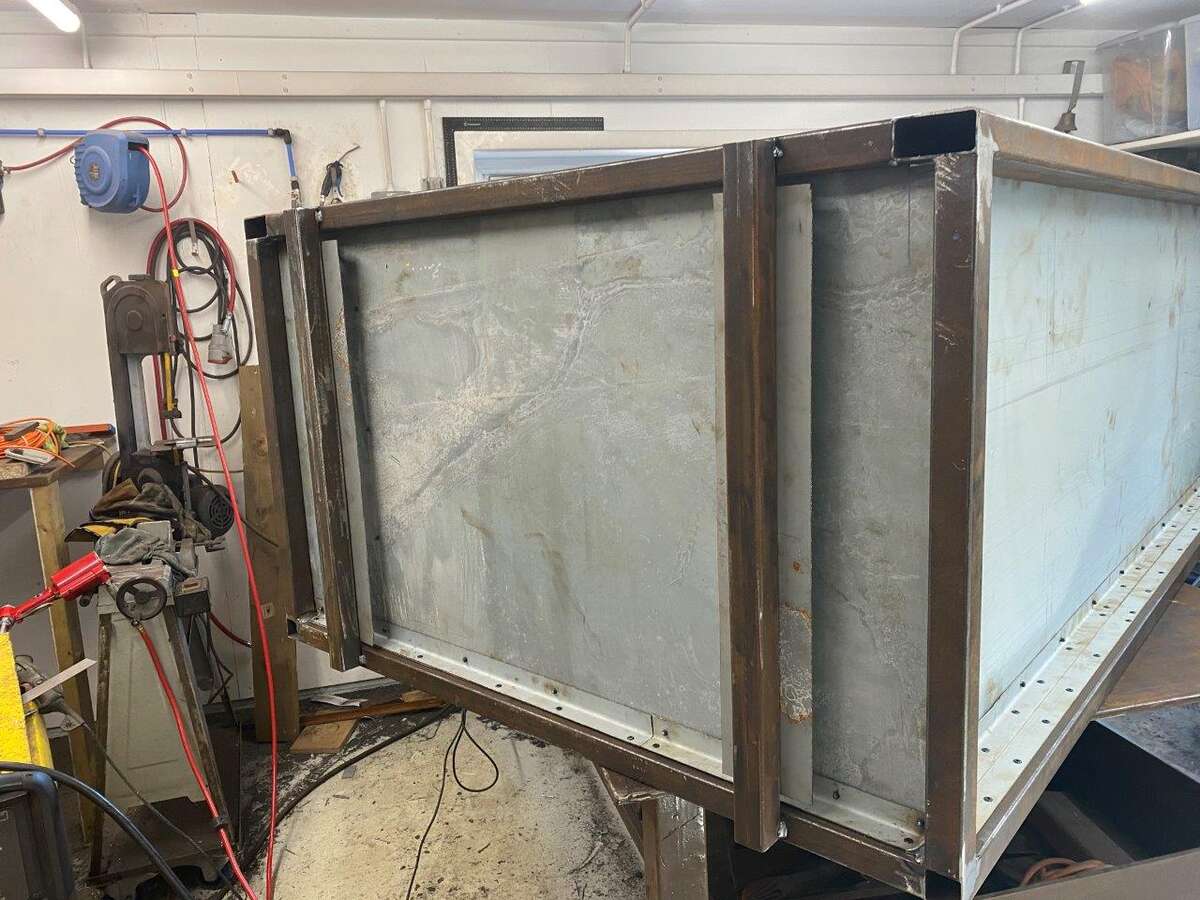
Top insulated and cover on
One side
Other side
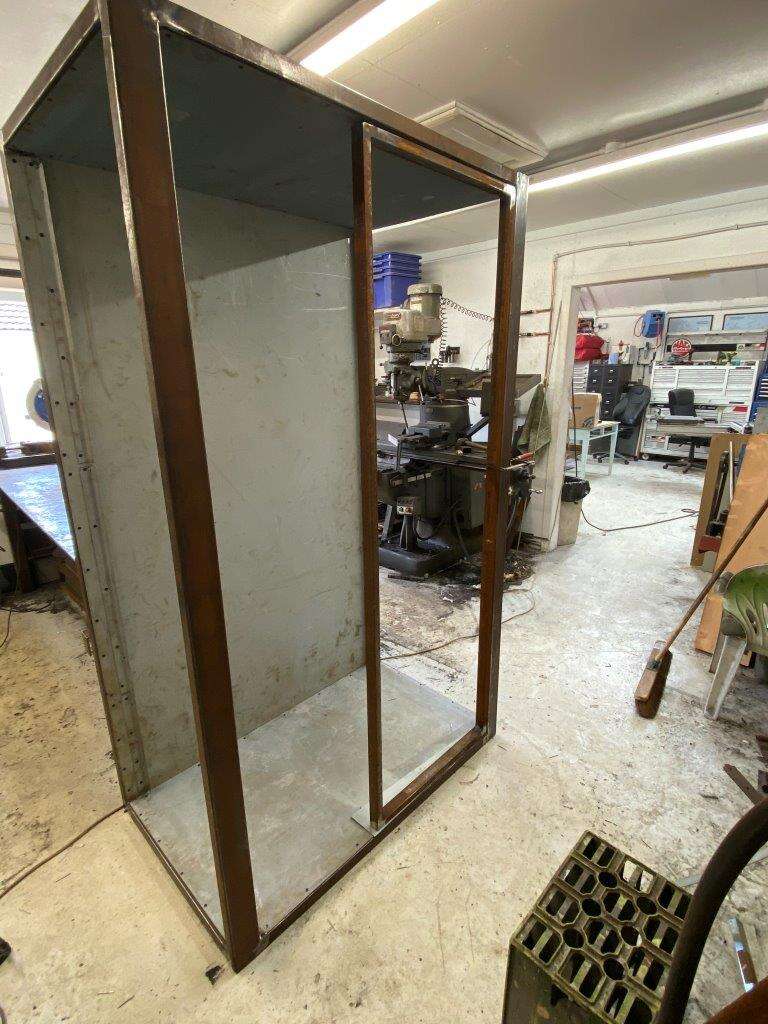
And we are here
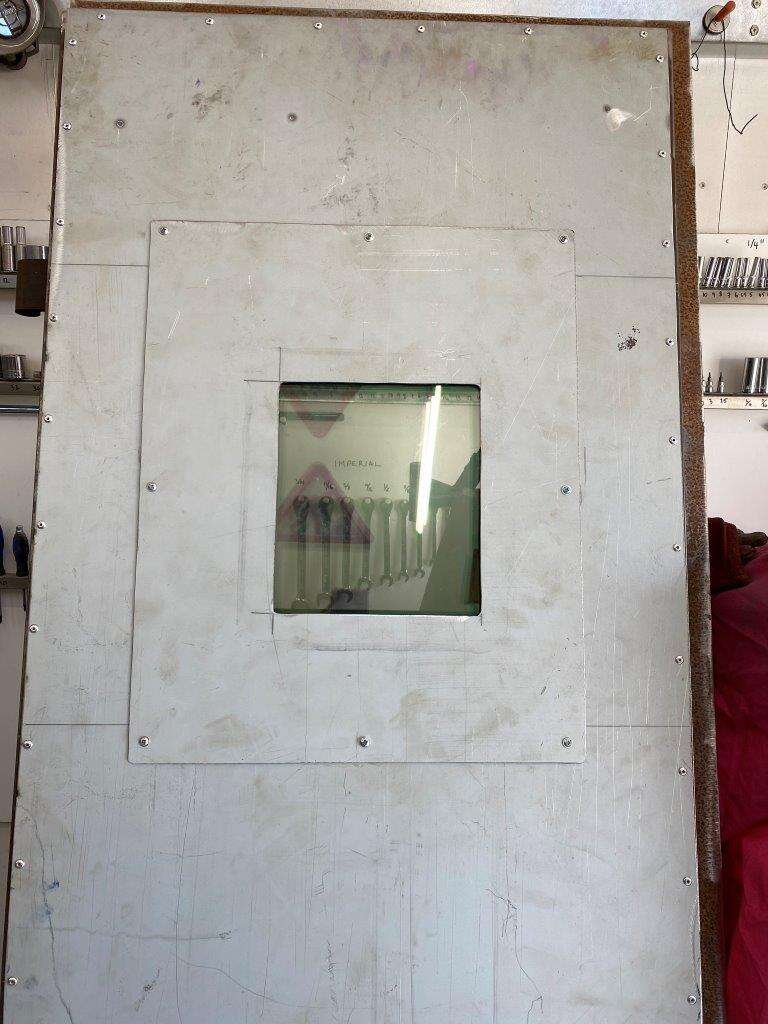
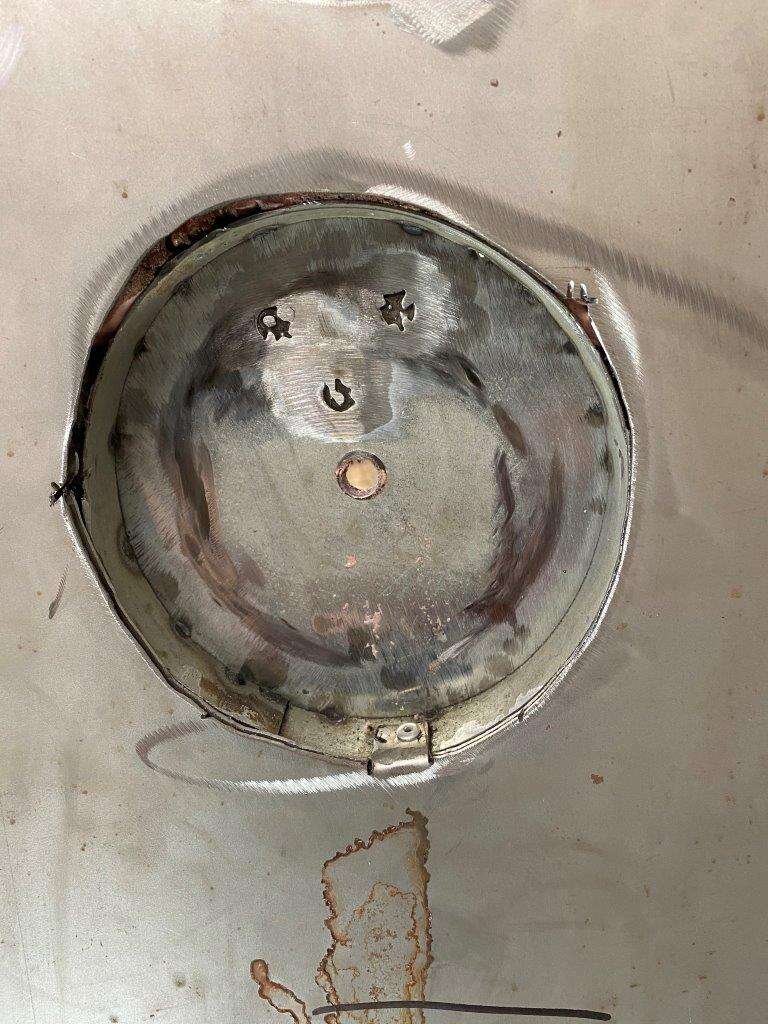
Small door
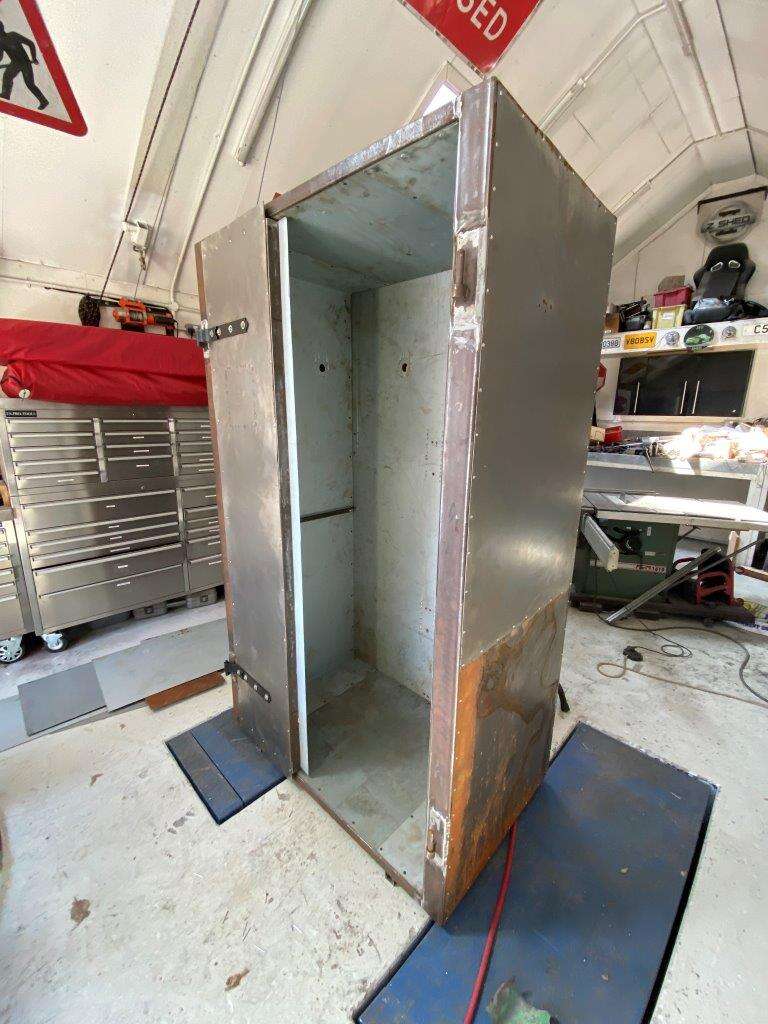
Window was fitted in theis handy hole
I made a cover plate but it is held in with self-tappers rather than rivets so the window can be easily removed if required
Now this thing is getting blooming heavy!
Had to get the heavy lift team in to get it from the Zed Shed to the powder coat room
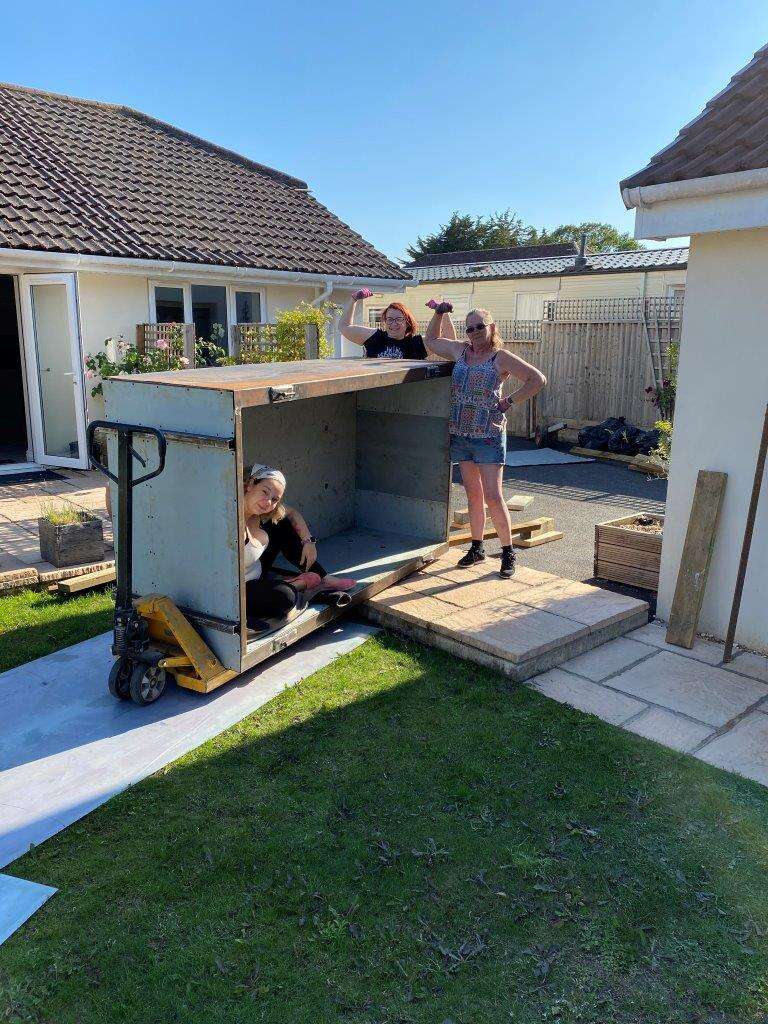
We did it

Just need to wire it and push it back against the wall now.
Hope to get some time in the Shed this weekend so there may be an update on Monday, have a great weekend guys n gals stay safe!
Keyser - “Never under any circumstances take a sleeping pill and a laxative on the same night.” – Dave Barry
-
5
-
-
Morning all. Hope everyone had a good weekend
So I got a bit done on the oven, Hoping to get these side projects cleared over the next two weeks and then get back to some work on the vehicles, The Bug first though as I’d like to have that in one piece and maybe even get some use out of it in the summer!
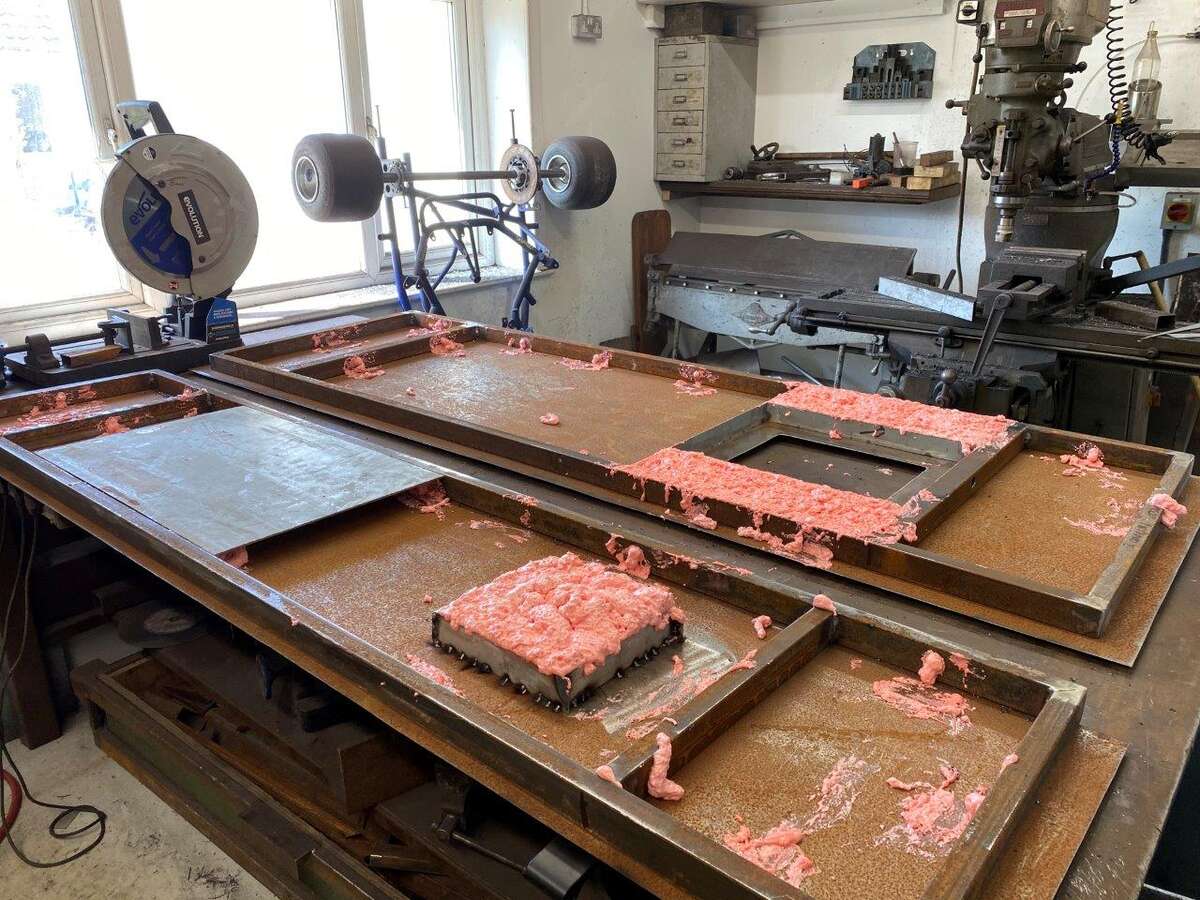
The mad fire foam has dried

So I trimmed that down and test fitted the window frame,
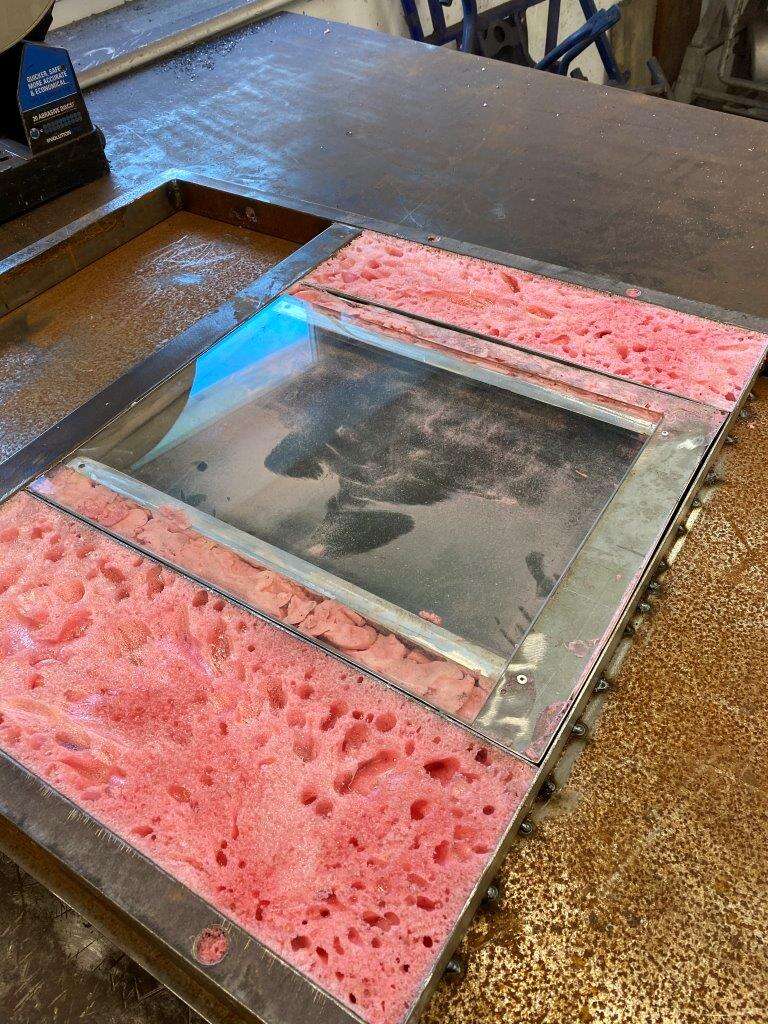
On the small door
The foam had a big hole in it right where it is most needed, not sure why, maybe it’s because the foam is out of date
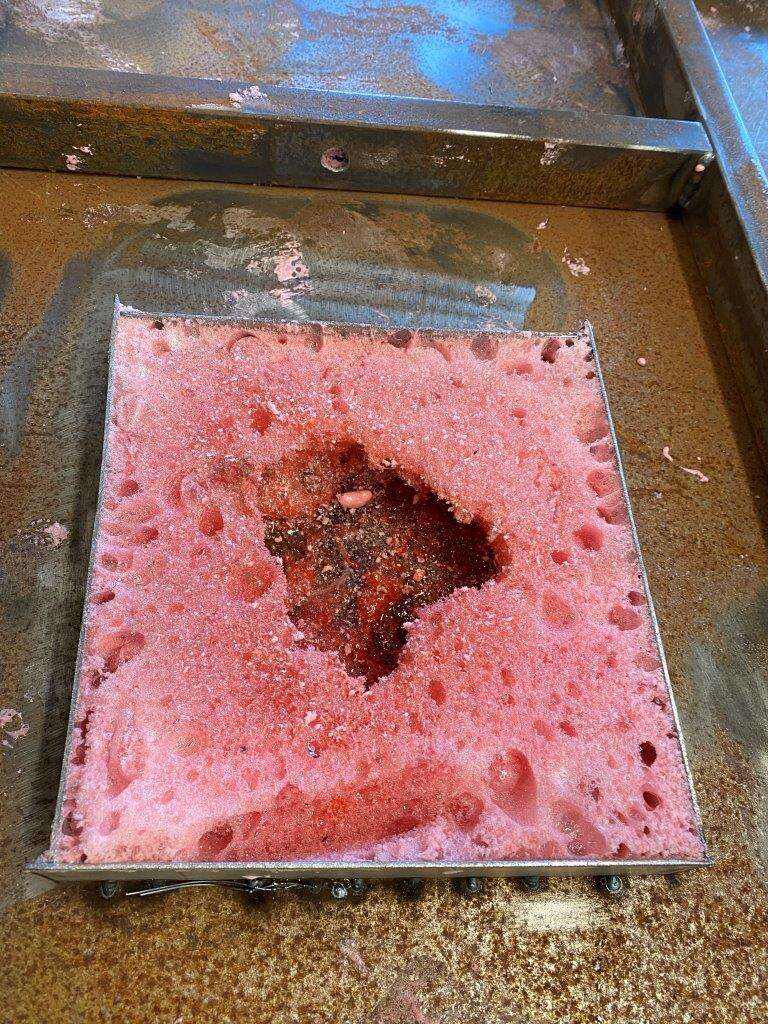
I’ll stick some more in when I do the last lot on the back.
I got part of the old SMEG
Cut some strips and ran them through the rollers to make loops
Then welded them onto Back plates

This was combined with a cut down box section to create mounts for the elements that stand 10 to 15mm off the inside skin of the oven
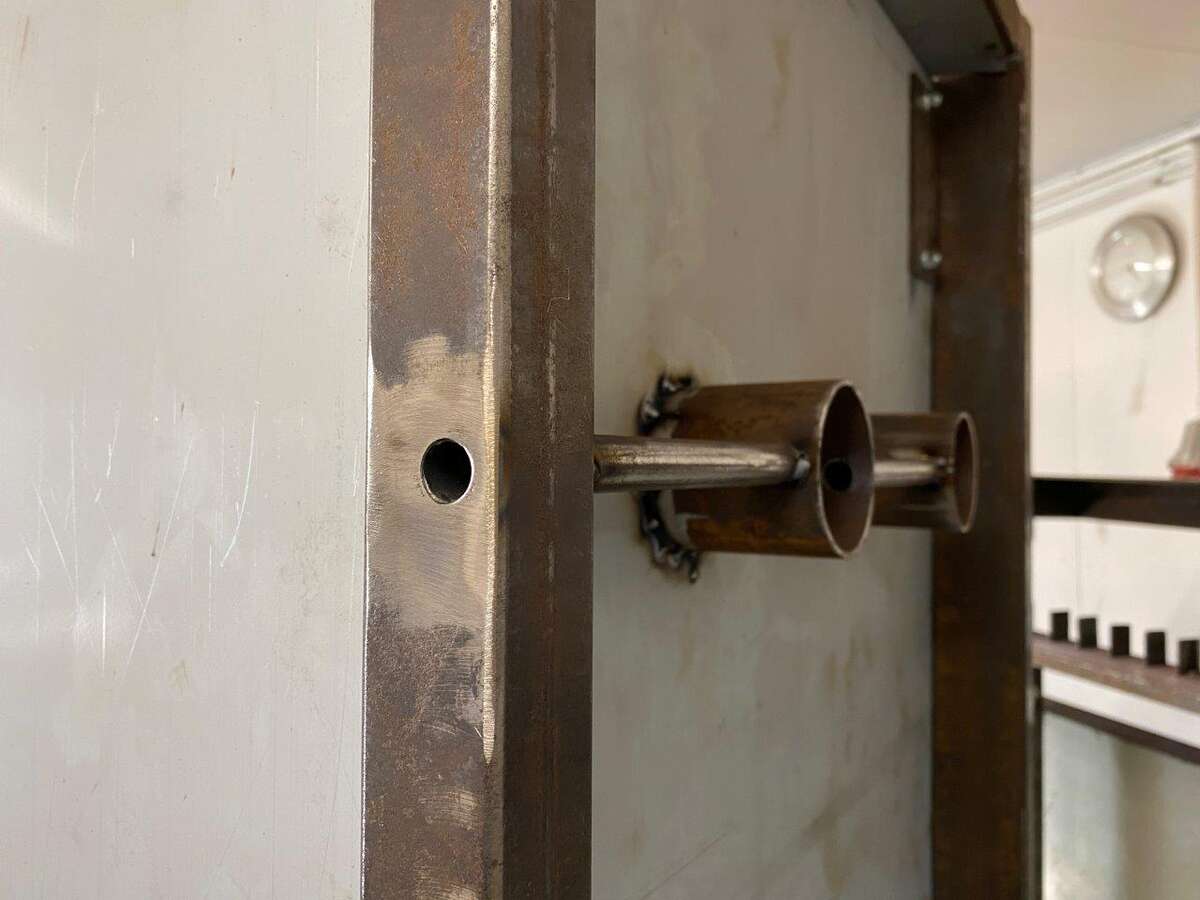
Then an old bit of pipe was cut into lengths
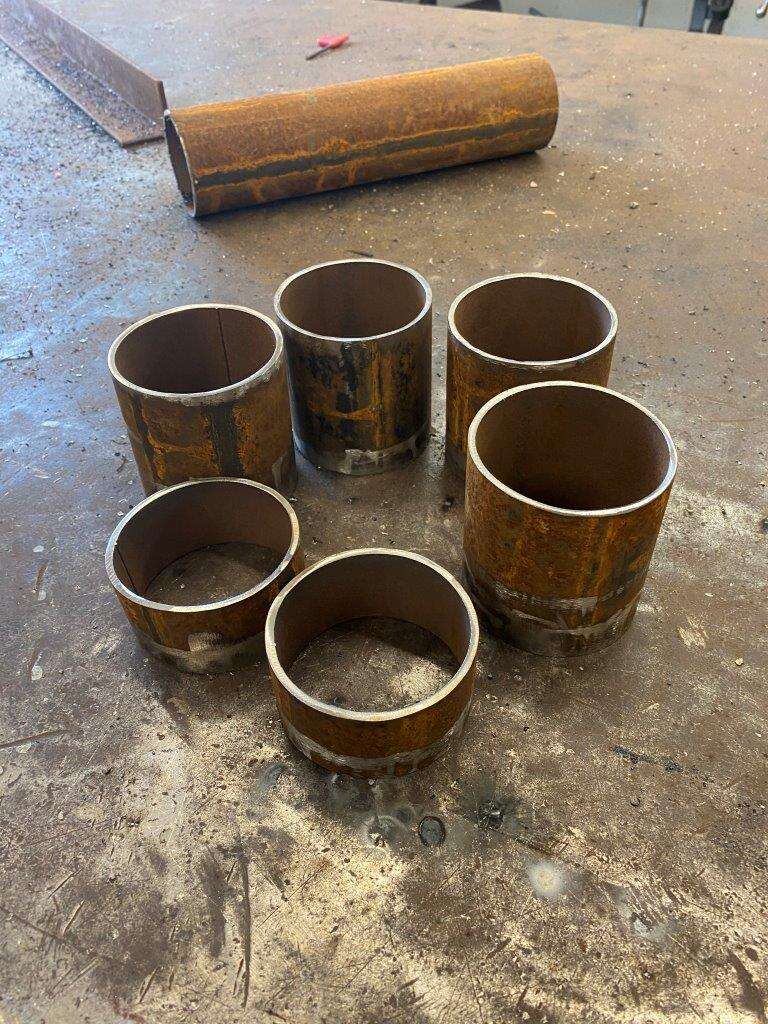
Some holes drilled
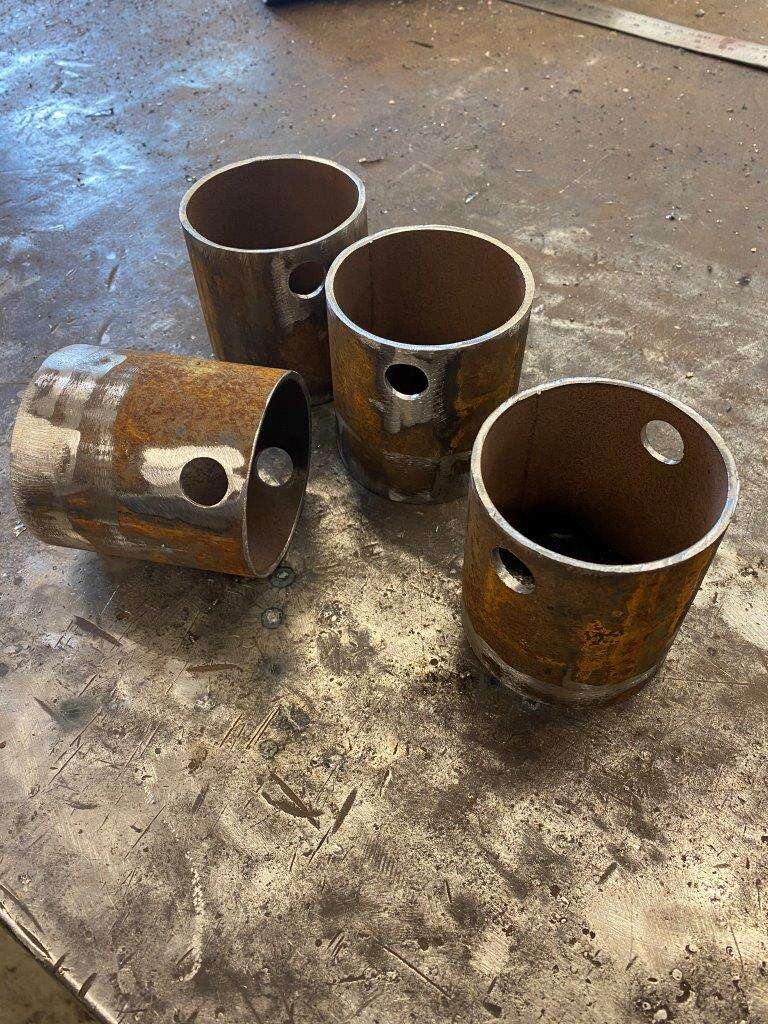
A bit of tube cut to length
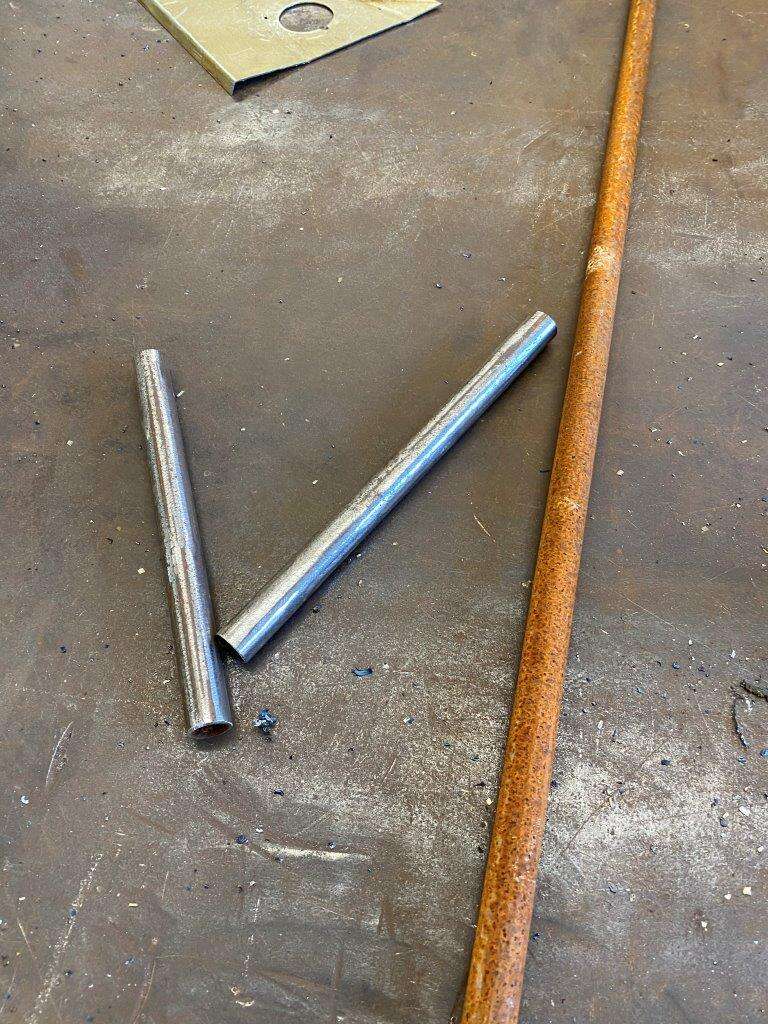
Holes drilled in the oven
Then weld it all together
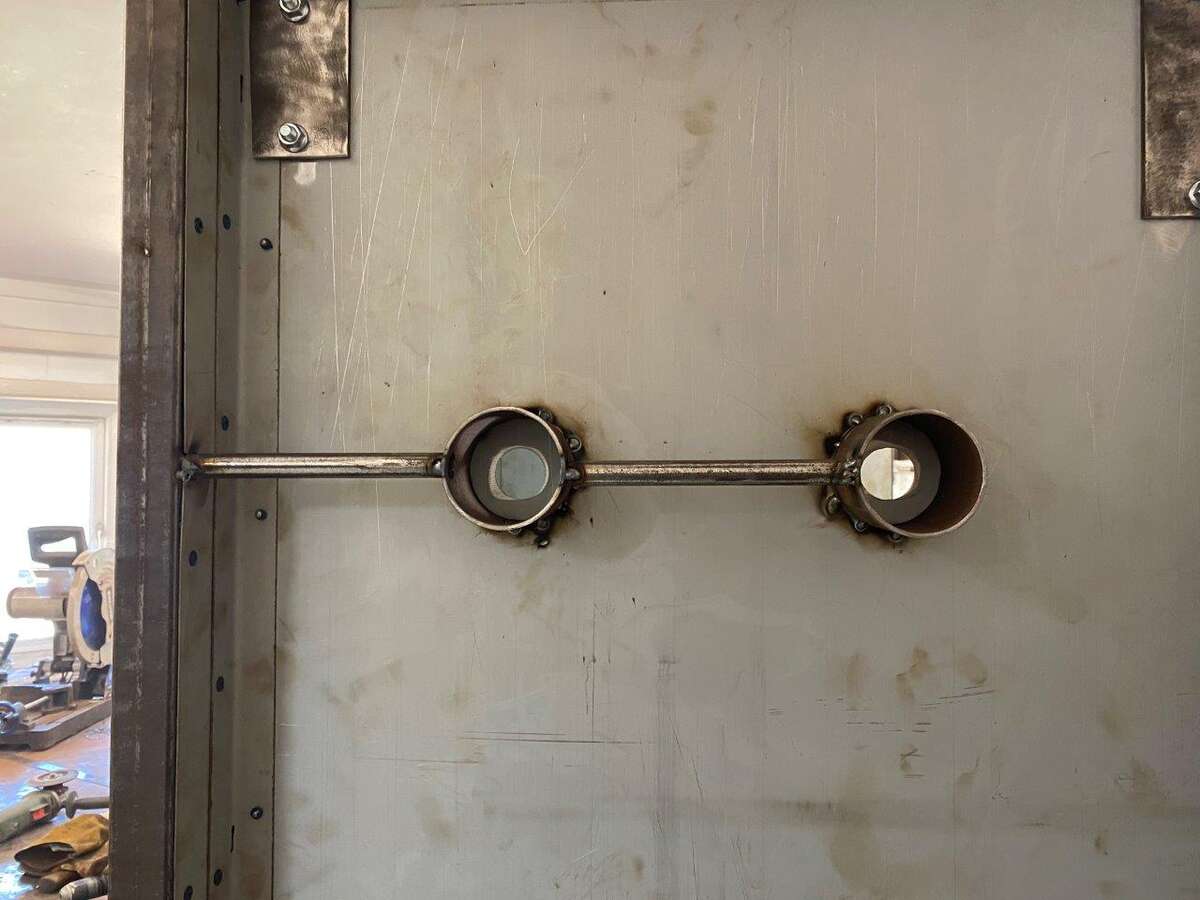
These are the light fittings and the tube is for the wiring
The oven seemed very happy with my work!
I may have been on my own in the Zed Shed to long, WILSON!!!!!!………………………………
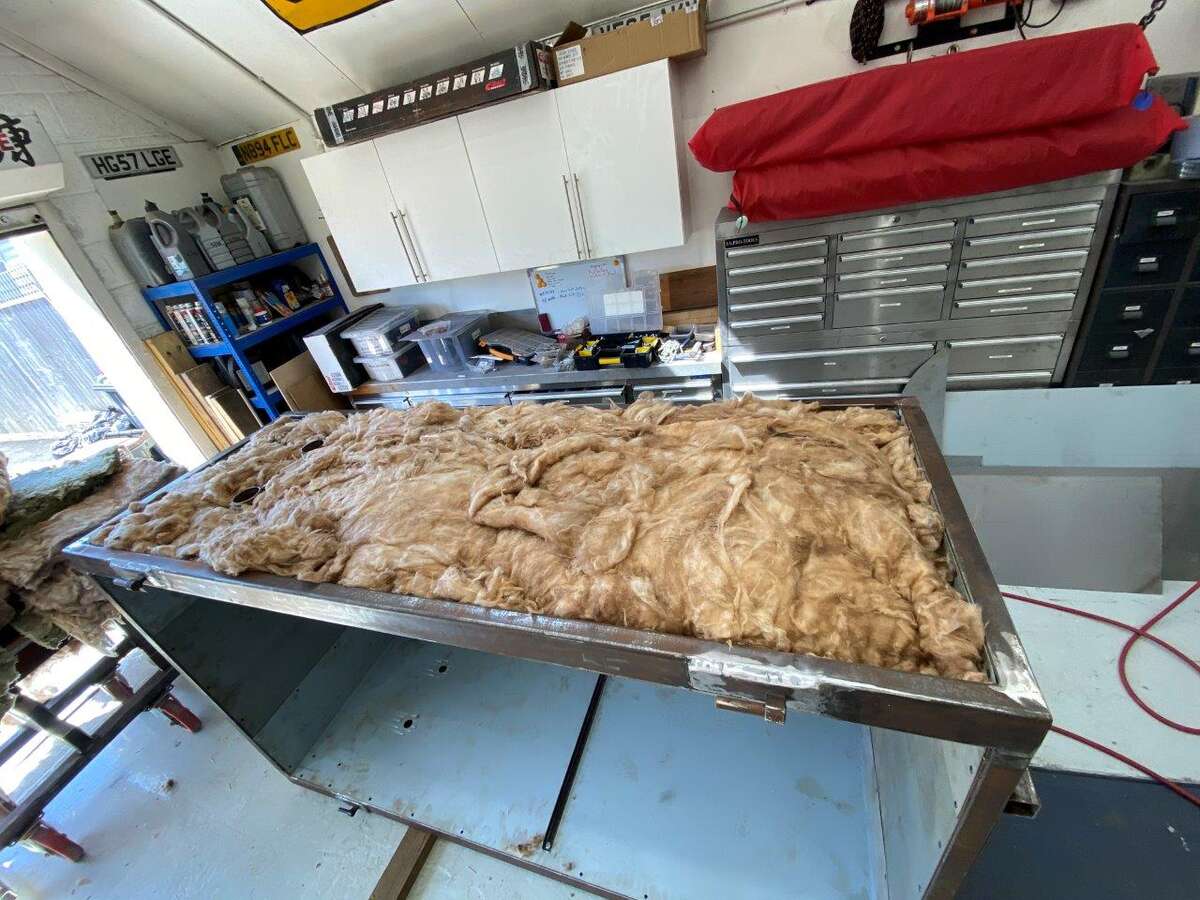
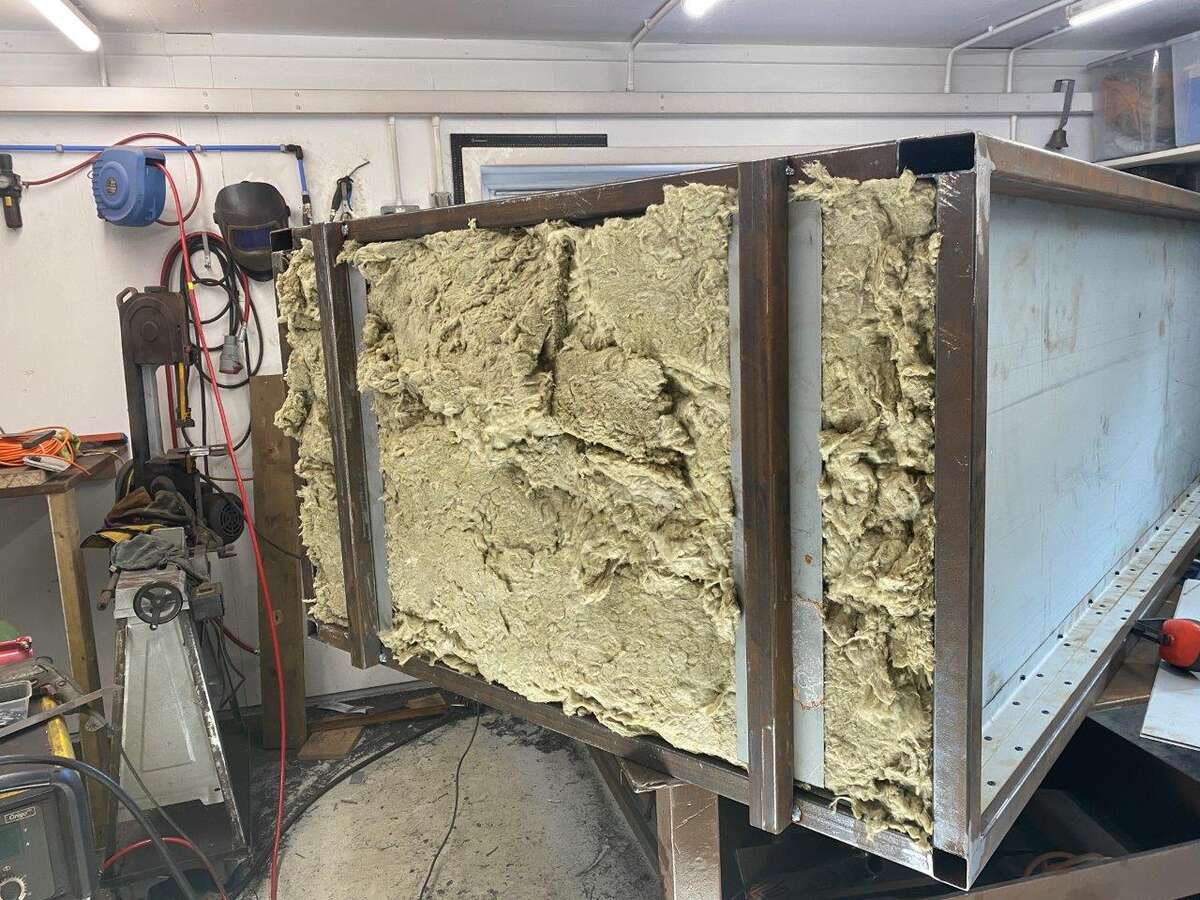
I then added some more box section behind the rest of the areas an element will go through

The idea is to create some insulation area behind the elements as on the original ovent they just bolt them to the outside no insulation at all in places

I’m trying to increase efficiency and it makes the thin steel stronger in the stressed areas, to that end I used my last bottle of fire foam
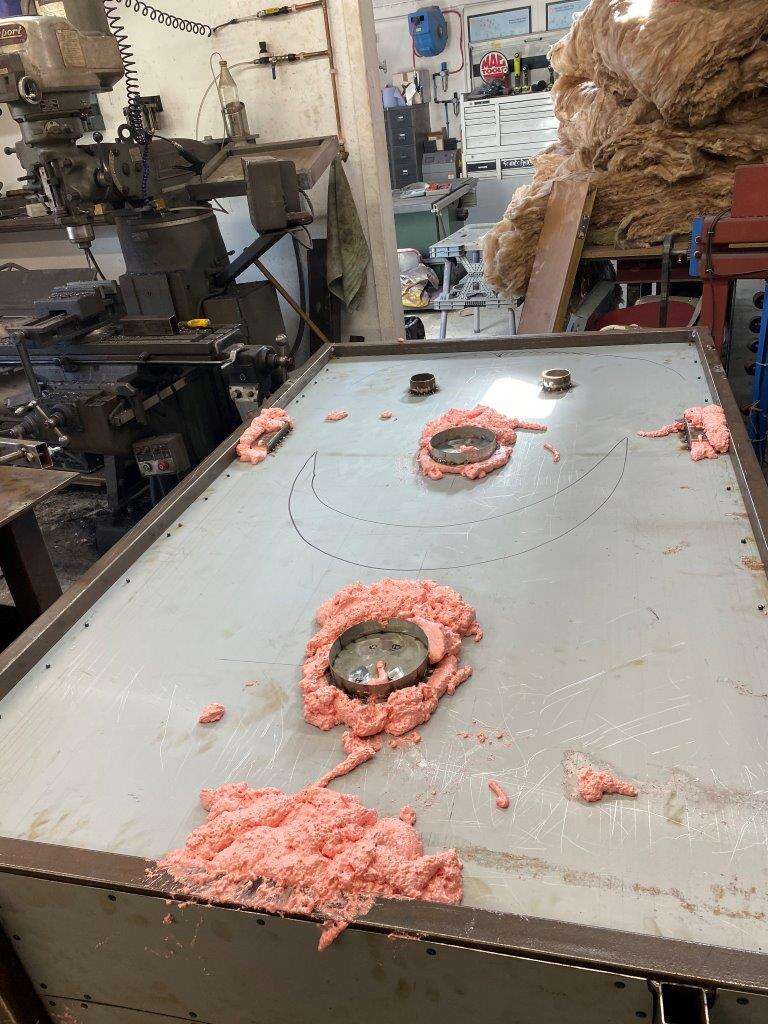
After that had dried I trimed it all up
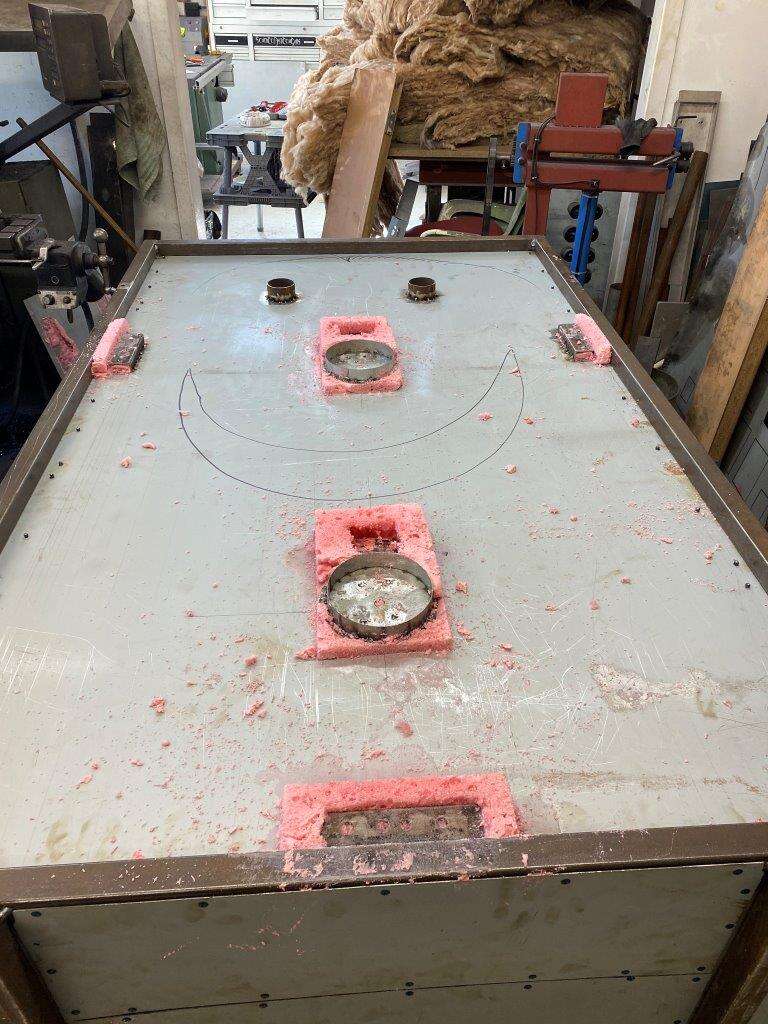
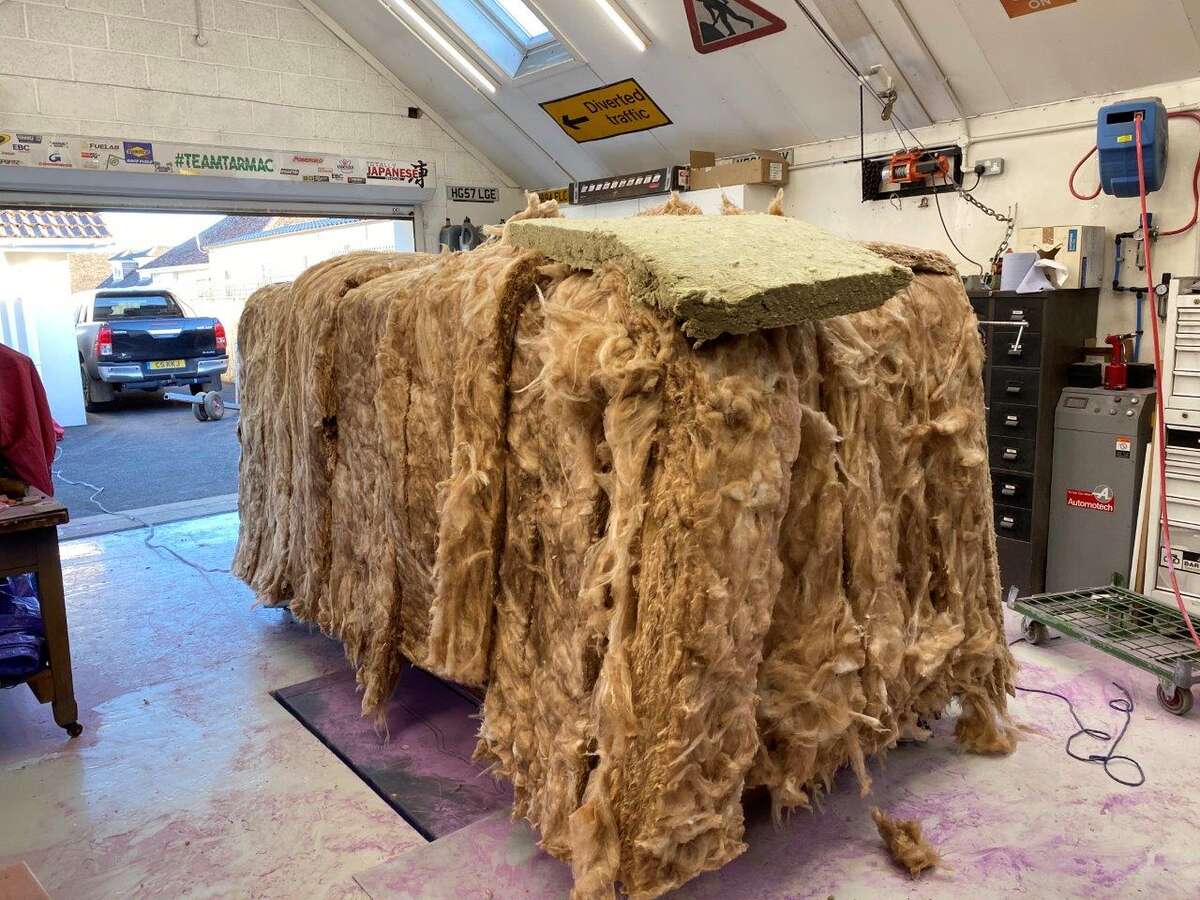
Added some insulation
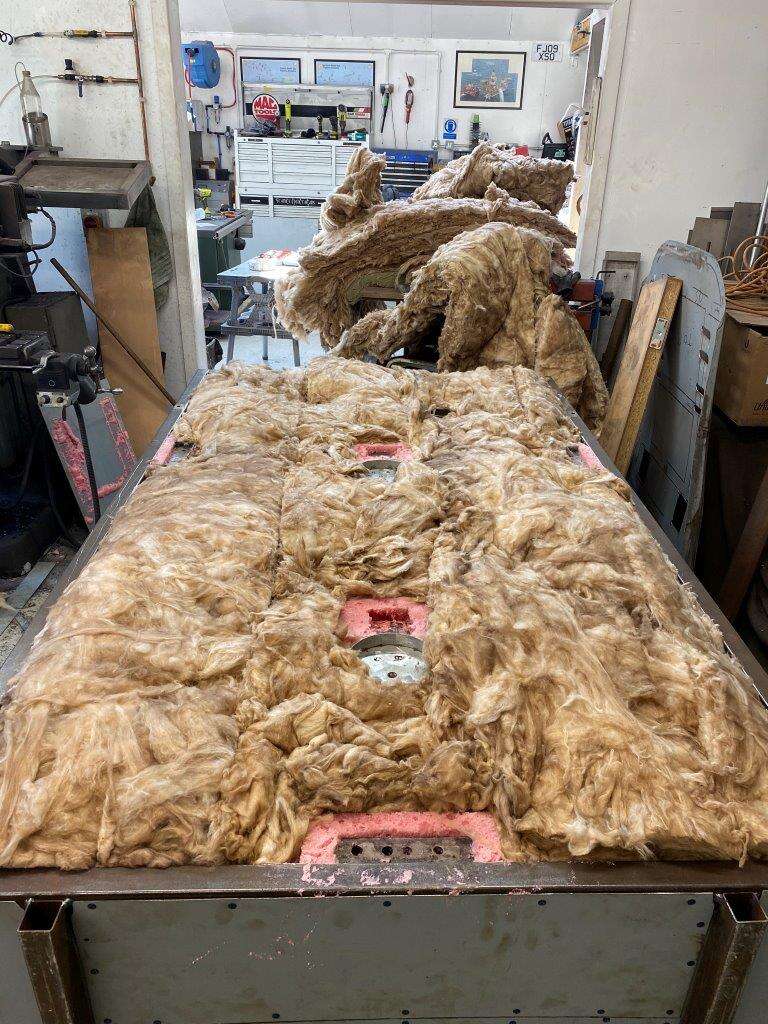
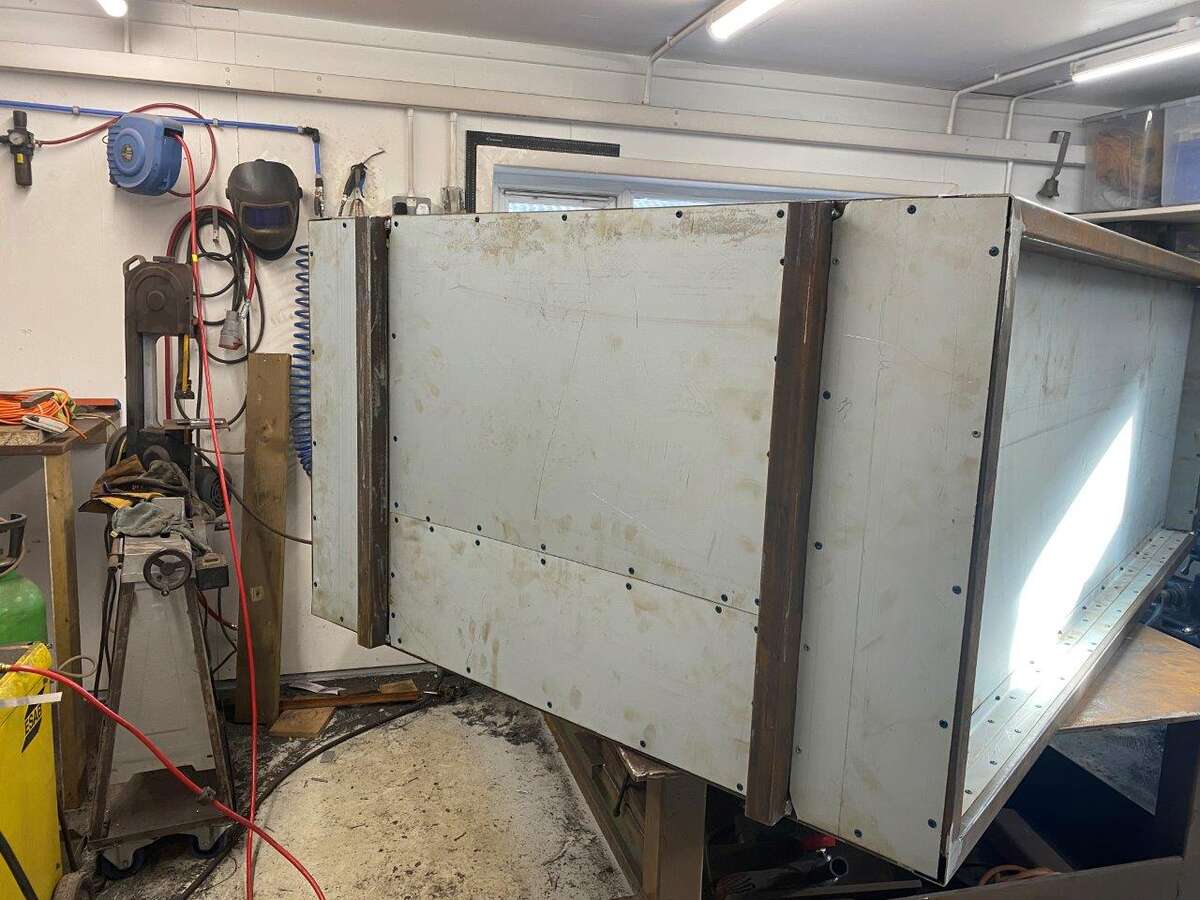
Then riveted the back on
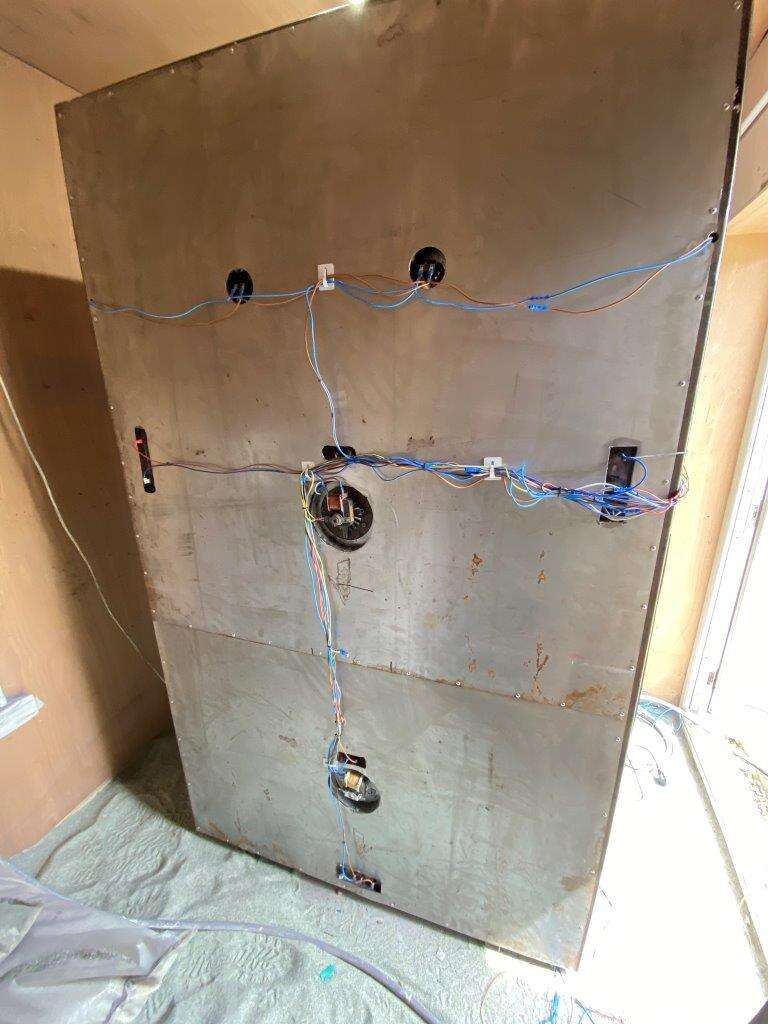
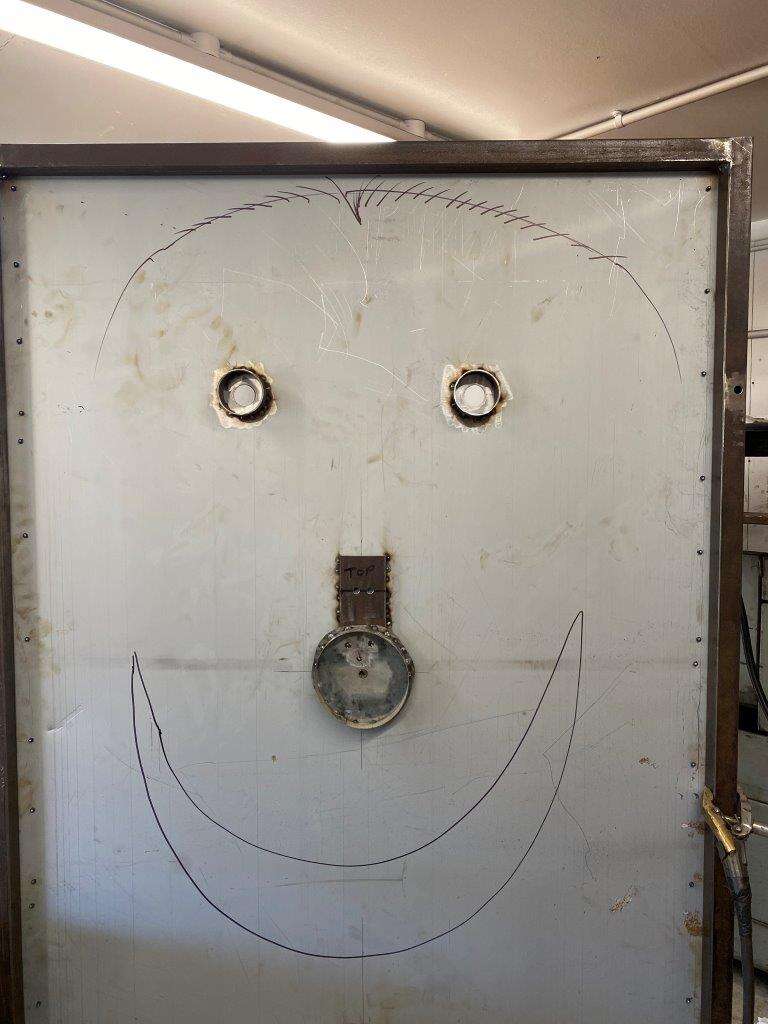
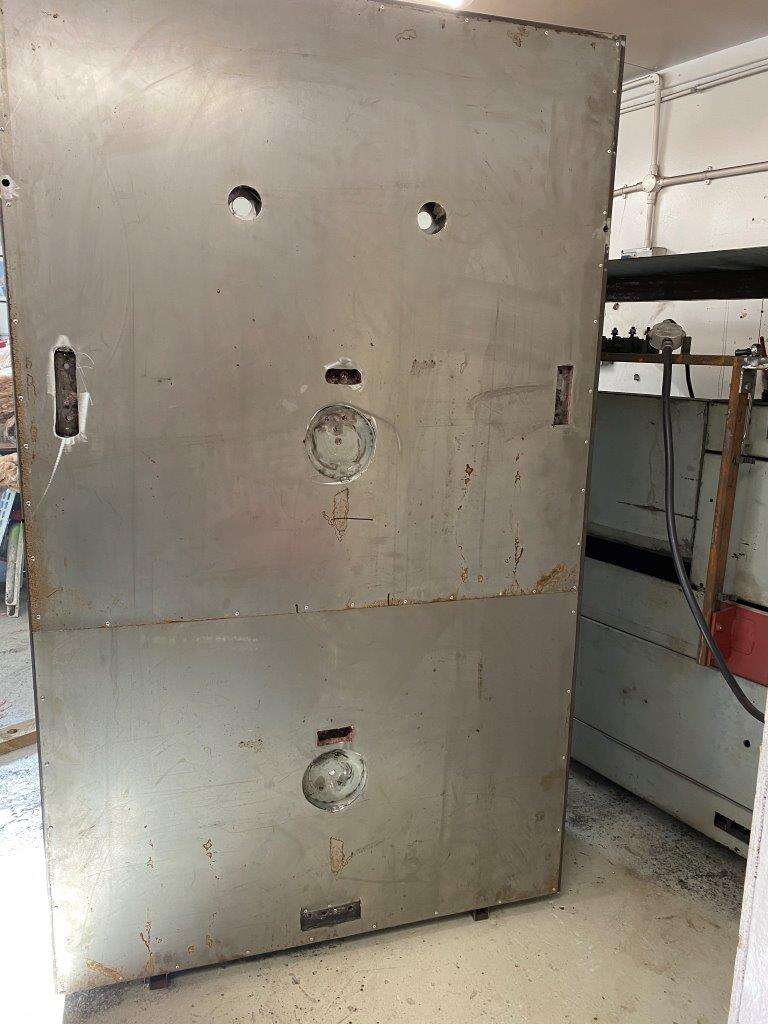
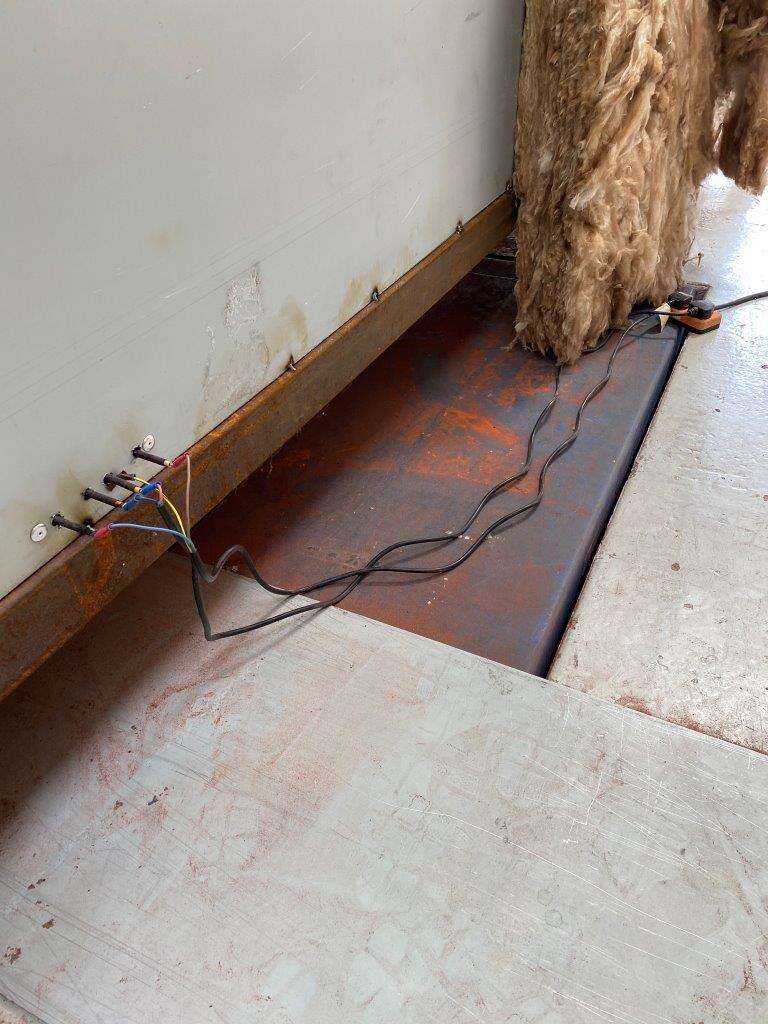
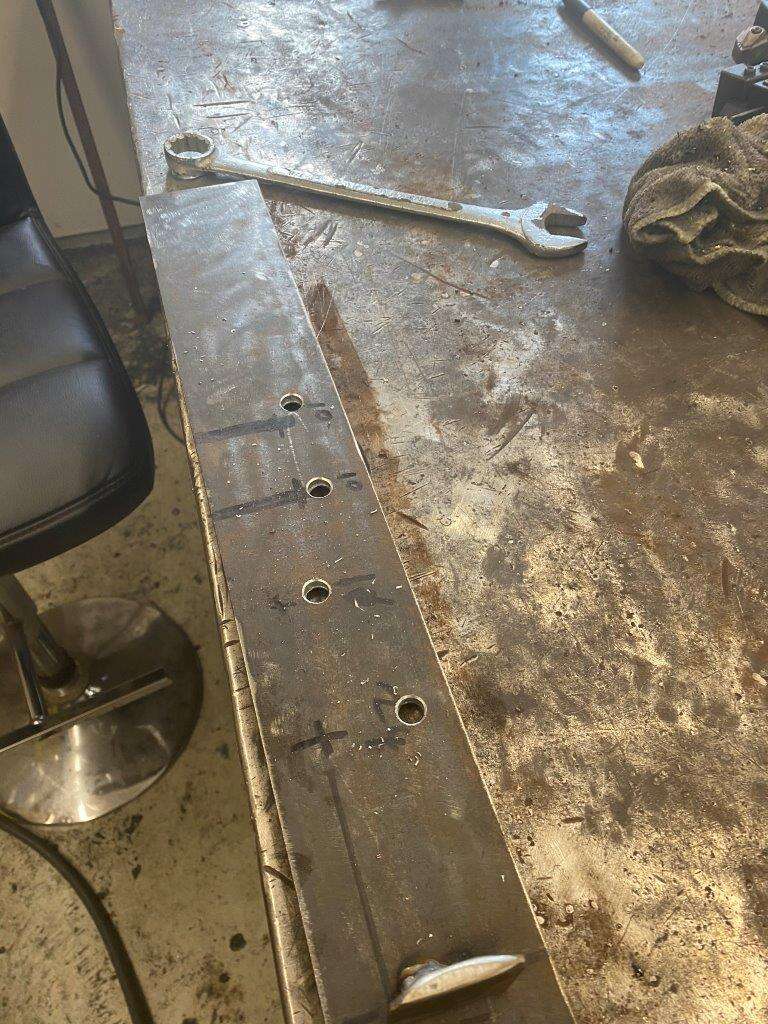
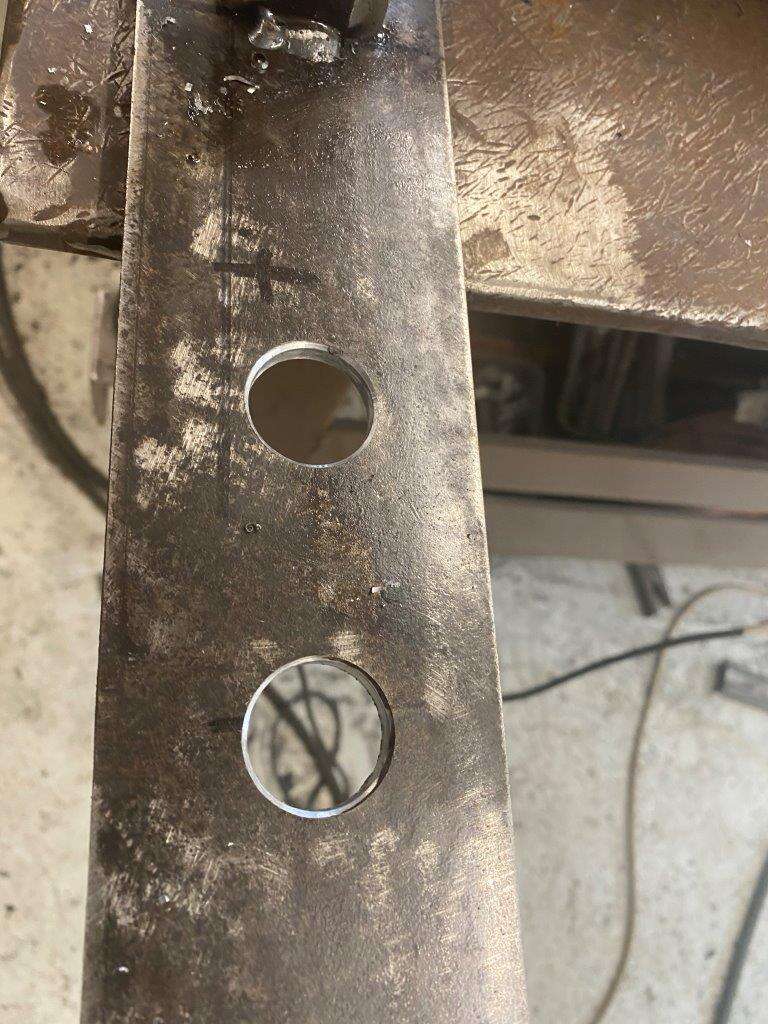
Then I opened all the access holes for the electrics.
The back looks like this now
Wilson?

#staysafe
Keyser - “I asked God for a bike, but I know God doesn’t work that way. So I stole a bike and asked for forgiveness.” – Emo Philips
-
7
-
 1
1
-
-
On 29/05/2020 at 10:50, neo said:
bet you could cook a whole cow in there
")
nice work again, wanna see some more buggy work when u get the chance
I know, I know, Thing is I now I have gone the powder coat route I need the oven done before I can crack on with The Bug but I will post the coplete build when I get to it, should be starting back on that in the next week or so, depends how long it takes to finish the Oven and put the lathe back together, the good news is that after The Bug the next two projects are vehicle
-
1
-
-
Yayyy it’s Friday
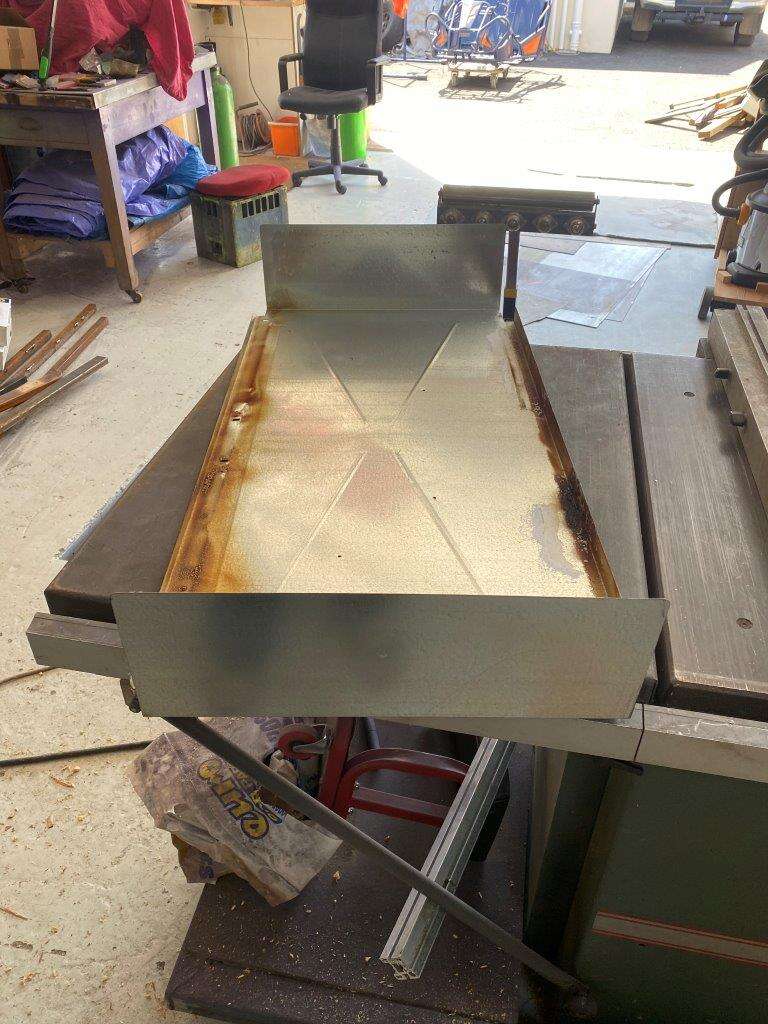
Still at it on the powder coat oven, I decided to go the extra mile on the rack for hanging the items being powder coated, I could have just put a metal rack in or just a couple of bars but where is the fun in that?
Instead I got some box
Marked it up
Cut it out a
And the obligatory clean up

Then I had to drag the lathe off the wall
Just to make these
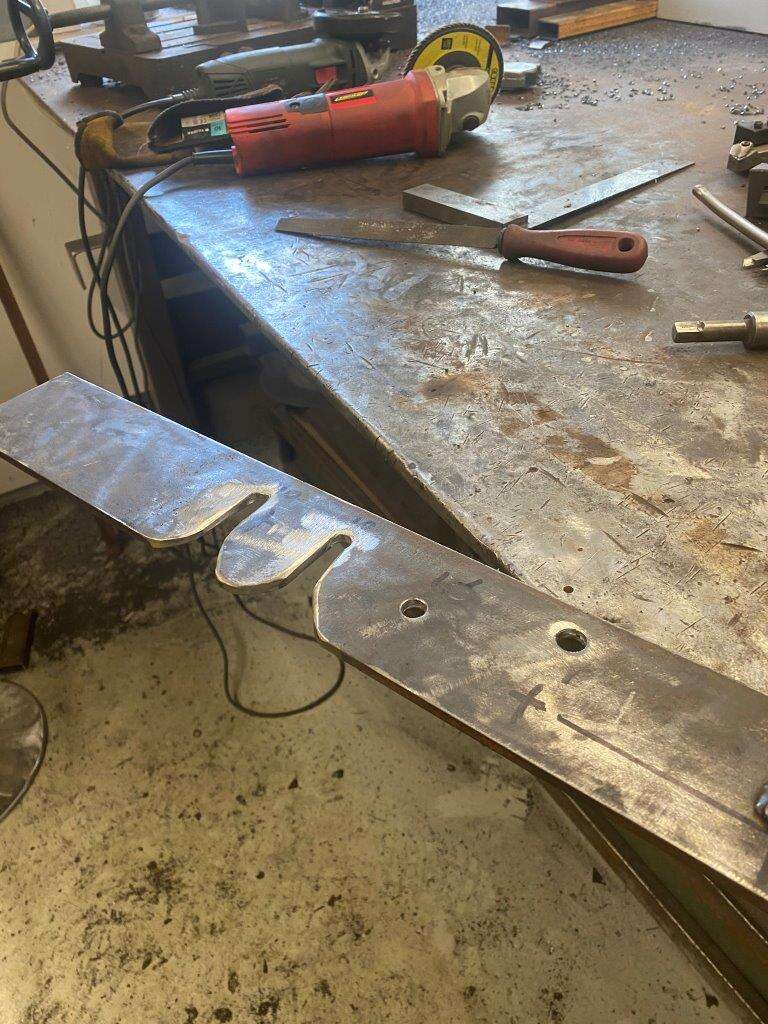
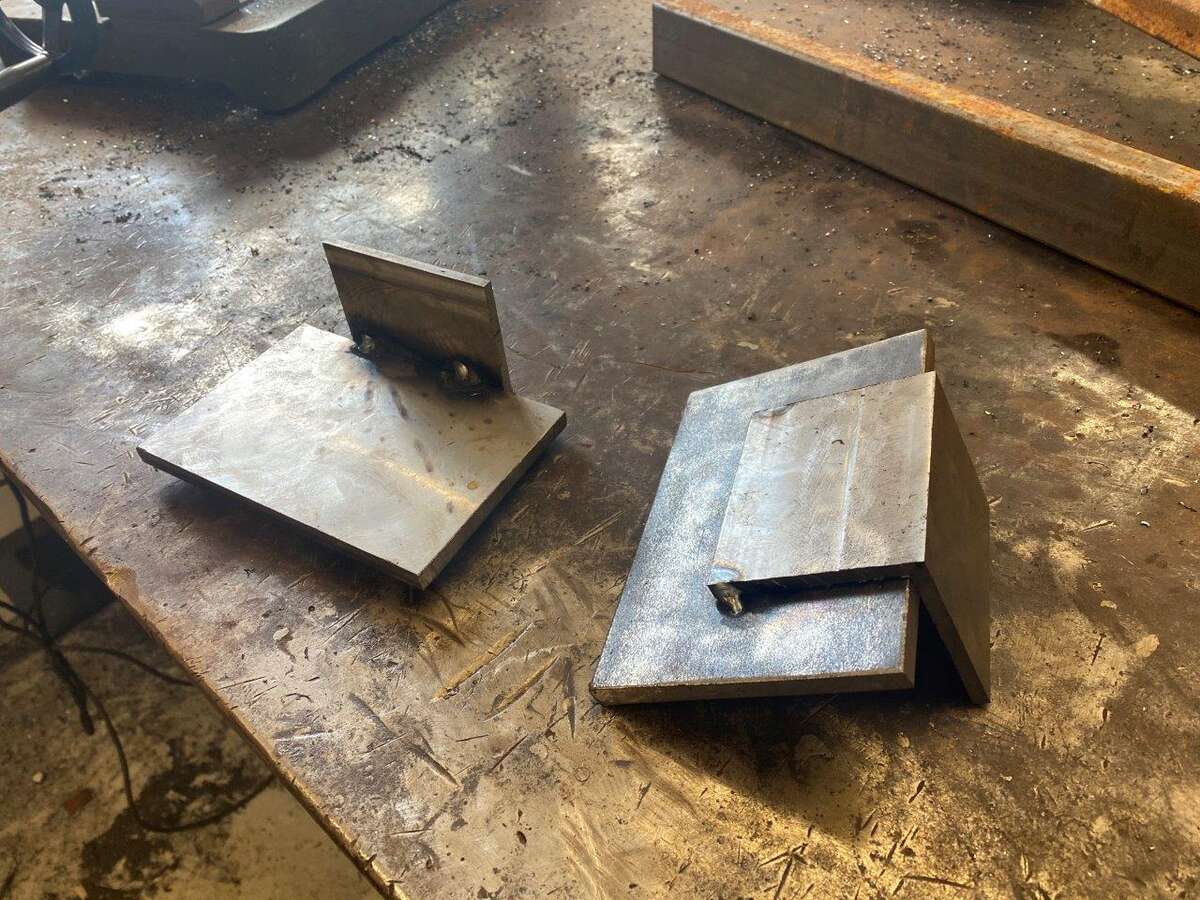
Then some plates
Lined up and tac welded on
Made these
And welded them on
Some more box
And some half inch bar
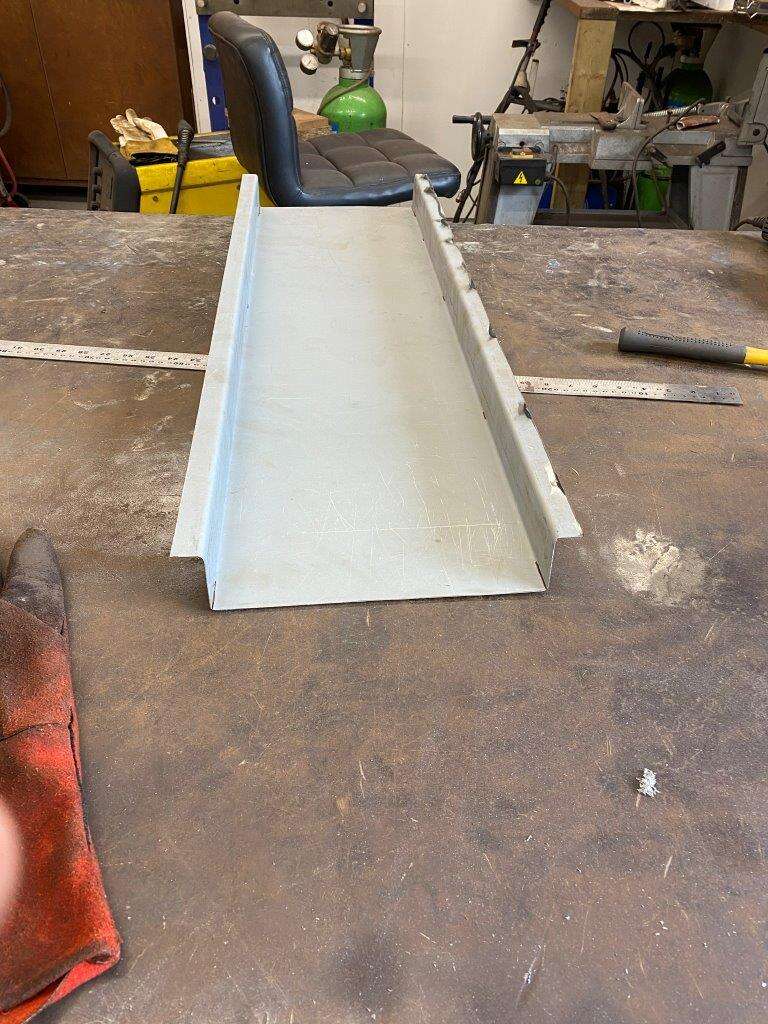
All joined together to make a shelf

That rolls out
Here are the rollers, I need to add a stop so it can’t fall out

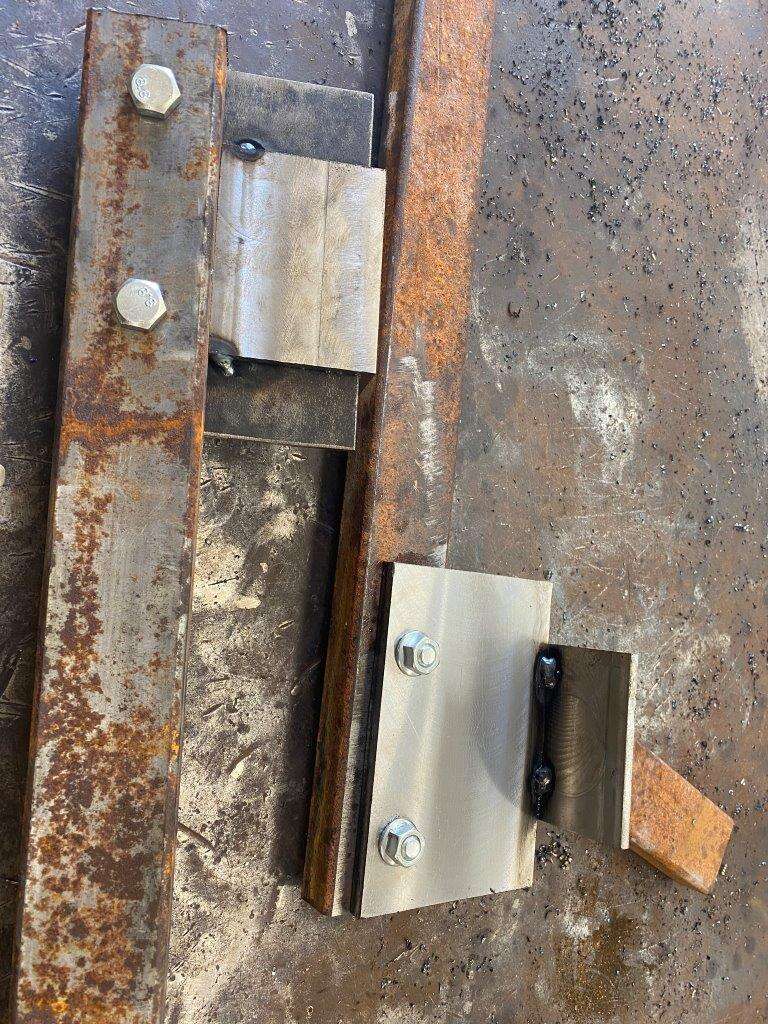
I added a second set of plates and they bolt through the inner skin
I will weld these outer plates to the frame and weld the nuts on so they become captive so the shelf can be removed and it is not just held up by the inner skin
Stay safe, have a great weekend I should have an update on Monday
Keyser - “Laughing at our mistakes can lengthen our own life. Laughing at someone else’s can shorten it.” – Cullen Hightower
-
6
-
-
17 minutes ago, Beb said:
How pink do you like your wheels?
I'm doing the ones on your Scooby pink mate
-
1
-
-
16 hours ago, Mikey_S said:
When do you start taking bookings for alloy refurbs?
Very soon - I have doen them before
Happy to practice on your wheels
-
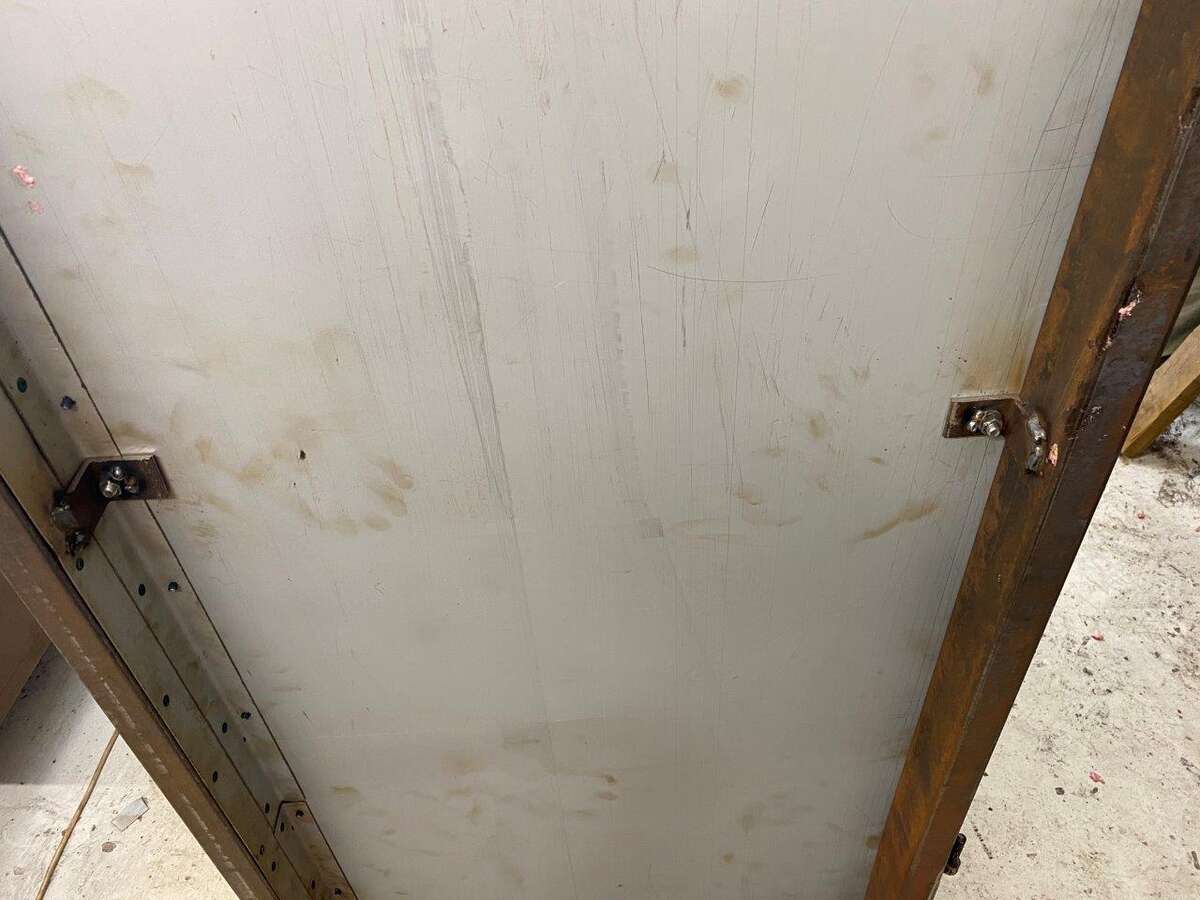
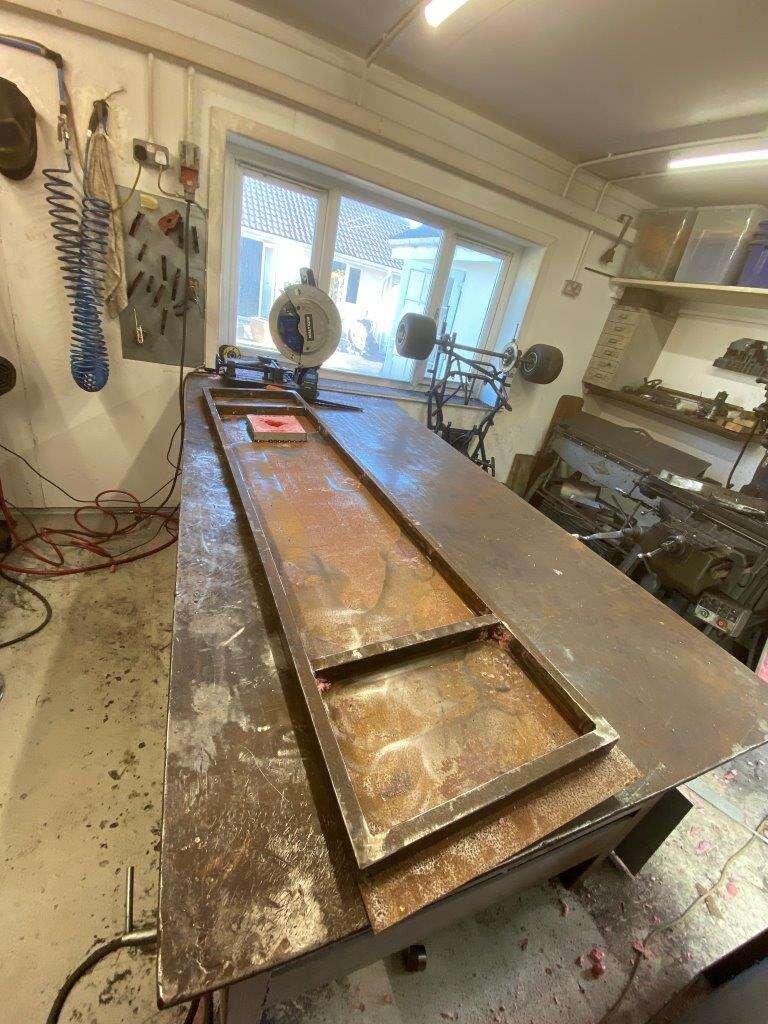
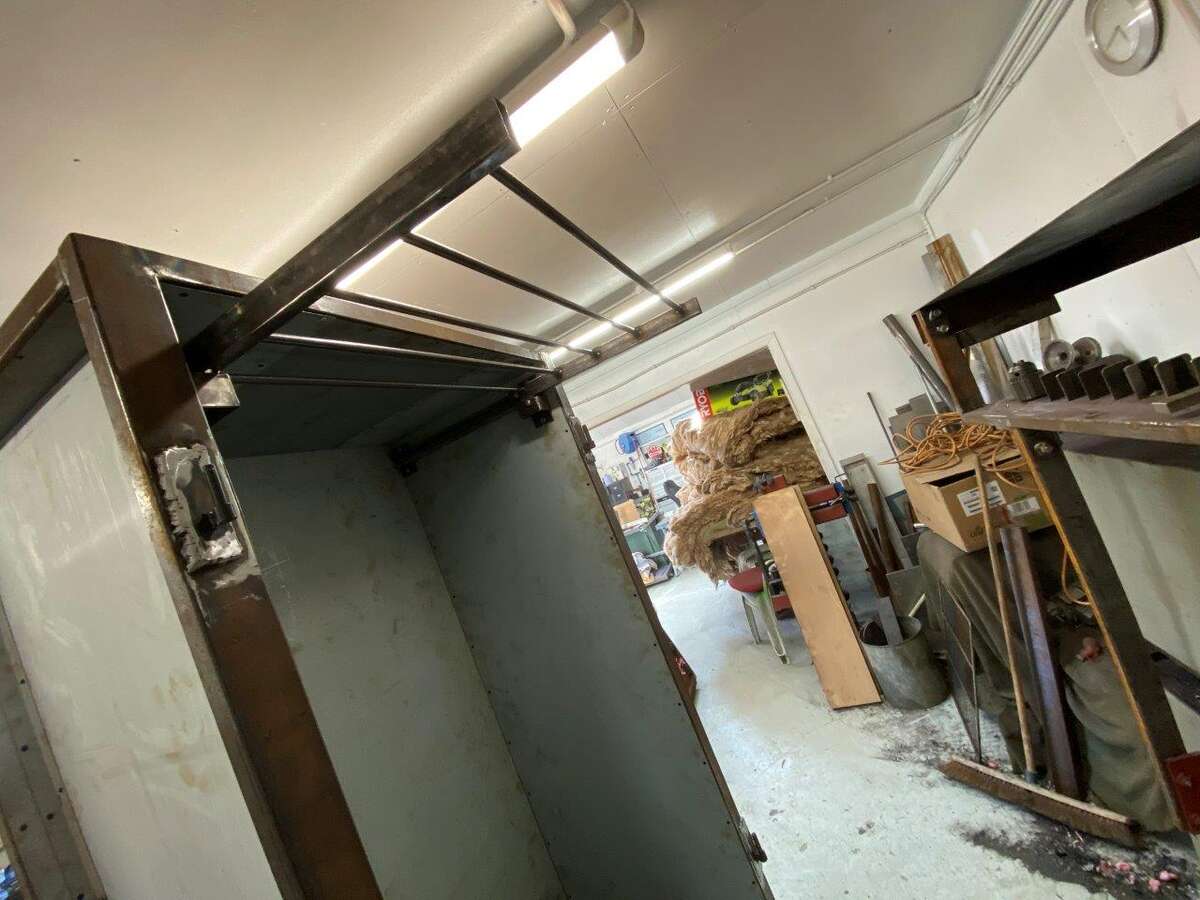
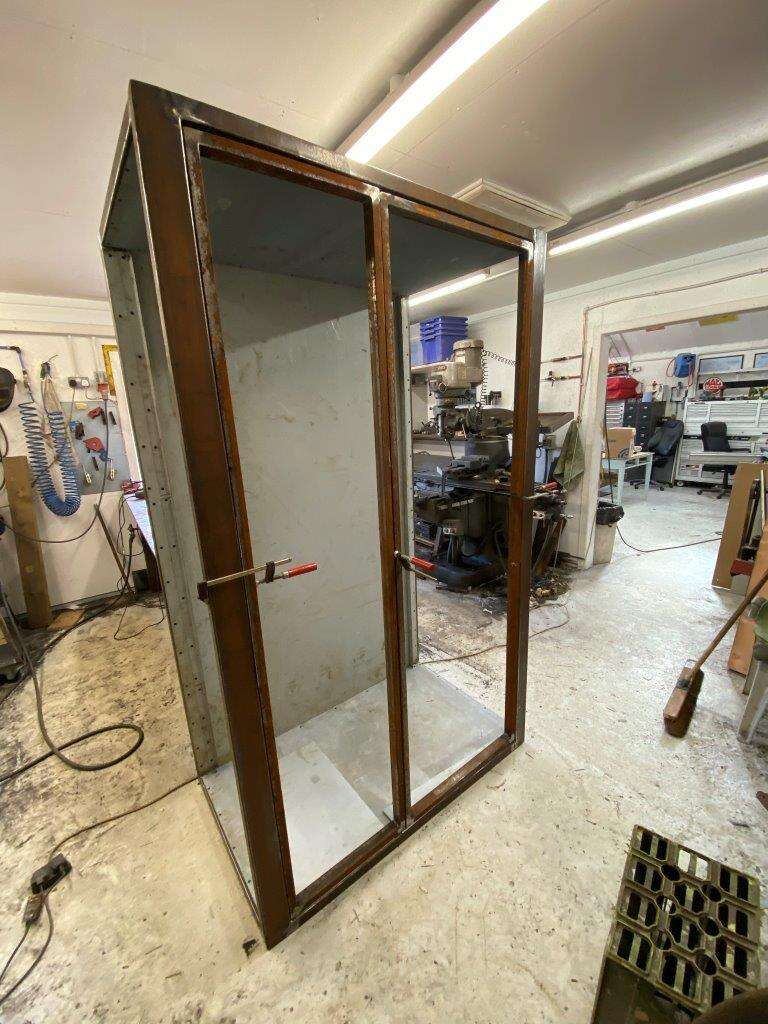
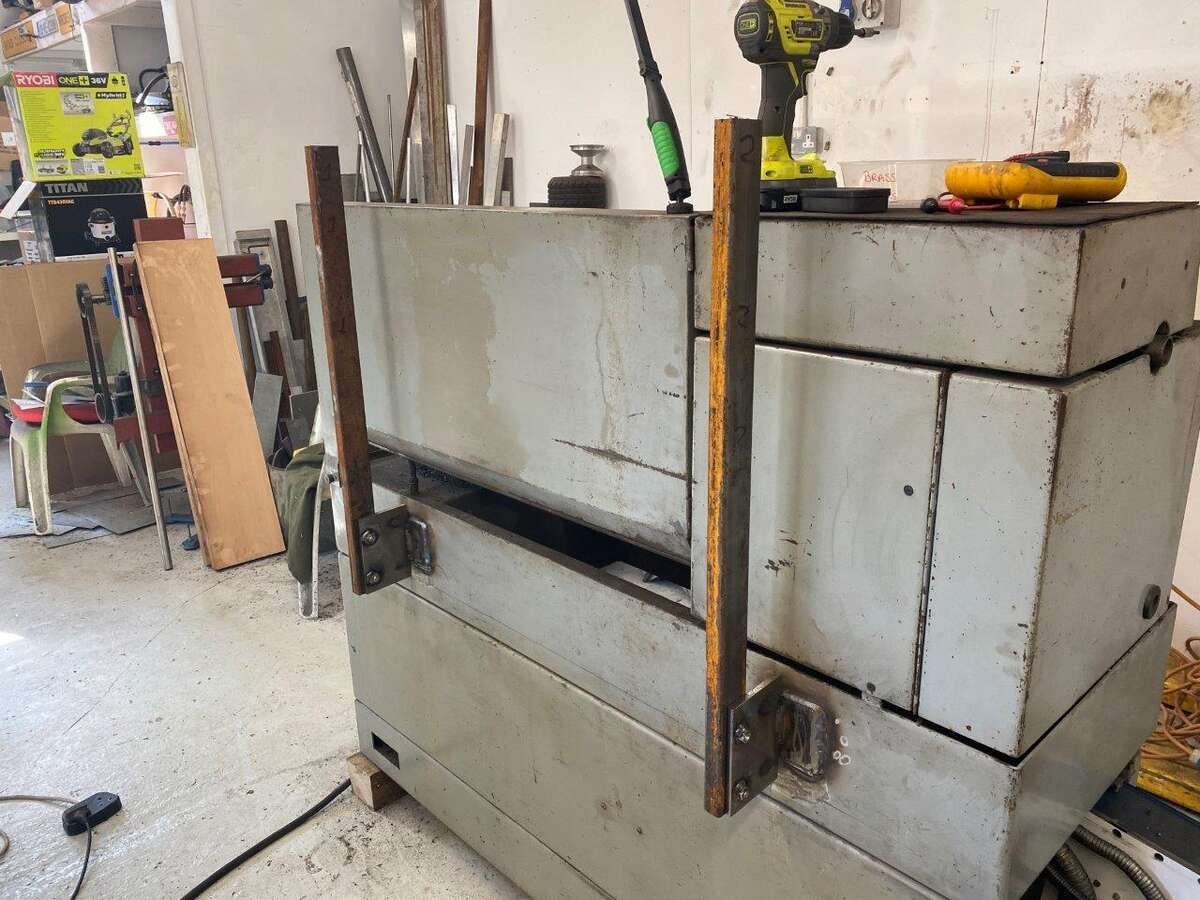
Morning, Getting less and less time in the Zed Shed now, but we have a weekend coming up so I can keep posts coming for a few more days
First I got Mrs K in to help with the next part of the project which is the doors, cutting the big sheets is hard on your own! and always handy to have someone to rivet while you drill
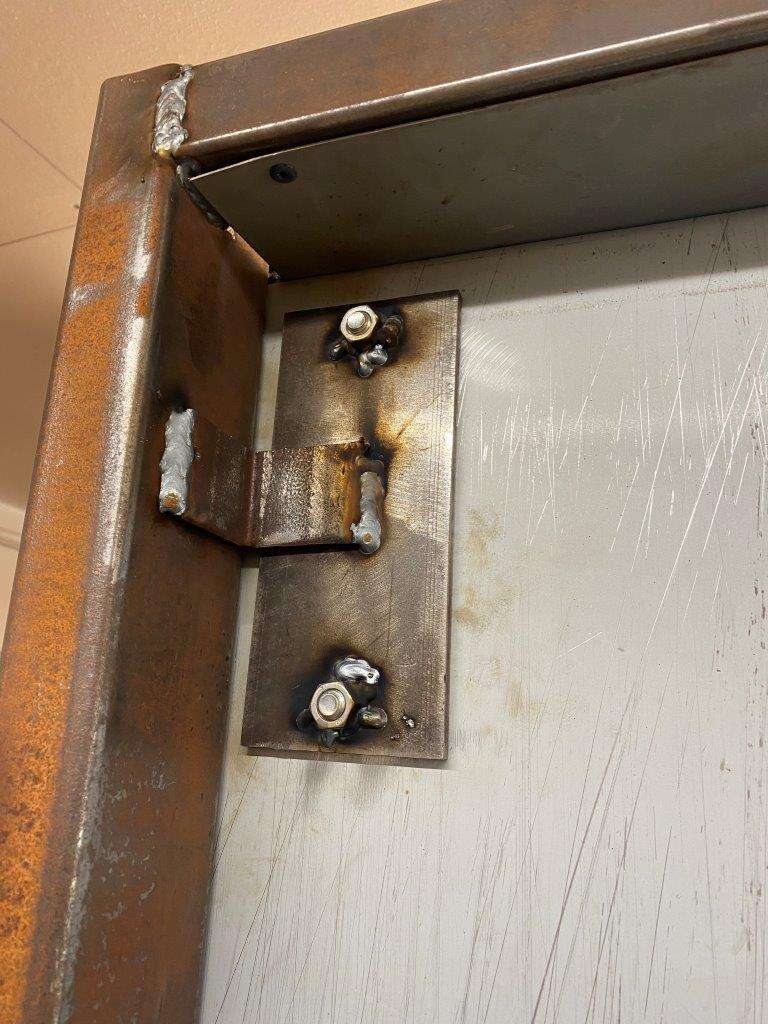
After the outside panel was on, we added support bars for the hinges
Marked and drilled
Hinges on
Soon had both doors on and checked
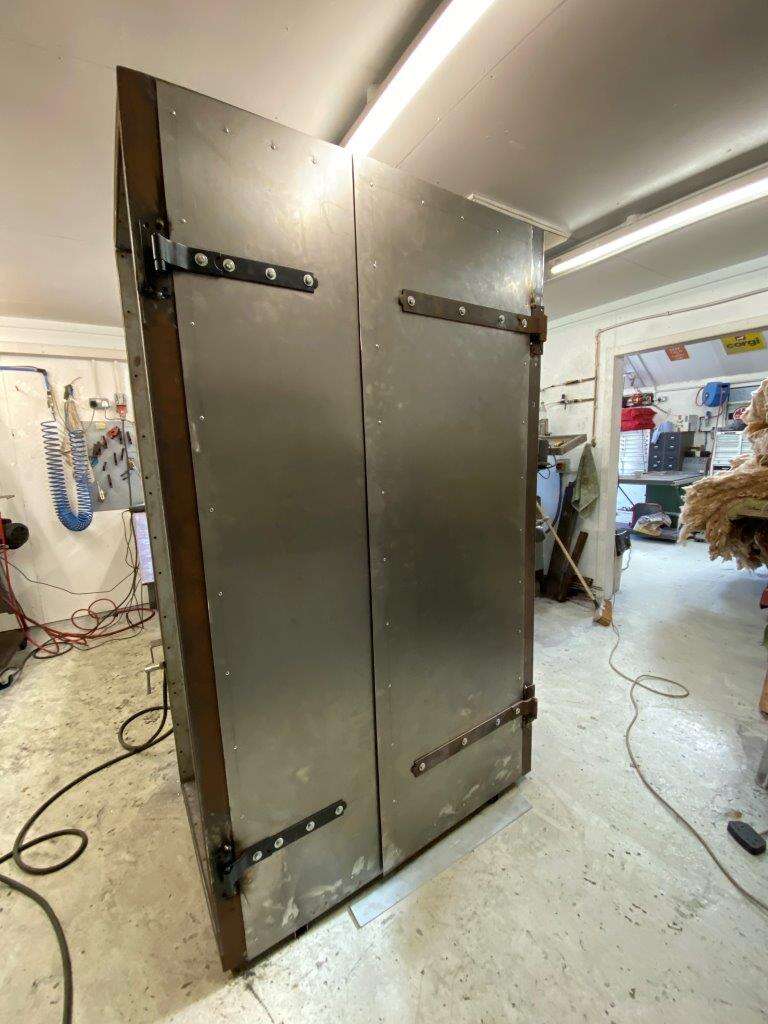
But the hinges. WOW! they were a PITA, now I’ll admit the big ones were ones I had laying around and we bought the smaller ones as the same design, they are cheap and designed for gates, that probably went against us, I wanted “cranked” hinges as it allows a lip on the hinge side which helps to get a good seal when the door is shut – keeps the heat in – but the hinges just will not line up, if you hold them flat to the frame the doors won’t close properly.
This was the solution
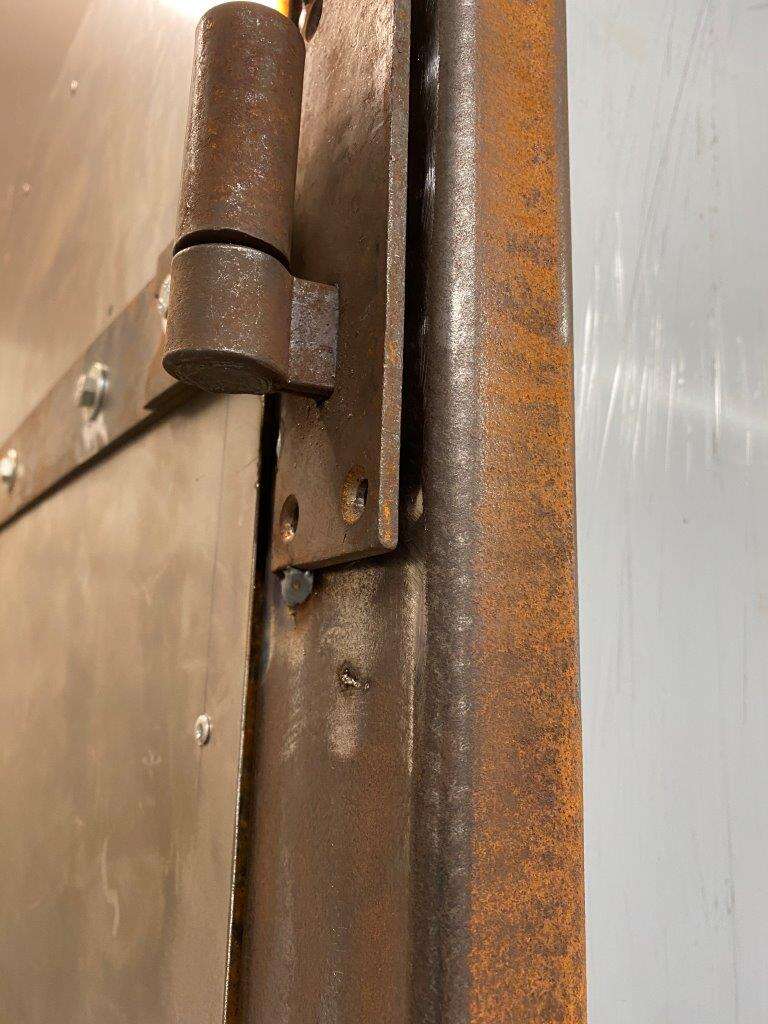
The hinges were welded on at an angle to get the distancing correct, mind you if you look at them carefully you can see they are not even round
That oval shape may be partly to blame, but welded at an angle has meant the doors work properly now
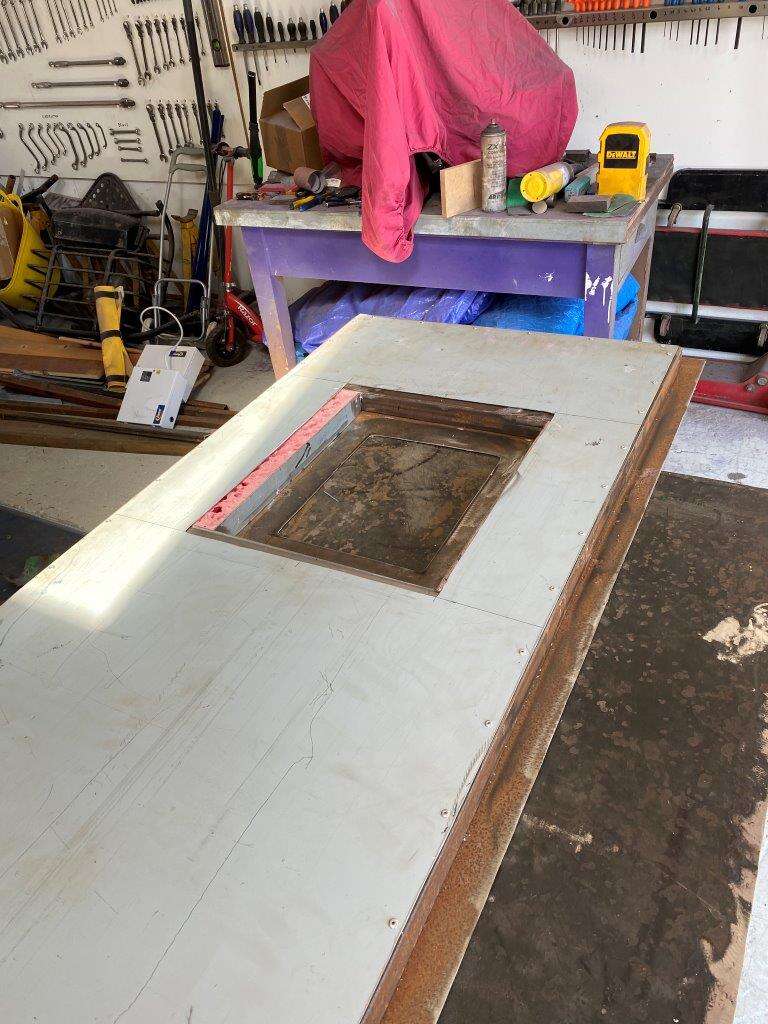
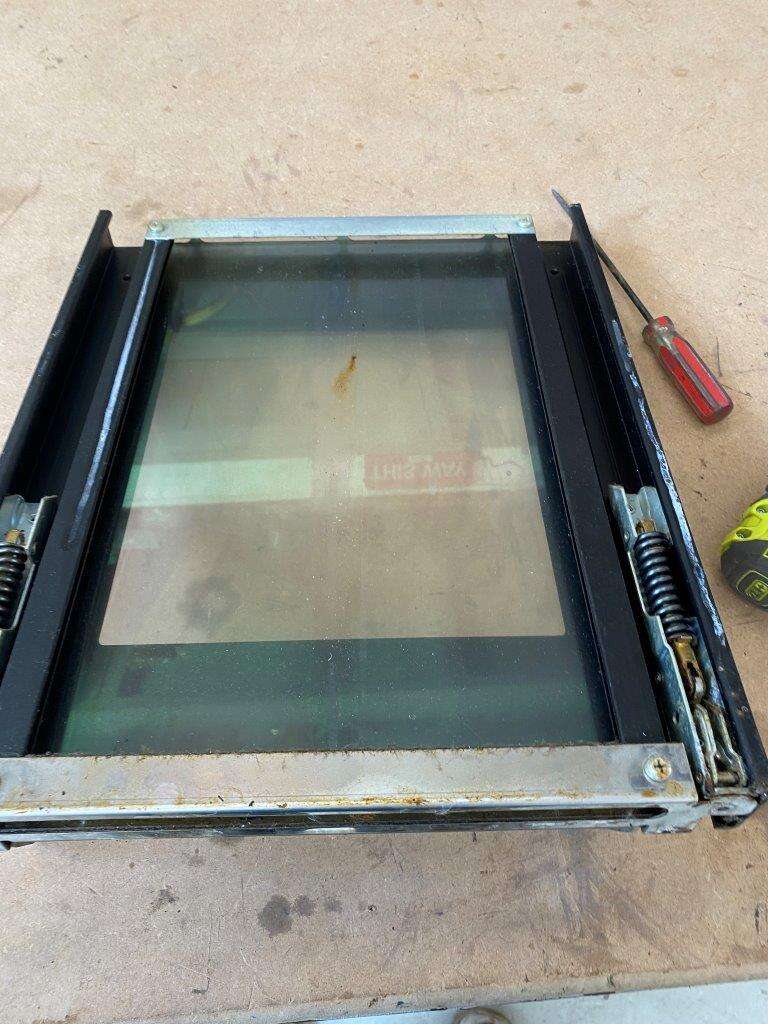
Next I got the triple glazed window out (glass protected by the cardboard for sparks)

Lined it up
Welded a frame around it
Then cut a hole in the door
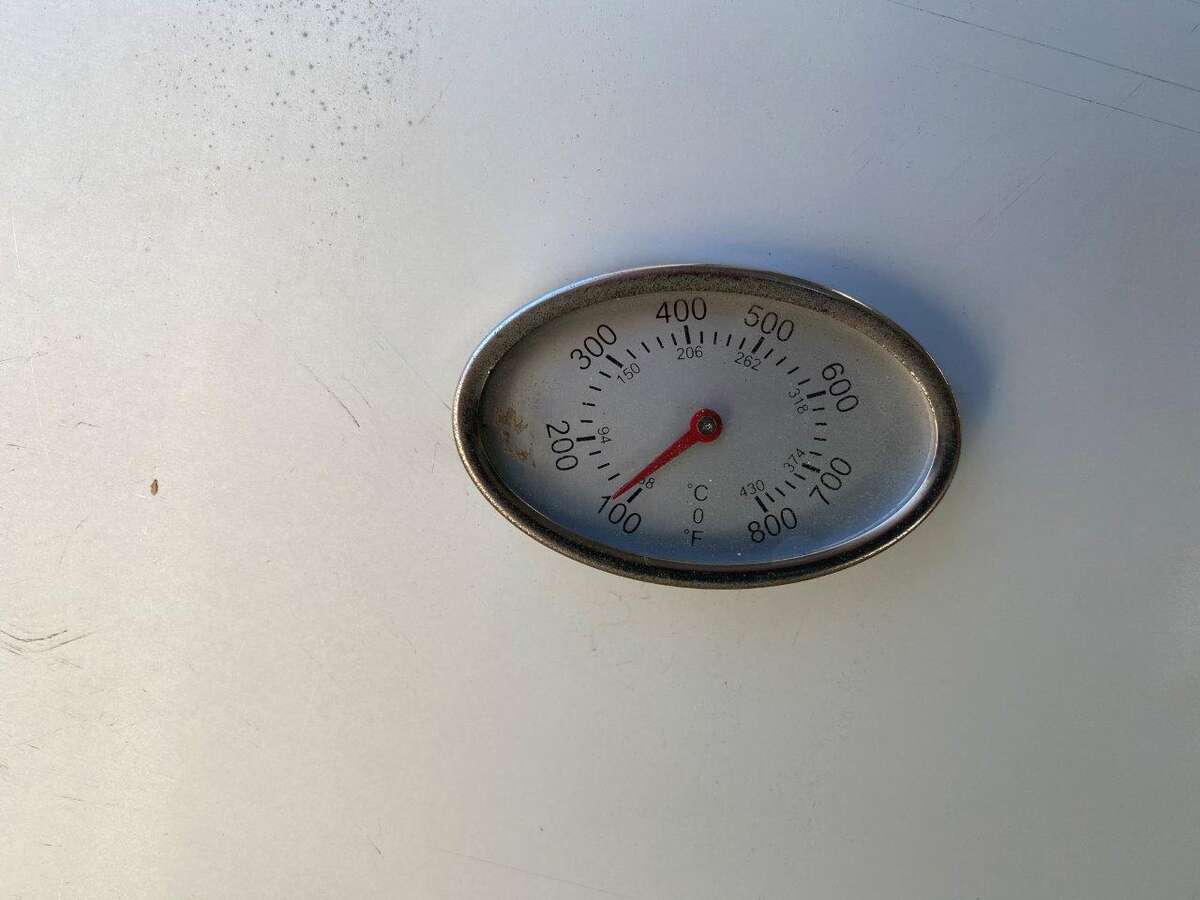
On to the thermometer
Now that has seen better days, also as the probe is short I had a recess in the old door, I want to avoid that if possible this time round, a quick search of the inter web found me a replacement thermometer with a 150mm probe for a few pounds so that has been ordered.
I built this box for it
The idea is that when I add this foam, I acquired as it’s out of date
Like this
I will be able to drill through and mount the thermometer, the theory is that I will be drilling through foam not rock wool, anyone drilled through rock wool? – it bunches up and wraps round the drill bit, I’m trying to avoid that issue – hope it works.
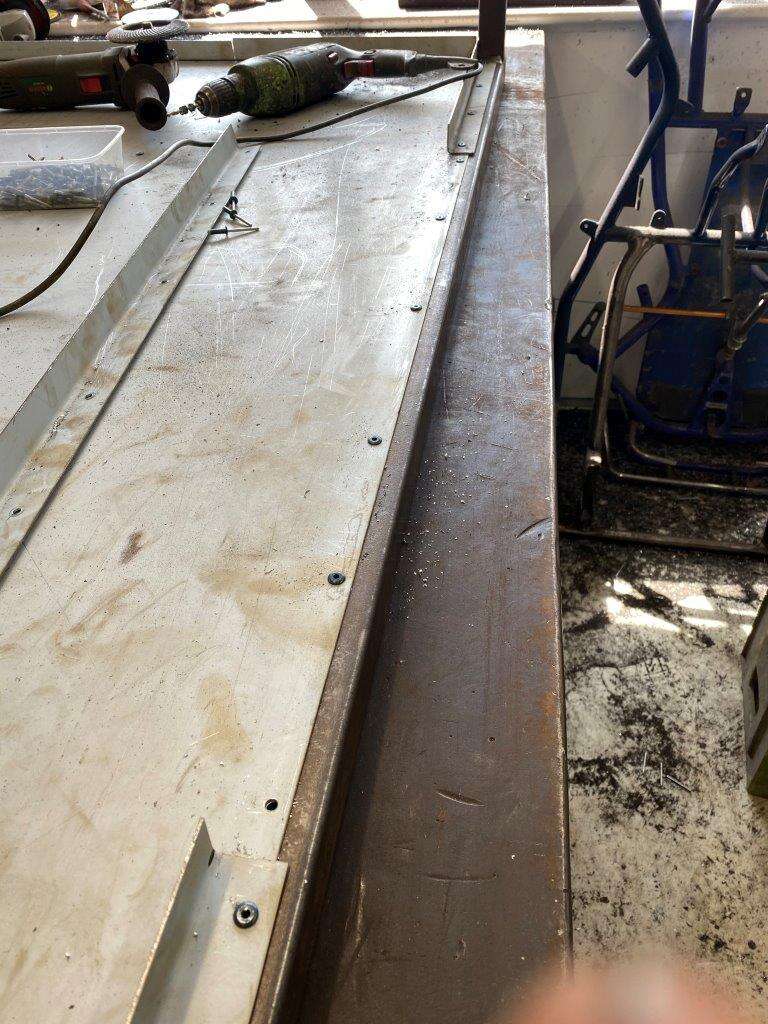
If you look closely at the frame in the pic above you can see the holes I drilled around the frame and filled with foam as well – fully insulated door
The sides of the window were done just to stiffen them up.
Now that takes a day to dry so ………………………
I got the car cleaning kit out and pulled the toy out of the car port where she has been sat undriven for weeks!!
Looks like a barn find

Looking better now


Now I’m no detailing expert but I was happy with the shine
Be safe guys hope work is coming back for you – or not if you are happy chilling at home on furlough
More tomorrow (work not withstanding)
Keyser - “I don’t believe in astrology; I’m a Sagittarius and we’re sceptical.” – Arthur C. Clarke
-
5
-
-
16 minutes ago, SuperStu said:
Was there an oven light to nick from the SMEG to assist with your viewing window?
There was two
Plus I have the ones from my origional oven and I may have bought extras from the bay of E to give me lots of ilumination
-
1
-
-
Morning,
Well dunno about you lot but I was swamped yesterday with work, looks like 80% of my clients are back to work in at least some form.
But you don’t want to know about that, you want to see cookers
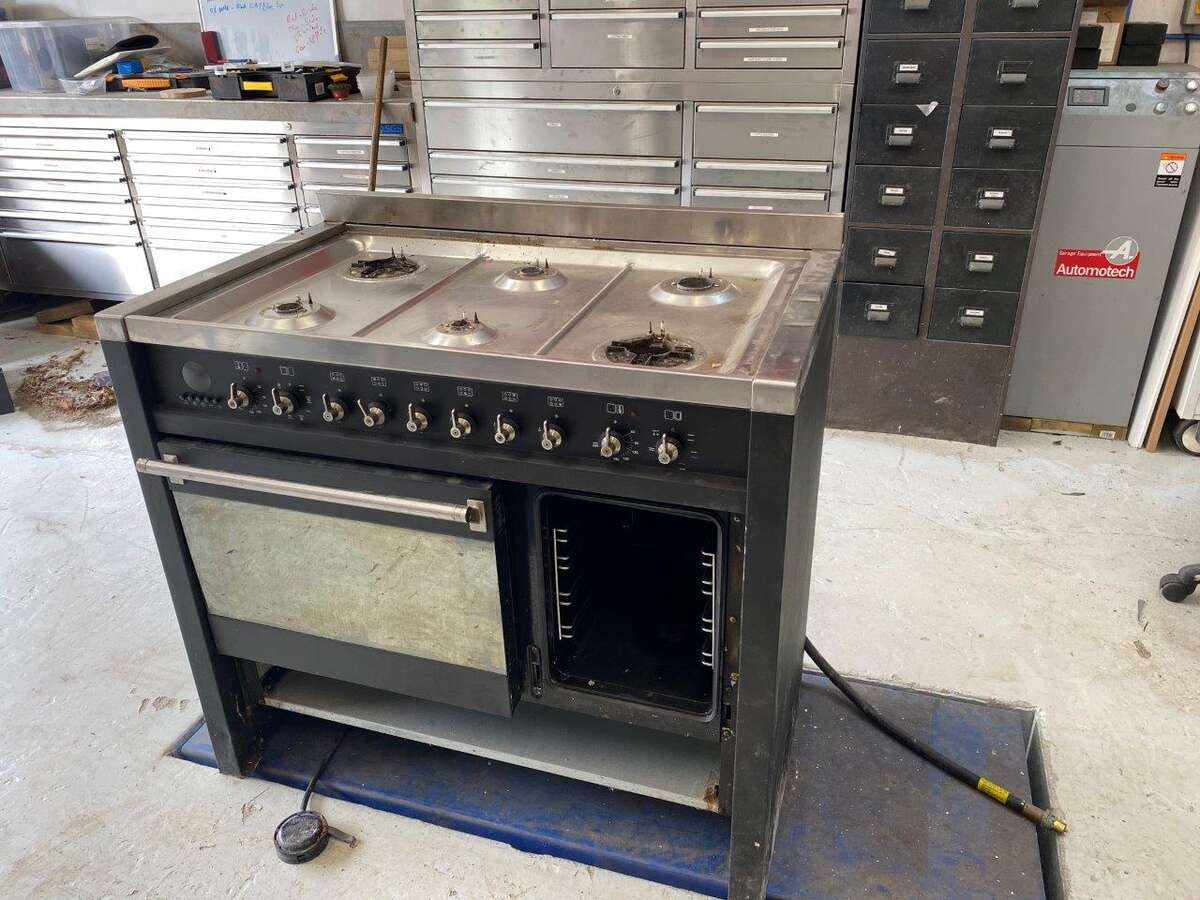
There ya go
That’s the cheap Smeg oven I bought from Gumtree worked out less than buying the bits I wanted and it has triple glazed doors
So stripped it down to get this lot
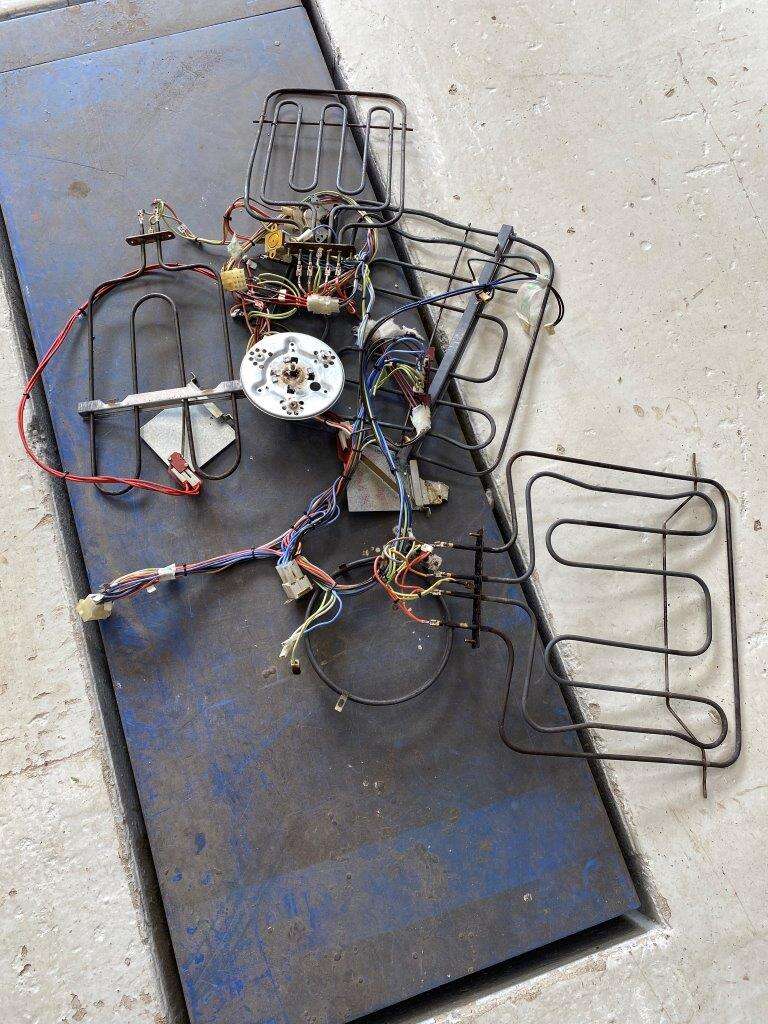
Left some scrap
This element has had better days
But then it is not new
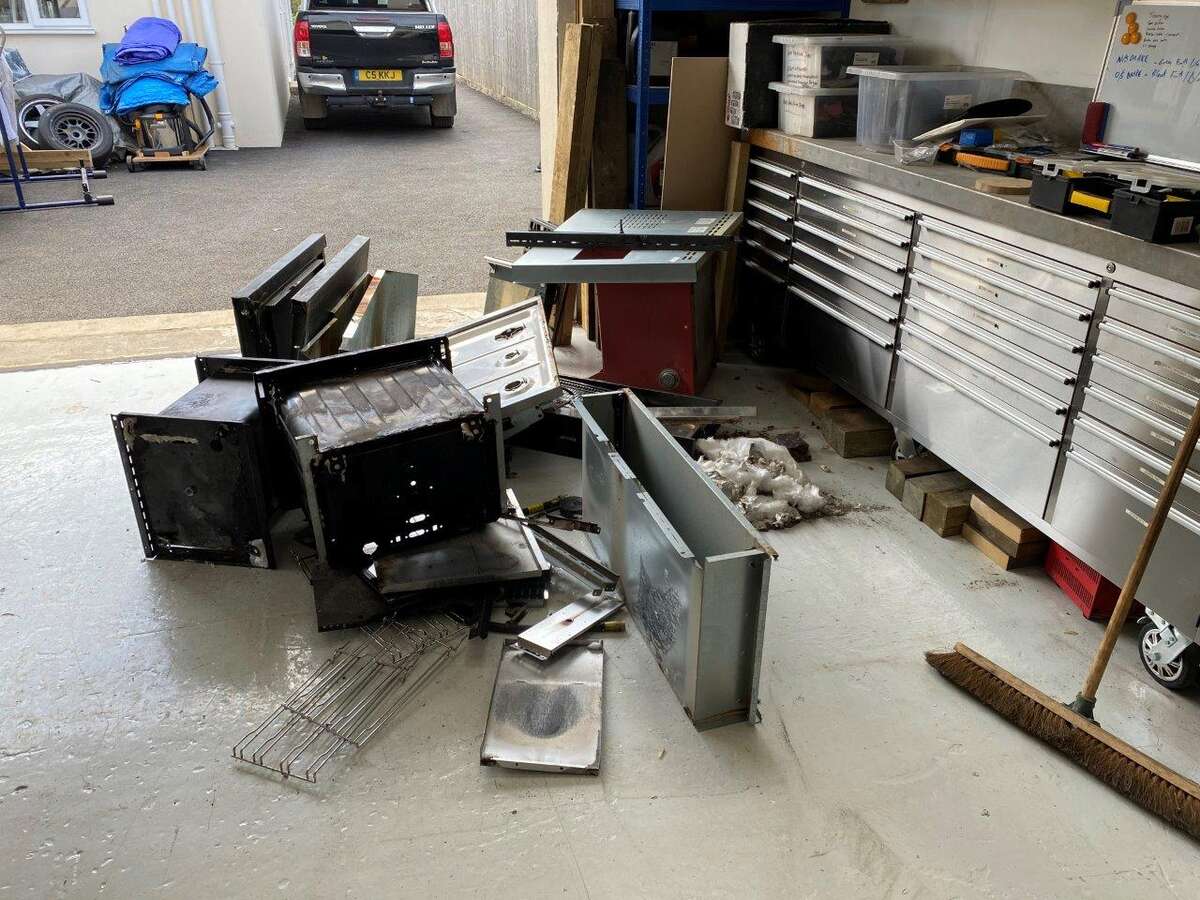
I needed to dump the scarp so I also dumped the old powder coat oven

I may have pinched the Stainless steel side panels and put them in my pile of bits in case they come in handy for something later on
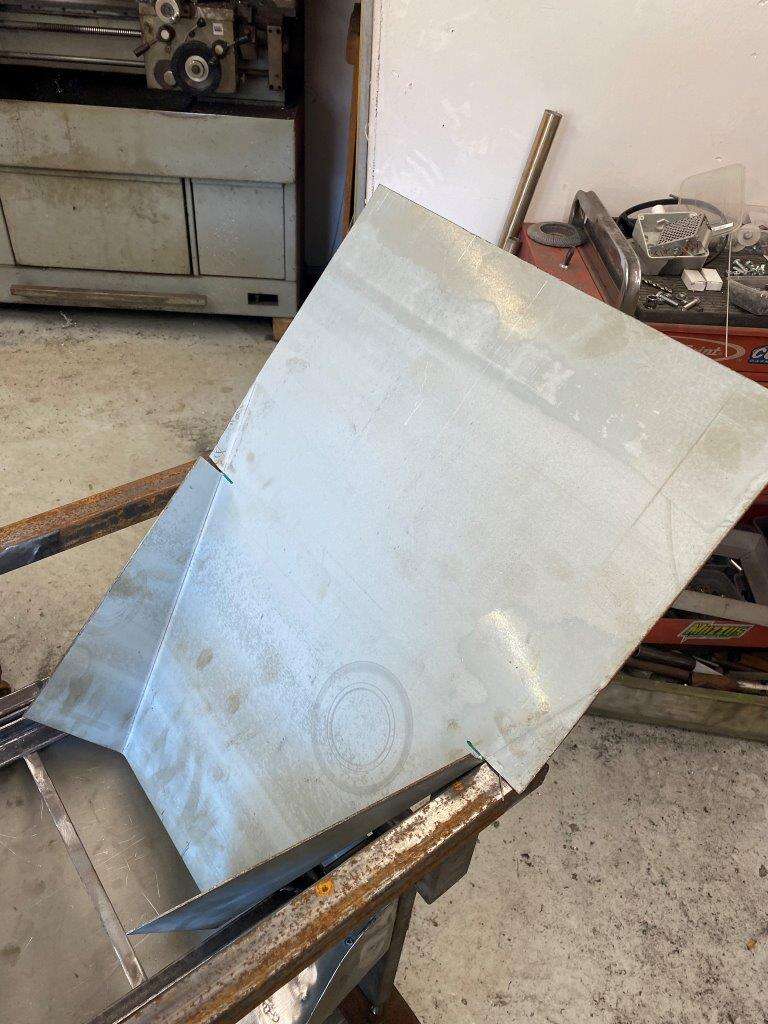
Onto the oven door, the small door was stripped down
But Smeg has some kind of mirrored glass on the outside which I don’t want and the door is to thick to fit in my door design,
so I stripped it completely

Then milled 3mm off
Made a new frame

Front
Back, but using the glass from my old powder coat oven so all 3 panes are clear
That’s laid to one side ready for when the doors are made.
Next we, the long suffering Mrs K was called in to help, bend 2.5m long strips of steel which I can’t do on my own
2 were made and riveted inside the frame
This is where my angle strips allow fixing and give me good corner joints
Next 2 bits of box cut to length
Riveted on some plate
And welded to the base
Some insulation
Then the covers were riveted on
It’s getting really heavy now
#staysafe
Keyser - “Common sense and a sense of humor are the same thing, moving at different speeds. A sense of humor is just common sense, dancing.” – William James
-
5
-
-
7 hours ago, SuperStu said:
I miss the violet.
I'll do the vibrating sieve in Violet just for you shall I?
-
2
-
-
40 minutes ago, Paul K said:
given that your elements are purely resistive .......10kW at 240v is 41.66A.....watch your breakers!!
Thats what Iwas trying to explain -
I did 6.5KW on the 32 Amp breaker - 6.5KW = about 27 Amp
Then
I did 2.8KW on a 13 Amp extension lead - 2.8KW = about 11.5 Amp fused at 13 Amp
So I agree the total was above the 32 Amp breaker but I did split it
Thanks for looking out for me though, appreciated.
-
Morning, hope everyone had a fun weekend?
I would take offence to the comment about being special even from a fellow battery licker like yourself, however I looked back over the last couple of pages of this thread and think you may be right
In answer to your question - My wife, on numerous occasions and many eye rolls have been given when she asks “what are you making now”? and I tell her
A quick update from the end of last week,
Firstly in case anyone was checking my maths for the electric supply to the car cooker, I ran it on a 32Amp supply which won’t run 10KW in fact it tops out about 7.5KW I think the total on that circuit was 6.KW (ish) and then I ran 2.8KW from a 13amp plug on the other side which is in tolerance for that circuit
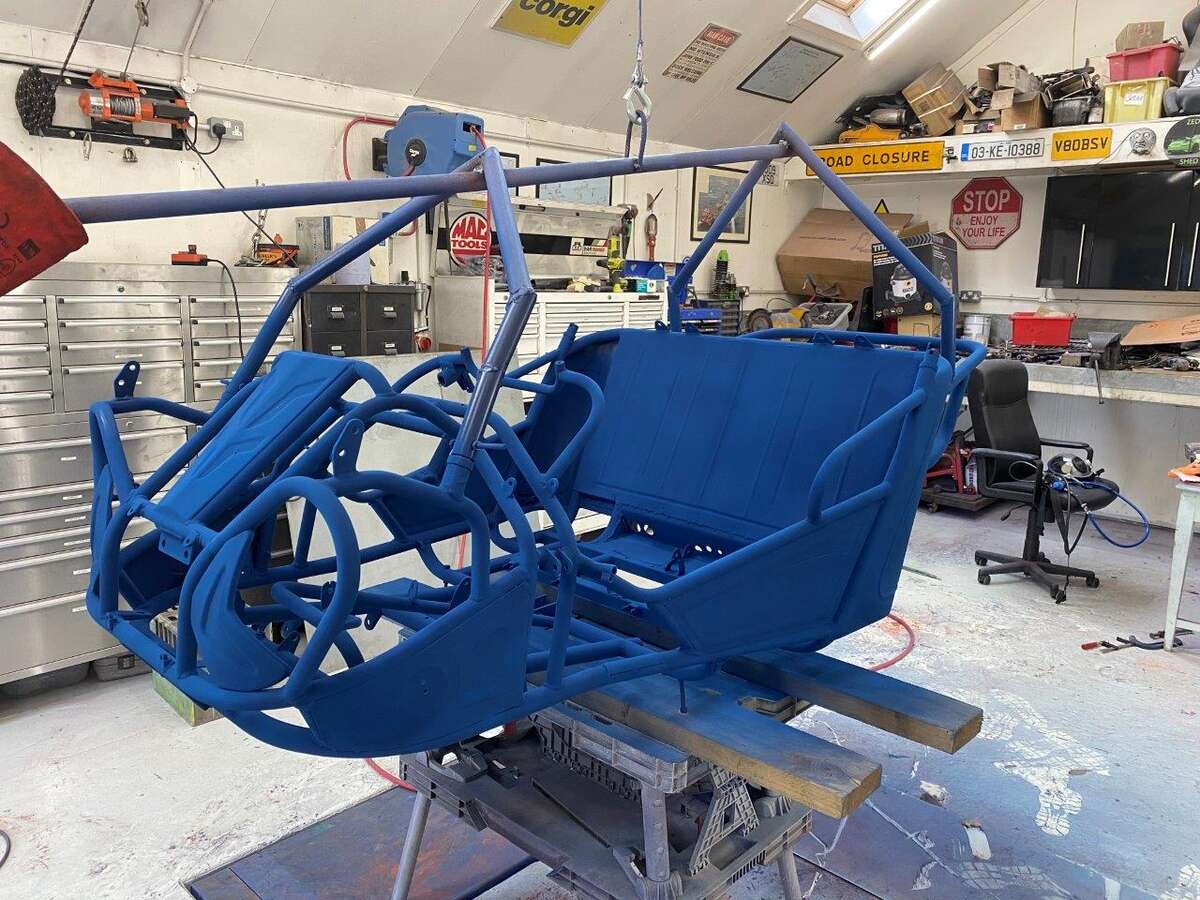
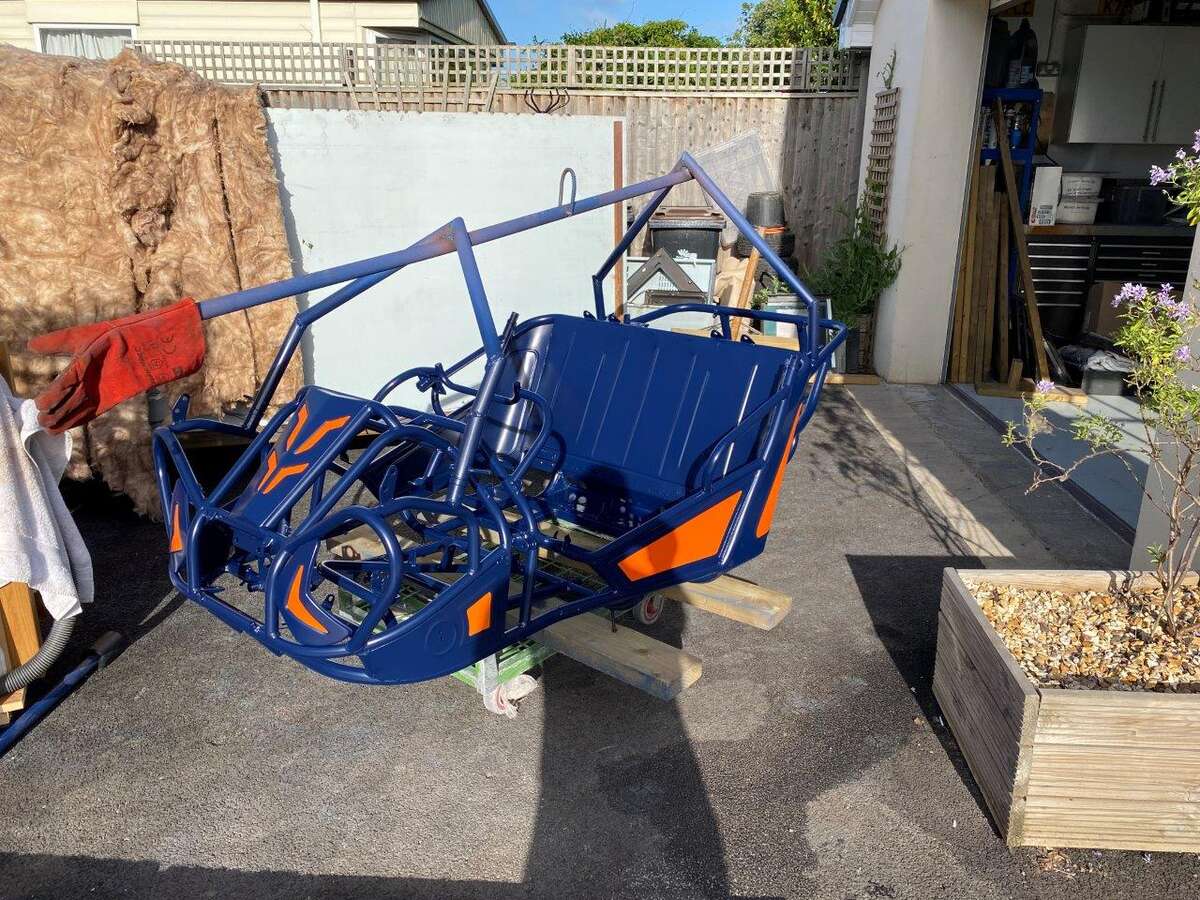
Back to the bug, I second coated it but it looks like @Beb snuck in and changed the powder coat for some of his favourite colour the little sneak
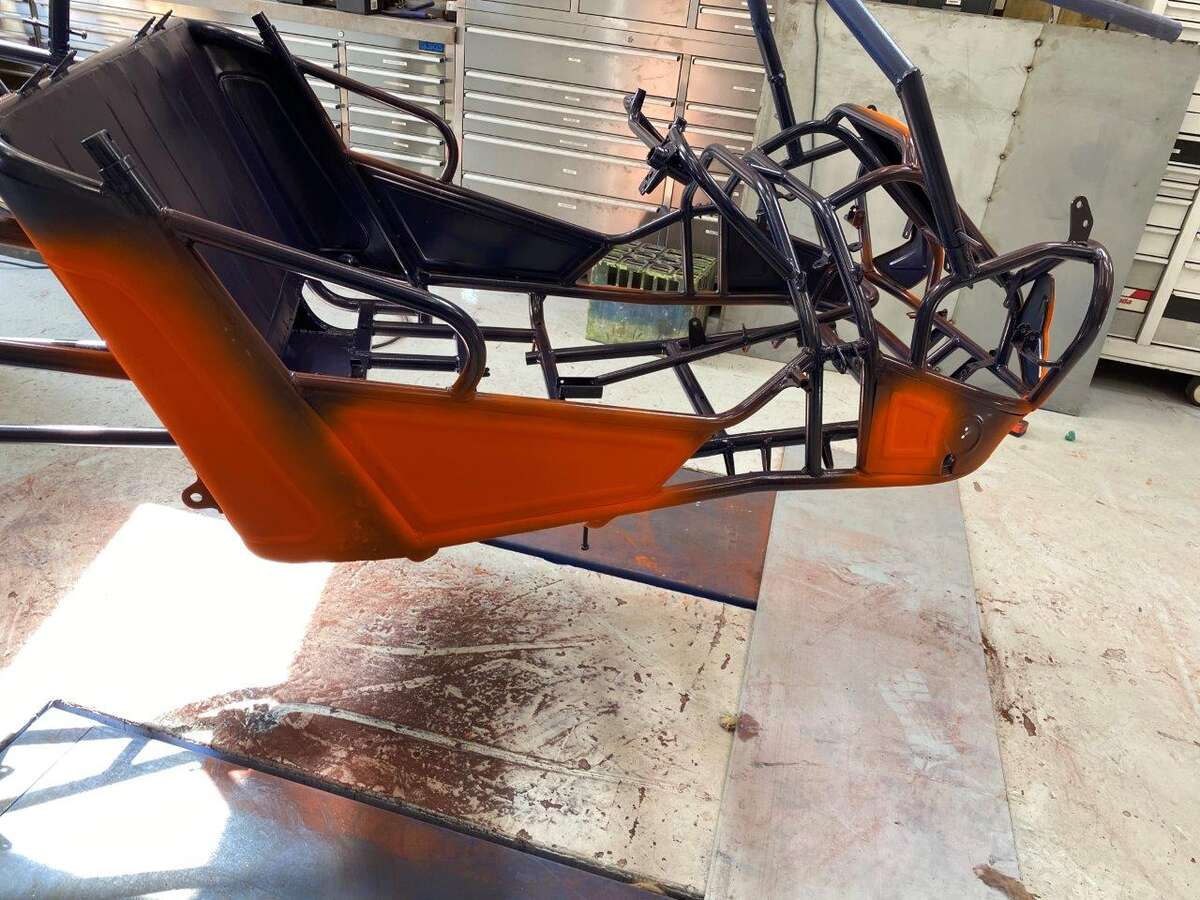
I soon put that right with the final coat of Blue
Then the Shaggy Beast came back in
Nothing to do for an hour …………………….
I swept the floor
Ahh it’s done, seems I missed a few bits with the final coat
It’s far from perfect unfortunately, the masking tape left marks in the orange, not sure why, maybe that the first coat didn’t cure right, it was supposed to be a 60% cure time but controlling temps in that huge oven is not easy or accurate, or it may be that due to so many coats the base coats softened during the final bake. Not going to worry to much as this is an off roader and we have a few options to improve it if we decide to – I’m not cooking it again!!
The rest came out spot on
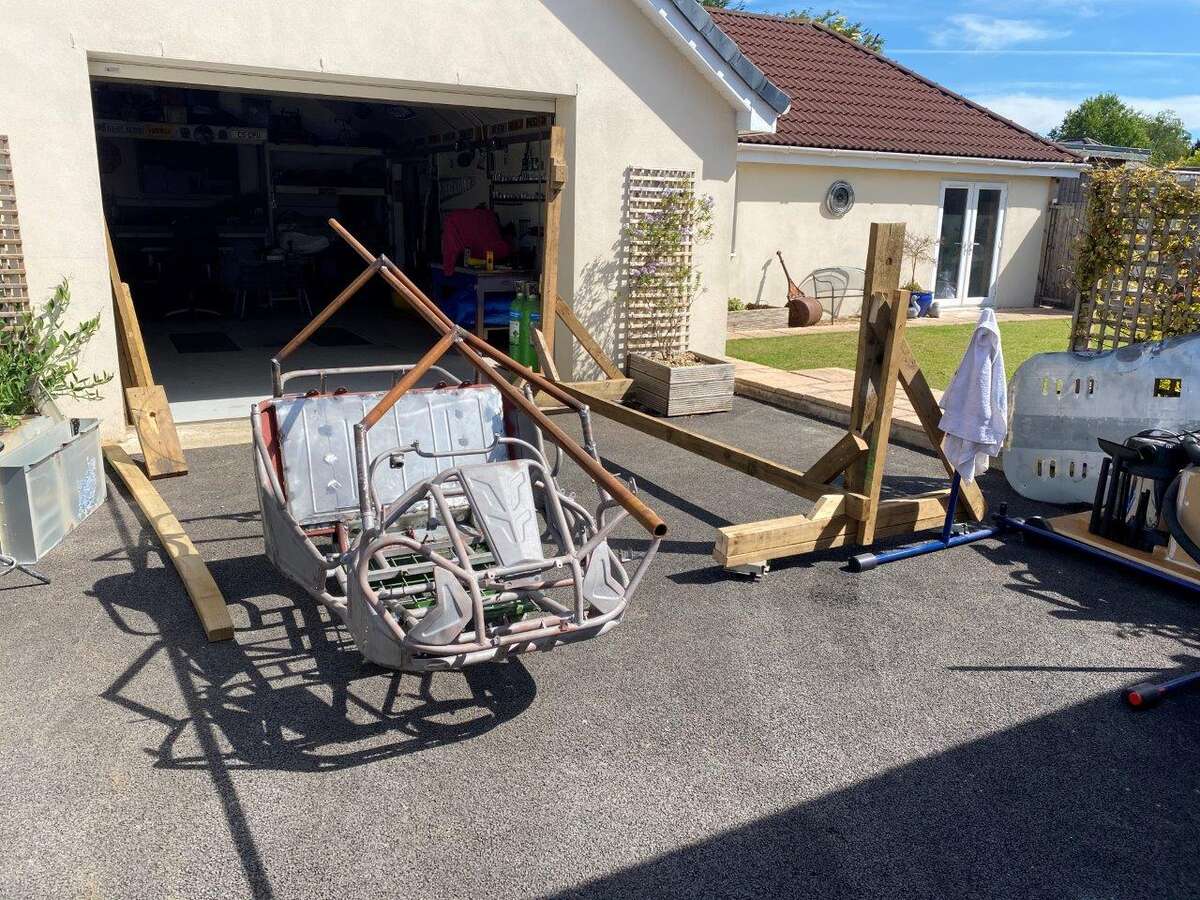
Then I started taking the Shaggy Beats apart
It is now extinct
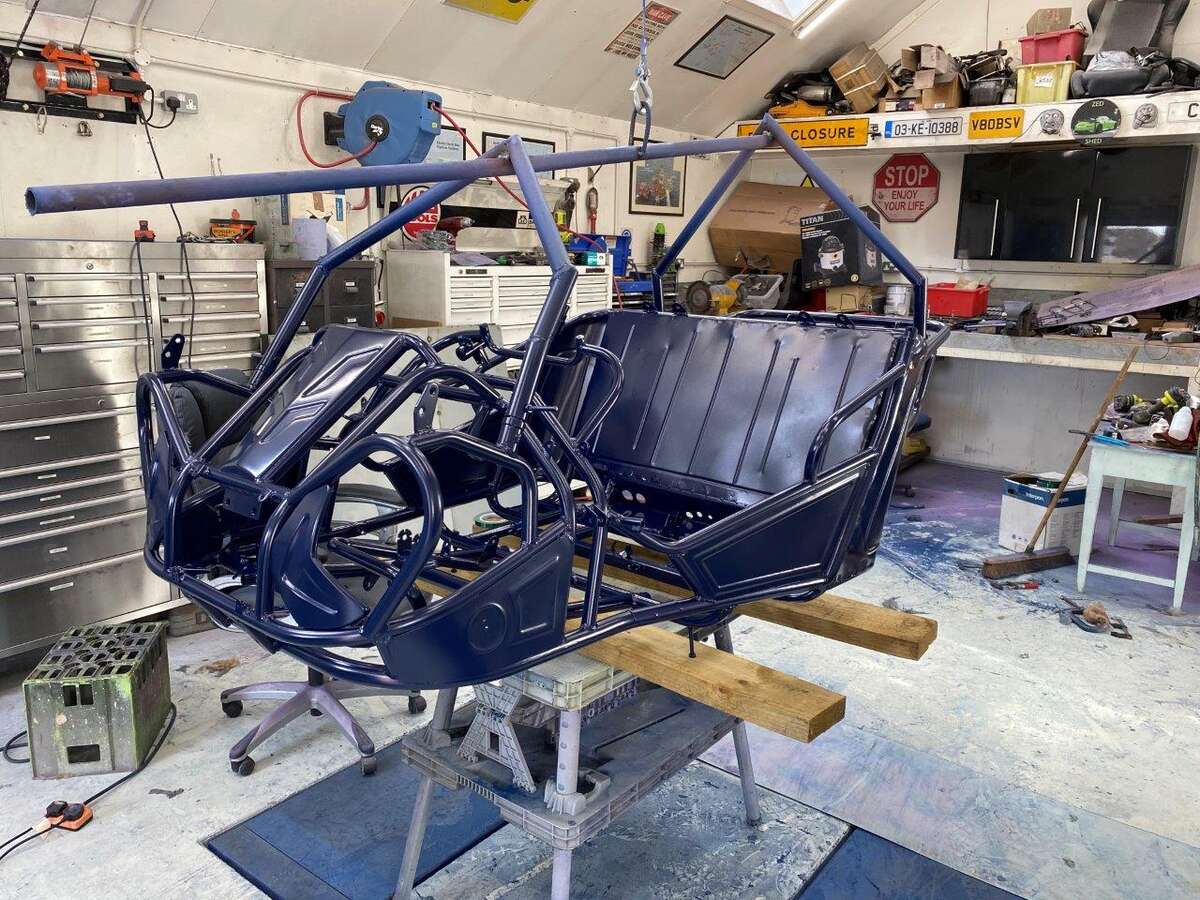
So The Bug is now here
I’m going back to finishing the other projects now, that’s the new powder coating oven and the lathe, then it’s back to sandblasting The Bug frame and I have another project waiting in the wings.
Keyser – “Trouble knocked at the door, but, hearing laughter, hurried away.” – Benjamin Franklin
-
10
-
-
Morning folks – Another bank holiday is upon us so I will at least get sometime in the Zed Shed, but I think Mrs K has ideas about some garden chores that we need to catch up on.
As you will recall I took Wednesday off to try a little something.
Back Story –
I recently purchased a bulk load of powder coat as it was ridiculously cheap, mostly because of the colour and there was no choice in what colour was available at the price - but the guy selling it did point out that even if you used it as the primer/base coat it was cheap. As you are following you know I’m currently rebuilding my powder coat oven only this time bigger, I was having a coffee break in the Shed earlier in the week and I realised that the only thing that I would not be able to powder coat on The Bug after the new oven was finished was the main chassis, that seemed like a shame because firstly powder coat is probably the best possible coating for this type of vehicle and secondly if I wet paint it then I would have to wet paint all the other parts to get a colour match.
At the same time, I have just stripped down another cooker from gumtree as I wanted a few bits from it and found it locally at the right price, due to the door hinges being broken and it needs new seals for both oven doors – It was cheap and I just wanted the parts so no brainer really. This meant I had a load of elements laying on the work bench.
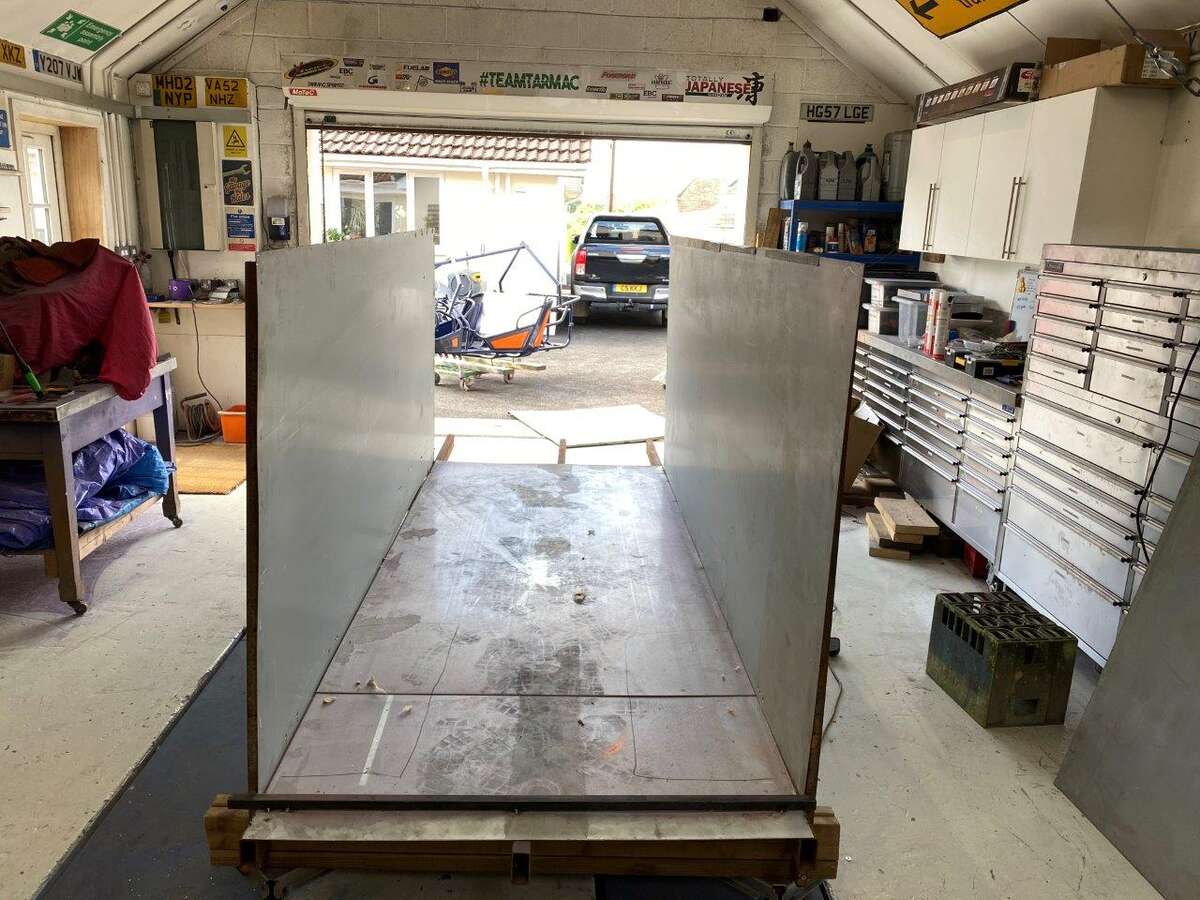
The (bad?) idea popped into my head, could I build a temporary oven big enough to cook a car?
Why not I thought, I have a load of sheet steel I’m about to cut up to make the side,back and door panels for the new oven why not use it at full size and cut it up afterwards?
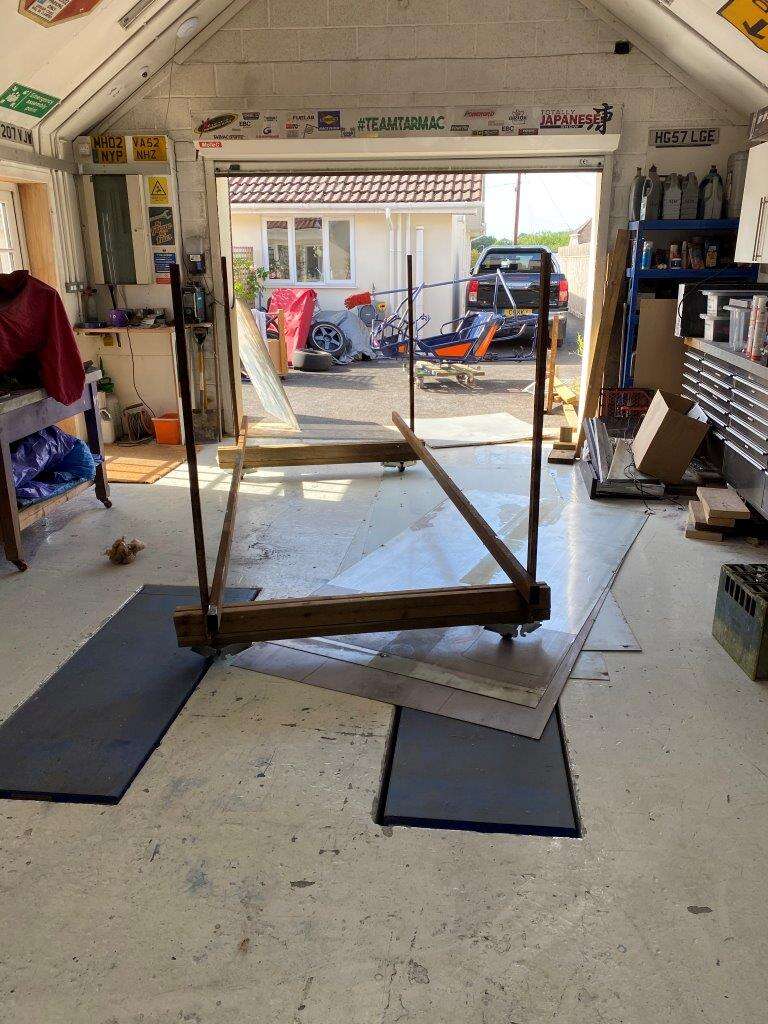
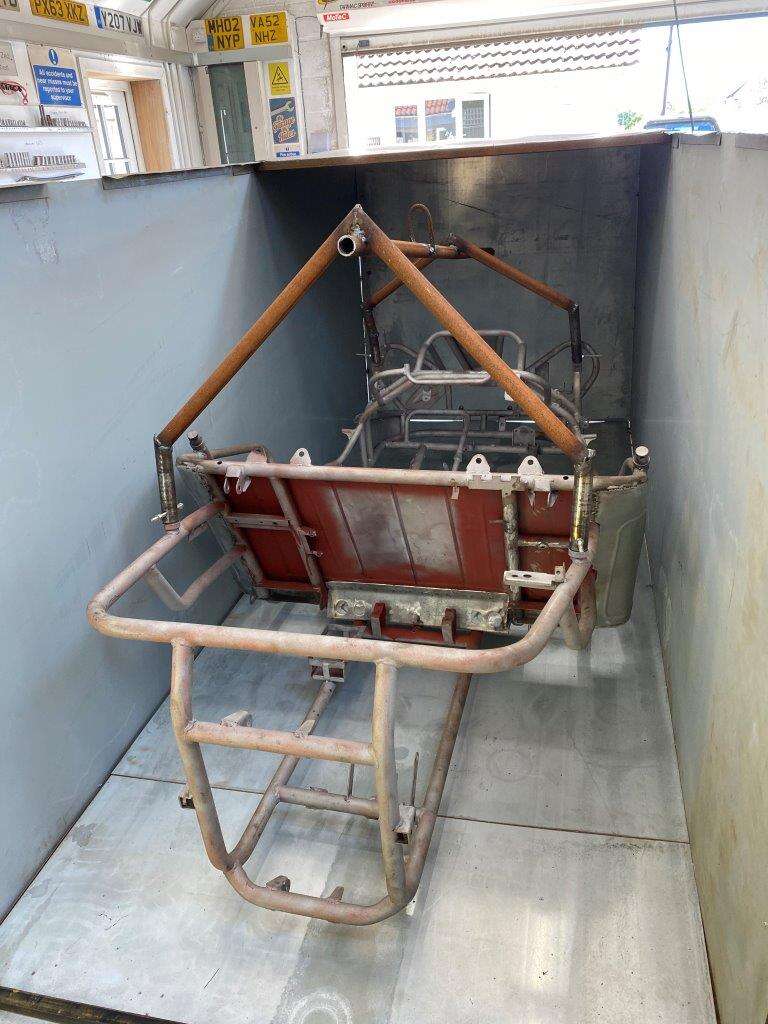
Lets gfive it a go, I emptied the Zed Shed and took The Bug off the rocker,
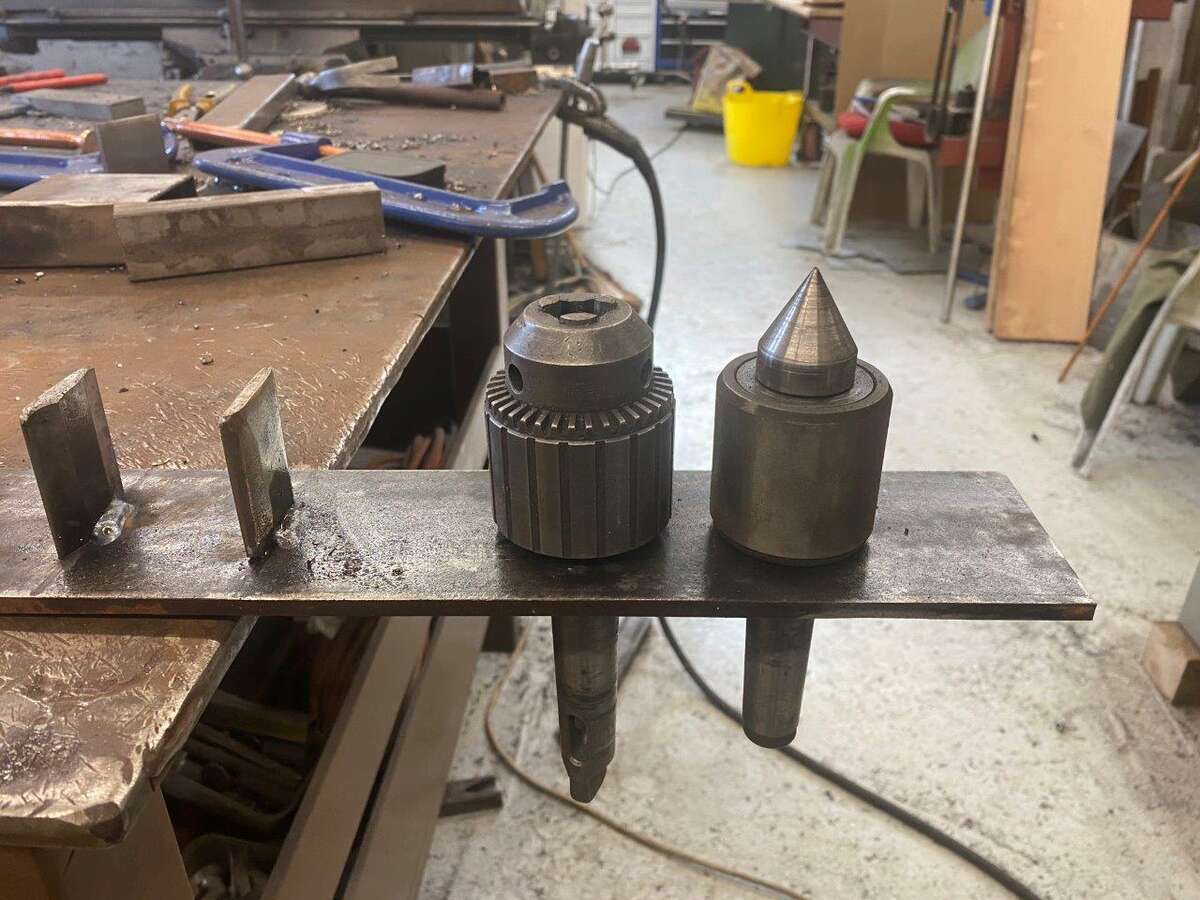
then dug these out of the store, they were on my old compressor from about 7 years ago,
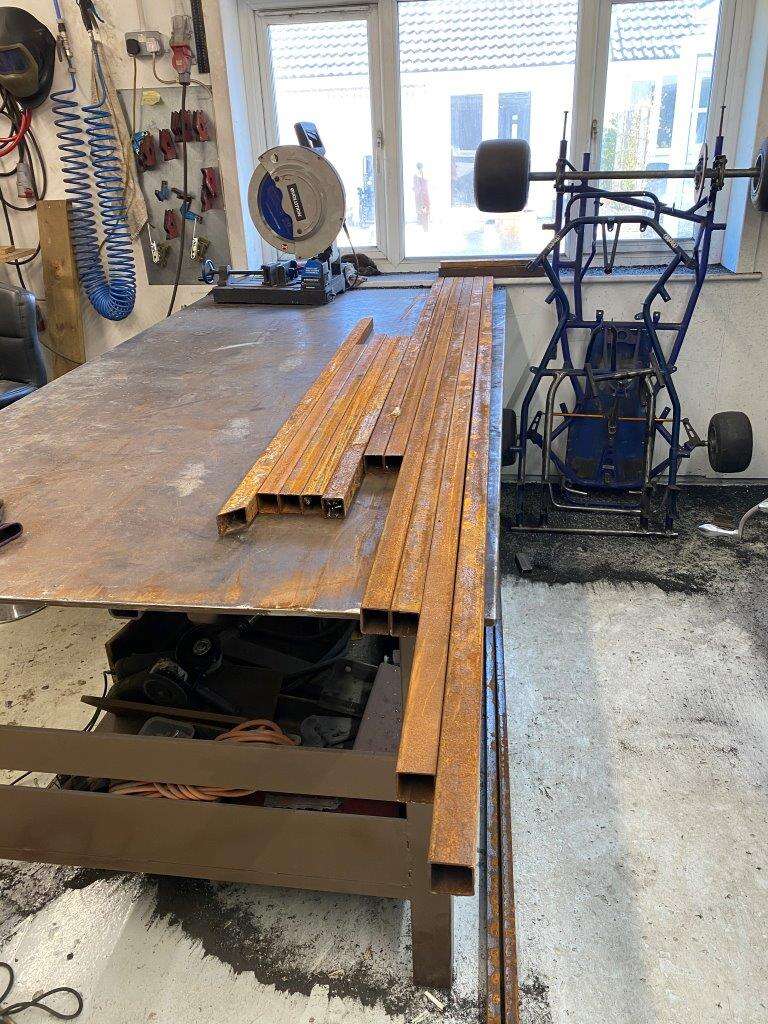
Bit of steel
FIRE!!!!!!
Shouldn’t weld nylock nuts but they were on the axel bolts
(they stink when they catch fire BTW) Had to open the windows and go drink some coffee while the shed ventilated
Anyway I soon had this built
But needed to add some aniti fall off guides
This allows the easy, well easier, transport of sheets from the store to the shed, as Mrs K can’t lift them
Then I took the Rocker completely apart and used the wheels and support bars as the cross beams added 3 massive box section bars from the scrap pile as they happen to be long enough and all the same size and laid some sheet on that lot
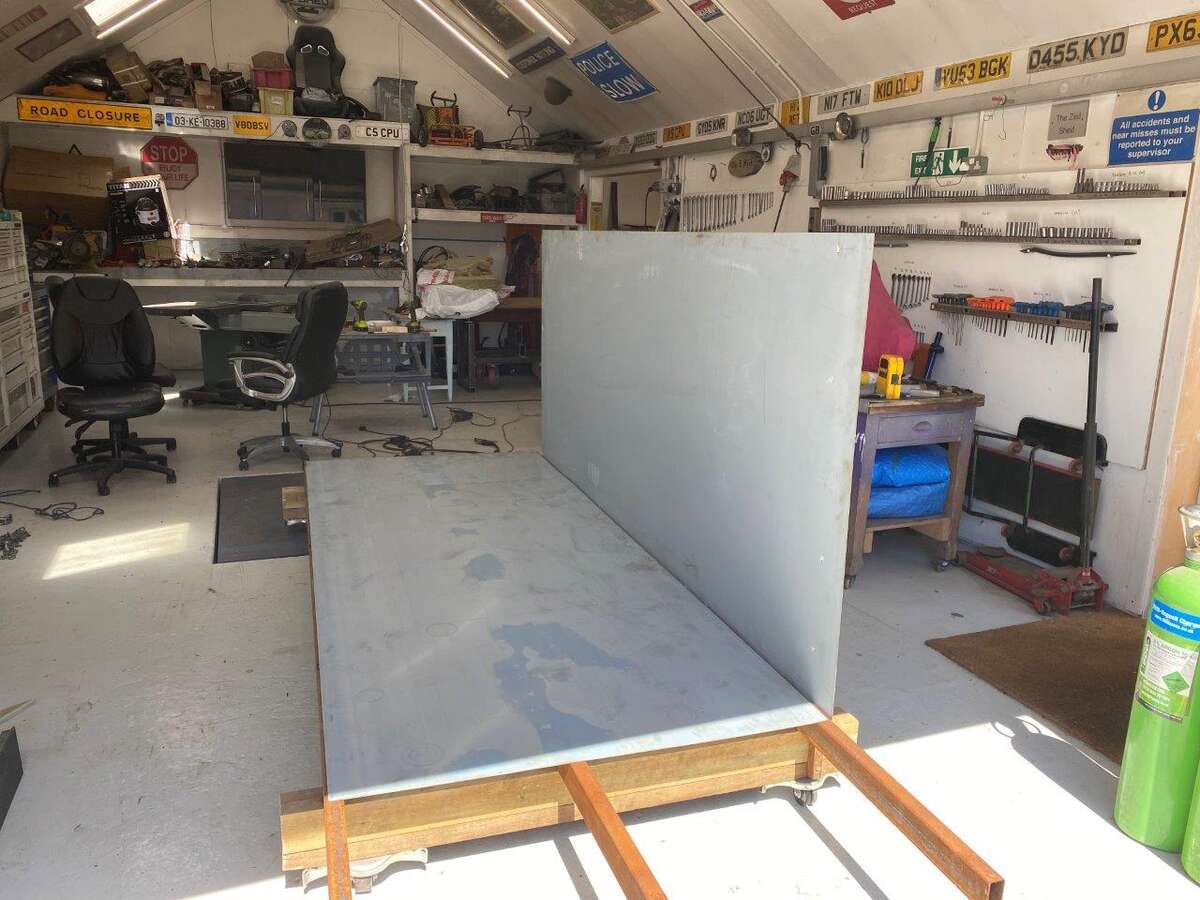
Then the other side and a front
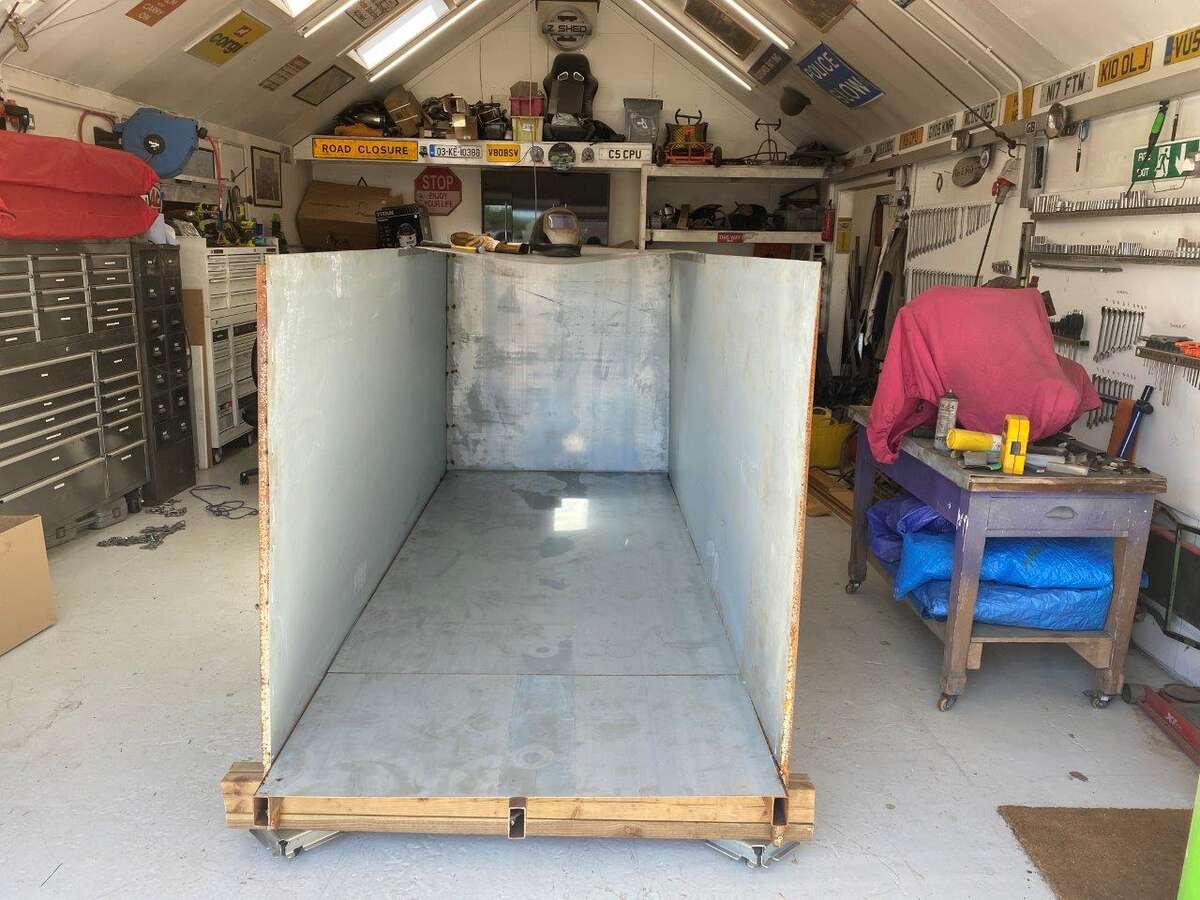
A removable door
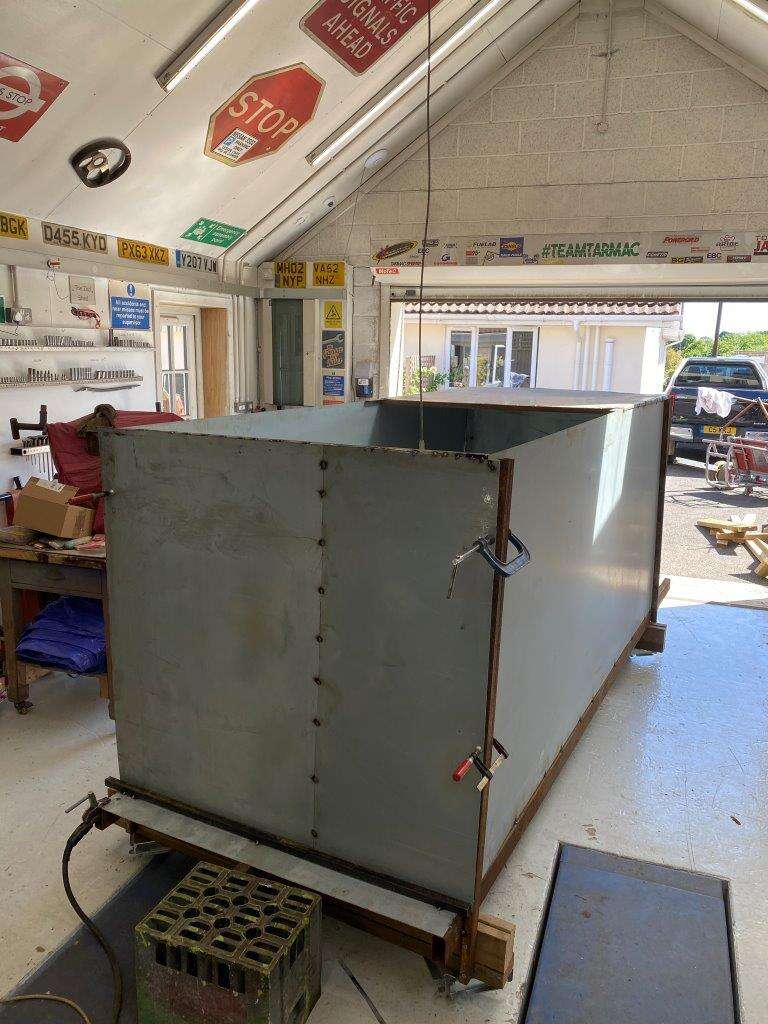
Test fit
Looking good, but I need to heat this behemoth, lets throw 10Kw of power at it, that should do the job
A thermostat so I can keep an eye on the temps
Some dubious wiring - Meh it's only 32 amps running 10Kw at 240v - safe as house that

Then after the application of some powder coat the SHAGGY BEAST was switched on
Love it
Monitoring the temps as I need 180 degrees
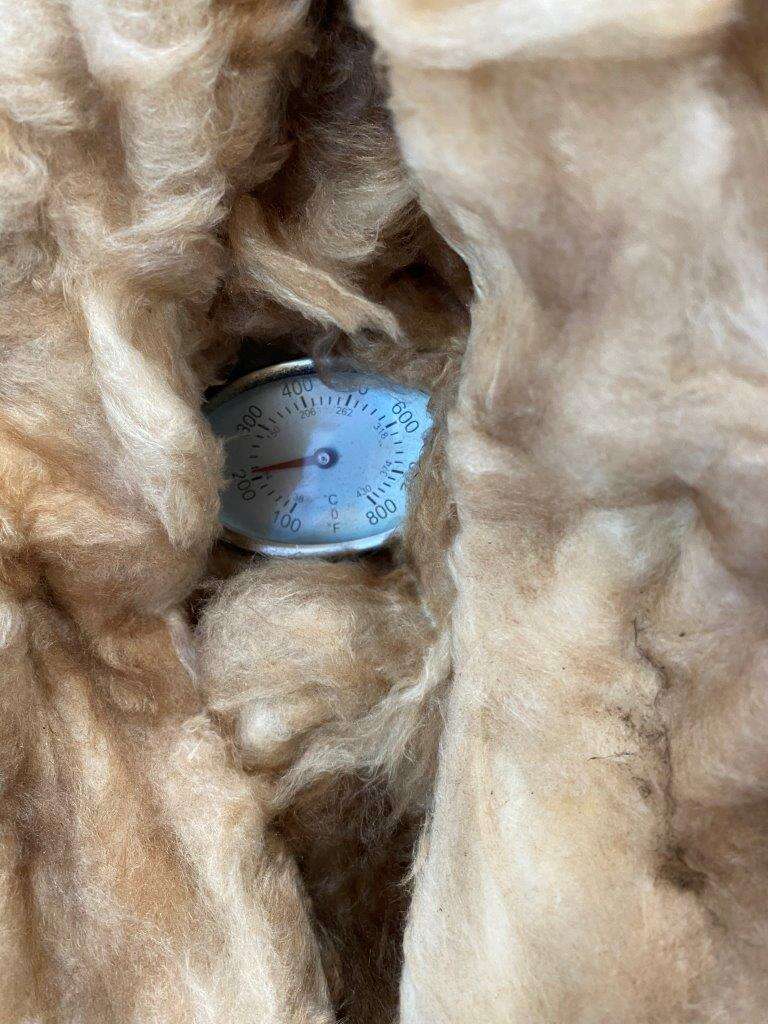
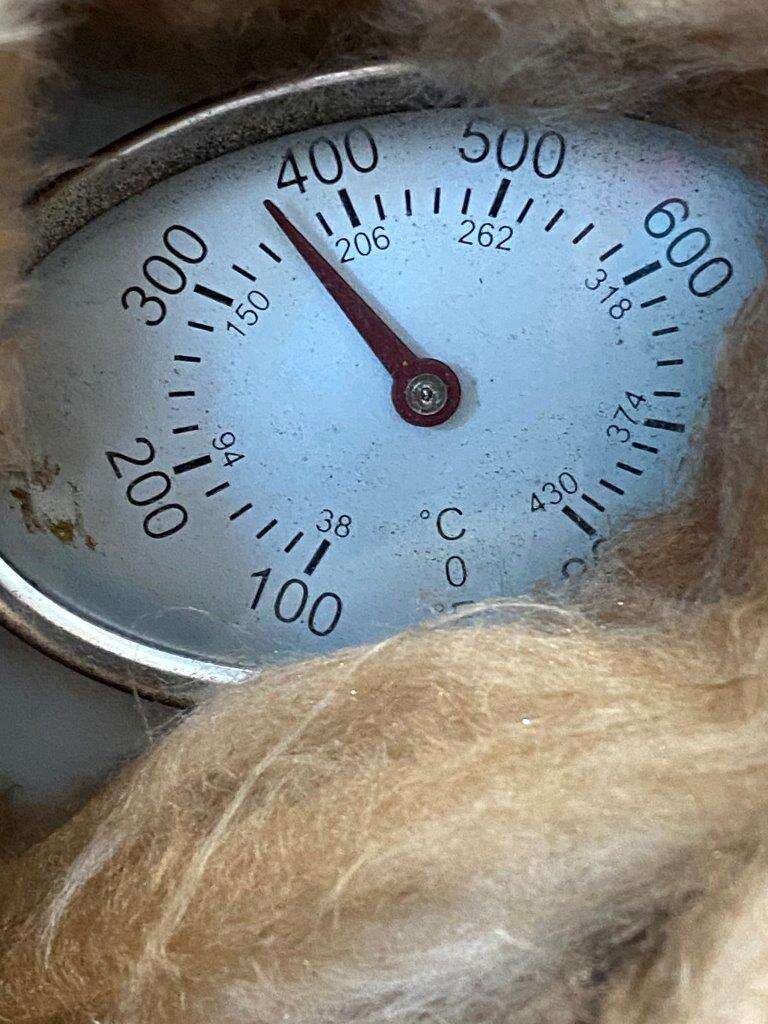
I did it, I did it
Took about 40 minutes to get to temp - The electric bill may be up this month
If you need a dozen ostrich, 4 pigs, two cows or all of the above simaltaneously cooked, get you orders in quick
Only thing is that after a successful bake it seems the Co-Owner of “The Bug” @Beb is not in touch with his feminine side and disliked the colour – A LOT – no he really, really did not approve (think he secretly admired the oven though
) An F1 team has a similar colour but no he wasn’t happy at all!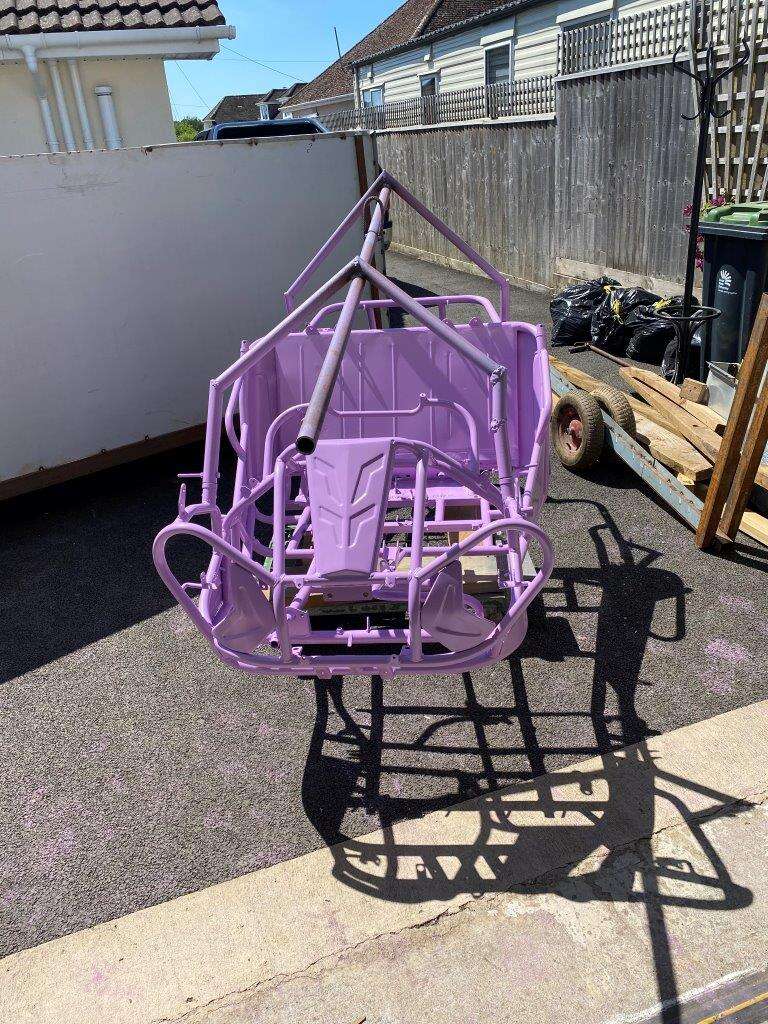

Shame for the Mad Scientis, as I’m the one powder coating it, he's stuffed, although in his defence when my daughter helped me roll the oven off the after the first powder coat bake she did start singing “she’s a Barbie Girl”
O I have some great fun here, I actually don’t mind the colour but I will admit that it may look better on a different vehicle, i.e an MX5 rather than a rugged off roader
Anyway after a long facetime chat with the Beb he said he wouldn’t stop talking to me if I kept the colour so I can see no advantage in keeping it anymore.

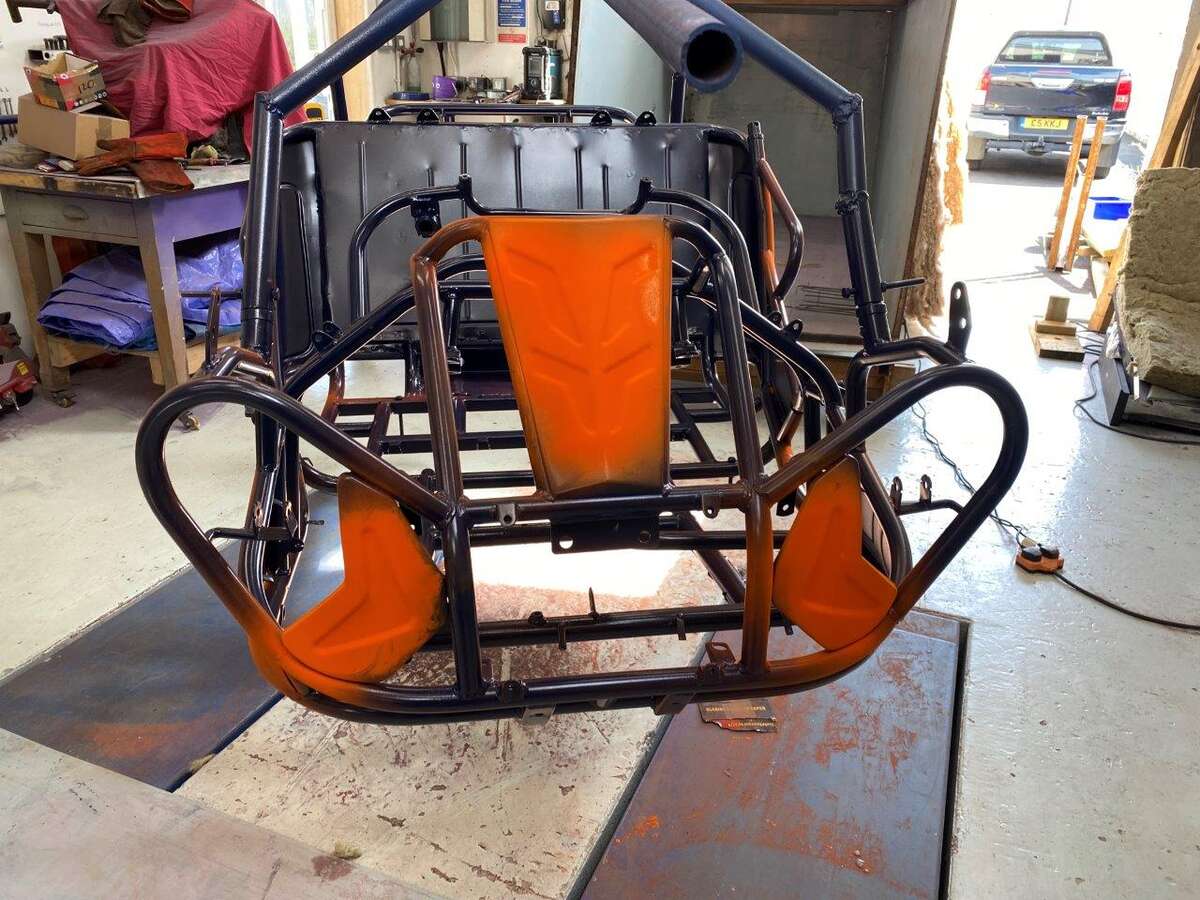
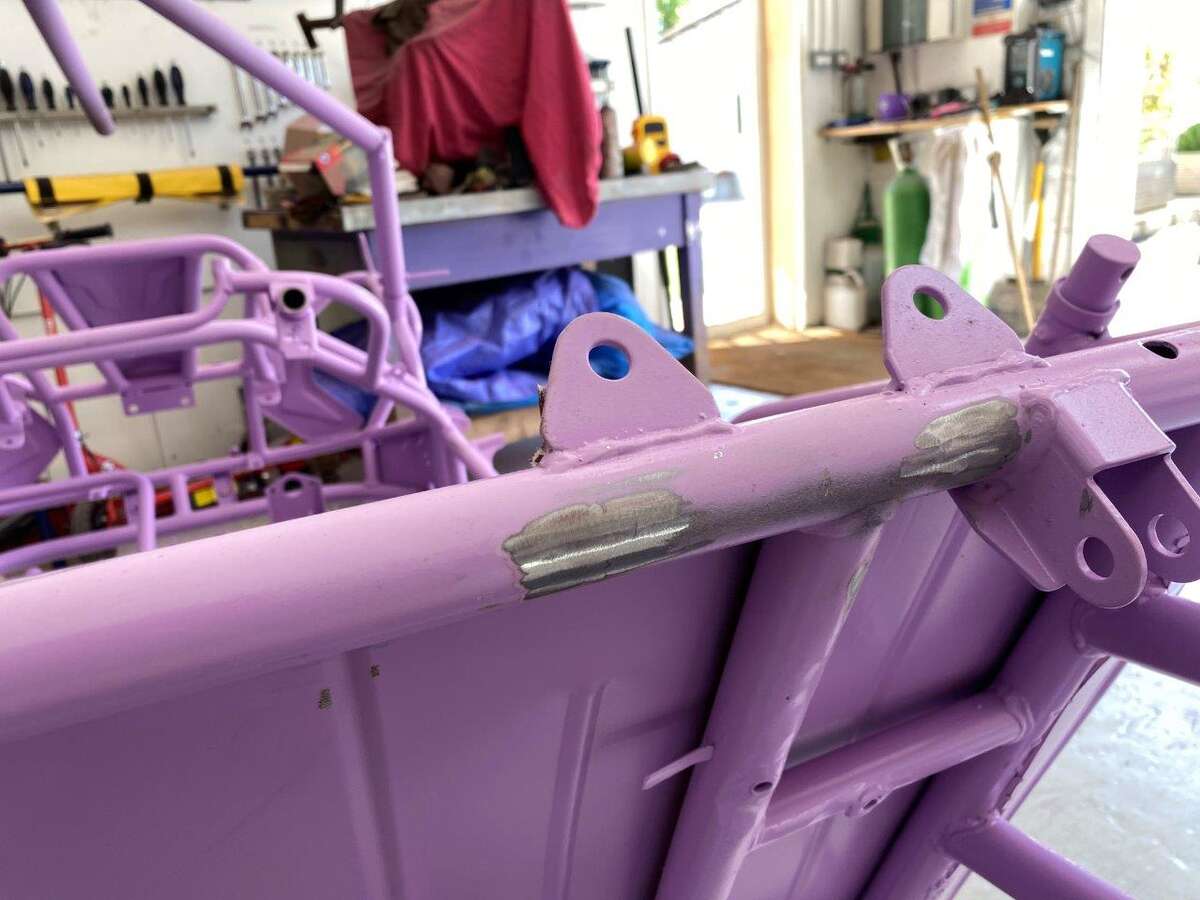
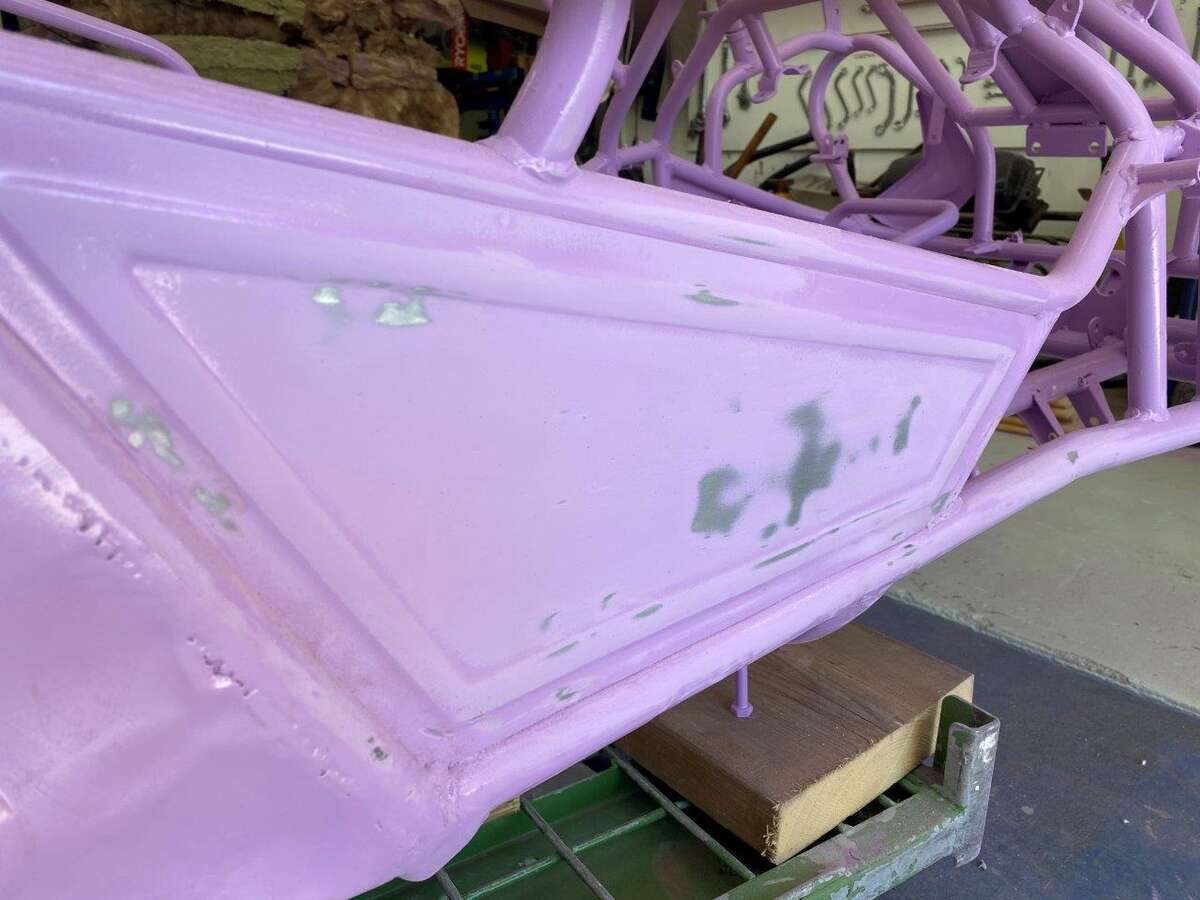
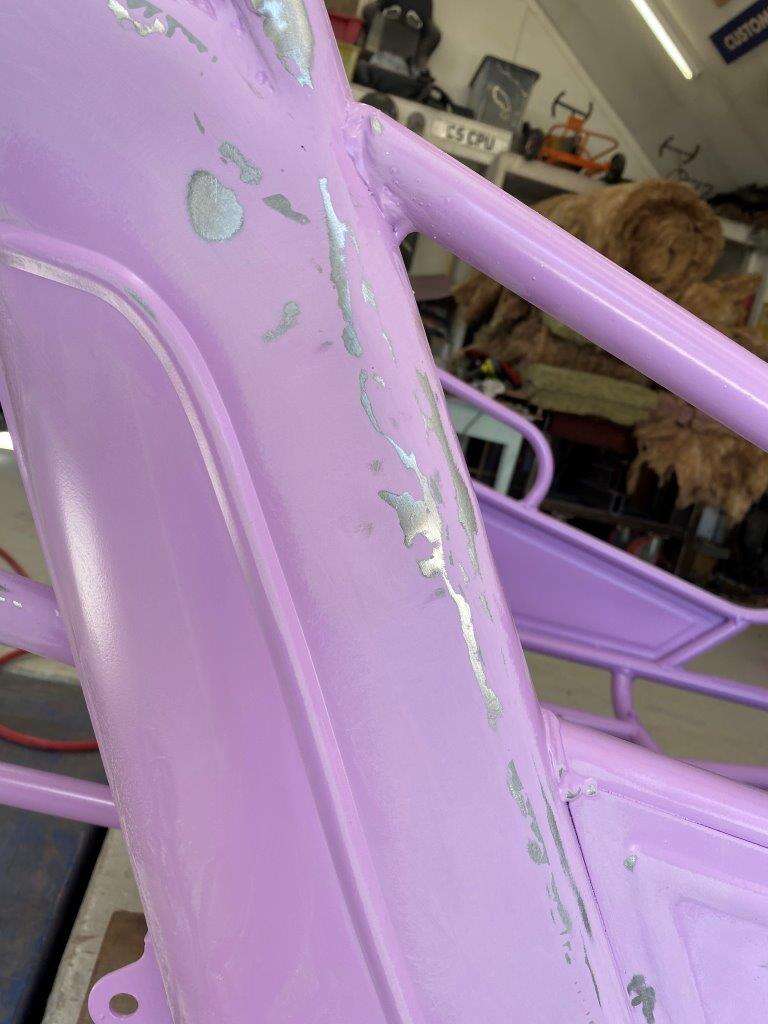
I cleaned up a few blemishes that stood out now it was powder coated and as I’m not using wet paint and can’t use filler I spent some time on the weld lines where I added the quarter panels.
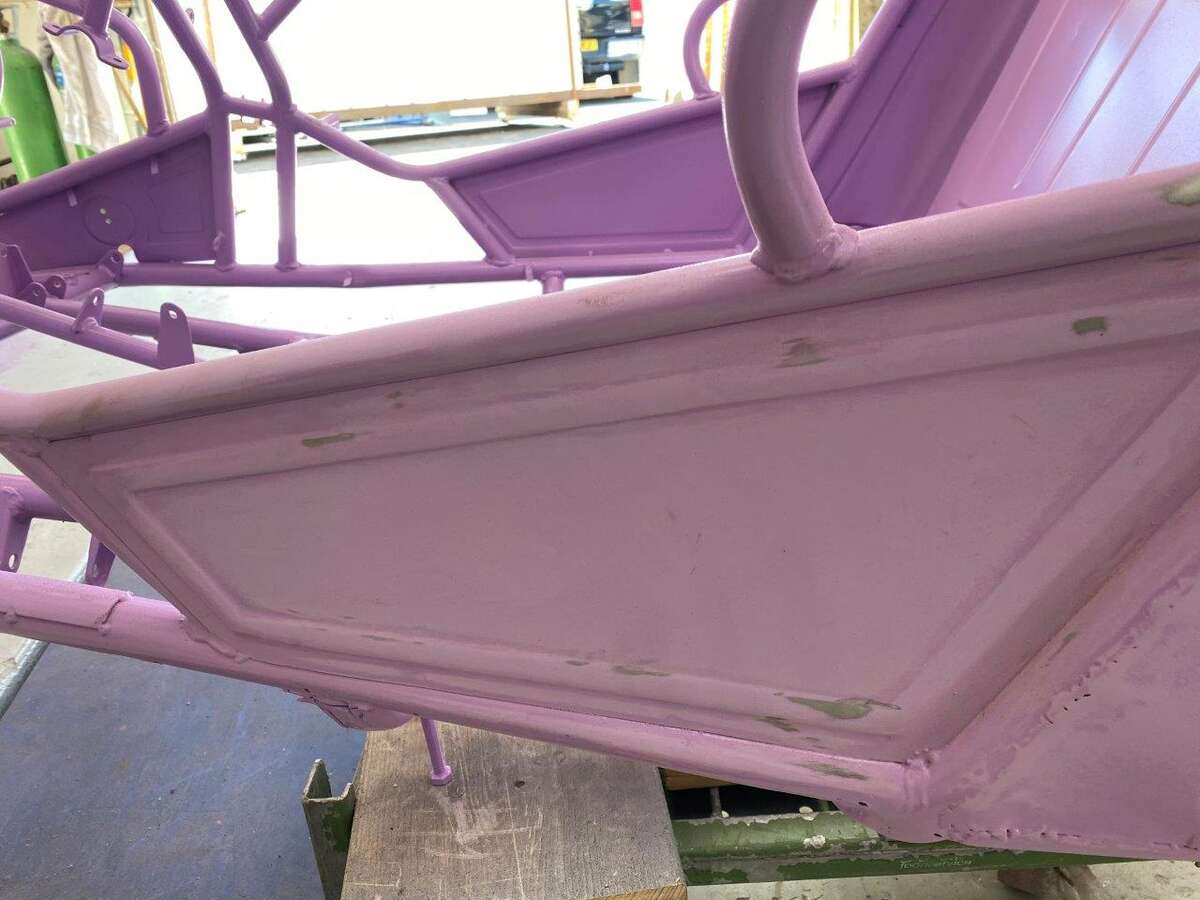
Then the BEAST was reborn
That leave us here
“A more manly colour” according to my daughter – I have 100 KG of this colour powder coat so you may see it a lot, mind you I also have 100 KG of the Violet
Just need to second coat the chassis over the weekend and do a final bake. The SHAGGY BEAST will come out one more time before I take it apart and use the bits to finish the actual powder coat oven.
Hope this madness cheered you up, I’ve been laughing all week, who does this sort thing? Well me obviously! Do I have issues? Can this kind of behaviour be condoned in anyway? Do I care? Is there hope for me? Answers on a post card
Have a great weekend I’ll probably have an update Tuesday for you guys n gals.
Stay Safe out there!
Keyser - “The man who smiles when things go wrong has thought of someone to blame it on.” – Robert Bloch
-
10
-
2
-
-
Morning all, As I posted my reply to @scobie140 you will have realised that even thought the thing I tried yesterday was both mad and dangerous it was apparently not fatal
I am actually calling it a success and will be posting that up in a couple of days after I catch you up on the new Powder Coating oven build
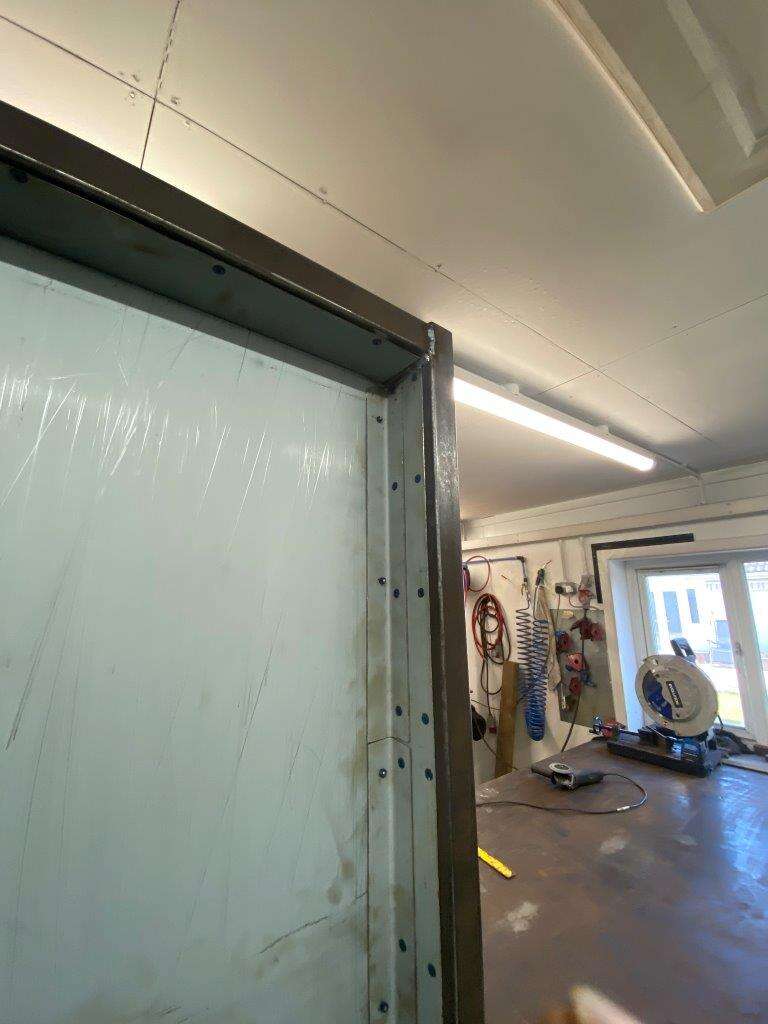
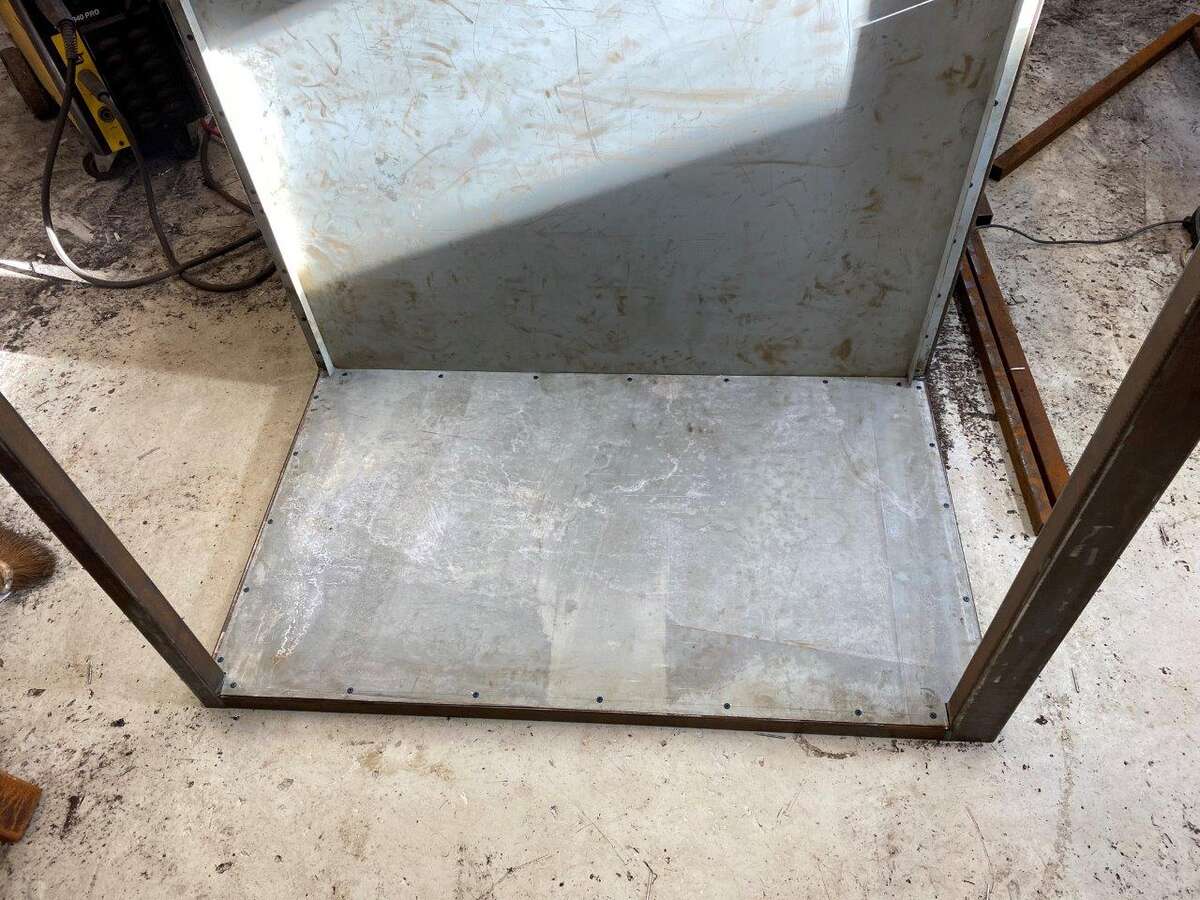
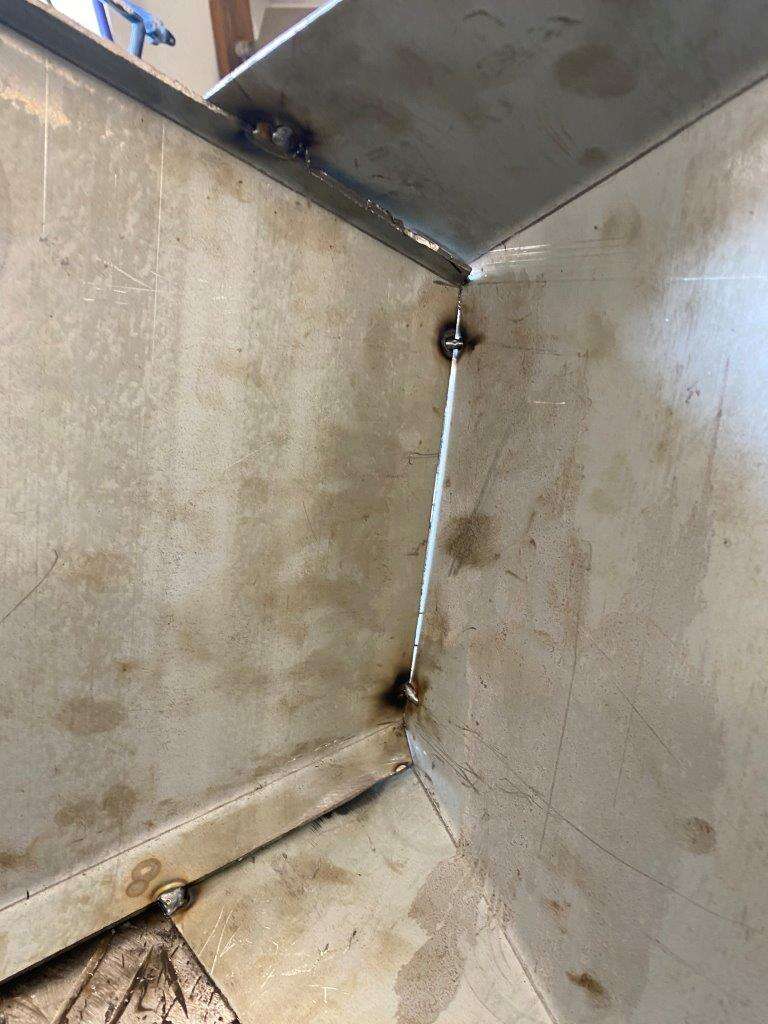
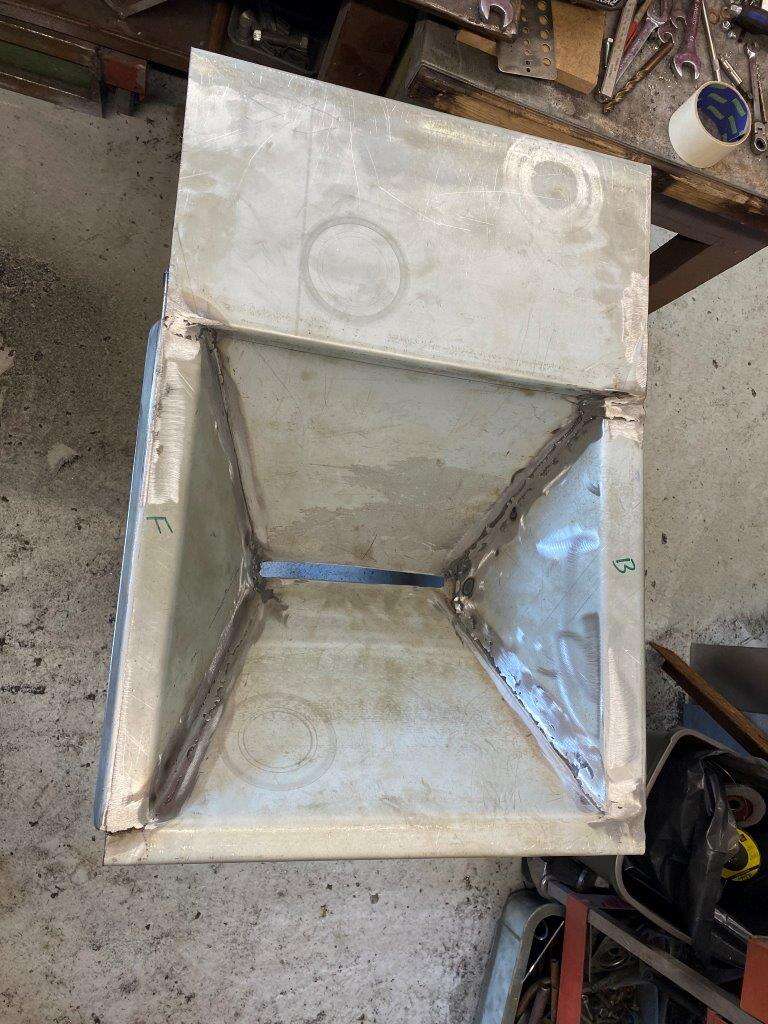
Now I started like most normal people would by laying out the frame for the back of the oven, however whatever way I did it, it would not line up as square – I was confused about this for a while but it turns out that as I’m using “scarp” and some previously used steel it was bent and warped
My solution was to build the back the in the wrong order, I cut some strips which will be needed to hold the sides in later and then riveted them through the backplate and into the frame using the backplate which is bang on square as the guide and I literally bent the frame to fit the sheet and welded the corners afterwards, not the conventional way to build it but solved the problem.
The strips
Bent to 90 in the sheet metal folder
Riveted on
To give the back
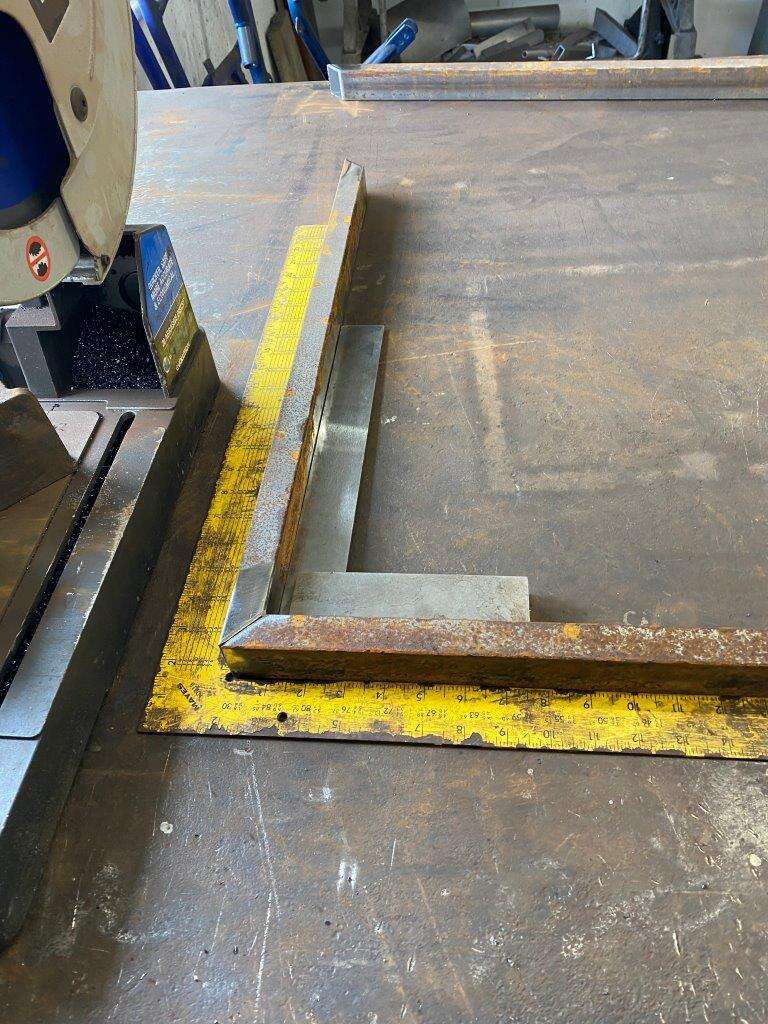
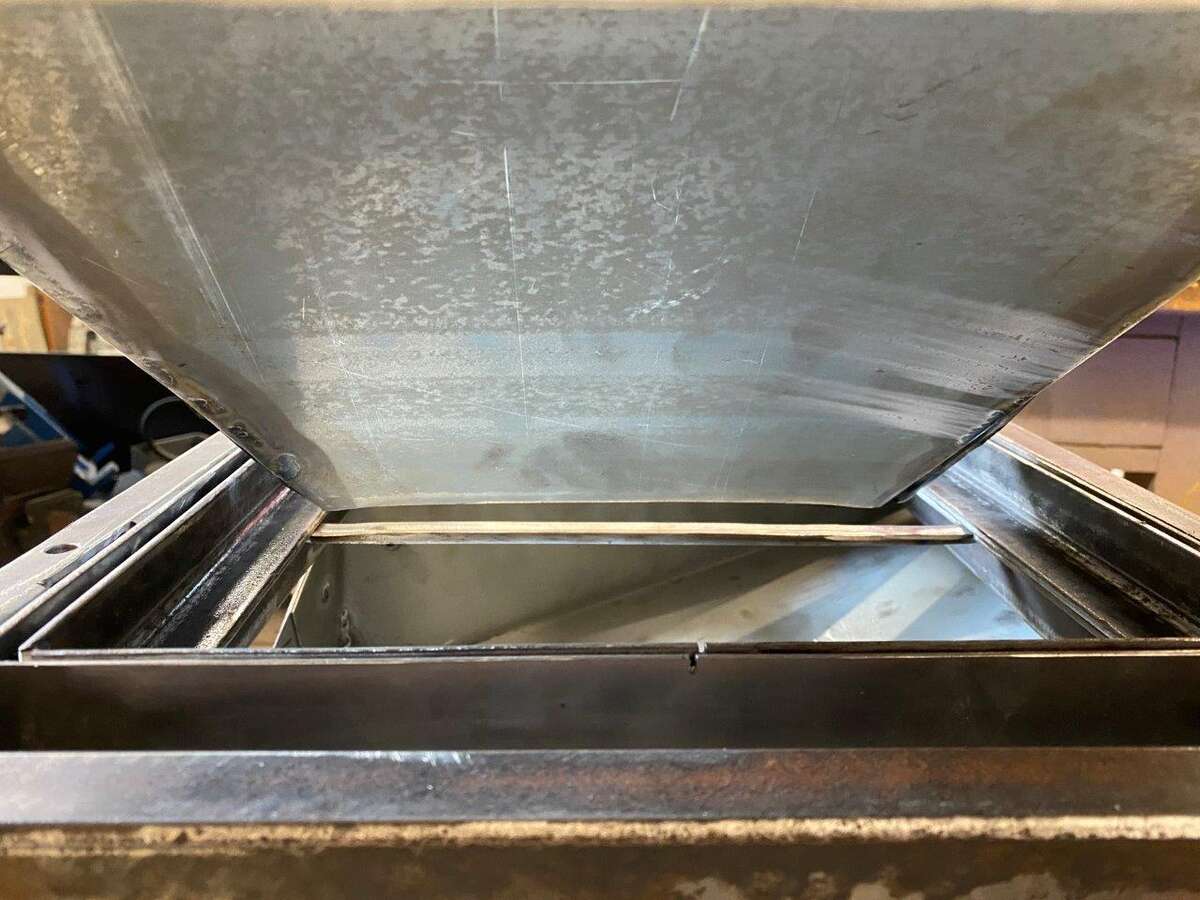
I then used my very expensive length set tool to cut 4 pieces that will make up the corners
OK it’s not really expensive but very effective
Then as I’m working alone, I had to come up with a way to hold the corners square in two directions and weld it
G Clamps and set squares
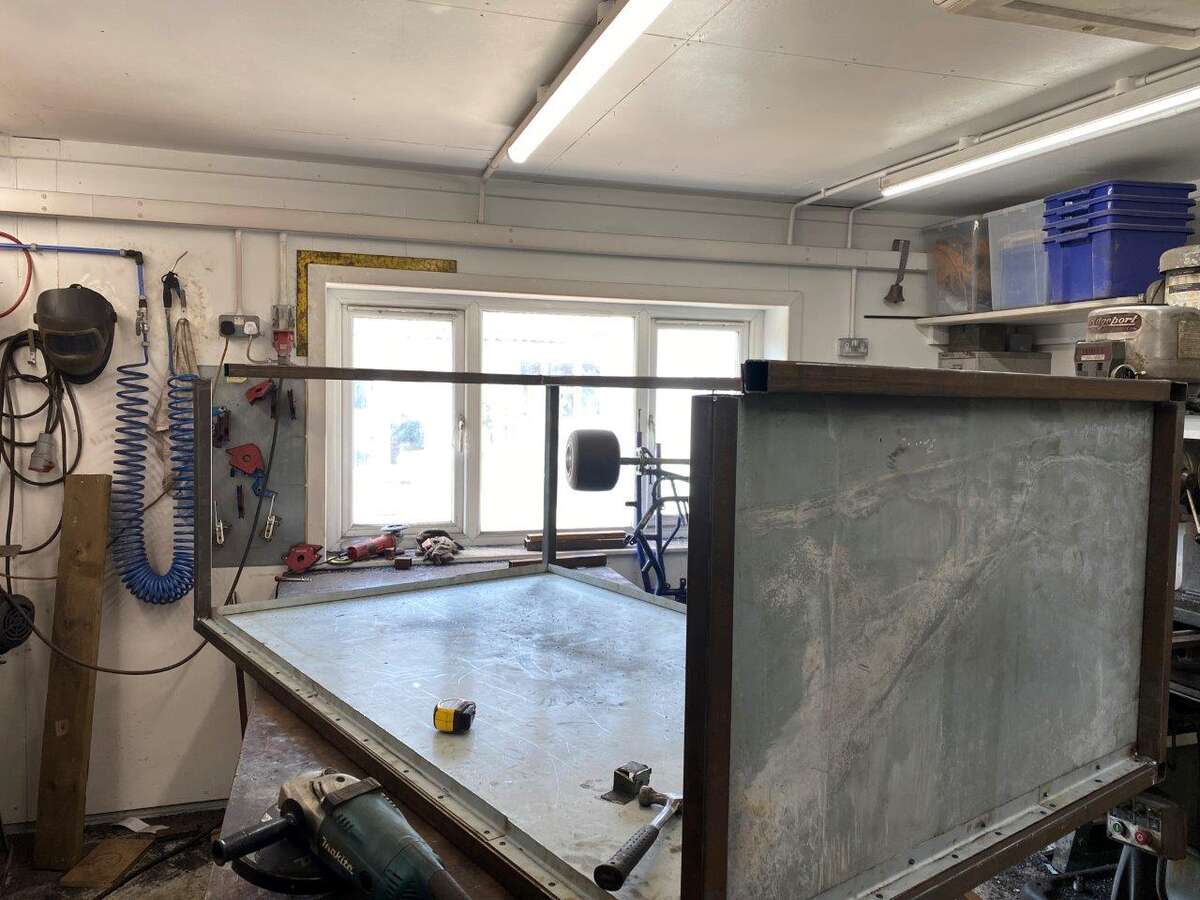
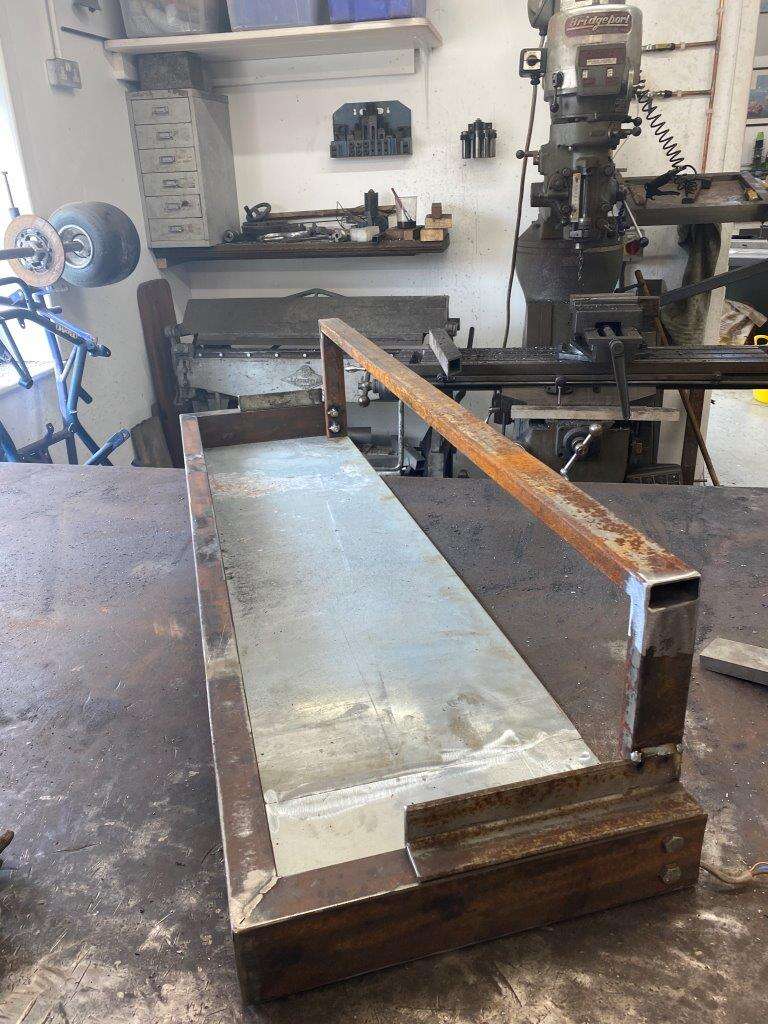
We now have this
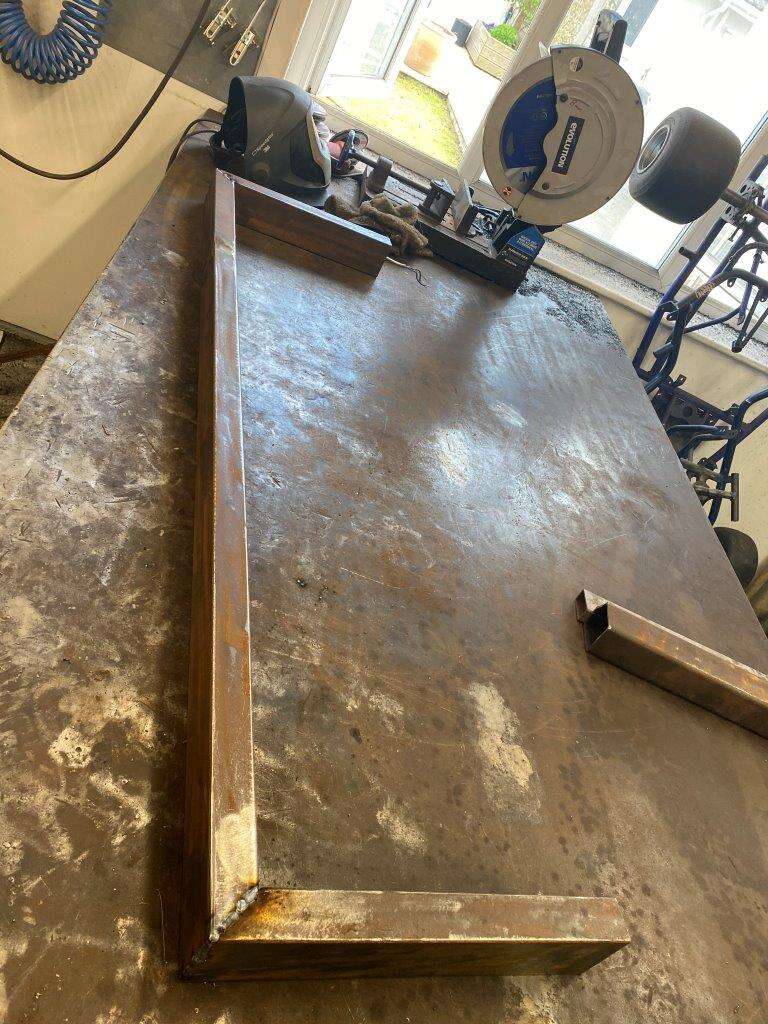
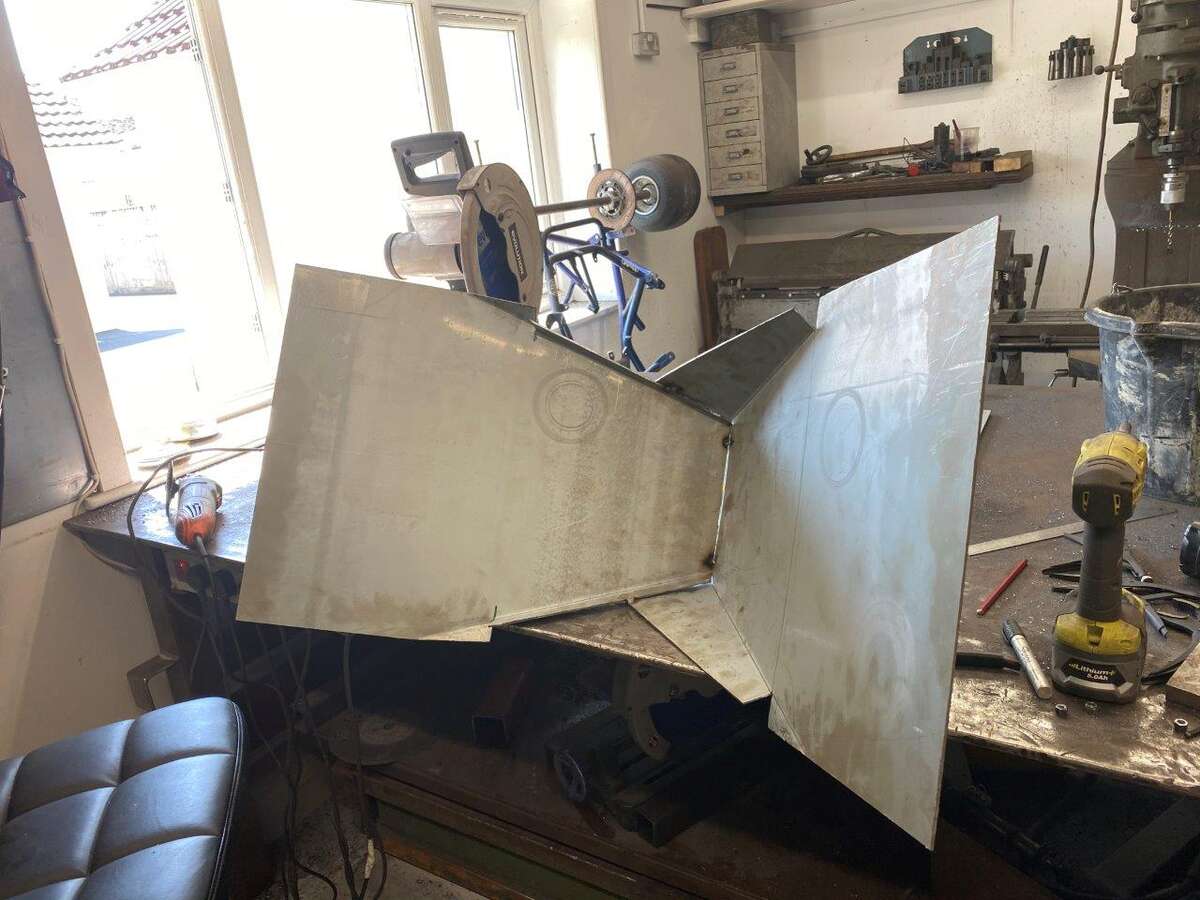
Then the front
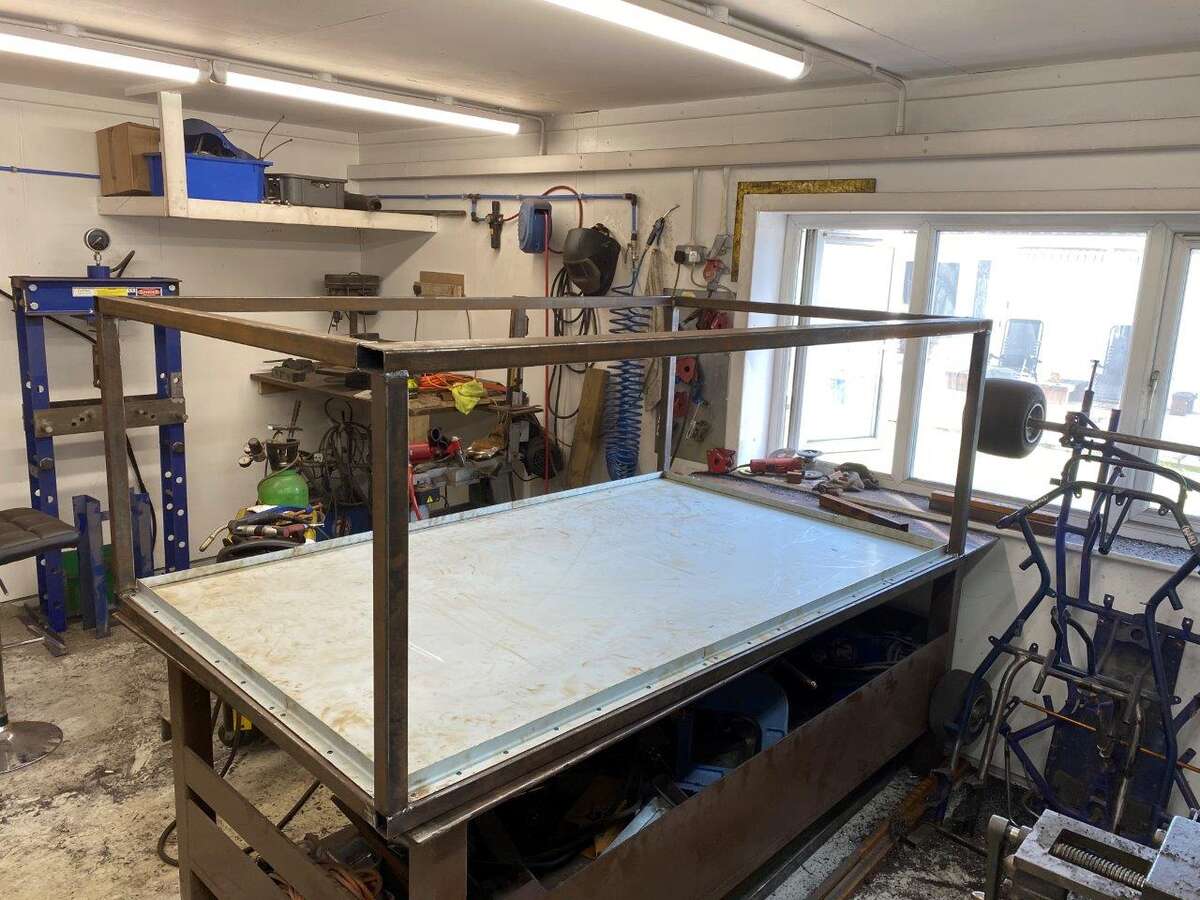
Add a bottom plate out of 3mm so it can take the hammer it will no doubt get, I’m using Zircotec sheet for the inside because I have it and it shouldn’t rust it is fairly light coloured – useful in an oven and I can’t really paint the inside unless I spend out on high heat paint – stuff that!
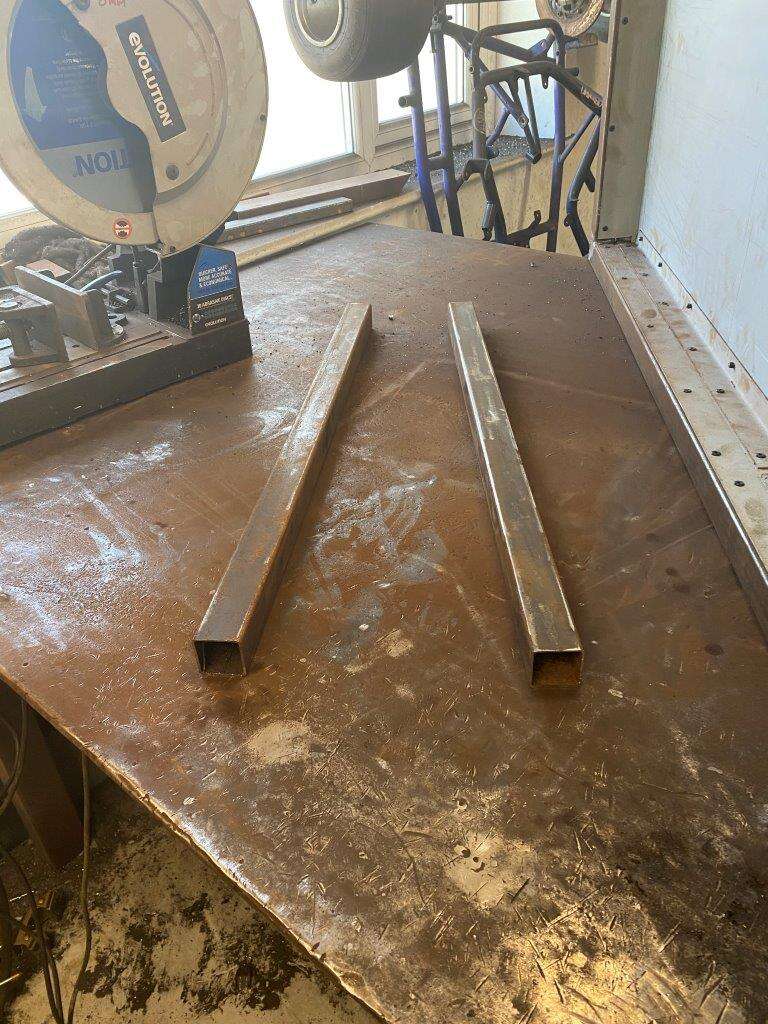
Then I changed the design

I was going to have one door but it’s just too big so I’m going 70/30 or 60/40 or whatever fits the hinges I have and looks right
So I cut out the front left bar and replaced it with a bigger one to match the one already fitted on the right – They are wider to take the hinges
Then I drilled out all the angles I added earlier and moved them over to accommodate the bigger bar – I love to do every job twice, but as I don’t work from plans it happens – A LOT!
We are now here
Start on the doors then
Door 1
Door 2
I think that’s you lot up to speed with where this project is but I have something special for tomorrow
Stay Safe
Keyser - “The cure for boredom is curiosity. There is no cure for curiosity.” – Dorothy Parker
-
6
-
-
21 hours ago, scobie140 said:
I don't know if i'm more impressed with your projects or your never ending scrap pile
Well now I would hope it was my projects, amazing skills, engineering prowess, ability to solve issues, multitude of talents or maybe just my extreme modesty
However as you have posed the question I feel it only fair that I post a couple of pics so you can compare my scrap pile(s) to the projects and decide which is more impressive.
The only problem is I wasn’t sure which scrap pile you meant,
There is the main scrap pile
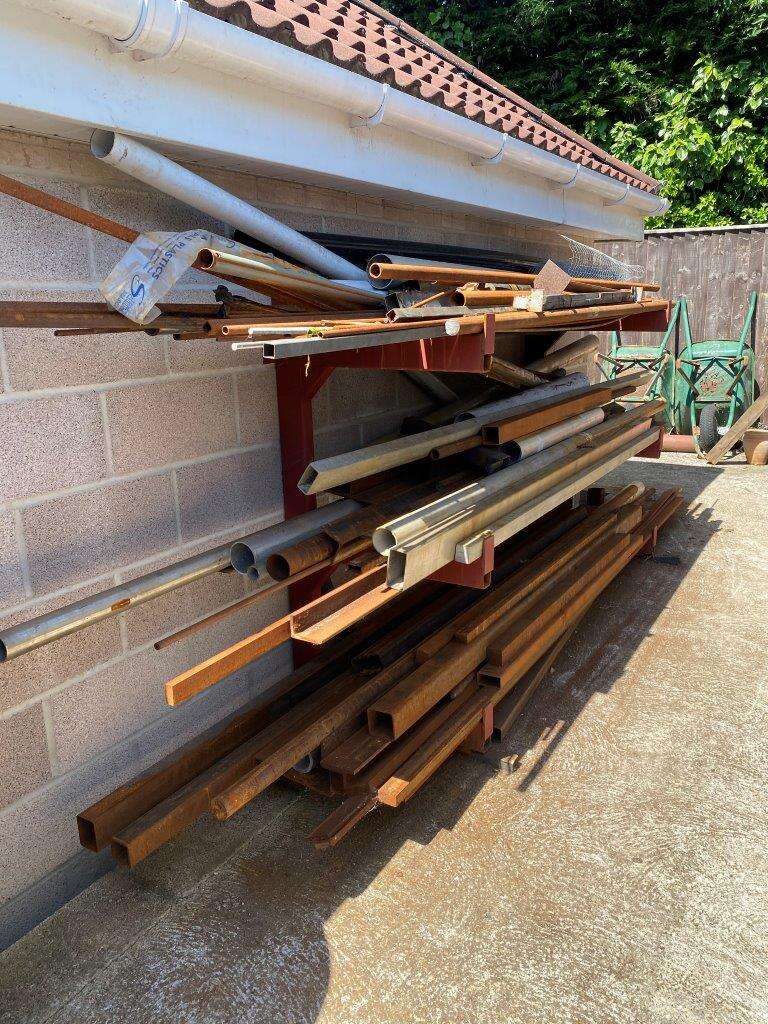
The odd big bits scrap pile
The sheet metal scrap pile
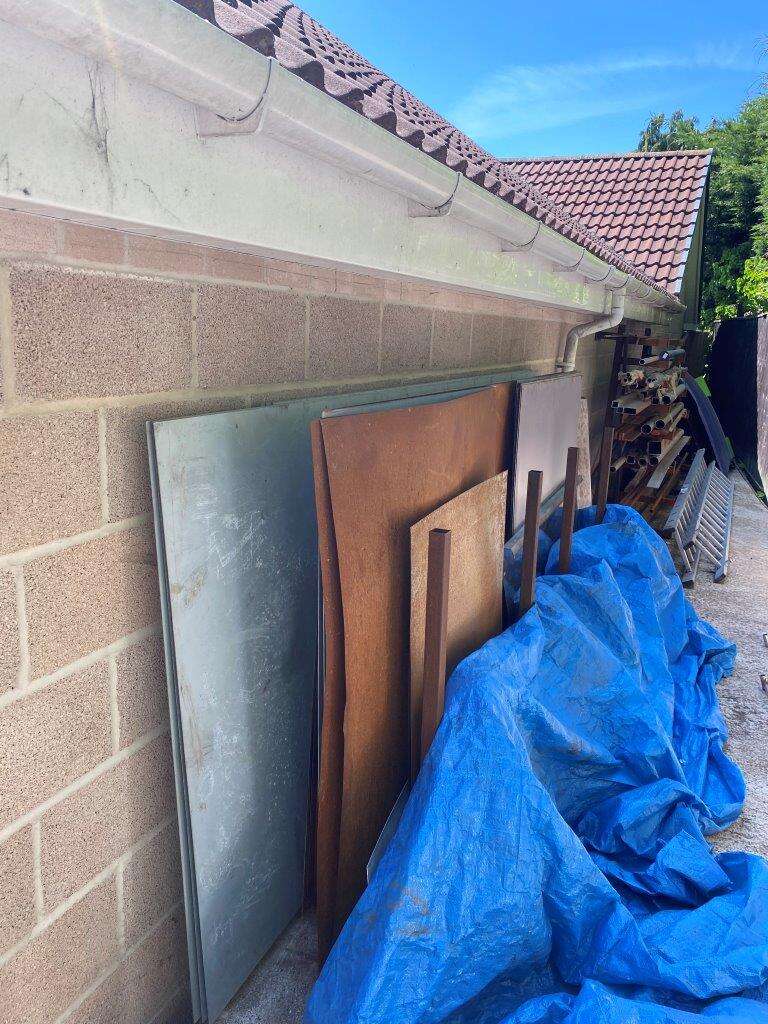
The stainless and bar scrap pile
Then we have the aluminium and stainless pile in the garage
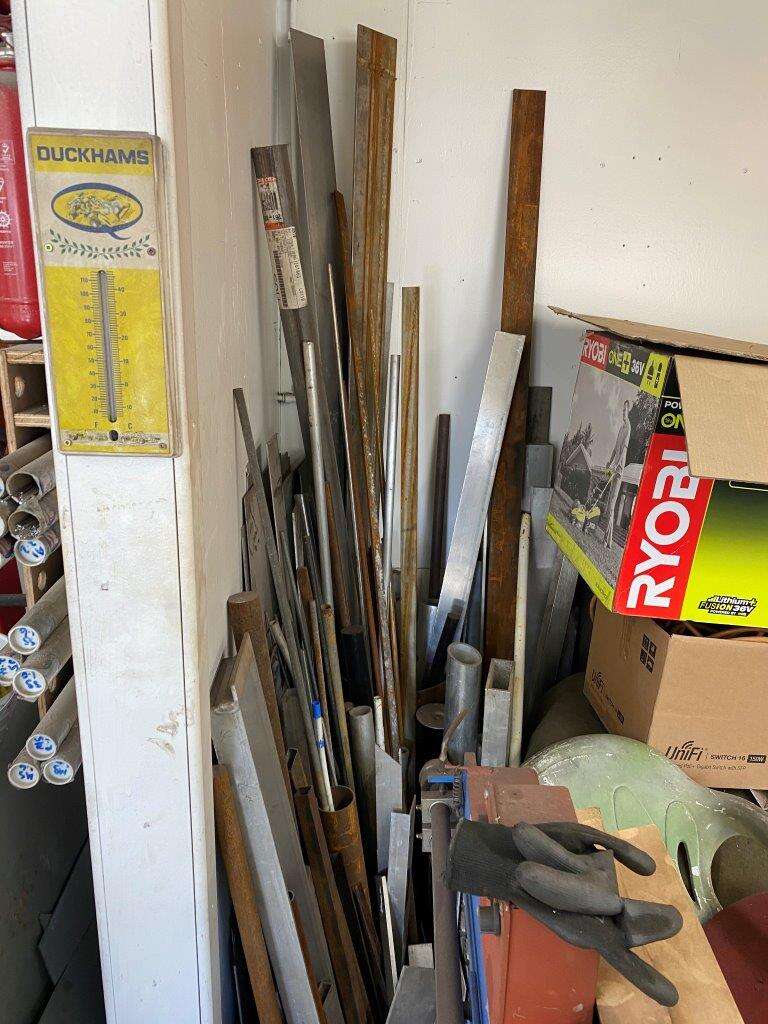
Or the bar and pipe pile behind the Mill
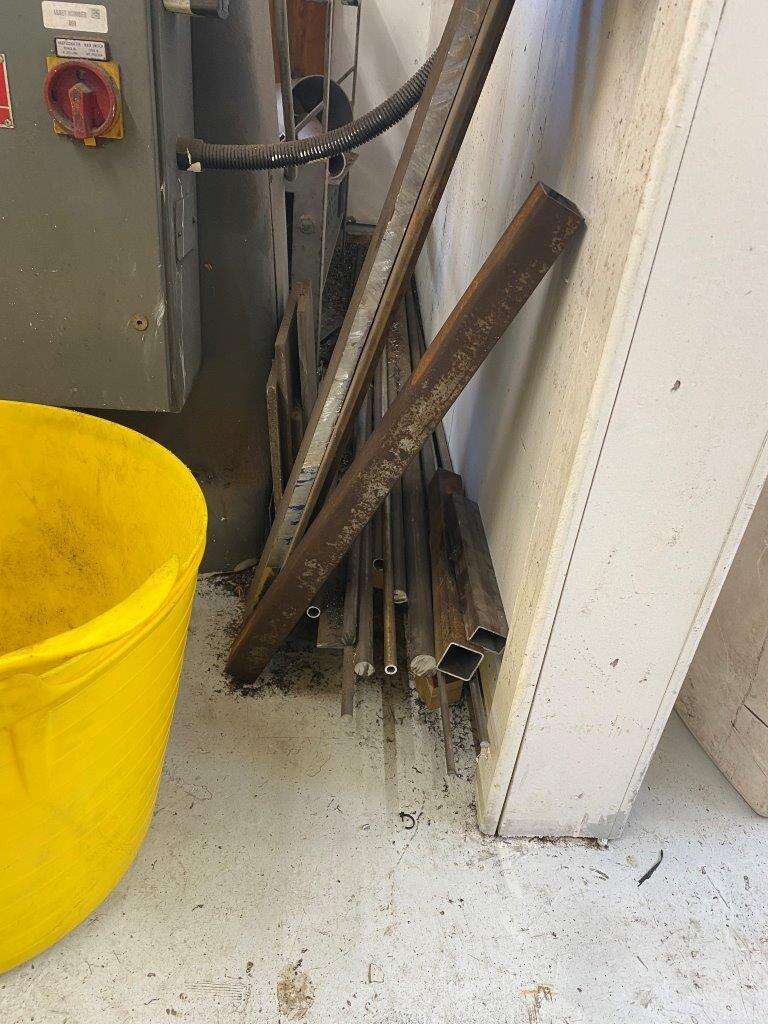
Not forgetting of course, the aluminium off cuts pile
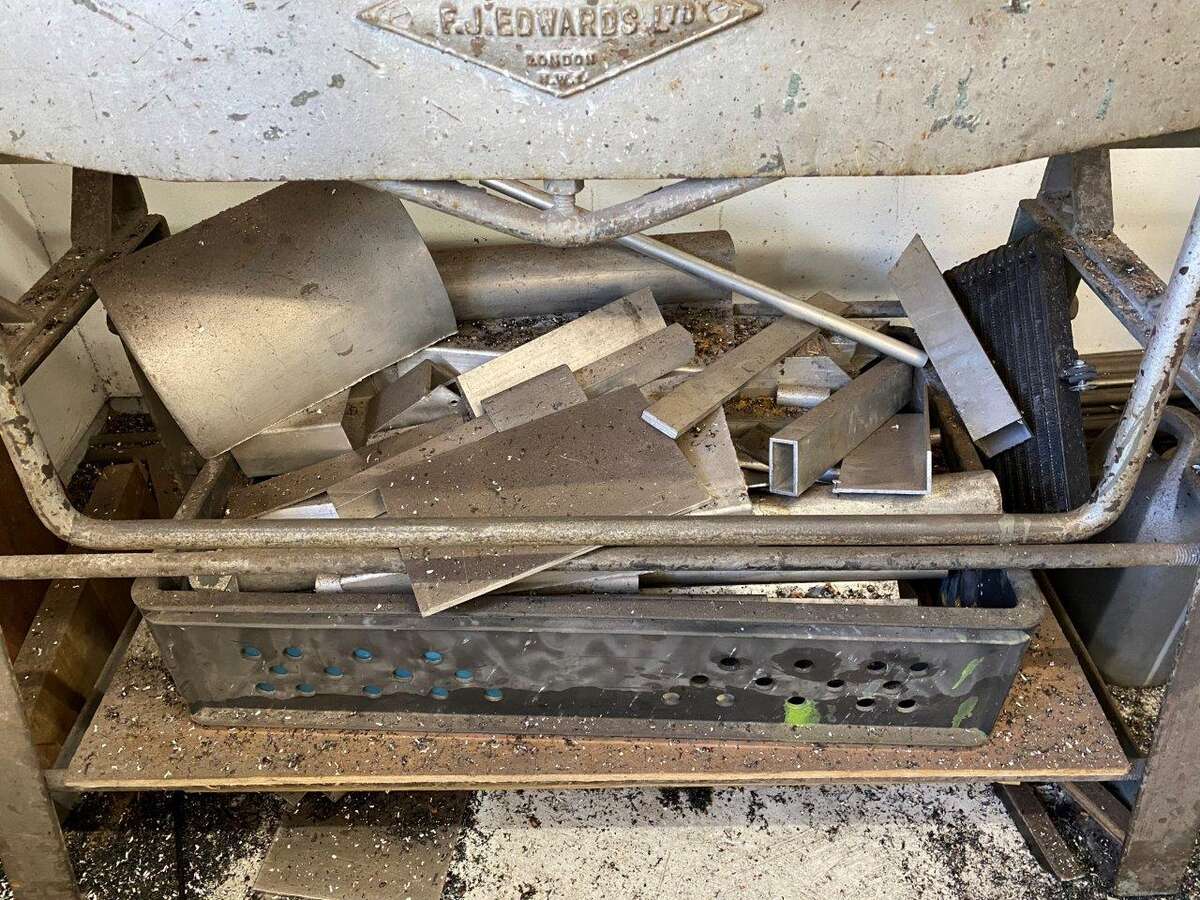
The general steel of cuts box
And lastly the draw under the big bench
Which has my “useful” of cuts scrap pile.

Over to you
I will say I have put quite a dent in the amount I had before lock down though
Keyser
-
3
-
5
-
-
Morning all, I’m actually struggling to stay ahead of the posts now, it takes a long while to fabricate some of this stuff but only a few minutes to post the results in a picture, things may start to slow down from here on in, I’m also doing more of my real job and the weekend is looking like some garden chores will need attending to.
Now I did say a new project was starting today, well this may or may not surprise you but at the end of my last post you will remember this
I mentioned this to Mrs K and she said “Why don’t you just extend your oven” I will also say she retracted the statement almost immediately and as I went off to grab a tape measure she mumbled something like “O no, what have I started now”
Anyway I thought – what a great idea I’ve had several occasions when a bigger oven would be useful, I have a friend that would like me to do his motorbike frames for example. I would like to do the Go-Kart chassis and just some bigger parts, even the exercise bar I did for my daughter meant hanging the longest bars at an angle and doing them one at a time as they were to long for the oven.
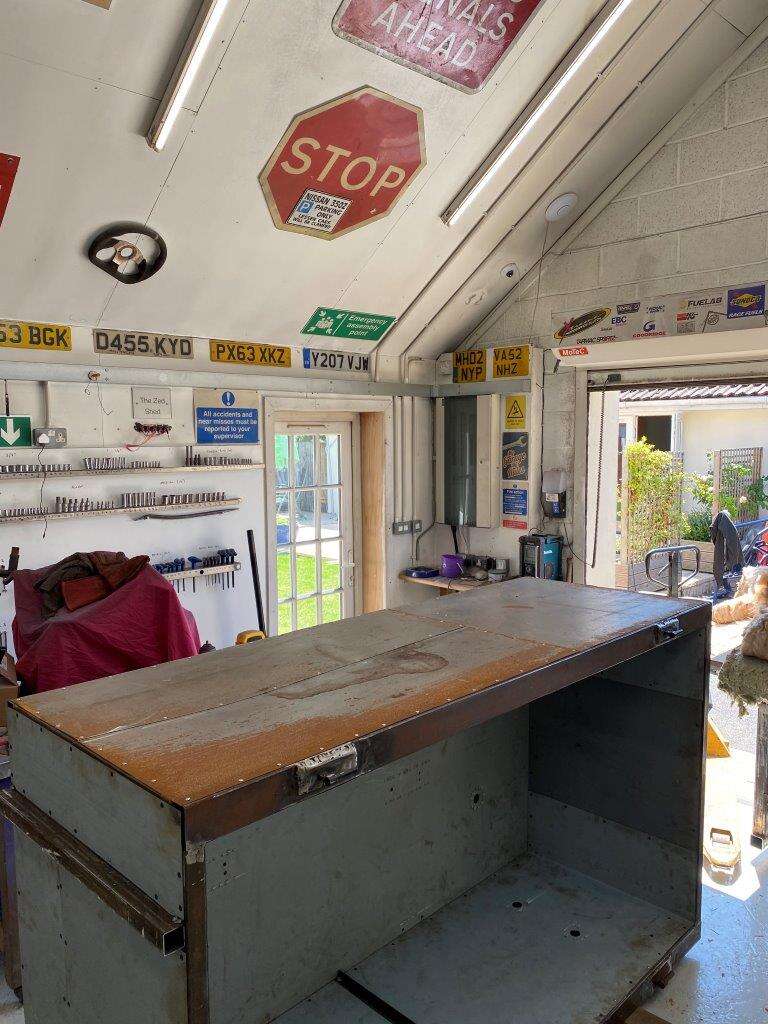
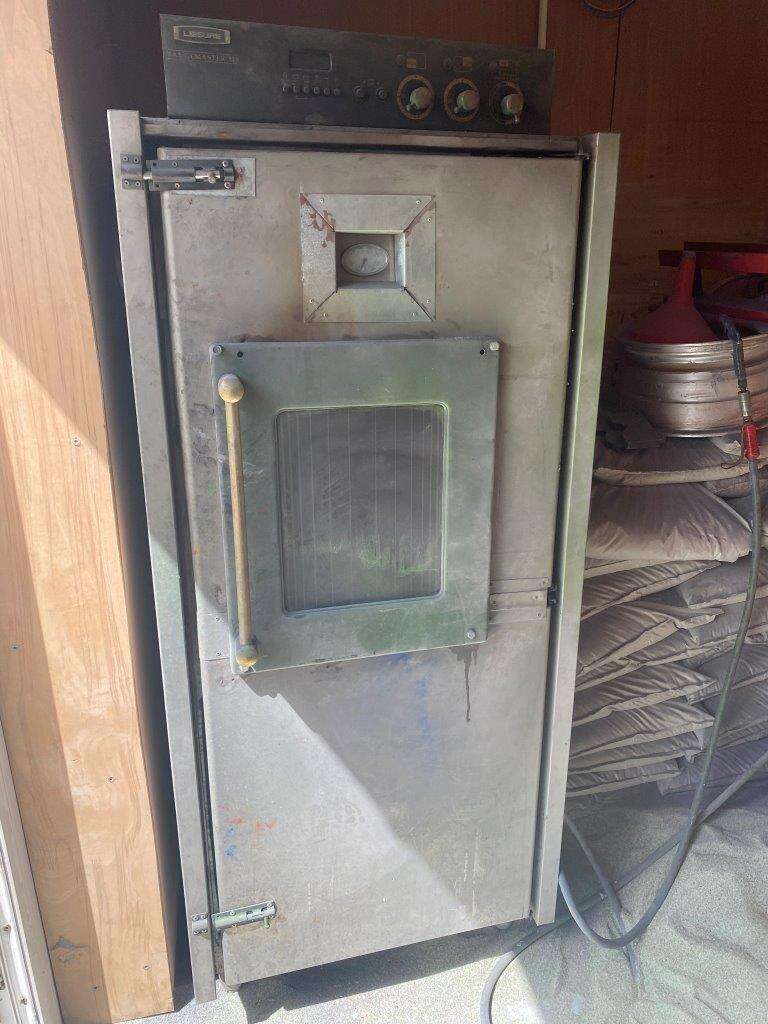
So Lets go have a look at the oven, this was my first attempt at a powder coat oven it was done in a hurry in the Old Zed Shed, it was really an experiment to see if home powder coating could be done, cheap gun from eBay and a cheap Rangemaster cooker from Gumtree, As a cooker is tiny I acquired a fridge but it is an industrial one from a hotel and as such is fireproof and lined with expanding foam, domestic fridges use polystyrene so are no use.
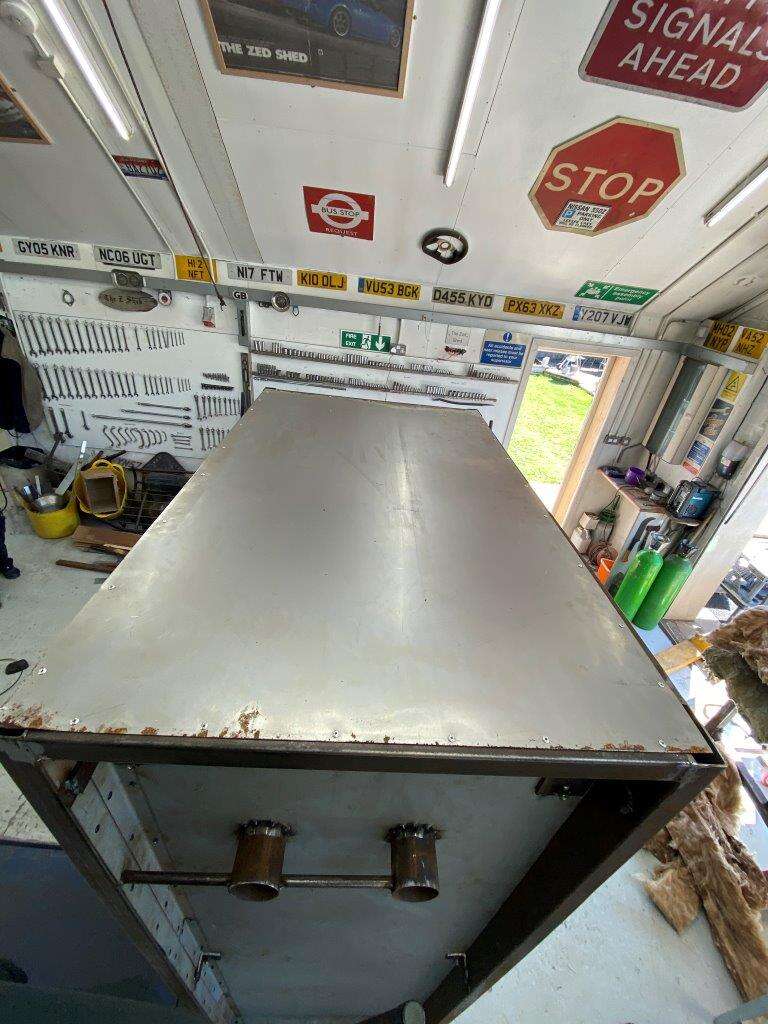
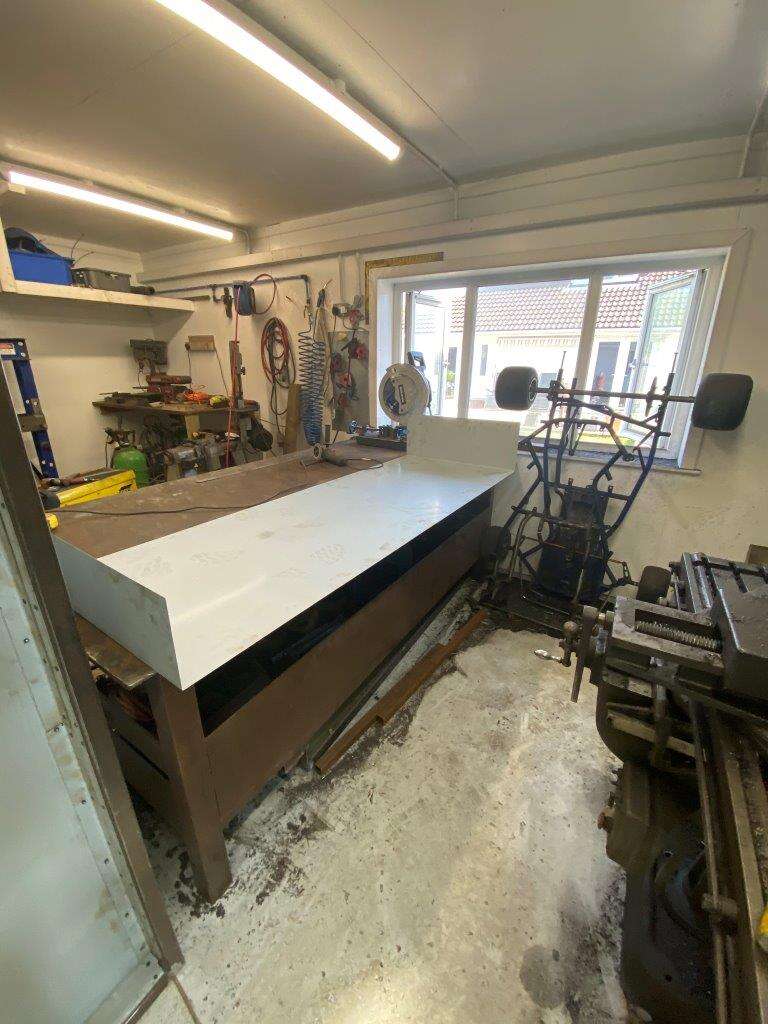
It currently looks like this

The wiring is scary, I literally took the electrics from the cooker and moved them directly onto the fridge
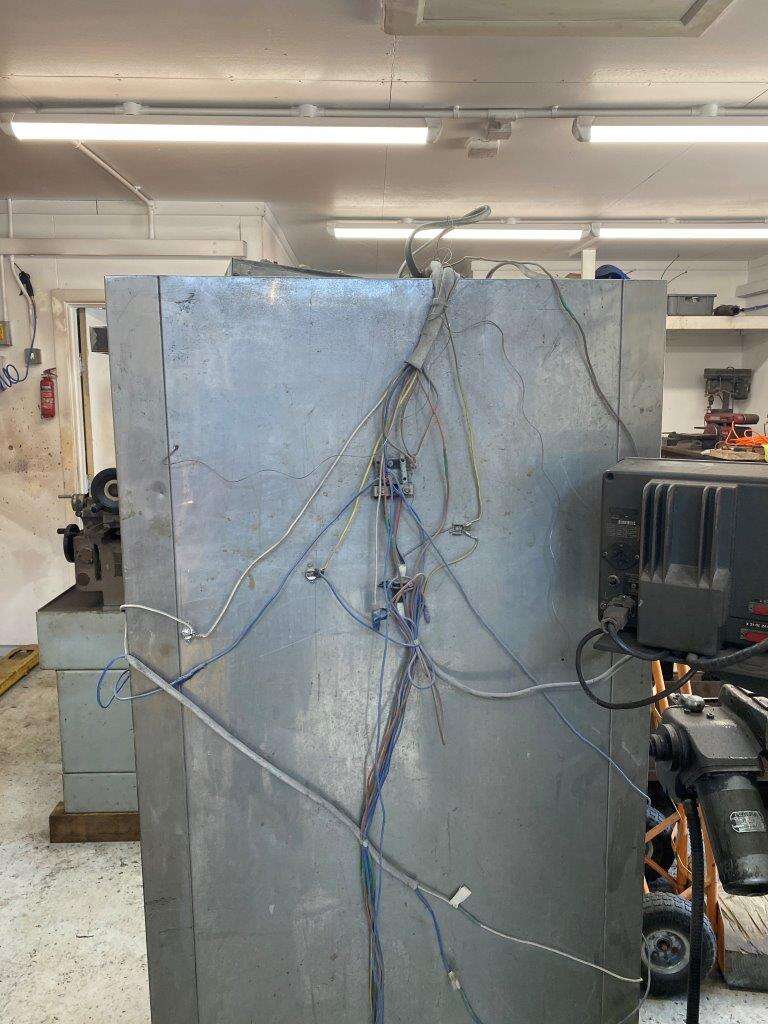
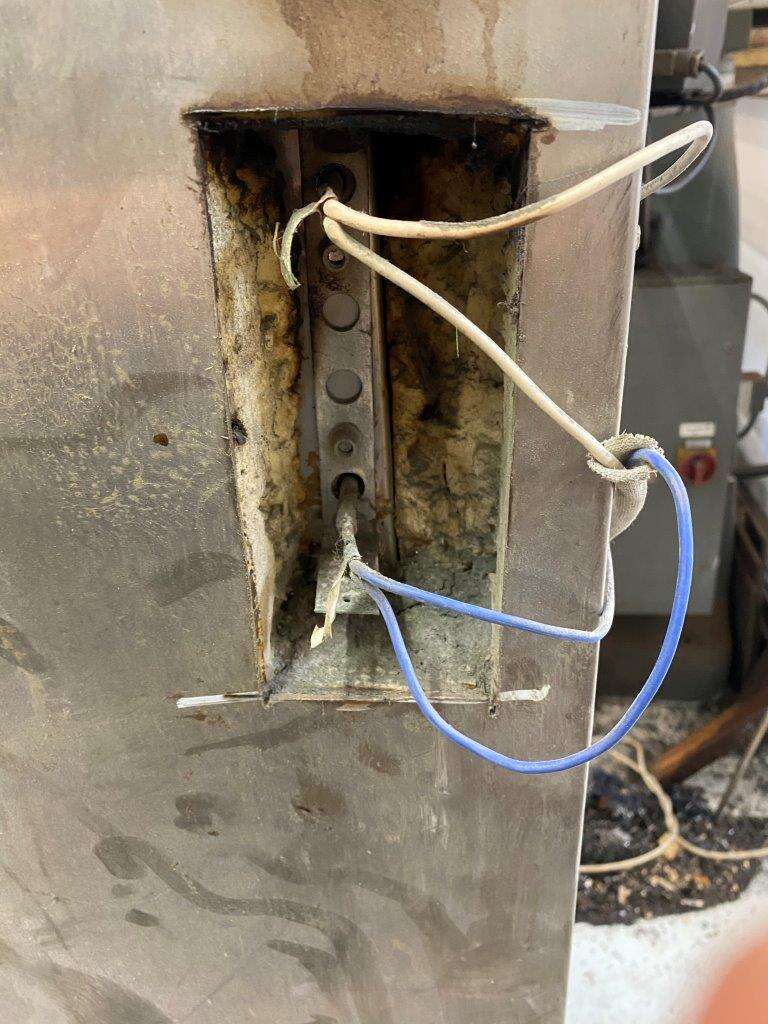
They are so scary that my mate and professional electrician Tim, would not wire it into the Zed Shed 2 – He said he would install the cooker socket but would in no way condone the attachment of “that death trap”
Dunno what he’s worried about been going for at least 6 years and apart from the fan not working, it blows thecircuit breaker if you turn the light on and it has uninsulated 240v AC mains wires all over it, its fine
Like I say this was an experiment – it worked – we never got around to tidying it up.
Another problem was the doors – they are rubber sealed and it melted over time – I was going to replace them with fire rope but never got around to that either
No secrets from me it looks terrible
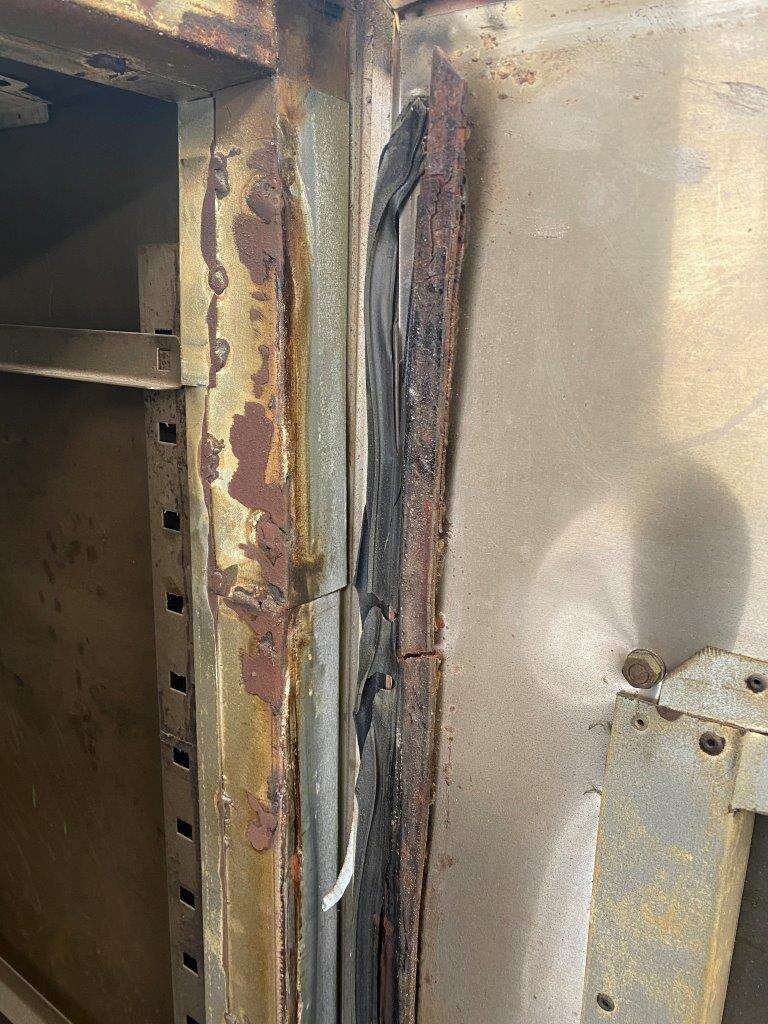
I think we agree an upgrade is well overdue.
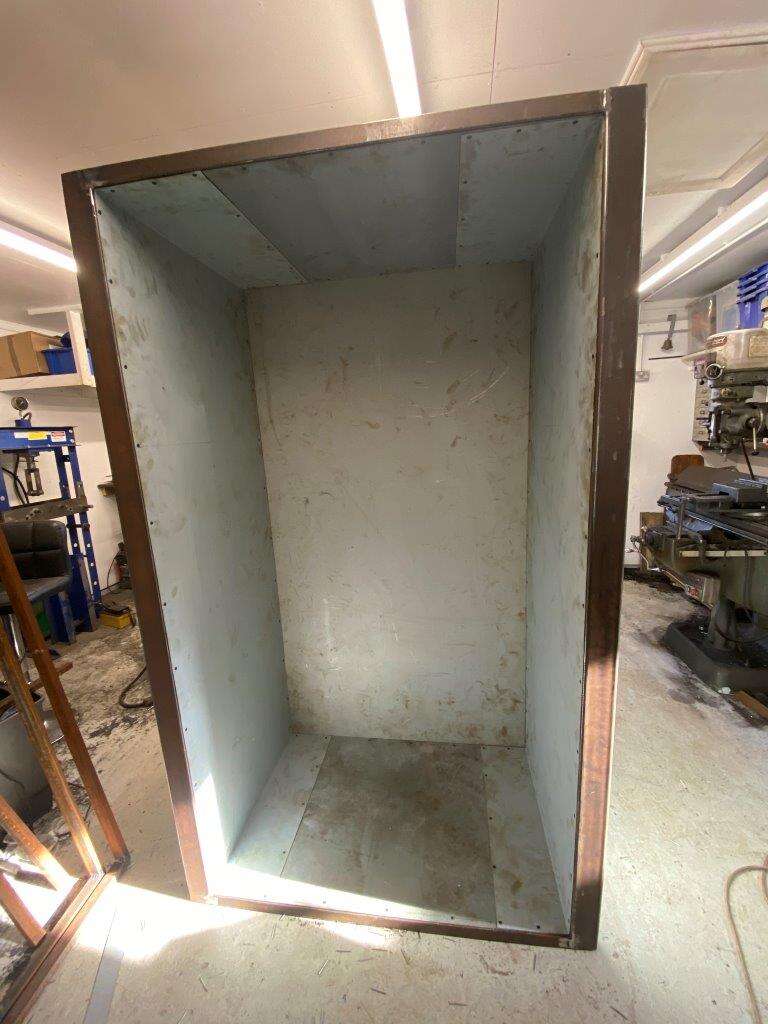
So lets strip it down and see how it can be improved / extended
Electrics out
The empty shell
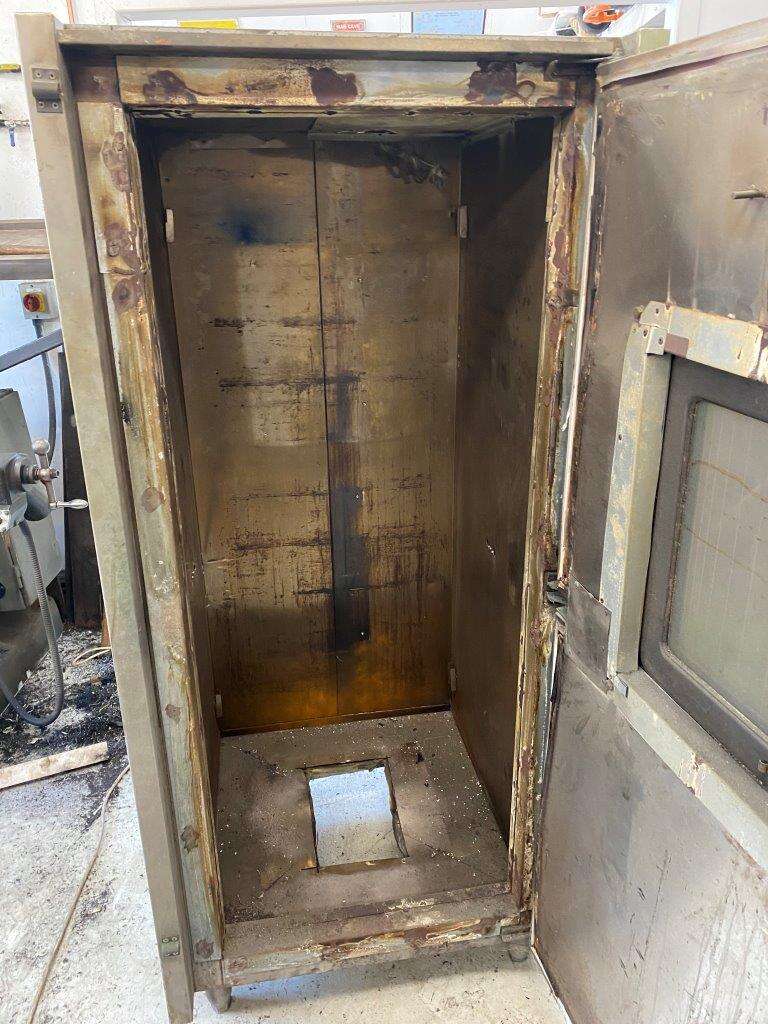
The doors were designed to be a top and bottom separately opening, I joined them together and bolted the oven door over the front during the testing phase I think it had a window in before but can’t really remember, they are looking bad!
I then sat back and considered options, drank more coffee and eventually decided – this is not worth the effort, I’d have to put right all my bodges and it won’t extend nicely in any direction except cut the bottom out and make it taller, but then the door would have to be rebuilt.
Only one thing for it then – To the scarp pile..........................
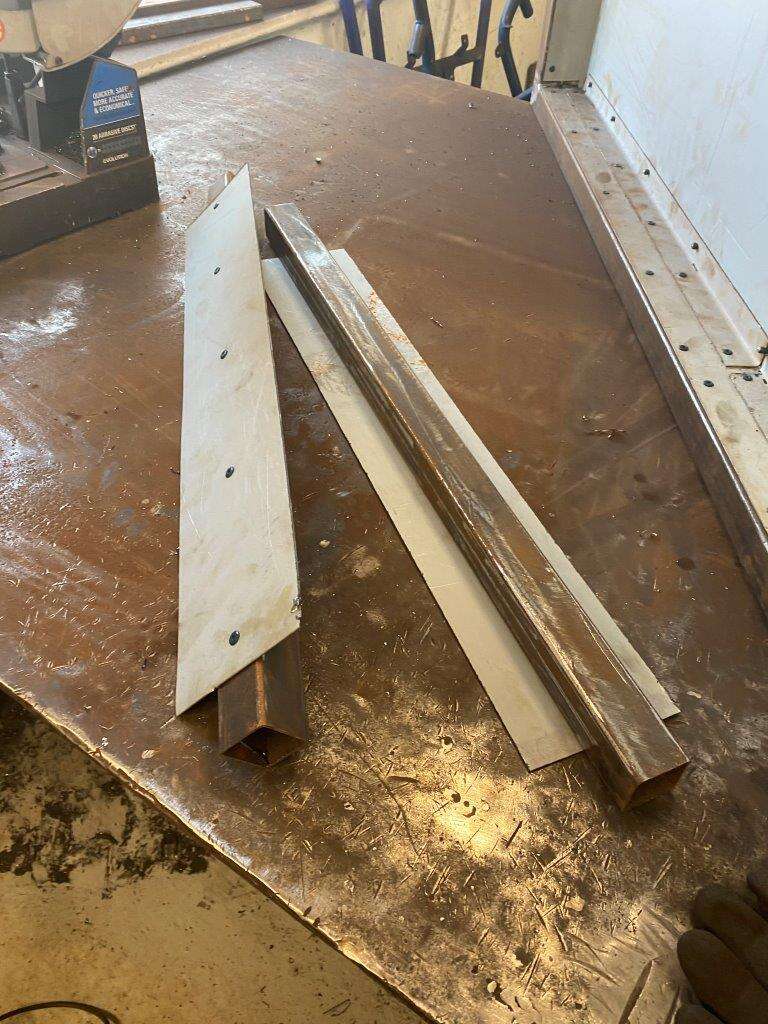
Framework sourced
Some panelling
Lets get started cleaning up some metal – AGAIN!, it’s all I do is clean metal
More on the progress of this as it happens, although I am taking a day off work today (emergencies not withstanding) my colleague is covering my calls and I am going to attempt something – I’m not sure if it will work. I’m not sure it’s even a good idea and it is probably dangerous, I may or may not post the results on here – if I don’t post anything it was more dangerous than I anticipated!
Stay Alert – The world still needs Lerts!
Keyser - “Never argue with stupid people, they will drag you down to their level and then beat you with experience.” - Mark Twain
-
6
-
-
Hi all,
Work is slowly coming back, jobs are starting to come in but they are booked for end of June into July but hey, not complaining looks like we will be back to full time soon
For the time being though I’m still getting a couple of hours a day in the Zed Shed so another progress report for you all –
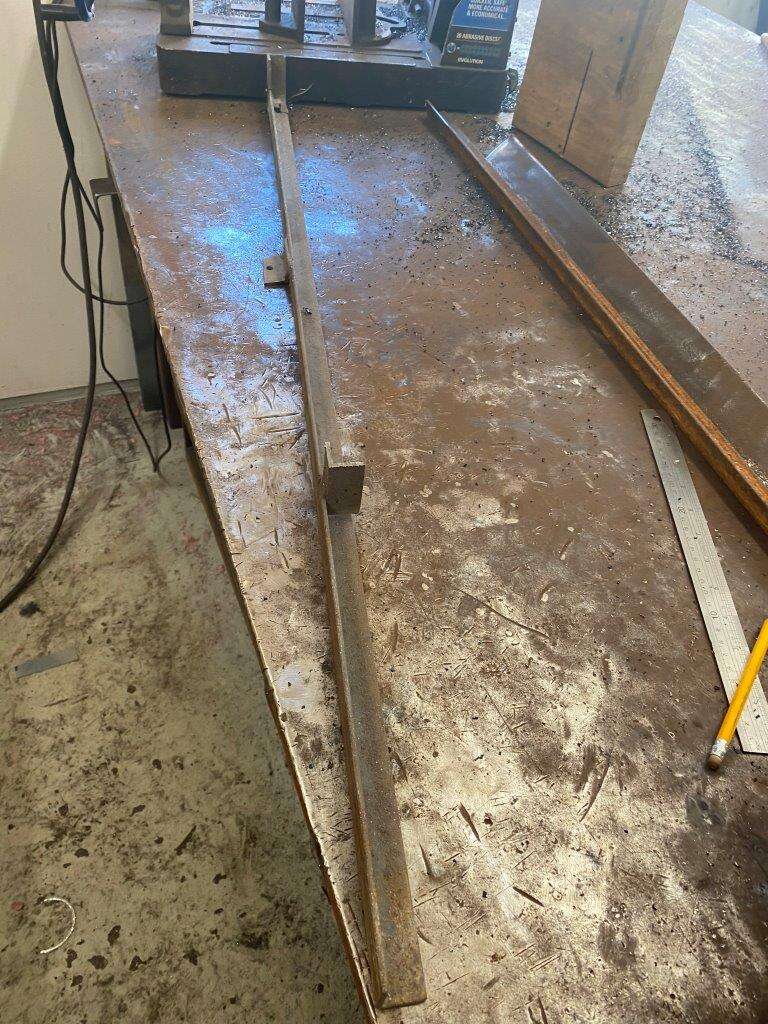
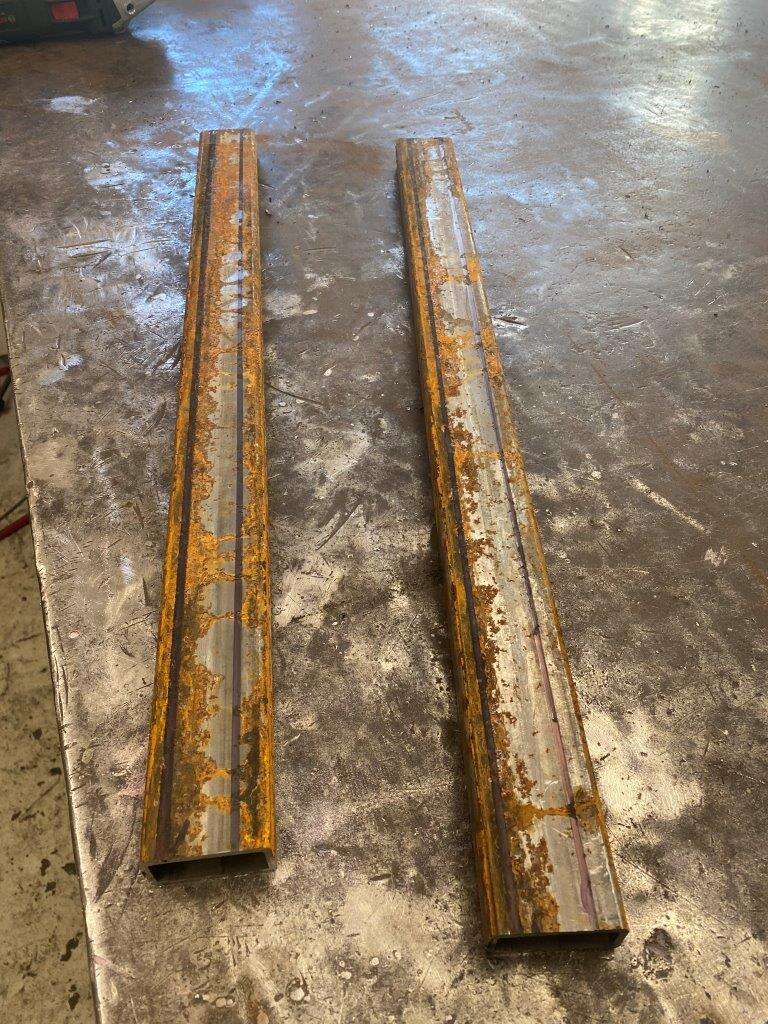
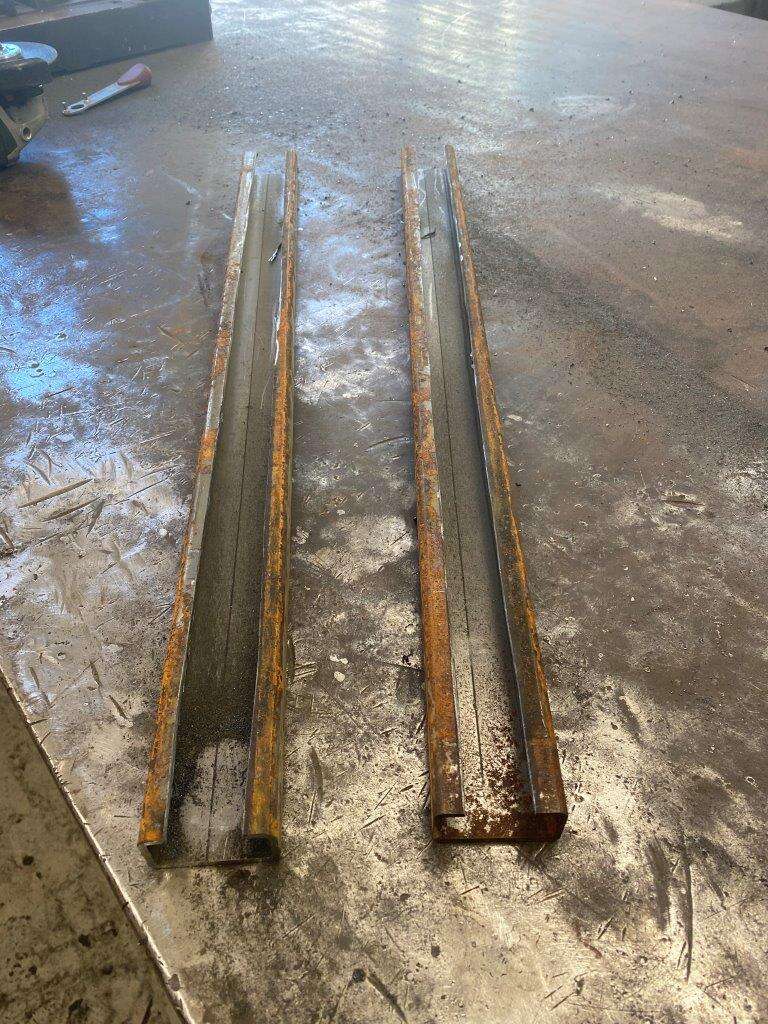
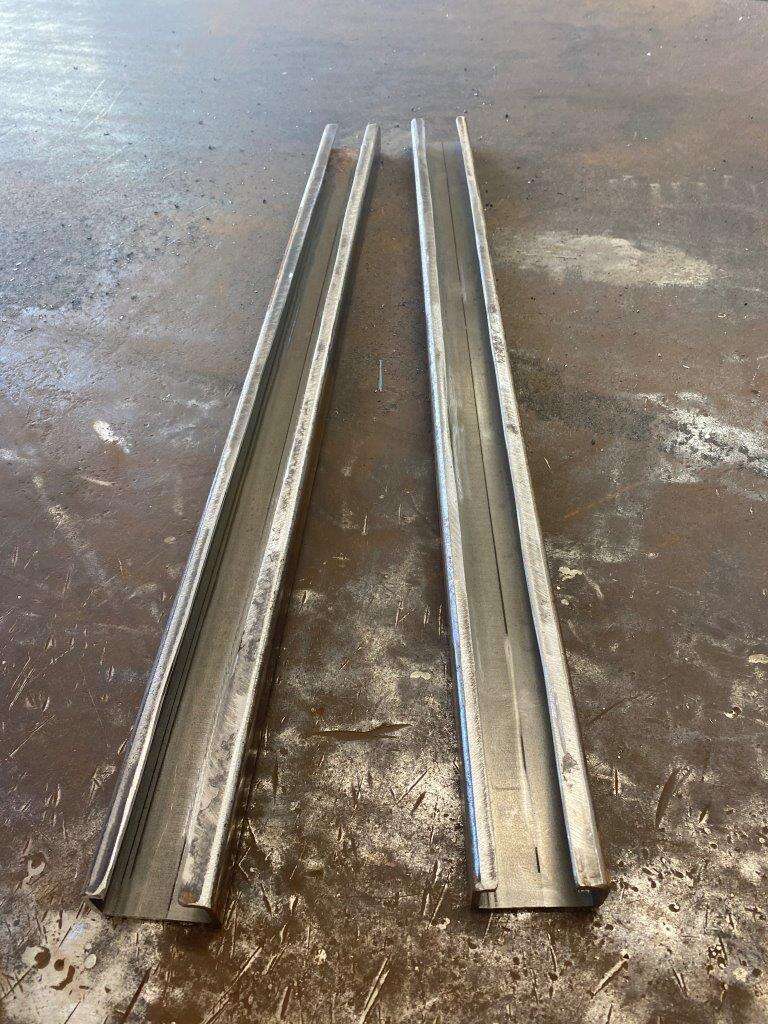
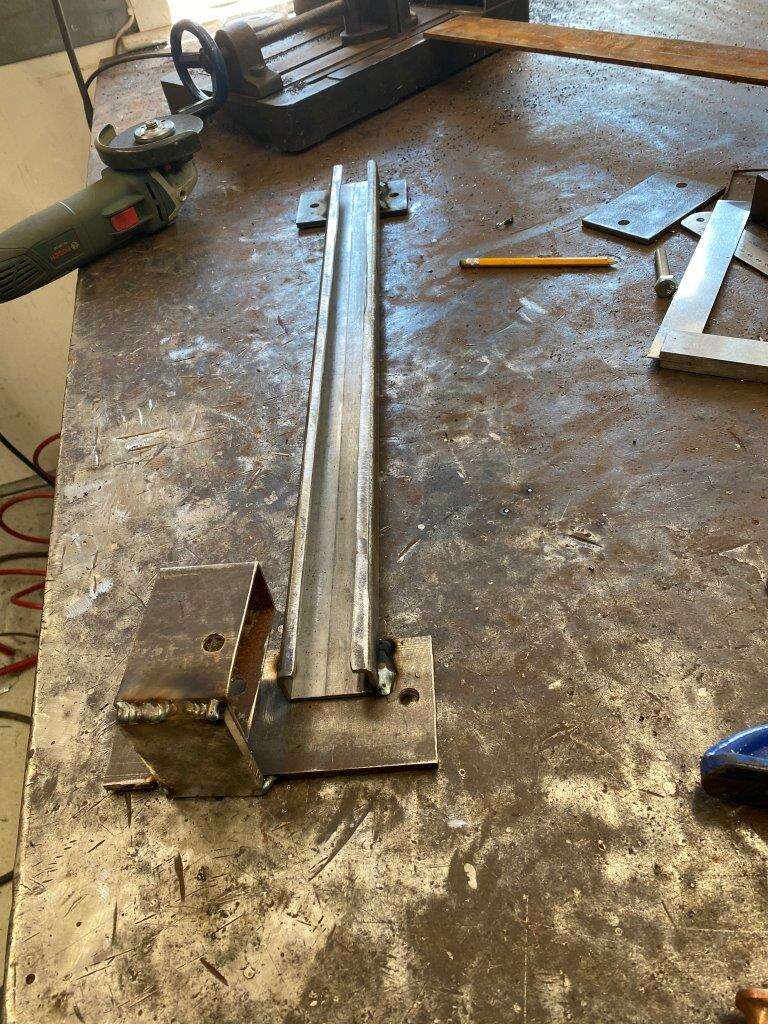
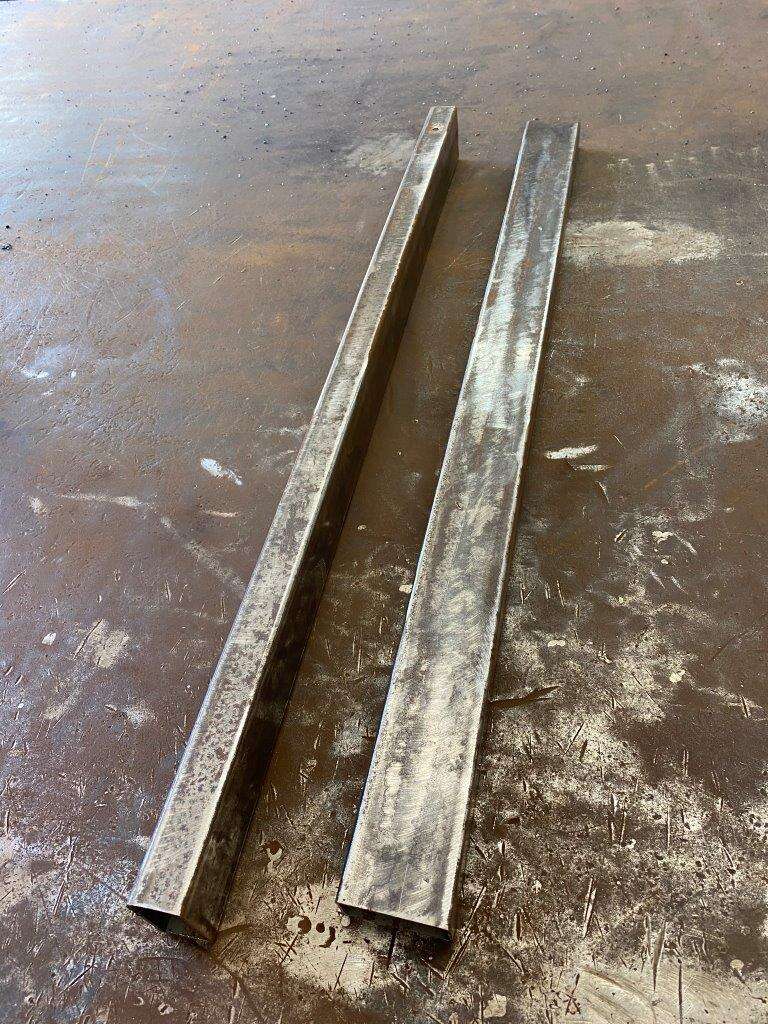
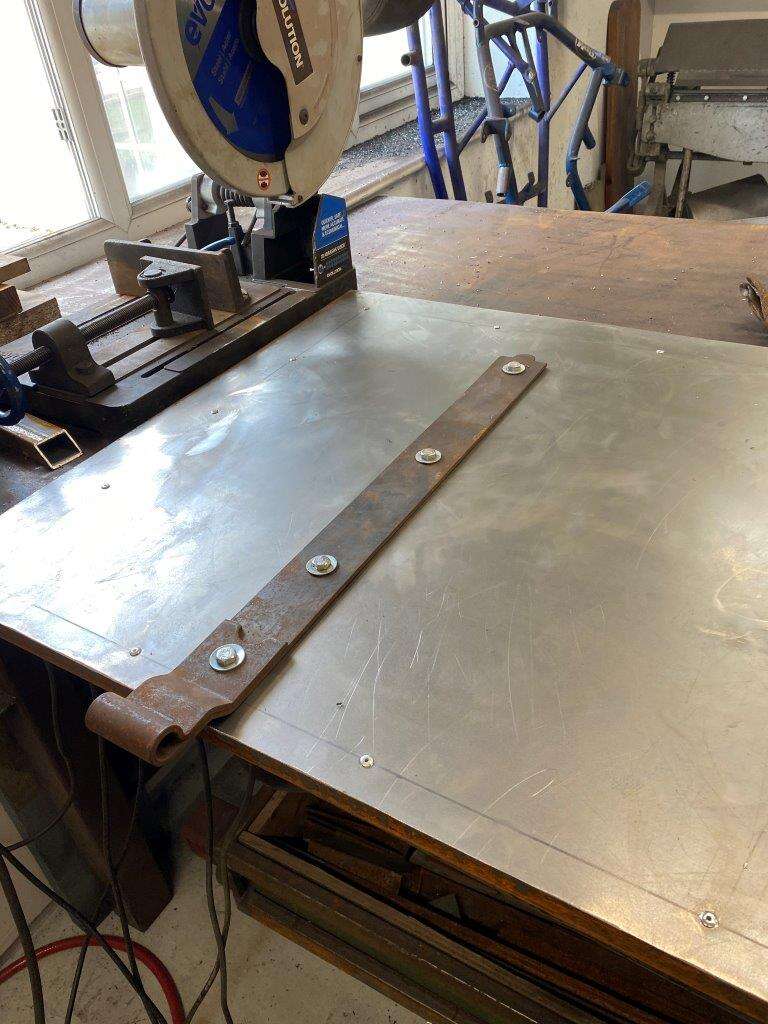
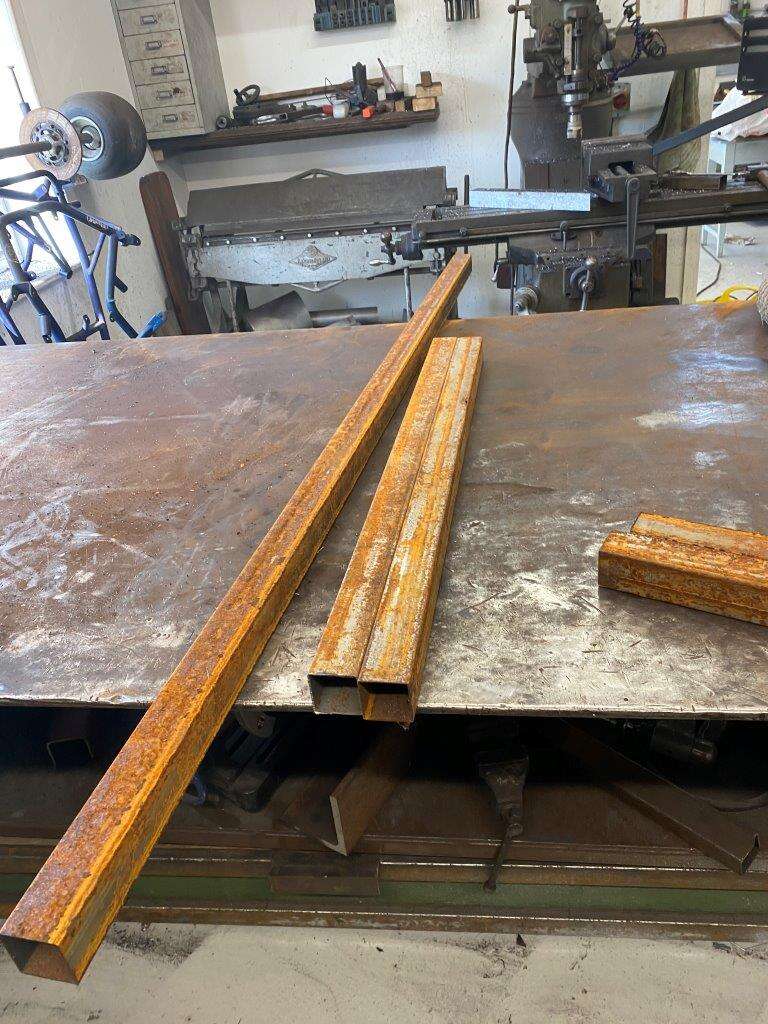
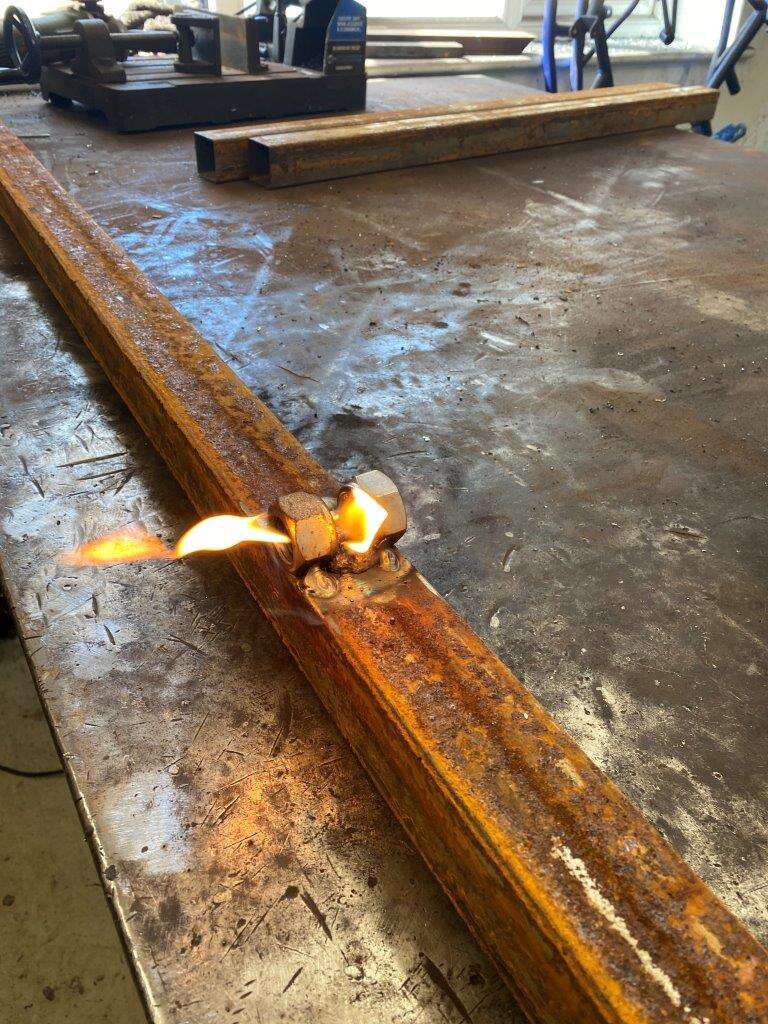
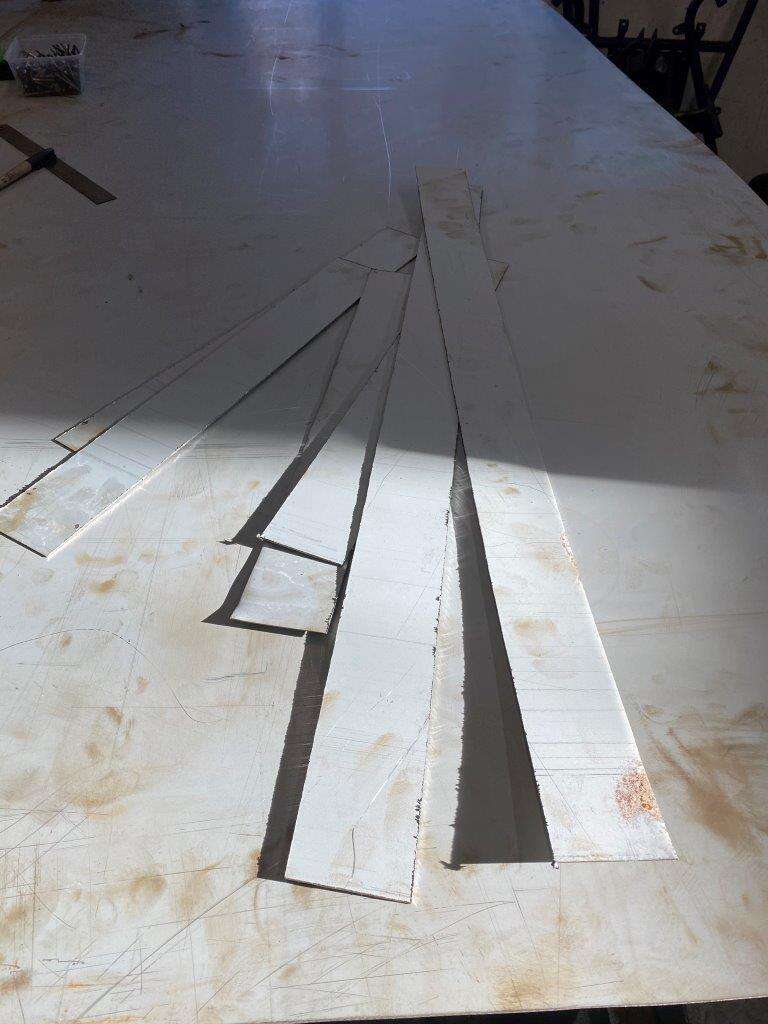
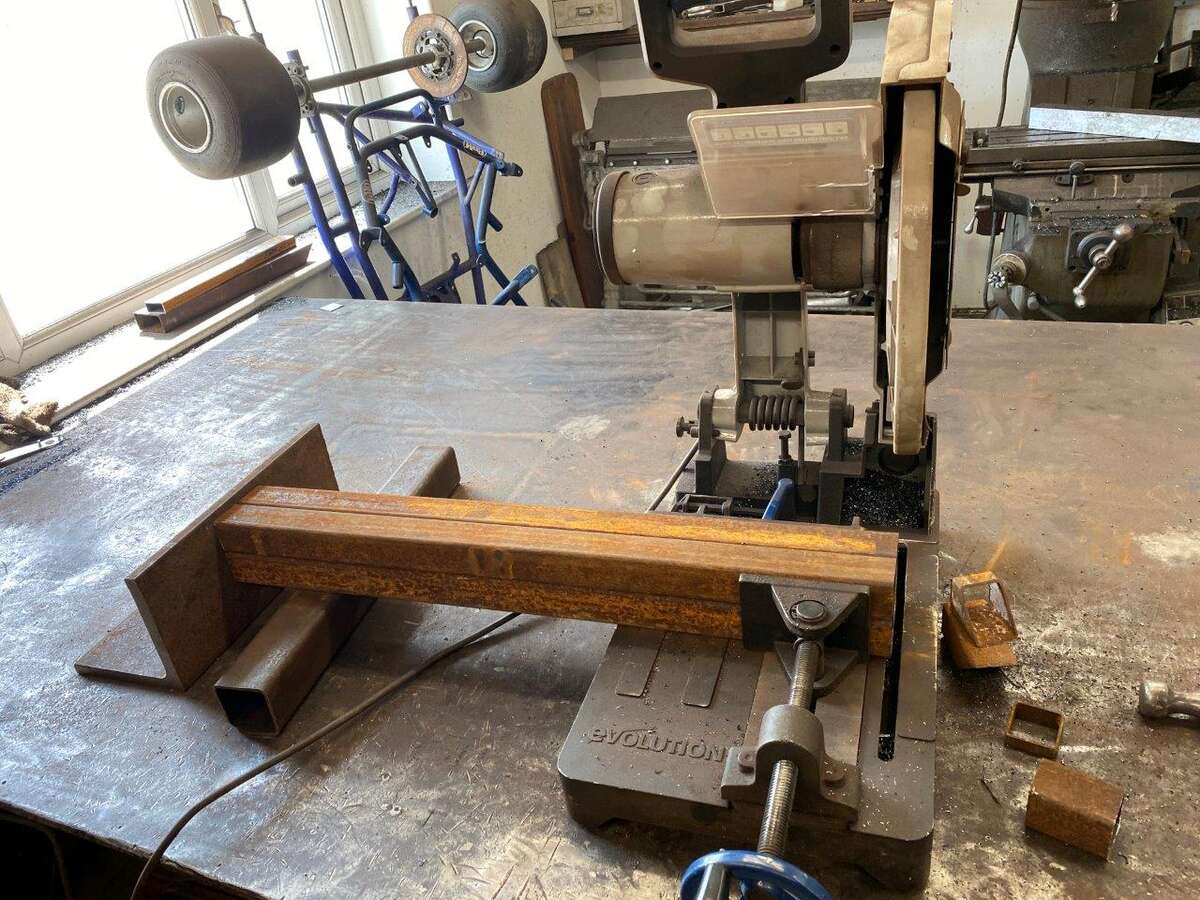
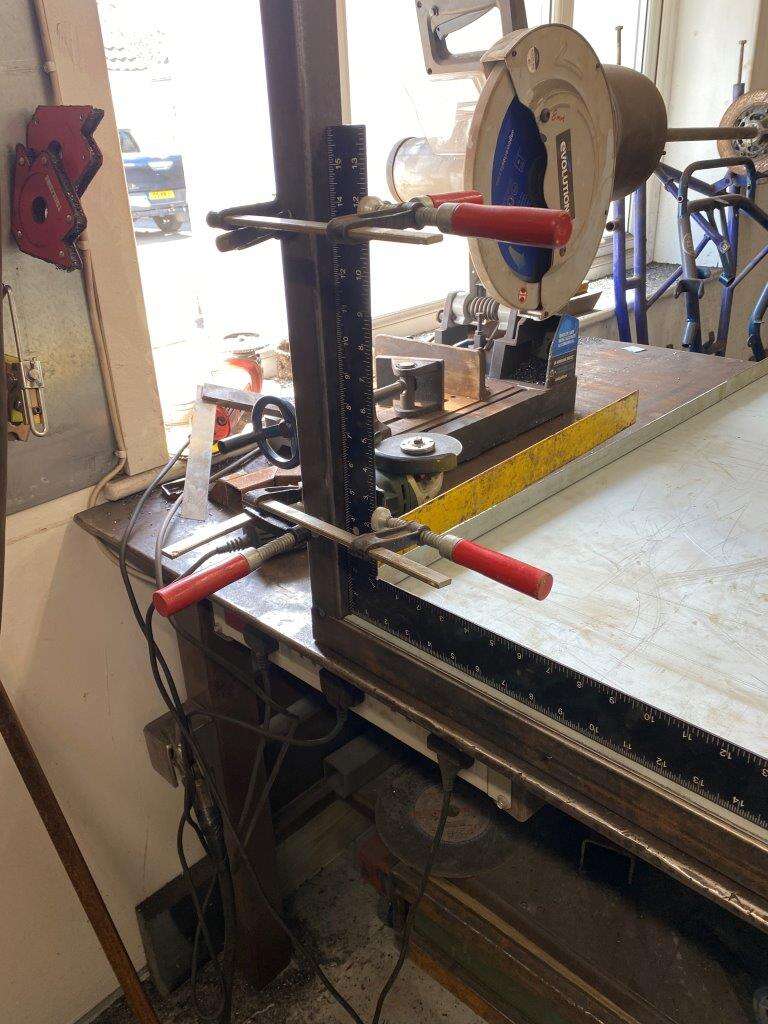
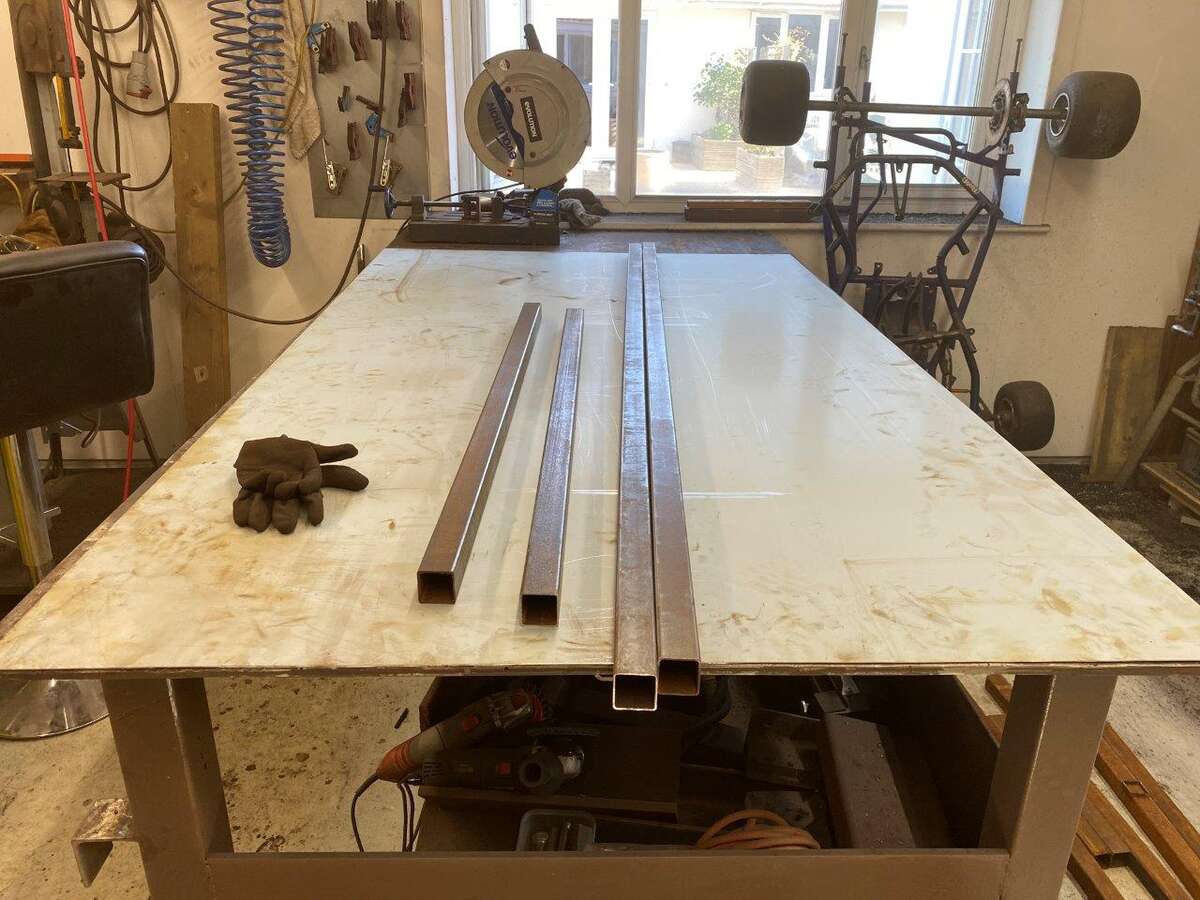
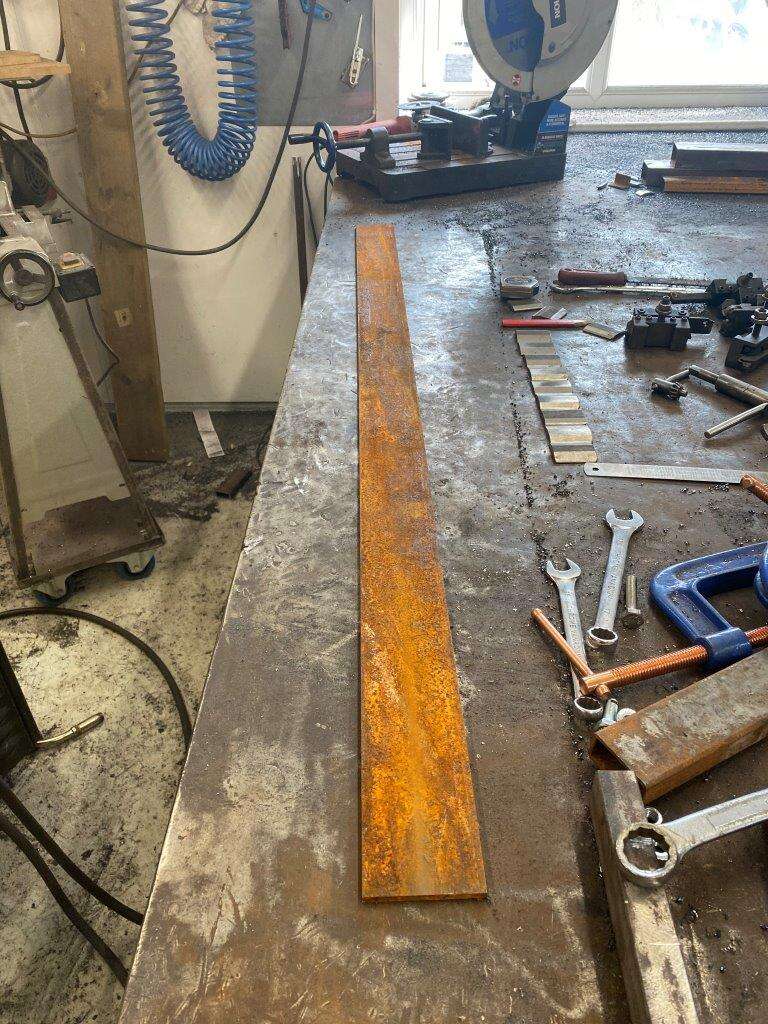
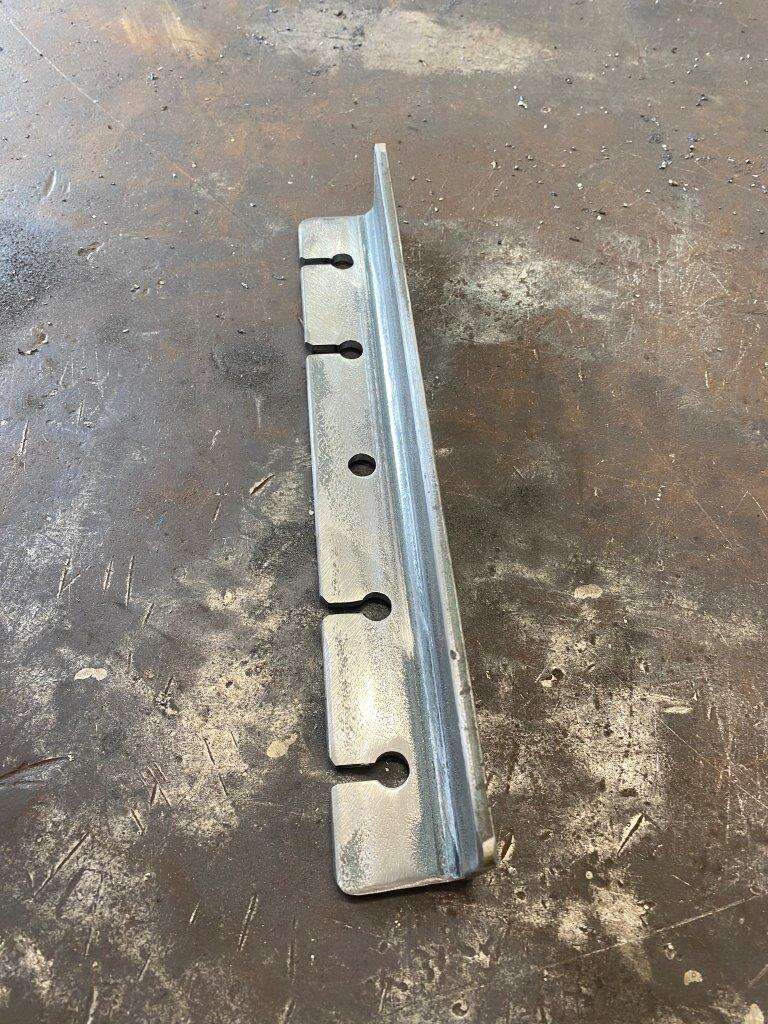
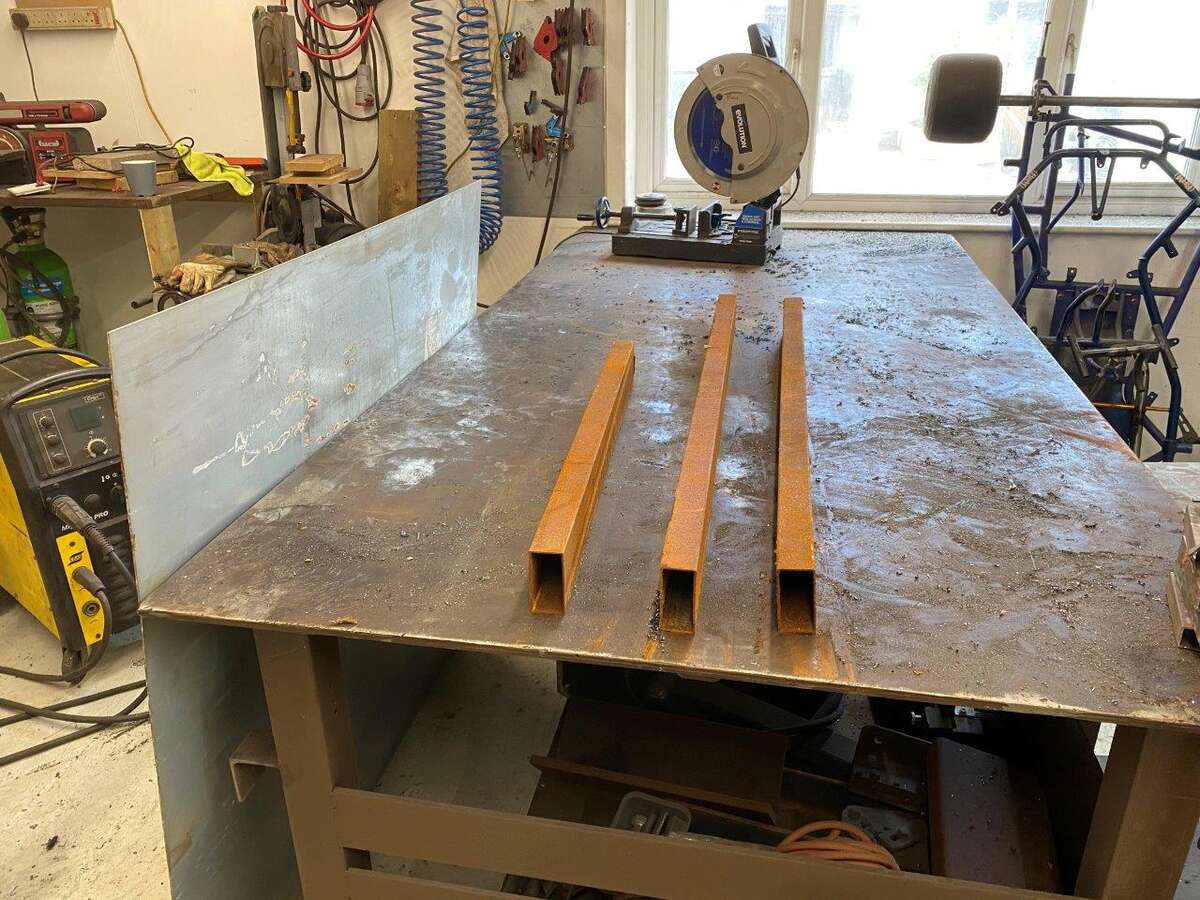
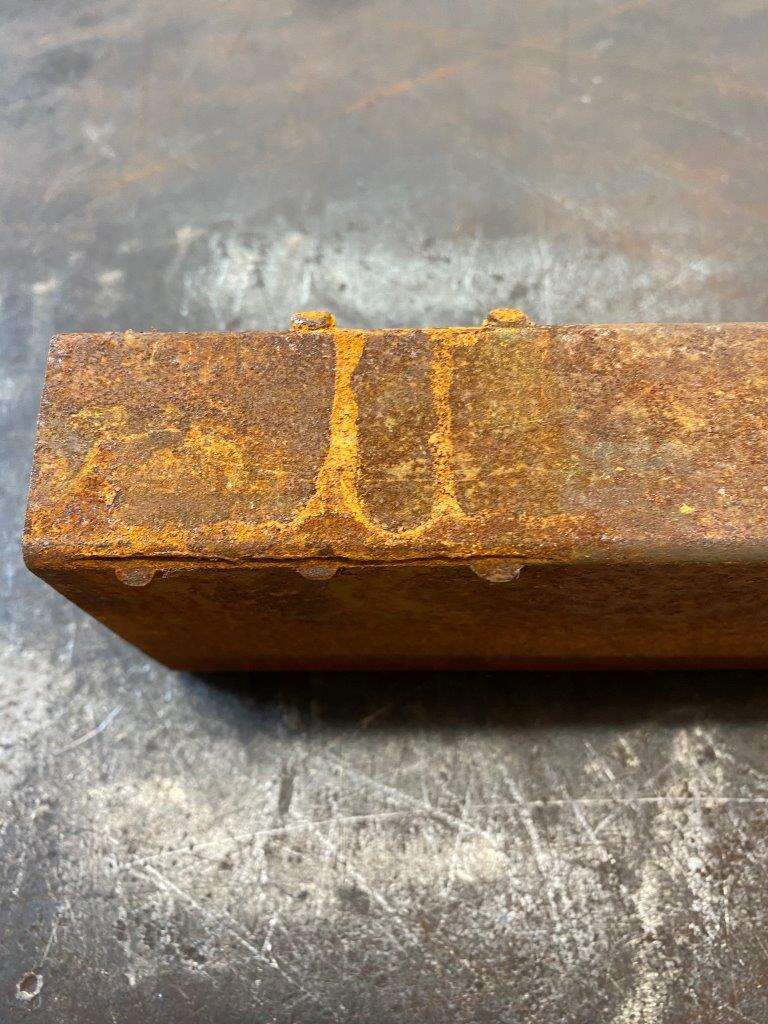
So I found a piece of flat bar close to the dimensions I needed – may be a bit long though
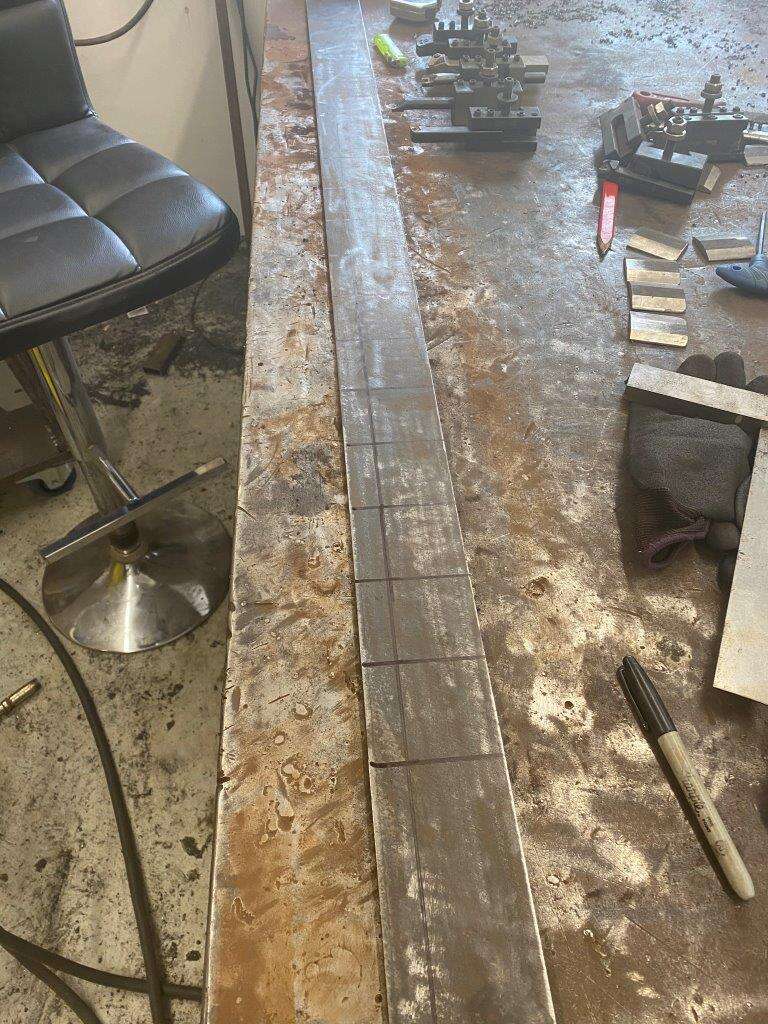
Cut some short lengths so I can get them in the Mill
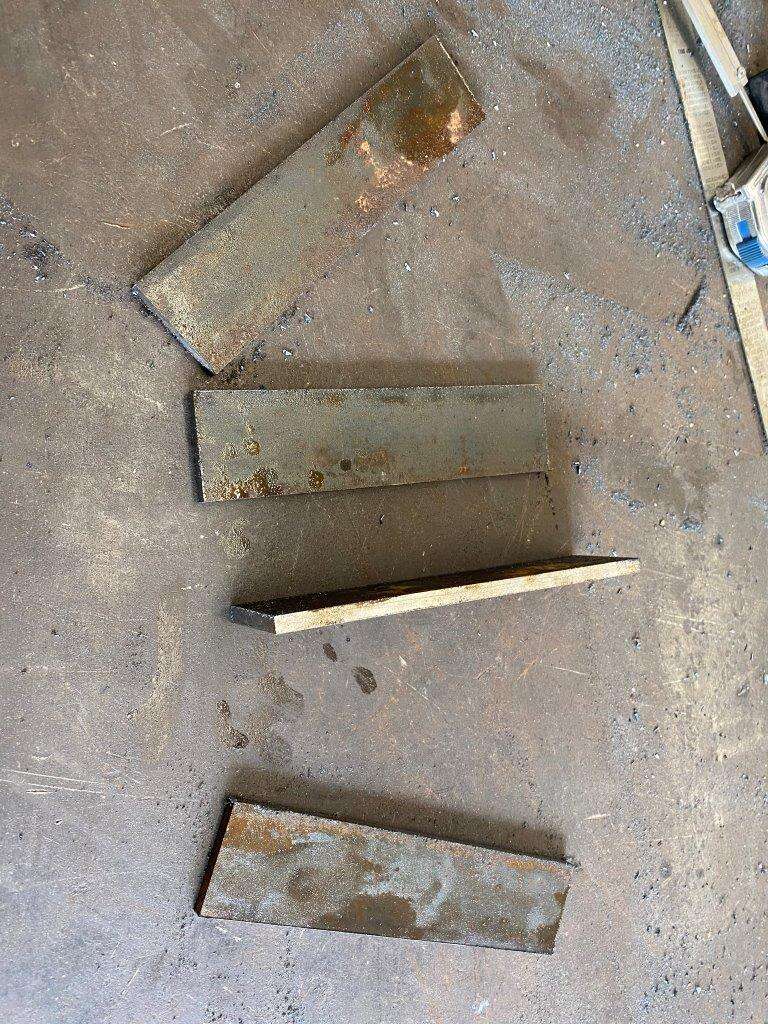
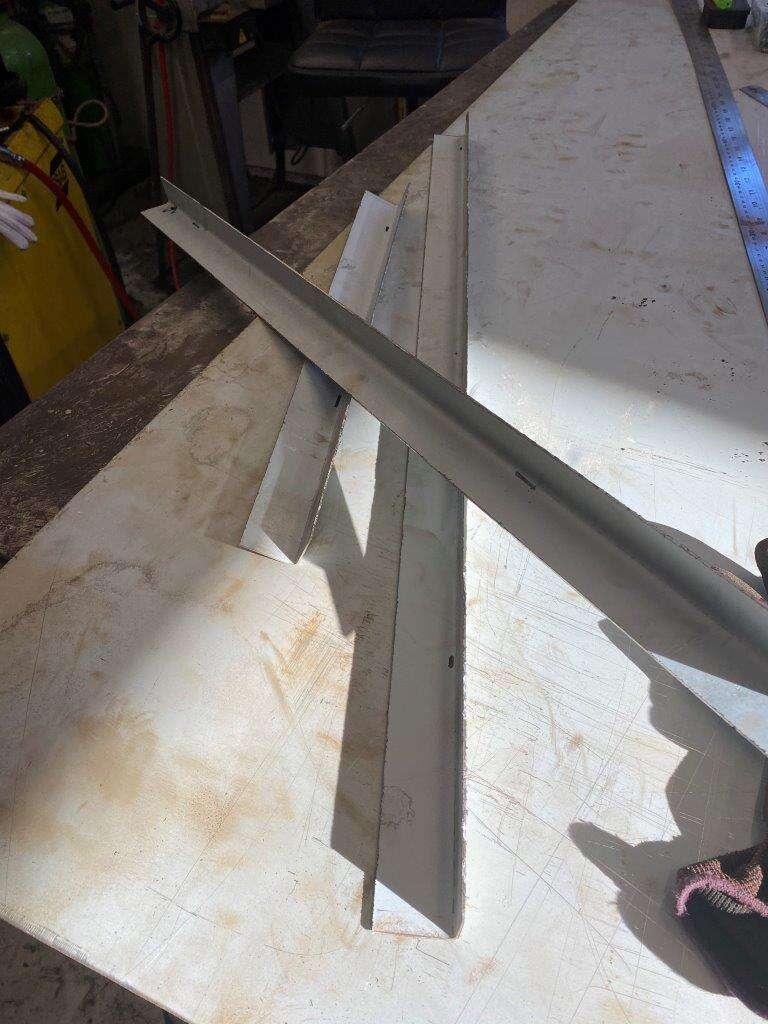
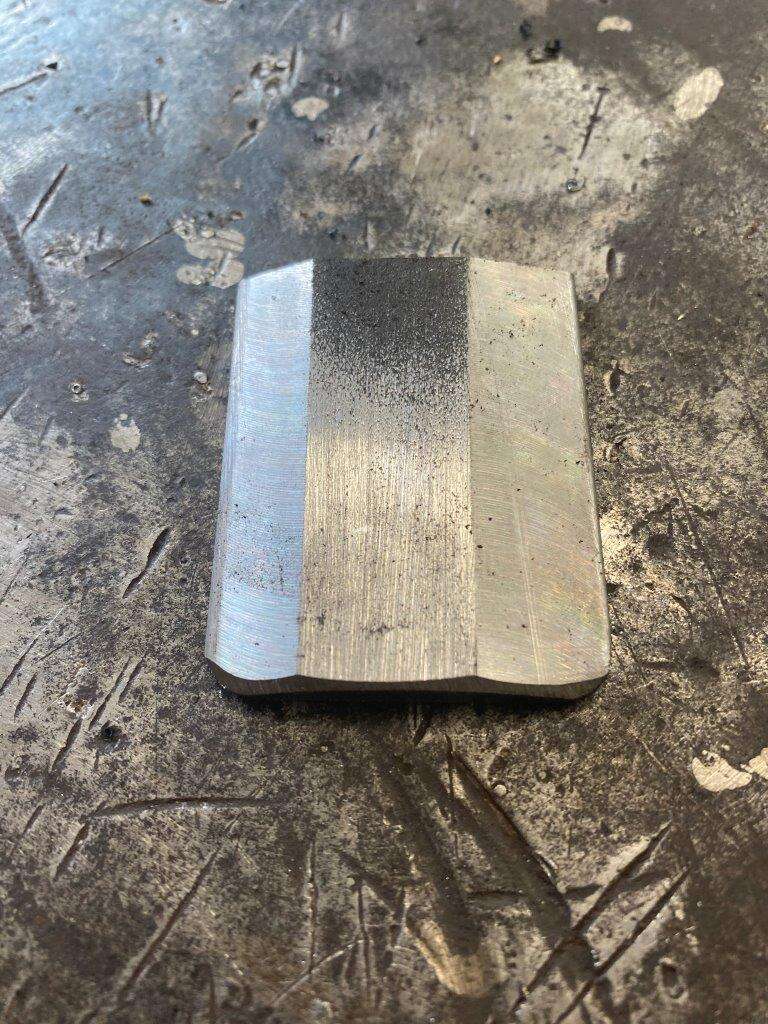
Angle faced two sides

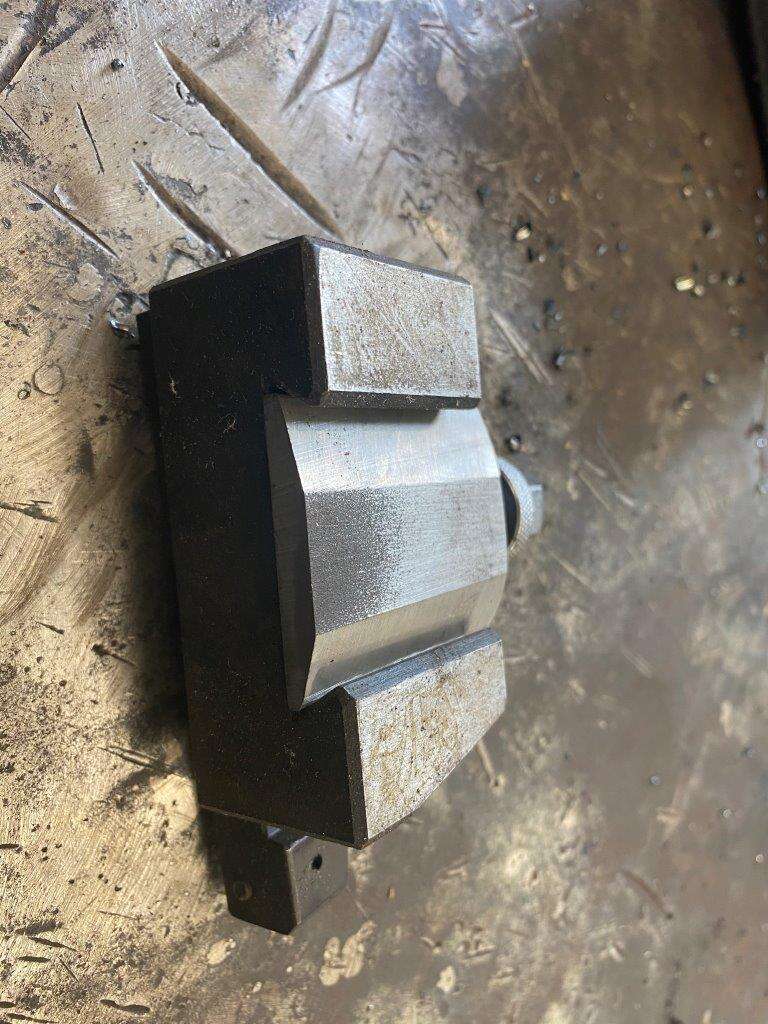
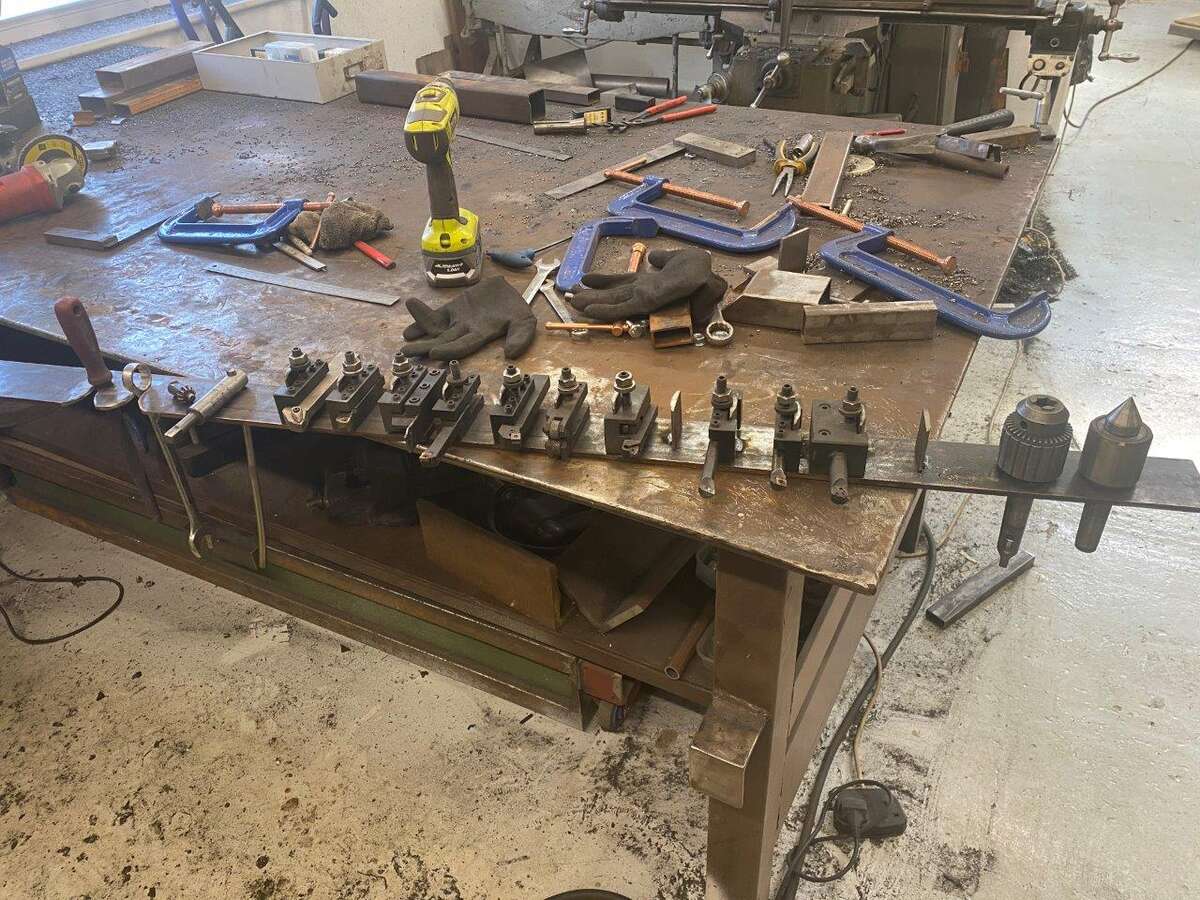
These will now fit into the slots on my Quick Change tool holders on the lathe
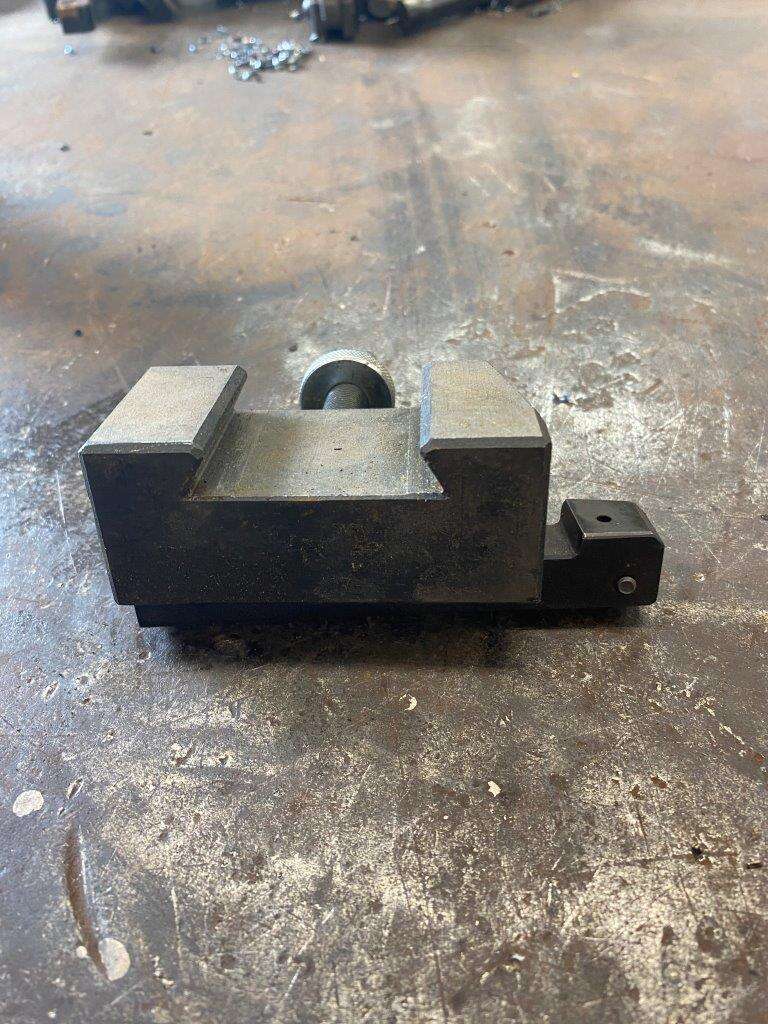
Like so
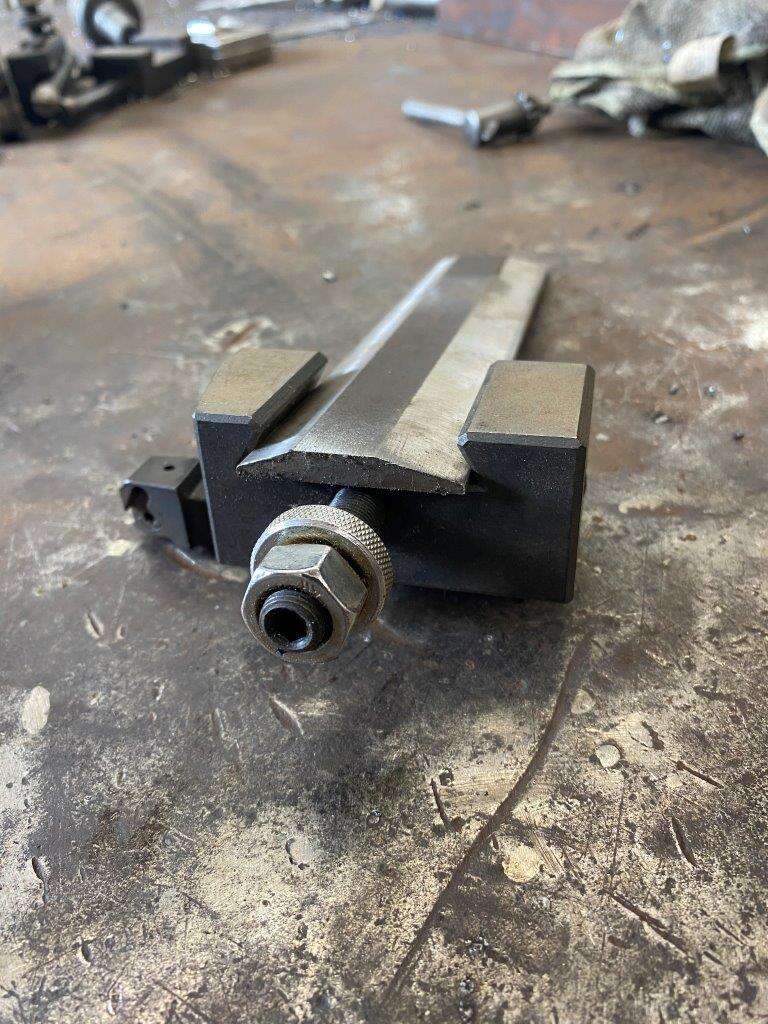
Cut to the correct size
Then another bit of flat bar
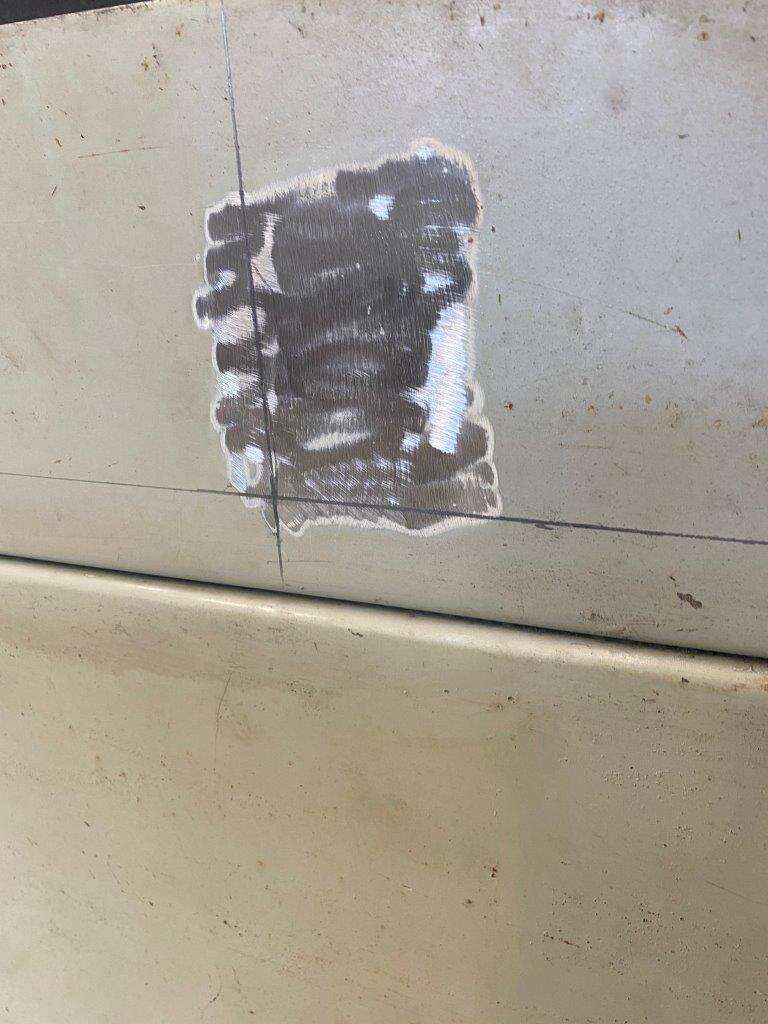
Cleaned up and marked out (getting bored of cleaning rust of steel! )
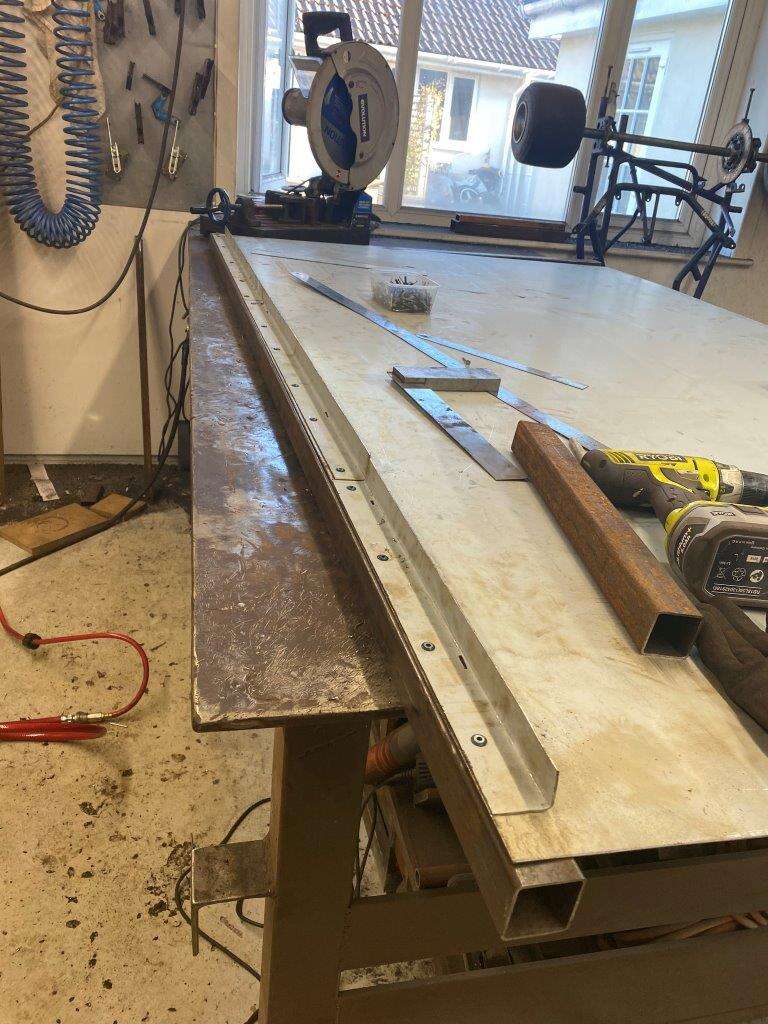
Welded the holders on
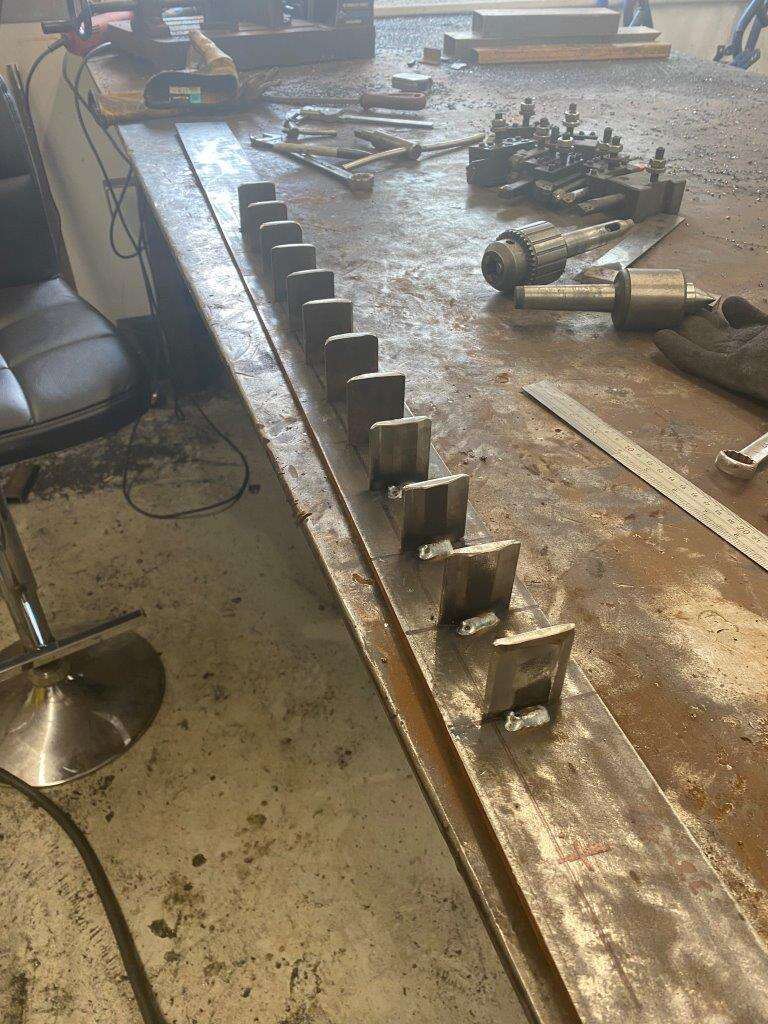
Then some holes
Cut outs
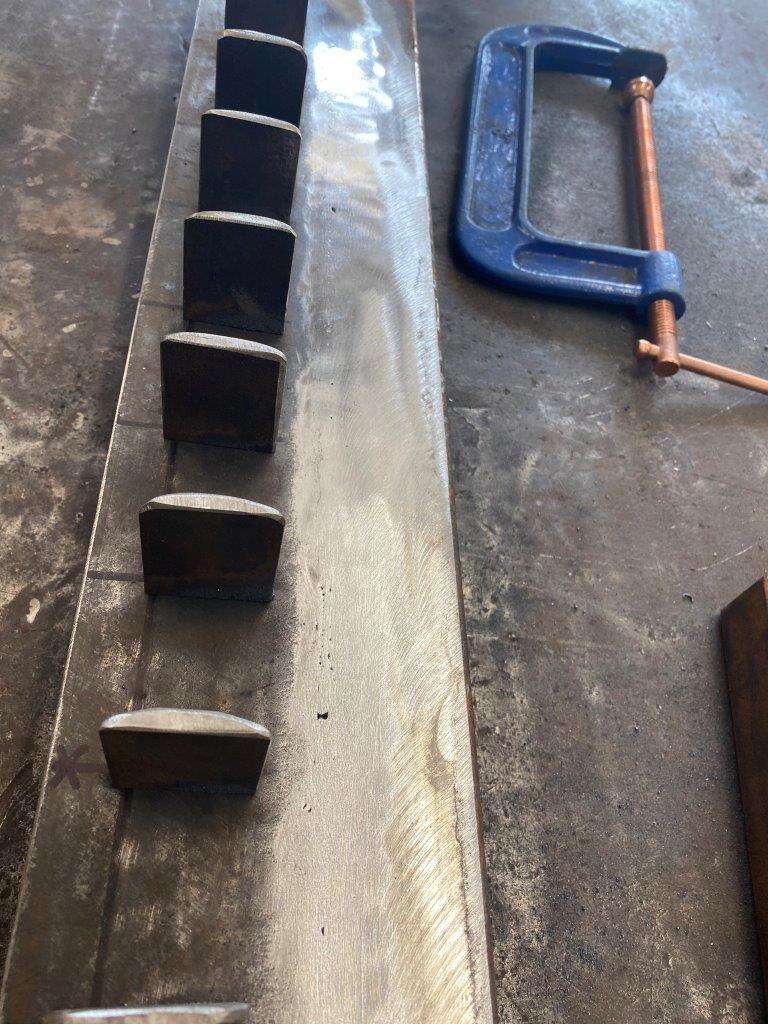
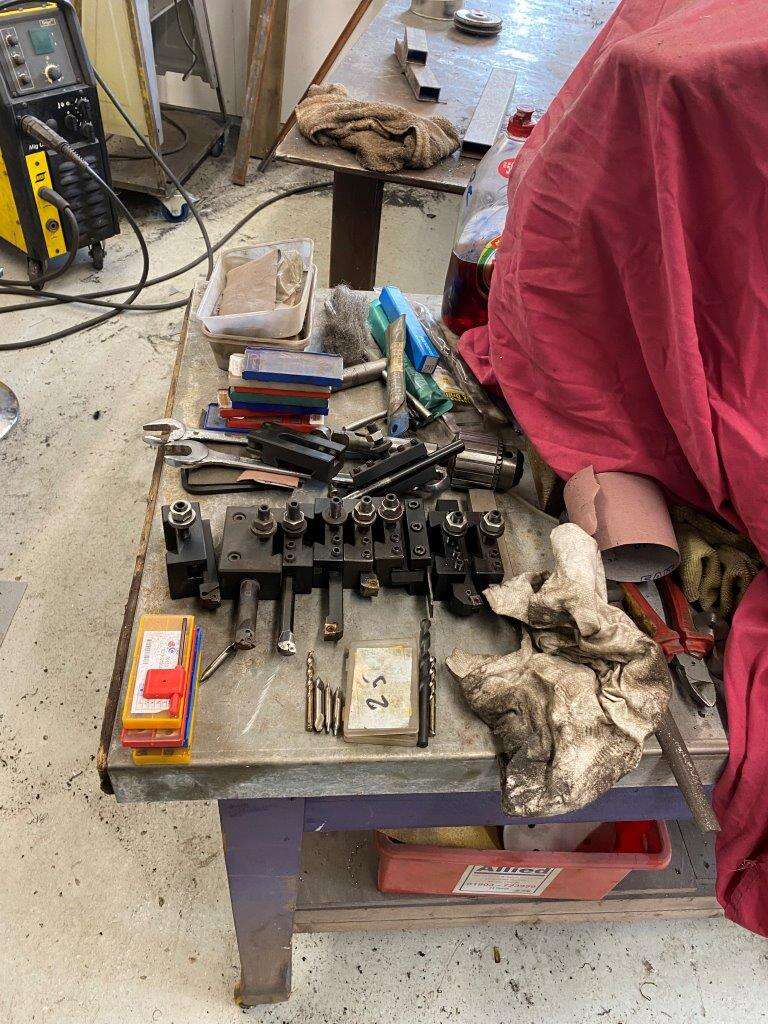
For additional tools I always keep on the lathe

To get this complete rack
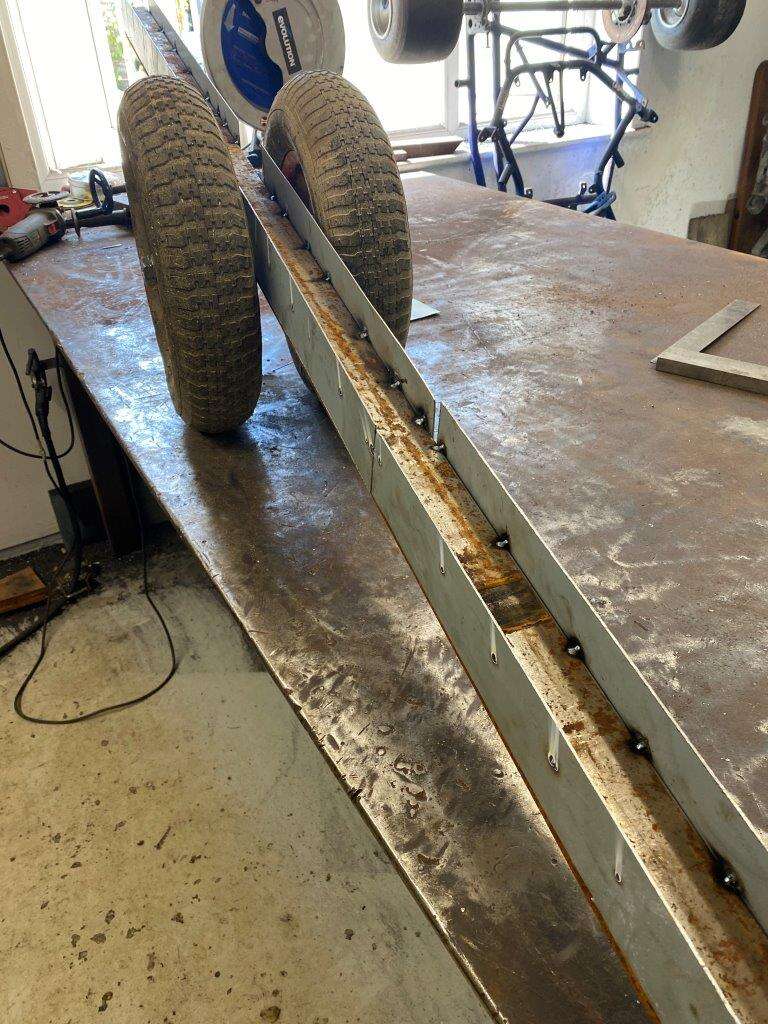
Now I need to join it to the cross bar

And sand back the weld of course
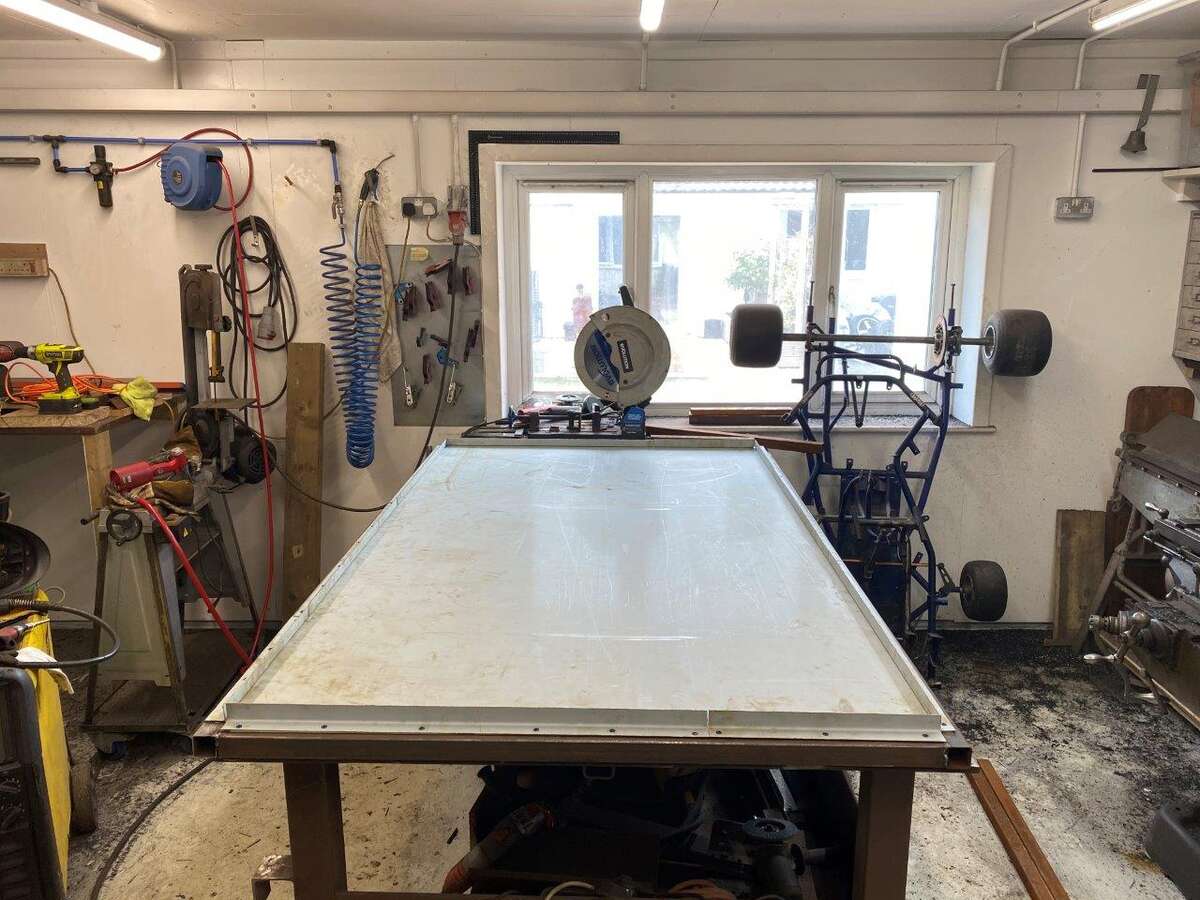
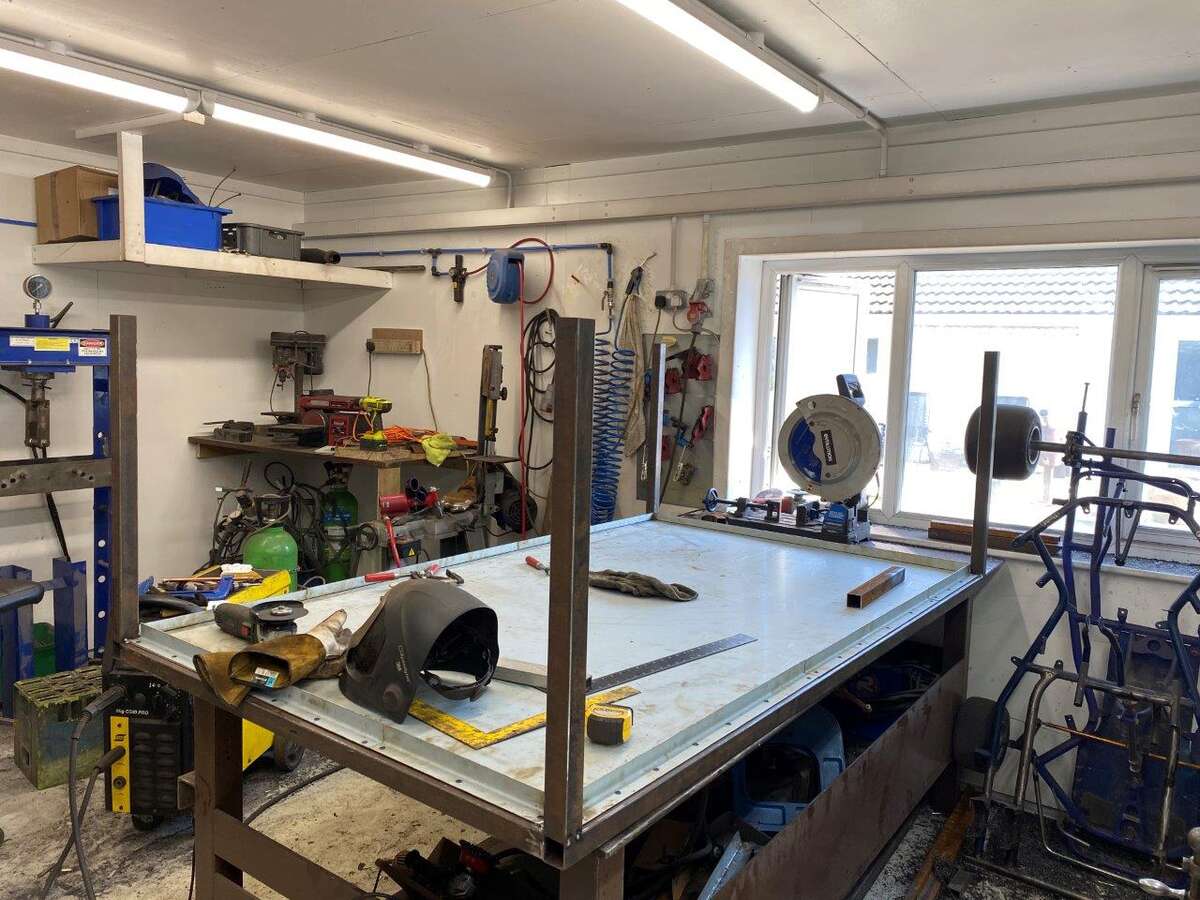
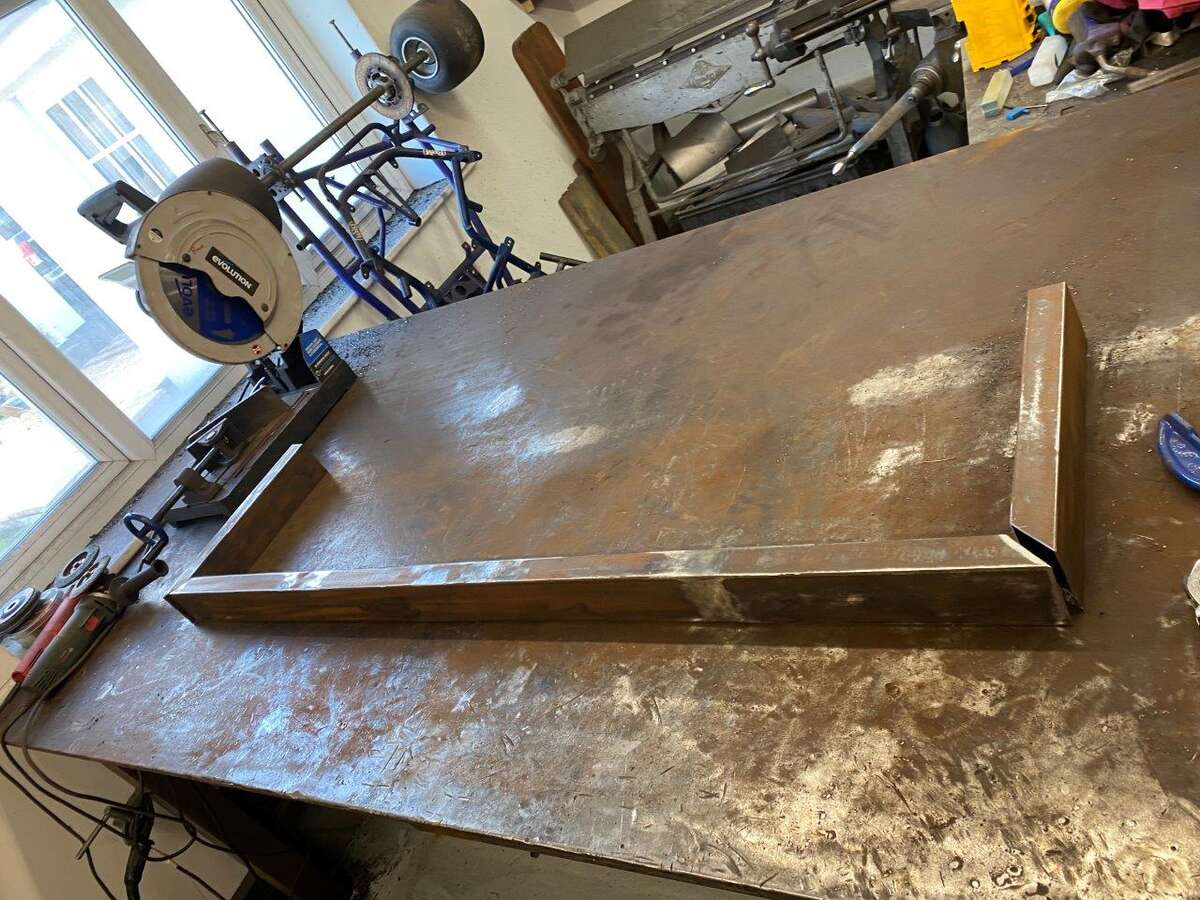
That’s it for now, I have 2 more jobs before I can continue, I want to fit the light but it hasn’t arrived yet and I did want to powder coat the shelf. Now as soon as I extended the shelf to the full width of the lathe I knew that would be an issue as this is my powder coat oven
This is the shelf

So looks like paint will be the covering of choice then
New Project blog starting tomorrow, the lathe will be on hold until I setup the spray booth and the light fitting arrives.
Be Safe!
Keyser - “Light travels faster than sound. This is why some people appear bright until you hear them speak.” – Alan Dundes
-
4
-
1
-
-
Morning,
Just a quick short and not very interesting update today, work is starting to come back so less time to play, already booked out all morning today, I thought I’d get a quick post up before I head out though.
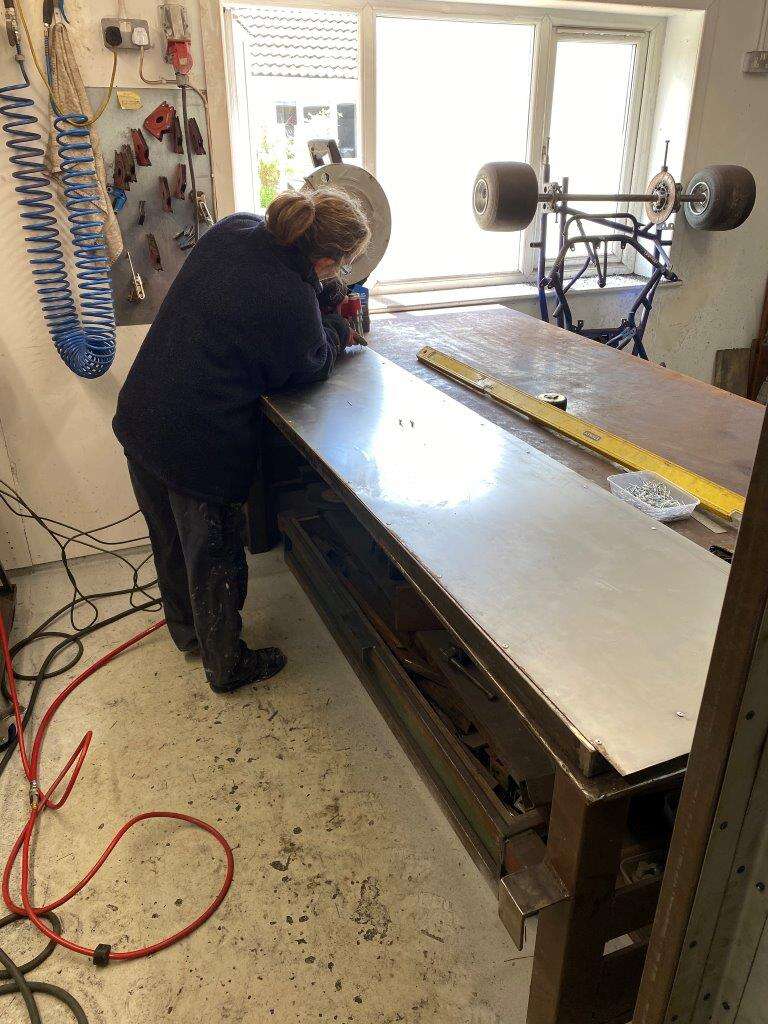
I welded the shelf up
Added the top – 3mm Plate so it is ridiculously heavy

Had to use 2 bits and stich weld them together
Then just because I could I decided to blend the join from frame to top so after a bit (read A LOT) of welding and some time (read stupid amounts) sanding I made it look like this
Good practice for body work and show pieces
Put some primer on the mounts
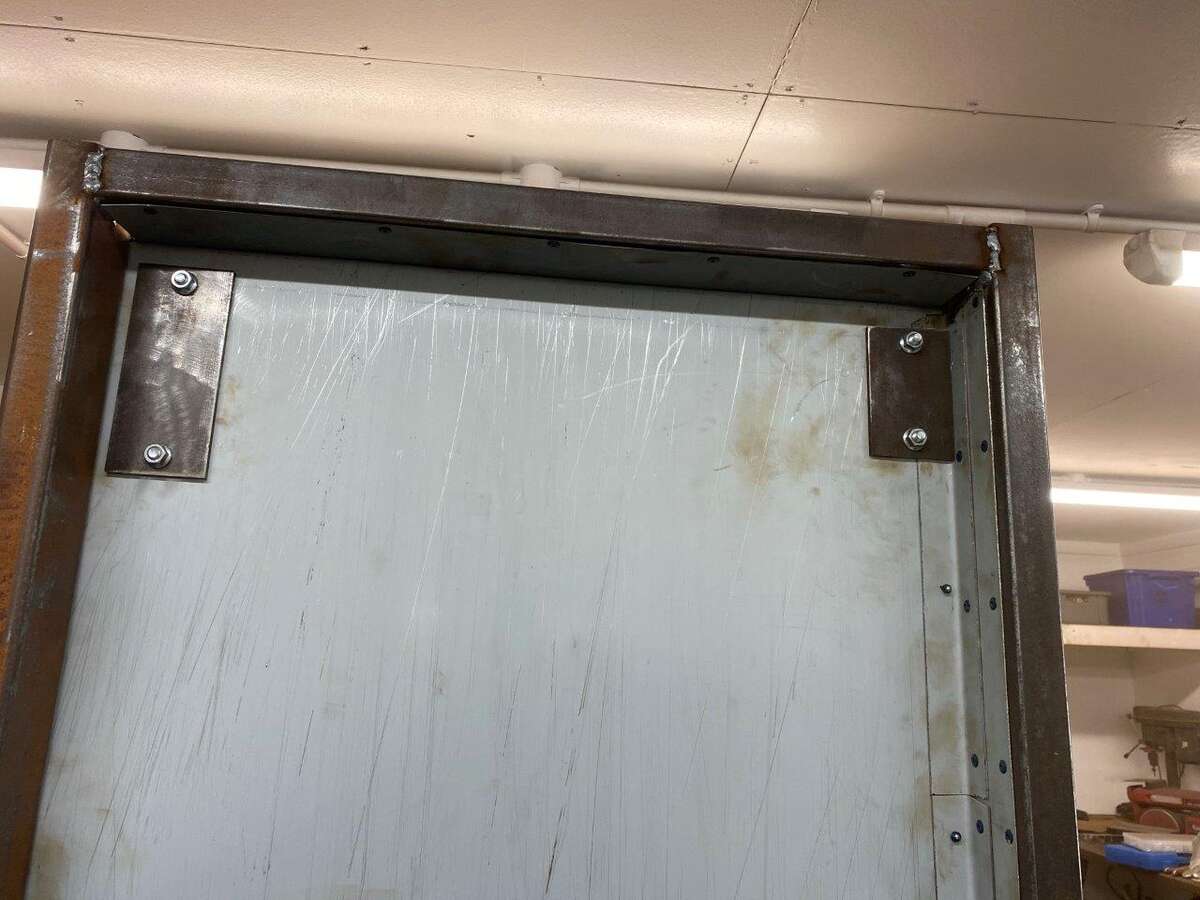
Lined up the shelf supports
Drilled and bolted
Gets the shelf to here
Added these bits of angle as the shelf is so bloomin heavy
Captive nuts of course
Shelf and mounts
Mount mounted
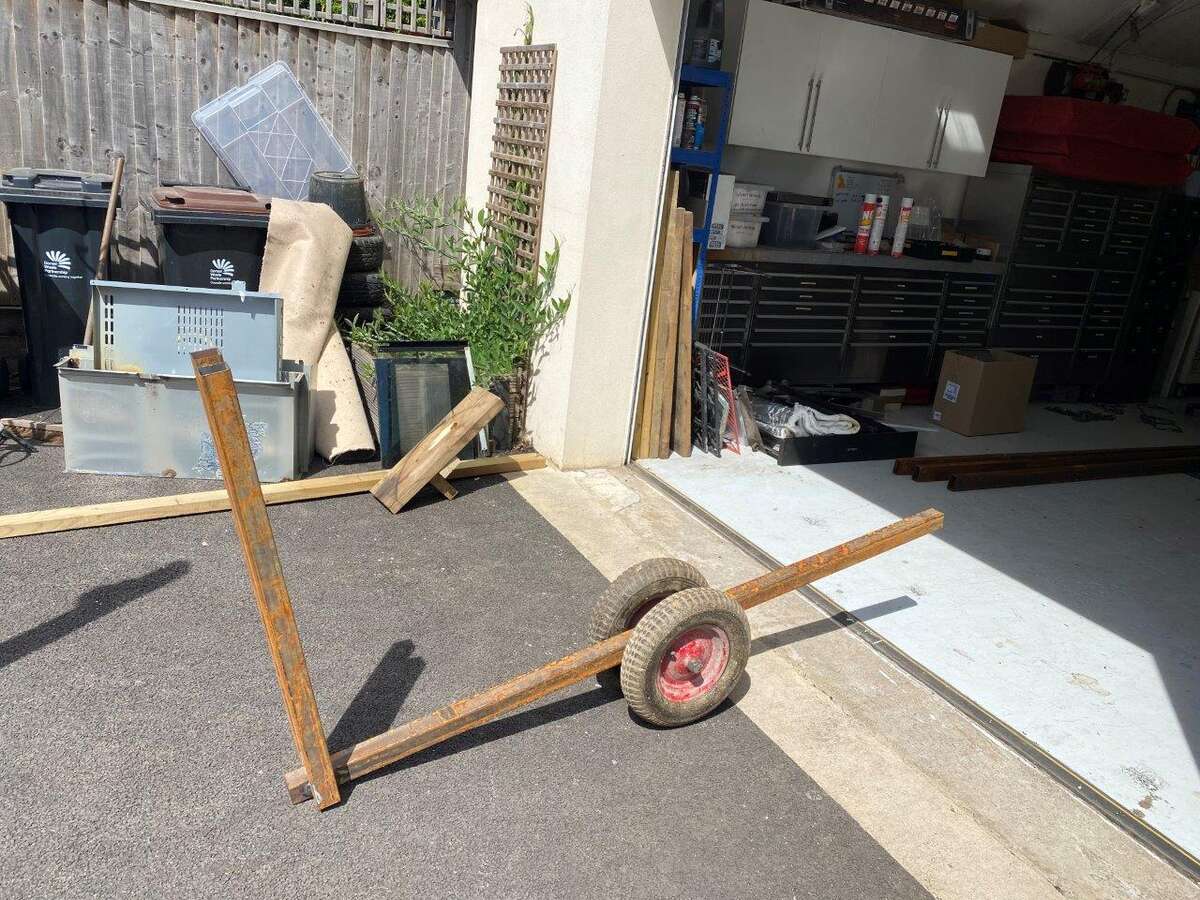
On a side note I made a part for my mates trailer I did post a pic a while back – when he asked me to make it I said angle iron would be stronger but he asked for it in flat bar,
He sent me this pic
Not saying I told ya so, but I told ya so,
Remade
And some paint
Stay safe
Keyser - “The best thing about the future is that it comes one day at a time.” – Abraham Lincoln
-
5
-
-
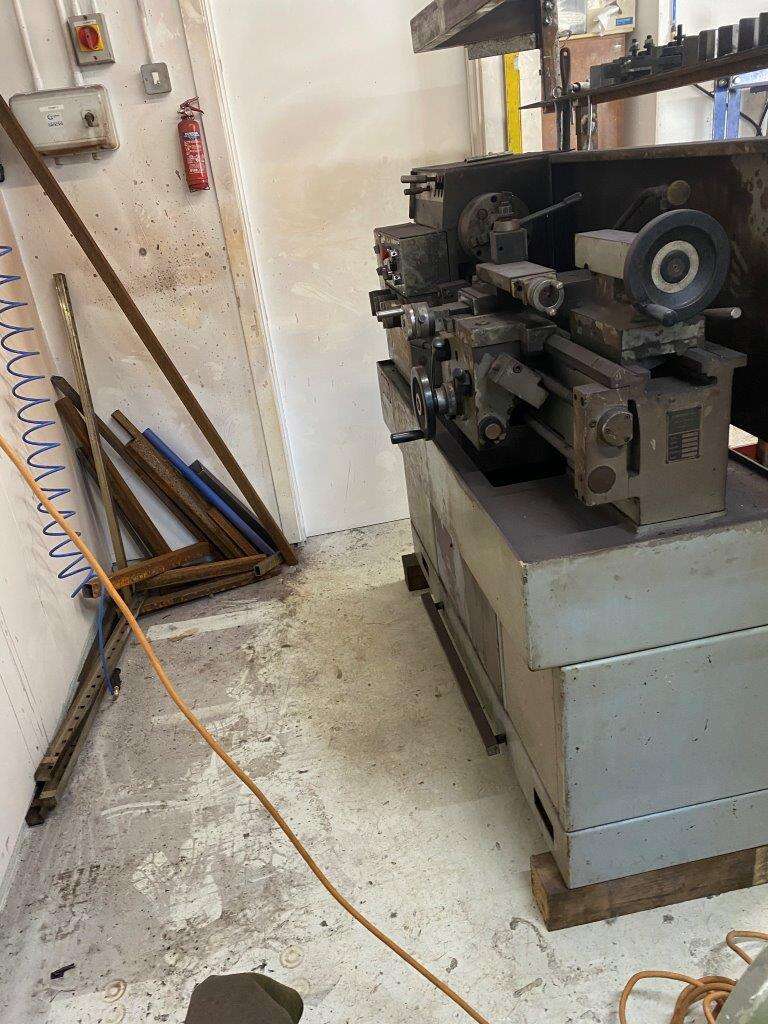
Morning chaps and chapets,
After the recent success of the sand blast media vibrator we need another project, I was supposed to be moving on with The Bug build but as I mentioned earlier in the blog the lathe happened.
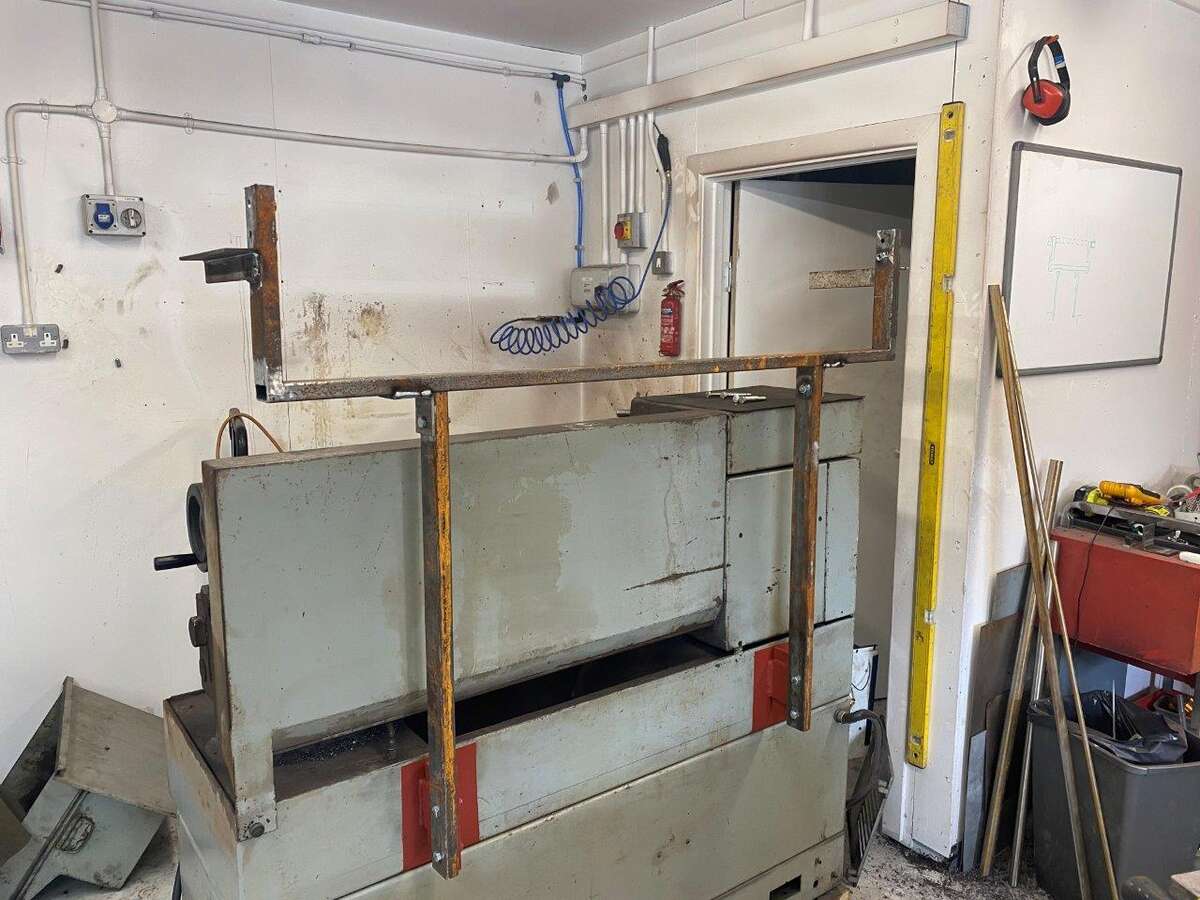
I was having my usual tidy up after finishing one project ready for the next and I thought I’d sort the shelves above the lathe, so I cleaned them all up leaving this
This is what is usually on them (along with loads of other crap that just gets laid on them
) 3
I have always thought I should make a tool holder for all my bits so I don’t have to keep searching for the right one, I have also been meaning to put a light above the lathe as it is always dark, this is exacerbated by standing in front of whatever you are working on and in doing so blocking what light is available. I was going to just screw an LED light to the bottom of the lower shelf but it is not quite deep enough so I thought I would put up a deeper shelf. First thing was to remove the old shelves
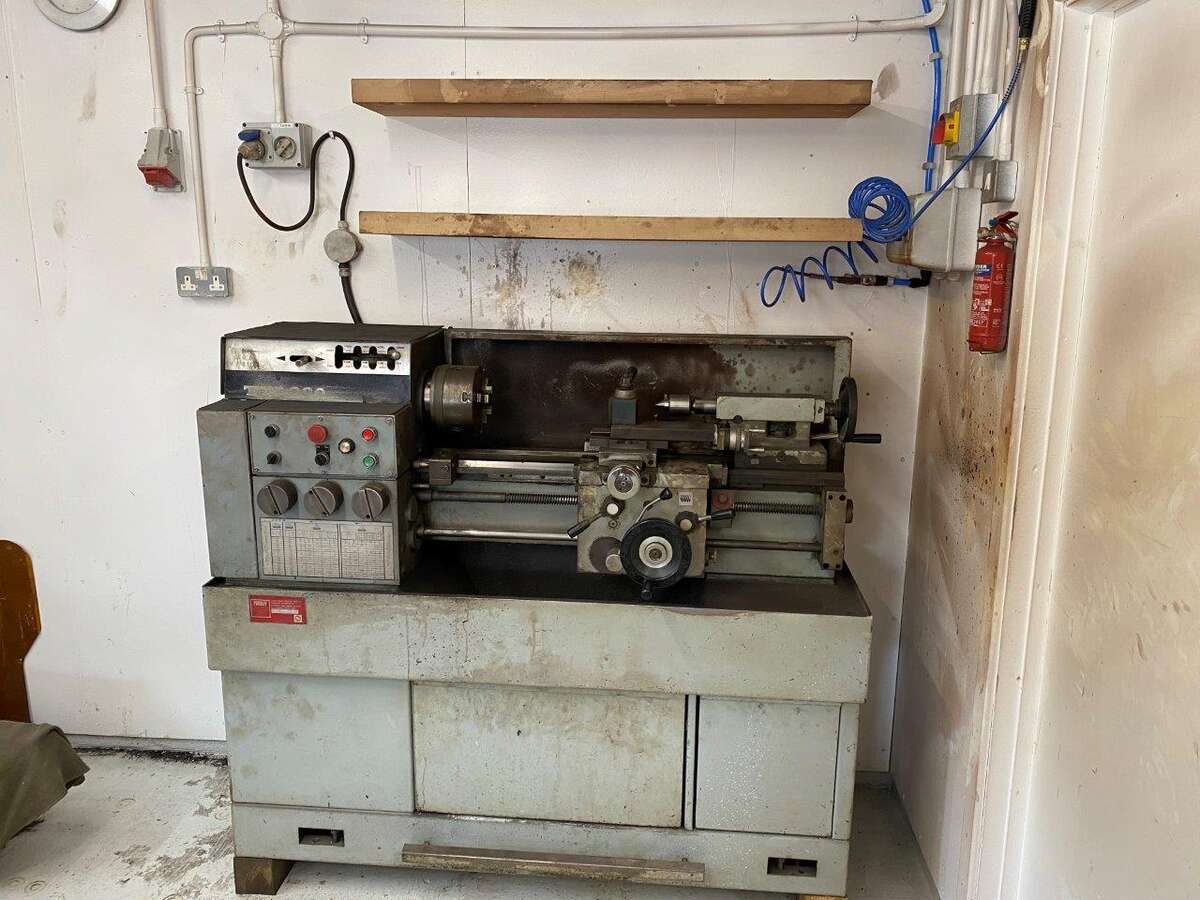
At some point I suddenly remembered that the guy I bought the lathe from did some great modifications including a conversion from 3 phase to single phase, a new control panel and he added a speed controller.
He also said he had put in wiring for lights and a coolant pump but never got around to fitting them as a pump wasn’t really needed and he had a light above the lathe anyway.
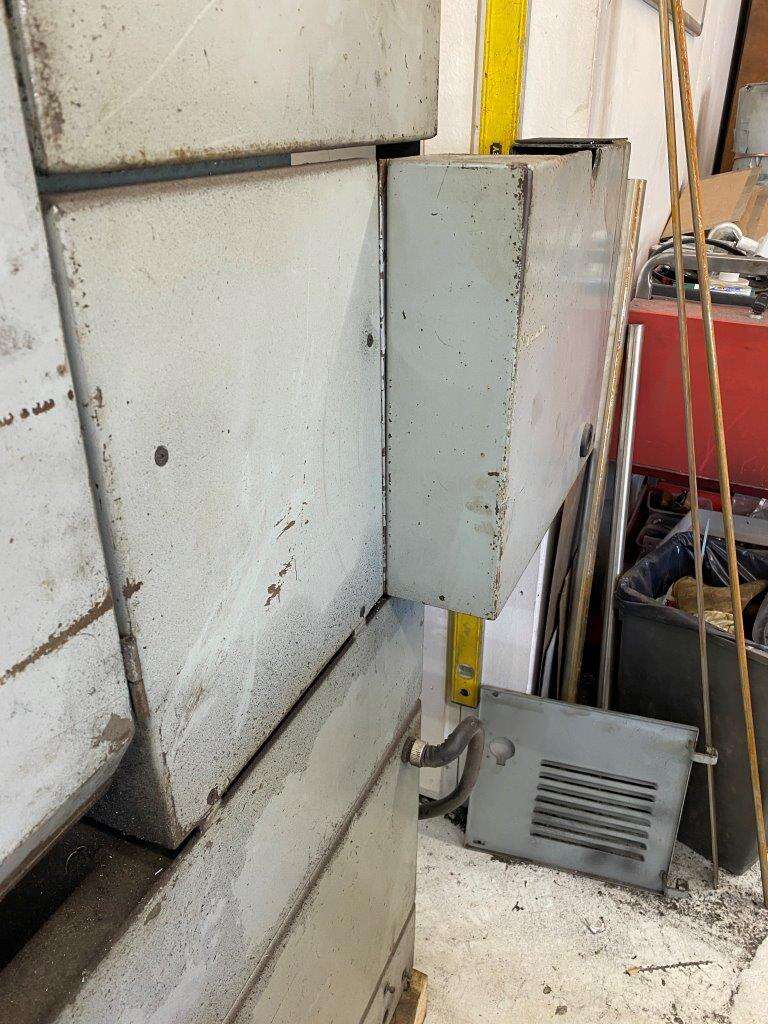
I have never bothered looking at what he did as it just worked but I thought it was time to take a look, so I pulled the lathe out
Removed the detachable back plate
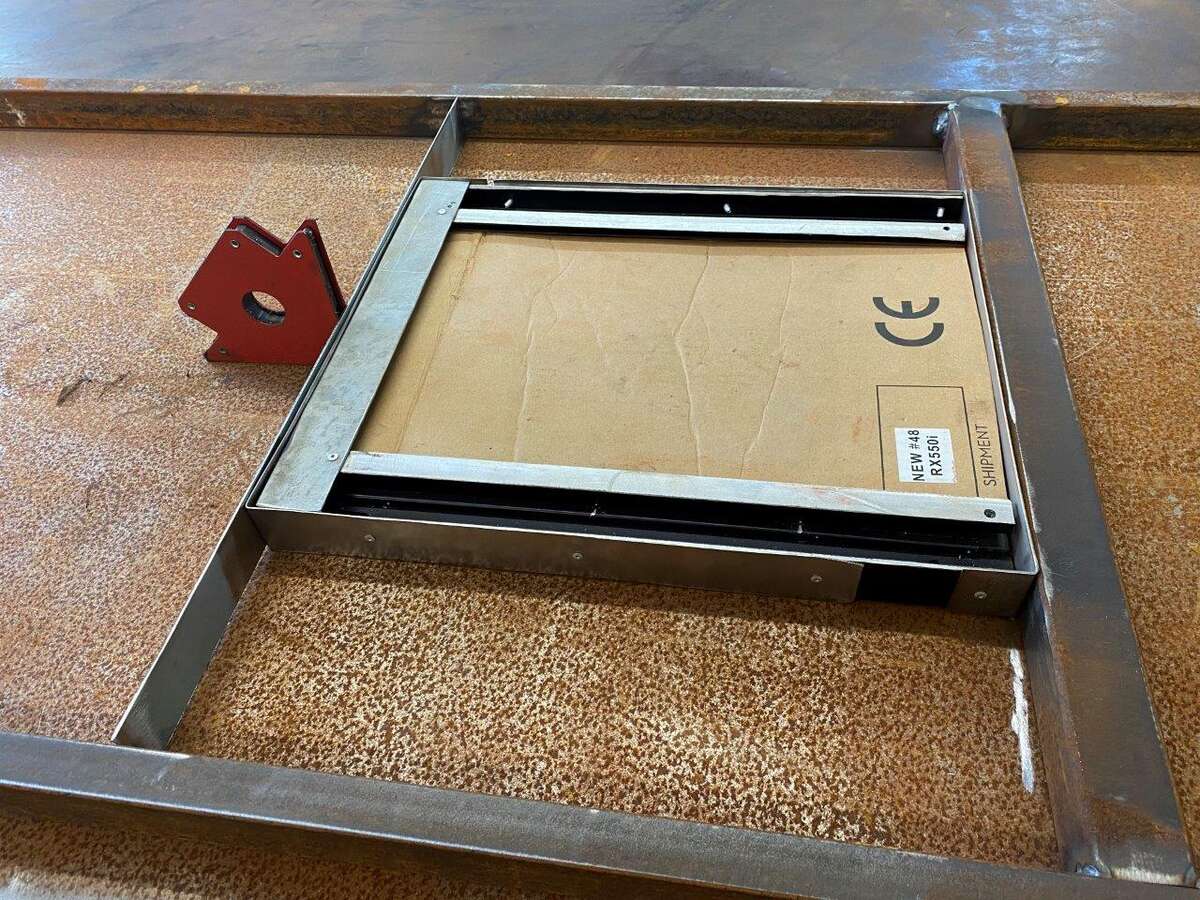
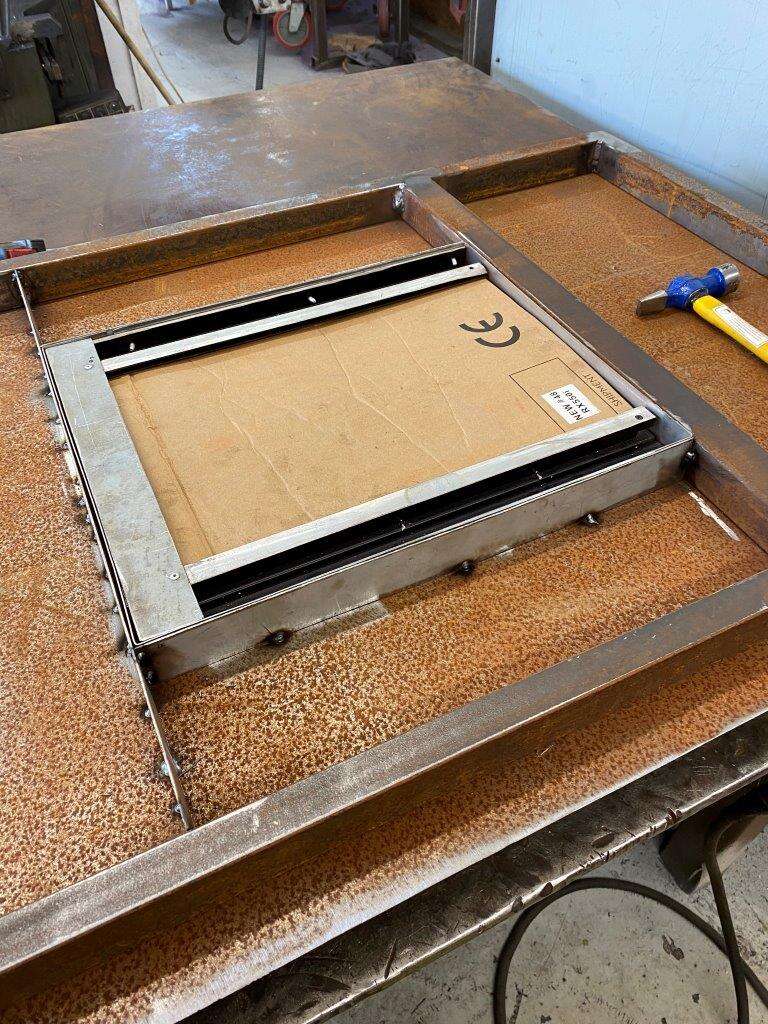
Found the wire for the light here
This is the control panel
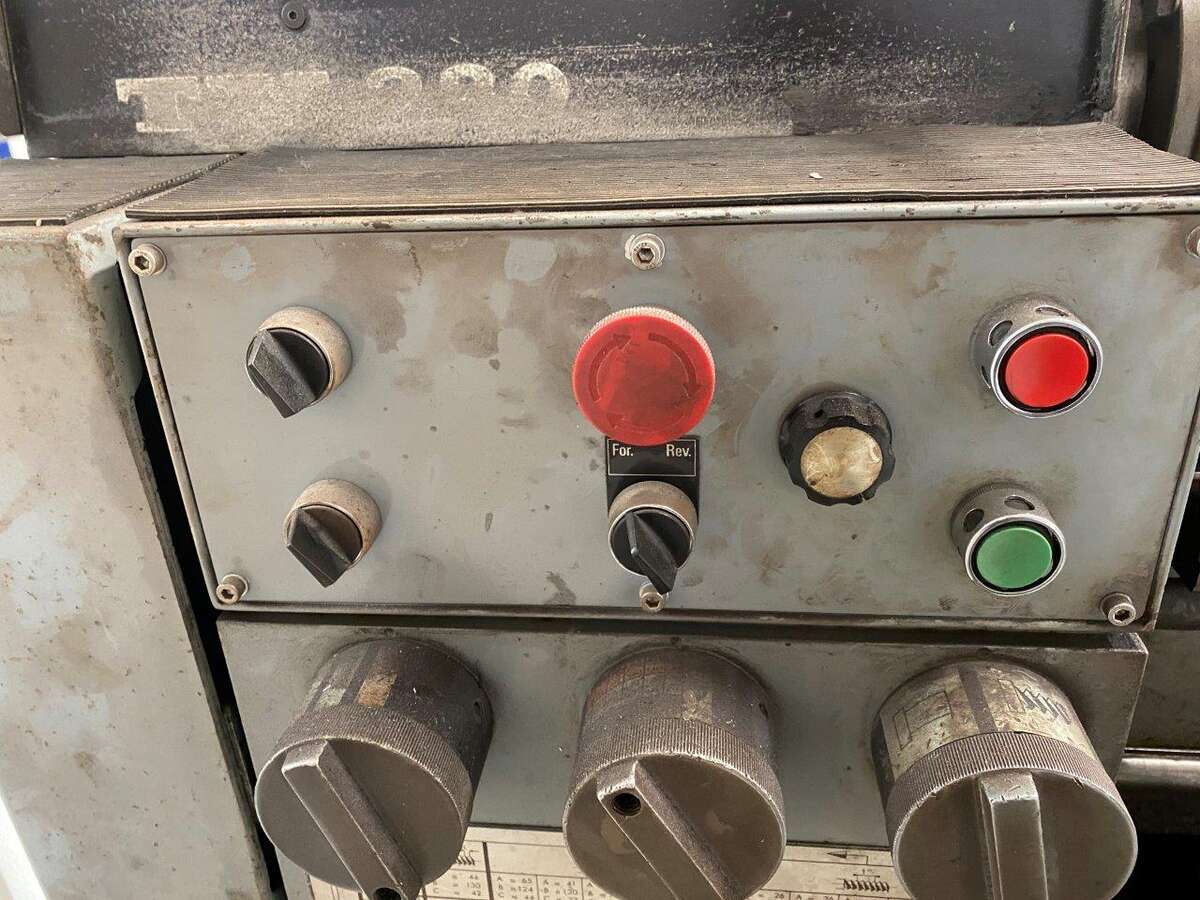
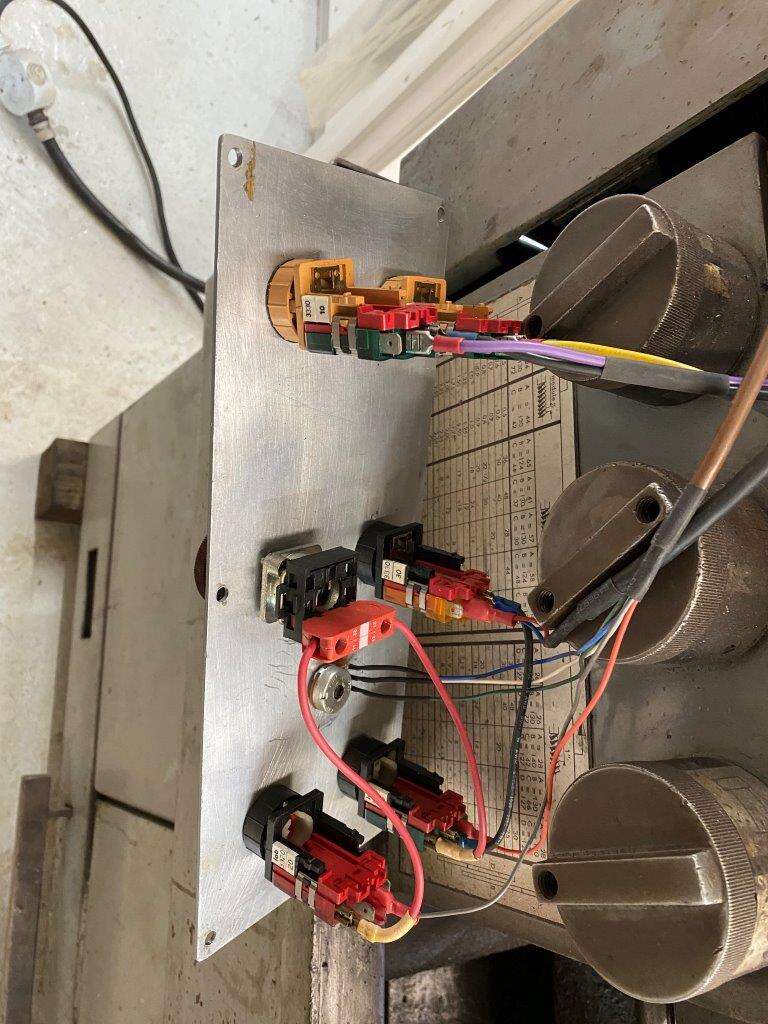
And the wiring inside
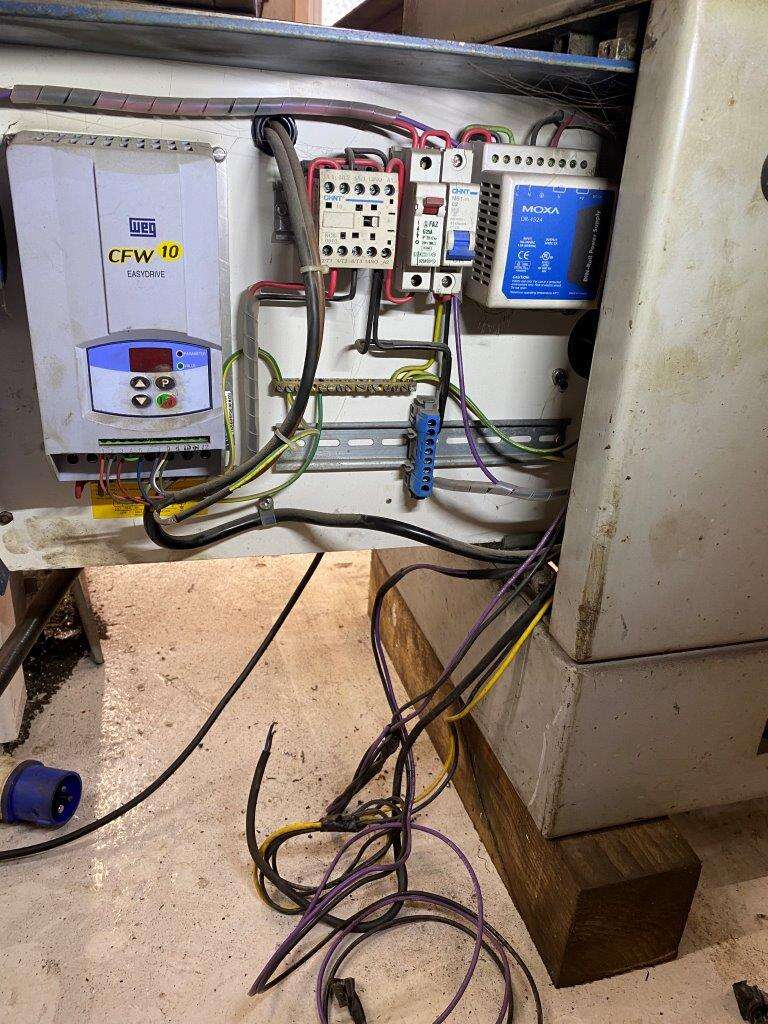
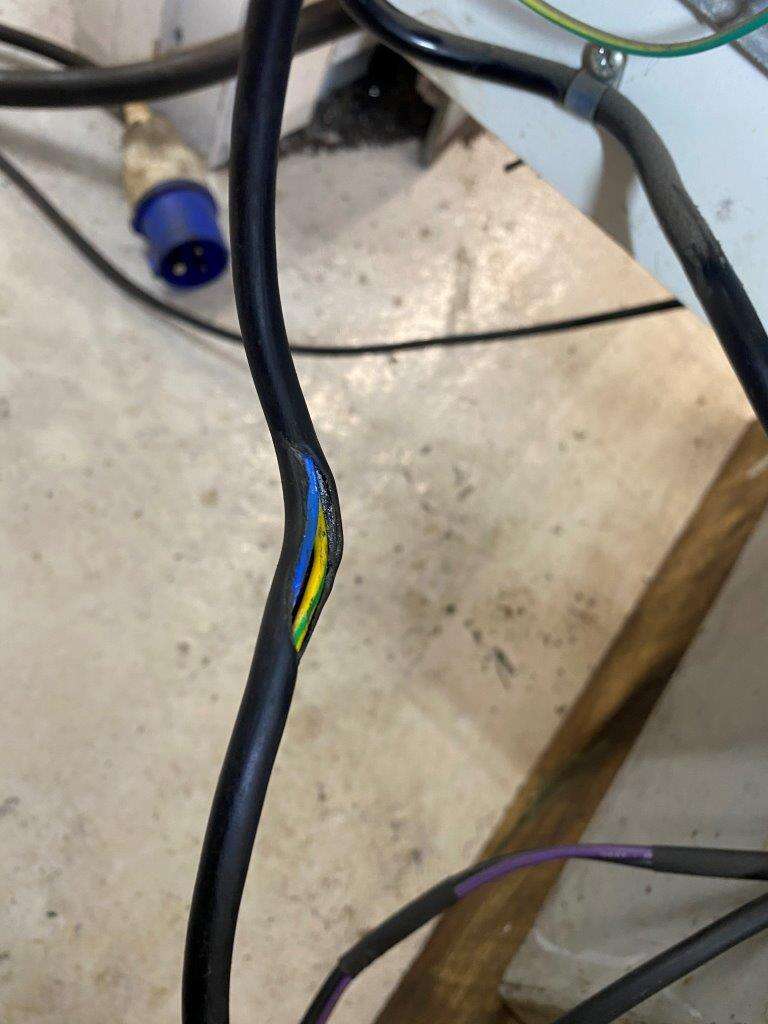
After some work with the multimeter I worked it all out and found some wires that need replacing before use
So the at this point the plan changed completely from a quick update to a complete refurb
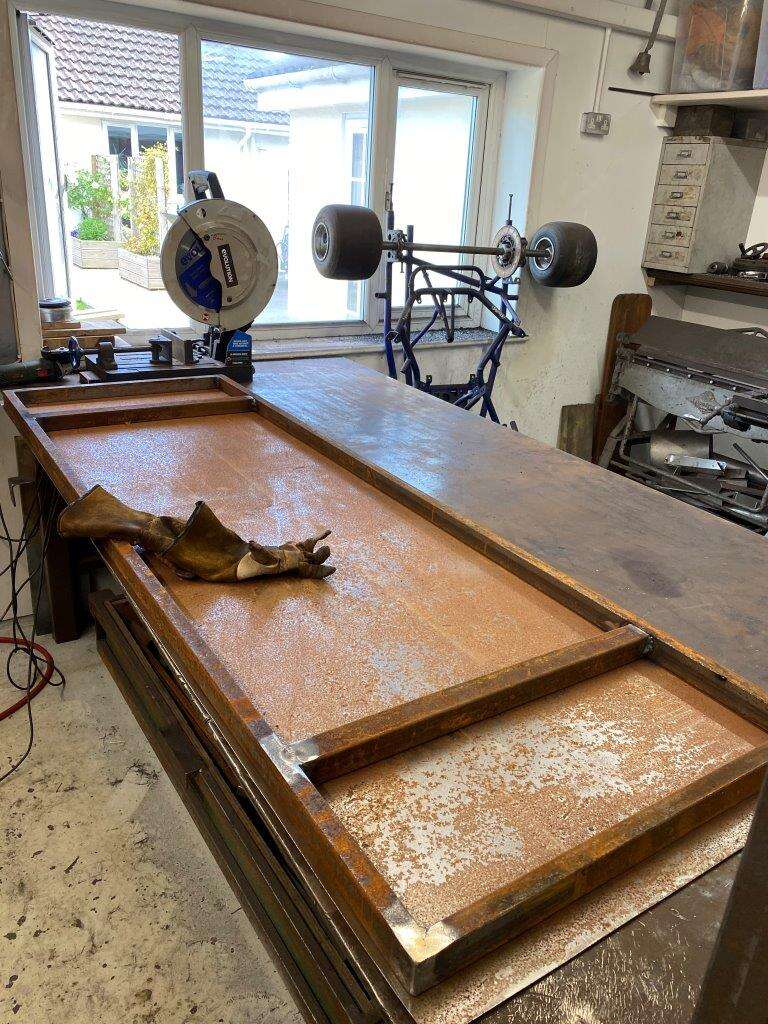
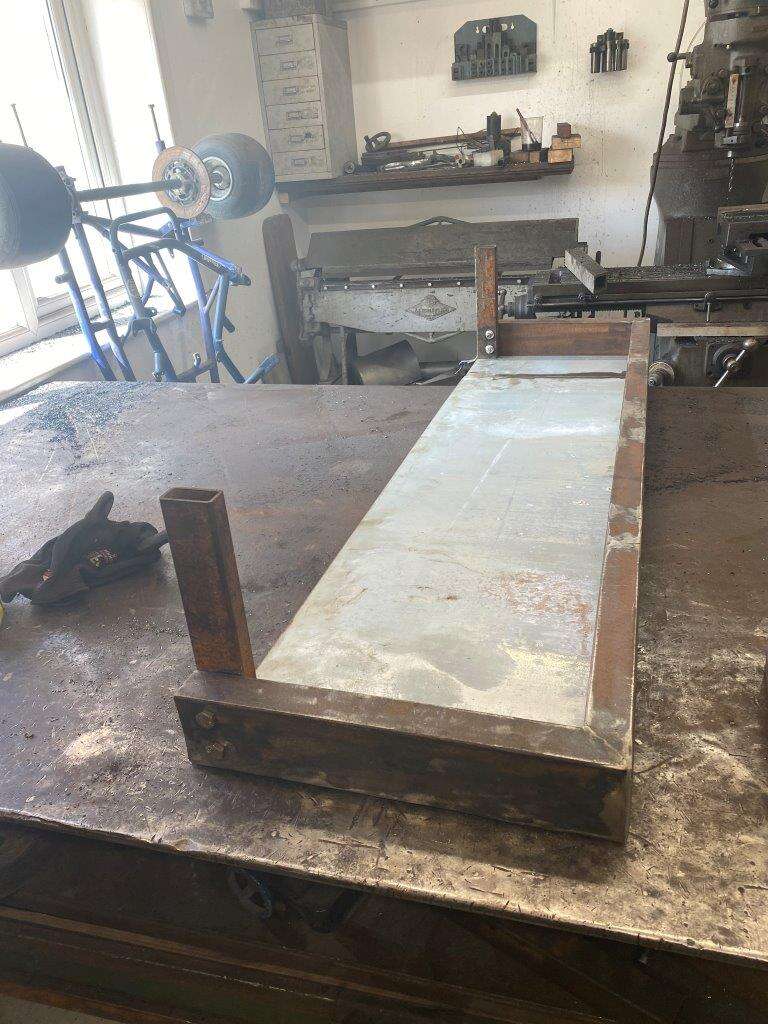
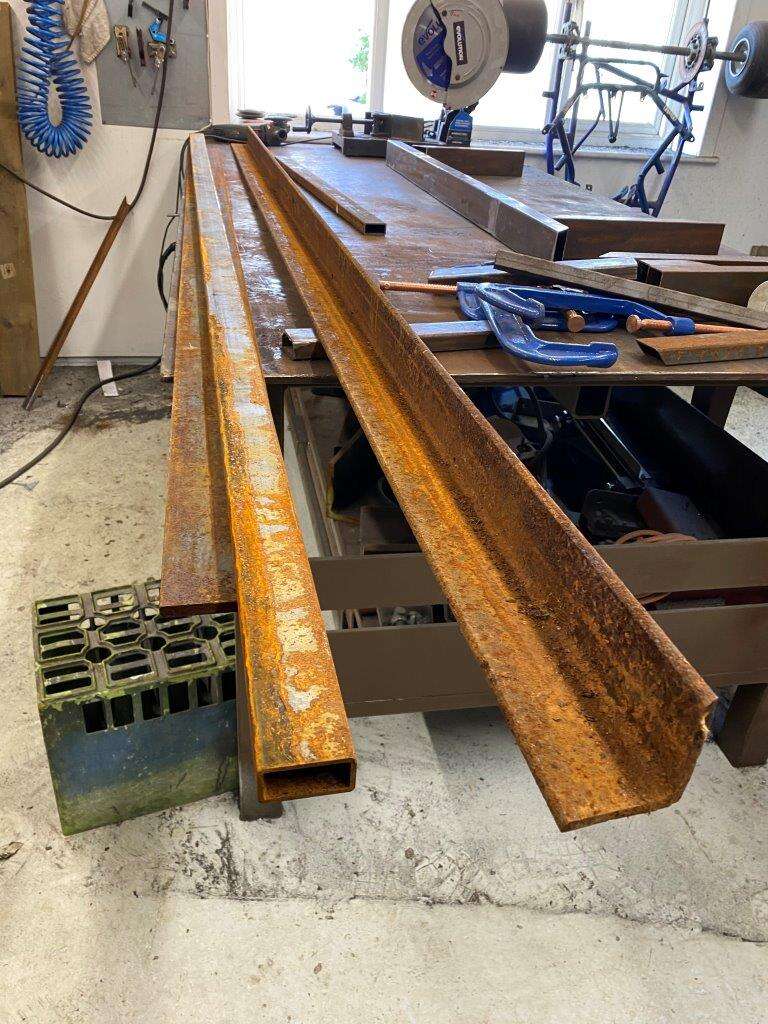
Firstly I needed to make a shelf
This box is the only thing I have with the right dimensions, it’s way to heavy for the job but I don’t want to spend money if I can help it and I have this just laying there going rusty
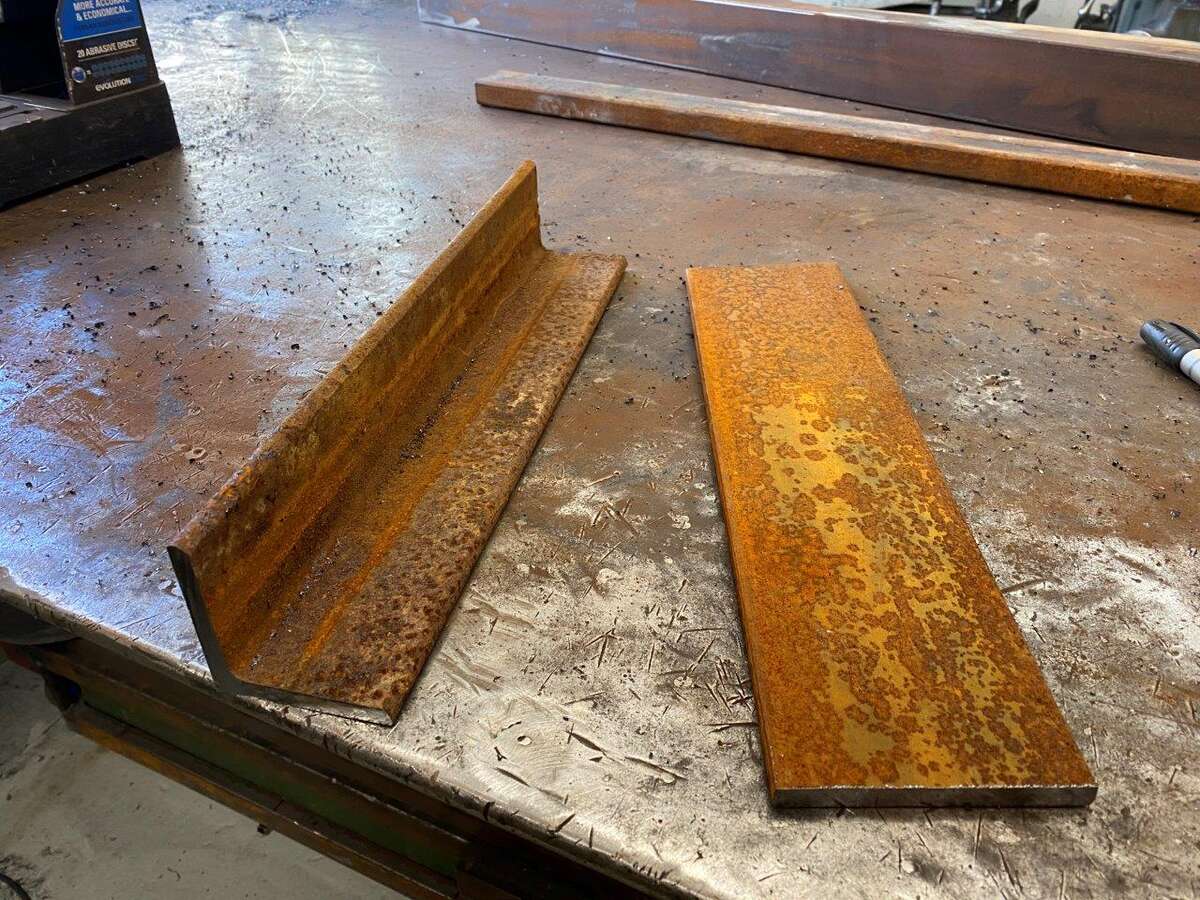
The only problem is it is not long enough so I squared the ends on 2 bits
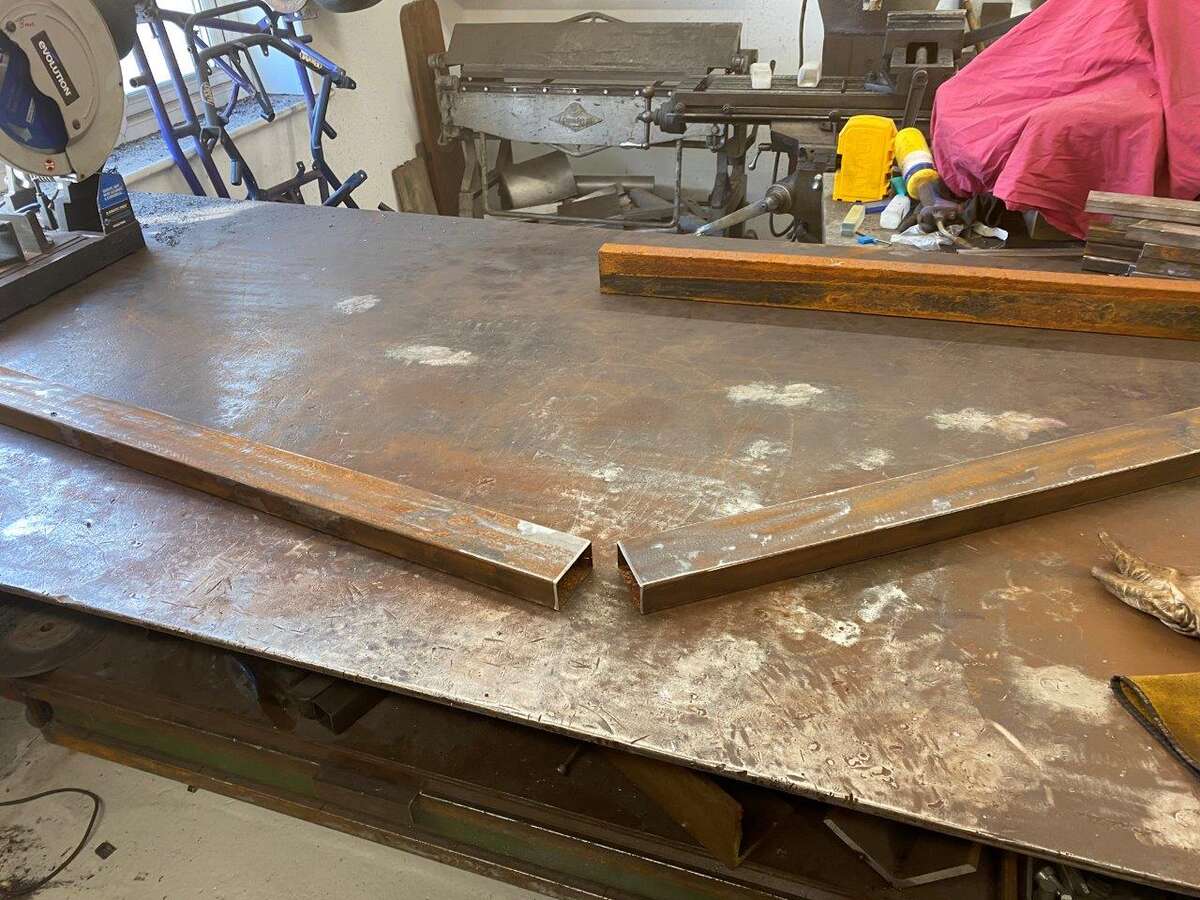
Chamfered them
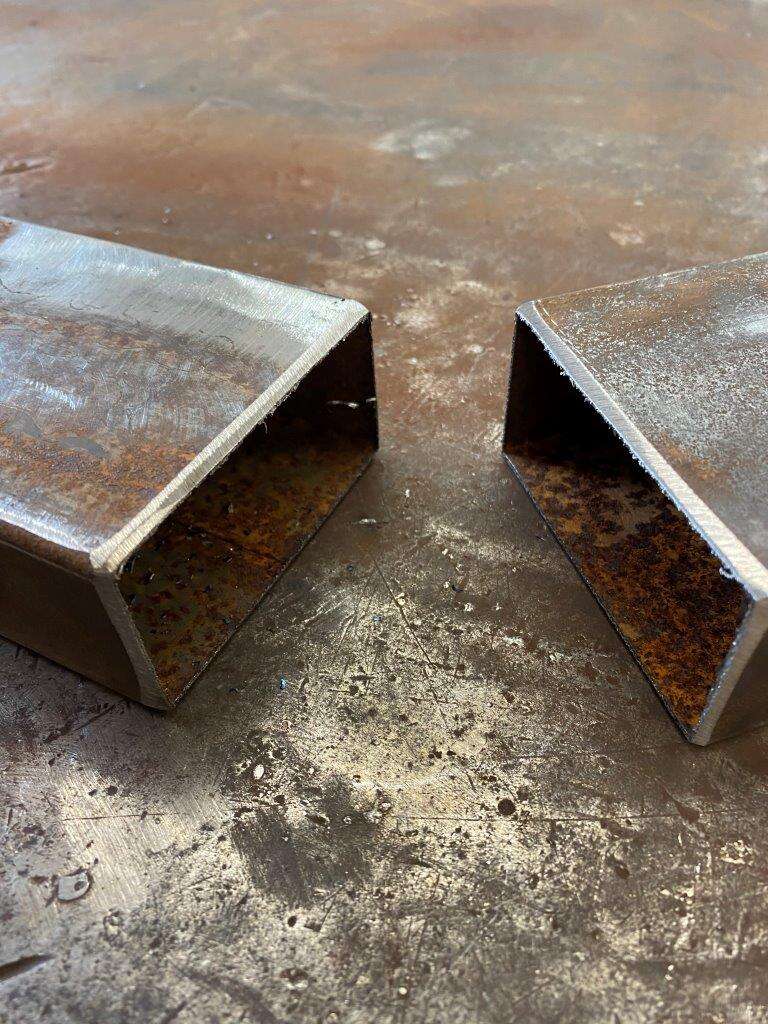
Clamped them with some large bits
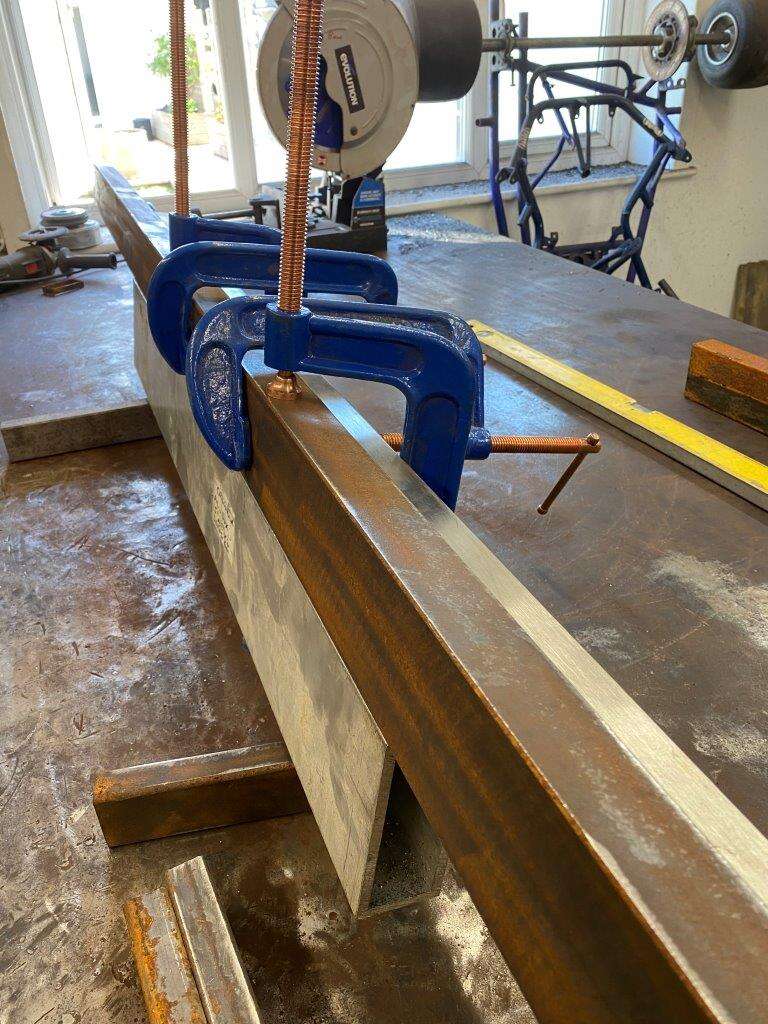
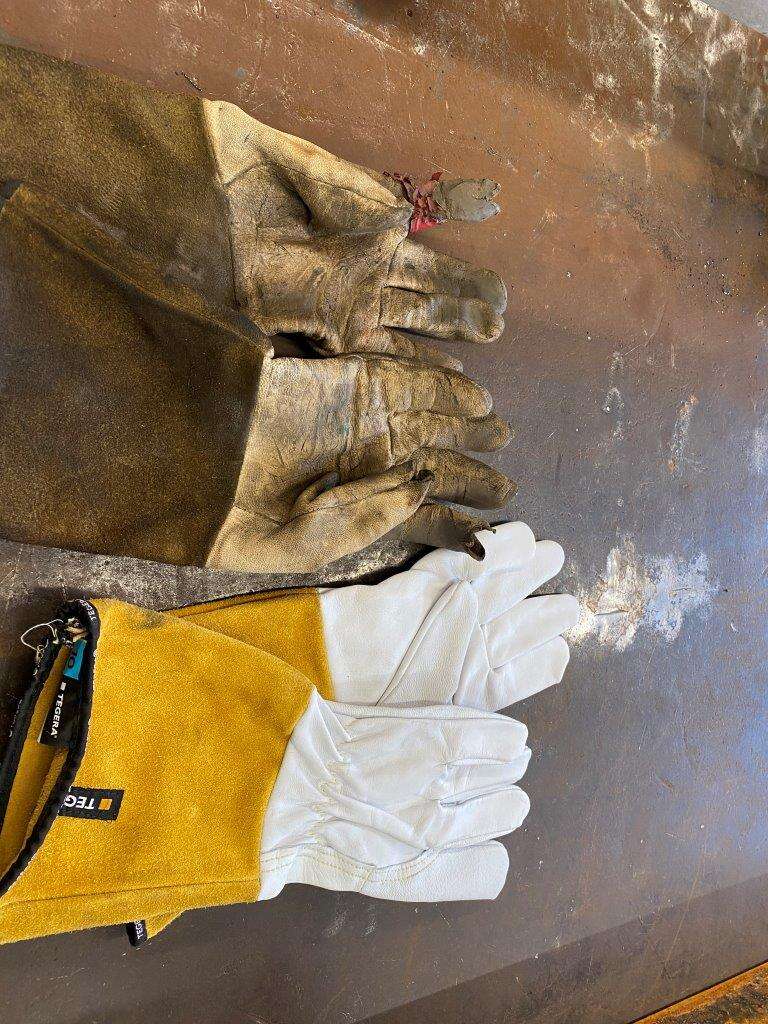
Decided I deserved to get out my new welding gloves
Welded them together, linished and checked it was straight and true
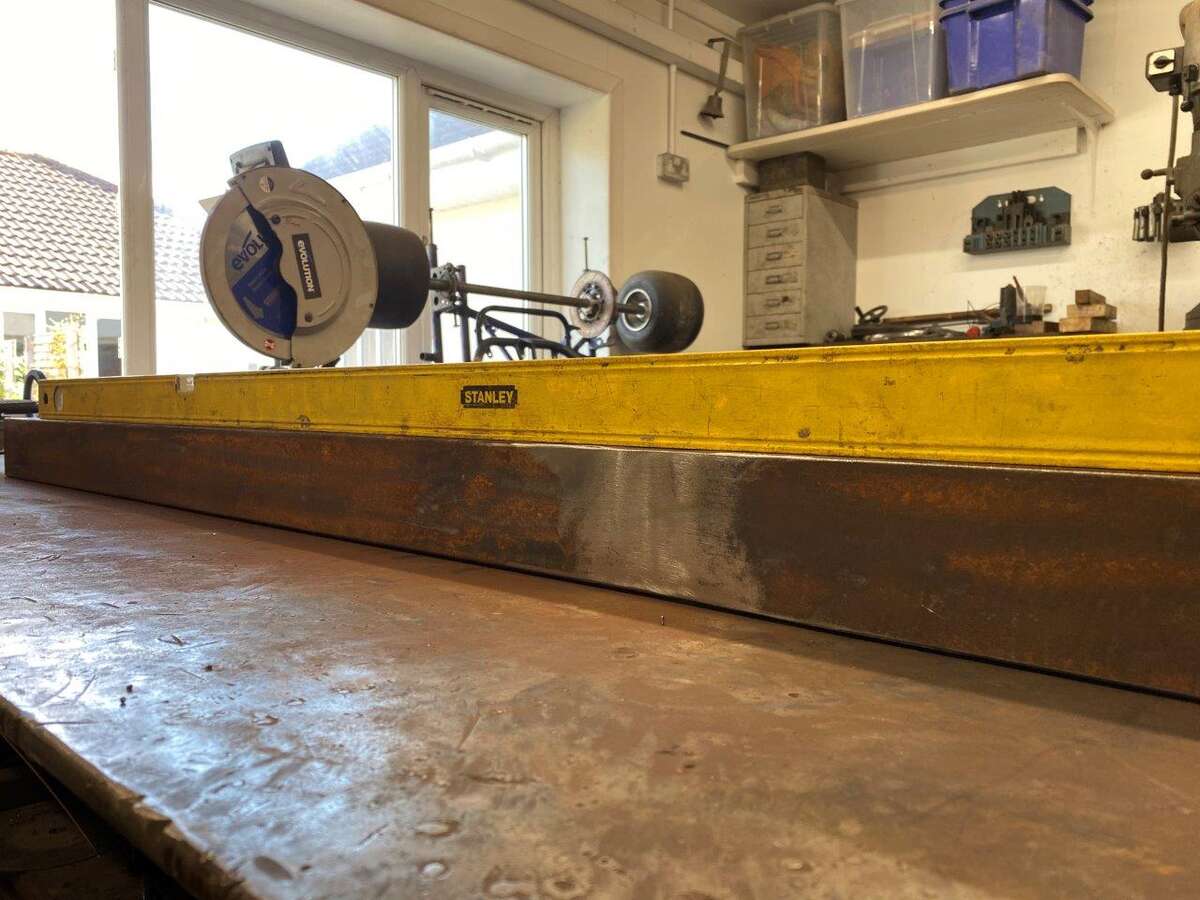
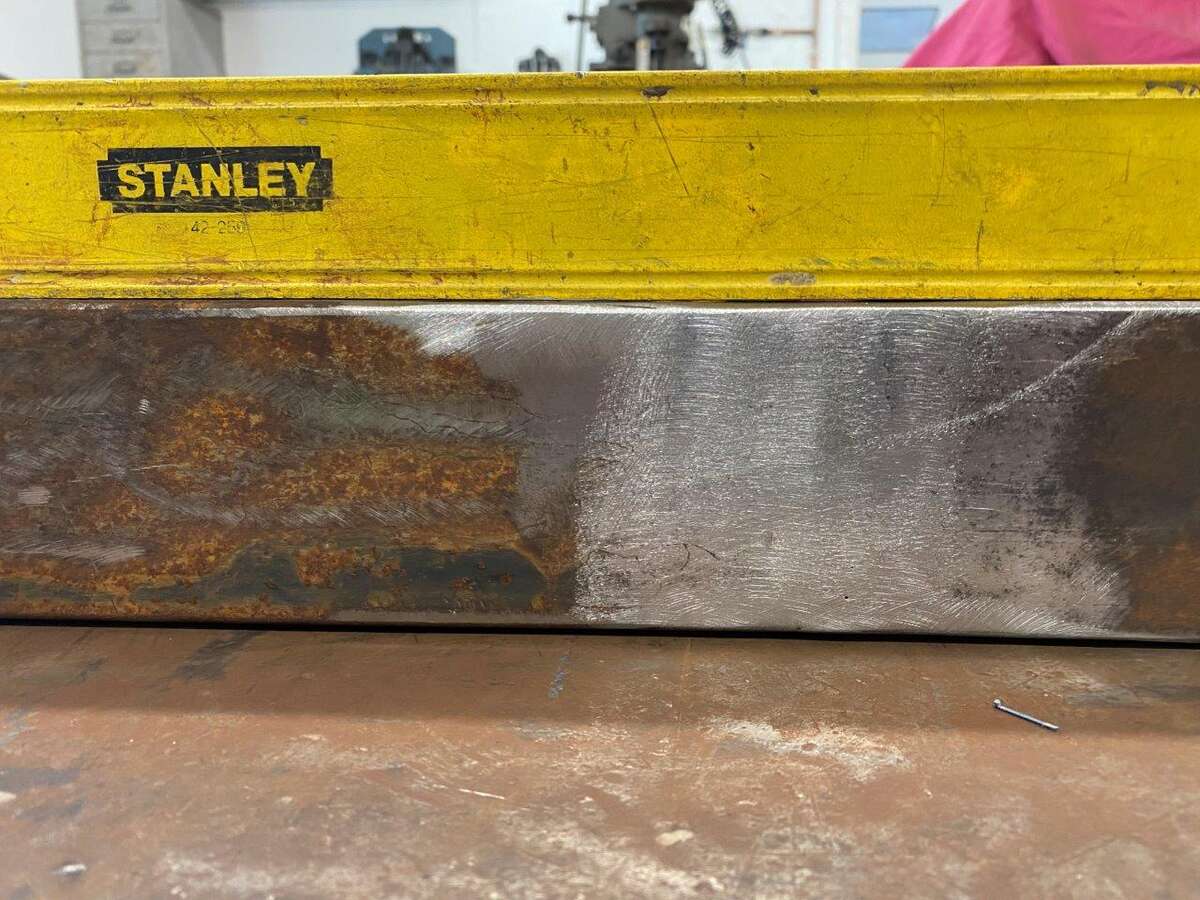
You’d never know
45 angles cut and the returns made
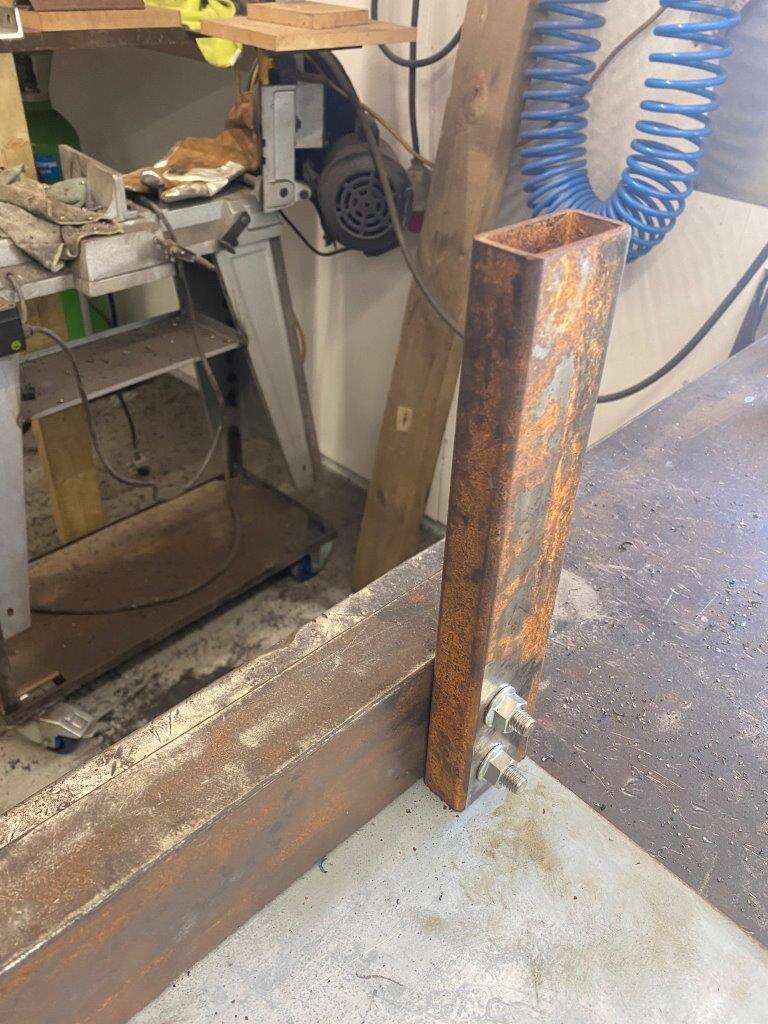
Now they need some supports
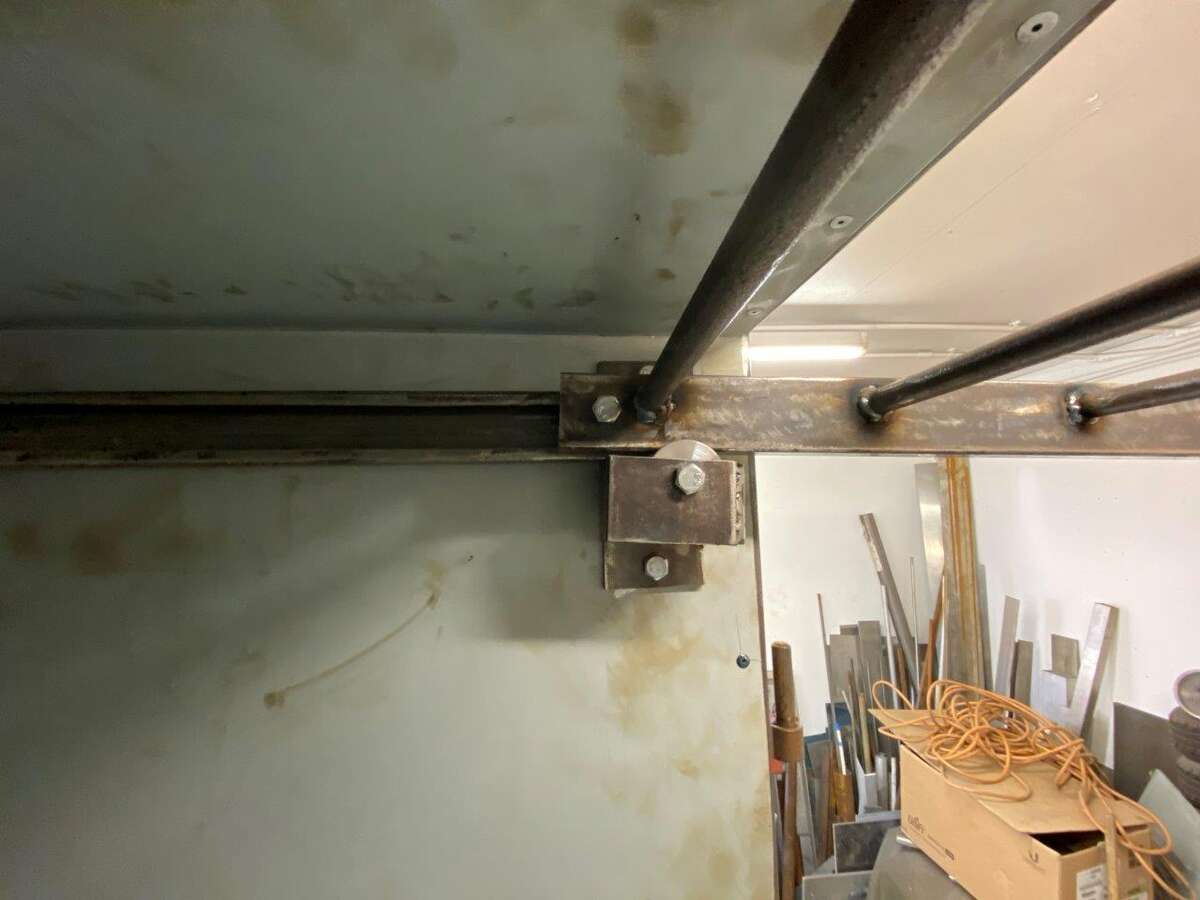
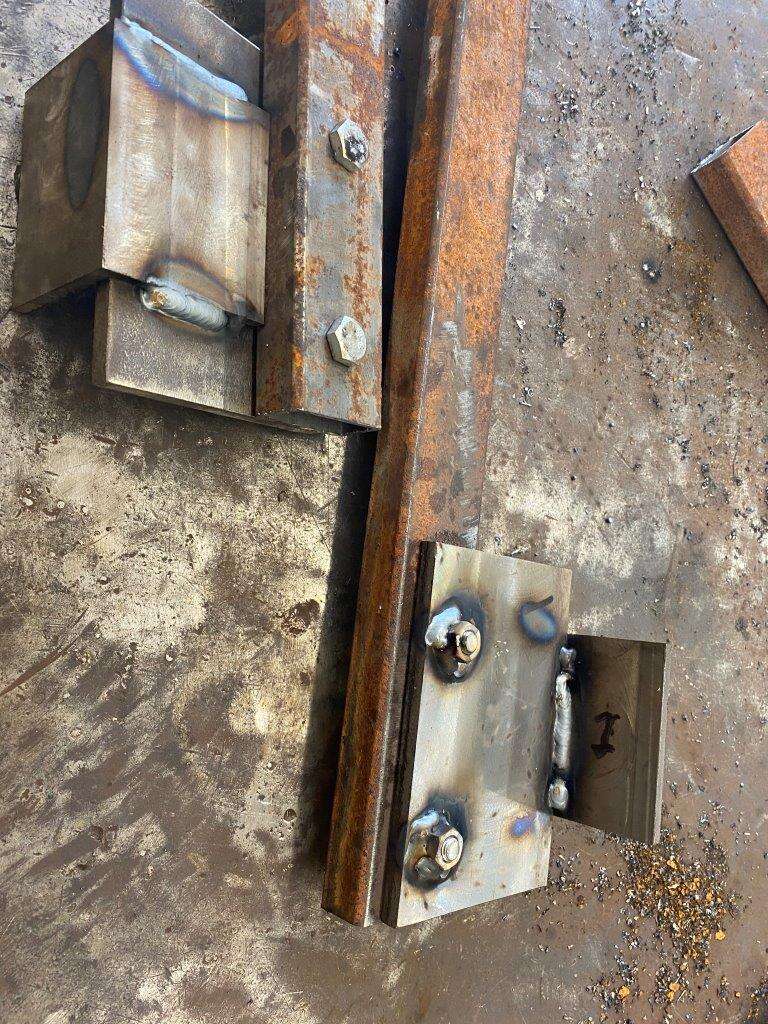
These now need to take a lot of weight and stand off the back of the lathe, the stand off is for 2 reasons, firstly the lathe can’t sit up against the wall as this door needs space to open or you can’t get to the gears etc
The second reason is depth I want the tool holder as far back as I can so it doesn’t get in the way of working, so substantial material was chosen
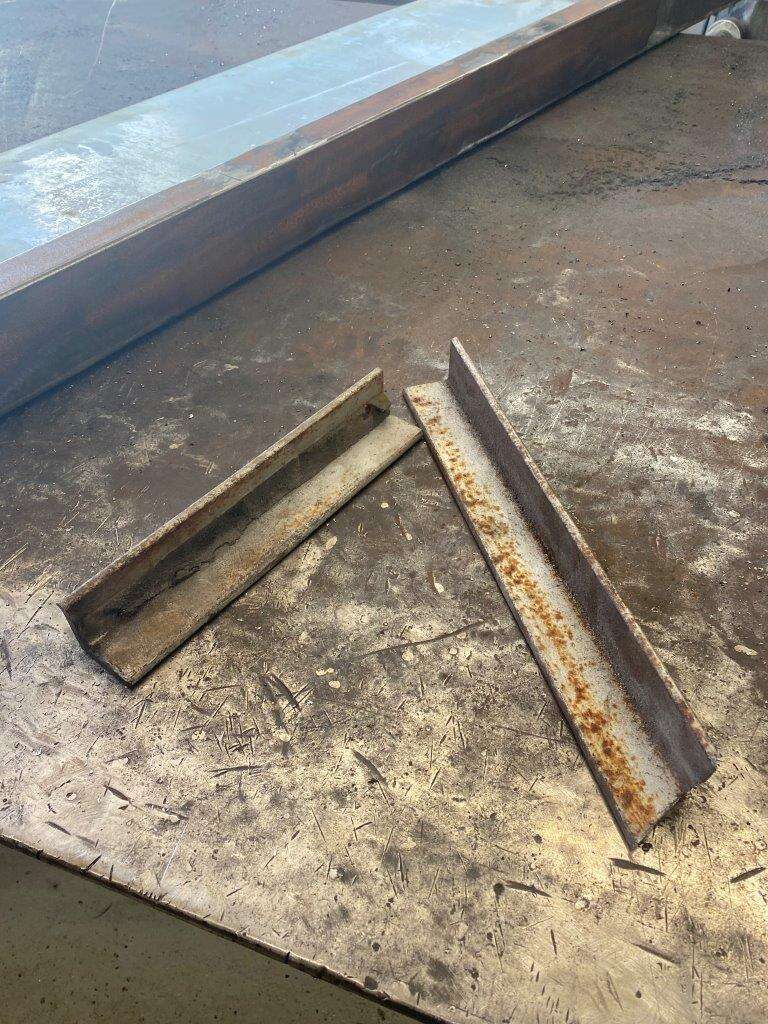
Cut what I needed
Overkill again but it’s what I have, I won’t be able to clean these up later as they will be welded to the lathe so I re-surfaced them, which has the added bonus of taking the ridge out of the inside face of the angle iron which stops a clean join.
24
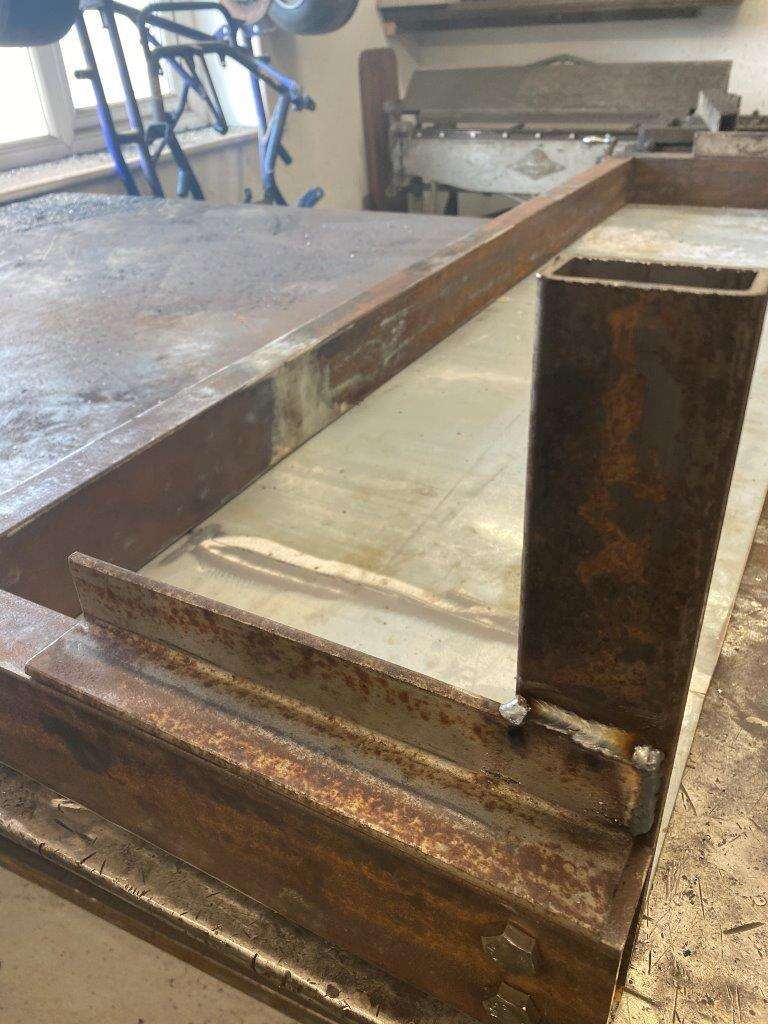
Tac welded those up
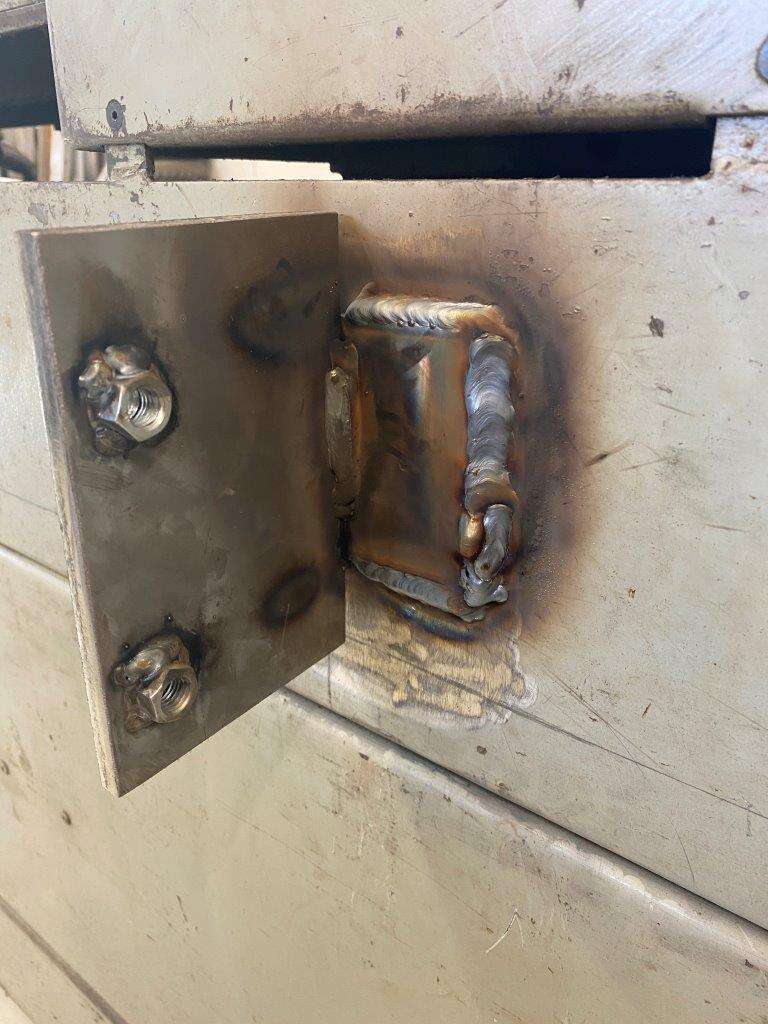
Found some uprights and drilled them to match
Captive nuts added
Prep the back of the lathe
Weld the supports on
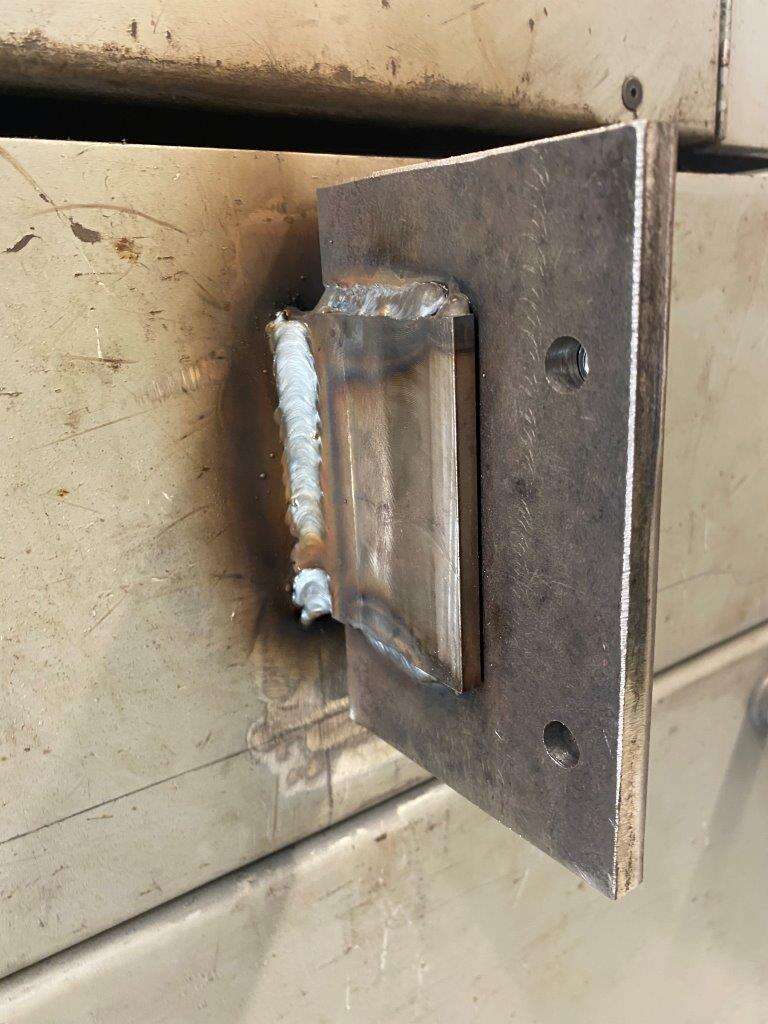
So now we have the first part done
More on Monday – Have a great weekend folks and stay safe
Keyser - “We never really grow up, we only learn how to act in public.” – Bryan White
-
5
-
-
5 minutes ago, SuperStu said:
You know, if there was a little positive air pressure inside the dust housing for the motor and vibrator, it might push dust and media gently out the gaps, instead of letting it in. Just sayin'...
Thanks for the feedback and the comments mate, I like the positive air pressure idea and I have compressed air right next to the vibrator, I'll see how it goes on the first few runs but may do that if the dust ingress is bad - I'm gald we thought of that
All comments welcome folks good, bad or indifferent I won't take offence
-
1
-
-
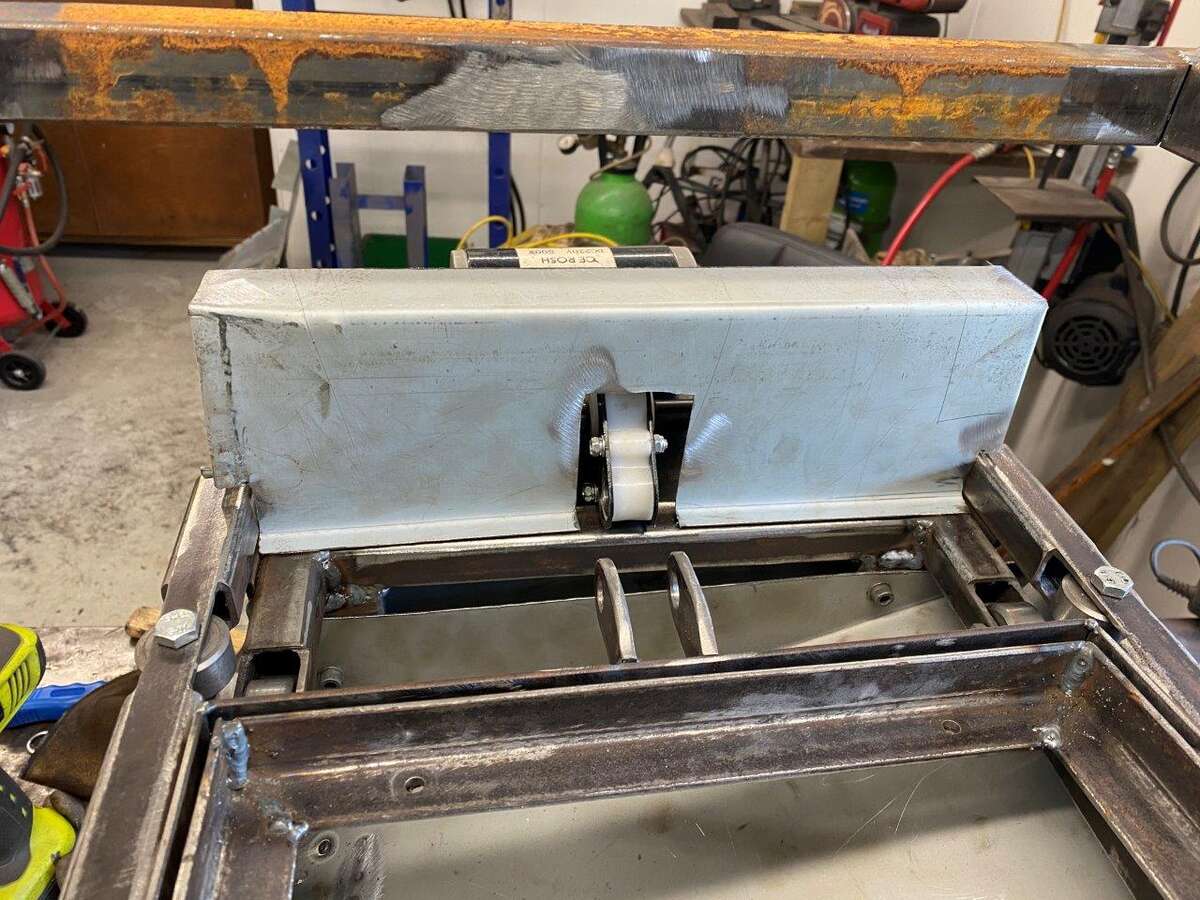
Good morning, not sure how you lot are doing but yesterday was definitely a lot busier with work calls as people are slowly heading back into work, but I still spent a few hours in the Zed Shed.
Today we are going to armour plate our vibrator
So a sheet of 3mm steel – why 3mm? My thinking is that this is the most likely place to take a beating as you load the vibrator and I want the chute to stay in place under it’s own weight as the sieve itself will need emptying and is obviously below the chute.
Turns out it’s VERY heavy but also effective at staying in place
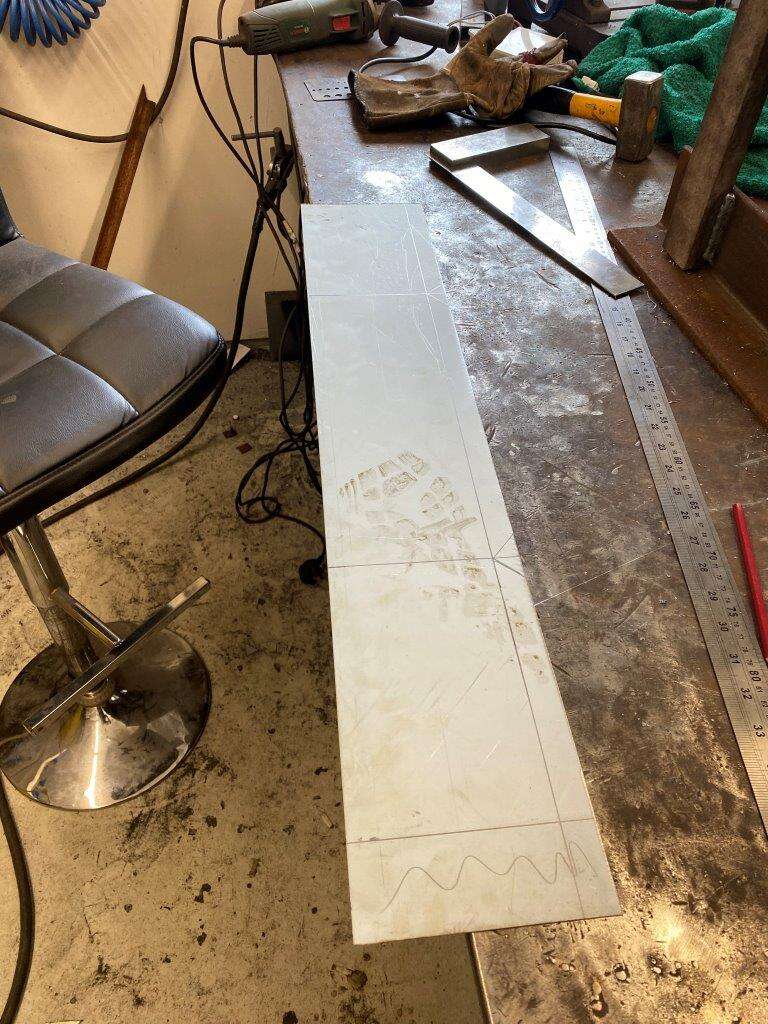
Started with some marking out

First bit
Then a second joined to it, I had a hard time lining these up and wasn’t sure how it was going to work, hence why it is to big at the moment
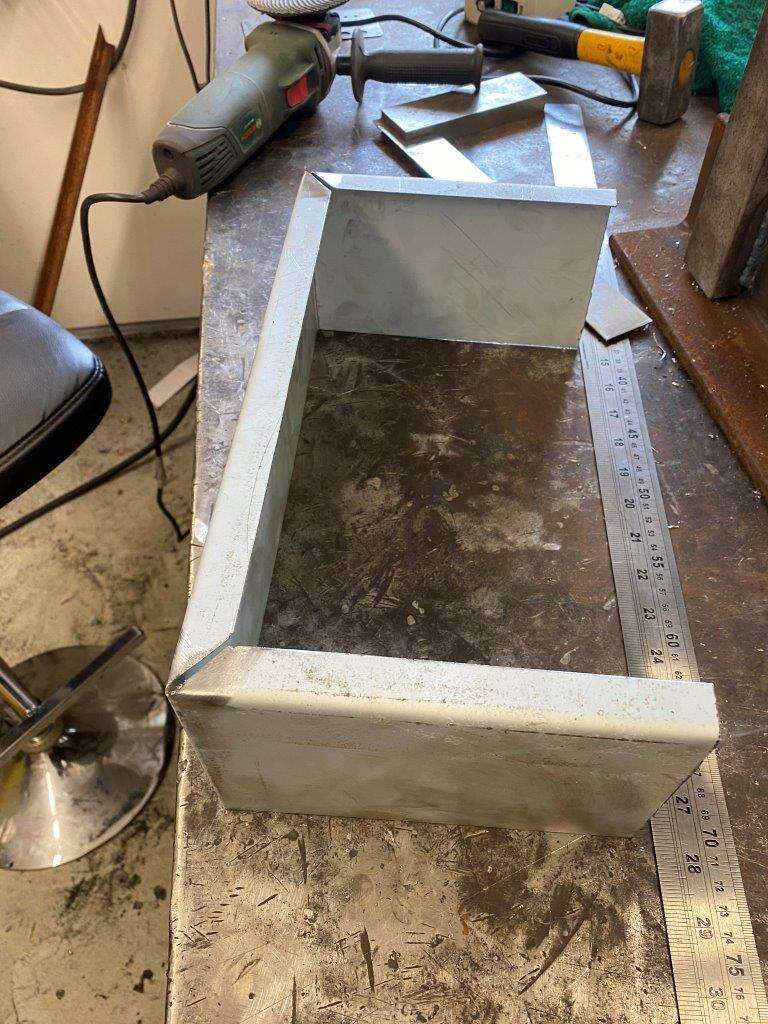
Tac welded the bottom to keep it in place
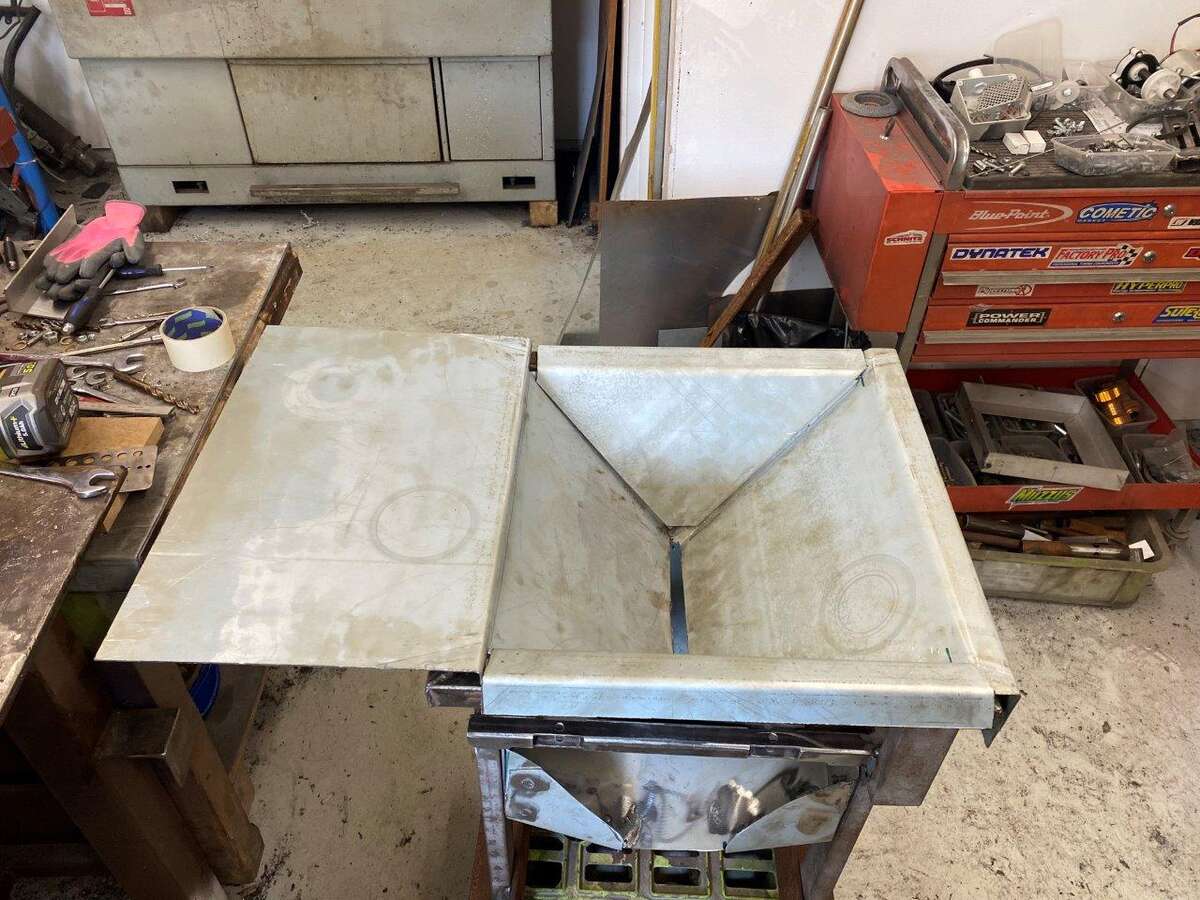
So looks like this
Added one side
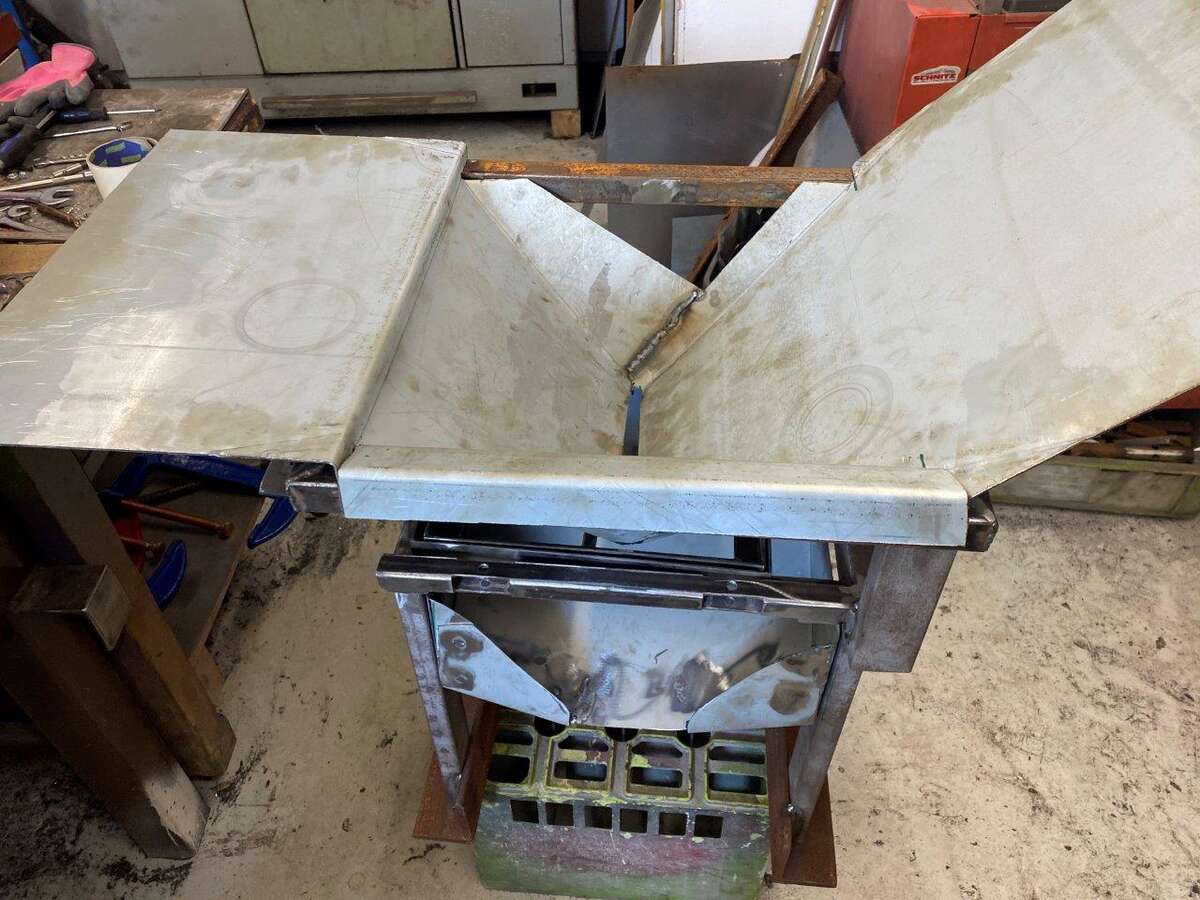
Then the other
All made up – that’s a days work in 8 pictures!
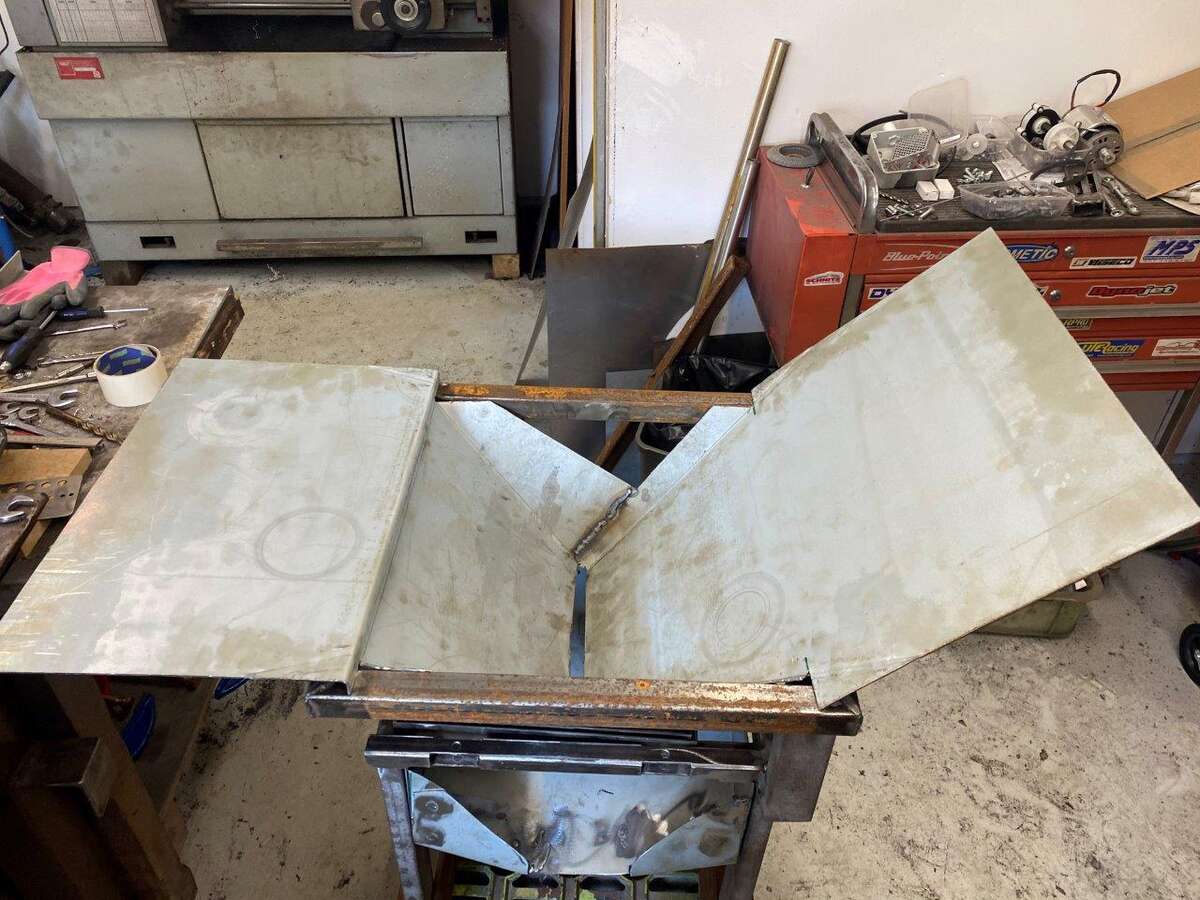
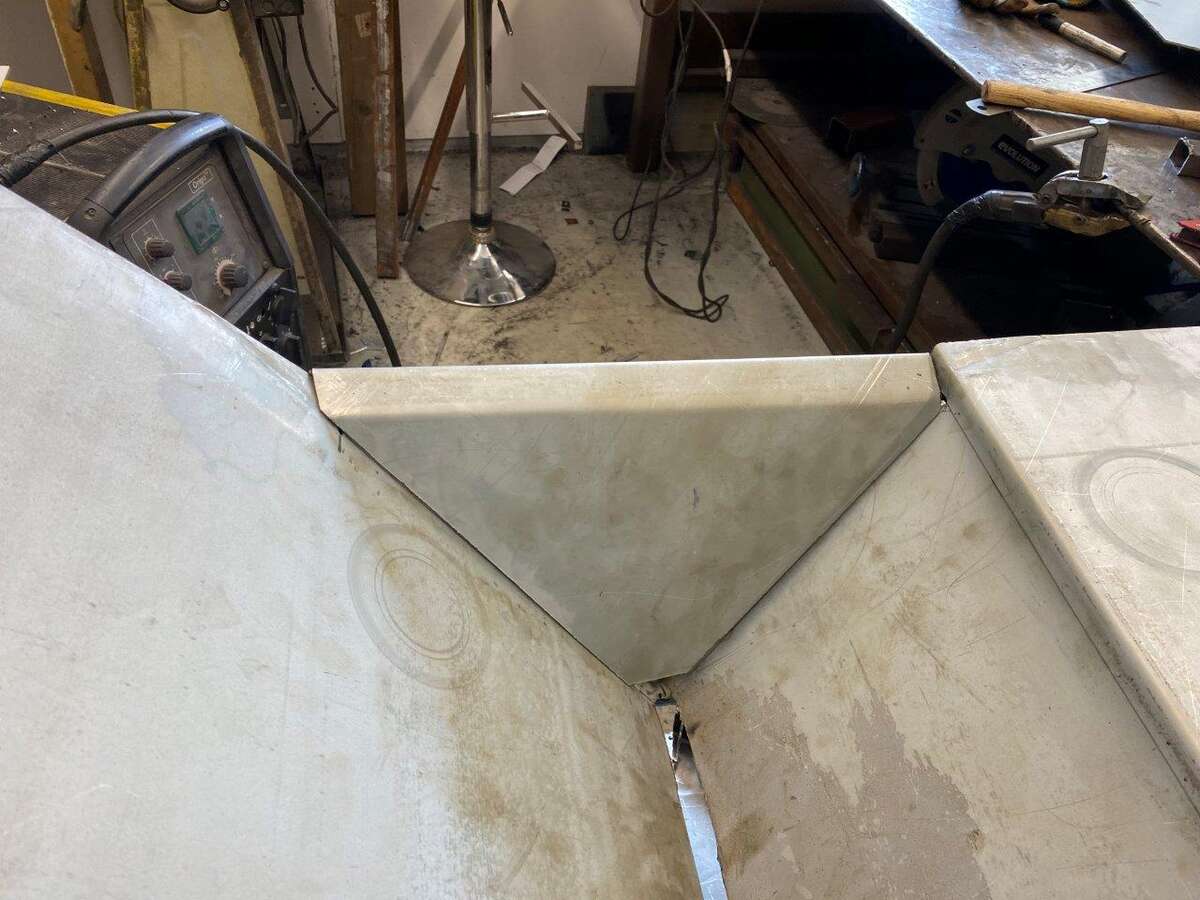
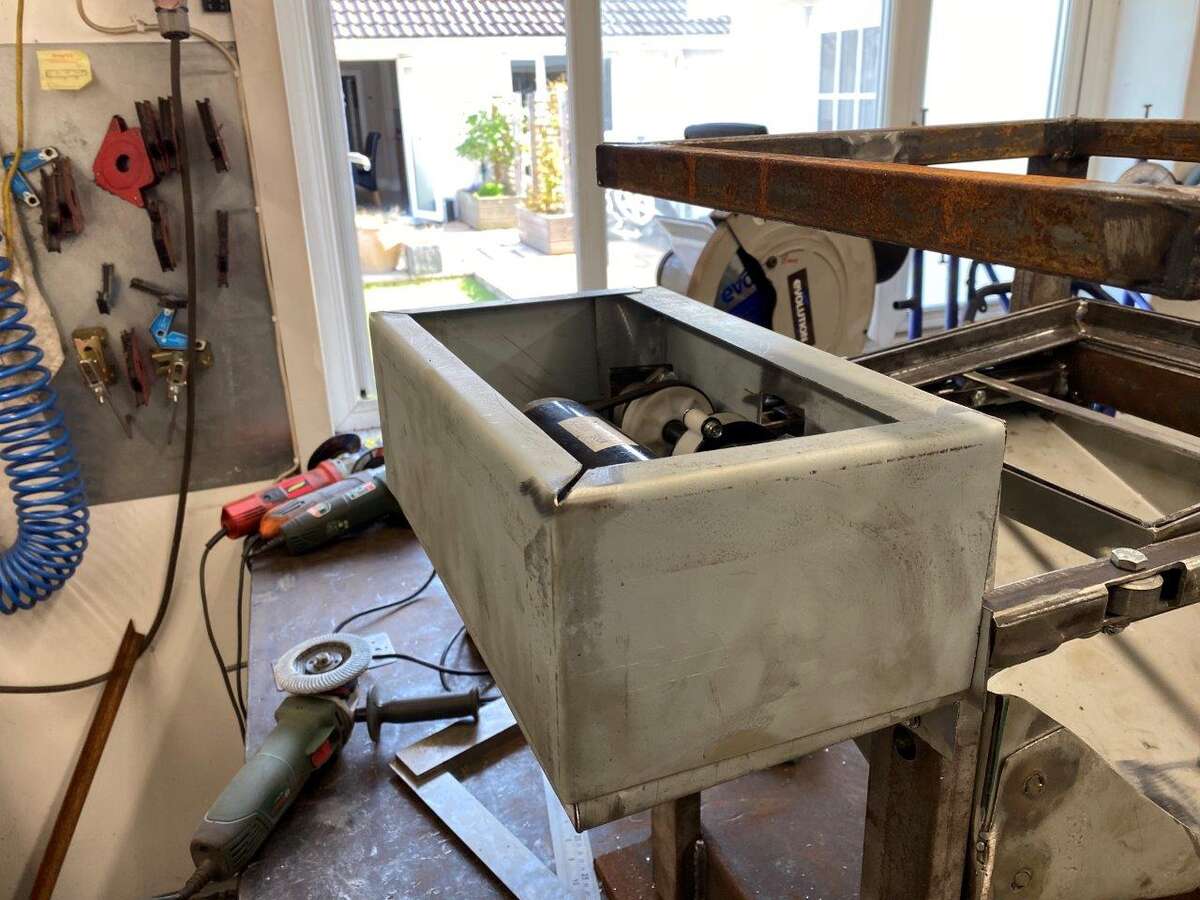
Then welded it all together
Now the only clever bit (I hope) is I made the bottom of the chute sit halfway down the depth of the sieve tray, the theory is no more media will fall through until the tray has sieved it down to the halfway point. This should stop it over flowing as it was prone to doing if you just pour the media in as I found out in the R&D phase
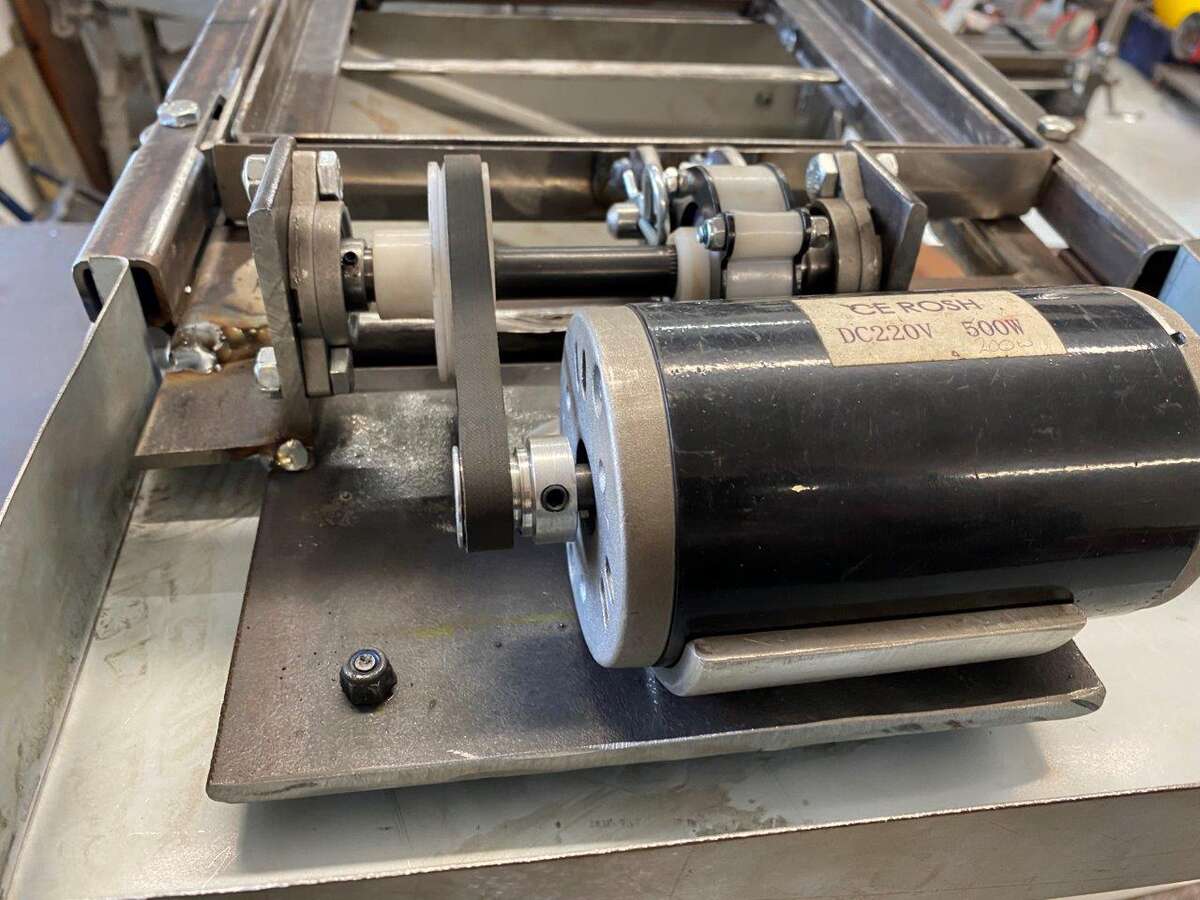
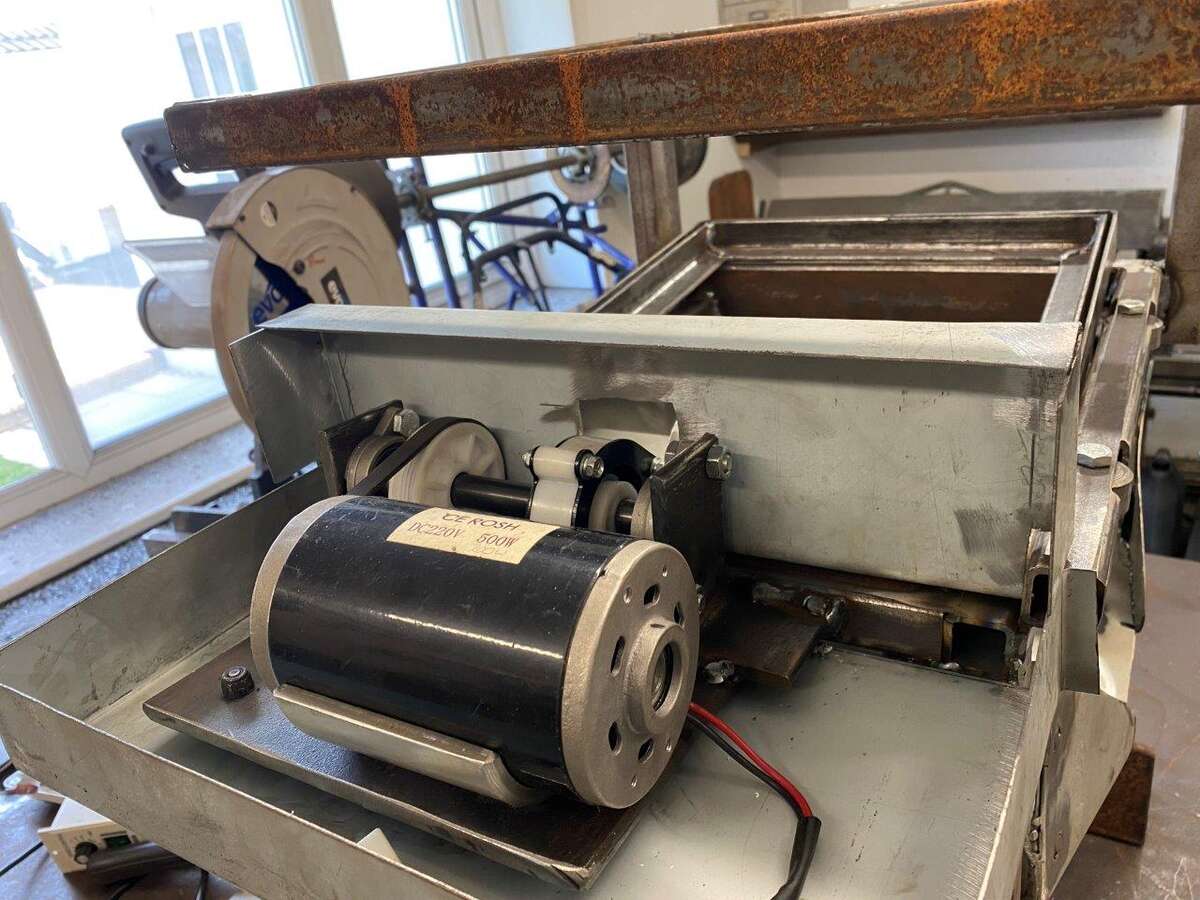
Moving along we now just have to give the motor and drive some protection, by definition this is going to spend time in a dusty environment covered in the most abrasive materials available so I need to at least try and keep the worst of it out of the motor, bearings and drive belt.
At the moment it looks like this

So a tray was made
And mounted

It bolts on so I can remove for maintenance
Top view before
Another plate
Now the top looks like this
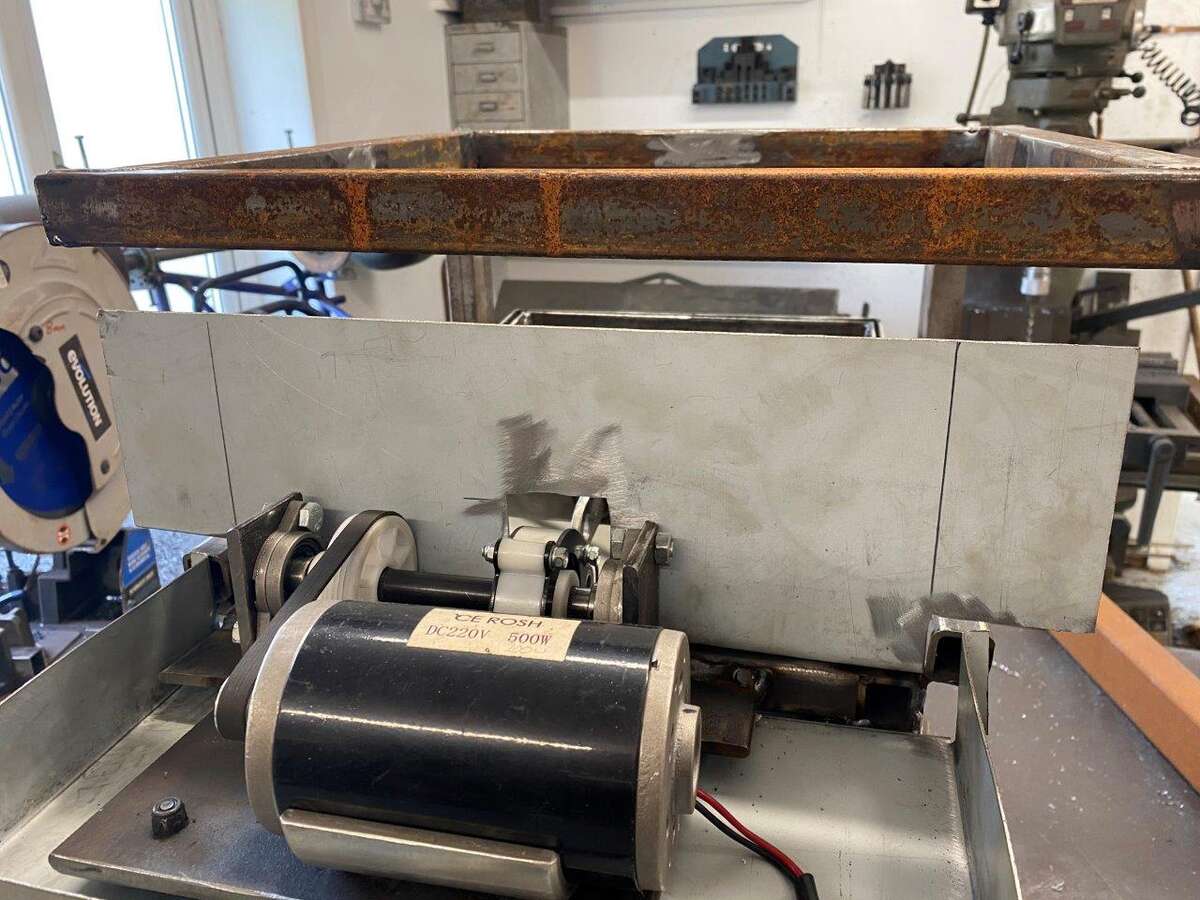
Bent the top at a sensible height
Now I would have made the cover in one piece but to be deep enough it would be to tall to fit under the chute support – design floor on my part so I had to make the dust cover in parts and the front is welded in.
Then my latest method of box making was tested – strip marked up
Bent
Fitted
Another sheet for the top
Fitted
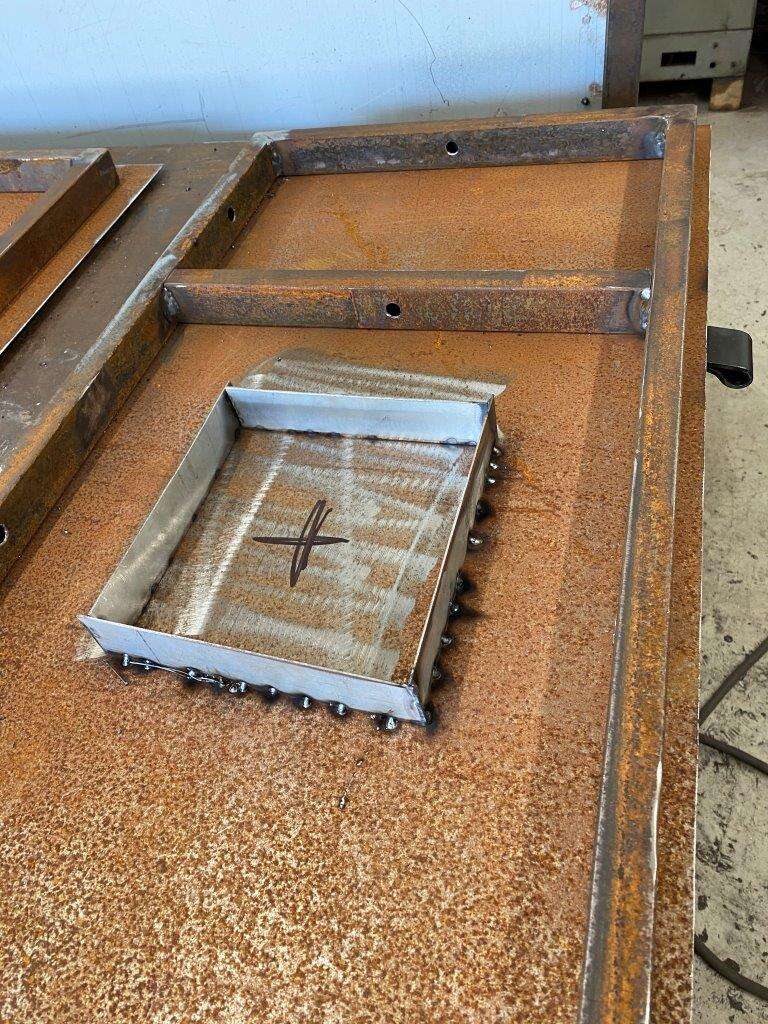
Cut a hole in the back
For the controller
Start welding the top on
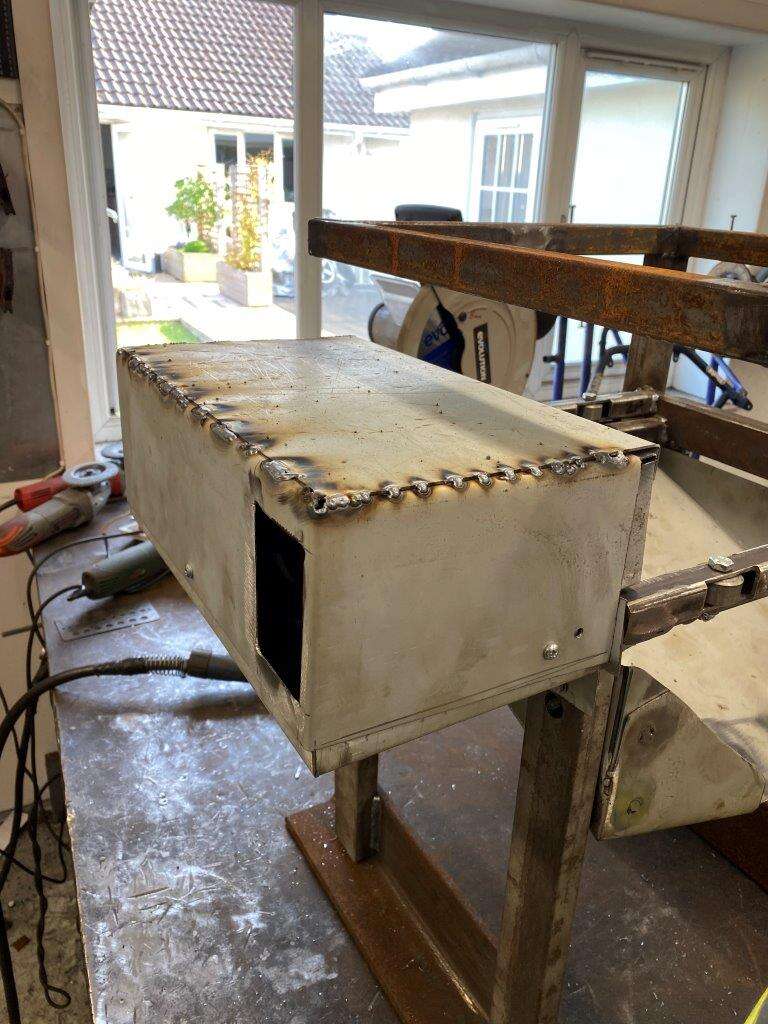
Some wiring
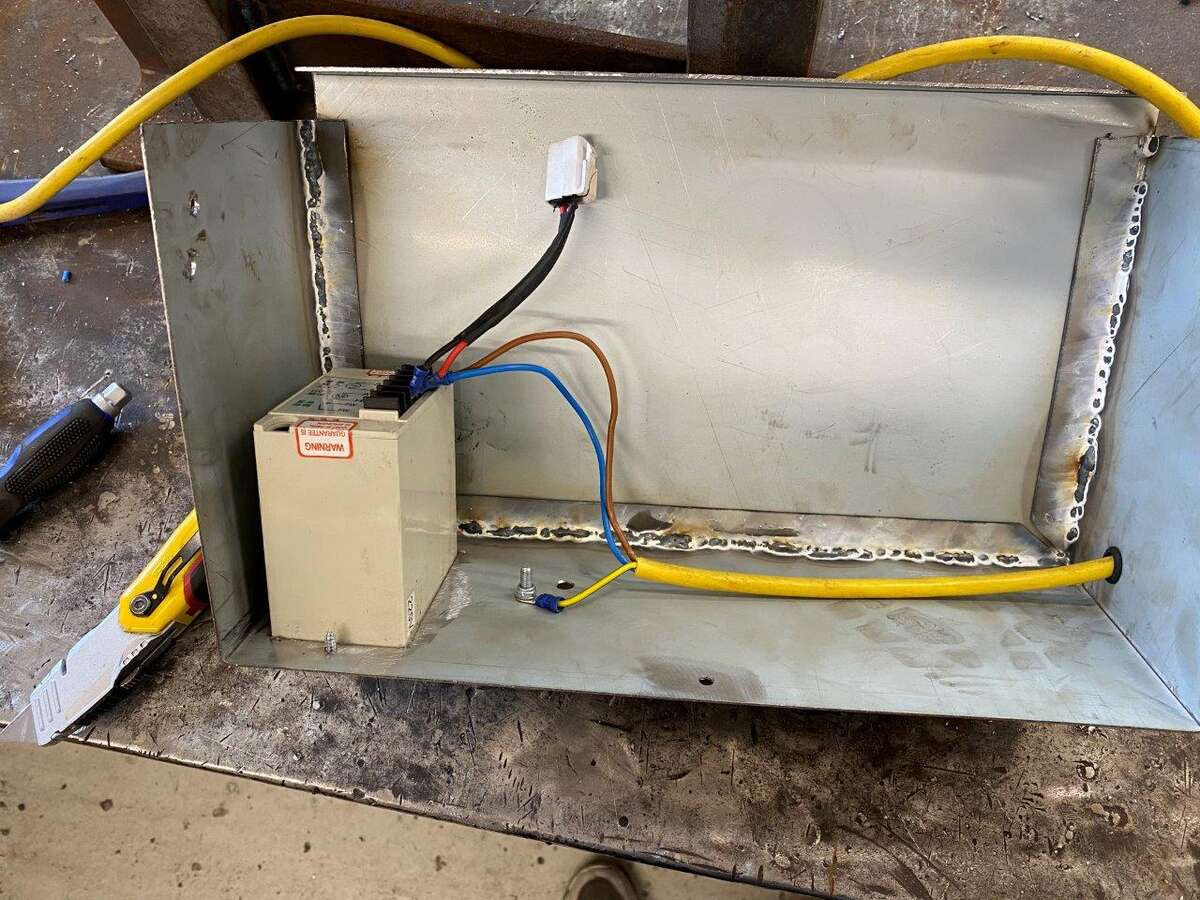
With earth
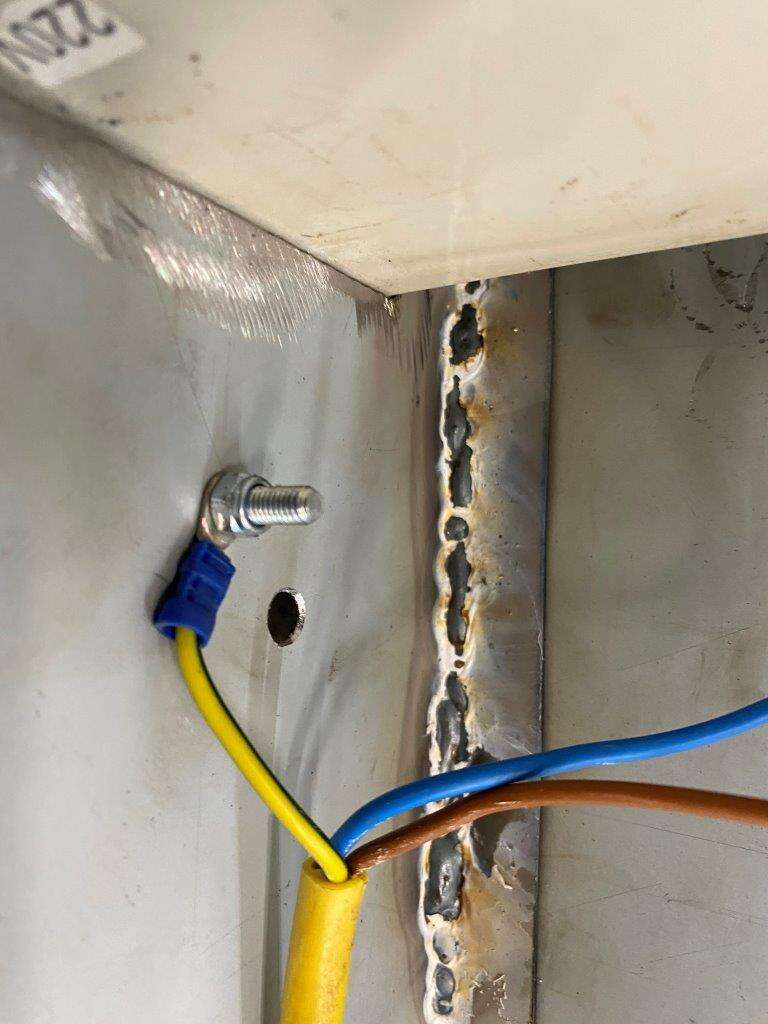
And grommet

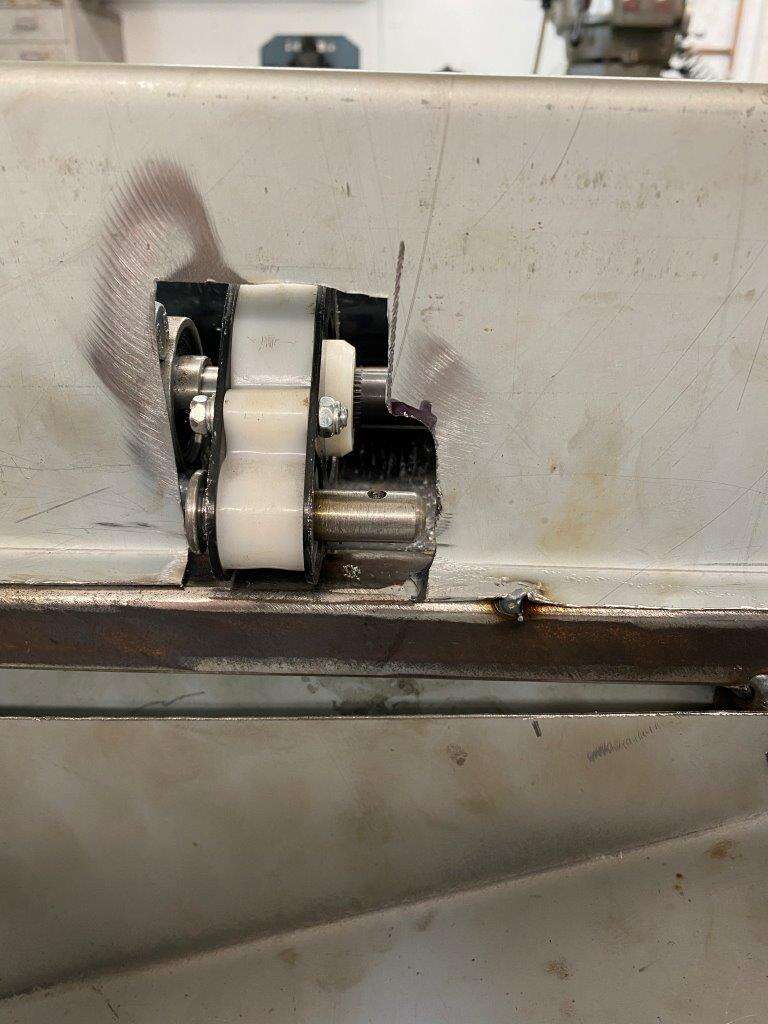
Then realise I am only human and forgot about the quick release pin
Had to modify the front dust cover
And here it is in action –
You can see from the small amount run through why this is needed to stop blockages while blasting
Happy with it but time will see how well it lasts.
Stay Safe out there
Keyser - “The surest sign that intelligent life exists elsewhere in the universe is that it has never tried to contact us.” – Bill Watterson
EDIT -
forgot about the foam tape that was added to the tray to keep the sieve sheet in place -
Works well
-
9
-
2
-
-
1 hour ago, Ebized said:
I'm just imagining the reaction indoors when you said you were now making a vibrator

What about @SuperStu If anyone looks at his internet search history - apparently he has been doing "A LOT" of research into vibrators - Explain that one mate
-
1
-
Helloooo from Dorset, 350z newbie
in Introductions & Welcome Messages
Posted