


Keyser
-
Posts
9,958 -
Joined
-
Last visited
Content Type
Profiles
Forums
Events
Gallery
Store
Posts posted by Keyser
-
-
2 hours ago, SuperStu said:
This is EASILY the most elaborate and properly made vibrator I have seen on the internet and I've don't a LOT of 'research' during lockdown.
Fixed that for you
")

-
 1
1
-
-
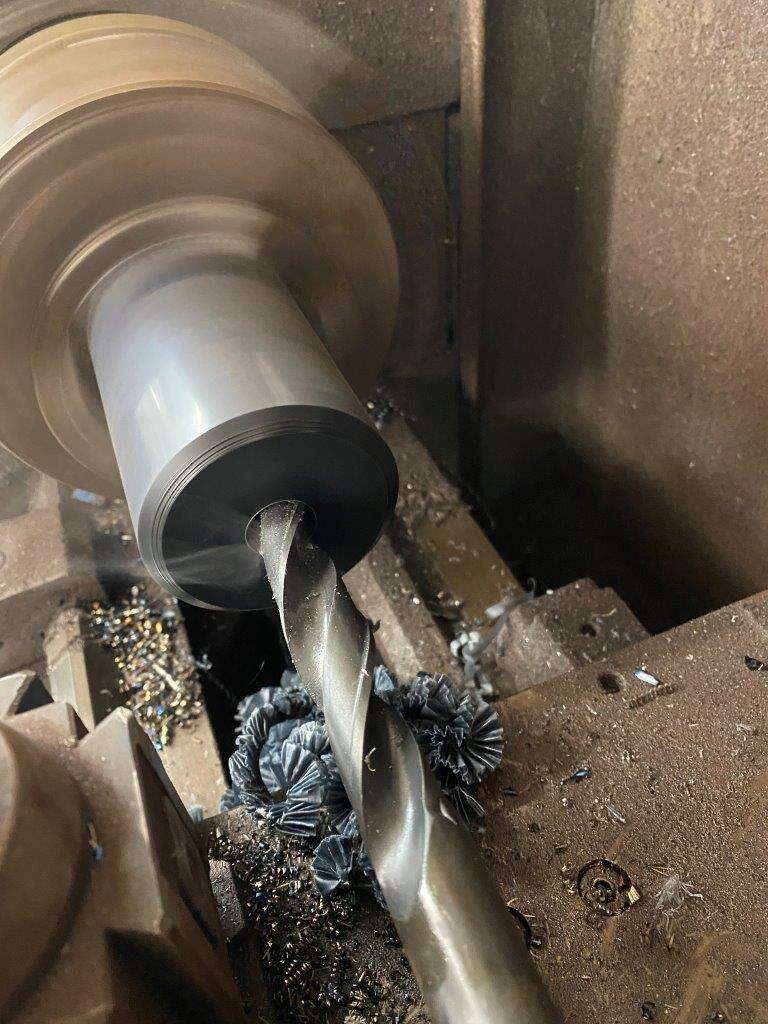
Good morning yet again, well yesterday saw a change in workload for me at least, only two jobs in the diary but ended up with quite a few calls and small jobs, it tells me things are starting to move. I also found out that some of the companies I subcontract to are planning to start a return to work, albeit with a skeleton staff to start. Things may be starting to move though, good news for work bad news for the projects
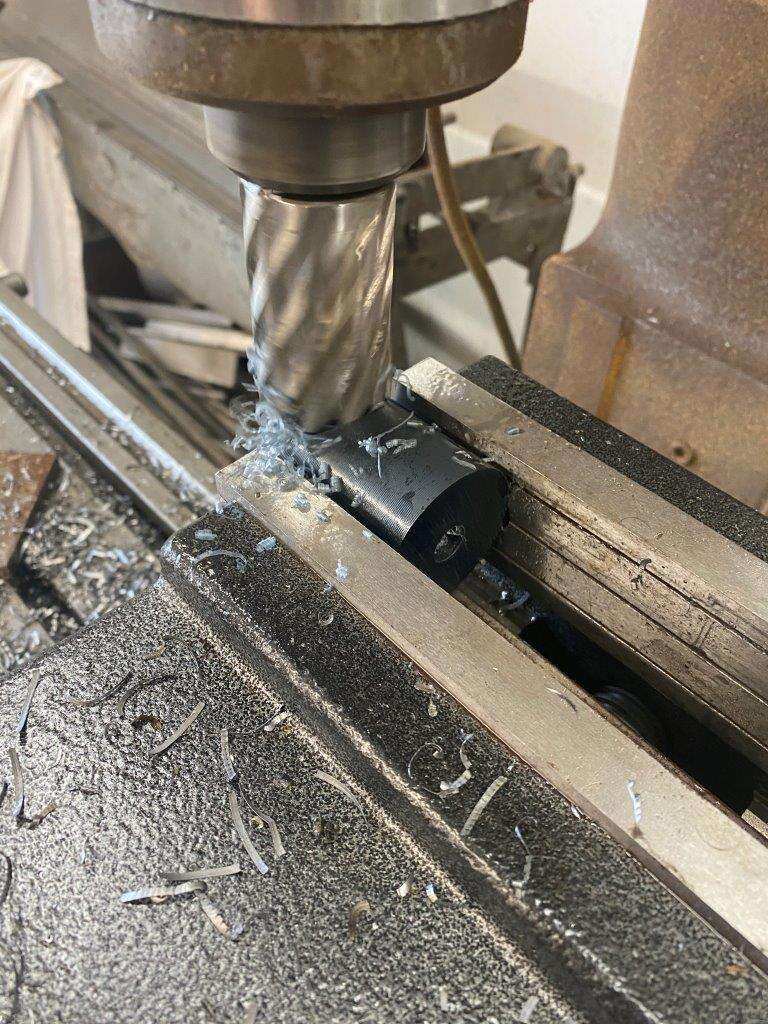
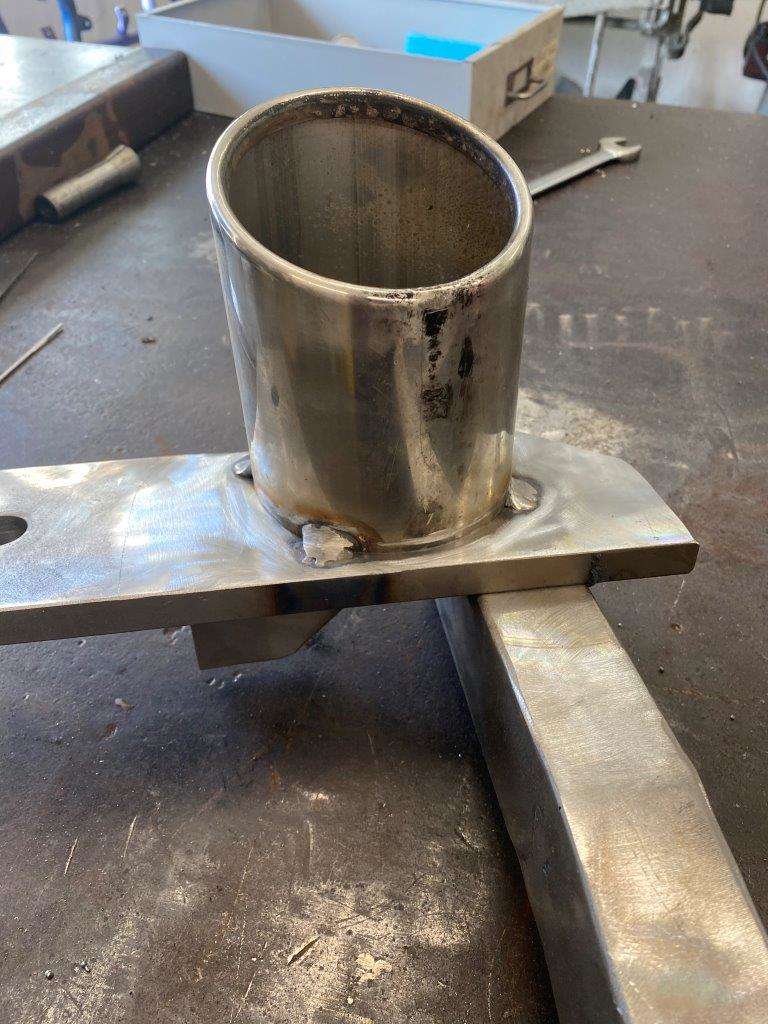
But for those still in need of some light relief from lockdown we have the motor mount and a couple of other bits –
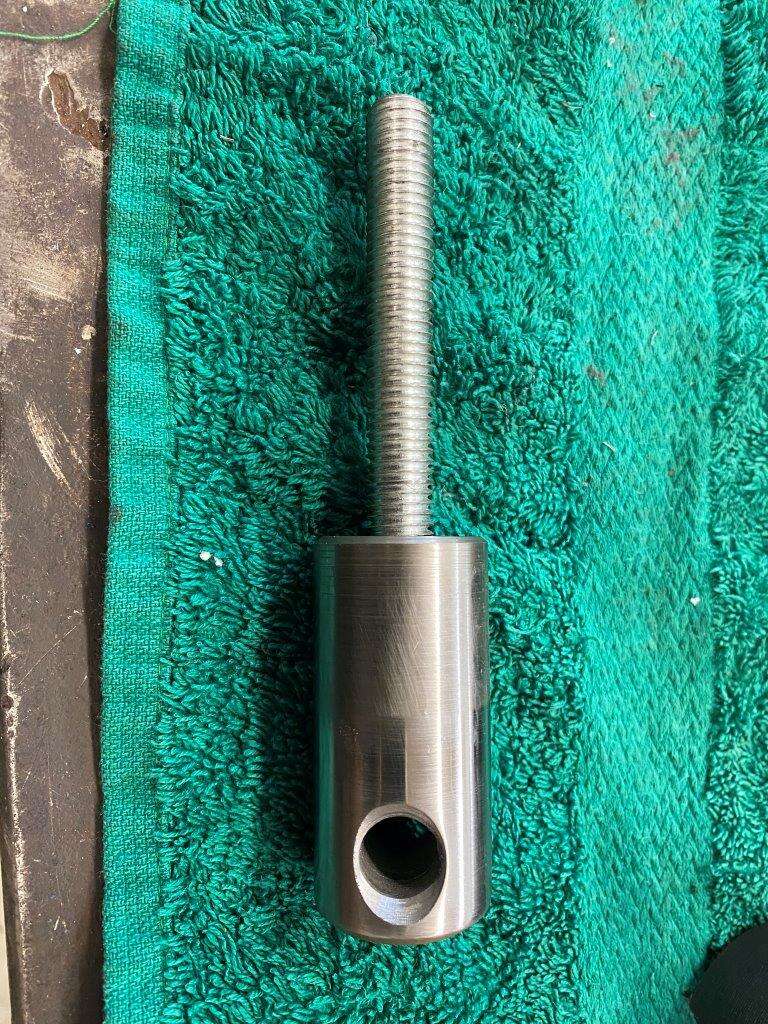
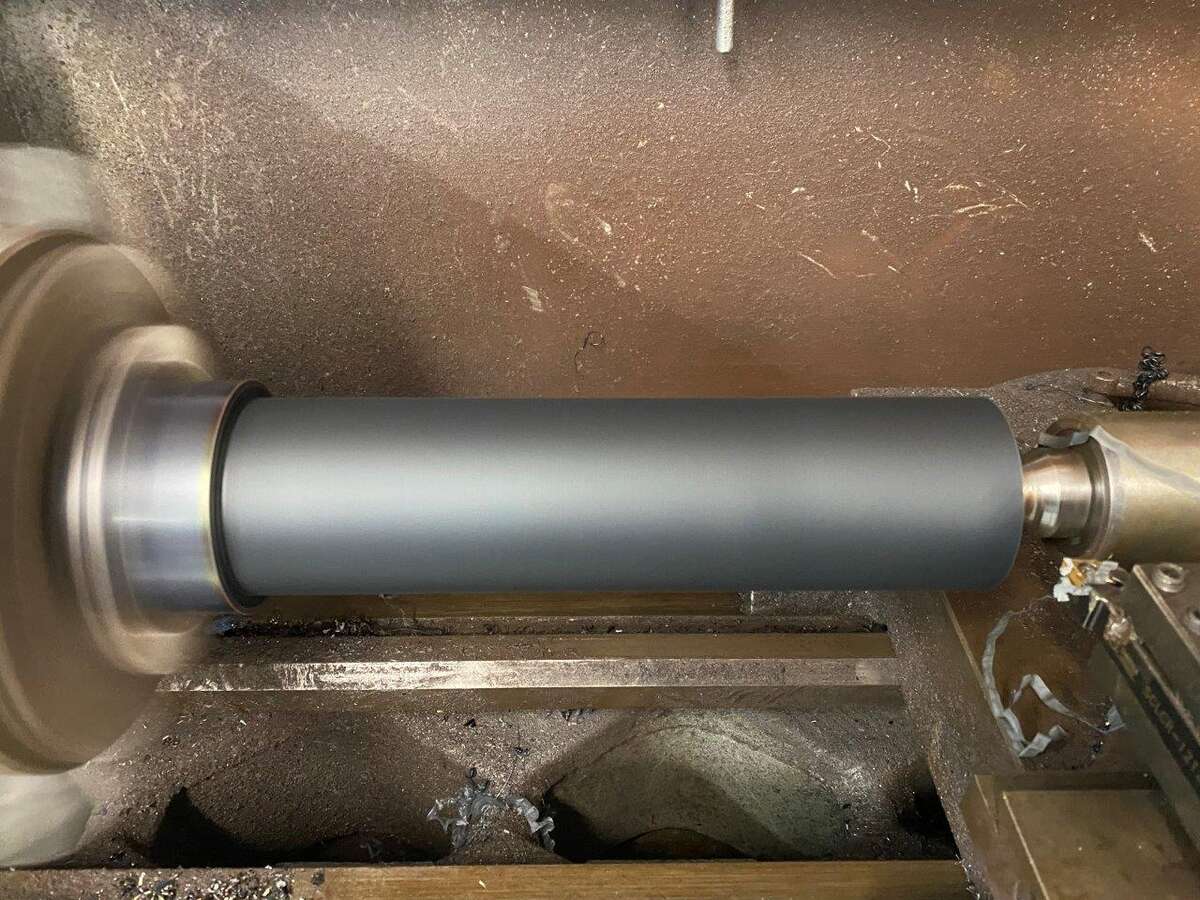
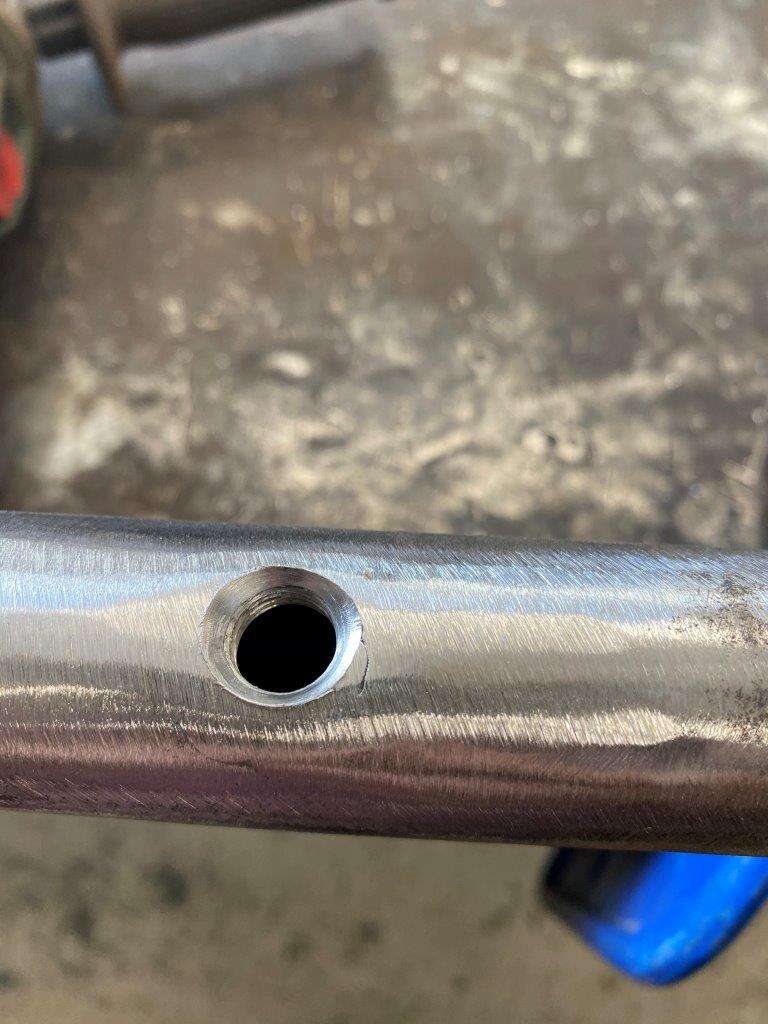
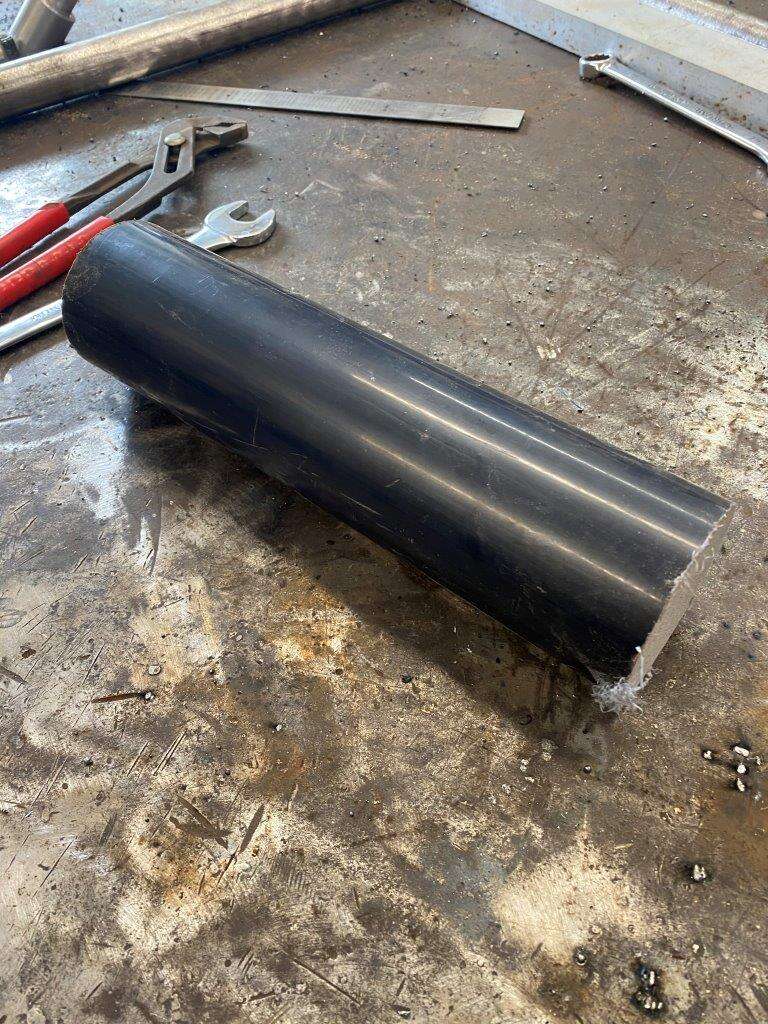
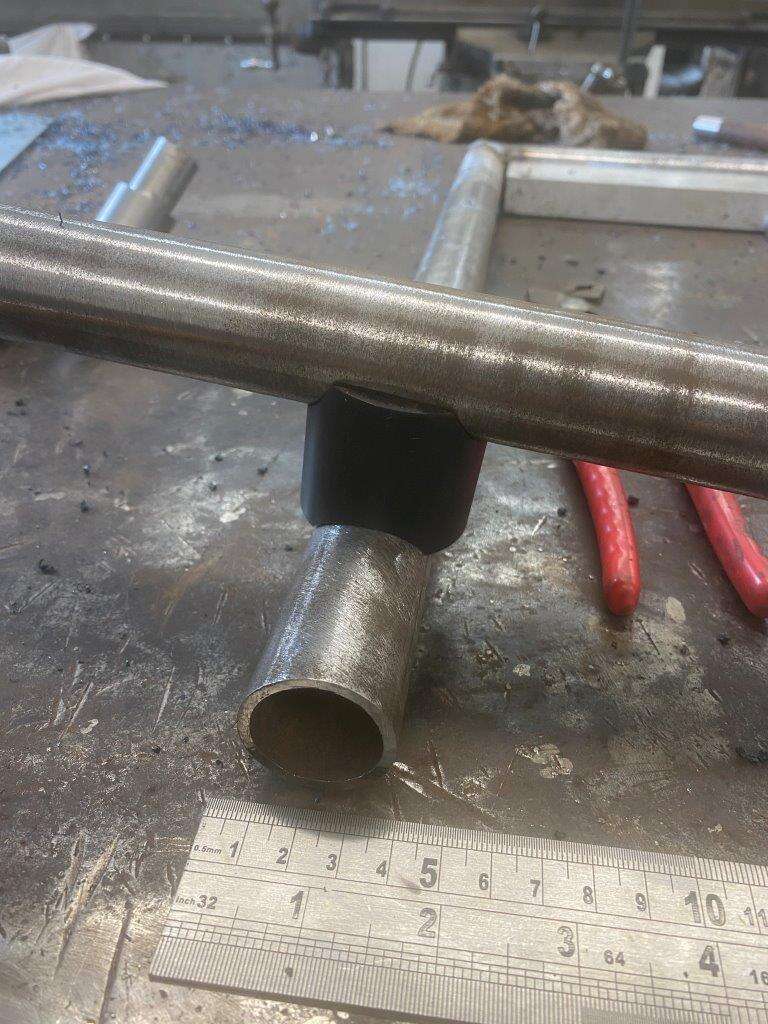
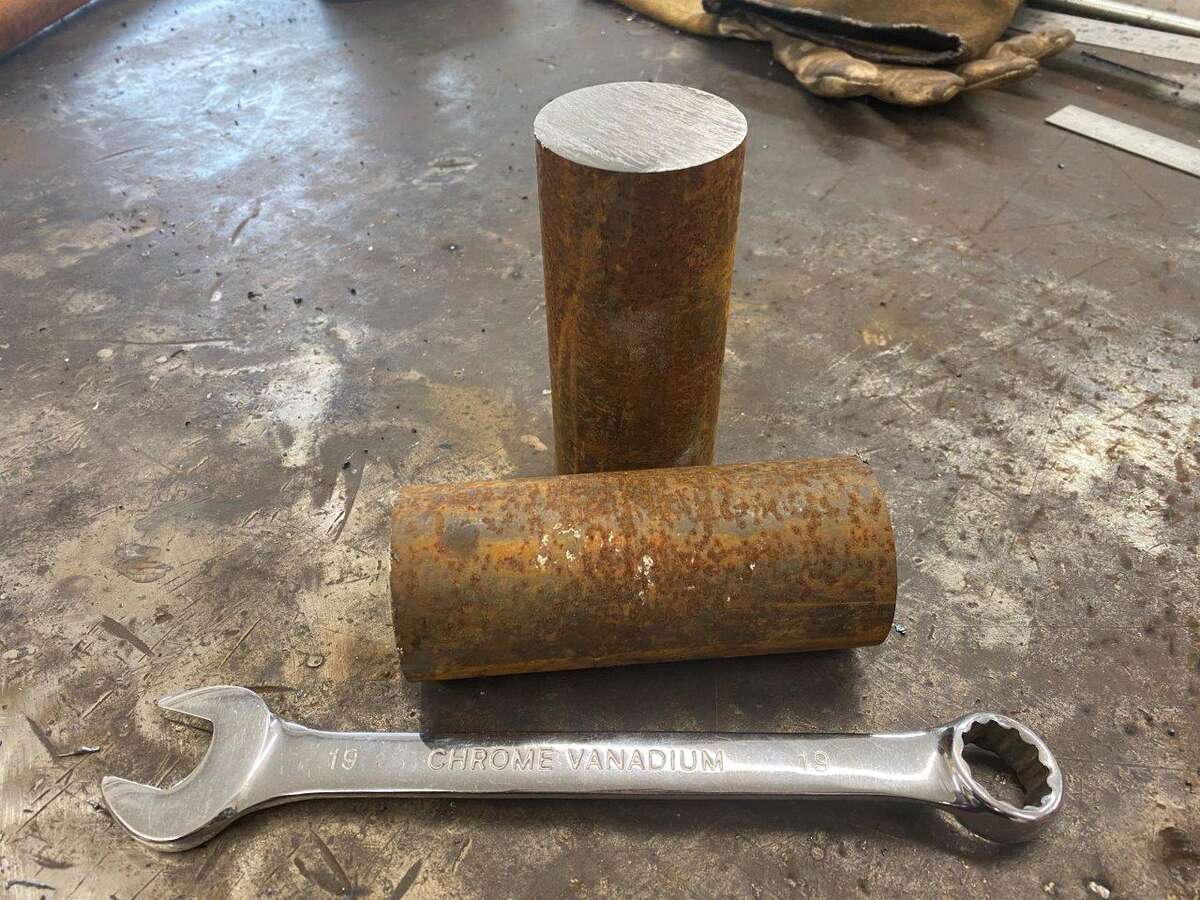
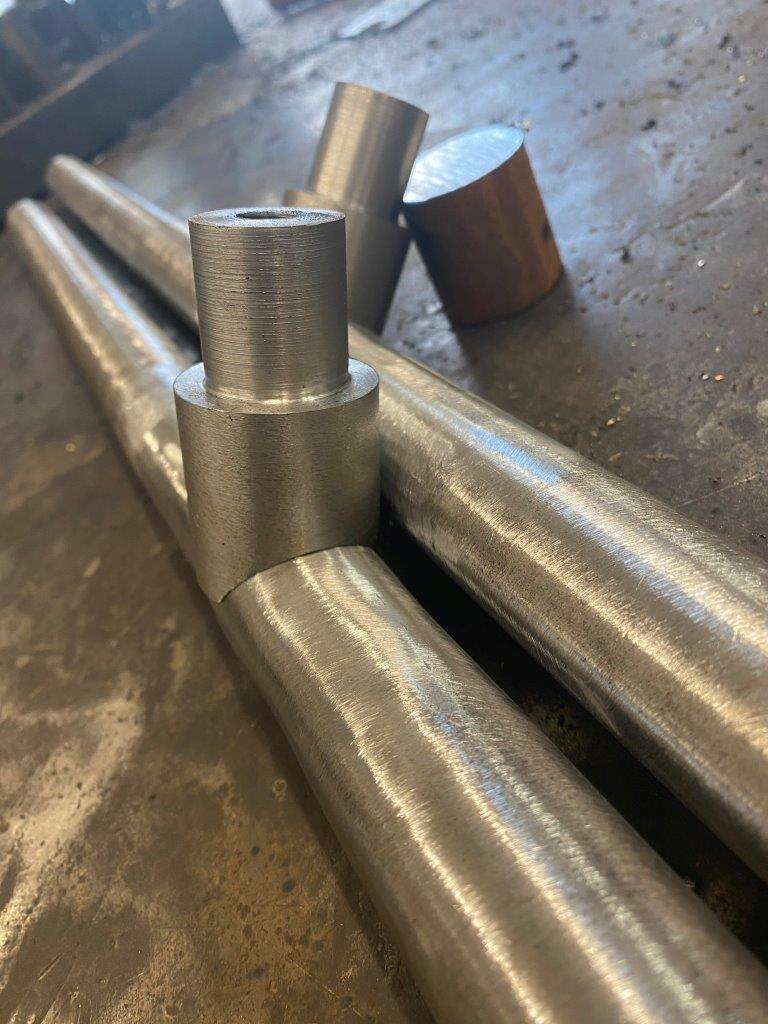
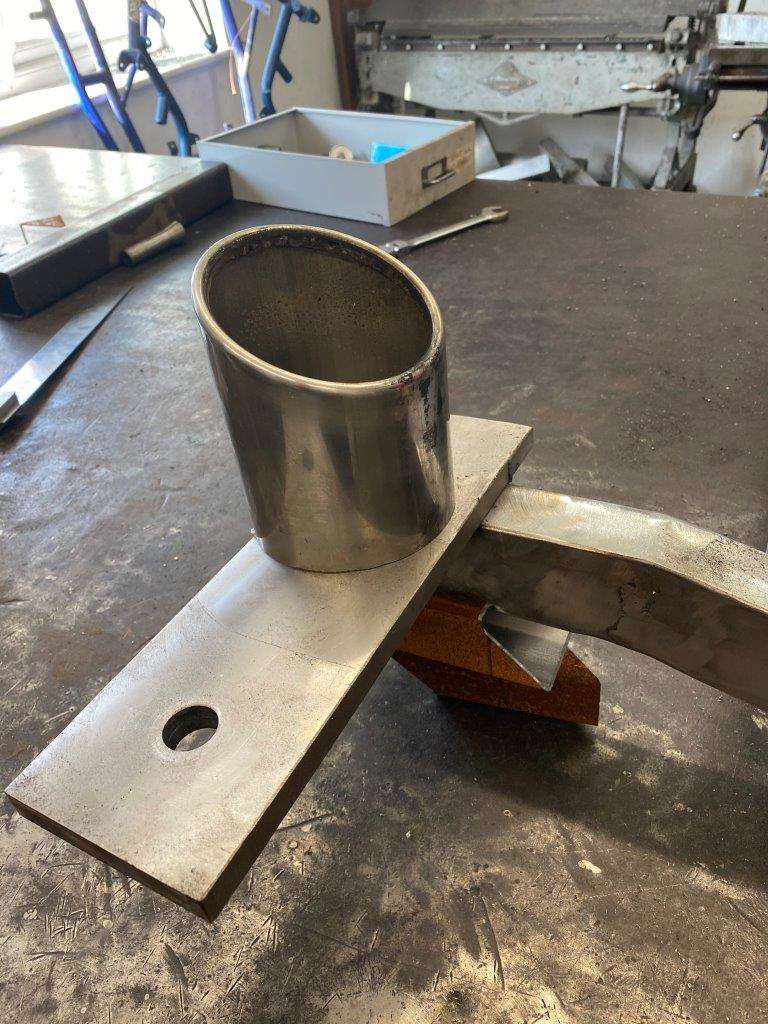
The motor itself comes with two threaded holes in the bottom
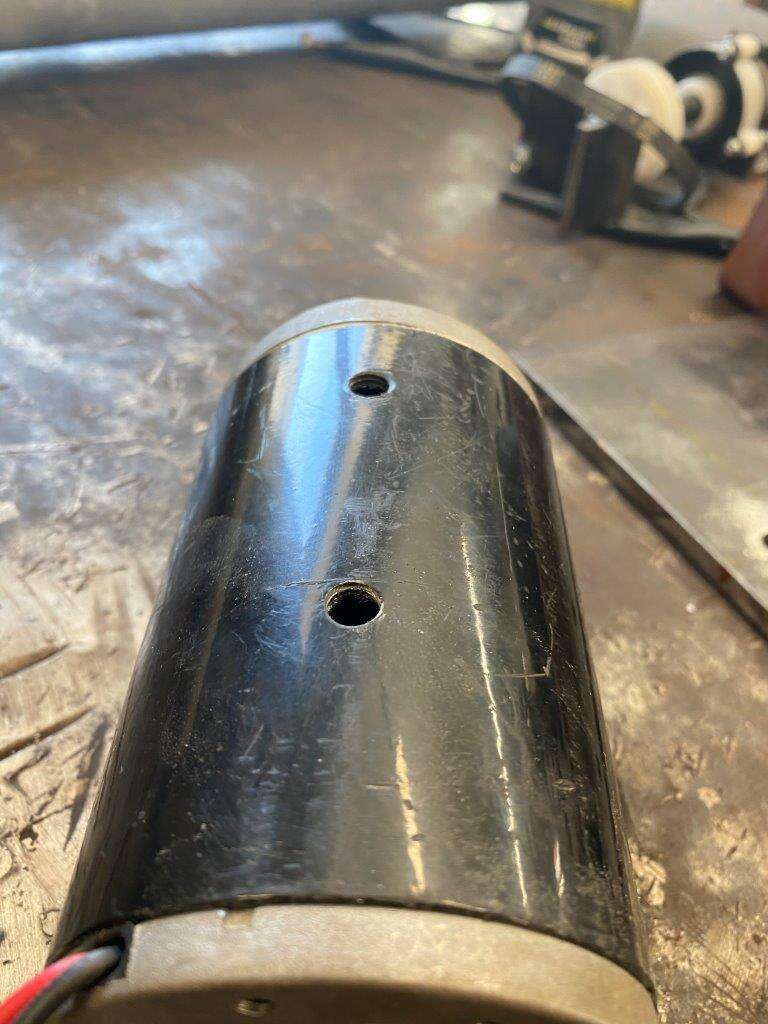
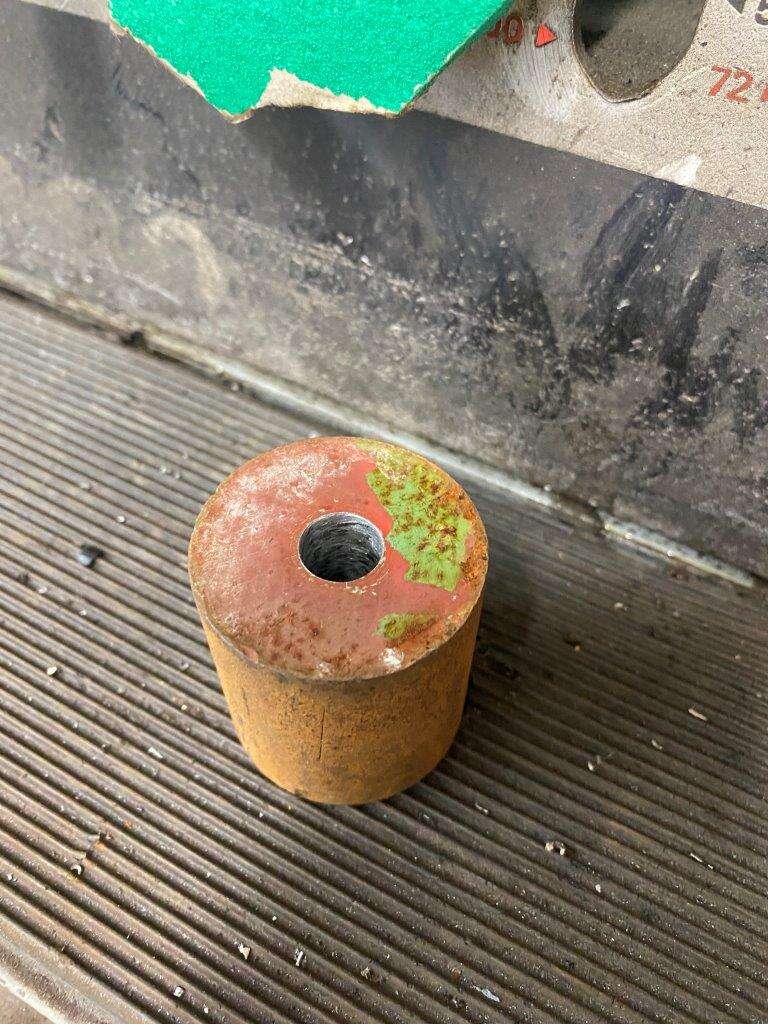
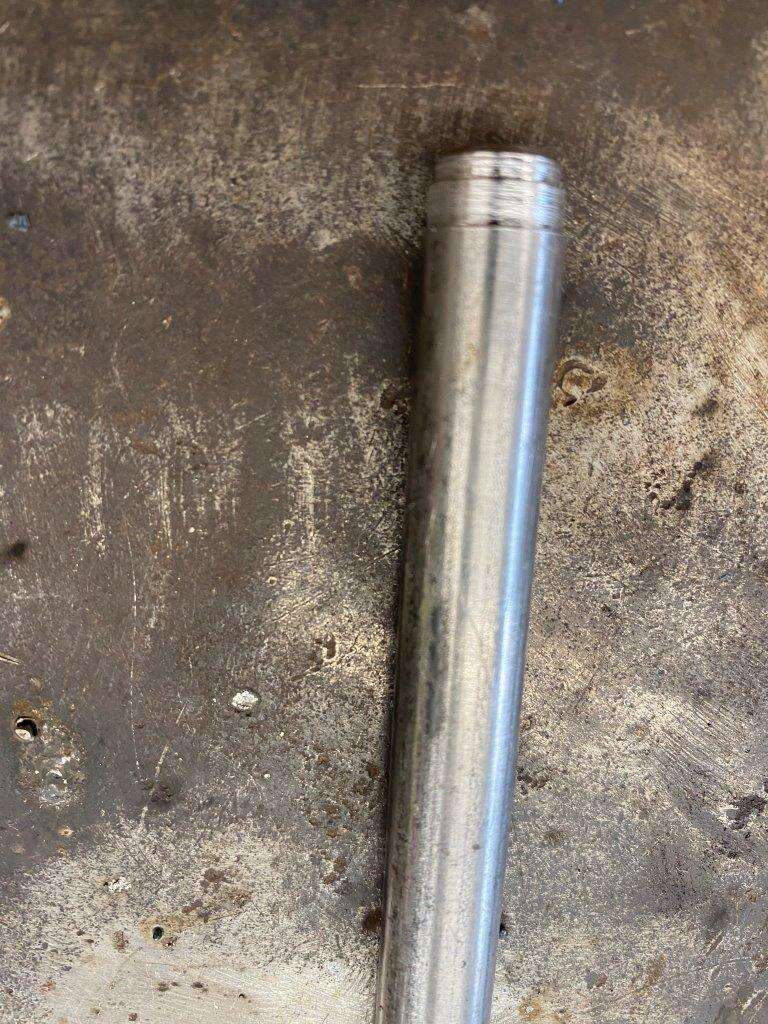
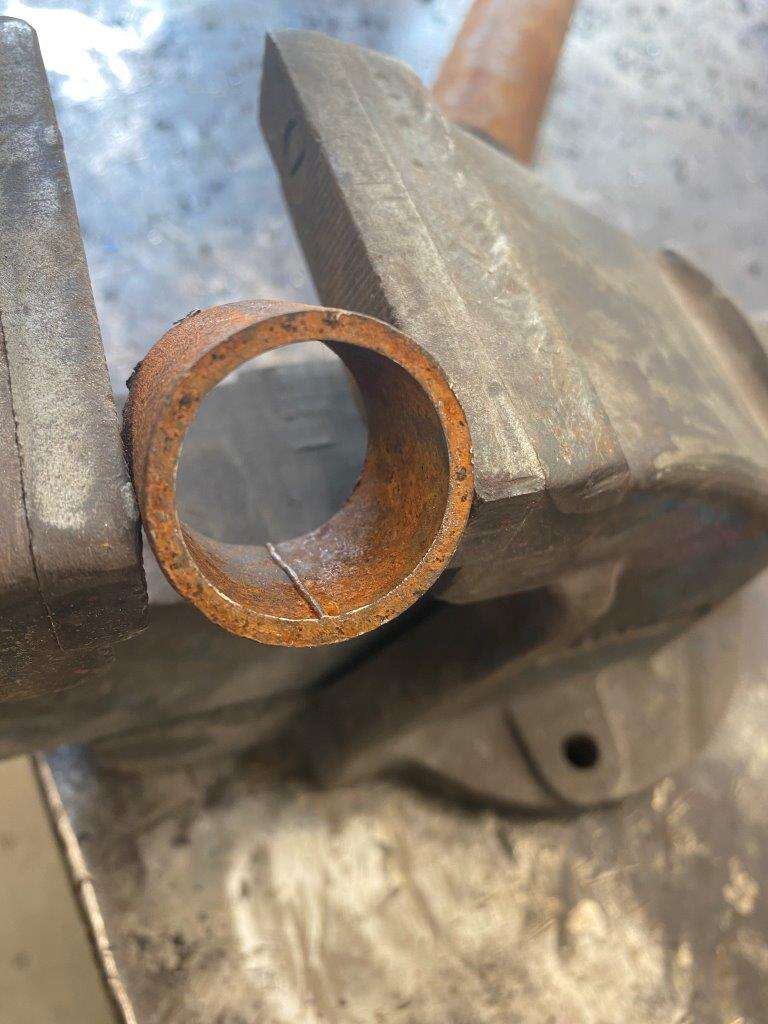
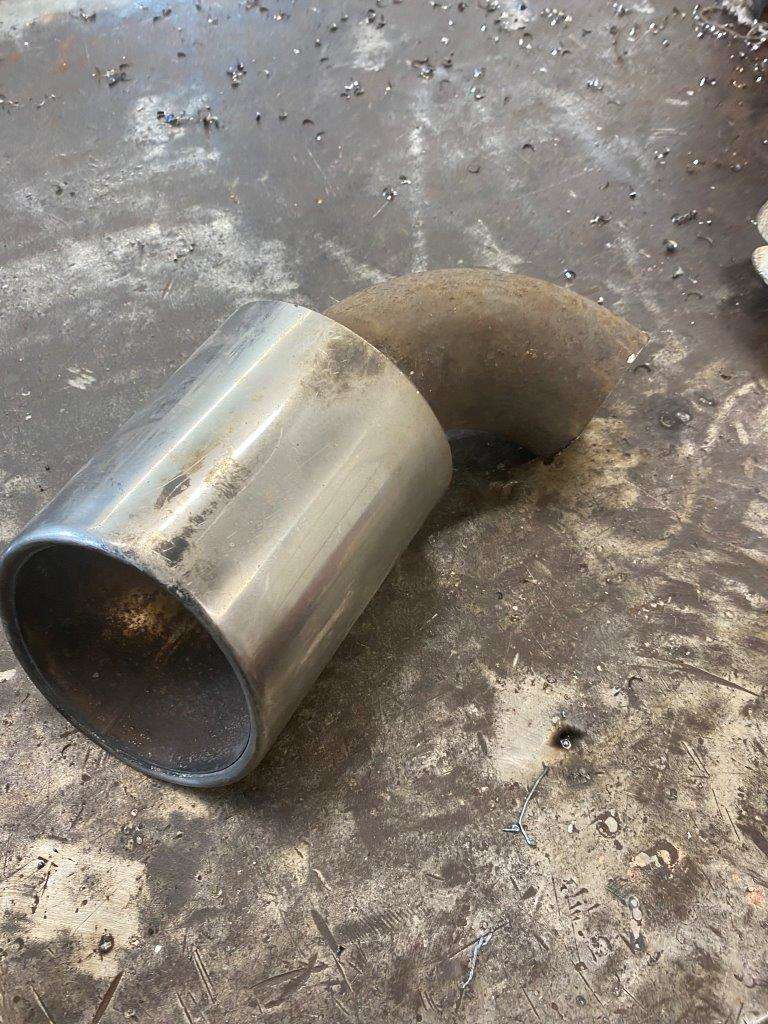
This means the motor doesn’t sit well on a flat surface, it would probably be OK but I thought it could be a little better, after a bit of rummaging I found this bit of aluminium pipe
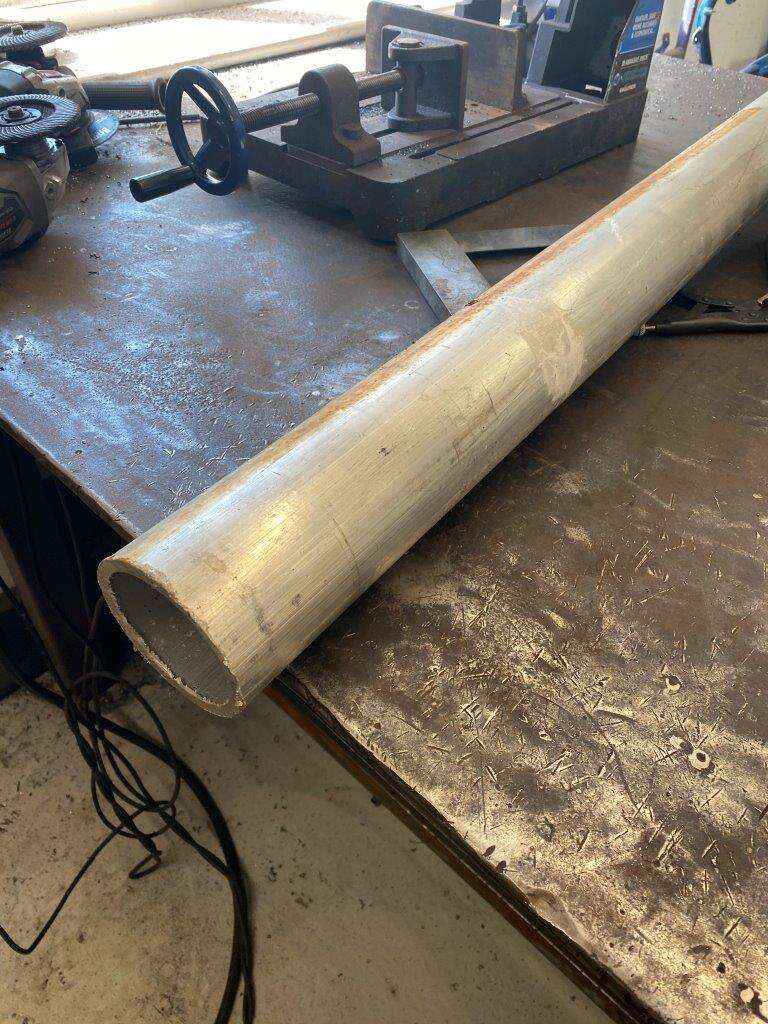
Which almost fits the motor
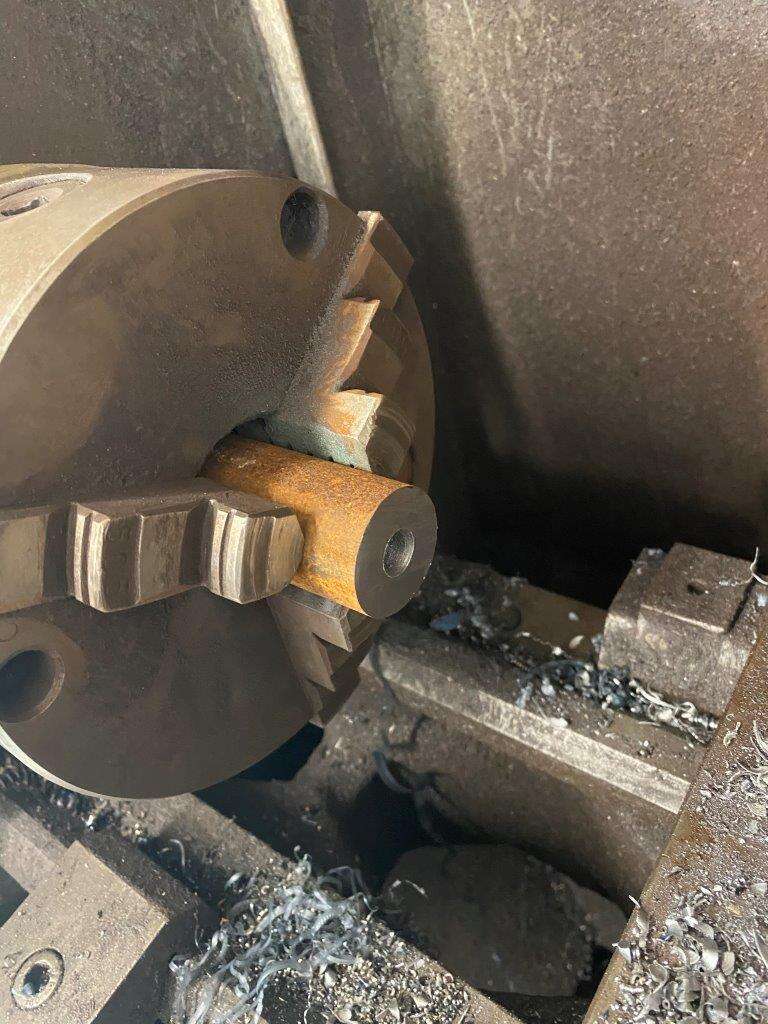
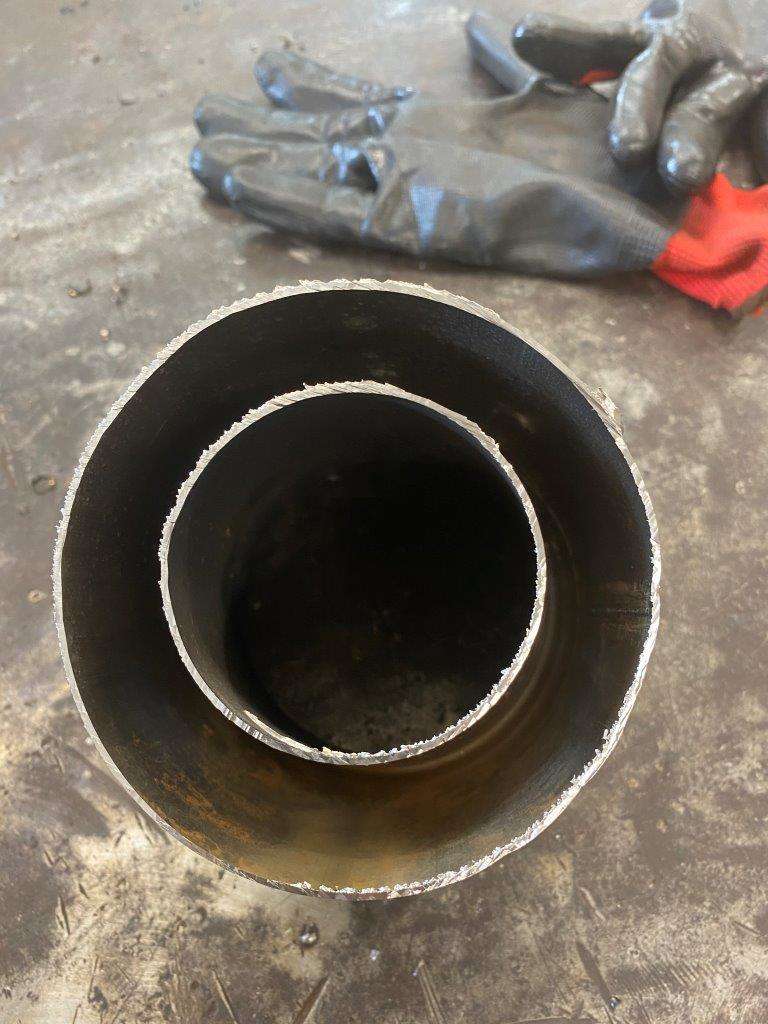
It has thick side walls so I have wiggle room
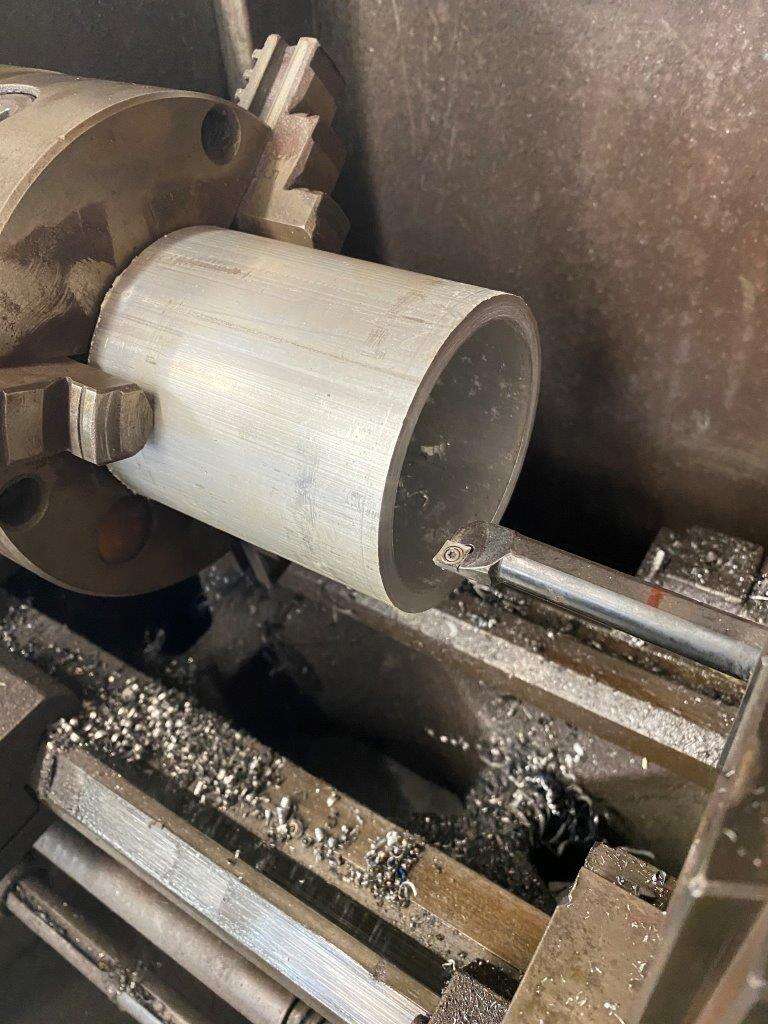
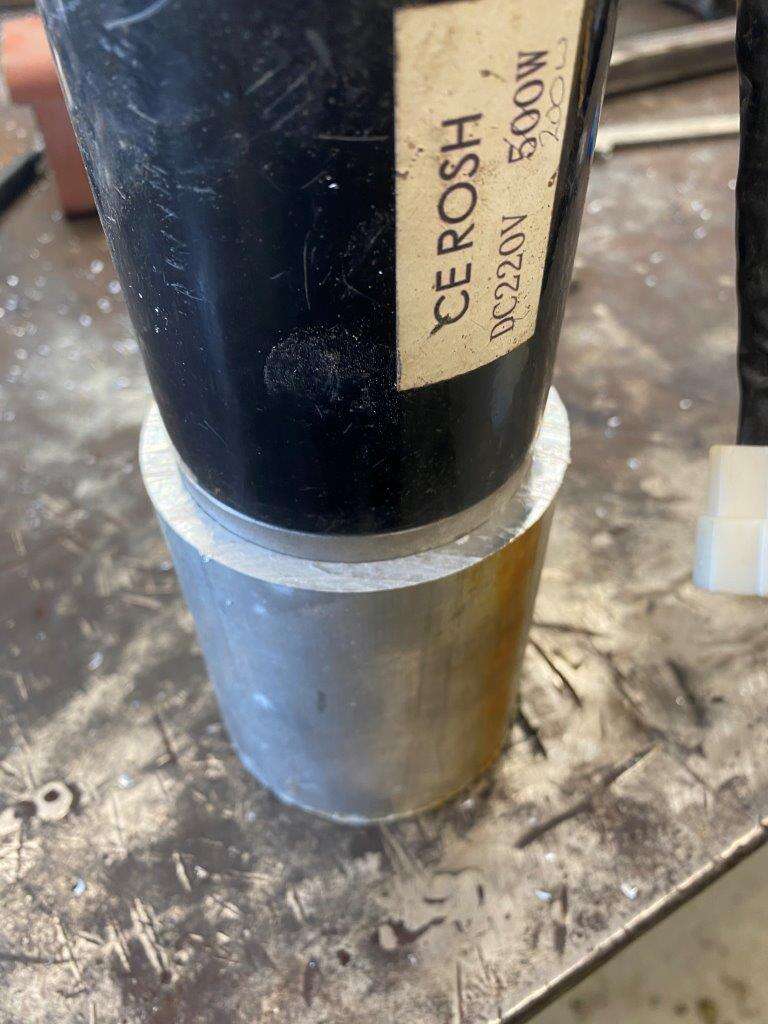
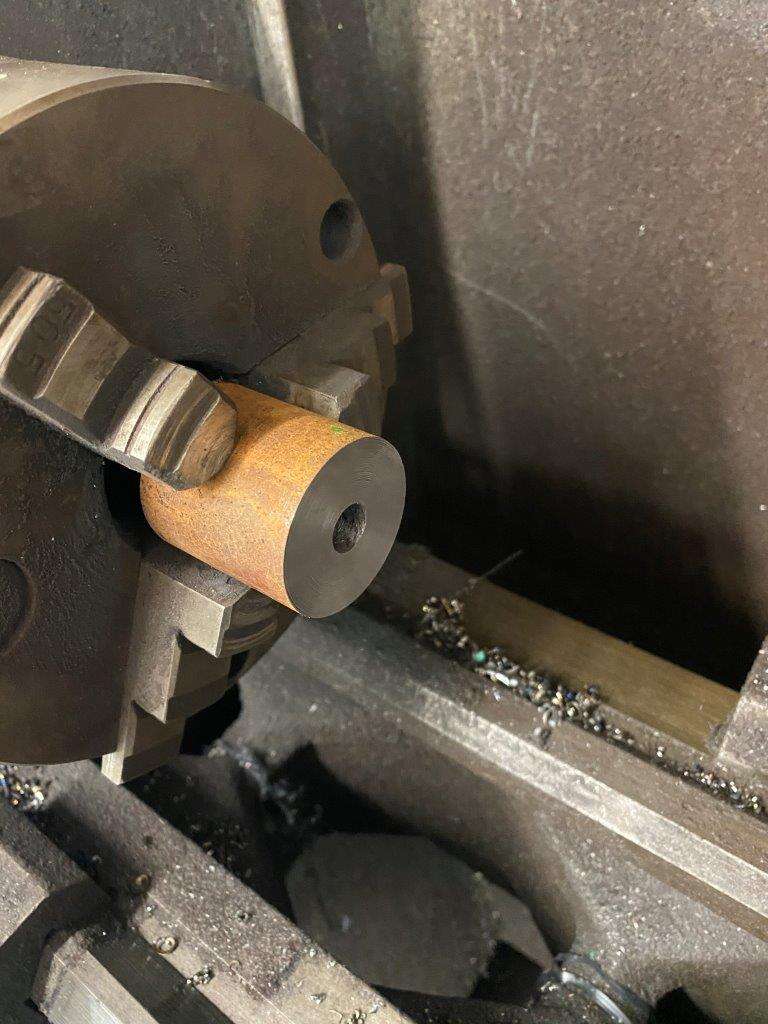
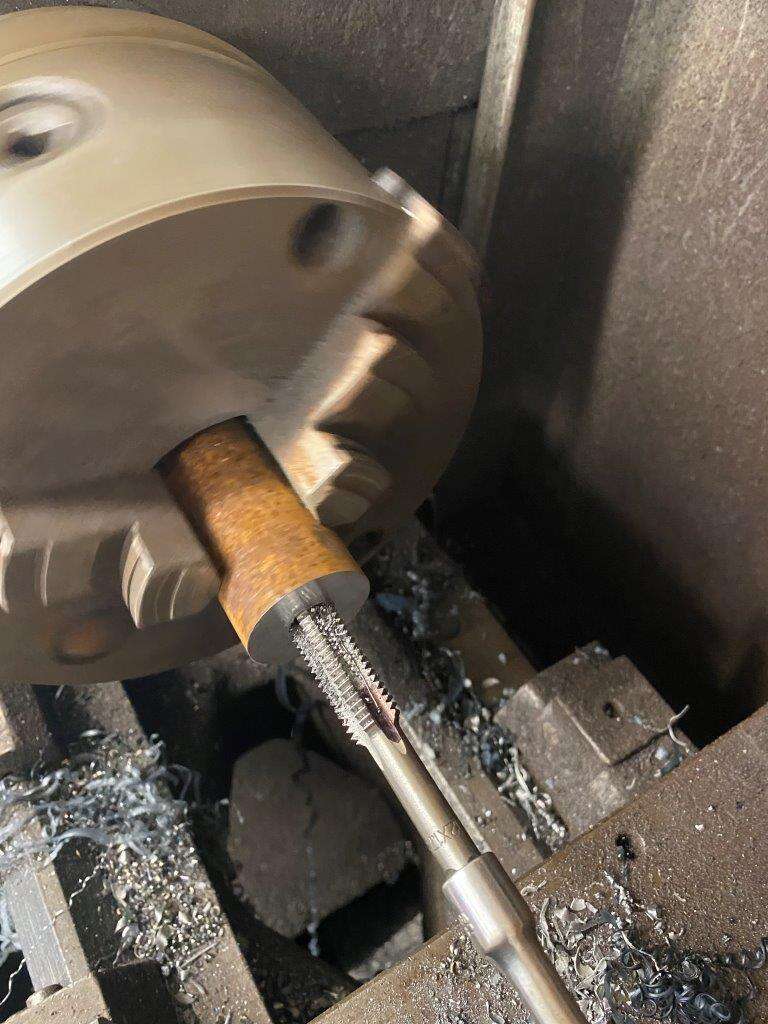
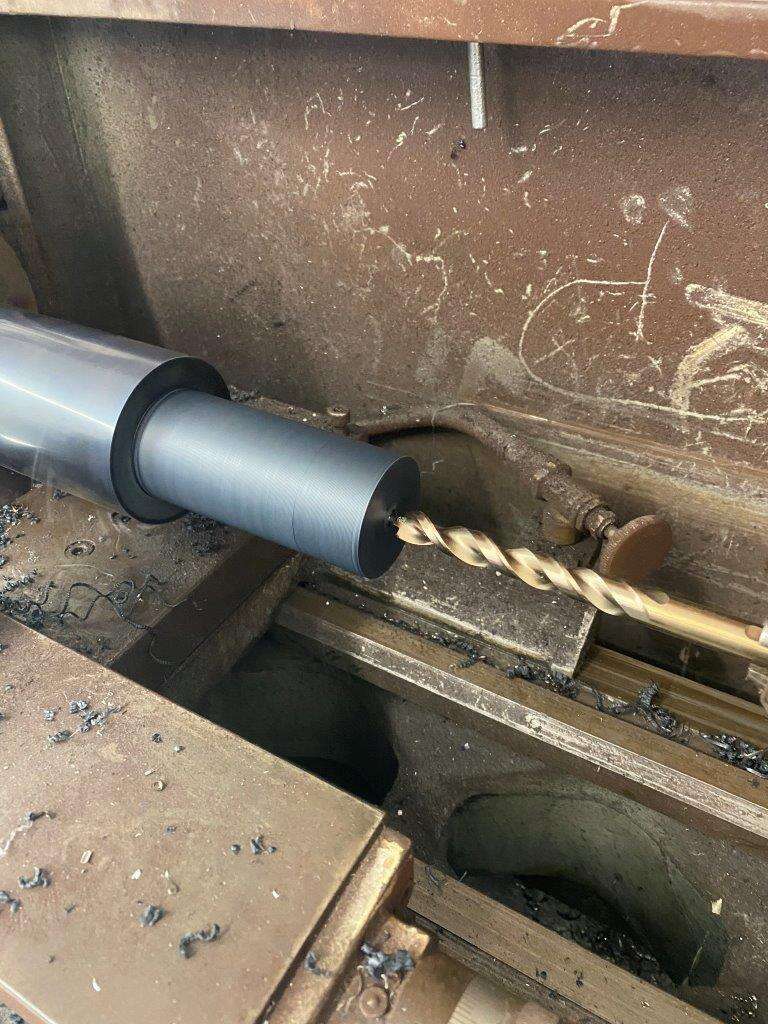
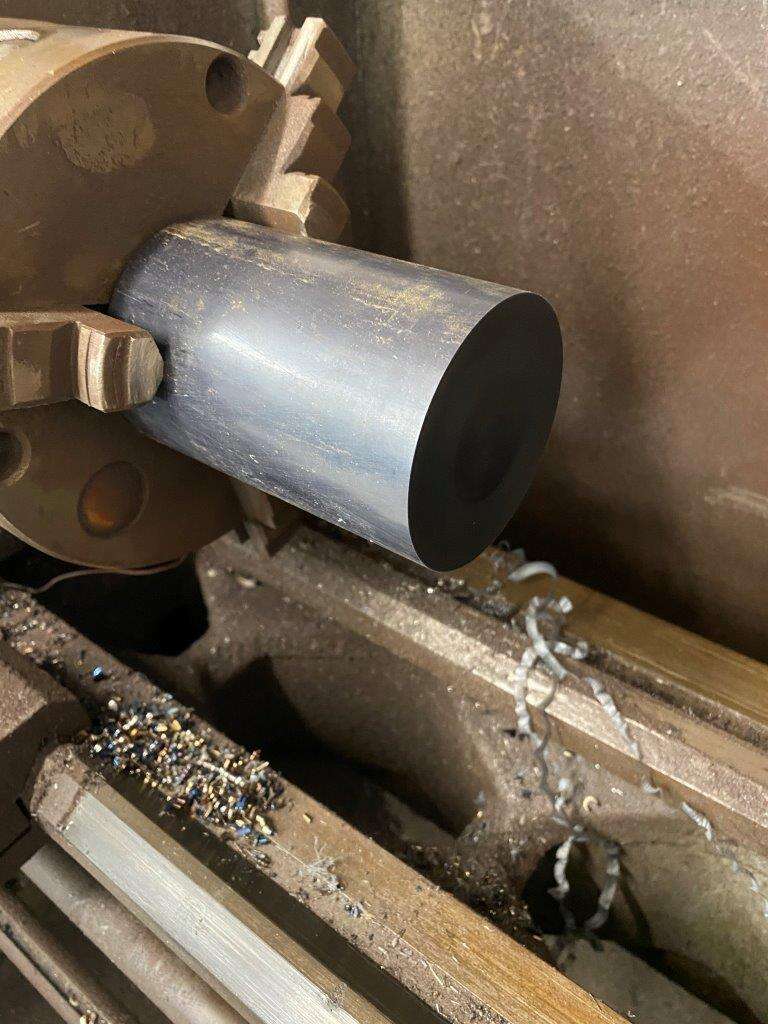
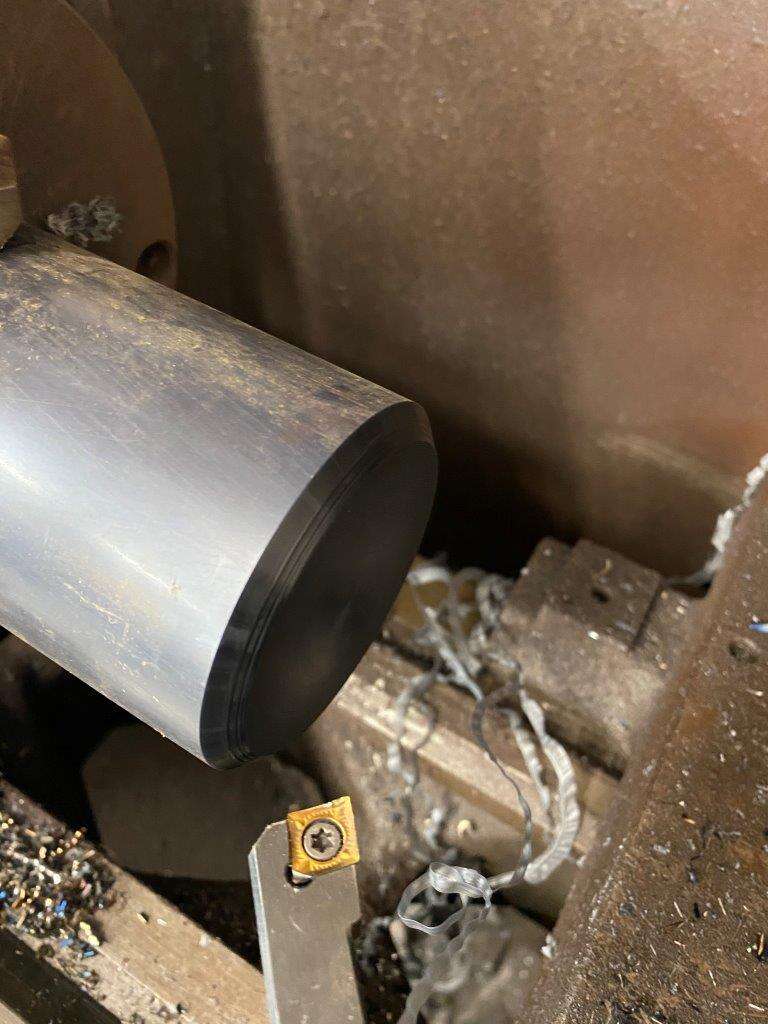
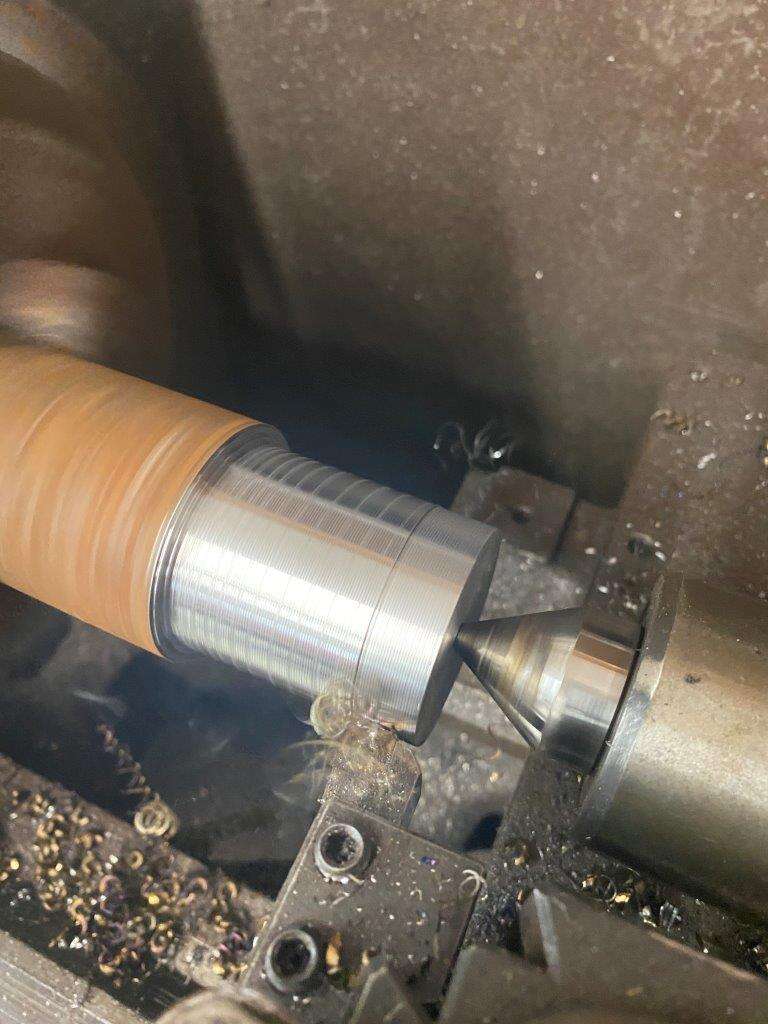
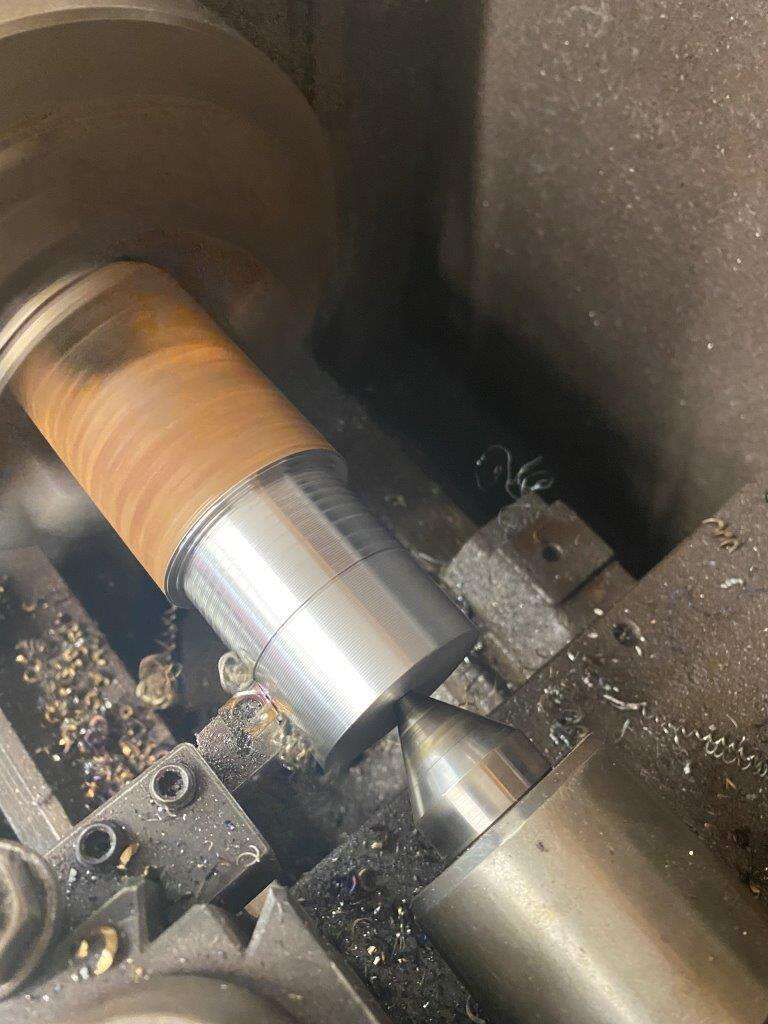
I utilised the wiggle room on the lathe
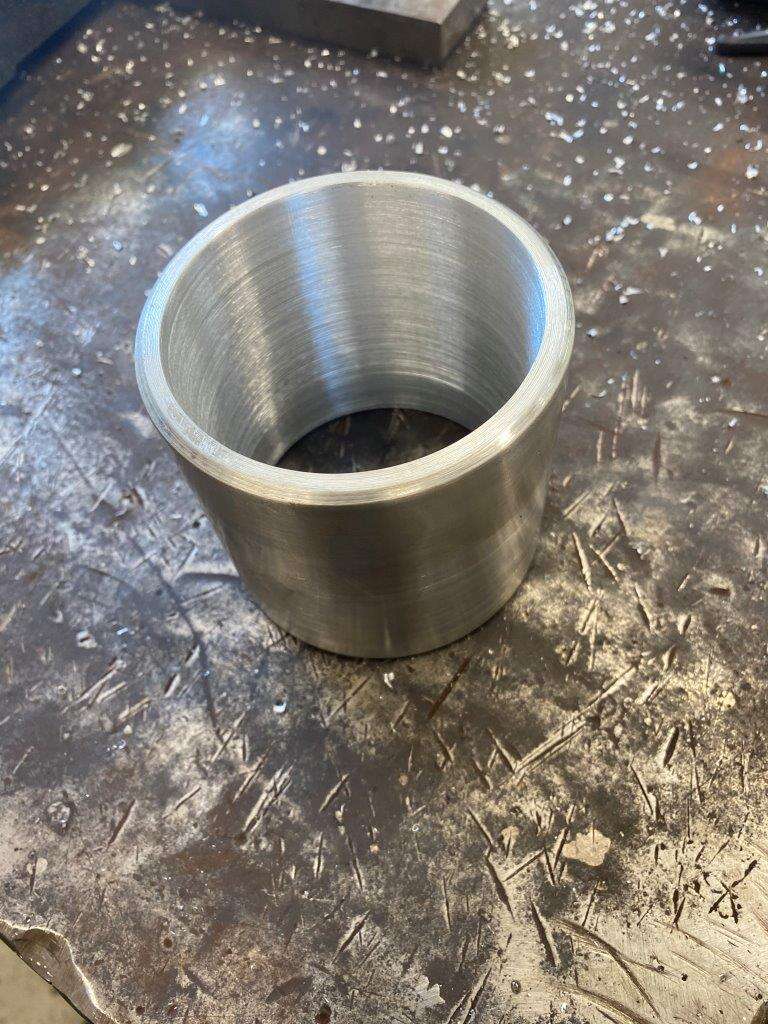
Now the motor fits
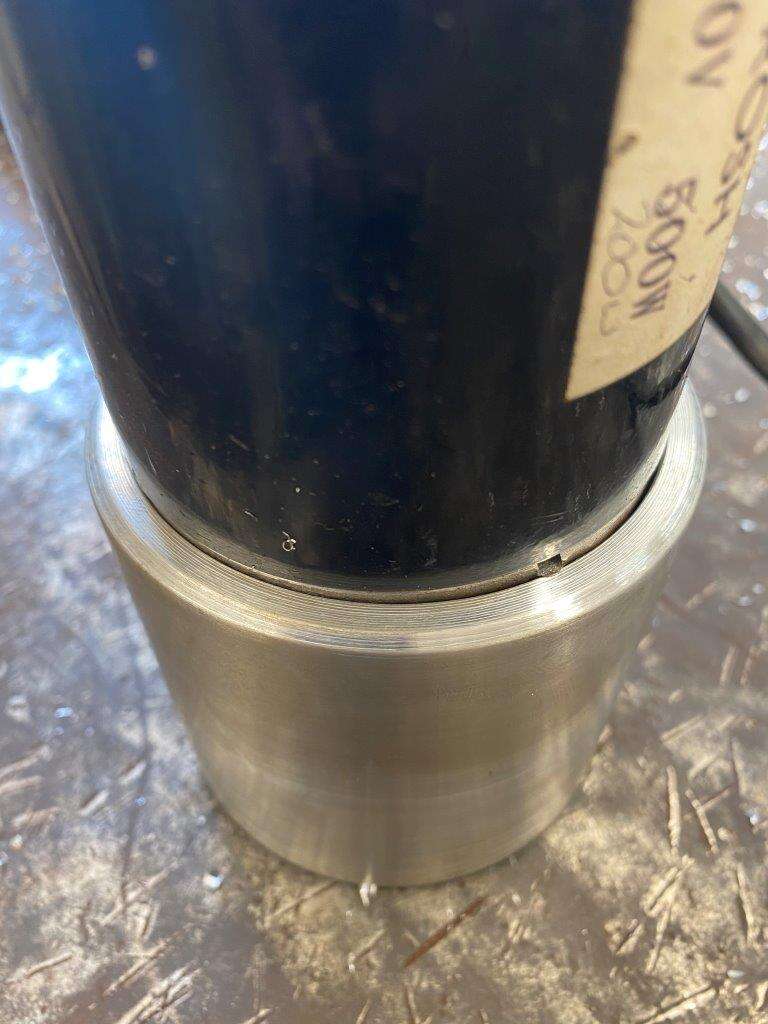
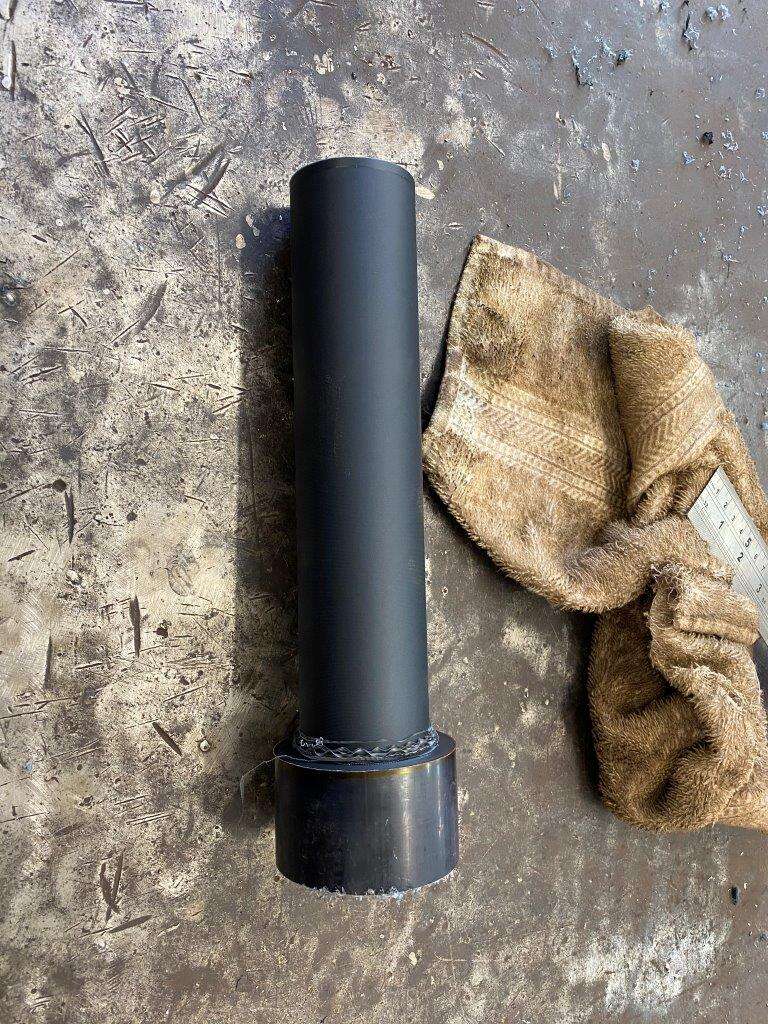
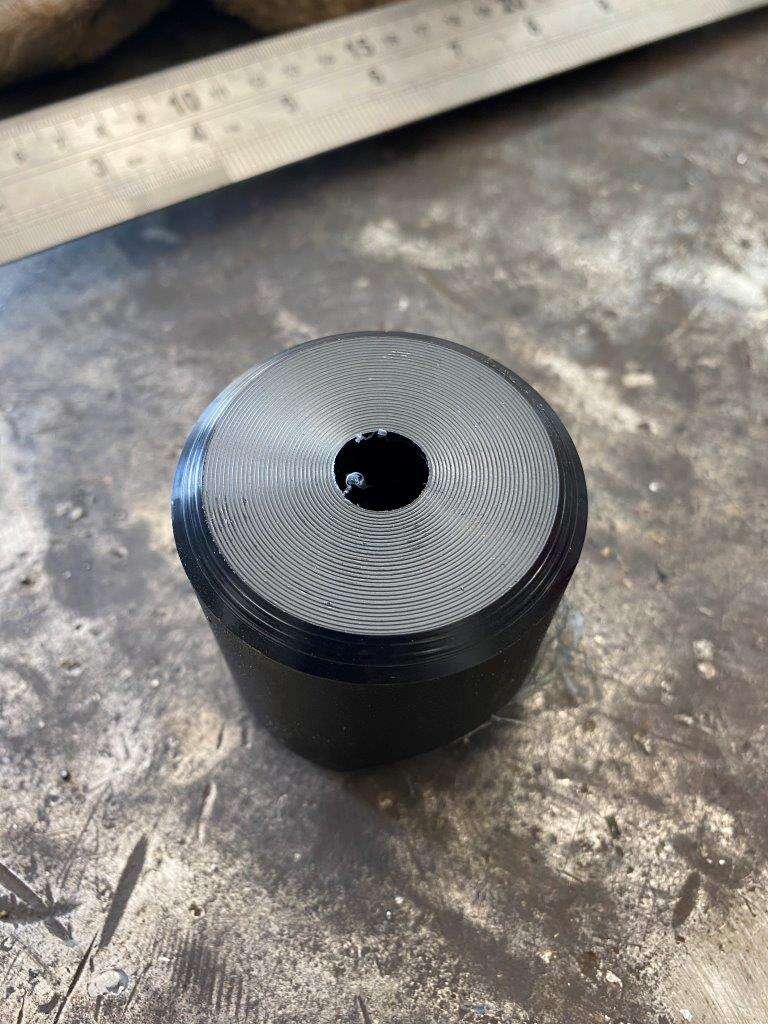
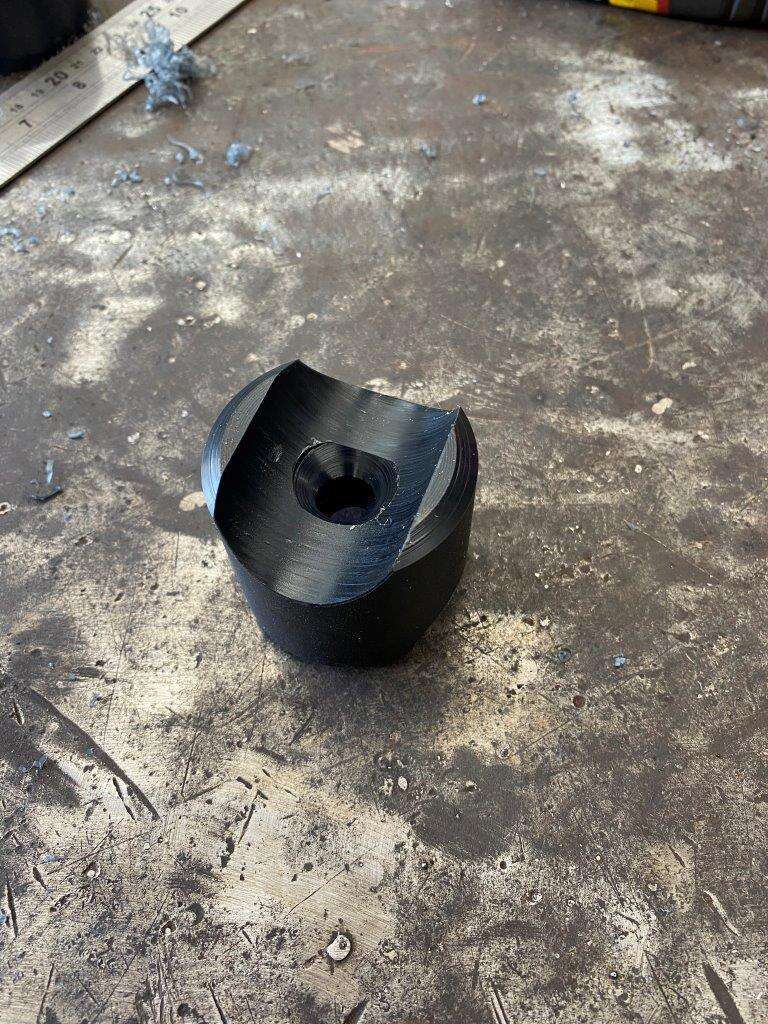
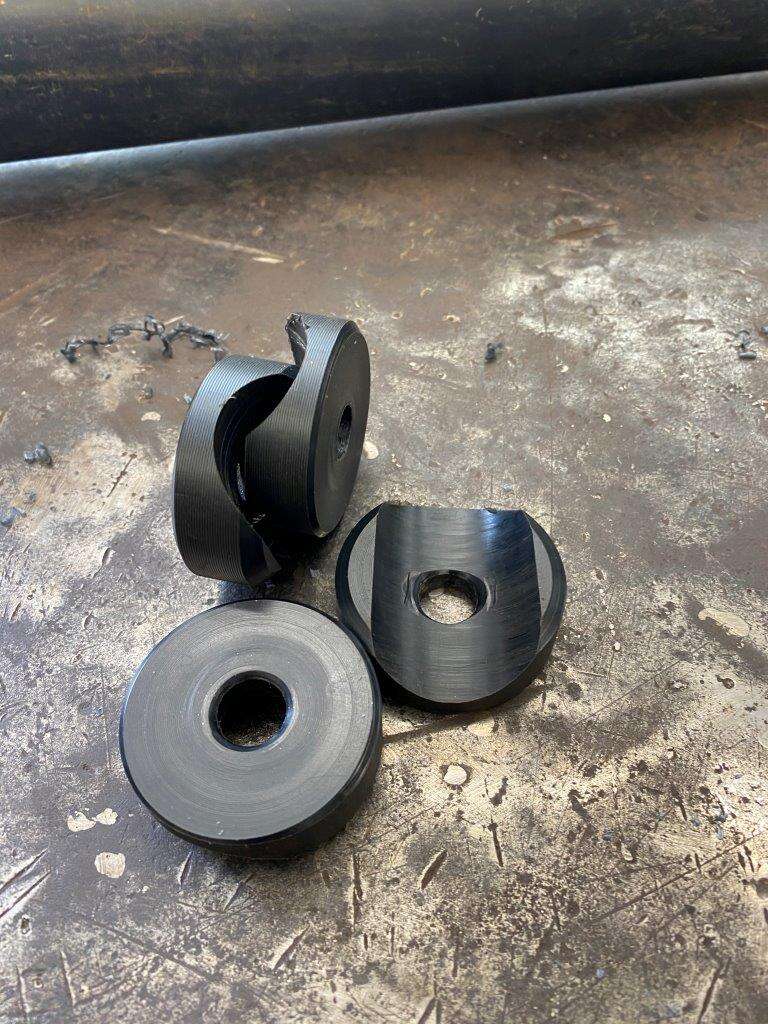
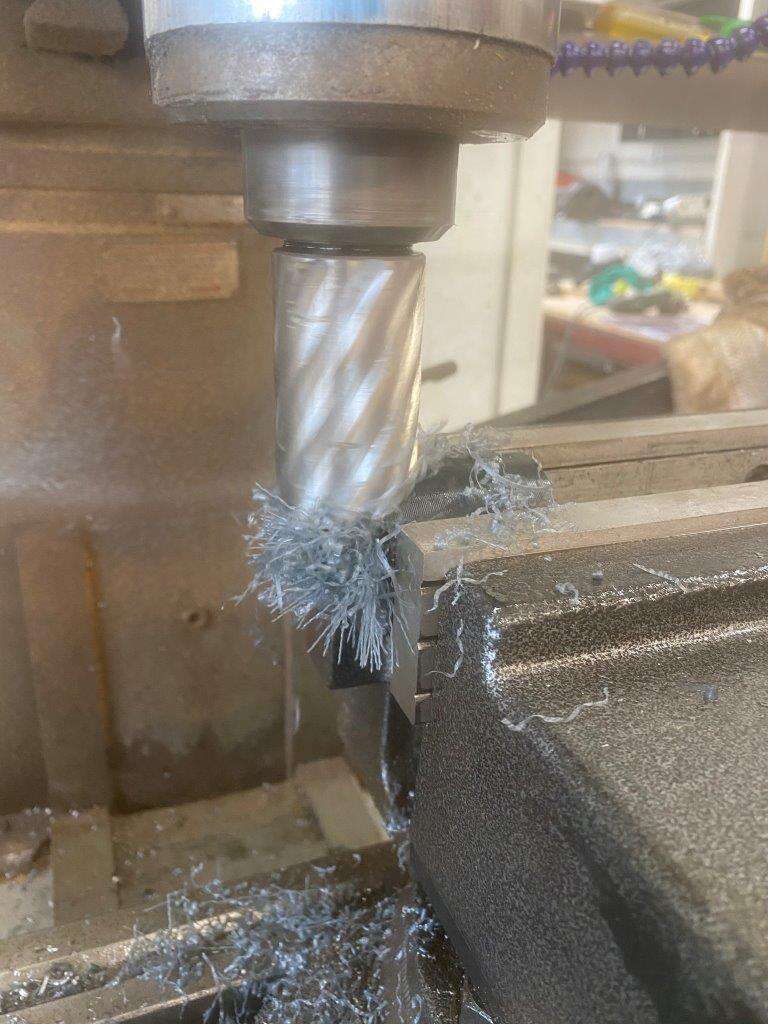
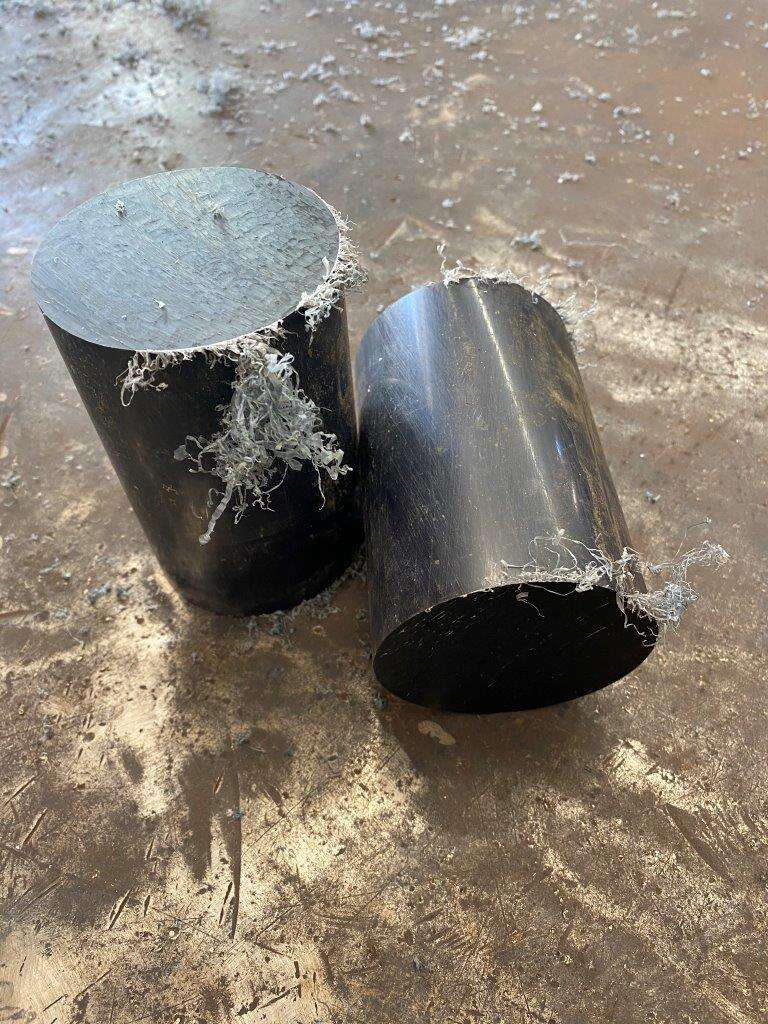
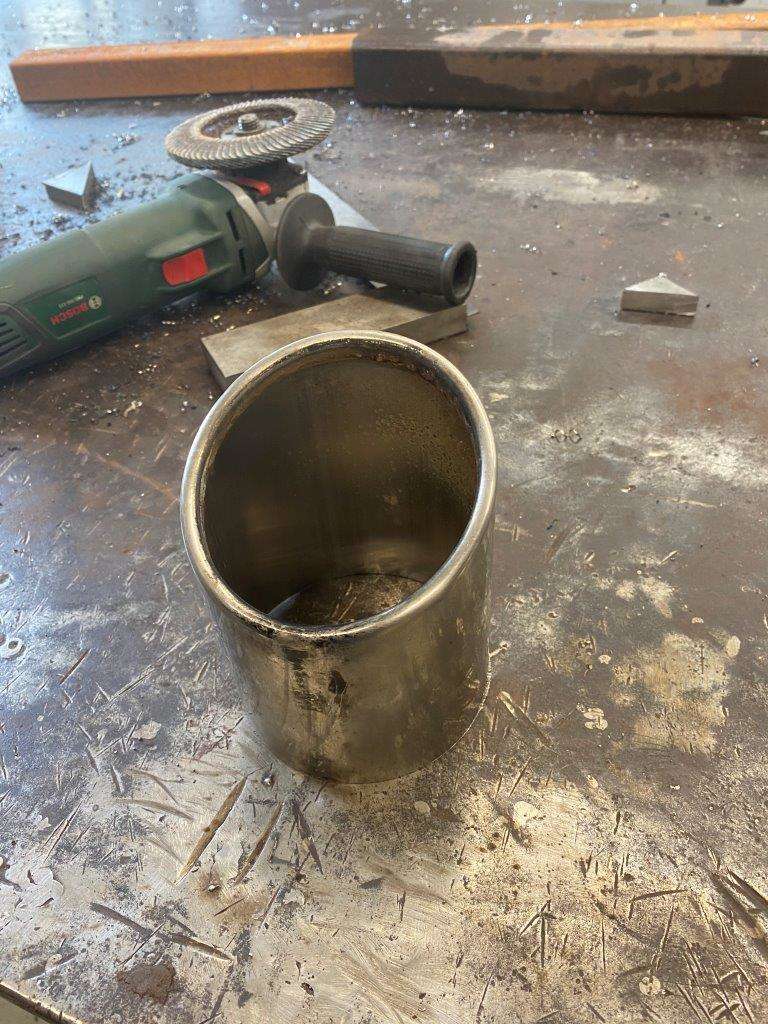
Quick spin in the mill
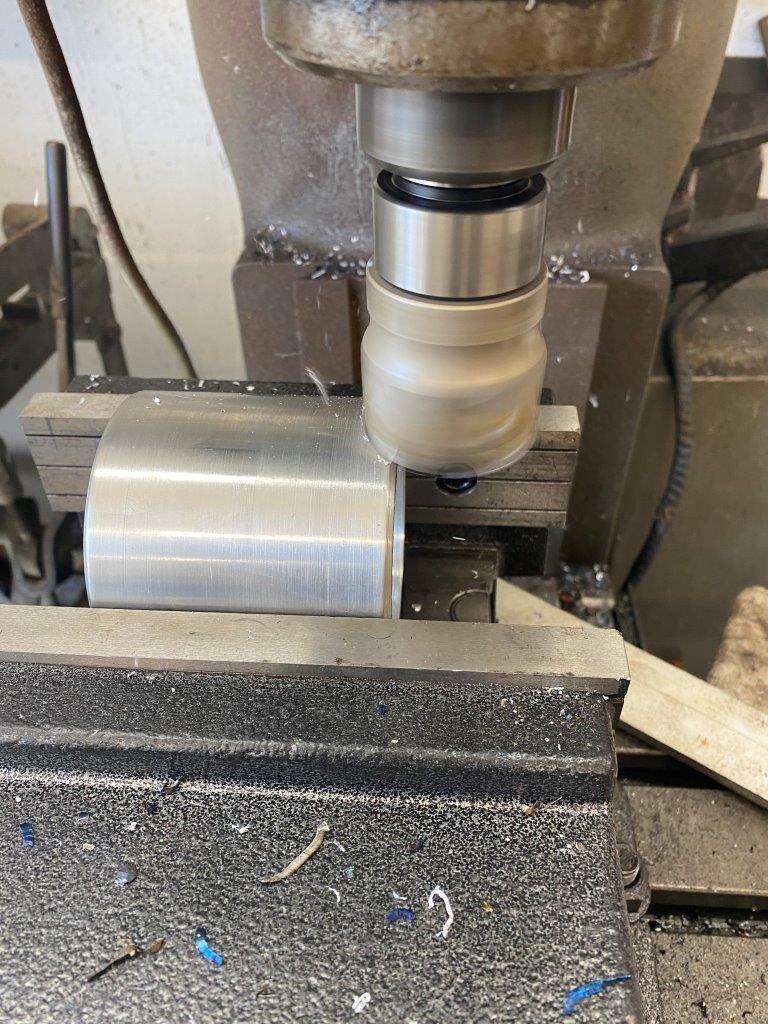
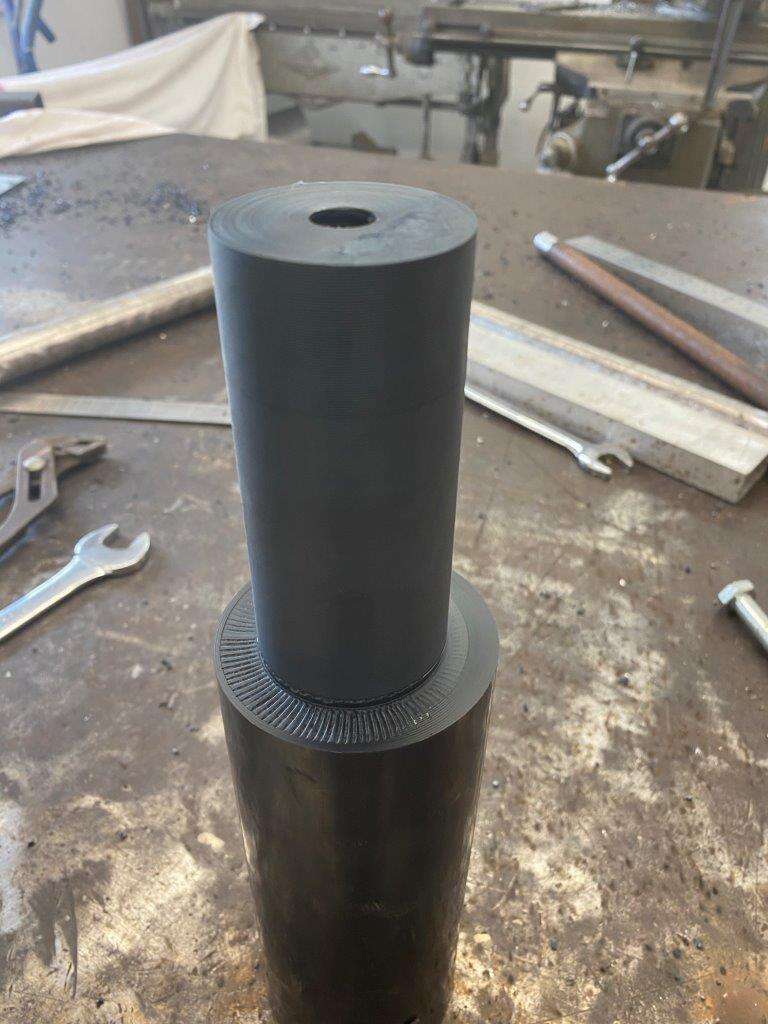
Gives us this
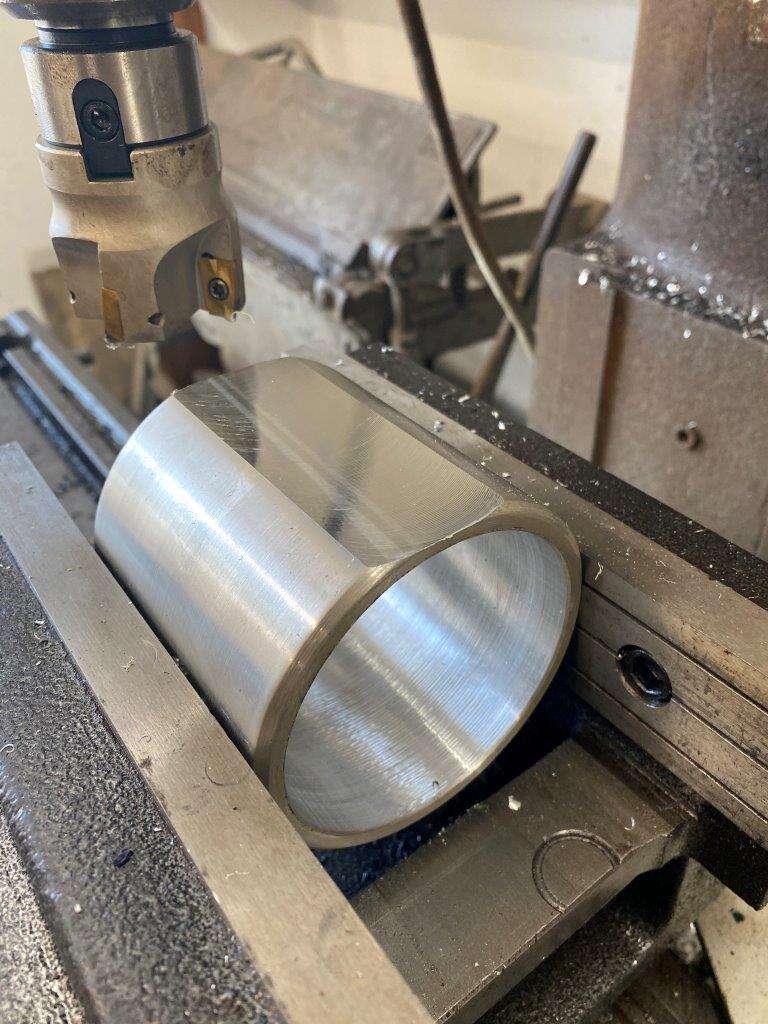
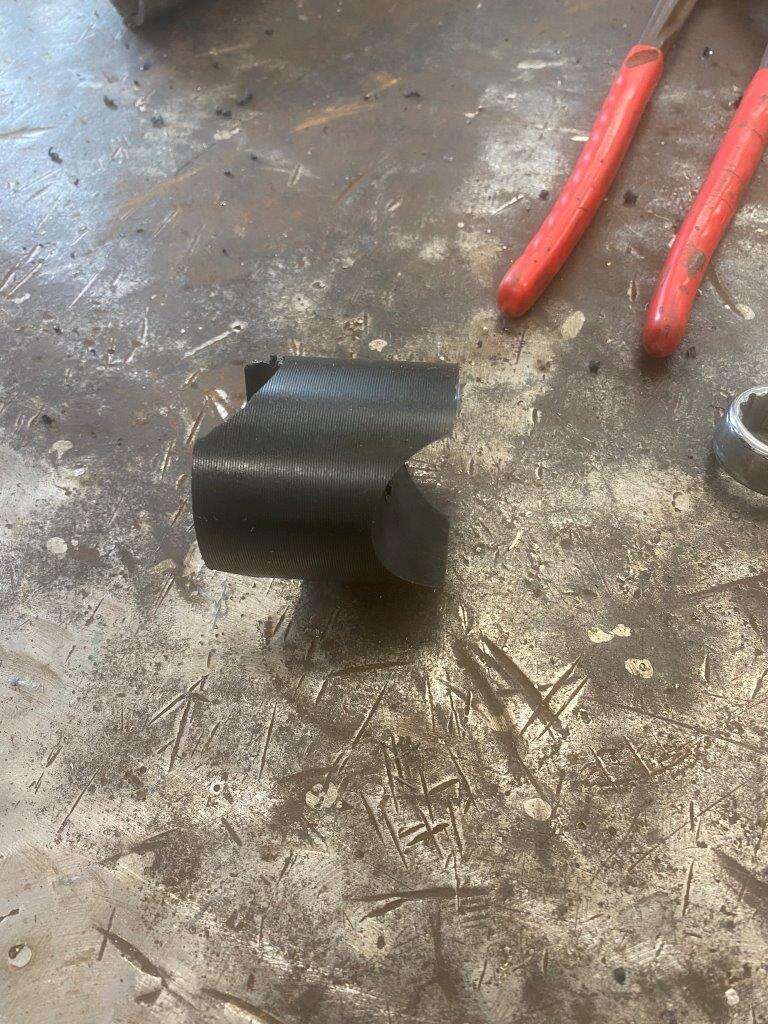
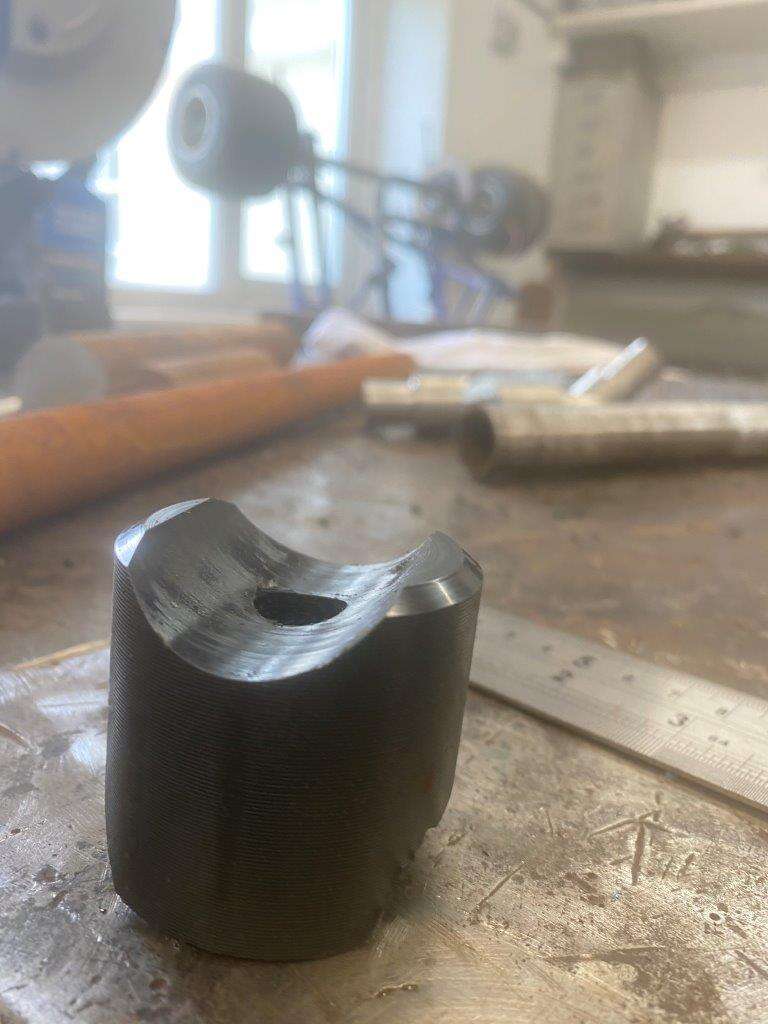
Cut about 2/3 of the pipe off
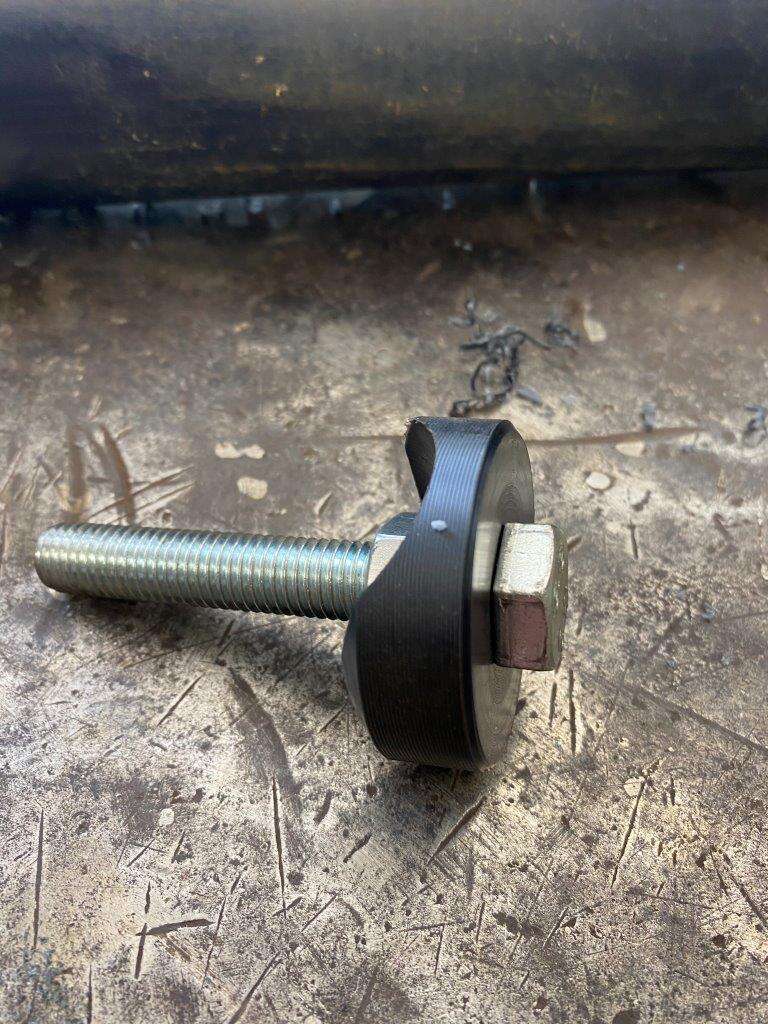
One motor mount

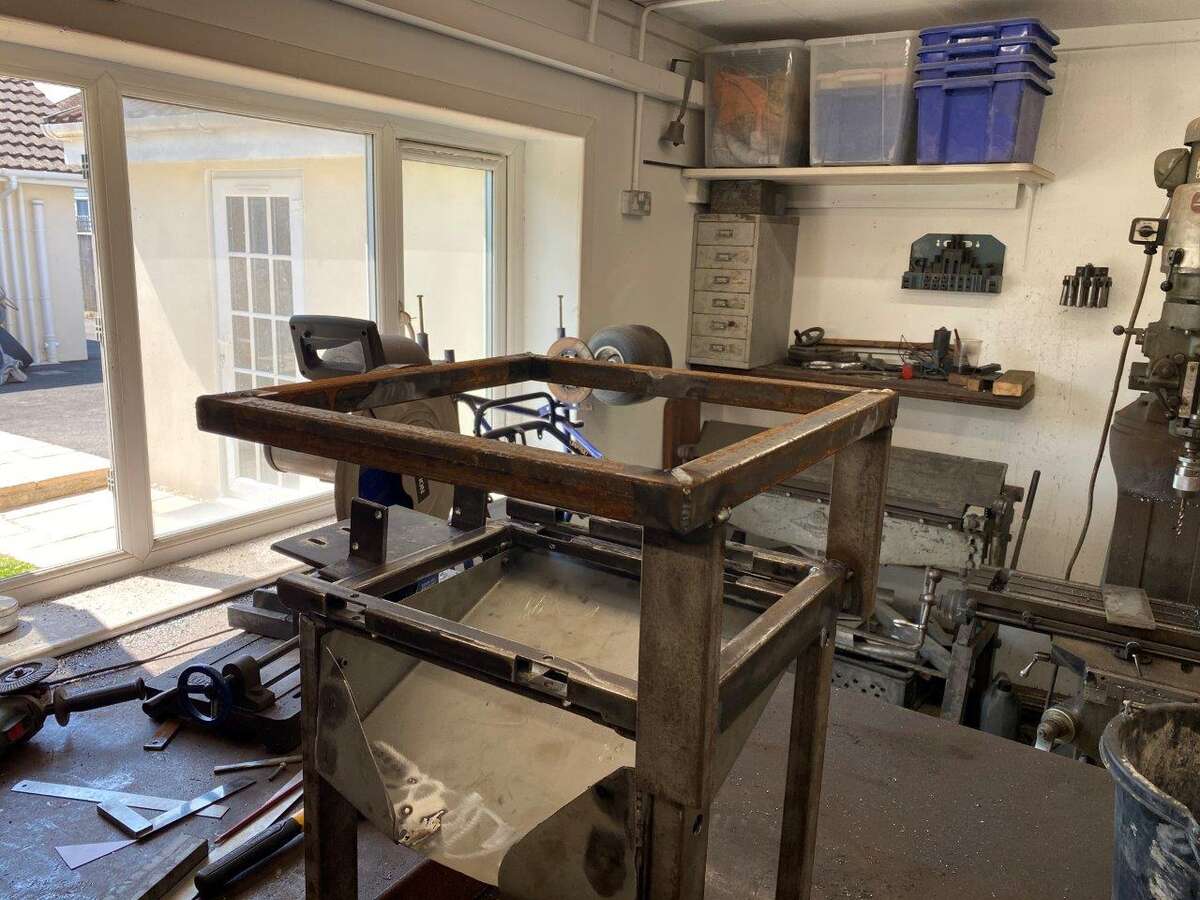
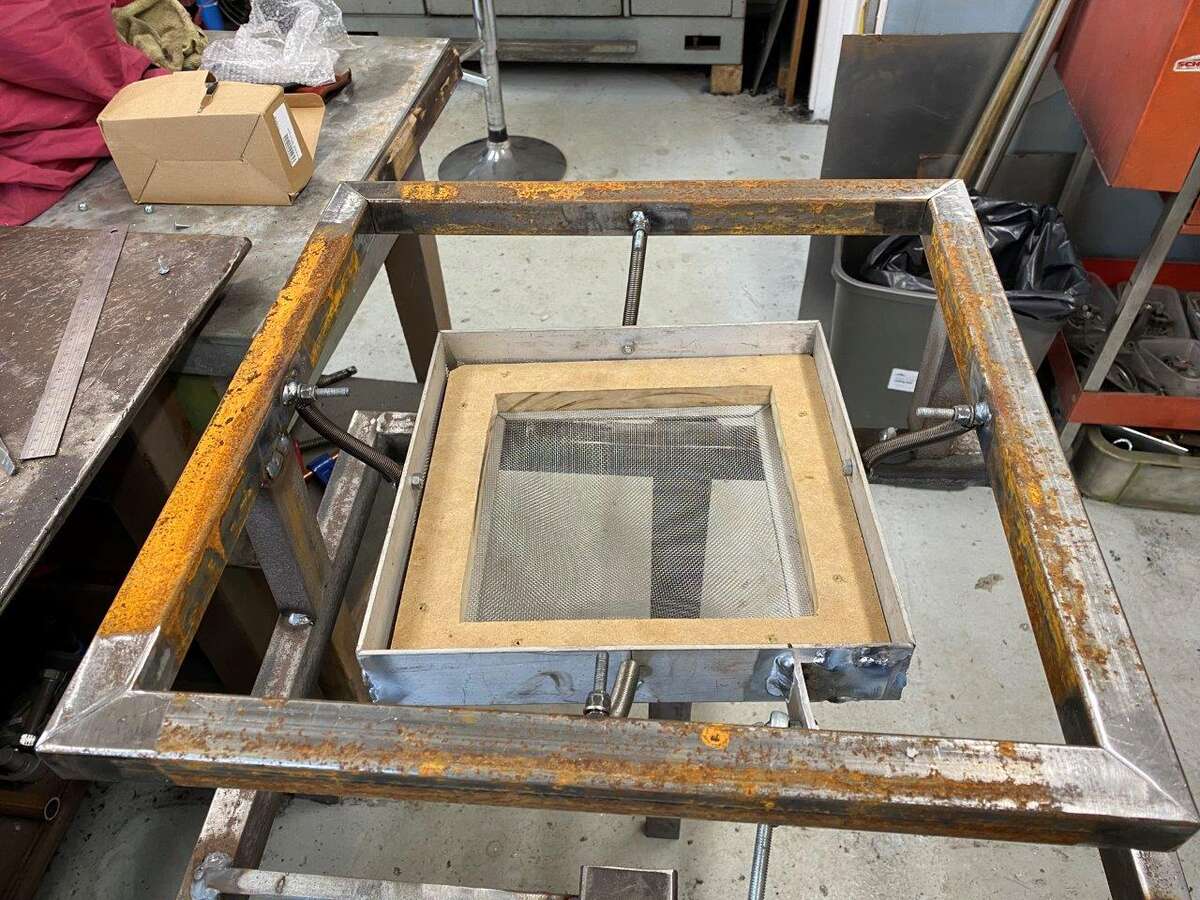
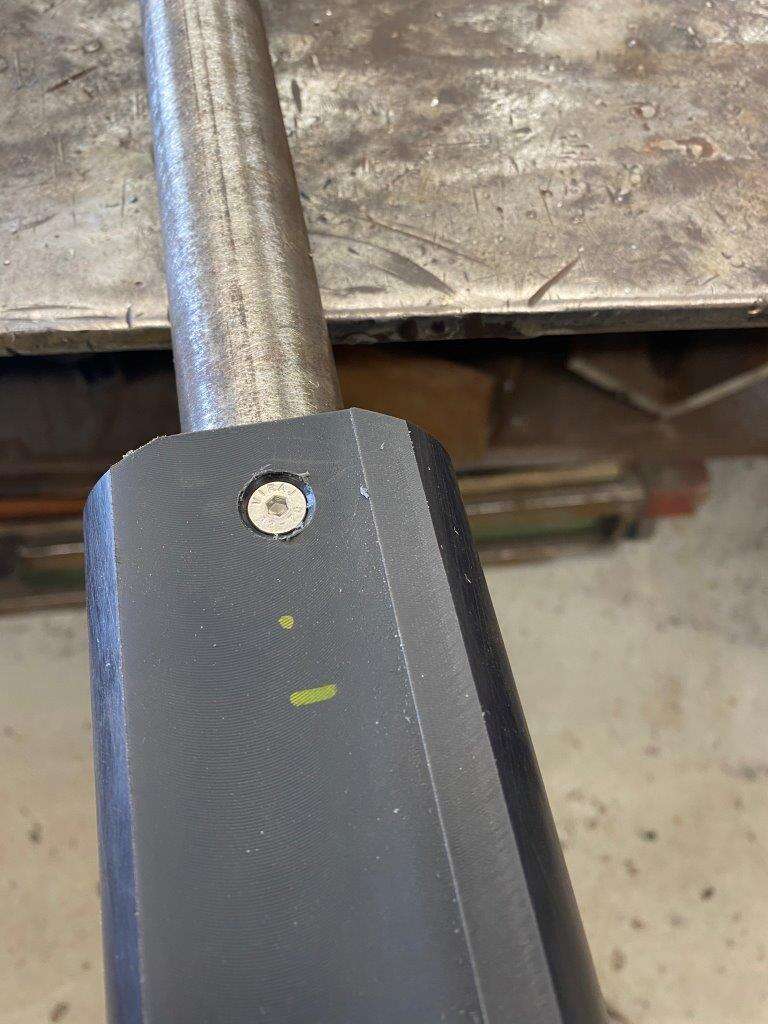
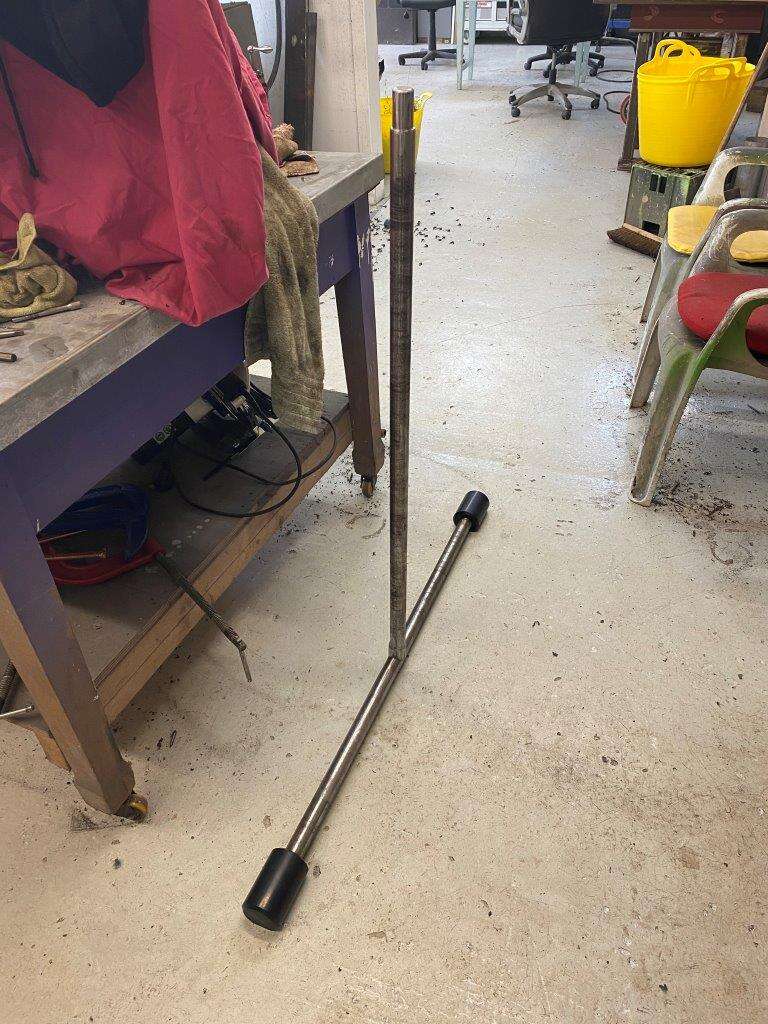
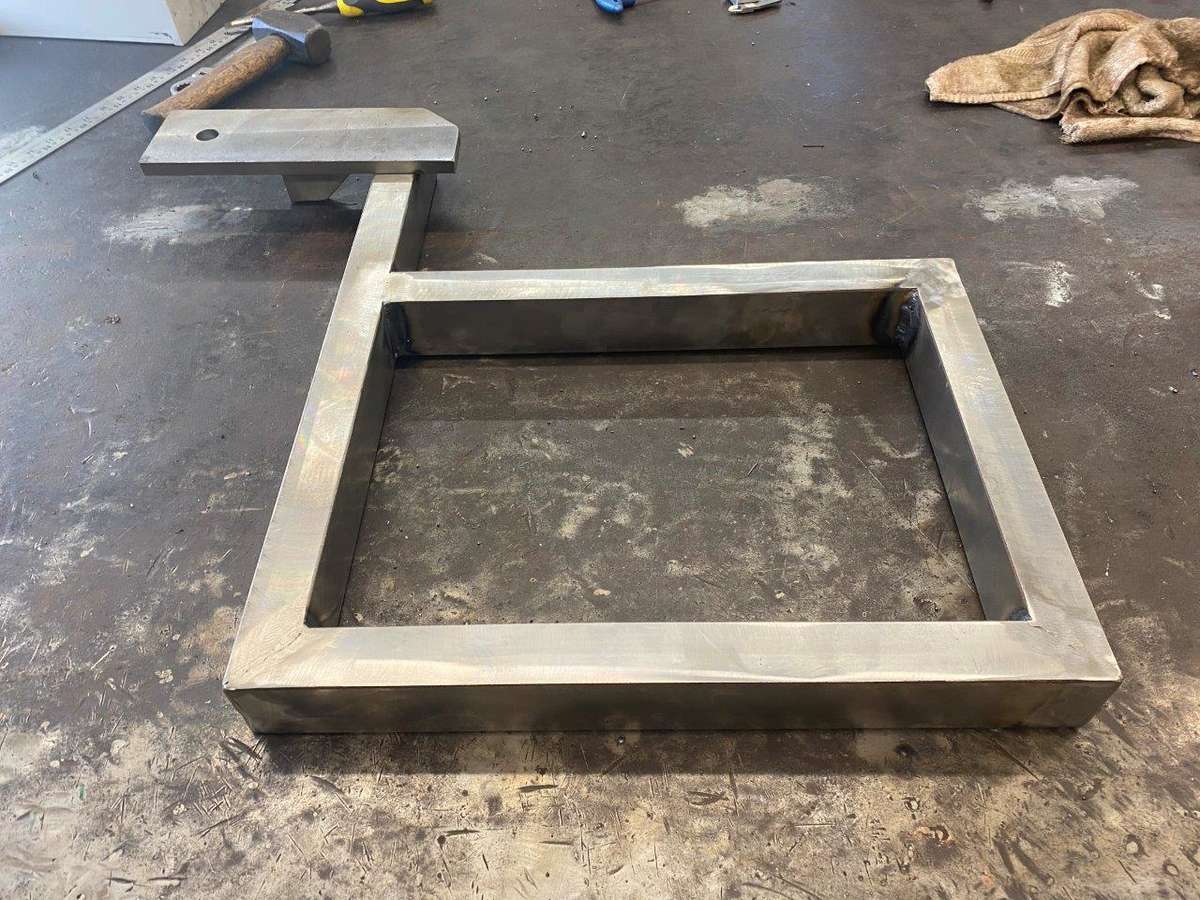
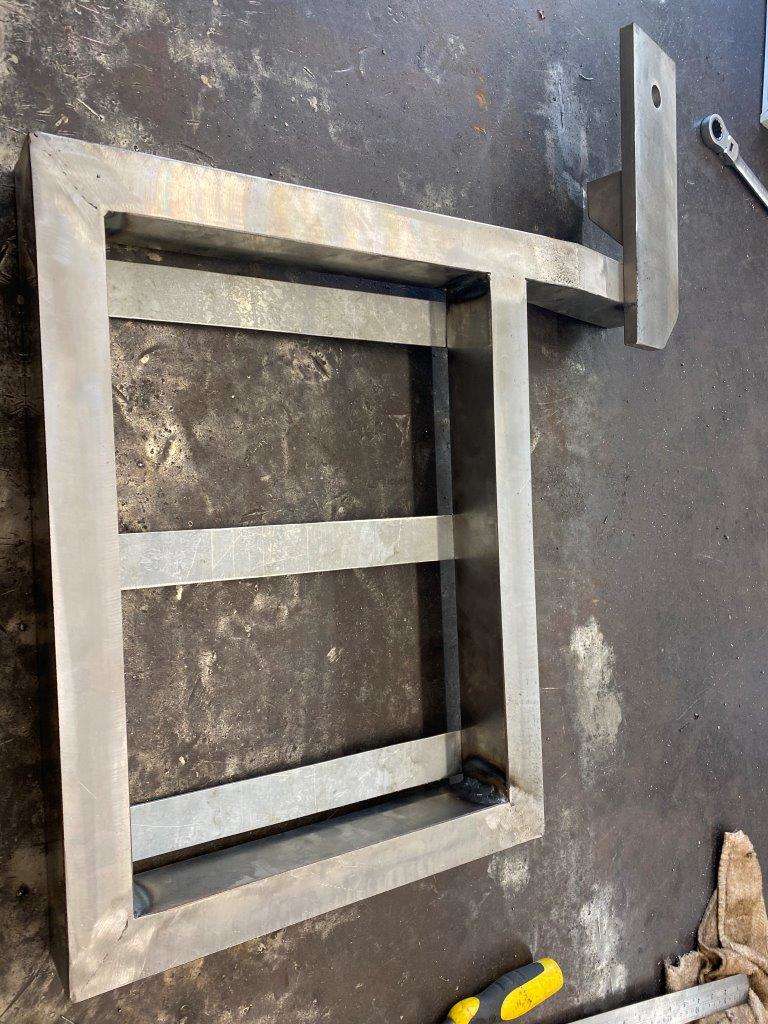
The plate is now assembled with the motor and vibration bar
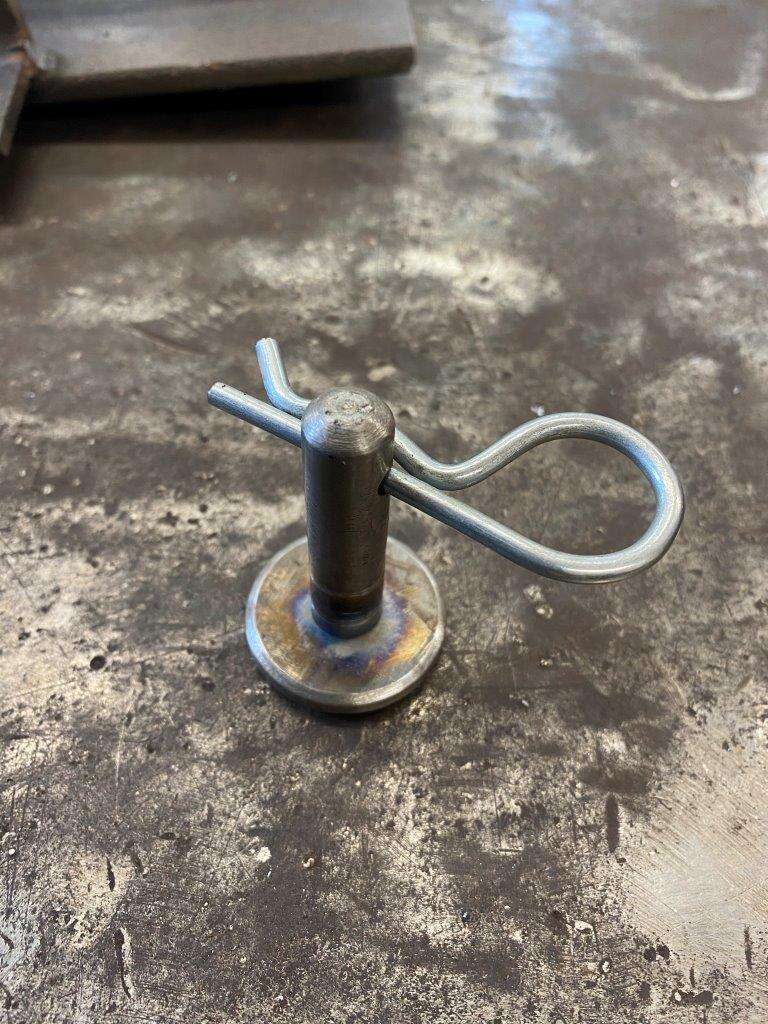
Next I made these links up
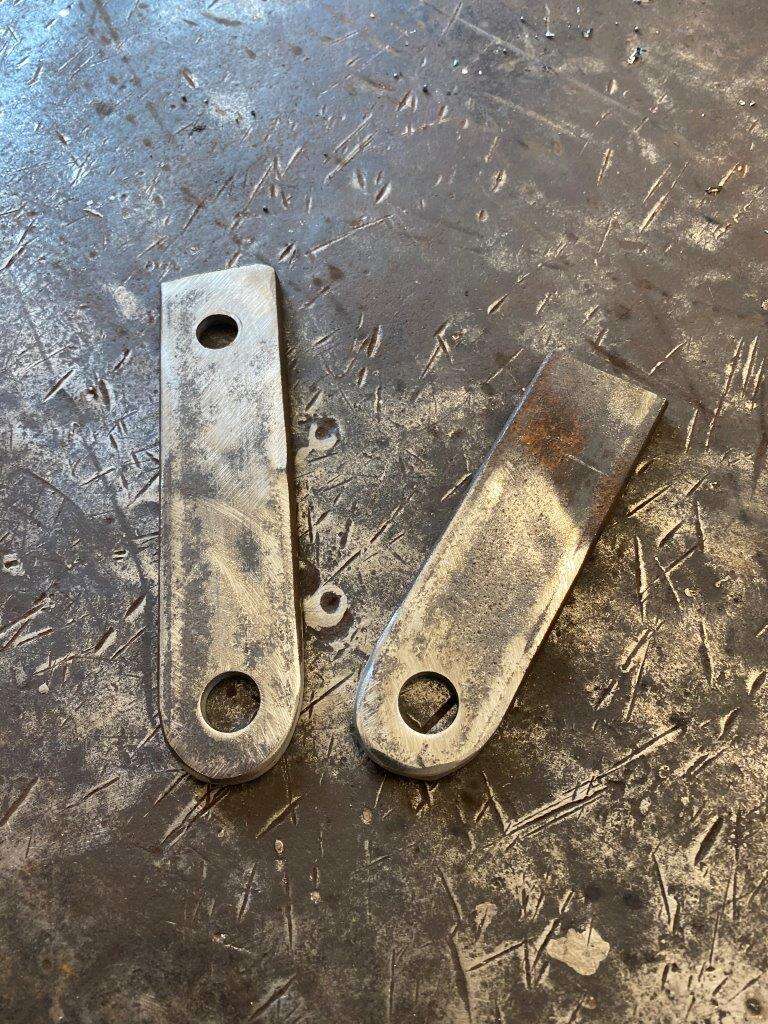
Along with a little quick release pin
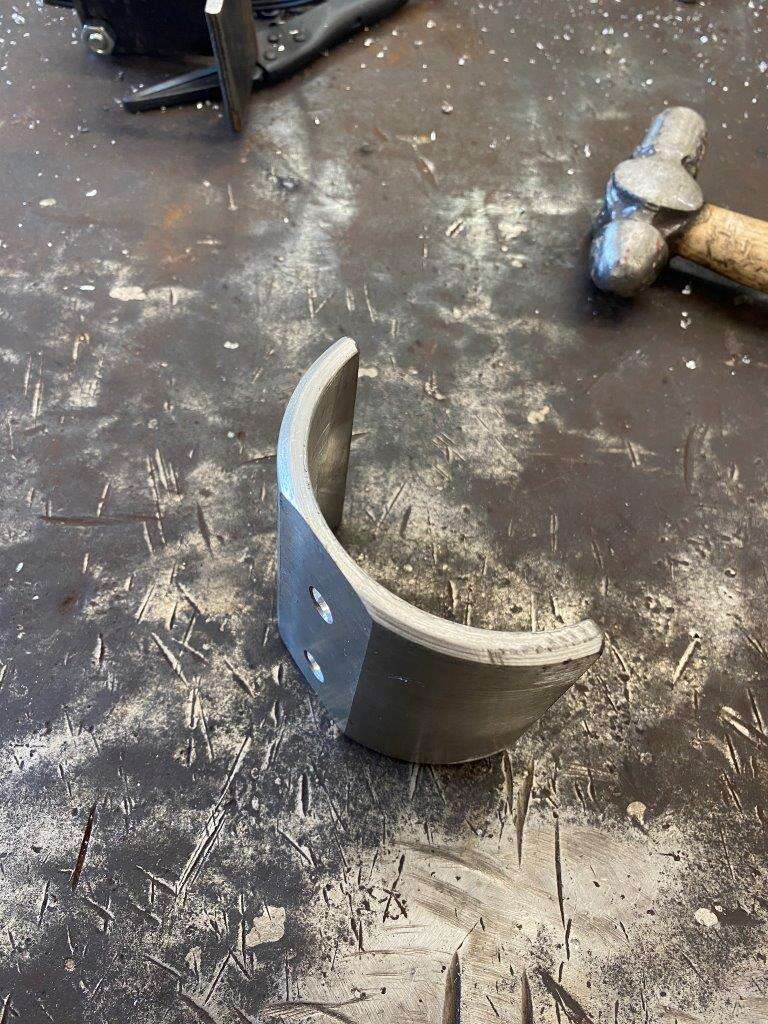
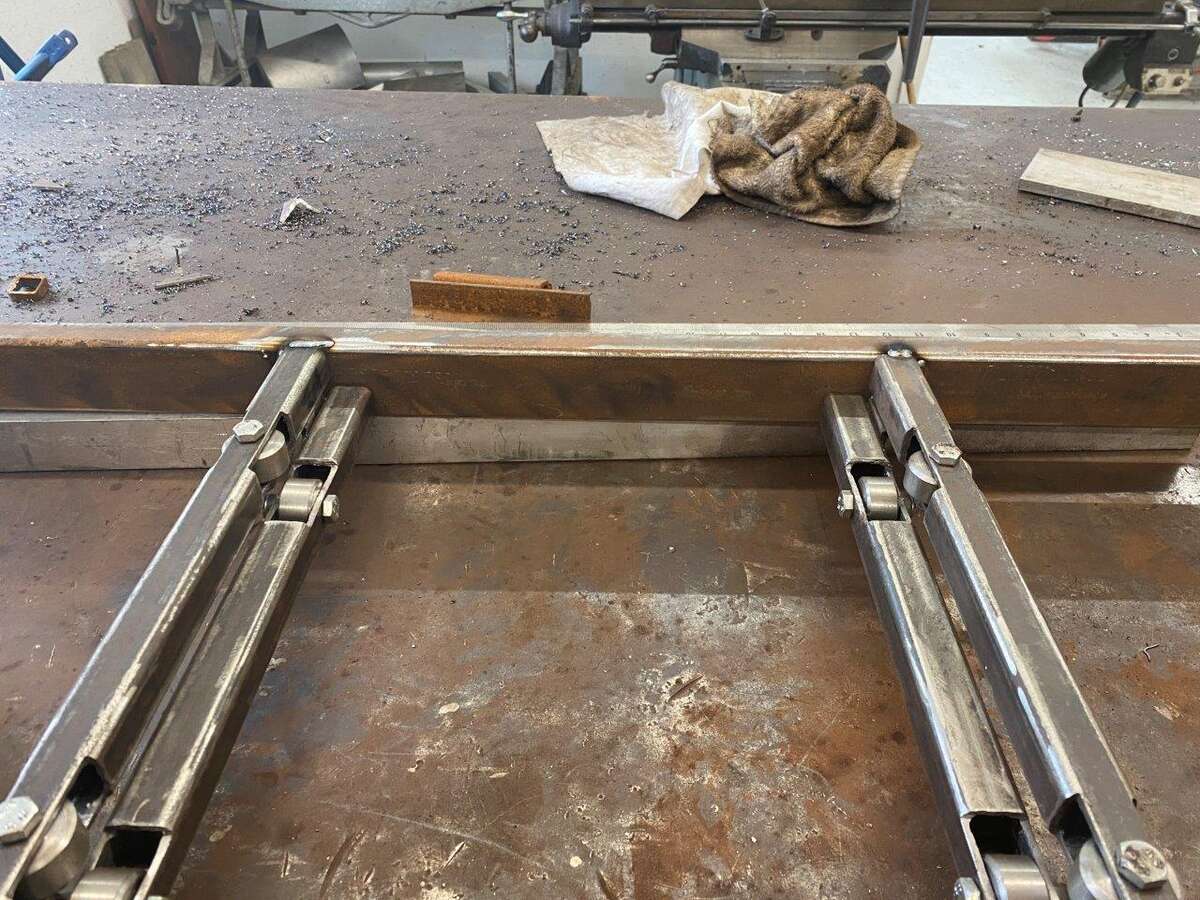
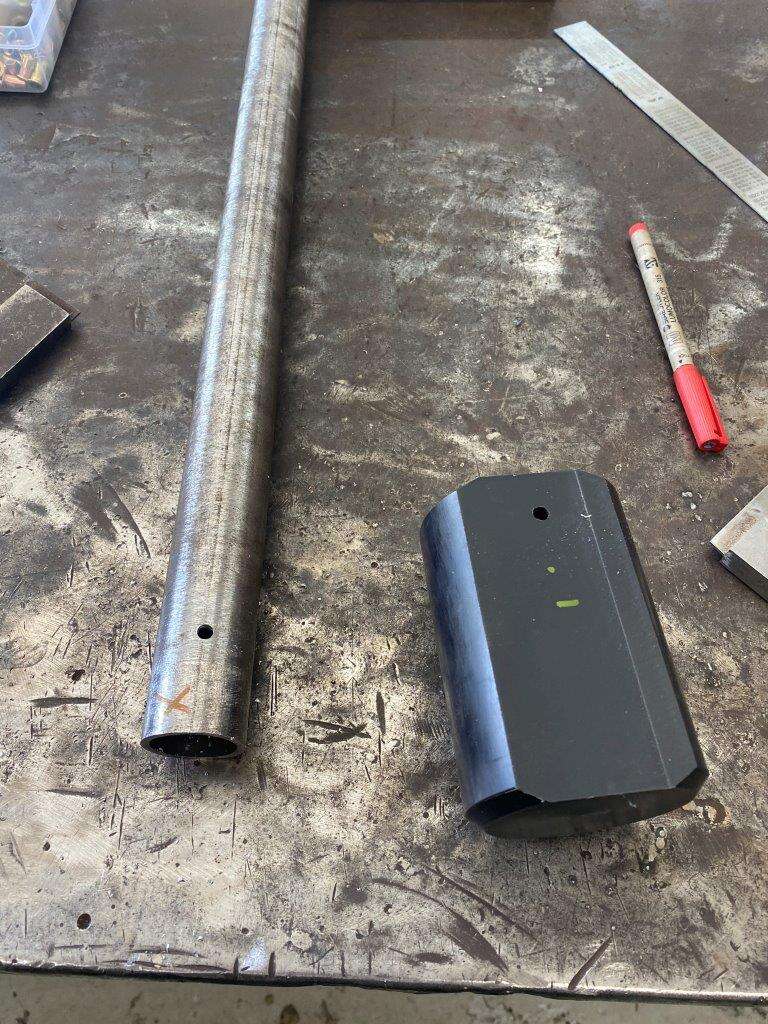
I also added a cross bar to the sieve tray as when testing I noticed it was sagging in the middle, That I think is down to two things, firstly the bolts are only front and back so the don’t fowl the rollers. Secondly the metal plates are not a tight grip on the mesh, I have ordered some 3mm foam tape to put round the mesh to hopefully make the fit tight and stop anything going round the sides.
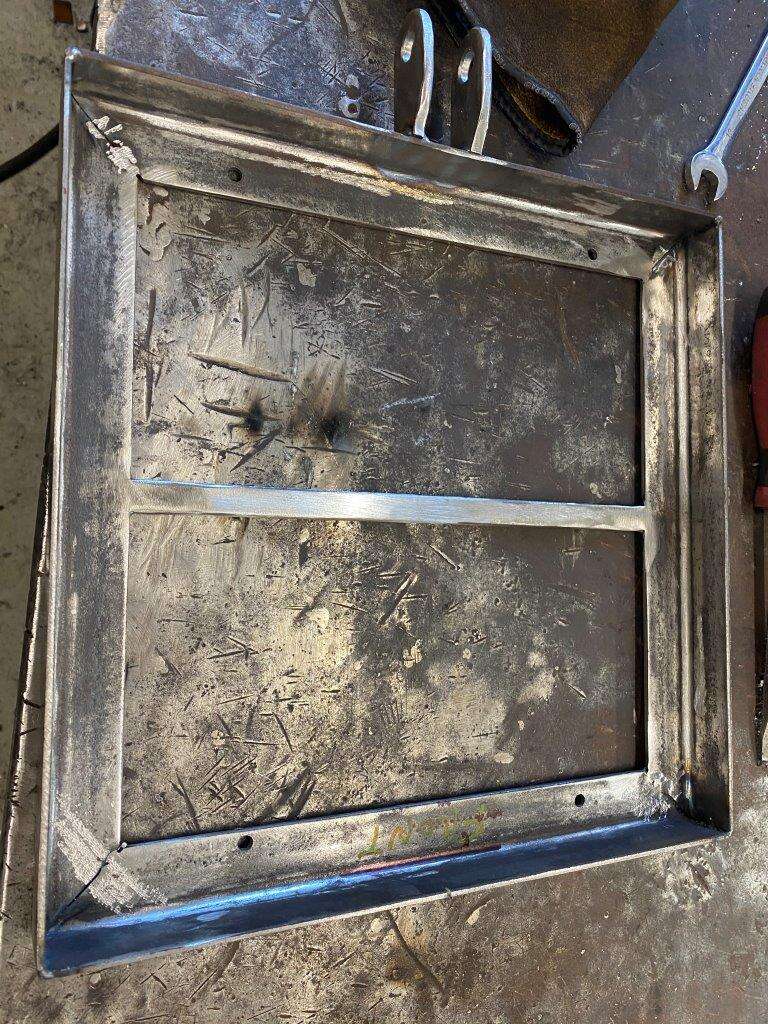
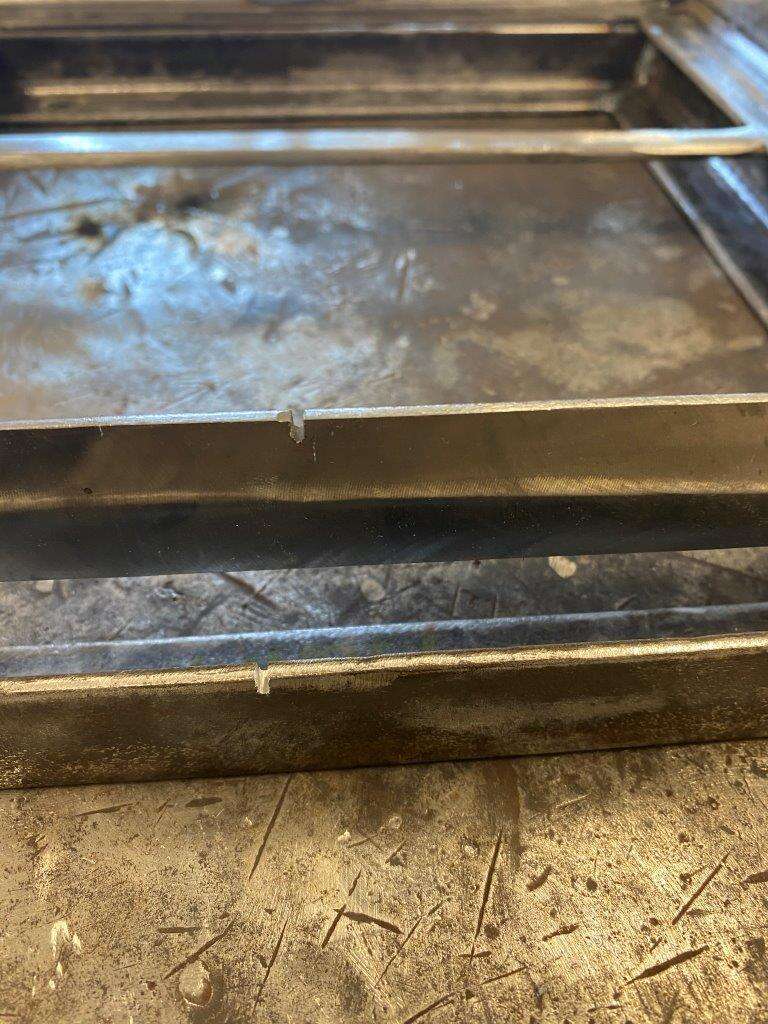
I also added a notch so I know which way round the plate fits when changing the mesh
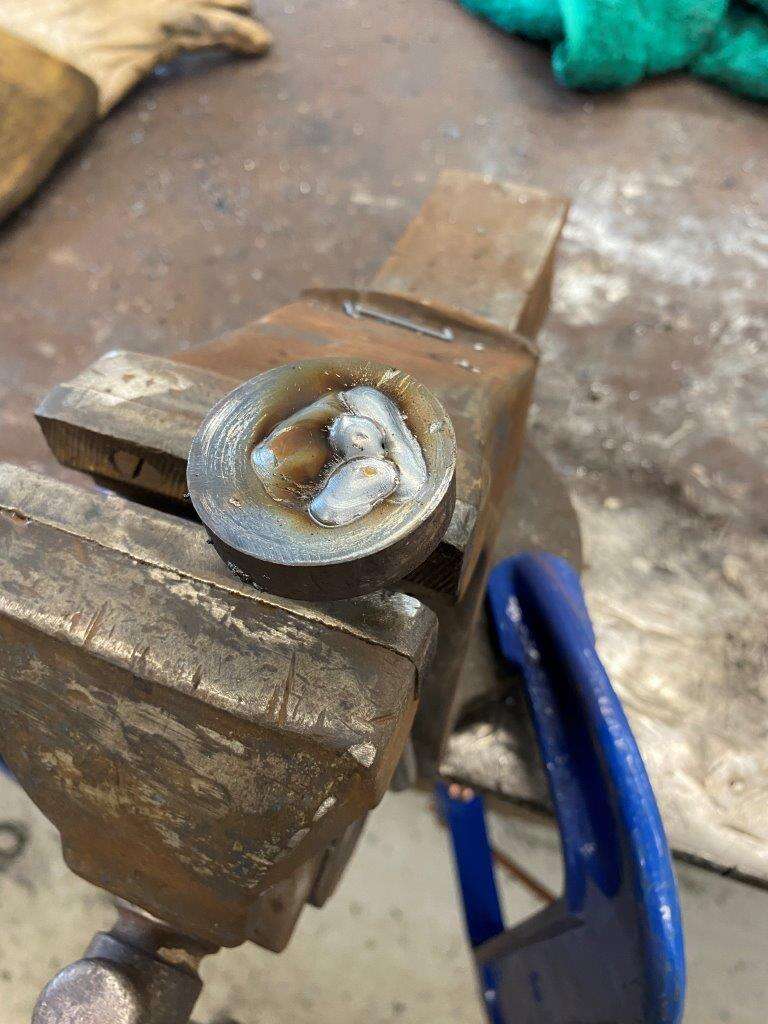
Then Tragedy struck!!!!
The welder ran out of wire

Its OK I keeps spares
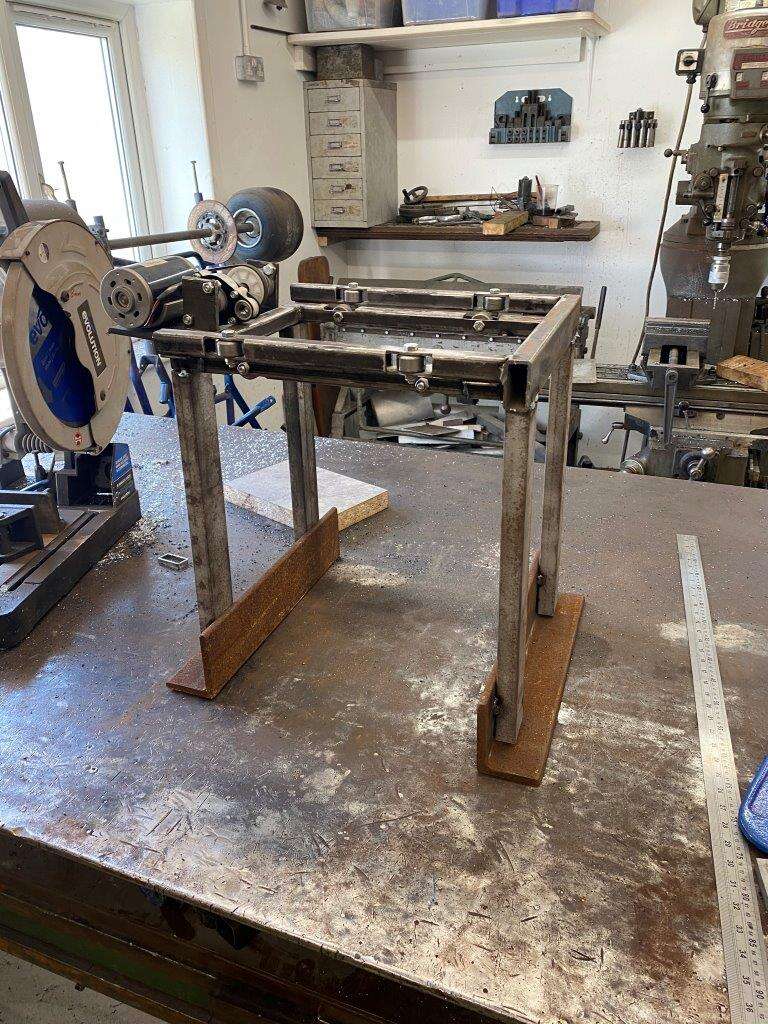
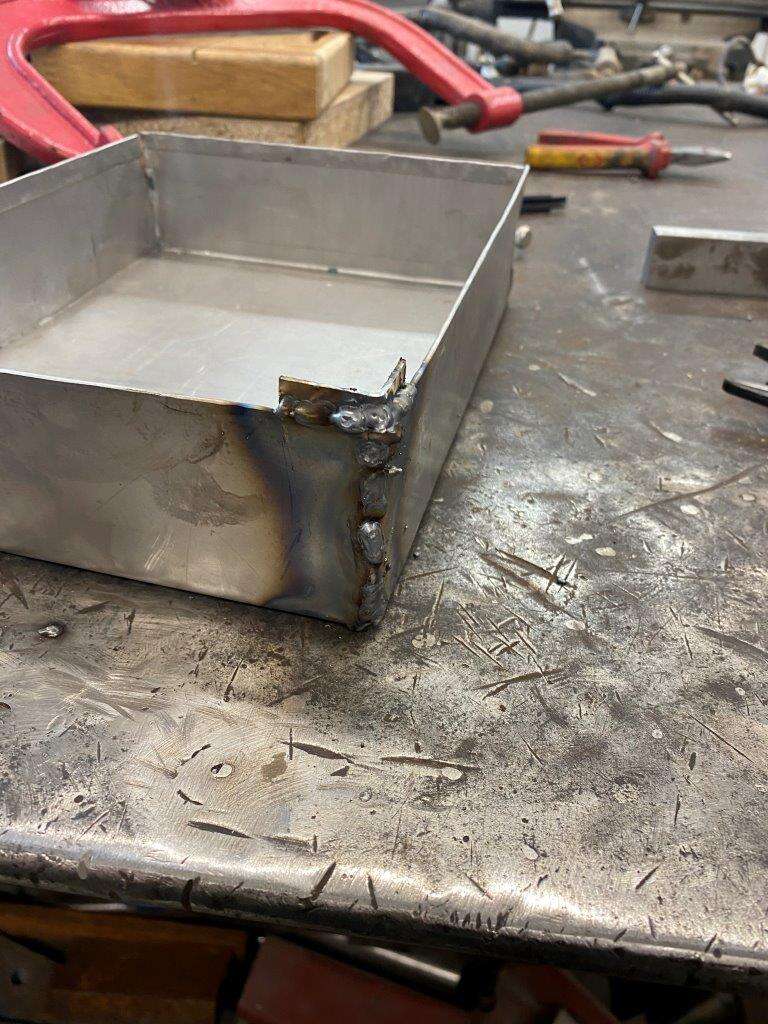
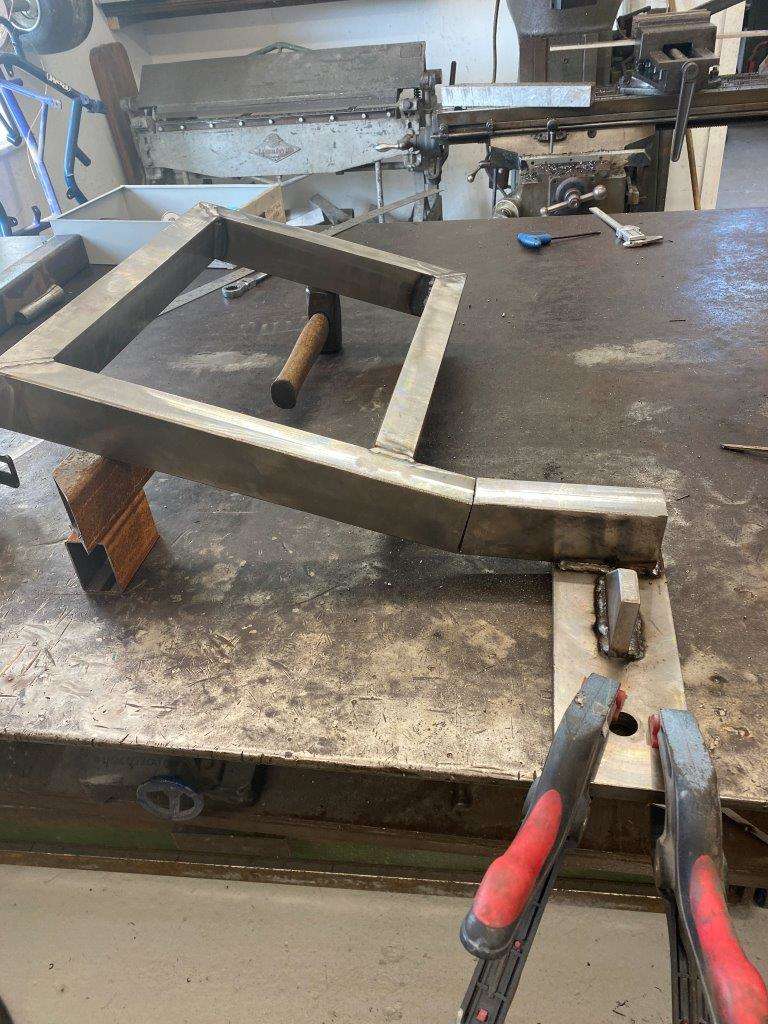
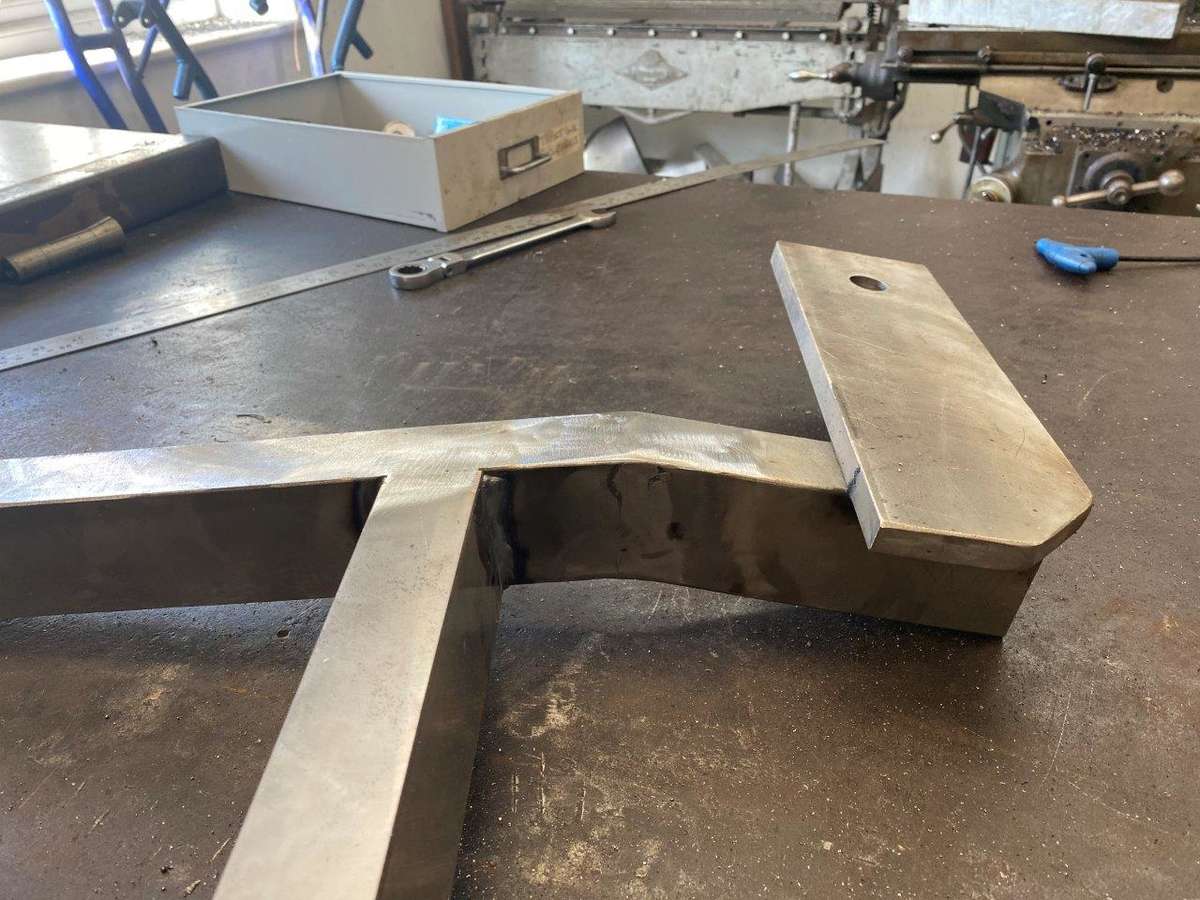
Anyway I joined the plate to the frame and cut the linkage arms to length and welded them on
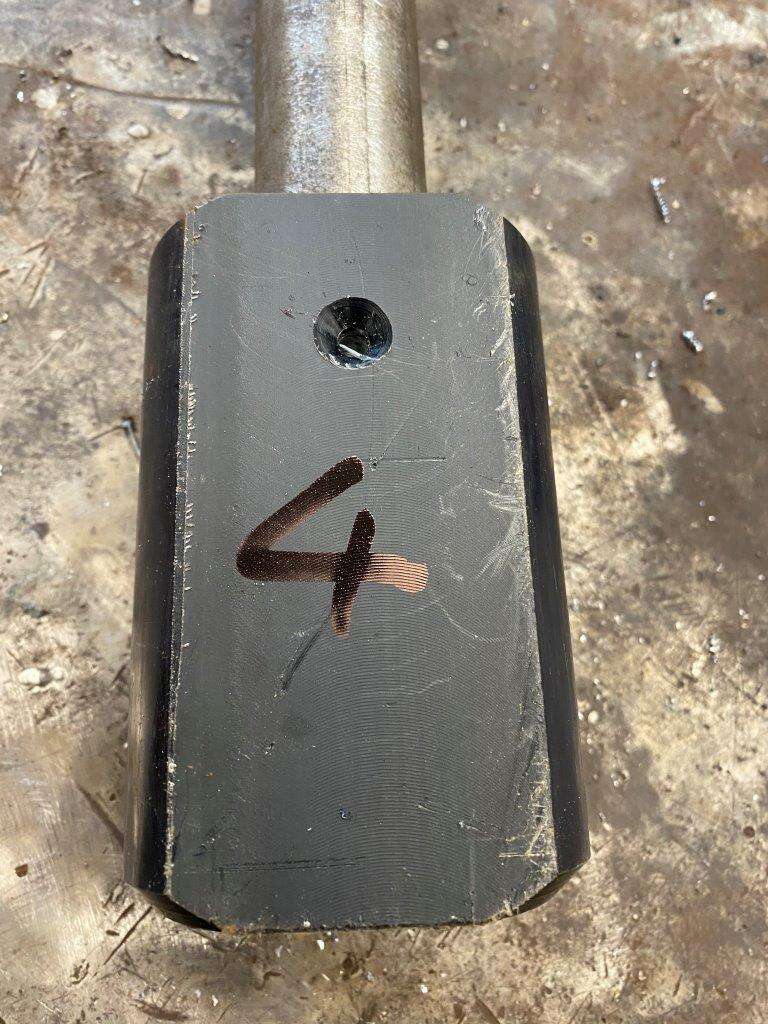
Next up we need to add weight for stability, I found this ridiculously heavy big bit of angle iron at the bottom of the pile, it just happened to almost be long enough to make two legs when cut in half –
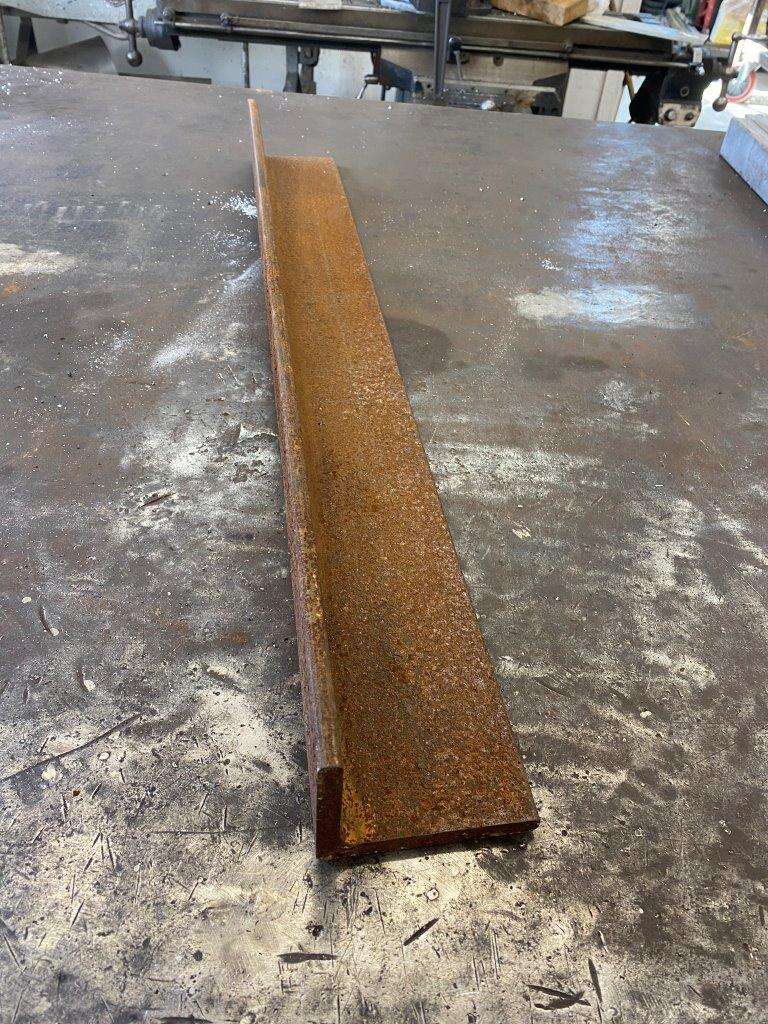
I’ll just set the legs inboard to accommodate the lack of length, which gest us to here
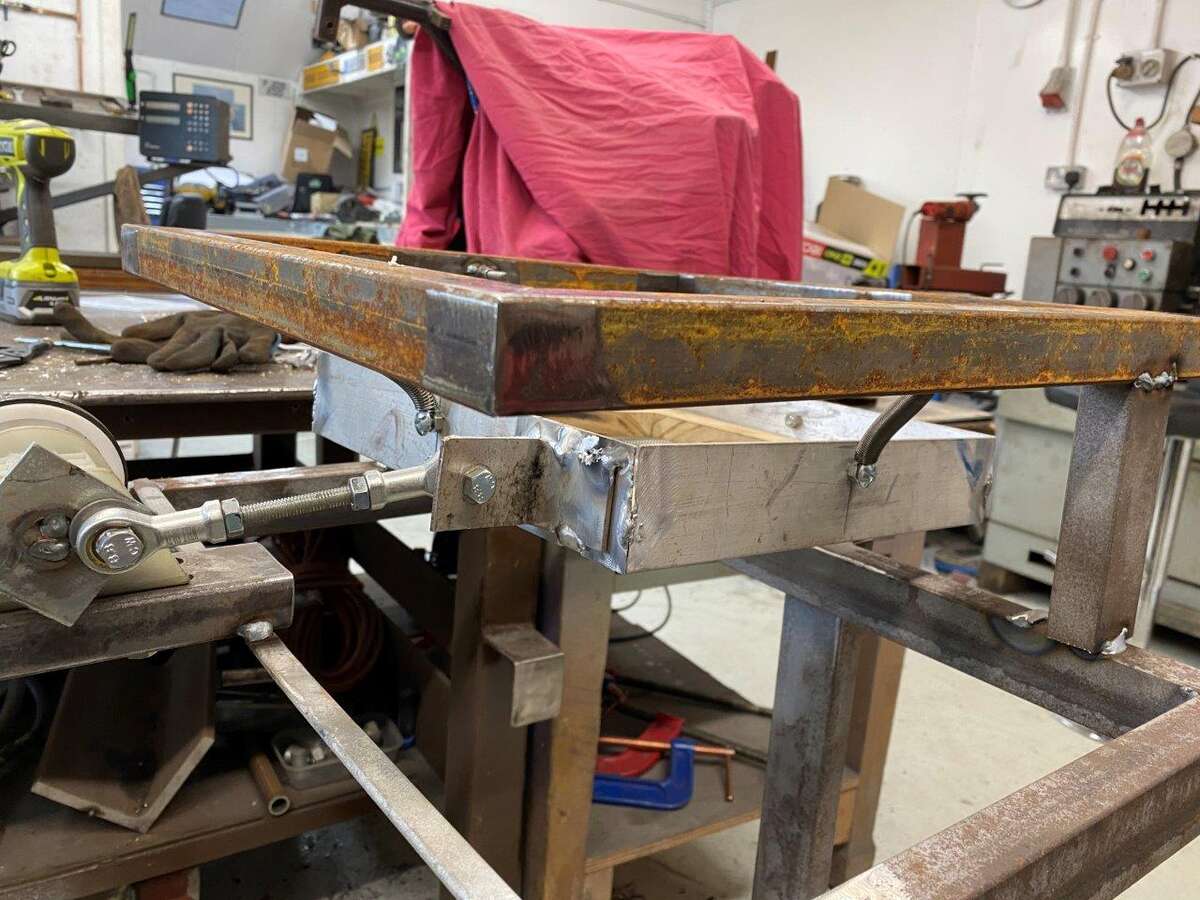
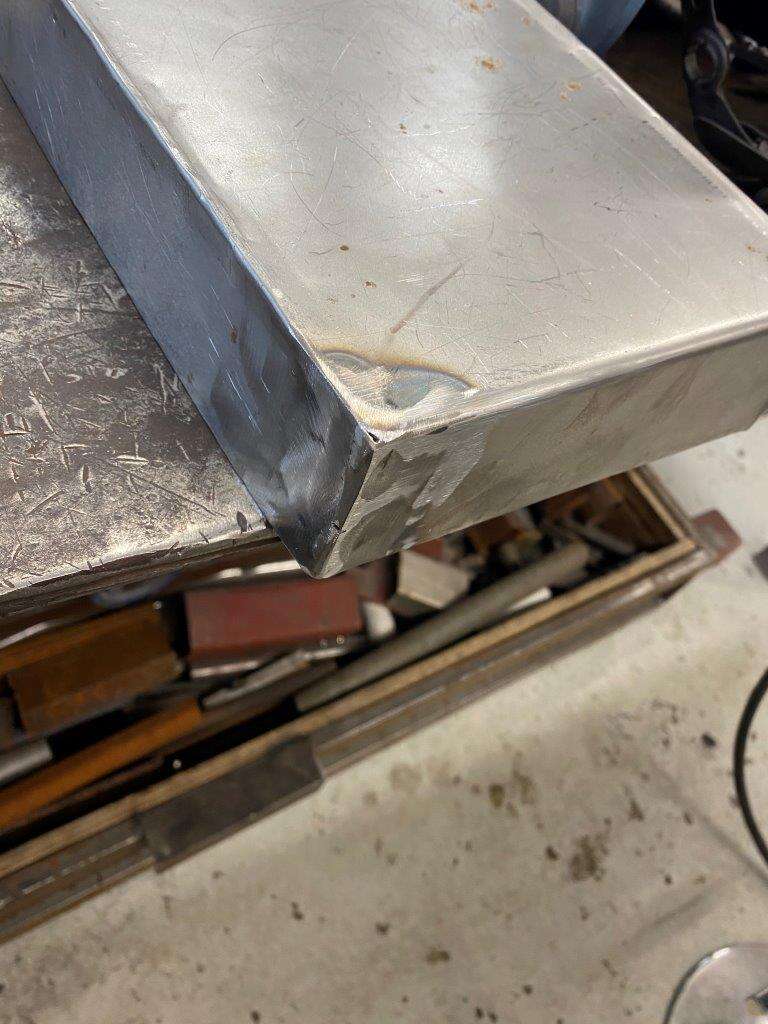
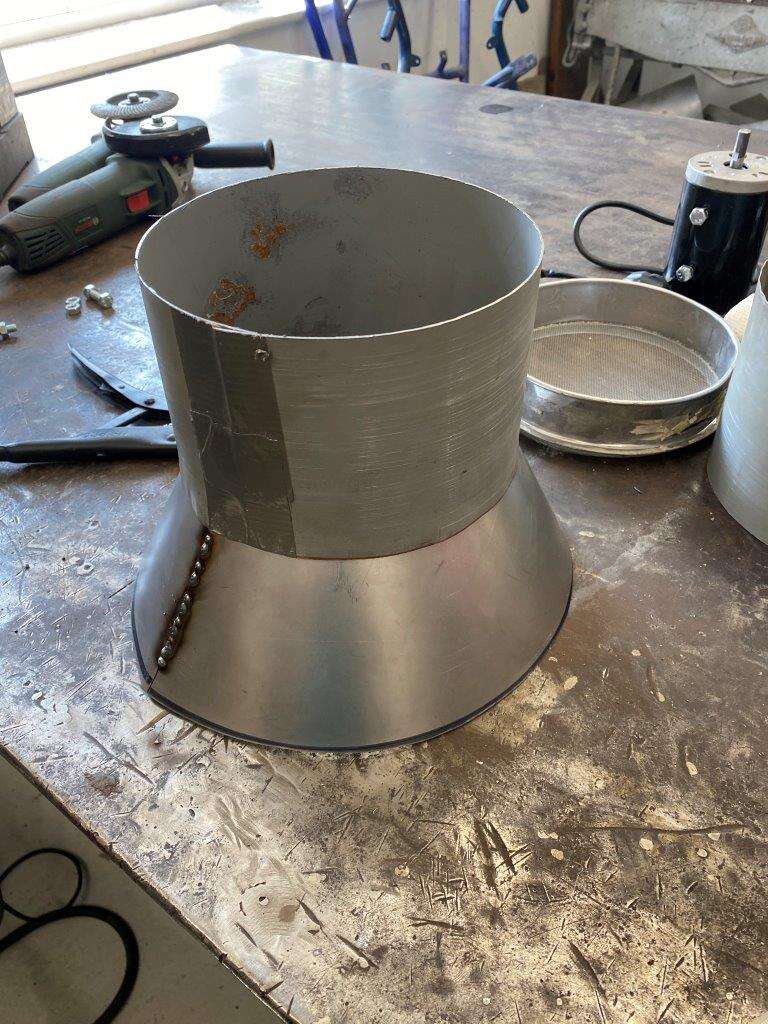
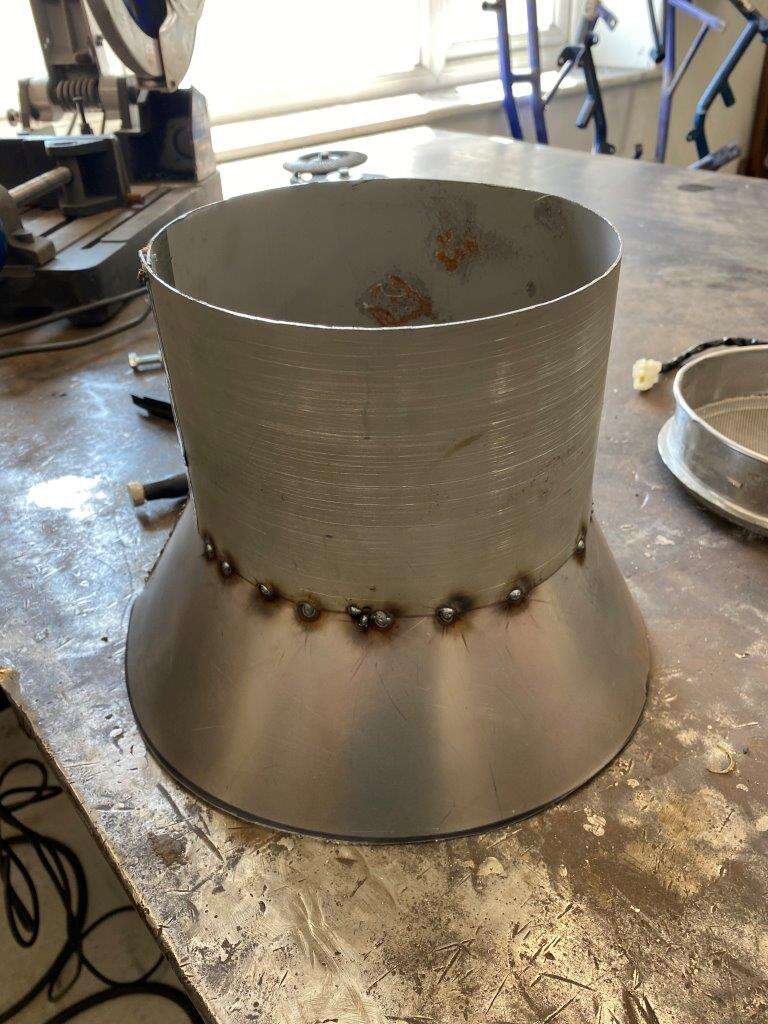
To catch the sieved media that goes everywhere at the moment we need a funne. One paper template
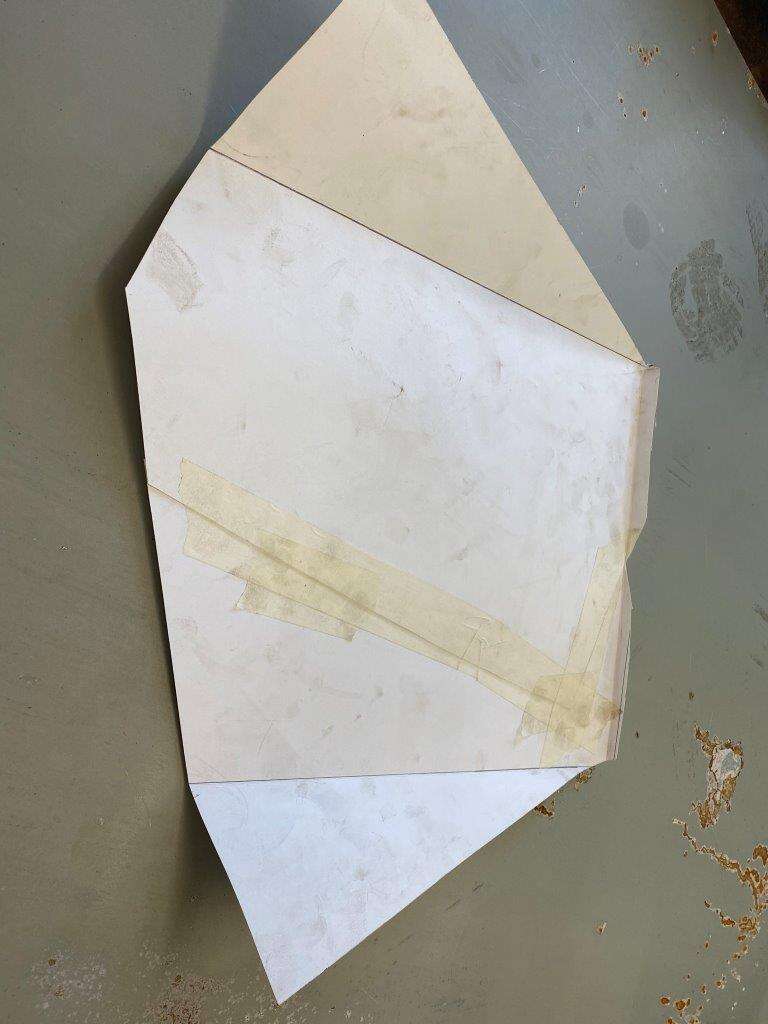
Something like this
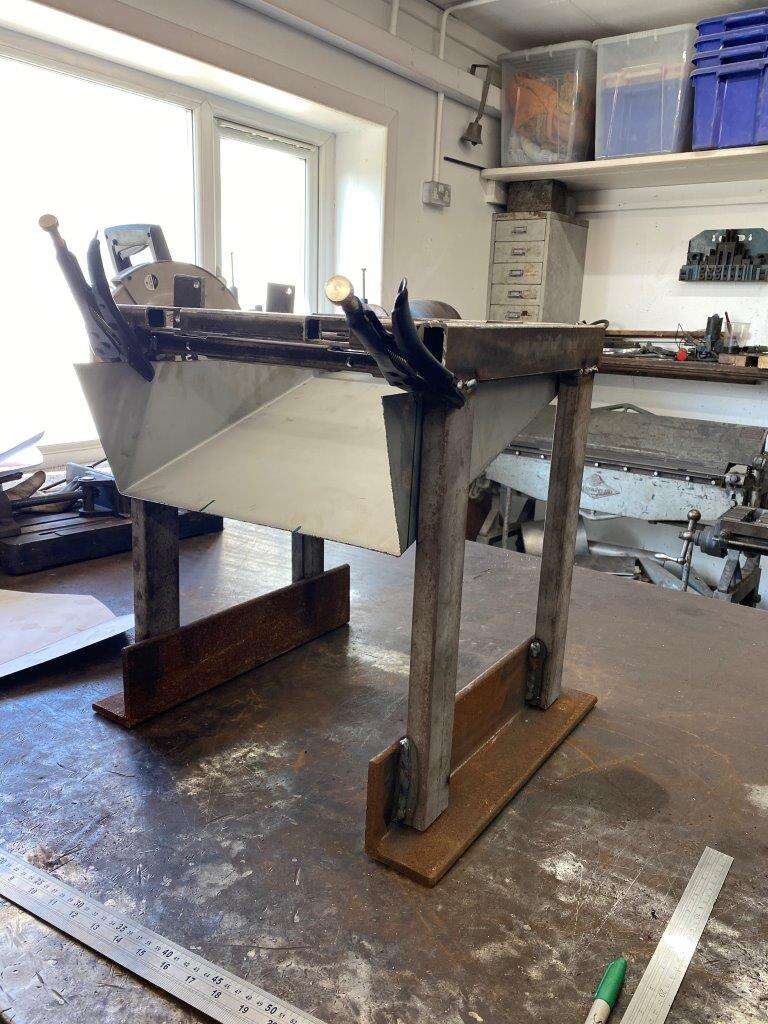
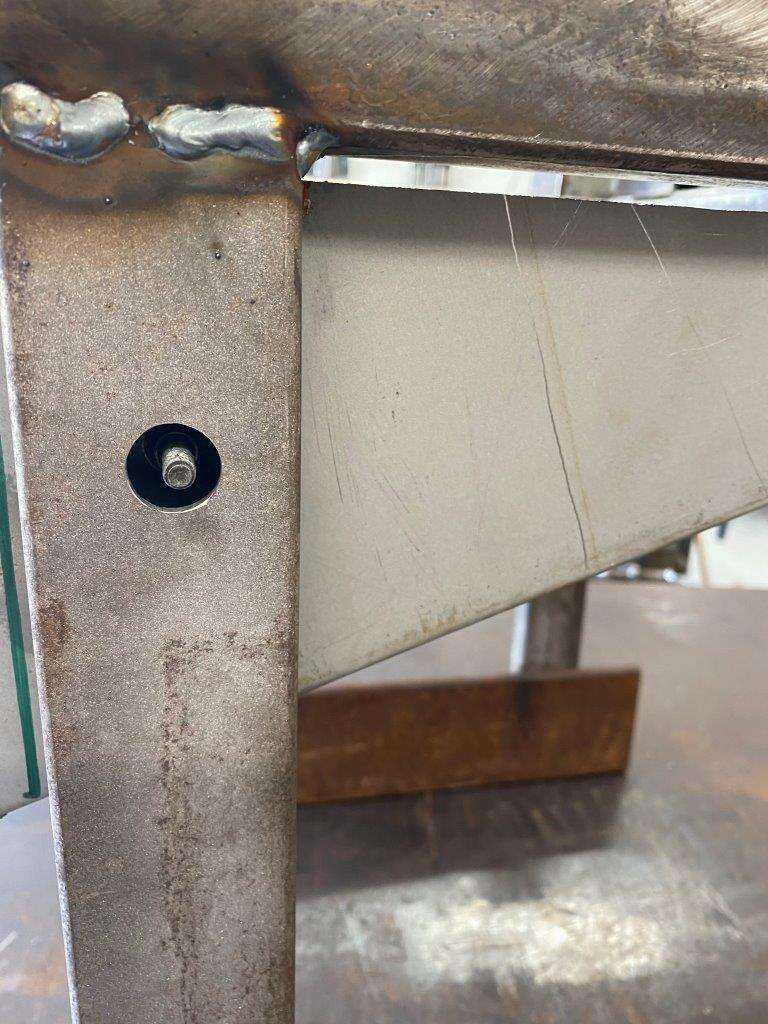
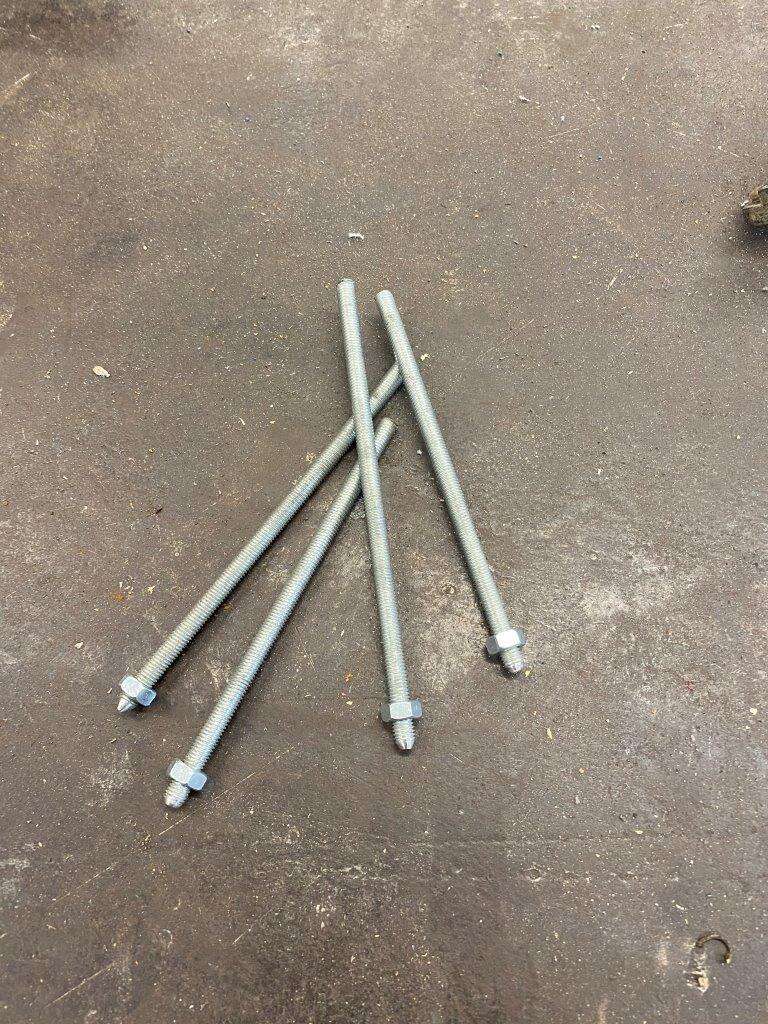
I had these bolts laying around
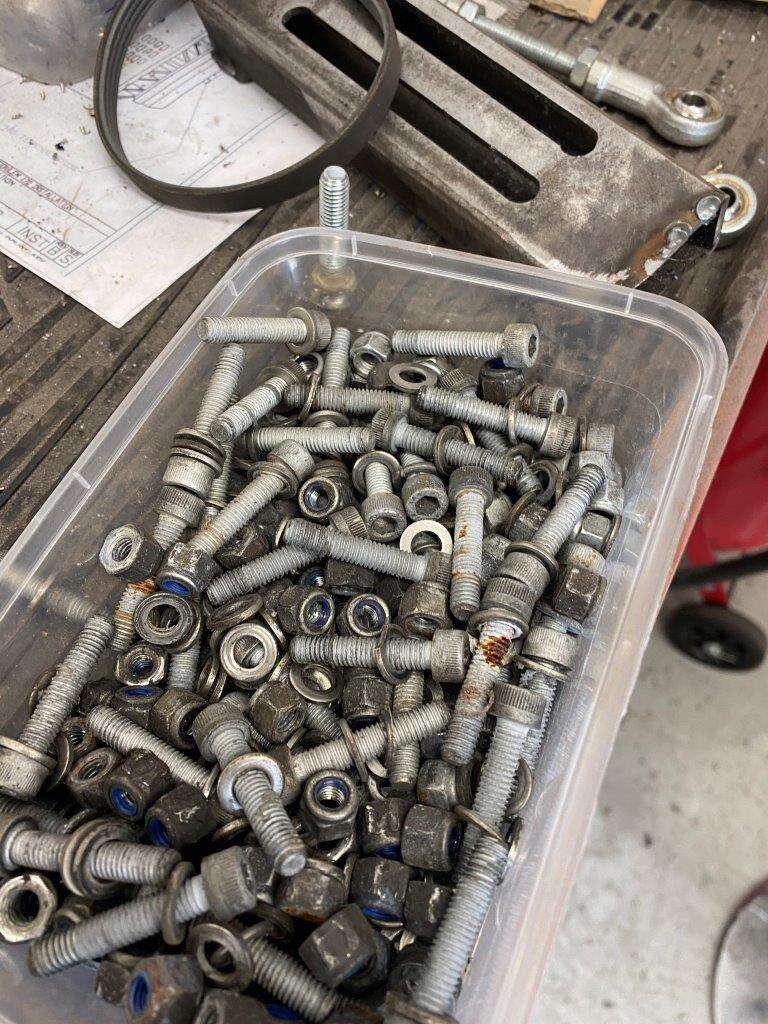
Ther weren’t long enough – I used them anyway and just made a hole for the socket so they only go through one side of the box
Added some guides to the funnel
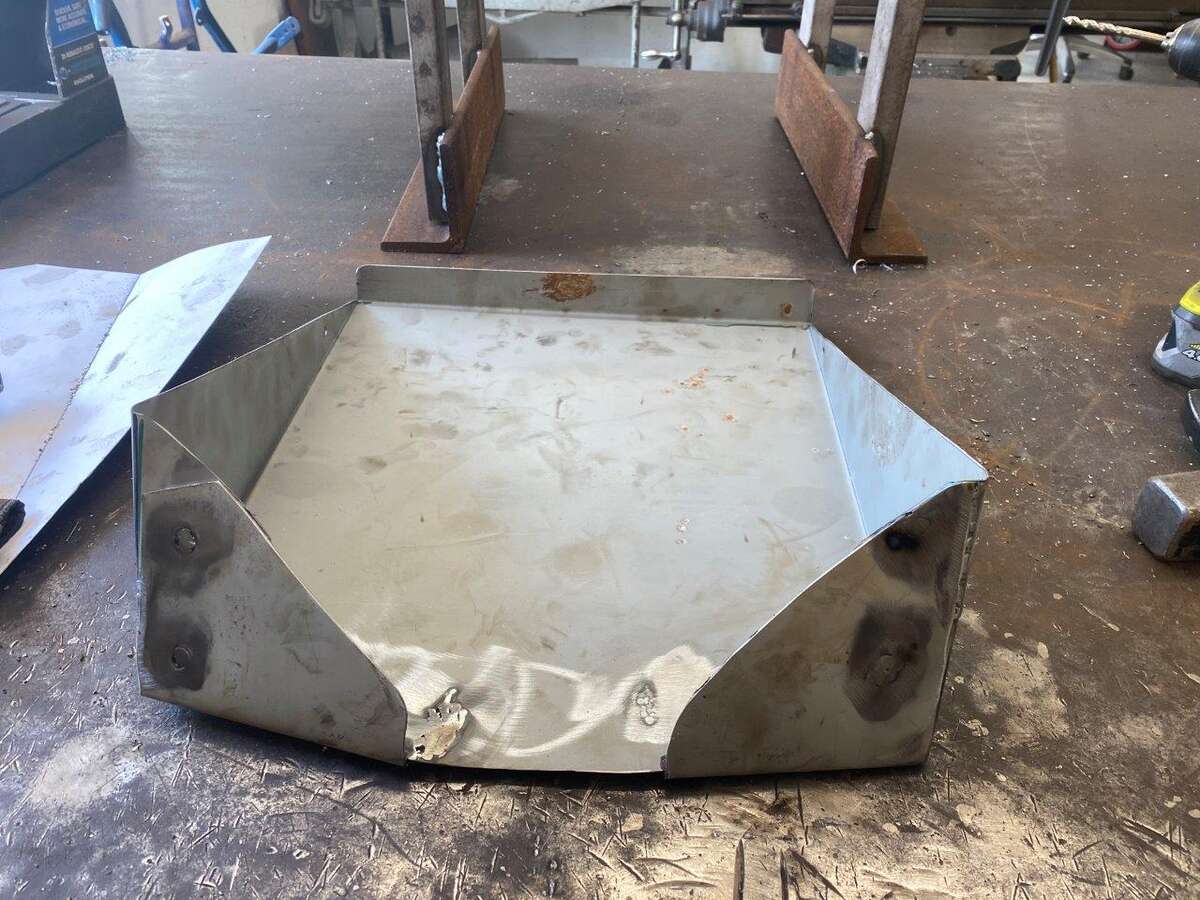
Bent the back edge over
And it looks like it will do the job nicely
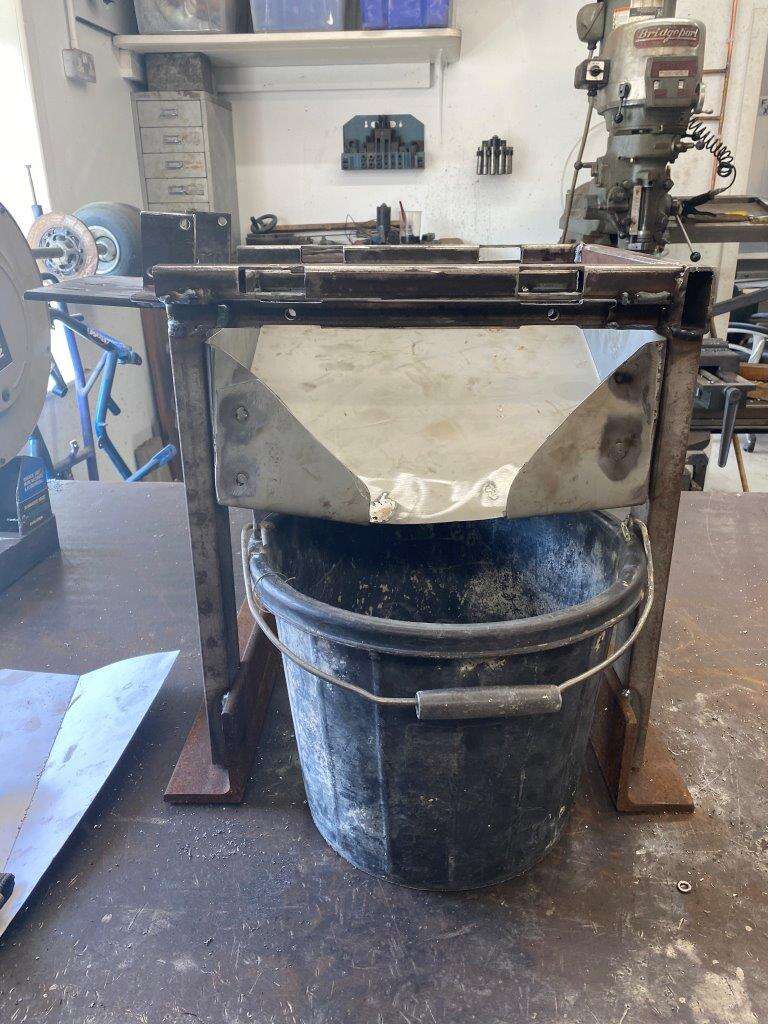
Leaving us here
Tomorrow the top armour plating – I mean loading shoot and possibly some wiring

Stay Safe – hope things are looking up for you guys n gals as well
Keyser - “My opinions may have changed, but not the fact that I’m right.” – Ashleigh Brilliant
-
7
-
-
Good morning,
Checked my diary this morning and I have 2 jobs in it, I’ve done one already and I can’t do the other one which will take about 10 minutes until after 10AM, I’ve never seen anything like it I usually have a dozen jobs on a quiet day!!!!
Of course this does mean I have time to post this morning, unlike yesterday when the bins couldn’t be emptied as the weigh bridge control computer had a hissy fit
What do we have today for your delectable delight?
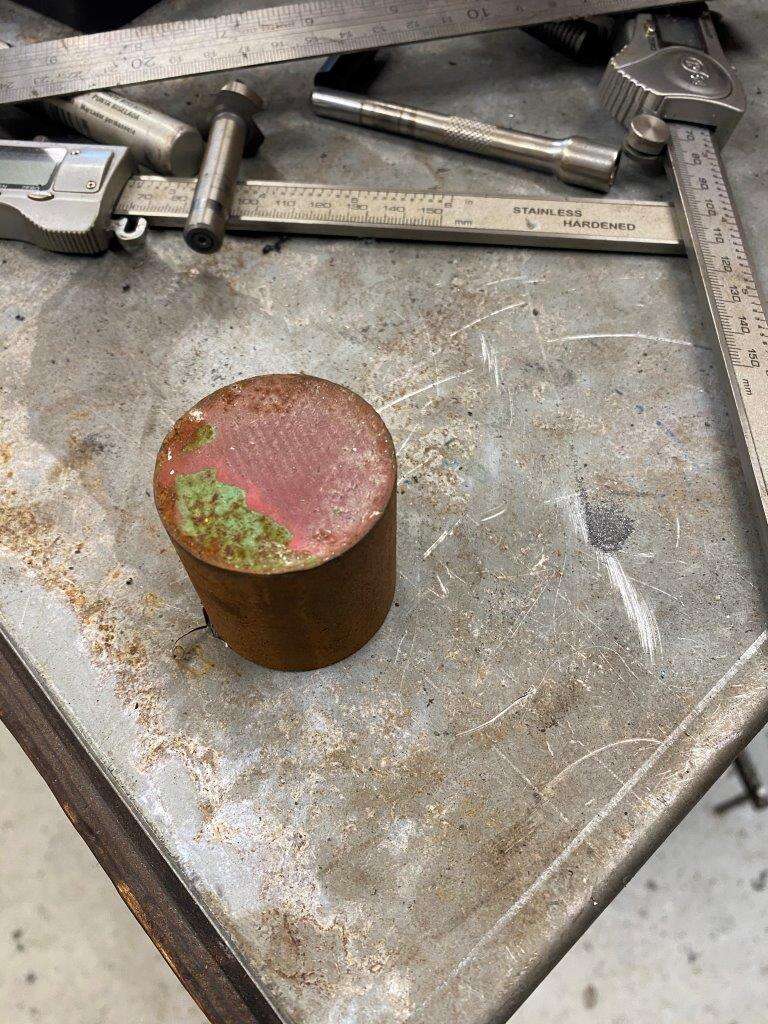
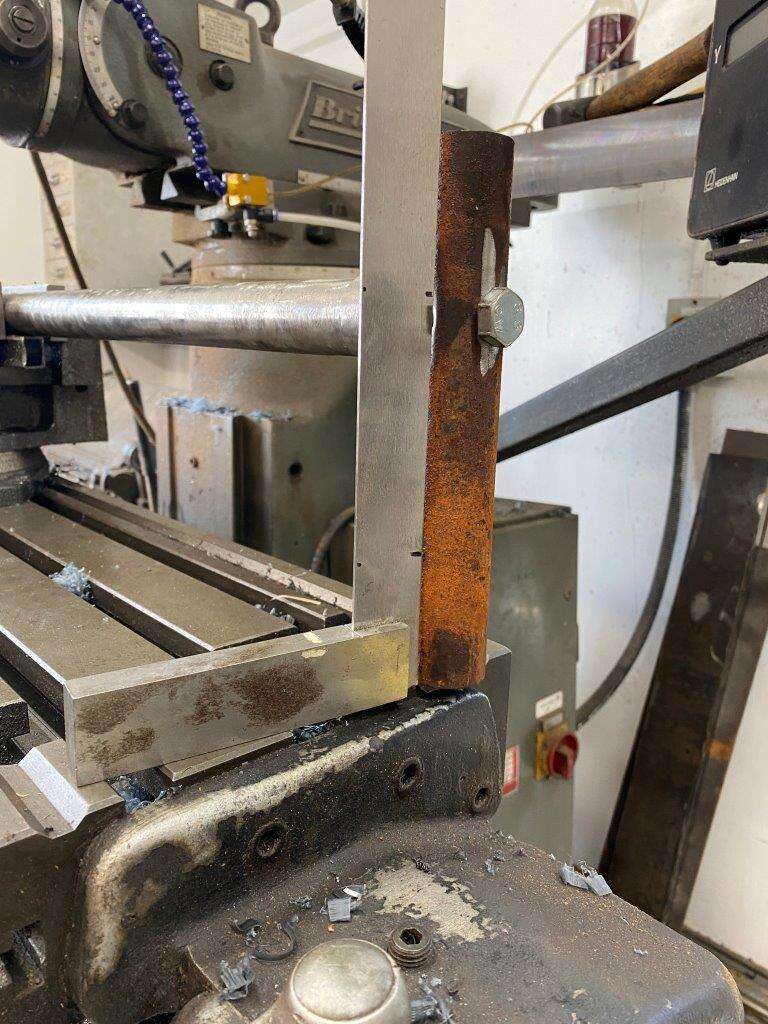
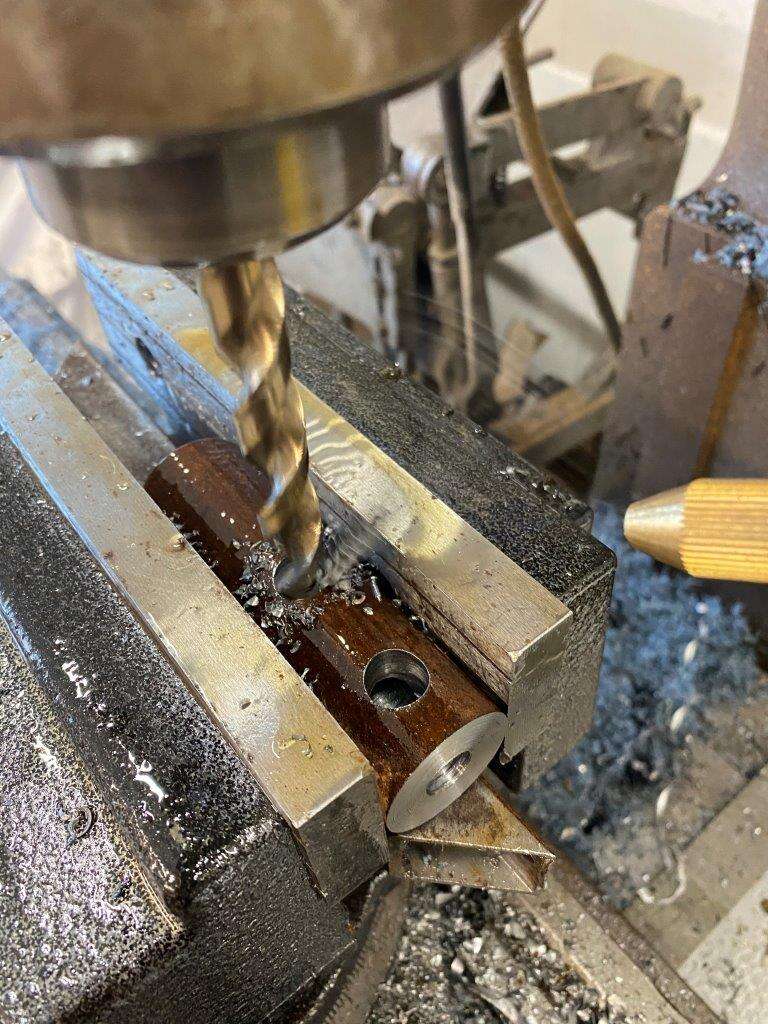
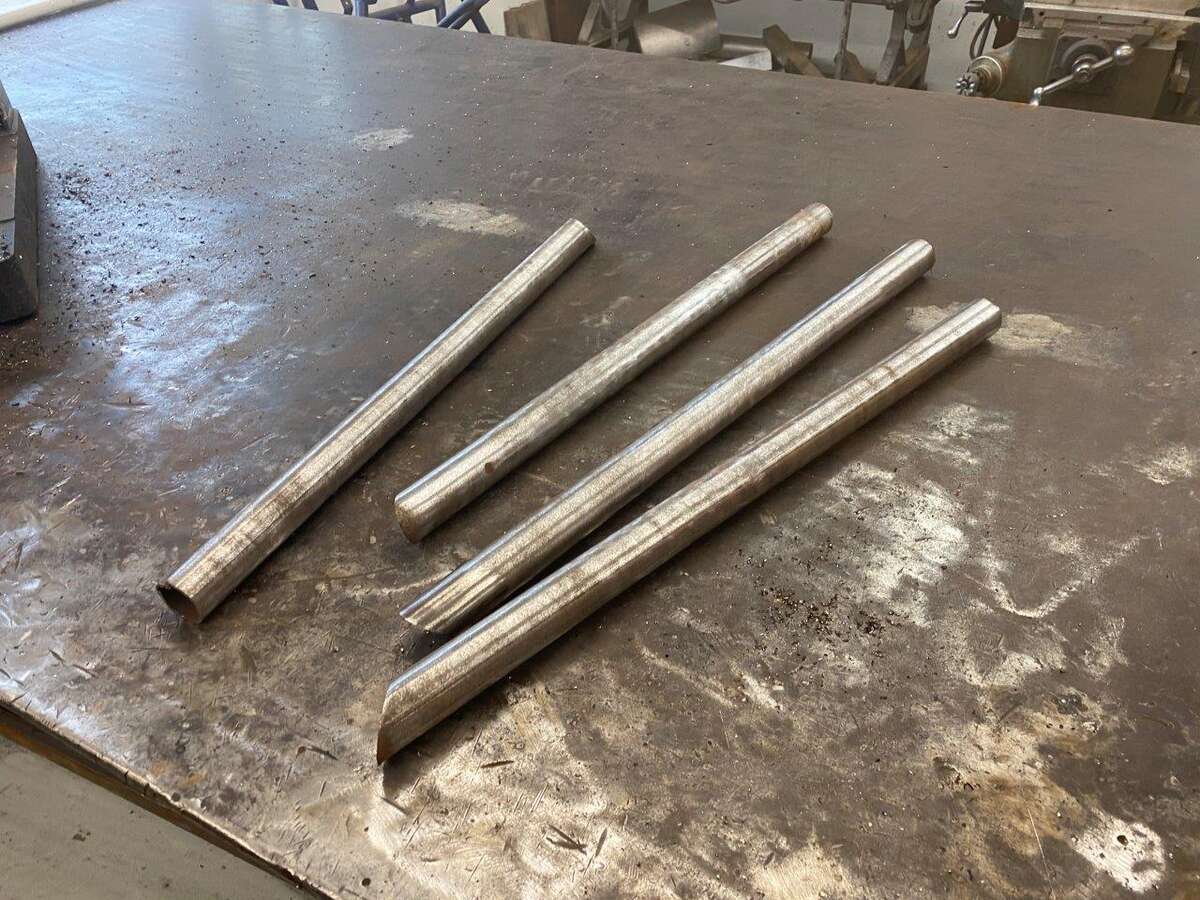
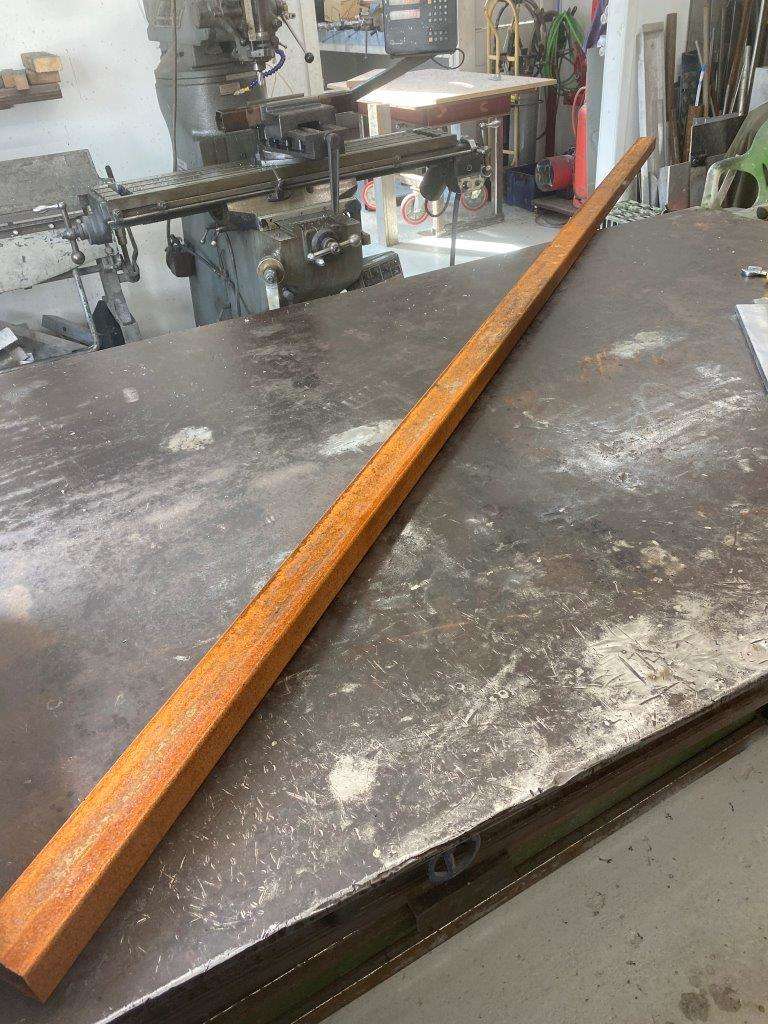
Some rusty old box section left over from when Beb and I were testing our new pipe bender to make Go-Quad chassis.
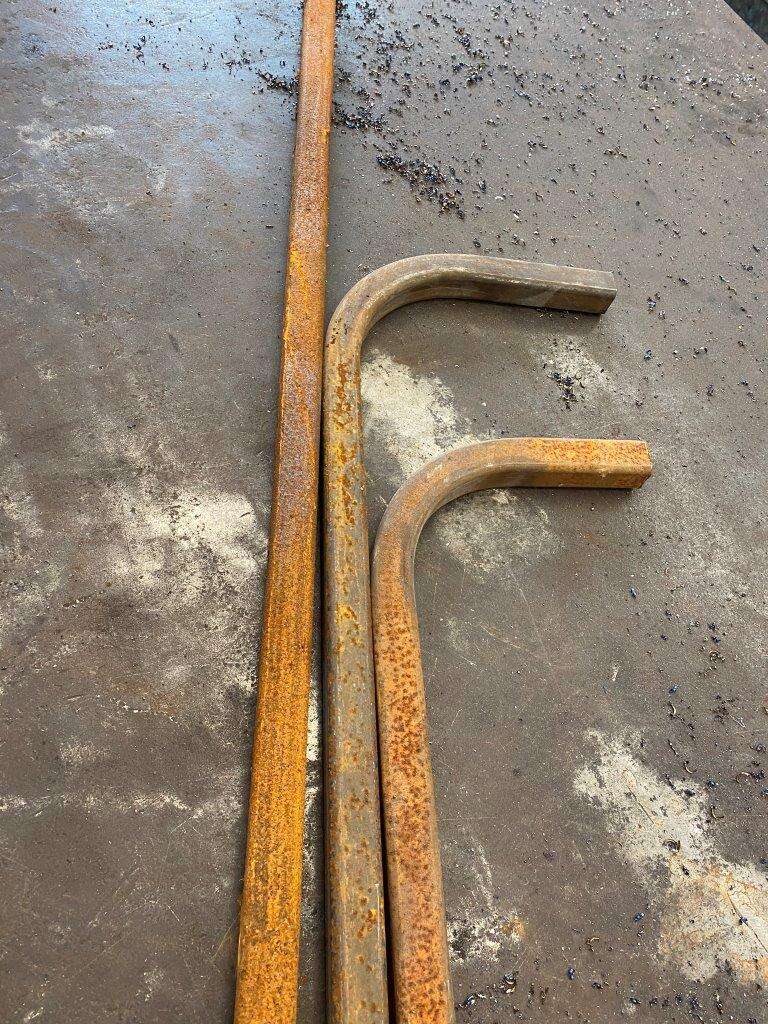
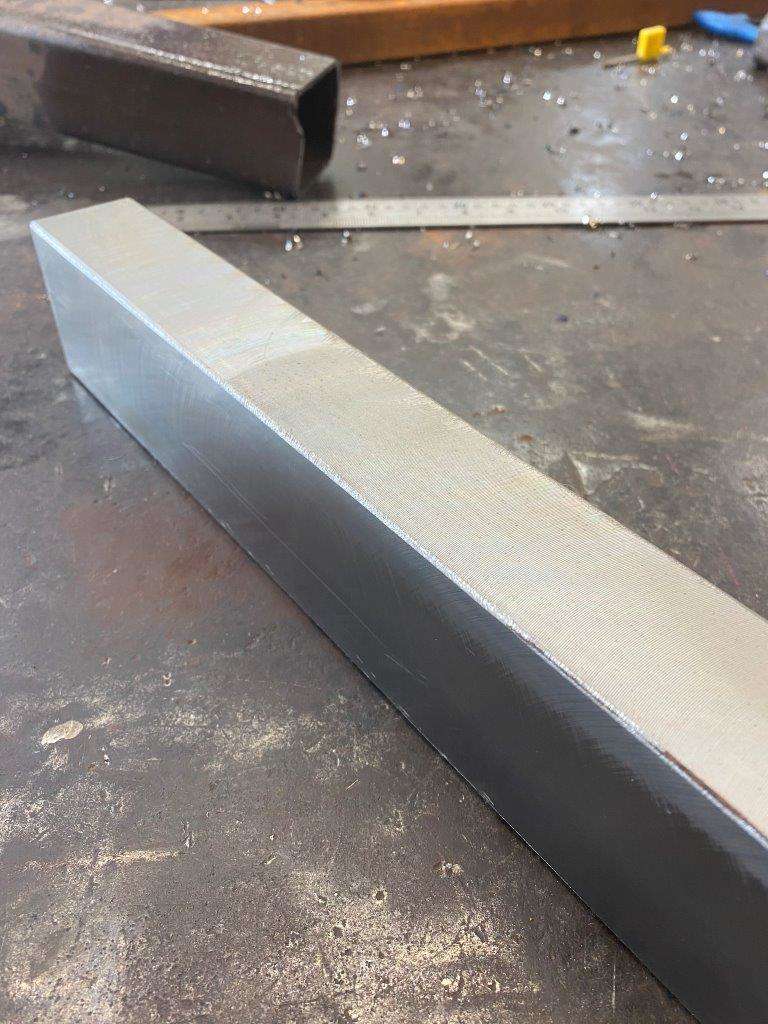
Then some really rusty solid bar
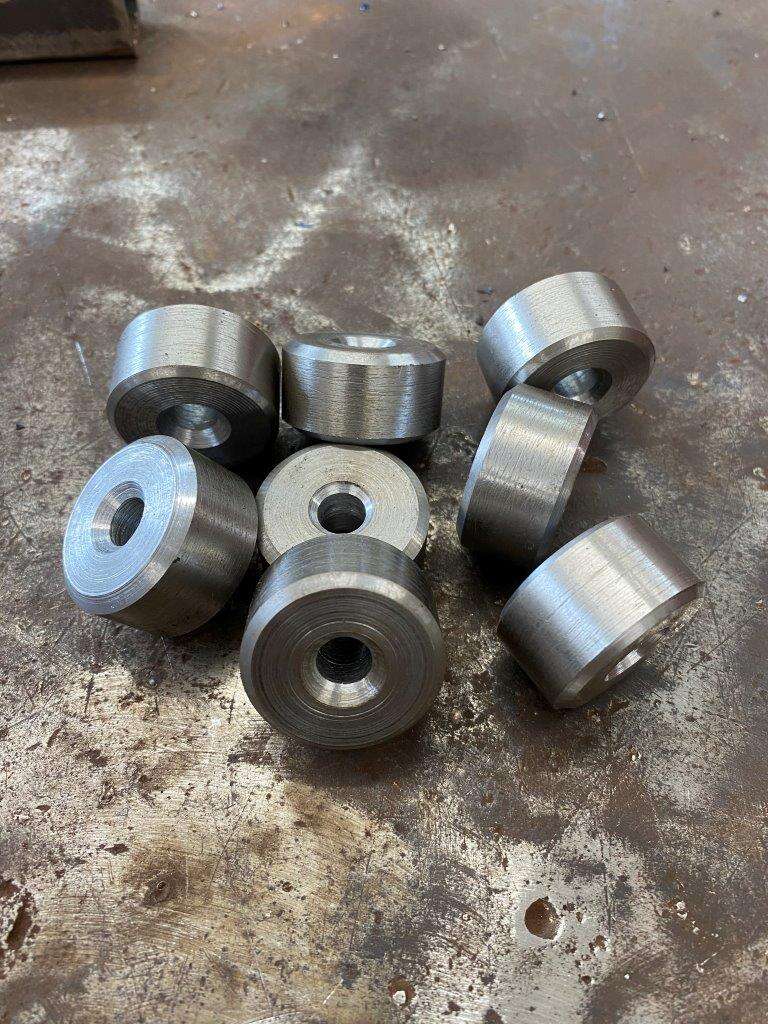
That had to be re-surfaced but size isn’t important – tell that to ya missus

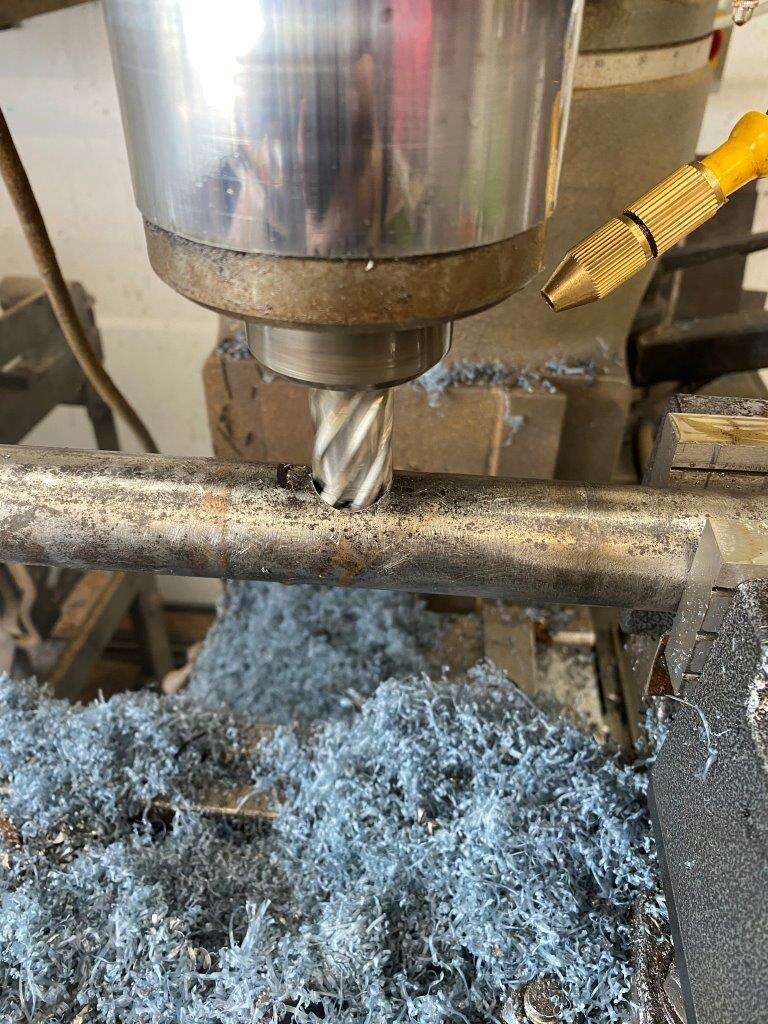
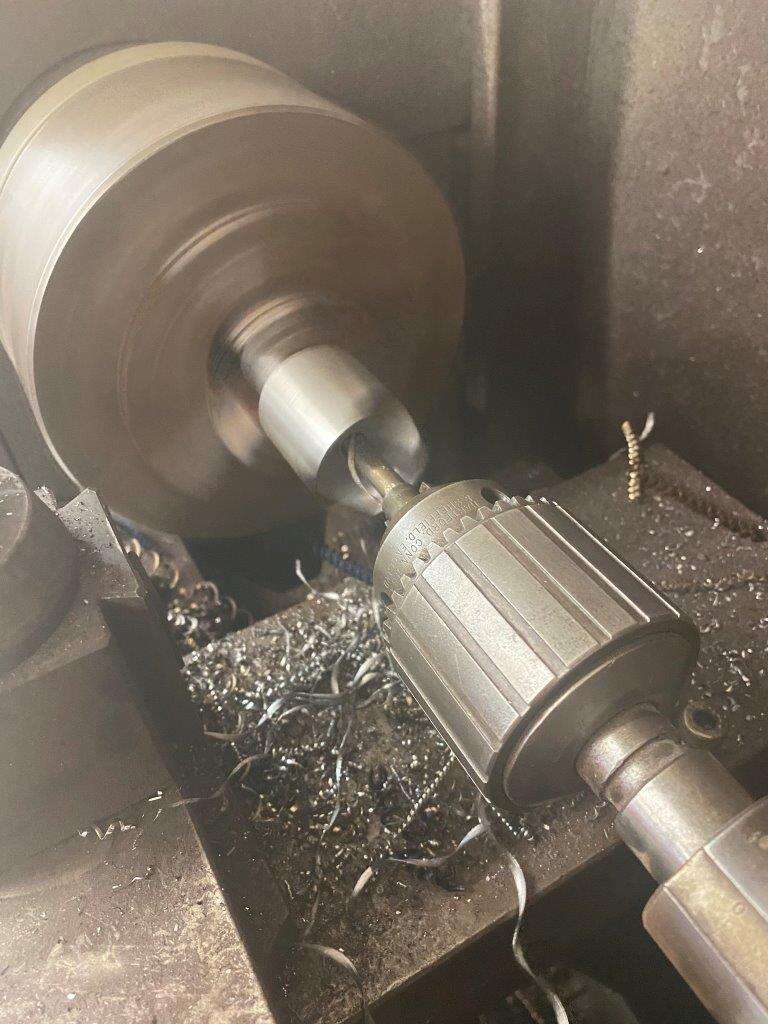
Drilled to 8mm
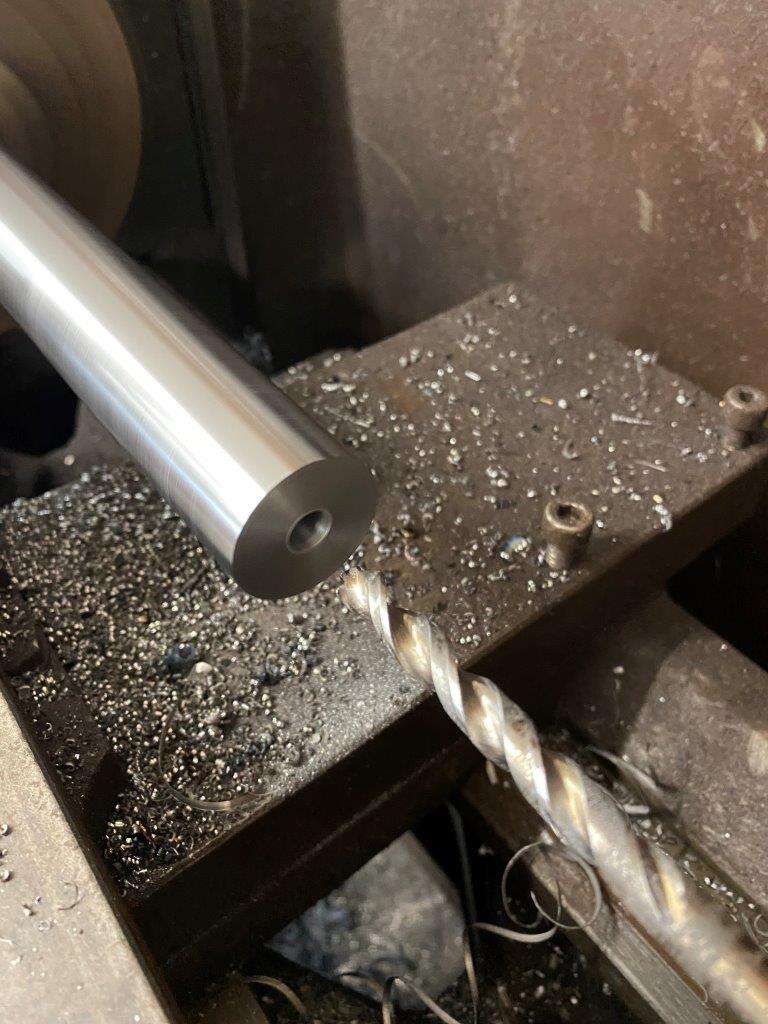
Then sliced n diced with a quick chamfer for that professional look
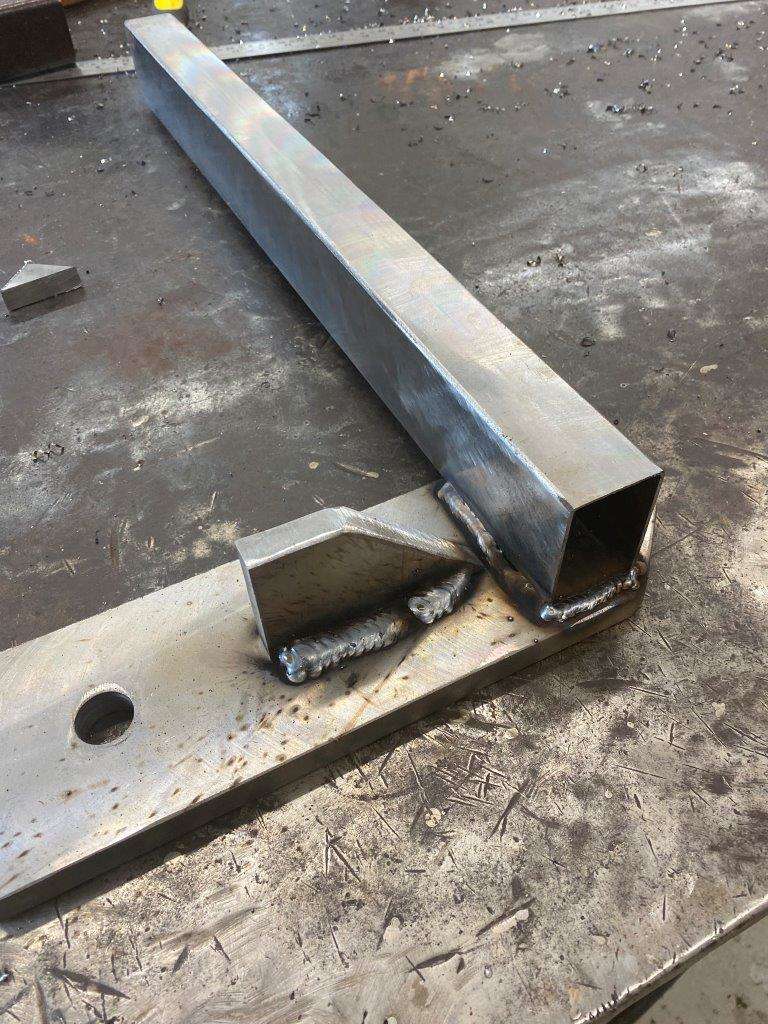
Back to the old box section and a spin through the Mill
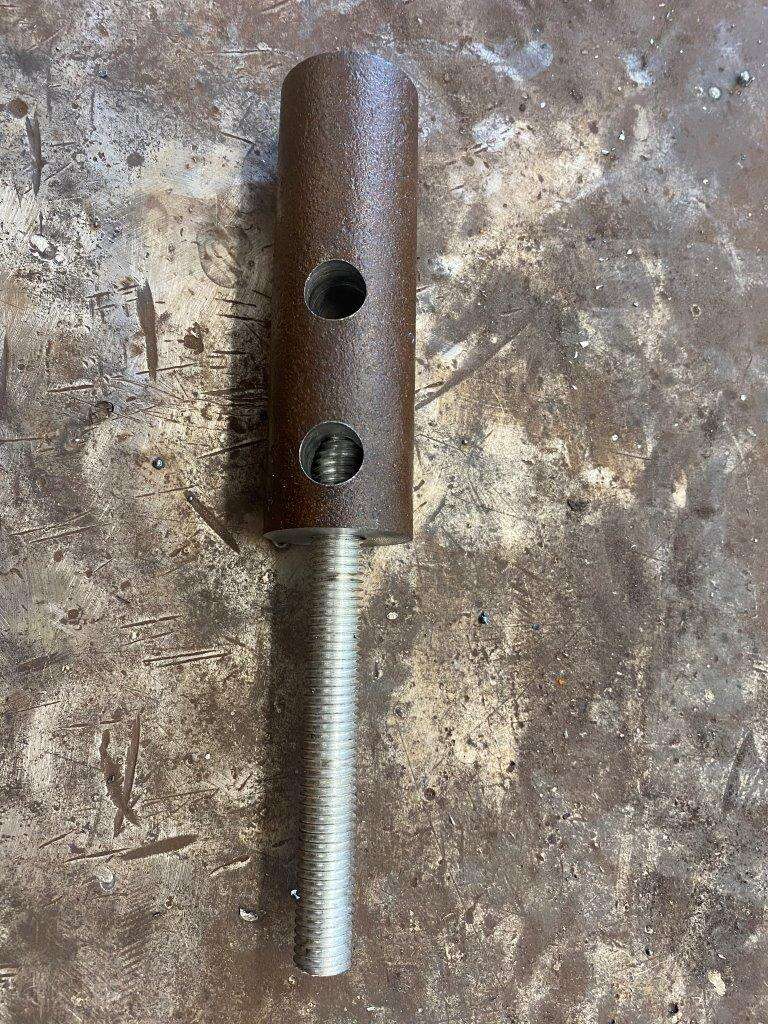
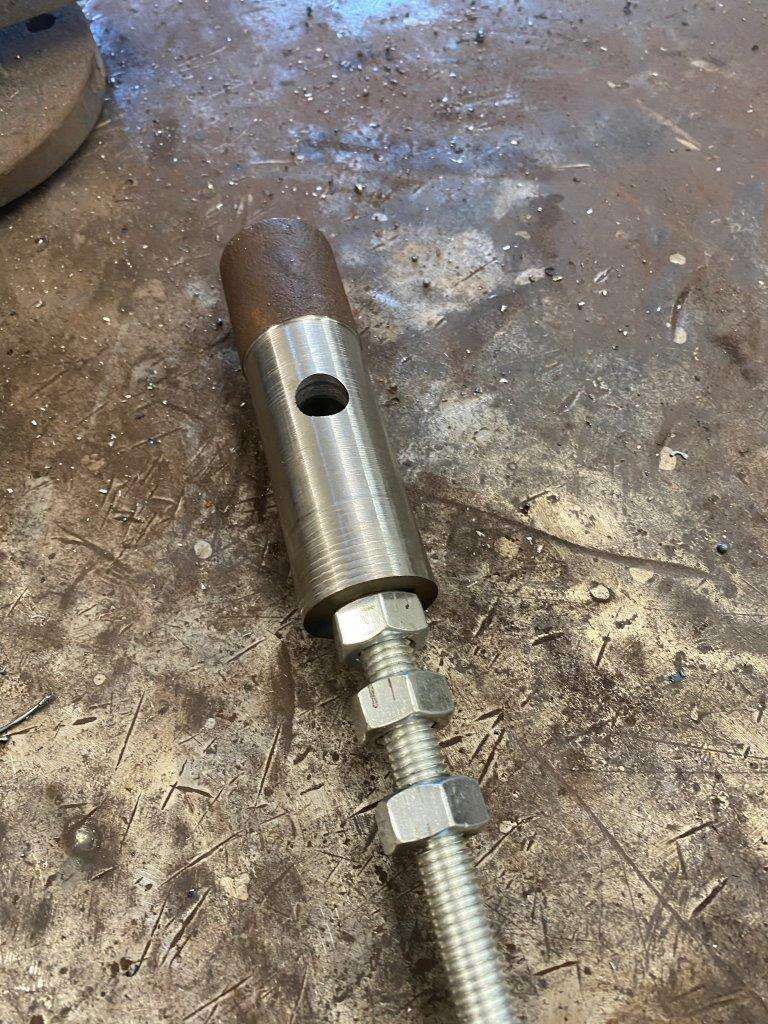
Add nuts n bolts we have these

Which can be used as in line skates if the rest of the project goes wrong
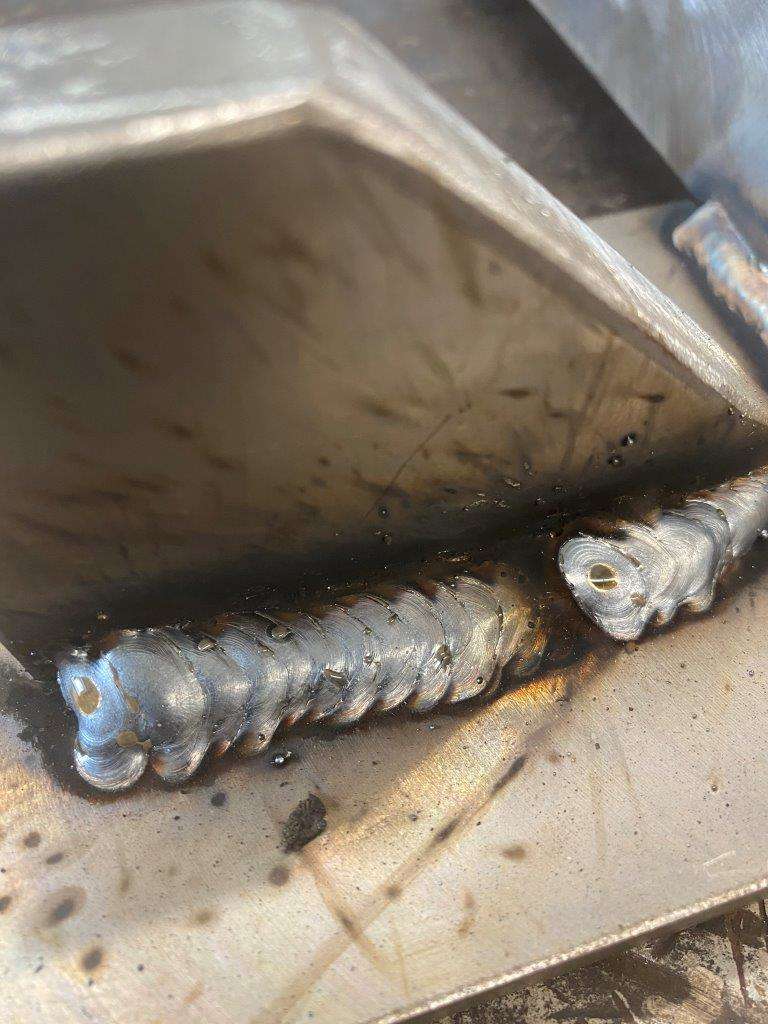
Close up
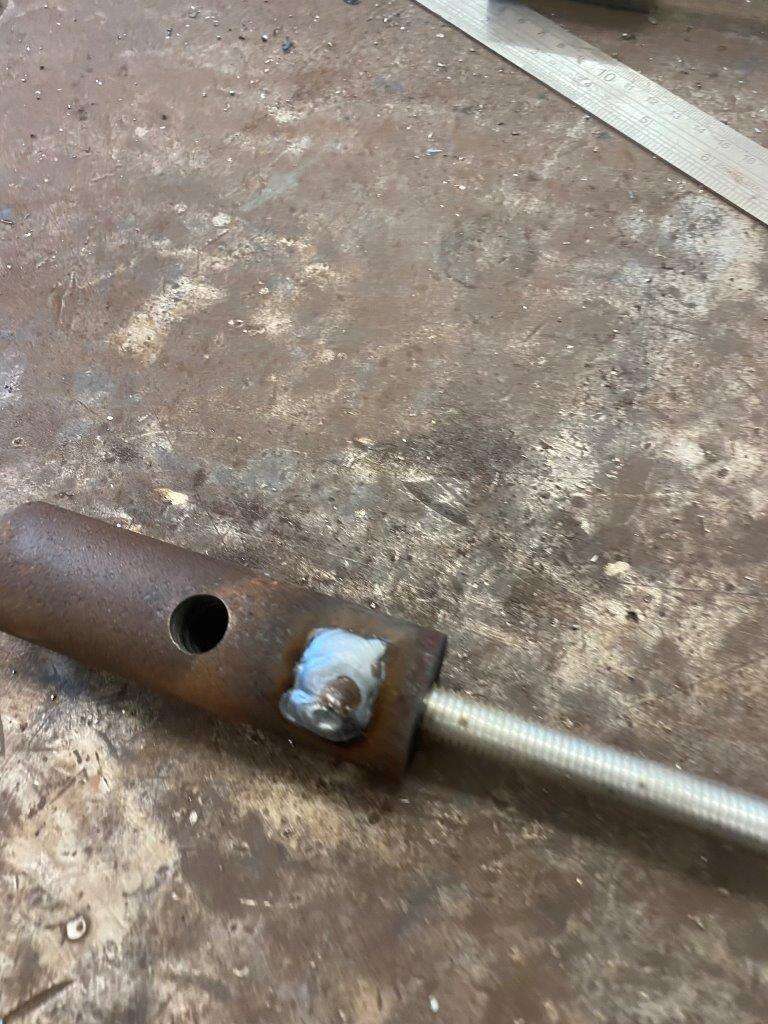
Weld those to a cross bar – I didn’t know how I was mounting it at this point so it was just a bit a of bar
I’m sure you can see the theory here and where I’m going – if not you’ll have to keep reading for the rest of the week
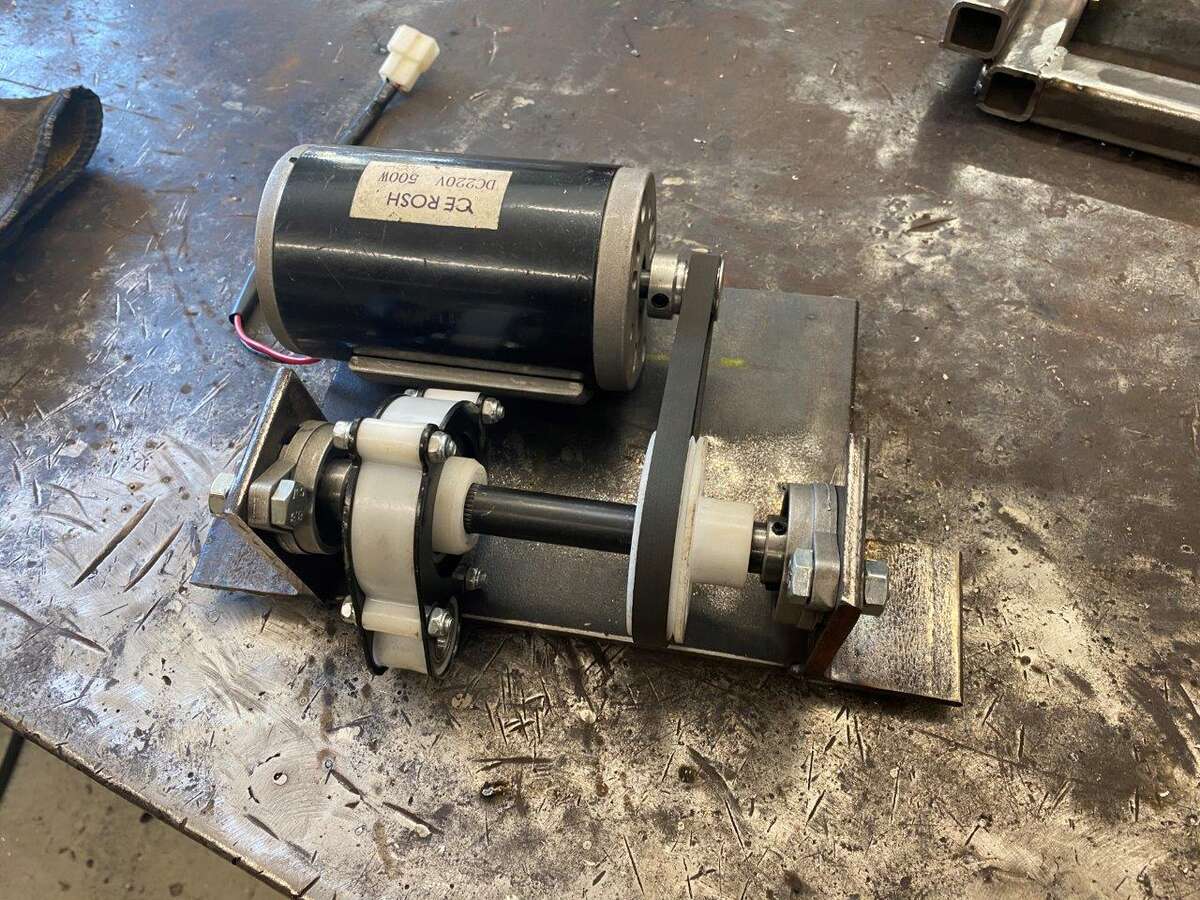
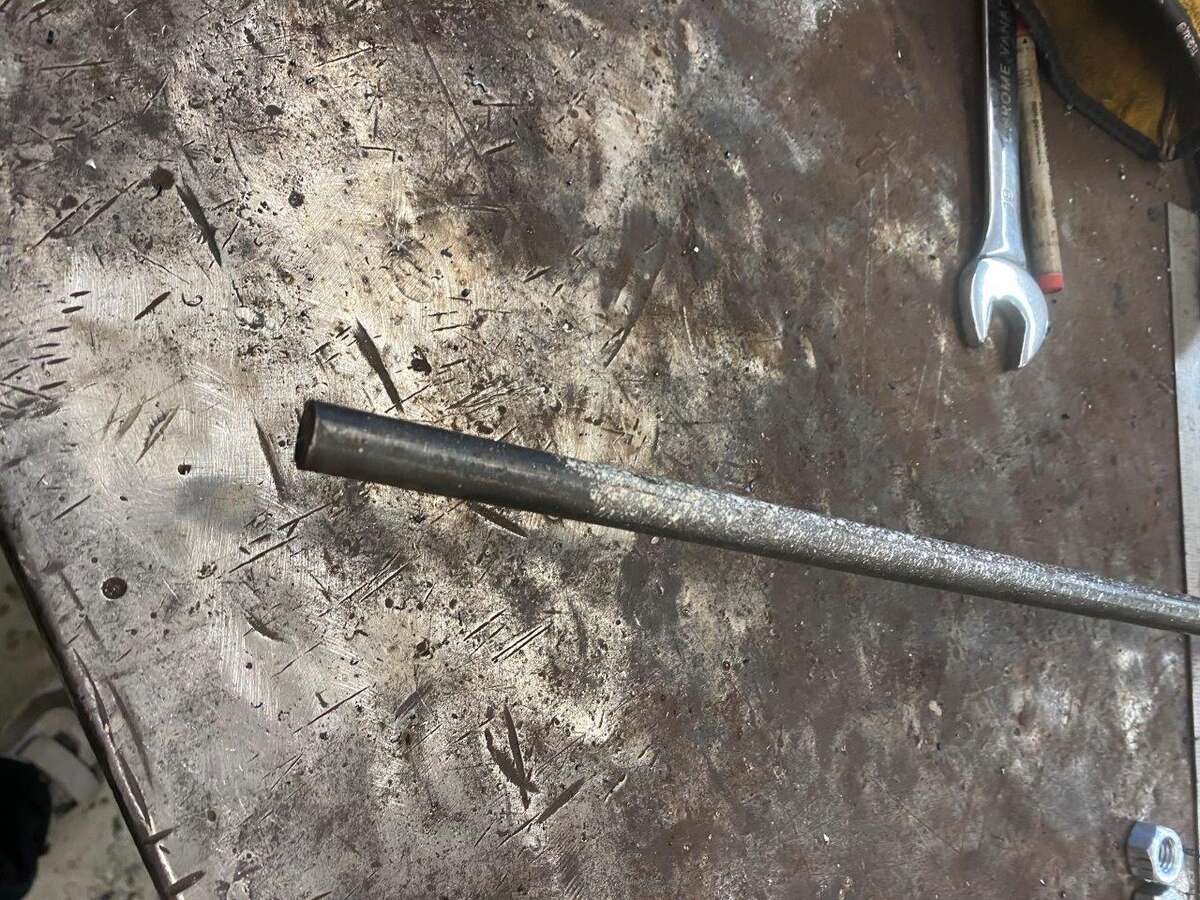
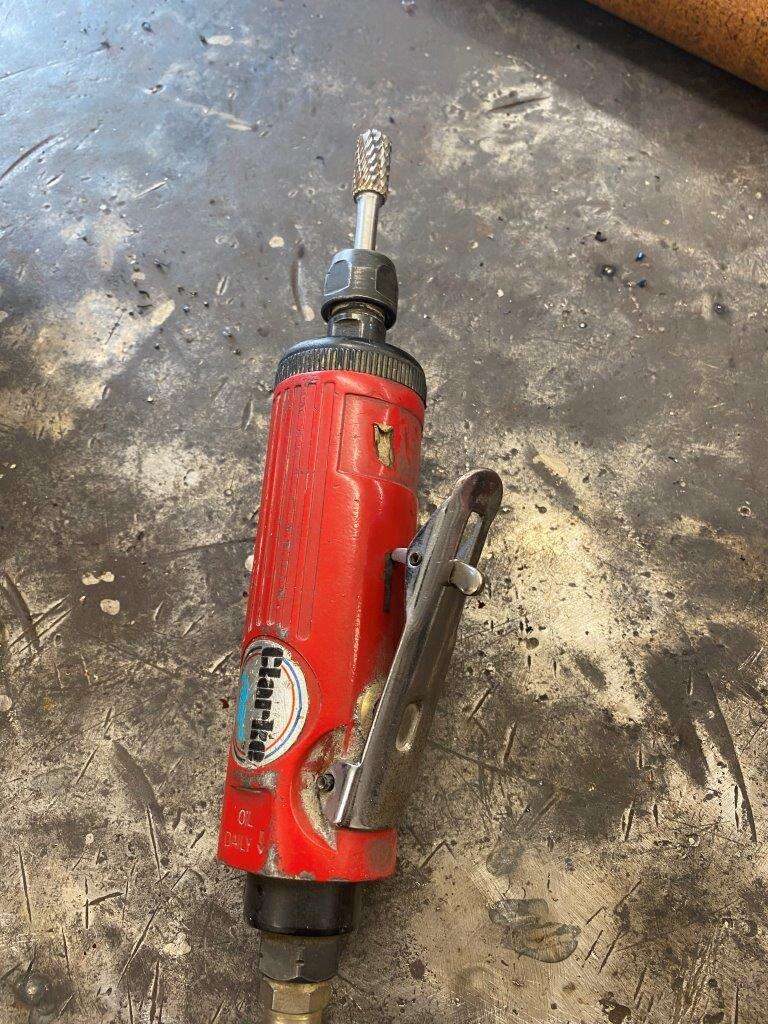
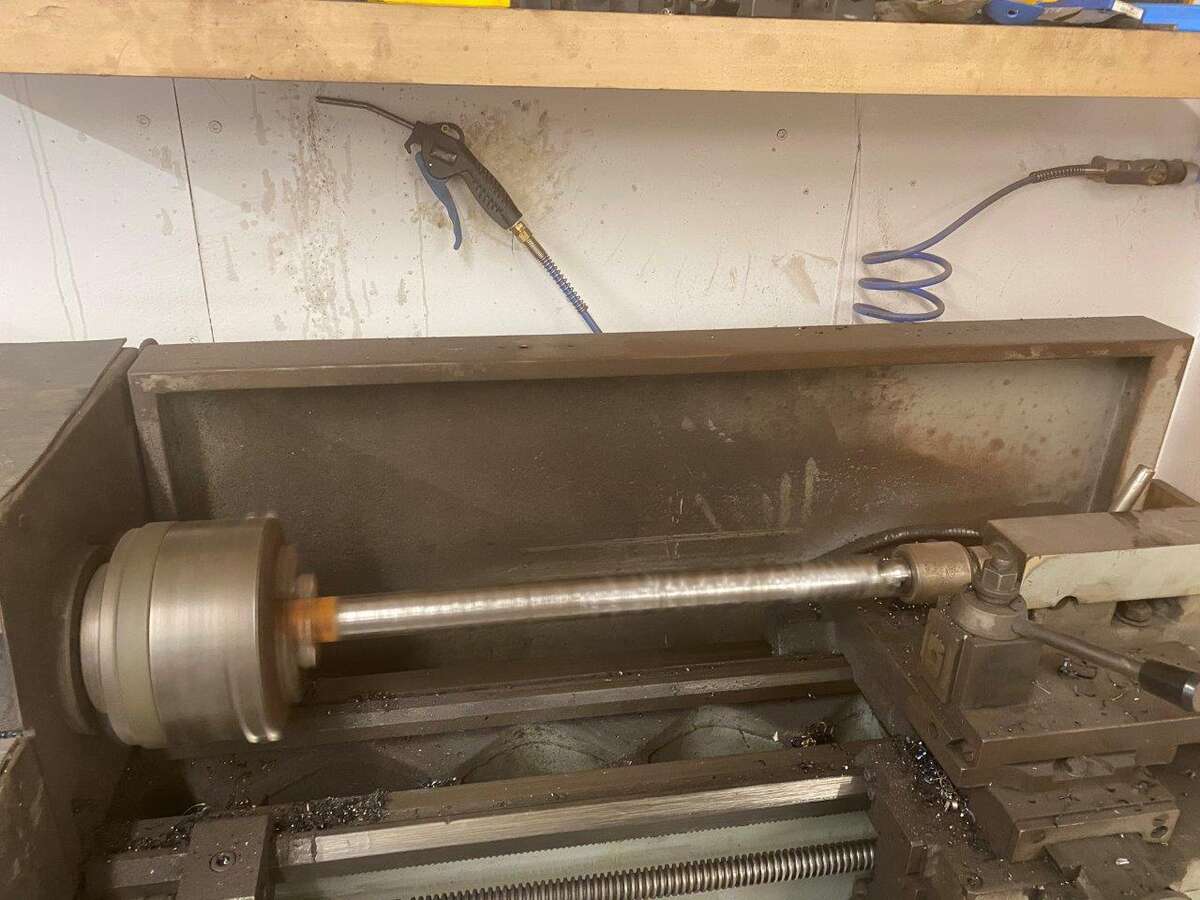
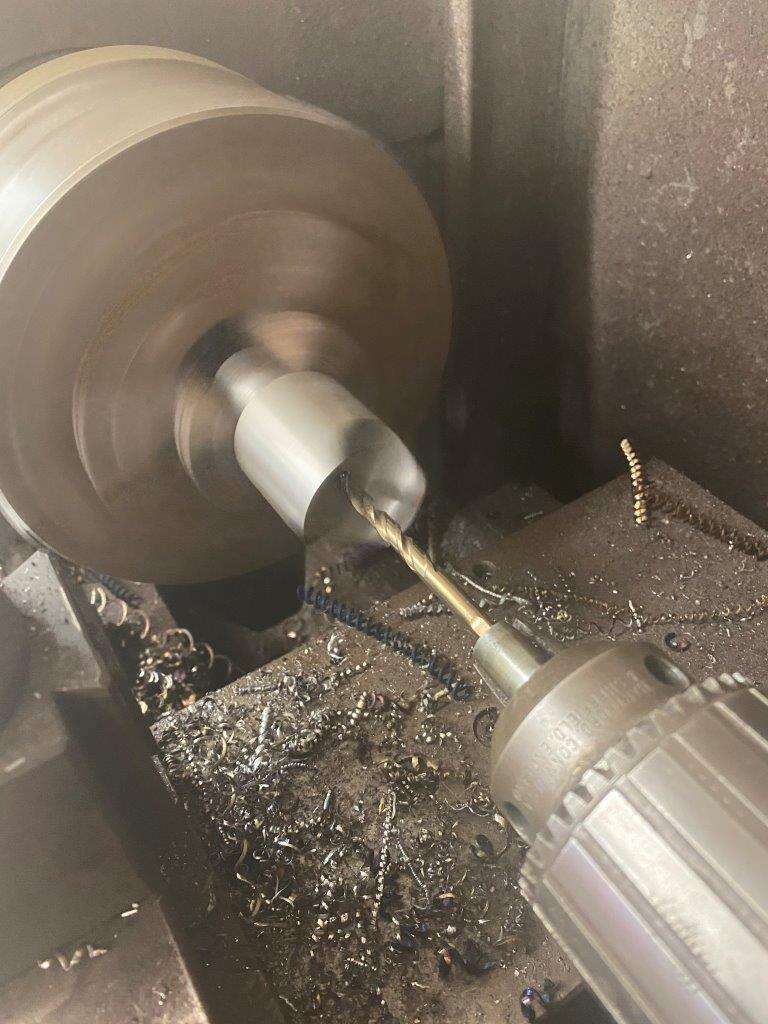
Moving onto the drive system, the nice man I bought the motor from said he gets the motors as spares for exercise machines. Both treadmills and vibrators now I have no idea exactly what they are but he sent a few of the other bits along with the motor “in case they were useful for your project” thanks mate, they are
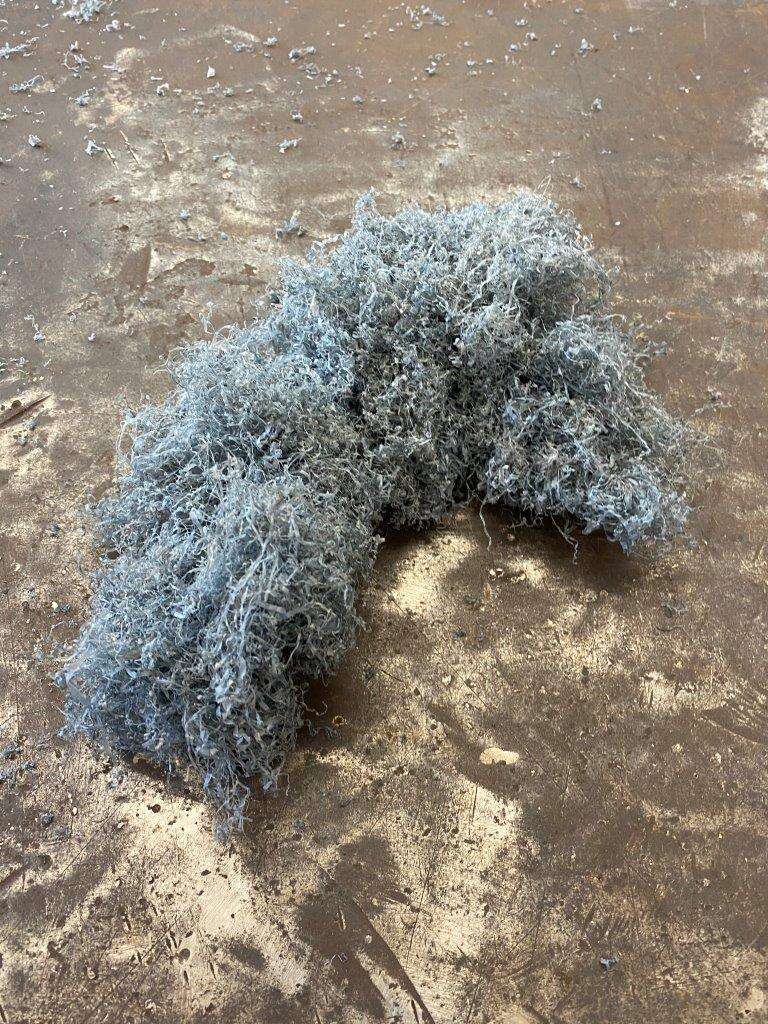
I was using this to vibrate/shake the tray
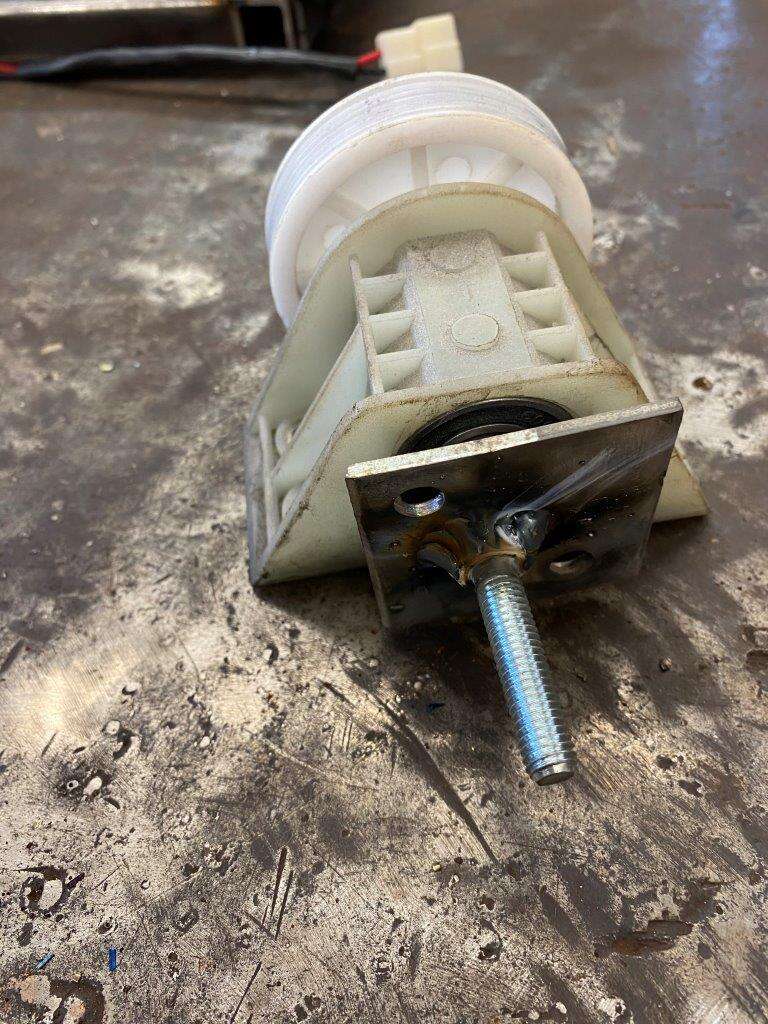
But this, which I must assume is from the vibrator was in the box
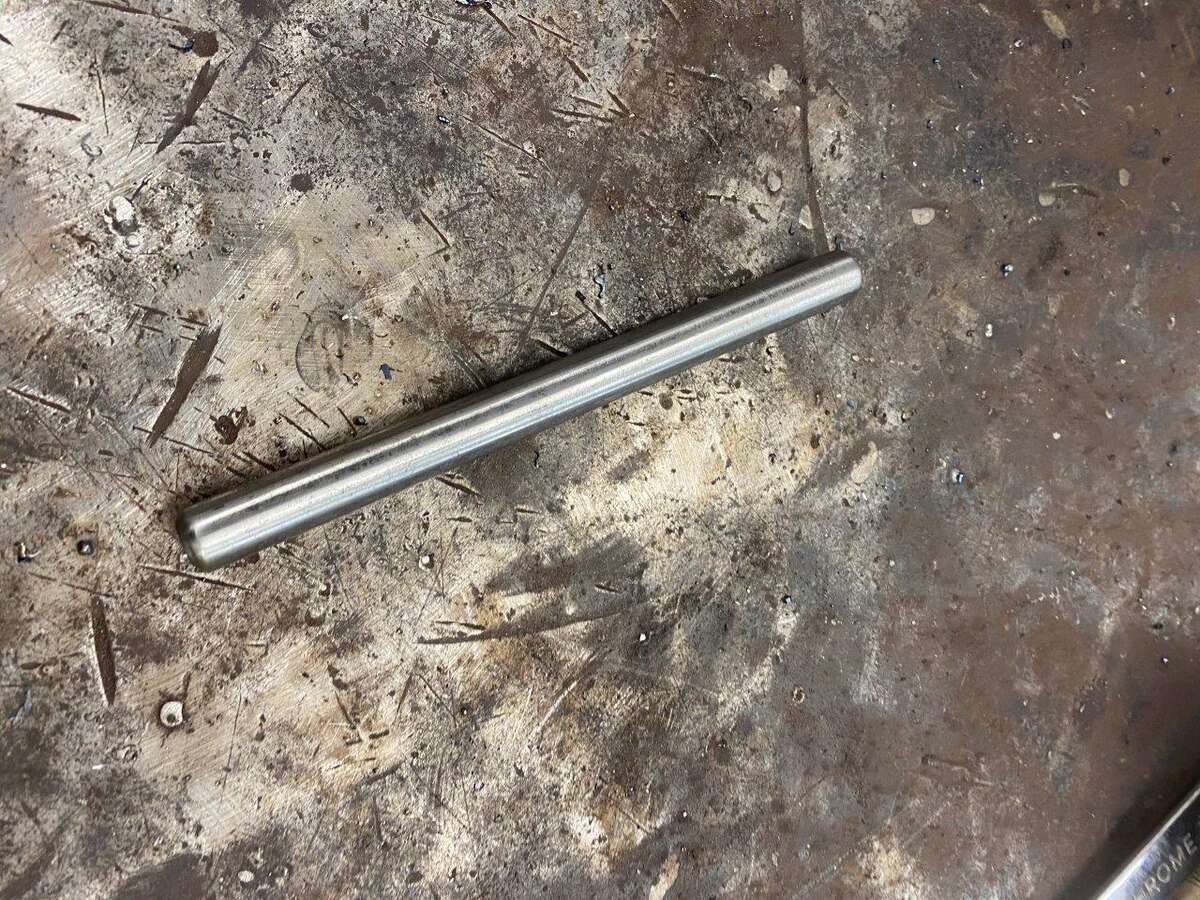
Its built for the job so with some trimming down
I can use that
First I need a mounting plate

Another bit from the scrap bin of about the right size, cut it down and squared it up
Looks good
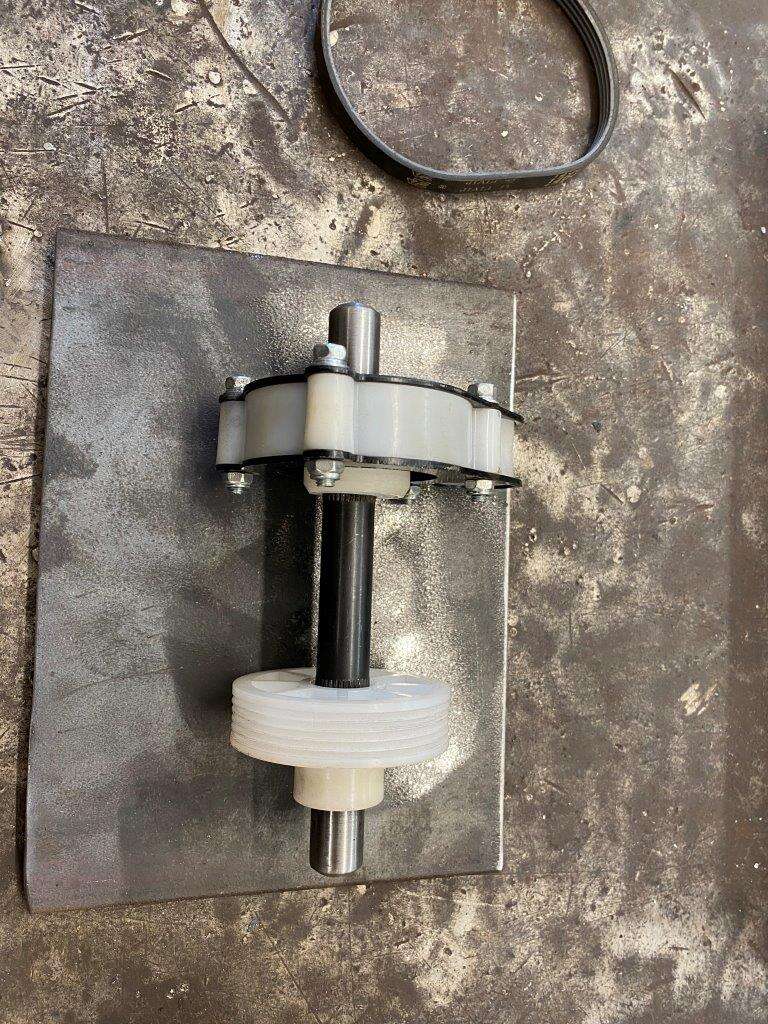
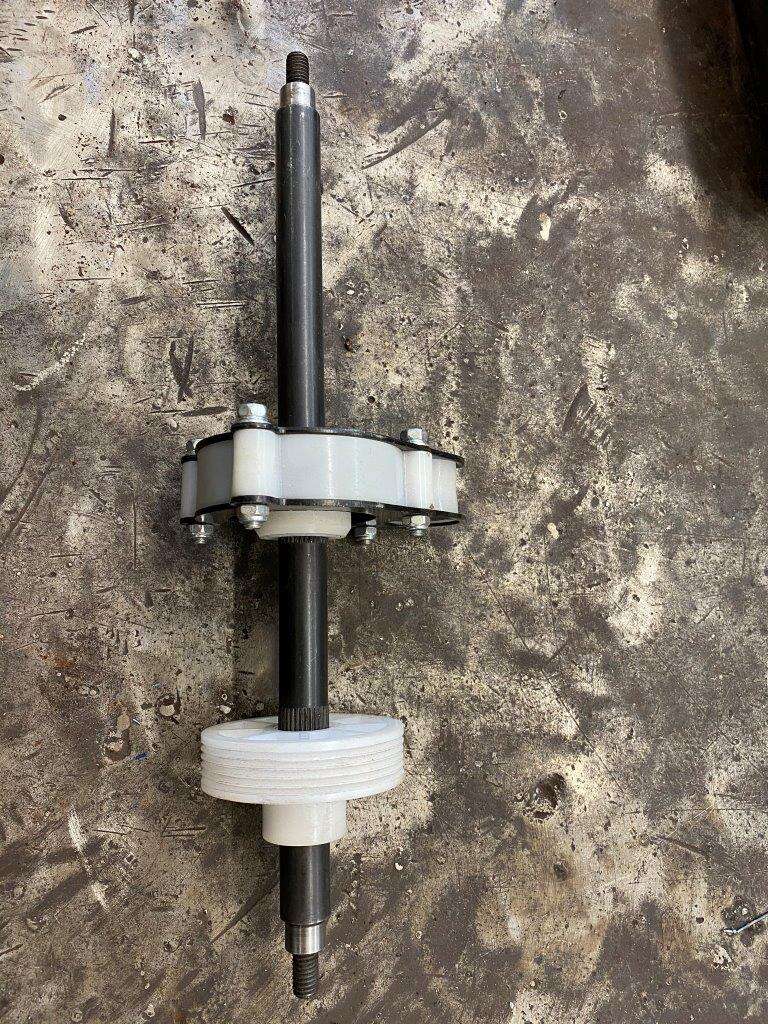
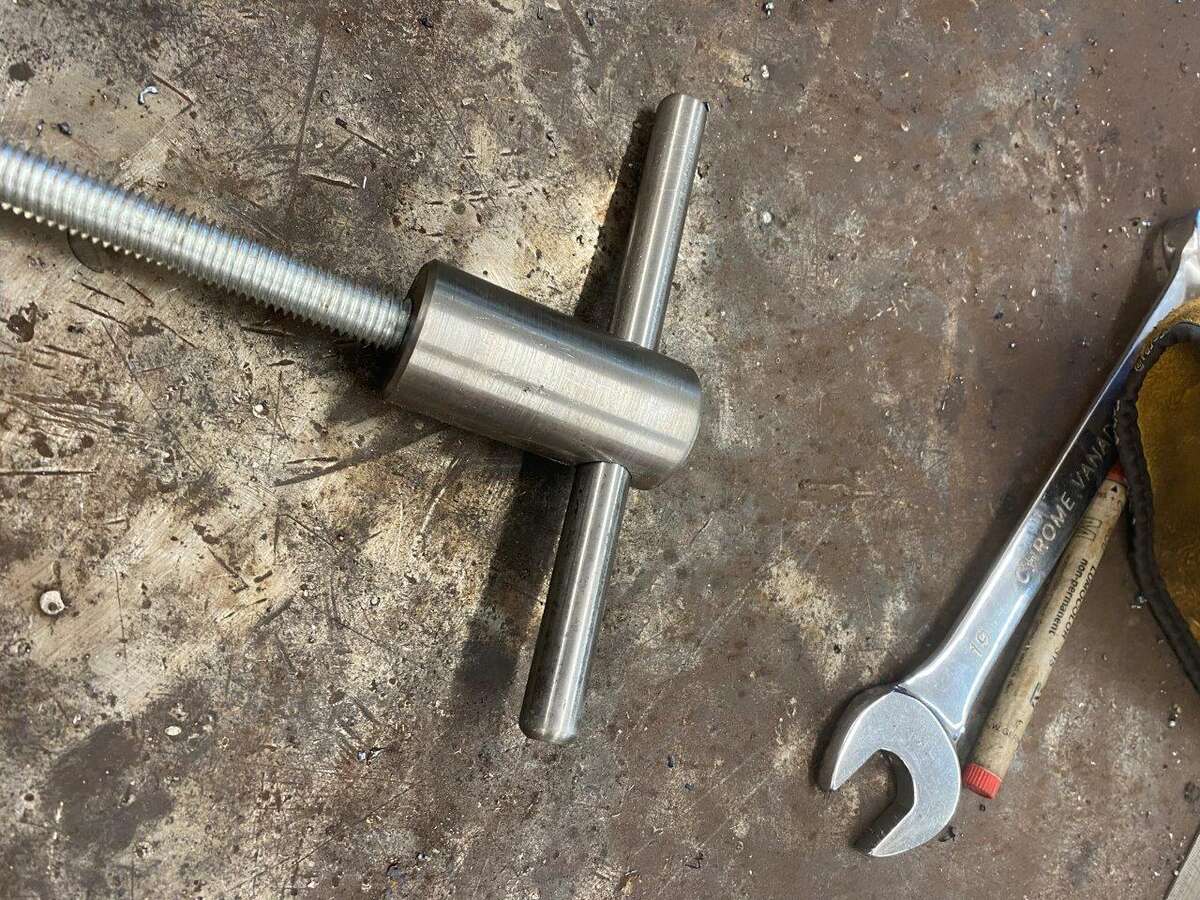
It just so happens that the bar is a 15mm diameter and I have some 15mm bearings from the E-Quad R & D
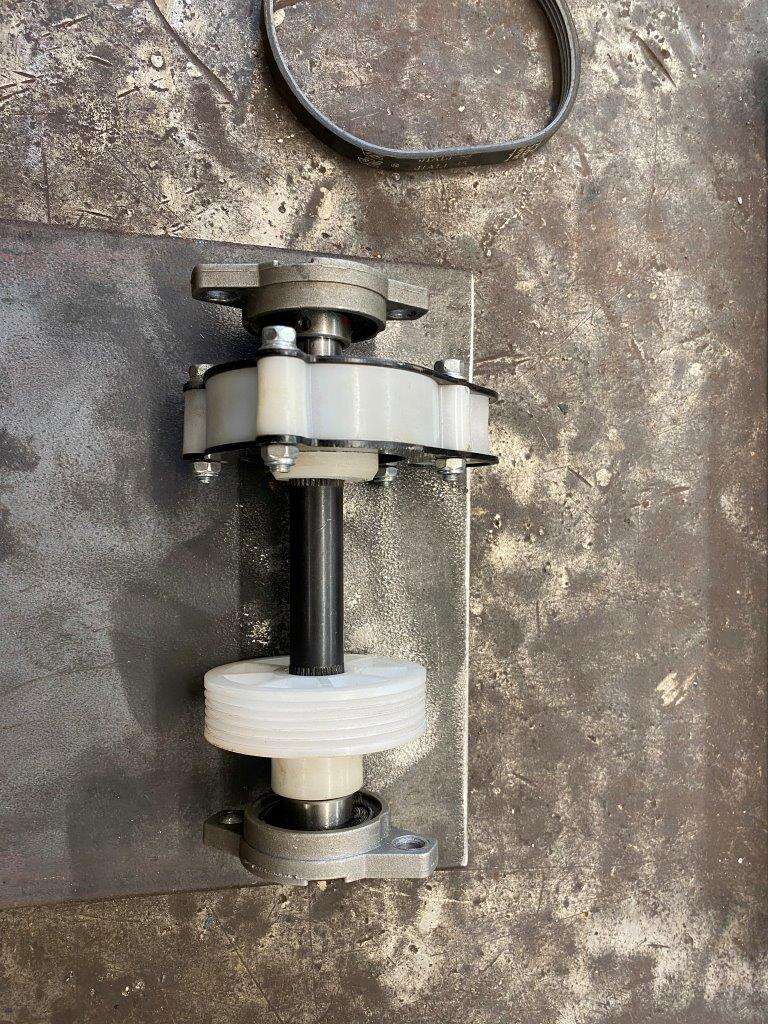
All they need is some mounts – back to the scrap pile

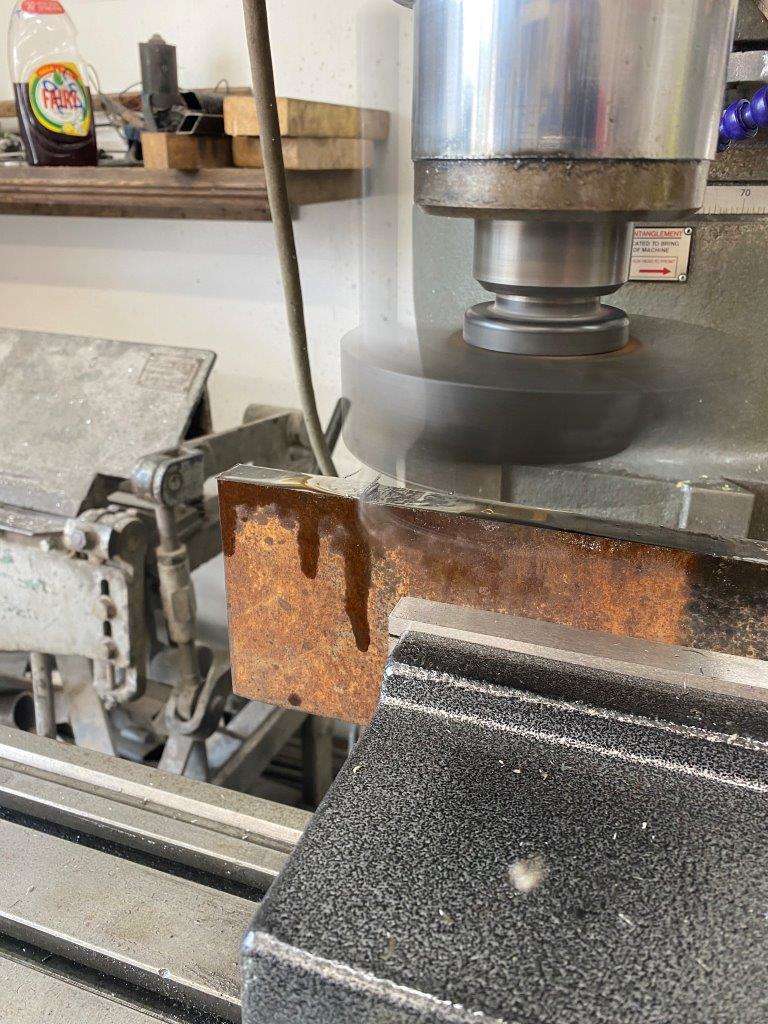
I spend a lot of time “cleaning” rust of old bits of metal lately

Quick line up but just clamped at the moment

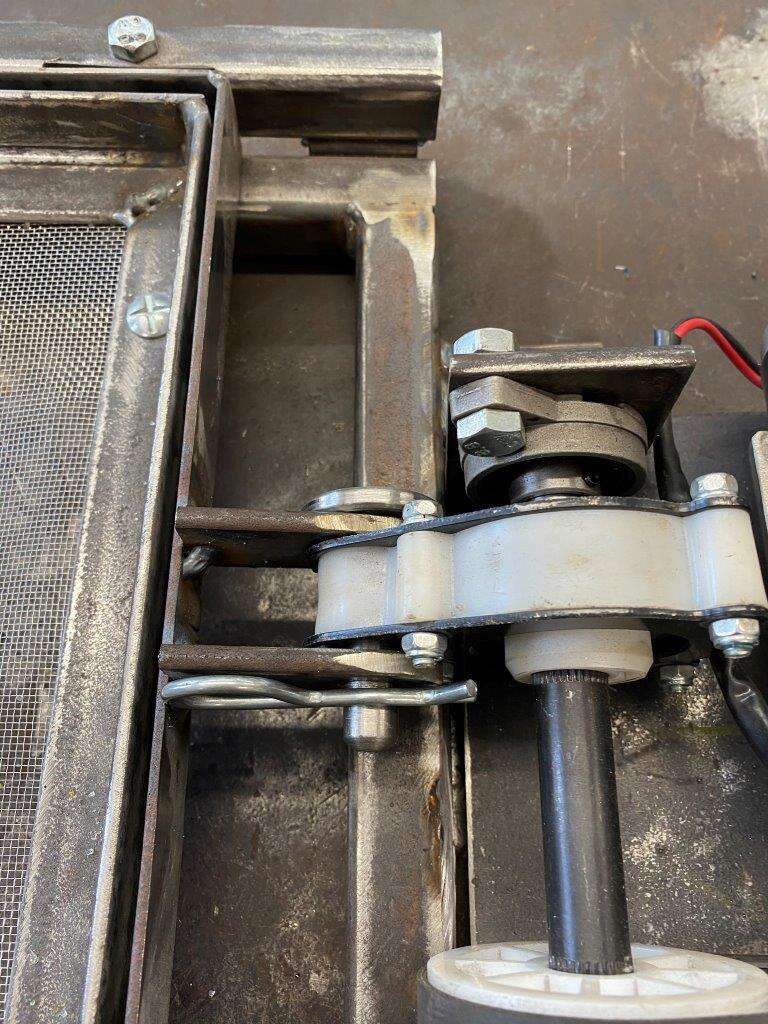
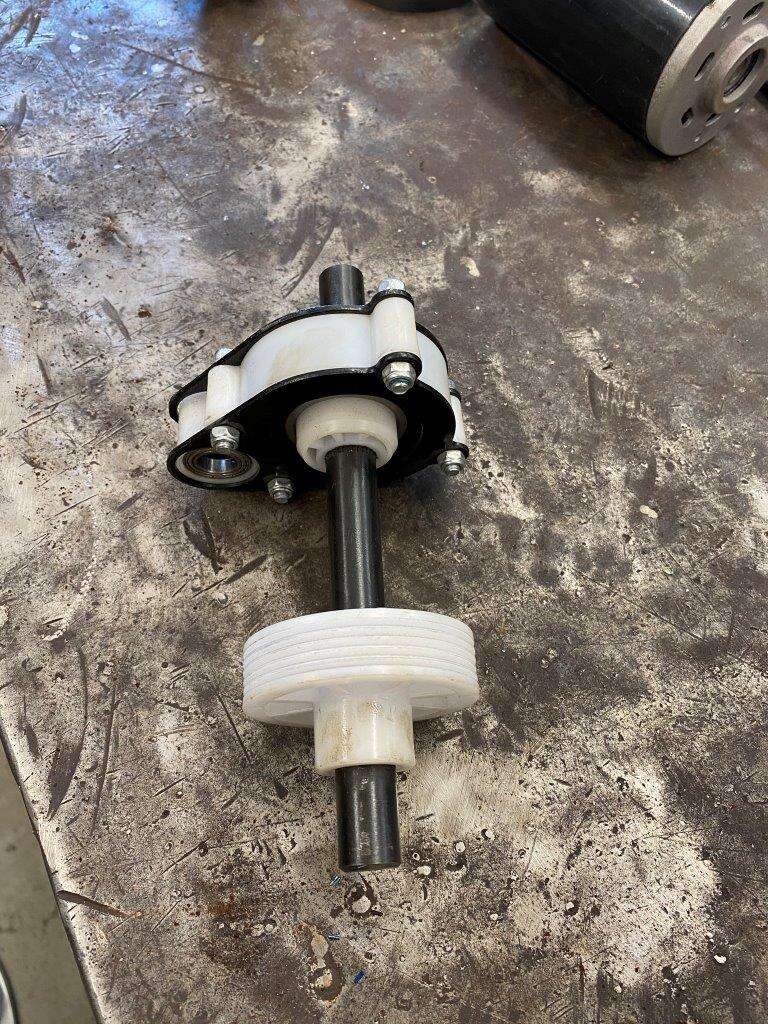
That should work, I need to add some slots so the motor can move to allow the belt to be tensioned and replaced if necessary, I stuck it in the Mill
Then cheated and drilled a row of holes
I used the mill to join the dots and finish off, it’s quicker to remove the majority of the metal with a drill, end result is a motor that can be moved and then locked in place
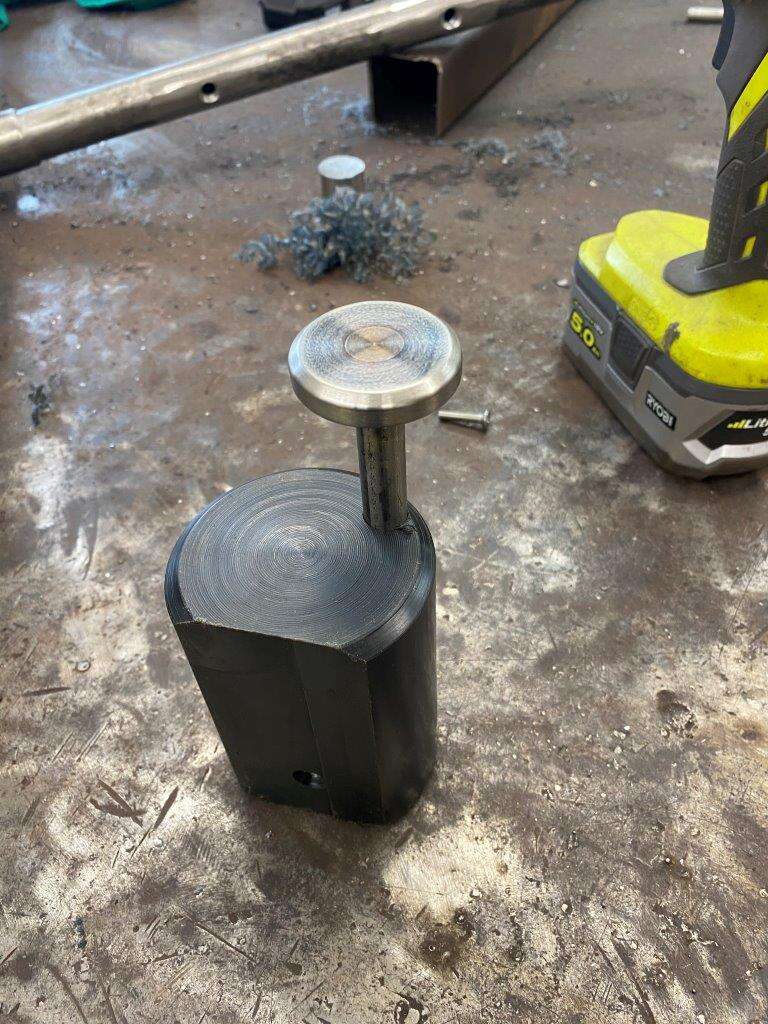
Now we need a motor mount so tomorrow I’ll show you how I did that – Properly
Be Alert – the world needs lerts
Stay safe all
")
Keyser - “The difference between stupidity and genius is that genius has its limits.” – Albert Einstein
-
8
-
-
All good thanks @SuperStu
Don’t have a bath in the en-suite just a shower, at my age I can’t get out of a bath

A bit late today so it’s good afternoon
I have been working – but not on fun things I can post on here just normal boring “doing my job” work, Friday was a bank holiday so I was out in the garage all day – so no post, same as weekends.
But never fear I’m back now
I have been doing lots of side projects at the moment, sorting things that I wanted to do and always thought would be useful but just didn’t have the time as I wanted to get on with the main task at hand. However as I’m down about 40 – 60% of my normal monthly work load I’ve had time so that's bad but also good if you know what I mean.
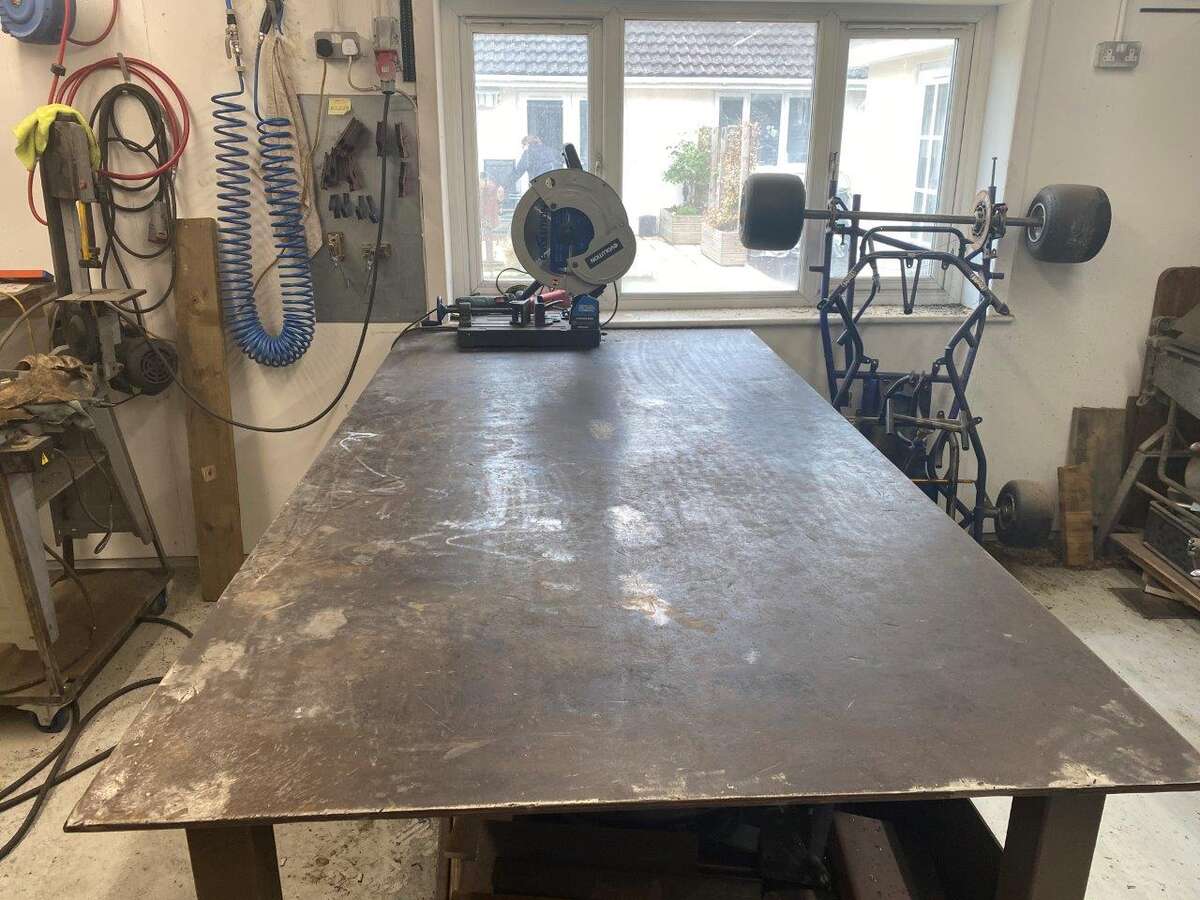
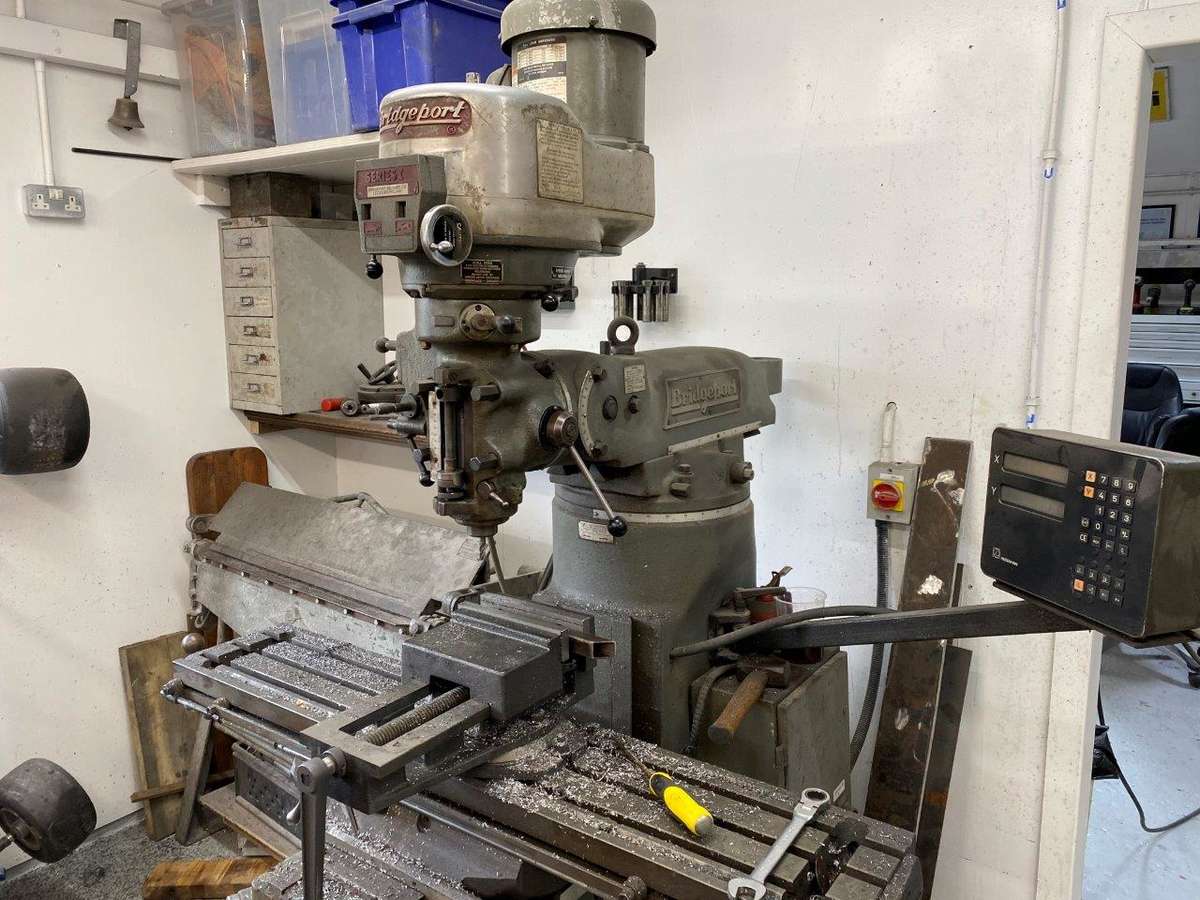
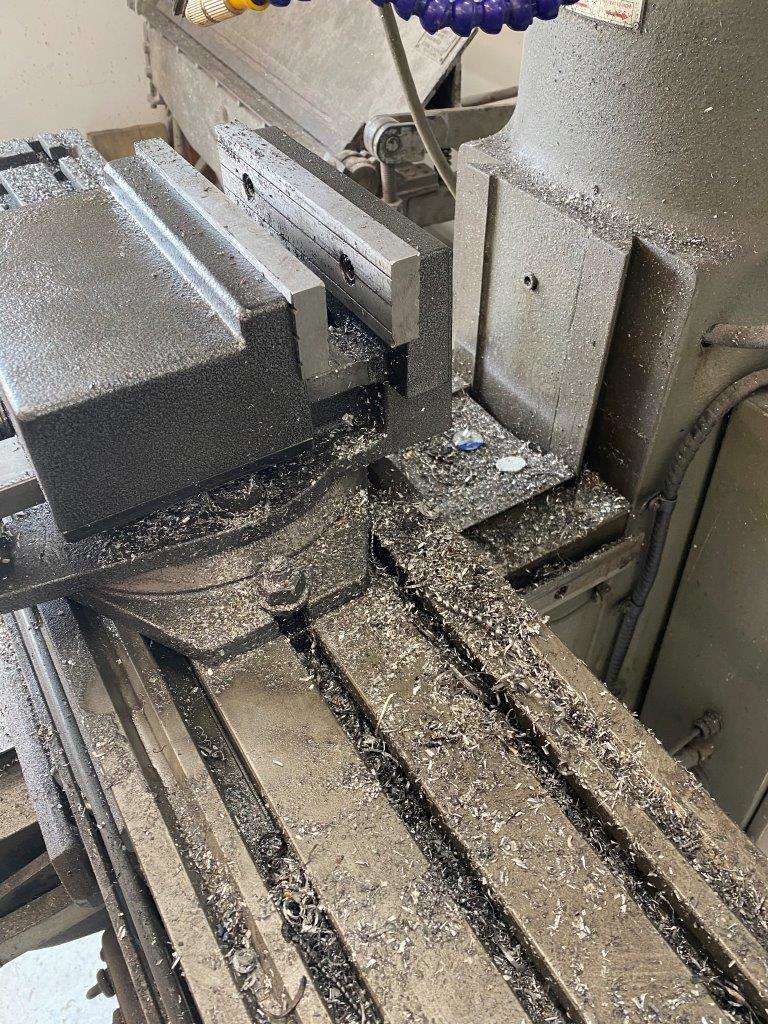
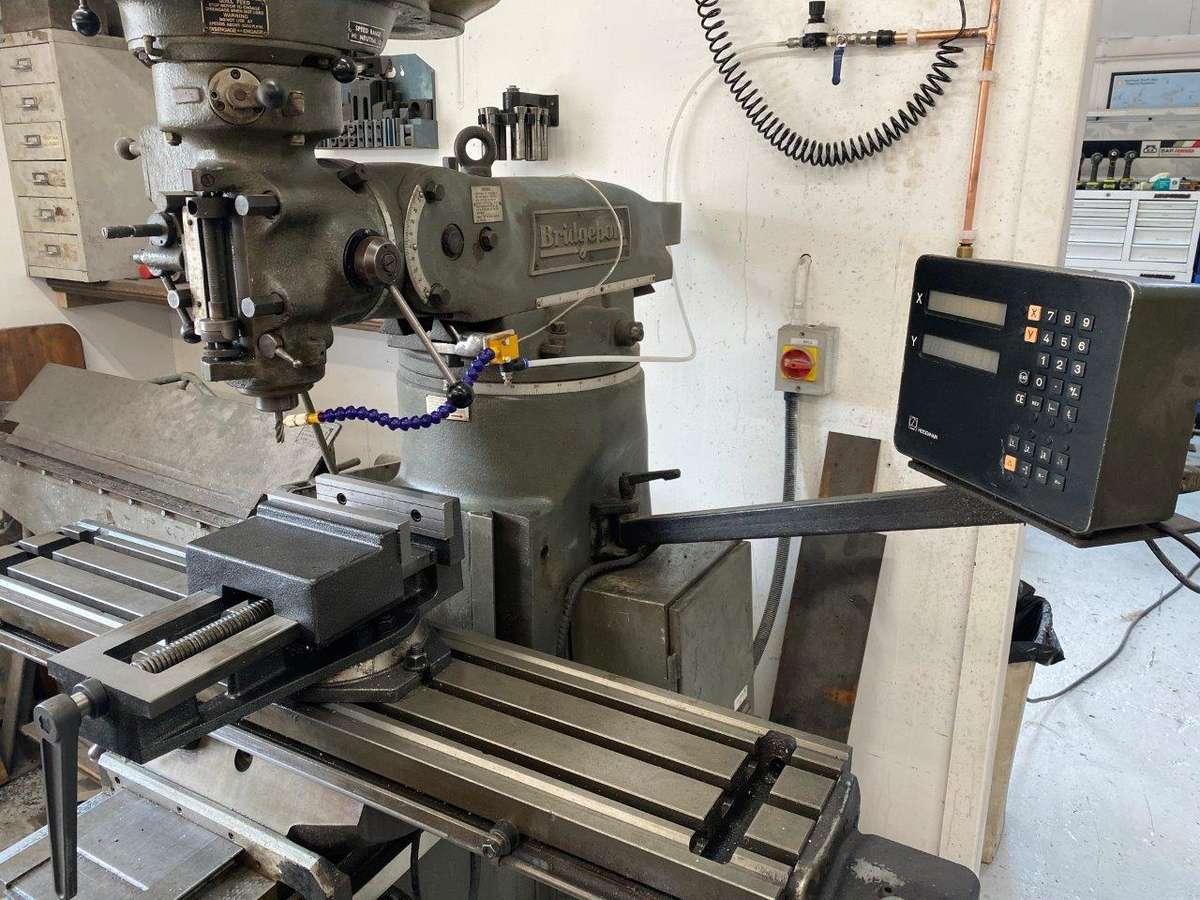
That has led to the shelf by the milling machine, it wasn’t “needed” to use the Mill but it’s nice to have, I have now started on the lathe, but we will come back to that.
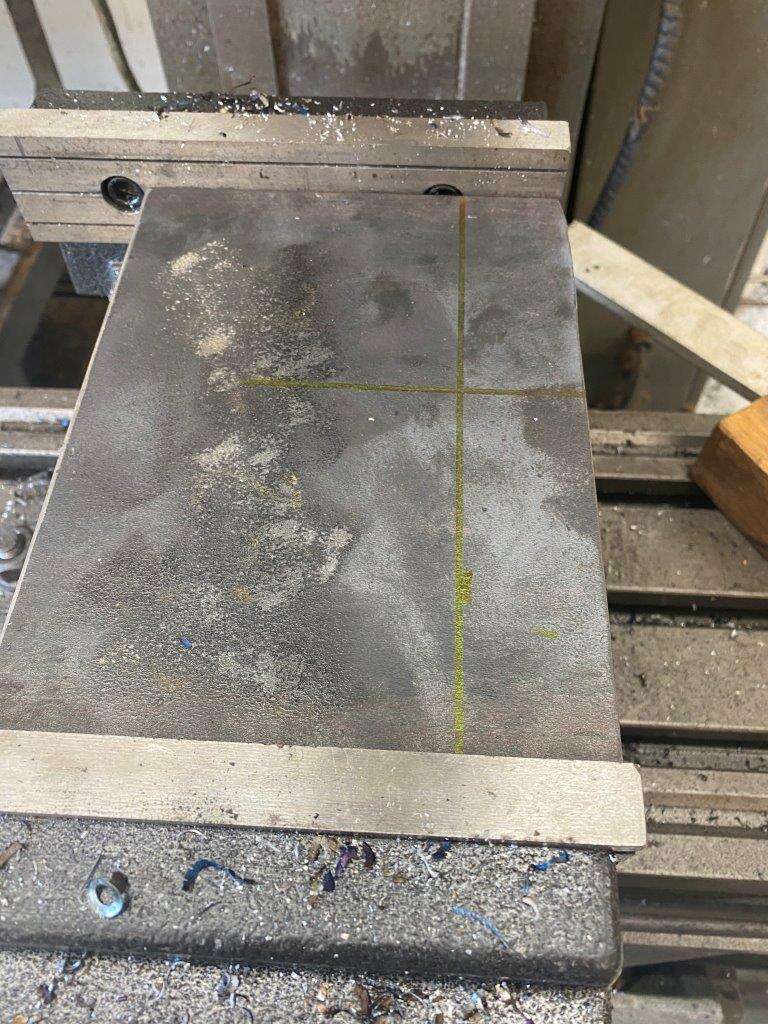
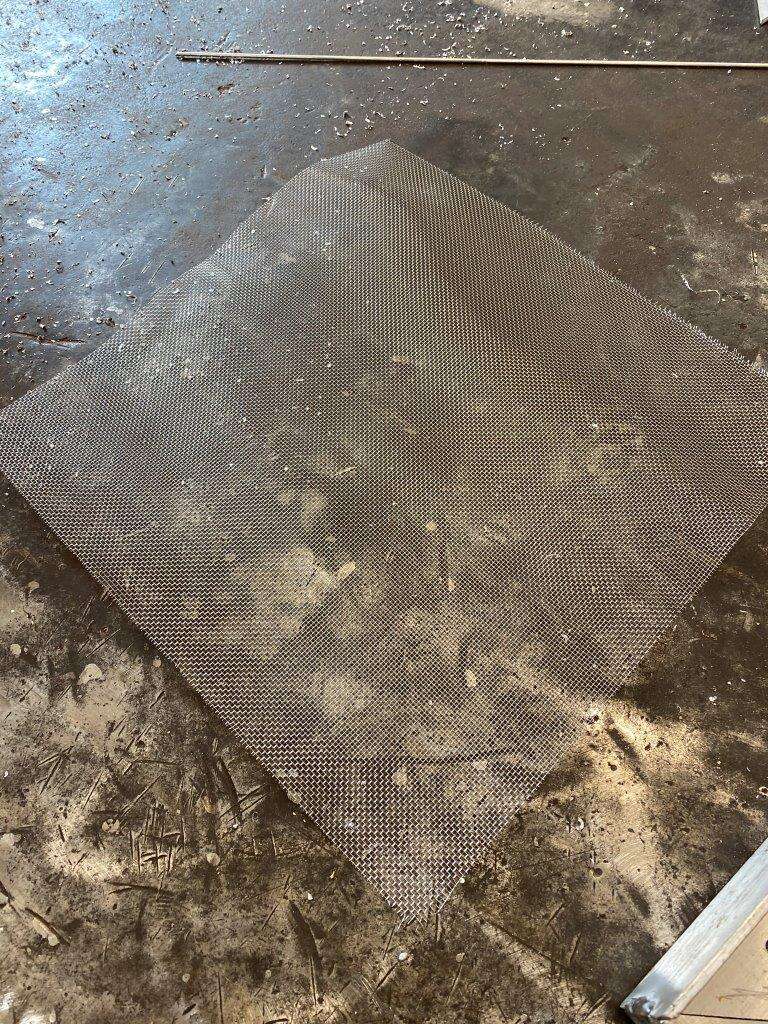
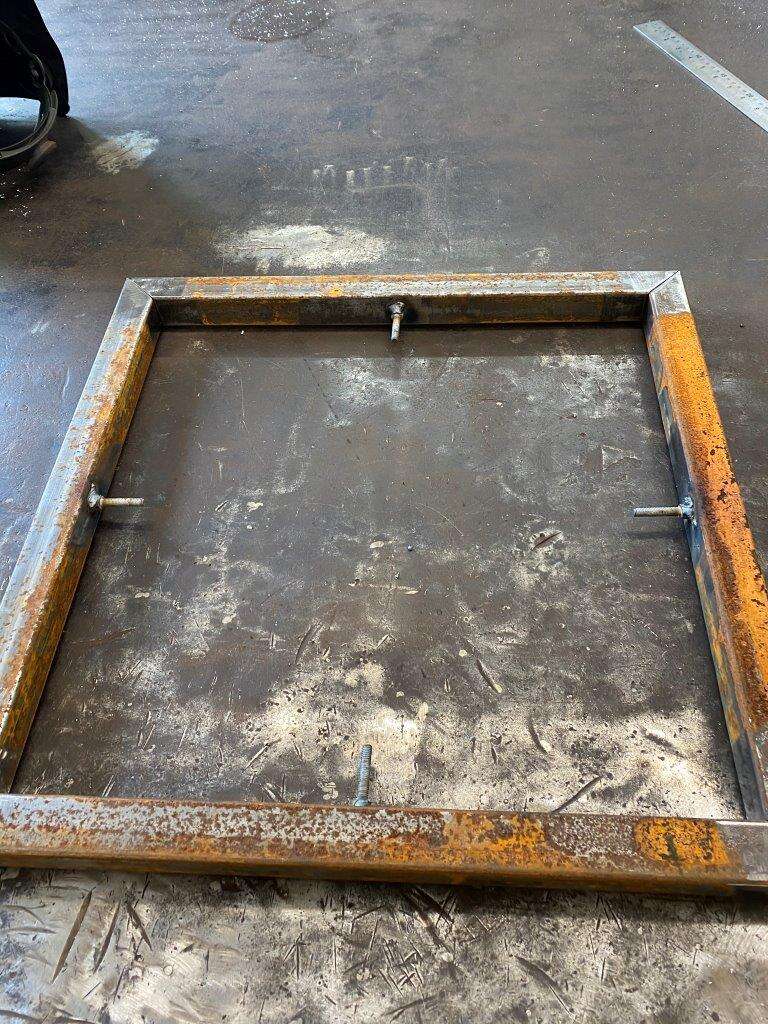
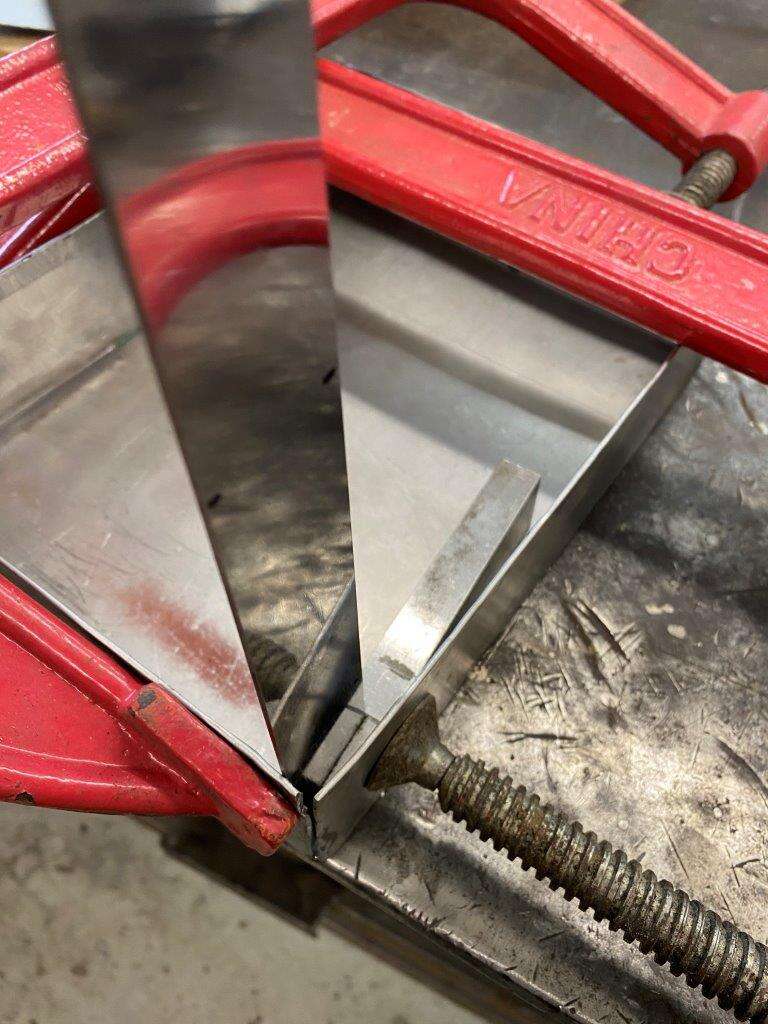
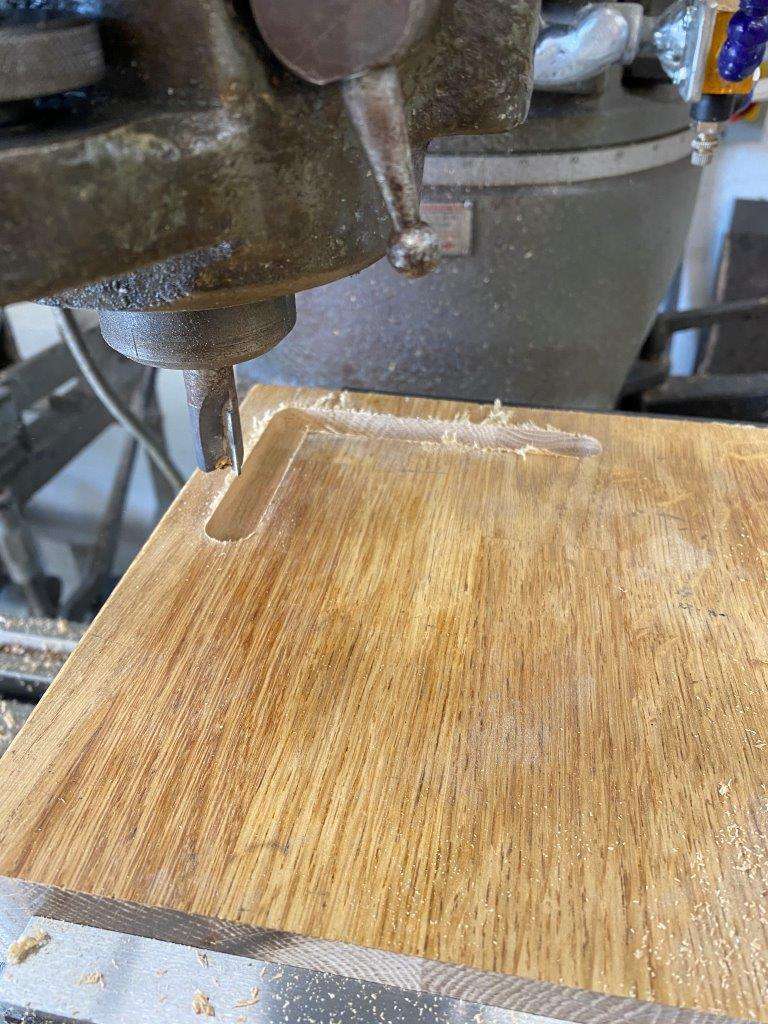
For now I have gone back to the blooming sand blaster as it was still bugging me, I need this so I can finish blasting The Bug frame and the first sieve system sort of worked but broke the actual sieve mesh, so it was put on hold. I found some mesh of the right size on good old eBay and that arrived, so I did a bit more R&D to see what would actually work.
So bit of aluminium angle was cut up
A scrap of MDF
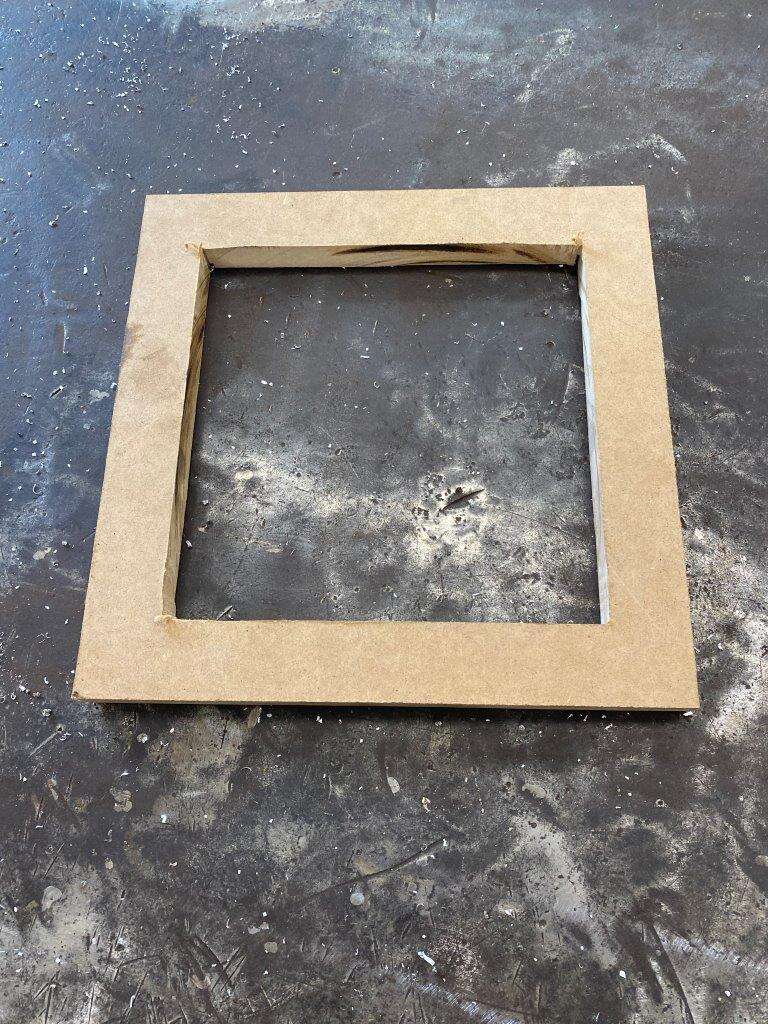
They fit like so
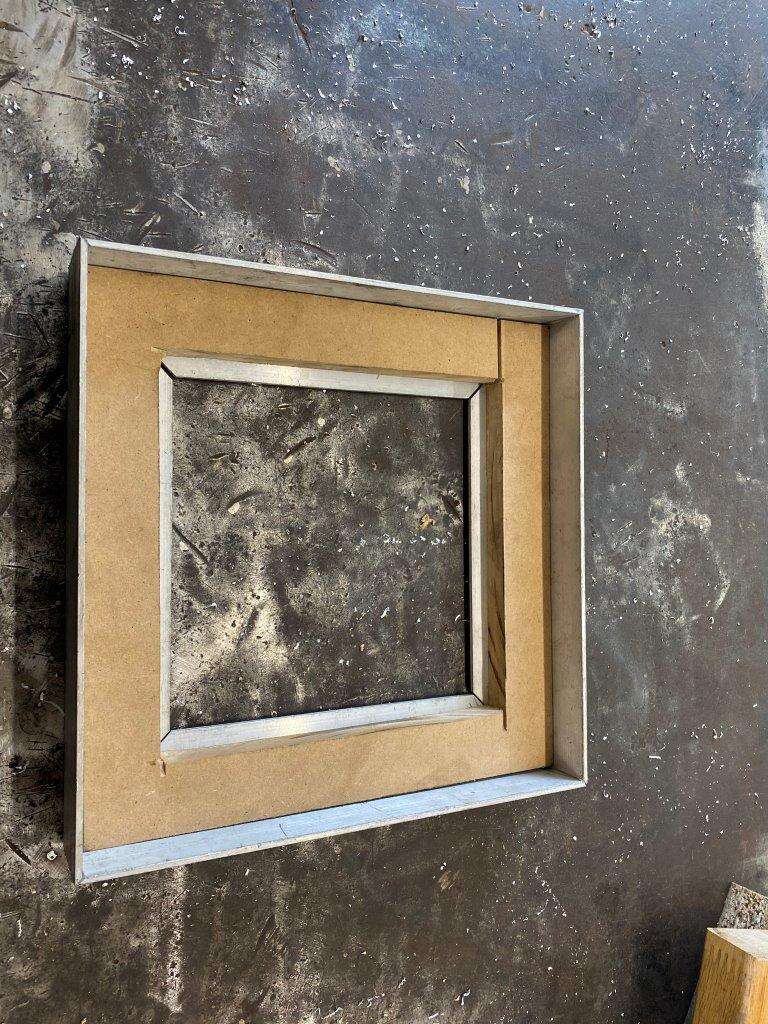
Tac weld
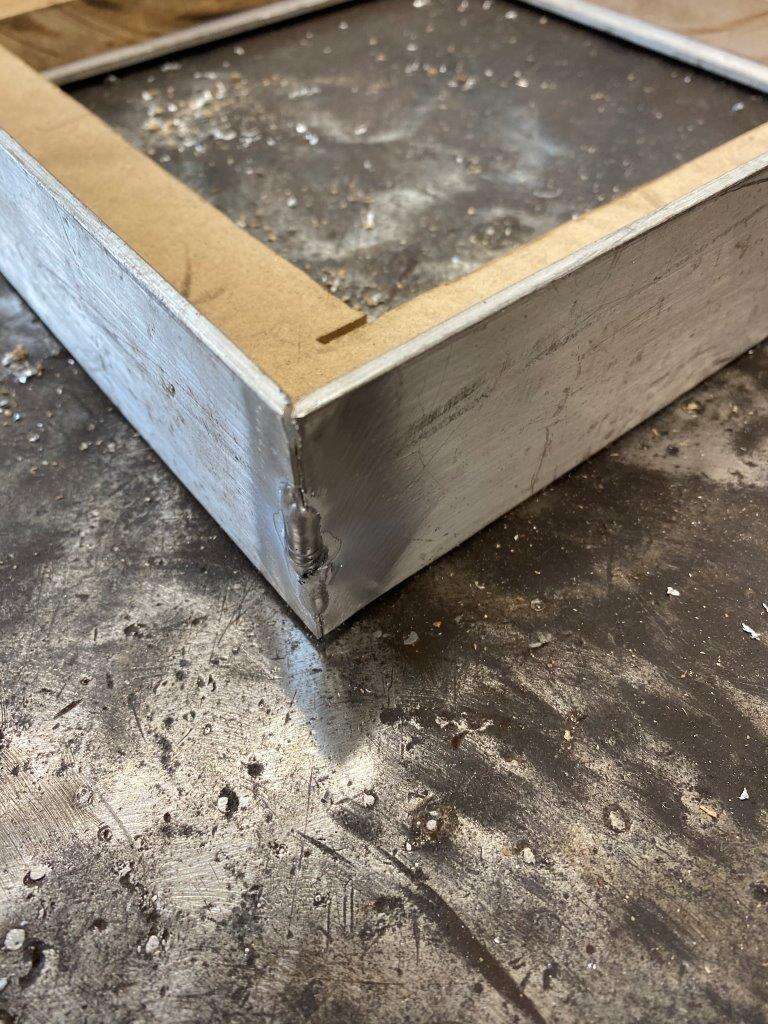
Mesh
Few holes
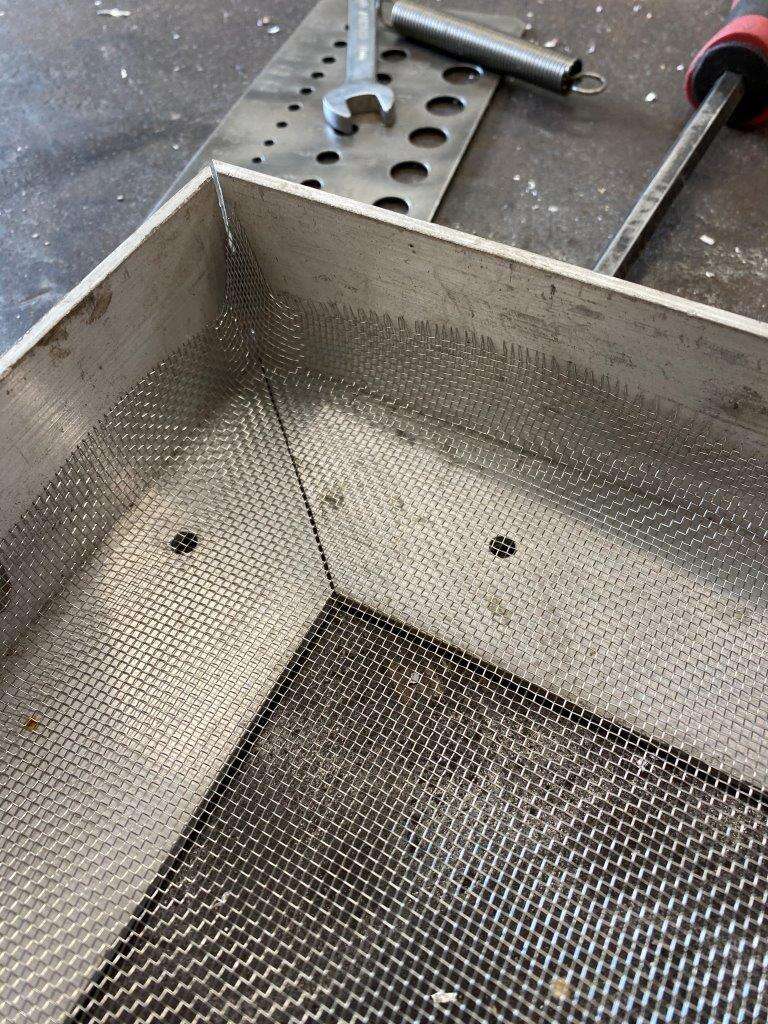
All together
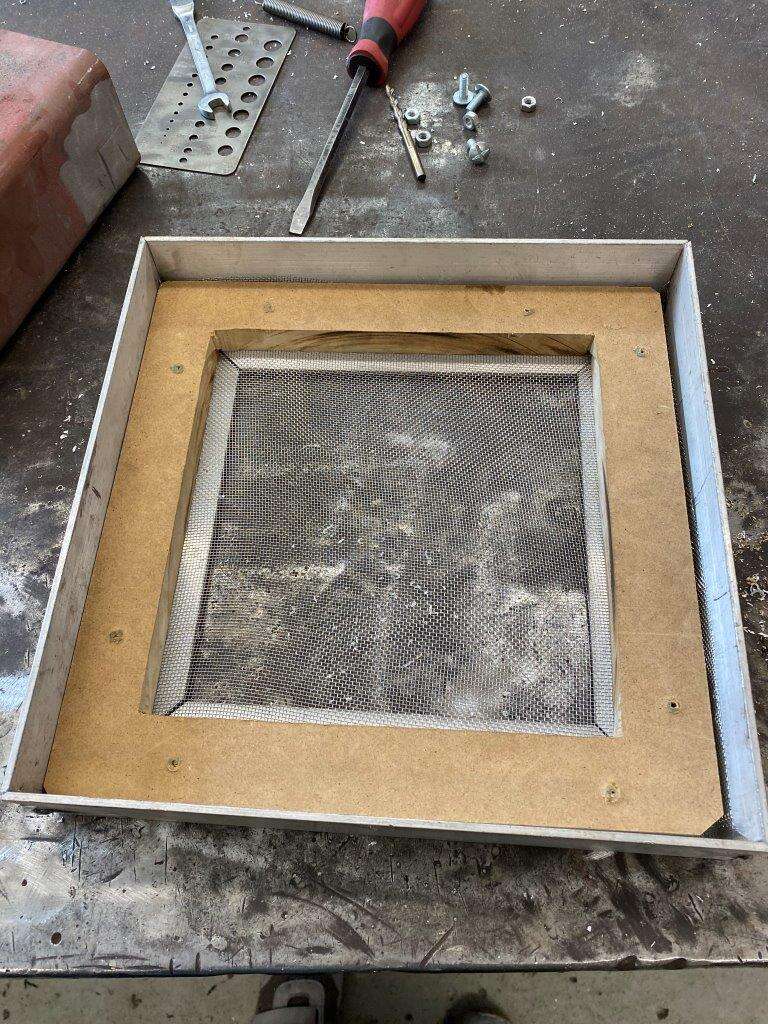
Added springs

Made a box from errrr…. Well box section what else
Added some bolts
Then joined them together using just the springs (this is test of concept or a prototype so it is rough I know)
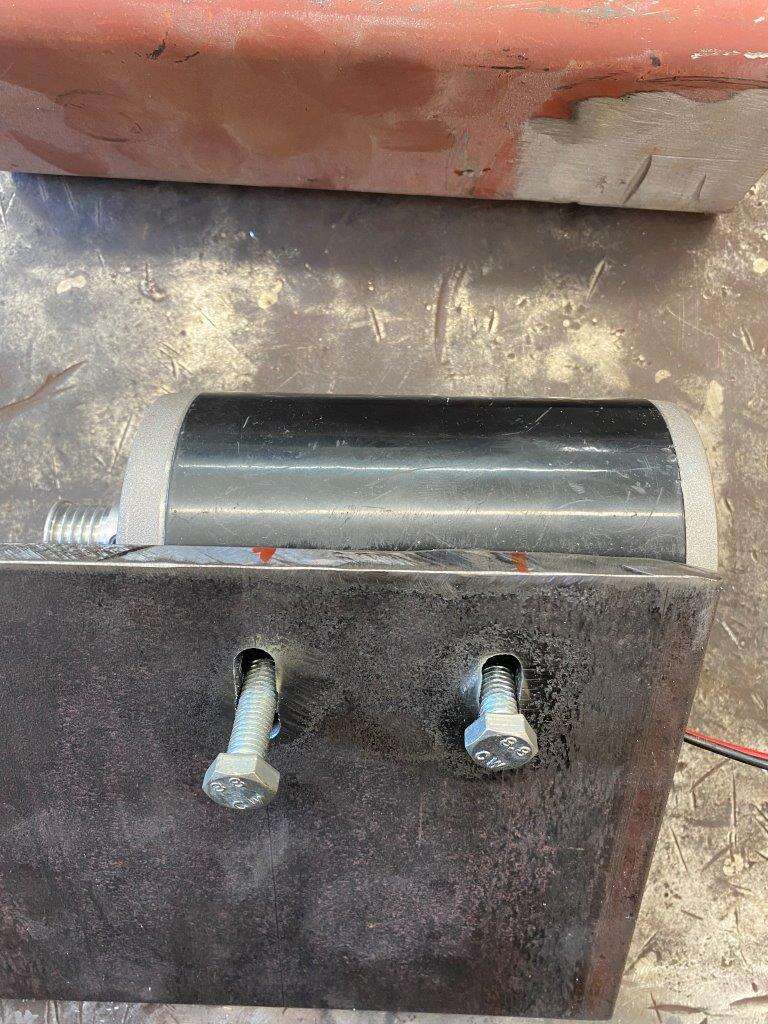
Attached the motor
The result ……………….
FAIL!!!
Not a total fail but is sucks as a concept, Now this is where we go back to me proclivity to “over engineer” things, it’s not over engineering it’s just doing it properly IMHO – everyone else says its over engineering but I still think I'm right
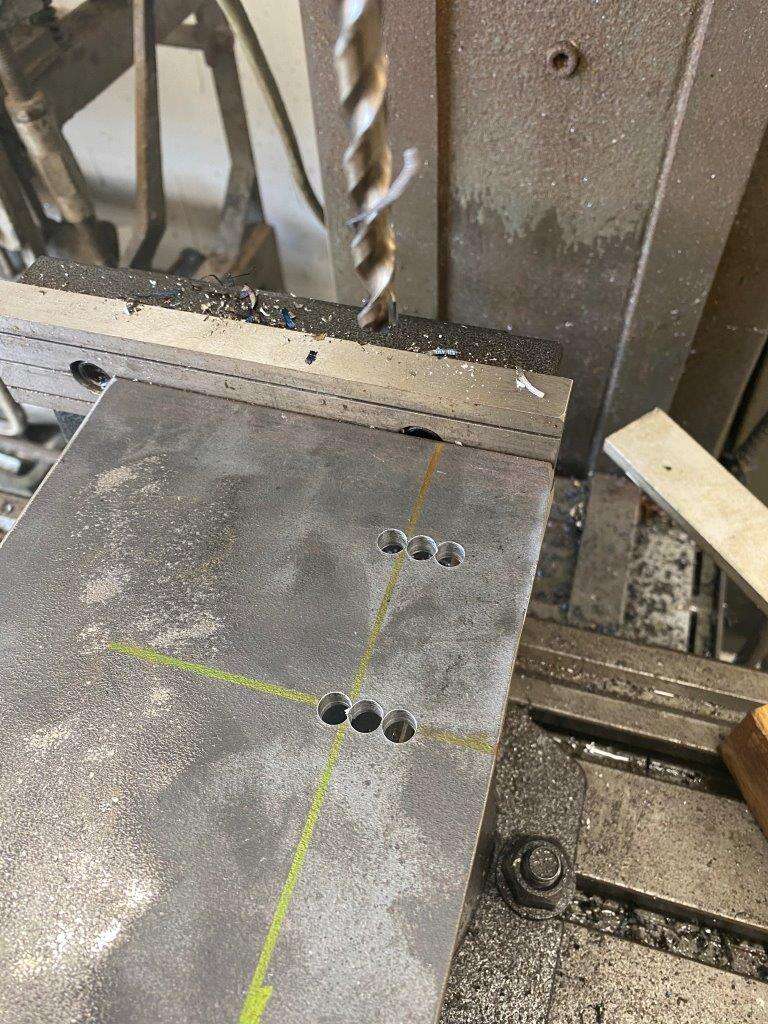
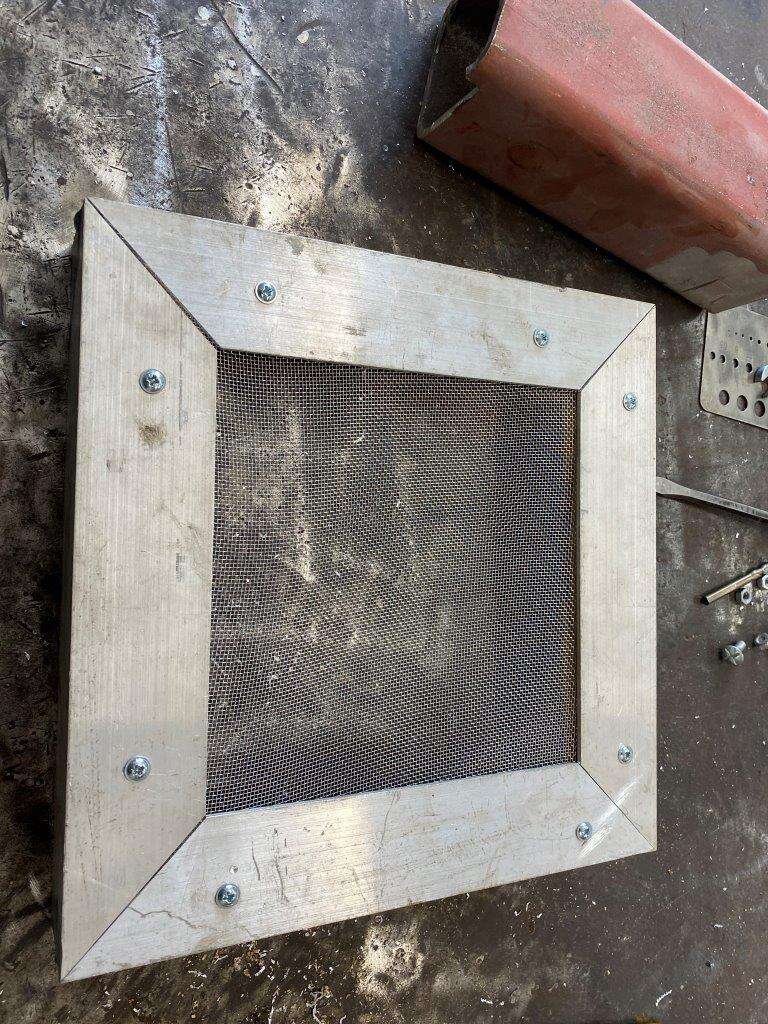
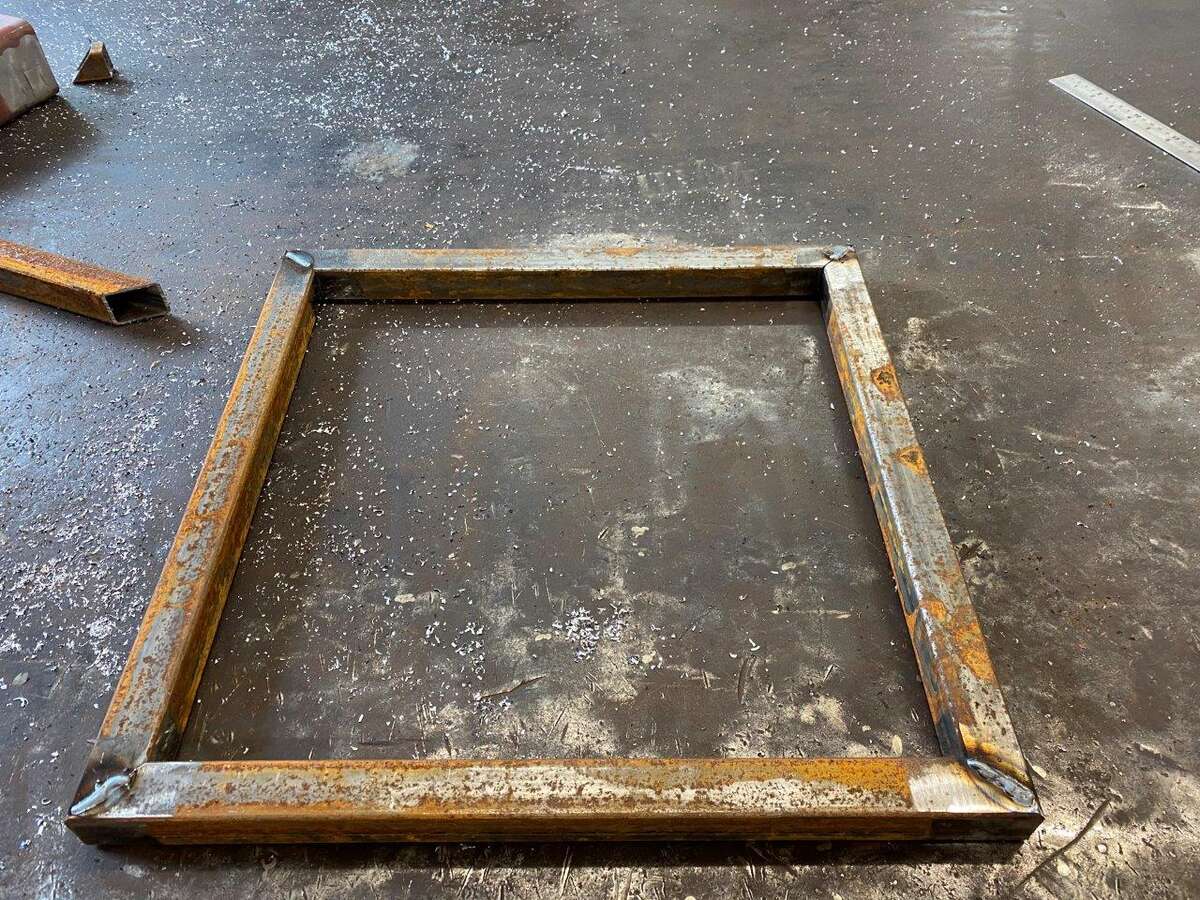
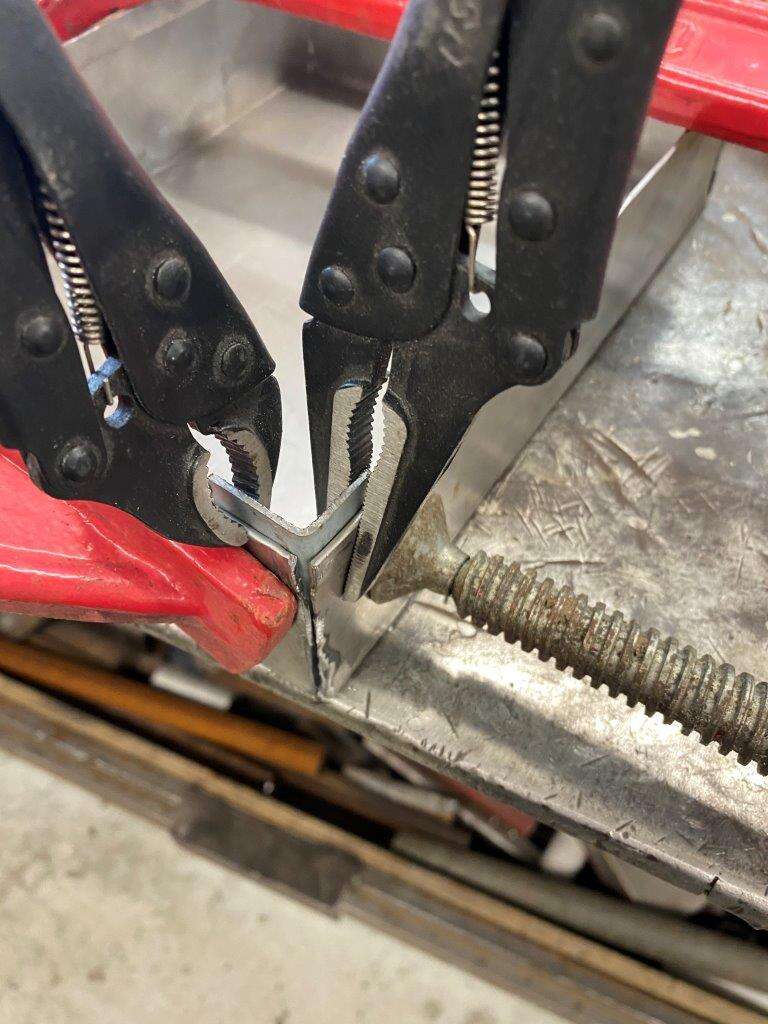
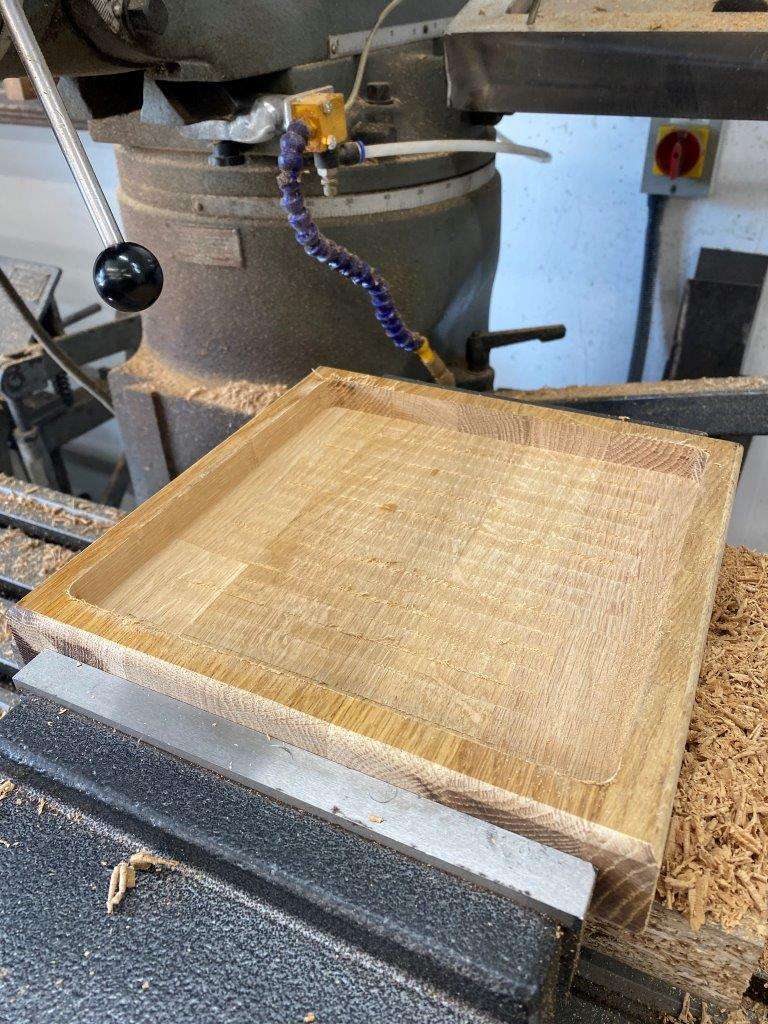
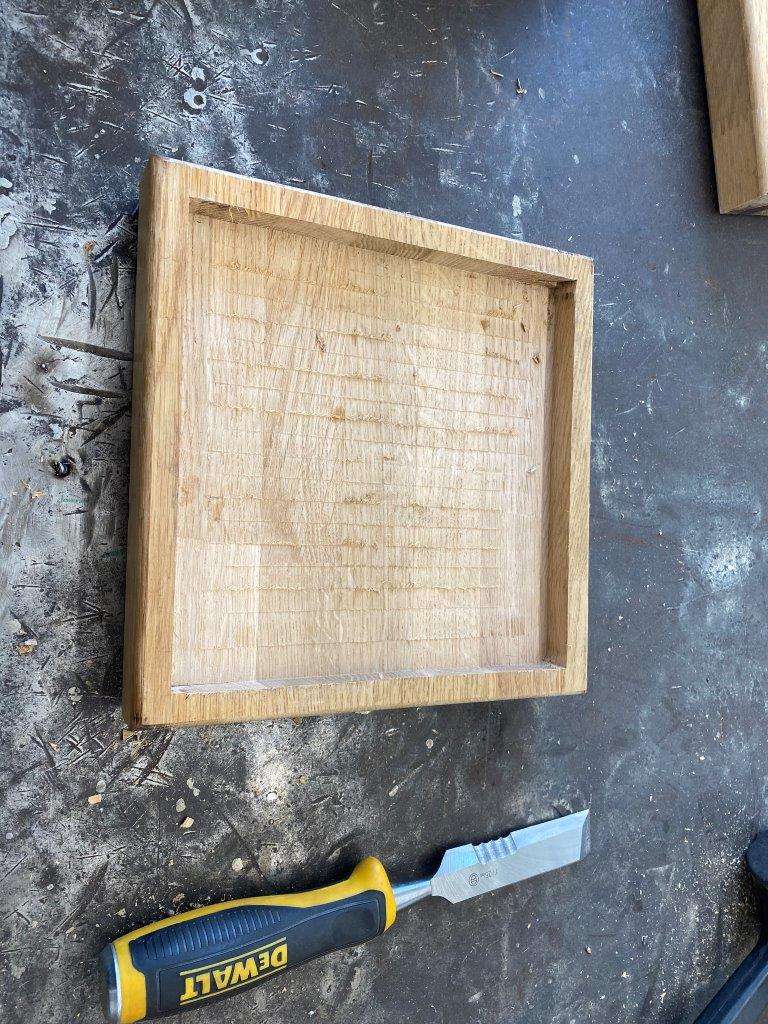
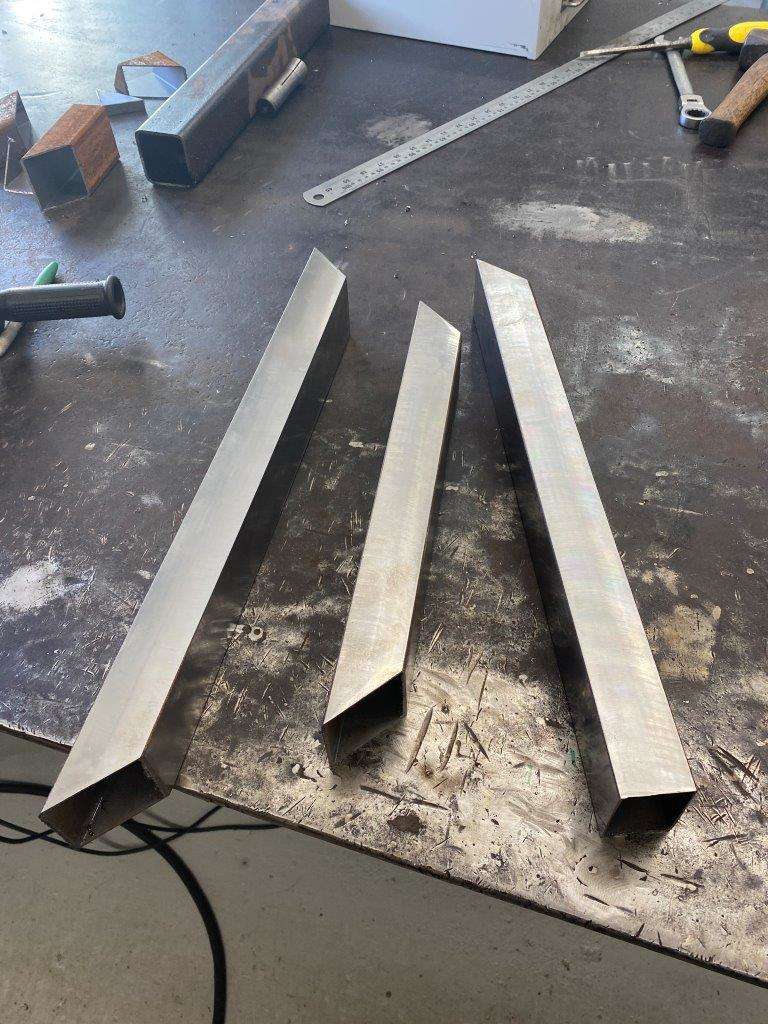
I did some more research on the Inter Web and looking at commercial as well as DIY sieves I decided to go with a sliding plate design, here is the start of me “building it properly”
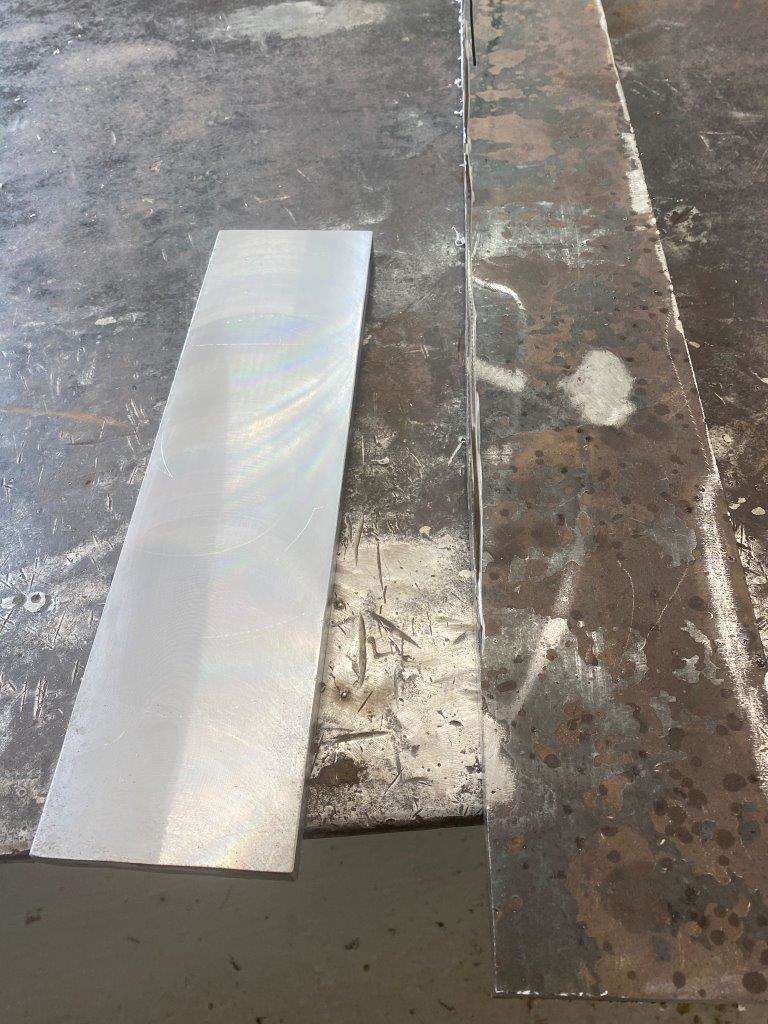
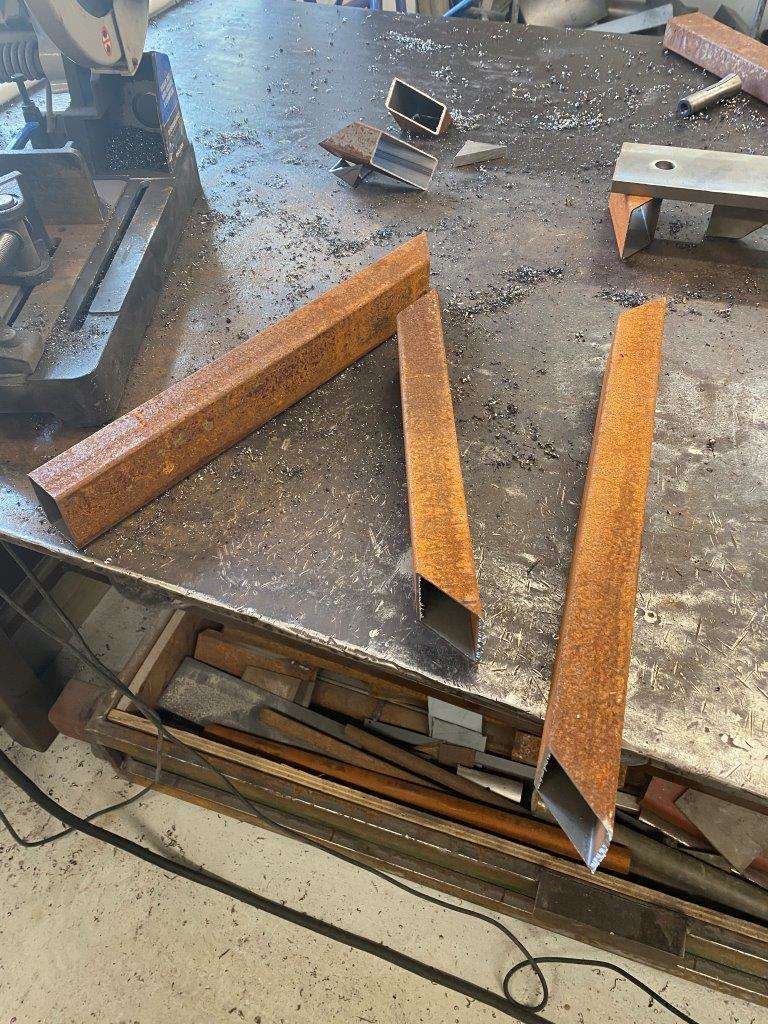
Some old angle iron from the pile,
A lot of this old steel is just that, old and rusty, a quick clean wasn’t going to be good enough for my cunning plan so I re-faced it on the Mill

And made these
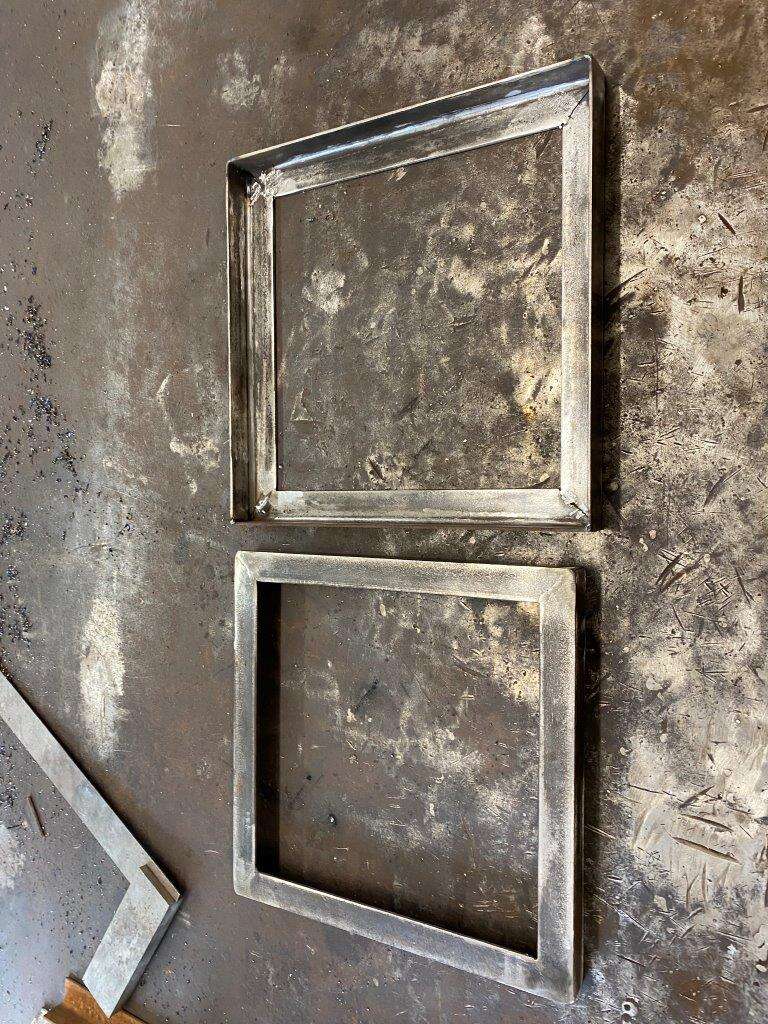
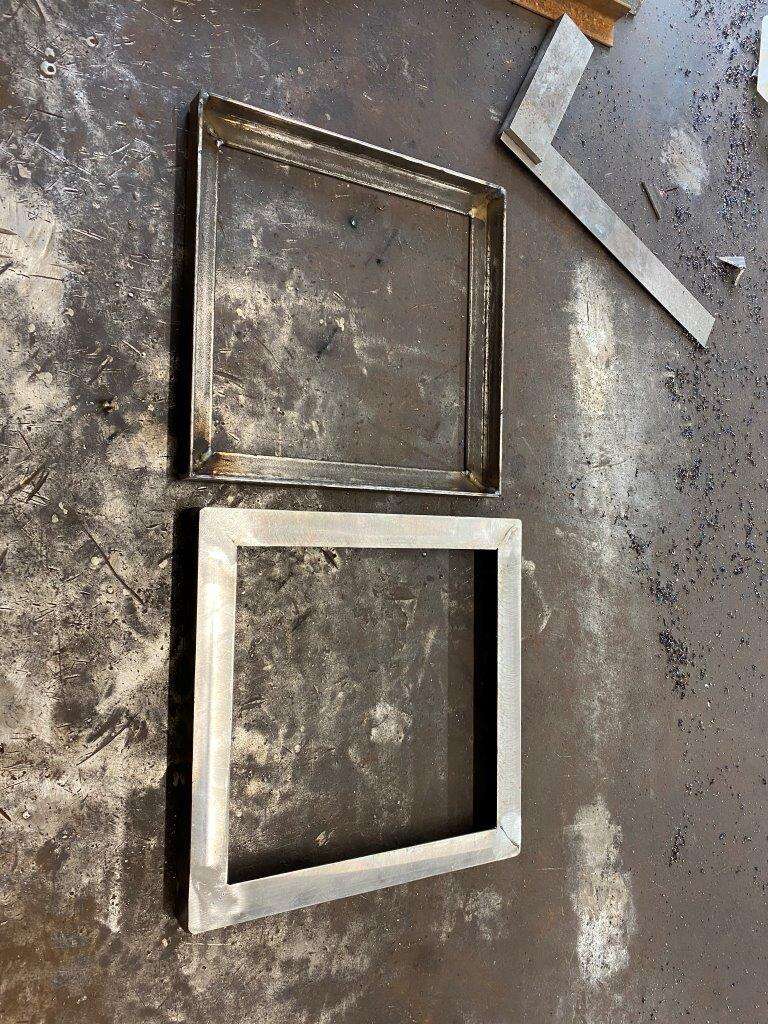
They fit together
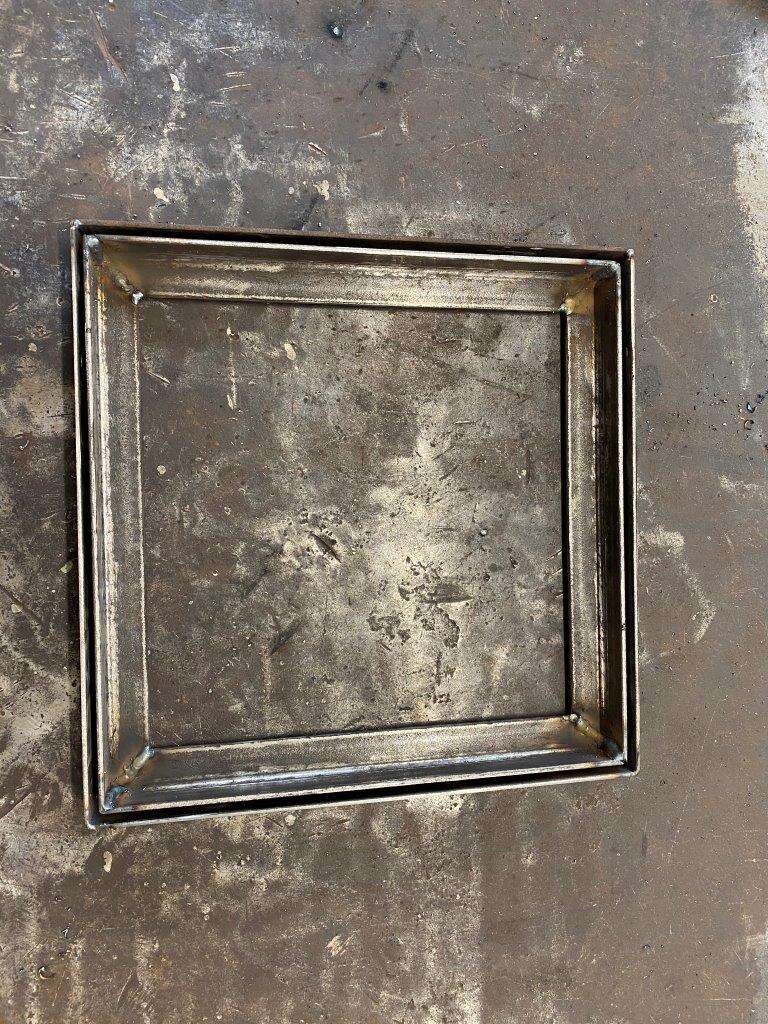
And then the mesh was added in

More of how I built a sieve properly tomorrow.
Stay Safe - or is it stay alert - He confuses me I can tell ya!!!!
Keyser - “The road to success is dotted with many tempting parking spaces.” – Will Rogers
-
5
-
-
Be best to do an LS conversion first then you would haver plenty of blowers to choose from and the power would be amazing, can't see it being worth it on a DE engine the lack of parts would mean by the time the fabrication had been done the LS conversion would be cheaper.
Nice to see some alternate thinking though
-
1
-
-
5 hours ago, DoogyRev said:
How many pull up have you done?
I built it for my daughetr - Wouldn't be right if I used it
-
1
-
 3
3
-
-
Morning all, Bank holiday tomorrow – not sure how much difference it will make to some but I have plans on getting some more bits done on The Bug, if I finish my current project by Friday night
So the last bit of the Gym Bar build,
I forgot to post the picture of the other end of the connector all chamfered
Then another old bar
Cut and polished
That is the T-bar to tighten stuff
Yet another off cut
Drilled
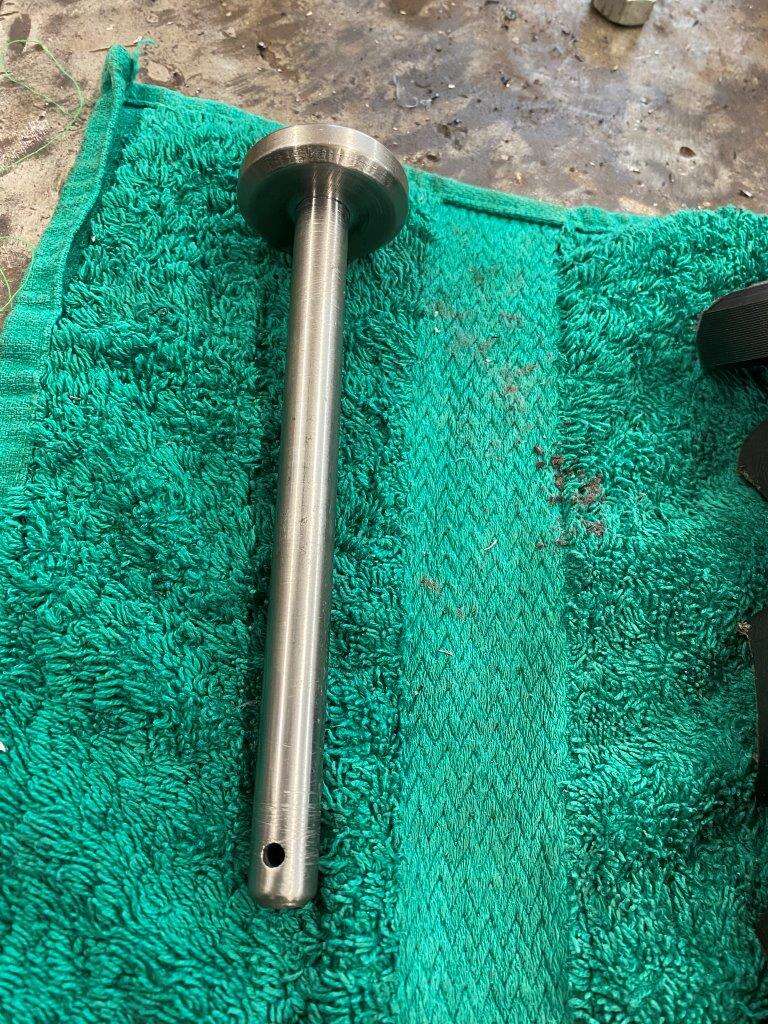
Lathed the end of the little bar
Faced the off cut
Welded the two together
And cleaned it all up
Now I need to store it so I drilled a leg
Nice tight fit
Then drilled the other end bigger
So now it is an easy fit but just snugs up at the end
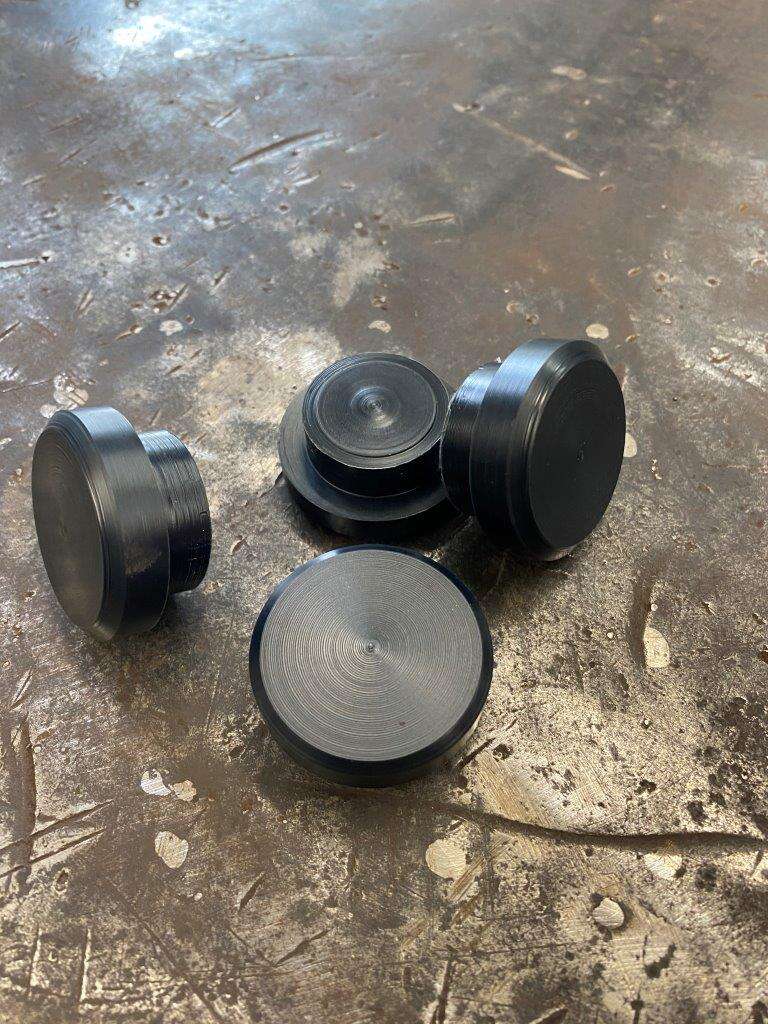
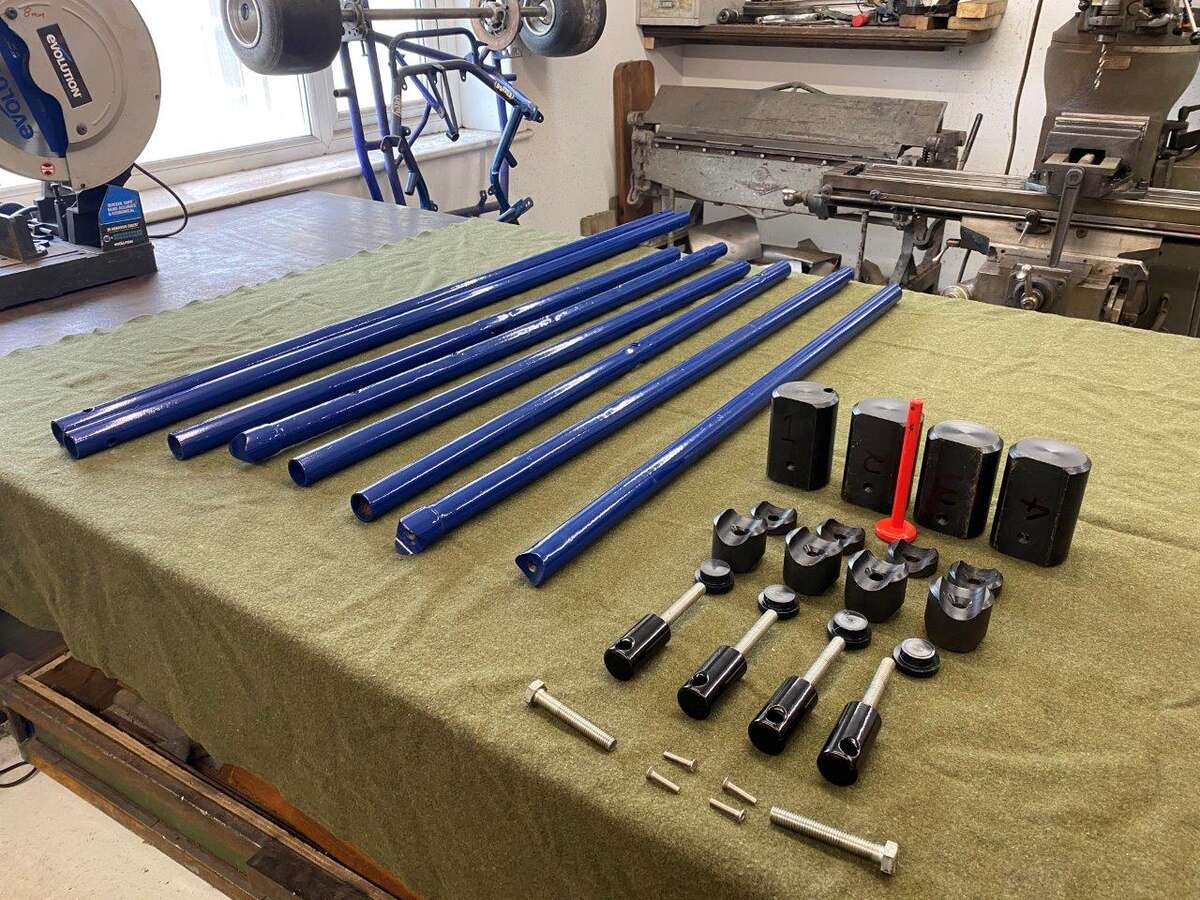
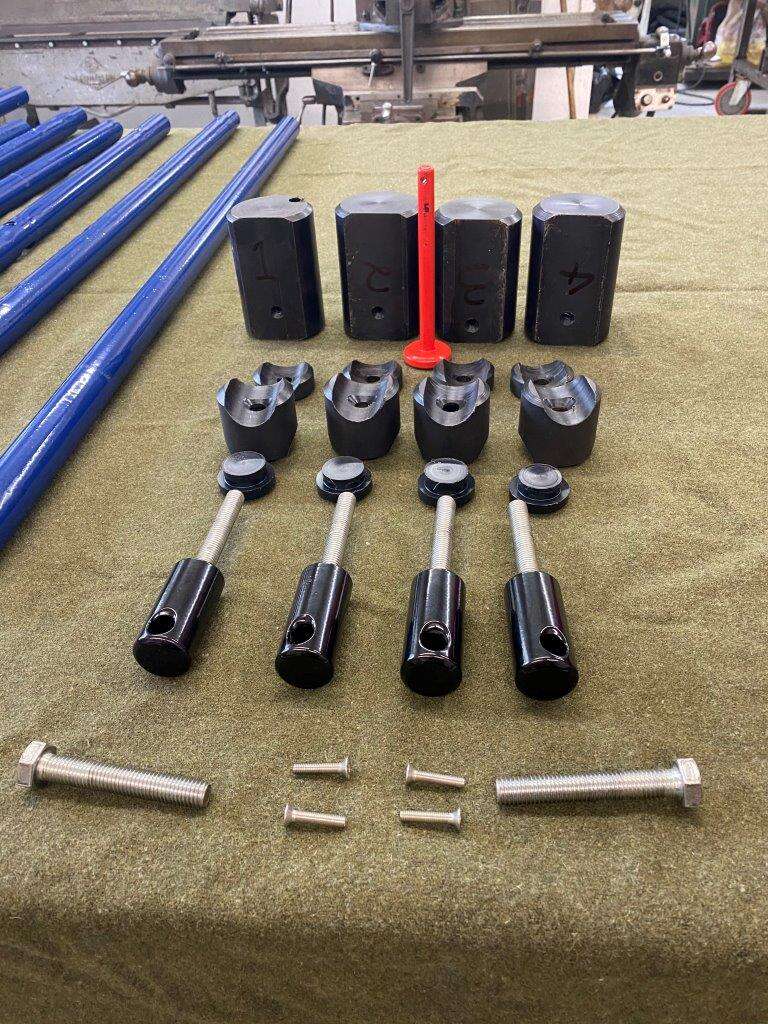
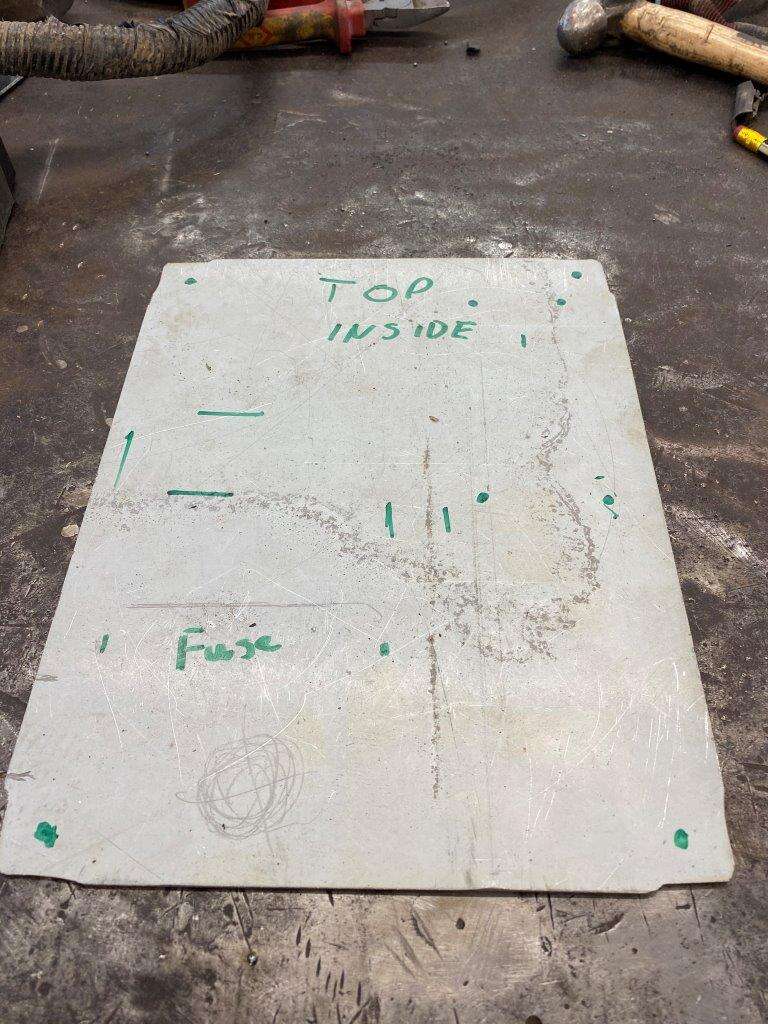
Now I have to take it apart for powder coat, the only things that are not interchangeable are the feet so I had to label them some how that would survive powder coating
That works, laid it all out for a quick quality control check
Few things to finish, these were counter sunk
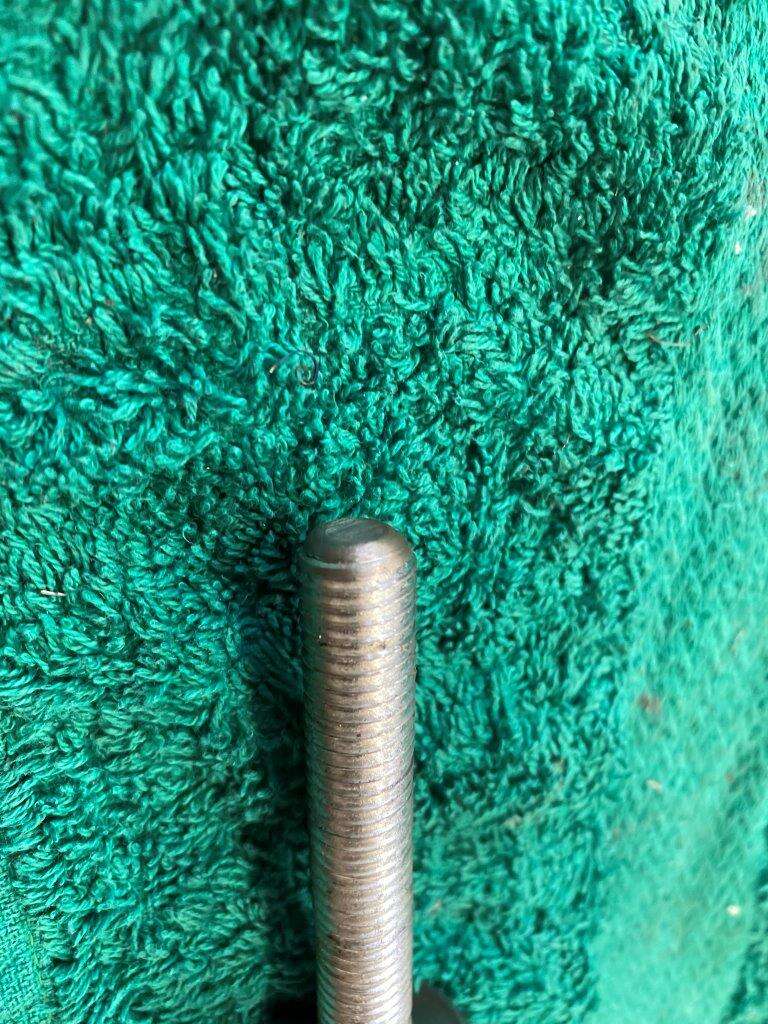
Then the threaded bar chamfered
The T-Bar was polished, and I drilled a little hole so I can hang it in the powder coat oven
I powder coat and sand blast in the same room, The wire holding this bit snapped as it was cooling and it dropped in the pile of glass

Had to sand it down and go again
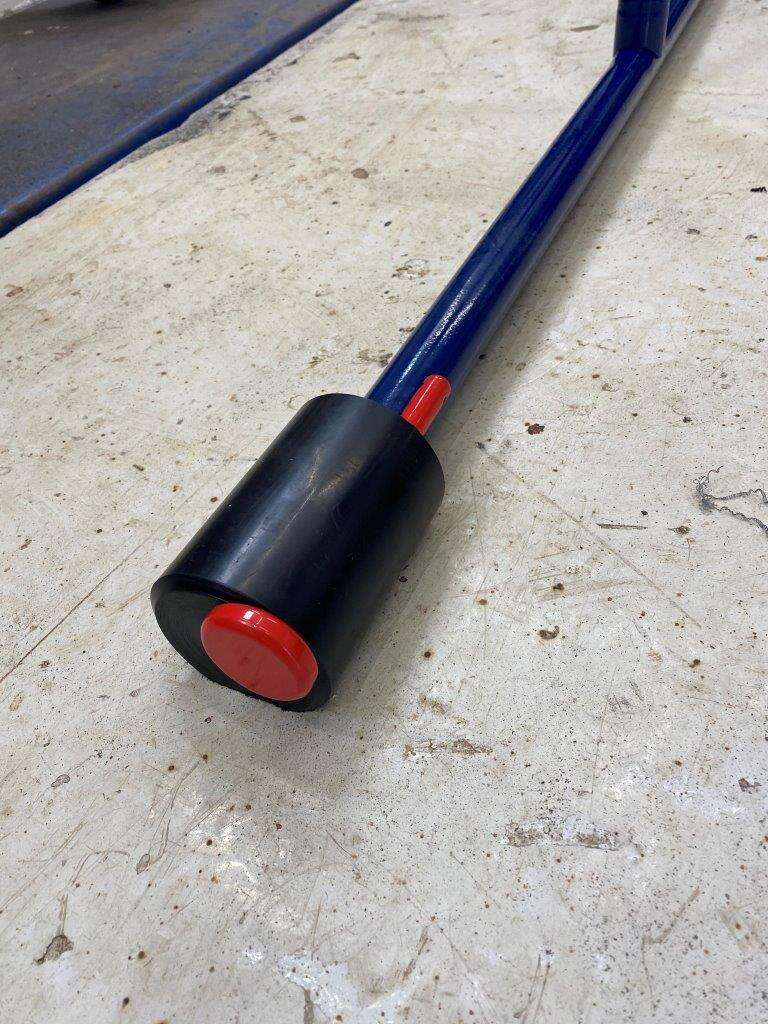
Made some end caps for the cross bars
And here it is the complete thing can be put up in about 5 minutes or stripped down to this in the same (not including the feet) so it could easily be stored indoors
Assembled in one of the 5 lower settings
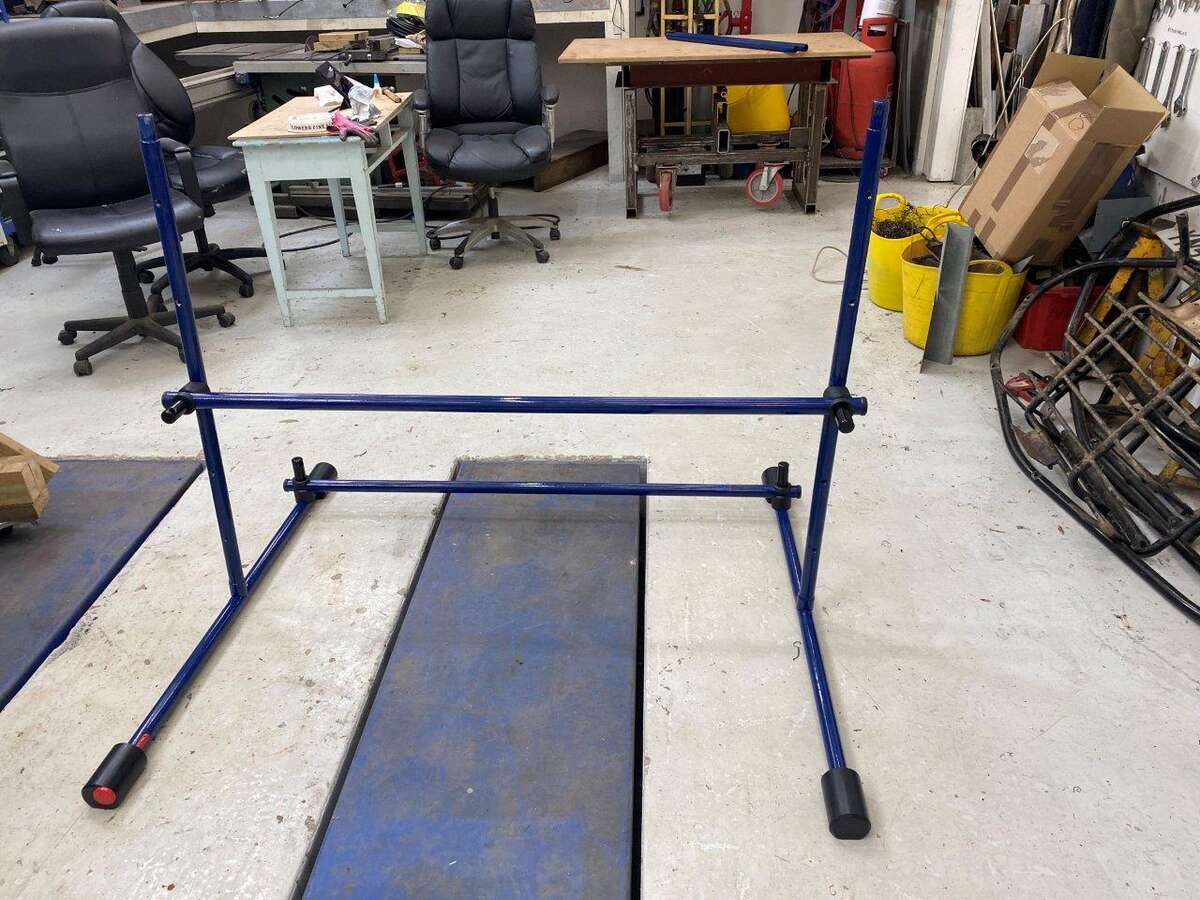
And the full pull up bar
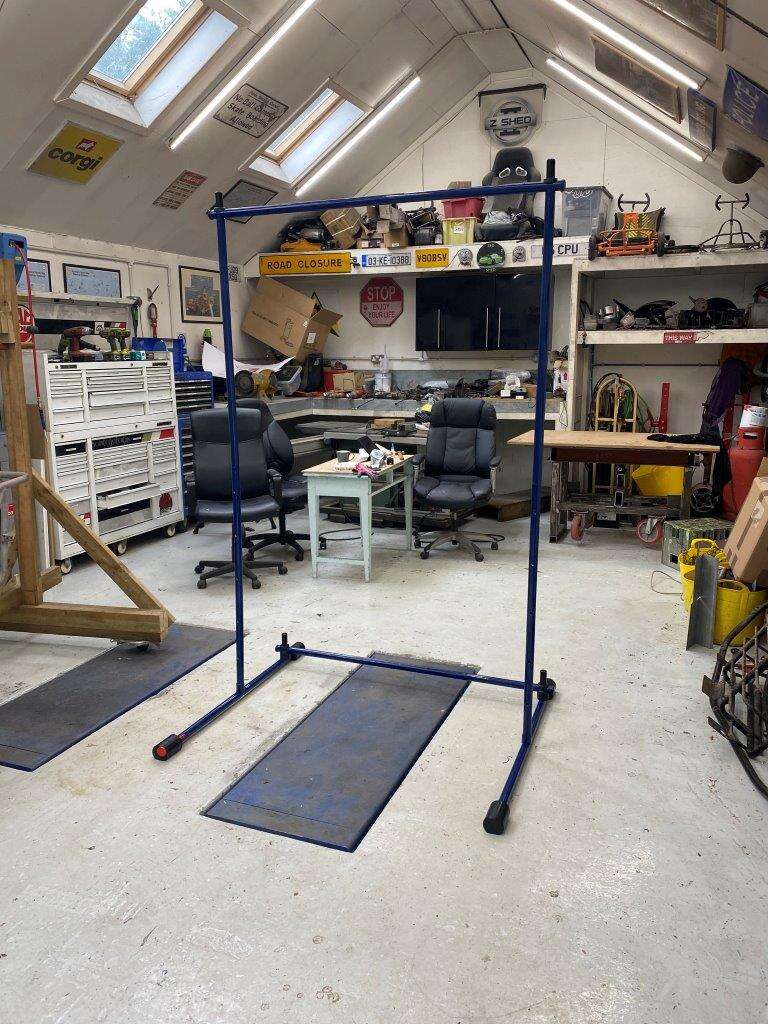
Joints look like this
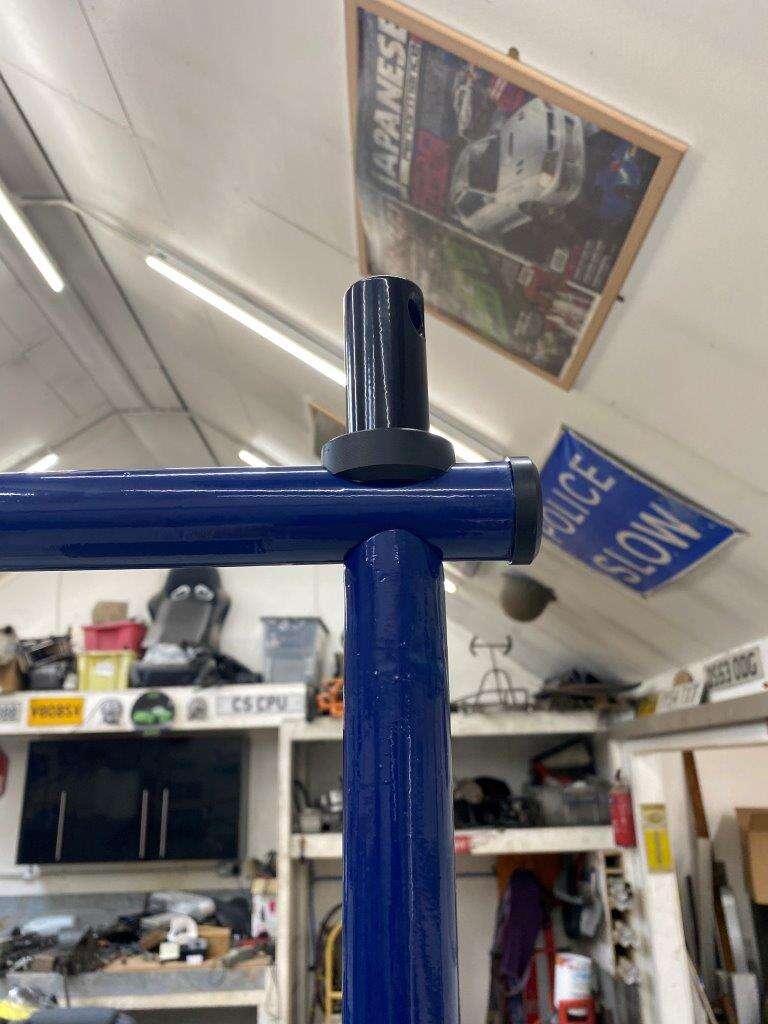
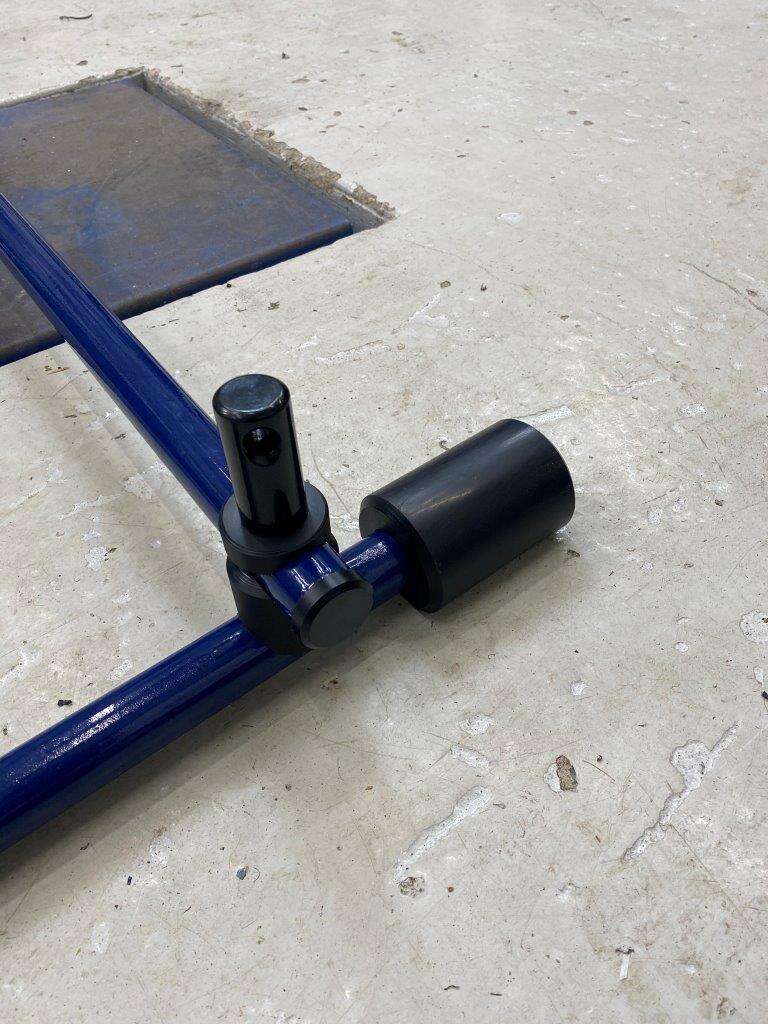
And the T-Bar to tighten is stored neatly here
I’m happy with how it came out
Hope you enjoyed it, moving onto something else in the next post.
Be Safe
Keyser - “I have learned from my mistakes, and I am sure I can repeat them exactly.” – Peter Cook
-
11
-
-
Morning,
Not sure if I have lost all my followers or you don’t find this as intresting? Got a lot less likes on the last few posts – maybe I’m just getting boring now
But I don’t care I took all these pics for you lot so I’m gonna post them
More nylon bar went to the lathe
Four times, so I had these
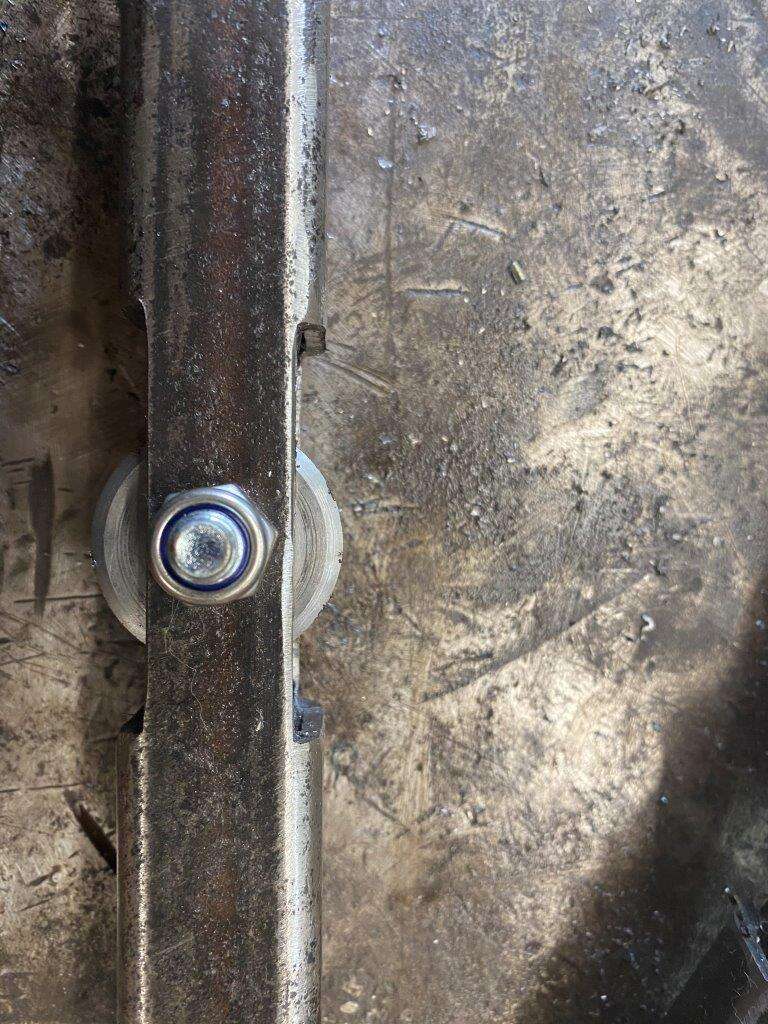
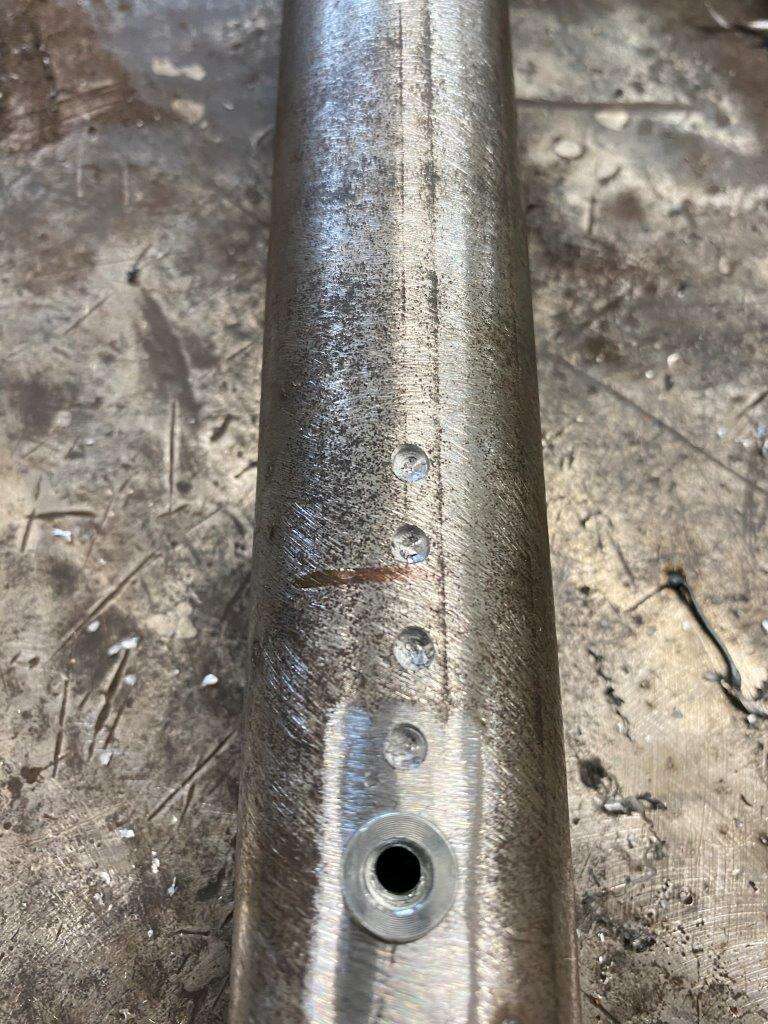
Then I got the uprights and bolted an off cut to them to keep them lined up while I drilled 5 x 21mm holes in each one.
Now it just so happens that if you take an M12 x 1.75 threaded nut with a 19mm head size and put it on a bolt like so

Then you tap it with a hammer it becomes a snug fit in a 21mm hole
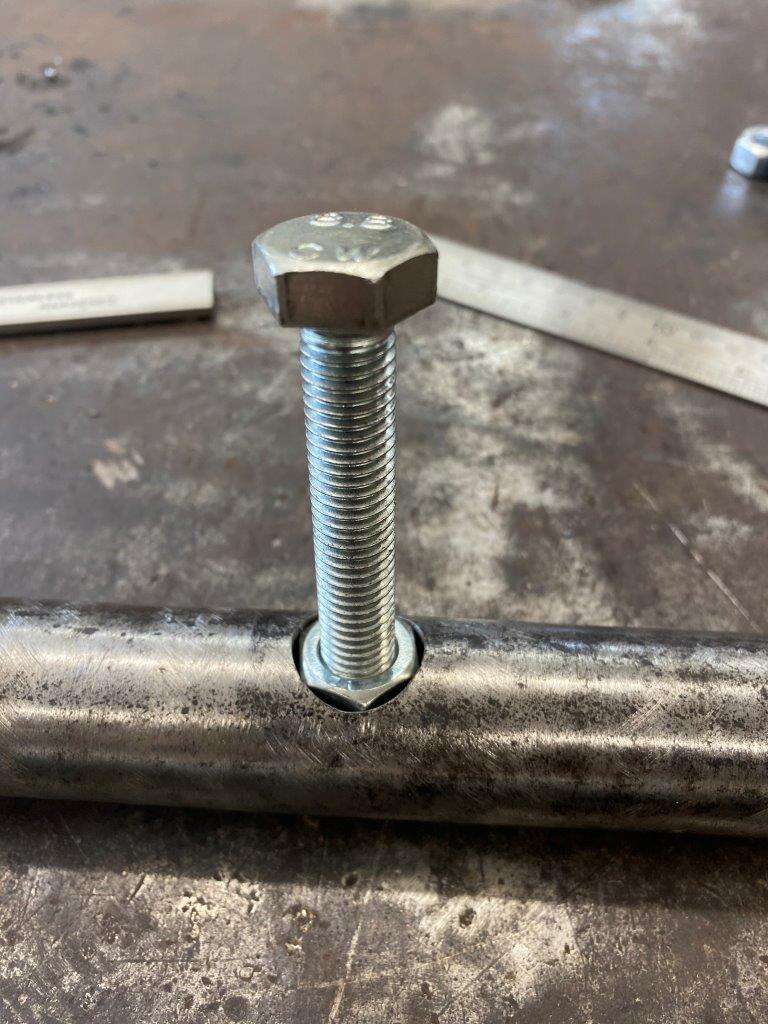
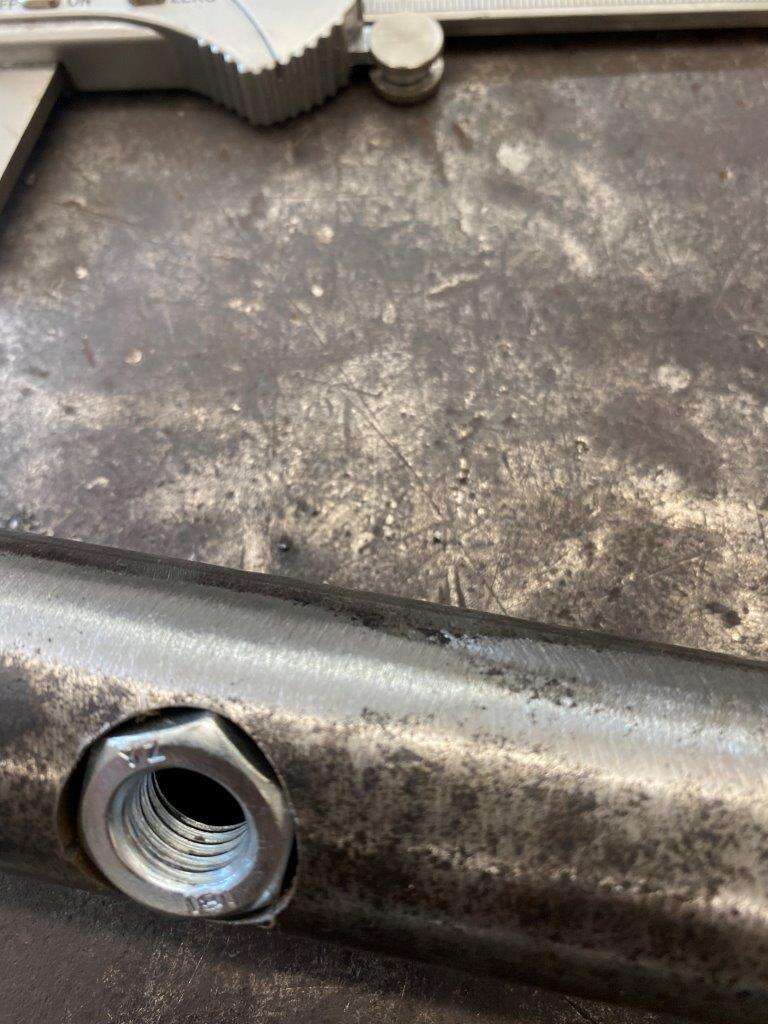
Do that 10 times
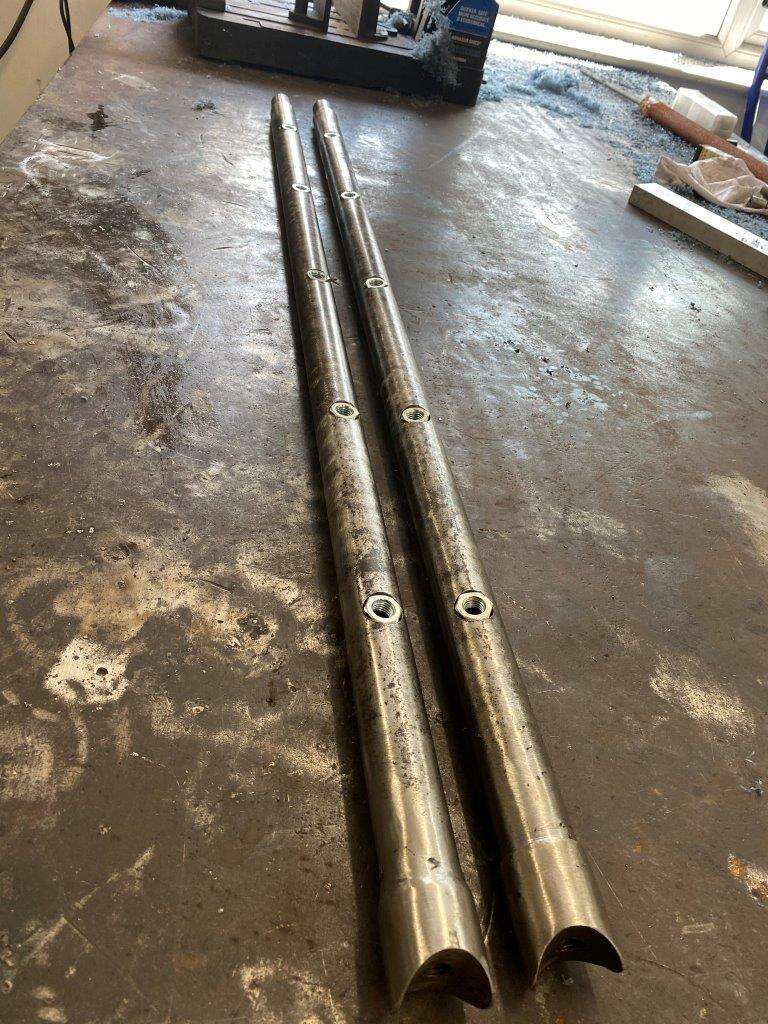
Then weld round them
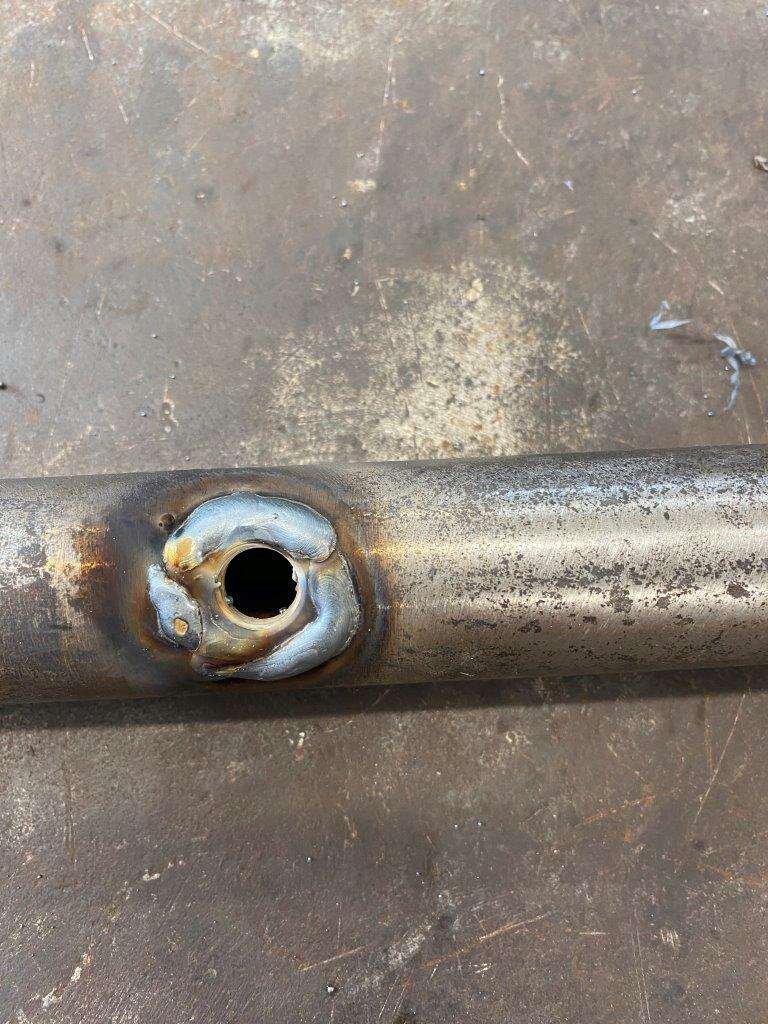
Linish and counter sink
That’s stronger than a riv nut
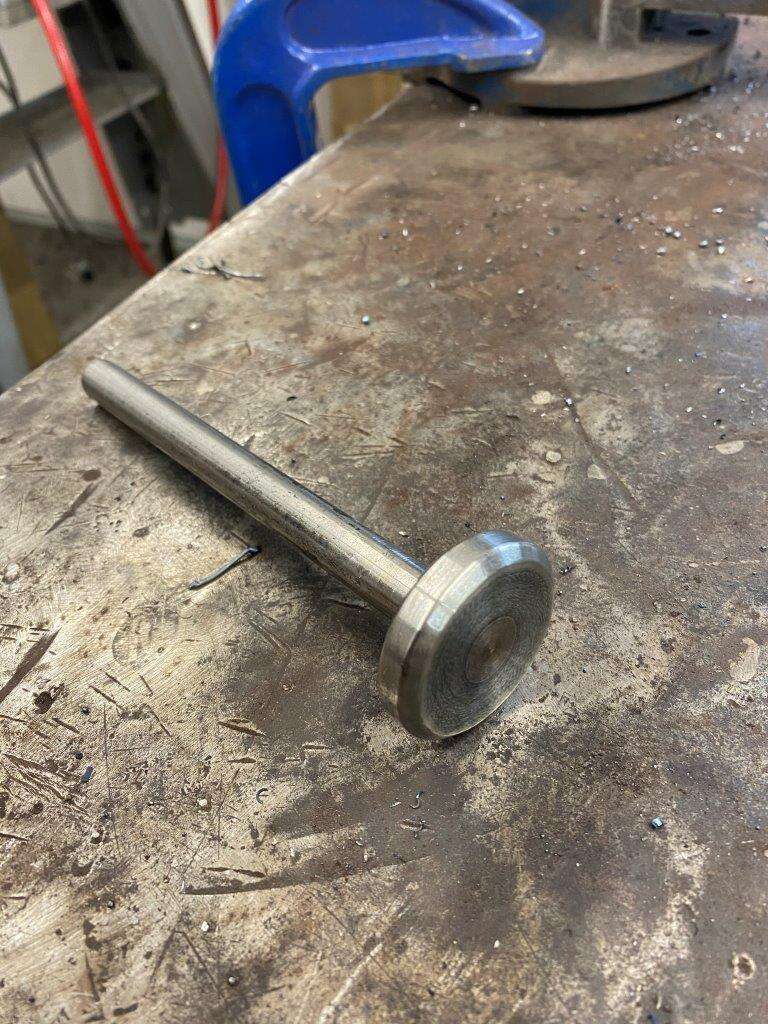
Next I drilled and tapped some more solid bar

Then 2 holes were drilled one half way through into the threaded section the other all the way through
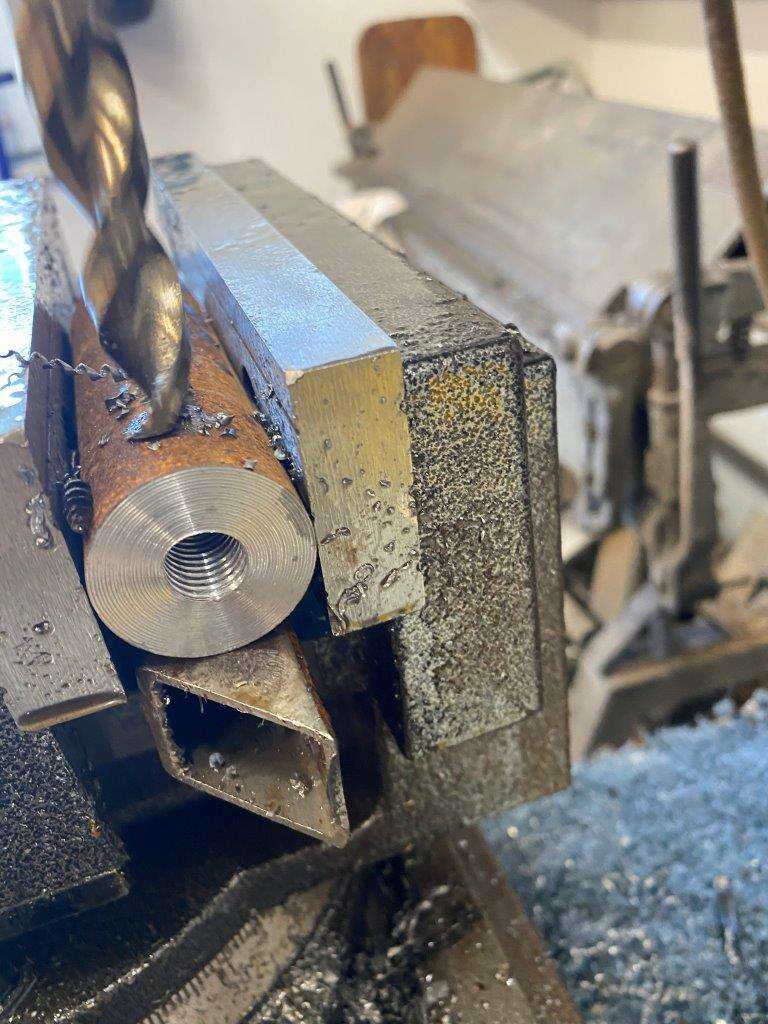
Then I screwed in a piece of all-thread
Then weld through the hole onto the thread to lock it in place
Put some nuts on the threaded bar and it can go back through the lathe
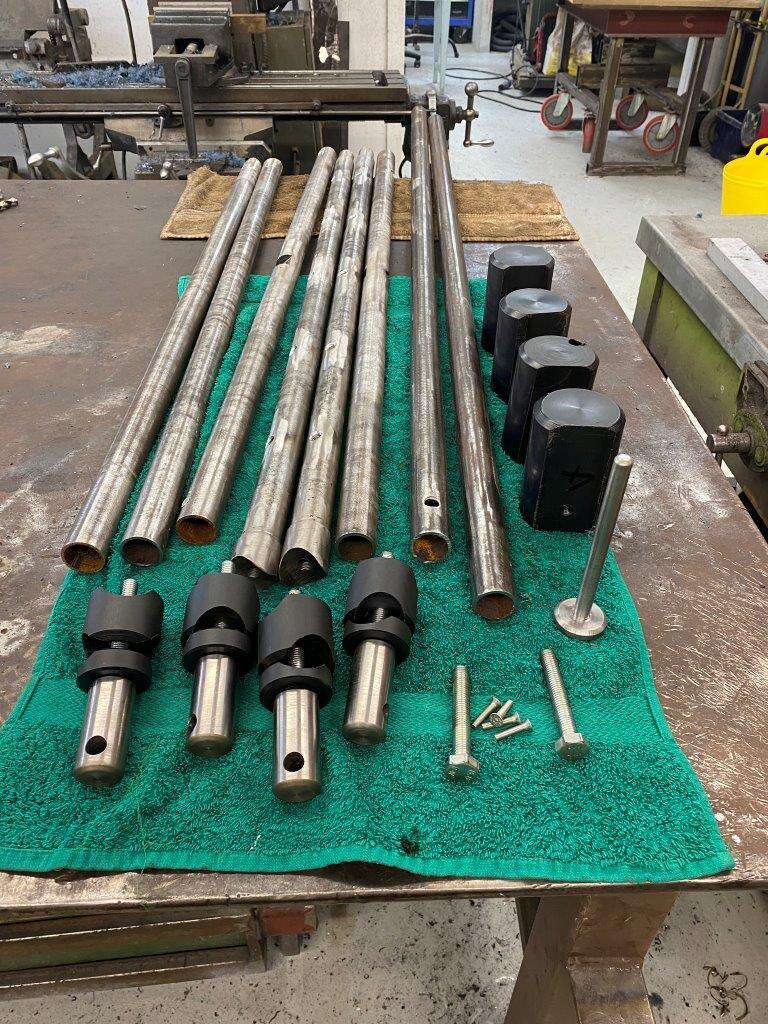
Four of those please
Final job on them was to chamfer the top
Stay Safe,
Keyser - “I was born to make mistakes, not to fake perfection.” – Drake
-
7
-
-
Morning, Bit cold here today and I actually have jobs in my diary
Yesterday got busy in the afternoon so the work is still coming in
Anyway onto the next bits, I have some Nylon (I think it’s nylon) bar in my odds n sods pile a Big bar, again aquired at some point thinking I can do something with this
Strange stuff to cut, it leaves this from the chop saw
But I cut a length
Machines well – So a bit on the lathe
To get this
On the Mill
I made these
They hold the bars at right angles
More bar
Through the lathe again
Bored out to take the bar

To make these
Then milled one side down
So I have 4 feet
Trying to line them up
Drilled
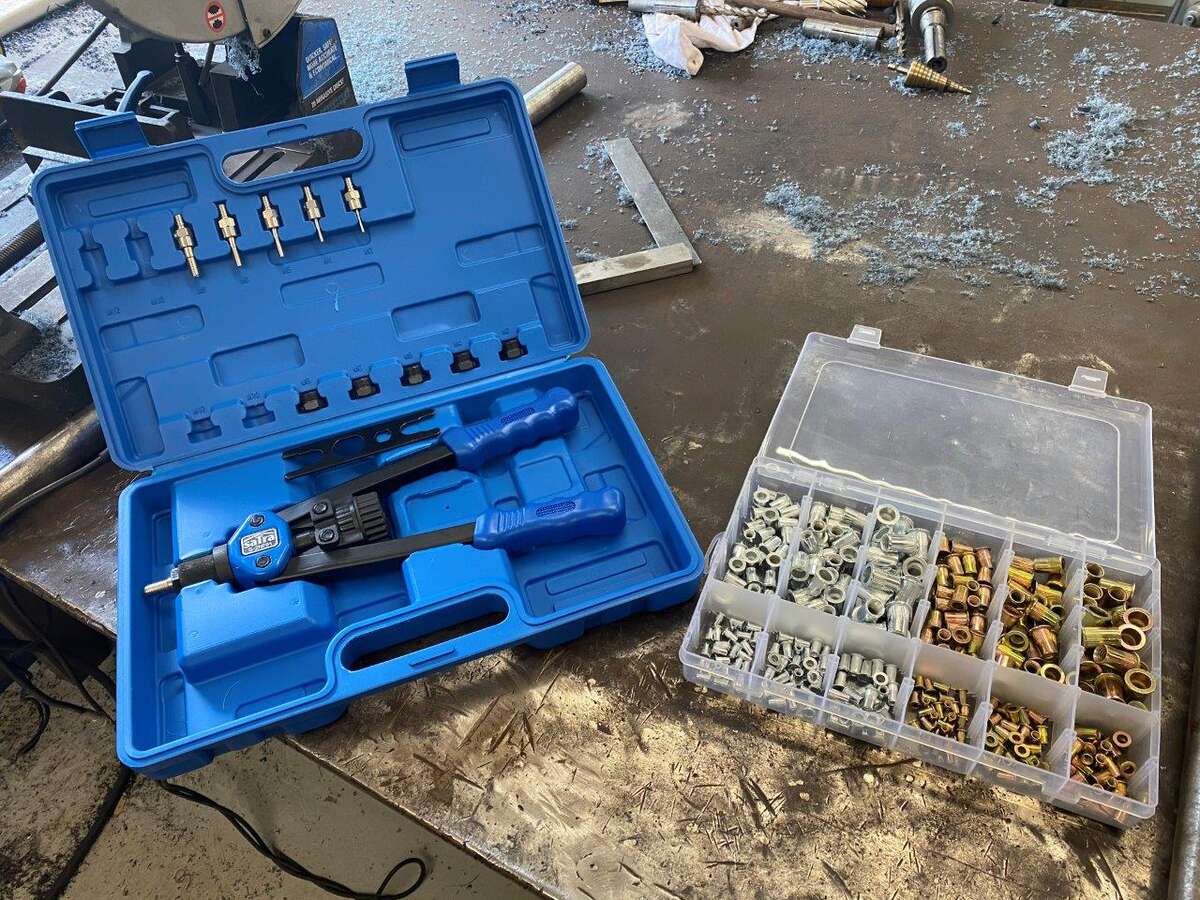
New rivnut tool as I broke my last one on The Bug
Used an M5 just to make a fixing
Now the legs stand up
Hope you like it
Stay Safe
Keyser - “Remember, today is the tomorrow you worried about yesterday.” – Dale Carnegie
-
5
-
-
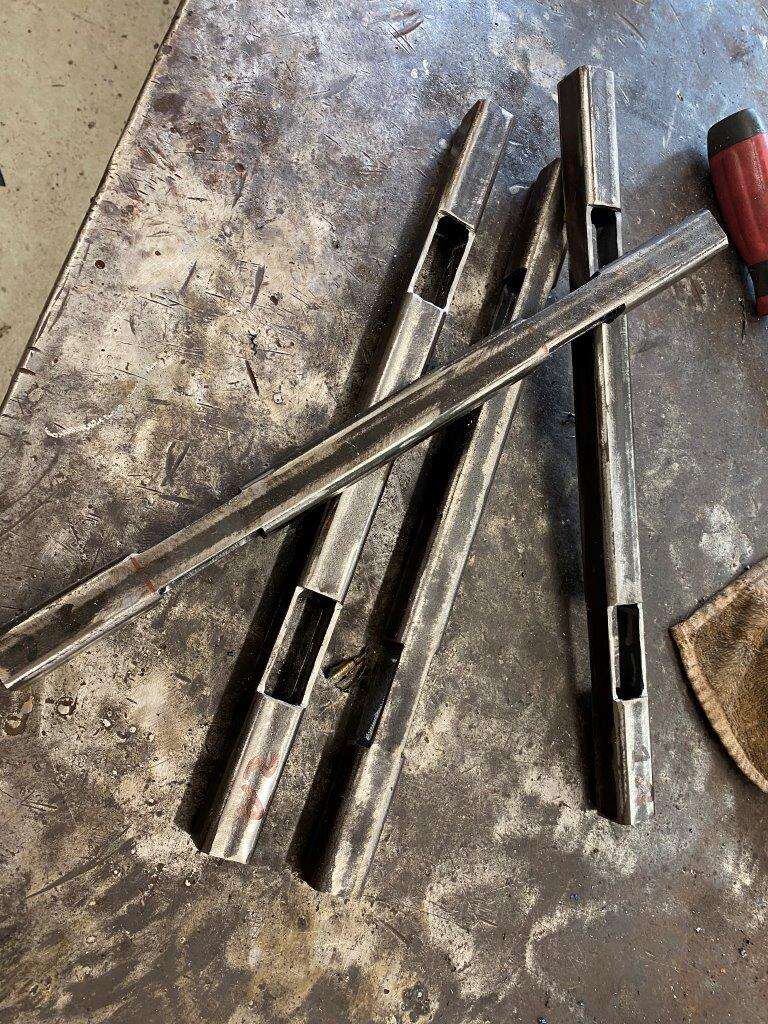
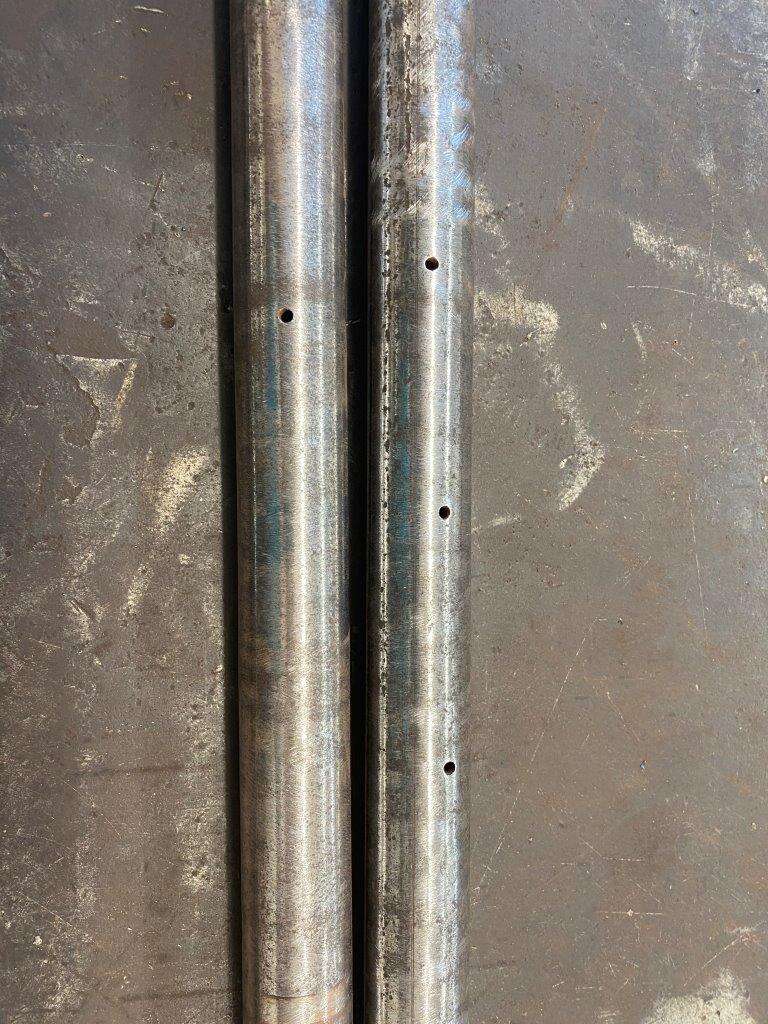
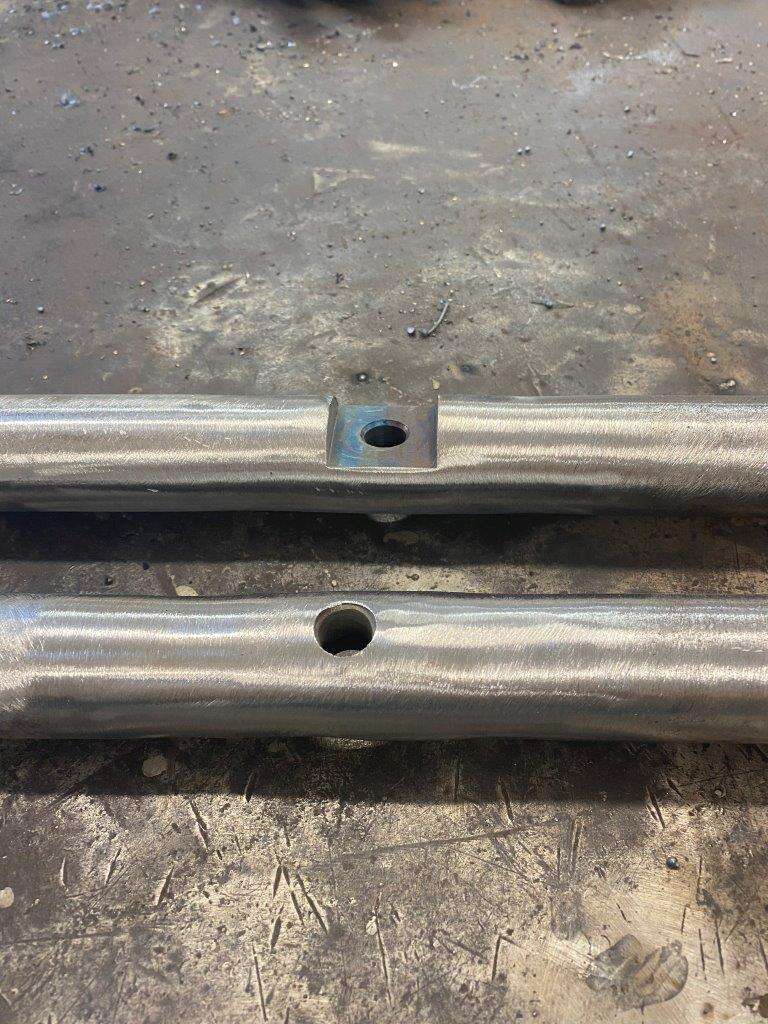
Now for some bars
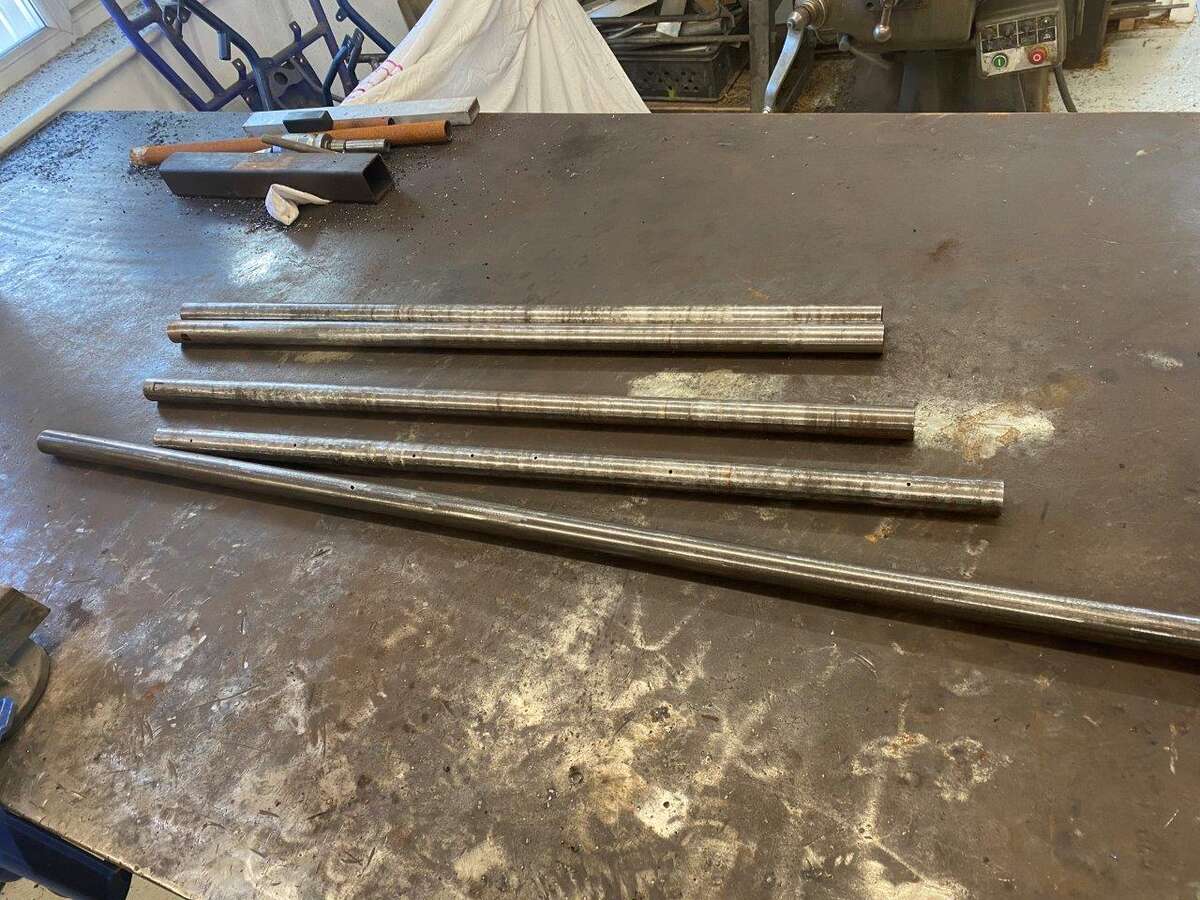
Some had holes from a previous incarnation, before I acquired them
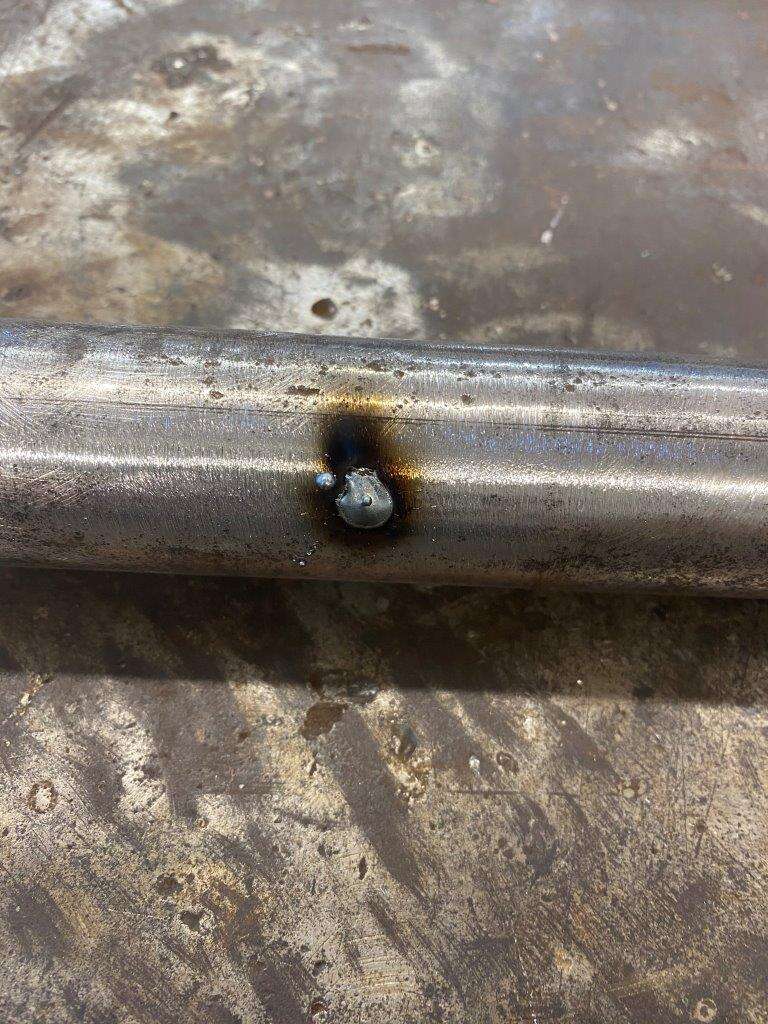
Welded them up
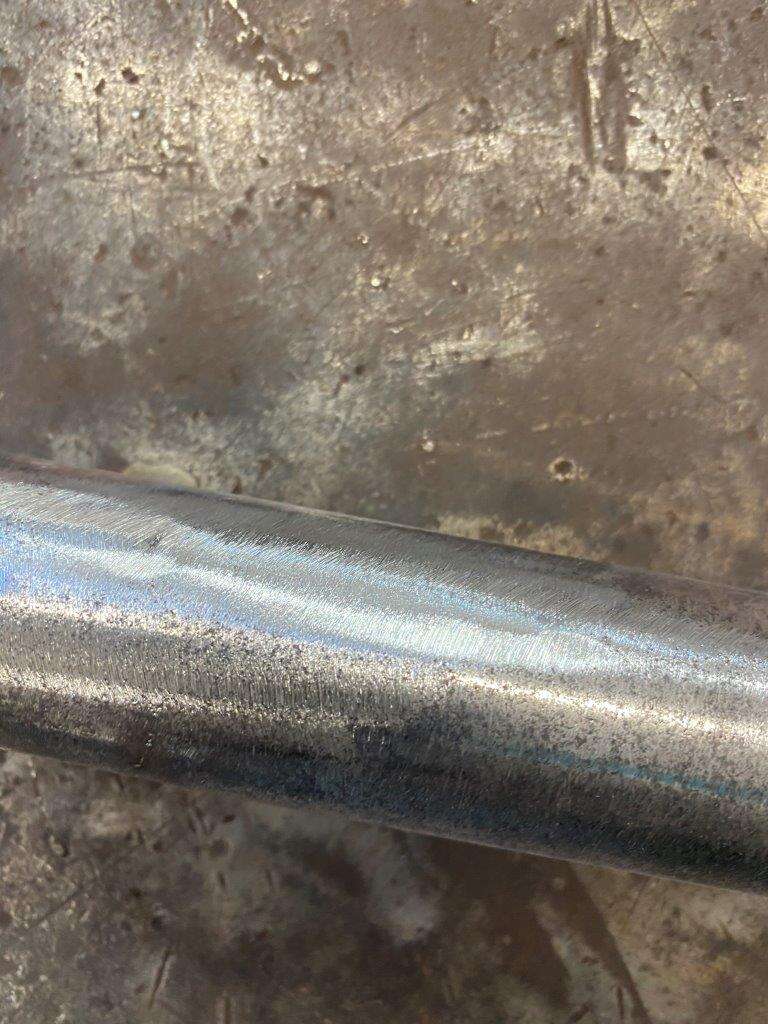
and linish
Weld on the bottom connector
Middle connector
And clean up
More tomorrow
Stay safe. Keep busy
Keyser - “I always arrive late at the office, but I make up for it by leaving early.” – Charles Lamb
-
7
-
-
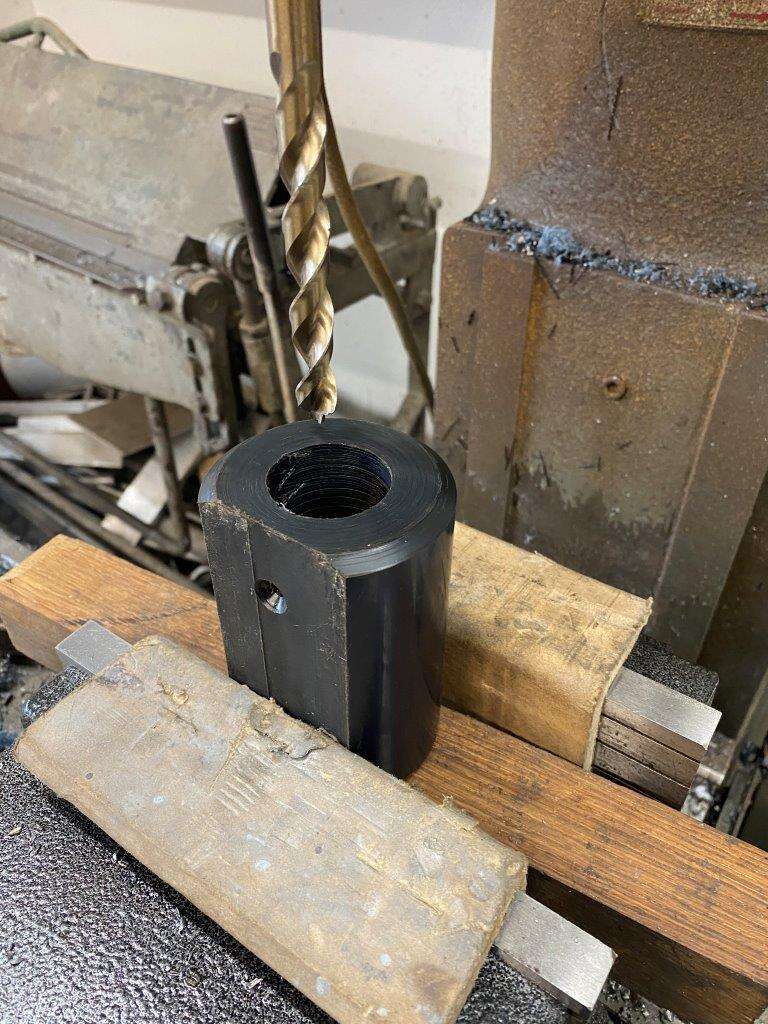
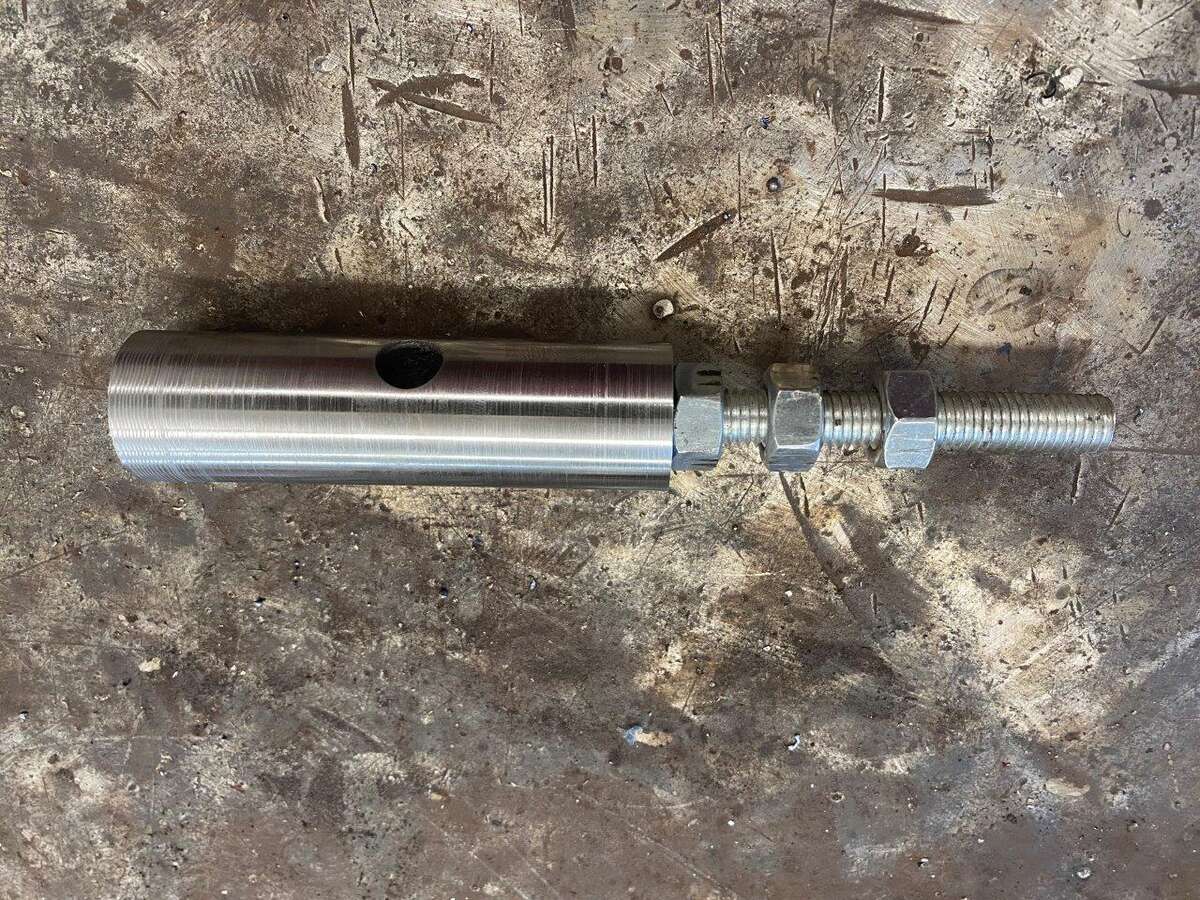
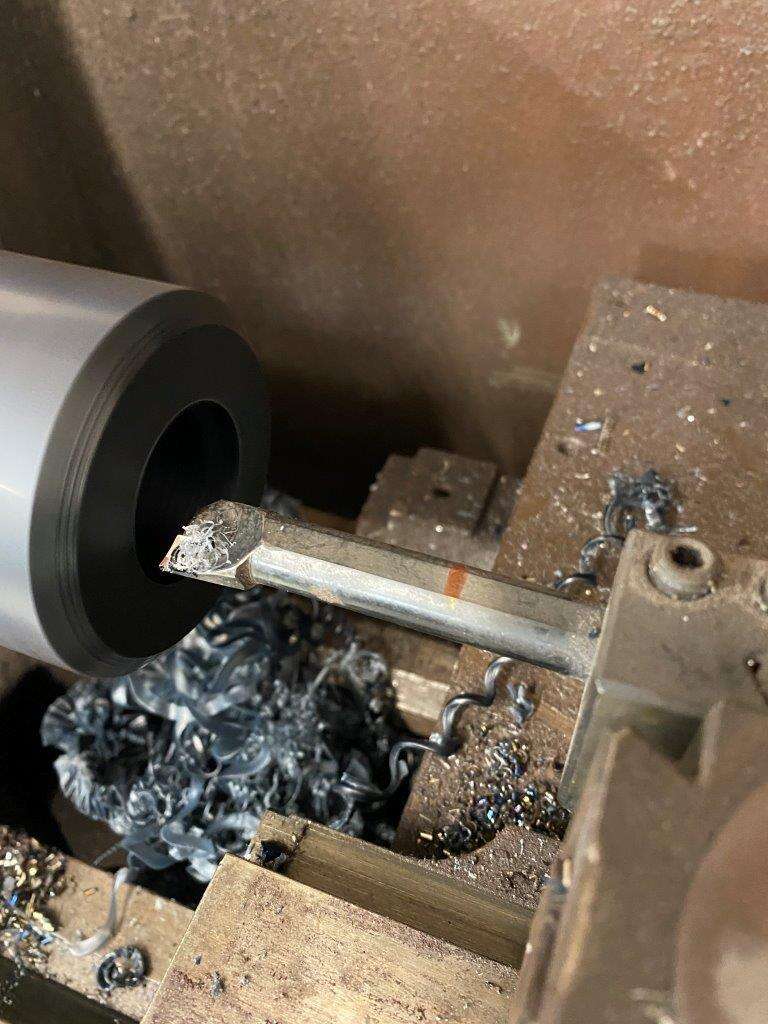
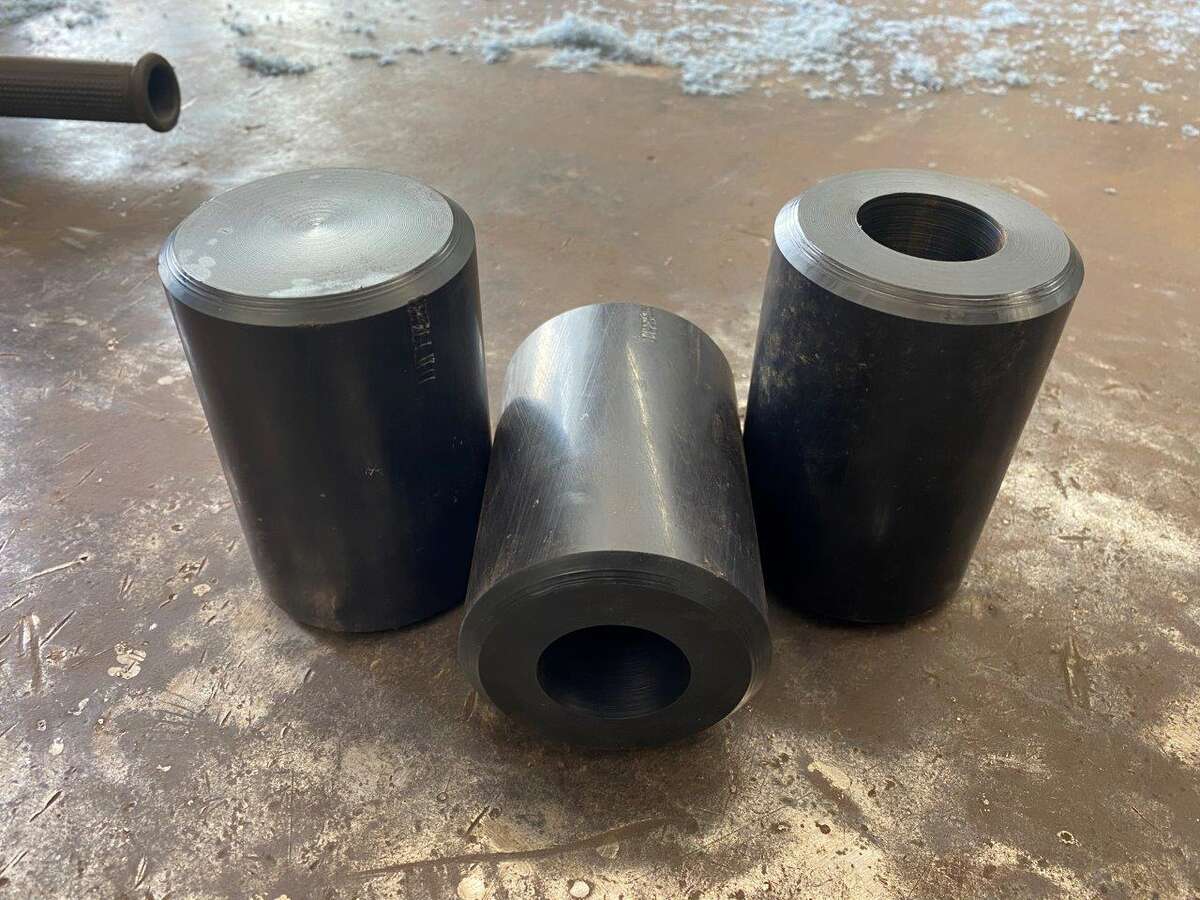
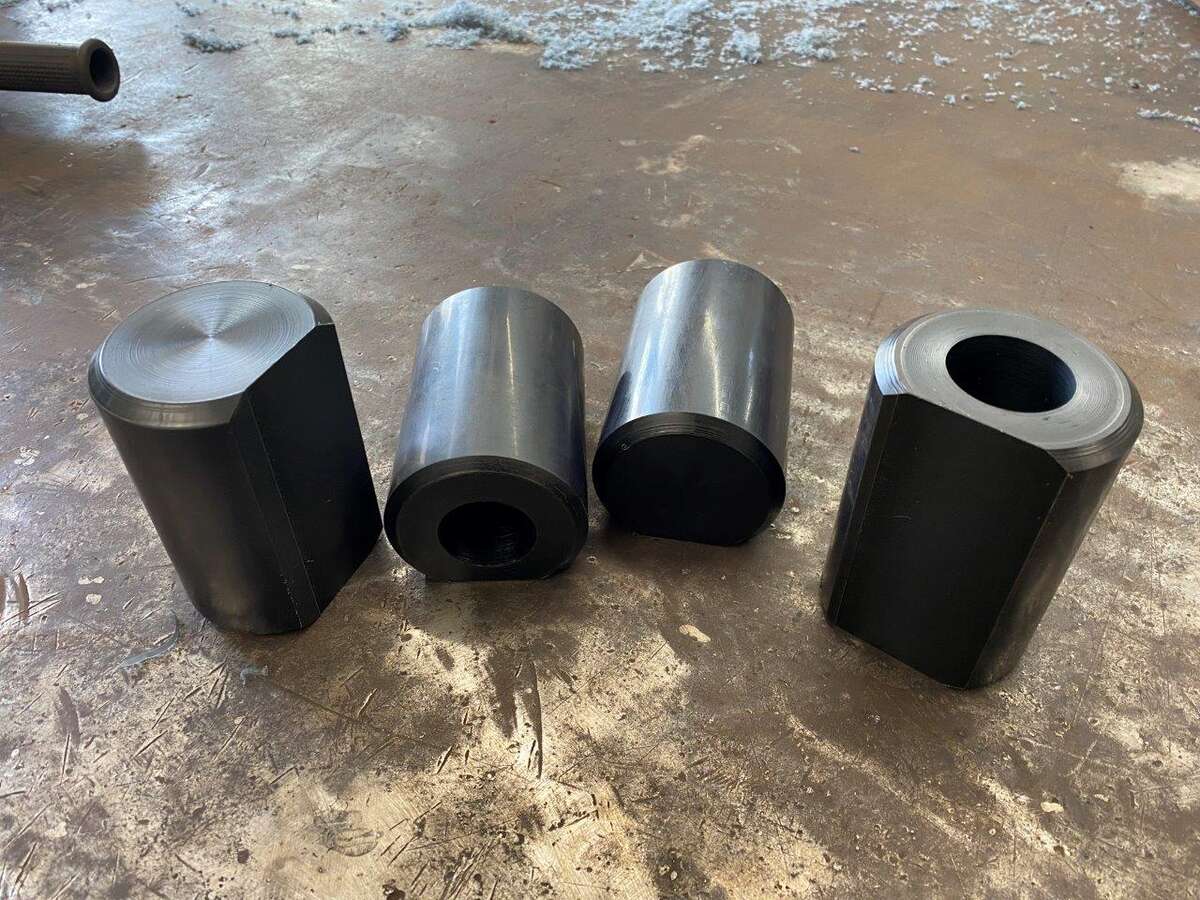
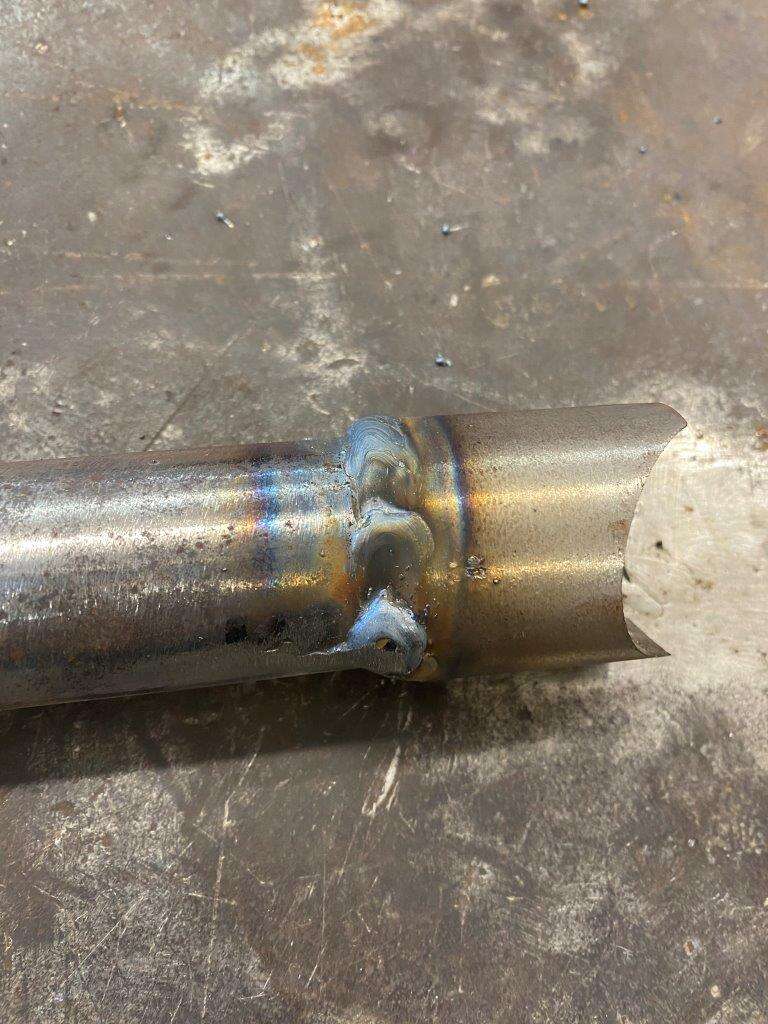
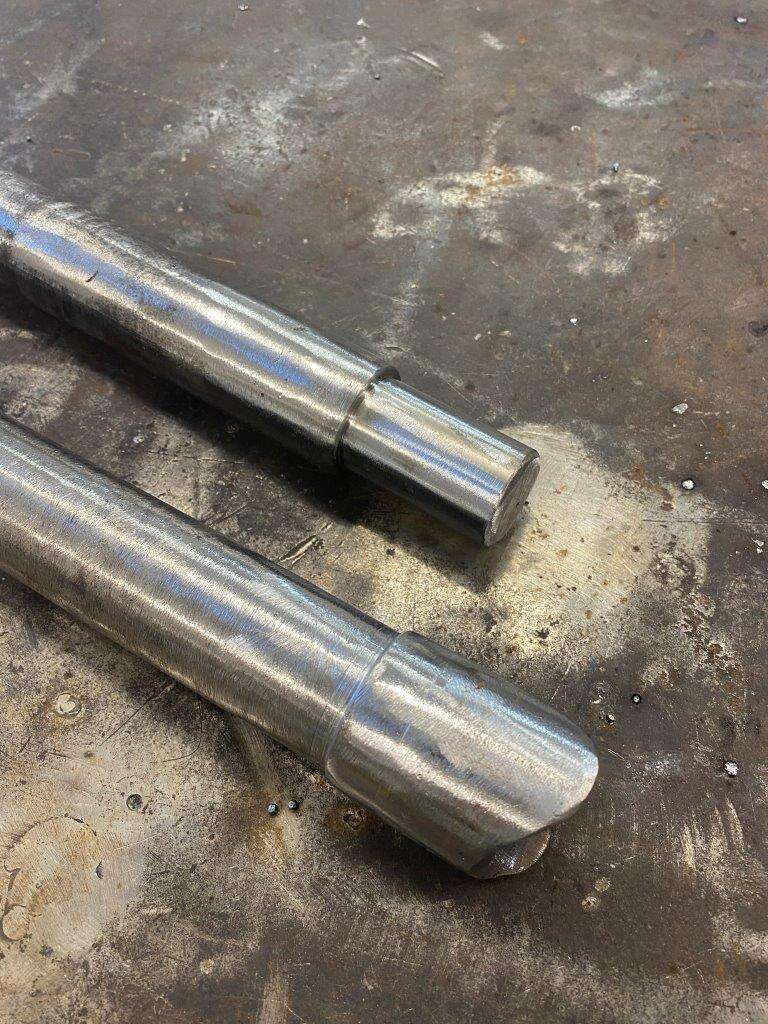
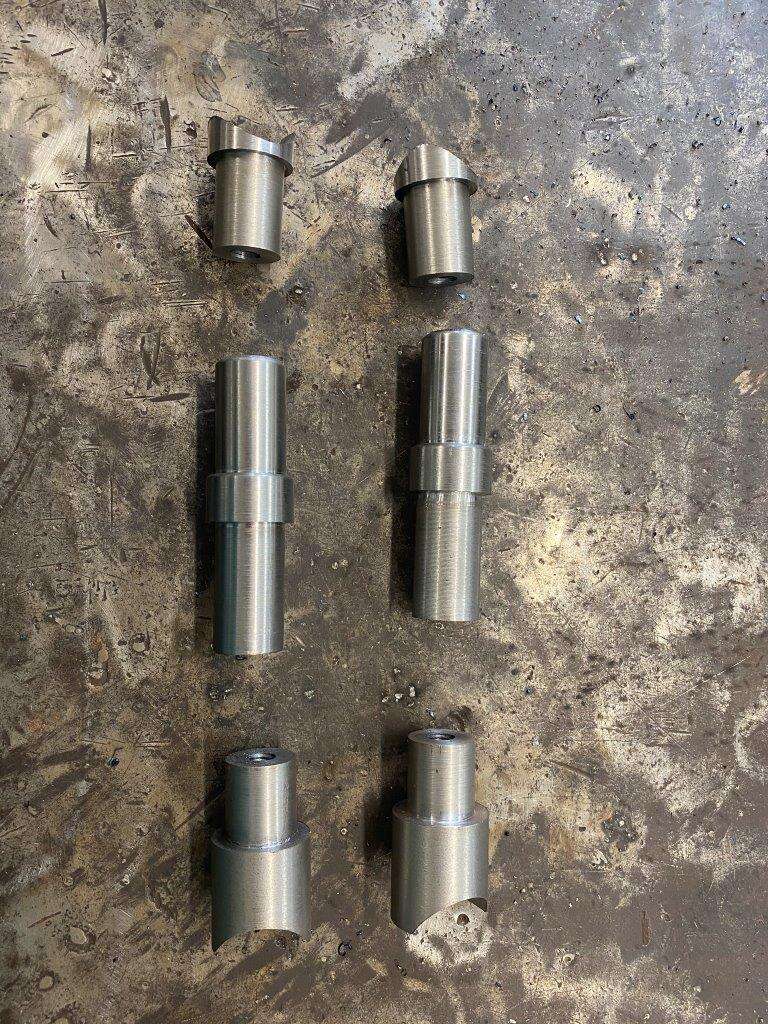
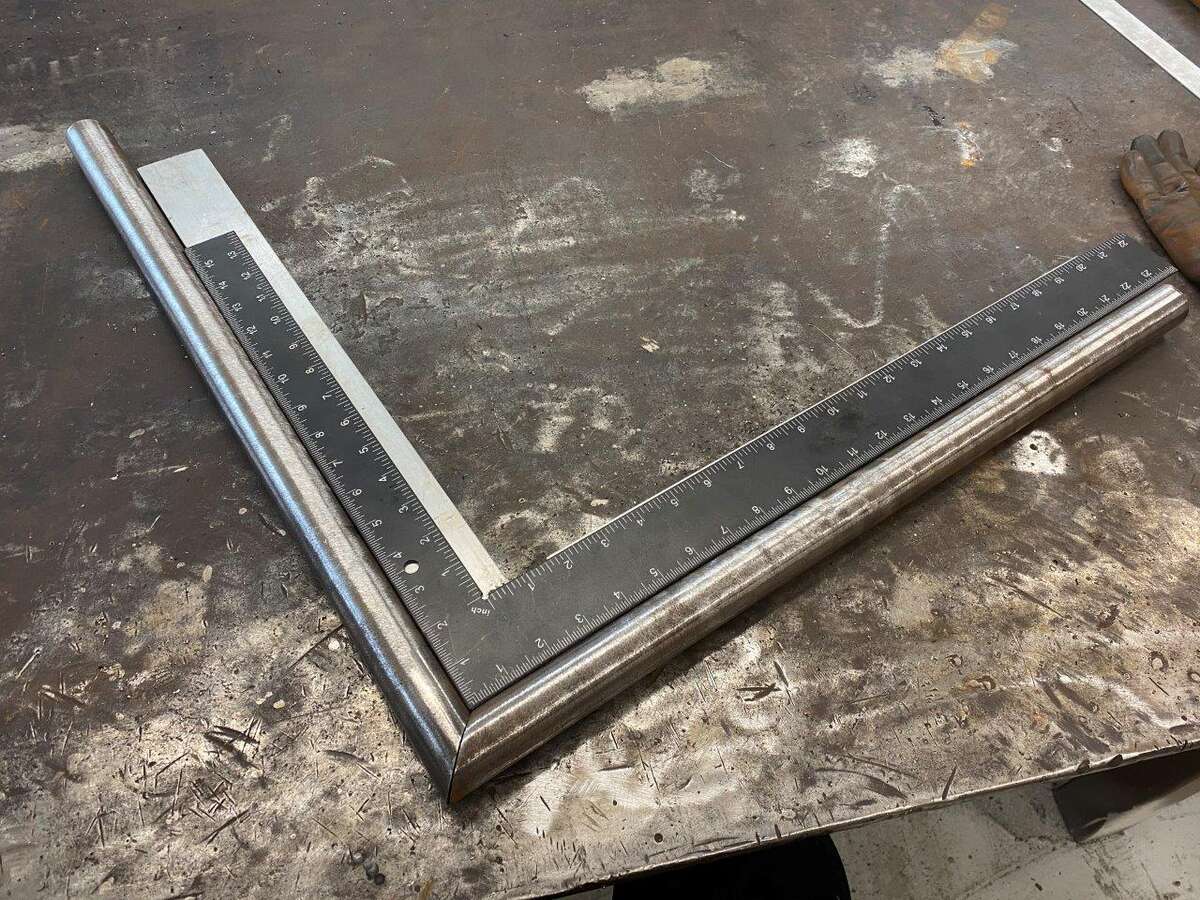
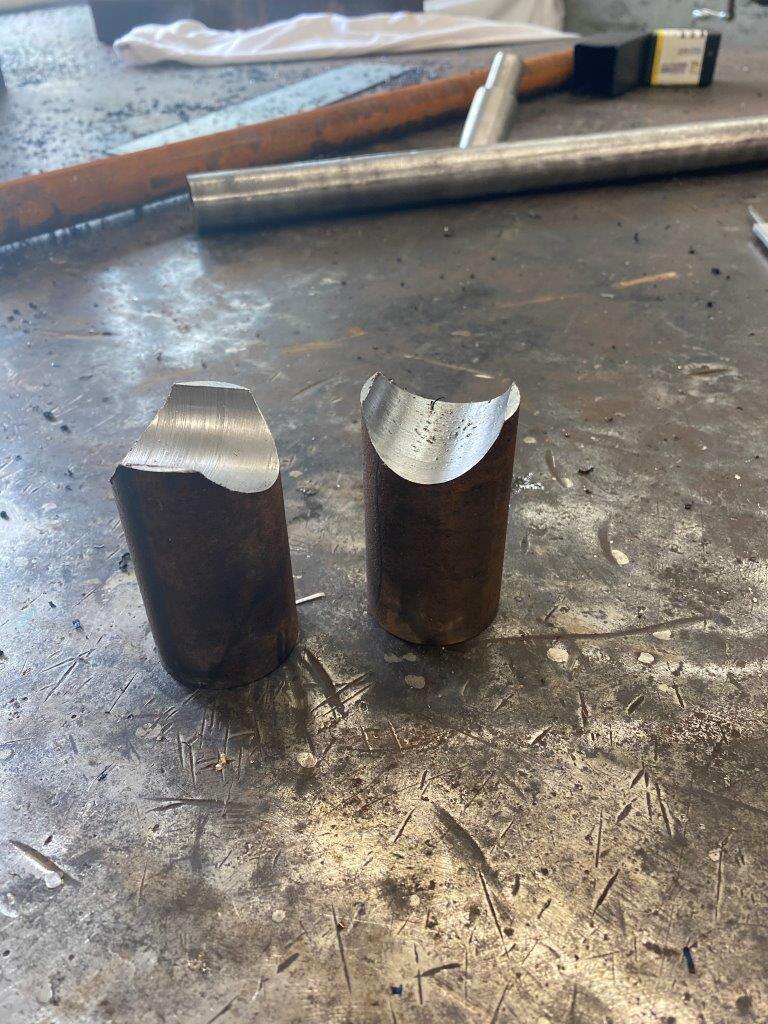
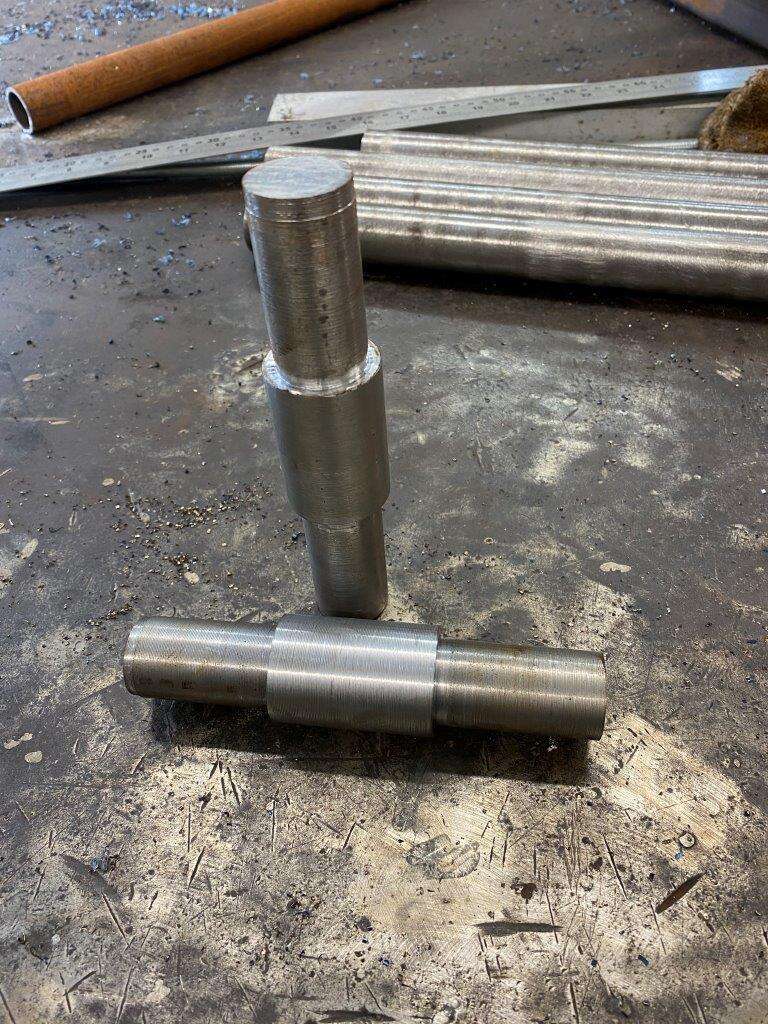
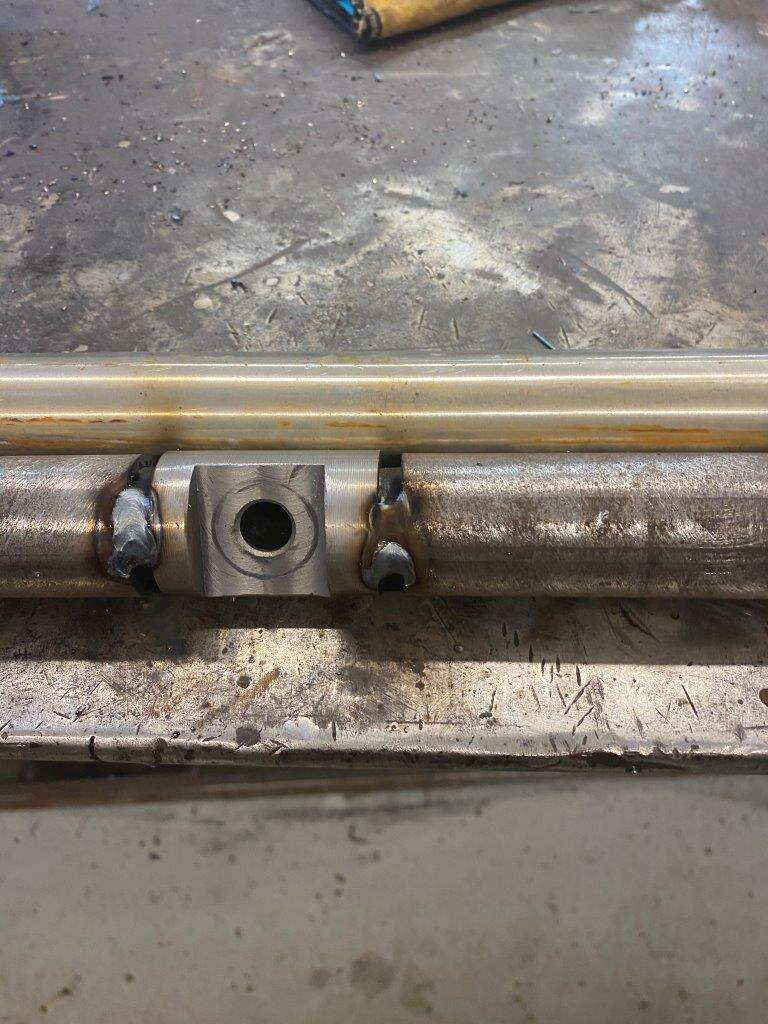
So lets take a closer look at the process as we make some more connectors,
2 bits of solid bar, next to a 19mm spanner for reference
Onto the lathe
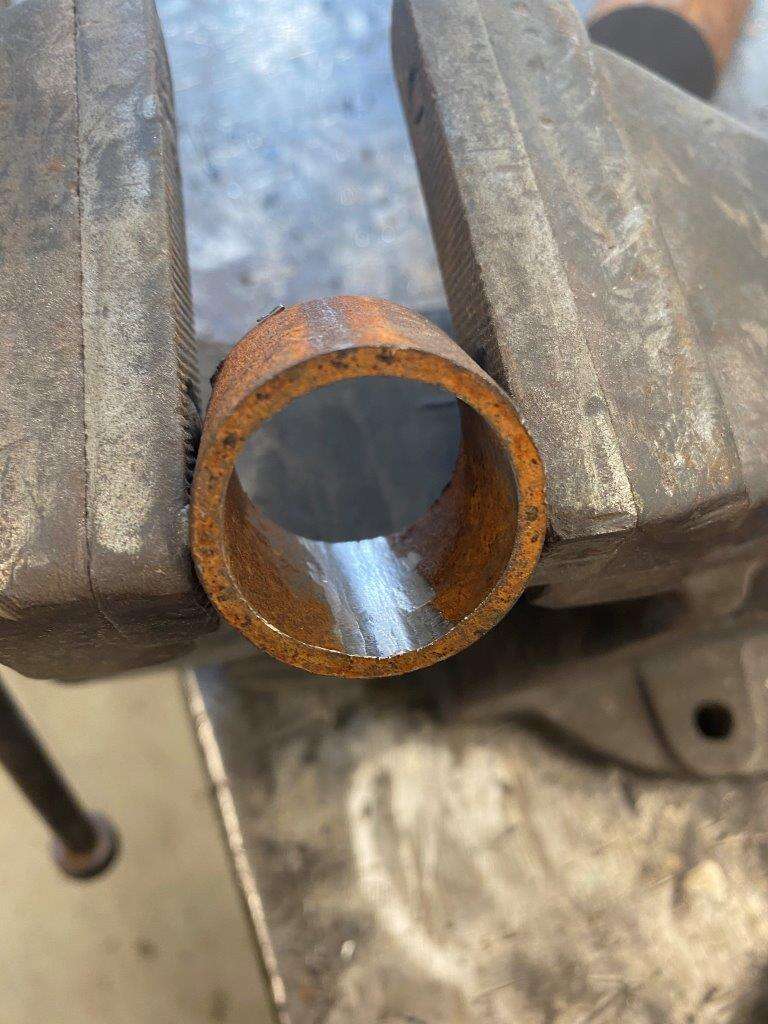
Now they need to fit this pipe
Notice the ridge on the inside, I want the tolerances close so that ridge has to go! That was achieved with the die grinder
To sive us a clean pipe
And the bars are starting to look like this
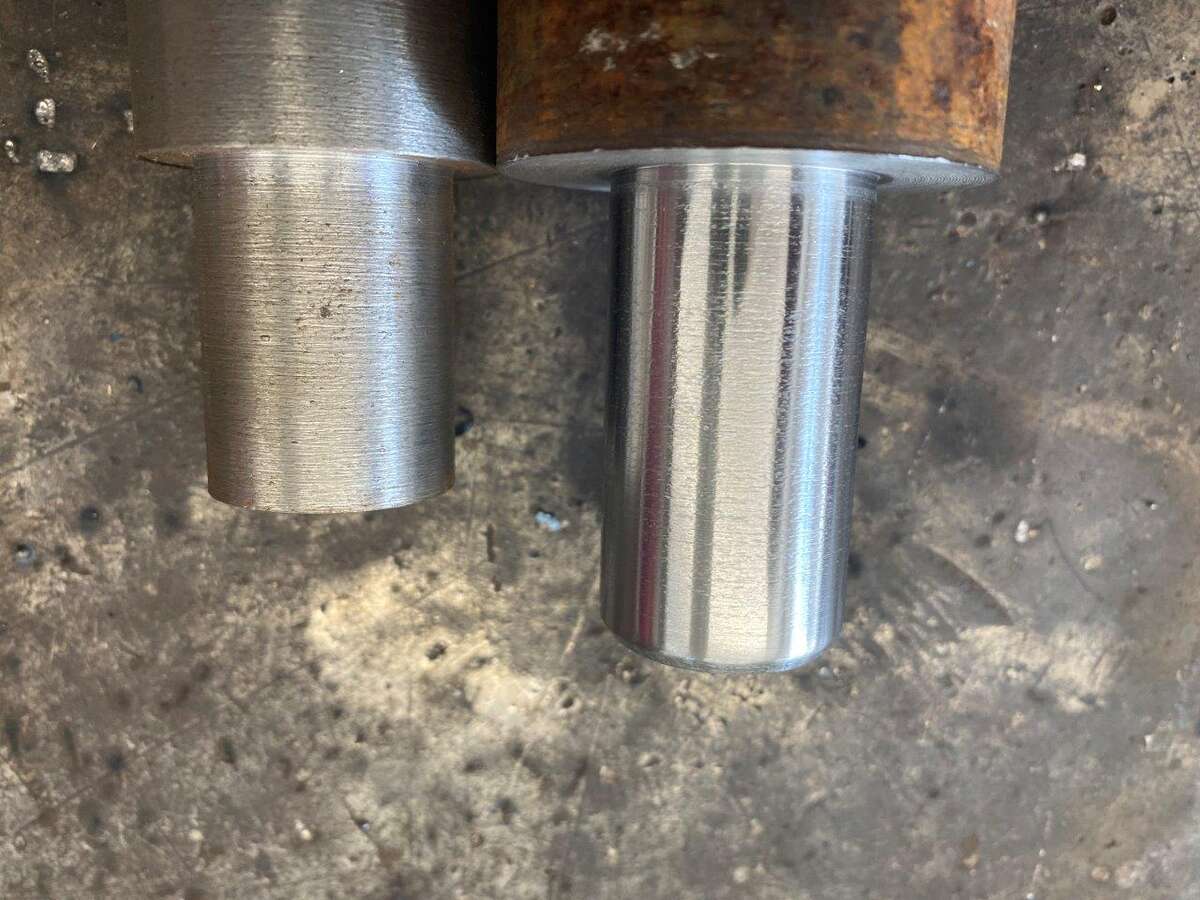
So before and after
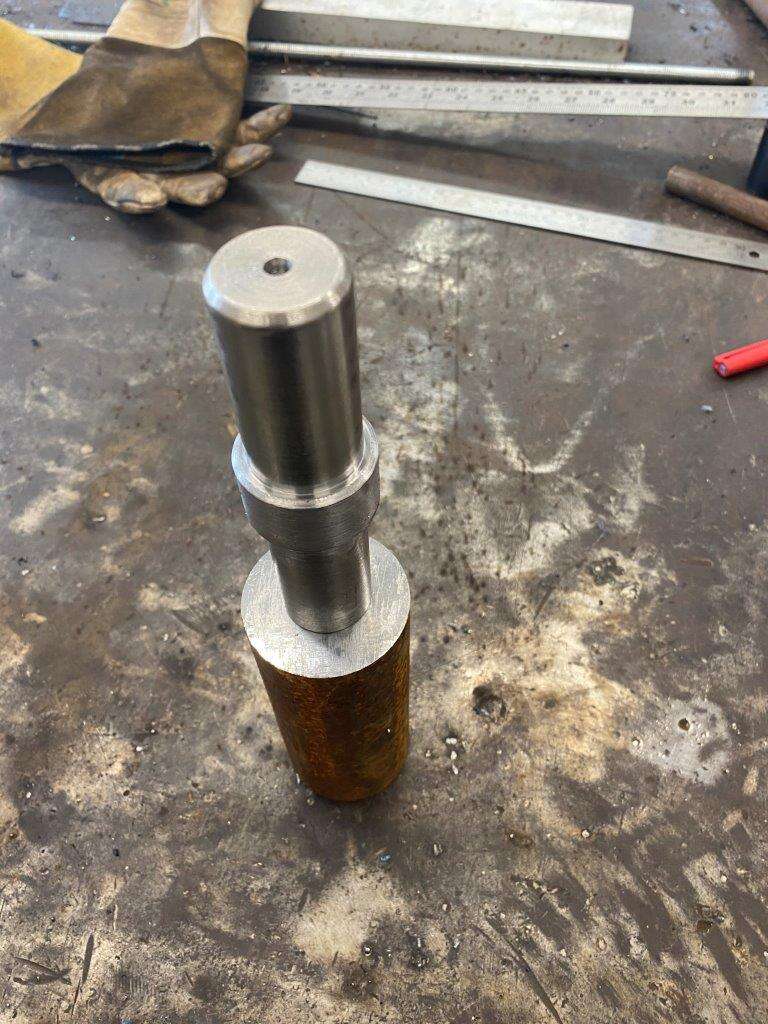
Of course, we need 2
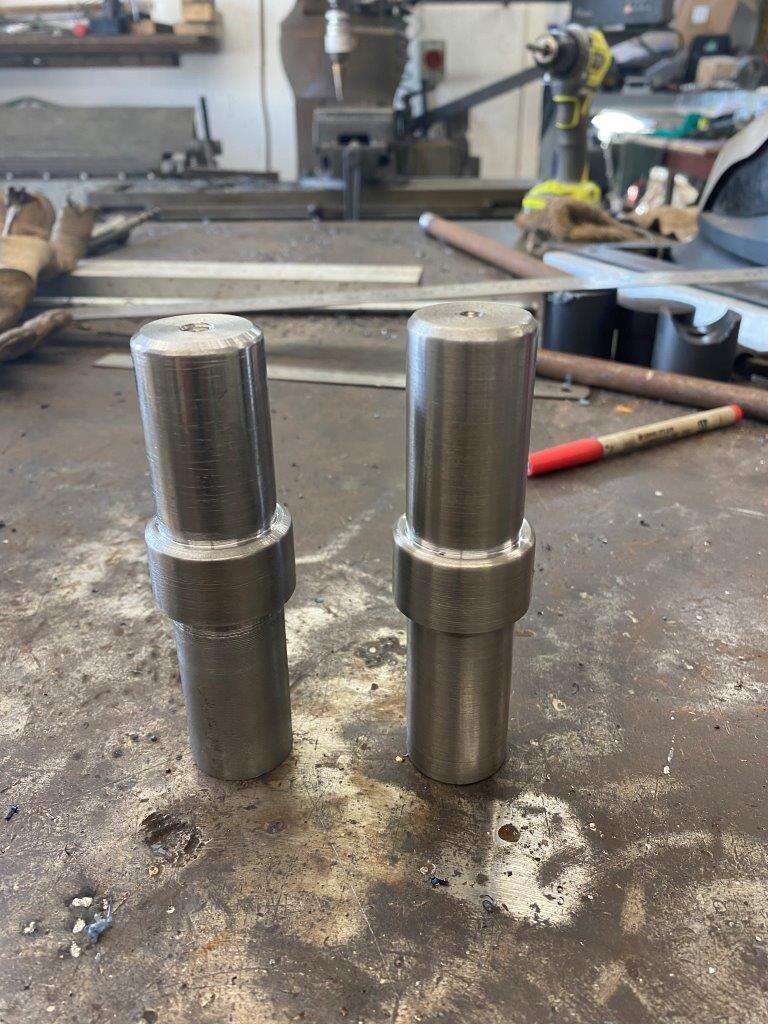
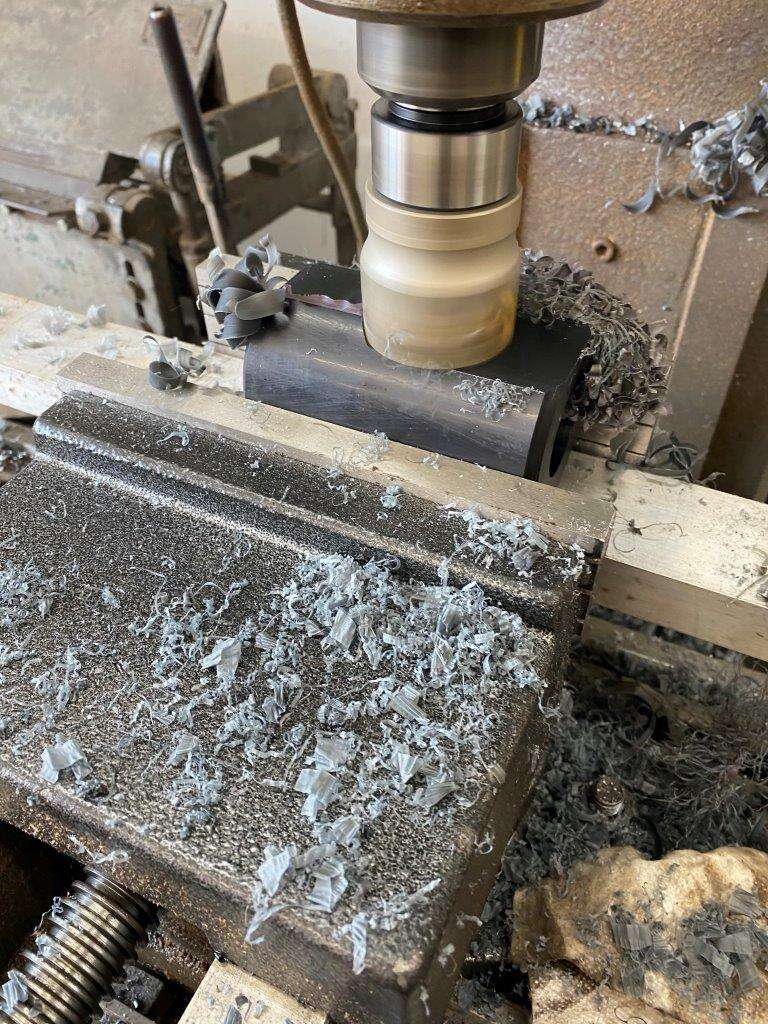
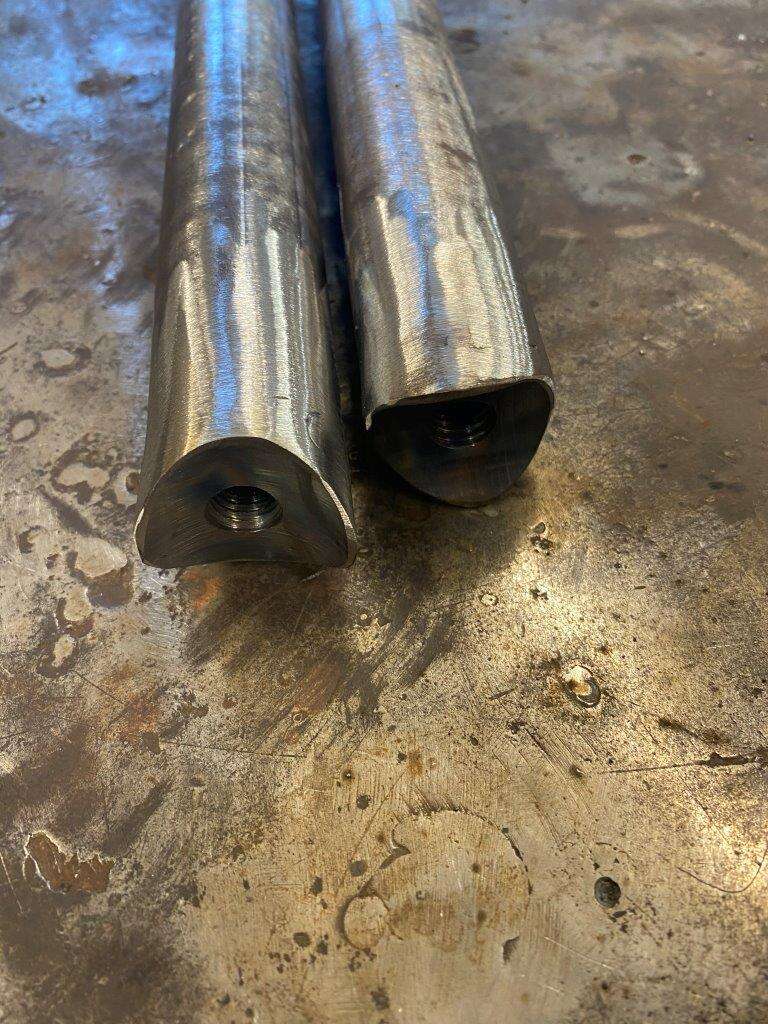
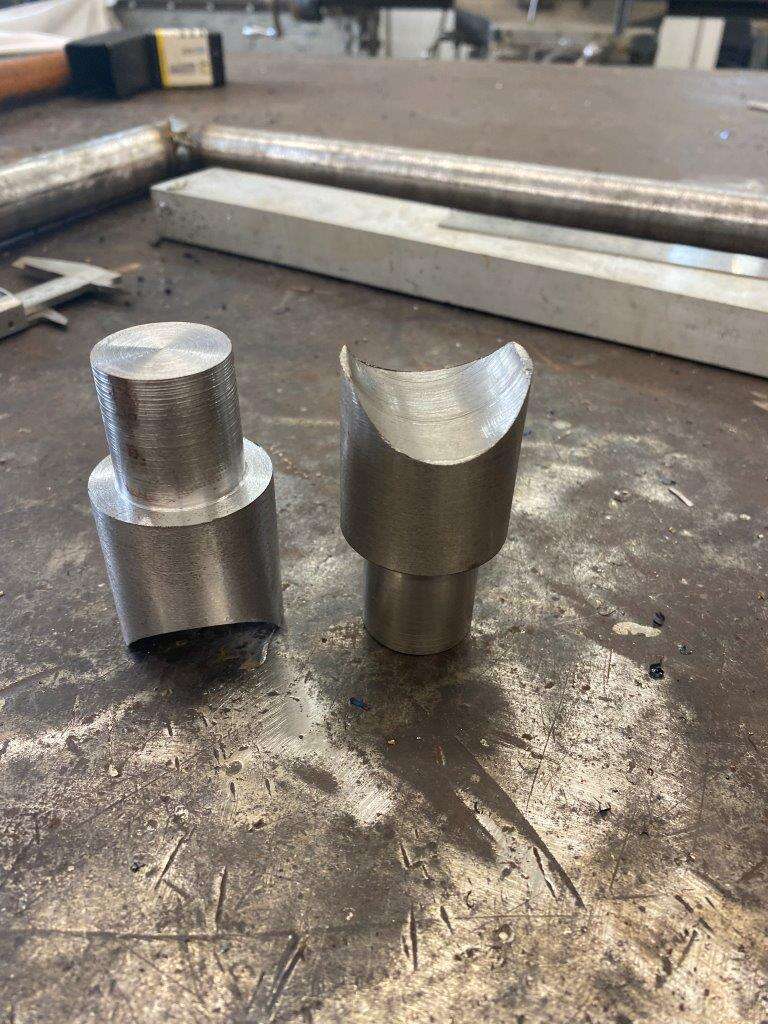
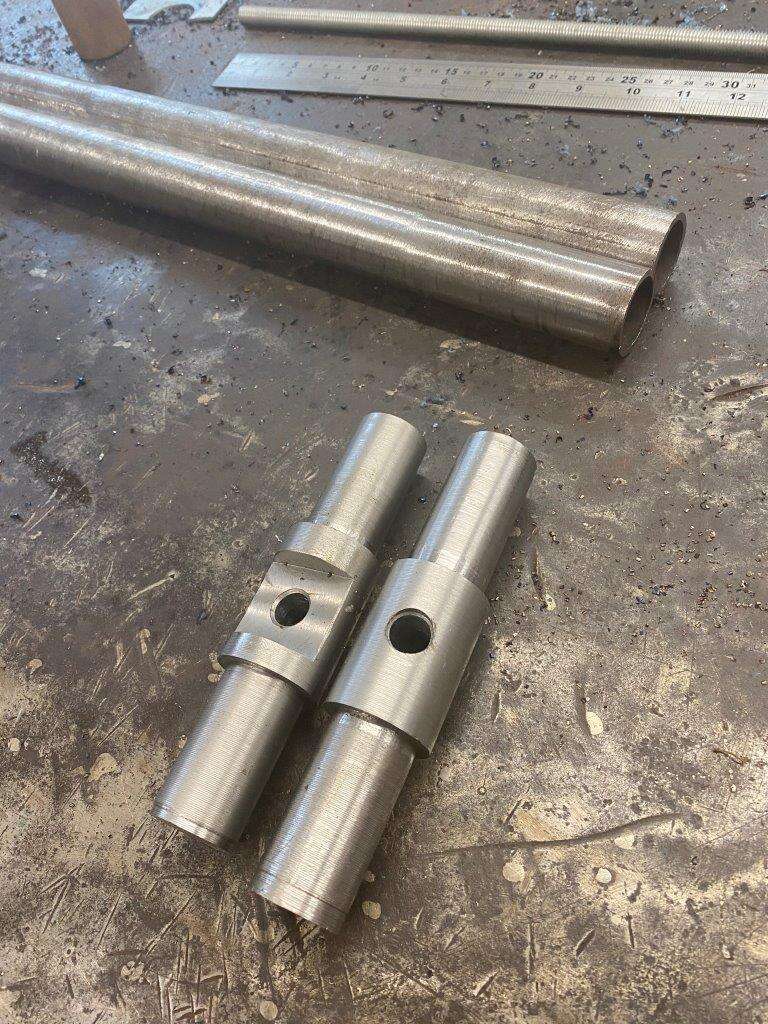
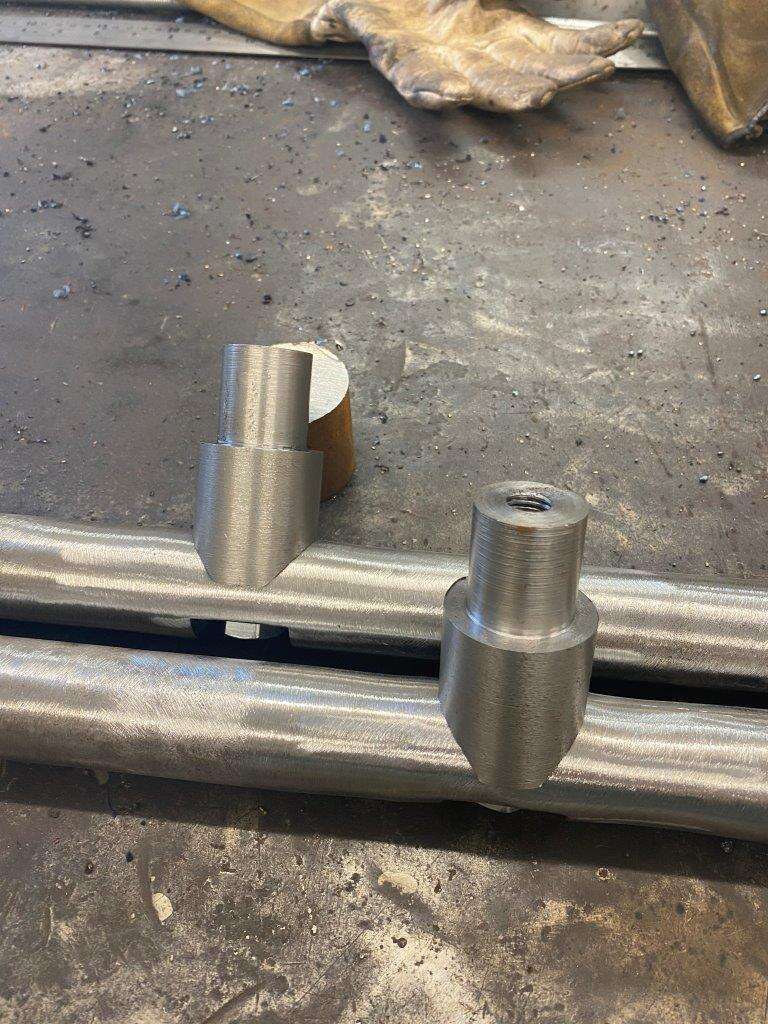
Next I made these
Drilled and threaded again to M12 x 1.75
They need to fit the hollow tube so on the mill for a radius cut
So they look like this

And we have this set of connectors
Even more in a mo …………………………..
-
3
-
-
The build begins!
New blade for the chop saw
Let’s cut some pipe
Clean it up
45-degree angle cut on the ends
Line them up
Weld that together
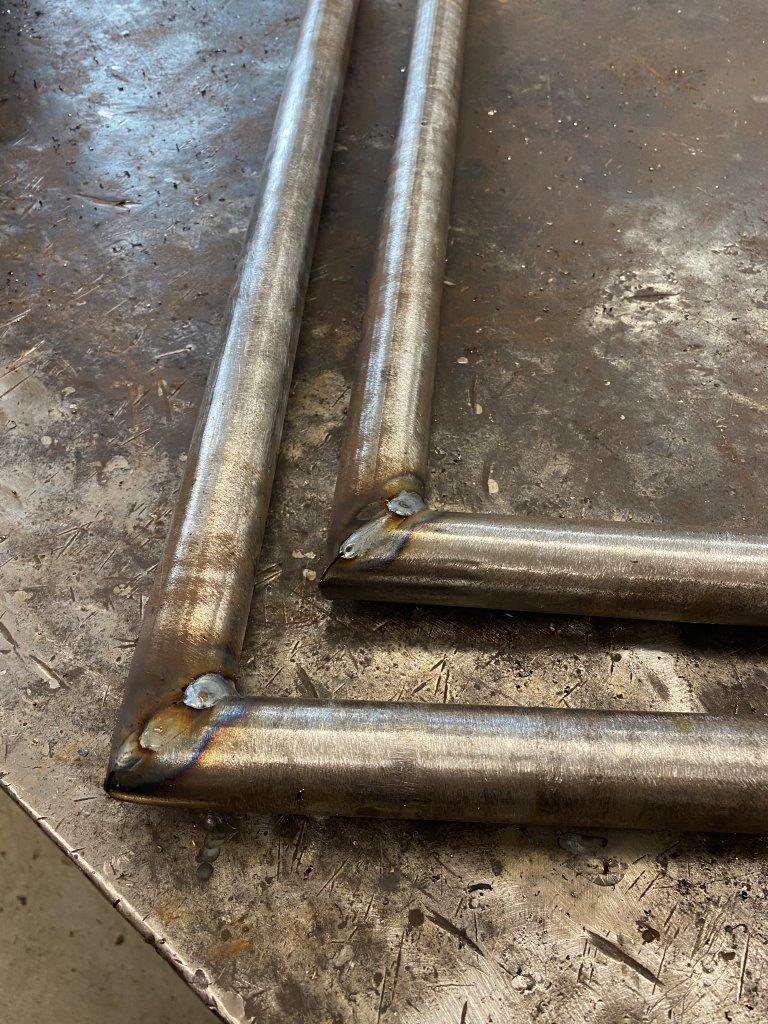
Hold on, Hold on – Stop right there what the F*** are you doing?
You said OVER engineered! What’s this a 90-degree welded joint sanded down so you can’t see the weld! That’s over engineered is it!!?? I don’t think so, this lot want to see some proper engineering! Not to mention you said “easy to dismantle” since when is a welded joint easy to dismantle?
Throw that lot away, go have a coffee, think about your life choices and come back when you have your – Lets do this because we can, not because we need to - head on!
(A coffee and some time later ..............)
Sorry about that folks I wasn’t thinking straight – I most humbly apologise.
The build begins!
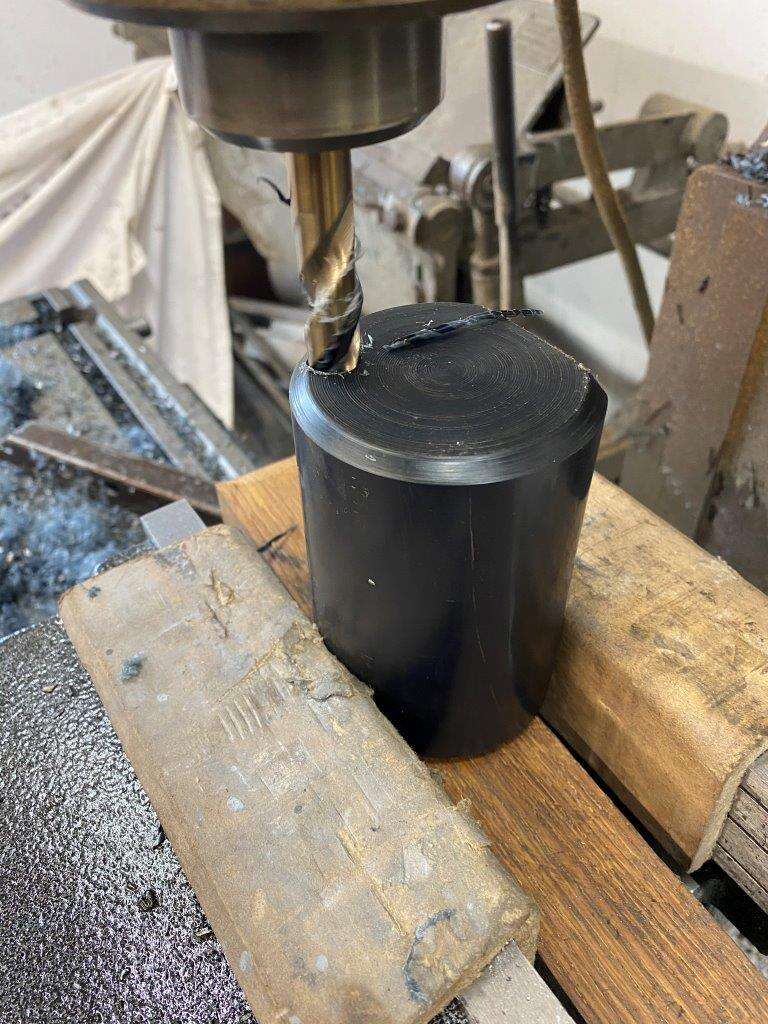
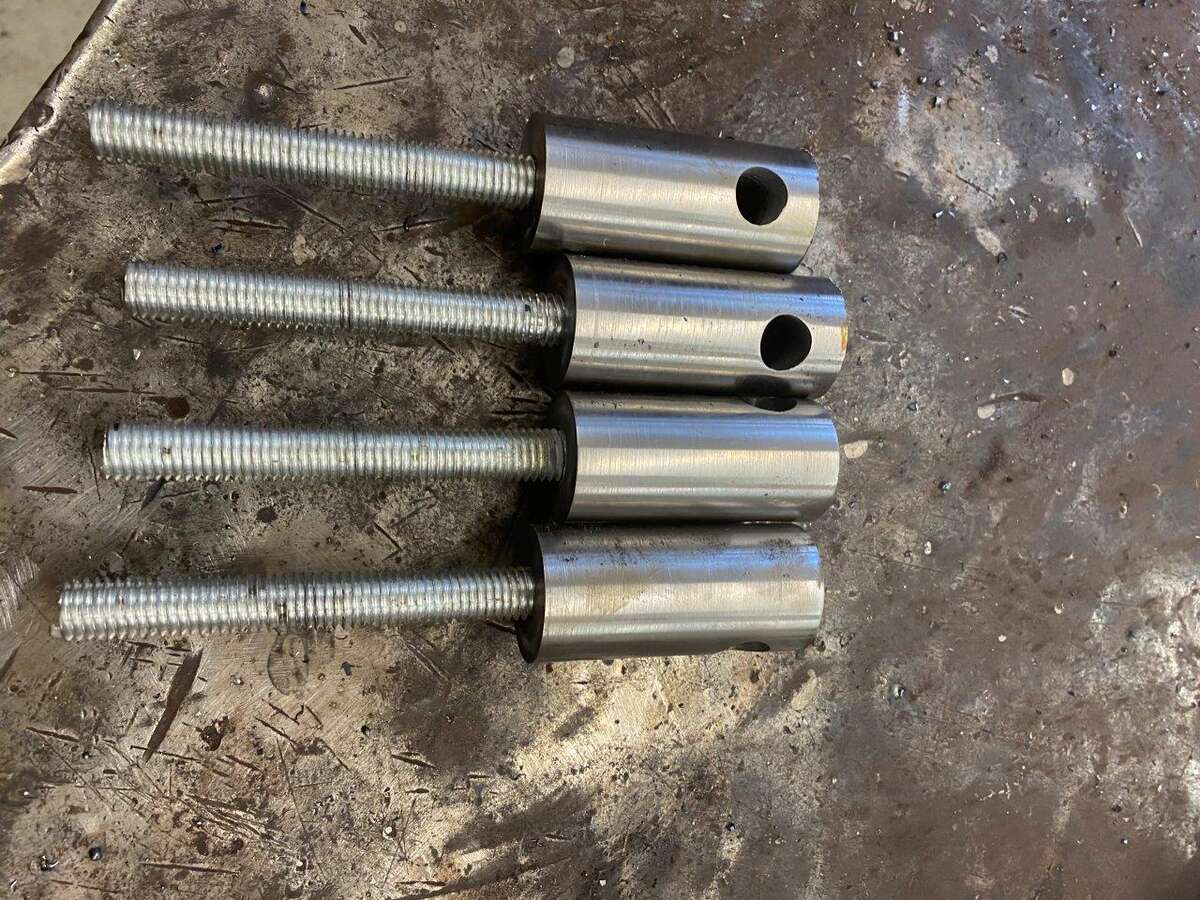
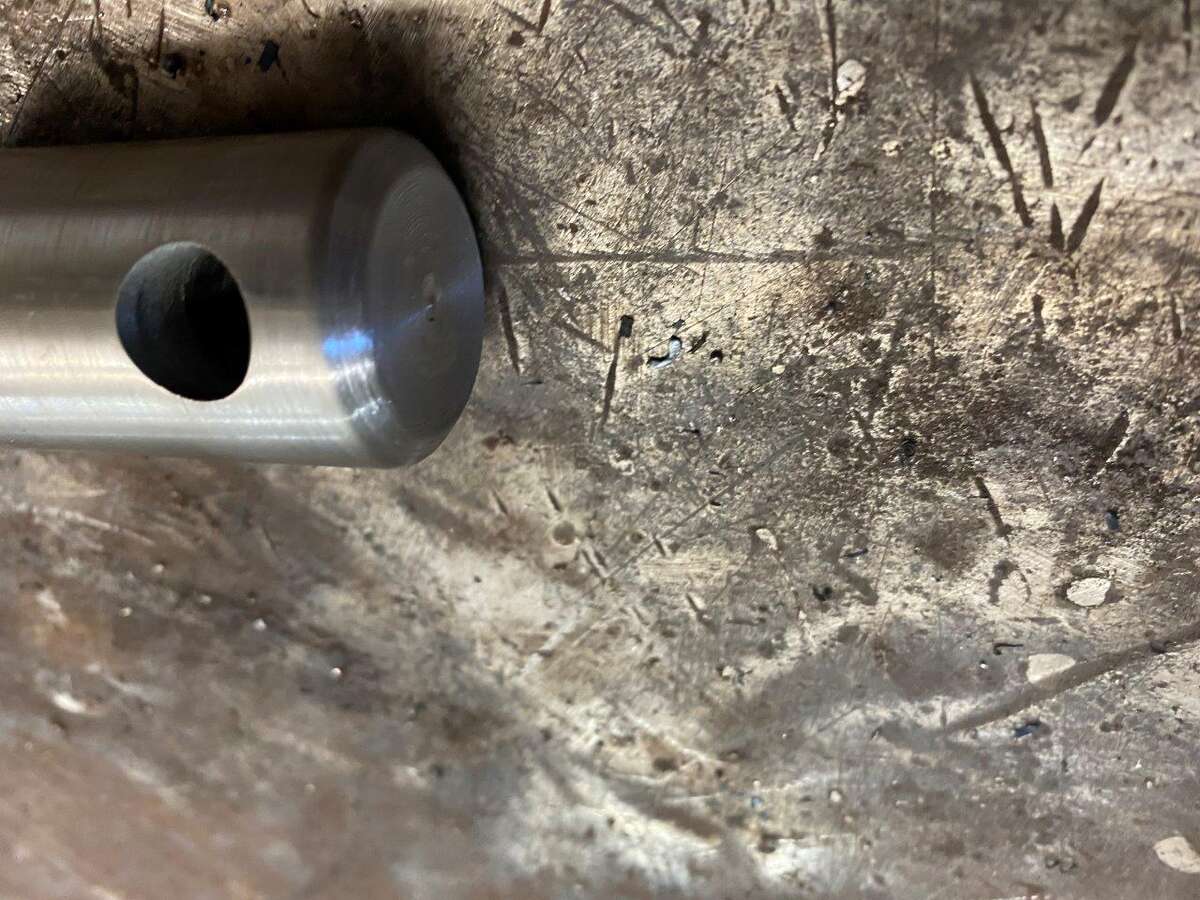
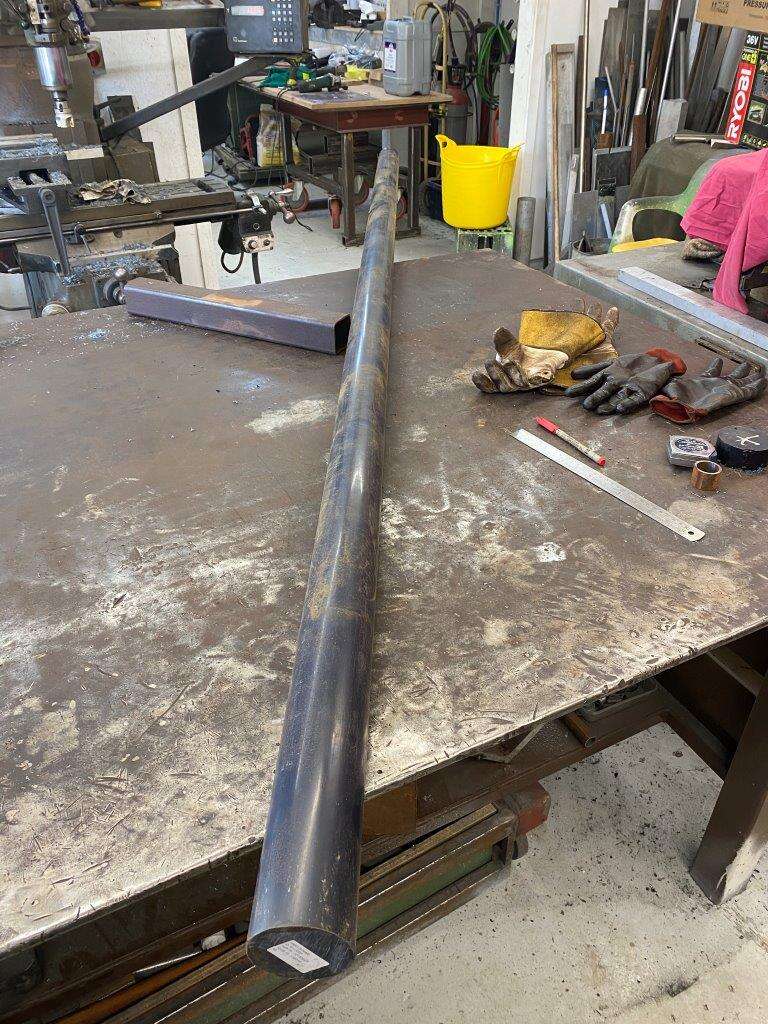
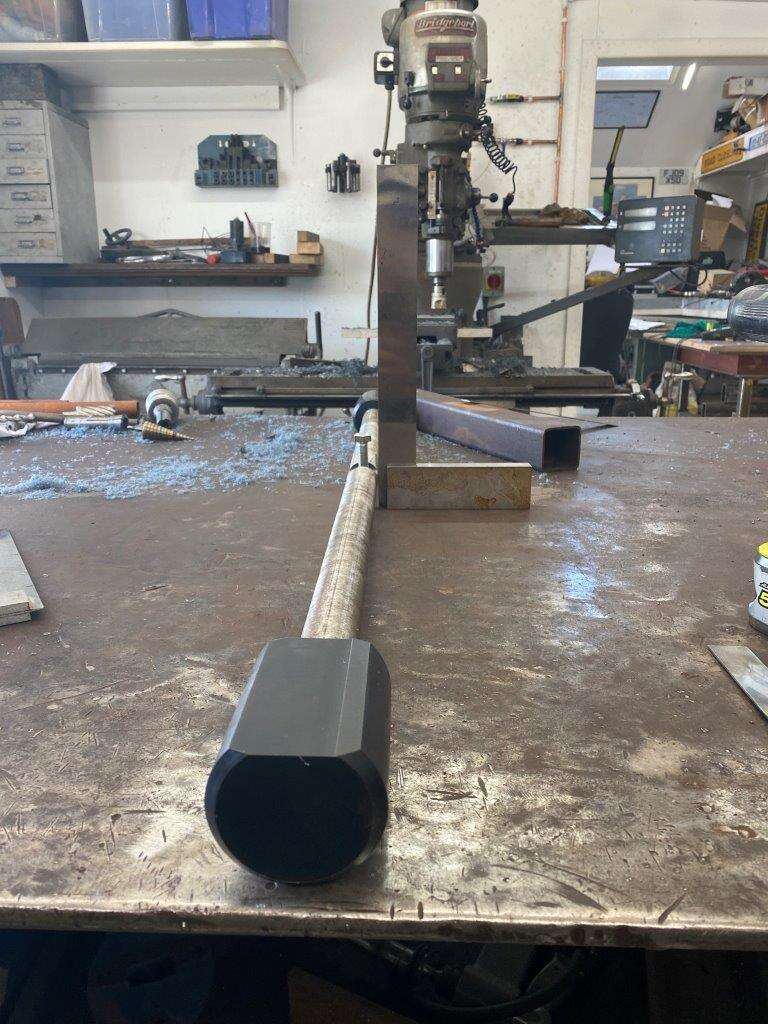
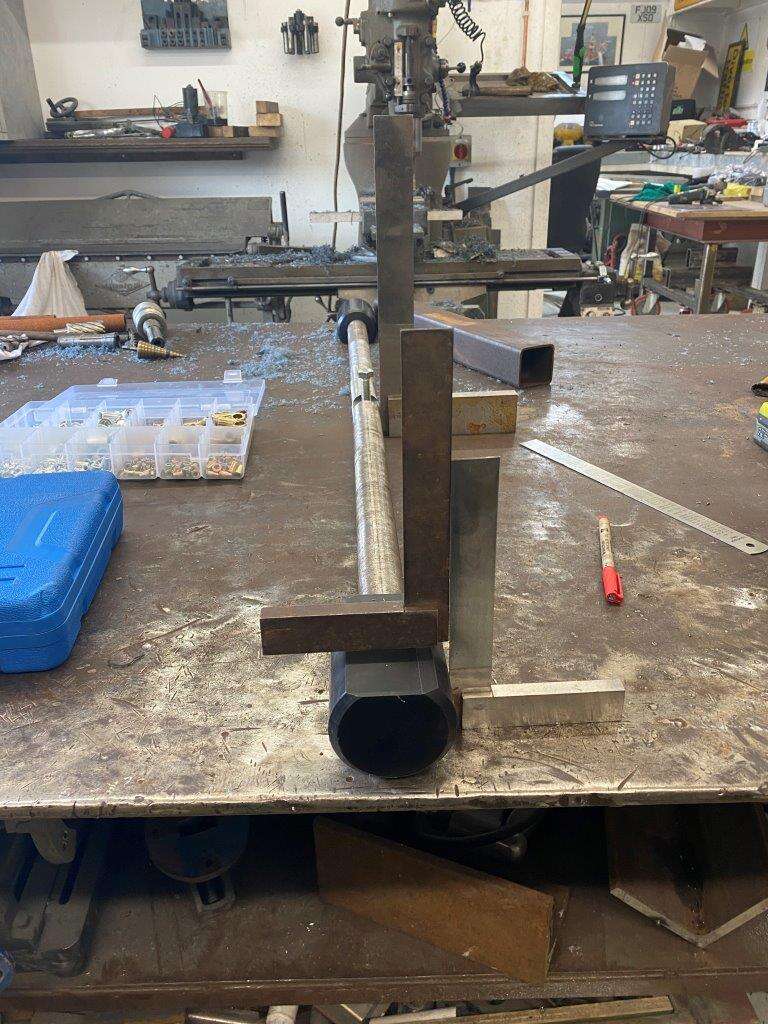
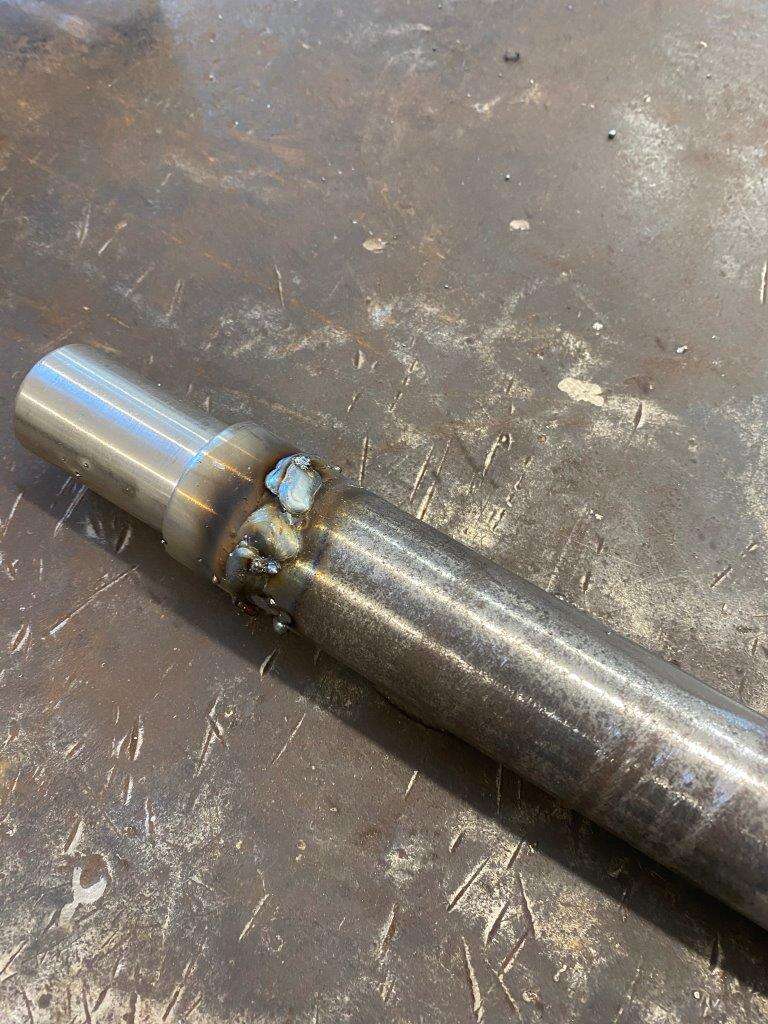
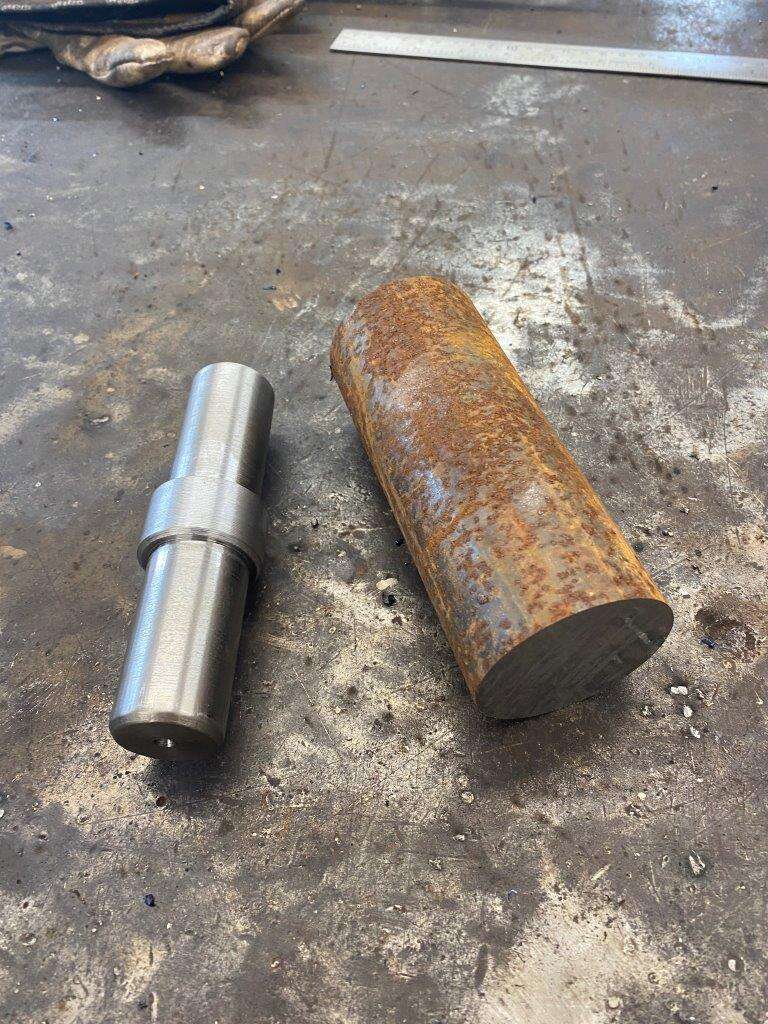
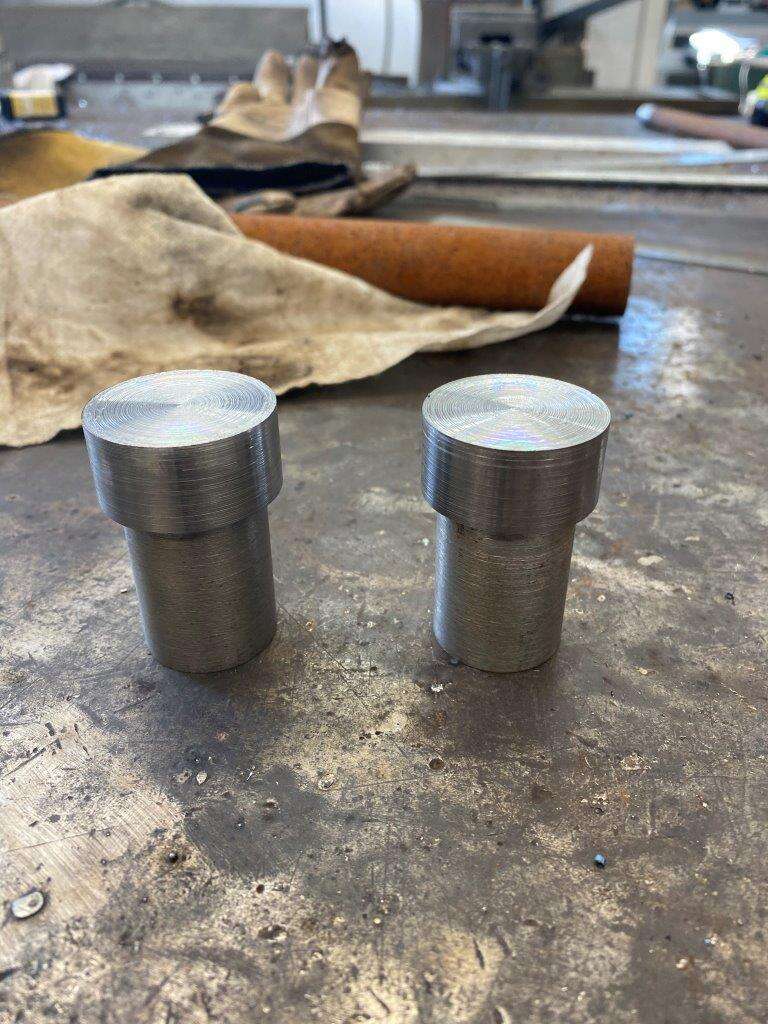
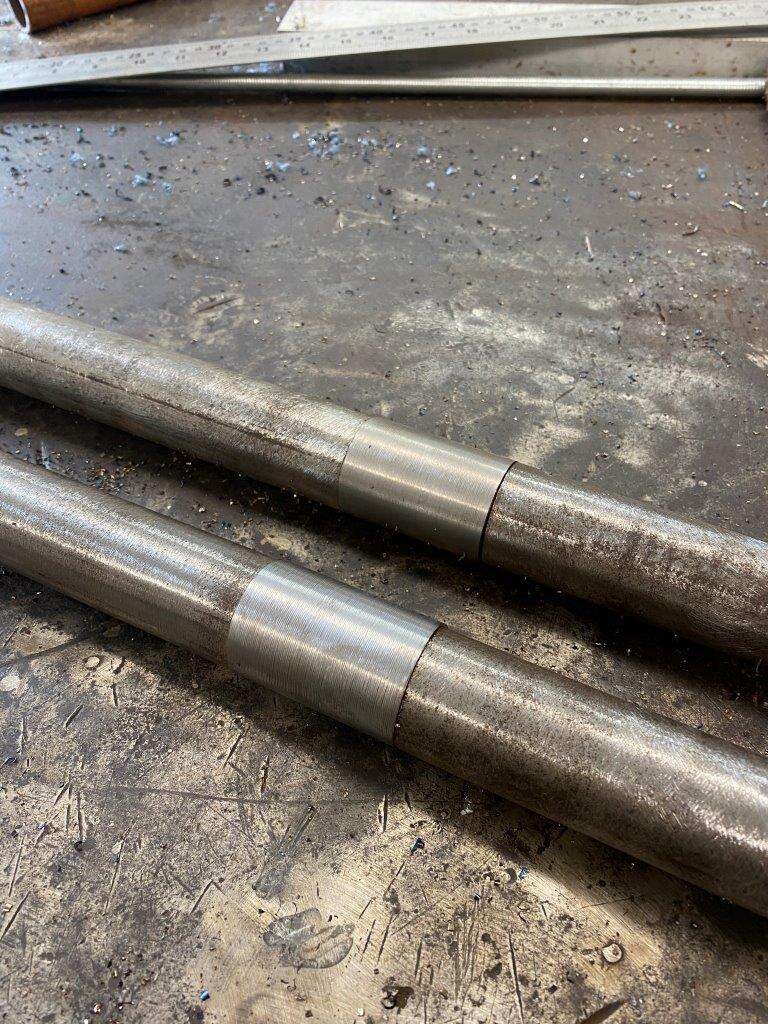
On the scrap pile I found some solid bar
That I want to use to join these recently cleaned bars

So lets get them cut to length and run through the Milling machine
Then some lathe work
That’s better, but lest get silly now, more bar and more lathe time
They join these bits like so
Back to the Mill
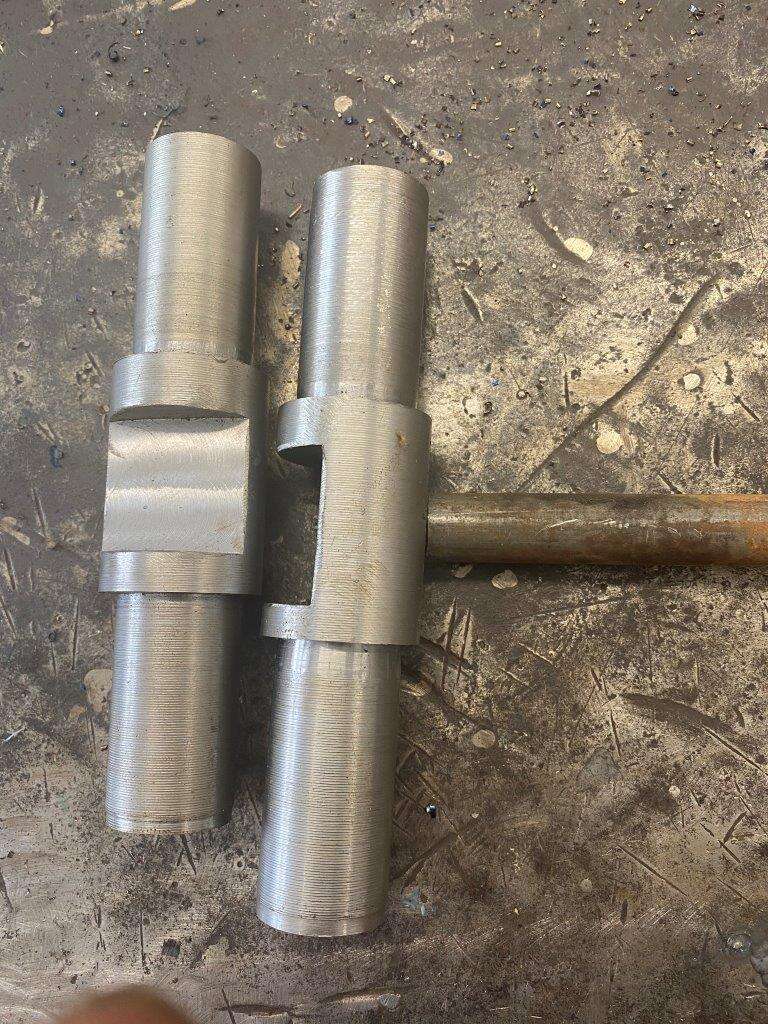
The drill press
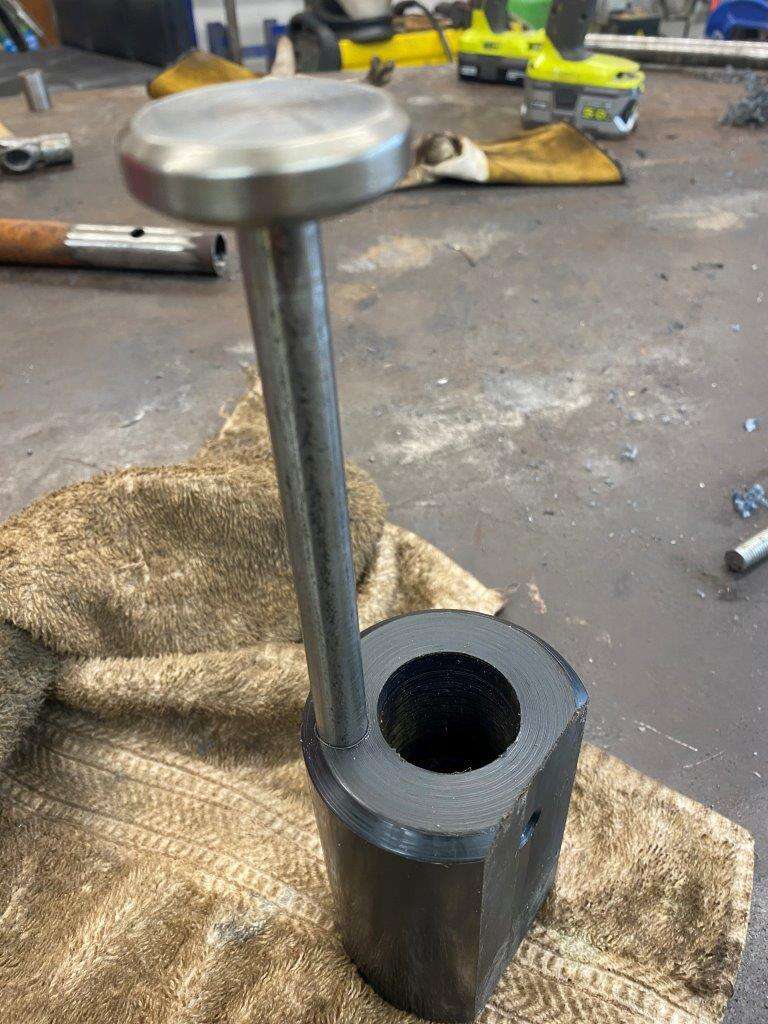
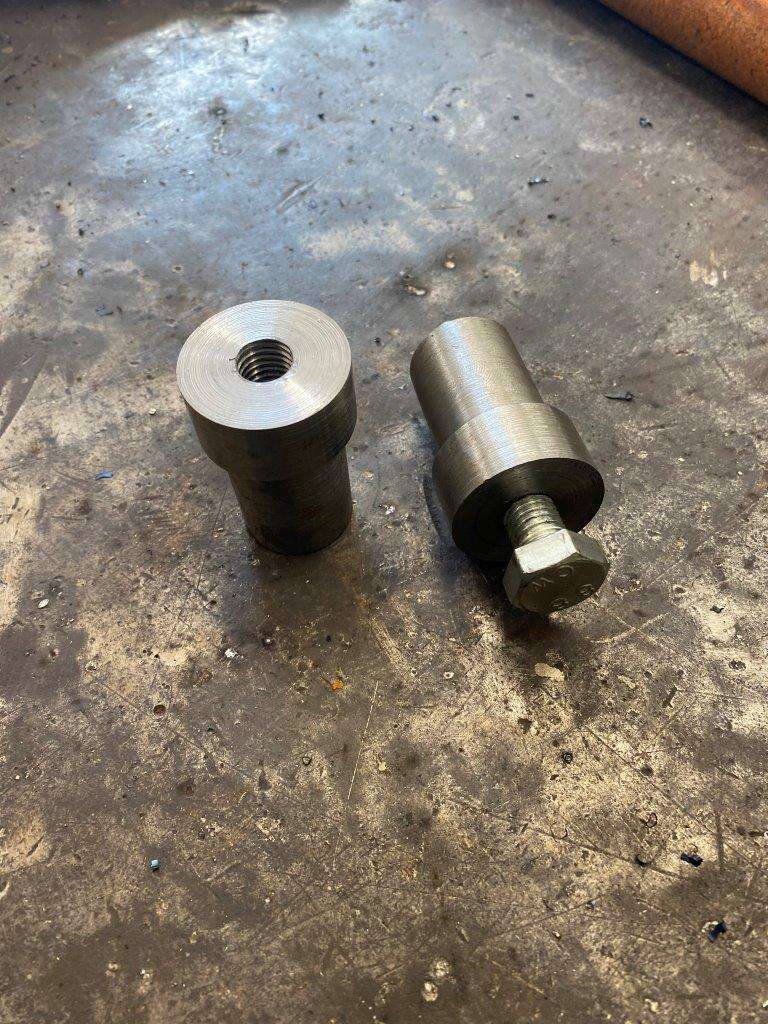
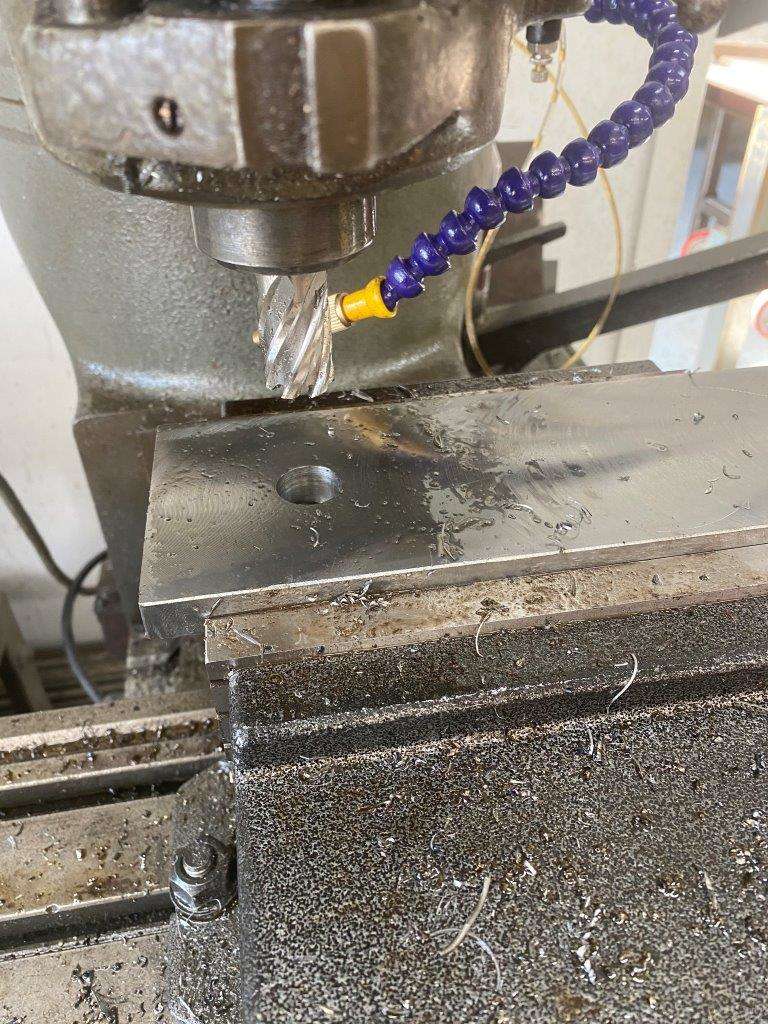
And take the first 2 parts back to the lathe for a pilot hole
Then drill to 10.5mm
Threaded to M12 x 1.75 - Now we have
Now we are over engineering.
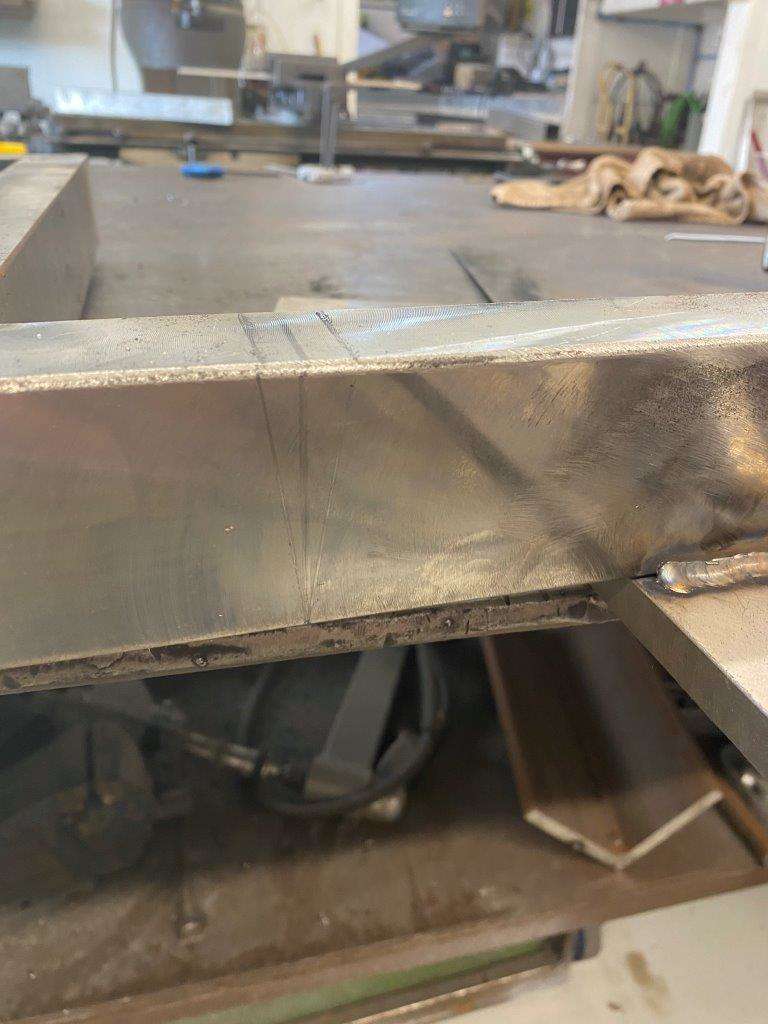
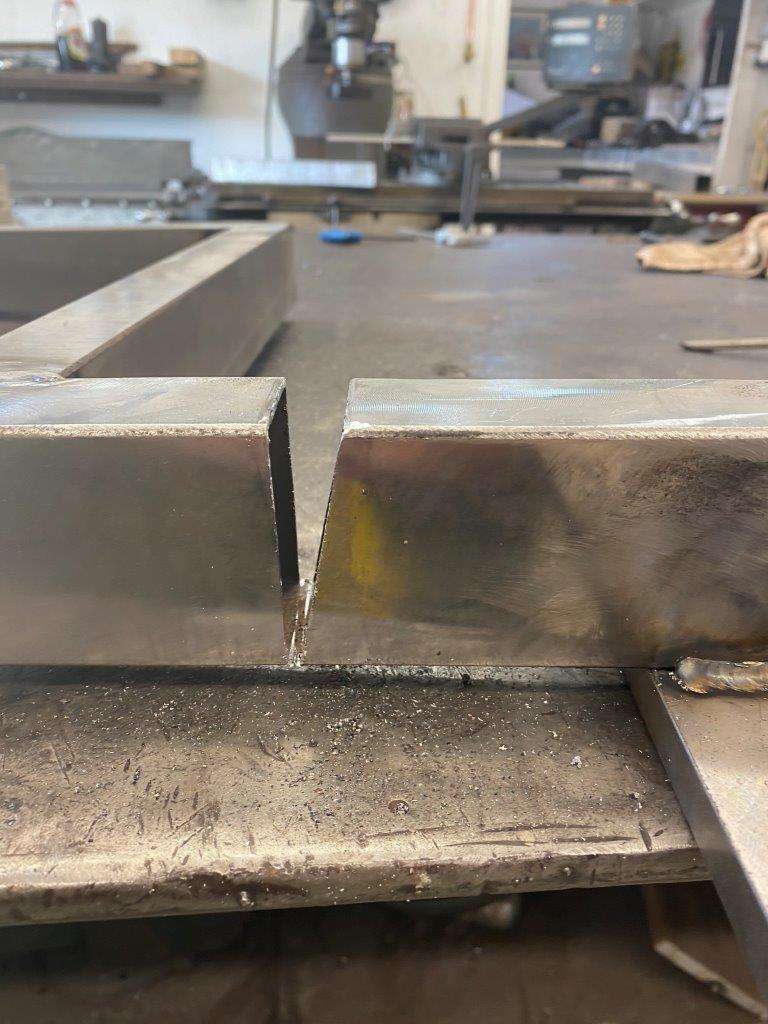
These were then placed into the pipes with a few millimetres gap and tac welded
When straight the weld was completed
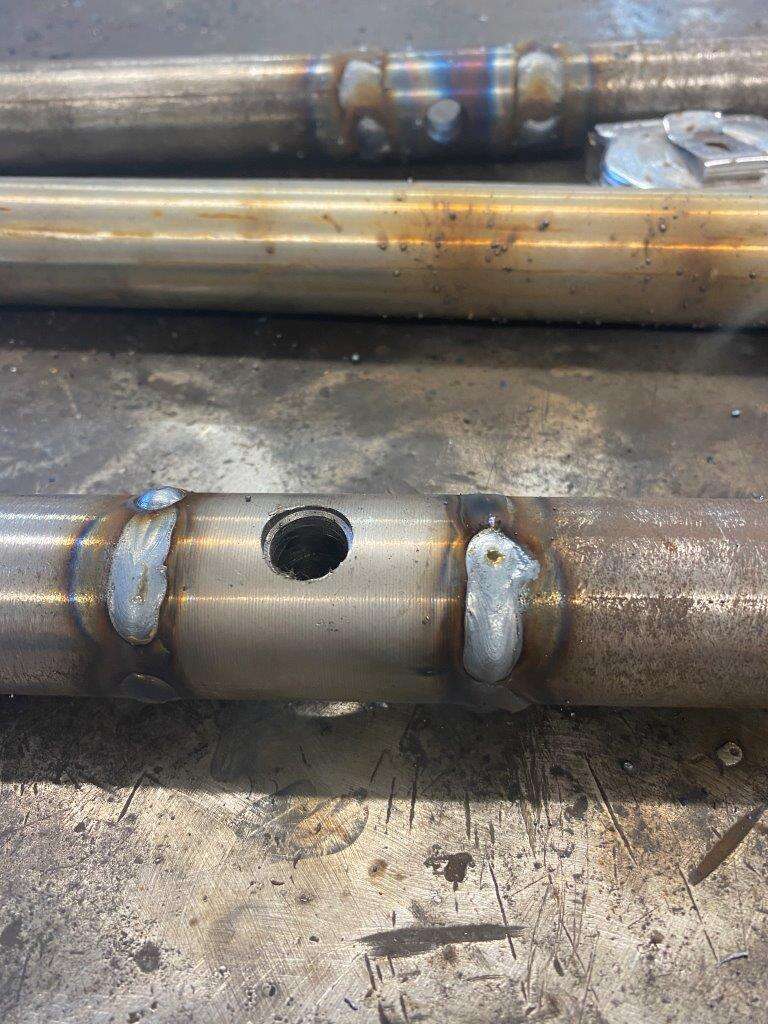
Then linished back
They will connect to the uprights
No visible welded joints - tick
Now that’s more like it
More coming …………………
Much more
-
3
-
-
Morning all, hope no one is going to stir crazy or succumbing to cabin fever?
I did say I had a new project to attempt this weekend, I’m pleased to say it went quite well,
Back Story –Daughter No 2 (JJ) had a “lifestyle change” about 2 years ago as she had always struggled with her weight, I’m pleased to say she has stuck with it and lost nearly 6 stone!!
In January I decided I needed to loose a few pounds (stone
) and JJ wanted to get fitter / stronger so we started training together at the gym, now JJ has some targets in mind and you get “targeted” exercises from the instructors at the gym depending on your goals, upper body strength is her current target with a long-term target of a planche.For those who don't know, one of these

Since lockdown we have been training at home and JJ wants a pull up bar and started looking at things like this as a possible birthday present.
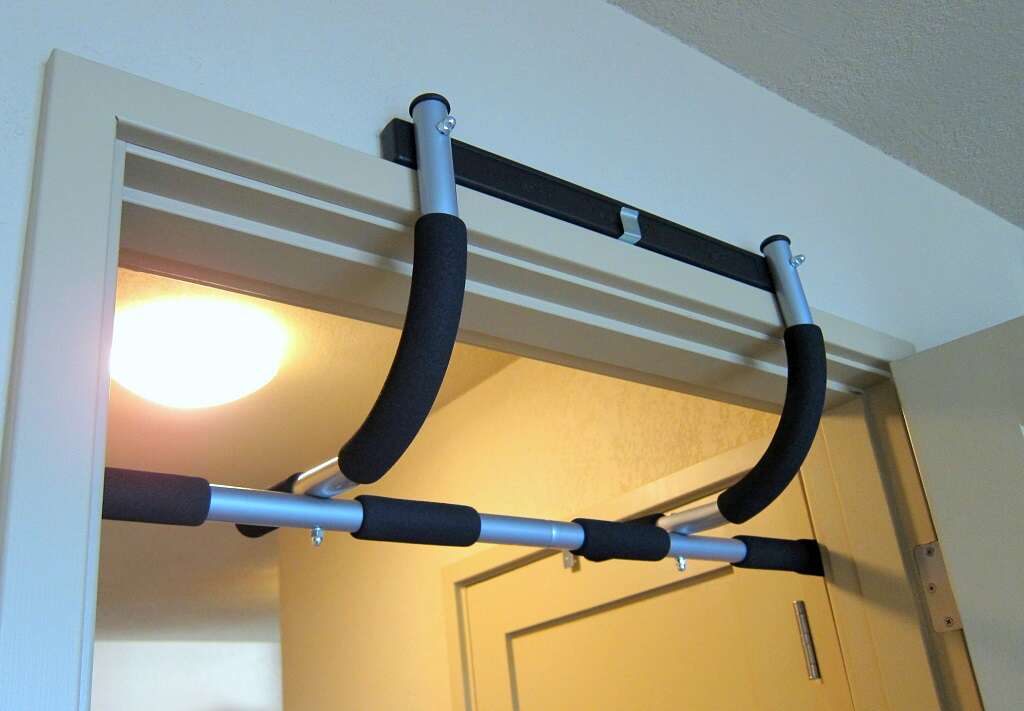
I decided I could do better than that and not hammer the house as we have a Zed Shed to train in
Onto the requirements
I need to incorporate all the following exercises


There are a lot of home use bars like the one below that can be bought starting at about £100 and going up from there

But I can do better and have more features
It has been said by more than a few that I over engineer things, I don’t mean to it just happens when you try and build something properly. I thought it would be fun to actually deliberately design something more complicated than it needs to then come up with some completely over the top solutions to achieve this – and we are on lock down, so time is on my side.
The challenge -
Incorporate all the above exercises.
No visible welds, minimal fastenings visible.
Easy to dismantle for storage
Stronger than is necessary.
No of the shelf solutions other than nuts and bolts – i.e. make everything from scratch.
Nothing to be bought for it – use stuff I have here already (don’t forget my scrap pile is HUGE!)
Attention to detail.
I like to put all my tools away, and have a clean up before I start a new project so lets get ready
Coming up the ridiculousness I can achieve in the Zed Shed …………………………………
-
1
-
-
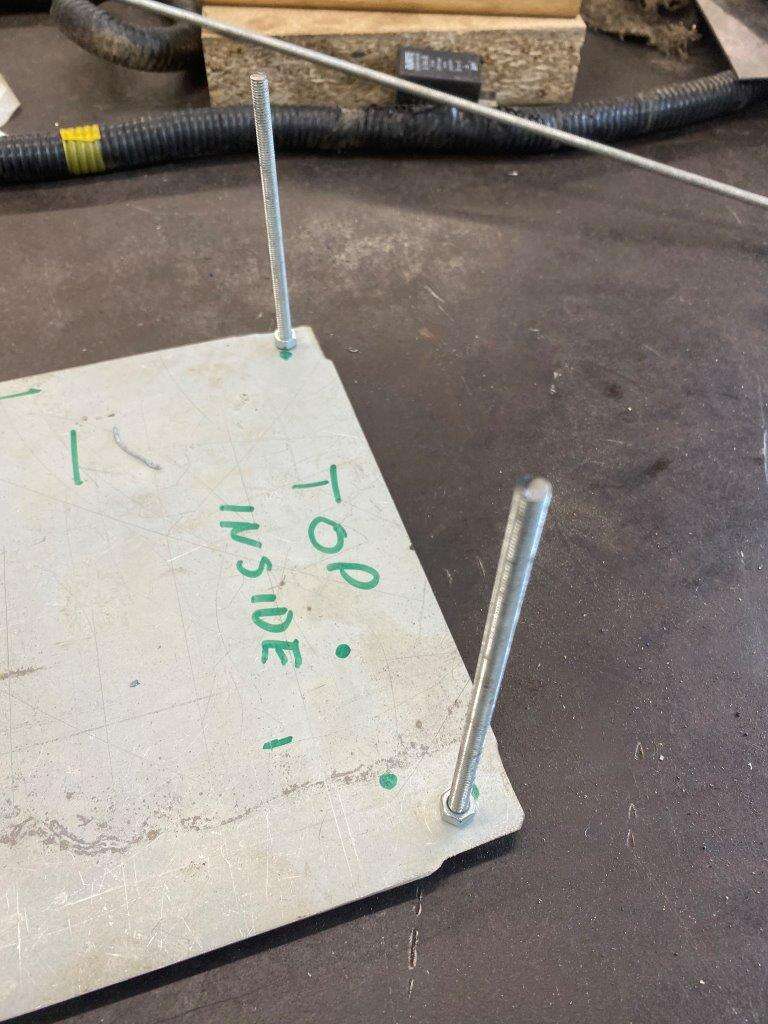
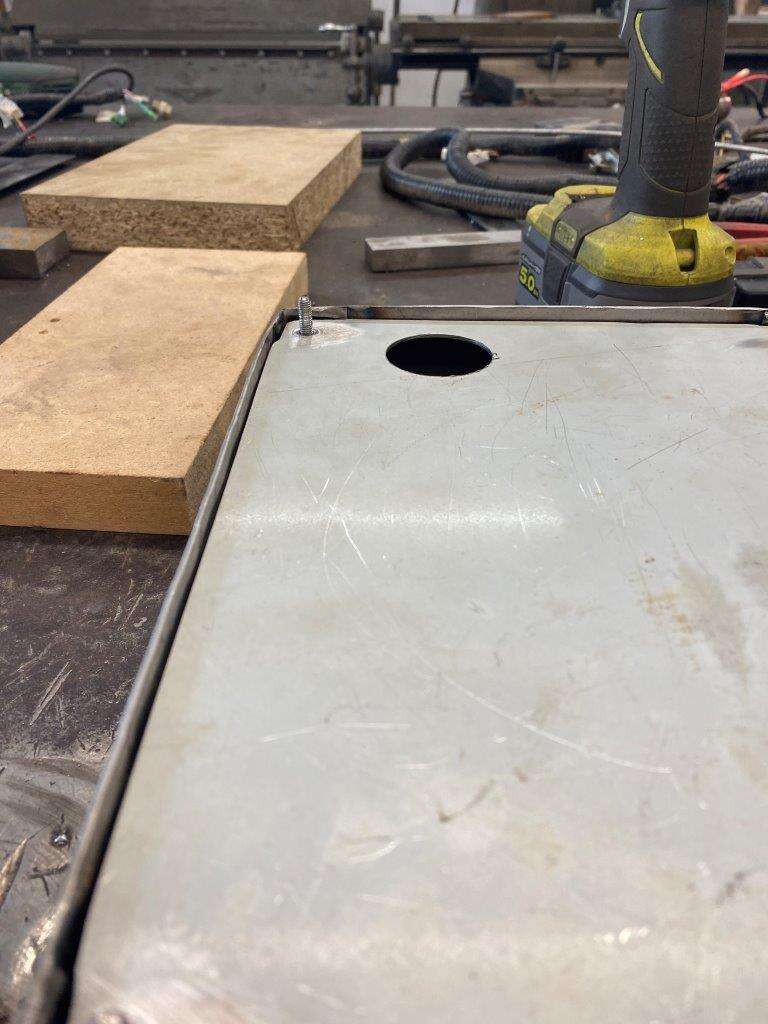
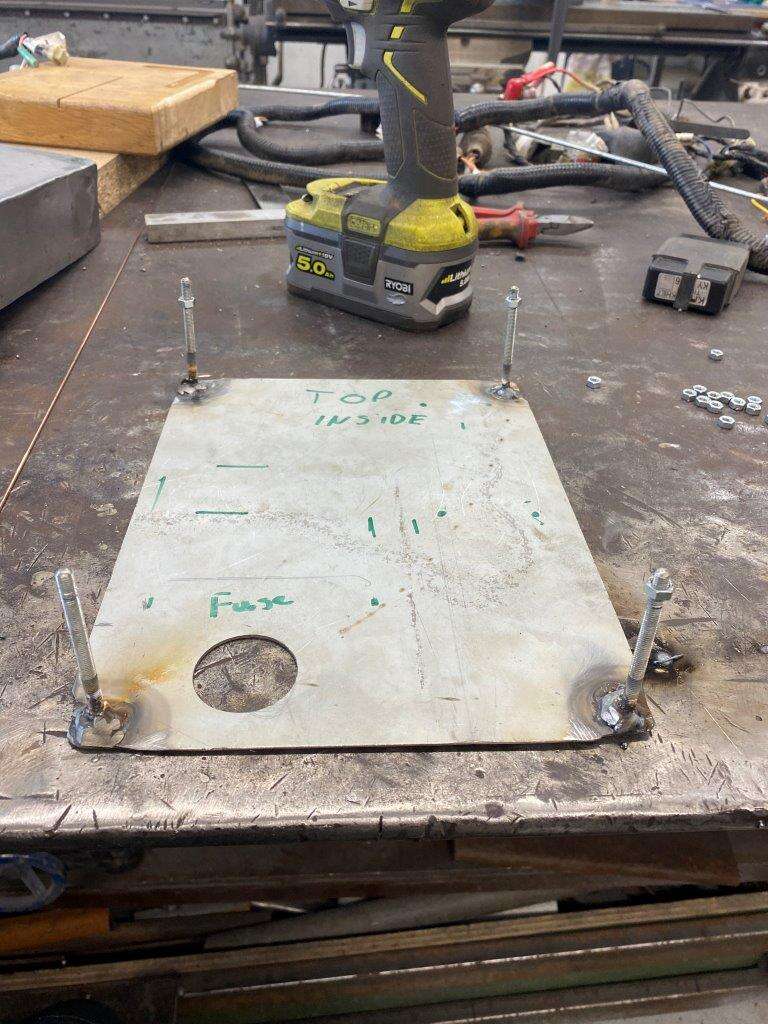
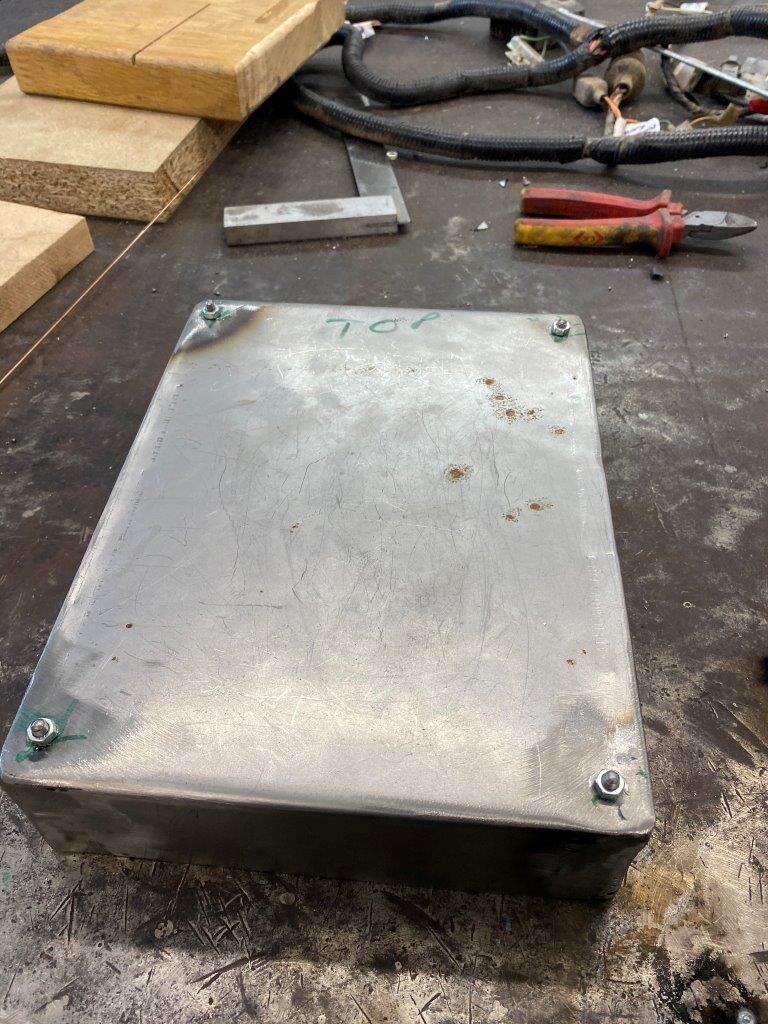
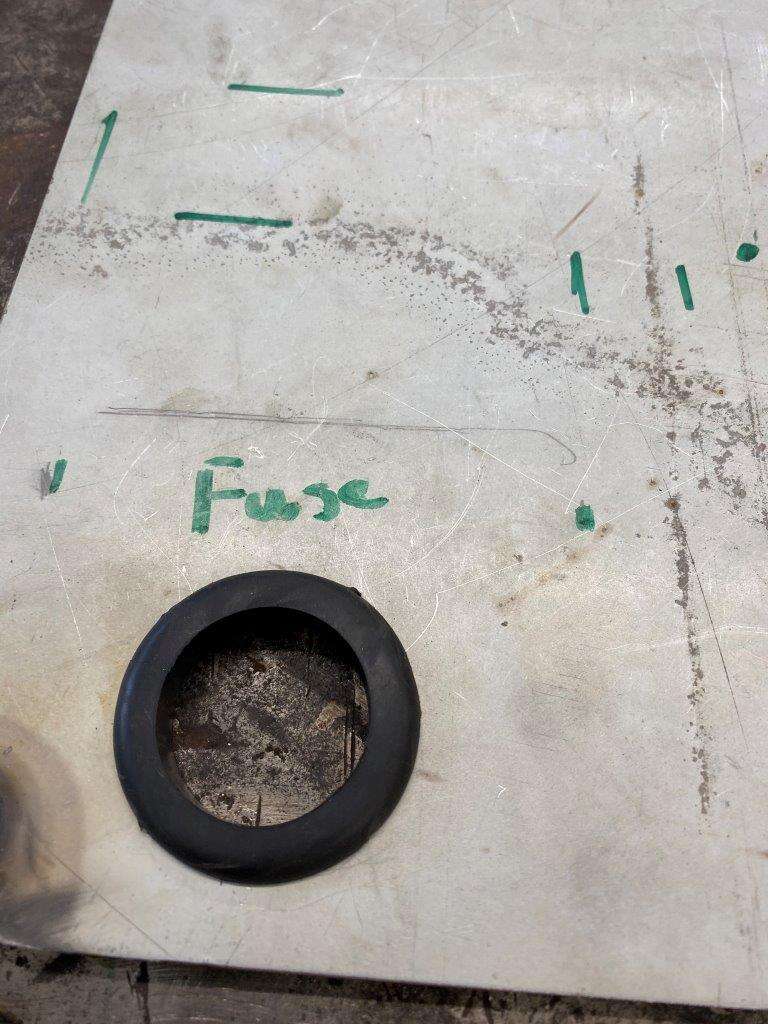
We now have a lid so some work on the back plate is needed................
Get that roughly marked out
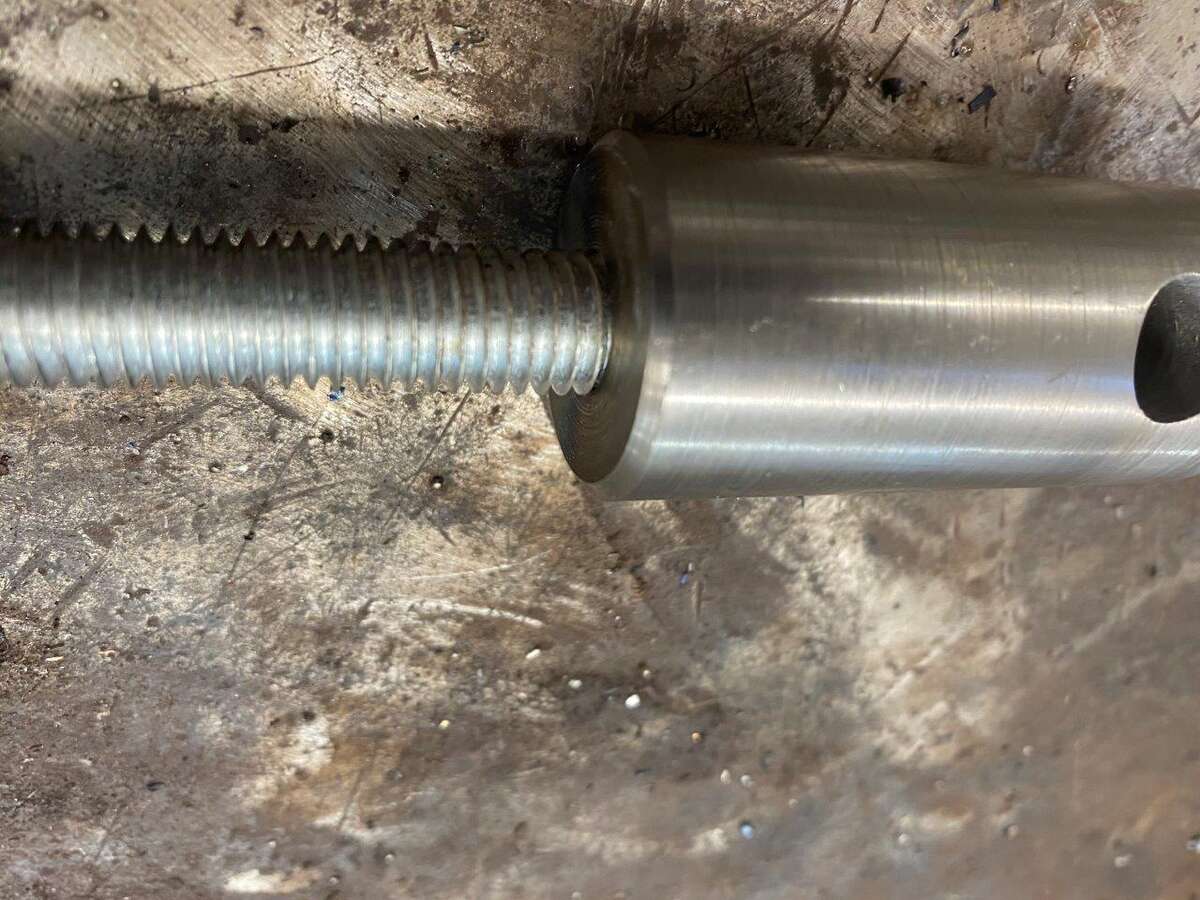
I have loads of this all-thread bar lying about so may as well use it
Lay a spacer plate on the Mill
Lay backing plate on the spacer
Note the cable entry hole was also cut
Place lid on base plate and drill all the way through
Make some bars
Bolt them in as I go

So we get the back plate like this
Lathed the ends on the All-Thread
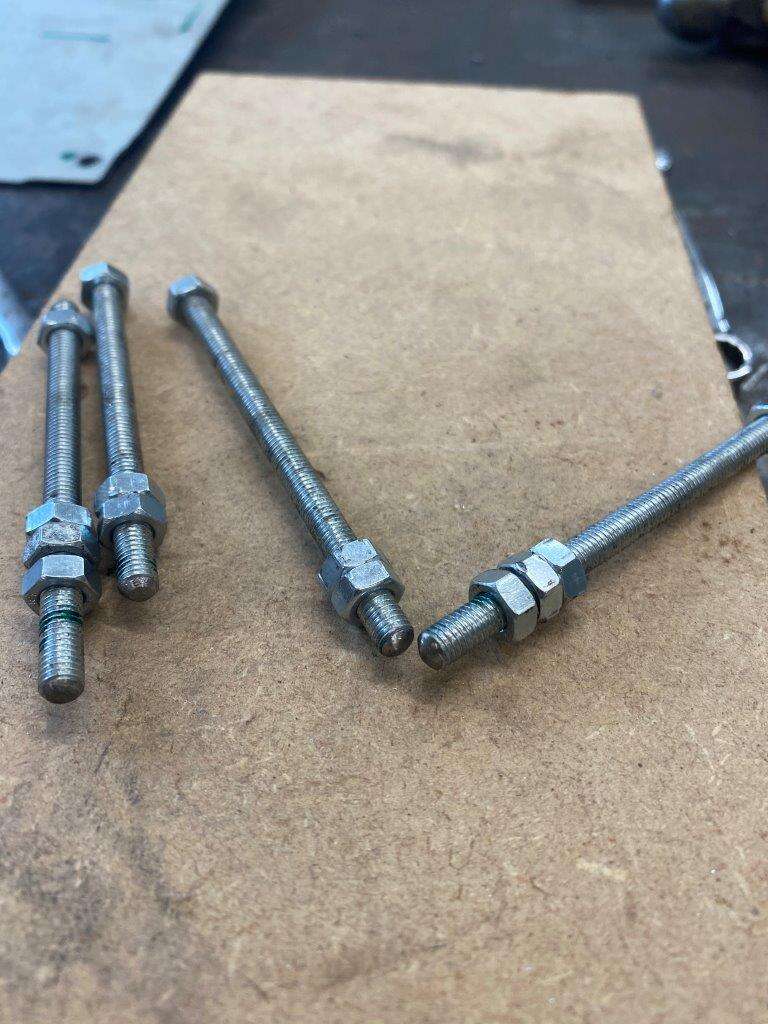
Testing
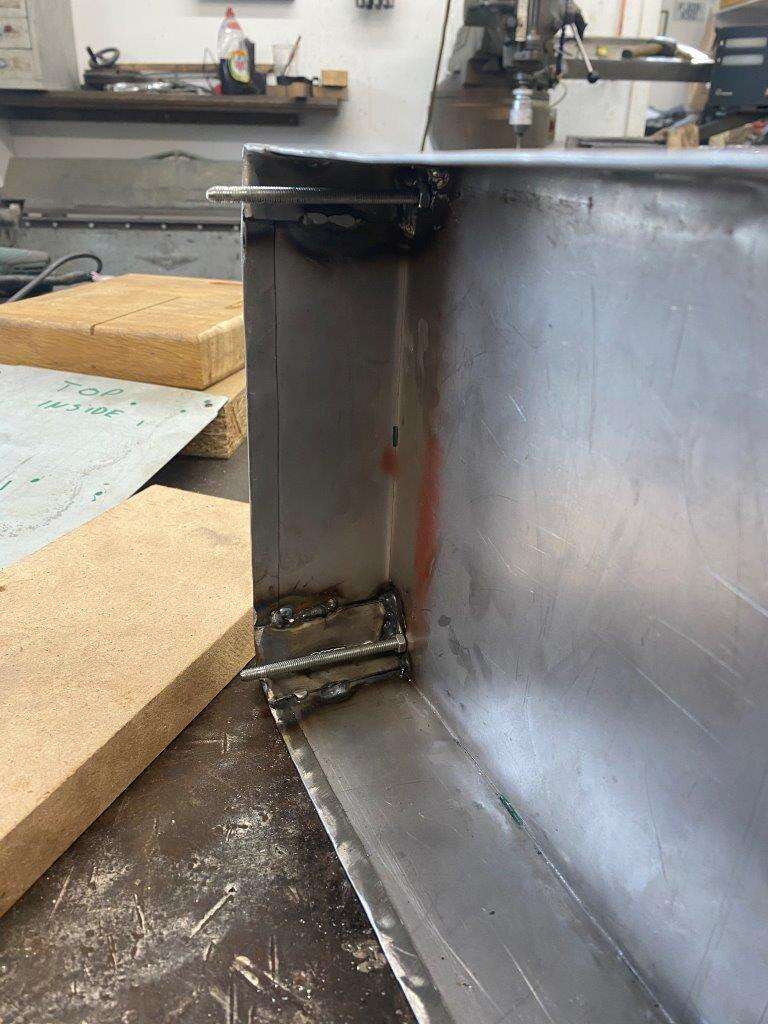
When I had the length sorted they were welded in
So it now fits together
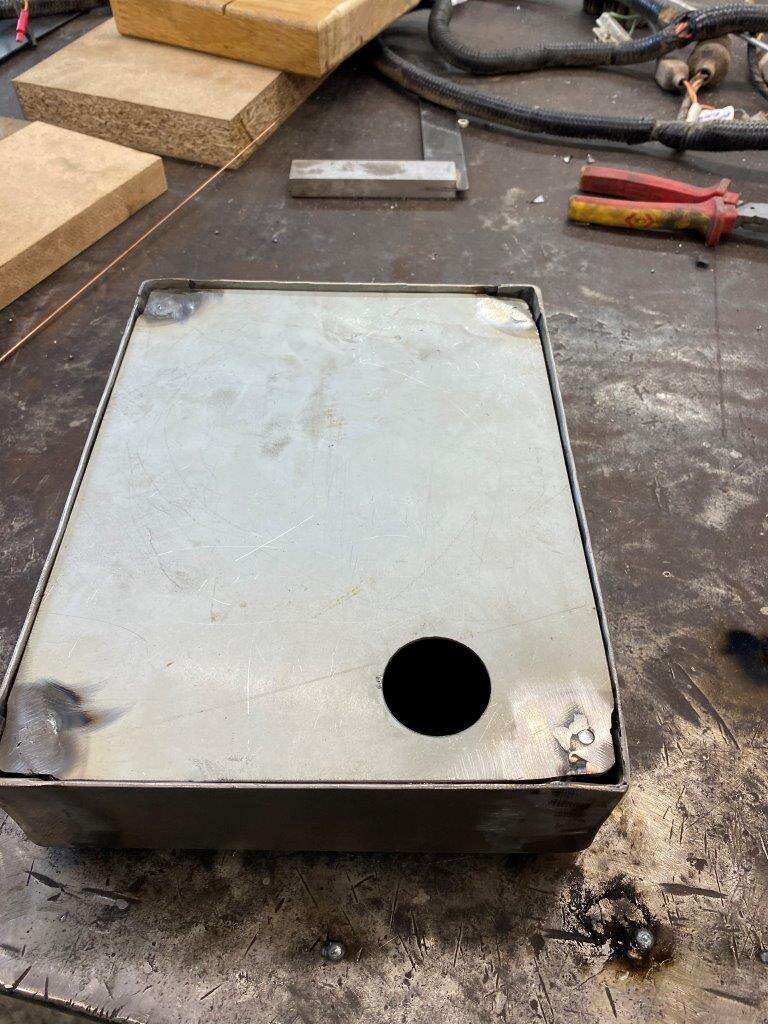
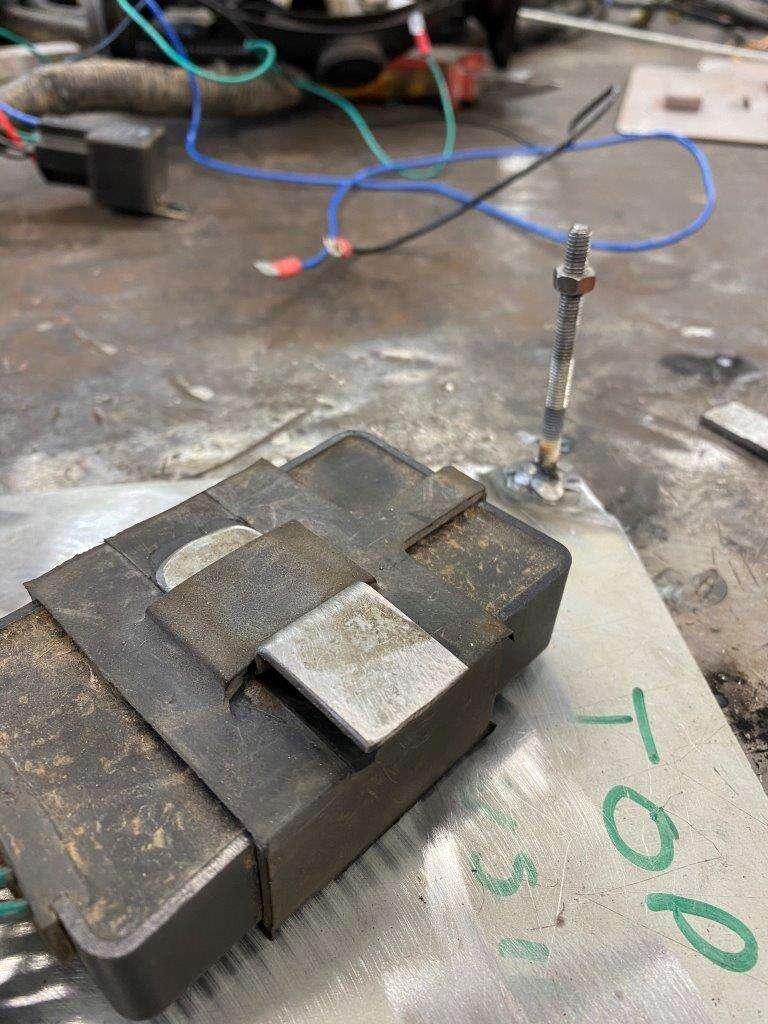
Test the grommet fits
Then onto brackets
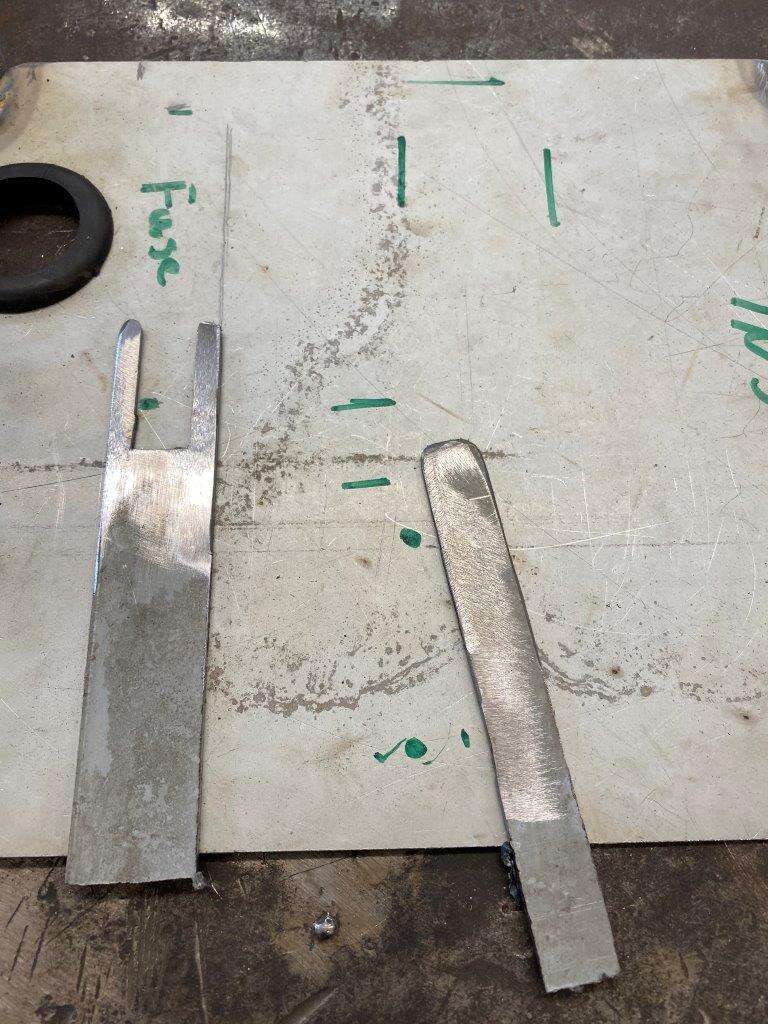
Welded on
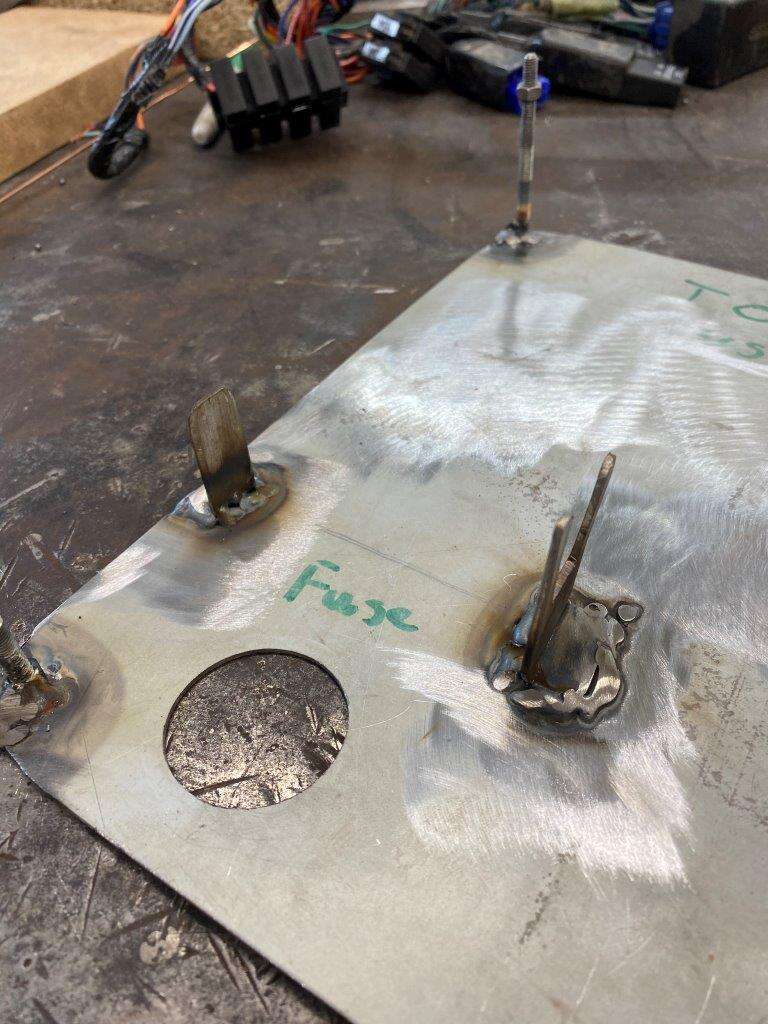
Fuses fit here
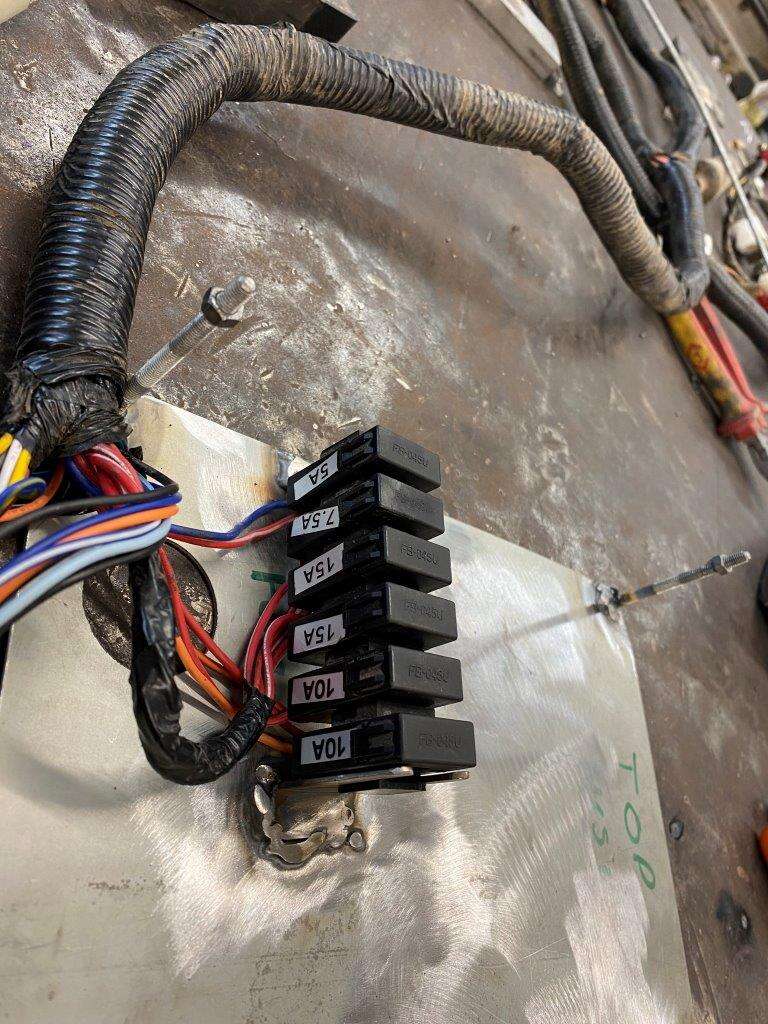
Then a box – I have no idea
And another bracket for something else – can’t remember I didn’t take a pic
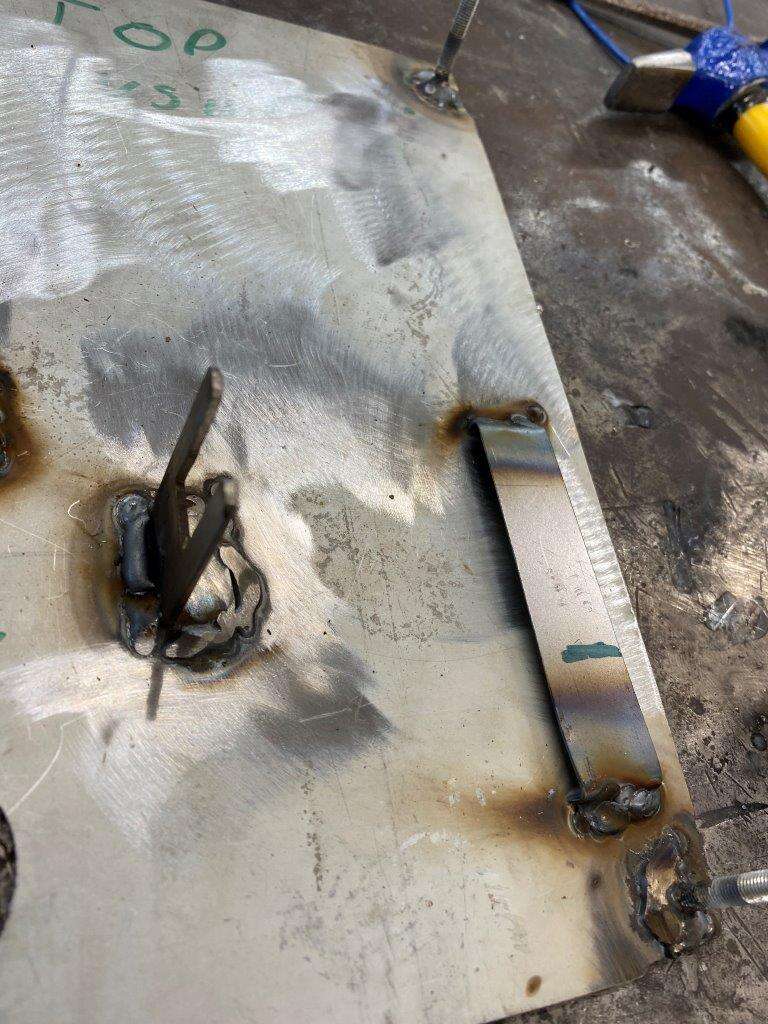
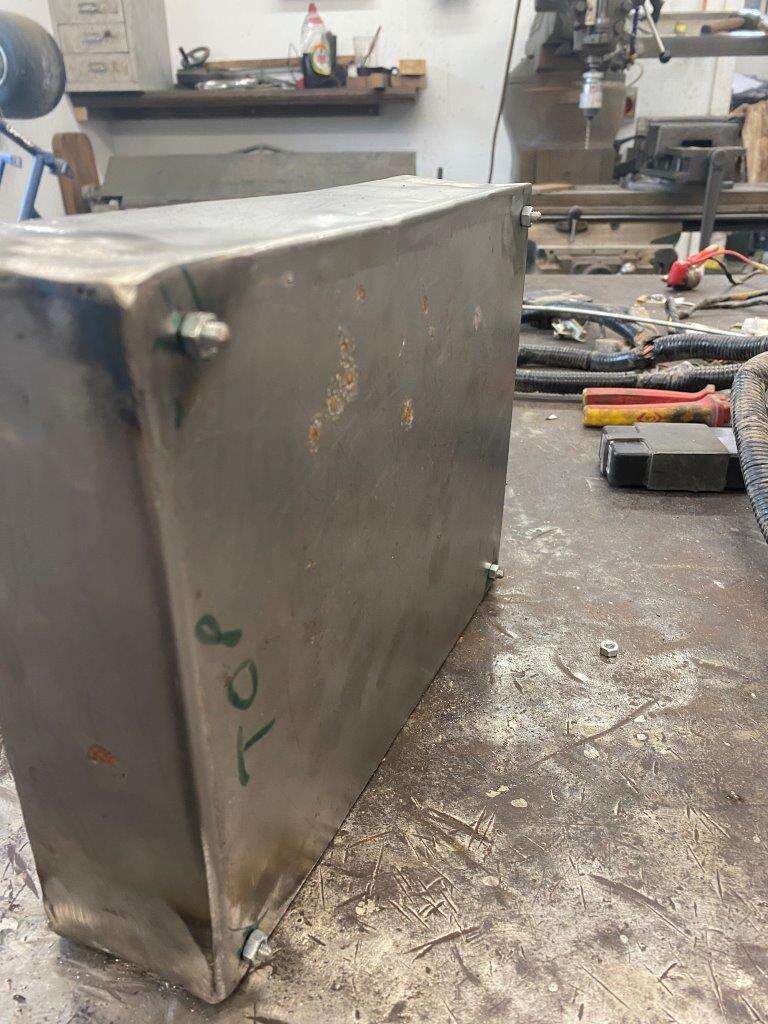
To “The Bug” Batman …………………. Err no just me O well, I'll drill some holes and weld in the Riv-Nuts then as my tool broke
Mount the back plate
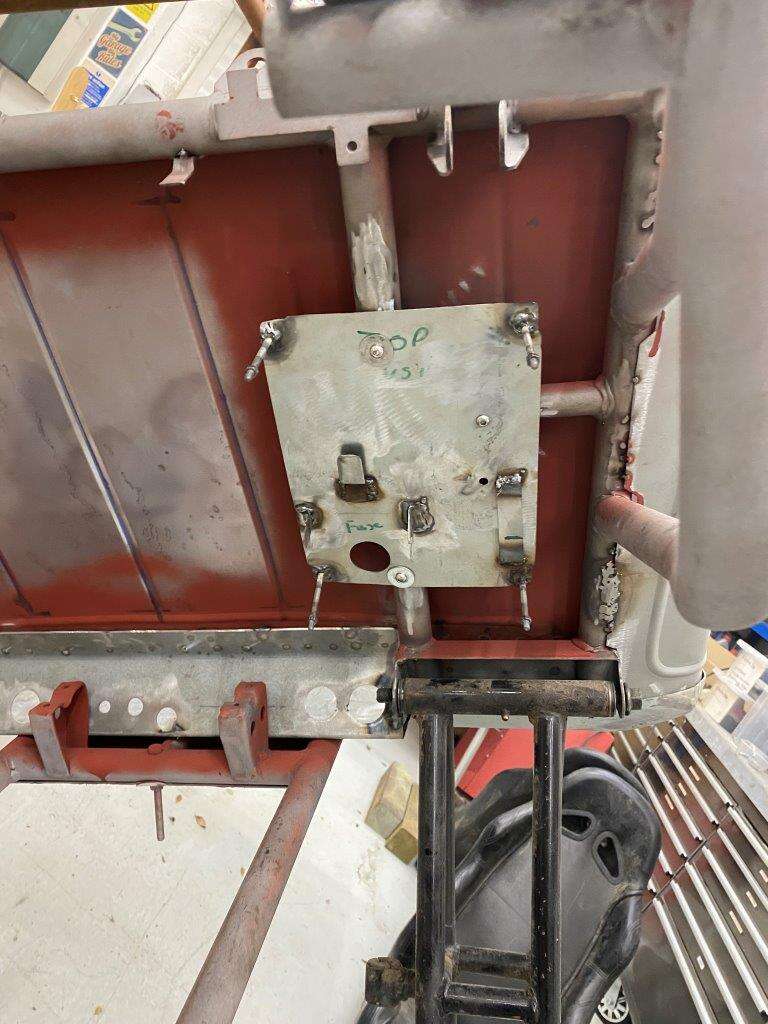
Put on the lid
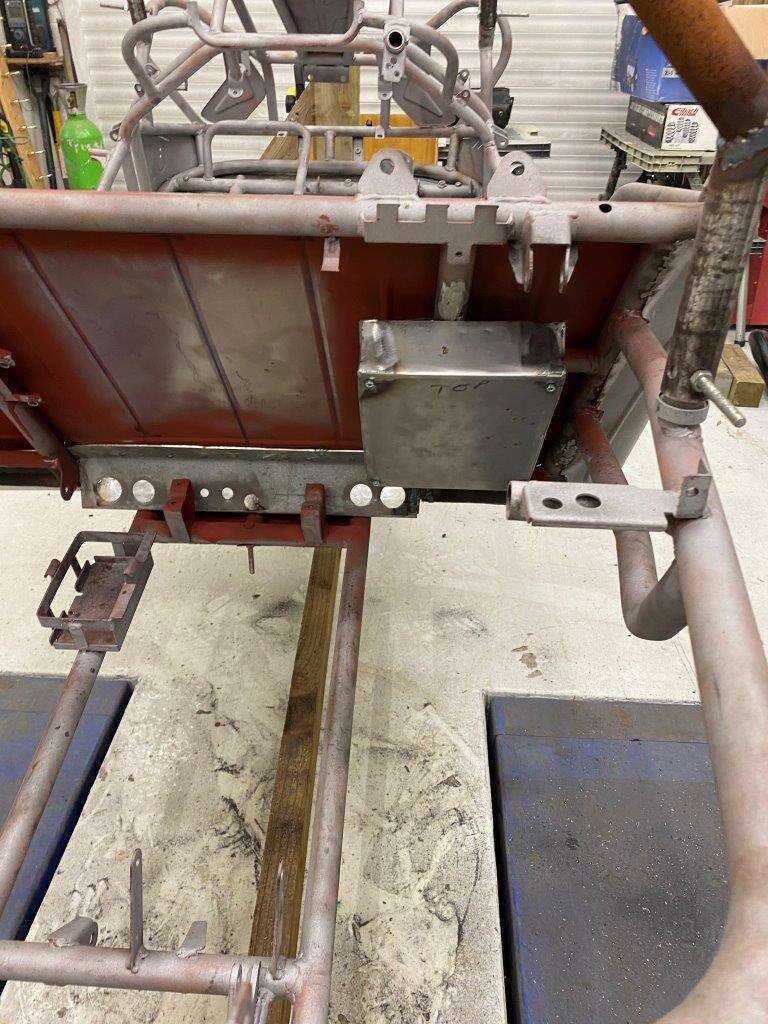

Then check it clears the suspension
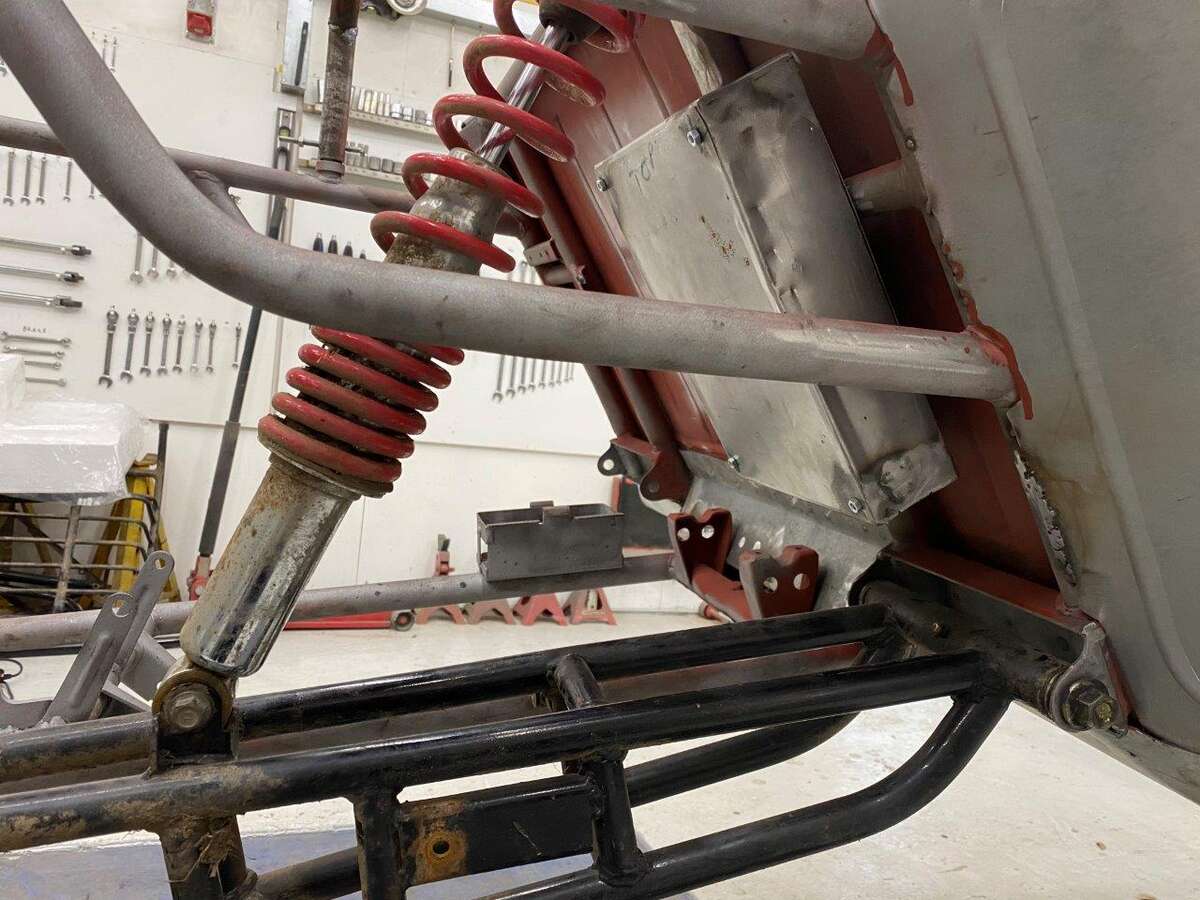
It did

That’s all for this week folks, Be safe, have a fun weekend, I’ll be back Monday with some more ….er …….er well of this whatever “this” is
Keyser - All right everyone, line up alphabetically according to your height.” – Casey Stengel
-
5
-
-
It’s Friday
Yes the weekend ahead, you can stay at home chill out [/sarcasm]
Sorry I may miss going out just a little bit.
Anyway, you’re here so you must want to see what lunacy has been underway in the Zed Shed?
Yesterday the sum total of nothing was achieved in the shed due to having to do my actual job and that was slowed down as it was all done remote

I do have some bits to share though,
My mate DM’d me some pictures on Facebook, he then called me to tell me he had
- I don’t go on FB very often
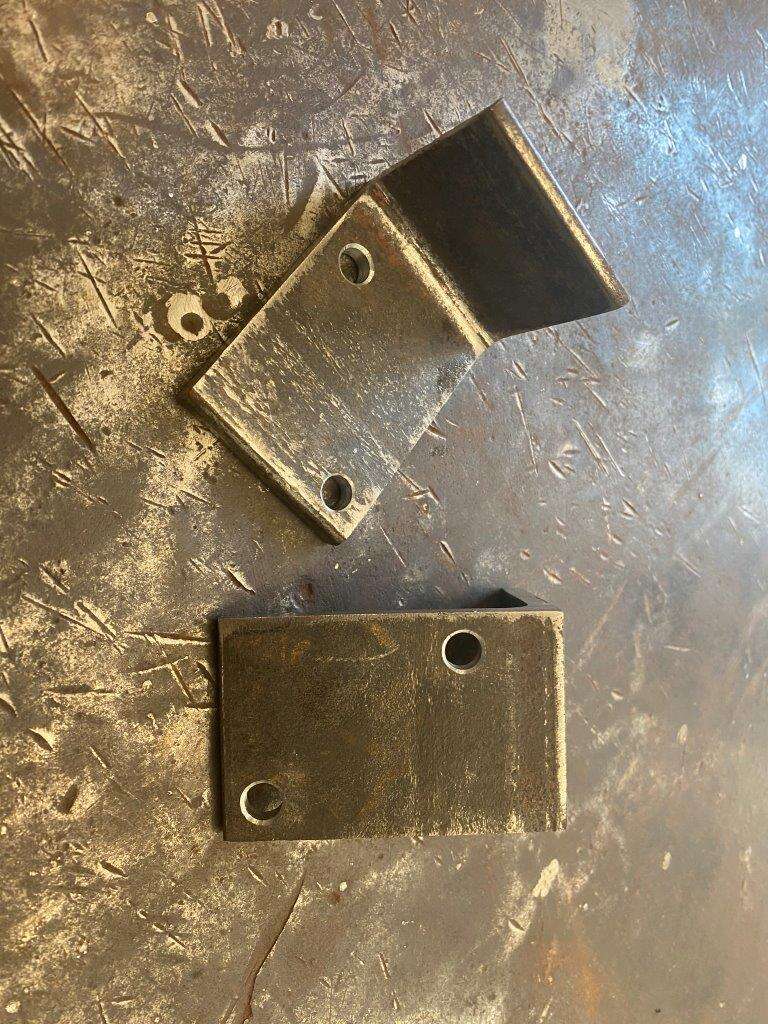
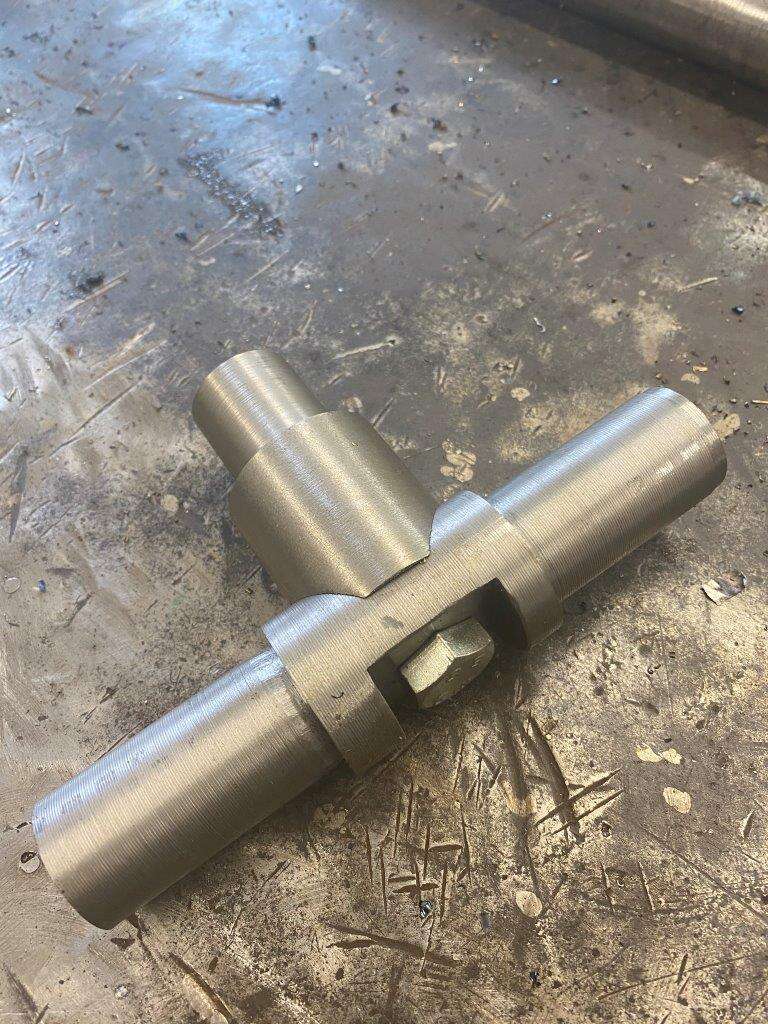
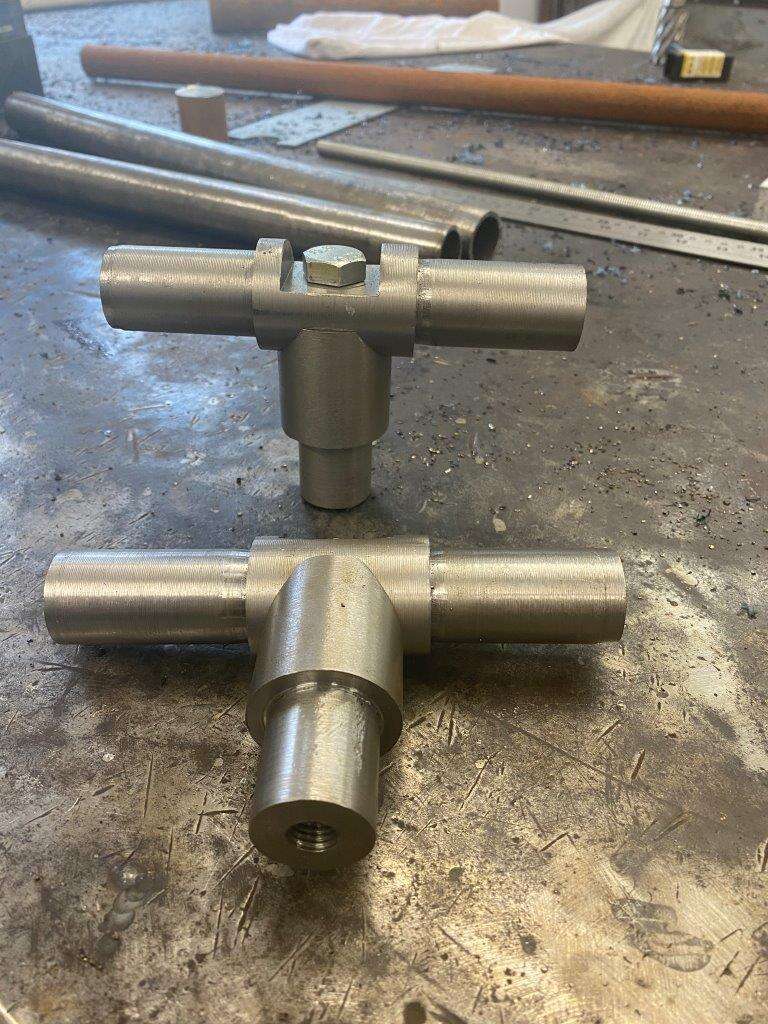
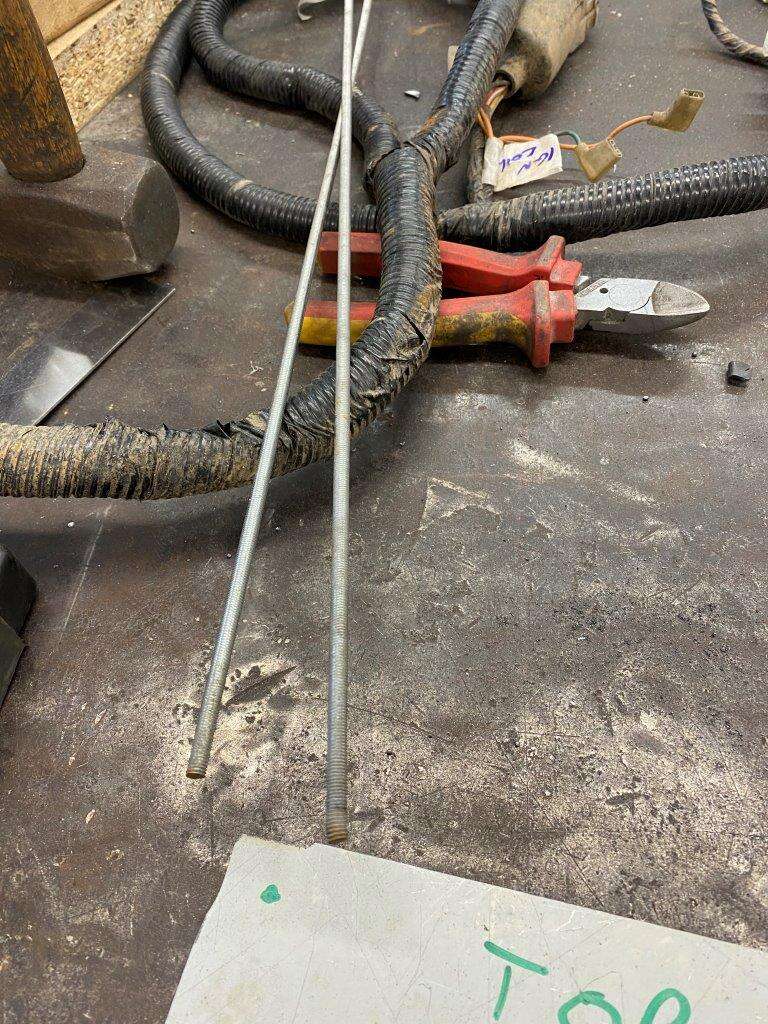
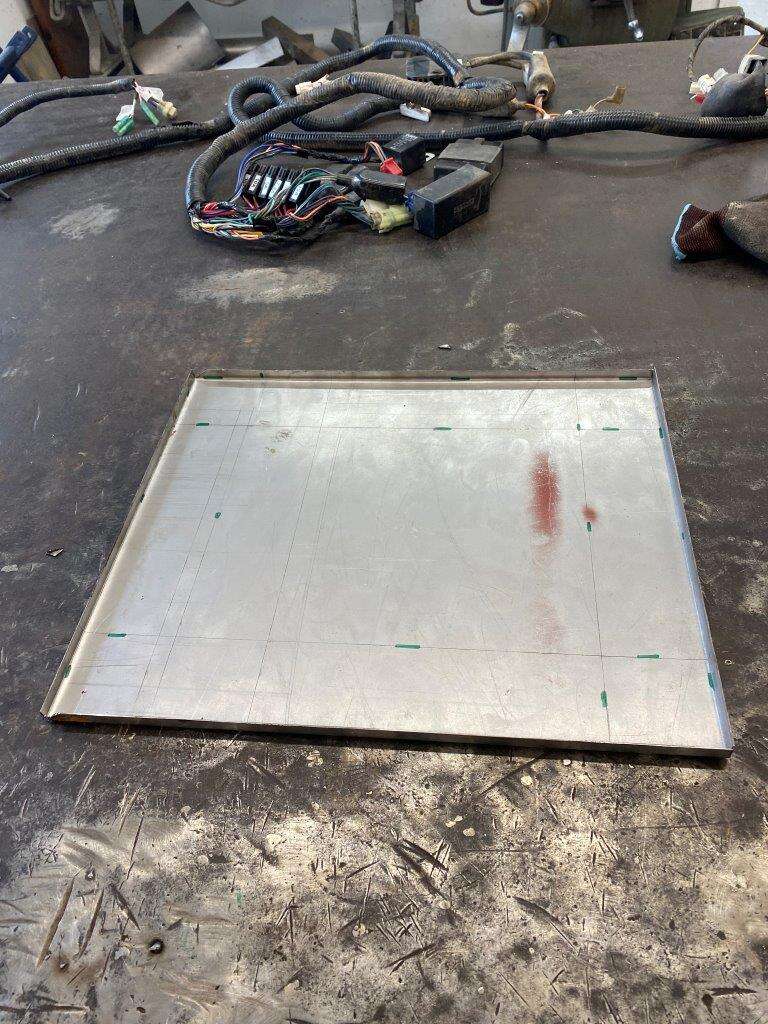
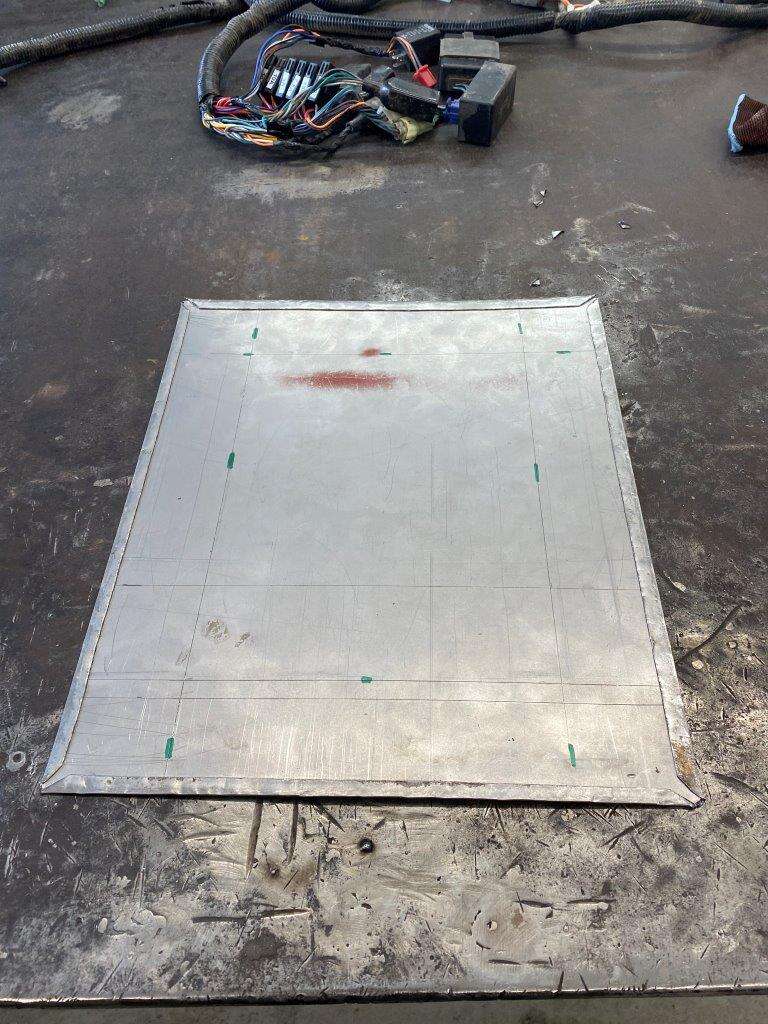
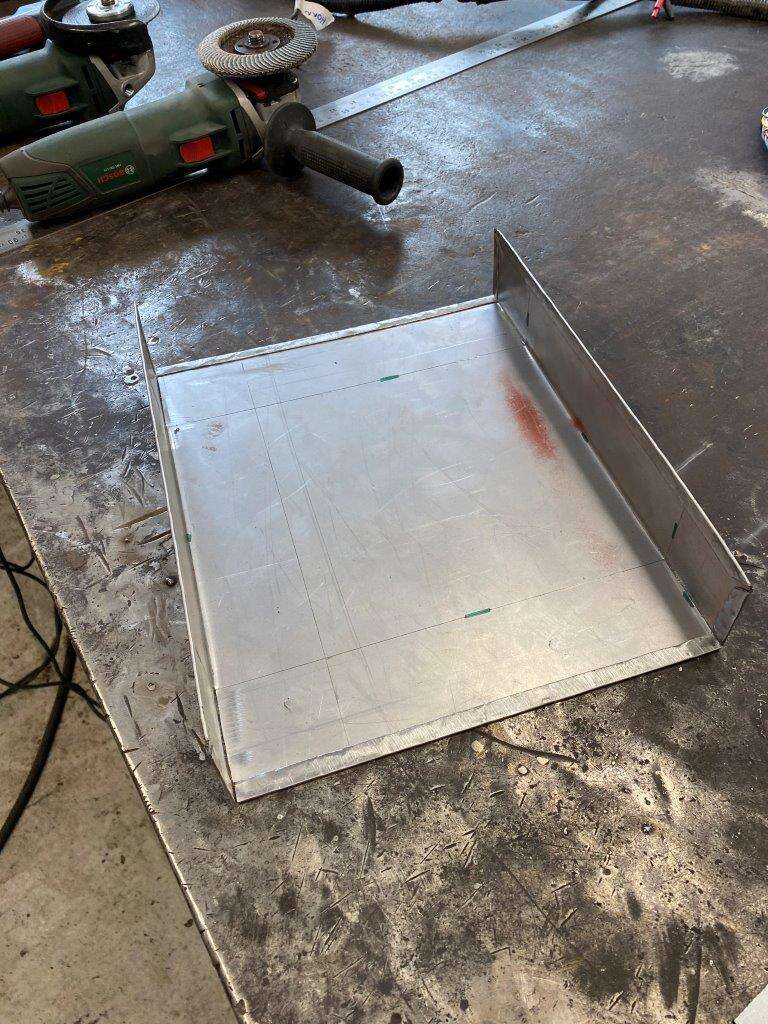
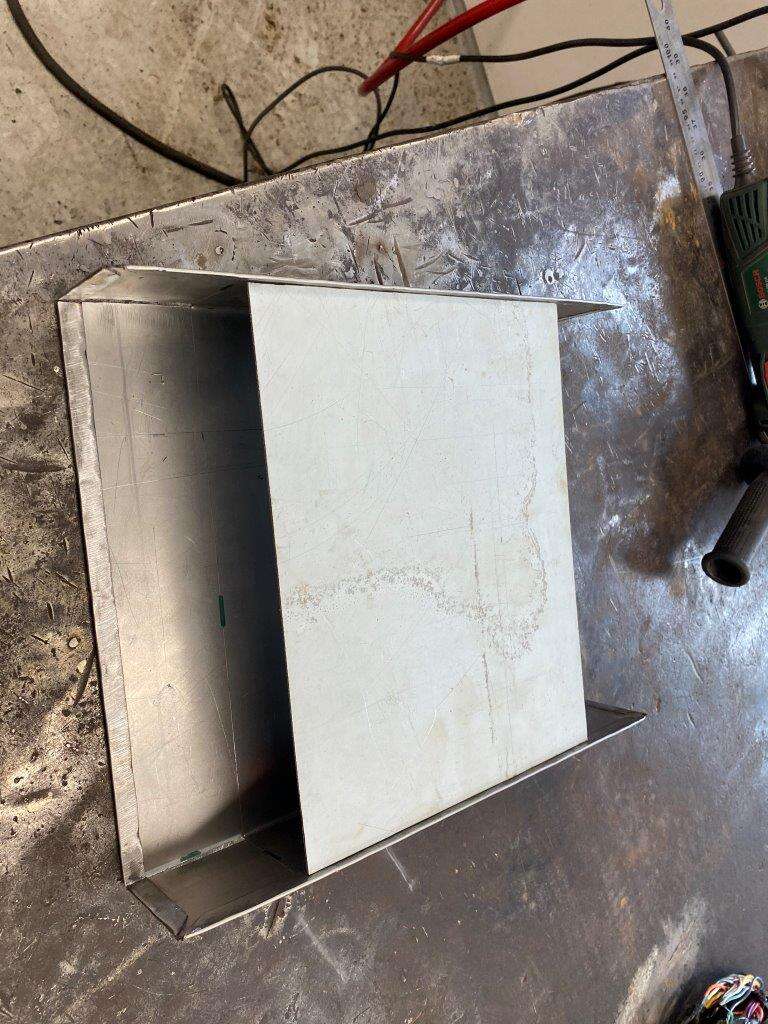
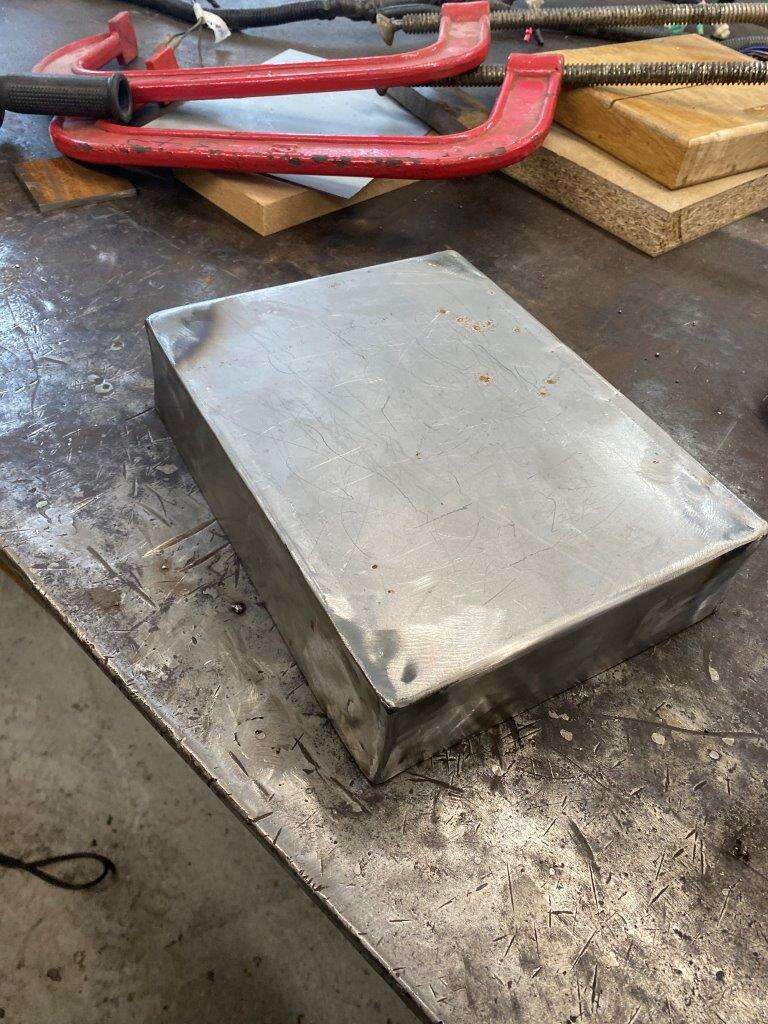
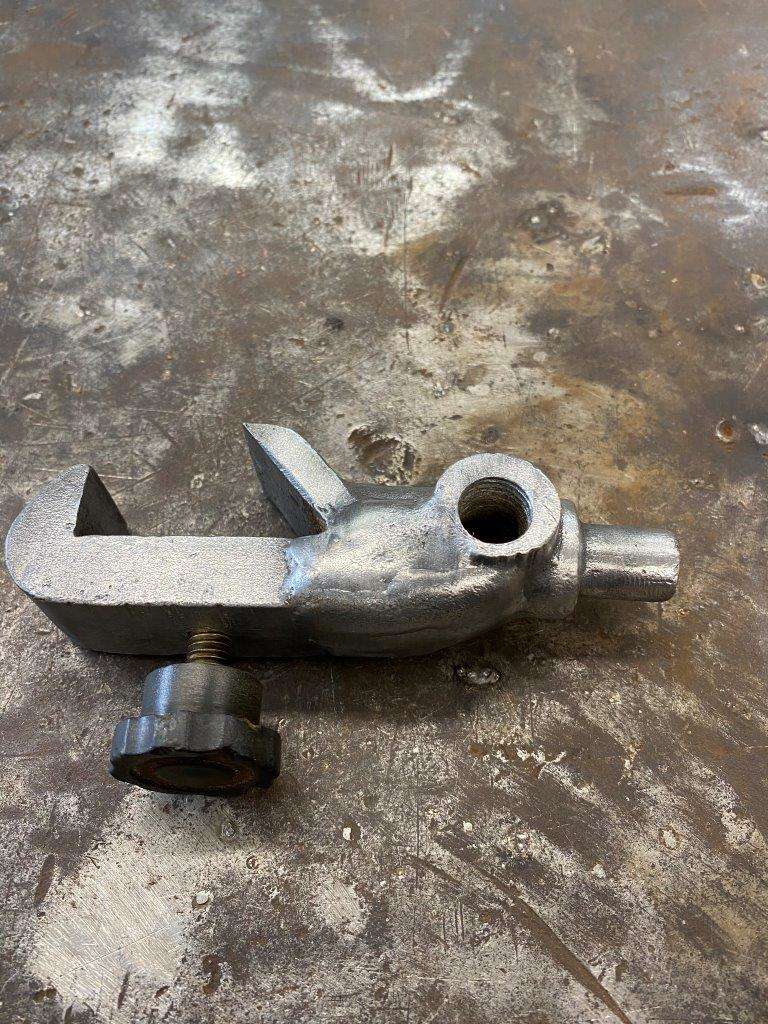
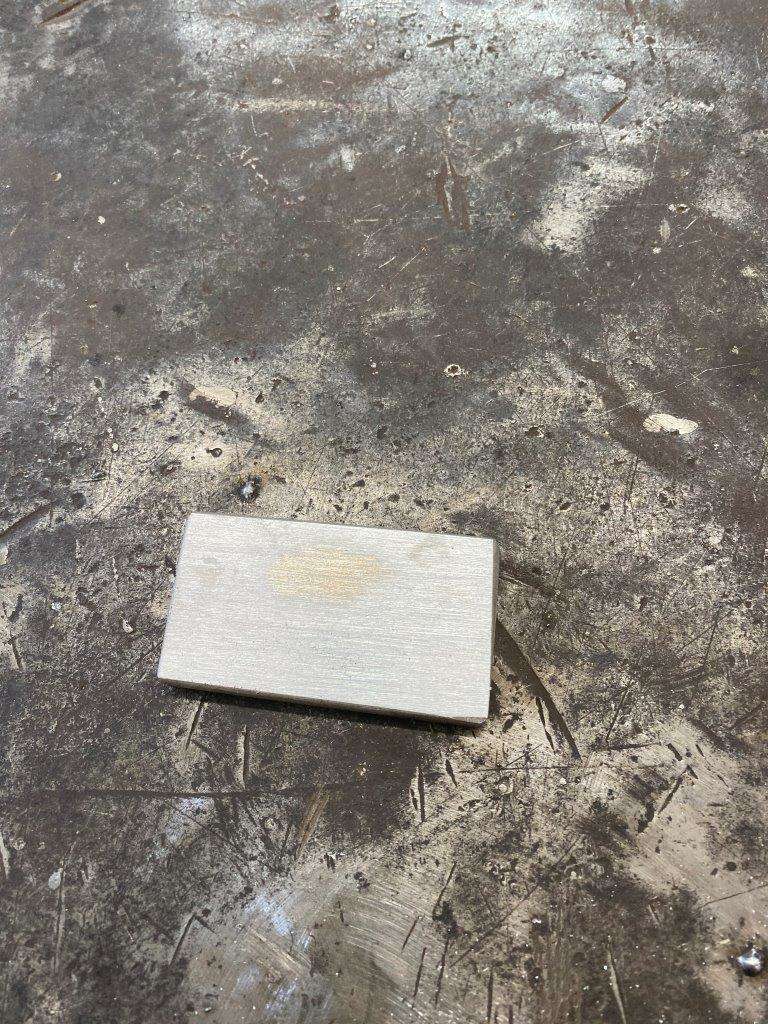
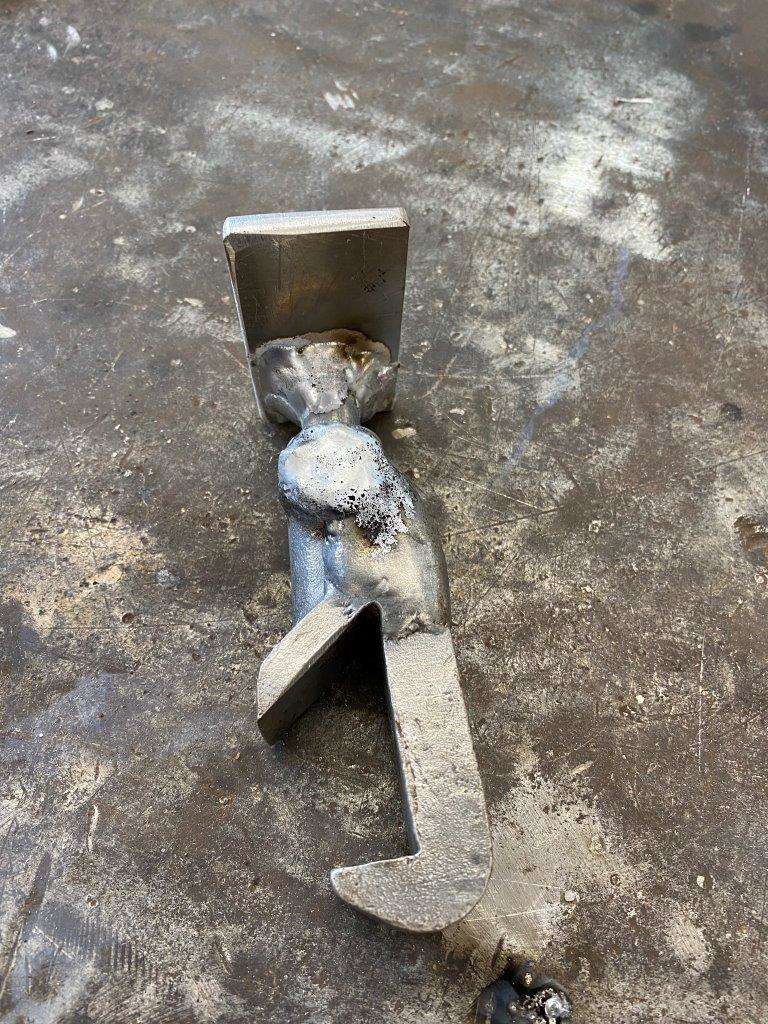
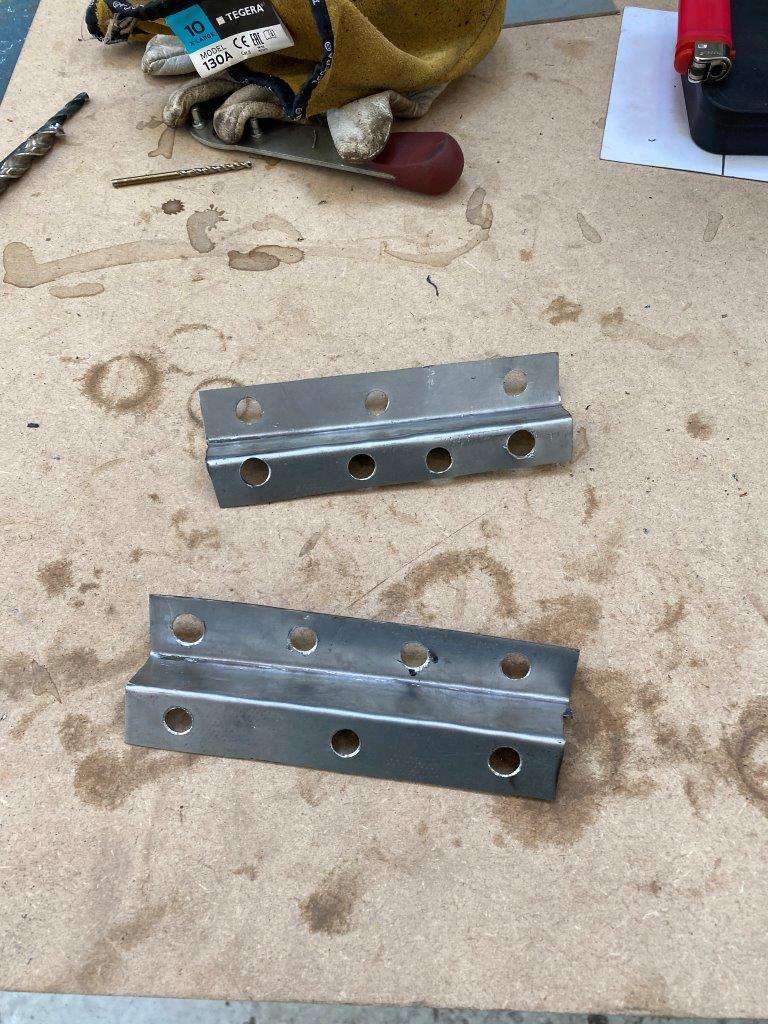
He needed a metal plate that connects the single brake cable on his boat trailer to the four cables that activate the brakes on each of the wheels.
He gave me the measurements and this is what I knocked up for him.

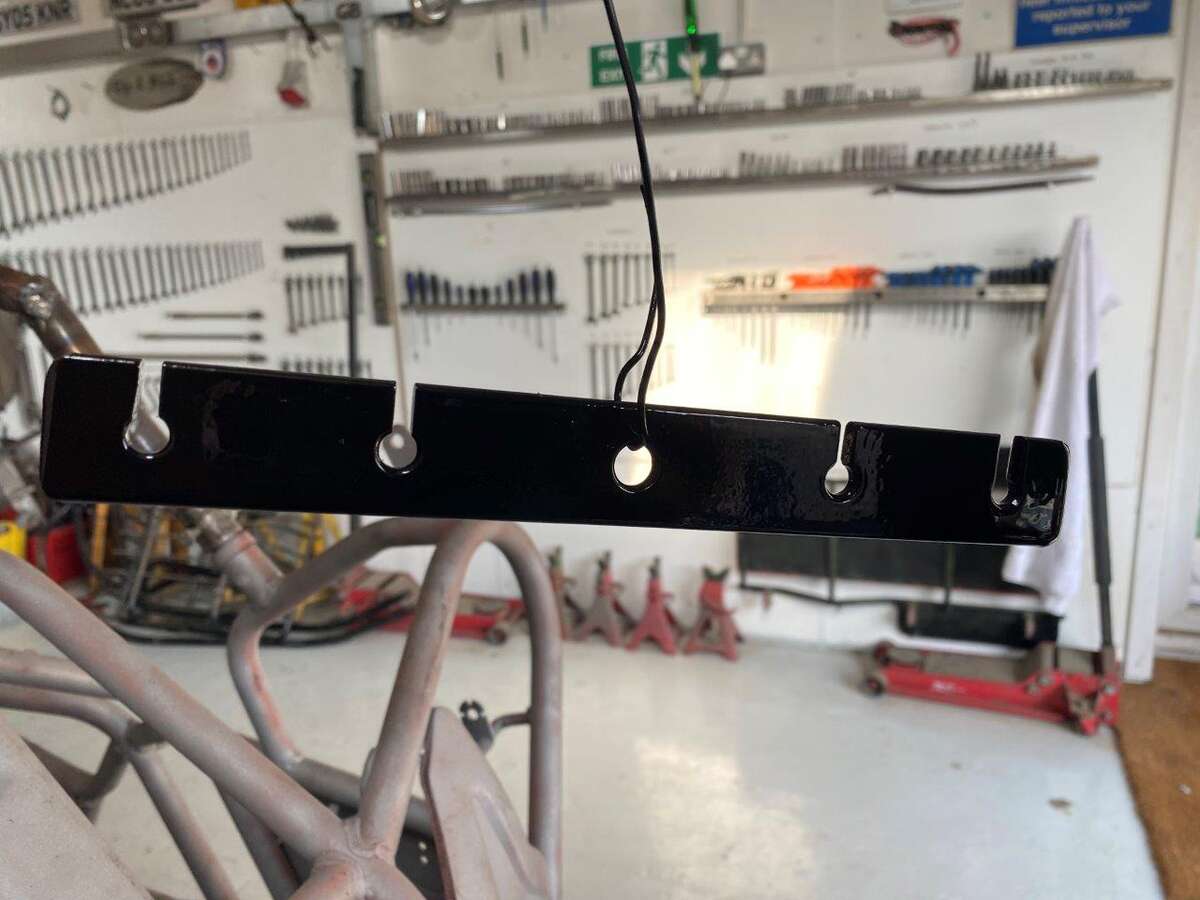
Apparently his has rusted and bent, so this should sort him out.
Moving on, I decided to do another of the hundreds of little jobs on The Bug, I say little this is two days work and it’s not finished yet!
Out with the wiring loom (again)
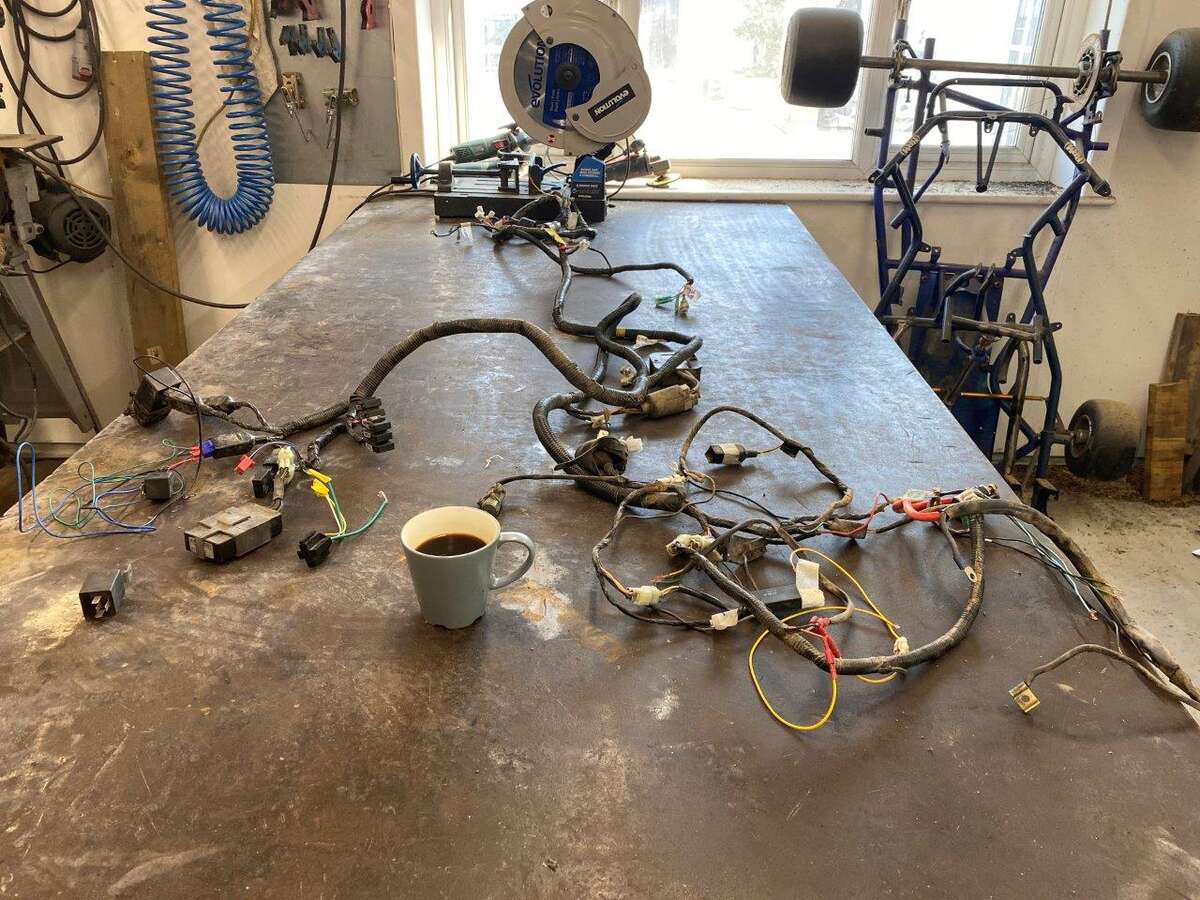
Coffee was needed for this!
If you remember we cut the old electrical housing box off to both allow access for the firewall and for the purposes of painting later, it looks like this
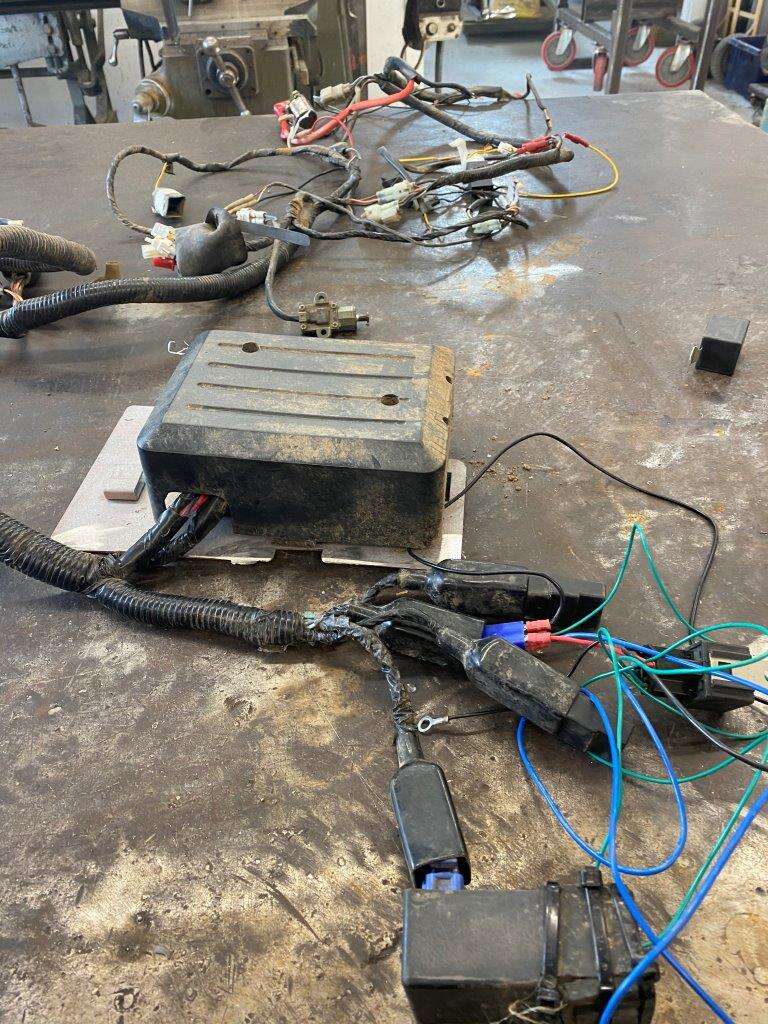
Holding this lot
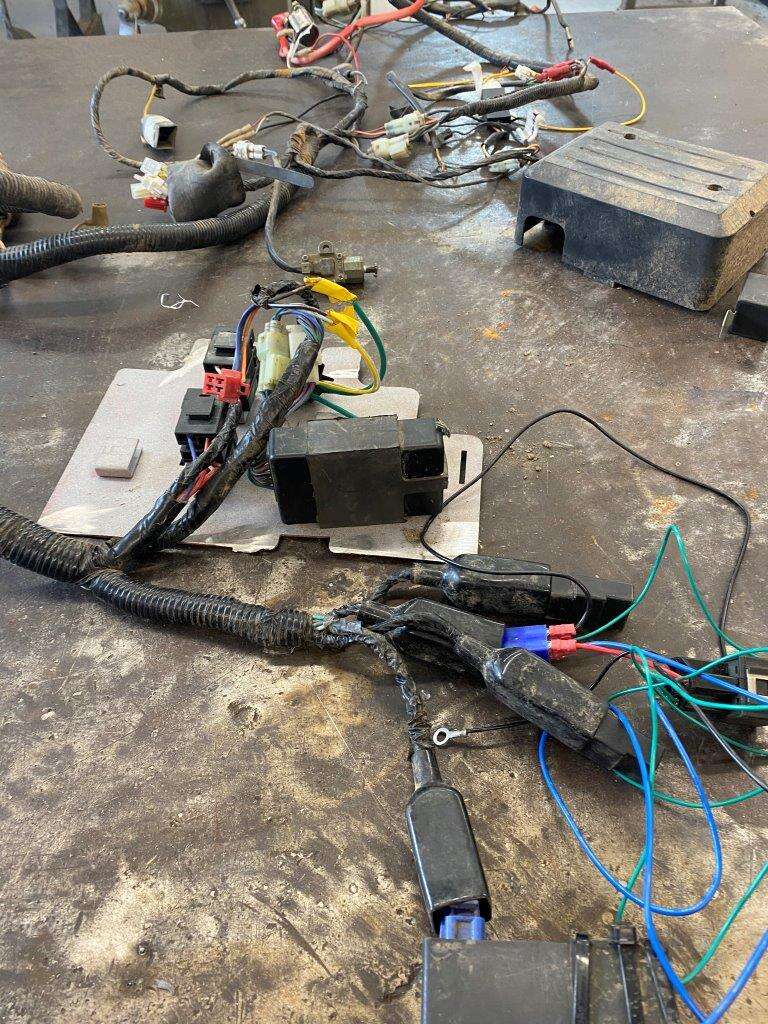
But the box does not cover the relays and another control box that I have no idea what it does, I don’t see why they didn’t just make one bigger box and put it all in??!
I’m going to try and do exactly that.
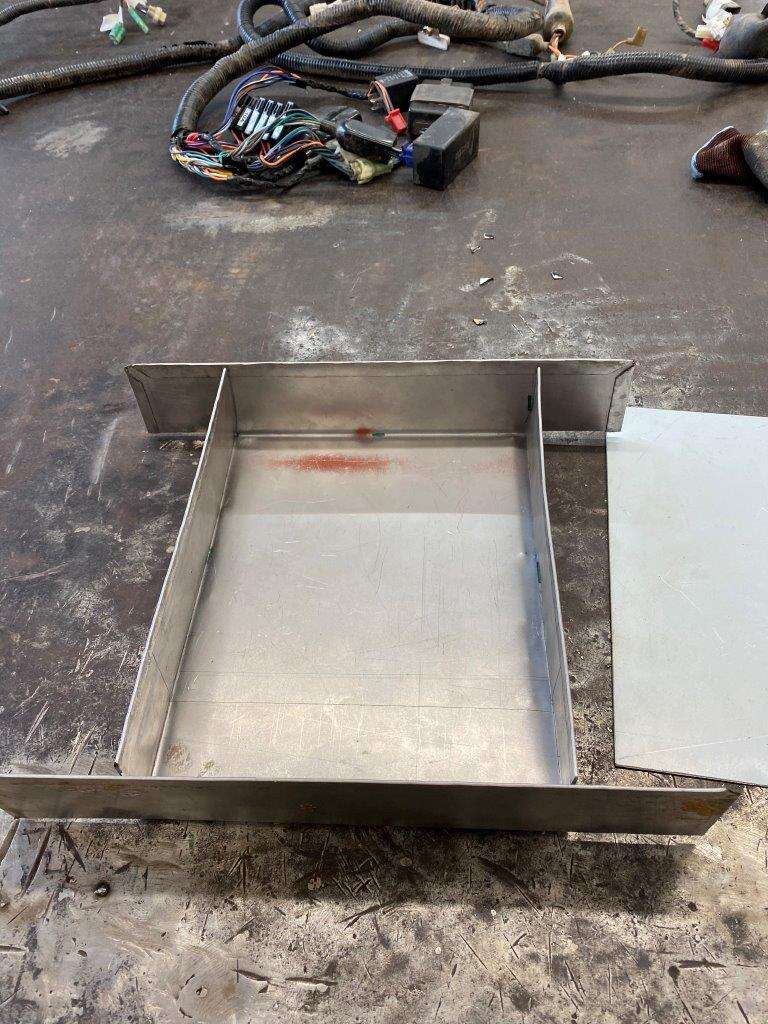
So we need to get this lot on this plate
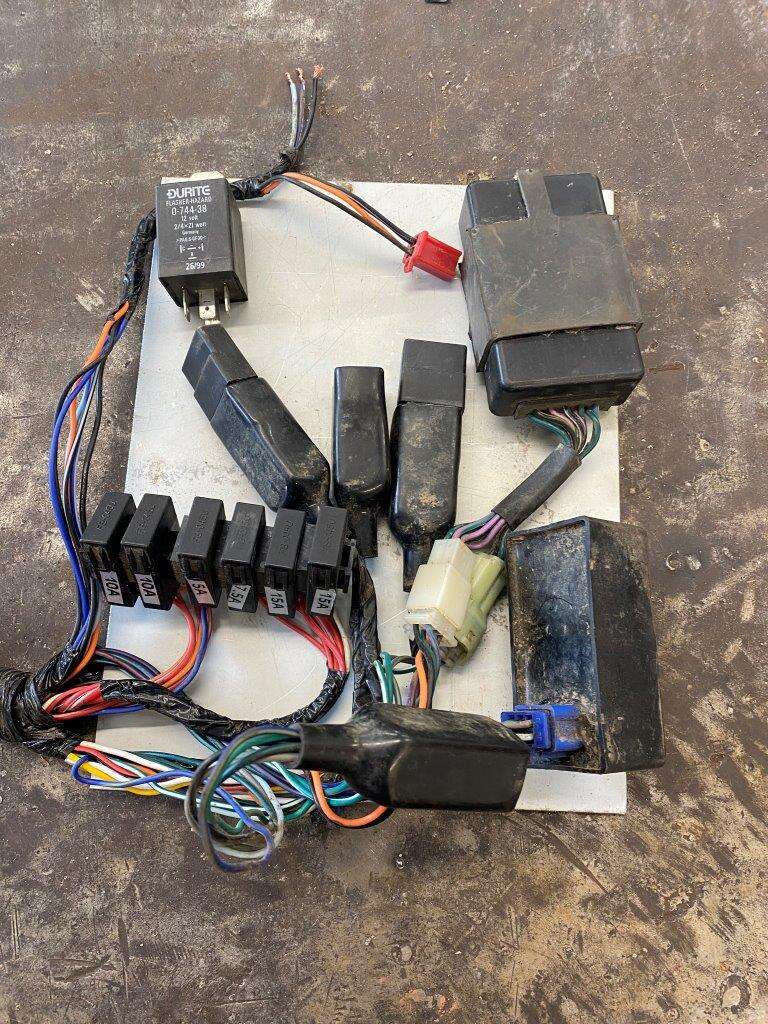
Tight fit then
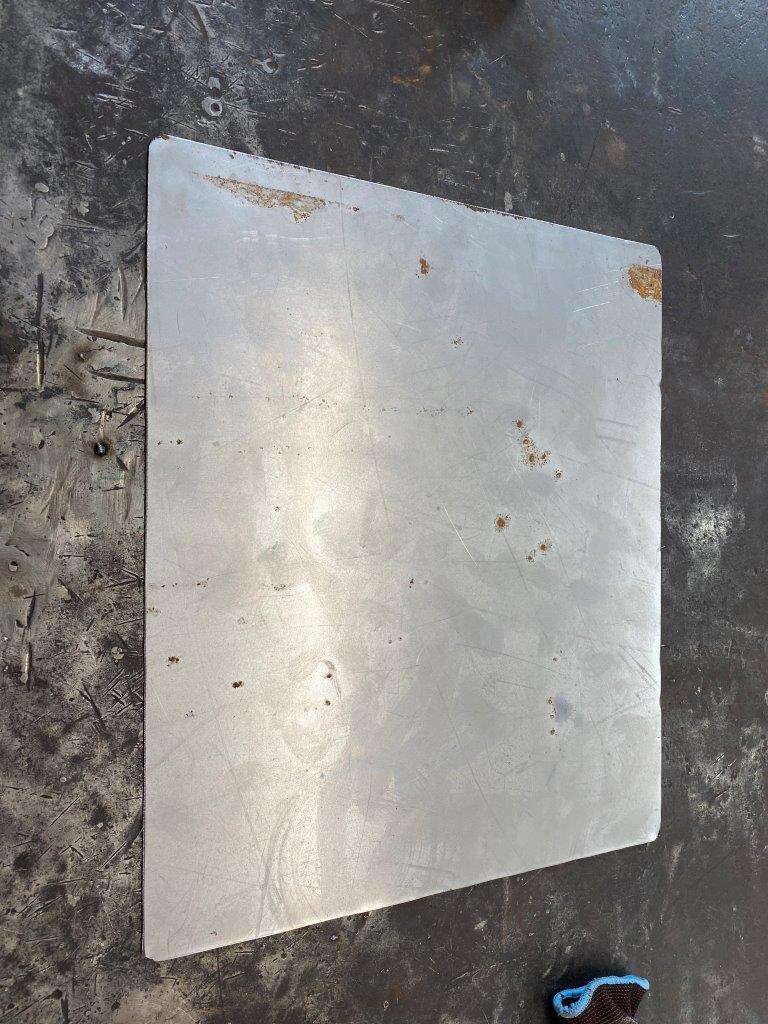
First job is to make a lid for that plate
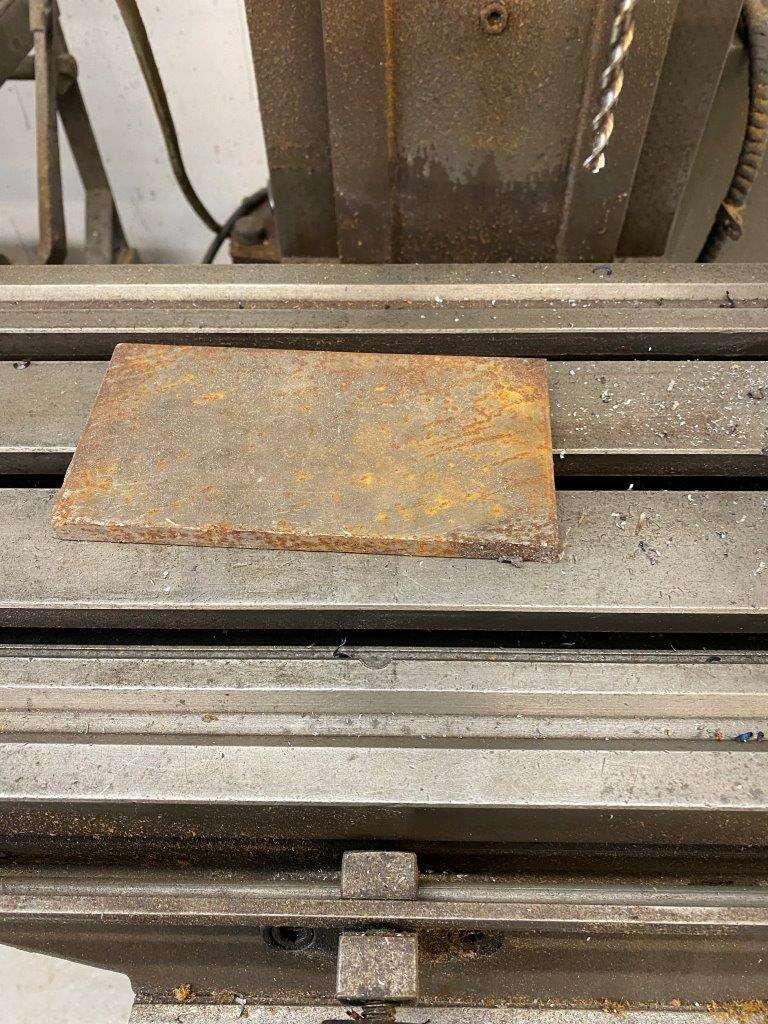
Another metal plate was cut
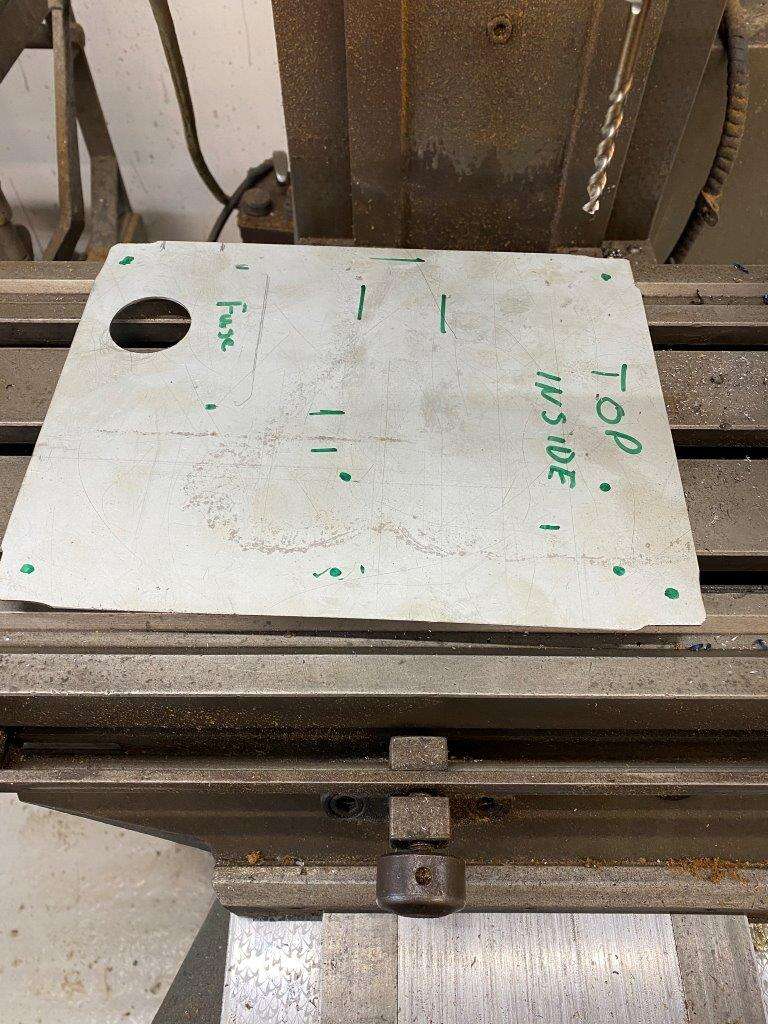
Marked
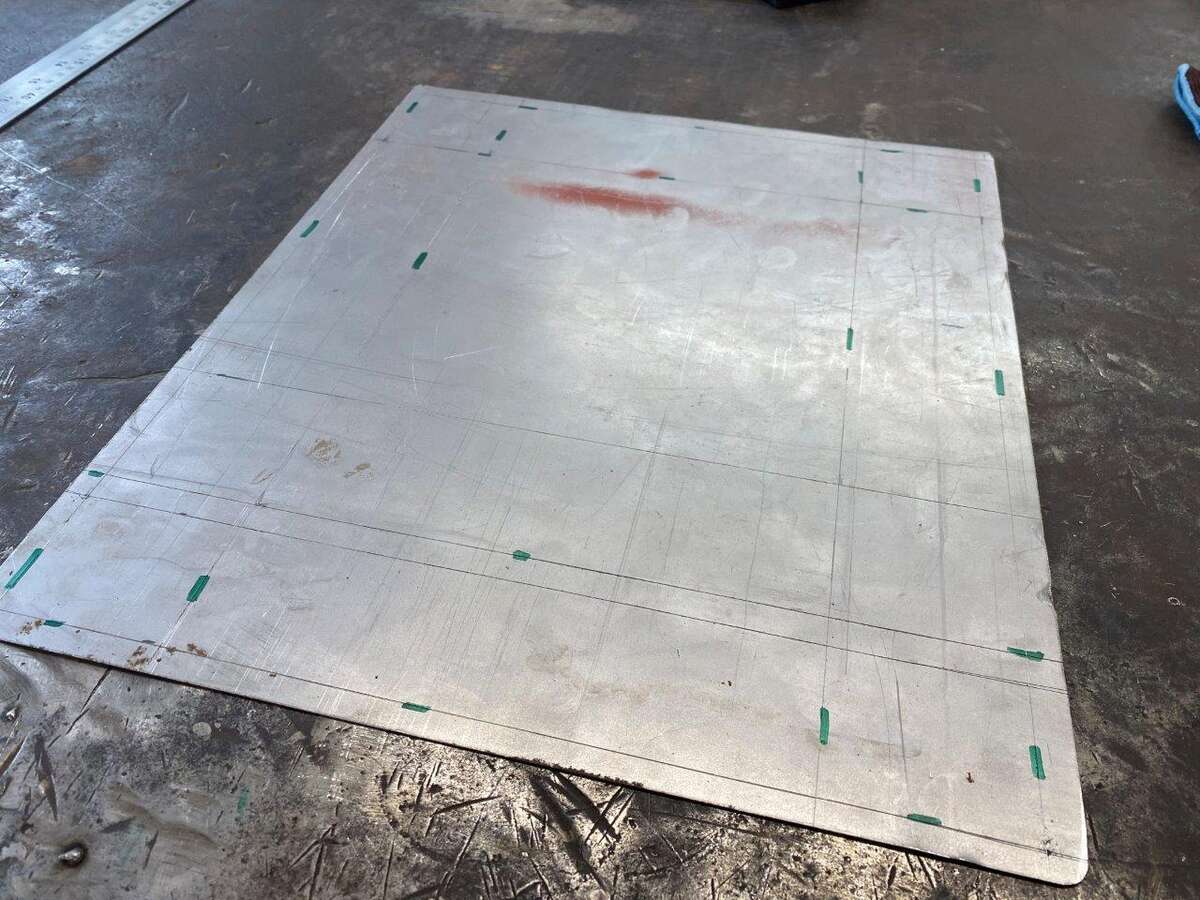
Cut
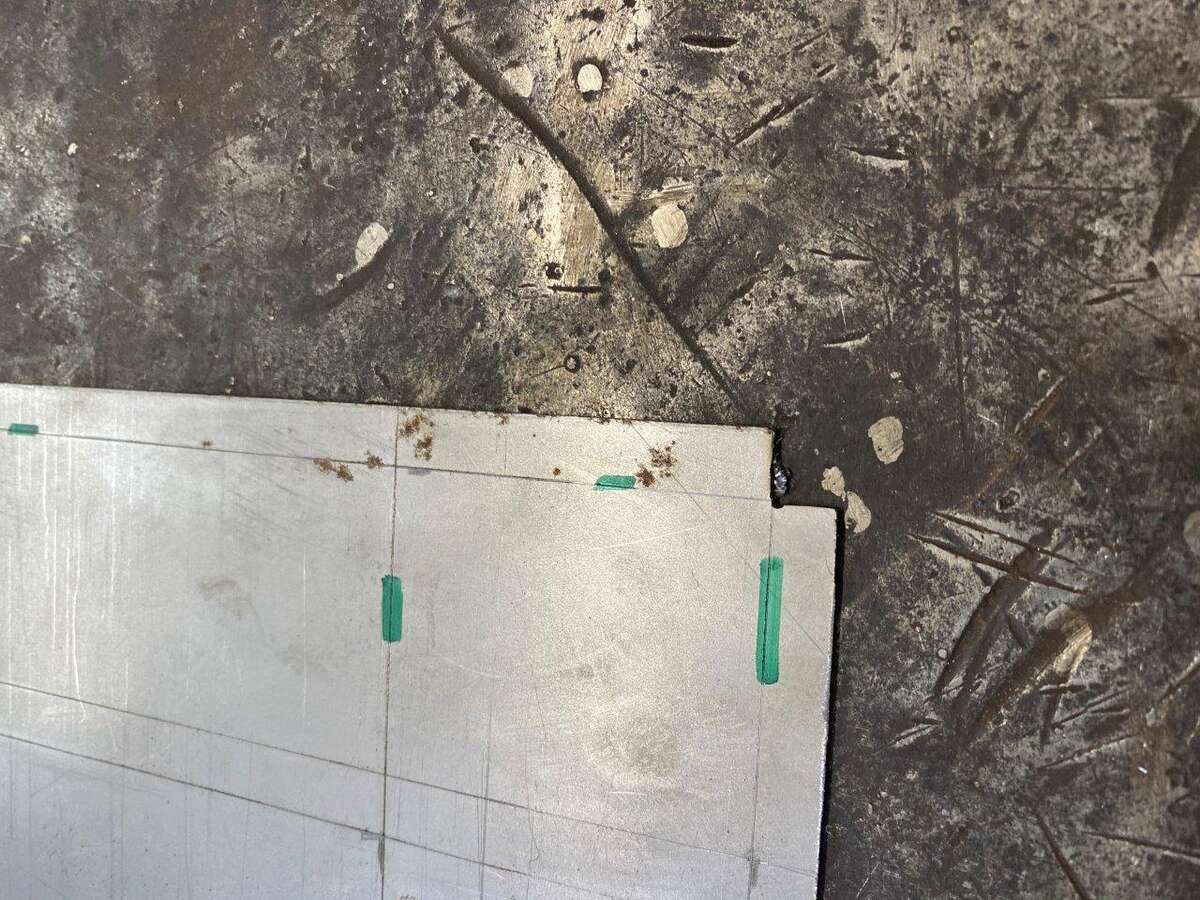
Folded
And hammered
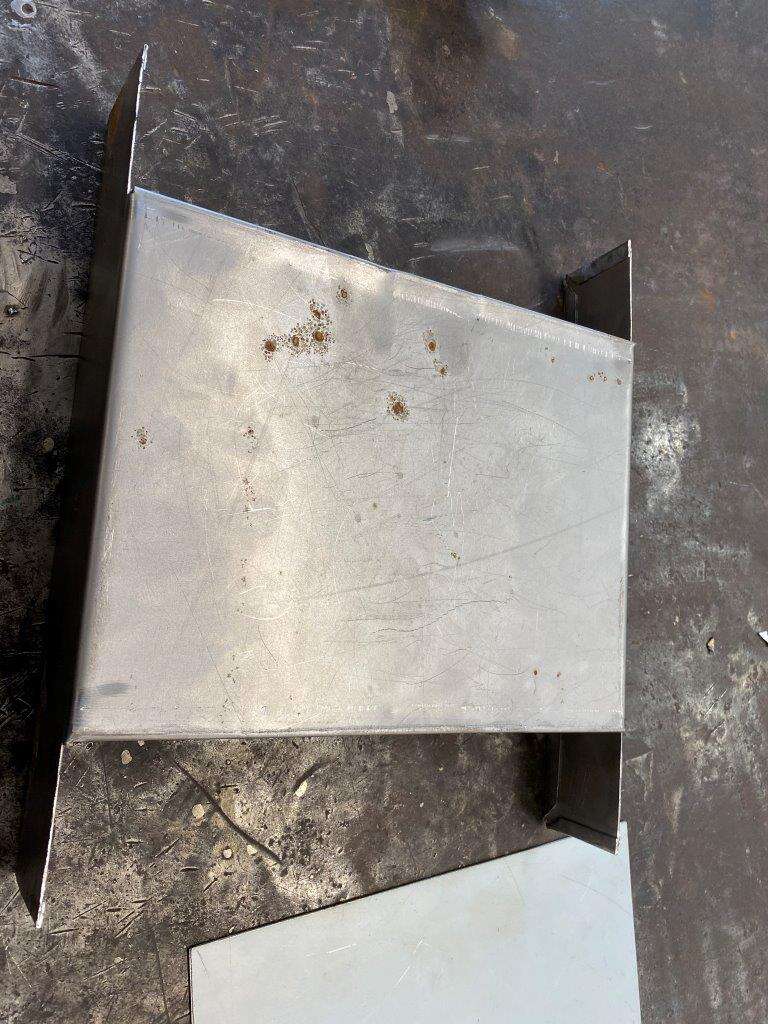
I rolled the edges over for safety and strength it’s 0.9mm again so paper thin.
Now the “fun” bit accurate folding
Test fit
Now as I don’t have a break press, I can only fold 3 sides in the folder so I had to switch to my vice folder for the 4th side
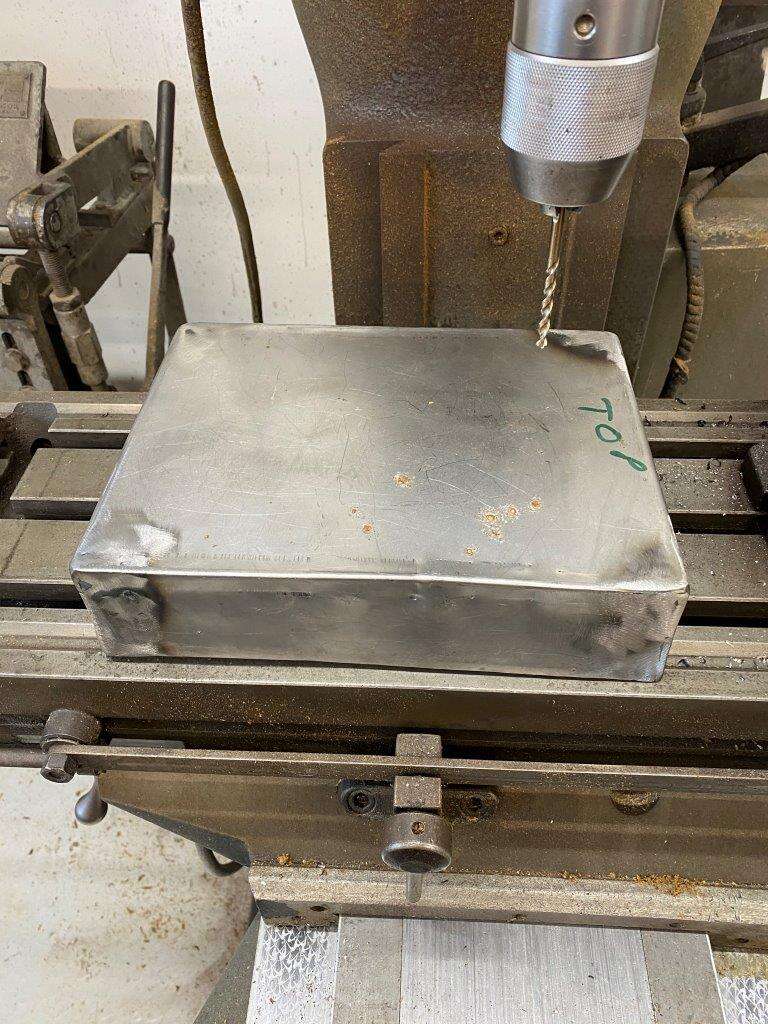
To get us to here
Then I cut the corners back
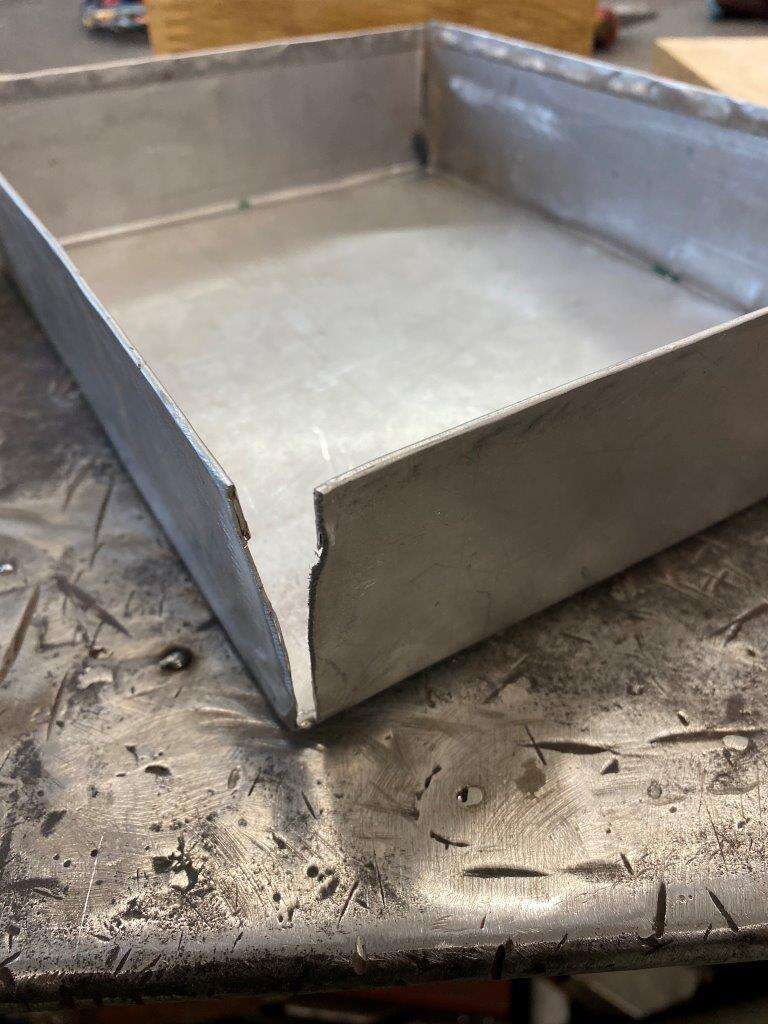
Corners are a PITA and I wanted to try something to give strength, make welding easier and hopefully look good, firstly I used clamps to hold the box square
Then I made some right angles on the folding machine and clamped those in

welded them up
Sanded back
And repeat 3 more times
More on it’s way ………………….
-
1
-
-
Morning all, Just a quick catch up today,
Firstly I’d just like to say a HUGE Thank You to @Ebized I posted up a little side project I did for him a week or so back, I made these “feet” for his patio table
Before
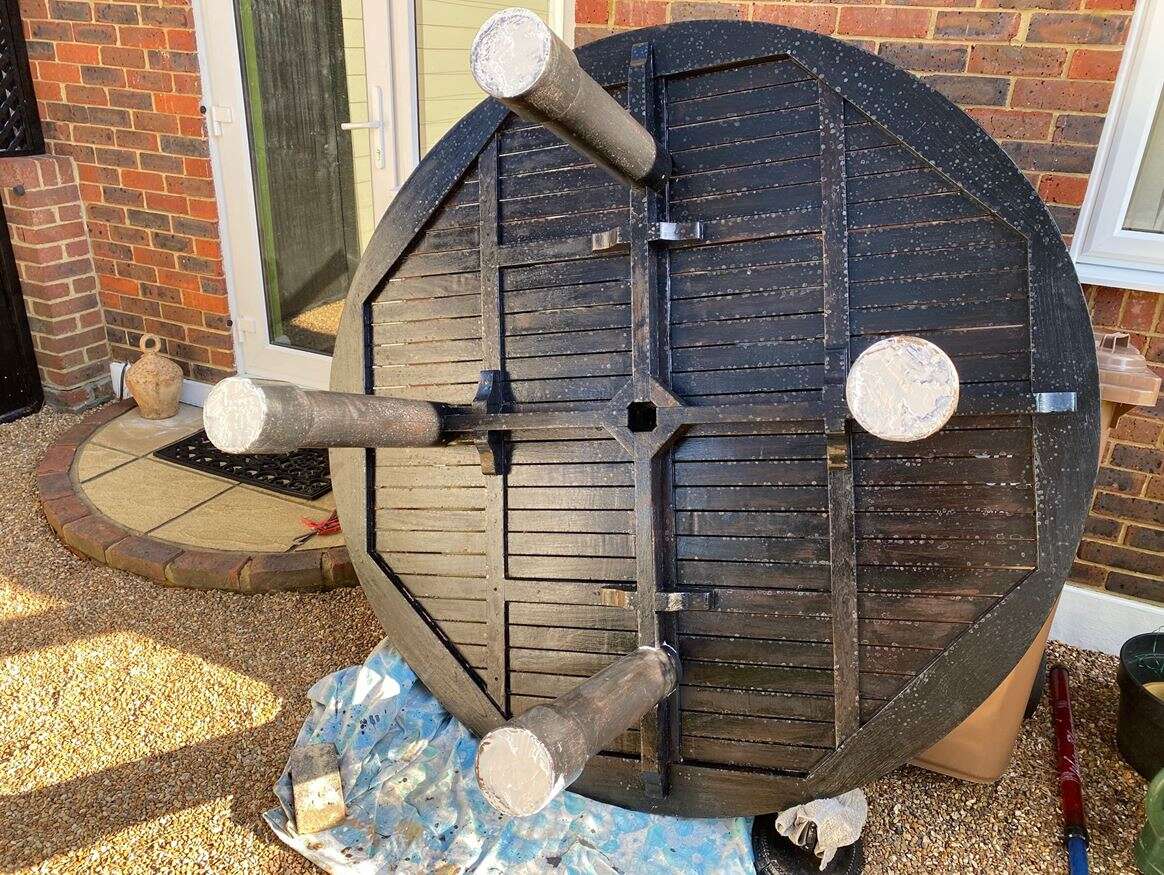
and after
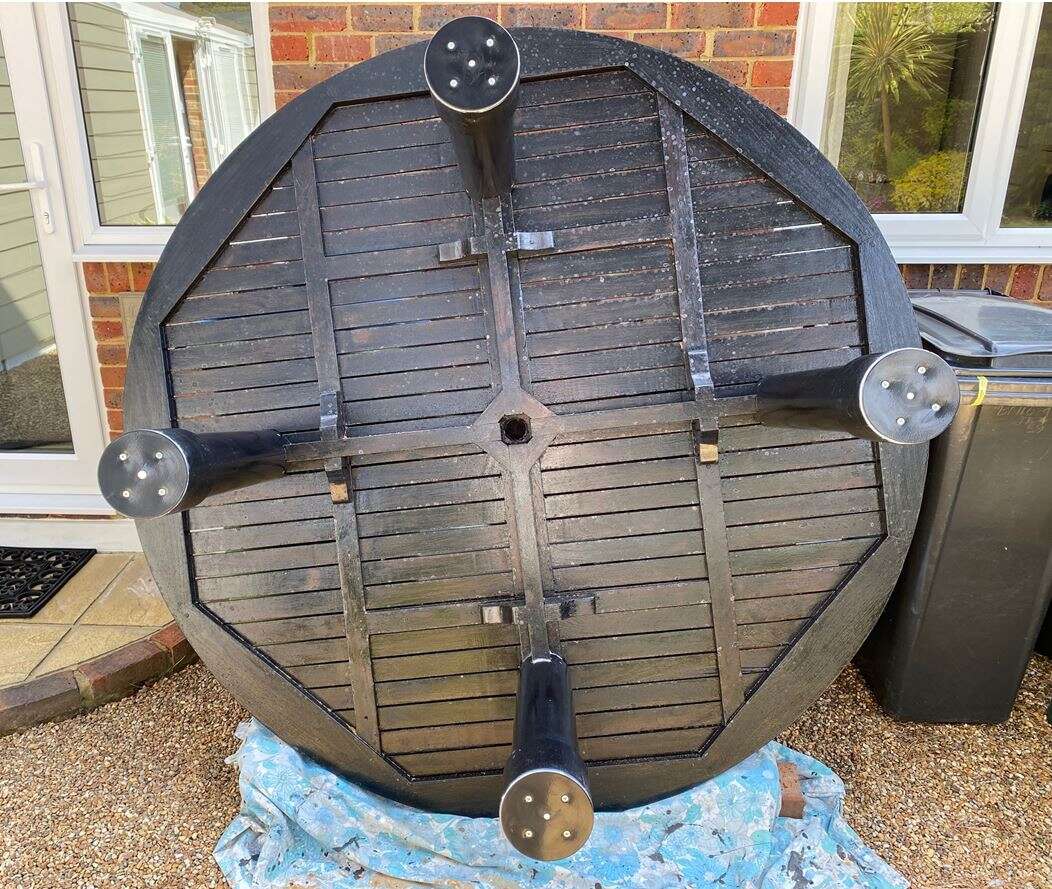
Above Pictures copywrite of @Ebized
We have known each other for quitea few years now and he has been good to me, even so he did offer to pay but I of course refused, but he didn’t let me get away with it
This lt turned up yesterday –


Thanks Colin
Not gonna do my slimming any favours mate
But a huge thanks again,and much appreciate – Pasty for dinner last night Nom Nom
I’ve made some great friends on this forum, I really have
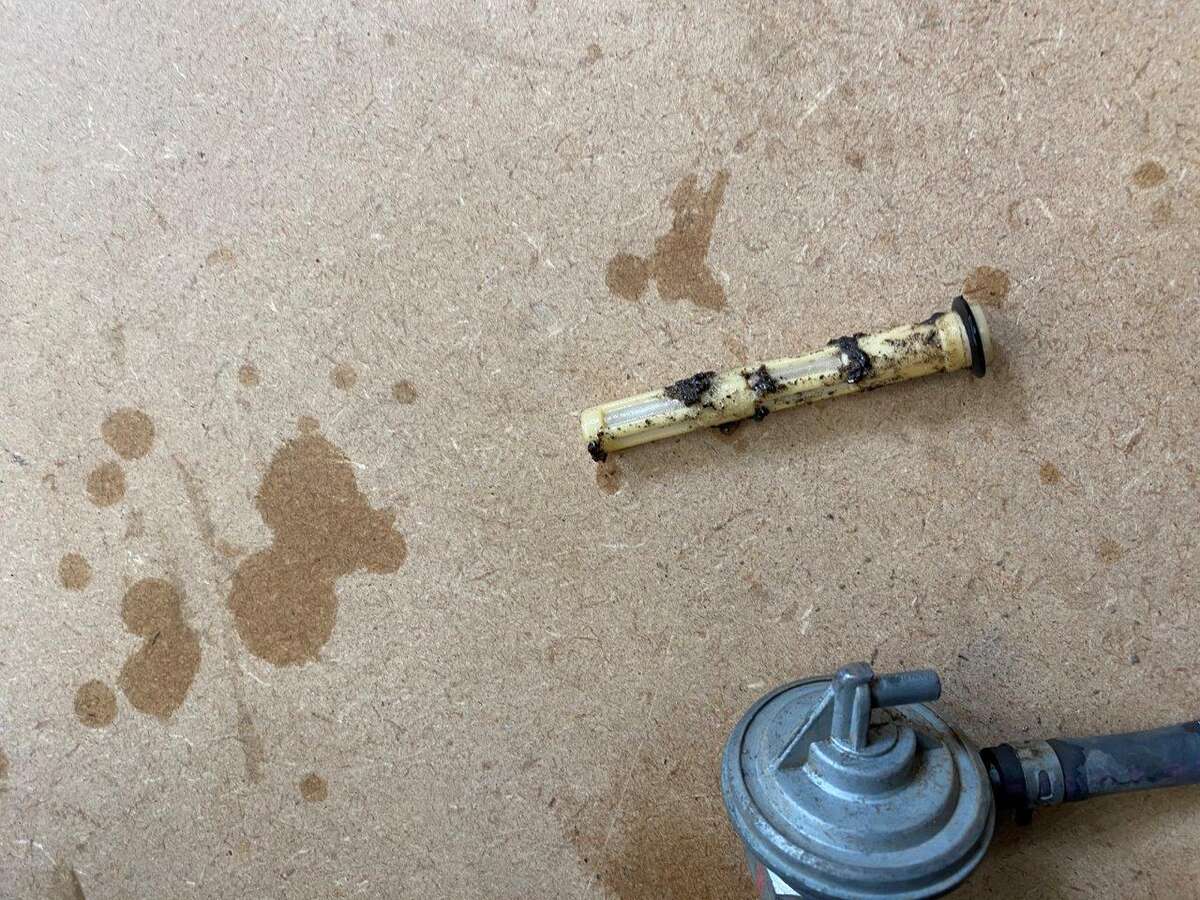
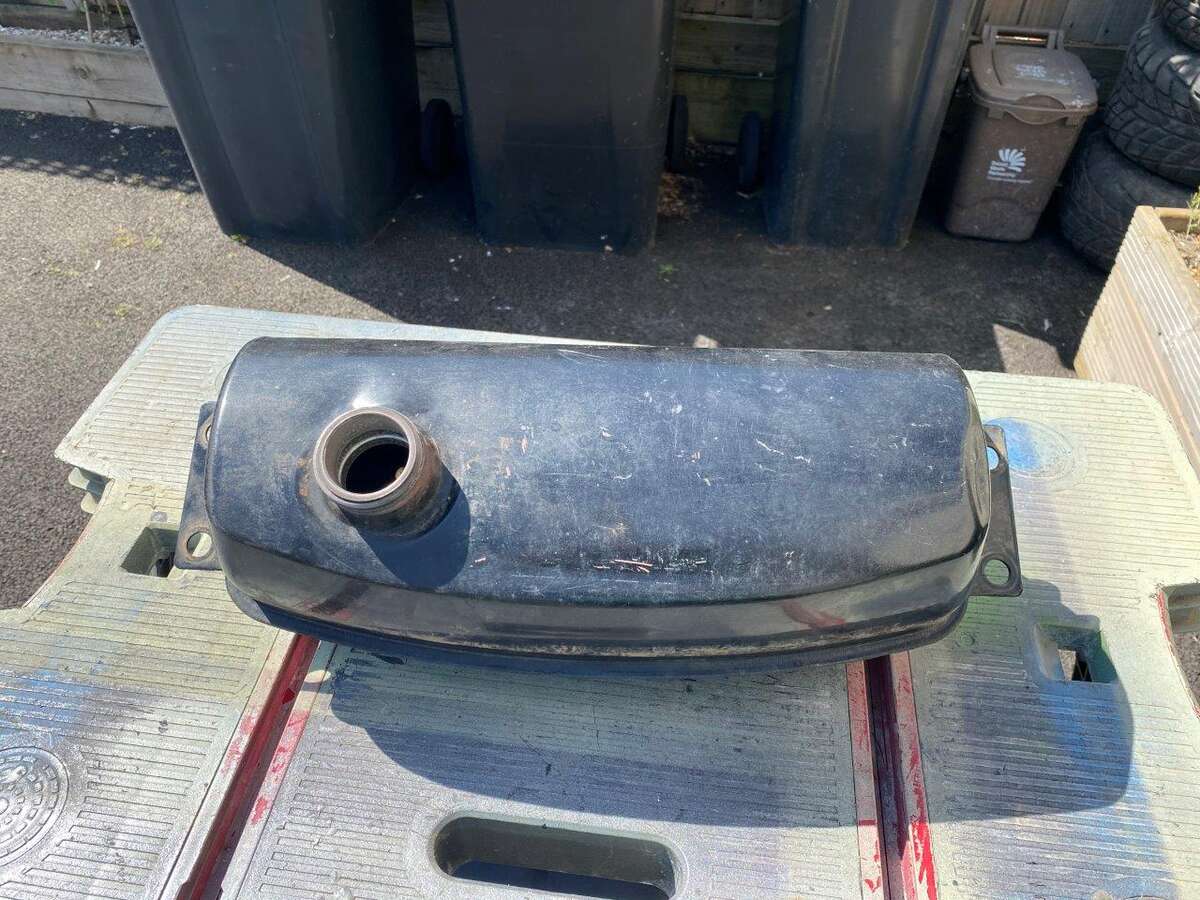
OK so I took the fuel tank from The Bug appart and drained the fuel, the filter was grotty!
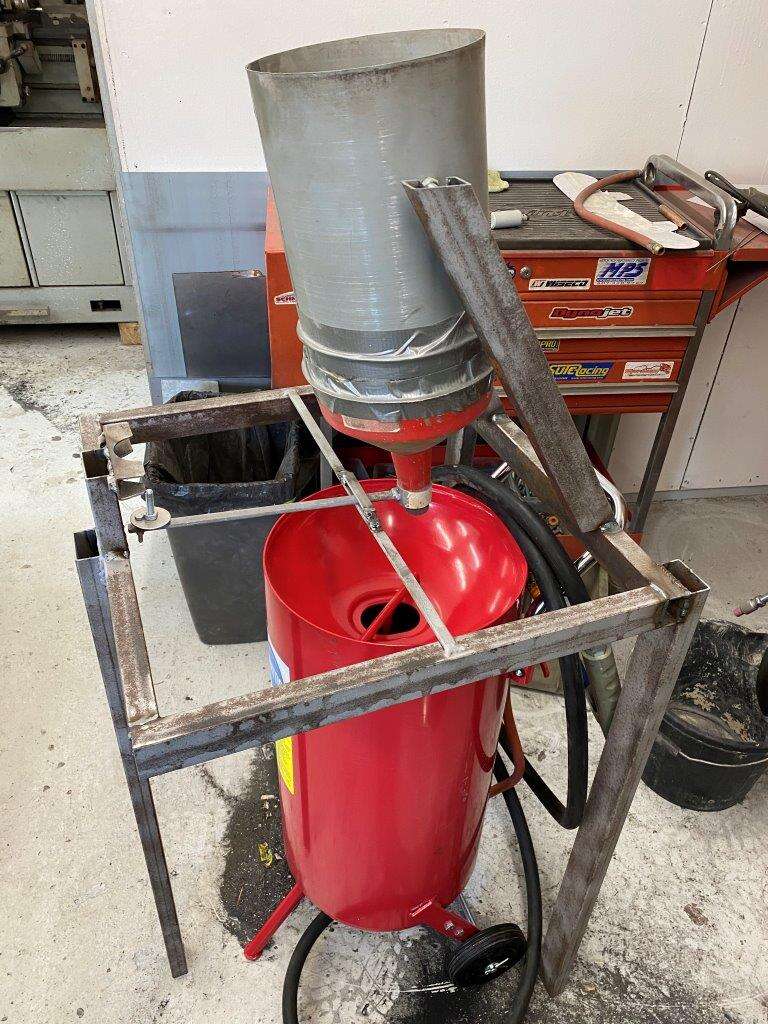
The tank is baking in the sun (when we have it) to get the fumes out as sand blasting can make sparks!
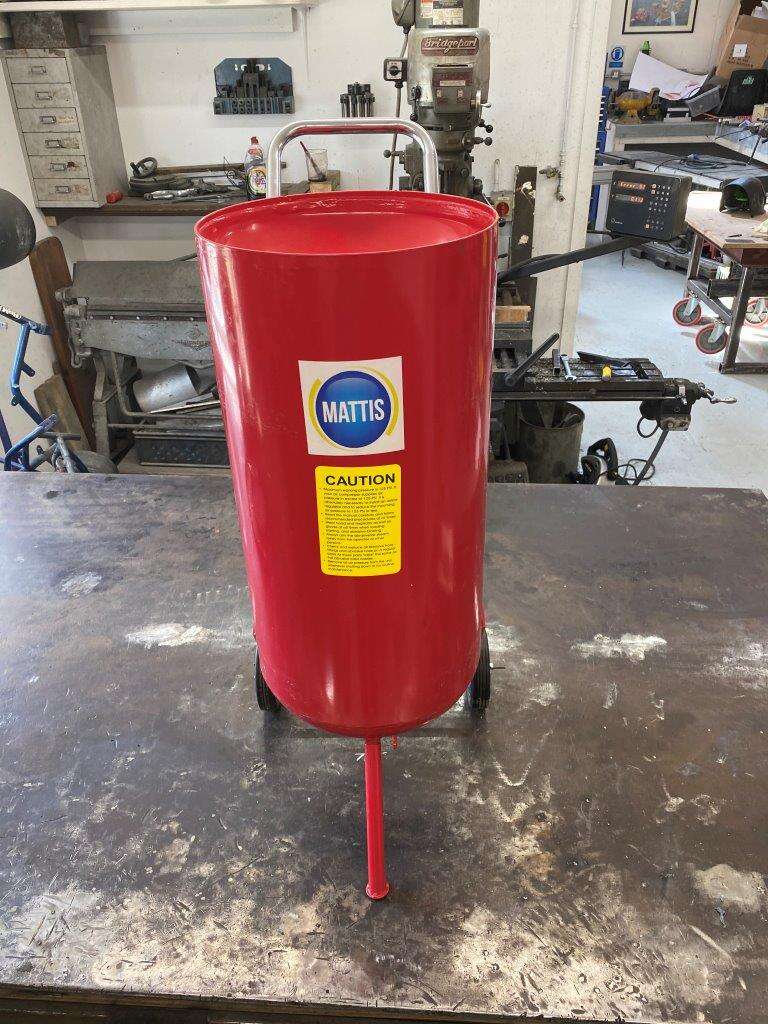
Meanwhile my sandblaster - that I have had since I did my 350z – so a long while needed a service but typically in today’s disposable society it was cheaper to replace the complete thing rather than repair it!
Old Pot

New Pot
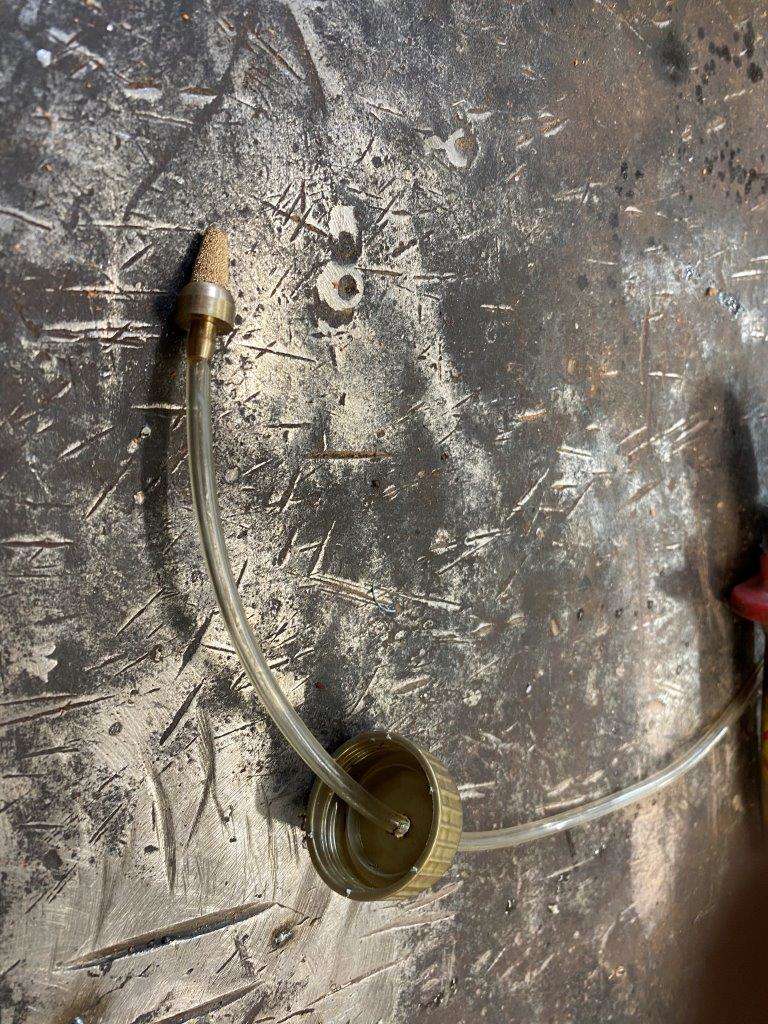
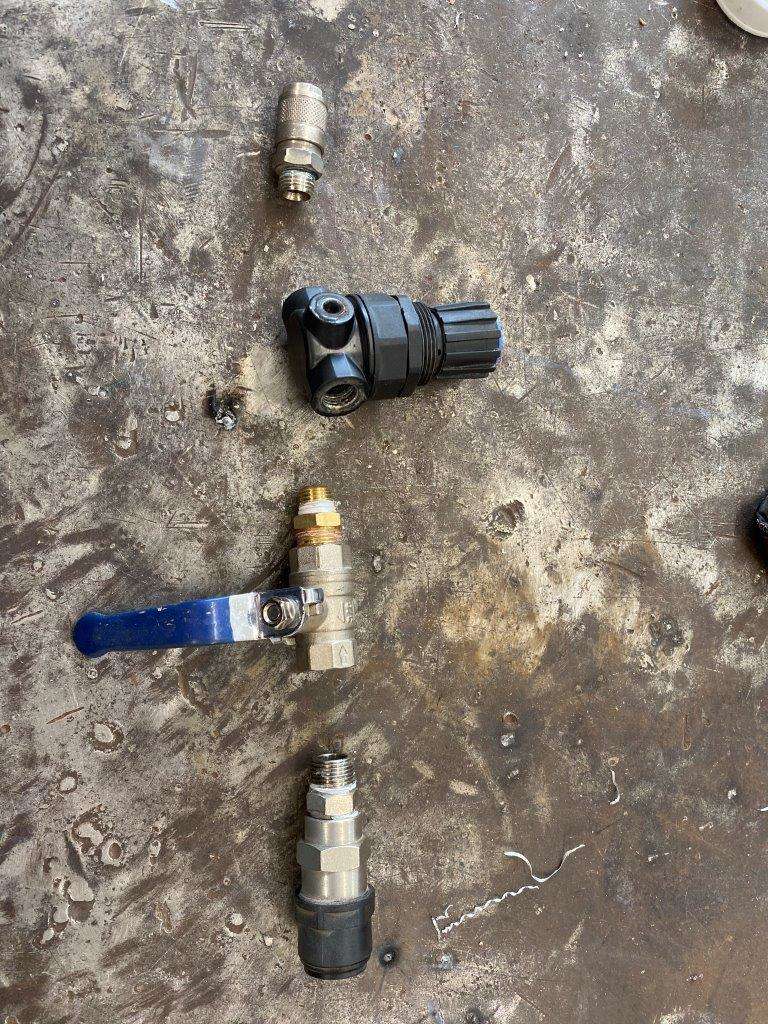
So the inlet arrived like this

So I got some bits
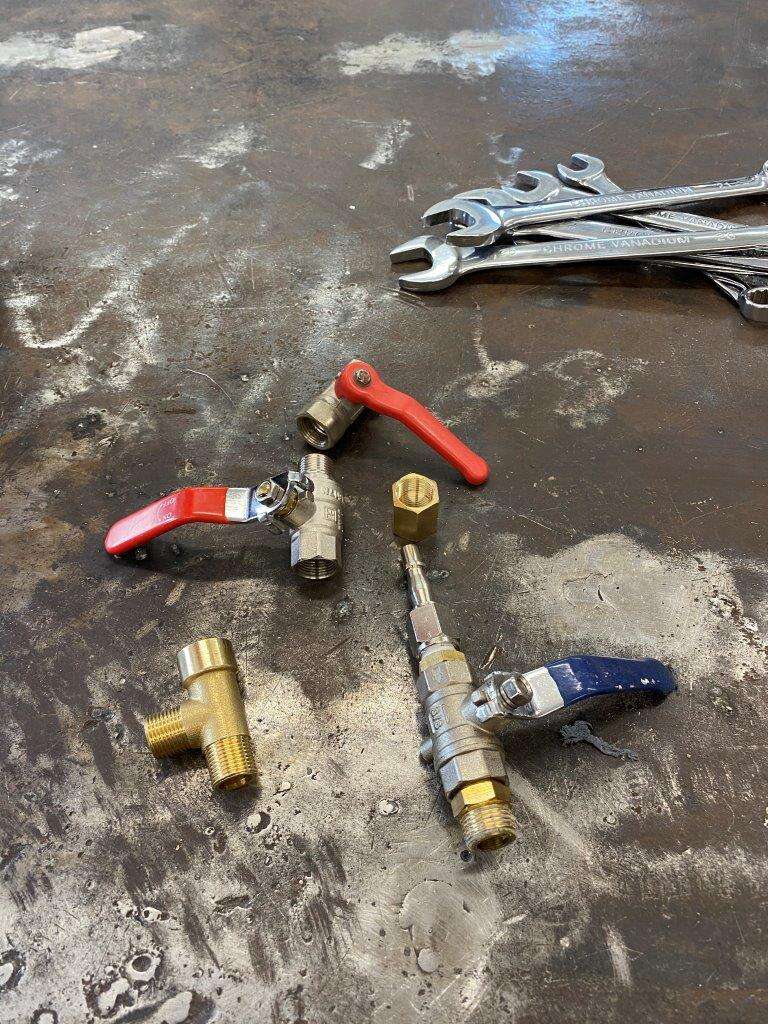
And modified it to this
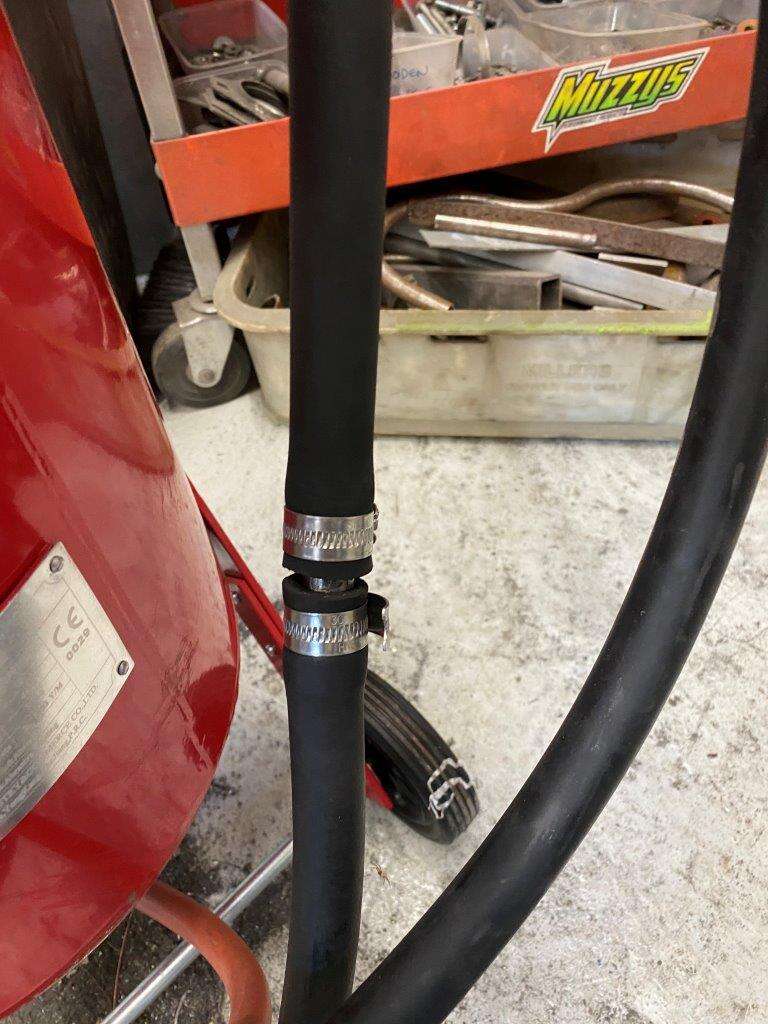
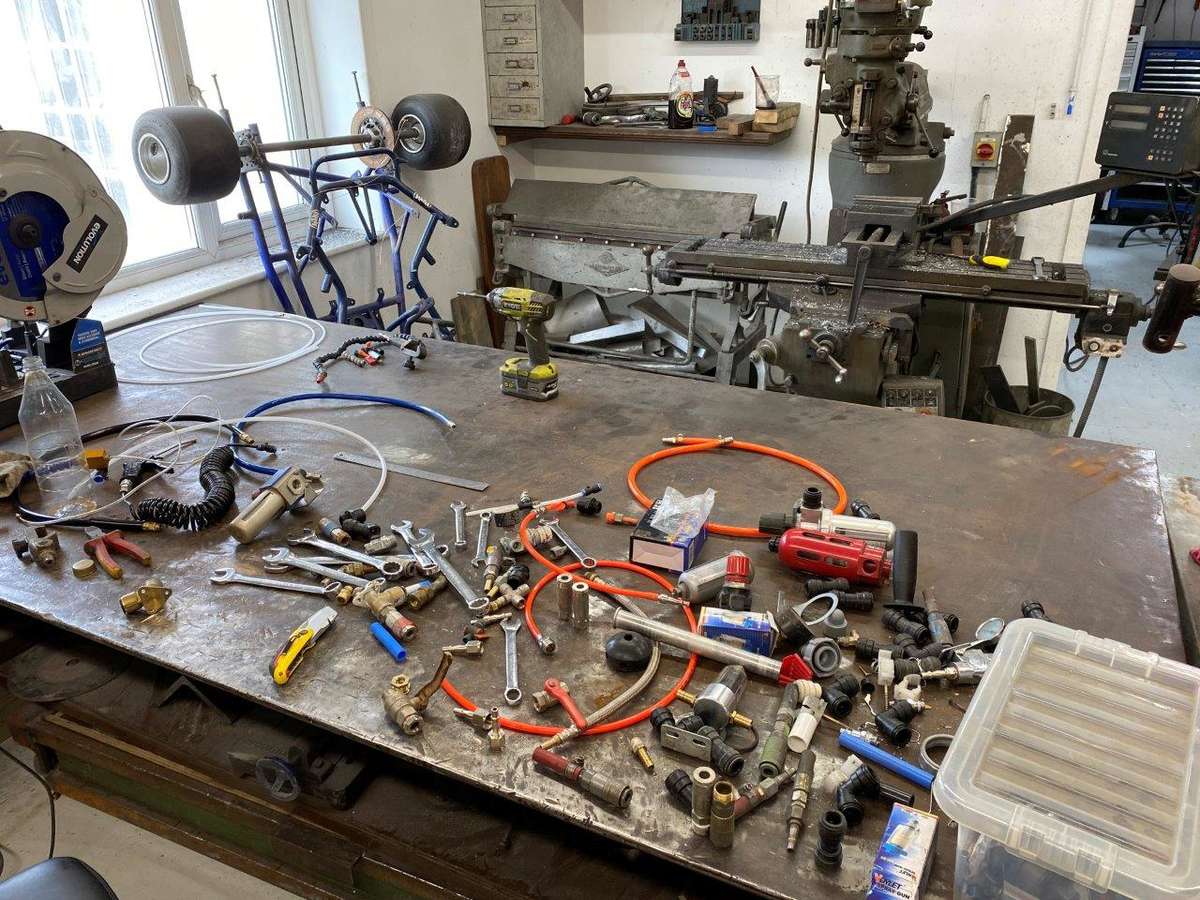
Basically I added an extra valve so I can release the pressure without holding the gun, makes refills easier
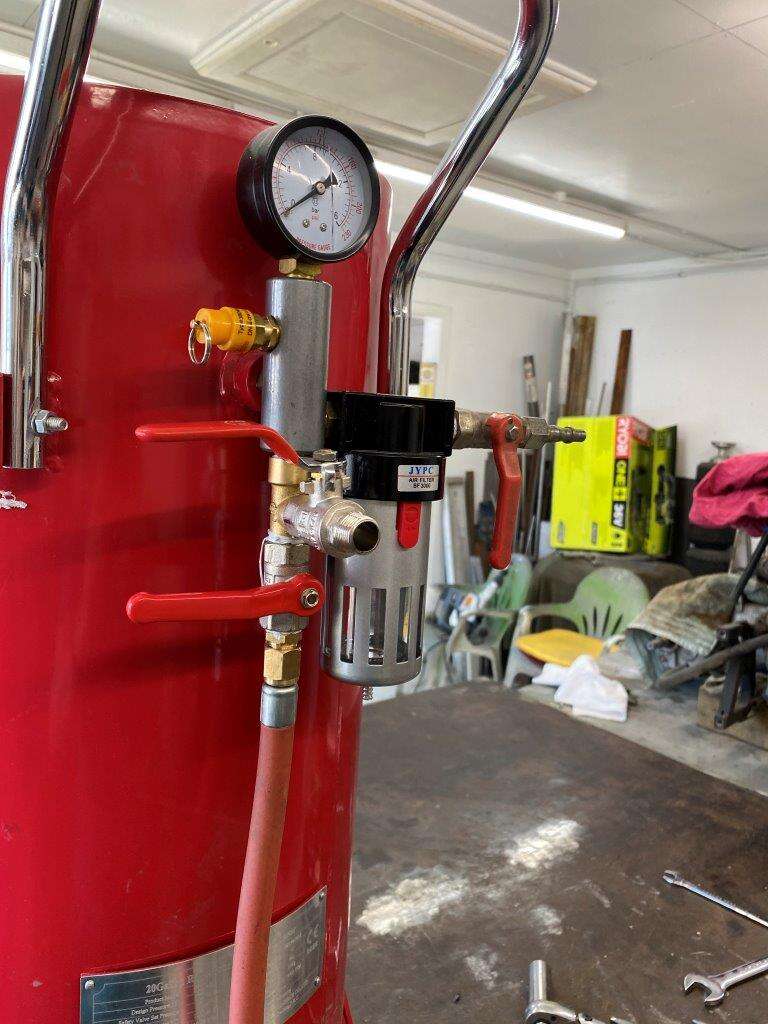
Next was a hose extension – they never come with enough, I was using copper to join the pipes
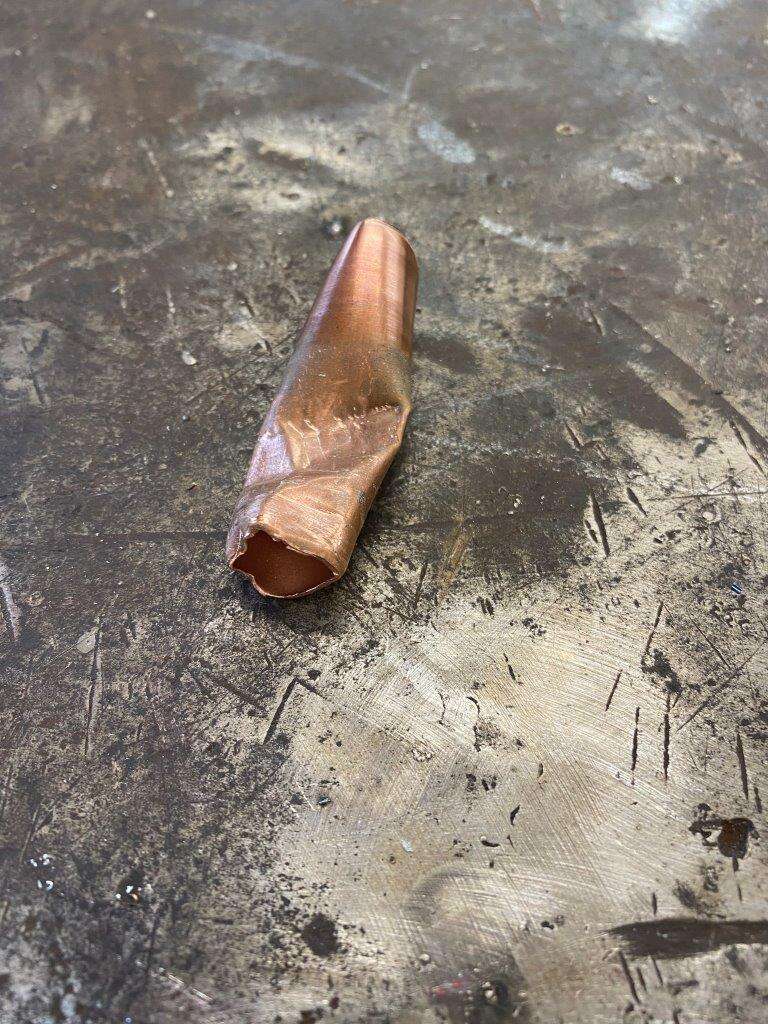
But it wears out quickly – everything on a sandblaster wears out quickly, I’m always replacing hoses, valves and nozzles. It’s just the nature of what they do, anyway I upgraded to steel
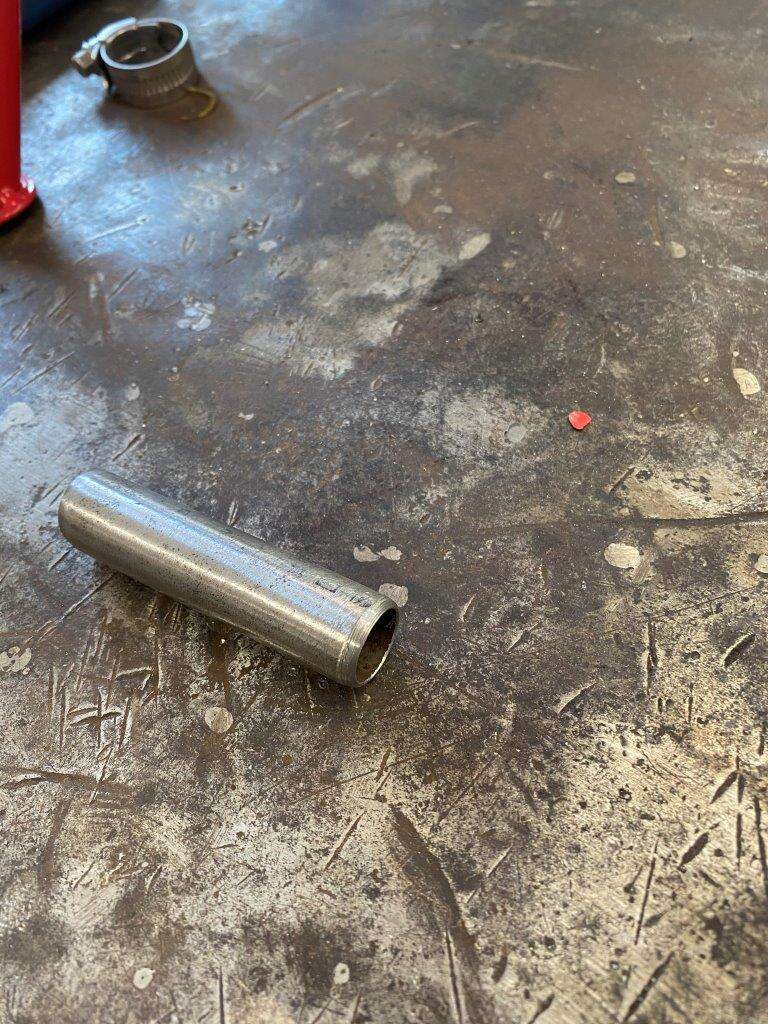
So now I have a longer hose
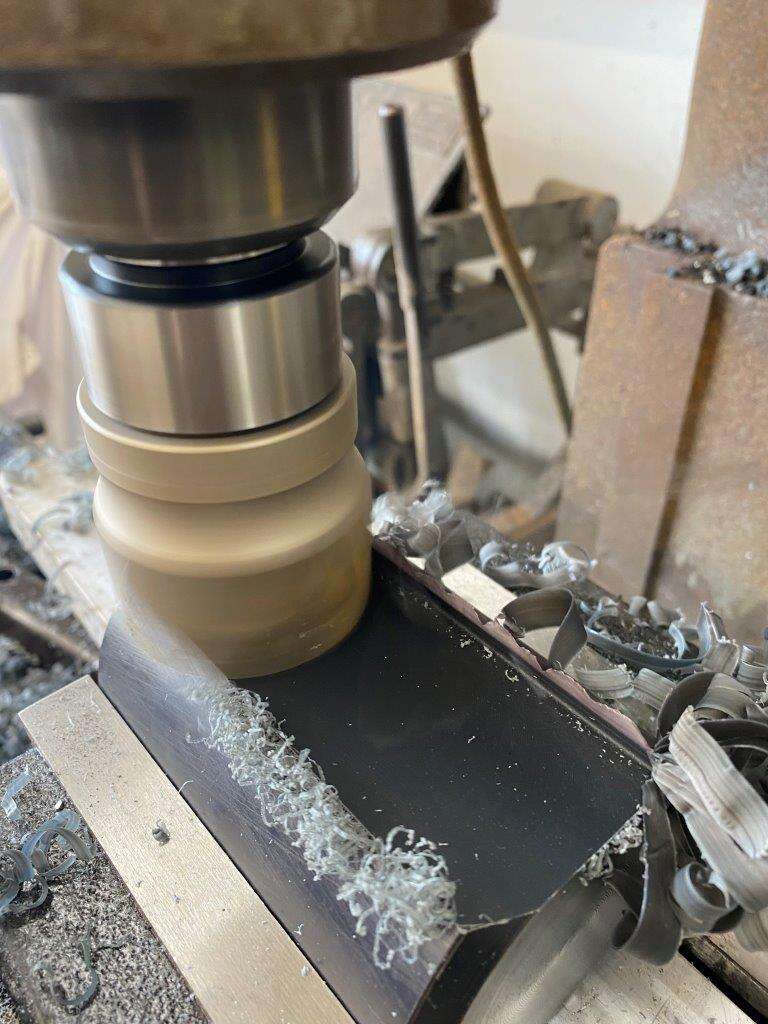
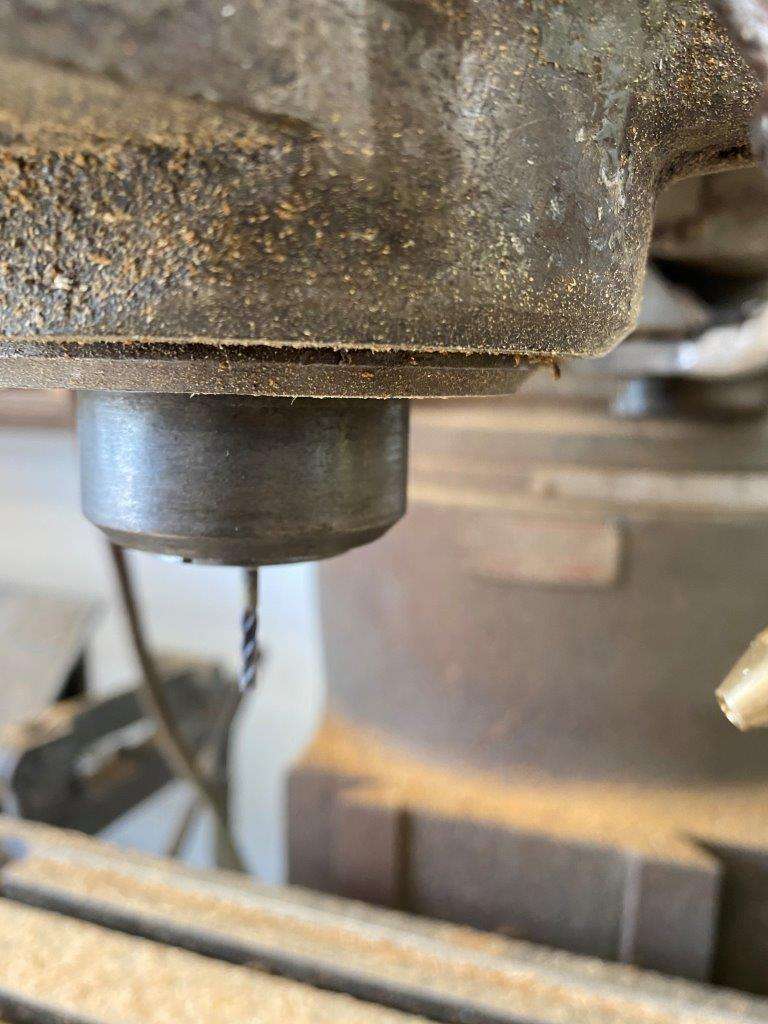
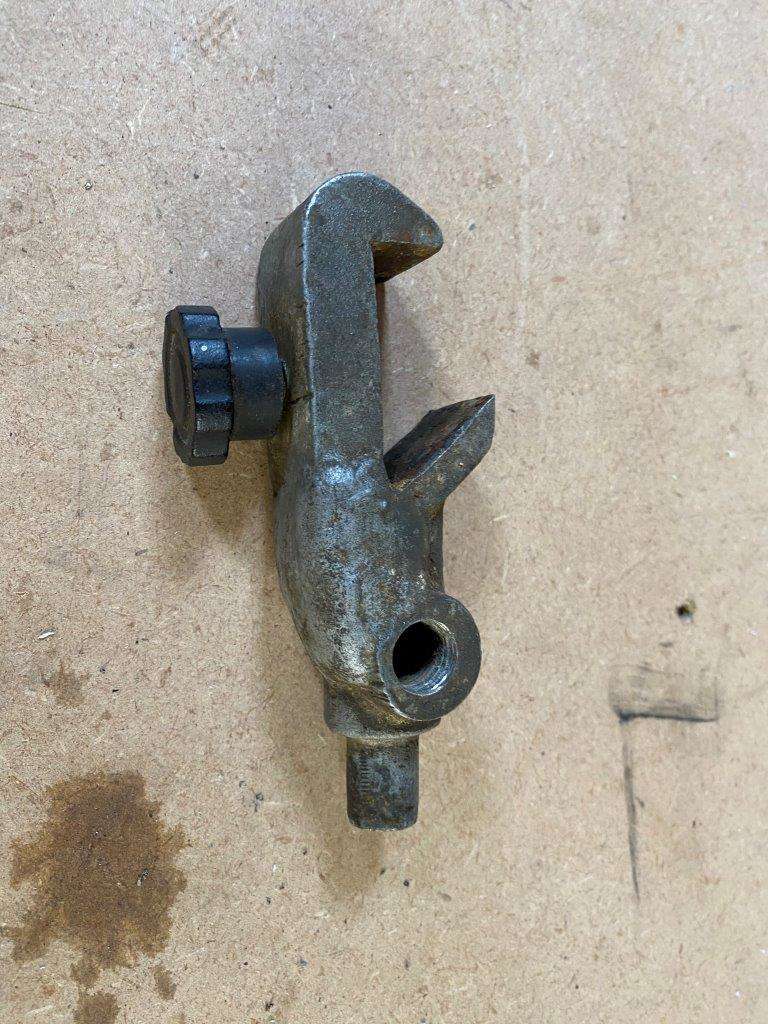
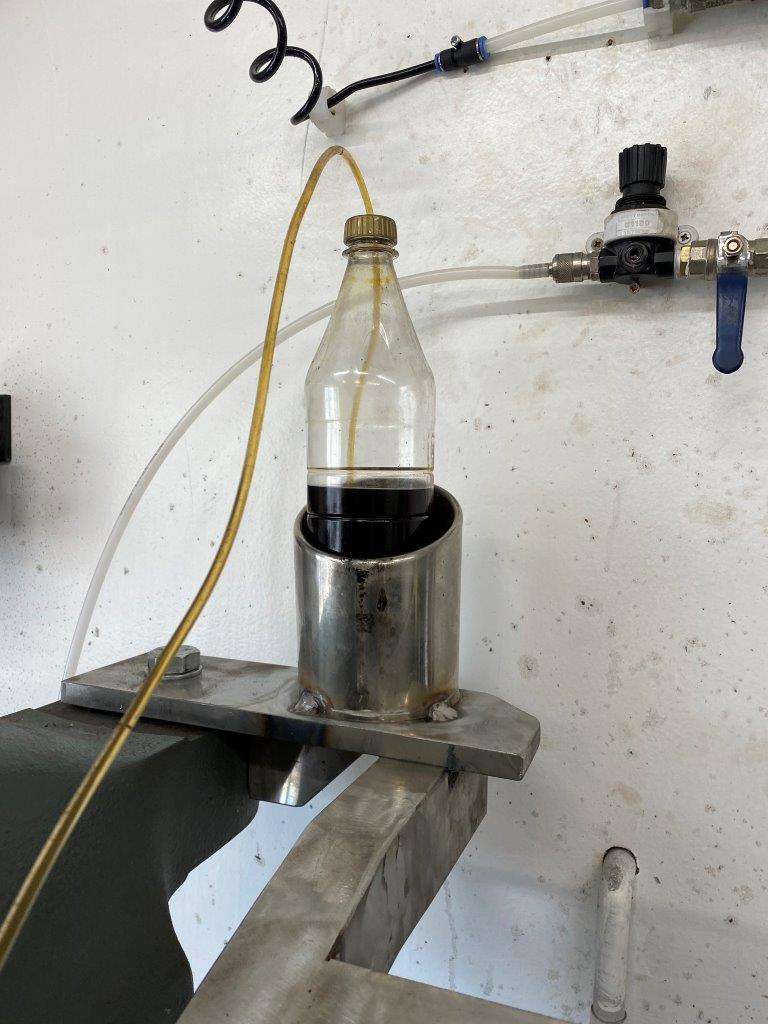
Now this is a prototype I have started tinkering with,
Backstory,
To load the old sandblaster, you stick this funnel with the sieve in it in the top
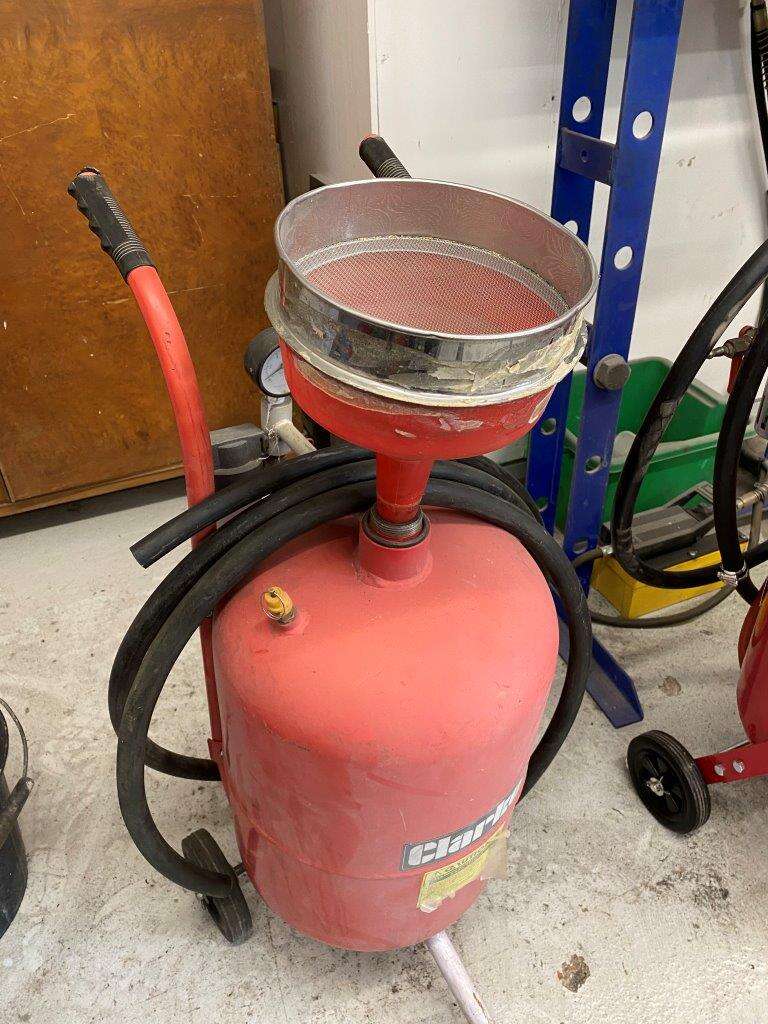
You then tip the sand in from a 25Kg bag and with the other hand (you know the third one all DIY sand blasters have) you shake the funnel – good game, good game.
It’s not so bad on refills as you shovel that in with a dustpan but it is still a PITA I always wanted to see if I could make the sieve shake itself
The new Pot is an “easy fill” so it has the lovely big top – no funnel YAYY – you still have to sieve the bloody sand/glass though!!!!
The prototype worked using an old drill as a motor
I have just added a funnel to it.


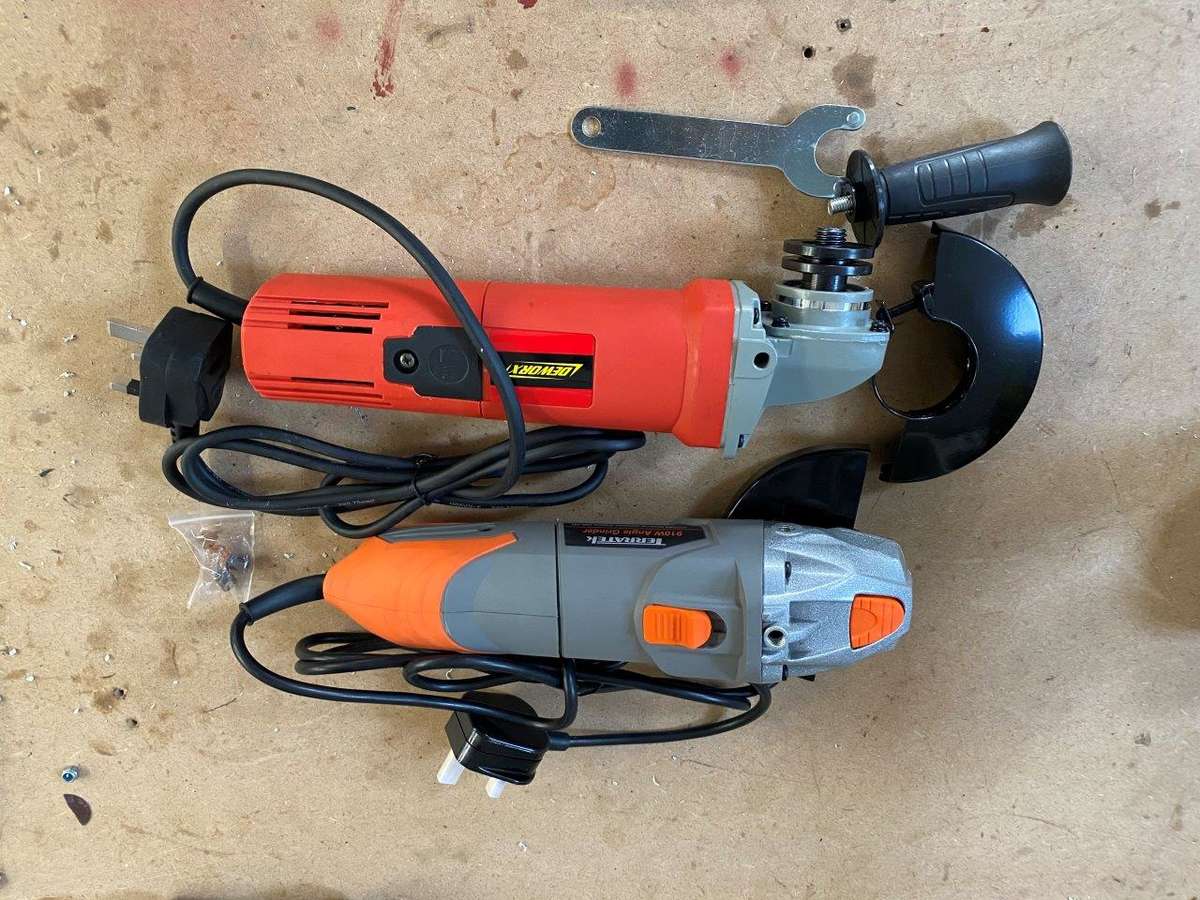
But my new motor has arrived – from a tread mill / exercise vibrator or something the eBay description was vague
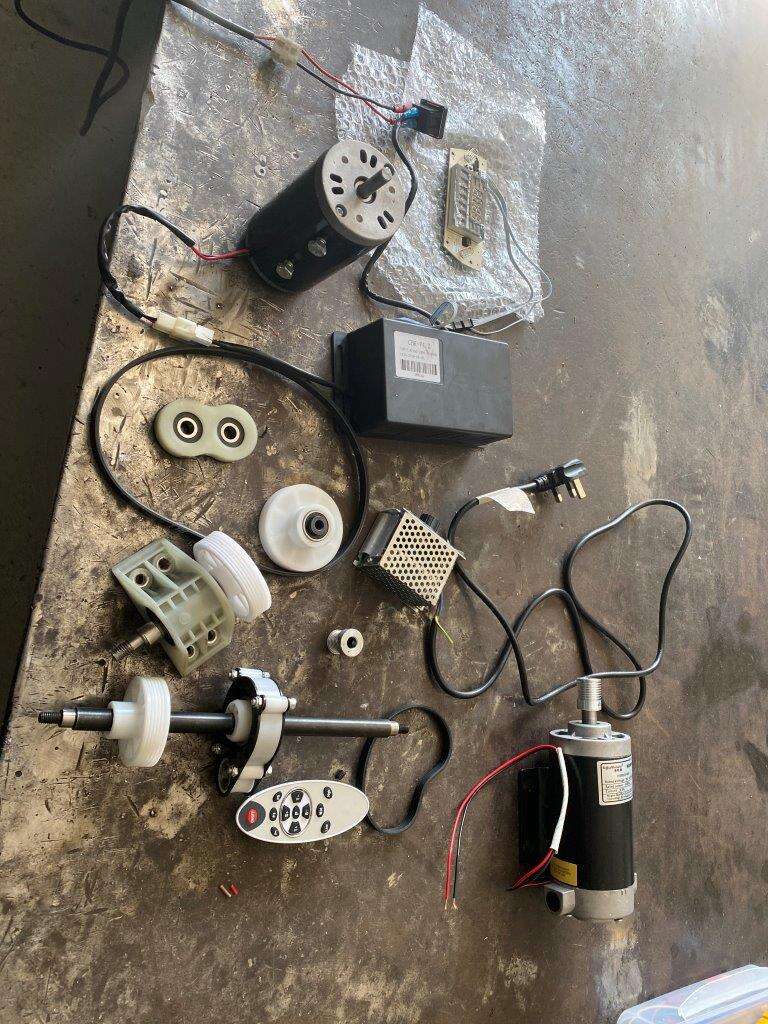
So soon I will have a go at the Mk2 all new and improved version. Be sure to stay tuned for that
Bit more on The Bug tomorrow, and the weekend is earmarked for a top secret OVER engineering project – more on that next week.
Be Safe
Keyser - “Inside me there’s a thin person struggling to get out, but I can usually sedate him with four or five cupcakes.” – Bob Thaves
Thought it an apt quote thanks to all those pastries
O and they were lovely for desert last night.
-
6
-
-
7 minutes ago, SuperStu said:
Wanna try one more please @Keyser
I went to reply to your test and it let me upload them, I even tried in another thread and got the same thing - anway thanks for the assist mate - we got there in the end
-
Ha Ha – Percy Verance that well known chap – No idea it’s random some work some don’t but eventually I got them to upload – couldn’t have you missing out on the fun in the Shed could I – I feel like its an obligation now
This was the post (I saved it
)
Good morning, Yet another day in lockdown, Work is slow at the moment only 3 jobs yesterday and 1 for today !!!
Got loads piling up for when we come out the other end though so at least that’s something.
Meanwhile today we have a tribute post for your amusement, Many of you that attend the Annual (may not be one this year) Zed Shed BBQ will know my wonderful and long suffering wife, Wekll she wanted something made for the kitchen and I thought it only fair that I over engineer something for her
We start with –
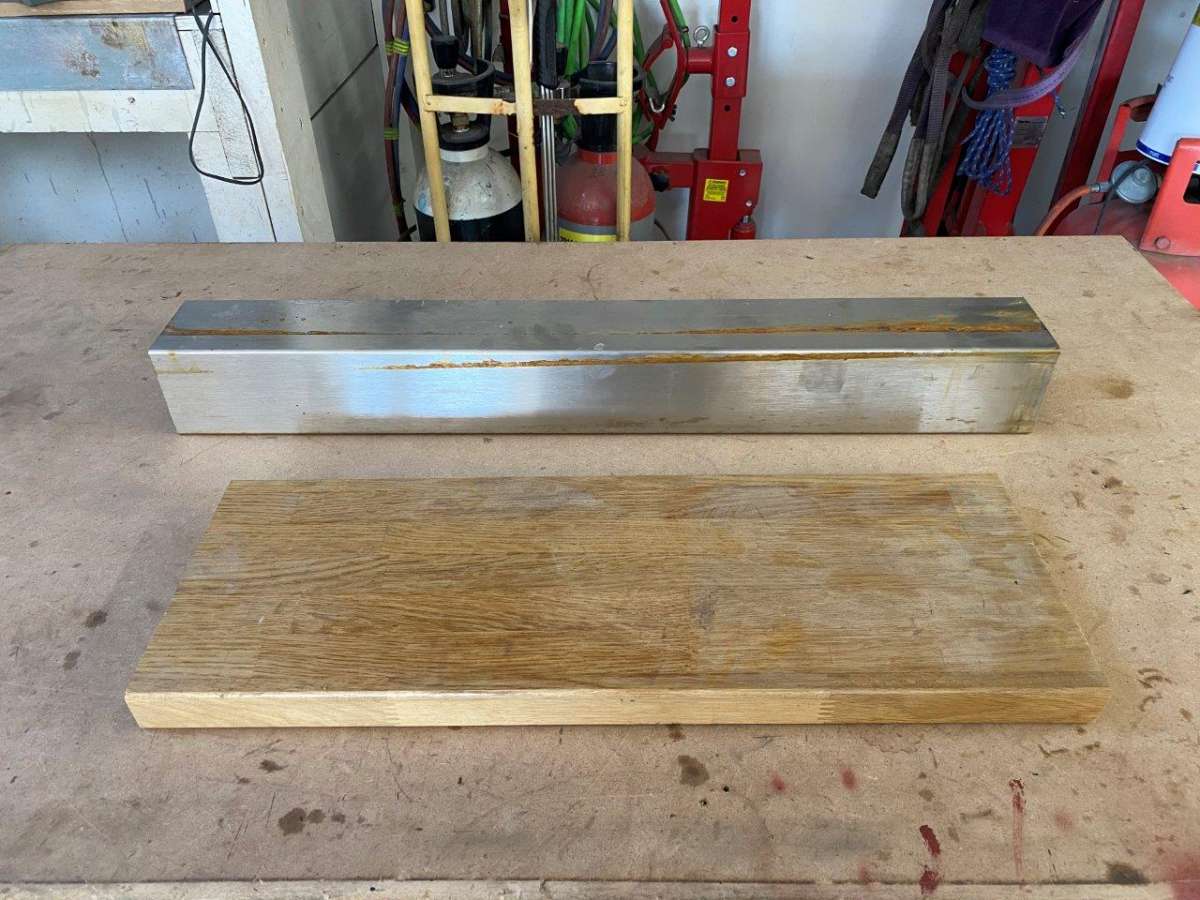
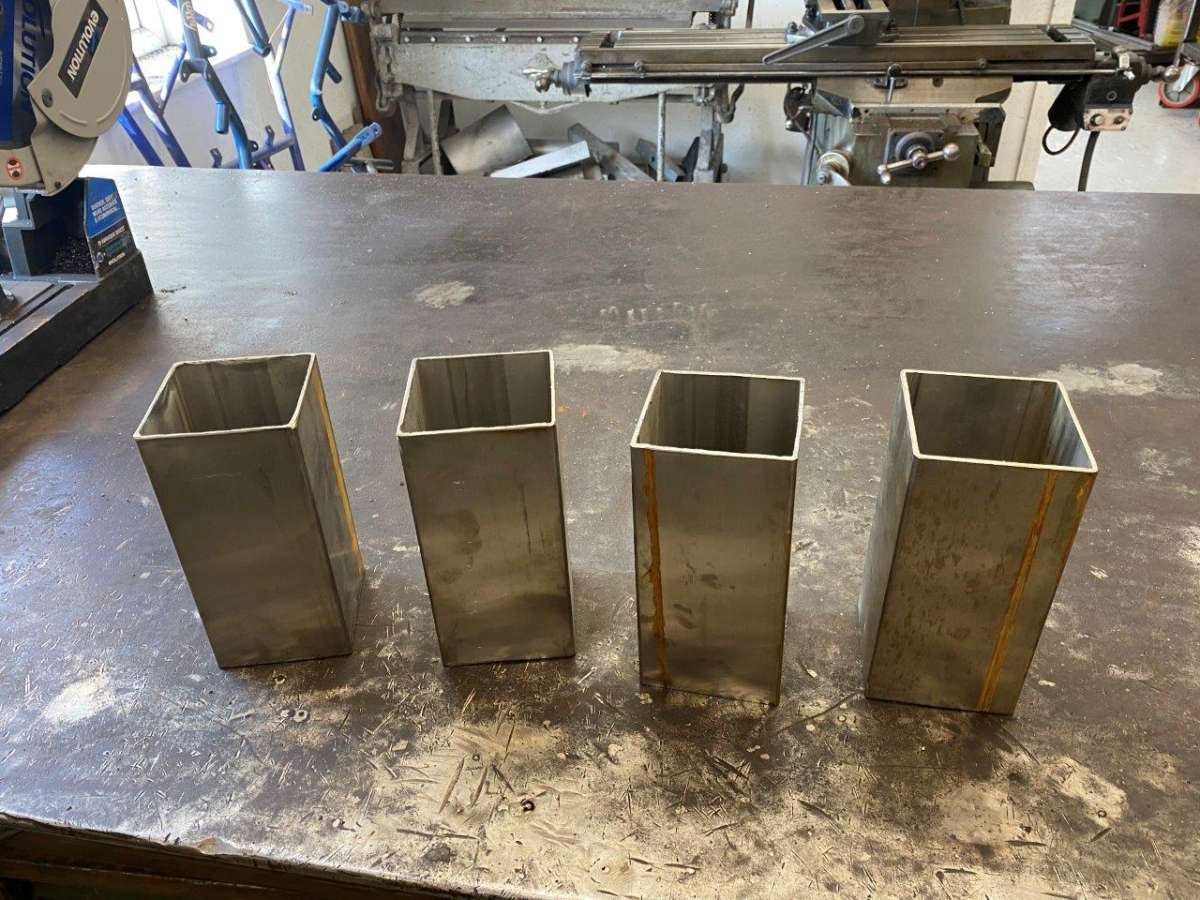
A piece of stainless-steel box section and an off cut of the old kitchen work surface
Box section cut in to 4
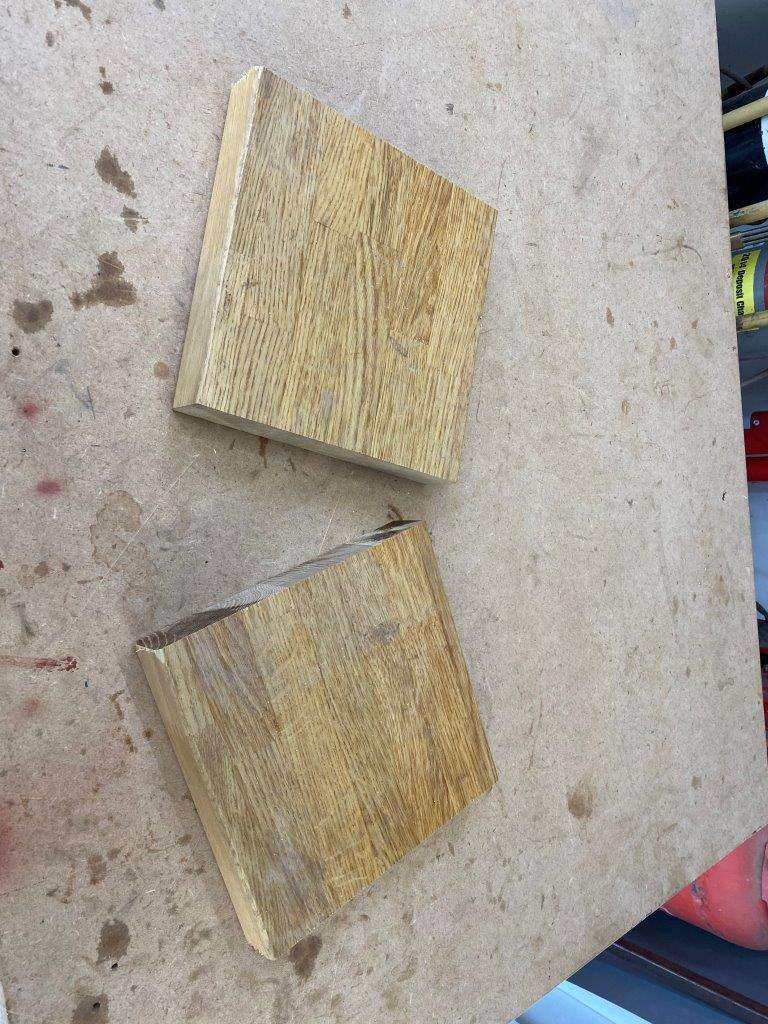
Wood in half
I even checked my milling machine before I started
Then I used the milling machine as a router – cranked it up to full speed on the spindle, this is slow compared to a router but tests proved it worked OK
Bit of time later
Hand tools
This now takes the 4 pieces of box section
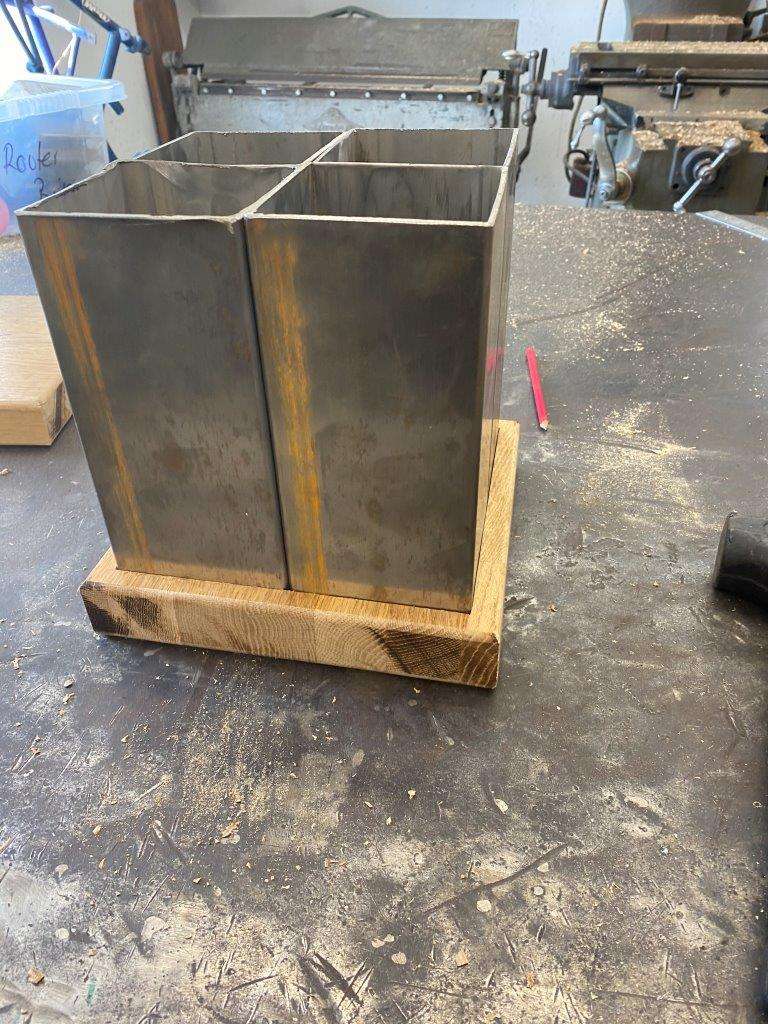
Then a 3mm metal working bit – as I don’t have any wood bits that size

To get this cut out

And then a wood bit to cut through
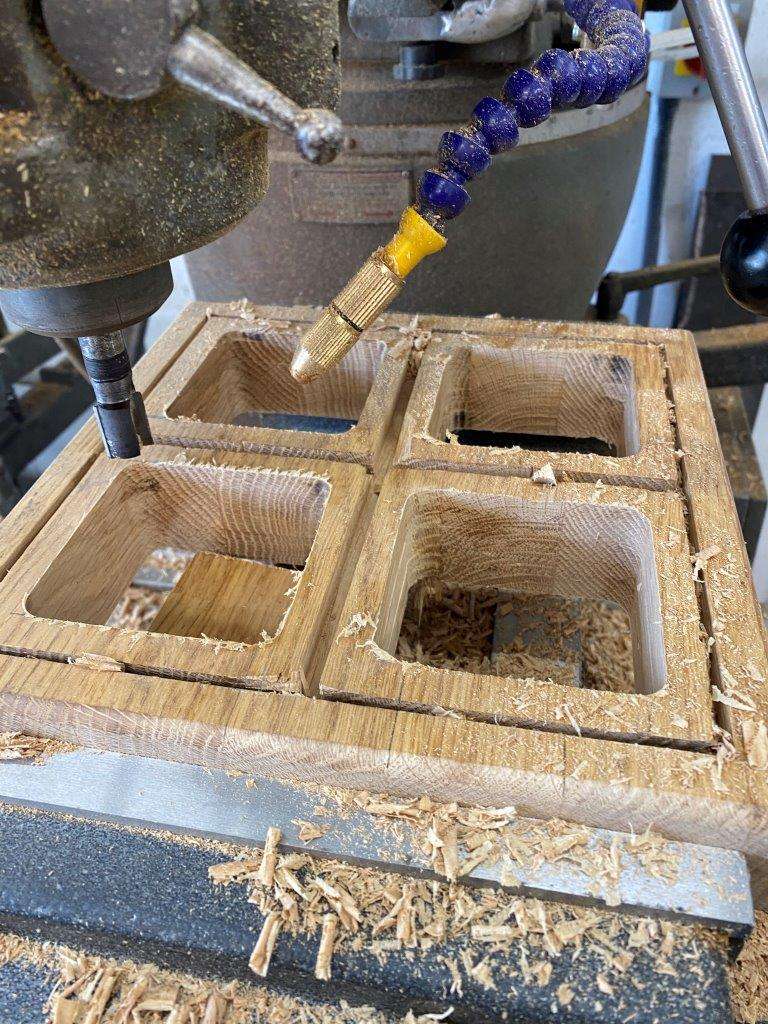
Now this is dedication
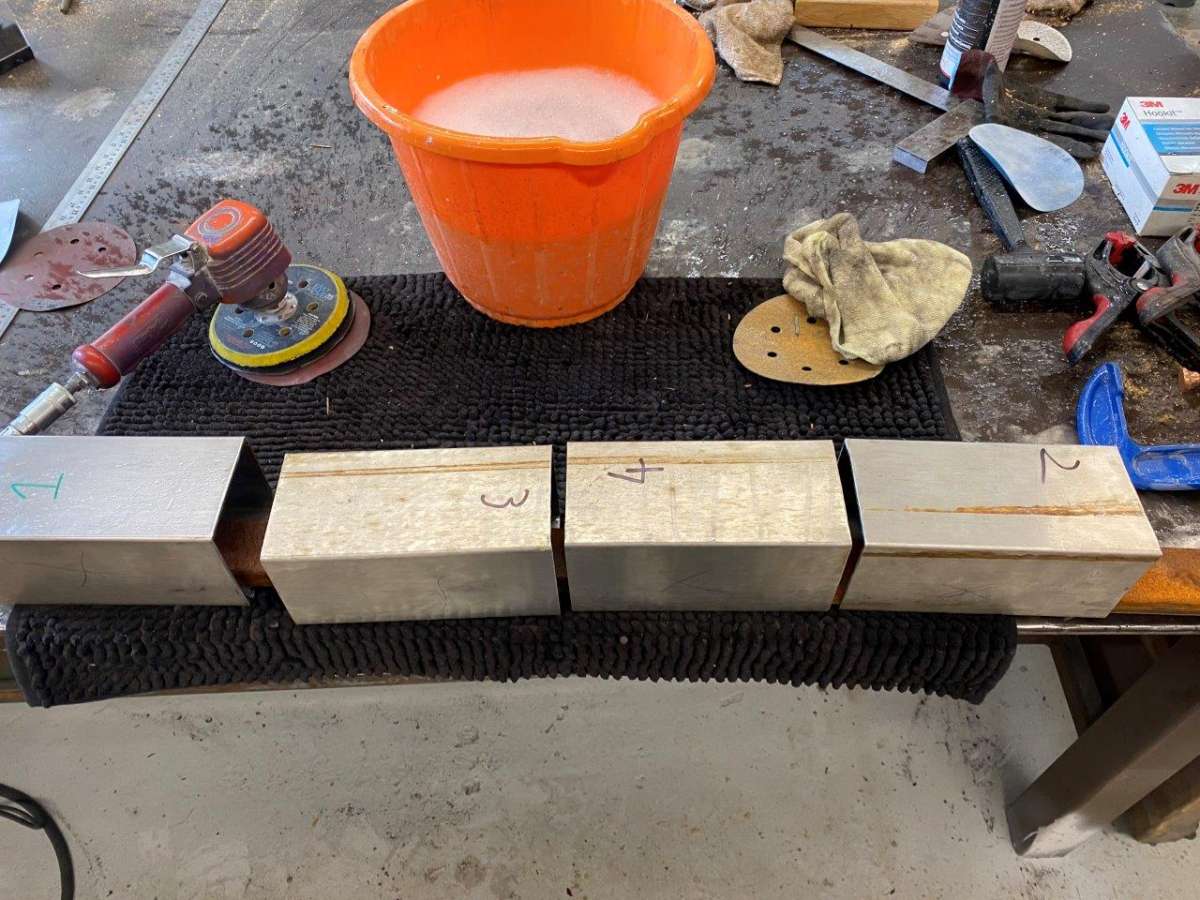
All lined up and sanded with 240
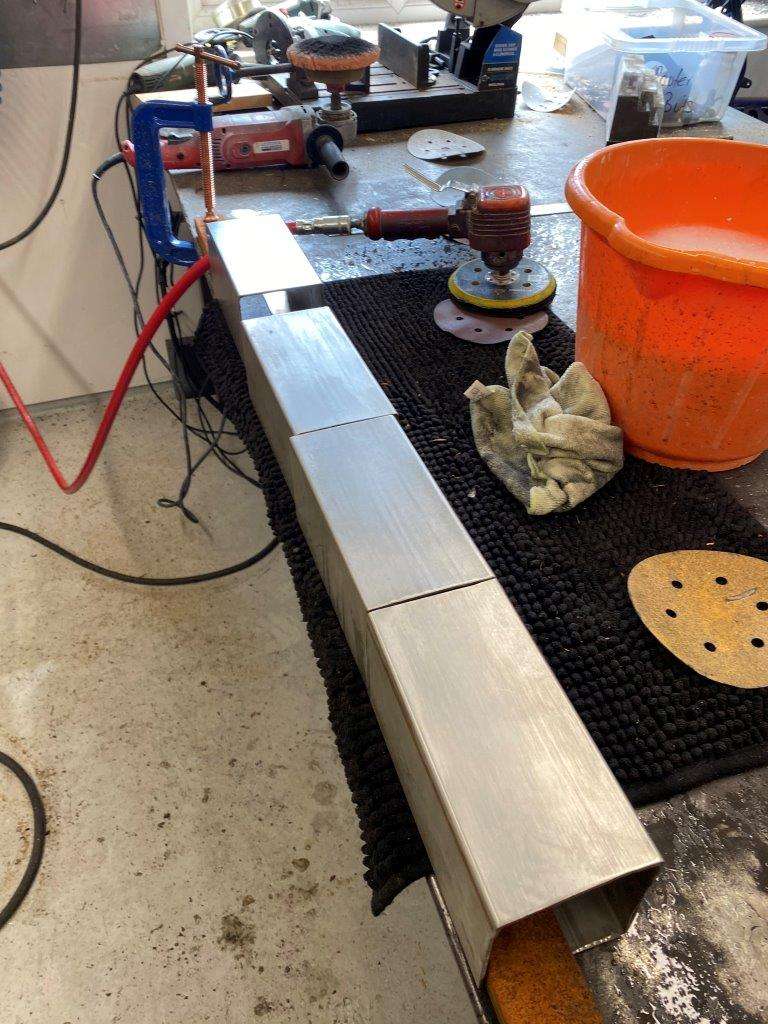
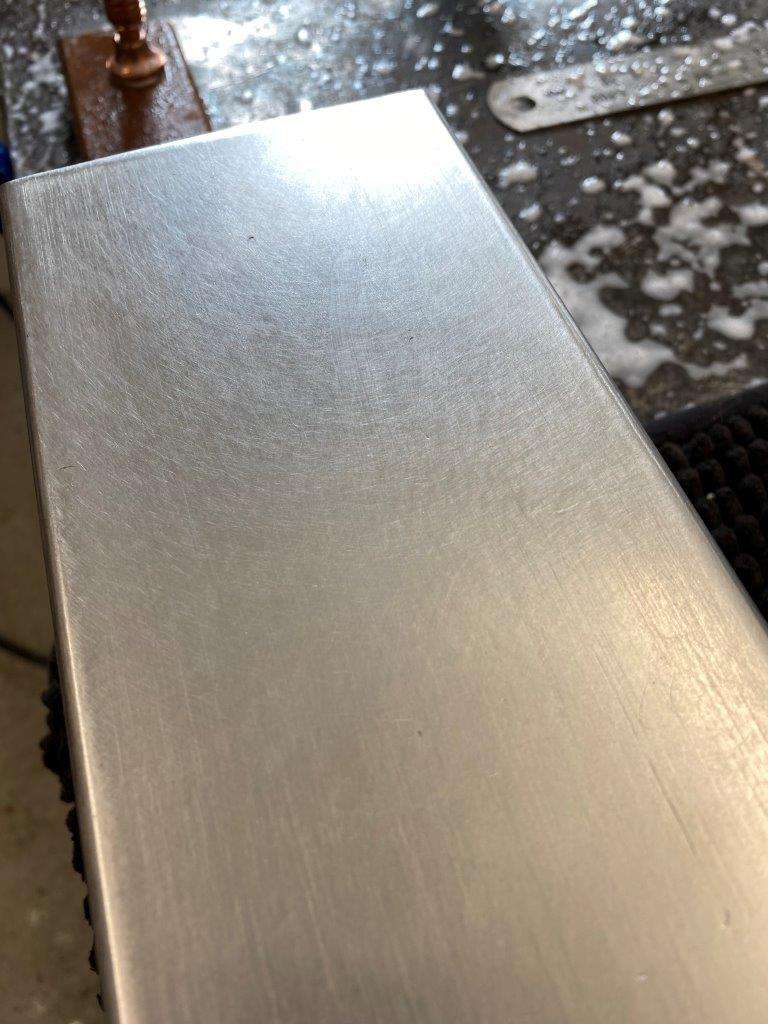
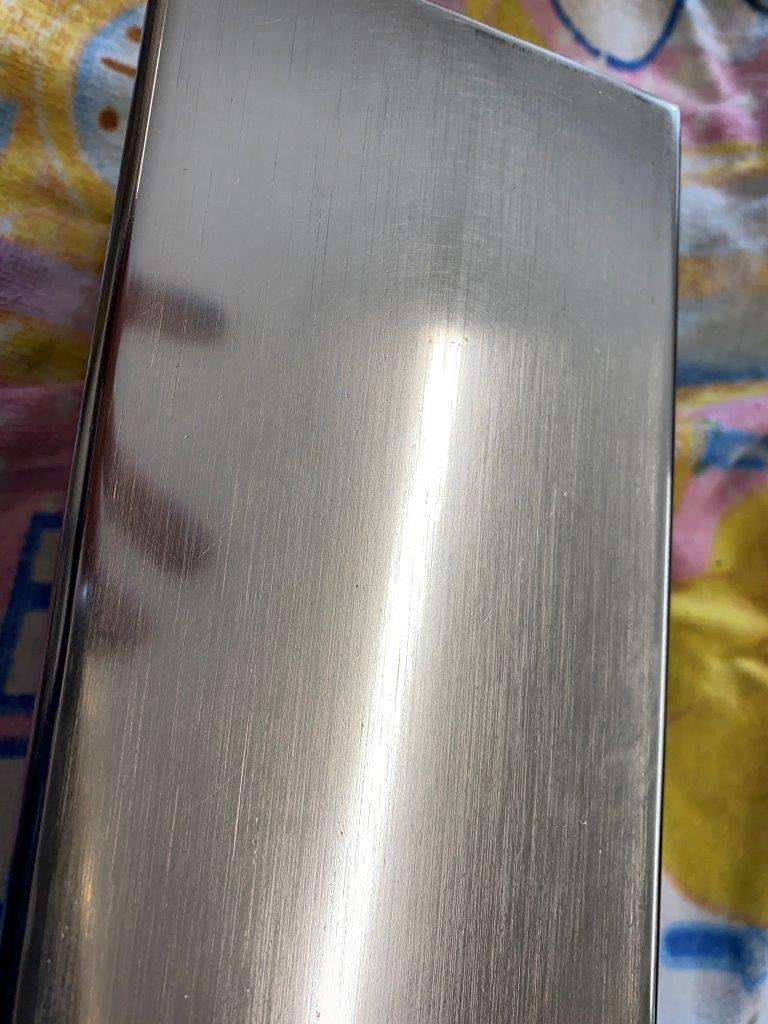
Then down the grades – this is brushed finish and I’m not resurfacing so it won’t be a mirror finish

Phew!!
Finished it looked like this
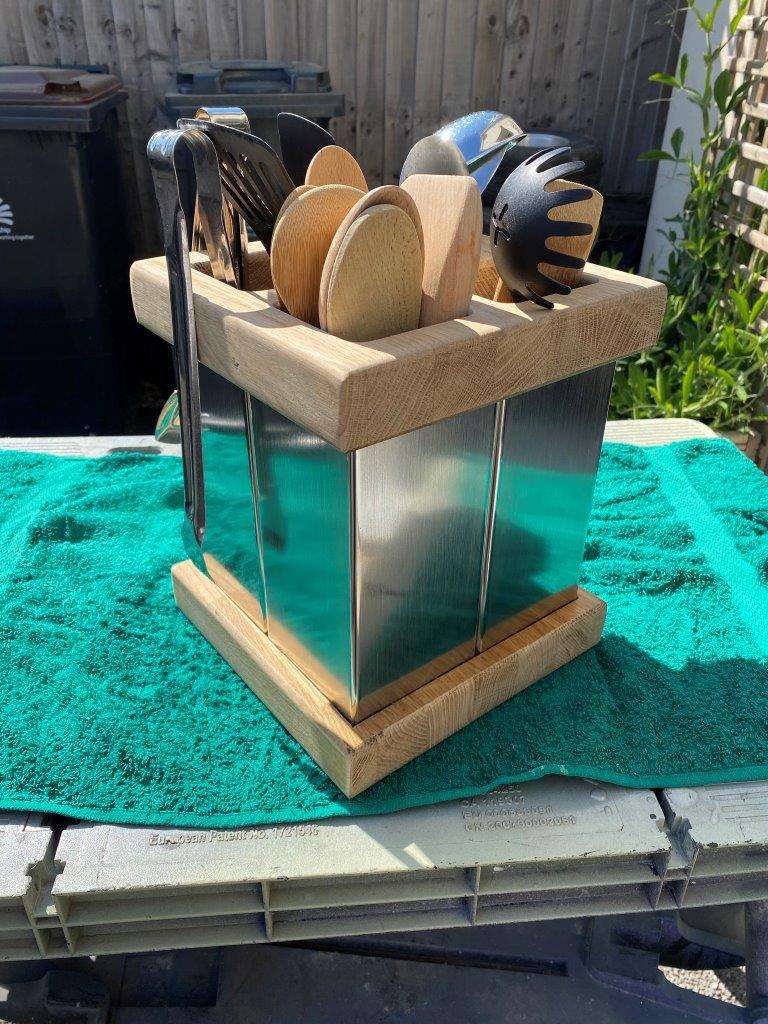
But we decided the top looked too “heavy” so it was cut down a bit to give
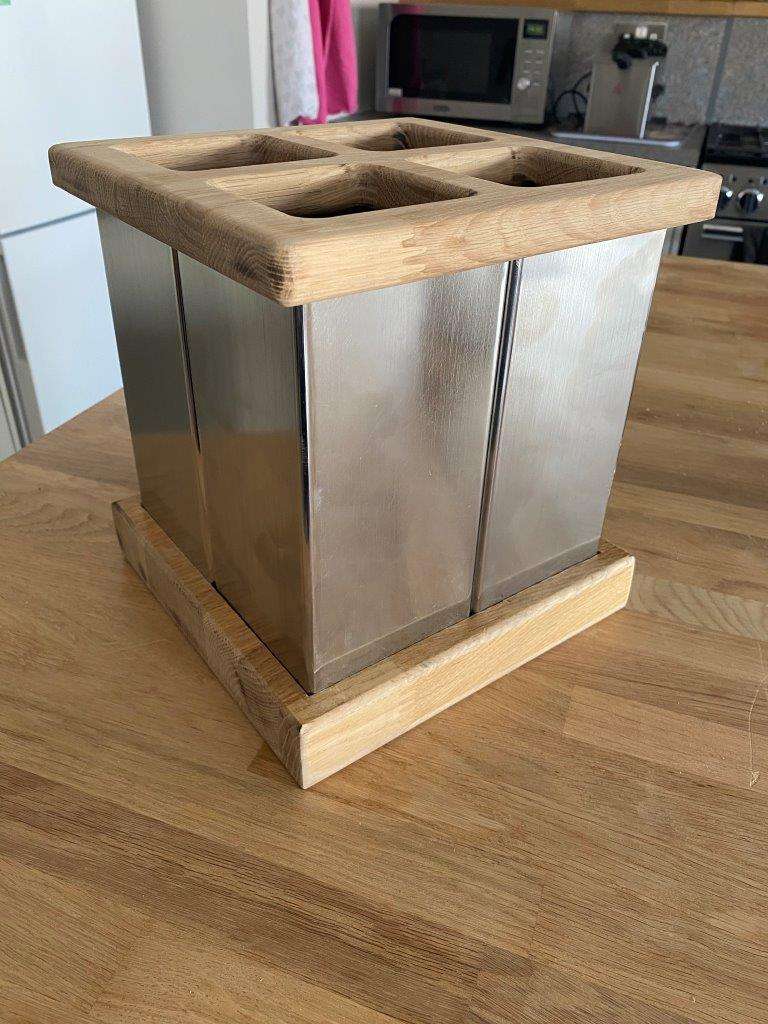
Just needs some varnish now
Well there ya go, I’ll be safe to carry on in the Shed for a few more weeks now
Be Safe
Keyser - “To be sure of hitting the target, shoot first, and call whatever you hit the target.” – Ashleigh Brilliant
-
8
-
-
No update today - I can't upload images
No Decode Delegate For This Image Format - I tried pics I uploaded yesterday as well - still no joy

-
 2
2
-
-
Hello again, I’m still at it but as promised I’m gonna mix it up with a side project, which you may or may not find interesting
Long Pic Heavy Post follows -
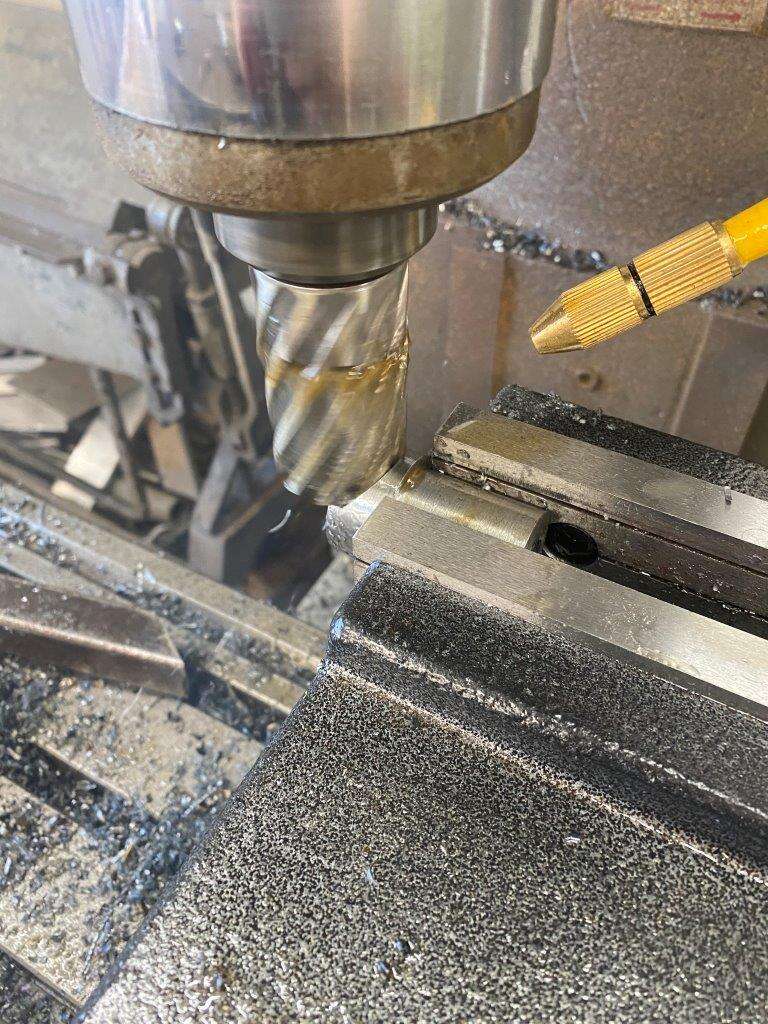
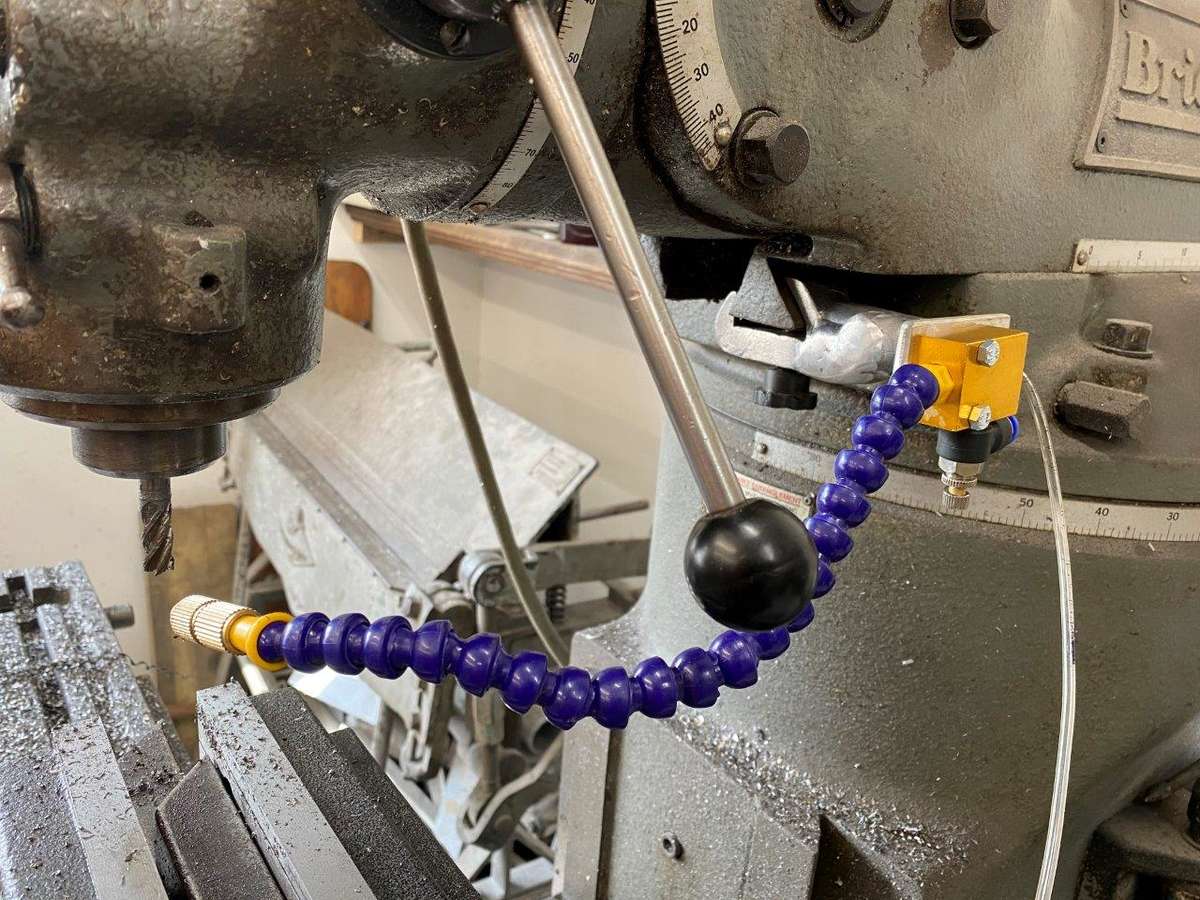
I decided to have a play with the milling machine
I got a fly cutter with the first milling machine that I have never used but to use it I needed an oil feed and cooler, as I don’t have a catch tray on my mill I cant use the recirculating pump. To solve this I ordered an atomiser from China (because silly cheap) last year it took 3 months to get here and has been sat in the draw ever since.
So I got me brand new BLACK! eBay trainers, purchased just for the Shed – with Velcro so I can take them off easily to go in the house (I keep bringing metal bits in
) 
Lovely shade of BLACK are they not?
I started by getting out my box of airline connectors and found a load of bits
Drilled a hole in a bottle top and fitted the oil pick up line
Found this old clamp
Cleaned it up
and welded this plate to it
So I had something to hold the atomiser steady
That goes like this
Side Note – Angle grinders are strange – blow up 1 get 2 back
Made up an air feed with regulator
I use plastic airline, but don’t have any, it just so happens the connectors work on 15mm copper and I did have some of that –
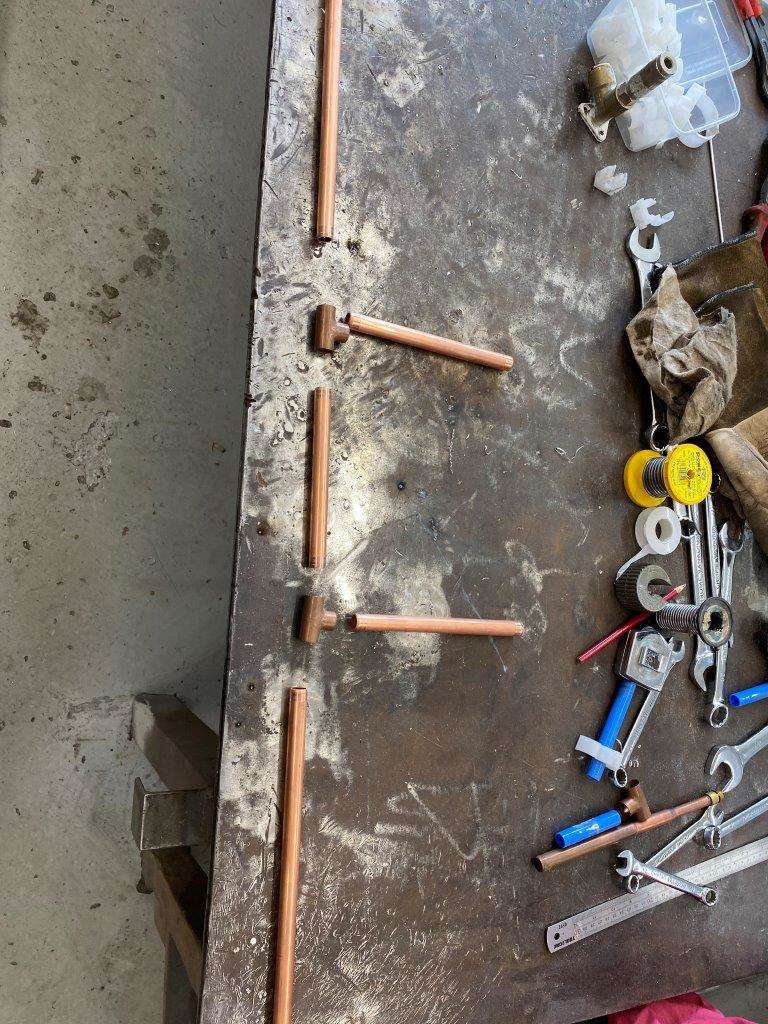
That gives me all the connections I need
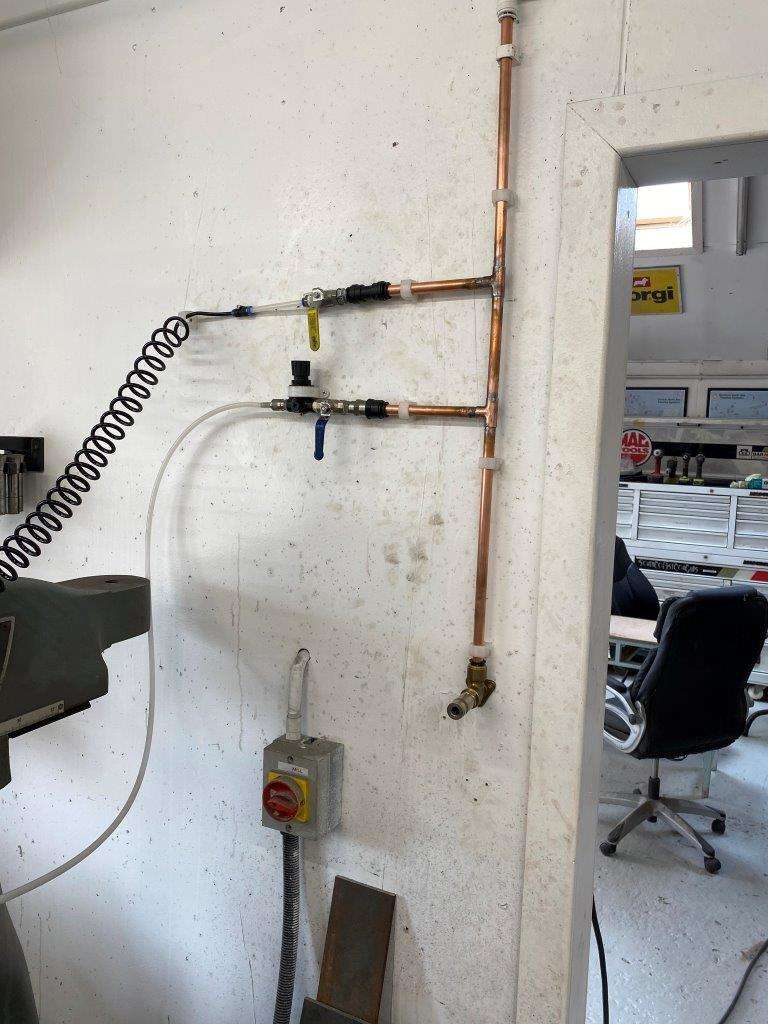
Next to the Mill itself
Needs a clean …. Ta Da
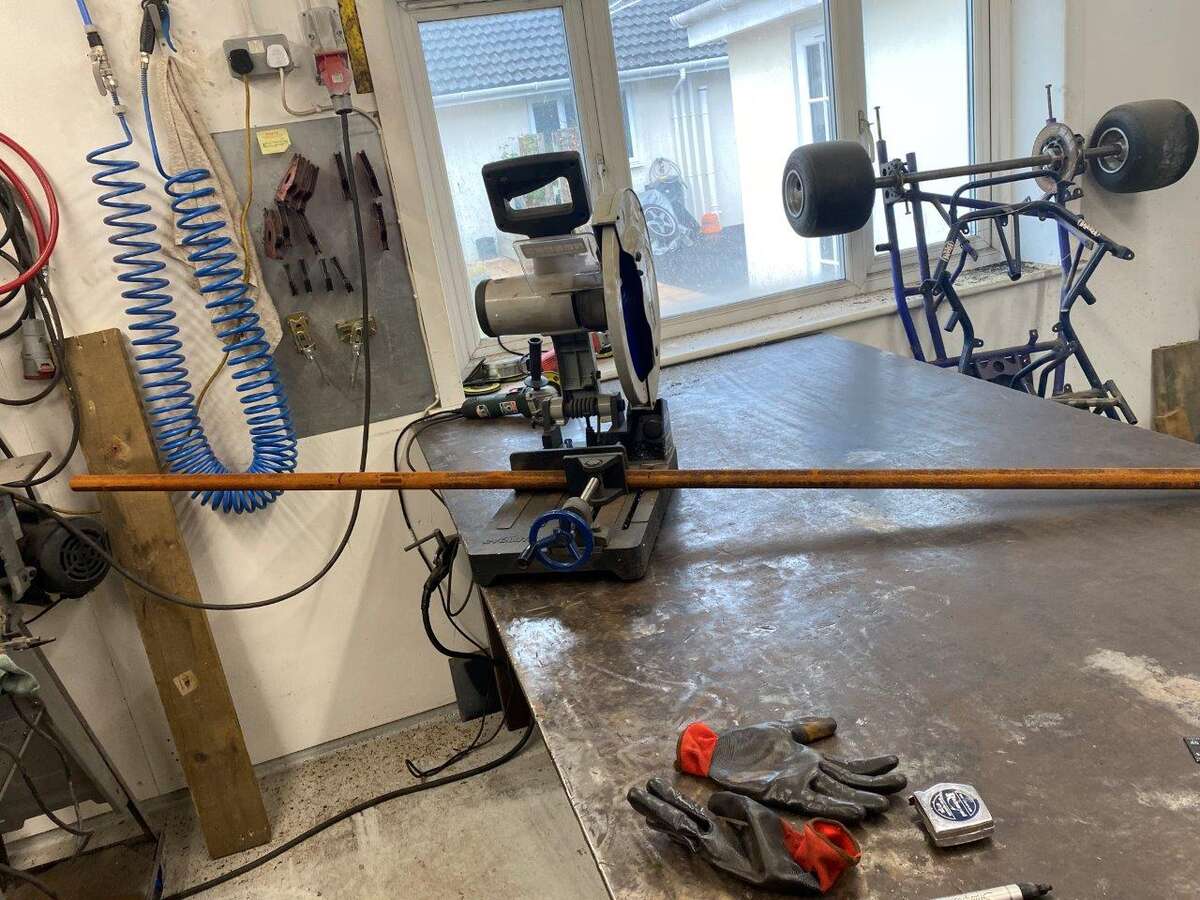
Now to test the fly cutter on a bit of old steel
That I cut off the mobile welding table I made…. This one
Using this
If that’s not a recommendation for these saw’s I don’t know what is
To the Mill – first side
Some time later
Wow – I like it
A hole is needed
Then some more old box section
Back to the mill and some more time later
Now weld a support bracket onto the first bar

And the box to the bracket
I love welding heavy metal
Warning – the following contains the destruction of 350z parts – viewer discretion is advised
Old exhaust end
If you cut the back off
You can take out the inner bit

To leave
More old box
Yes even more time later
Weld that all together
Then change the design
And hide the evidence
Add some straps
Add the stainless exhaust – first time welding stainless to mild steel and something that thin to something that thick but it Tig’d up OK
Off cut of worksurface from Mrs K’s kitchen refurb
And we have ………………………

Now I can keep my tools to hand at the Mill

And the oil won’t get knocked over
Over engineered? Probably but it was good practice and I now know that my Fly Cutter works
Be safe all.
Keyser - “Better to remain silent and be thought a fool than to speak out and remove all doubt.” – Abraham Lincoln (maybe I should have listened to Abe? )
-
4
-
-
Now it had all the holes in it I tacked it in place
From the back it looks like this
Then some filler bits for the corners
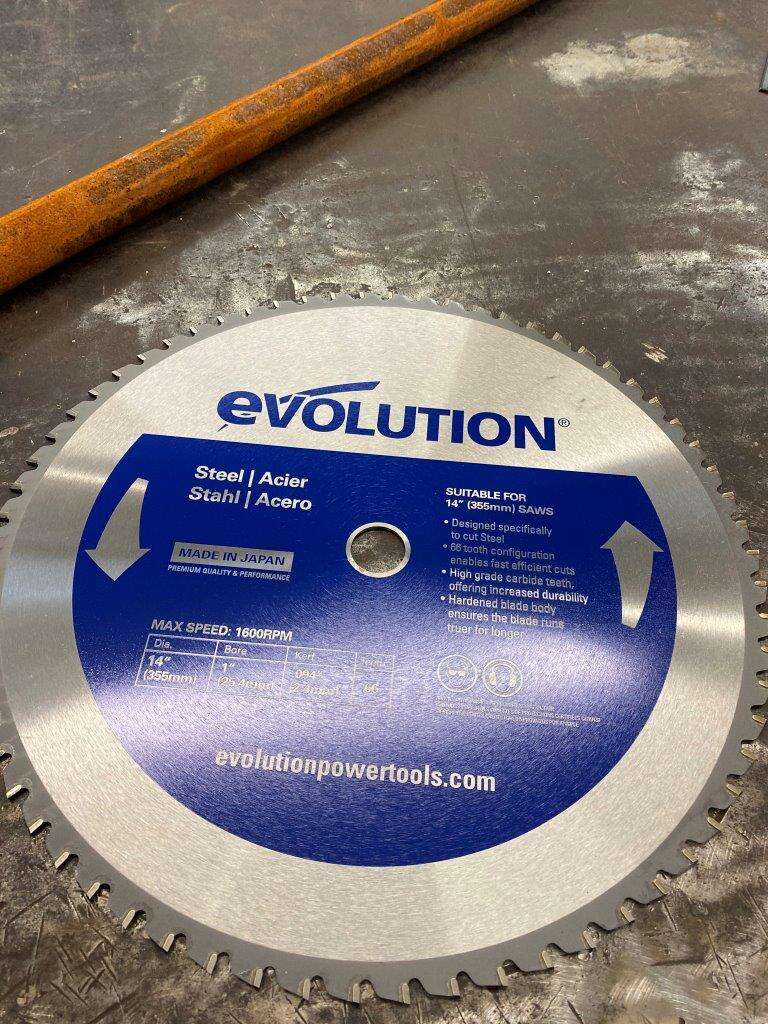
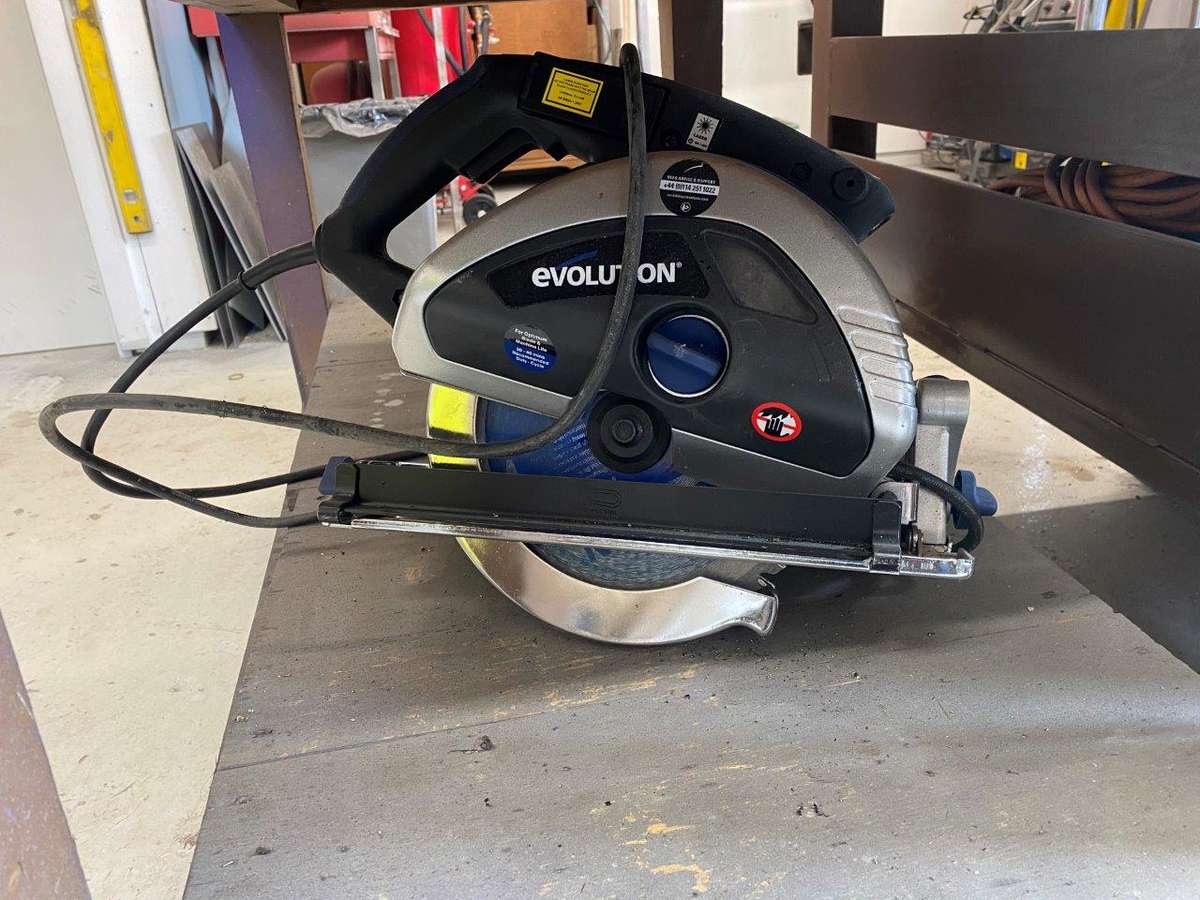
Here is something fun, I have a rather nice saw bench for wood, after a bit of research apparently you can use it for steel as long as you change the blade of course, it took some searching to find a compatible blade but I sorced one and have been using it, it does small bits well and gives a lovely clean cut
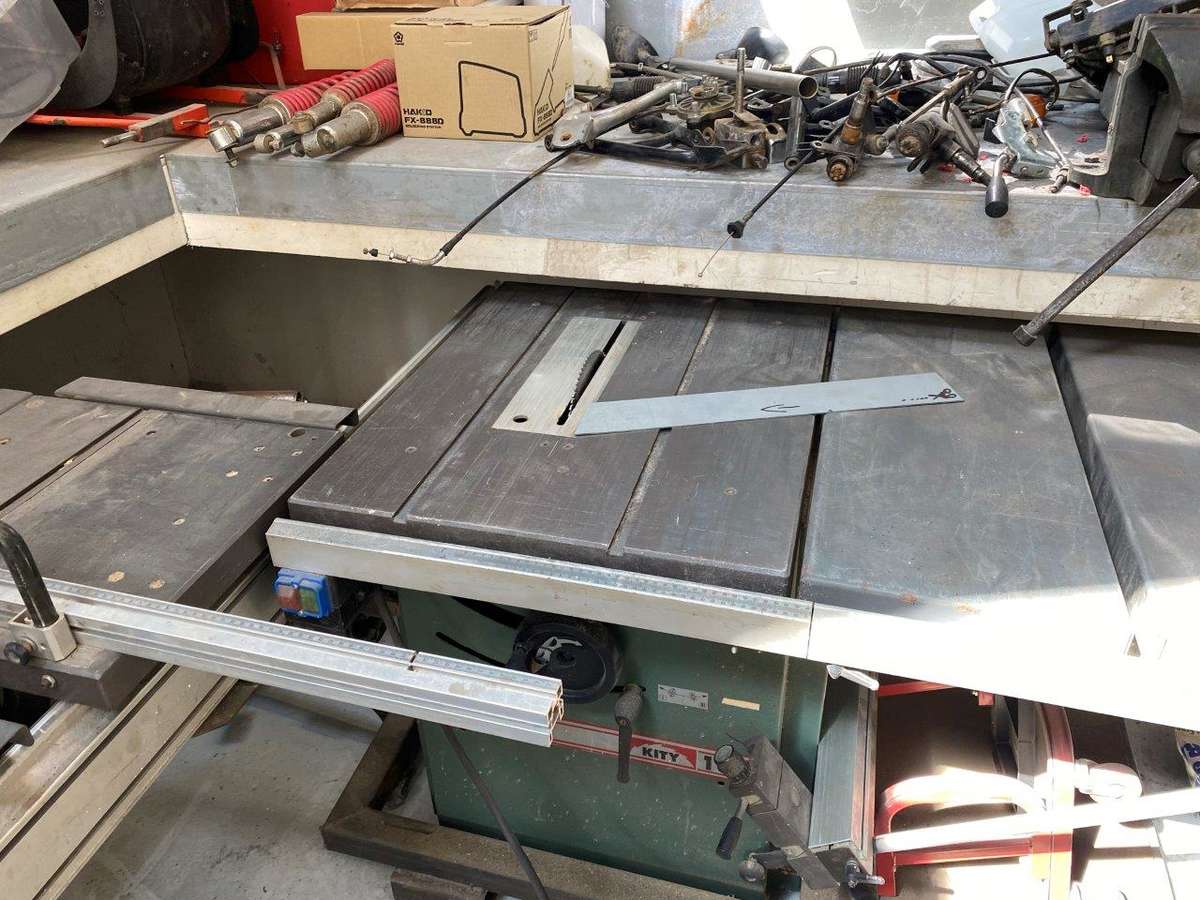

Used it to cut these, the curve was done with a flap wheel on the grinder
Welded those in and finished the rest of the welds
That just left these holes that need to be at least splash proof
Marked up some 1mm
To make these
Which I didn’t photo fitted – use your imagination
Bored of saying stay safe so Have fun instead
Obut do stay safe Keyser - “I never really understood the word ‘loneliness’. As far as I was concerned, I was in an orgy with the sky and the ocean, and with nature.” ― Bjork (lets just not go there
)
-
3
-
-
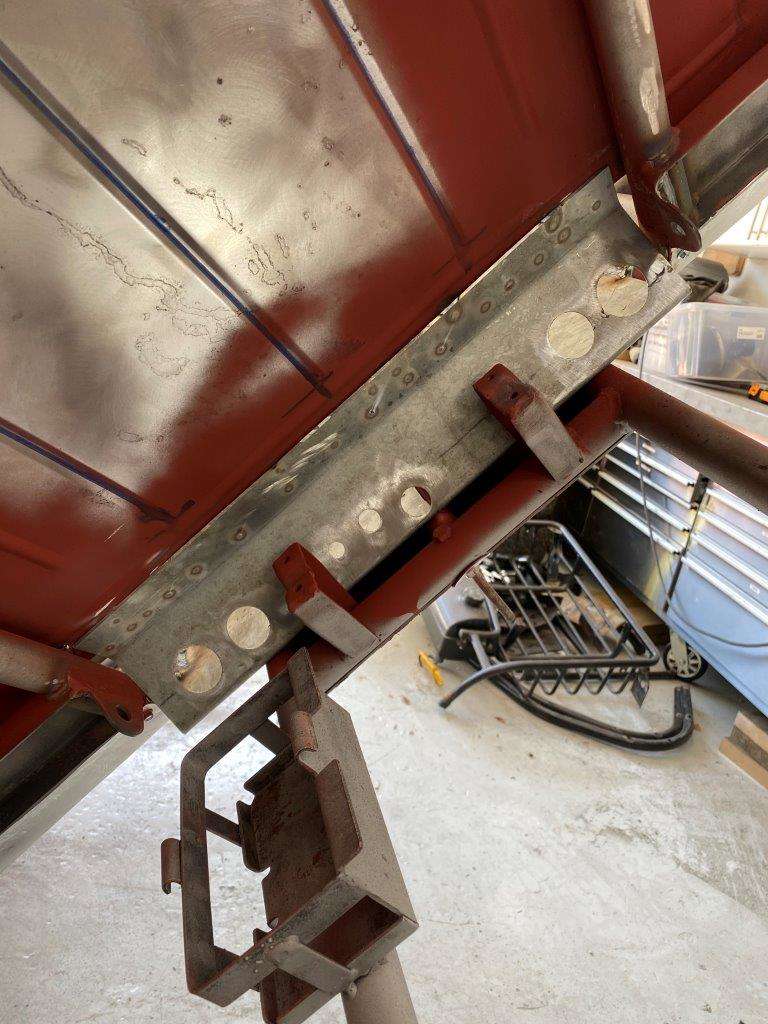
Morning folks,
Weekly update from the Zed Shed – no work on The Bug this weekend as I decided I needed to sort a few little jobs and got into a couple more side projects – more on those in later posts
But at the end of last week I finished the firewall
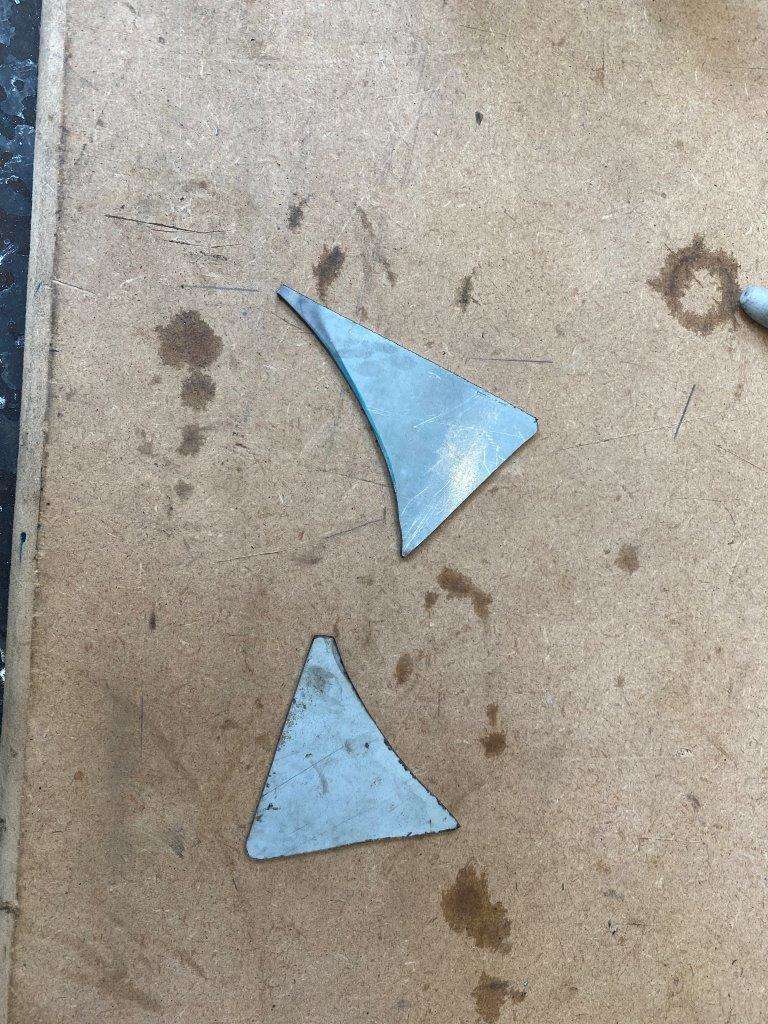
So the job was to do this bit at the bottom,
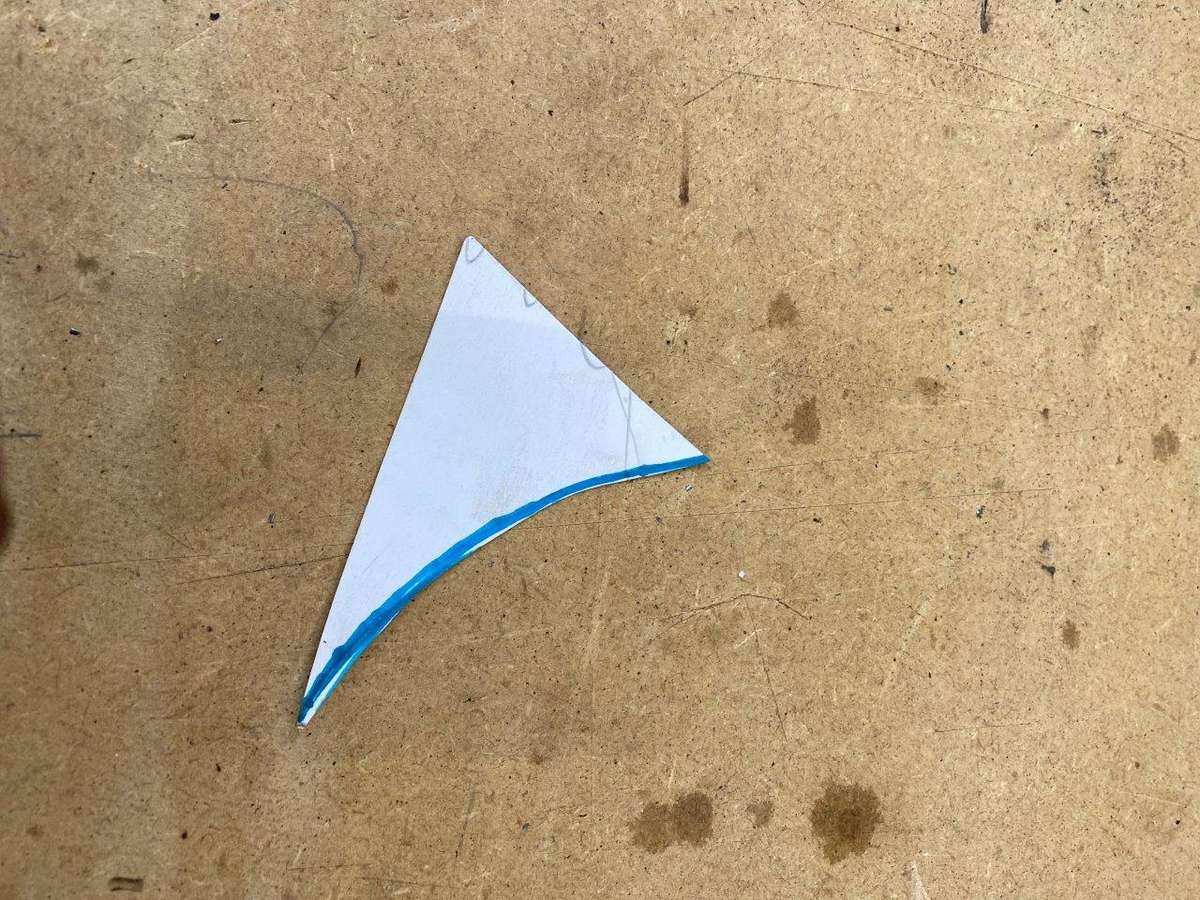
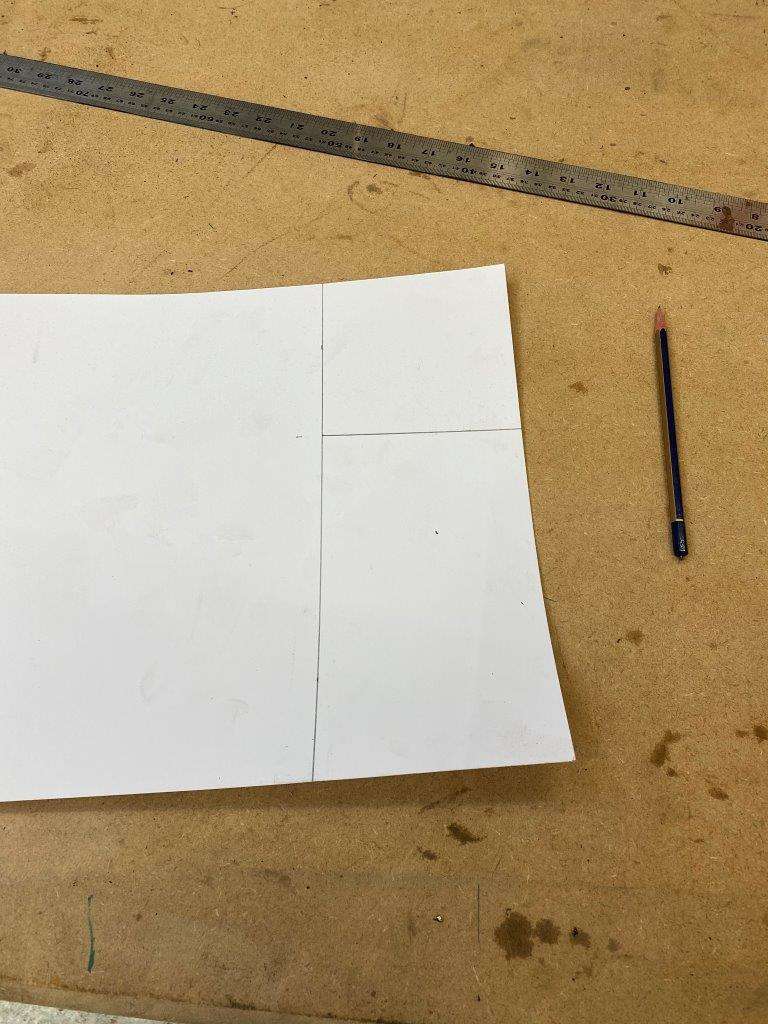
A good old paper template was needed
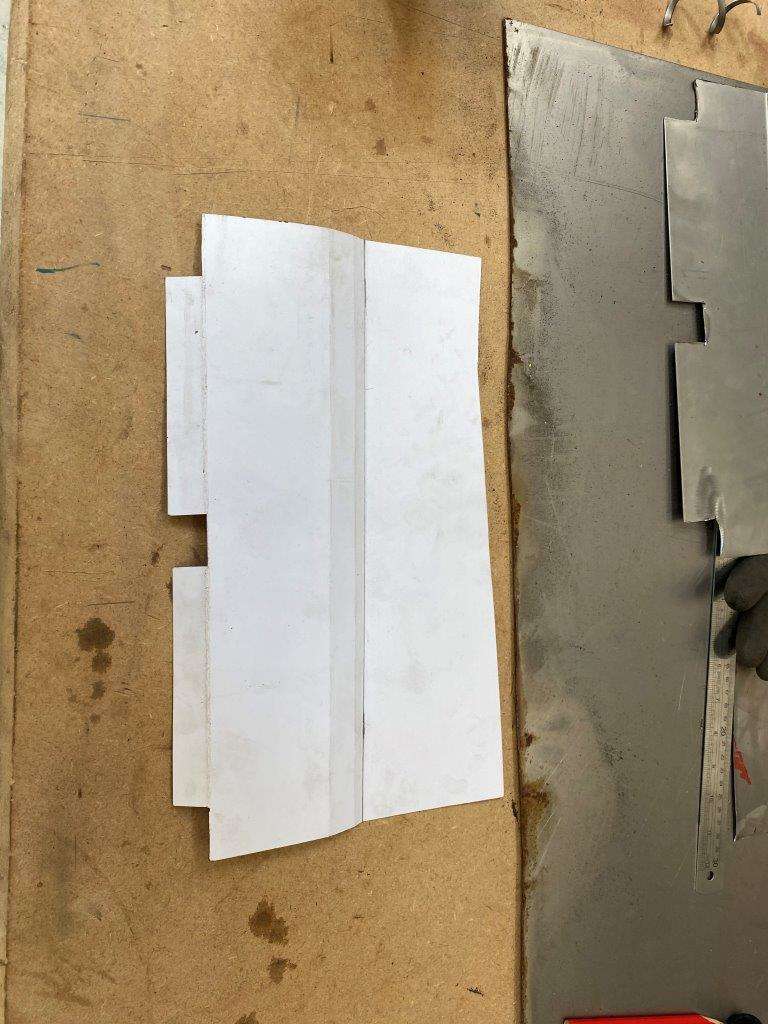
Transfer to 1mm stee, bent and trimmed to shape
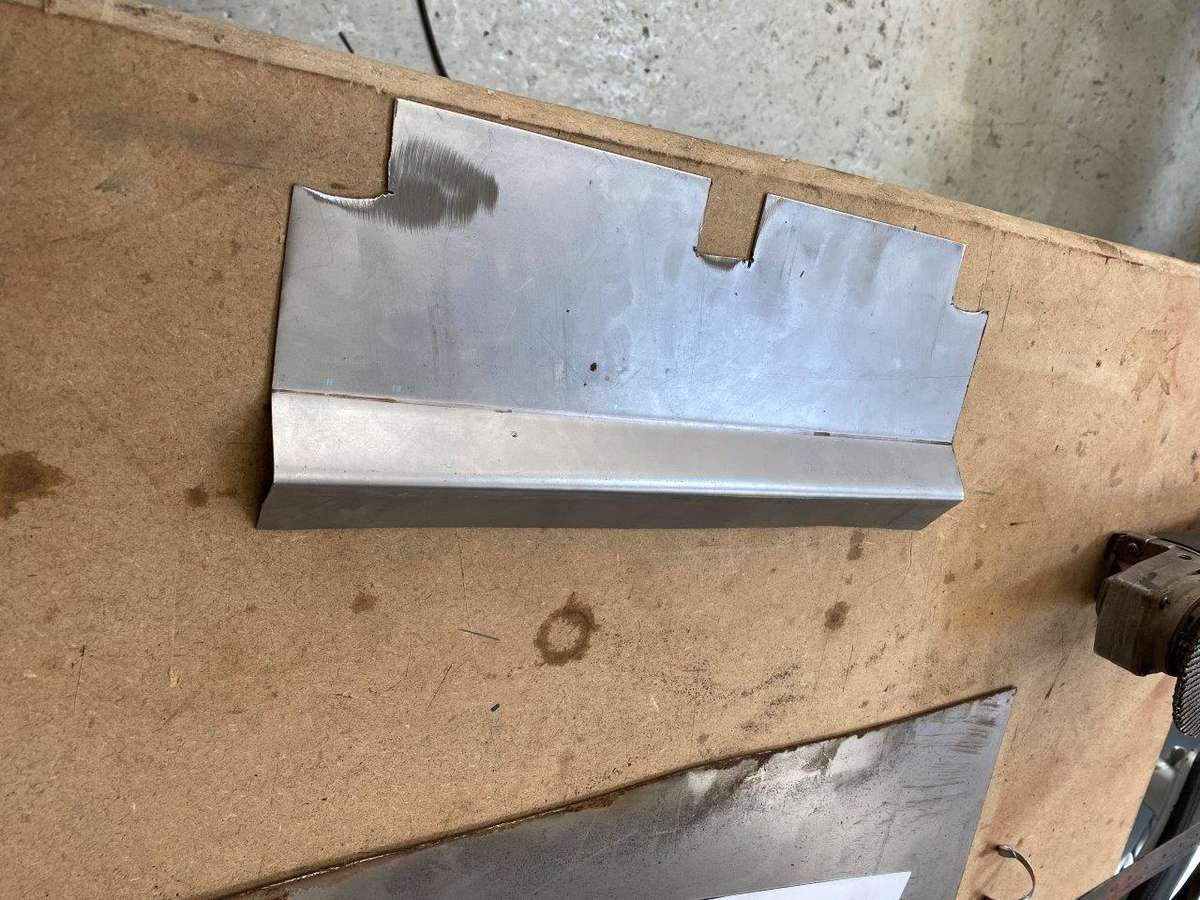
Fits like this
I used my magnetic “crickets” to hold it in place
As I had my obligatory coffee before moving forwards, I was looking at the new panel and it just didn’t work for me – not sure why but I just wasn’t happy to carry on with it like that
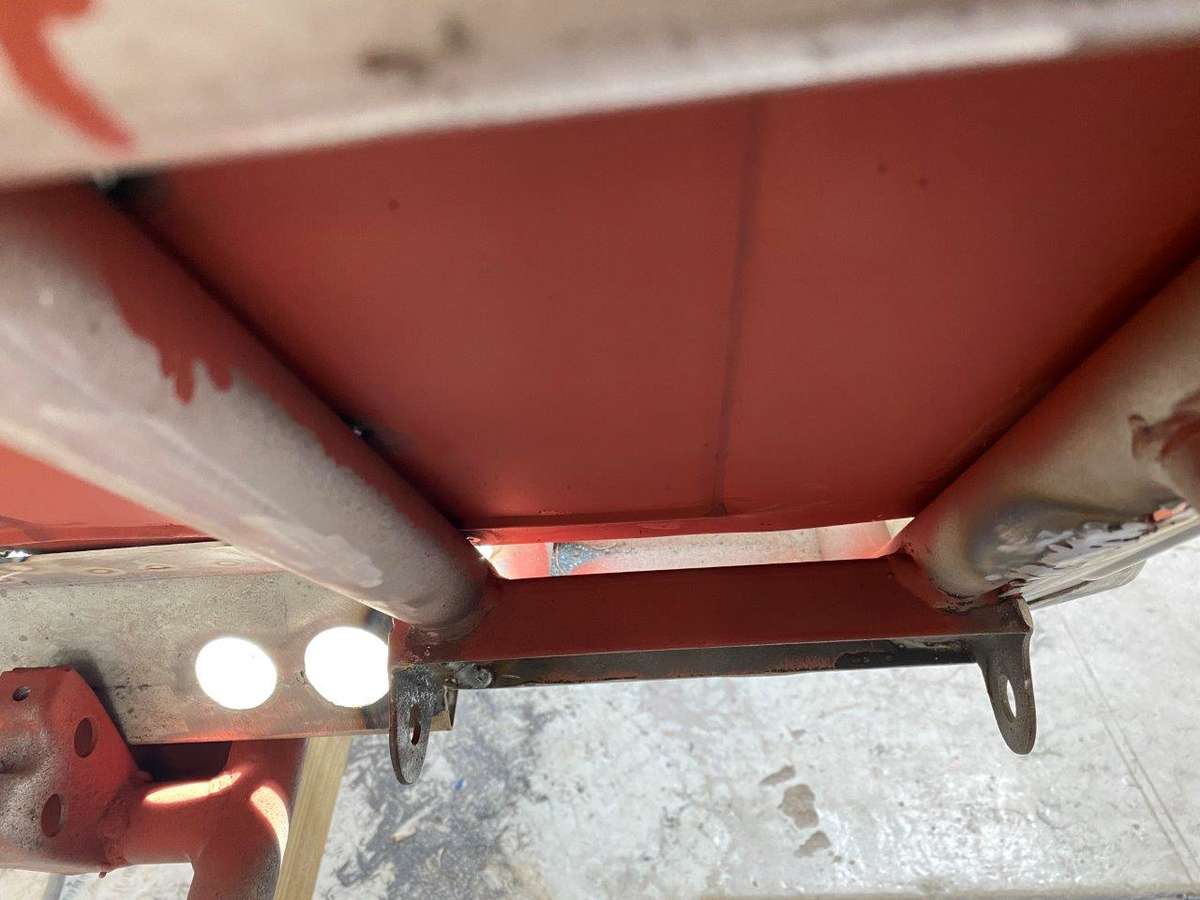
Its mostly as I have to tie it into the floor pan but can’t weld it as the floor pan is now removable So I binned it and went for a new design in the 3mm steel like this
Now before I can fit that I need to take a look at the wiring loom and allow for the pipes, linkages and wires that need to pass through the firewall, it will be a lot easier to do that now rather than later, I did take some pictures to help me keep track, no doubt I will have forgotten something
Wiring loom laid out
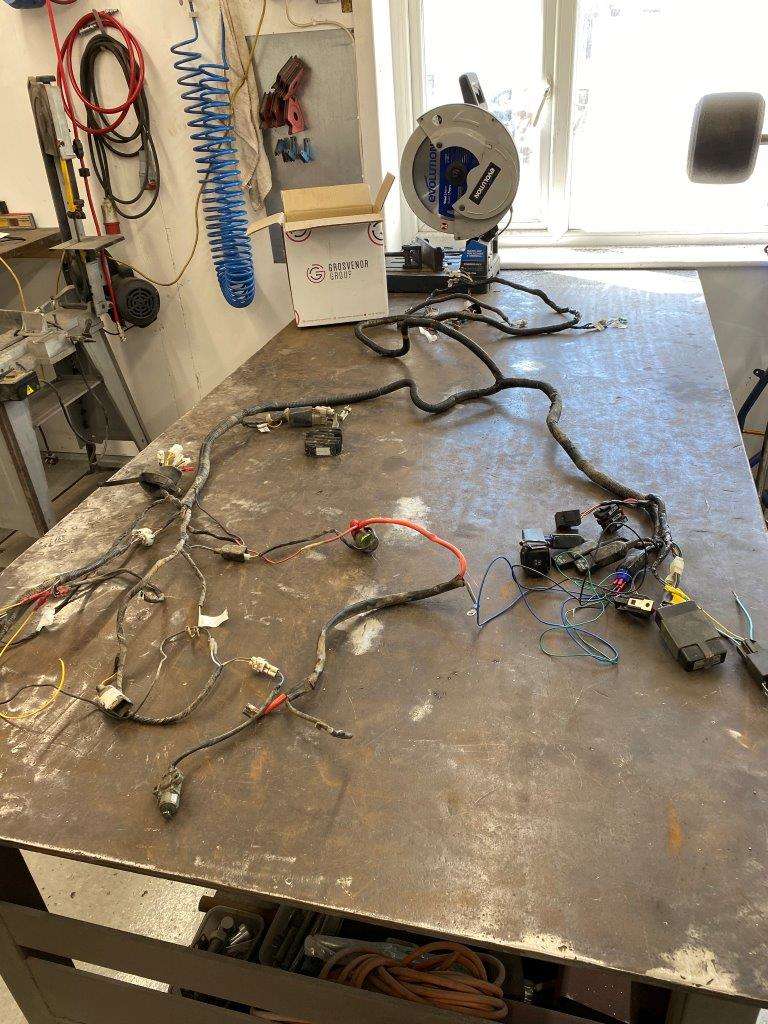
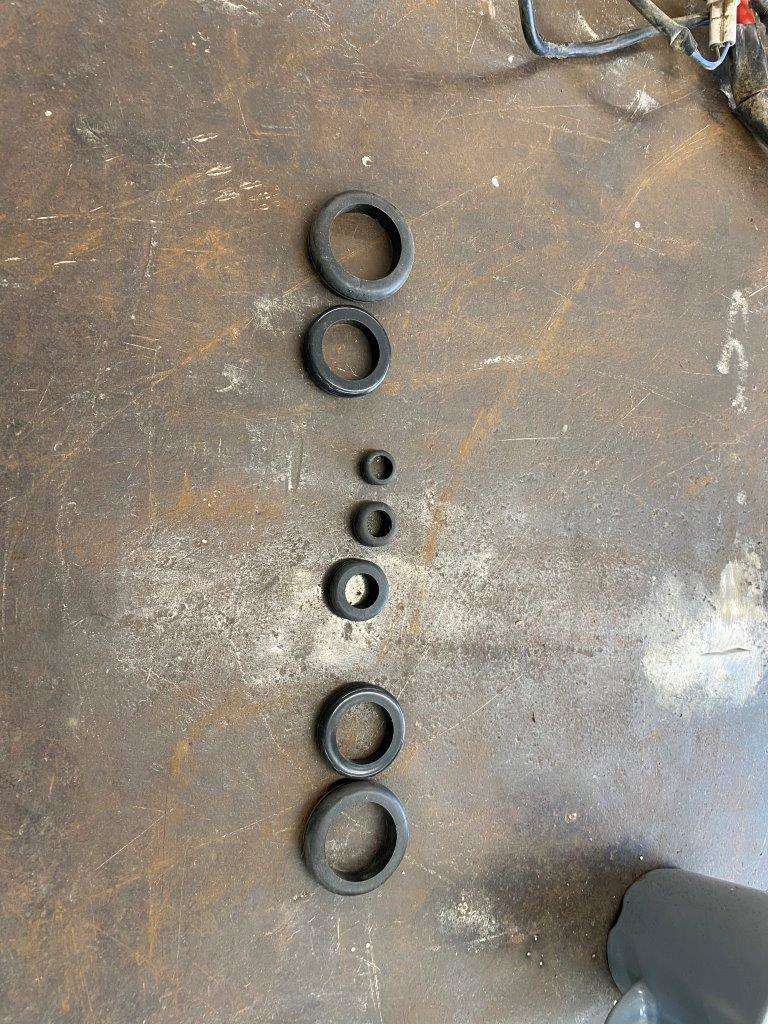
Got my grommet selection out
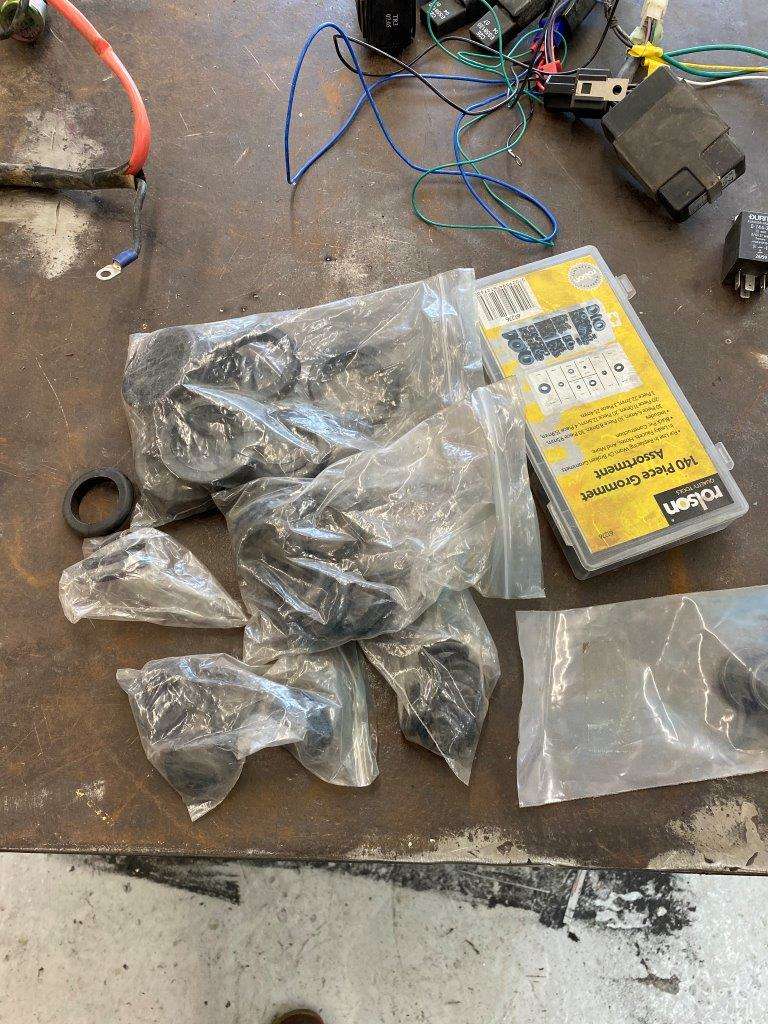
I settled on this lot
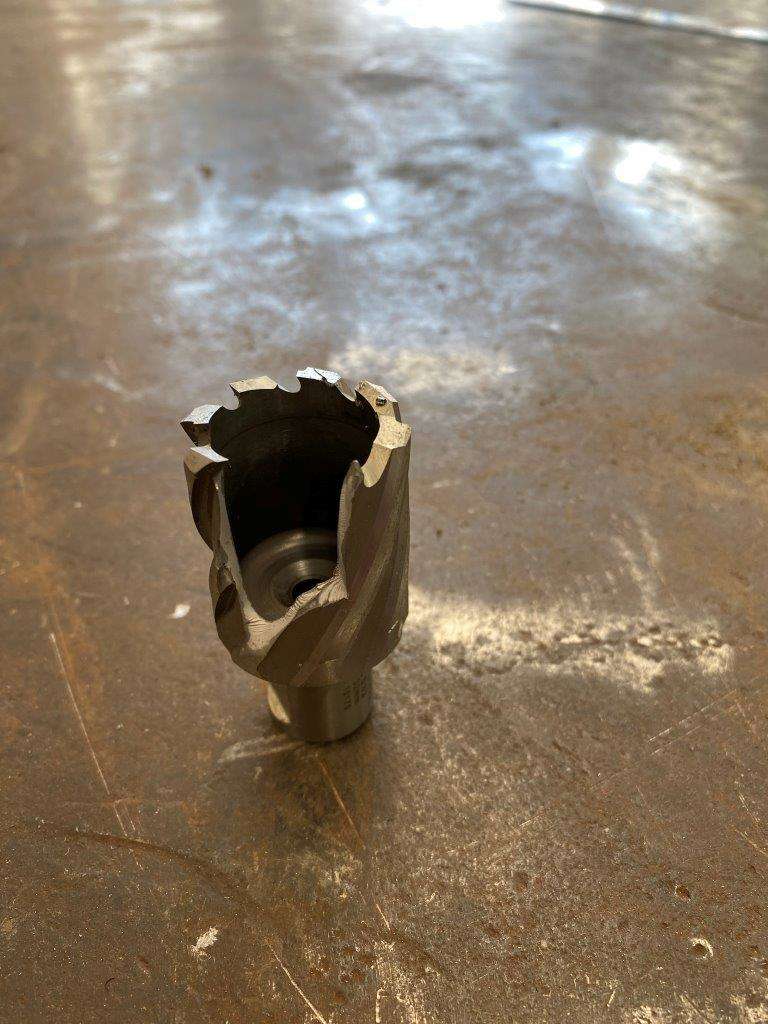
Then a selection of annular cutters to make the holes (and more coffee)
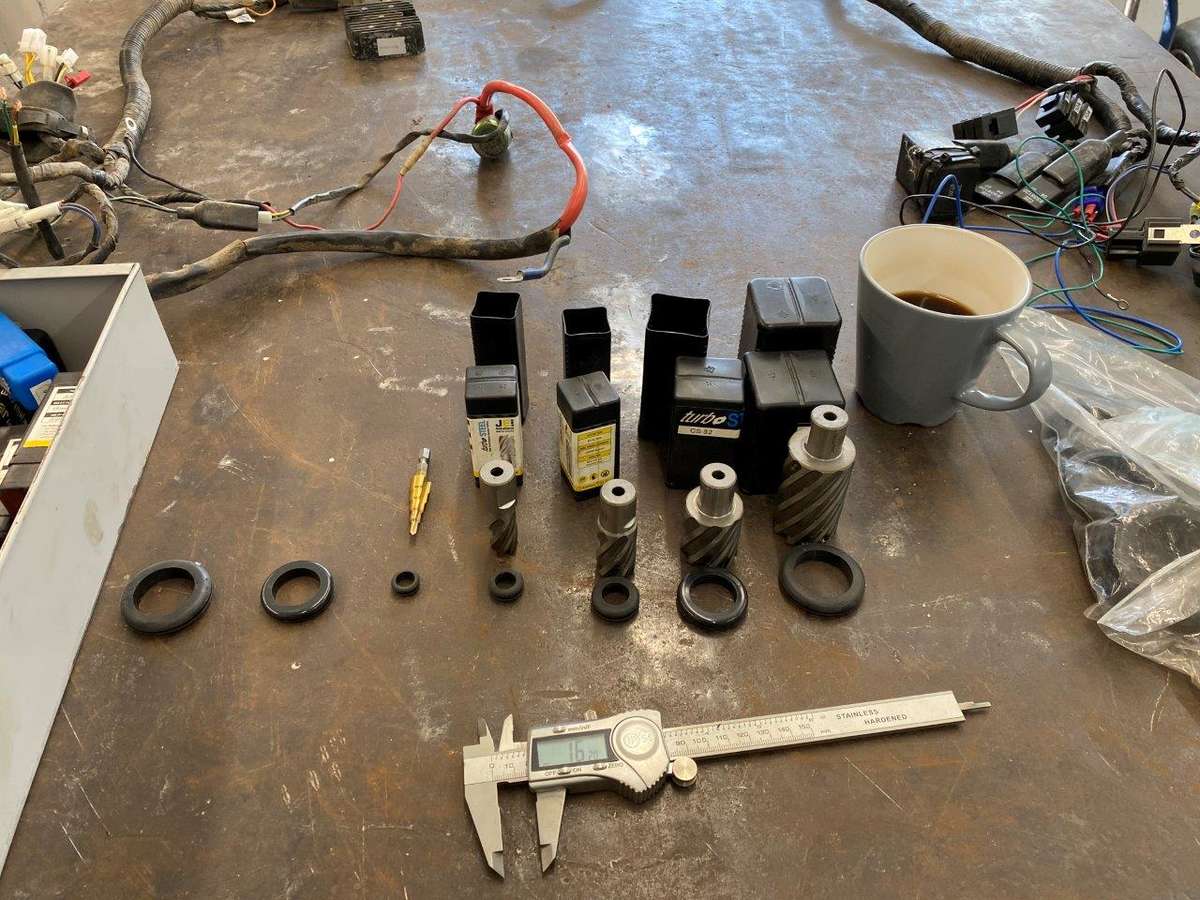
And finished with grommets tested for fit

An annular cutter was harmed in the making of this post
More coming ………………………..
-
2
-
-
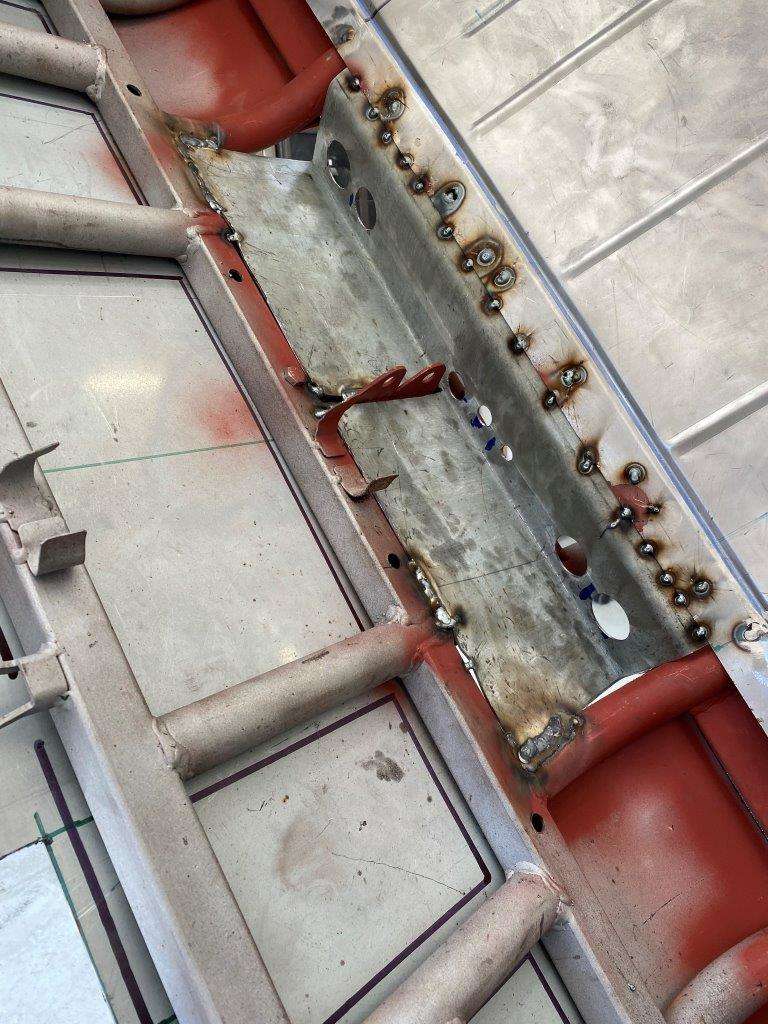
Good morning all, got a couple of hours in again yesterday and have a plan for the weekend but first I need to bring you up to speed on the firewall installation.
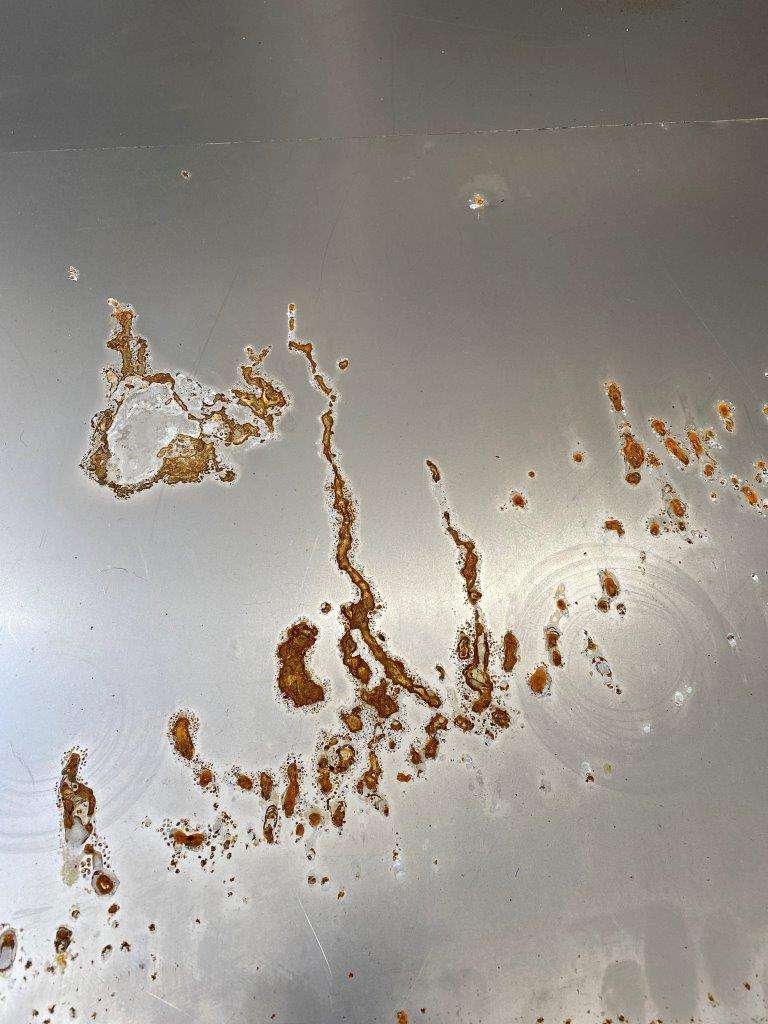
So starting at the scrap pile I selected a sheet of 0.9mm mild steel – this is just standard sheet no coating so I thought best to use it before the rust gets to it.
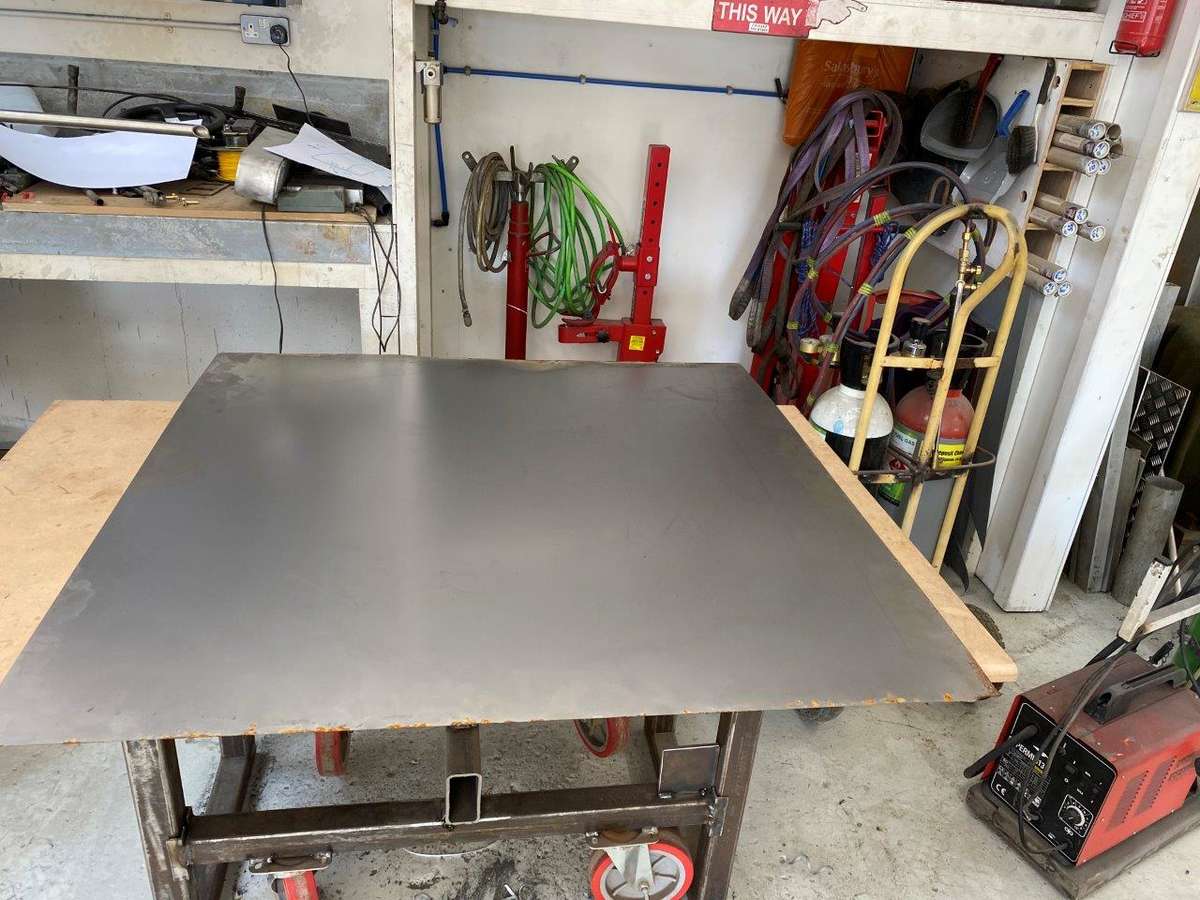
Well the rust is creeping in
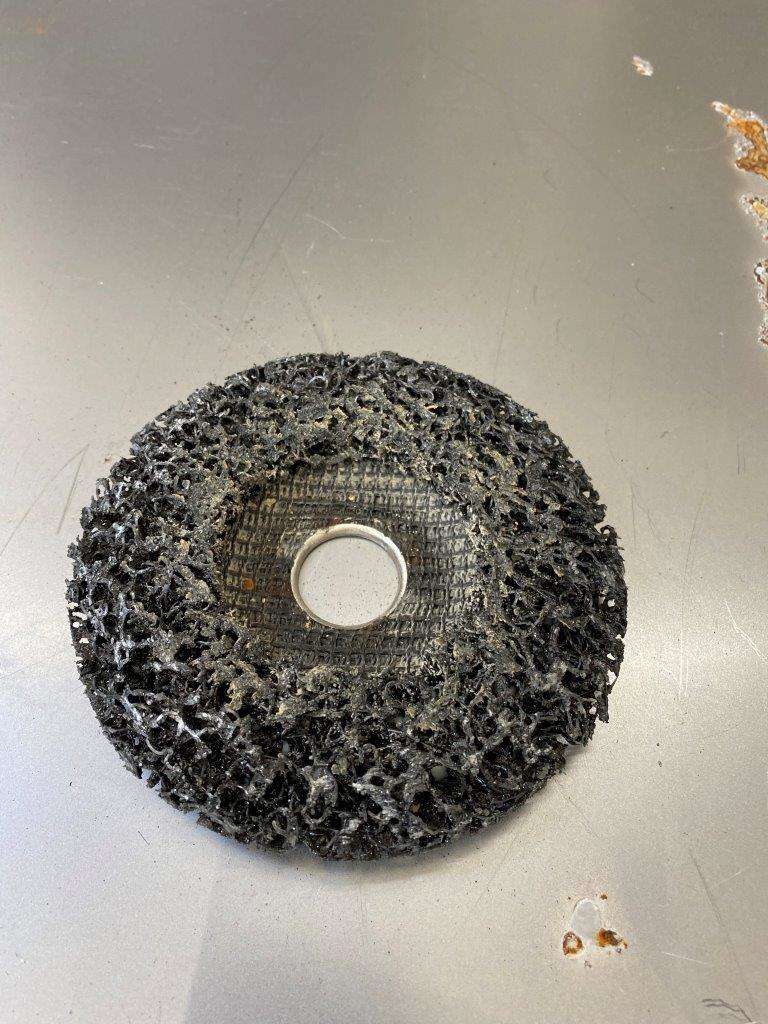
I used one of these paint removal disks for the grinder as this is only thin sheet and any hard sanding will weaken it.
Got the surface cleaned up OK though
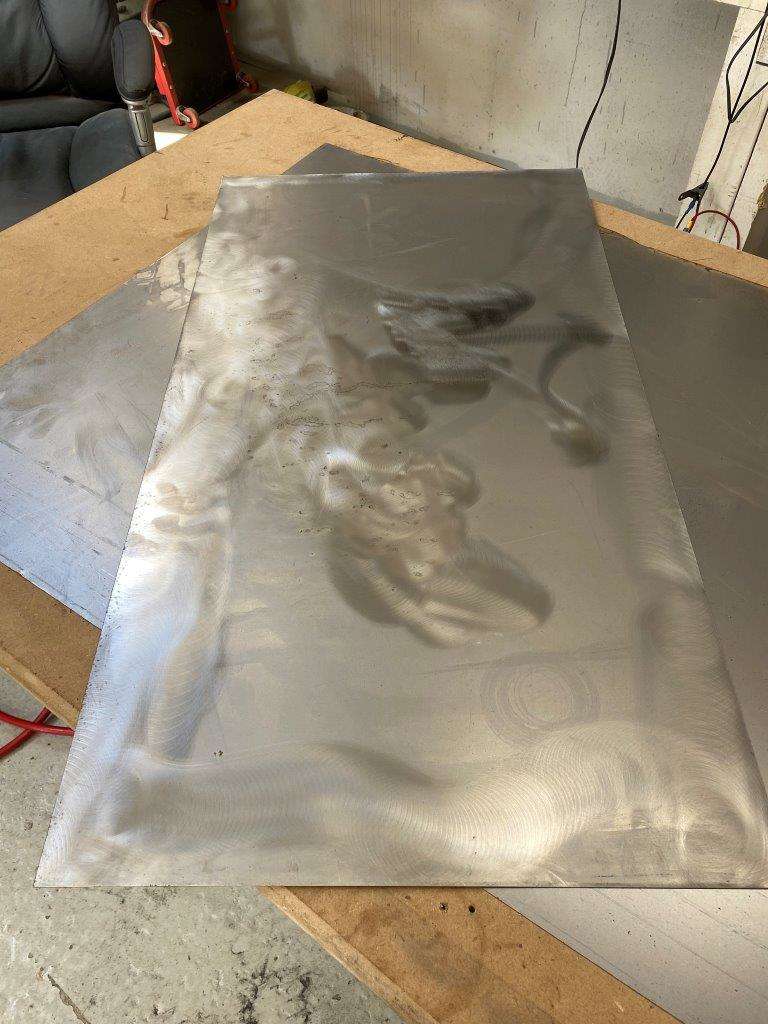
I took a few measurements then put some weld through primer on the frame as again paint wont get a good hit on the back edges after the panel goes in.

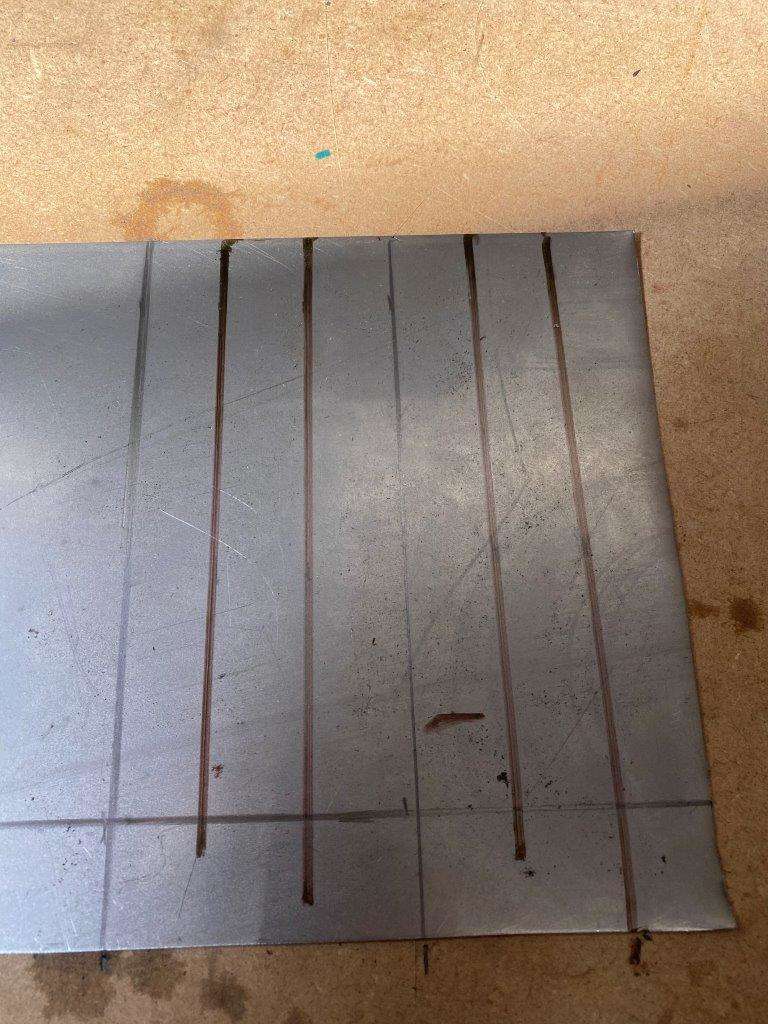
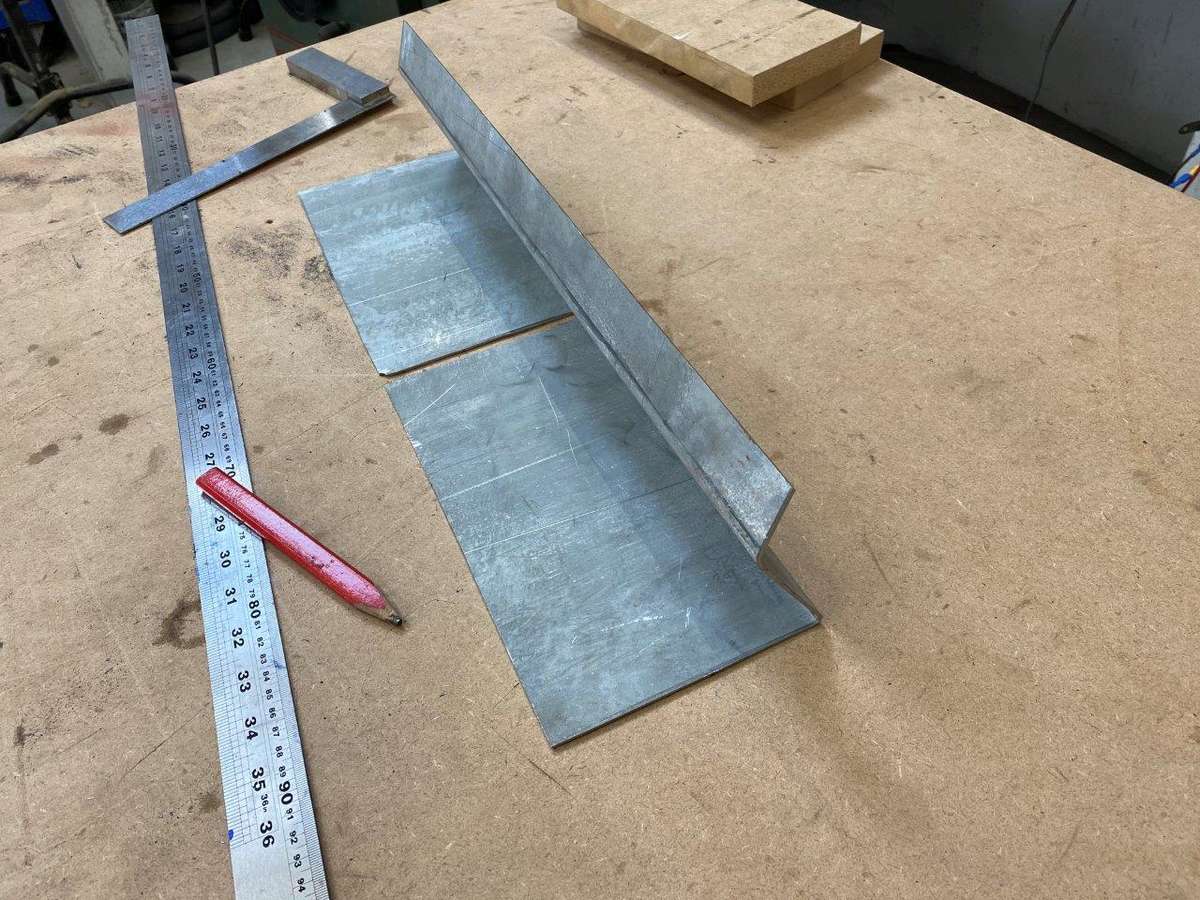
I started by cutting to size then marking where the frame rails will sit
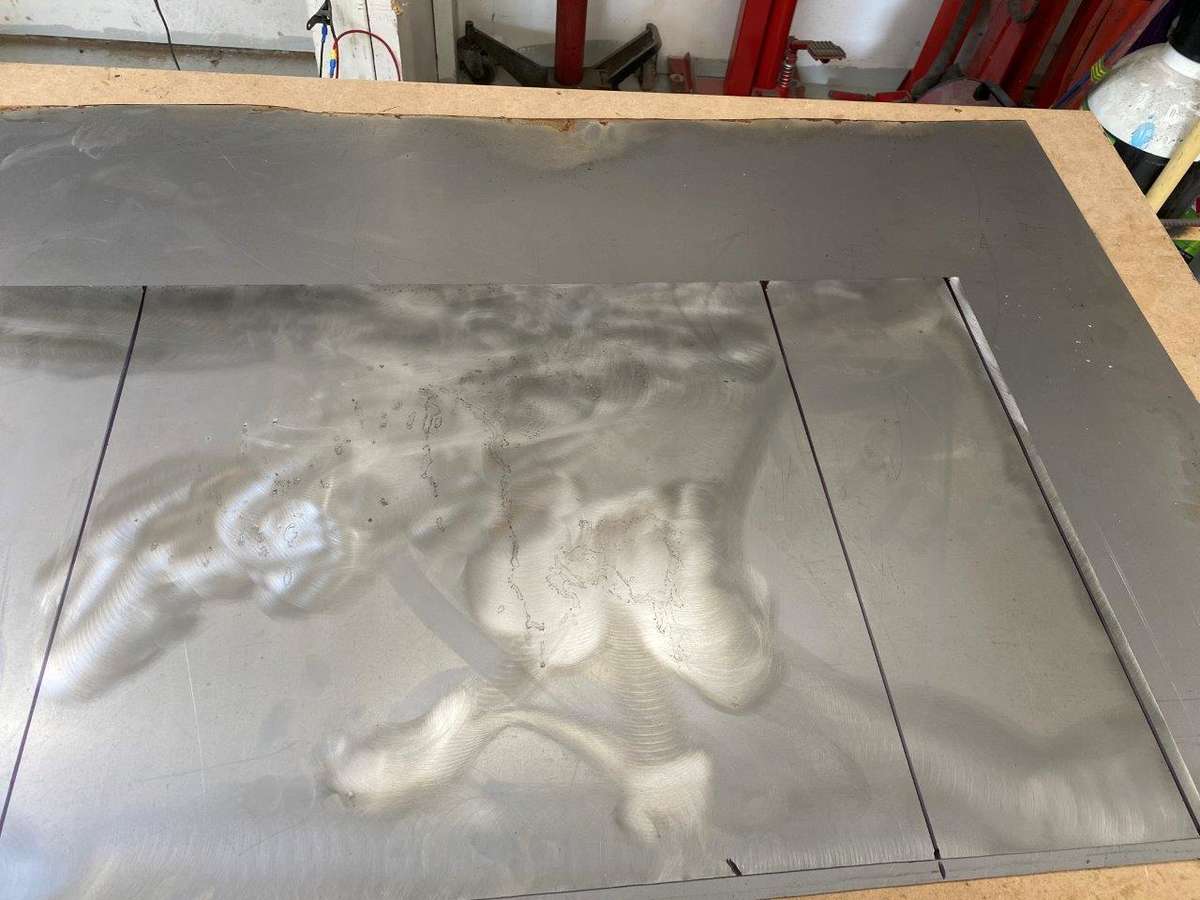
Then I marked up for some strengthening beads
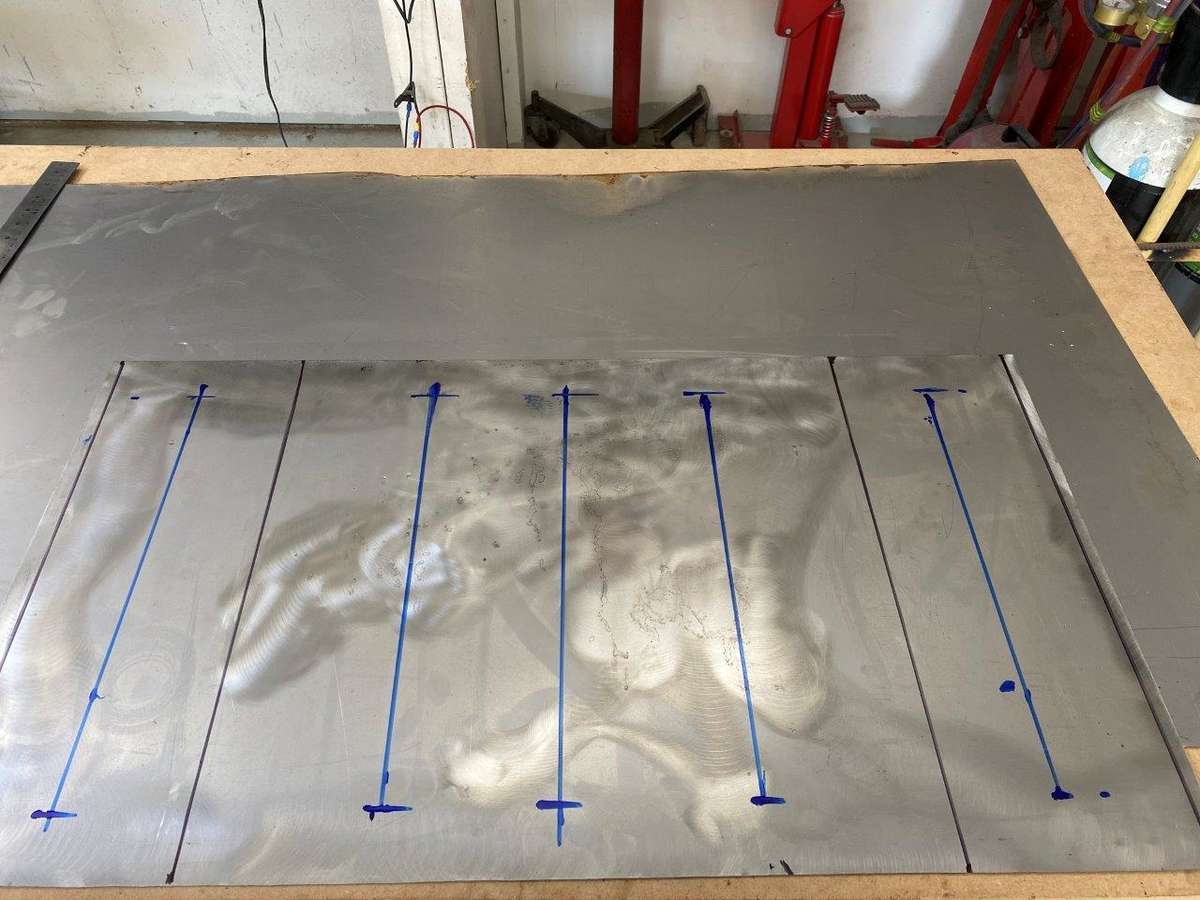
Ran those in
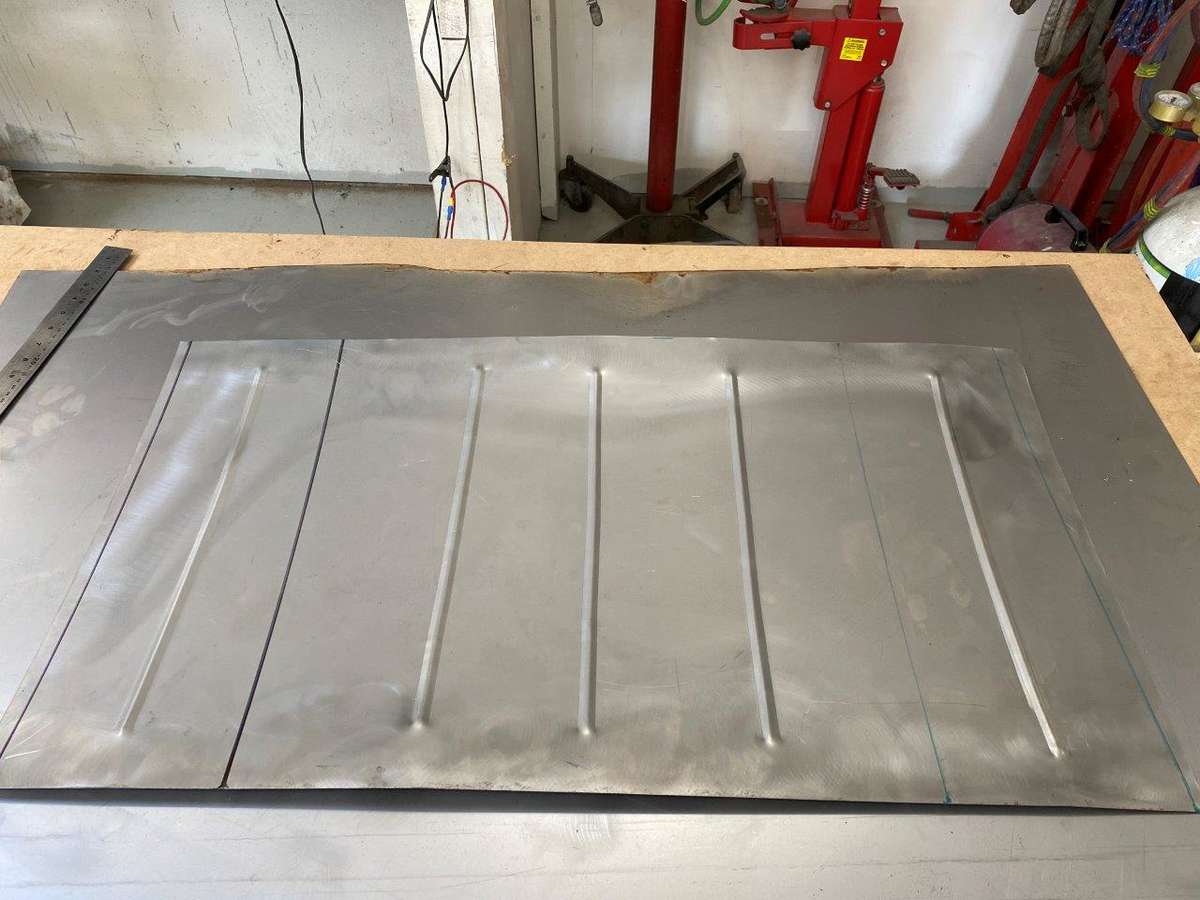
As you can see this starts to put tension in the sheet causing a slight bow I then added 2 from the other side to help counter the bow
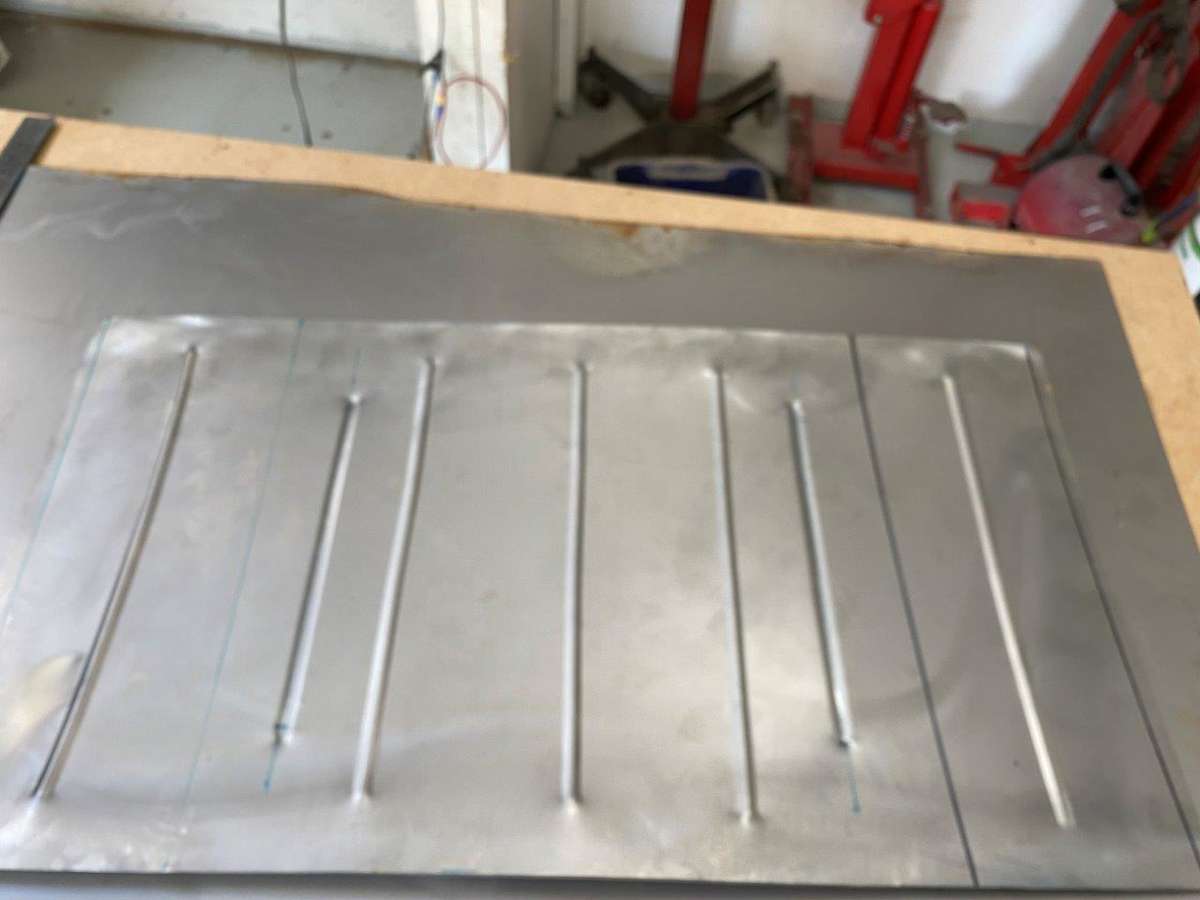
Then one along what will the bottom as this does not have a rail to support it (yet) I also drilled it for the spot welds
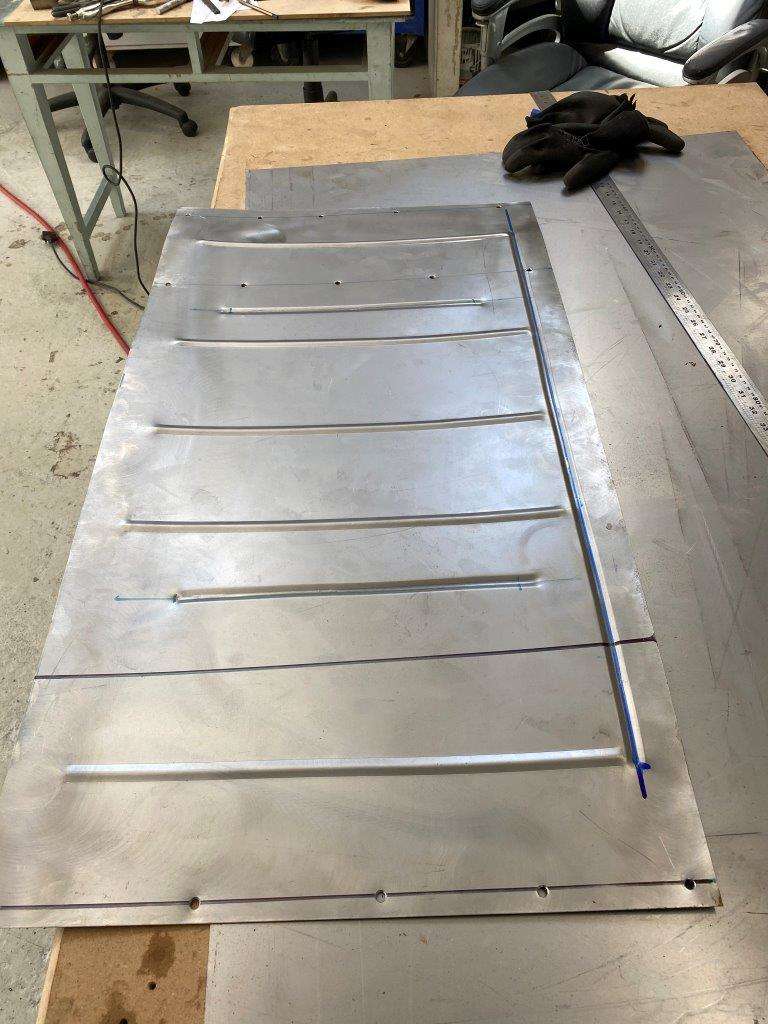
Some primer on the back face
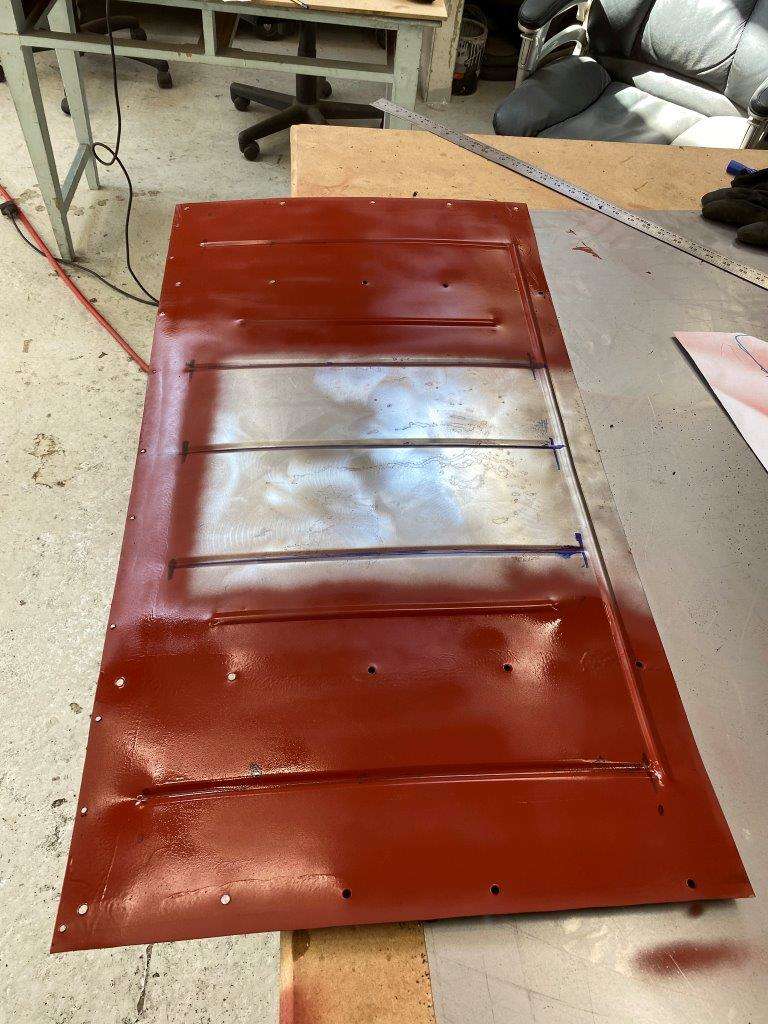
Clamped it in place and welded the top edge
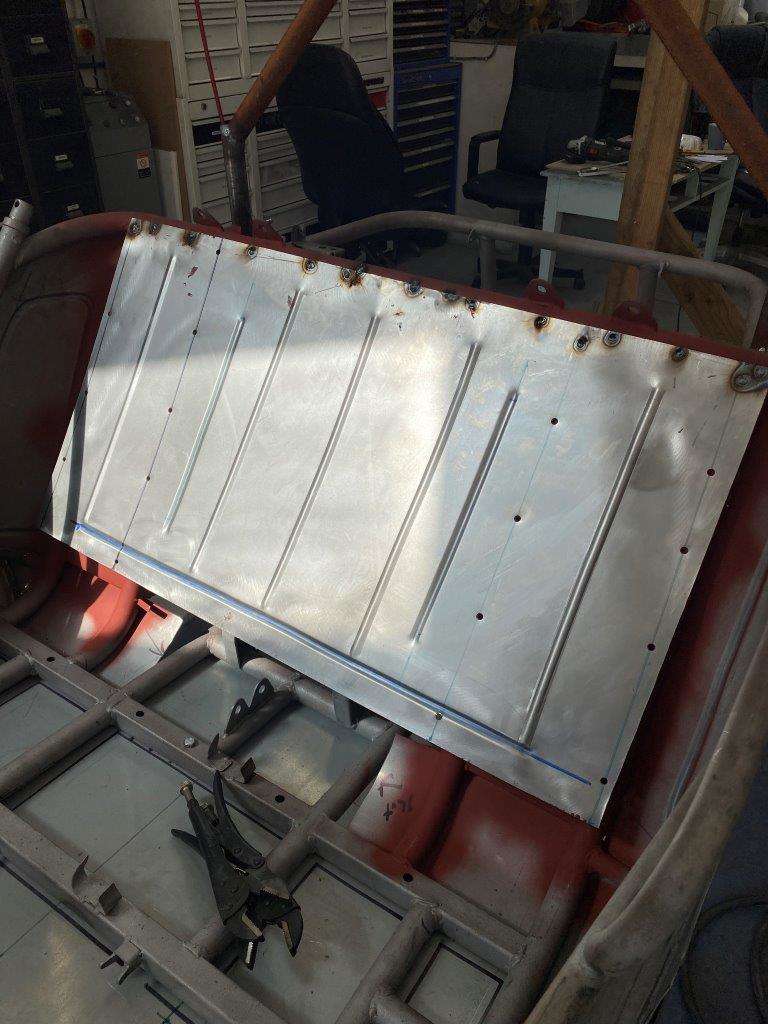
Then I clamped on a spare bar to keep the bottom edge flat before welding
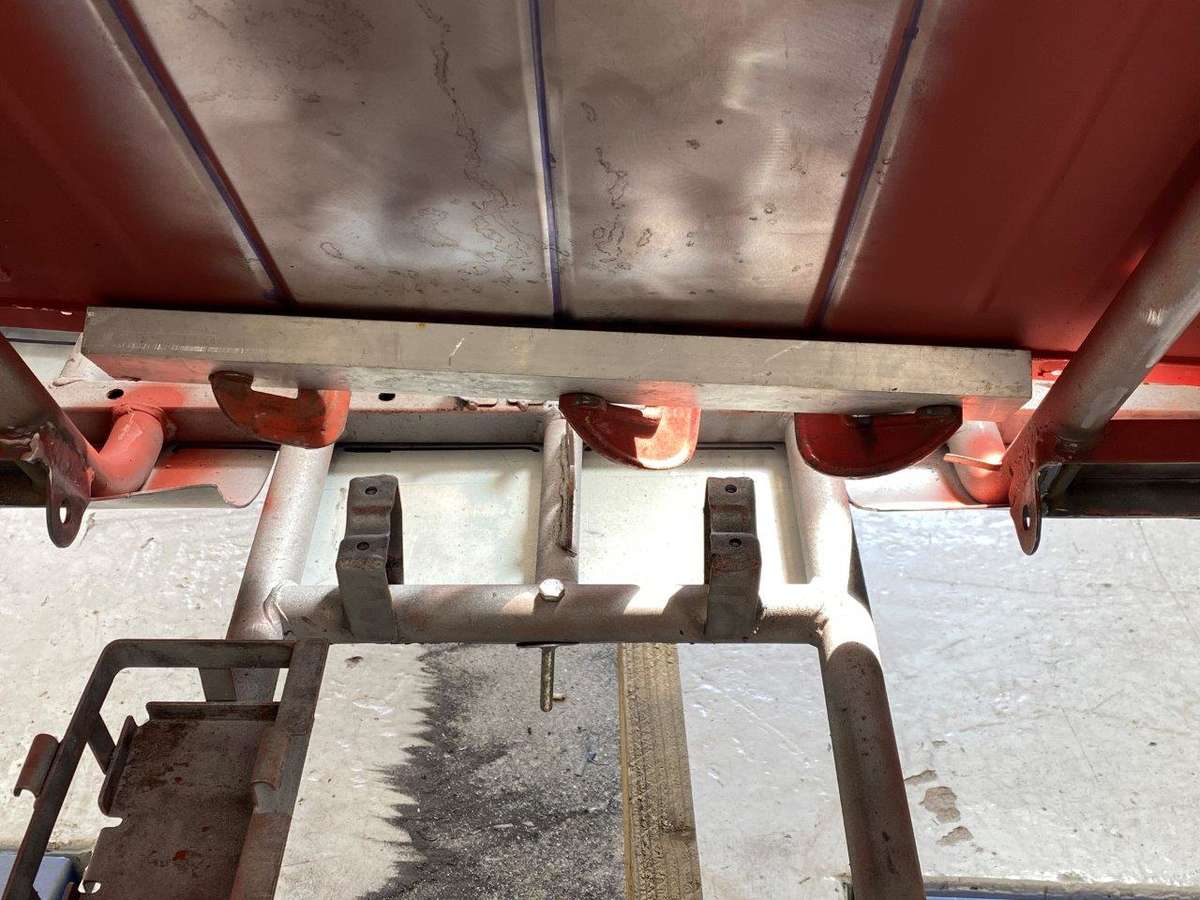
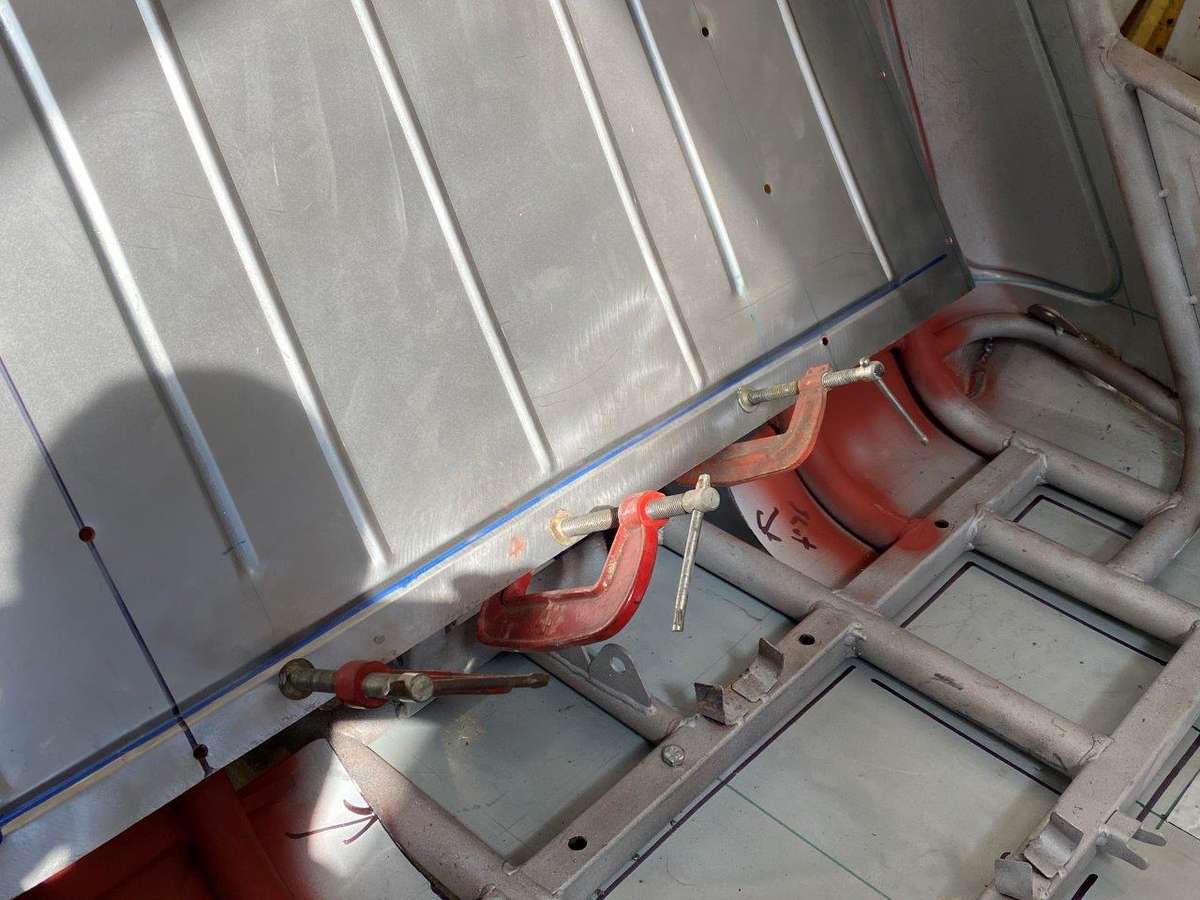
Then finished the spot welds and linished back
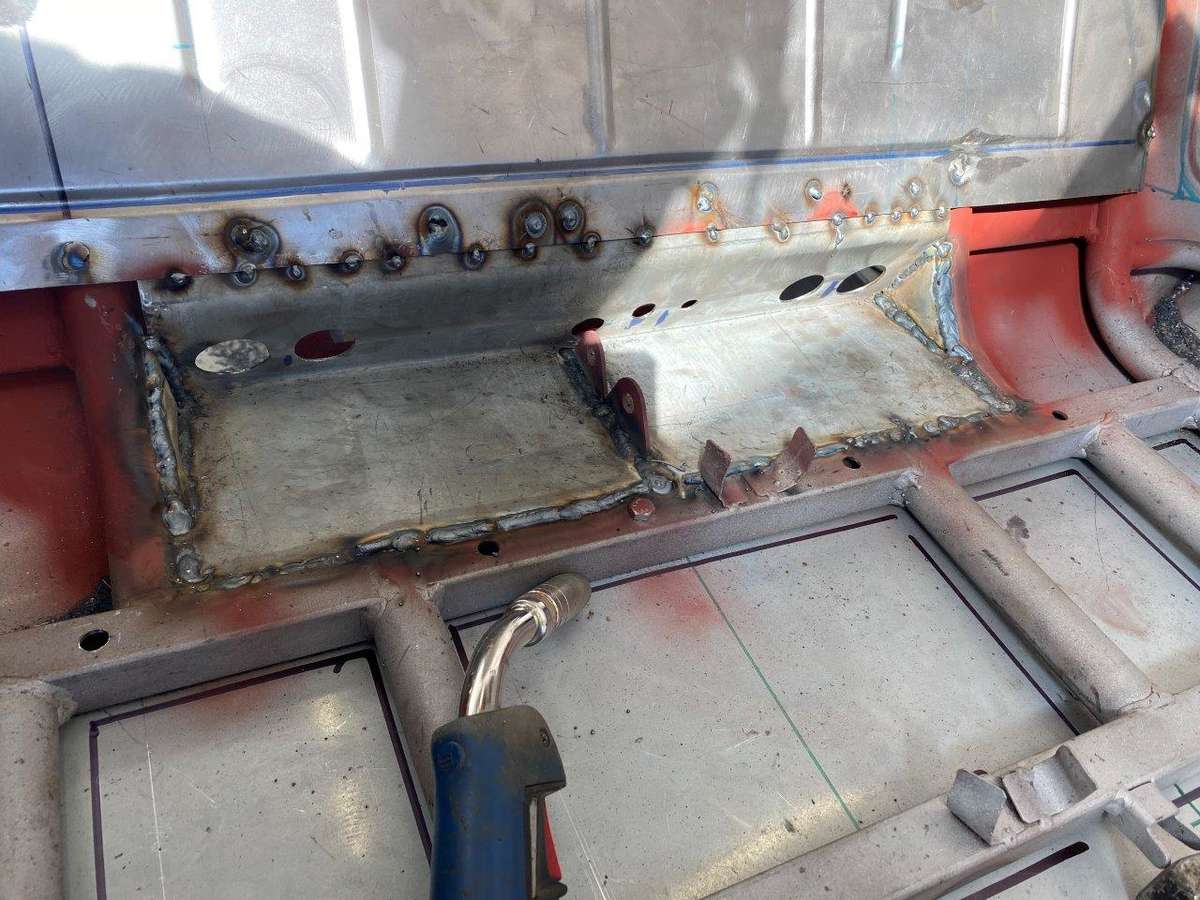
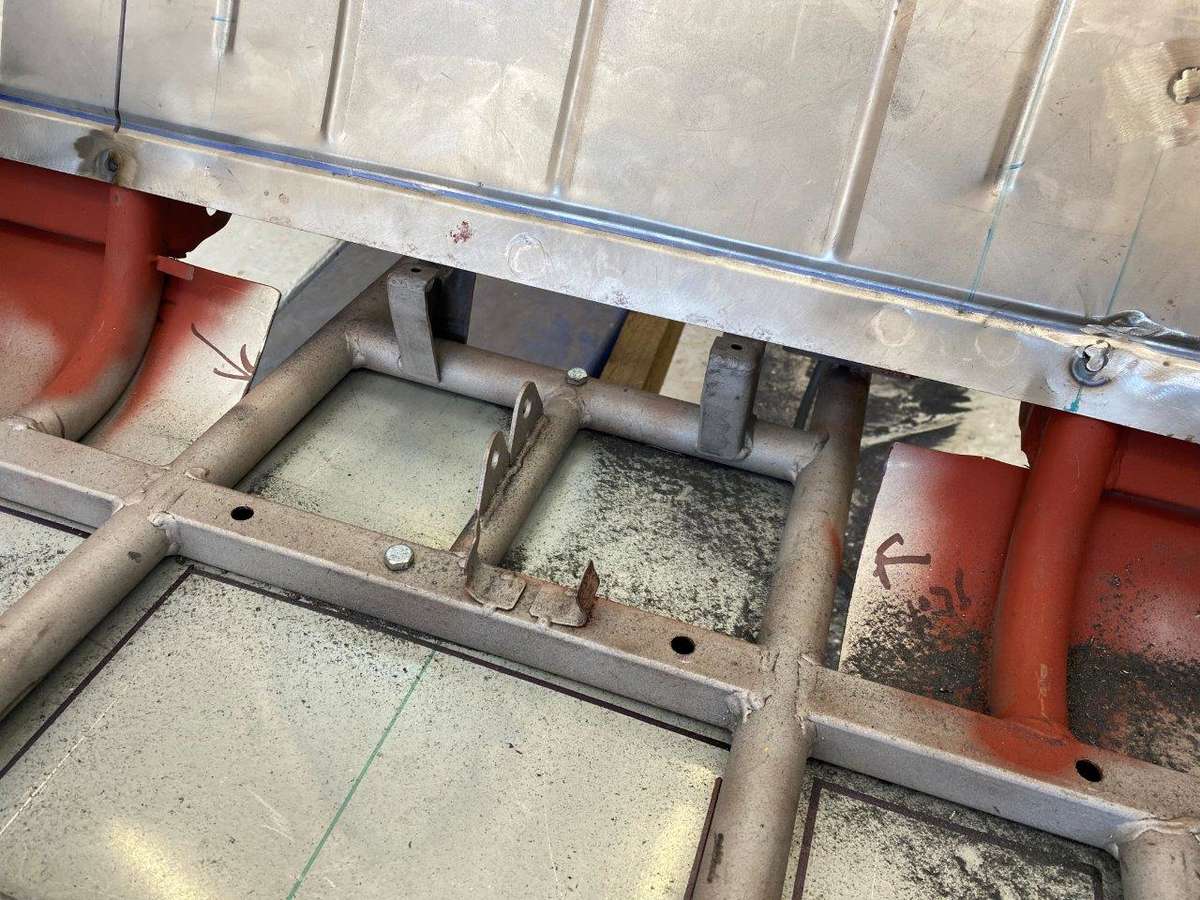
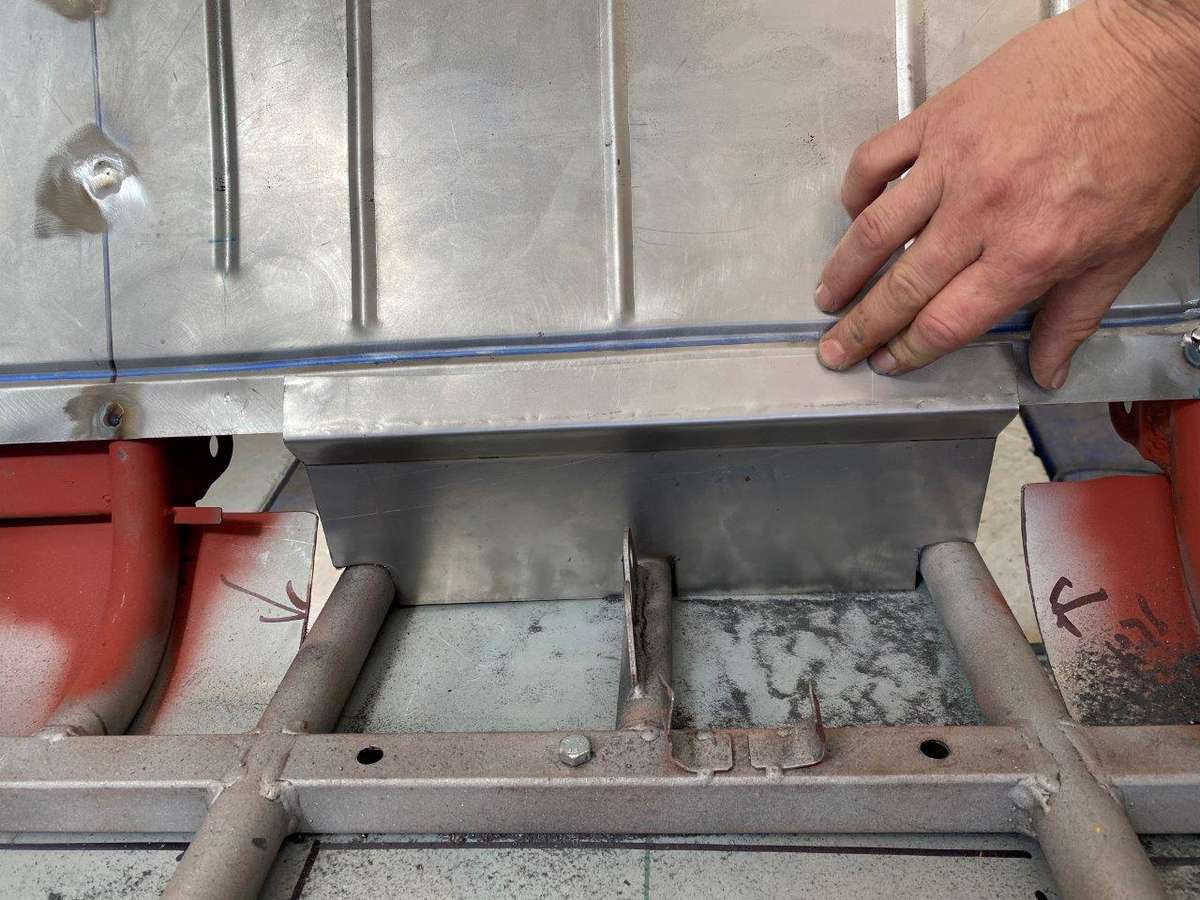
Next I have to sort out the gap at the bottom and tie it all into the removable floor pan.
Be Safe Guys n Gals – have a great weekend I will have hopefully have more on Monday for you.
Keyser - “Do not whine... Do not complain. Work harder. Spend more time alone.” - Joan Didion
-
6
-
-
8 minutes ago, SuperStu said:
First firewall looked fine, just needed a bit of filler, some sanding and a splash of colour
Trying to avoid filler if possible - I dont mind a thumb full to hide a weld line but don't want to shape the panles with it - It's probably me but the rugged off road thing keeps me away from filler I want steel - but Thanks for the input all comments welcome
-
1
-
Zed Shed Antics - Something will happen!
in Other Cars
Posted
Of course it begs the question -
Will it work???
- Only time will tell