Wayne370Z Posted April 15, 2013 Share Posted April 15, 2013 Hello to everyone again. Had my 370Z about 6 weeks now and just got it run in, trip down to Essex at the weekend has taken it up to almost 1500 miles, so thought I`d share my thoughts on the new car. Well, I think as everyone on here expected, I love it and think it`s awesome. Love the power now that I can stick me foot down and cornering feels like it`s on rails - can`t wait for September now - trip down to Cornwall and the twist country lanes, also, quite happy with the 28.2 mpg average that it`s now gone up to as I`ve used the motorways a bit more than when I first got it (25mpg). Must say, though, that a few of the features on it could have been better with a bit more thought by the manufacturer, I`m forever walking away from it on a car park leaving the mirrors out (the RCZ folded them automatically on locking) or if I do remember to fold them in on the road side I`m then wanting to get out but can`t see traffic coming up behind, and, I`ve just realised after 6 weeks that the doors aren`t auto locking and luckily found an old post on here on how to turn the feature on from the factory default - off ! Sure there`s nothing in the handbook about that ! The wife has insisted on a cushion to sit on. She`s about 5`2" and said the passenger seat was way too low and her legs were stuck out straight in front. Begrudgingly I had to agree and think that seat could definitely do with some height adjustment as on the drivers side. Overall then I love it and it`s everything that I thought and expected it would be. Can`t see me ever tiring of just going out for a drive round in it or even just washing and cleaning it. Just got to remember now to stick the 40 quid in me piggy bank each month ready for when the tax is due in another 10 months or so. Cheers, Wayne. Quote Link to comment Share on other sites More sharing options...
The Bounty Bar Kid Posted April 15, 2013 Share Posted April 15, 2013 to the world of zeditus! Quote Link to comment Share on other sites More sharing options...
Kev T Posted April 15, 2013 Share Posted April 15, 2013 Hello and welcome, i found this on the USA site about seat raising a few months ago and did it myself, it only takes a few minutes but does improve visibility. DIY: How to raise your factory seat to improve visibility Been seeing several posts asking how to raise the factory seats, so here it is. The original idea came from a member "modshack" about 3yrs ago. I tried it long time ago and gave me great results. here's what i did... As with any DIY, do at your own risk!! First go to your local AceHardware.. they seem to have the best selection of loose metric screws and washers. You want to get: a. 2pcs: Grade5 (or 8) metric screw M10x40 or M10x50 1.25pitch (10mm diameter, 40 to 50mm in length) b. 2pcs: 1" thick wide collars or bunch of large washers that your M10 screws can fit through. Make sure these are wide collars (spacers) as your seat rails will sit on them. c. 2pcs: Large washers that your screw can fit through. You will use these above the rails. d. Assortment of large diameter spacers that your M10 screw can fit through for backup. I ended up using a box of the large washers you see up at top under the screws. Tools needed: Small flathead screw driver or pick-tool, socket, adapter, and ratchet. Torque wrench (to do 36ft/lbs). Now onto your car's driver seat: 1) Seat rail mounting bolts are hidden under black plastic caps. Just pop them off with a small flathead screwdriver or pick-tool. There are 4 of them (2 front, 2 rear). In this pict you can see the black cap sitting up side down near the screw driver. 2) Then loosen the front 2 bolts (dont remove the screws, just loosen real good). 3)Then slide seat forward, remove the 2 black caps and the 2 rear bolts completely. Keep an eye on how much thread went into the floor so that when you put your new M10x40 (or M10x50) screw in, you dont go in too deep. store factory bolts in safe place for when you want to sell the car. 4) Raise the back of the seat and rail off the floor (seat isn't that heavy), and place your two thick 1" collars(spacers) between the seat rail and the floor. you can easily do different heights ranging anywhere from 1/4" to about 1-1/4". align the screw holes so that you can thread your M10x40 (or M10x50) bolt through. 5)Then take the M10x40 (or M10x50) screws you bought, place washers (and spacers if bolt is too long) and thread it from above the seat rail into the floor. At this point I recommend you slide your seat back, sit in your seat to see if that's the desired height. It's better to set it up slightly too high and lower your seat using the seat adjuster. Obviously if you put too many washers your headrest will hit the ceiling. lol dont do that. Once you got it to where you want it, tighten the screws to 36ft/lbs. if you dont have a torque wrench, it's tight but not super tight. Here you can see that i used a lot of large washers. The screw i used was M10x50 so it was a bit on the long side for the added height i wanted. I used washers on top of the rail to compensate the length so i dont go in too deep into the floor. Close up: This is what the finished product looks like on the rear 2 screws. NOTE: Once you place your seat back to your driving position you will not see these screws or washers so dont worry about the aesthetics. 6) Then side your seat back, torque down the 2 front rail bolts to 36ft/lbs. 7) leave the black caps off for now as you will need to retorque all 4 bolts after a few drives. retorque 3-4 times until they do not loosen anymore. 8) place black caps on the rail bolts and you're done. Depending on the screw you bought, the black caps may not fit over the screw head. GL! 7-28-2012: Just a follow up... i took everything apart today as i was working on another project unrelated to this DIY... inspected everything for any signs of weird wear. no such thing found after 3yrs. Quote Link to comment Share on other sites More sharing options...
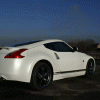
Reeco Posted April 15, 2013 Share Posted April 15, 2013 Welcome , I'm forever doing the opposite with my mirrors on the 350z and leaving any front facing car park space or my drive way with them still folded in. Nice looking 370 though! Quote Link to comment Share on other sites More sharing options...
Gonzo88 Posted April 15, 2013 Share Posted April 15, 2013 I only fold my mirrors in when I'm bored stuck in traffic... Welcome along Quote Link to comment Share on other sites More sharing options...
Harryjax Posted April 15, 2013 Share Posted April 15, 2013 Quote Link to comment Share on other sites More sharing options...
ioneabee Posted April 15, 2013 Share Posted April 15, 2013 Wayne370z - welcome - and I agree with every word - particularly the wing mirrors (its a bit of a PITA) Kev T - have you got a linky to the US site (for piccies etc) - cheers Quote Link to comment Share on other sites More sharing options...
choptop Posted April 15, 2013 Share Posted April 15, 2013 Welcome Quote Link to comment Share on other sites More sharing options...
FUG Posted April 16, 2013 Share Posted April 16, 2013 Nice car Quote Link to comment Share on other sites More sharing options...
bronzee Posted April 16, 2013 Share Posted April 16, 2013 Welcome to the forum. Enjoy your lovely 370. Quote Link to comment Share on other sites More sharing options...

Recommended Posts
Join the conversation
You can post now and register later. If you have an account, sign in now to post with your account.