


mr v6
-
Posts
541 -
Joined
-
Last visited
Content Type
Profiles
Forums
Events
Gallery
Store
Posts posted by mr v6
-
-
I've seen a few of these that are a transparent coloured perspex that look good.
-
What brand of belts did you fit? I replaced the longer one with a Gates & the shorter with a Conti one. Double check your tension too as that will cause some squeal, unless they're the wrong length?
-
Cheers guys. So where does everyone else fix / tie or clip the excess wiring to?
Bit confused... I didn't really have any wiring spare..... Unless... Have you kept the two (unequal length) wires that plug into the loom, run around the OEM cowl and go into the back of the standard fans? - I took these off with the OEM fans / Cowl and plugged the Mishimoto wires straight into the two sockets on the loom. (Making sure I got them the right way round
 ...). Is this the difference?
I positioned the Mishimoto wires straight across the back of the fans (rather than running them round the Mishimoto cowl) and put a couple of wire ties onto the plastic bars across the back of the fans (the wires are not exactly heavy and it didn't seem to block a lot of air...).
I was surprised at how much I seemed to have. I just bundled it together & cable tied it to the ARB as there was that much of it, probably a few feet or more, there was simply nowhere to put it.
By the way, I found that NRF kit on the Mister Auto shop on ebay for around £135 before I bought the MM setup. As for the noise, the odd time it comes on I really don't mind it, at least you know they're working.
-
so what was it then?
Throttles had to be reset at Nissan at a cost of £69, but hey you live and learn lol
Glad you're now sorted, but I've just Googled this & there's loads of sites showing how to do it yourself with the pedal.. Unless I've missed a trick somewhere.
-
Tyre Leader fan here too, never had any issues & fast delivery even from Europe. Just make they're not 'new, old stock', which you can tell by the markings on them.
-
Shouldn't the Z use 5w30? I used Shell Ultra in the Z a few weeks ago during an oil change & it doesn't seem to mind it.
-
I just put the LED bulbs in mine and it's not cambus.
I have tried a few different bulbs but never been impressed with them. My current front sidelight bulbs touch the inside of the clear lens & I don't want them to melt it.
I've had those on my 350GT for approx. 2 years.
No problems and they're very bright.
Looking at these some sellers say they're only for Z's of 2006 upwards. I didn't think the design or fitment of the lamps changed whether it was a 2003 or a 2008? But if someone can correct me I'd appreciate it.
-
Thread resurrection.
I don't mind adding my details.
OBDII ELM327 with a few apps
Nisan Datascan II - full version
M60 J8 / M6 J21 & surrouding areas
-
On my previous car I was lucky enough to be able to remove the number plate lamp lens & fit an LED panel of the right size, this looked great. I notice the Z lamps can't be split open, so unless you're only replacing the halogen 501 bulb for an ebay LED one, you don't have much choice.
I've seen these on ebay that seem to be a pair of lamps with an LED panel inside ready to fit to the Z connectors. Has anyone any experience with these? Is the Z canbus?
-
Is this O-ring available on it's own other than with the complete cooler? It's not currently leaking, but on my last car it was & couldn't get it to seal without buying a new cooler at around £280 it was an expensive seal. It's something I'd like to renew on the next oil change, preventative maintenance I like to call it.

-
In fact I've just been out after downloading NDS II again, it seems to connect to all ECU's apart from the TCM one. The button on the lower dash panel of my Z says ESP, not VDC. Is this the reason why it won't communicate?
-
I too have the blue Vagcom cable, it was an ebay £8 special but works on every VW I've used it on. I do also have Torque Pro I use on the phone with a bluetooth ELM327 adapter. All fine, but all Torque gives you are engine codes & data. What I'd like is SRS, ABS, TCM information, basically the ability to read all the ECU's for all faults should anything arise, it's just the way I like to work.
Buying NDSII seems easy, but the faff of registering on the forum to get another code seems a bit
 . Not sure why it can't be emailed straight afterwards by the developers.
 -
The initial clattering noise, are you near a train track? As for the chirping noise, I'm guessing it's on the auxillary side? My last car (406 Coupe V6) had a similar noise, it's issue was the centre rubber bond on the crankshaft pulley would spin on the outer metal part when cold causing a shrieking sound till everything warmed up & it expanded & gripped thus stopping the noise.
Why not remove the belts & run the car briefly?
-
Being a Fiat dealer we do loads of Petronas stuff, but have no demand for the Syntium product. I know eurocarparts do this with a filter for around the £30 mark, so maybe worth a call to them, as long as they don't sell you a budget filter in a plain white box. I'd like to try this stuff myself sometime.
-
I've trawled the net looking for an answer to this but keep drawing a blank. Mine has a slight rattle as it's warming up, which is bearable, but I want to sort it. Last night I removed the 2 lower screws & managed to prize up the right hand side of it & slid it towards me slightly, that's where I'm getting stuck.
Do I really need to remove the clocks to get it off? If that's the case I think I'll just wedge something in a gap somewhere.
-
Welcome aboard, not far from Cheadle Hulme myself
 .
. -
I would firstly have it read for any stored or pending codes.
-
Welcome aboard! The Z is a much more manly car than the MX5, it is, really it is.
-
Looks like the previous owner is an enthusiast with another Z parked behind it. Azure was my second choice colour after gunmetal. The market & timing I had bought a Blade Silver. I'm sure you'll more than enjoy your Z.. I know I am
 .
.Be wary of one thing though, although everyone on here seems friendly, your bank balance will take a hit! I told myself I wouldn't spend... But I did, because I can, and don't regret it.
-
Has whoever pressed the new bushes in, pressed them in the correct position? I had the rear one replaced on the lower compression arm 3 weeks ago, apparently it goes in a certain way. The wandering feeling I was having went immediately after replacing that rear bush. Perhaps the new bush has highlighted another issue?
-
I was asked by John M if I'd do a full machine polish on his Aegean V6. I'd have been stupid to say no
 , so I said yes!
Left home this morning with a tiny amount of fog, shorts & shirt on, as us northern monkies do in this weather, boot full of cleaning stuff & headed off to his house. Got there about 10.40am & made a start.
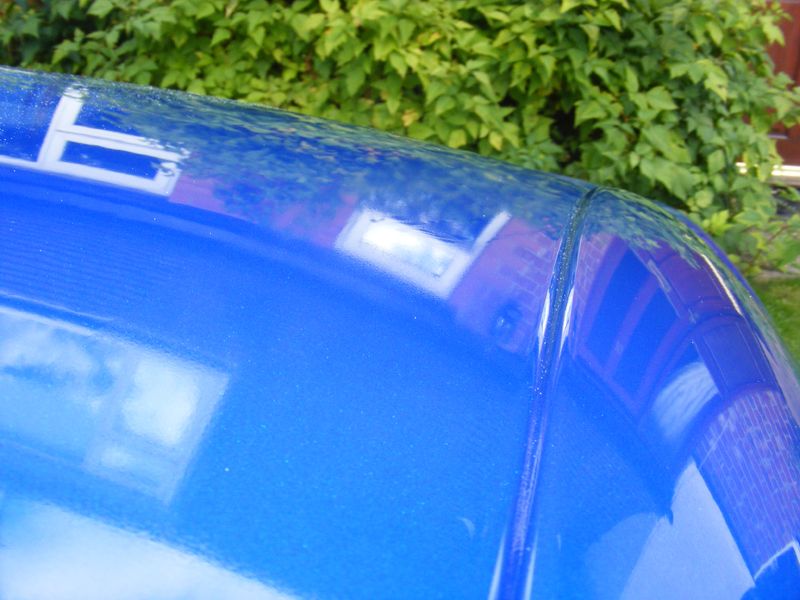
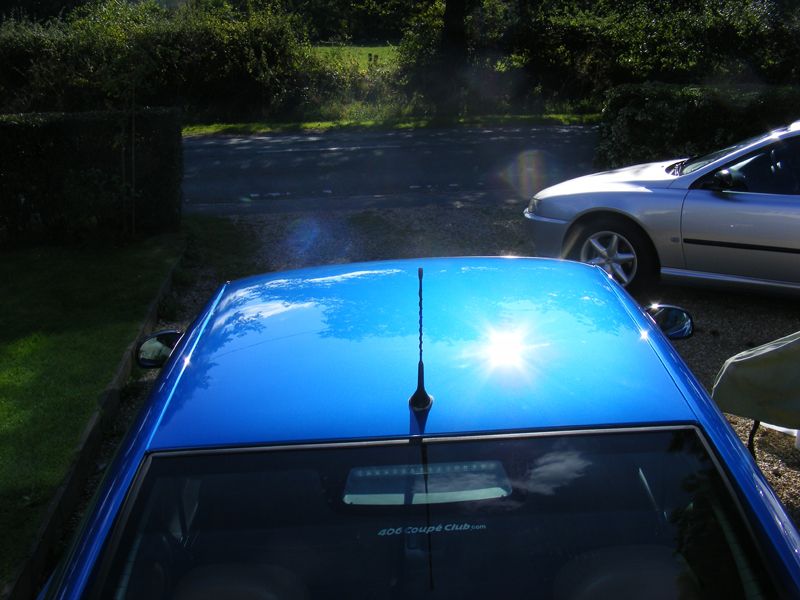
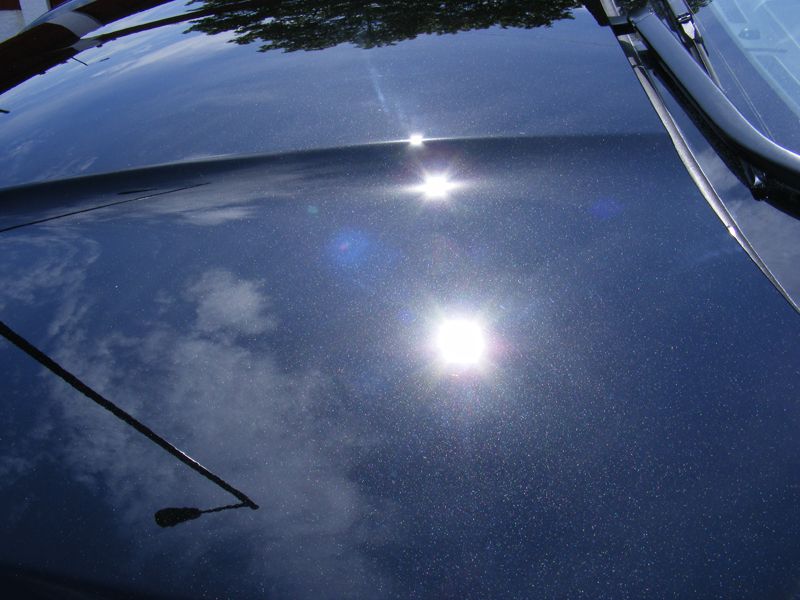
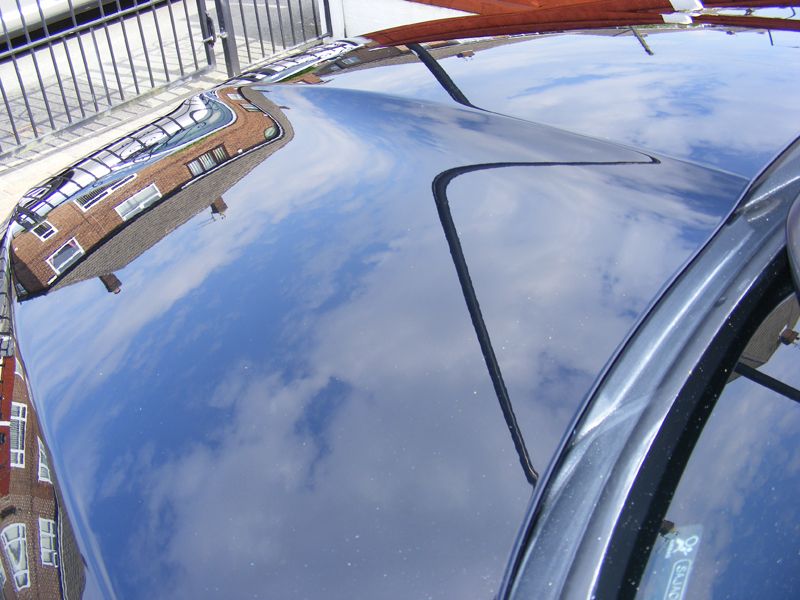
There were a few things I'd noticed, which you'll see in the following photos. Compared to the rest of the bodywork, the bonnet appeared to have a slightly different texture / shine on it, was only slightly noticable when you really looked. Also on the passenger side of the roof, about 1/8" of the inch in from the pillar, going from front to back about 2" in width was a dull line, as if something had been stuck on there, or fitted to the roof at some point. We couldn't get rid of it at all, so had no choice but to leave it. The line was perfectly straight, we were stumped, but it could only be seen from the passenger side front looking along it.. Very strange.
Stuff used:
Kestrel DAS6 dual action polisher
Bilberry wheel cleaner
Various small brushes
Sonus fine green clay
Autosmart Reglaze as clay lube
Meguiars 6" polishing pad
Sonus 4" polishing pad
Autosmart Evo 1 polish
Meguiars #83 polish
Meguiars #16 PPW
Poorboys wheel sealant
Meguiars metal polish
Autosol
Microfibre cloths
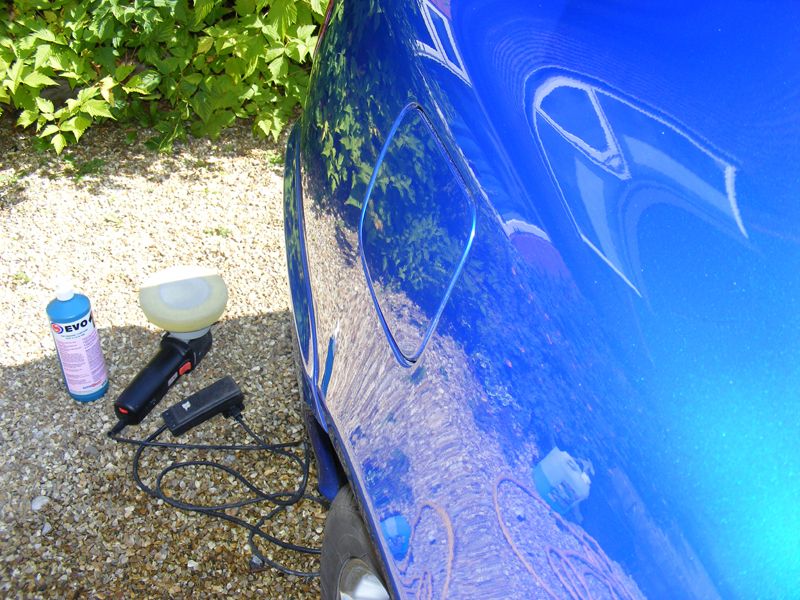
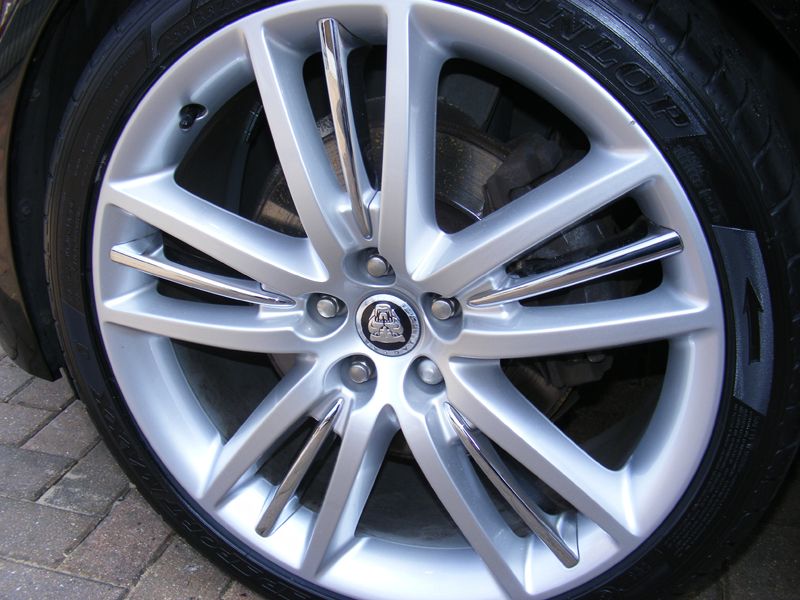
I asked John if he could have the coupe washed by the time I got there, which he did, so I went straight to work on the wheels. These needed a quick clean, nothing more, they were sealed at the very end of the day with 2 layers of Poorboys wheel sealant. After that I clayed the car with Sonus fine green clay & Reglaze as lube. Very little came off to be fair :good: . The whole car was then polished with the DAS6 & the 2 polishing pads, alternating between Megs #83 & Autosmart Evo 1, depending on how bad the surface was. Finished off with 2 layers of Meguiars #16 PPW 8) :wink: . This wax can be tricky to work with, applied just a little too thick & you've created yourself a bit of hard work removing it, thin thin thin is the way with this wax. It leaves such a deep, glossy, crisp finish, which for a £16 wax that's apparently been discontinued by Meguiars (just, why???), beats a lot of much more expensive waxes hands down.
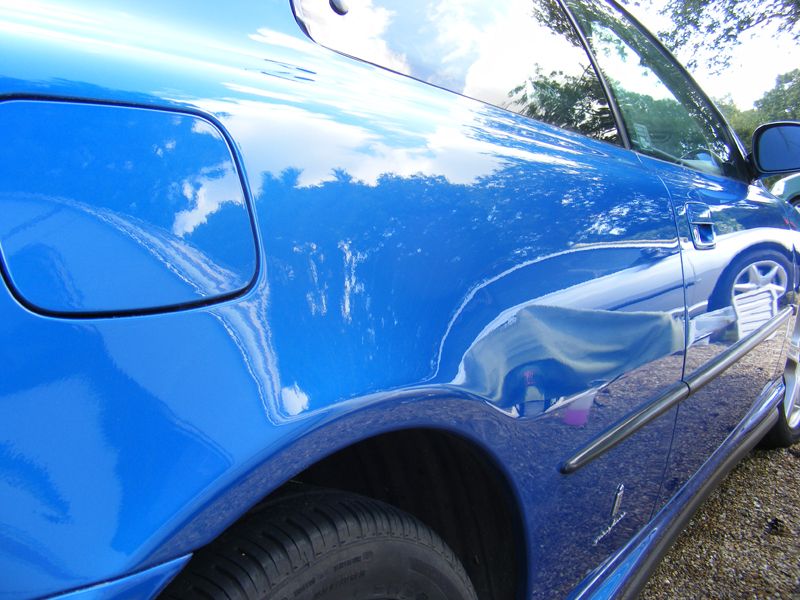
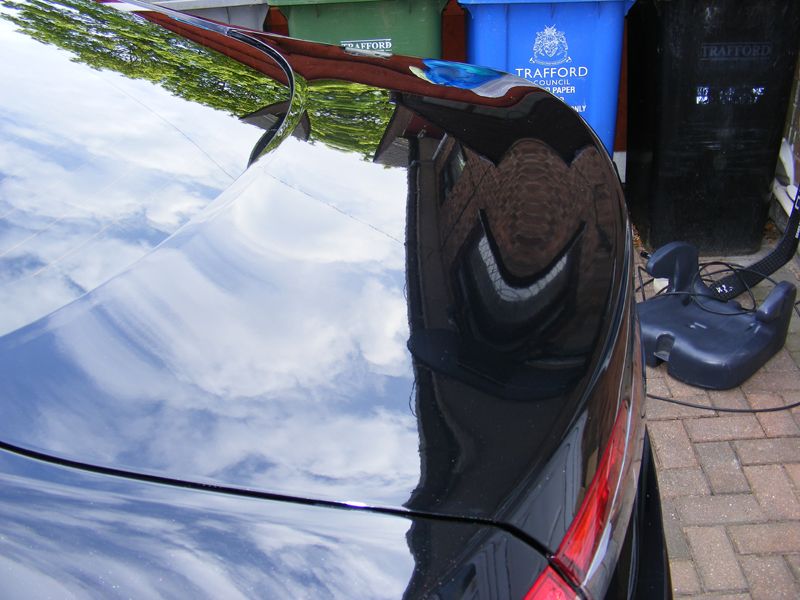
The bodywork other than swirls was pretty good, the bootlid will need to be painted, it looks worse in real life as there's other scratch damage going through the paint:
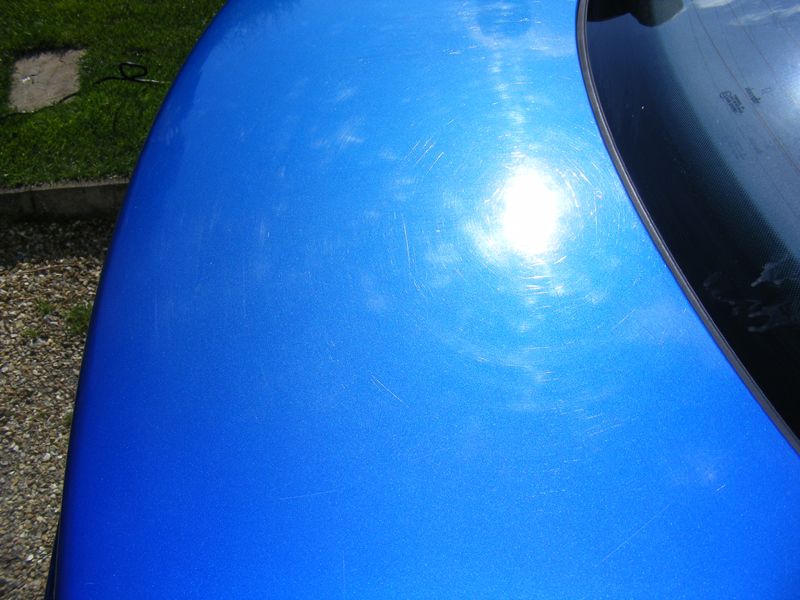
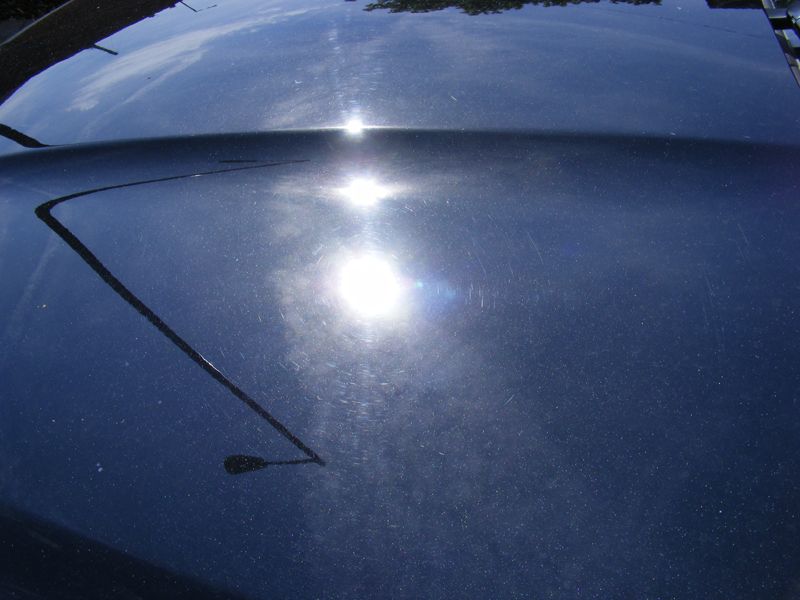
Bonnet before:
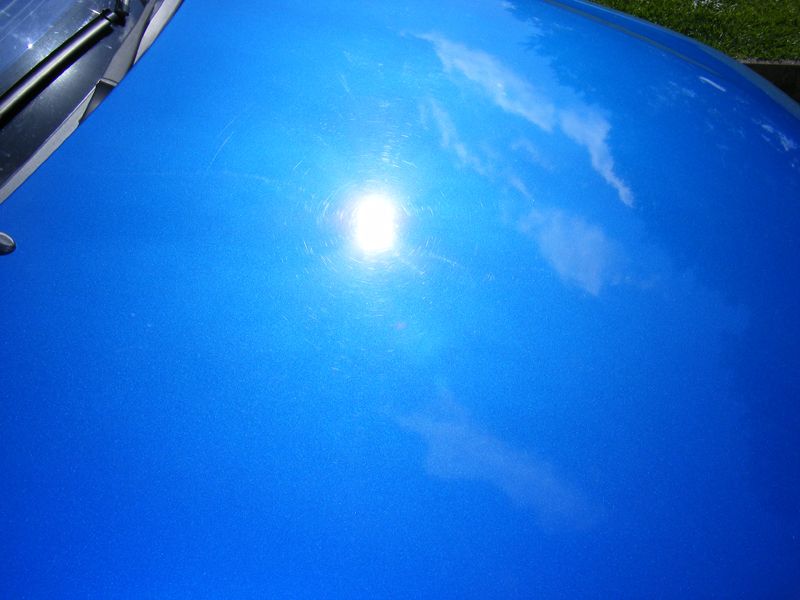
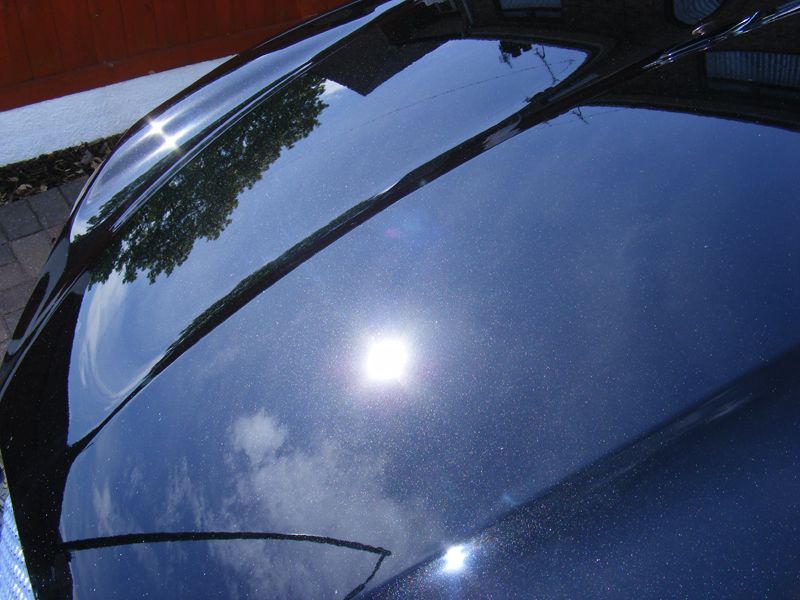
Roof before:

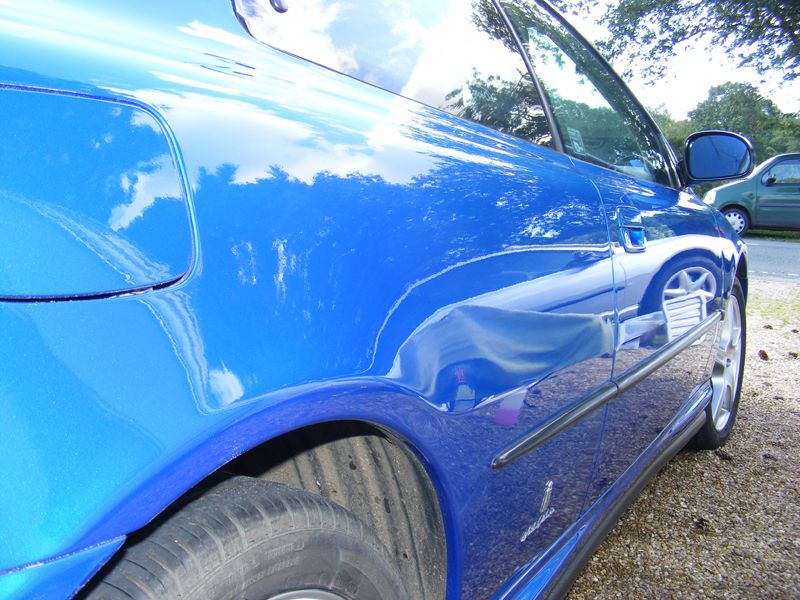
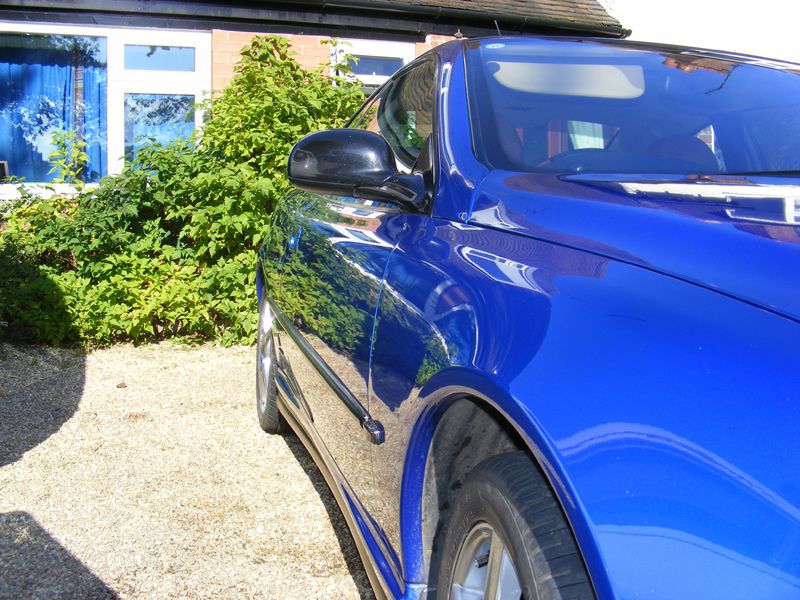
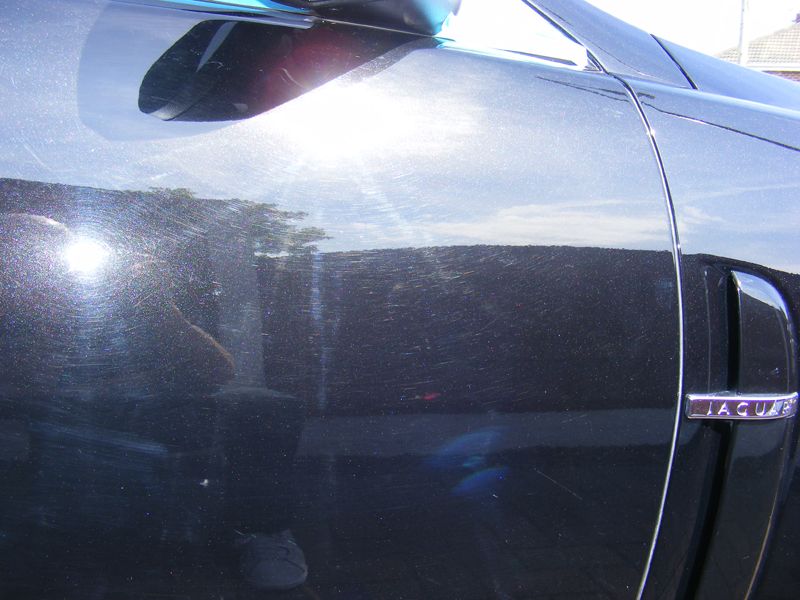
Rear quarter after just a machine polish:
Roof after a machine polish 8) :

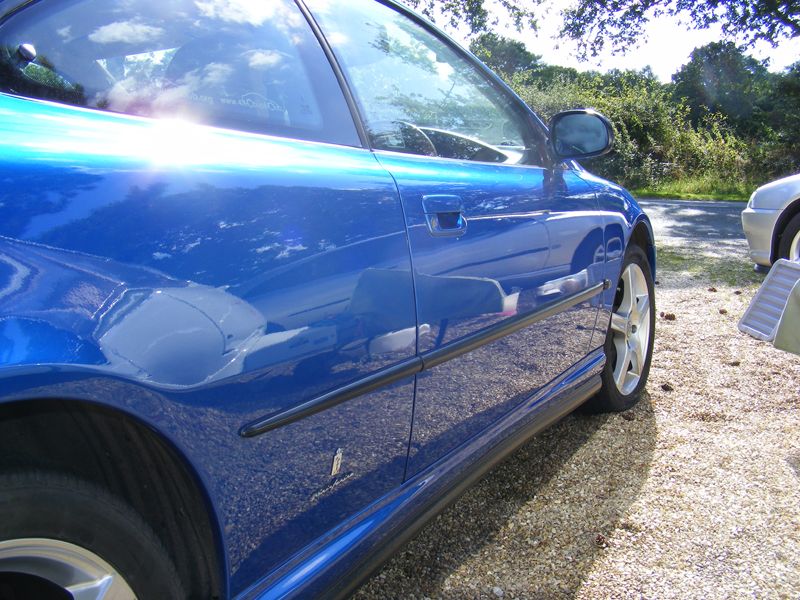
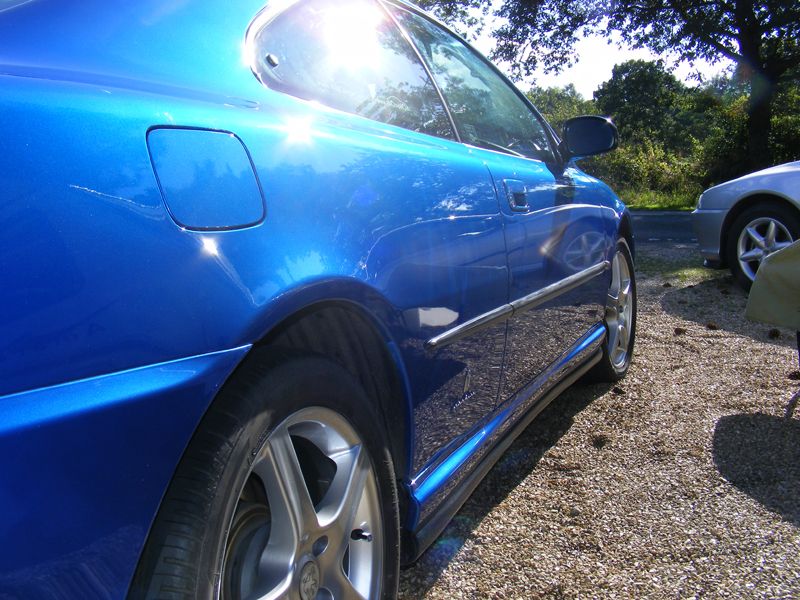
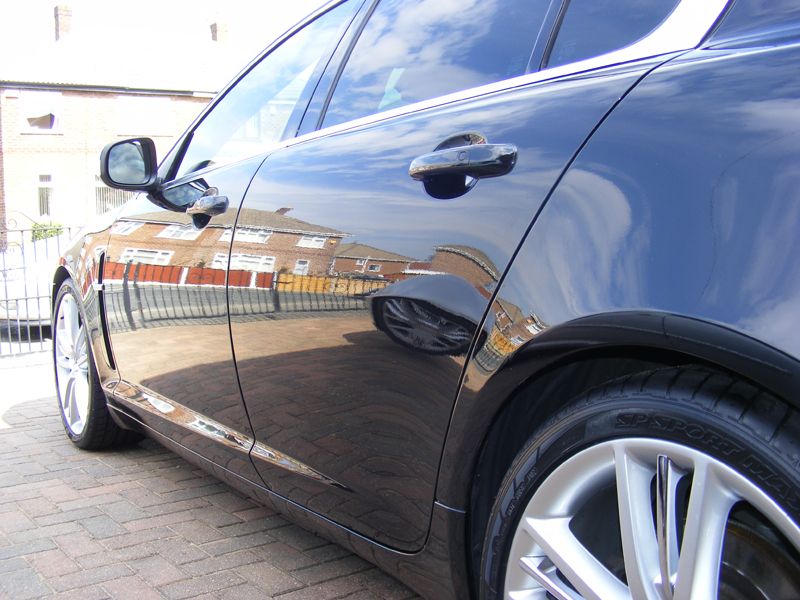
Side after machining
 :
:
C pillar:
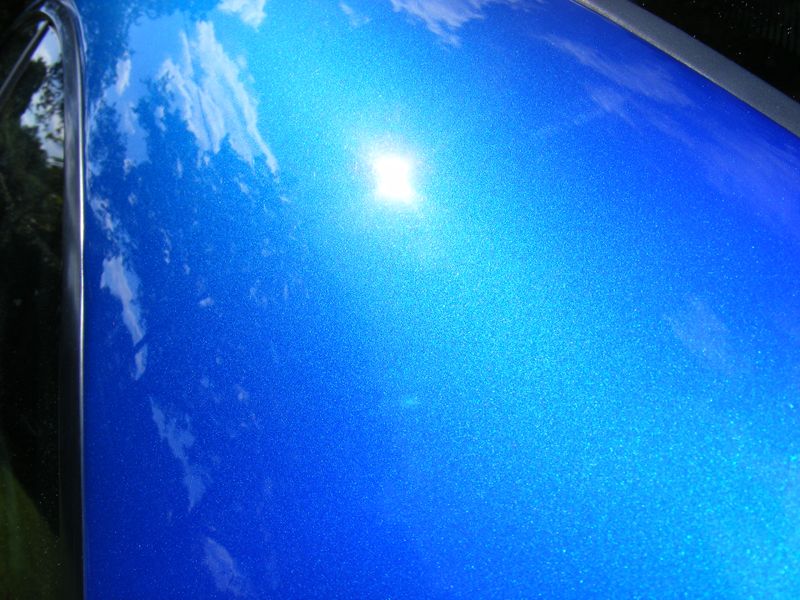
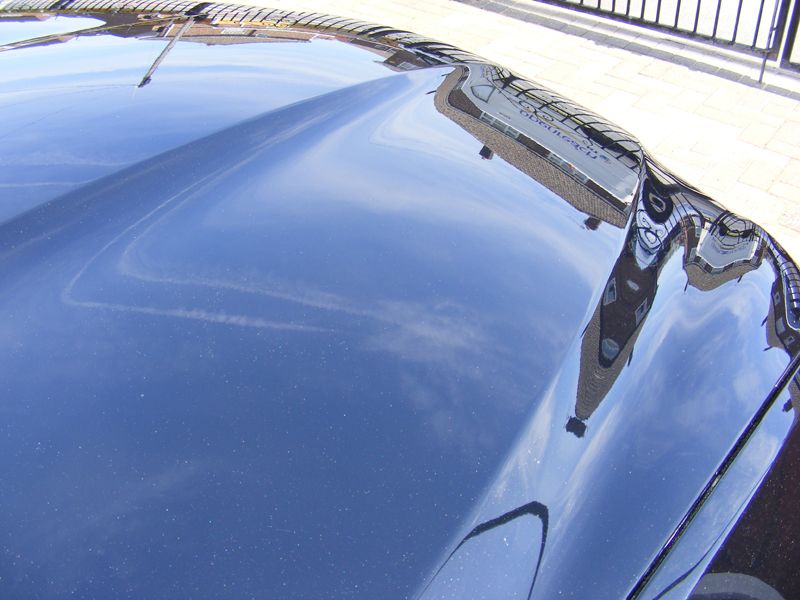
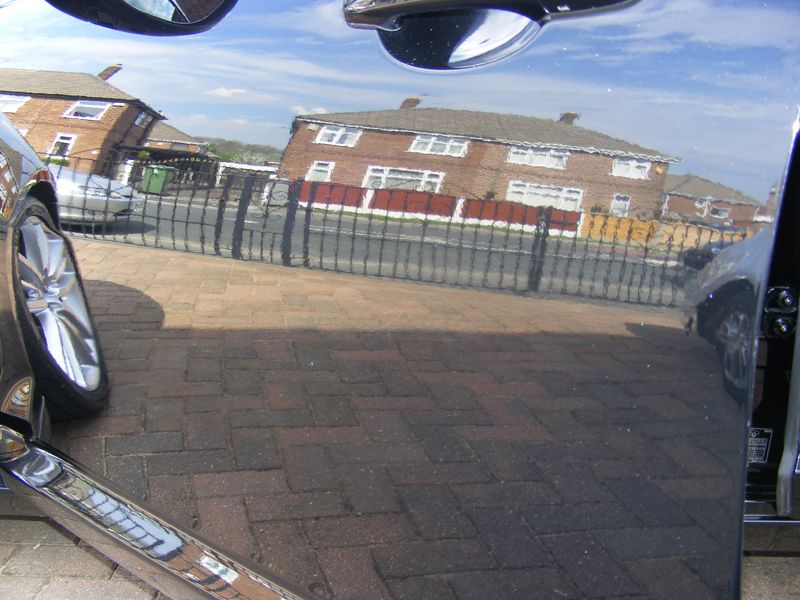
Reflections:

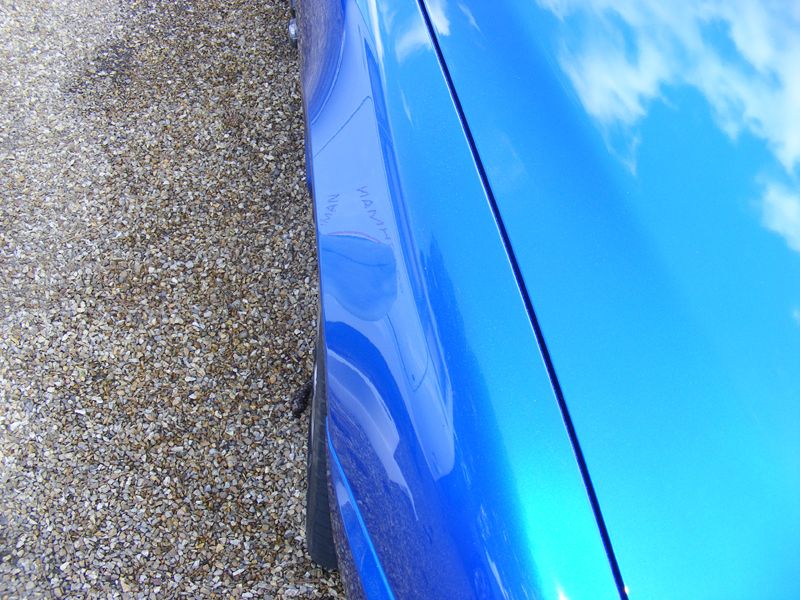
Spot the roof defect:

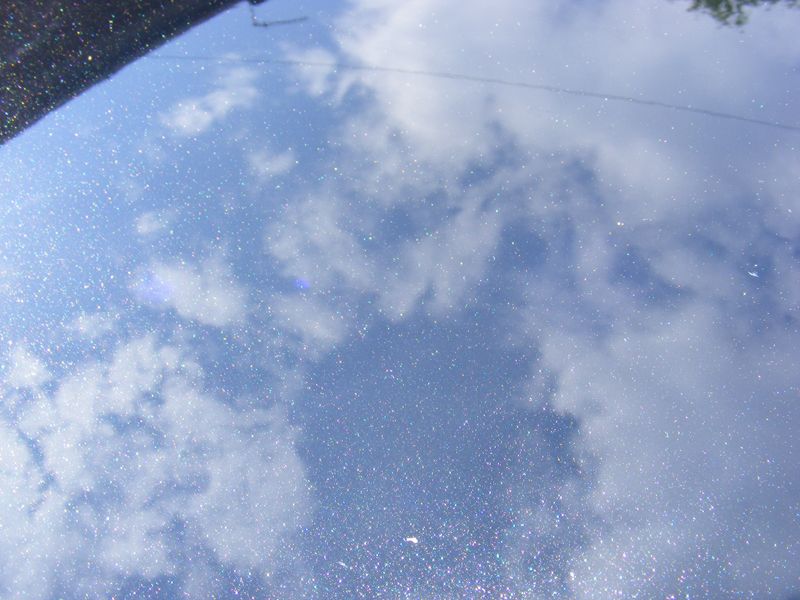
A little closer :? :

All finished with 2 layers of Meguiars #16 PPW :Yahoo!: :
No, my coupe isn't hitched up to the caravan!
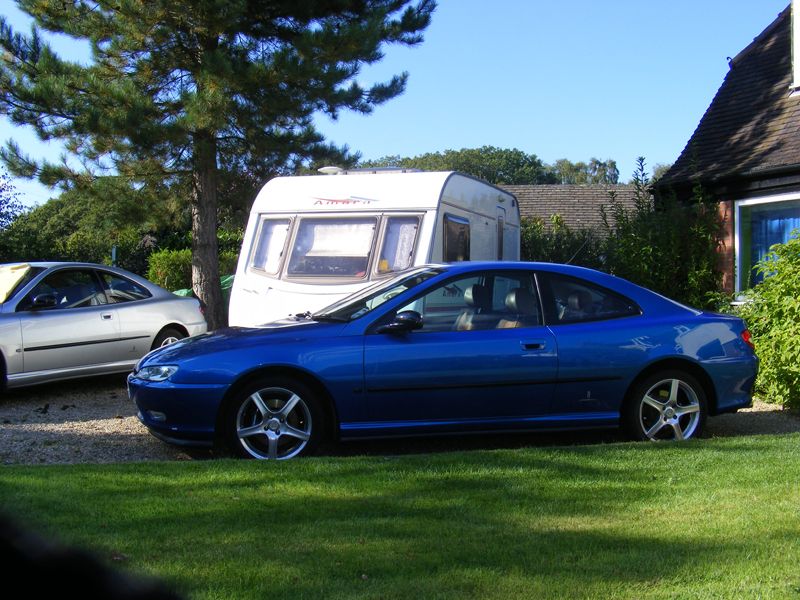
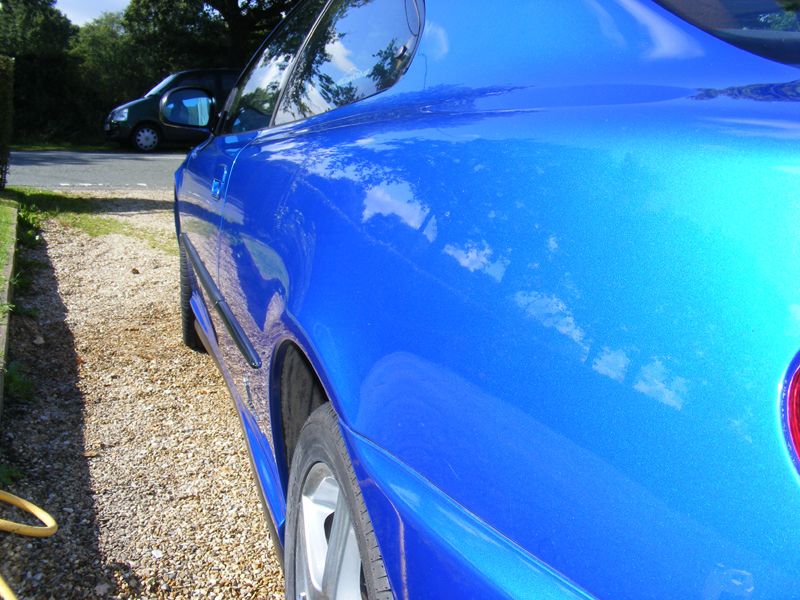
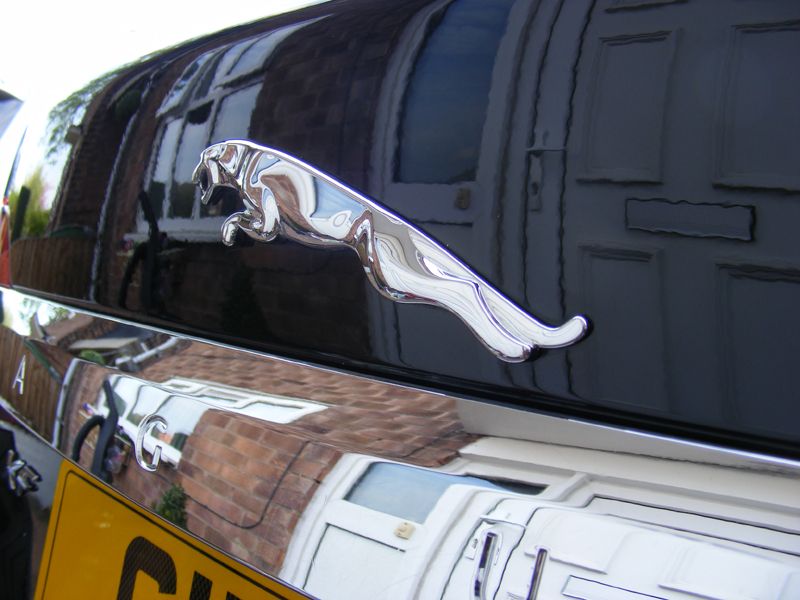
The car looked stunning as I left, such a super crisp, sharp finish from the polish & wax combo. I spent around 5.5 - 6 hours in total, this included lunch break. Nothing was rushed, the job was done correctly, I'm over the moon with the final result. If you could see the car in the flesh it looks so much better, the photos really don't do it justice. What I did notice, apart from the metallic flake popping everywhere
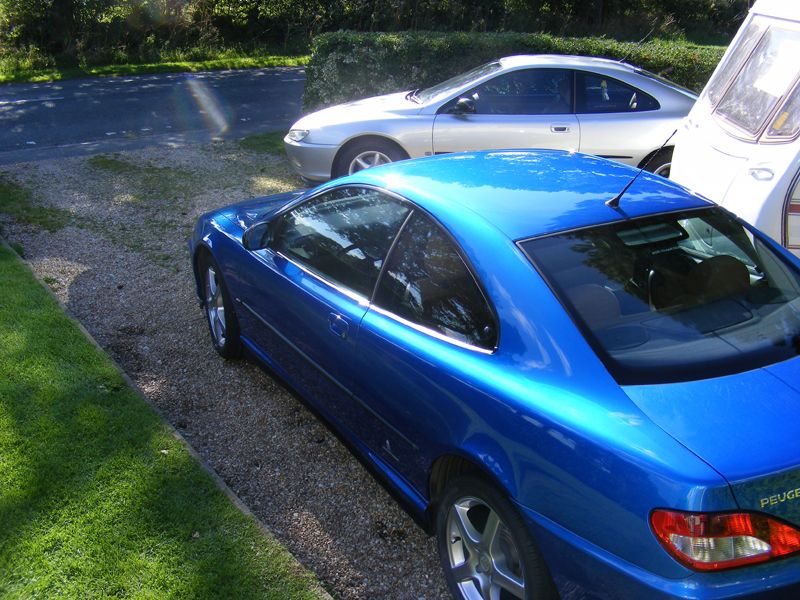
 , was at certain angles this paint seems to have a slight purple tinge to it, looks very smart indeed! When you see photos like this with a coupe in, you realise just how awesome the angles, curves & overall design of the car really is!
All the high-res photos are here if anyone wants them: http://www.mrv6.co.uk/detailing/johnm/
Thanks for reading :beer:
 .
. -
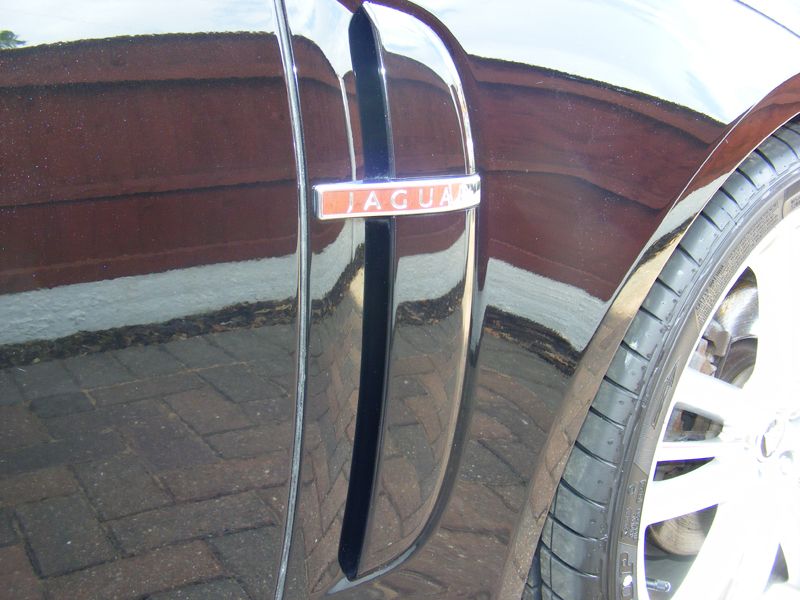
This is one I did earlier this year for my sisters fella. He traded his EVO 8 in for this car, something more practical. I do a bit of detailing, repairs, servicing & the odd auto electrical jobs in my spare time as a hobby, I like to mix them up a bit
 .
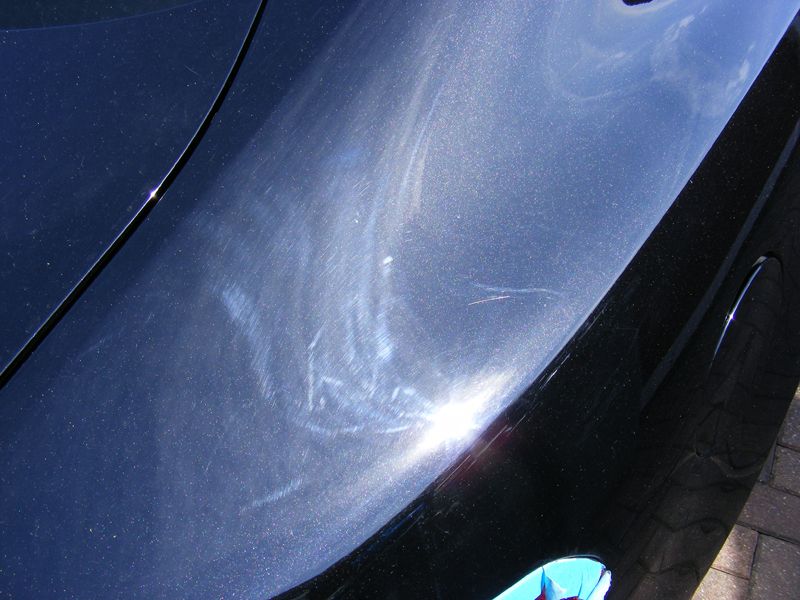
.Today I had a full machine polish to do on a 2008 Jaguar XF in Ultimate black Metallic. The owner bought the car last October & this job has been on the cards ever since. It would seem it's spent a lot of it's life up & down the motorways judging by the amount of stone chips on the bonnet, but I wasn't there to sort those out. The front bumper had a 'blow over' a while ago to hide a lot of the chips, but the finish wasn't great.
Down the sides are the obvious hand car wash markings & scuffs where it's been pushed upto the bushes down some country lanes. The paint wasn't in overall bad condition, it was reasonable.
I spent a few hours on it yesterday washing it, de-tarring the lower half of the car, claying it & giving the 20" wheels a good clean.
The aim of today wasn't to achieve full correction, but to give the car a significantly good polish, that's what it got
.Products used:
Washmitt
Chemical Guys Mr. Pink
Bulk de-tar remover from work (same as Tardis)
Sonus green clay
Autosmart Reglaze
3M blue tape
Kestrel DAS 6 polisher
Meguiars 6" pads
Sonus 4" spot pad
MF cloths
Carpro Iron X
Poorboys Wheel Sealant
Carpro PERL
Autosol
Mothers Mag & Aluminium polish
Autosmart Evo 1
Prima Amigo
FK 1000P
Poorboys Natural Look
Gliptone twins GT1 & GT2... I think that's everything
This was the general condition of every panel on the car, depending on where the sun shone depends how bad it looked:
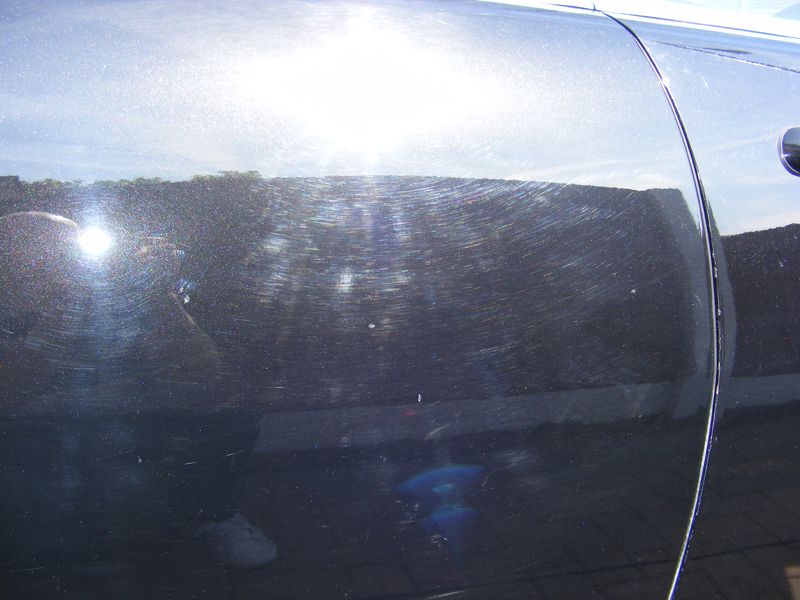
I was up against 2 huge trees that wouldn't stop releasing pollen, every time I turned away there were particles all over the car, it was tedious trying to keep up with it all.
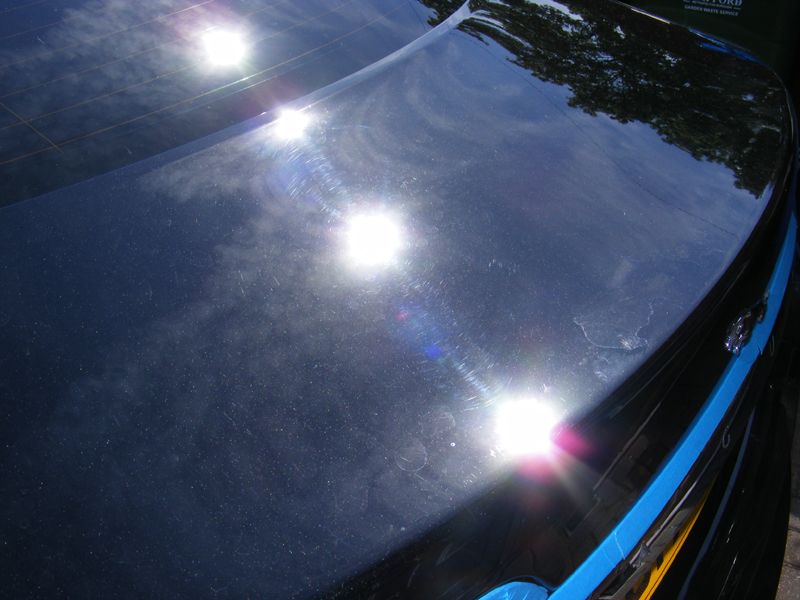
After the huge bonnet was finished this was what I was left with.. It seemed a huge panel to get round, it was
:
Not perfect, but in comparison to what I started with it seemed like it was:

More damage around the rear, but the whole car was like this:

Managed to bring out the metallic flake so much during the polishing process. Lots of greens reds & purples really popped in the sun:
Those 20" alloys were awkward to do, & seemed to take a while, but looked great once all the crap was off them:

This is the side of the car completed, finished off with 2 coats of FK 1000P & a layer of Prima Amigo because I had time :good: :
Thanks for reading :beer: .
-
 1
1
-
-
I've had mine in my possession for a month now. I put about £40 a week in, mixed motorway & A & B roads & after 6 days still have about 1/4 tank & average around 27mpg. I don't drive like a tool mostly, but do like to put my foot down occasionally.
What comments I do get thrown my way a lot is (previous car was a Pug 406 Coupe 3.0 V6) "I bet that drinks juice" & all those kind of comments. My reply is, "I didn't buy it for fuel economy, if that was an issue I'd buy a boring Germanic 2.0tdi 140bhp VAG lump with no kerb appeal"
. -
Welcome from one noob to another. Good to see a fellow northerner too, not quite as oop north though
.-
1
-
Strange central locking issue.
in I.C.E & Electronics
Posted
Hi everyone,
All has been fine with Z, tonight I had just left work & as always, I lock the doors (dodgy areas of Manchester & all that ). Took the usual route home, sat at the usual sets of lights & heard the C/L clunk. I thought initially I'd knocked the button on the door, but you'd need to be a spaz to do that given where it is. Anyway I locked it & set off, next set of lights clunk, it did it again. Once I'd got past the Tesco & 2 hotels I locked it & all was fine, and it seems to have been fine since.
Could this be an interference of some sort from cameras / some sorts of radio waves from the hotels etc?? I'm confused, Jap cars aren't known for their electrical issues are they.