

.jpg.dd954627ce381a75101127fb881c164b.jpg)
davidv10
-
Posts
509 -
Joined
-
Last visited
Content Type
Profiles
Forums
Events
Gallery
Store
Everything posted by davidv10
-
.thumb.jpg.5a08b3f86e6135ca5ce92cfc21ea3a3e.jpg)
[SOLD]SOLD: Tastefully Modified 370z GT Pearl White
davidv10 replied to davidv10's topic in Zeds For Sale
Bump -
I have a Stillen Gen 3 CAI on mine as well. I dont have a mega loud exhaust, i have the Stillen Exhaust to match (its a great combination IMO). If you are standing at the front stationary when the car is revved then you can hear it have more of a growl. But driving along from inside the cabin it sounds maybe a bit more growly (but that may be placebo). My conclusion would be that with a stock exhaust you would notice the difference in noise, however with an aftermarket exhaust you wont notice much of a difference, if any, with the the noise depending how loud the exhaust is. I did it for the engine bling really. And because i got the car mapped, so all it could do is benefit the map
-
[SOLD]SOLD: Tastefully Modified 370z GT Pearl White
davidv10 replied to davidv10's topic in Zeds For Sale
Price further reduced to £13,000. I could do with the driveway space now, so will consider sensible offers. -
HELP: Sidelights & Just One Taillight Not Working
davidv10 replied to davidv10's topic in I.C.E & Electronics
The problem has been fixed! It turns out that it was a fuse, but not to do with the Tail/Illum fuse. It was the 'Clearance' fuse (how was i supposed to guess that by the name ). I was probably being naive not to just check all the fuses in the fuse box, regardless of their name. So i hope this thread can help others in the future if this happens to them. Apparently one rear sidelight runs on a different circuit for safety reasons (so not all lights will go out at once), which makes sense and explains my issue. Thanks for all the help guys! Feel free to close the thread -
HELP: Sidelights & Just One Taillight Not Working
davidv10 replied to davidv10's topic in I.C.E & Electronics
Yeh its a really @*!# issue to have. Having a single corner sidelight being the only one working just makes no sense and has no logic... I have the car booked in at Abbey on Thursday for the EcuTek remap, so ive emailed them to see if they can take a look at the same time. So fingers crossed! -
HELP: Sidelights & Just One Taillight Not Working
davidv10 replied to davidv10's topic in I.C.E & Electronics
Thats for a 350z unfortunately. This is the 370z fuse box below. The arrow points to the normal TailLight/Illumination fuse which i believe is for the front and rear sidelights and license plate bulbs. Thats the one i checked and it was fine. When i pulled that fuse out, the passenger sidelight went out. So that means that there is power going through that fuse fine. Then when i reinstalled it the passenger sidelight came back on as expected. So thats why im thinking there has to be a relay or something further down the line that is causing the issue for the other bulbs? The service manual references a tail light relay. Does anyone know where this is located? Thanks again.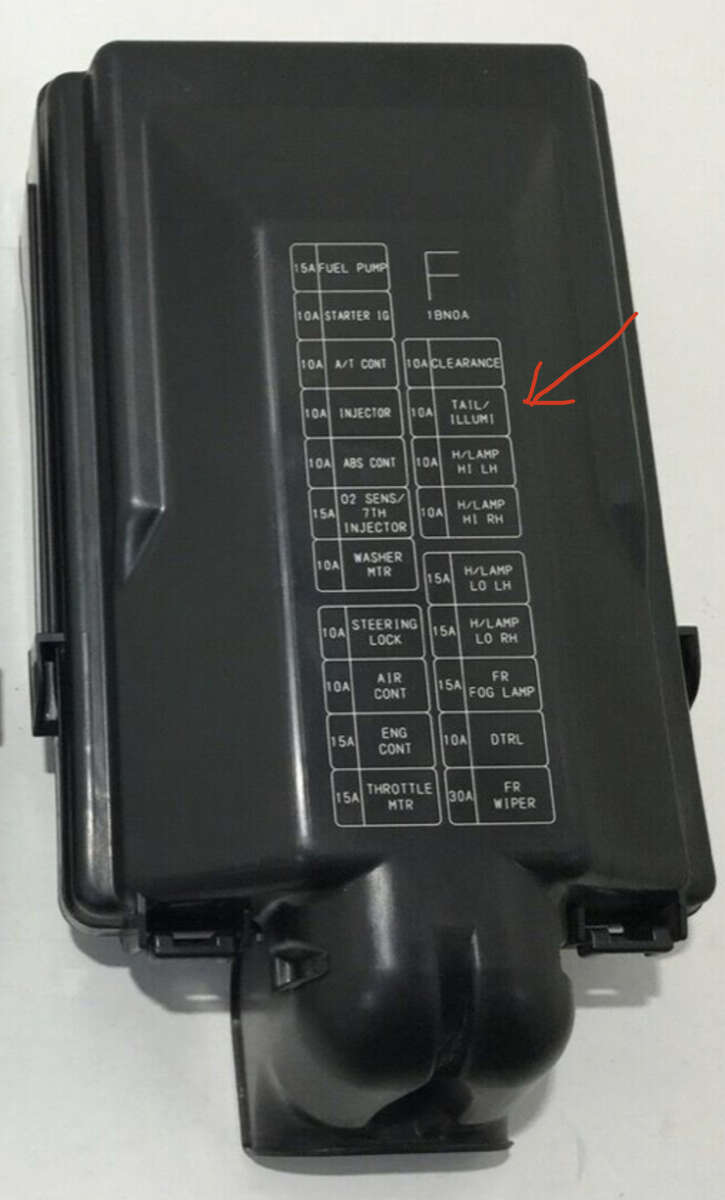
-
HELP: Sidelights & Just One Taillight Not Working
davidv10 replied to davidv10's topic in I.C.E & Electronics
So the specific lights that arent working are: - Both Front Sidelight Bulbs (now stock bulbs) - Both Licence Plate Bulbs - Drivers Tail Light Sidelight LEDs All the rest of the drivers tail light bulbs (indicator, reverse, brake lights) are working fine. Its just the sidelight LEDs that arent. The passengers tail light sidelight LEDs are working fine. Thanks for your continued help! -
HELP: Sidelights & Just One Taillight Not Working
davidv10 replied to davidv10's topic in I.C.E & Electronics
Thanks for the reply! I have since removed the adapter and replaced both sidelights with normal T10 bulbs. And still nothing is working other than the passenger side taillight. So i must have blown/damaged something if back to stock there are lights still not working? Are both tail lights on the same circuit? Is there a relay or fuse or something between them causing the damage/blown something to be after the power to the passenger taillight? Also, do you know where the tail light relay is, and can it be removed/replaced? Sorry for all the questions! -
HELP: Sidelights & Just One Taillight Not Working
davidv10 replied to davidv10's topic in I.C.E & Electronics
Ok will do. Thanks -
HELP: Sidelights & Just One Taillight Not Working
davidv10 replied to davidv10's topic in I.C.E & Electronics
Any help would be greatly appreciated. -
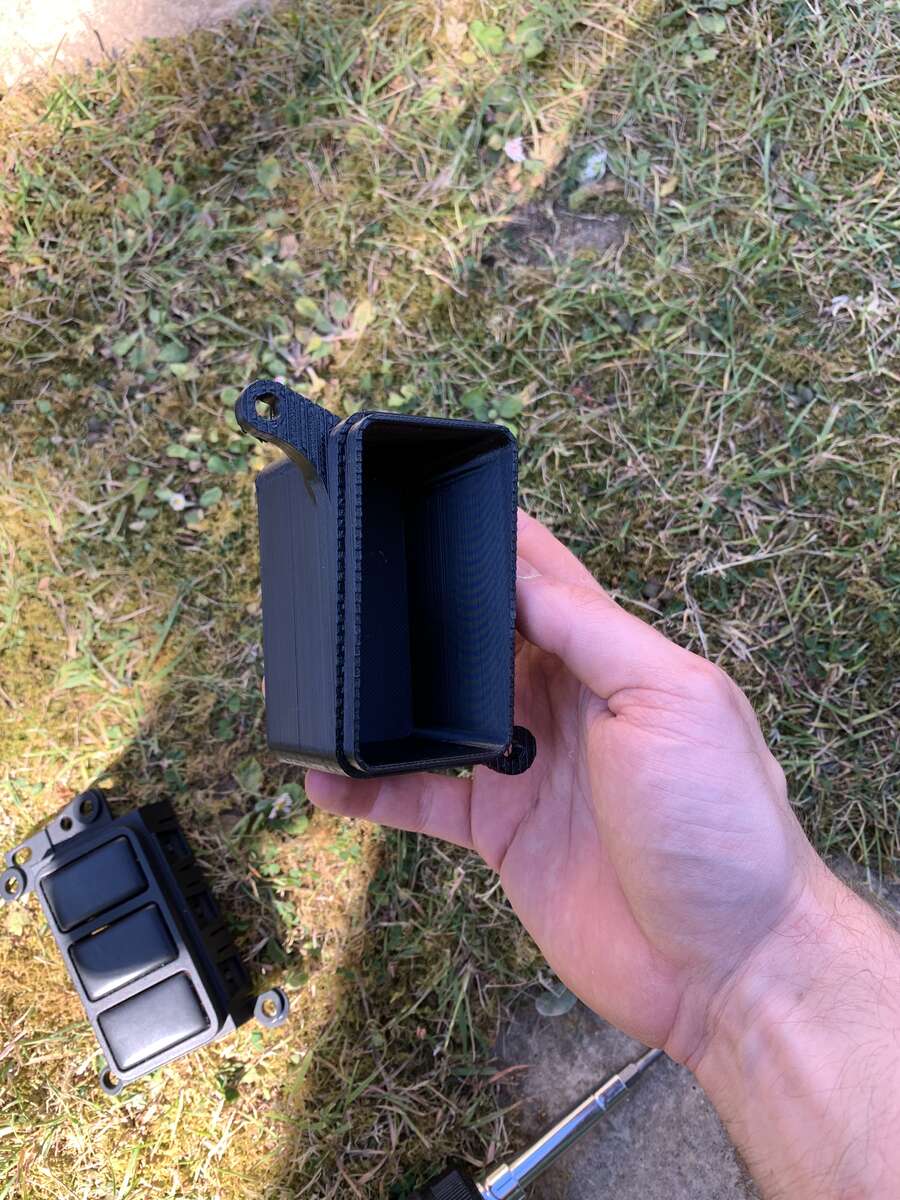
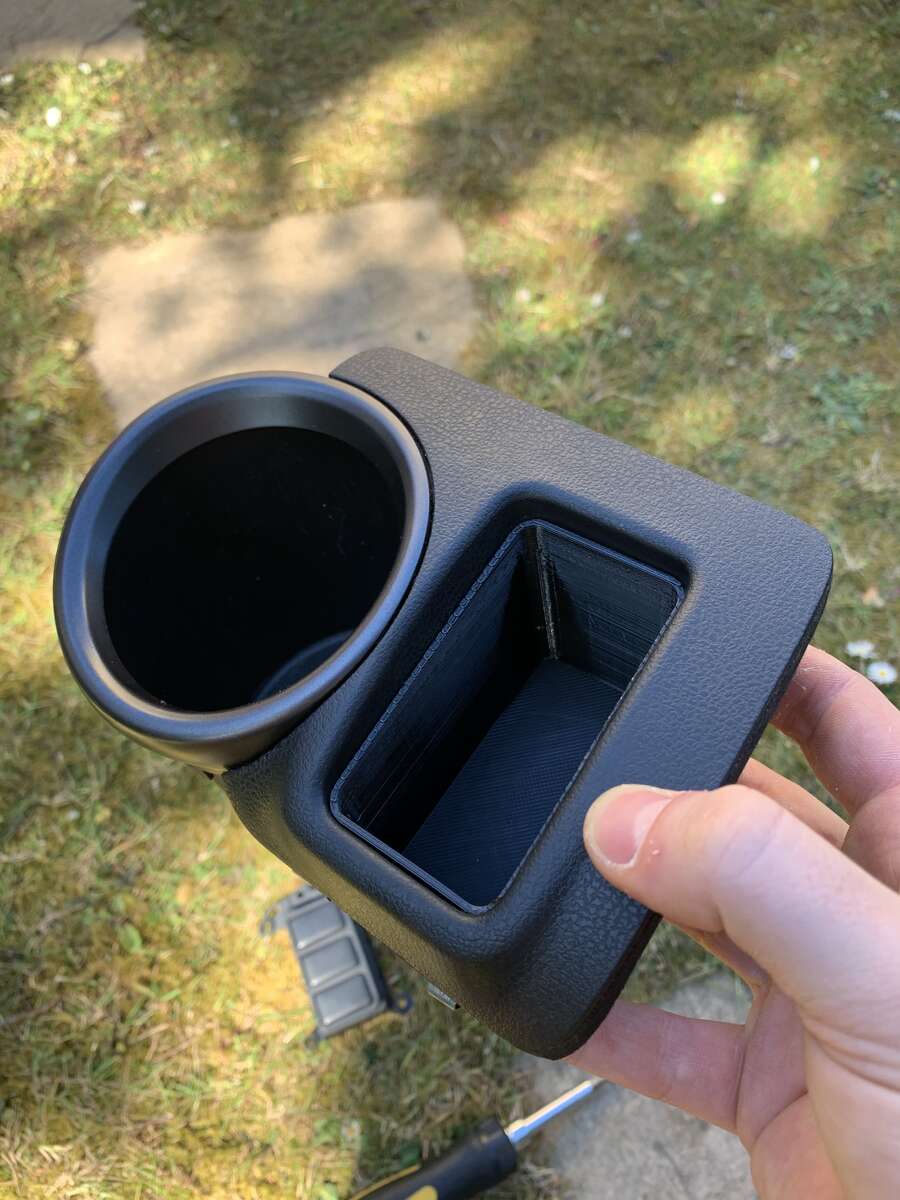
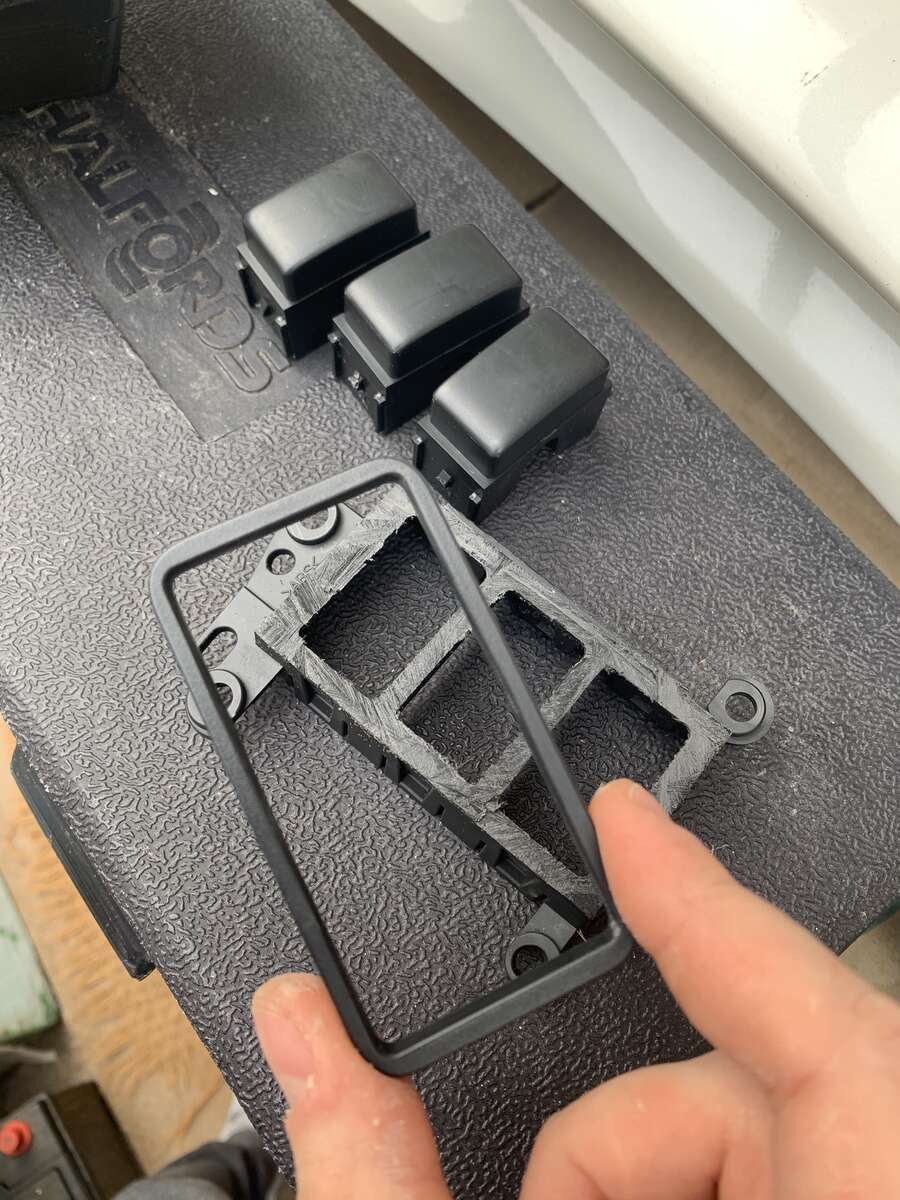
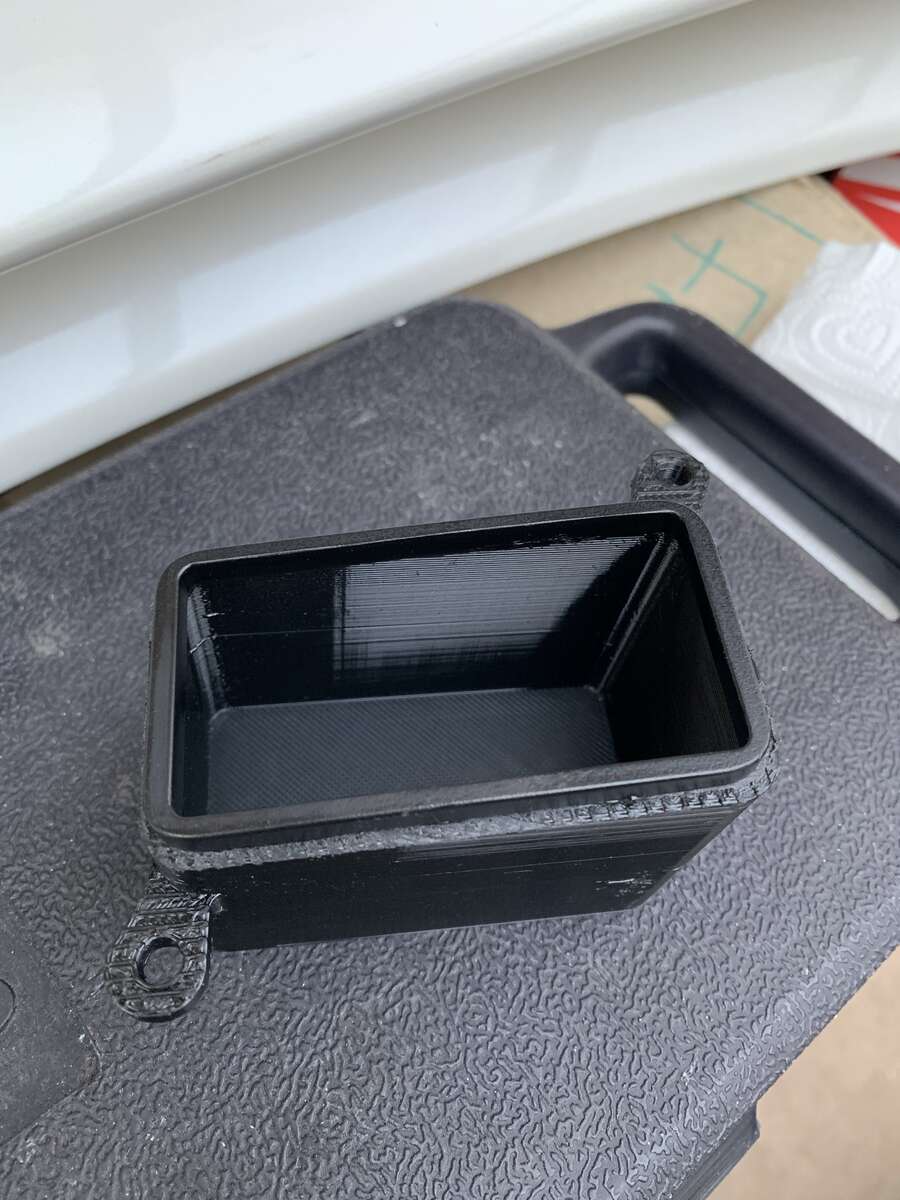
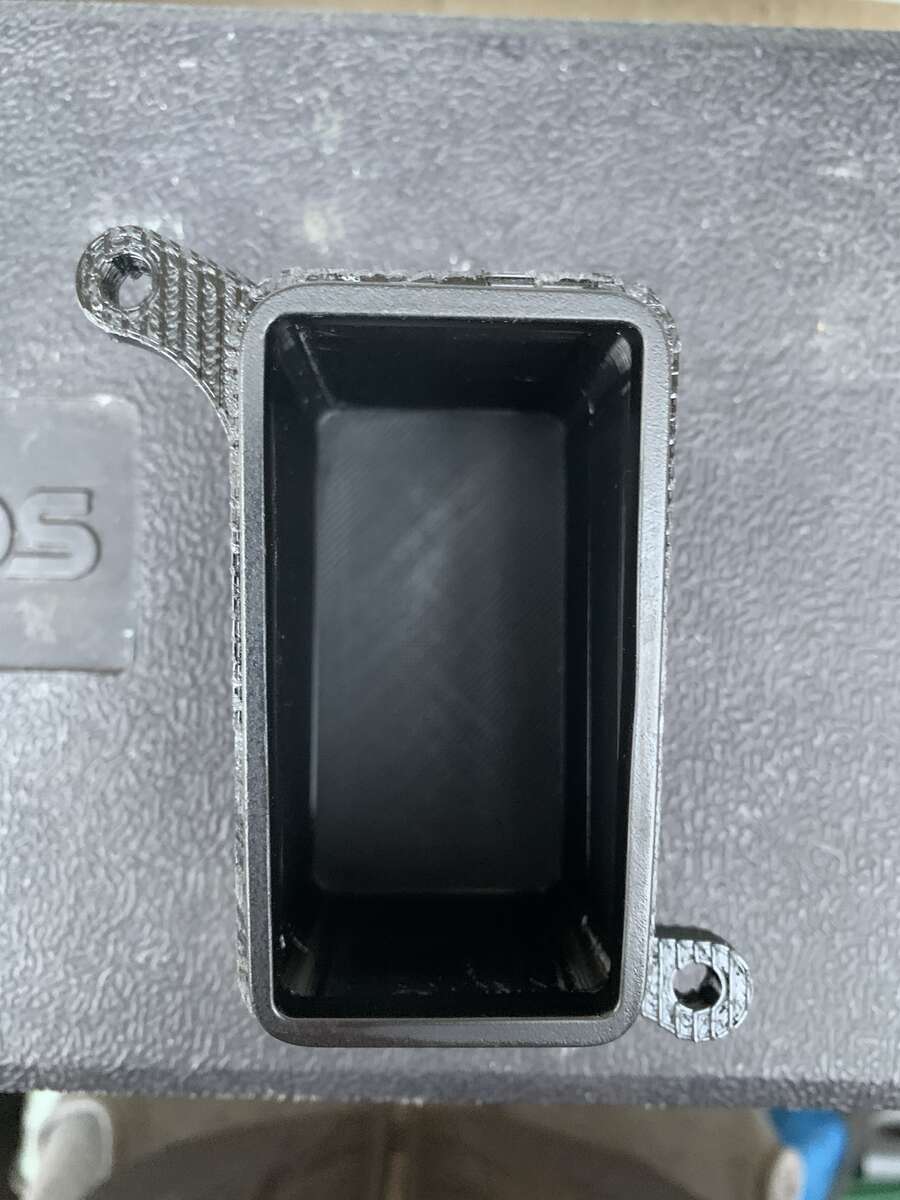
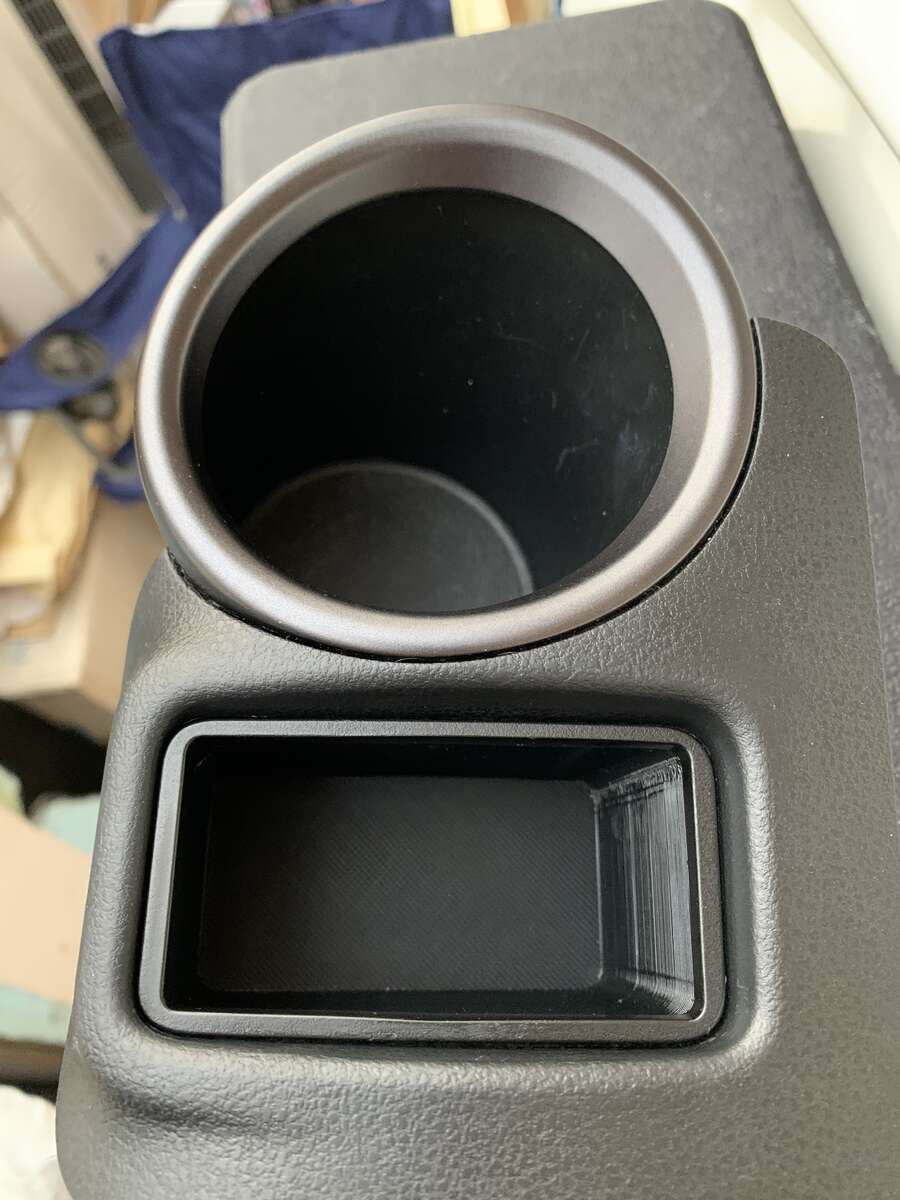
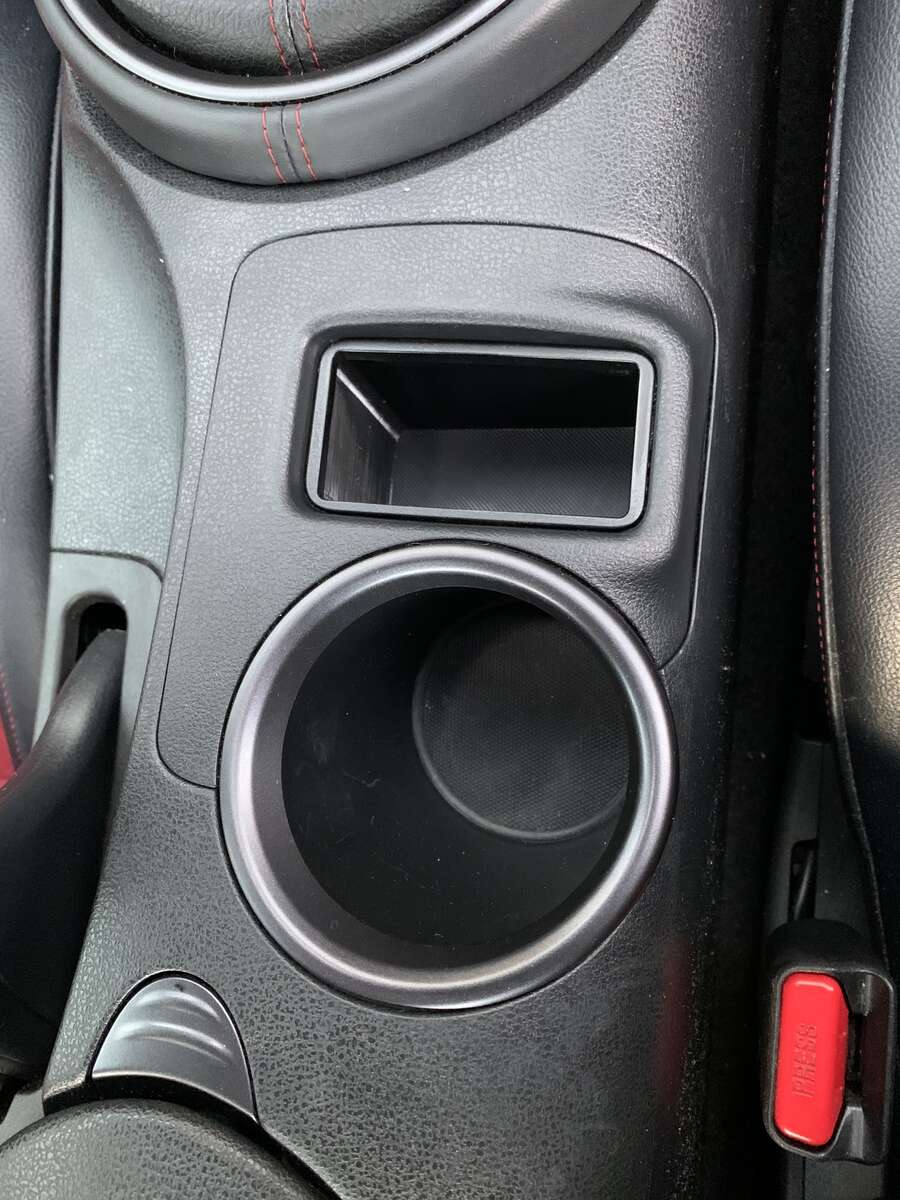
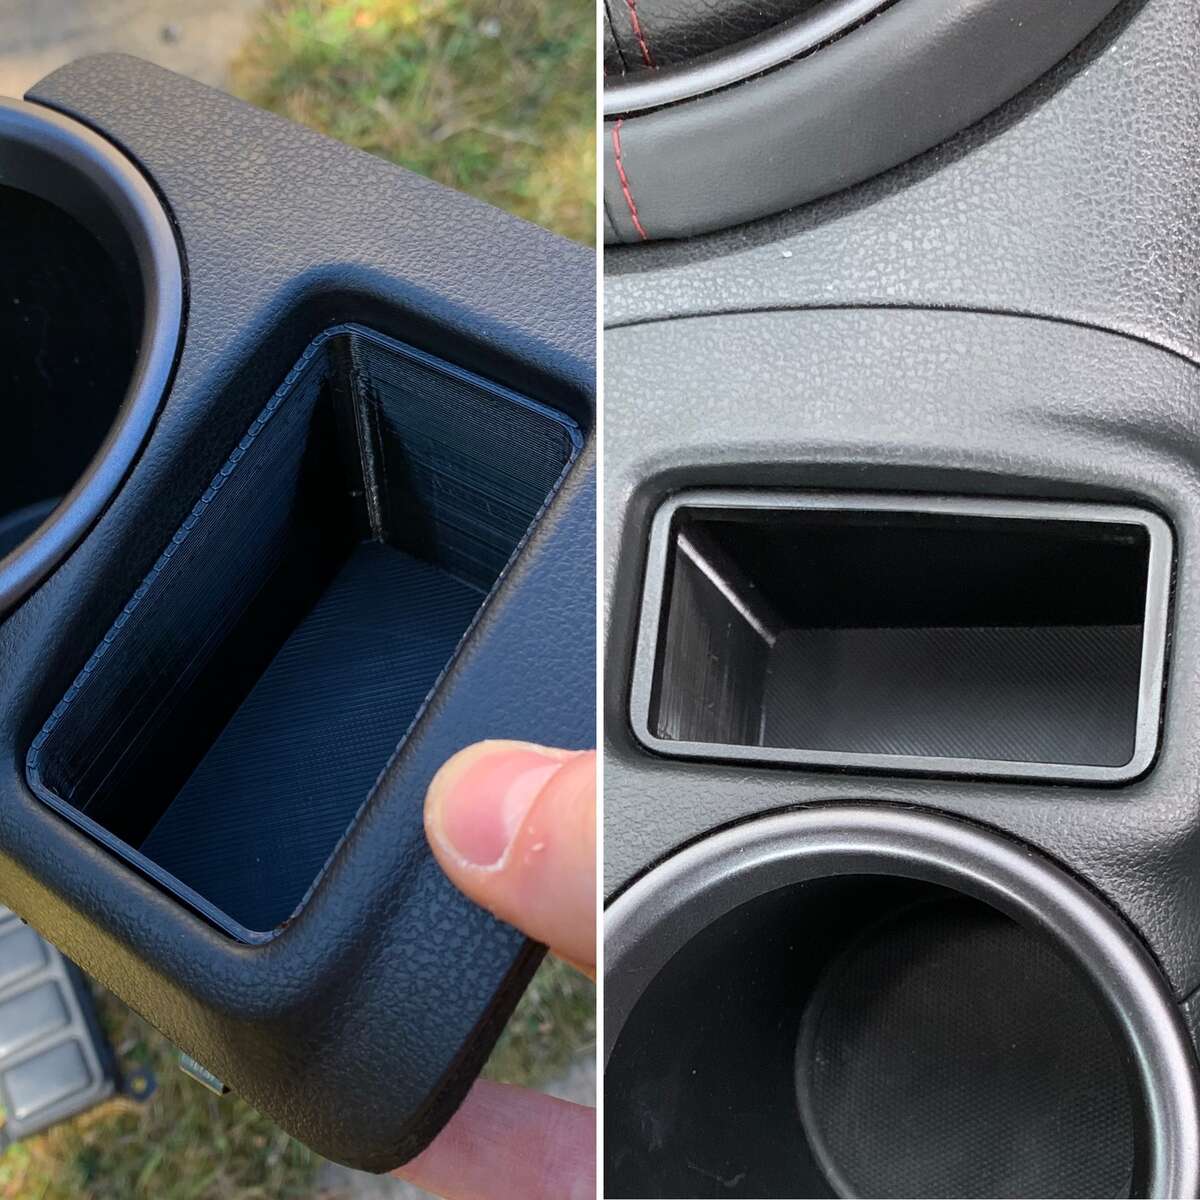
Next update, i purchased one of the 3D printed cubby units (for £25 or so) on ebay that replaces the blank switch panel if you dont have heated seats. It came from the states and i did get hit with £15 import tax, but oh well. Link: https://www.ebay.co.uk/itm/173476610749 It looked great and in 2 minutes i had it installed. It fitted perfectly. The one thing i wasnt happy with however was the rugged top edge which just didnt look good and I really wanted an OEM look, like it had always been there. I then had the idea of sawing off the top of the heated seats switch panel and then sawing off and sanding the middle separater bar bits in the middle. This would then theoretically give me an OEM looking top to the cubby. So i got to work... It came out brilliantly and all i needed to do after sanding the inside was give it a quick spray in black. I then cut the lip off the cubby and glued my new lip onto it. It worked perfectly and it now looks completely OEM. Before and After my custom lip:
-
I purchased one of the 3D printed cubby units (for £25 or so) on ebay that replaces the blank switch panel if you dont have heated seats. It came from the states and i did get hit with £15 import tax, but oh well. Link: https://www.ebay.co.uk/itm/173476610749 It looked great and in 2 minutes i had it installed. It fitted perfectly. The one thing i wasnt happy with however was the rugged top edge which just didnt look good and I really wanted an OEM look, like it had always been there. I then had the idea of sawing off the top of the heated seats switch panel and then sawing off and sanding the middle separater bar bits in the middle. This would then theoretically give me an OEM looking top to the cubby. So i got to work... It came out brilliantly and all i needed to do after sanding the inside was give it a quick spray in black. I then cut the lip off the cubby and glued my new lip onto it. It worked perfectly and it now looks completely OEM. Before and After my custom lip:
-
- 1
-

-
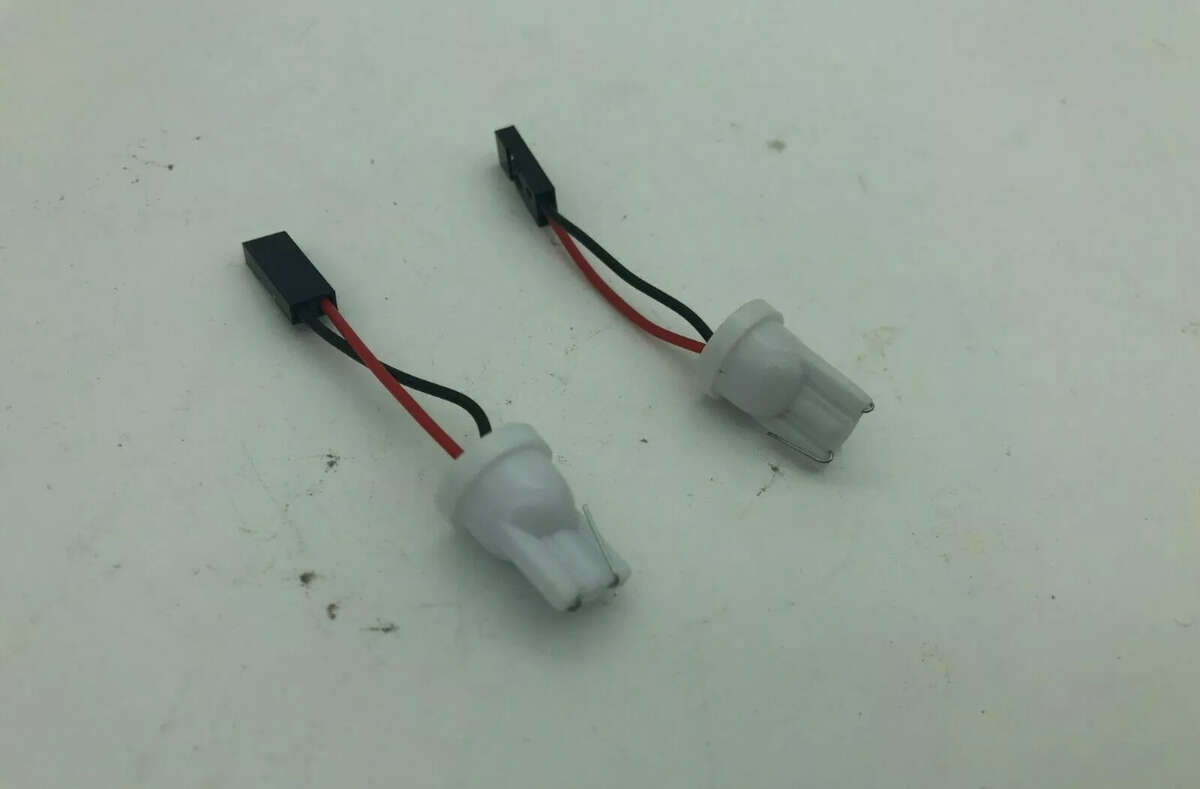
I was running a little project of using a sidelight bulb holder into red/black wire to run wiring into the cabin for some footwell lighting (501 halogen not led). So that the footwell lights came on with the lights. All the wiring was done and i tested out the wiring going straight to the battery and it worked perfectly. I then plugged them in to the passenger side sidelight holder wiring and they didnt work. I then checked other bulbs and my licence plate bulbs and ONE of my taillights are not working. The passenger side taillight still works, but not the drivers side! I checked the fuse in the engine bay near the battery and it was fine. When i removed this fuse the passenger taillight obviously went off, then when i reinstalled the fuse that one taillight came back on. I replaced the drivers taillight (with a spare one) just to triple check it wasnt the light unit, and same result with the other unit. I also plugged in two normal sidelight bulbs and nothing... So this has left me very confused and i cannot get my head around it.... How can it appear that some of the circuit (the passenger taillight) is still working but the other lights (that i believe are all on the same circuit) are not working? Any advice would be really greatly appreciated! Im hardly driving atm and not at night, but i still want to get this resolved asap! This is a picture of the sidelight adapter i used (i only used one of the drivers side sidelight). Which is pretty straight forward and should be fine to use (they are used for led halo sidelight wiring a lot).
-
[SOLD]SOLD: Tastefully Modified 370z GT Pearl White
davidv10 replied to davidv10's topic in Zeds For Sale
Price Reduced to £13,500 -
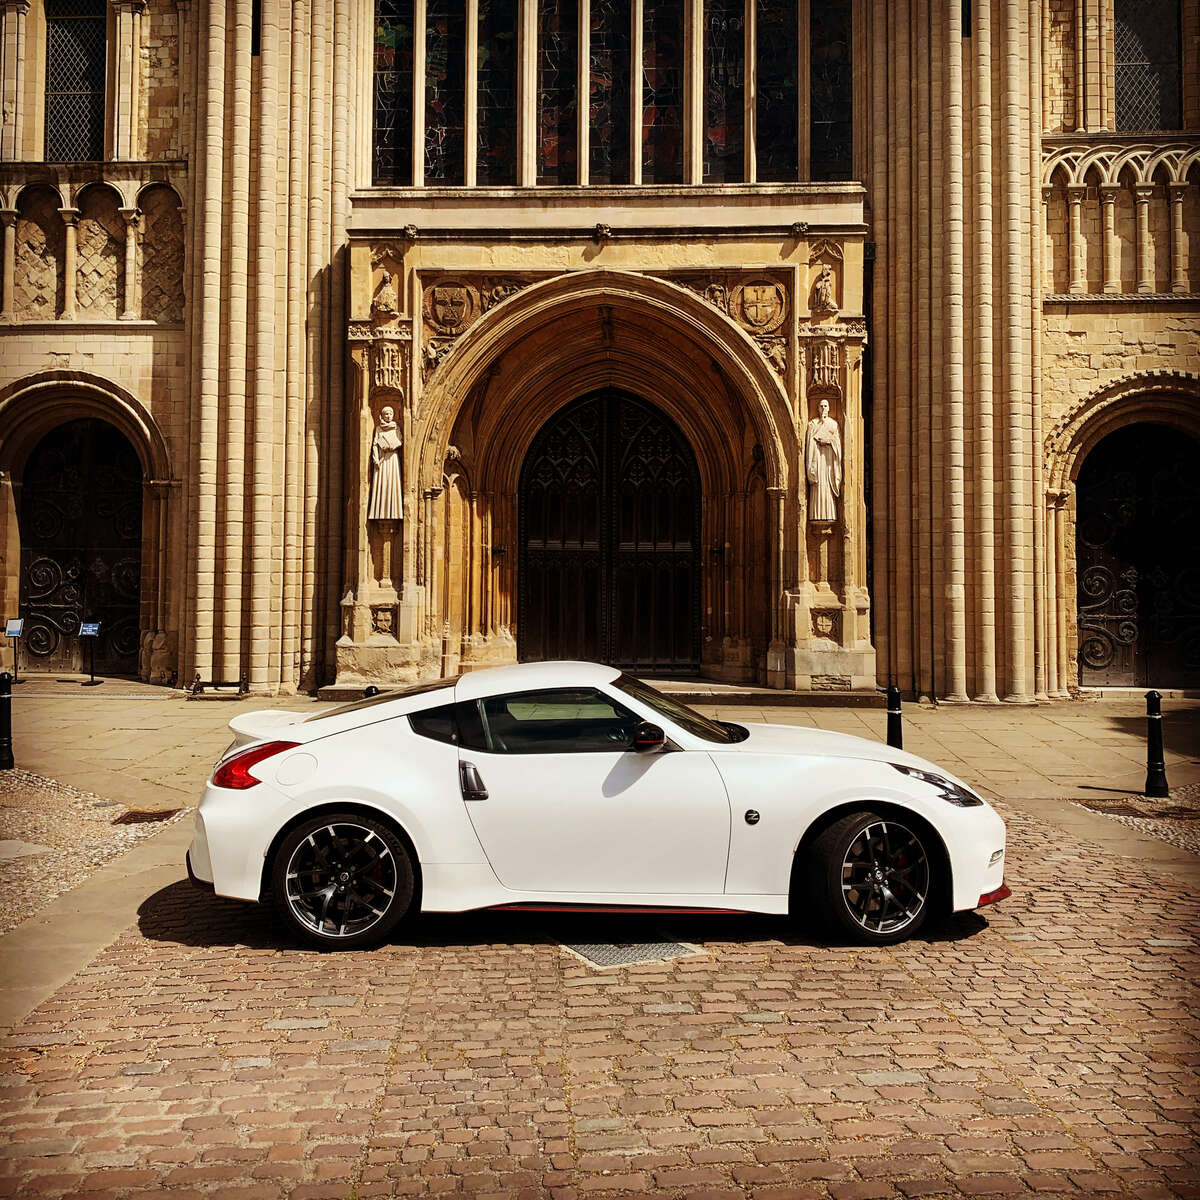
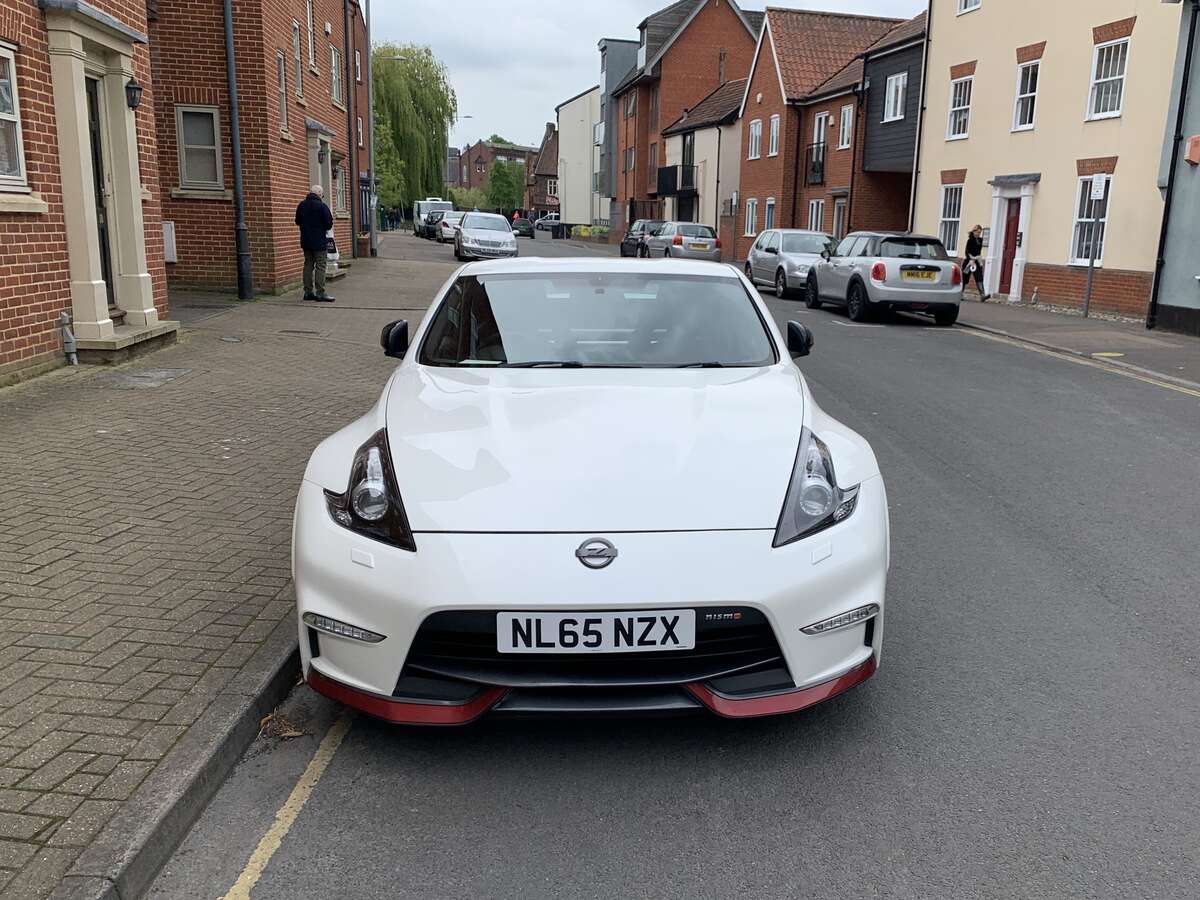
Had a little diversion on my way to the supermarket to get a quick picture outside Norwich Cathedral (30 seconds from my house).
-
I have done it 4 times with a hairdryer, so it does come apart eventually. You have to be quite aggressive with the screwdriver and pulling the lights apart. But they will come apart.
-
I would never use the oven personally. You cant really keep an eye on them properly and there is so much risk and damage that can be done. Whereas with a heat gun (or ive even used a hairdryer a few times) you have complete control and there isnt much chance of damaging the lights unless you put it at a stupid temperature or really dont pay attention. My key piece of advice would be to go into the job expecting it to be a slow process. Therefore you wont get impatient and frustrated, which can lead to trying to rush it and damaging your lights. I just kept heating up a section, then pulling apart a little (starting with wedging in a screwdriver), then heat a bit more, then pull apart a bit more etc. and just keep going until they come apart. I had my heat gun at about 220 degrees, and i would say it takes like 30-45 mins per headlight to take apart? Once they are apart its very easy as its just a few screws to take apart the internals, paint, and then reassemble them. With regards to putting the lights back together, i bought plenty of sealant and put it all around the lights where the old sealant was. Dont use it sparingly, as you want to make sure the unit is well sealed and has no gaps that could cause condensation. Once the sealant was on, i then went around the lights with the heat gun to soften the plastic again, and then pushed the lense back on. Then you can get the screws back in on the back to really pull the headlights back together. It honestly isnt difficult to do, it just takes A lot of patience.
-
Thanks! Yeh definitely, i was pleasantly surprised when i saw mine for the first time haha.
-
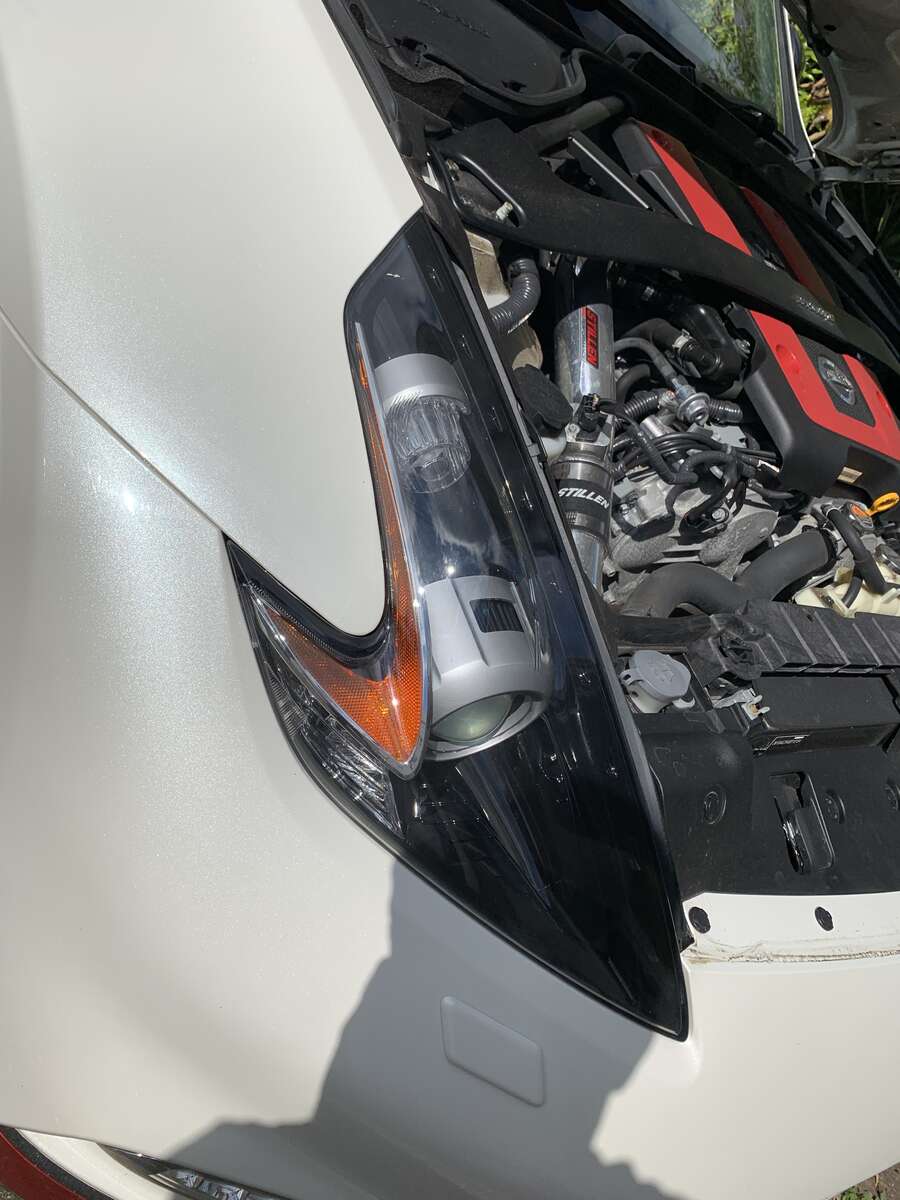
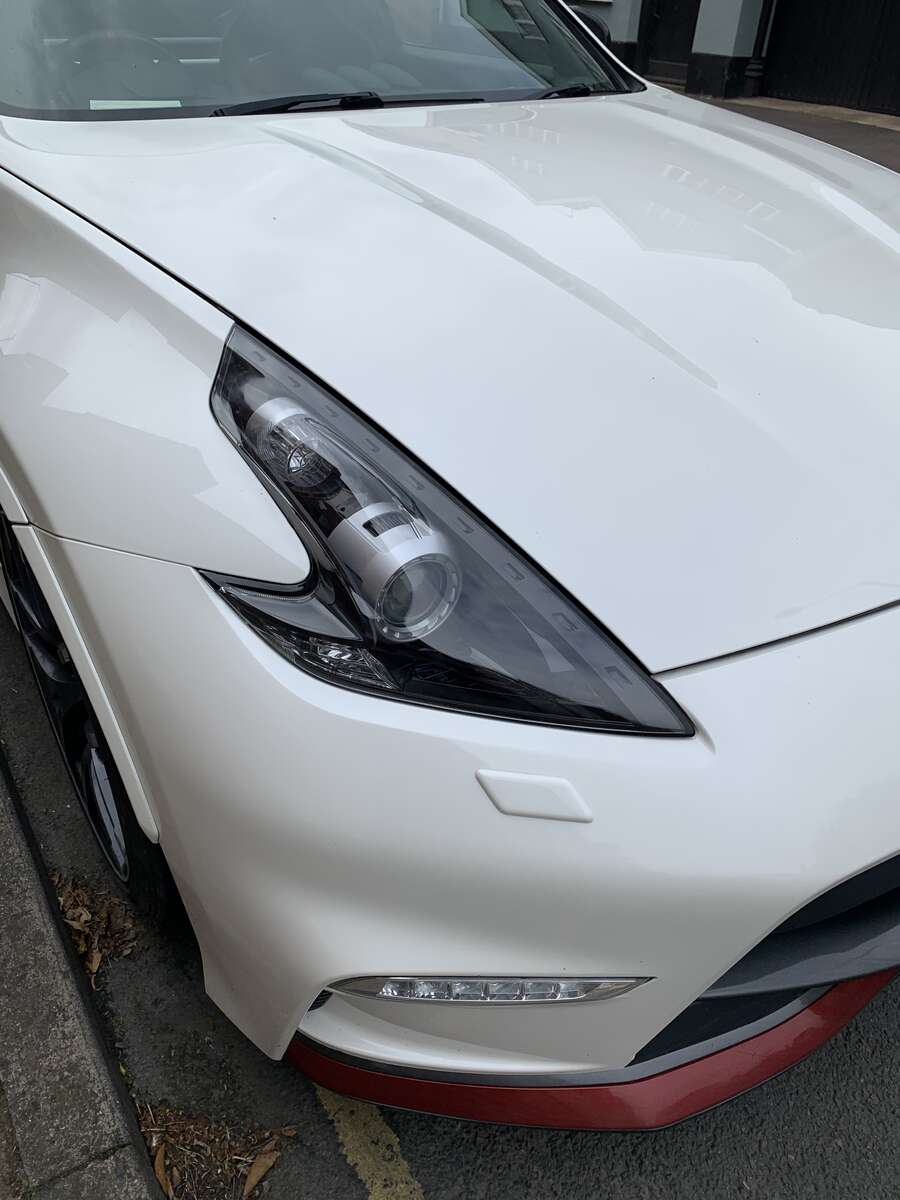
Decided to have a little lockdown mod day and take the headlights apart to ‘de-amber them. Ive done about 5 lots now, but that doesnt ease the length of time it takes to do... It was really worth it though, and im very happy with the results! Before: After:
-
[SOLD]SOLD: Tastefully Modified 370z GT Pearl White
davidv10 replied to davidv10's topic in Zeds For Sale
Still for sale - Happy to accept serious offers -
Yeh, its still for sale
-
I am looking to wire in some footwell lighting to come on with the sidelights. I did this in the old car by tapping in to the Heated Seat button light, but the Nismo does not have heated seats so i have to find another power source. The rear light wiring would be a good place to tap in, but i am not sure which of the 5 wires is for the rear sidelights. I believe, but will double check and get a picture, that the wire colours are; red, black, green, brown, tan. Any help would be greatly appreciated!
-
[SOLD]SOLD: Tastefully Modified 370z GT Pearl White
davidv10 replied to davidv10's topic in Zeds For Sale
Bump - Still for sale -
Spare factory plug/connector in the boot - What is it for?
davidv10 replied to davidv10's topic in 370z General
Yeh thats what i thought. Ive put the interior back in now, so ill just leave it and forget i noticed it -
Spare factory plug/connector in the boot - What is it for?
davidv10 replied to davidv10's topic in 370z General
No, i unplugged the subwoofer and that plug is near the strut bar end. My only thinking is its possibly to do with the folding roof for the convertibles and they just kept the same wiring loom or something?
