

.jpg.dd954627ce381a75101127fb881c164b.jpg)
davidv10
-
Posts
509 -
Joined
-
Last visited
Content Type
Profiles
Forums
Events
Gallery
Store
Everything posted by davidv10
-
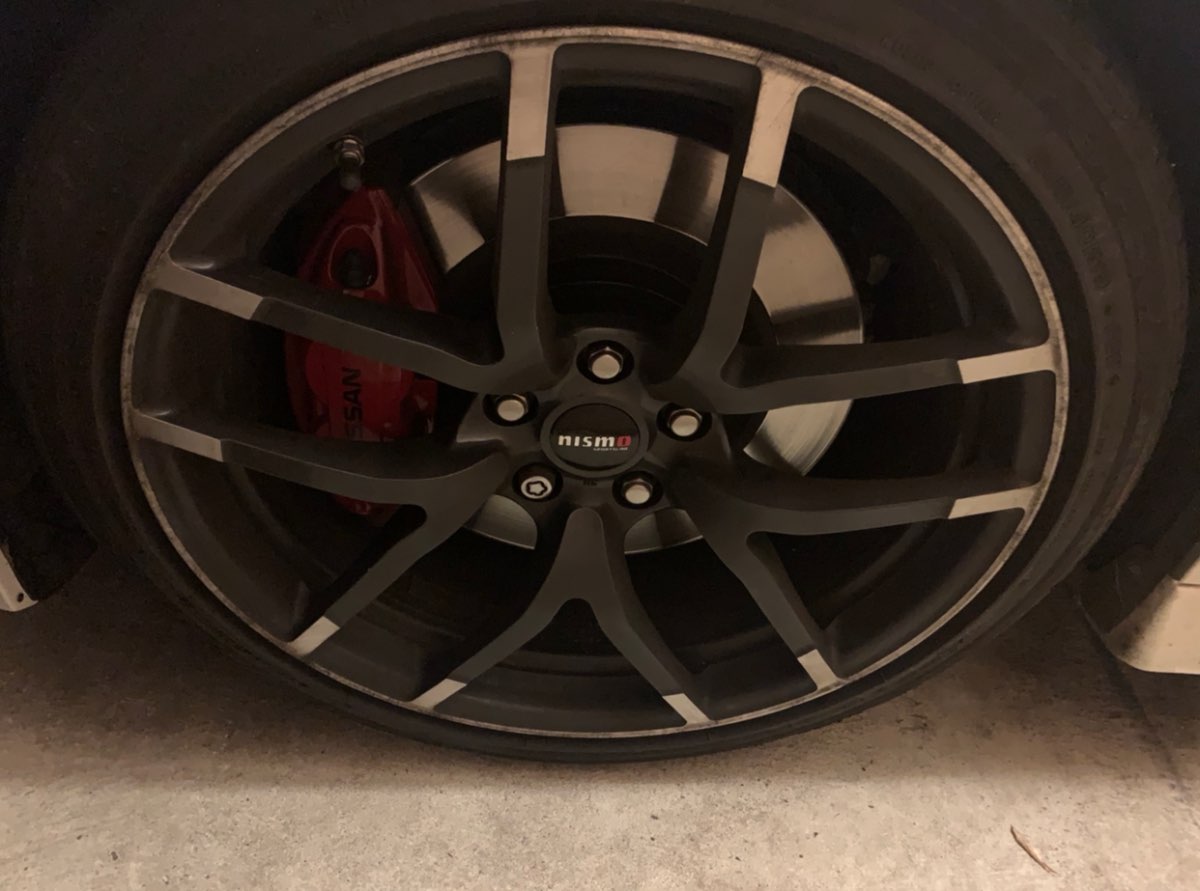
Tiny update this one. I have looked around for ages for Nismo centre caps but no-one seems to make them for the 370z alloys (54mm off the top of my head). I did however see Nismo adhesive centre cap toppers, that were slightly larger than the centre caps. So i decided to get creative, got another set of standard Nissan centre caps that looked like the Nissan badge just popped off, and it did. So i popped the nissan badges off them and then stuck the Nismo toppers onto them and popped them in to the alloys. The way the alloys are, they are fine being a little larger than the centre caps and sit perfectly. The adhesive seems strong and they shouldnt come off. And so i now have Nismo centre caps... Excuse the distorted picture, but this is what they look like.
-
Reduced: £30 Posted
-
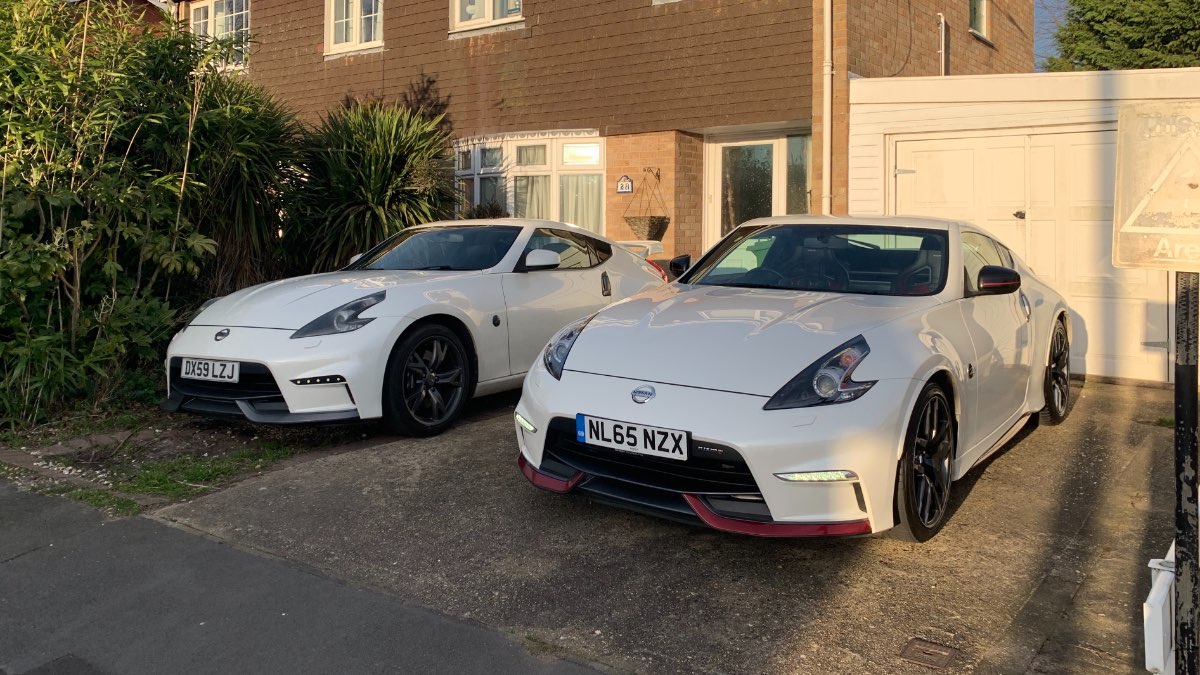
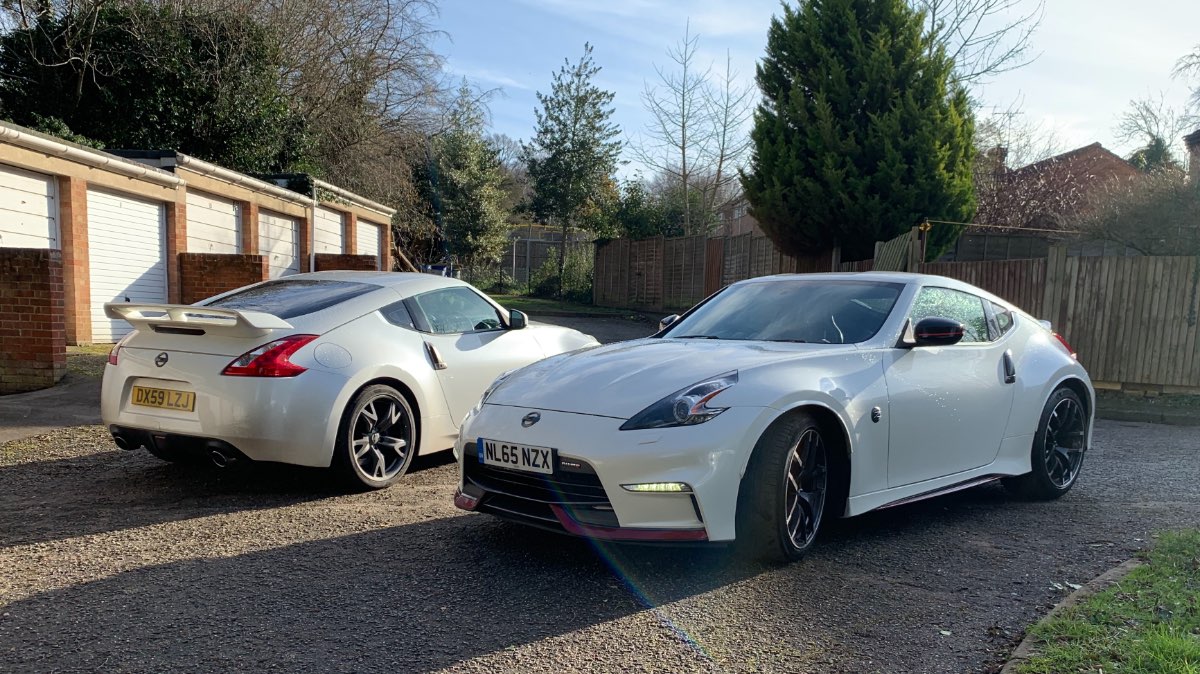
I did exactly this, and went from an early GT model to a MK2 Nismo. Although in a nutshell they are the the same car, there are loads of things i loved about upgrading! And in my view it was so worth it! - The MK2 nismo bodykit is just worlds above the GT. I already purchased a Nismo front bumper for the GT, and planned to get the rear as well. - The Recaro seats completely change the interior and are so nice! (I lost heated and electric seats but because of the look of them i dont care!) - The Nismo is on stiffer springs and dropped slightly. And has extra strut bars for stiffness. It definitely handles better! - It has wider rear tires (285 rather than 275) which is nice in the wet. - There were more small differences for me as mine was an 09 model. So i gained a rear view camera, touch screen, updated sat nav. - And lastly you get to say you have a Nismo
-
Oh nice, well you will have to let me know when you guys have a meet and ill come down, as will only be like a 1hour 30 drive.
-
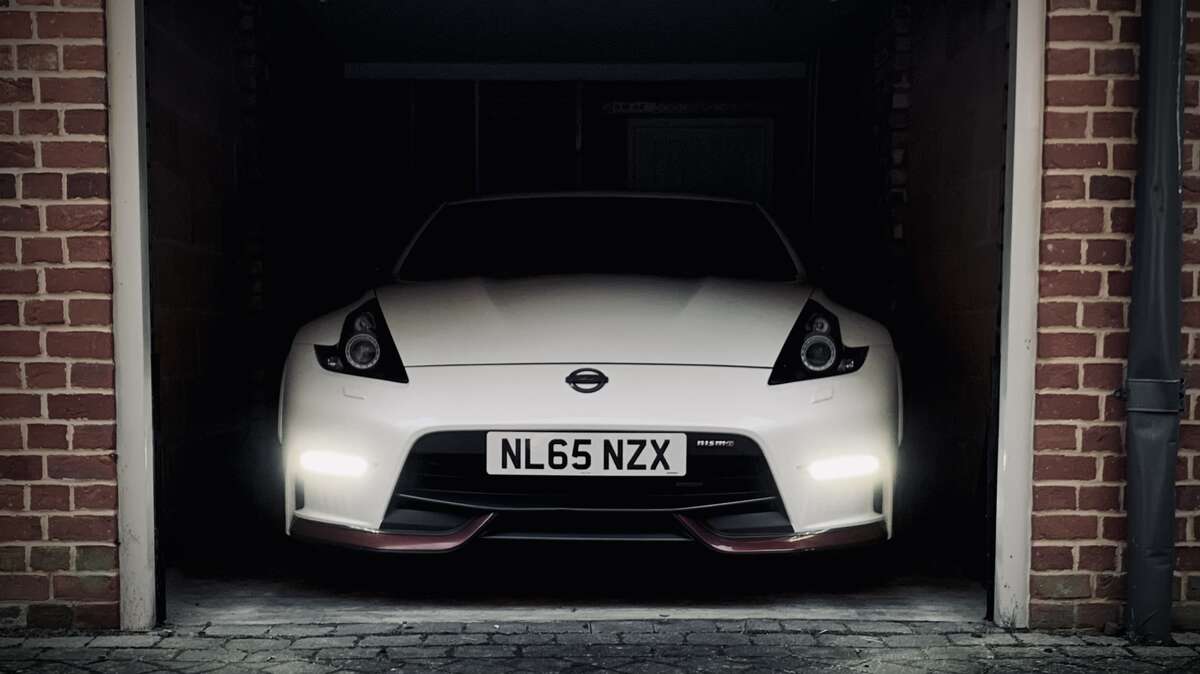
Raring to get out the garage...
-
Im in Norwich, so not too far. We just had a family break there in some cottages (back when holidays were a thing ). We will have to get some Norfolk meets started once all this is over! As there are a fair few Z owners here now.
-
Oh really, how odd. Maybe yours had built in mini resistors or something Yeh so much better!
-
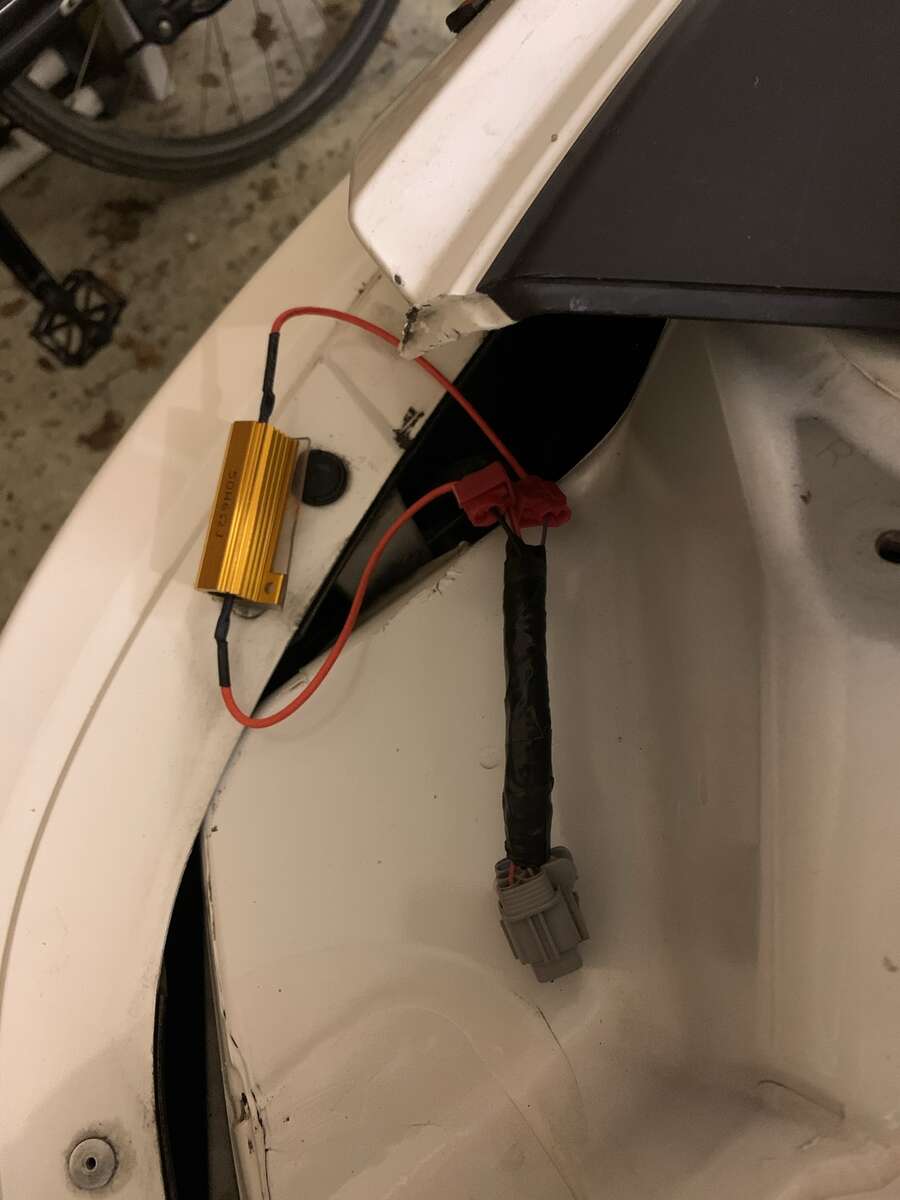
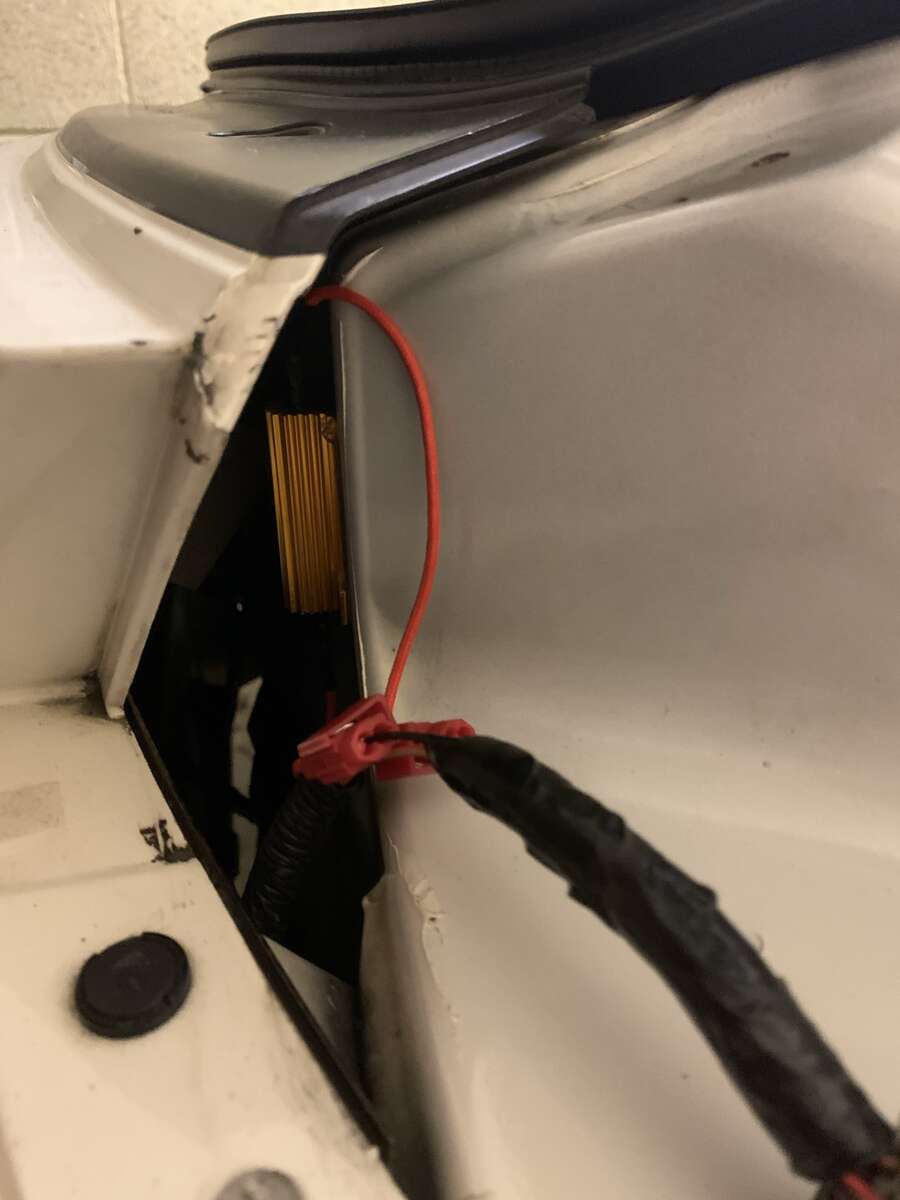
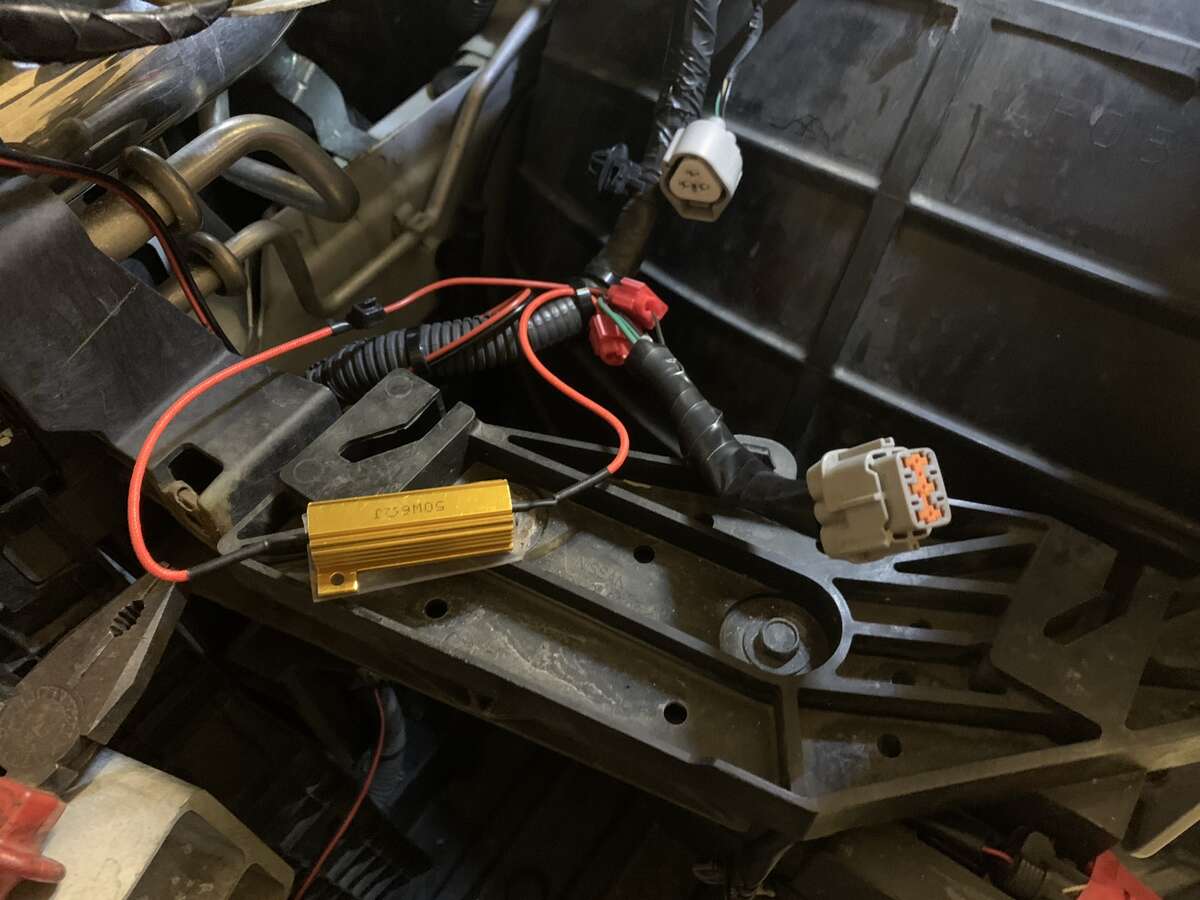
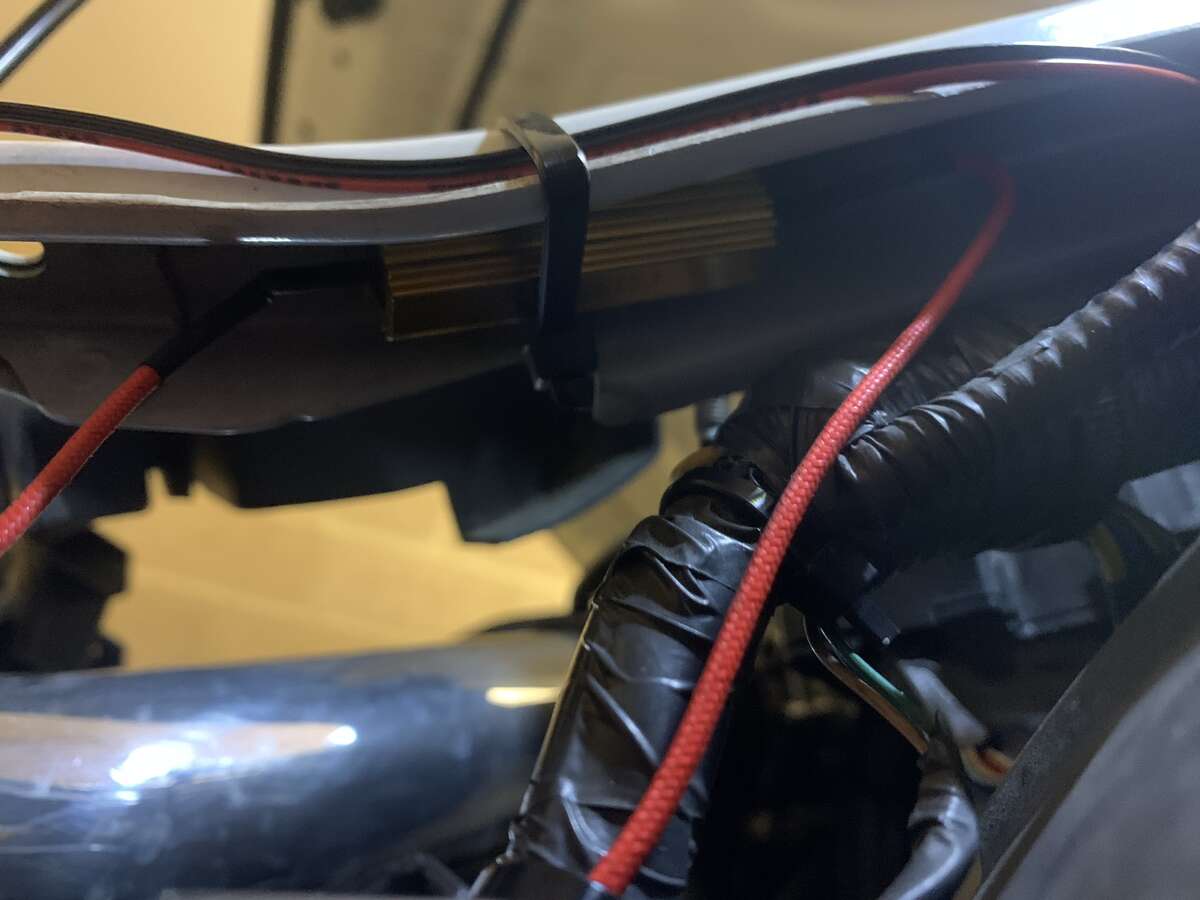
I decided to upgrade the reversing lights and front and rear indicator bulbs to LEDs to match the rest of the LED lights and overall make the lighting system look more modern. I knew the reversing lights would be very straightforward, however the front and rear indicators would need resistors installing into the circuit to stop the fast 'hyper-flashing'. I didnt know much about exactly how this works and so was a bit sceptical at first, but read up on it and actually it sounds a lot scarier than it is. All you do is 't-tap' into the positive and negative wires of the bulb to each end of the resistor. As the resistors get hot, and i didnt want to make the lights any harder to remove than just the one plug, I didnt install the resistors on the light units themselves but followed the wiring through to the plug on the lights, then followed it to the wiring loom so i could tap in and install the resistor there. Then i found the bits of metal body to mount the resistors where it doesnt matter if they get hot. This is what it looked like once i had 't-tapped' into the both the front and rear wiring: And these are the places i found to put the resistors: The results were fantastic. The lights are so much brighter and look more modern. I havent been out since installing them yet, but i did take comparison videos: And here are the reversing lights (i forgot to take a comparison):

-
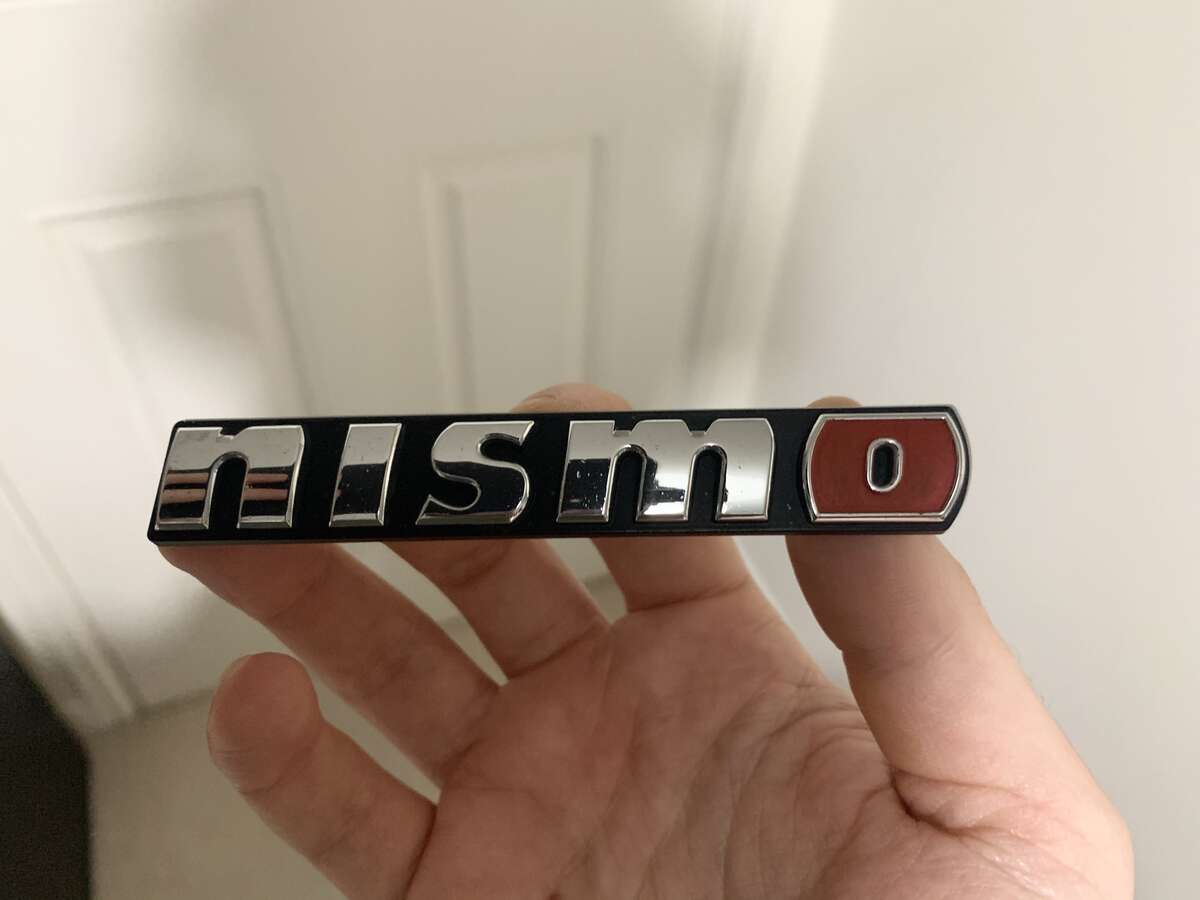
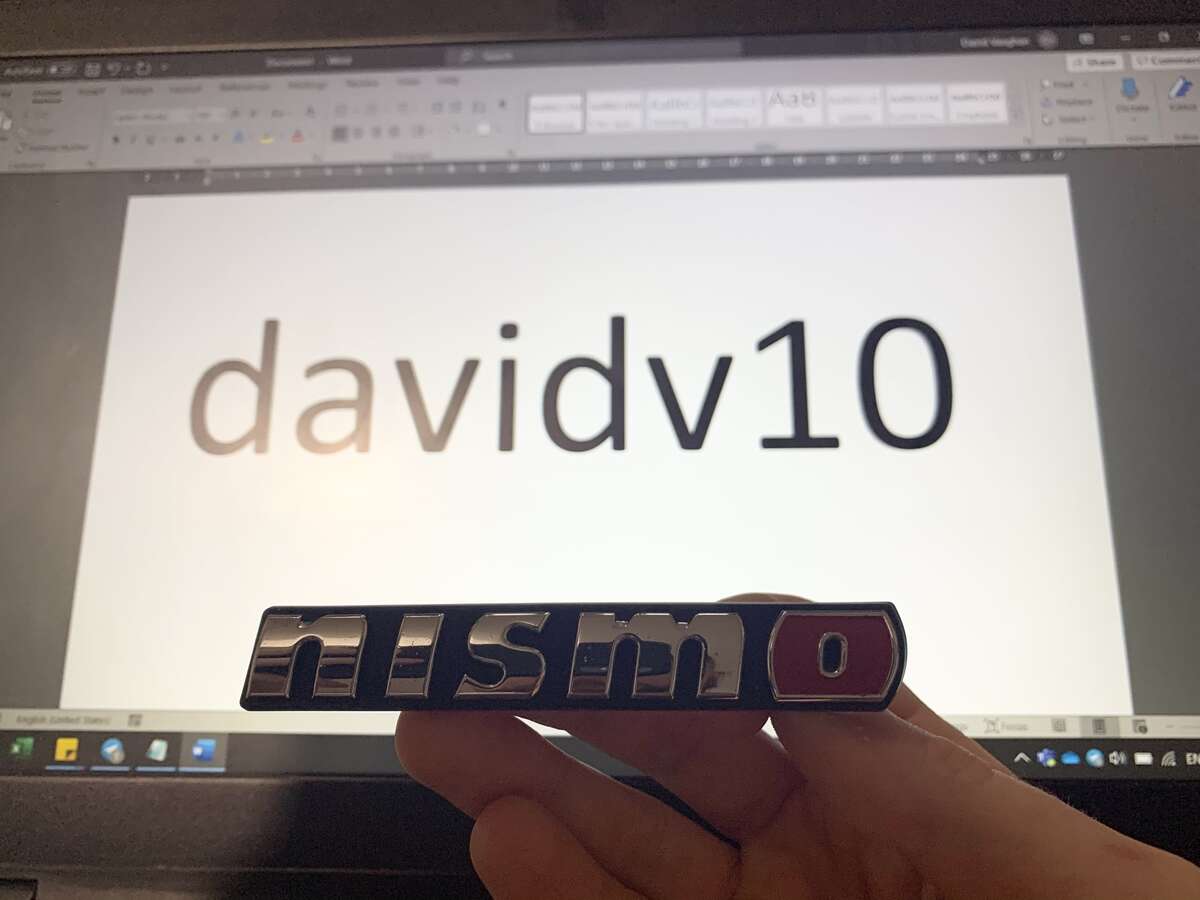
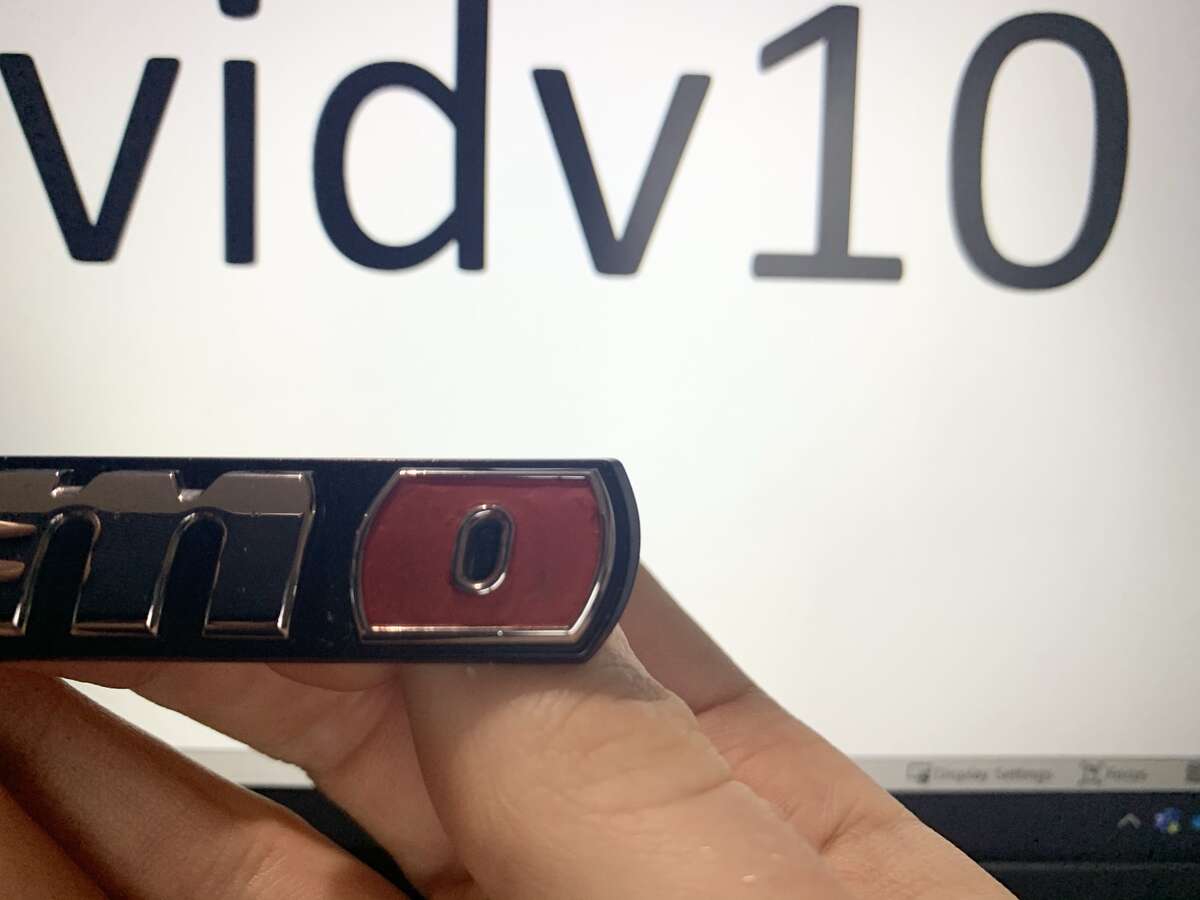
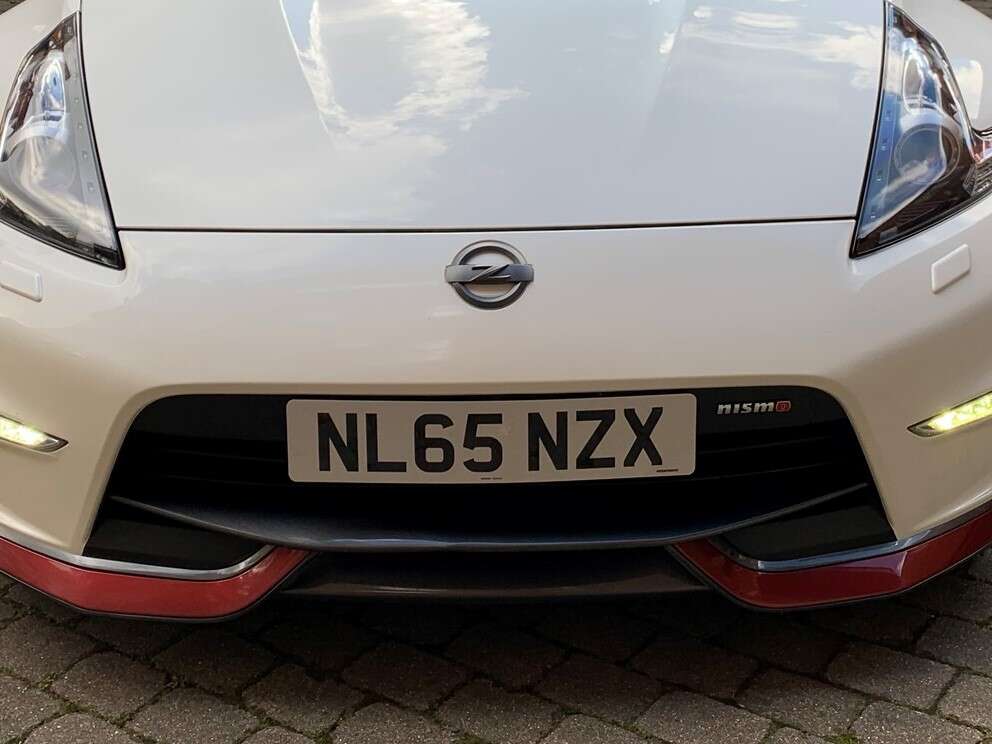
I have for sale my 370Z Nismo Front Grille Badge taken off my MK2 Nismo front bumper. These are very rare to come buy other than spending £60 or more brand new and posted. This is in used condition and has the usual tiny chip marks when looked at closely at certain angles. It has also had the red 'O' repainted by myself as the original colouring had come off so the red paint is not perfectly smooth, but again can only be seen when looking very closely. I have tried to show the slight imperfections in the pictures as best i could. £30.00 posted. And here it is when it was on my car:
-
.thumb.jpg.5a08b3f86e6135ca5ce92cfc21ea3a3e.jpg)
Nifty City Apple Car Play System - Install & Review
davidv10 replied to davidv10's topic in I.C.E & Electronics
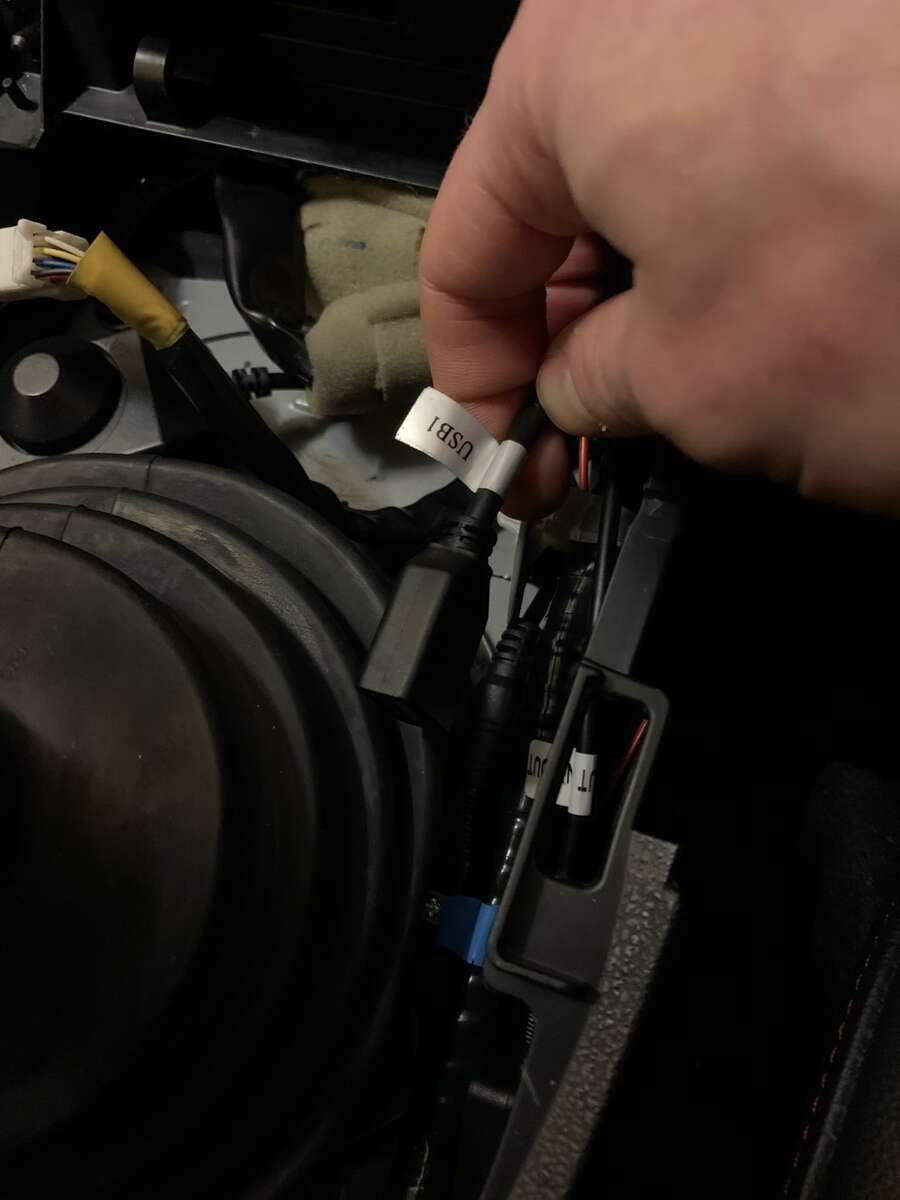
This is the new ubs port extension that i put in the cubby to replace the stock usb port.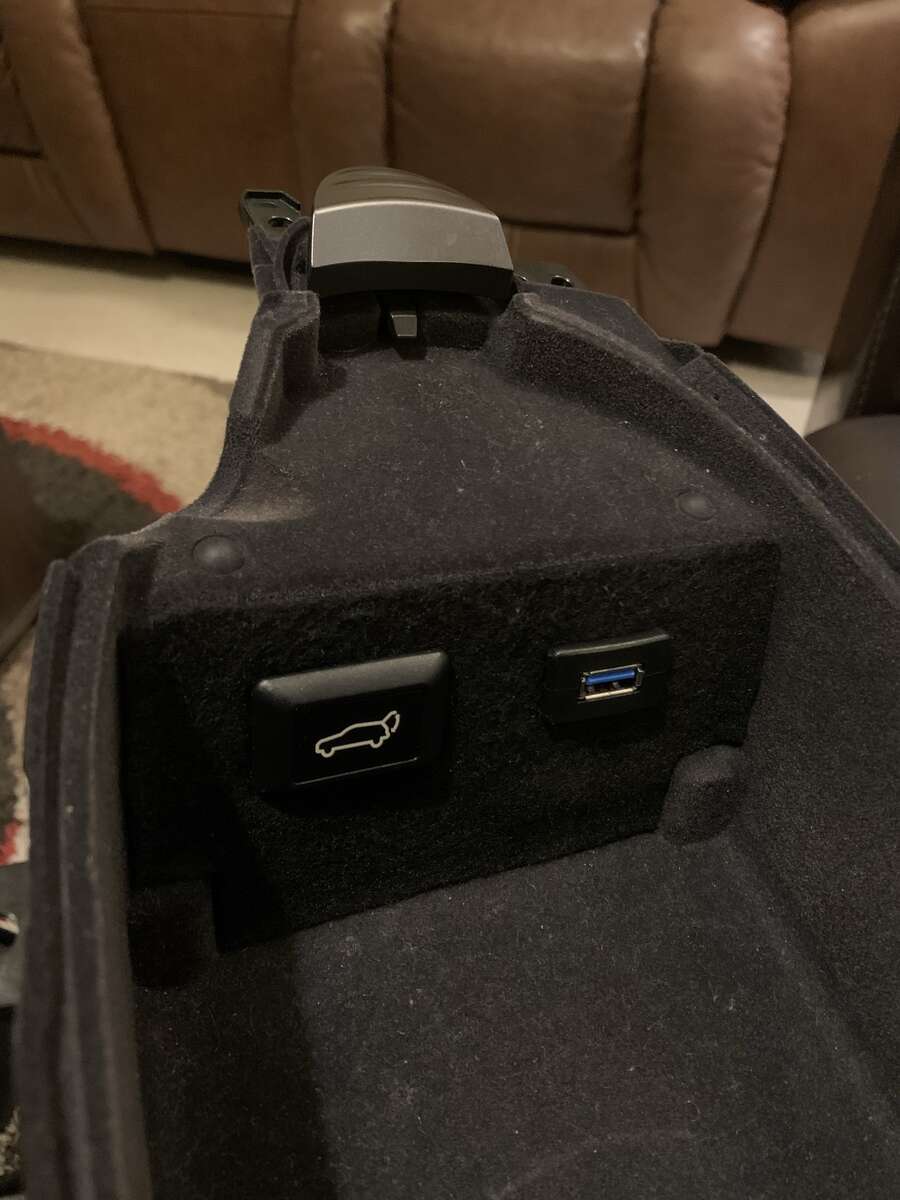
-
Nifty City Apple Car Play System - Install & Review
davidv10 replied to davidv10's topic in I.C.E & Electronics
Thanks mate. Thats good then, you will love it! -
Nifty City Apple Car Play System - Install & Review
davidv10 replied to davidv10's topic in I.C.E & Electronics
Thanks! I just checked and they dont have a 350z integration system unfortunately You could always email them and ask -
Nifty City Apple Car Play System - Install & Review
davidv10 replied to davidv10's topic in I.C.E & Electronics
Thank you. Yes it really does! -
Nifty City Apple Car Play System - Install & Review
davidv10 replied to davidv10's topic in I.C.E & Electronics
Haha thank you! -
Nifty City Apple Car Play System - Install & Review
davidv10 replied to davidv10's topic in I.C.E & Electronics
Thanks. It really is a lot simpler than it looks! Essentially its just unplugging and plugging in cables where they are all different sizes so you cant plug them in the wrong place anyway Or at least theoretically not -
Haha i always like to get stuck in with these things! Thanks!
-
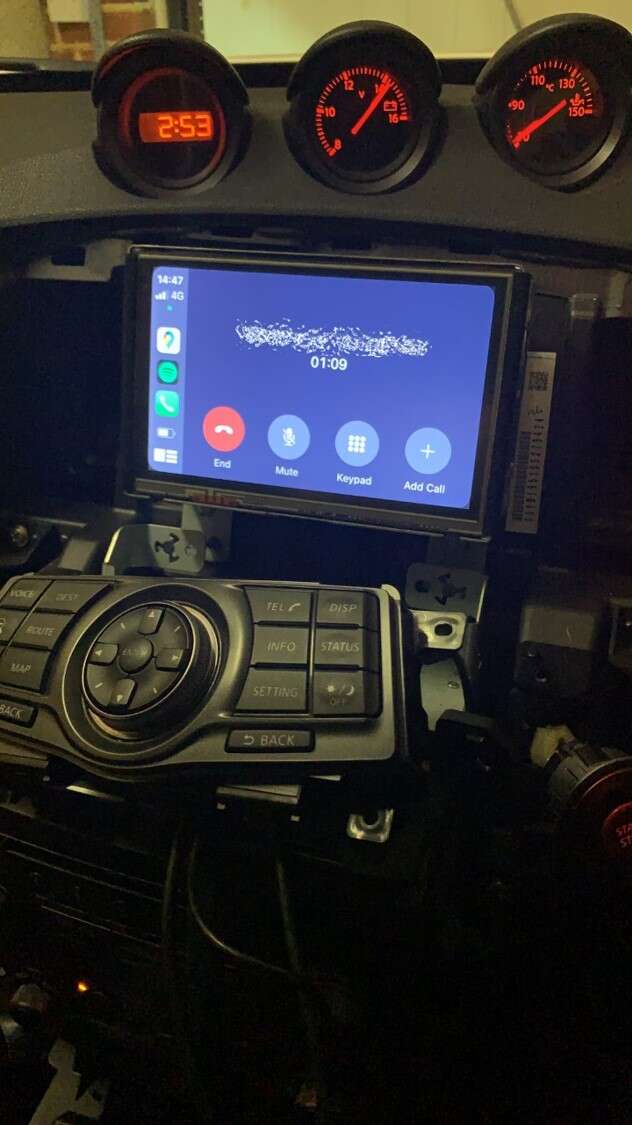
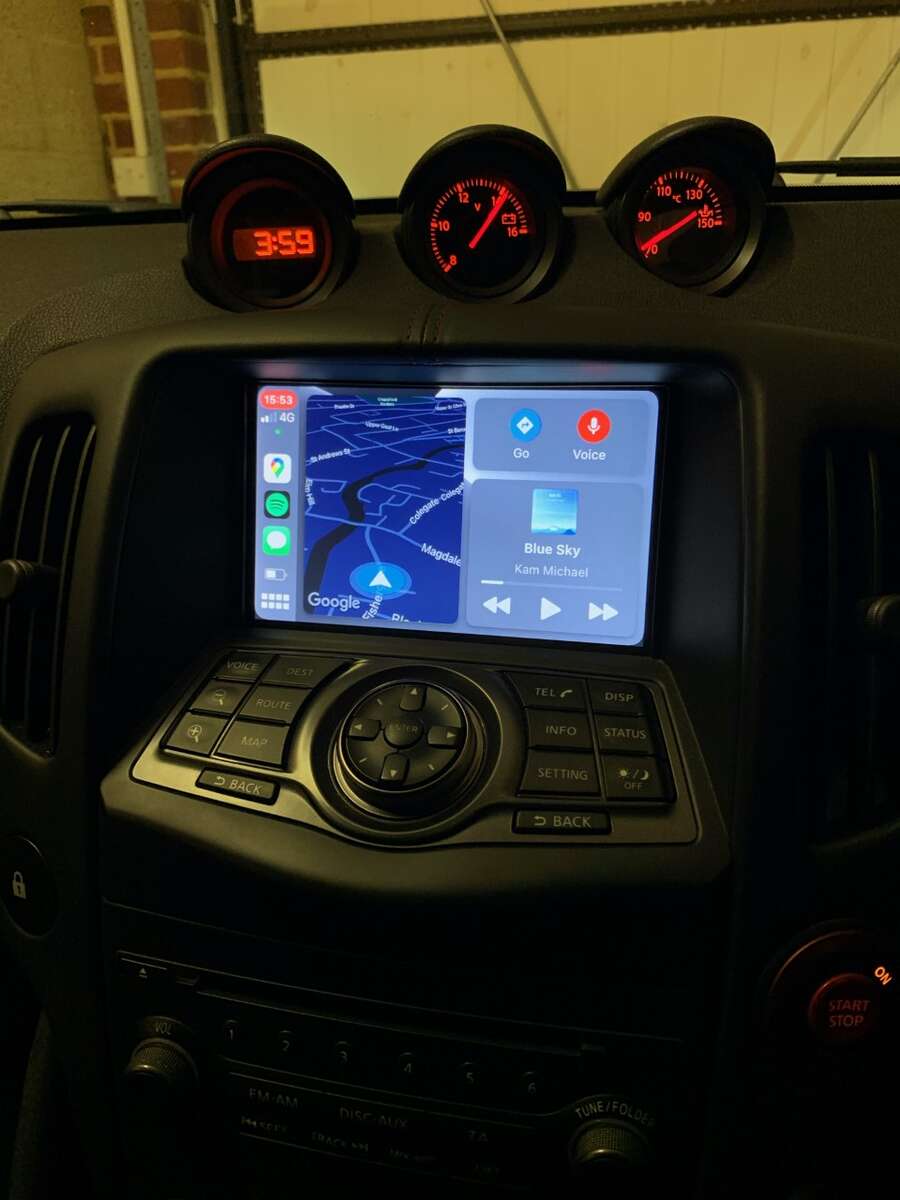
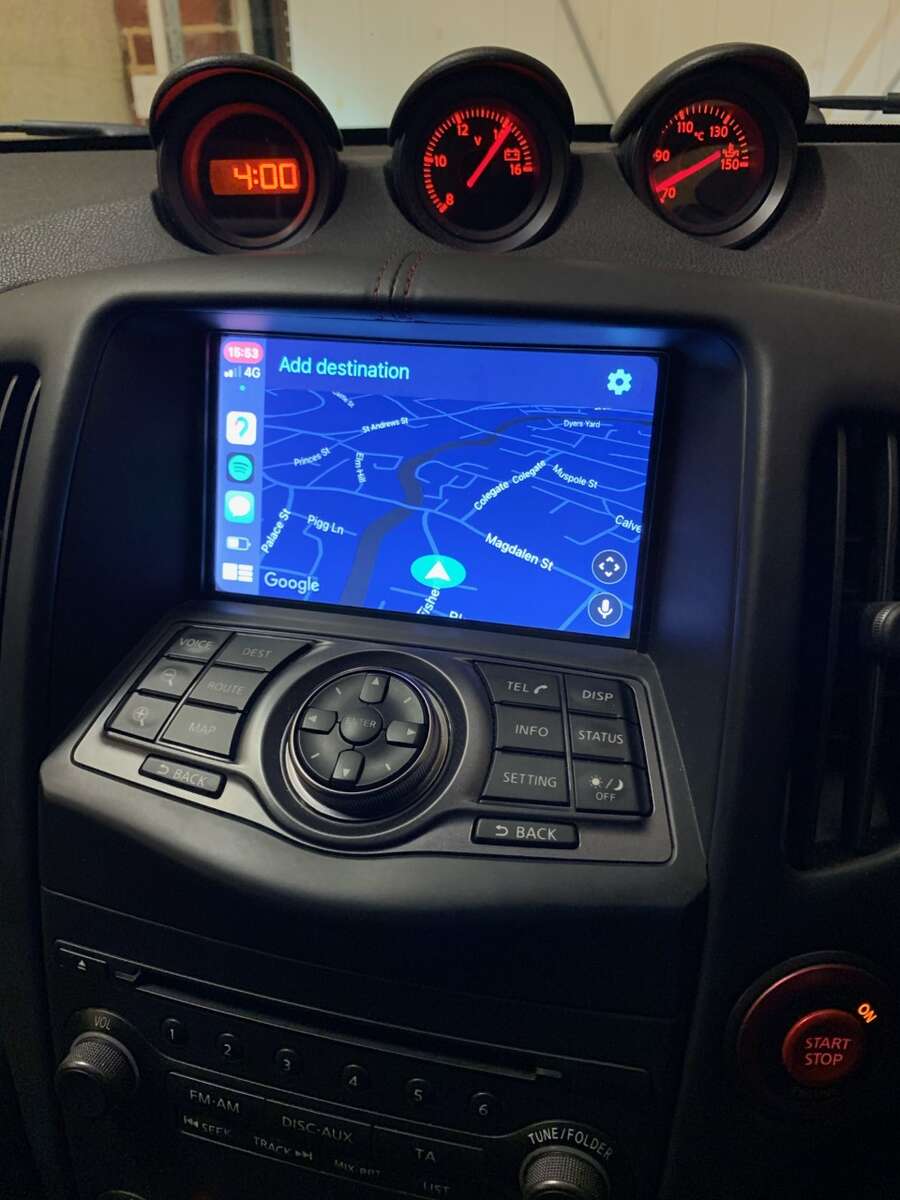
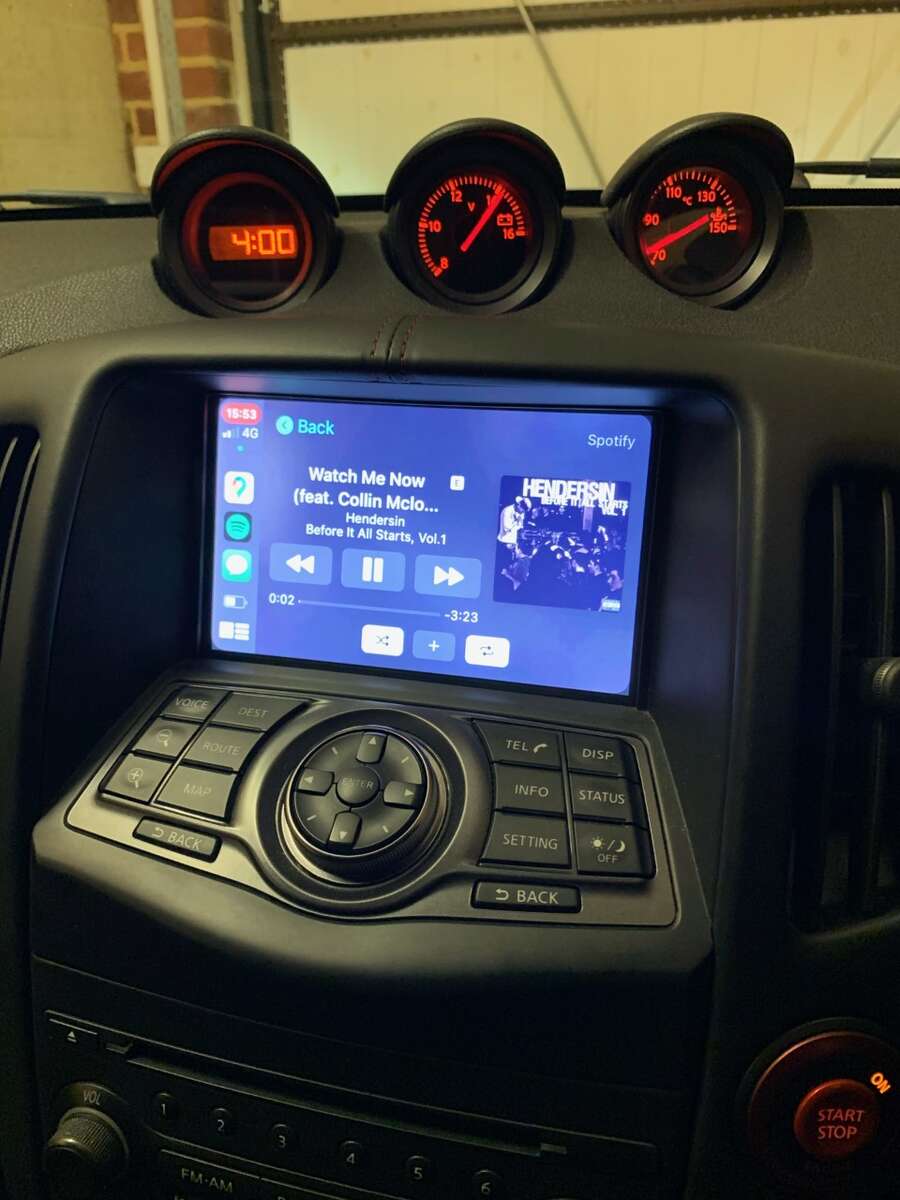
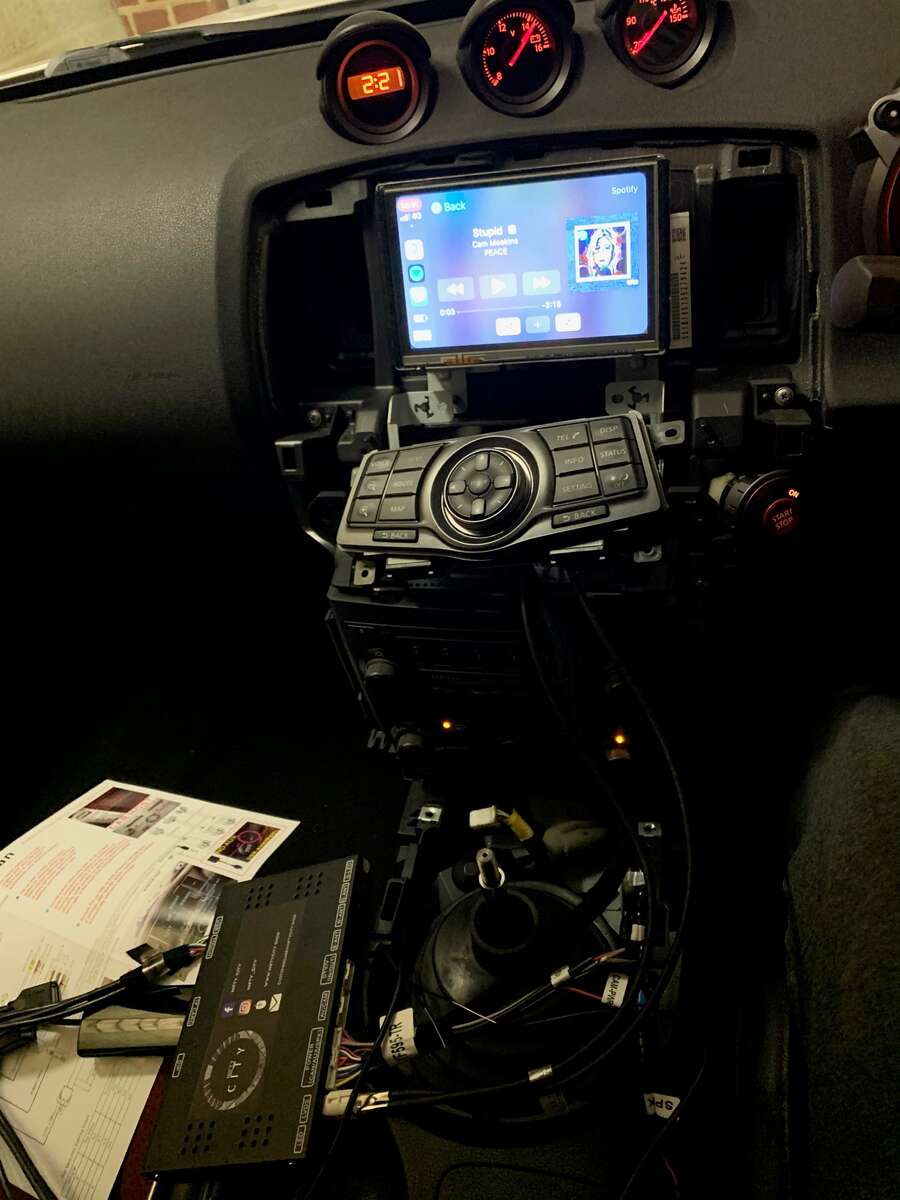
My next update is a big one. I decided to take a bit of a plunge and purchased a full Apple Car Play system from Nifty City. It was not cheap at around £400 shipped to me, but it fully integrates with the stock stereo and screen and does not require any cutting of wires etc. I am incredibly happy with it, and it really modernises the whole interior when looking at it! I now have always up to date Google Maps and can use Siri to make calls which is a million times quicker than the quite frankly terrible stock voice command system. I have done a full write up/review/install thread here: Here are some pictures of what it looks like: And this is when you click on either Maps or Spotify: This is when you are on a call (i hadnt re-installed all the interior plastics when testing this): Lastly, this is where i installed the unit which fits perfectly just above the stereo and so all wiring and the box are completely hidden away:
-
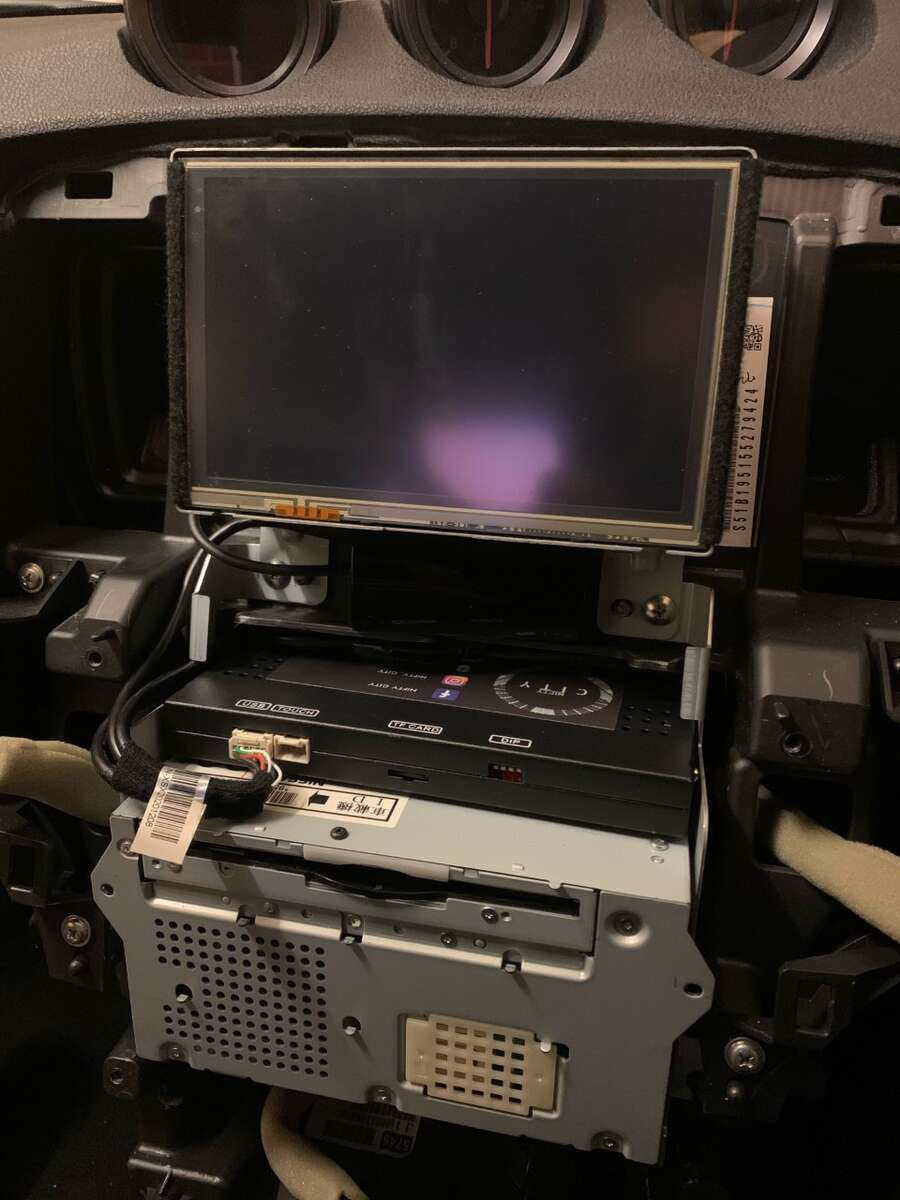
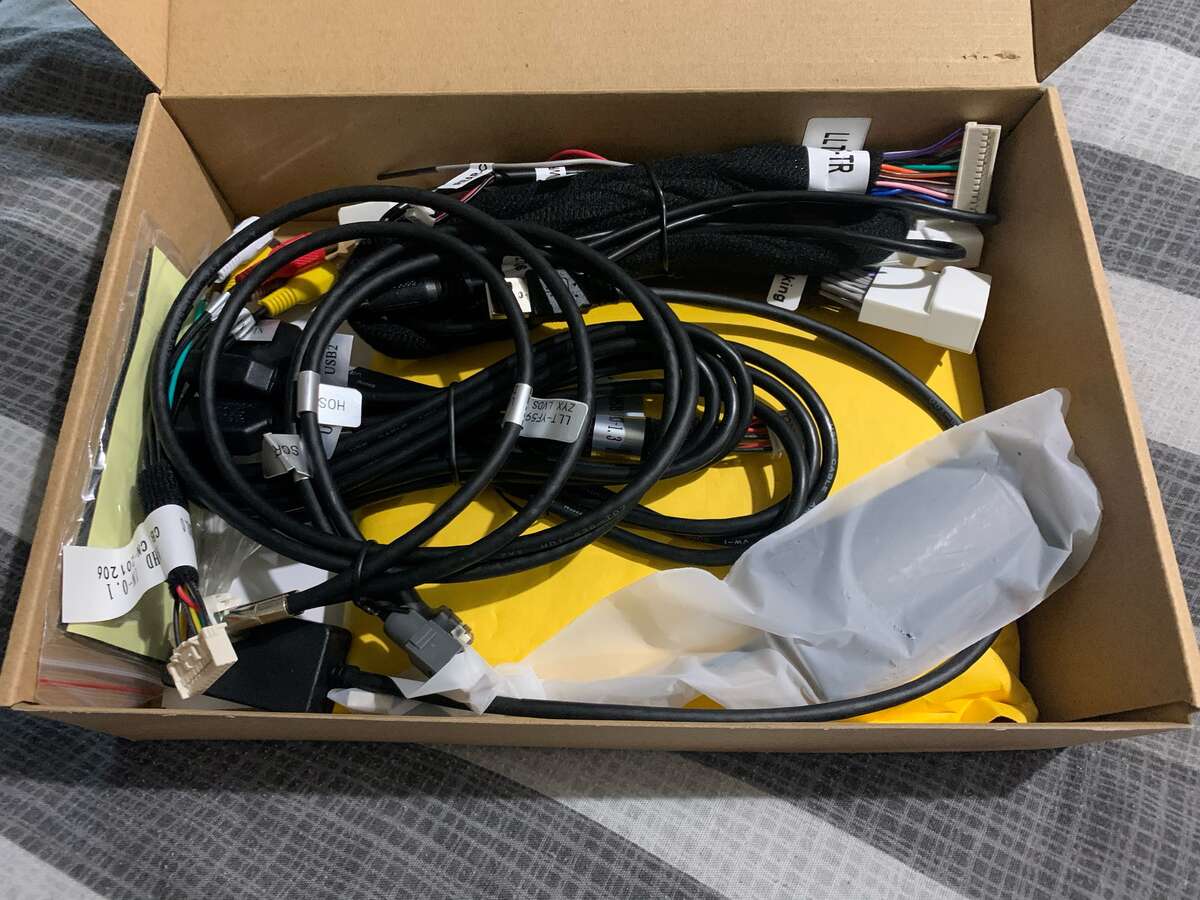
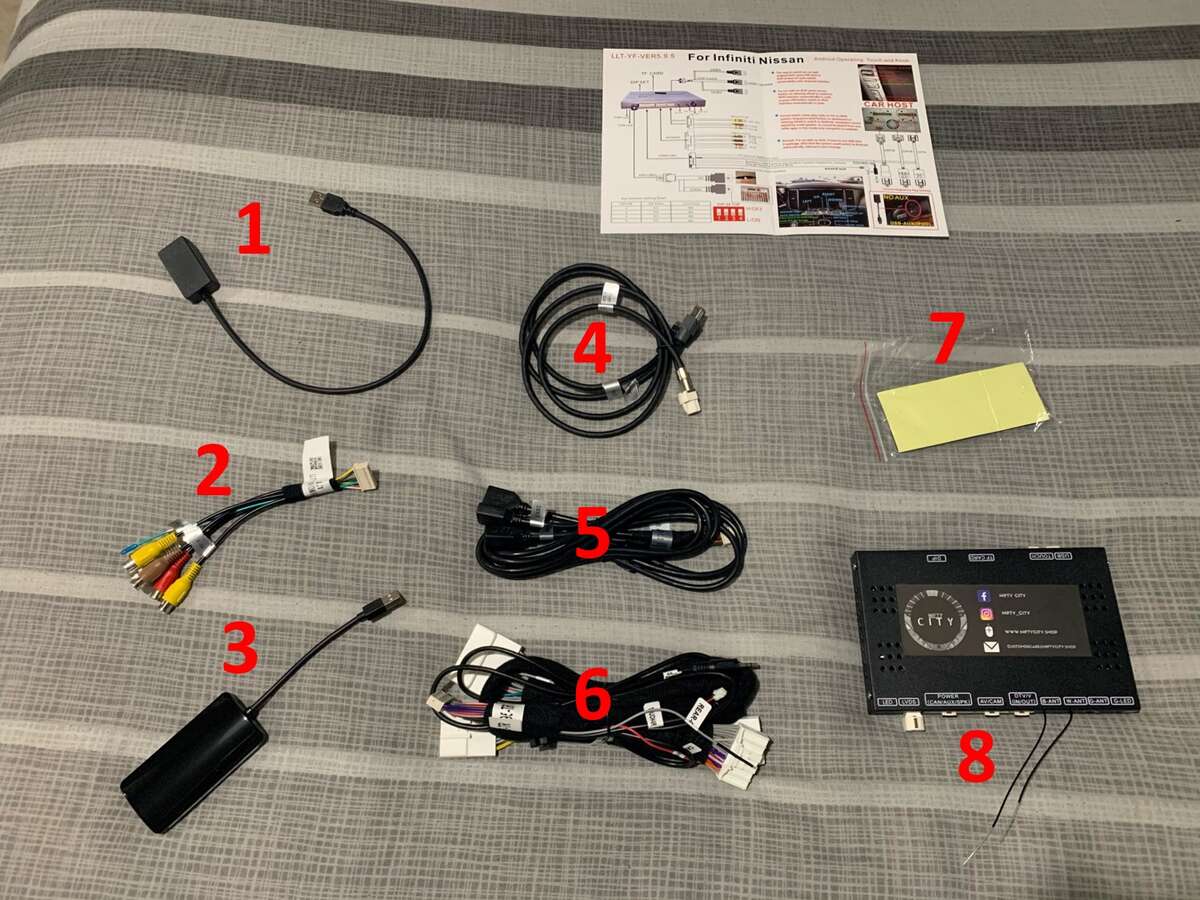
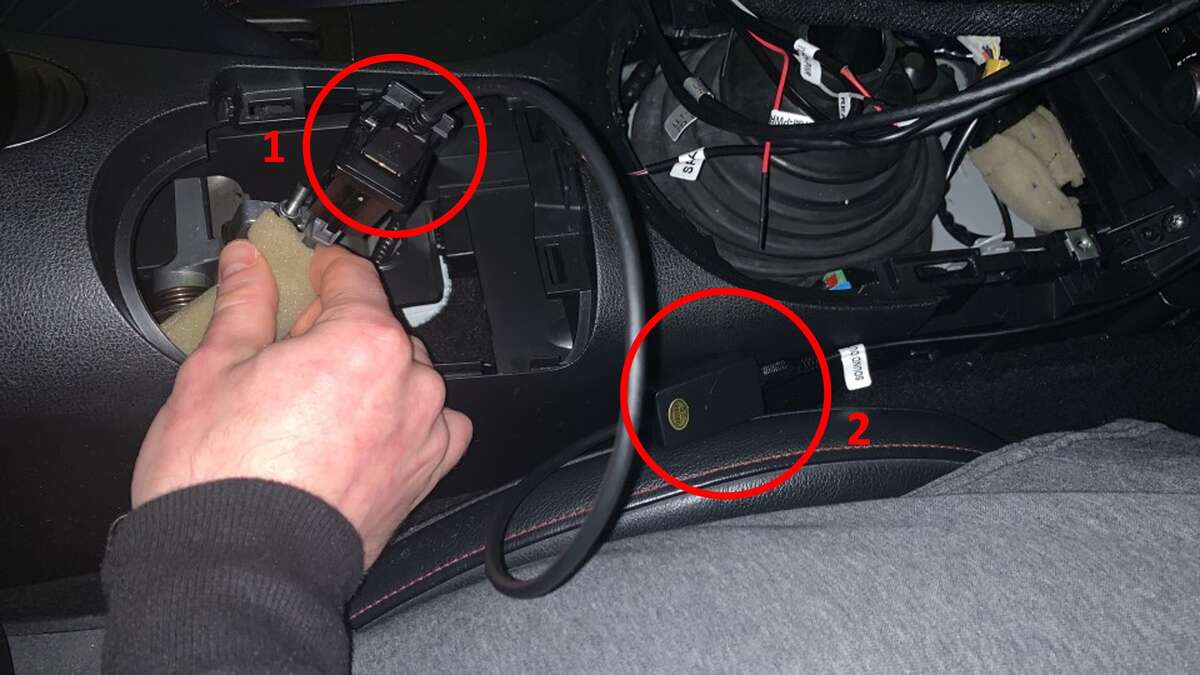
Having seen a couple of Youtube videos on the Apple Car Play plug in systems, i decided to go for it myself. One bug bear i have with the 370z is how old the stock system looks, how the maps dont update well (i often use a new stretch of road not on the sat nav), and how bad and long winded the voice commands are. Although expensive (around £400 shipped), it looked like a very clever system that plugs into all your existing stereo and screen without needing to cut any wires and allows you to keep using your standard features such as steering wheel controls and reversing camera etc. It also allows you switch back and forward between the Car Play system and the Stock system at the touch of a button. Now installed and working, i am extremely happy with it! It makes the interior look so much more modern, it is much easier to use and i have completely up to date Google Maps. This is what the main screen looks like: You can then expand each component by clicking on it: And this is how it looks when you are on a call (i was testing before all the interior panels went back on): I have taken a video of me using the system, which shows it a lot better: My Review of the System Overall i could not be happier with it and would recommend it to everyone! Good Points - Looks much more modern. - Always up to date Maps. - You dont need Spotify/Apple Music open on your phone to play in the car. - You can use Siri which especially for making calls is a million times quicker. - You can still use the majority of the steering wheel buttons (volume/next track etc.). - Although for half a second it goes back to the stock system, the reversing camera still cuts in. - Any new messages (for any messaging apps) pop up on the screen and when clicked will be read out to you. You can then reply using speech. - The system is fully reversible if you need to remove it (for example selling the car). Points Worth Noting - Not bad points but just some small limitations (as you would expect) - The stock system will always come up on start-up. You have to manually press the back button to load the Car Play system. - Based on the above, you have to wait (i would guess at) 10 seconds for the Car Play system to load up. - Although the majority of the buttons (including steering wheel controls) work with the Car Play system, there are a few that dont and then cut the screen back to the stock system (phone call button/steering wheel voice control button). This isnt really a problem as once you know you just dont touch them. - The system requires the stock USB (or 3.5mm jack) port. The system does then have two extra USB ports that you can use as replacements, however it does not have the stock port. I have ended up taking the stock port out of the cubby and just have it under the centre console section. I have then bought a USB port extender panel and have plugged it in to one of the USB ports on the Car Play system and installed it into the cubby as a replacement. You do not need to bother with this if you dont ever use the USB port anyway, but i wanted to go the extra mile just in case. I have not written a full guide, but I have done a bit of one, which will hopefully answer the questions that i went to Nifty City about as i wasnt sure. Nifty City by the way have been incredibly helpful! They are on whatsapp and whenever I had a question they replied very quickly and sent videos to help explain when necessary. Guide This is how the box arrived, with all the components: Here is a layout of all the parts with a description to help with exactly what is needed and what goes where. The instructions are helpful, but not amazing and not 100% accurate as the page is for a range of models: 1. This cable is only needed if you have a USB port in your cubby (as opposed to a 3.5mm jack). It is an adapter that goes from the 3.5mm jack in the main harness to your USB port in the cubby. 2. I did not use this cable at all. It is not needed for a normal set up, but i believe is there for adding external audio/video devices? 3. This is the Apple Car Play device. It plugs into one of the USB ports in the USB harness. It can be connected to wirelessly or you can plug your phone into the device (there is a usb port on the end) it you prefer using wired Car Play. 4. This is the harness for the screen. One cable goes into the screen and the other into the stock screen wiring. 5. This is the USB harness. One port is for the Apple Car Play device (Number 3) and the other two ports are the spares for plugging in devices (one of which i used an extender USB port plate and installed into the centre cubby - See below). 6. This is the main harness. This is where it differs from the instruction sheet slightly. There are two ports in the back of the stereo that are used (not three as the diagram says). You then plug in this harness in between the stereo and the stock wiring plugs. The last cable you need to plug in is the 3.5mm jack. This either plugs directly in to the cubby if you have a 3.5mm jack port, or with the adapter if you have a USB port in the cubby. The other cables/wires are not needed for a normal setup. 7. This is a set of velcro strips (im guessing to secure the main unit), however i did not use these and found a great place for the system box to sit (see below). 8. This is the main system unit and is there the various harnesses and plugs provided (Numbers 4,5 and 6) plug in to. Here is a picture testing mid way through the install: Here shows the stock USB cubby port (that i removed from the cubby to hide in the console) plugged in the Car Play system using the adapter. Number 1 is the stock USB port and Number 2 is where the 3.5mm jack from the main harness goes in to the extender. For the full install, i had this wiring fed below the stereo and under the gearstick plastics under the console so it cannot be seen. This is one of the spare USB ports from the Car Play system that i have fed through into the centre console. Where i now have my USB port plate extender going in to the cubby where the stock USB port was. Lastly, this is where i decided to fit the main system unit. It fits perfectly in the gap above the stereo and is completely hidden away. It is a bit of a squeeze with all the extra wiring behind the stereo, but it does fit. That was pretty much it for the install. It took about 2-3 hours i think which included time of me asking Nifty City questions for bits i hadnt plugged in properly/didnt know about. I couldnt find much on this system for the 370z other than a Youtube video for one installed on a G37, which didnt really have any detail and review on the good and bad points, so i thought i would create this to hopefully give people loads of detail on it so they can decide whether to get it and some help when installing it. As i said to begin with, i absolutely love this system and am so glad i went ahead and bought it! Its not cheap, but it is definitely worth the money!

-
Ordered from the dealer. The cap and the split pin was £15 delivered, so very happy with that! Mods please close.
-
Yeh, i have done as well
-
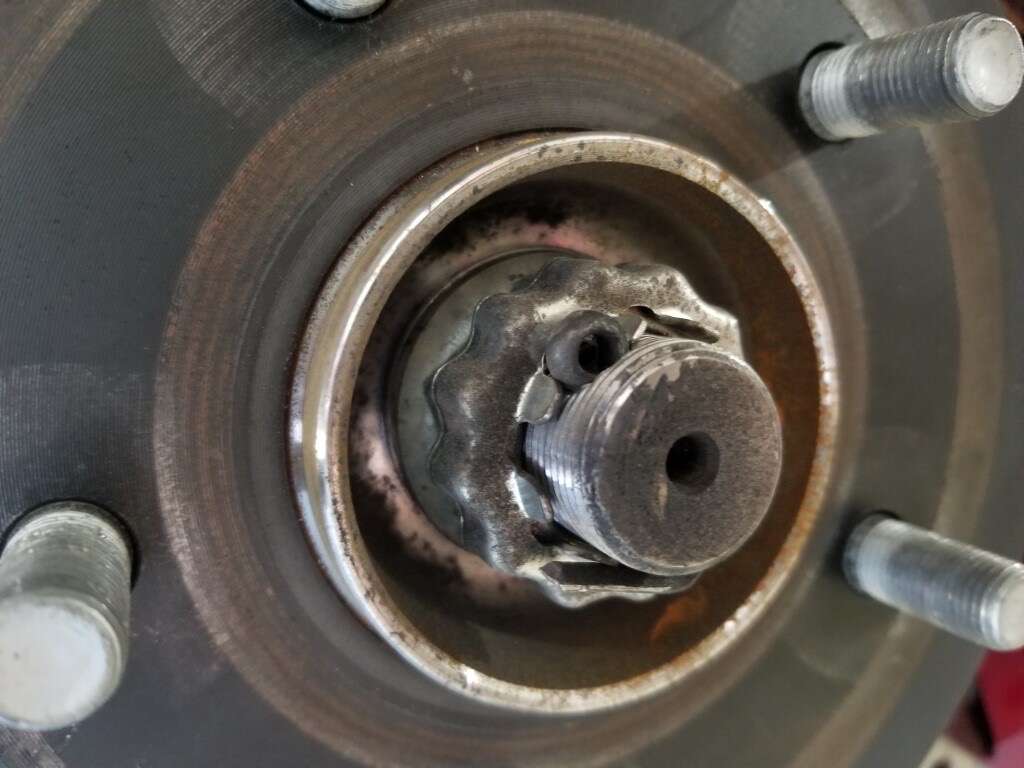
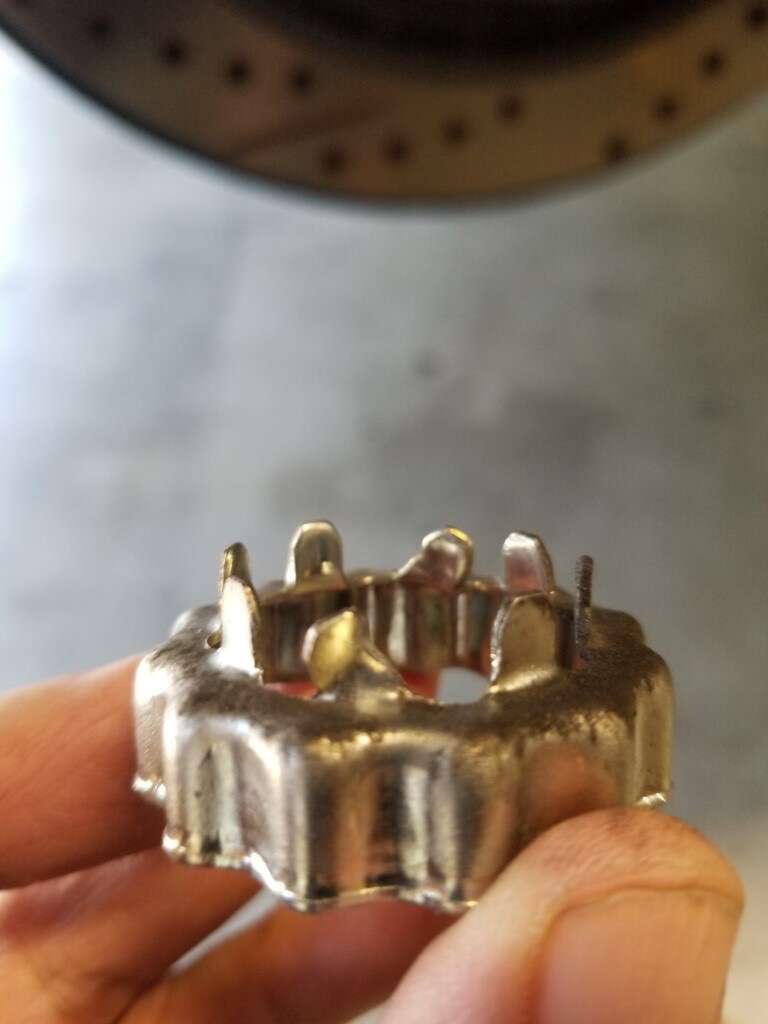
Hi, i am after a replacement rear axle nut cap (and cotter pin). Does anyone know what the part number is or where i could purchase one? I found the USA part number which is 40263-1CA0A but i cant find the UK part number. Here are some pictures of the part. Any help in finding one would be appreciated.
-
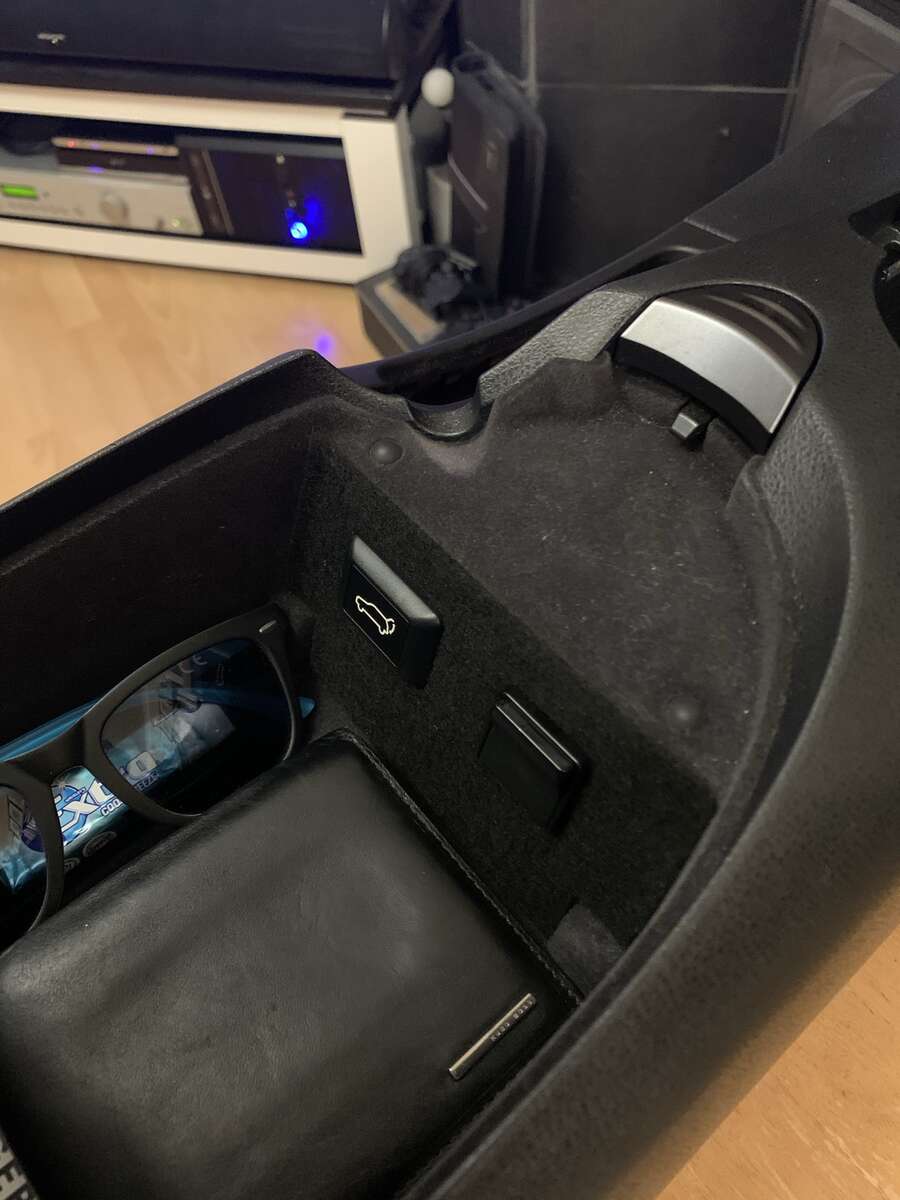
Little update. I removed the red white yellow plugs from the centre cubby a while ago and just put plastic plugs over them to temporarily fill the gaps. Now with the boot release button causing another hole on that panel to fill and not sitting central with the usb plug i decided to drill a hole to re-centre the boot release button and then re-felt the panel covering all the holes i no longer needed. Its not a perfect colour match, as the stock black felt looks a little faded compared, but it definitely looks a lot smarter now and is all level and centred. Before: After:
-
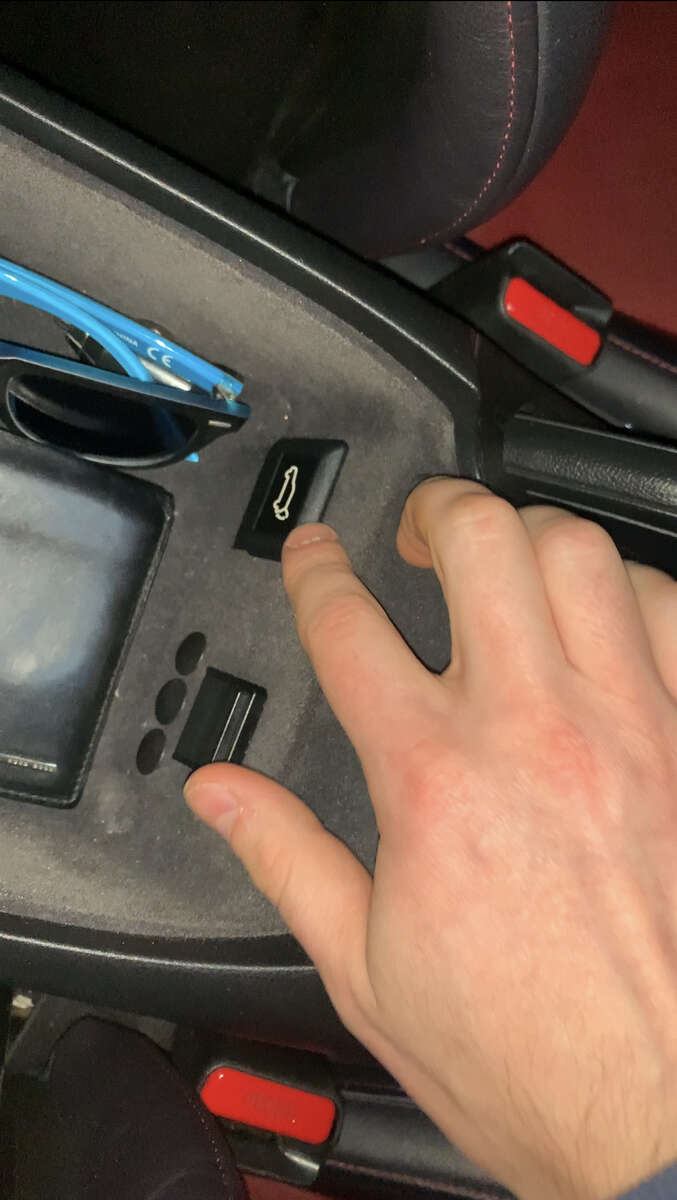
After finding out the newest 370s (2018 and newer i believe) having internal boot release buttons, i decided to give myself a project and retrofit one. I couldnt put it where they are stock as i got rid of my blank switch unit for the cubby mod. So i decided to take out the cigarette lighter in the centre cubby and install it there. I found a helpful post on the US forum as to which wire to tap into and it was actually really easy to do. Here is me testing the button before i properly installed it: And here it is fully installed.
-
Thanks for the effort to find them for me! Im really sorry to be a pain, but im looking for cats with the heat shield still on. As i could technically rip the heat shield off mine and it would be fine, but want to keep having the heat shield just to be safe. I really appreciate you taking the time to find them though!
-
No worries at all! Thanks for helping out and checking!

