


Adem
-
Posts
98 -
Joined
-
Last visited
Content Type
Profiles
Forums
Events
Gallery
Store
Everything posted by Adem
-
Do you mean the surround around the gearstick with the climate control dials on? if so then yes just grip on the ring (around the gearstick) and pull it up towards you If you meant the whole center consol (everything after the gear surround) i.e. armrest and cubby, then you will need to first remove the gear surround anyway remove two phillips screws, pull your ashtray out and undo a philips screw inside, push your seats all the way forward to expose two more phillips screws either side of the centre console (either side of your armrest cubby) then carefully lift it out (make sure the handbrake is pulled all the way up it should slip over) hope that helps
-
Good luck bud
-
I make you right Paddy... Ive seen those too was just hoping for something a little better on a second hand one to be honest, just being tight really!
-
Google
-
Does DD stand for Carbon Fiber cos there is a ton off that in your pic... and in your banner come to think of it.. (is there a theme here) What's the top screen in yours bud, and did you fit it up yourself?
-
Very nice I want to have a go at this...
-
But once you go black....
-
... tumbleweed
-
I'm no audio 'buff' but it sounds to me there might be something wrong with the way your AVIC-F900BT is hooked up if the sound is 'that' bad! Just as a quick trial before you decide to spend money on a new one I would test and see if there is a way of getting your current one to sound better as its not a bad head unit by the looks of things. first thing you could do as a really basic test would be to test each speaker individually without removing anything. Just use the fade and balance on the head unit itself to see if all speakers are working correctly! they should all be fading and balancing correctly and all sound the same I would then take the unit out and have a play with inputs on the back to see if there is anything you can change to get it sounding better. the only thing I can think of that might be wrong with the unit itself would be if the pre-amp stopped working but that's 'really' unlikely and you should, 'with a bit of tweaking' be able to get a banging sound out of the current one without spending! Just my opinion, sorry if it doesn't help
-
The way I have it set up you couldn't have the radio on and have sound playing from the tablet (I don't think ) Even if you hard wired it into the head unit 'which mine isn't' you would still have to switch the stereo to aux to here sound from the tablet (I think ) so 'no' not over the radio. but over your music playing from the tablet 'yes' the music fades out when you get instruction from the Nav and when you get calls etc... hope that makes sense!
-
It's not open for discussion
-
I realized early on that making it so that I could get the the original controls for the tablet would compromise the look but I would need to at least reach the power button, so I opted to re-locate it. I opened the tablet, striped back the small power button to expose the live and earth points (outer ring earth inner live) originally I planned to take the power from source without interfering with the actual button itself before I realized how complicated that would be and gave up on the idea. I ran two wires out from the tablet to use with the new power button, this part did require a steady hand. This CAN NOT BE DONE FOR THE VOLUME CONTROLS DUE TO THE NATURE OF THE TABLETS WIRING! bare that in mind before you wast your time and potentially ruin your tablet, the on screen volume controls will work fine once installed anyway so no need: Below is a picture of the tablet fitted up to the center dash piece at this point its almost ready to go in just need to stick a power button for the tablet somewhere: I decided to use an iPhone 4 button as a power button. this proved more difficult that I expected and will require a little electrical knowledge to do . I recommend against it for anyone having a go if I'm being honest i ruined one before I got it right myself any on/off button will do the same job just nick one from an old stereo or something! This is where I decided to locate mine! it seemed the easiest place to hide the wiring and keep the whole thing looking neat. Not as OE as I would have liked but eh.. I still have loads to do at this point (stick yours where you like) Oh yeah A quick point here. (quite an important one) The little circular plastic ring at the bottom of the above picture is what I used to latch the door you will need to have a play around to find something that works well for this I just used a number plate screw cover! Bellow is just the back of the tablet to show how i neatened up the wiring so it doesn't get in the way later (just taped it to the back of the tablet) you can also see in this pic the plastic backing i refered to cutting in my last post to get the tablet to fit nicely next is me ripping out the old center piece (again there should be plenty of tutorials on how to do this its quite straight forward) Ive had mine out about 6 times since I bought the car (like two weeks ago) Old and new side by side Disassemble old - re-assemble new: Unbolt the s**t I mean 'OLD' sat nav After doing this you are pretty much ready to start installing one last thing to do for the tablet that's going in is to sort a power source. What I did was buy a standard car charger for the tablet (should be at least 2amps output) then just take the outer casing off and solder a wire for live (the center bit on the spring) and a wire for earth (the outer ring) find your ignition live from the stereo loom (I used the sat navs ignition live wire) make sure it isn't live when the ignition is turned off and ideally you want it to come one with the ignition key in position one so that you can charge the Tablet without having everything else come on and drain your car battery: Oh yeah and earth wire to an earthing point somewhere there are loads, either use an earth wire from the loom or a part of exposed chassis. One more point, Make sure you tape up or heat shrink all exposed wires and solder everything (don't use connectors its cowboy) I removed the center console before re-installing everything as I wanted to run a usb cable from my head unit into my armrest cubby. This will also give you a chance to neaten up all your wiring as you go more easily: Take your time re-installing everything to make sure you don't catch or twist any wires awkwardly. If I'm being honest this is my least favorite part as it is quite difficult to get stuff to go back nicely but it is the last part before completion so its worth doing right. Make sure to test that everything works prior to screwing anything down and try not to scratch your dash to bits (or your hands). Things to bare in mind: 1. Make sure the tablet charges and that your power button works 2. make sure the tablet doesn't continue to charge when the ignition is off as this will drain your car battery 3. in my case I hooked up my tablet via bluetooth audio to the head unit (make sure you have sound) 4. plug everything in together then test that everything that was working on your car is still working before finnishing 5. If something isn't working (it happens), don't freak out! its usually something simple (blown fuses etc.) re trace your steps and figure it out! 6. Finally preparation is key, get everything set up prior to installing there's no point rushing it and having to re-do it! If you try it, I hope it goes well for you (try and have fun doing it) and don't blame me if you f**k it up If Ive missed anything (which I no doubt have) let me know and I'll put it right. Thanks
-
OK so here goes not sure how best to lay this out so I'm winging it a bit! To start with my stock layout: Fitted my Pioneer X2500 BT there are probably plenty of tutorials on doing this out there already: I bought a new center dash unit and cubby to save me having to leave my car in A & E while I worked on sizing stuff up etc. I'd recommend doing this for the peace of mind that if you mess something up you have a spare anyway! Below I am just trying the Tablet out for size against the cubby hole It doesn't fit!: Using a Dremel I took out the two curved edges leaving only the bits the door would need to latch on to when it goes back be careful here mistakes will b hard to hide later! The next step is literally wedging the tablet in place you will get it to fit if you cut the backing plastic for the OE sat nav first don't worry too much about damaging stuff behind the cubby that wont be seen to get the tablet to fit nice. I took the door off the cubby also one screw in the center and some small plastic welds that can be super glued back later: Then just test the door opens and closes ok I also re-fitted the little rubber feet on the door so they would make contact with the glass so not to scratch it (just super glued them back on) Next just a quick test that it will still fit back into the dash: To hide some of the unwanted edging and make it look more OE I decided to make a new surround this will also help hold the tablet in place. This part makes all the difference in looks so take your time getting it right. I just cut up an old plastic folder with similar texture to the plastic surround Cut lightly across a ruler for a straight folded edge: The stuck them in place using 3M double sided tape. I did this so that if need be I can remove the tablet without ruining what Ive done to this point. This picture was taken before I actually stuck them down though as you can see from the bottom piece that's lifted slightly: That's how I did all the showy stuff I'll post up the technical stuff separately
-
More than a little embarresed Thanks a bunch Guys you are all ace
-
Ive just fittet the same ones... very good! (Cheers Guys)
-
I am putting a Nexus 7 tablet into the Batmobile. The aim is to have it replace the OE sat nav (I never liked that thing!) Its important to me that it looks as OE as I can make it so I will be using the origional Sat Nav cubby and modifying it for the tablet, if all goes well I should be able to run my Music, Google Nav, Torque (Car interface) etc without any hastle. I do intend to teather it to my phone for internet youtube etc also. Fingers crossed all goes well I'll post little updates as I progress!
-
Anyone have a K & N Typhoon induction kit they want to sell? PM me Cheers, Adem
-
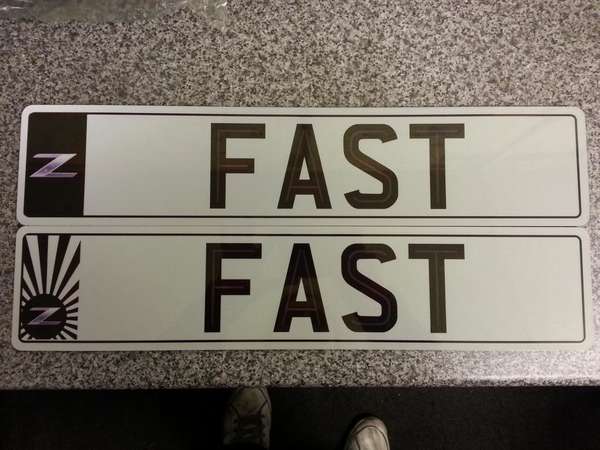
From the album: Plates
-
We can have pretty much any number plate made up for £25.00
-
-
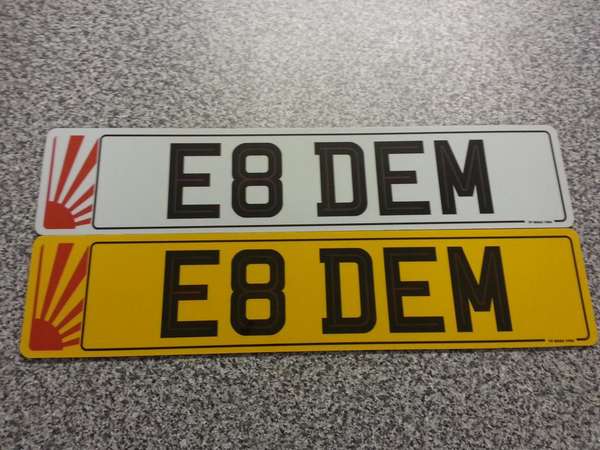
From the album: Plates
-
I'm about to attemt something like this myself, Its interesting to hear all the different ideas on it. I'l post something up once I find a solution I'm happy with.
-
I'd go with Pioneer. I just fitted mine up with the X2500BT. You can change up the lights on the facia to match your interior for that 'OE' look and the sound quality is very good. I have fitted dozens of systems over the years and although Kenwood despite what some might say are a good brand I'd always choose Pioneer over them
-
nail varnish works well also
-
Just like in the good ol' days before computers hey?
-
So Mike has kindly added my garage in the trade section of the forum, check on there from time to time for special offers and deals exclusive only to forum members. We are currently offeing forum members a discount on their MOT's contact either myself or a member of the forum team for the discount code and pop in. http://www.350z-uk.com/forum/208-fast-mot/
