


Wolfman
-
Posts
25 -
Joined
-
Last visited
Content Type
Profiles
Forums
Events
Gallery
Store
Posts posted by Wolfman
-
-
2 minutes ago, Andy_Muxlow said:
Lovely looking car. As above maybe a wrapped gloss black roof 👌
Many thanks for the kind words.
-
57 minutes ago, pintopete58 said:
I think I would wrap the roof in black
Yes, been thinking about it, absolutely agree on the sentiment.
-
 1
1
-
-
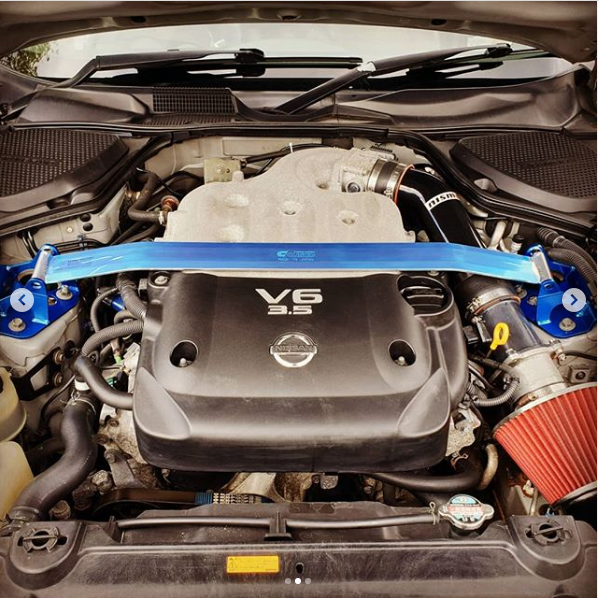
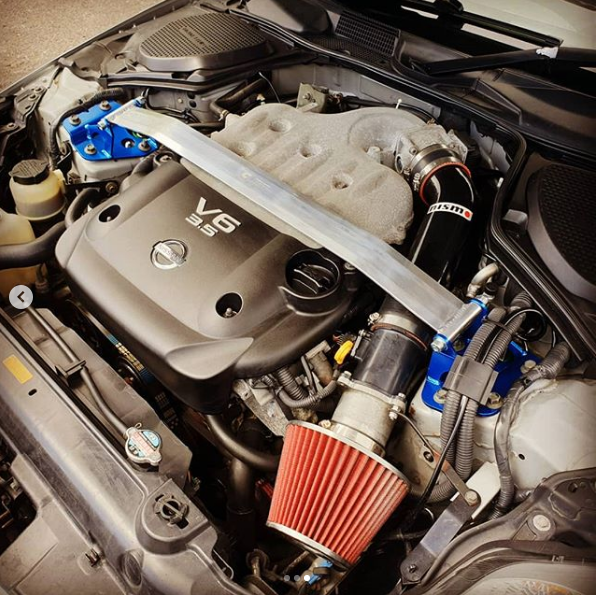
Summer is here, and time for some new mods.
What better way than to start off with putting some carbon fiber on for weight reduction.
VIS Tunnel hatch supplied by @Adrian@TORQEN and fitted by RT Performance. Turned out amazing.
Massive thank you to all those you helped me with this.
.jpg.3511fb7d392afe950592d811929cb777.jpg)
-
Hi all, its been awhile sine I posted but I have been continuing to work on the car.
Mods done so far since last post
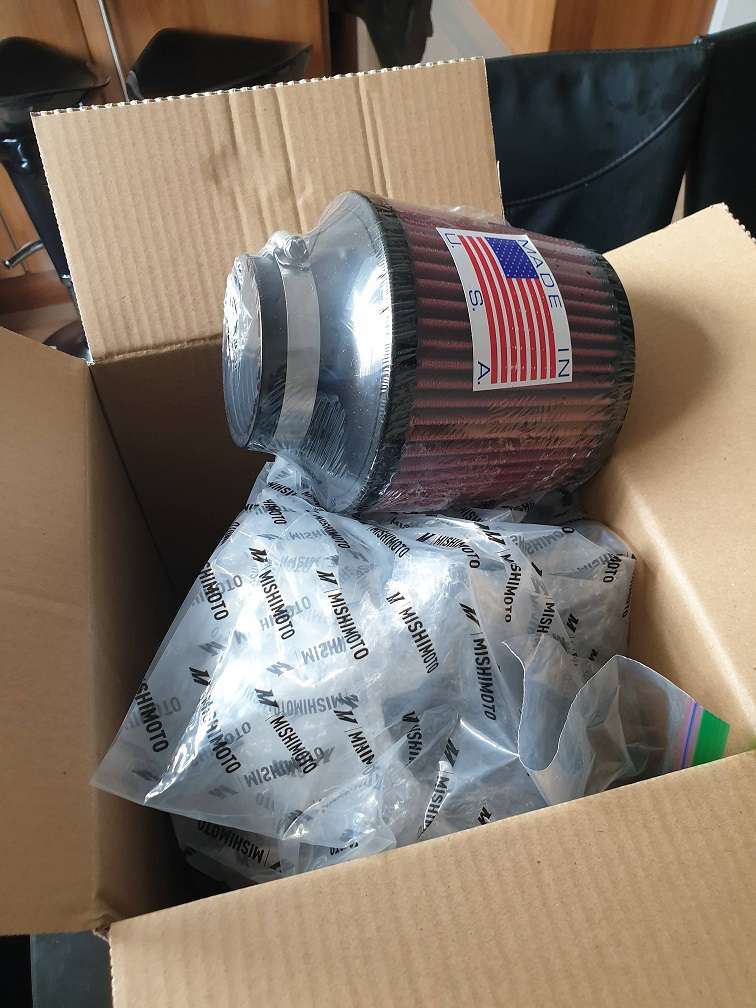
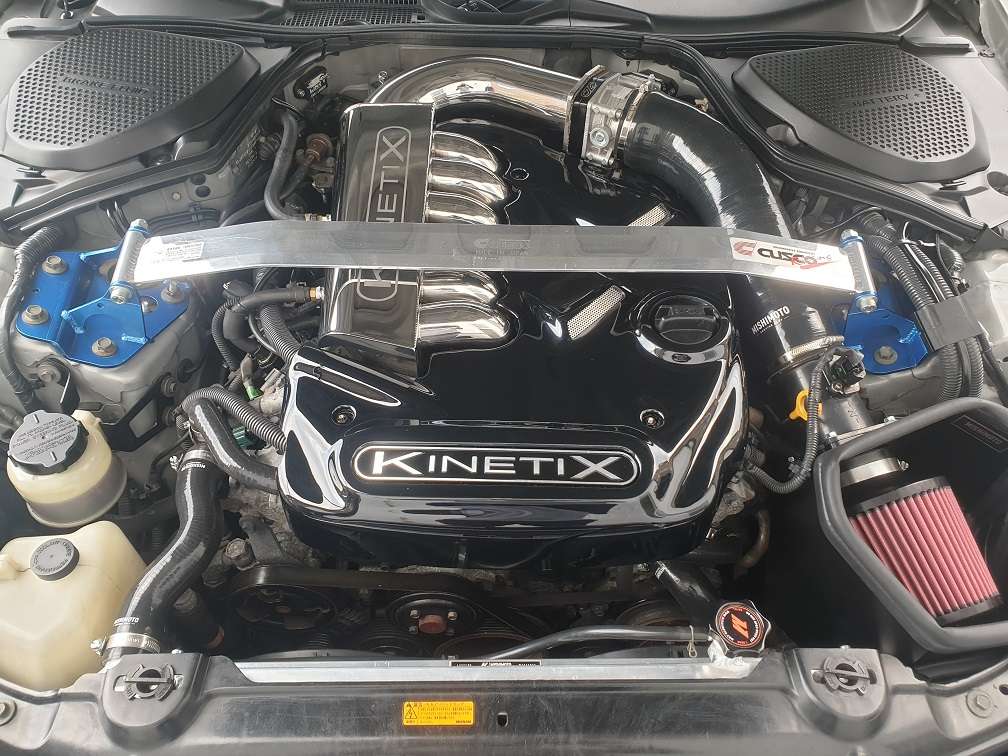
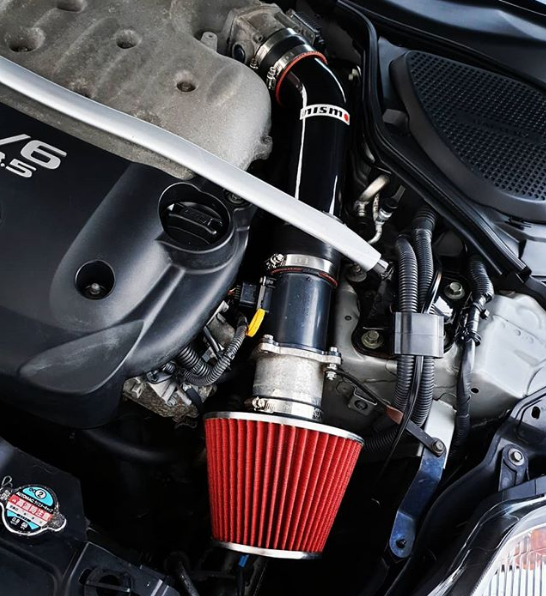
- Mishimoto air intake & piping
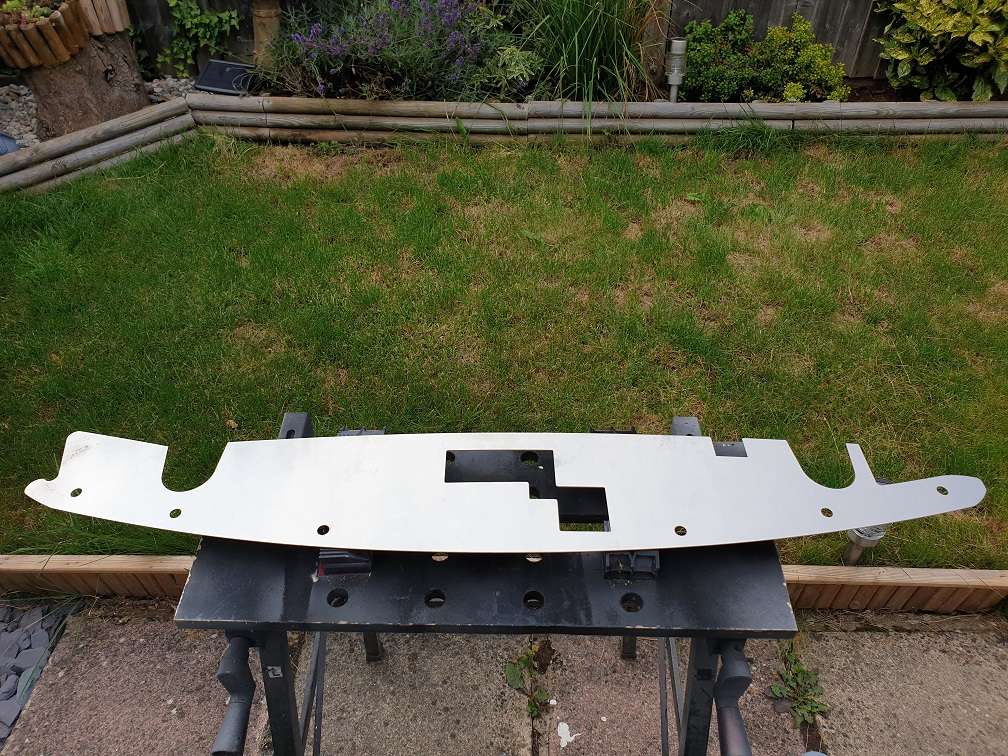
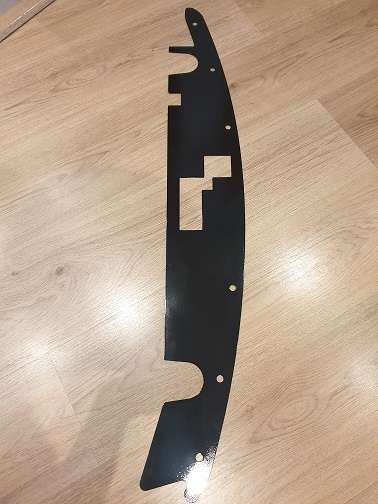
- Cooling plate (Bought from forum member @RDON, thanks for the lovely product mate)
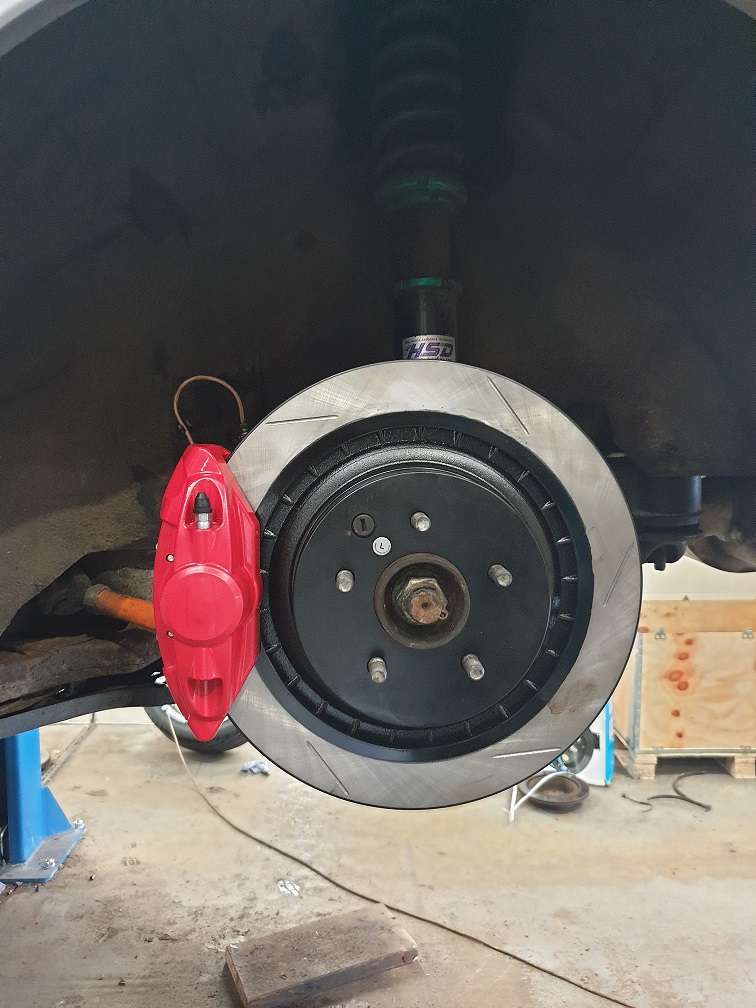
- Akebono big brake kit with stop tech discs, pads & lines
- Suspension setup for fast road and track by Horsham developments
Mishimoto air intake
Intake fitted
Cooling plate before painting
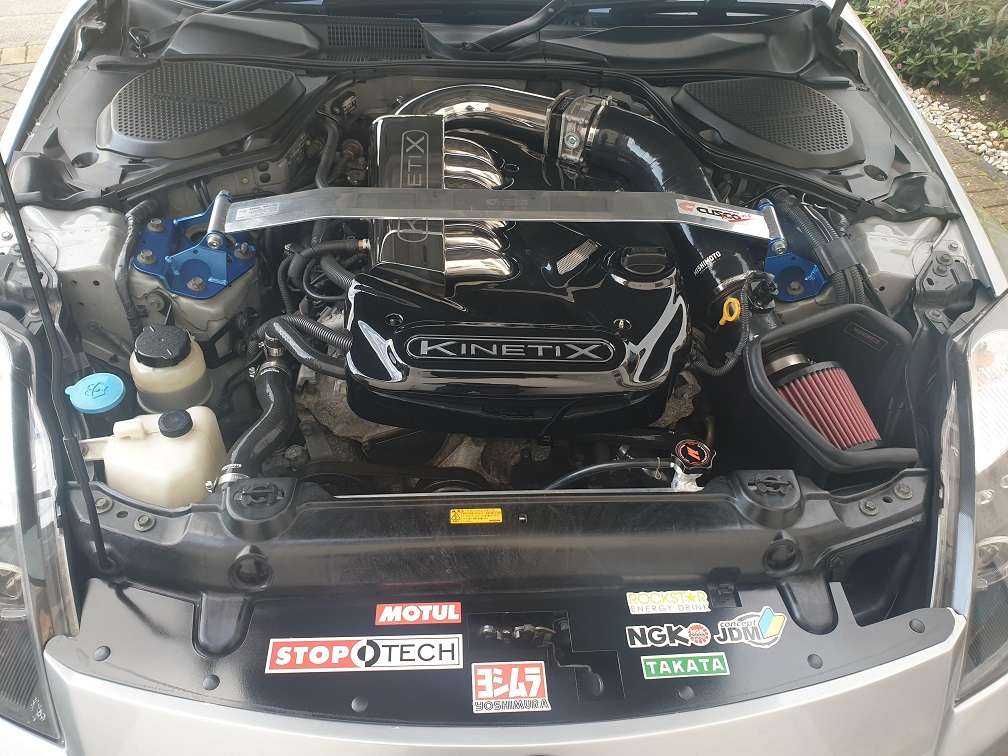
Akebono big brake kit with stop tech discs, pads & lines
That's all for now. Bit more bits and bobs to finish off this year hopefully before winter hits.
-
2
-
Did you manage to get this ? I need one for my self as well as mines a JDM import. Any pointers ? Will be grateful. Or anyone else here know how to get this. ?
-
On 02/06/2021 at 12:49, RobPhoboS said:
Good stuff !
Which company did your cage ?
And how do you find it driving with I guess half interior ?
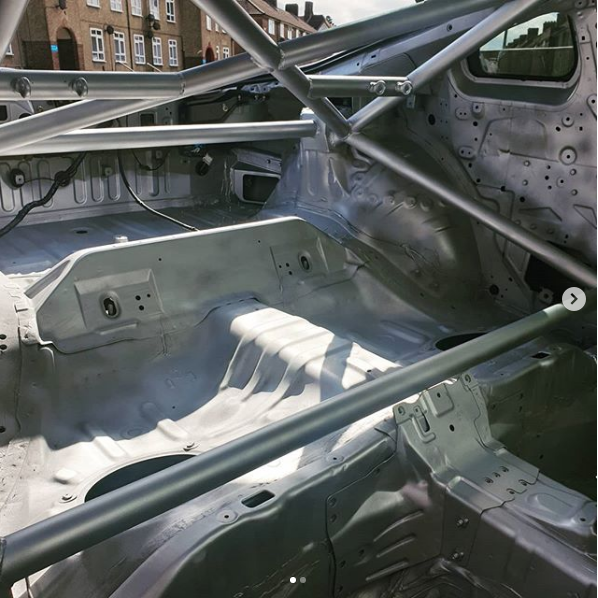
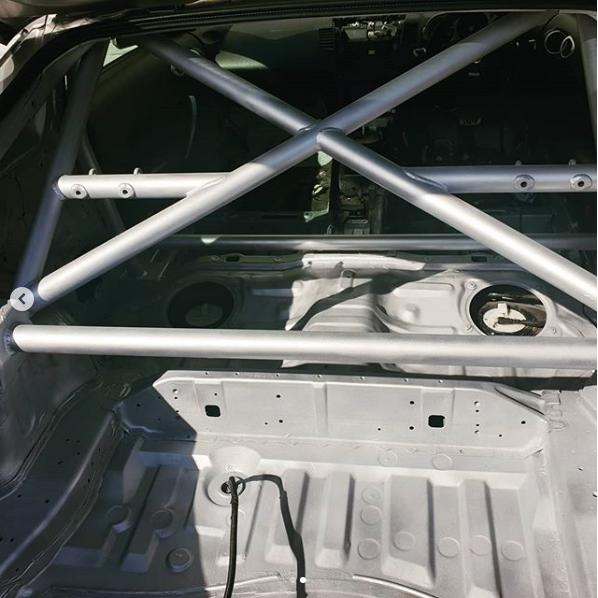
My Z is basically just for track stuff now, so I'm thinking I may as well gut the rear and sort a cage at some point this year.
Thanks, its been a journey for me with this build.
 . I actually like it semi gutted. Its clean and light now. Everything is easy access. Easy to clean up etc. Doing it though required a mammoth amount of work. I did alot my self to keep costs down. The cage was done by a company in Surrey. Nickson motorsports. Did a very good job, not cheap and there were a few delays. But I was not in a rush, I basically wanted a quality job.
Downsides of having it gutted. Well more road and exhaust noise. Since its fully open and the chassis has alot of openings in it. The handling of the car changed for the better I must say.
-
2
-
-
9 hours ago, HEADPHONES said:
I envy your DIY skills.
I had a new single DIN unit nearly 10 years ago.
Never got round to going back when I noticed the top of the trim behind the triple gauges hadn't been popped in properly.
Is it a case of just forcing it to click back in?
Hey, yeah. Triple gauges have a connector at the top, just make sure the wire doesn't get in the way when putting it back in. The tricky part is the bottom where you kinda need to make sure all the audio cables are tucked away towards the back as you need space to push the AC control unit back into its space. Its a bit of a balancing act if your doing it by your self. If you get someone to hold the center console while you tuck the wires away, its super easy .
-
1
-
 1
1
-
-
Audio system upgrade
Summer time good weather finally time to do some work out side.
Bought a new head unit
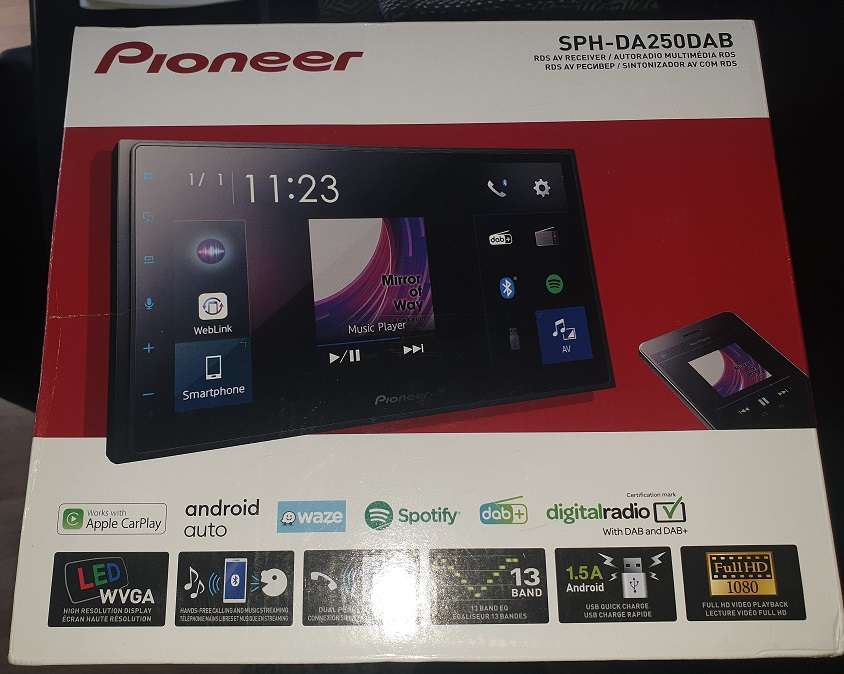
Decided to remove a lot of the interior for easy working and neater cable routing
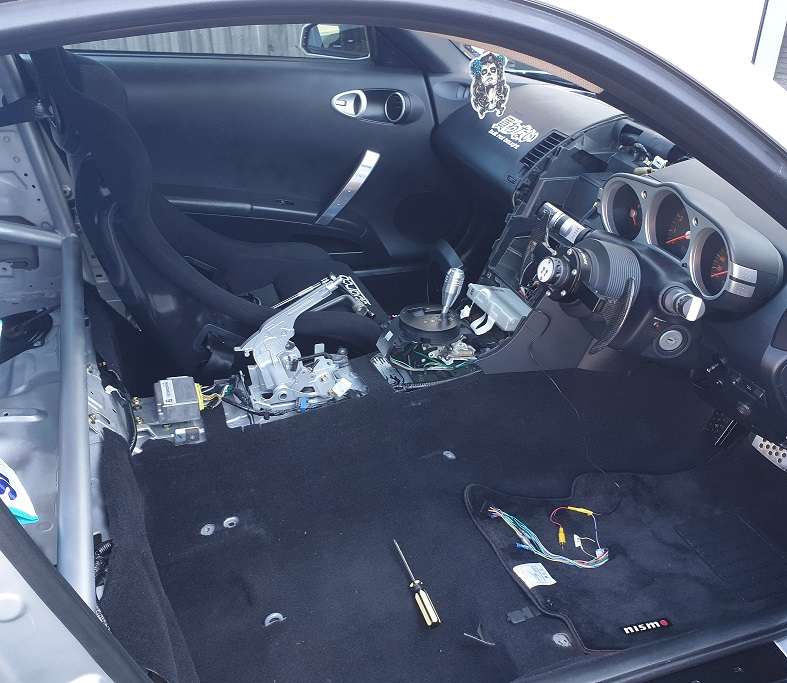
Did some drilling and cutting to get the usb-c cable to the centre cubby
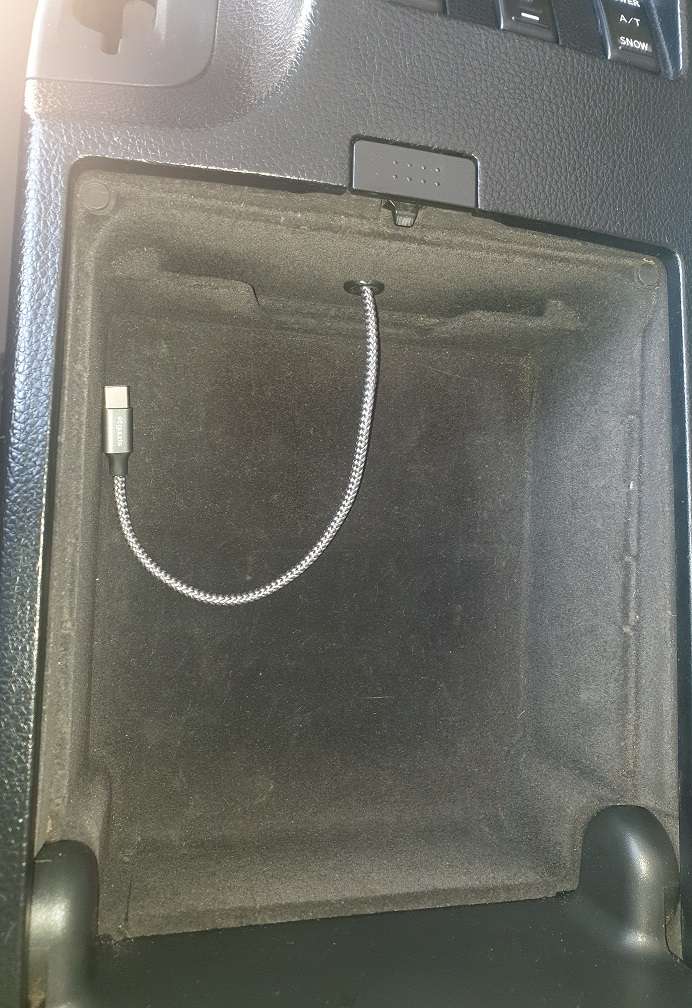
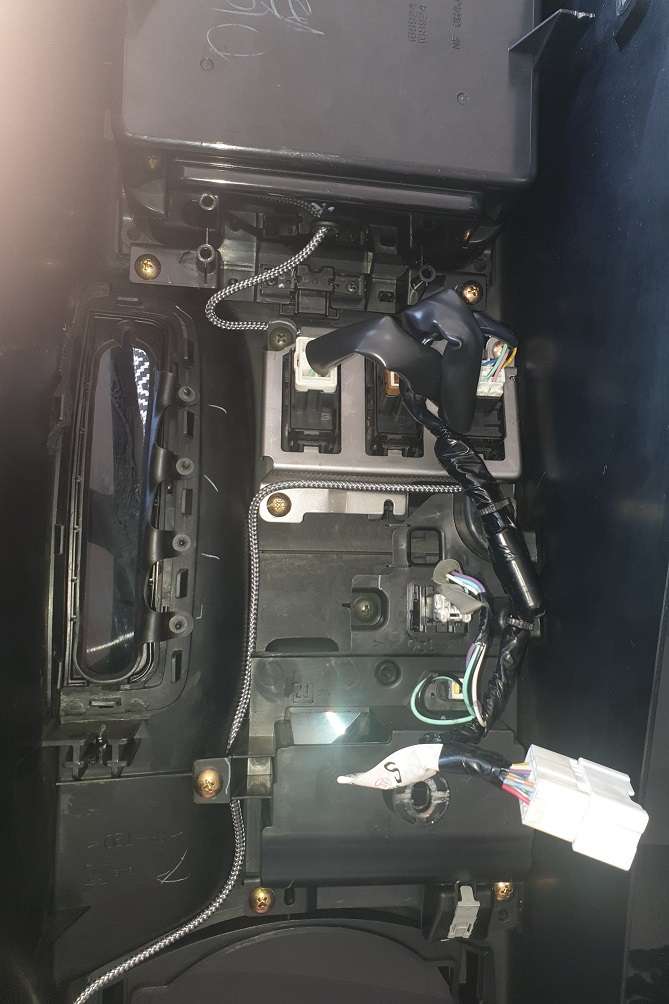
Then put it all back together.
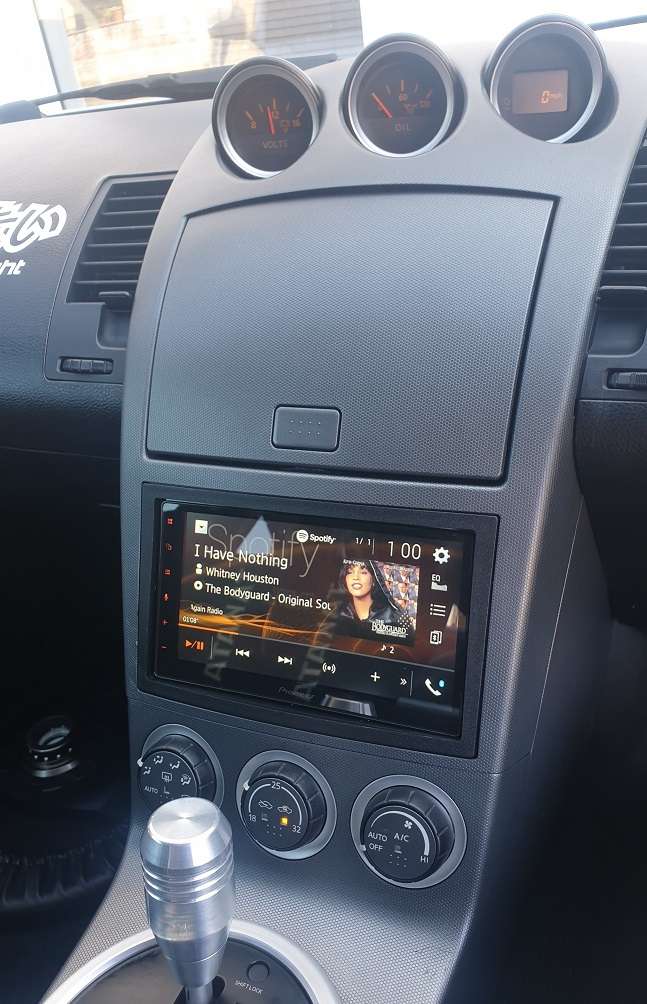
Loving the new system.
-
2
-
-
Been a while since I posted here. As its been winter and nothing much could be done.
Only a couple of minor updates.
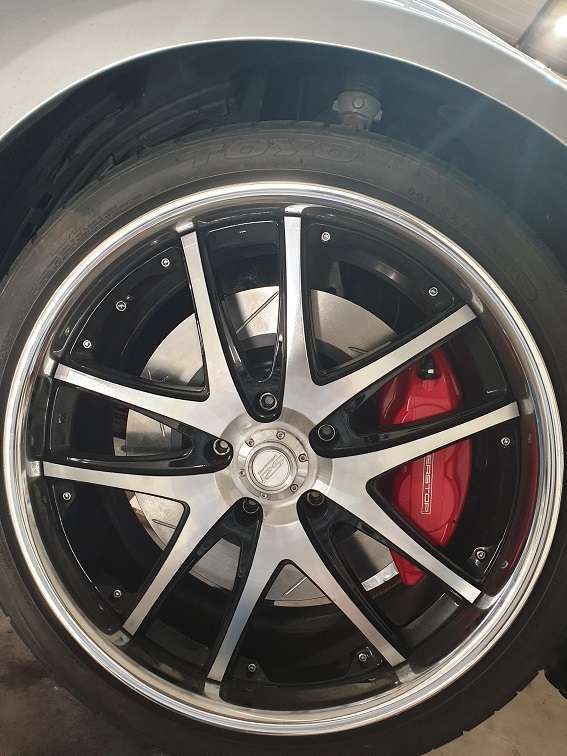
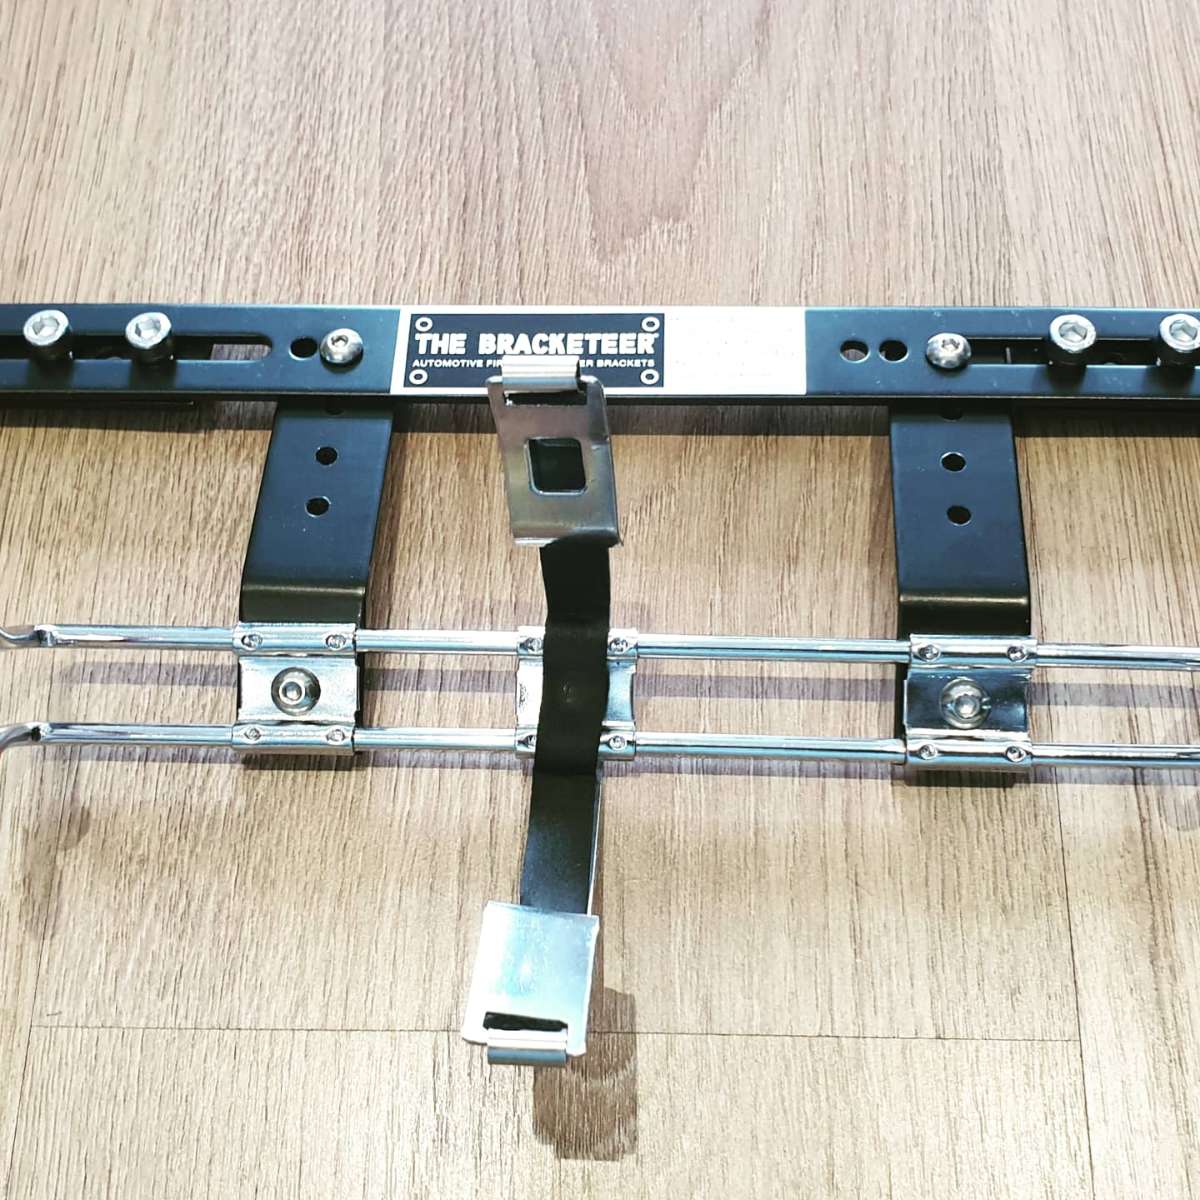
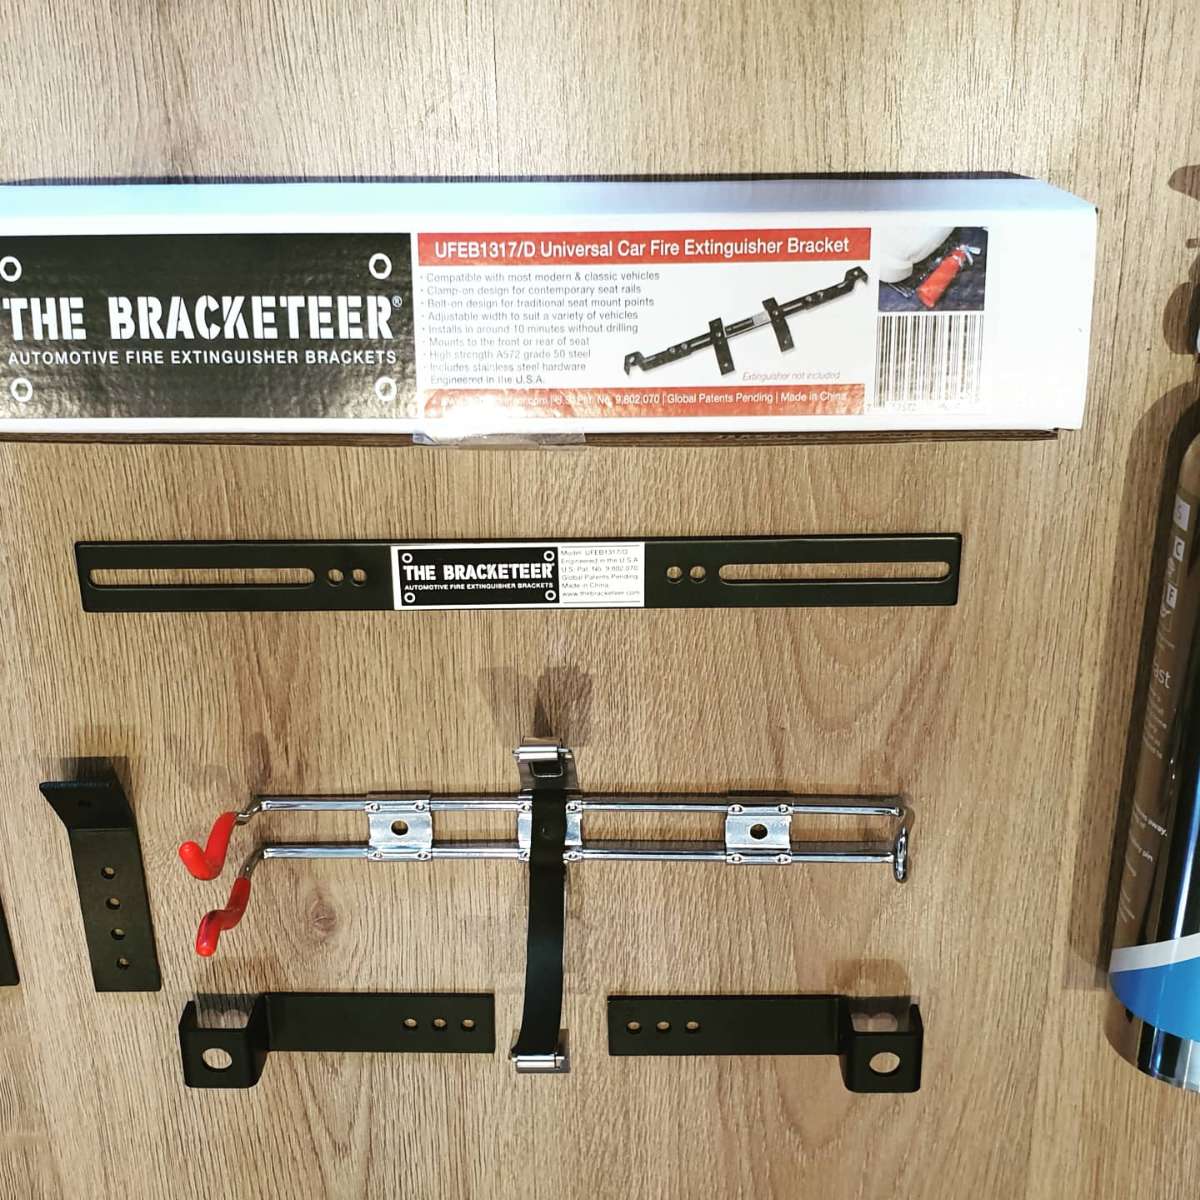
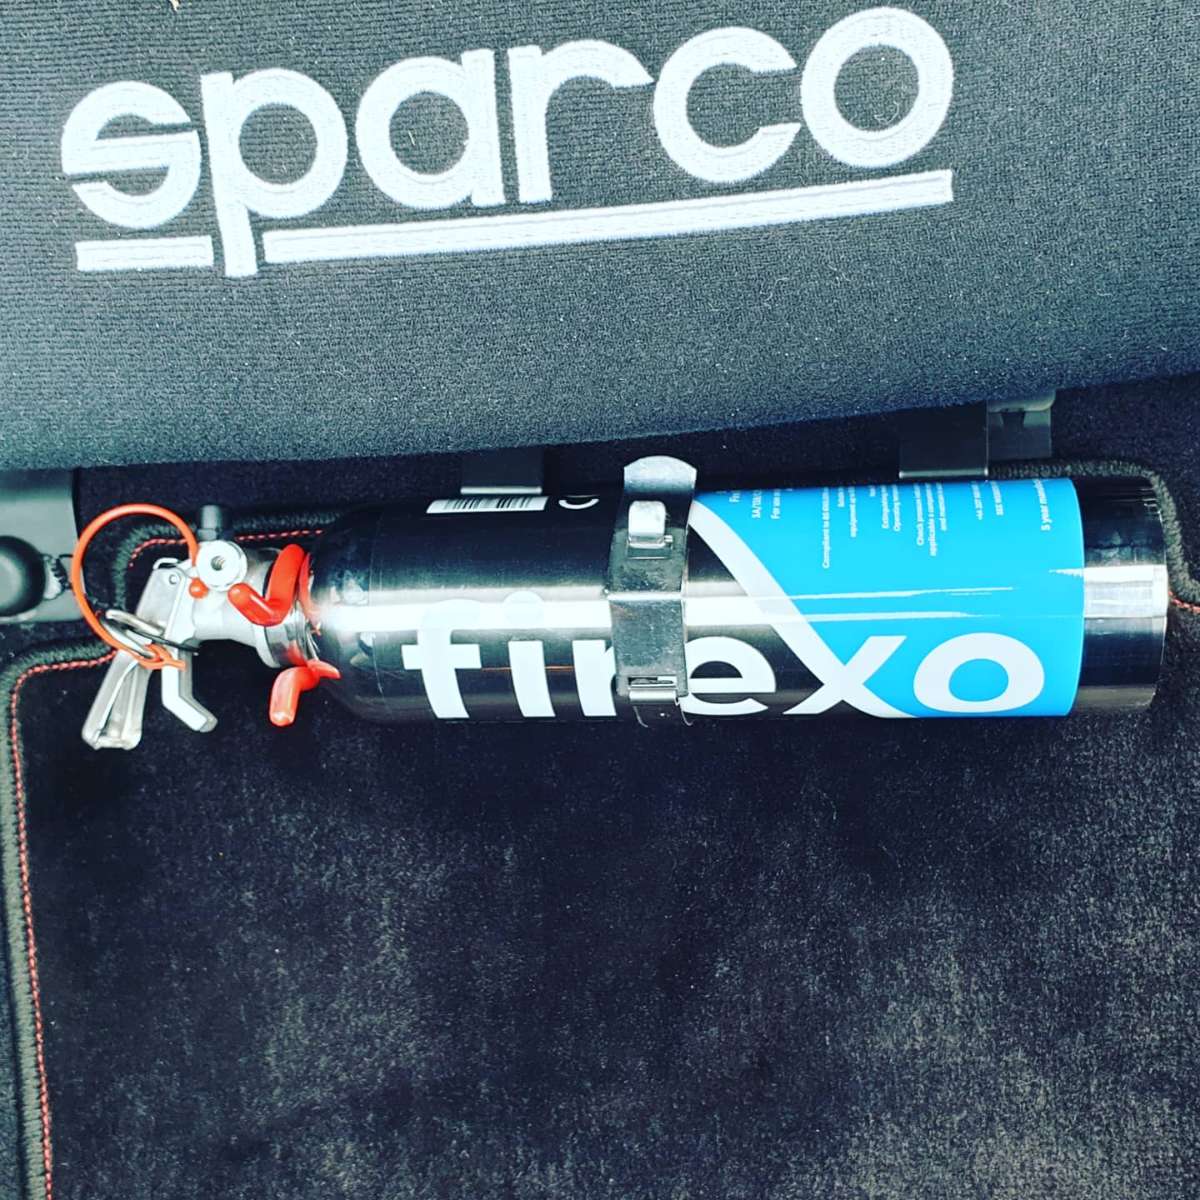
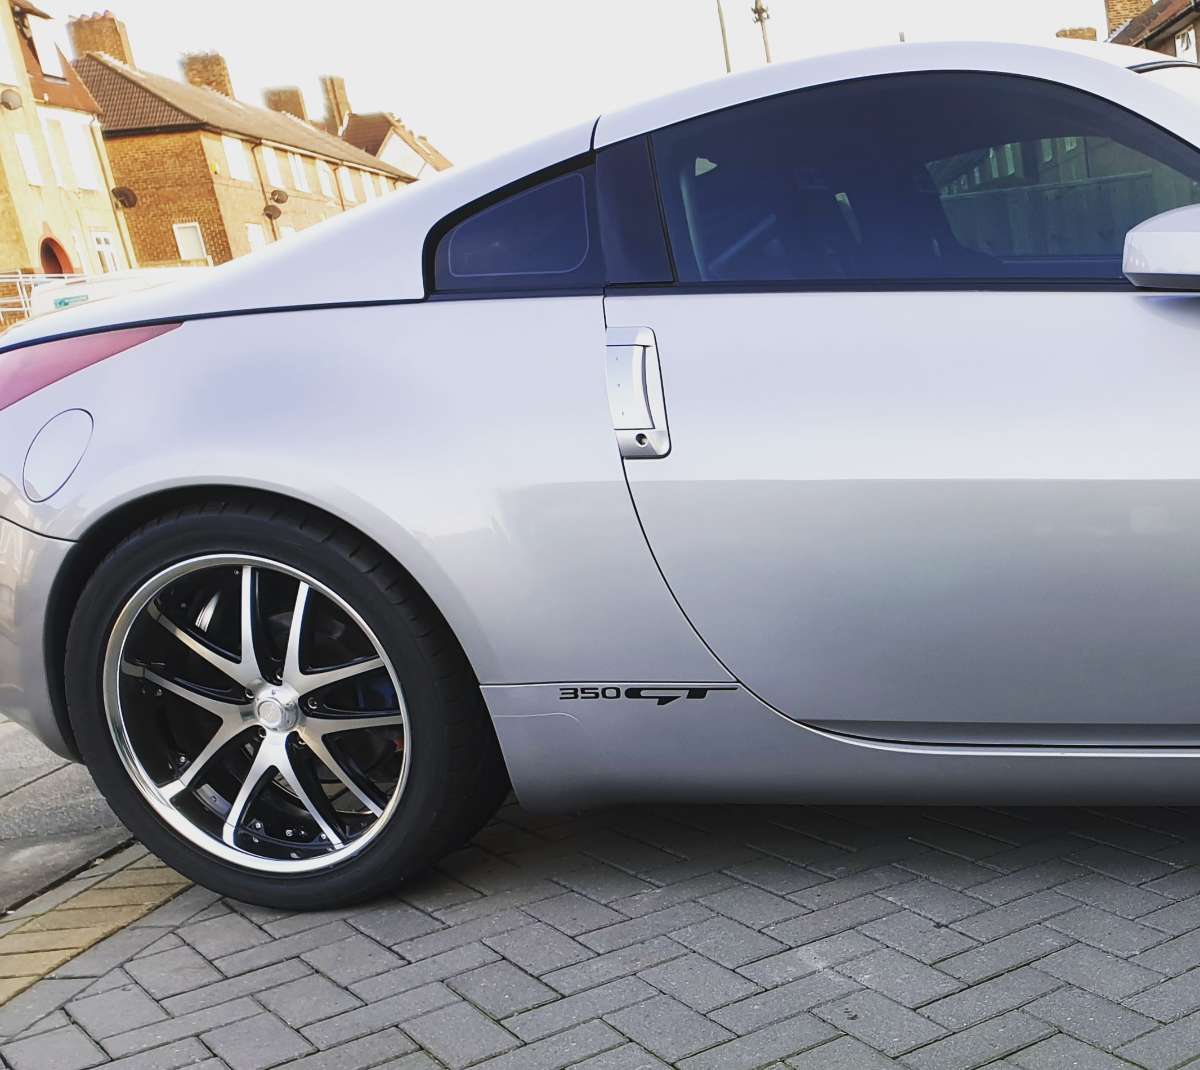
Managed to get fire extinguisher setup done, and with a massive thanks to @ZMANALEX got a cracking set of alloys.
Hope to get more done during the summer.

-
1
-
-
1 hour ago, ZMANALEX said:
Indeed I do mate, been a bit quiet of late due to Covid restrictions.
Shipping to London or any UK Mainland location is not a problem
Just drop me a PM if I can help further.
Alex.
")
Pm sent, thanks.
-
Hi Alex
Was wondering if you still have the Racing harts for sale ?
Also will it fit a 350z or do I need spacers.
Kind regards.
-
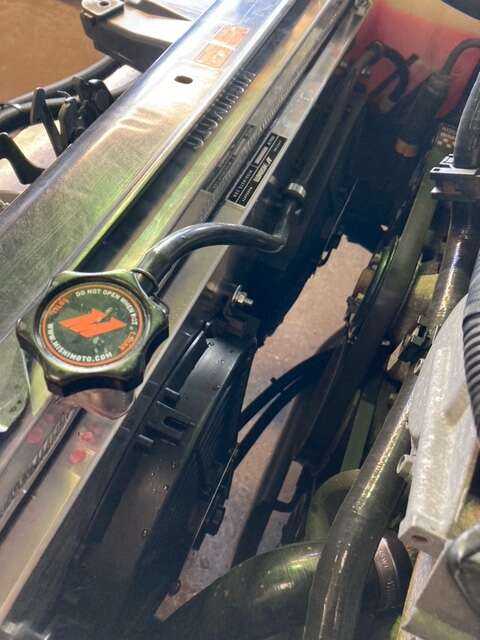
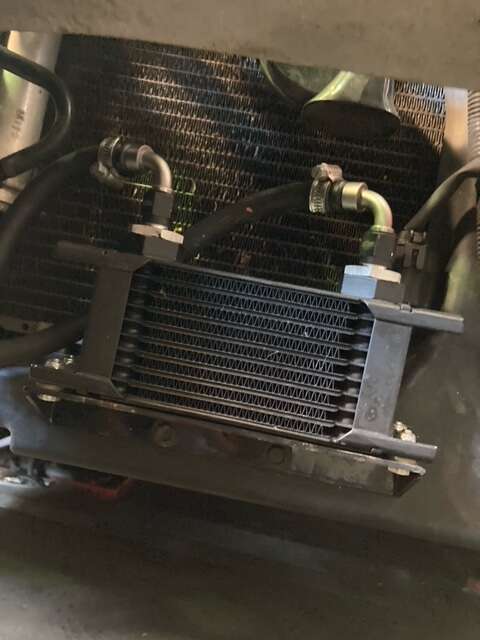
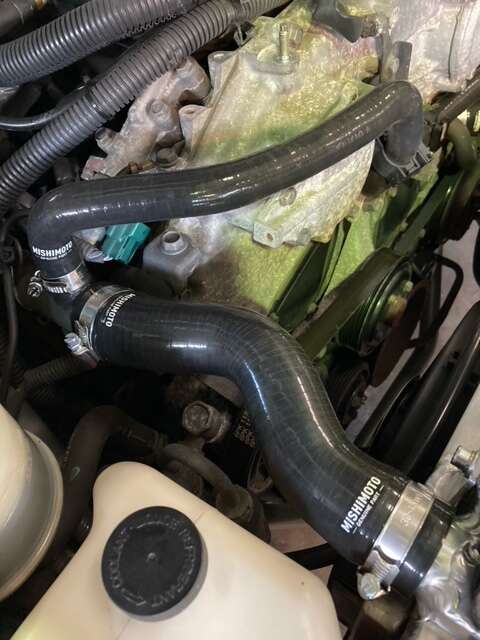
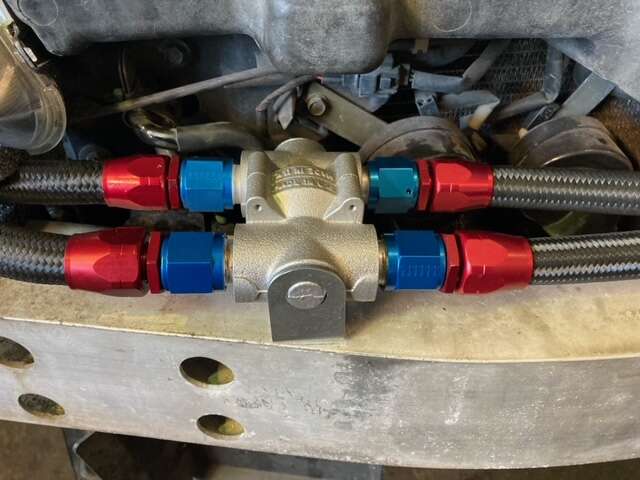
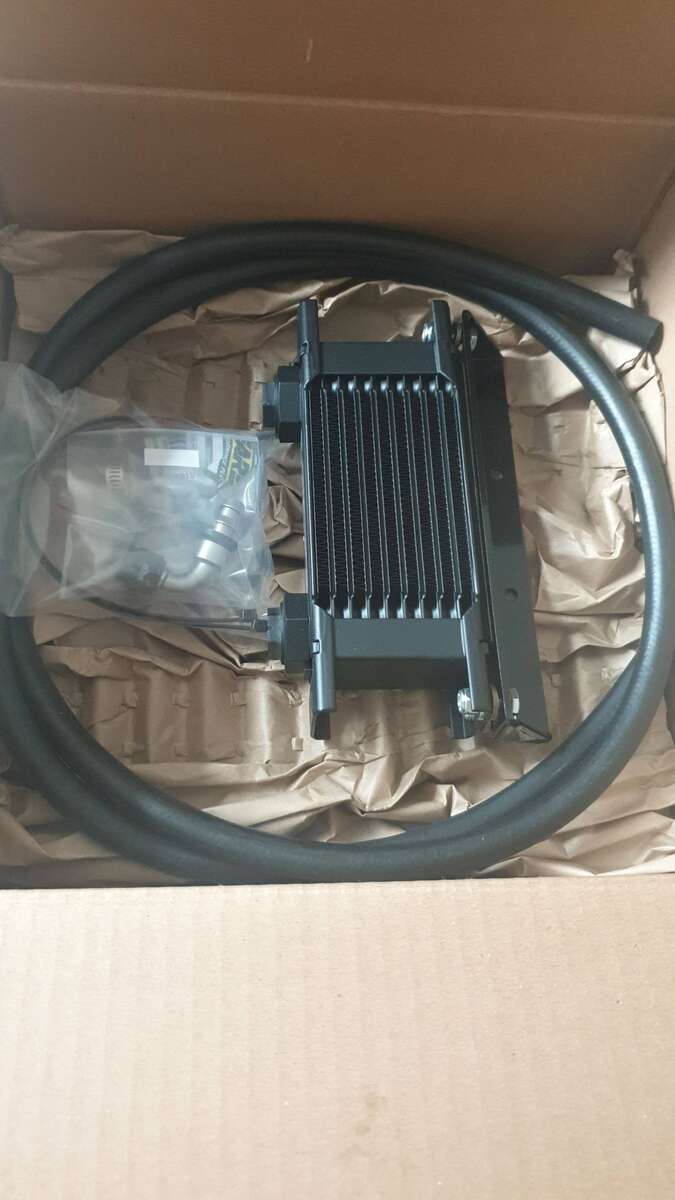
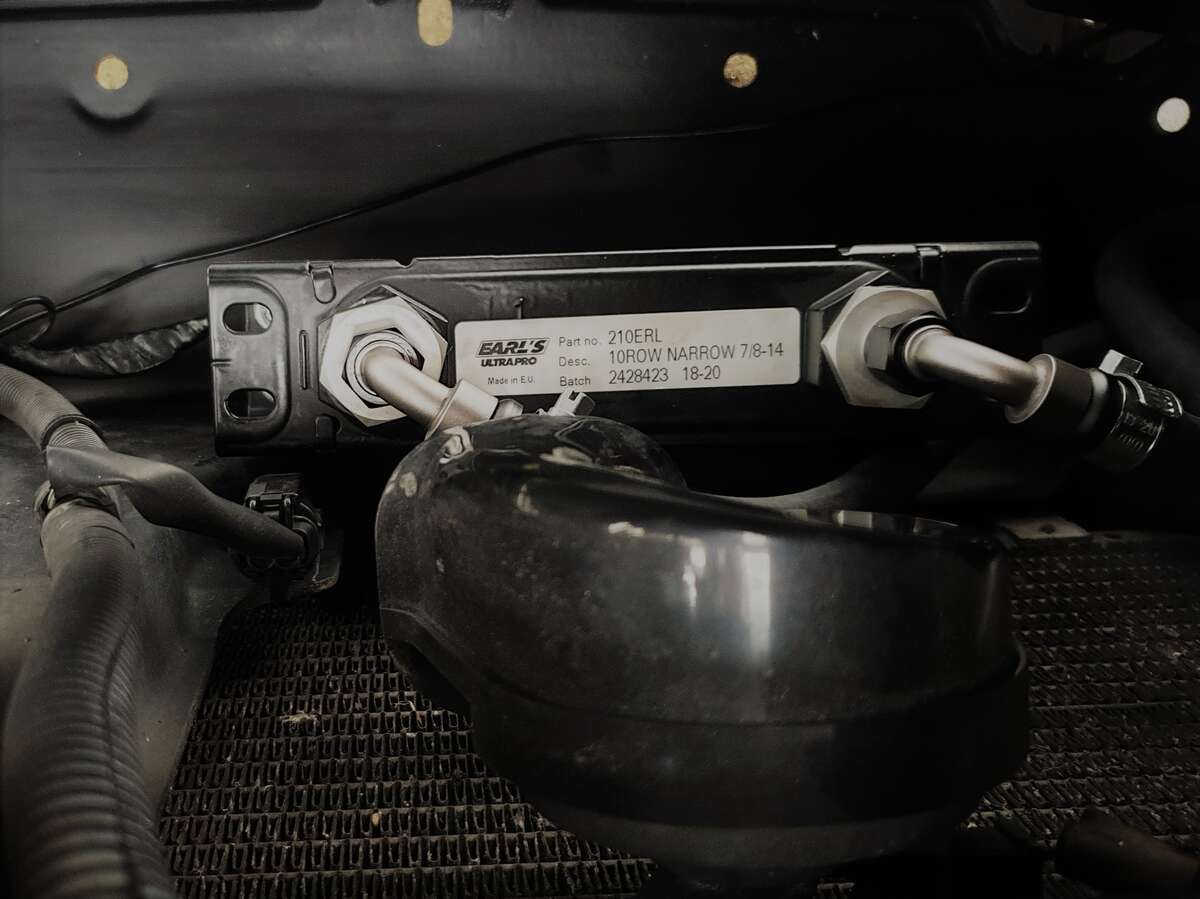
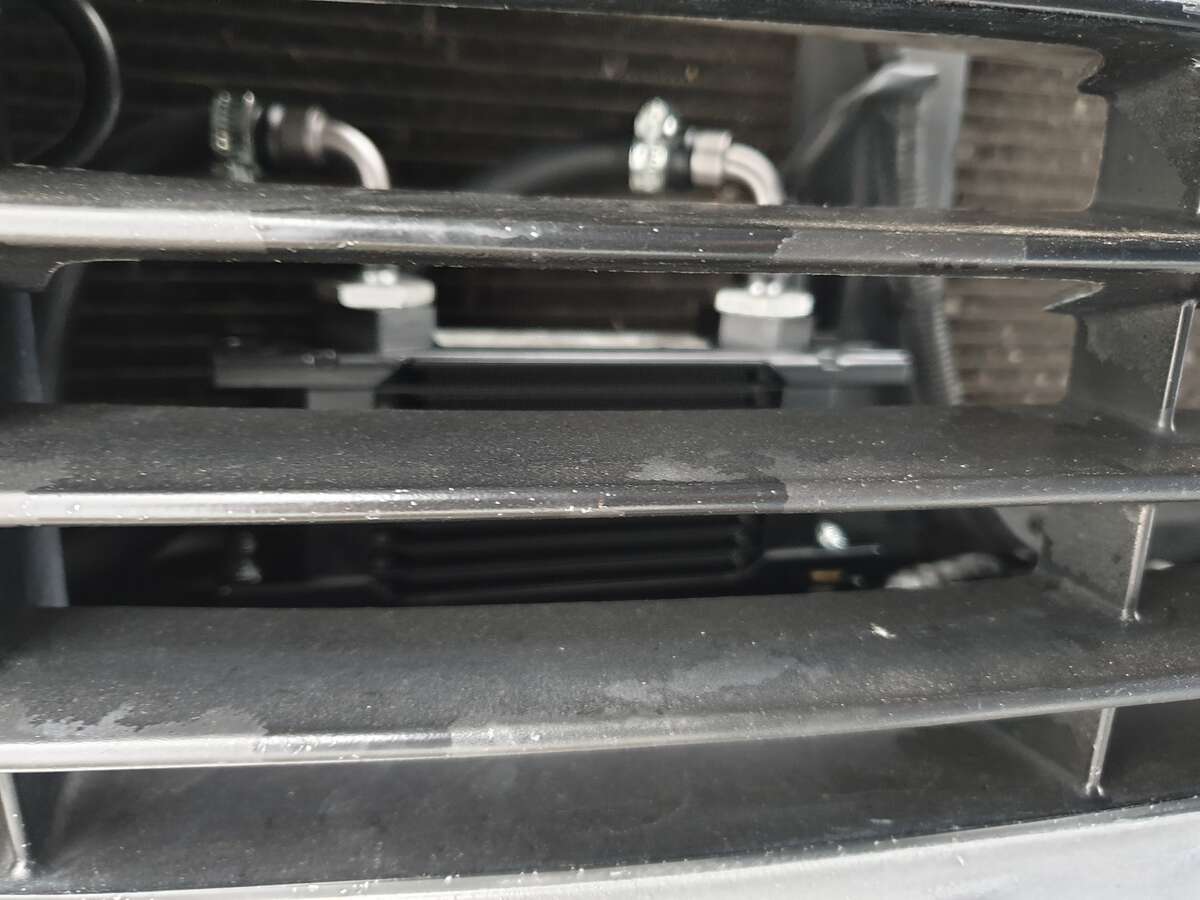
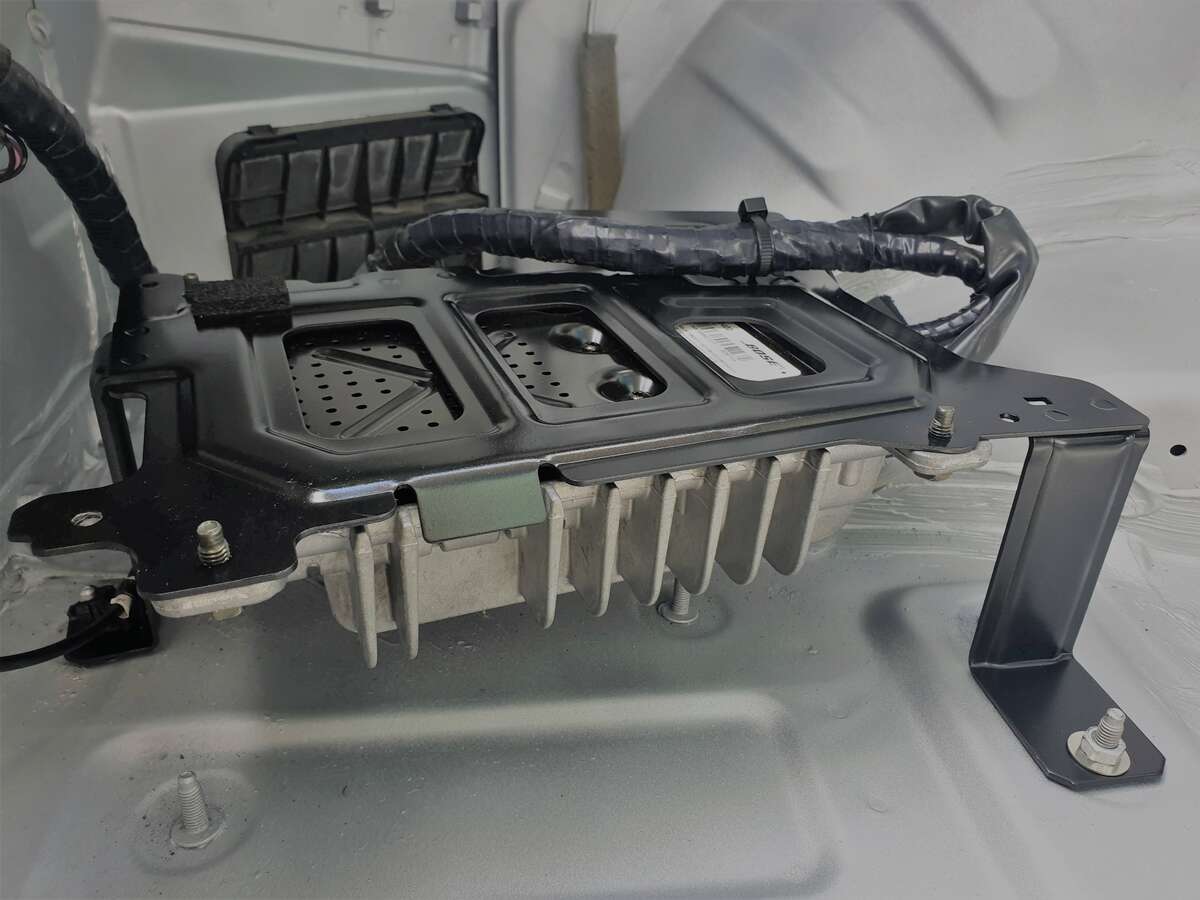
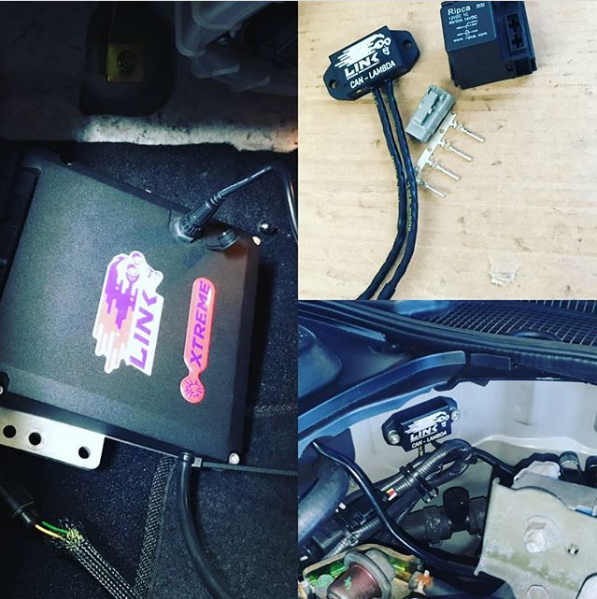
Hi guys,
Been a while but a massive upgrade is in progress.
Things that are getting addressed are
- Gear box upgrade with Transgo kit
- Gear box cooler
- Oil cooler
- Mishimoto radiator with Mishimoto fan shroud
- Mishimoto silicon horse kit
- All coolers are fitted with sensors and wired back up to the LINK G4
The work is currently in progress and its all done by Abbey Motorsport. Massive thanks to Mark and his team.
.jpeg.2aa8bc8b470b6cbdd2b56fe2fb25d249.jpeg)
.jpeg.1e2f651ddf409fa6942fc009964a91e2.jpeg)
.jpeg.db1a73397a92389b5baa08eca548ddb2.jpeg)
.jpeg.80162ac523acd17dd25dd5e13182b432.jpeg)
.jpeg.5365060cf6c307e381f3bf7a966cd42f.jpeg)
-
2
-
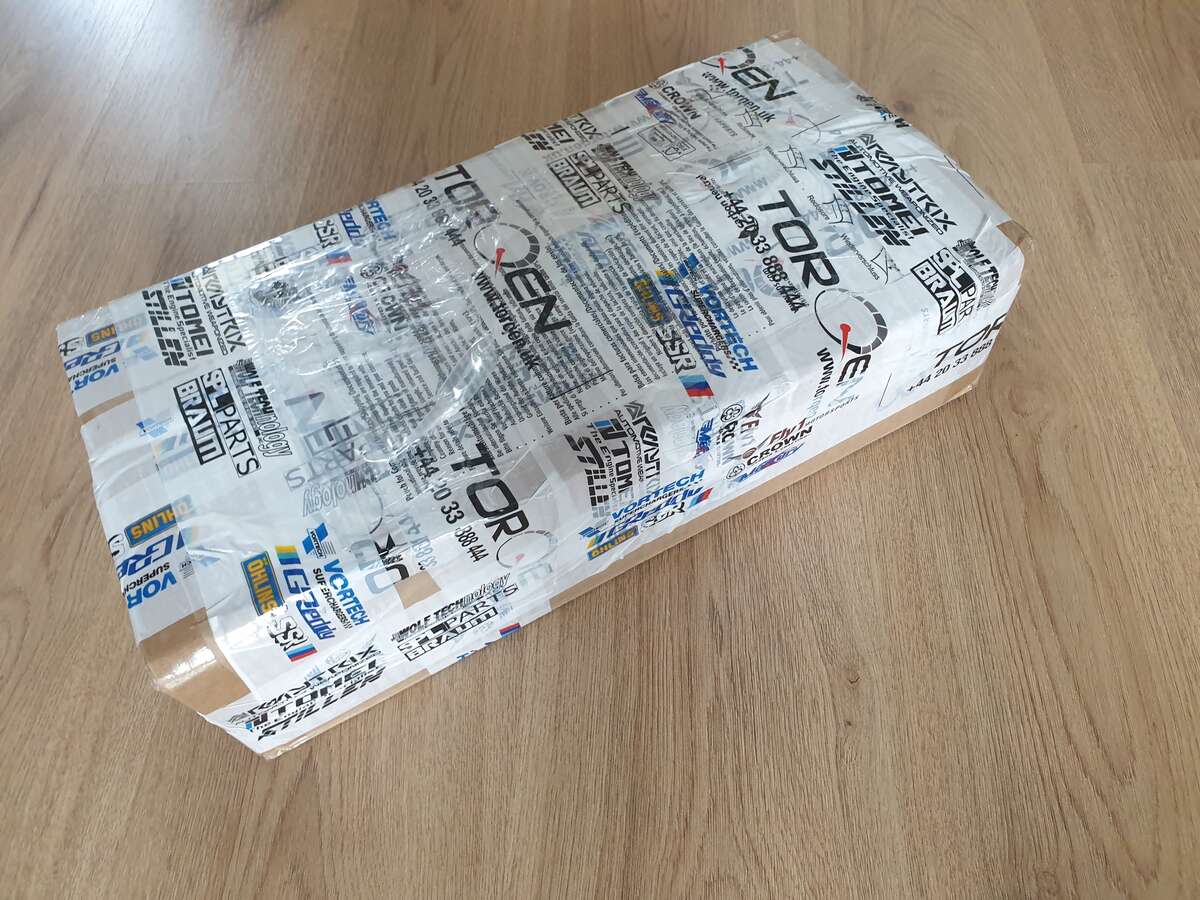
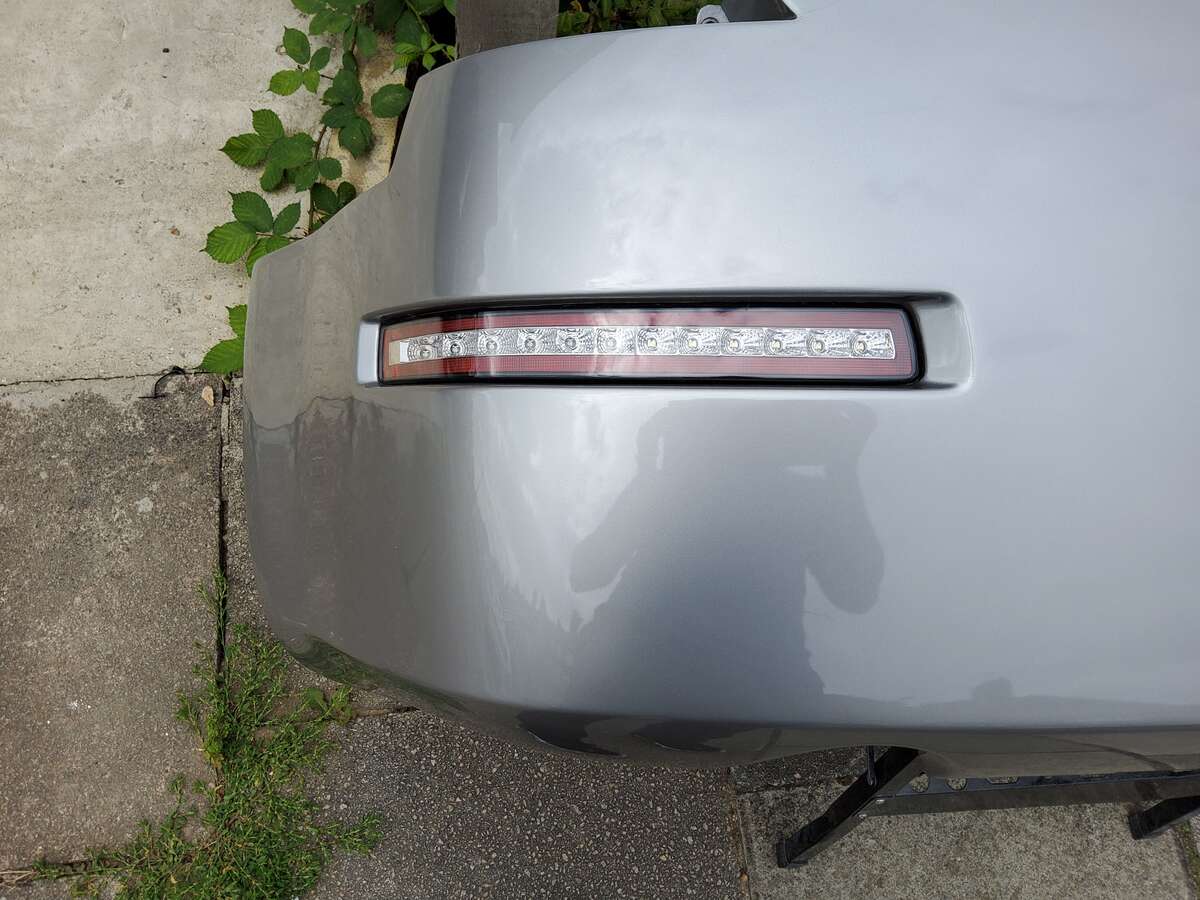
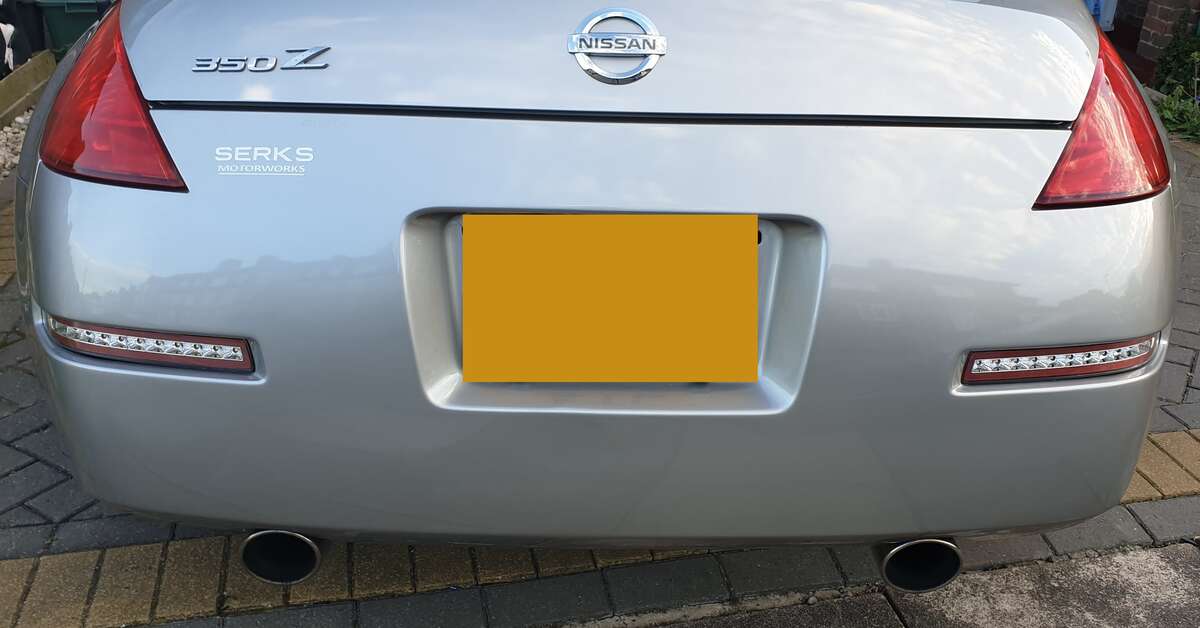
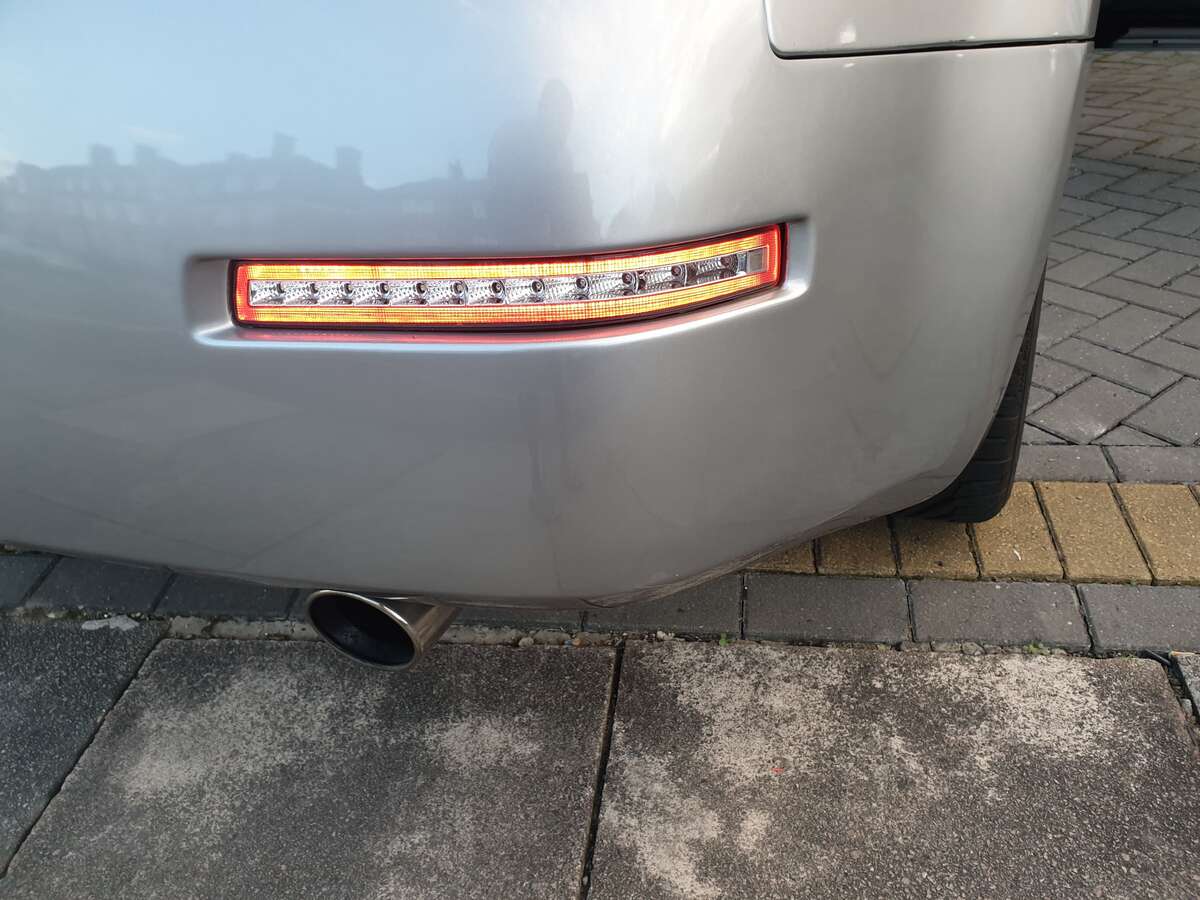
Led reverse bumper lights
Got a delivery courtesy of Torqen. Thanks @Adrian@TORQEN for the prompt service as usual.
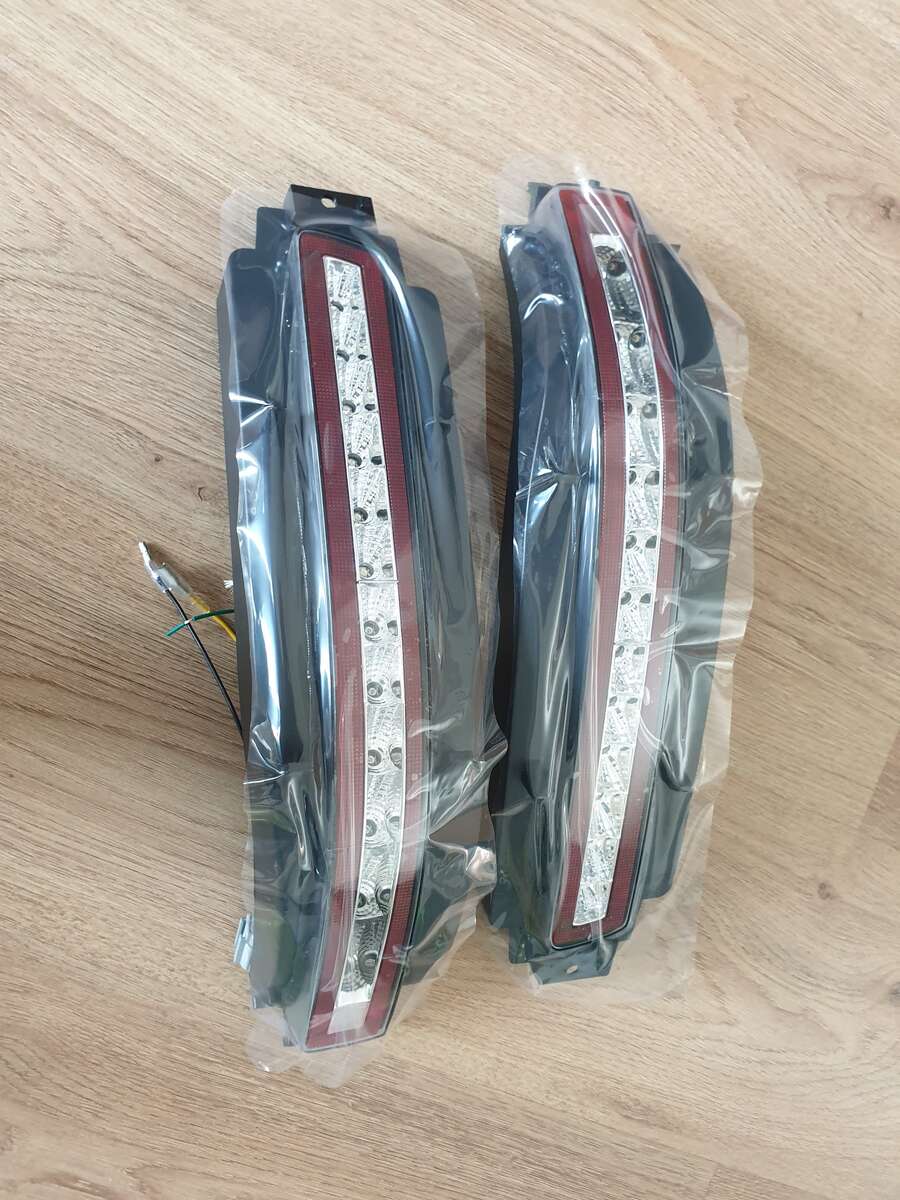
The lights were a perfect fit and are very good quality
Need to take the bumper fully off.
While I had it off decided to clean / wire brush a bit of rust which was there and spray the underside with some hammerite silver direct to metal.
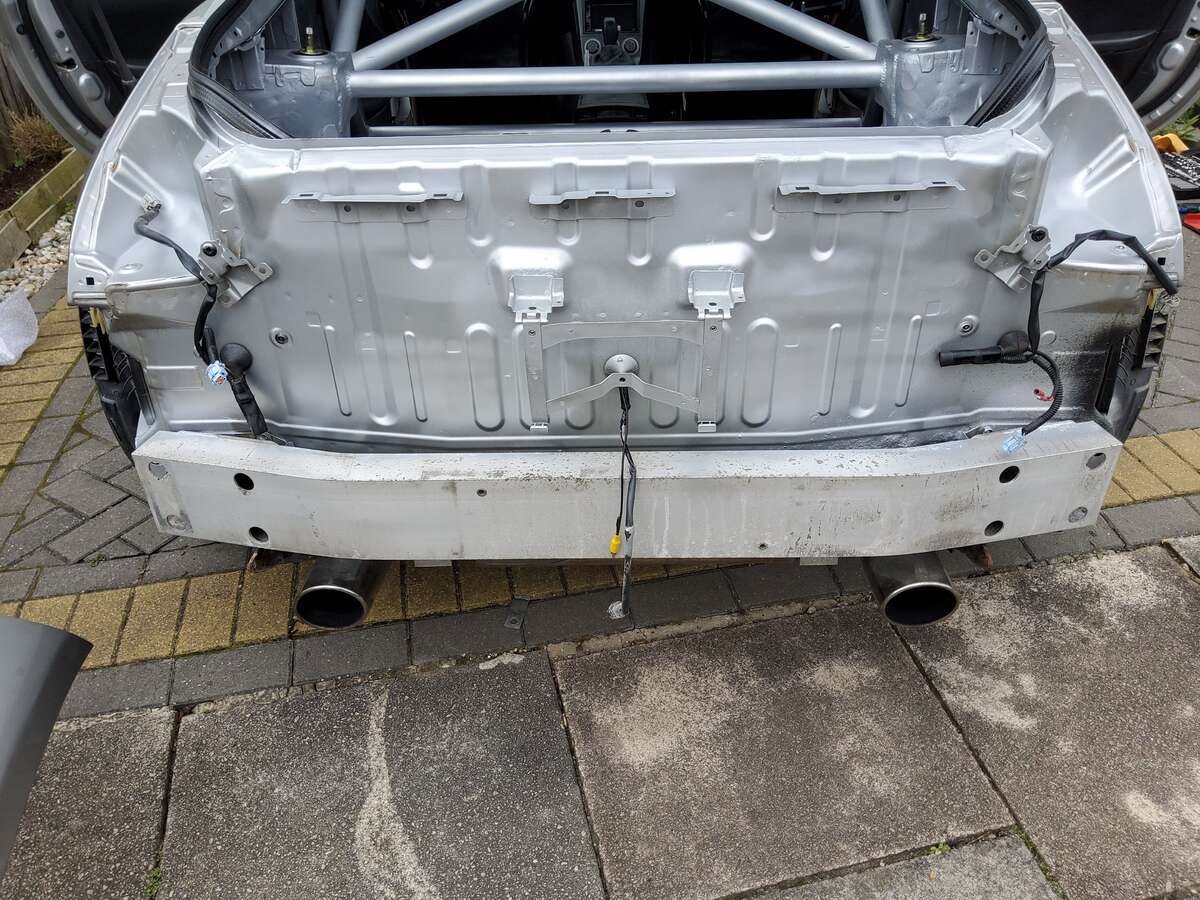
Decided to wire everything up perfectly with connectors so, if I need to disconnect in the future it will be easy. Also took the opportunity and wired up a reverse camera since I had the bumper off and connected it all up to the reverse signals to switch on. Since mine is a JDM the rear fog lights are hard wired externally and come as a individual set of wires. Decided to wire it as running lights to the cluster so that I can switch it on when needed.
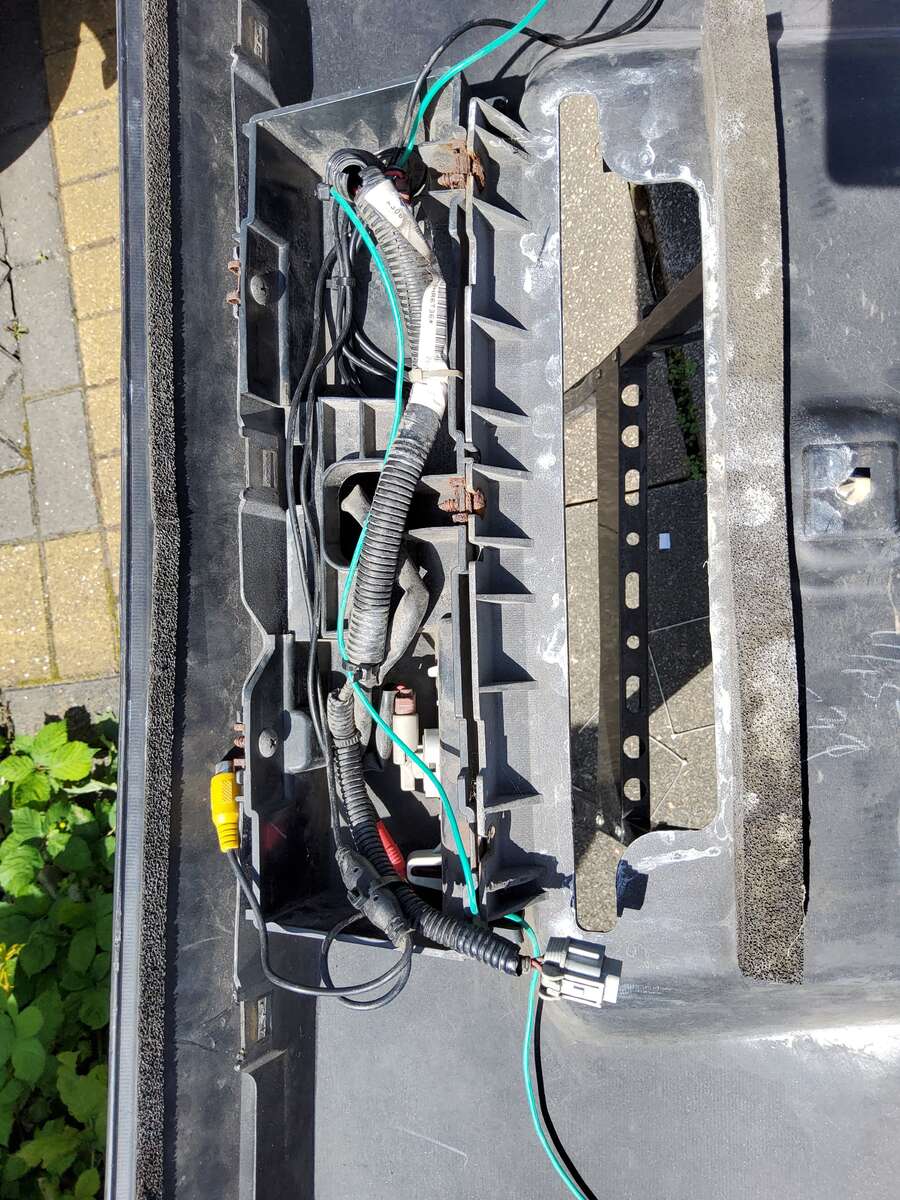
Final setup
1. White Led : Reverse lights
2. Red Led : Running lights as fogs (Slightly dimmed red)
3. Red Led : Brake lights (Running lights get brighter if they were on)
4. Orange Led: Signal lights (Turning and emergency)
Very happy with how it all turned out.
-
Power steering cooler upgrade
Got the Stillen kit from Torqen. Cracking kit with perfect fitment.
Thanks @Adrian@TORQEN
Here are the pictures fitted on the car.
Fits on the factory mount points, no fabrication needed.
-
NRG quick release mod
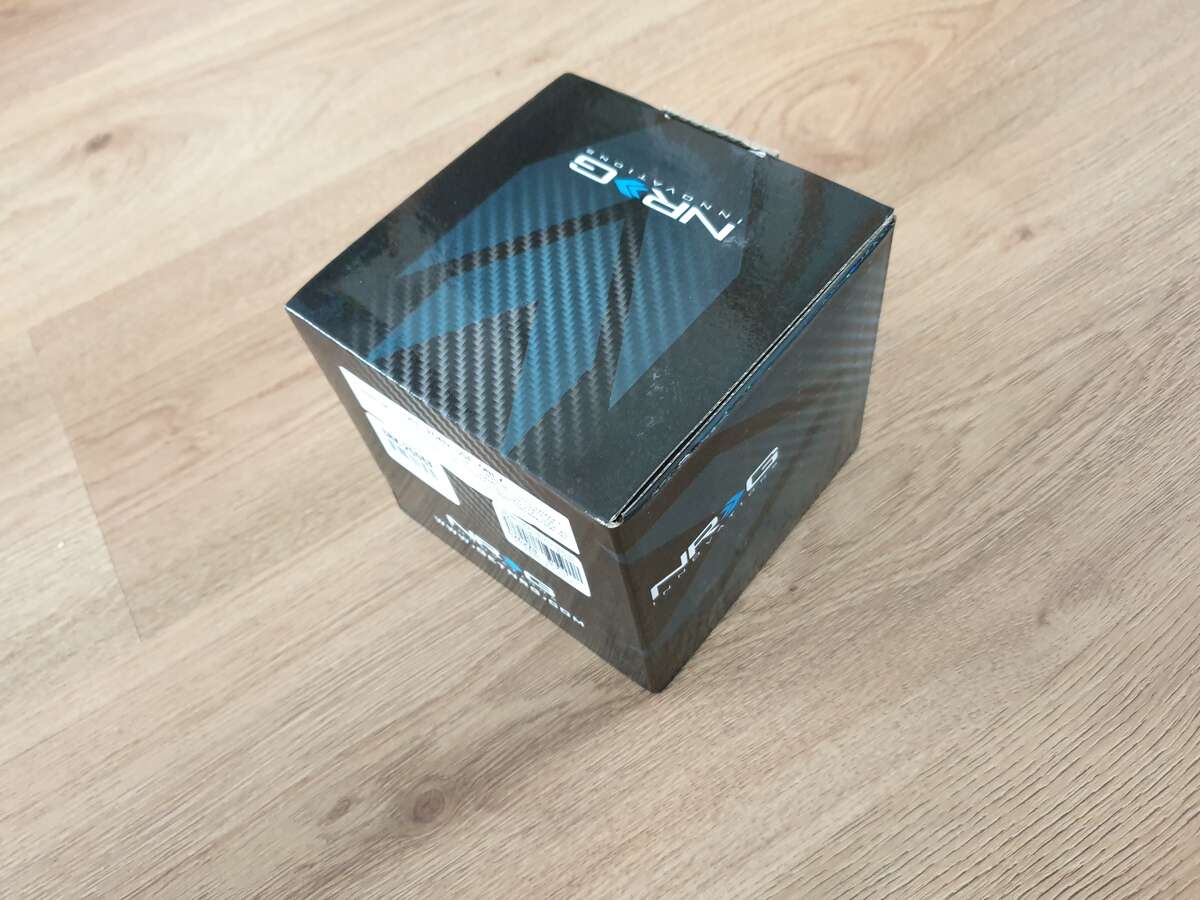
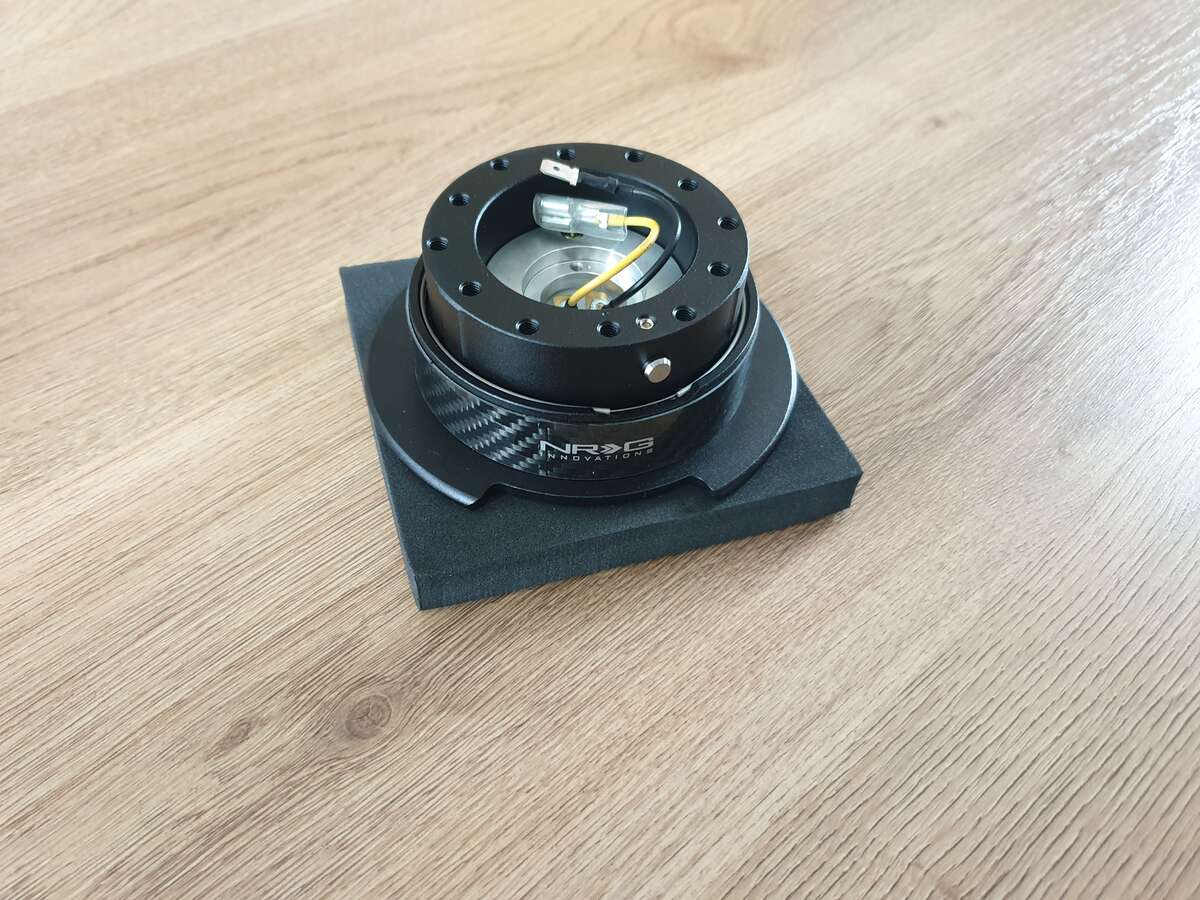
Adding a NRG hub to a Works bell hub and Sparco wheel needs some modding as the cables for the horn dont fit straight out of the box.
I had to build a few adopters using clips and wires
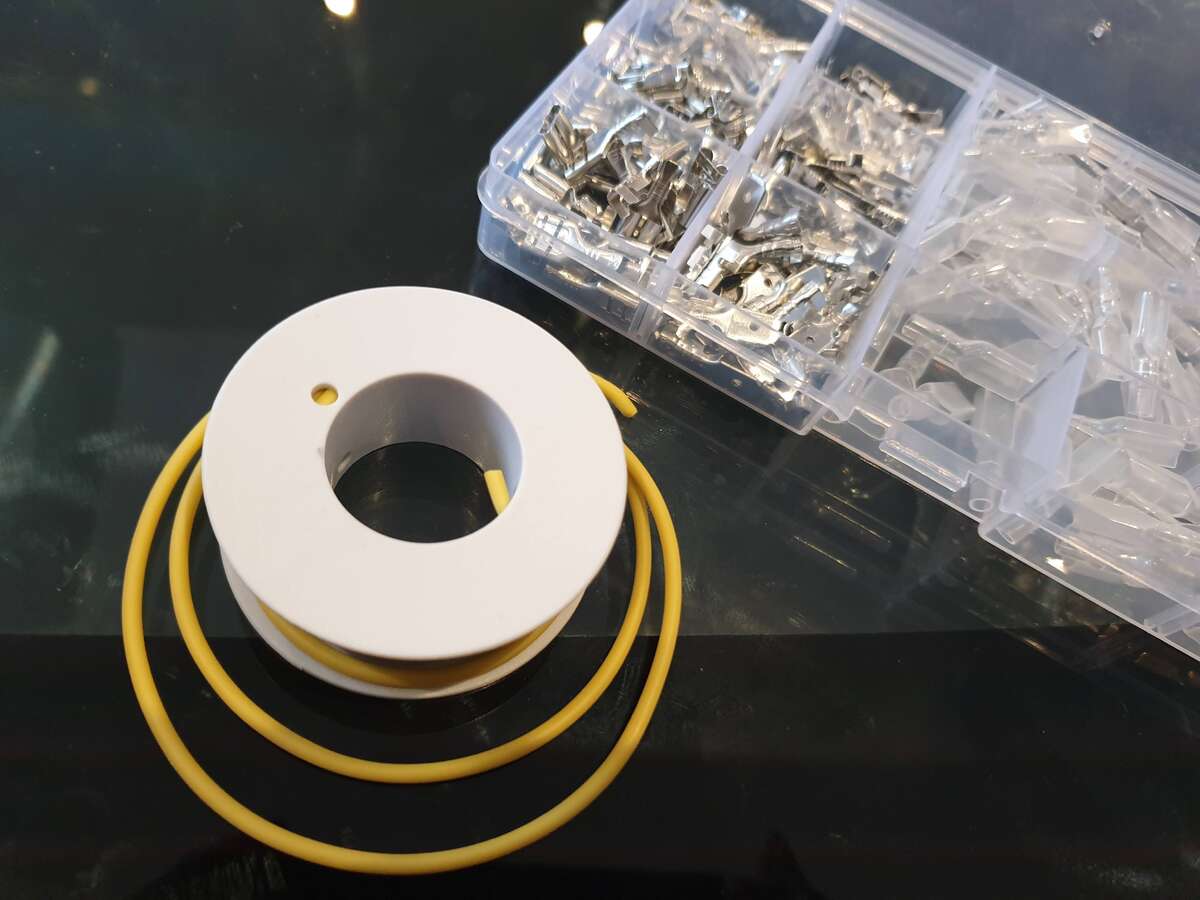
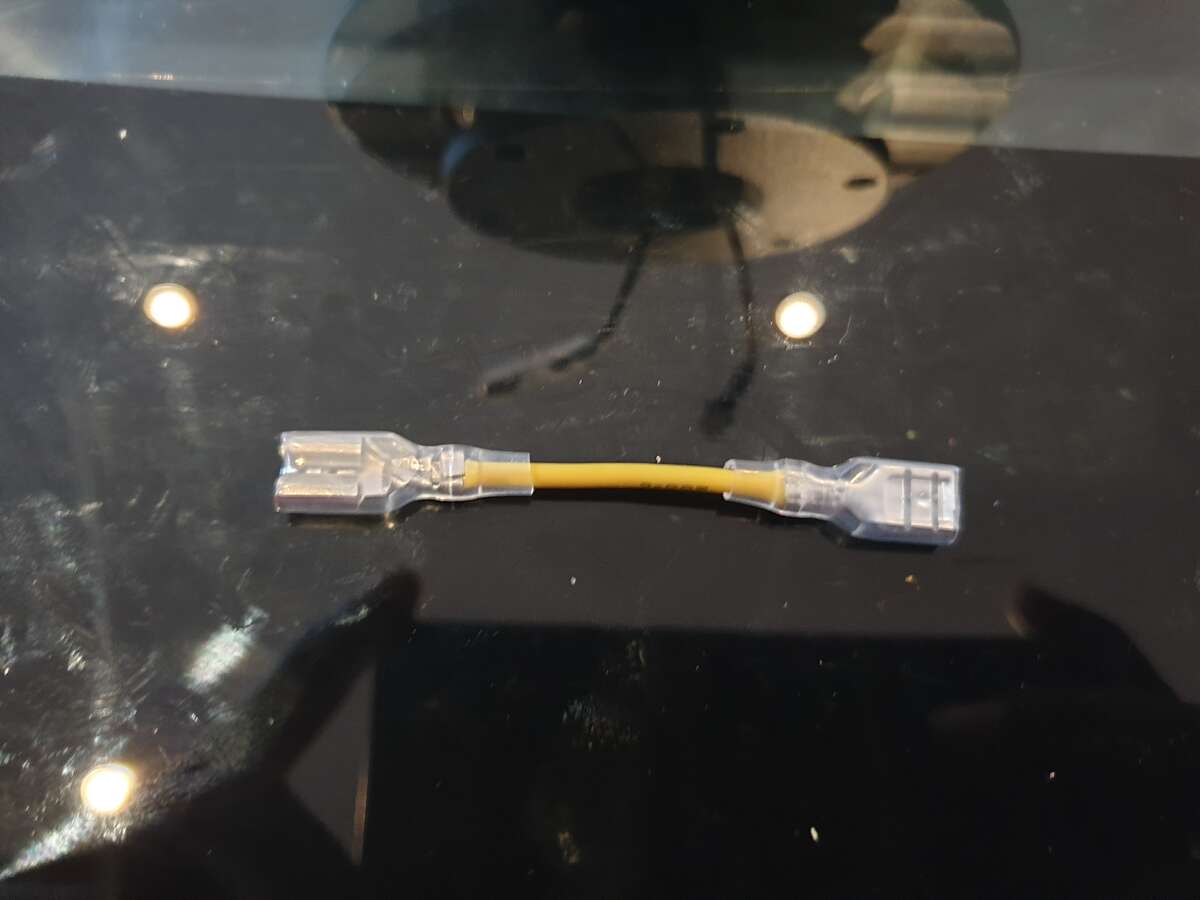
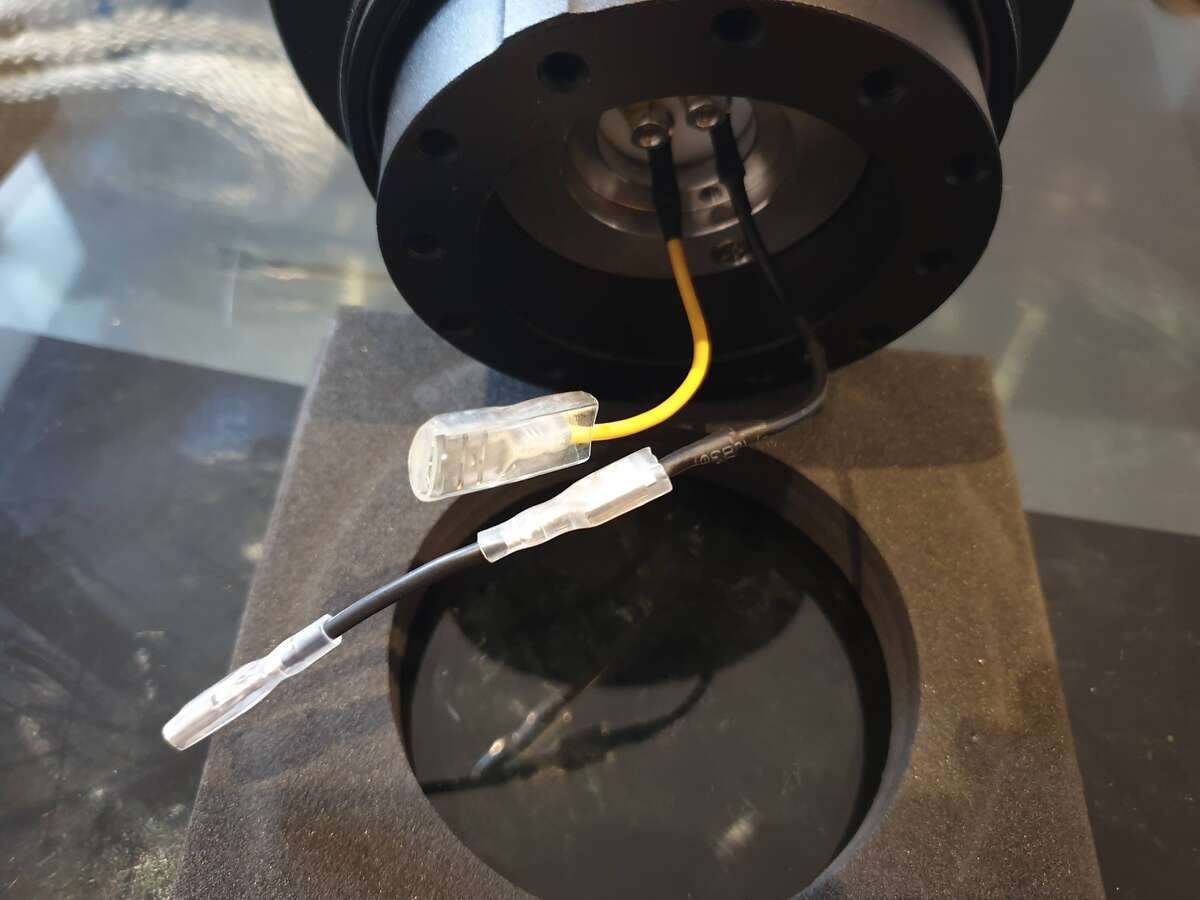
Final assembled the full setup
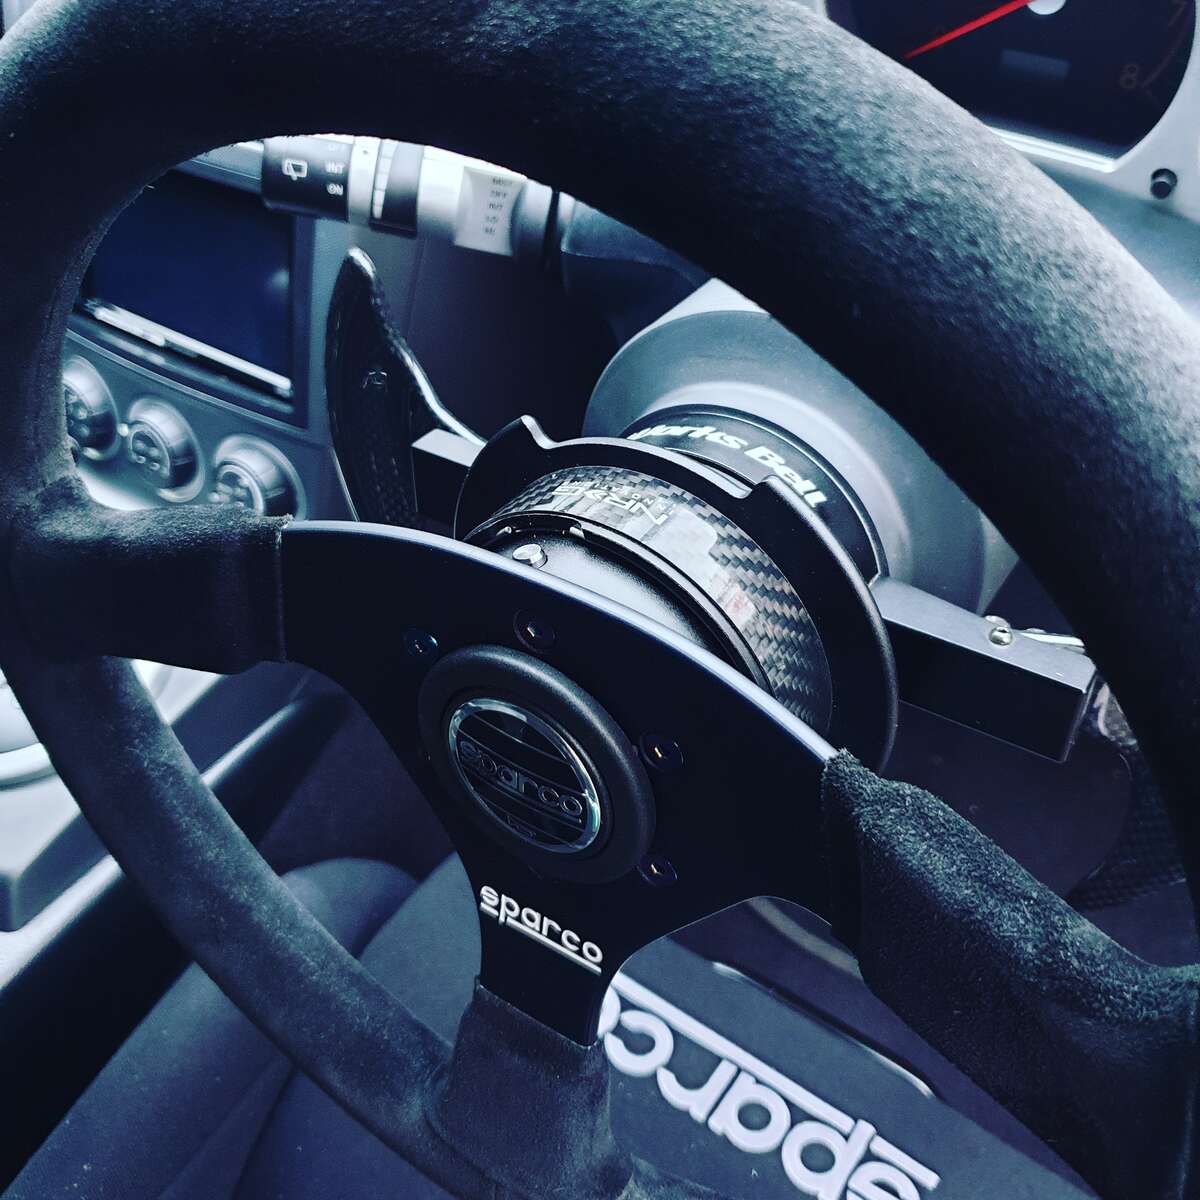
I also got some Neo chrome NRG screws to go with the install.
Pretty happy with the way it turned out. The carbon effect on the hub goes well with the carbon on the Works bell paddles.
-
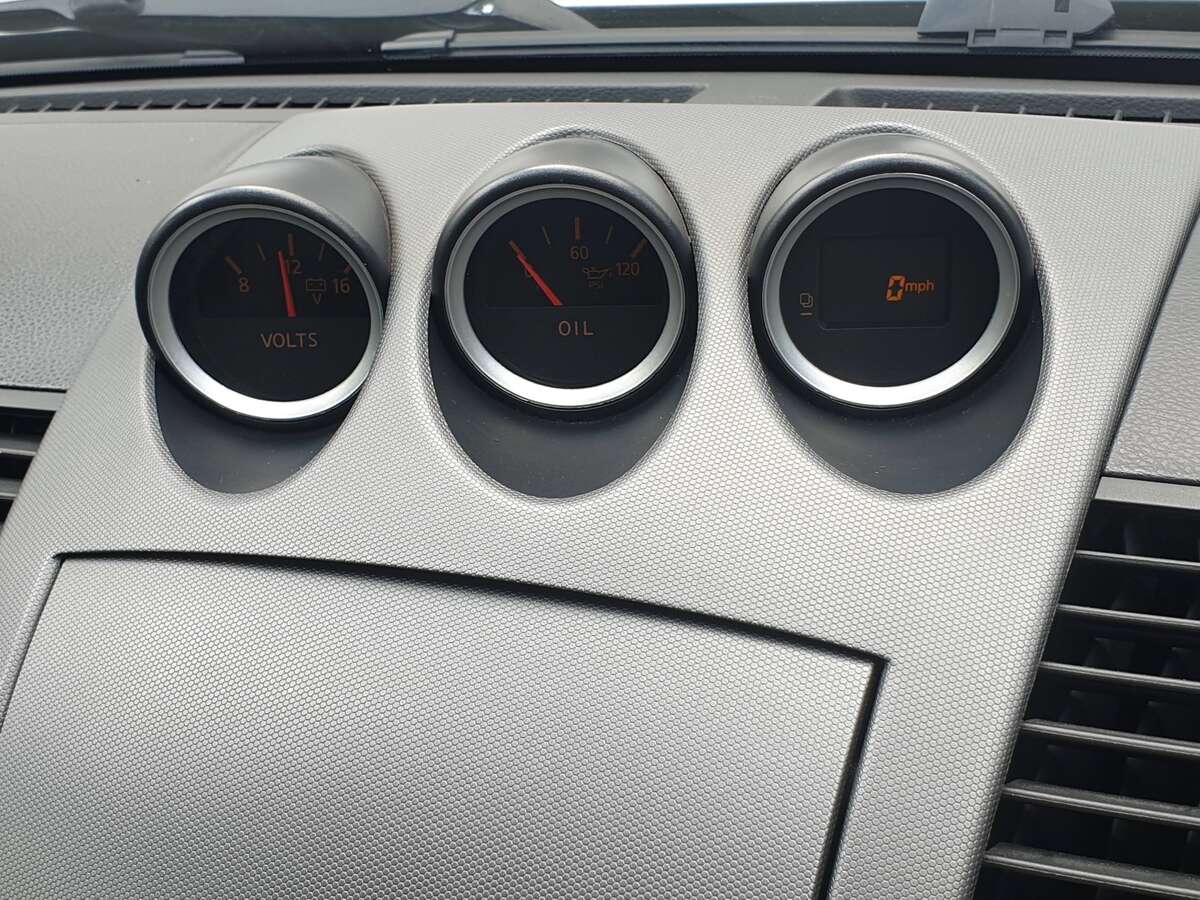
Did a couple of small mods. Since my car is JDM decided to swap the center gauges to UK miles cluster.
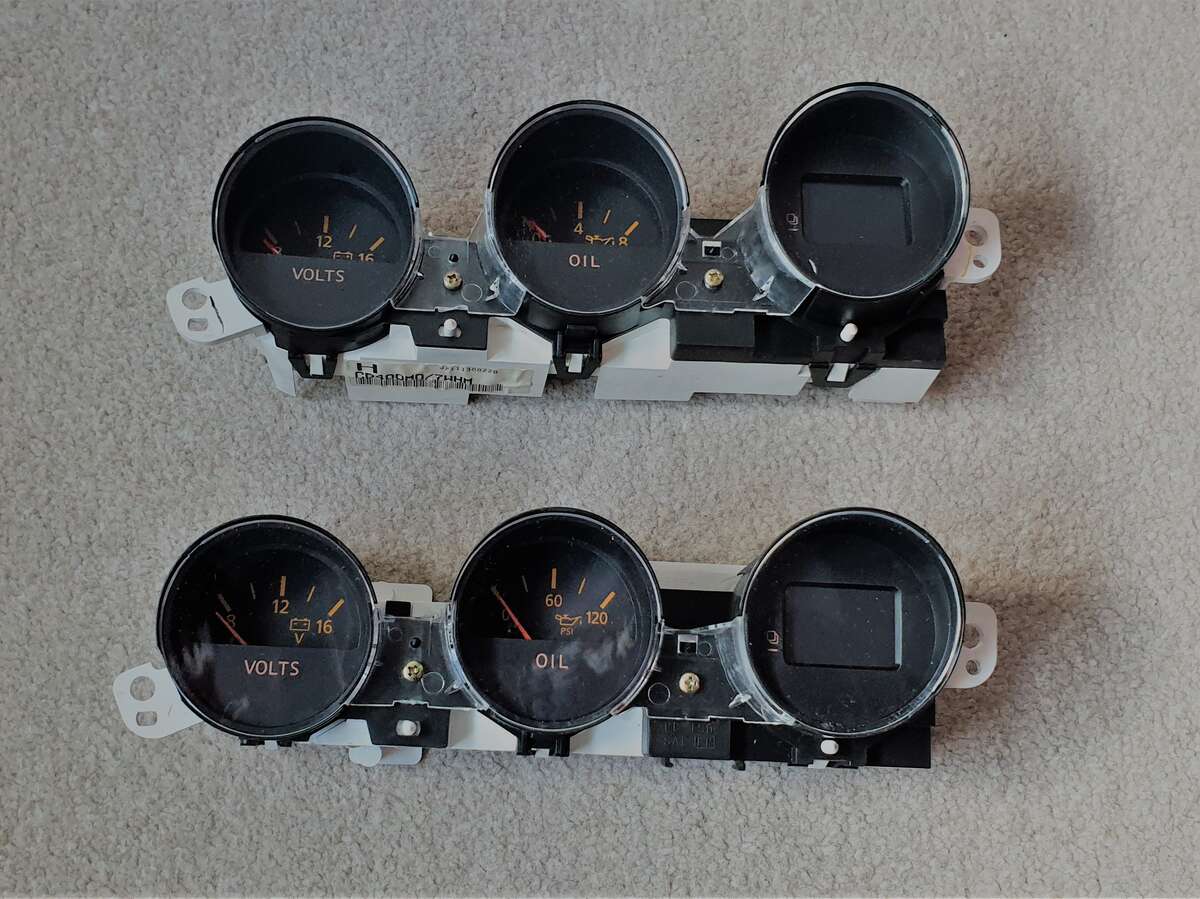
All installed and working
Next up was door sill refurbishment
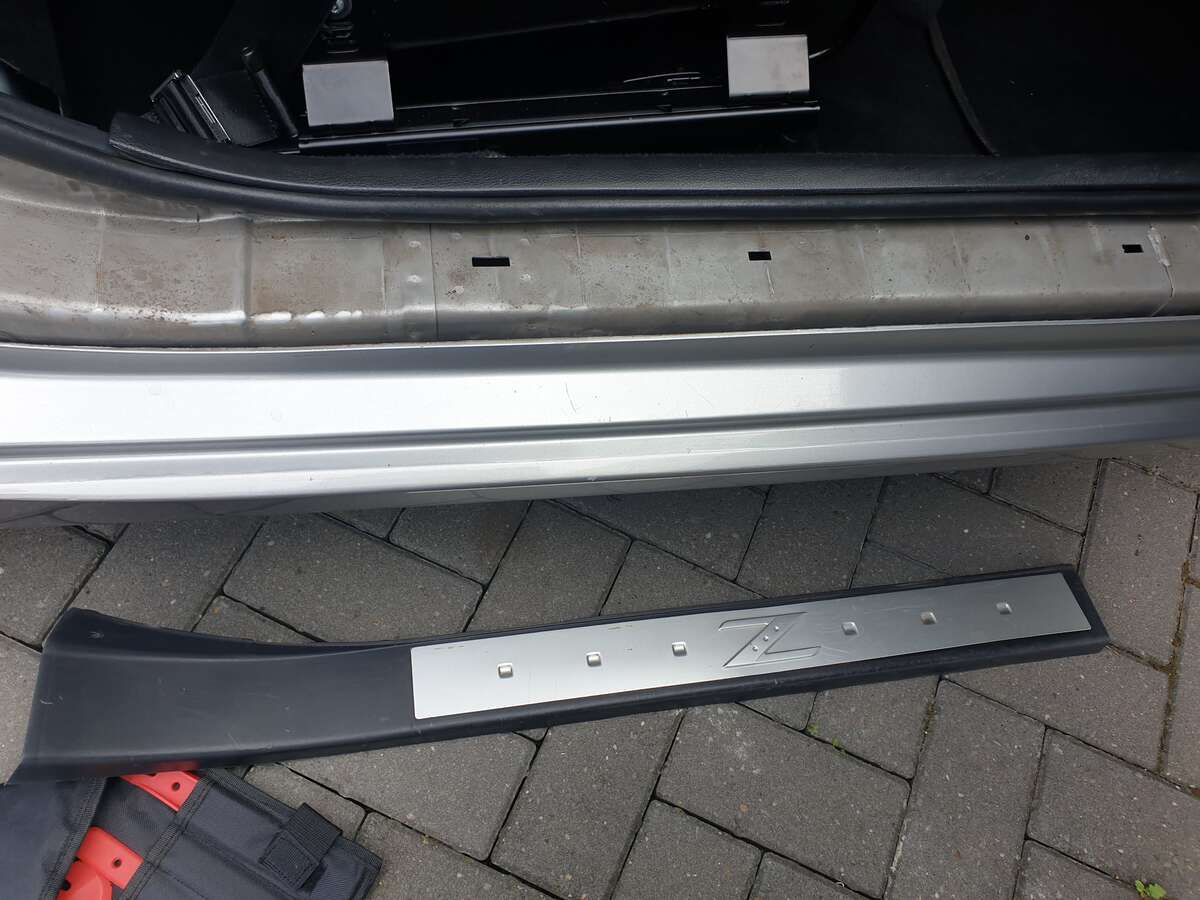
I used some trim tools to remove it. Still managed to snap a few clips

Primed then using etch primer
.jpg.bd8998a8168b8f571313abb04c3561e8.jpg)
Painted them gloss black after that
Had to use some double sided tape on the bottom to compensate for the broken clips when I installed it back in.
That is all for for this weekend folks. Hope everyone had a good one.
-
1
-
-
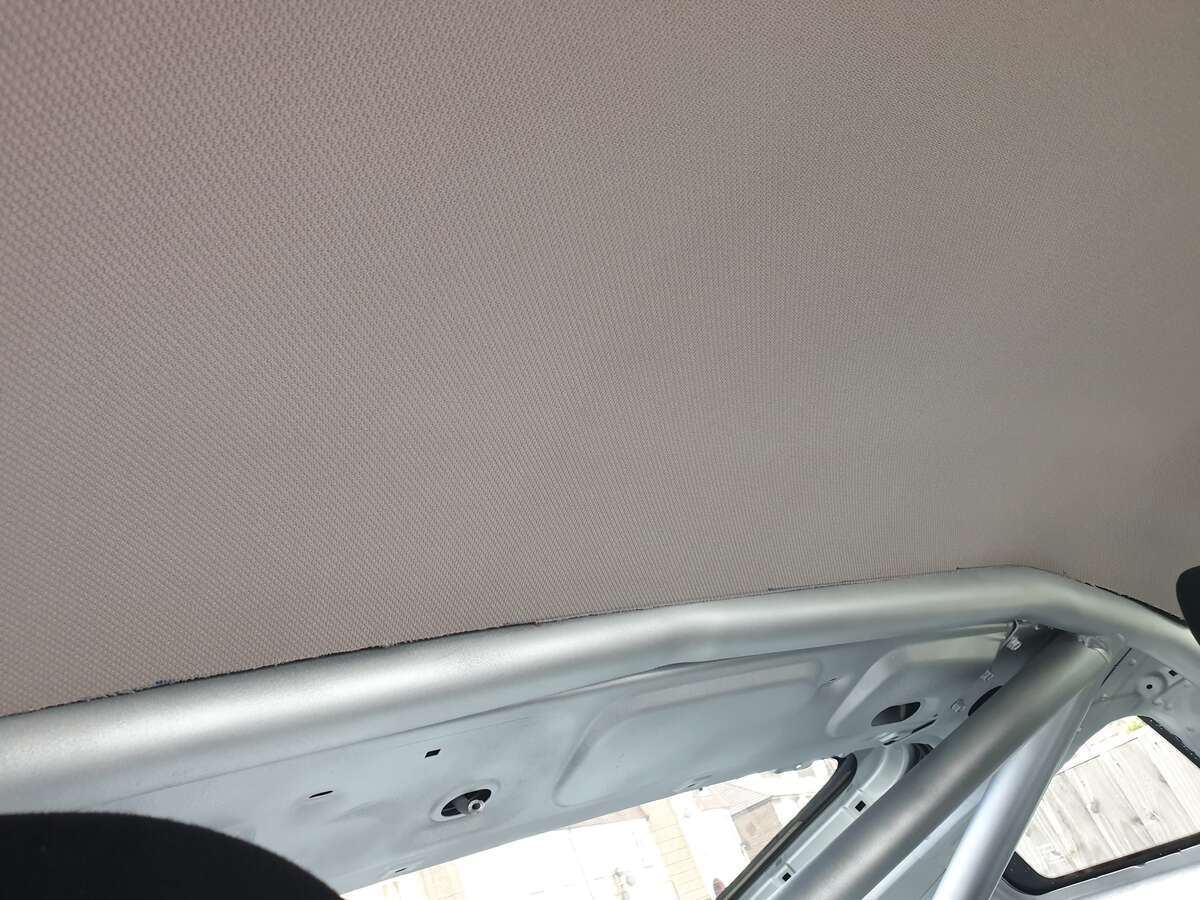
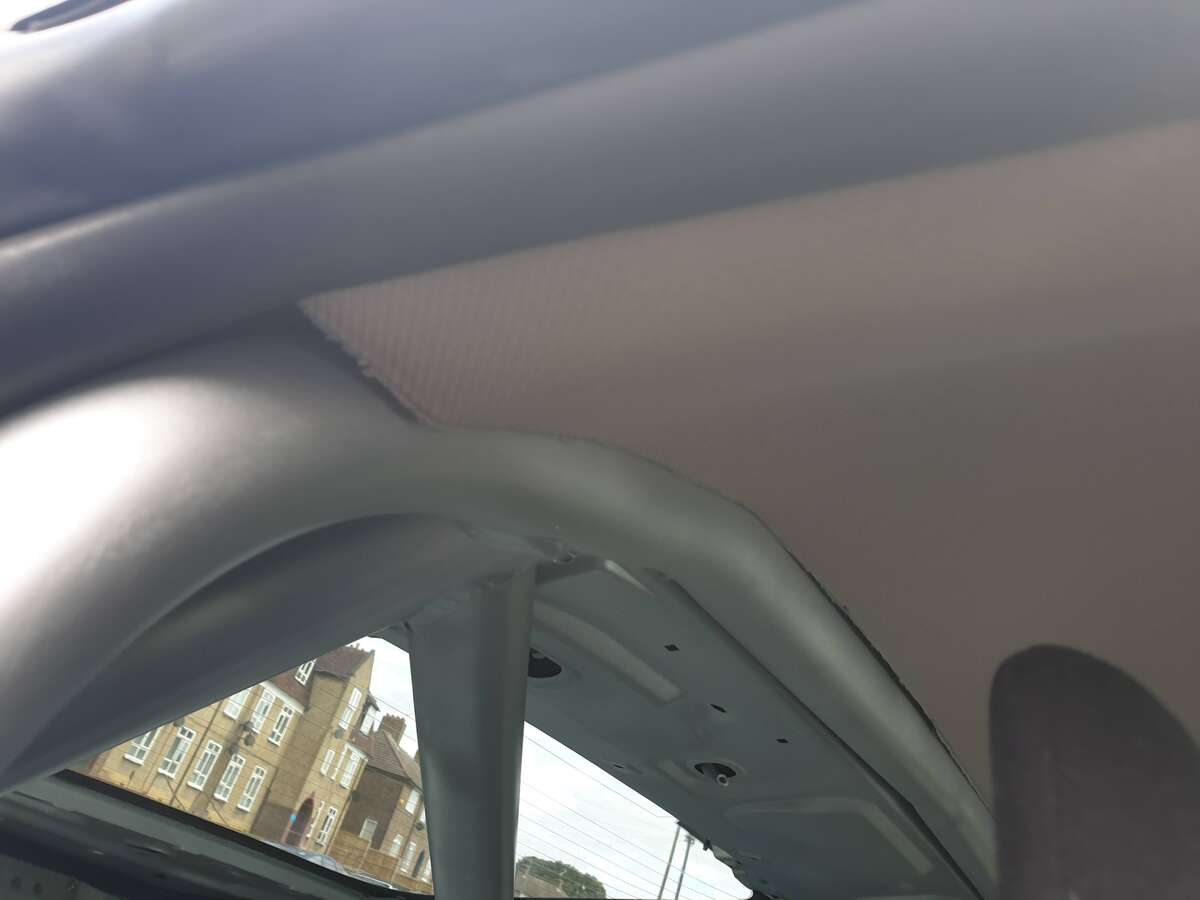
Adding the head liner back in.
This week I have slowly been refreshing the headliner that I took off.
Cleaned it fully using upholstery cleaner.
.jpg.d26a3b78fa2ba454b8646ceb53b0d2a1.jpg)
Replaced the bulbs
.jpg.70b3250d5d078696e1961ce938c3472f.jpg)
Fitted it all back in. It was not straightforward as the cage was in. Had to trim the edges to get it fit correctly.
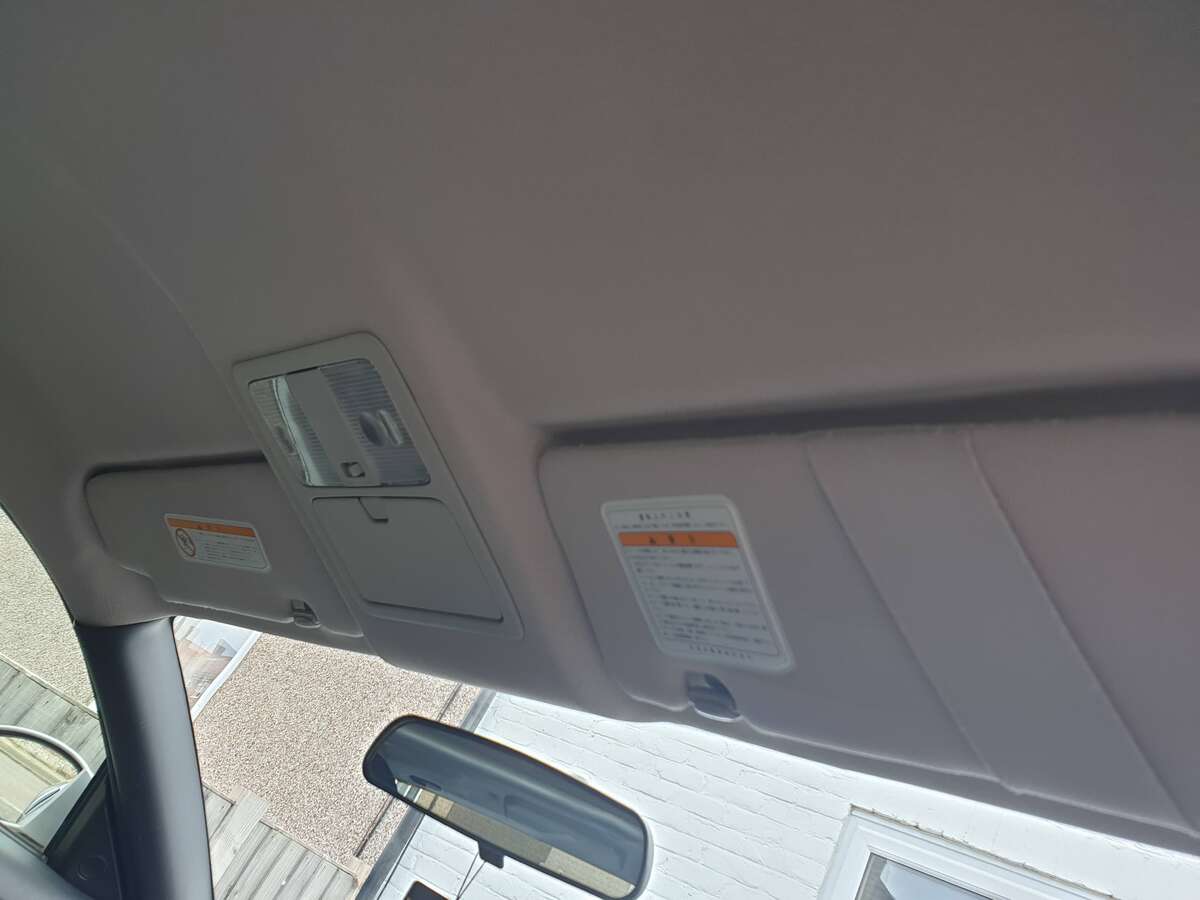
Trimmed edges
Need to get some edgings to finish it off. I dont have any with me yet.
Next up need to refresh the door sills. That's the plan for the weekend.
-
2
-
-
3 hours ago, davey_83 said:
Looks really good with BIG plans!!
Don't often see this many engine mods given to an automatic 350z
Yes this is true. I thought about swapping to a manual before I started all this. But the car has a lot of sentimental value to me, which was one of the reasons I decided to go ahead with it. Thinking about it afterwards I was pretty glad as its pretty unique in that regard.
-
1
-
-
Manged to do couple of small things this morning.
Refurbished the dead pedal
Refurbished the Bose amp and installed it back in, at least now the 2 door speakers are back in action. Need to relocate and make some custom fittings for the rear speakers and the sub woofer.
-
17 hours ago, HEADPHONES said:
Welcome to the OC

You've been a busy bunny!
Done so much in such a short time.
Looking good
")
Thanks man.
-
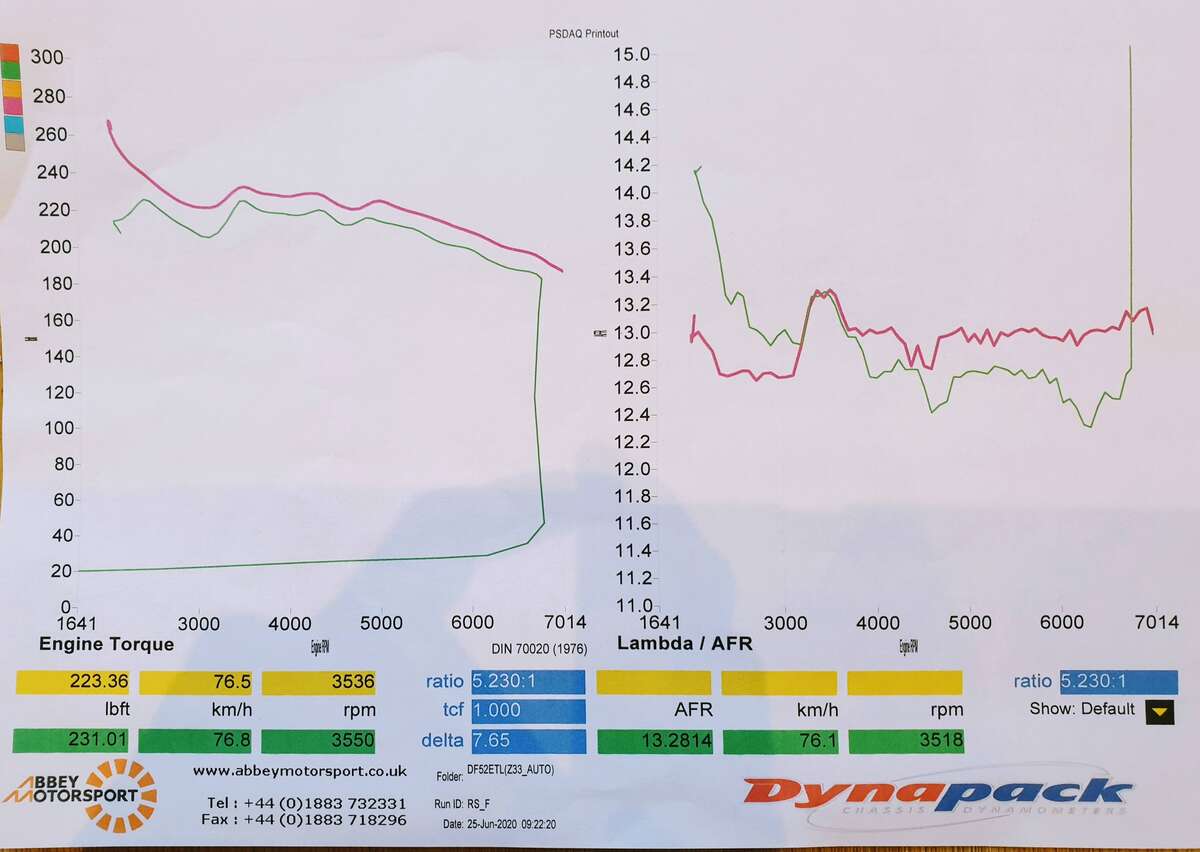
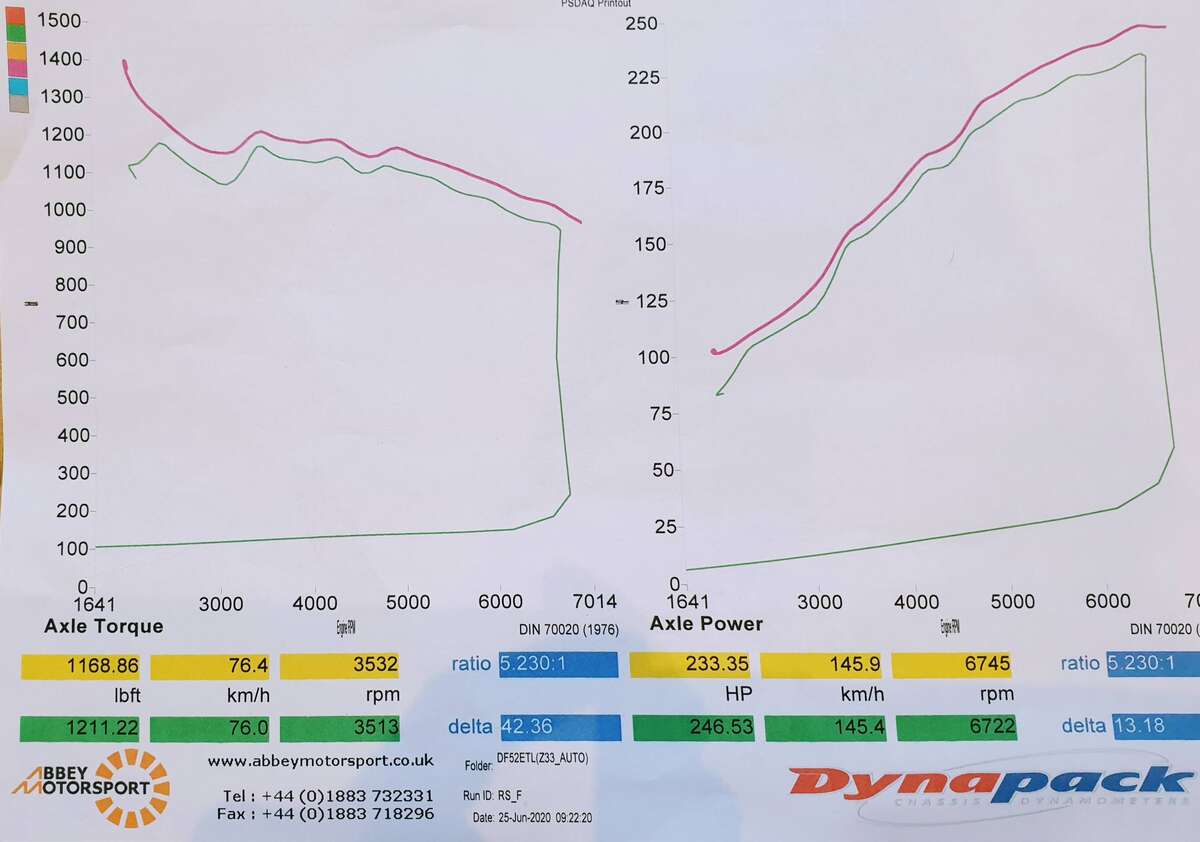
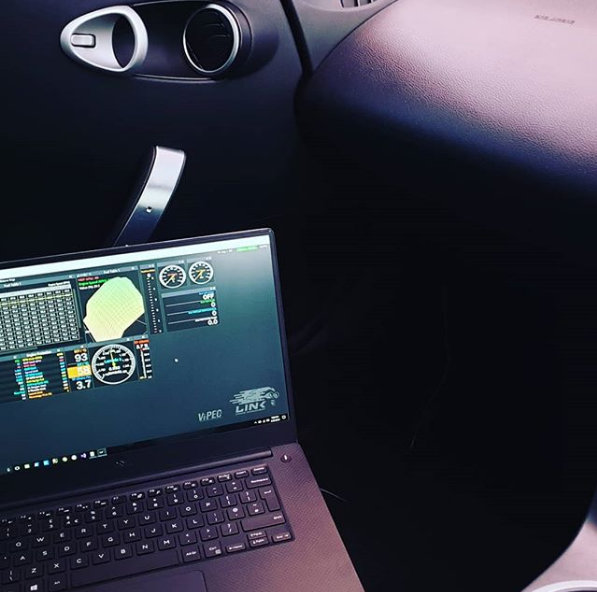
Took it to Abbey 2 weeks back and got it fully mapped using the Link. Green is before, Red is after.
-
52 minutes ago, zelda said:
Future plans? Or are you just enjoying it now..
Tons of future plans. Just getting started.
")
Things on my list.
- Radiator upgrade
- Oil cooler with braided lines and sensors wired to ECU
- Transmission cooler and sensors wired to ECU
- Valve body upgrade to the gear box
- Vortech supercharger kit
- BBK upgrade (Not sure which kit yet)
Probably start on body kit upgrades after that. Not decided which way to go on that yet.
-
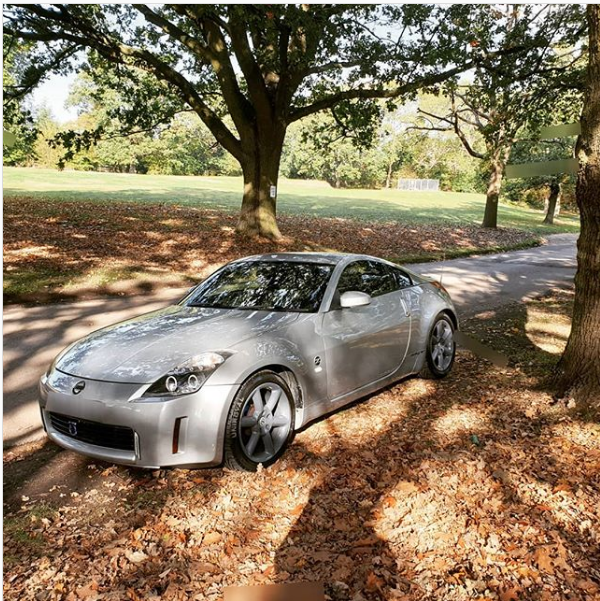
Hi all,
I have been lurker on this site for while and haven't posted any content. Mainly due to being lazy and not having time. Finally decided to collect all the pictures I have taken along the way of my 350z build and will post it here. Hope you guys like it.
I got the Z as a gift from my wife 2.5 years ago. A lot has changed in her since the time I got it. I will try and list all the things I have done so far in chronological order. Unfortunately I do not have pictures of everything at the time they were done, I will upload all that I have to give as much detail as possible.
List of mods (So far)
- Full service with all gaskets and sumps changed. (Engine oil sump, gearbox sump and oil )
-
Full suspension upgrade with drift works kit (True coil overs with spring delete)
- HSD MonoPro Coilovers
- Diftworks camber arms (Front and Rear)
- Driftworks traction rods
- Hardrace lower arm (Needed for spring delete)
- White line roll bars front and rear
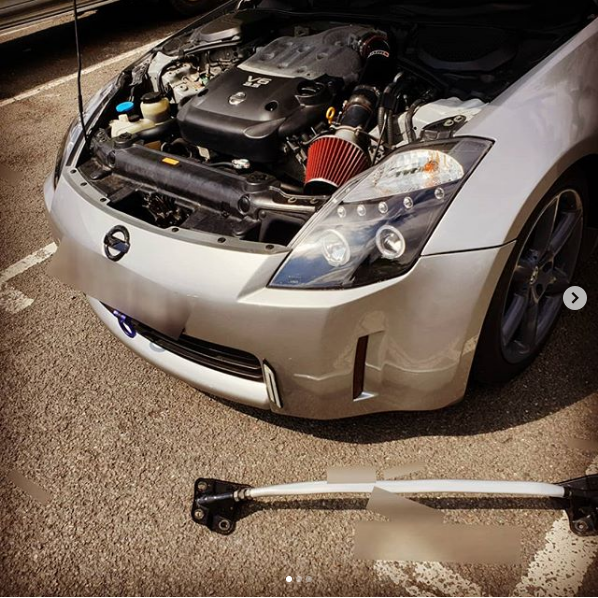
- Cusco strut bar
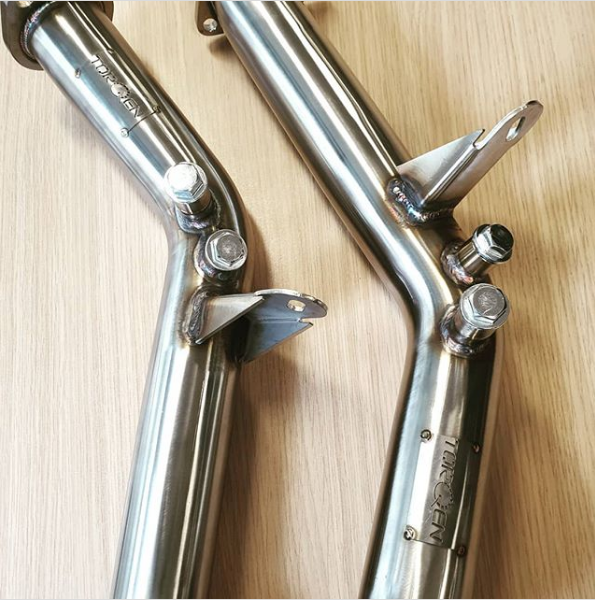
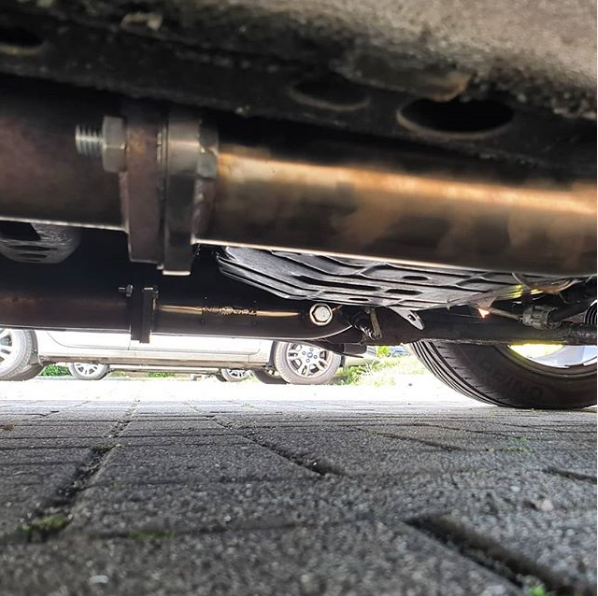
- Torqen decats
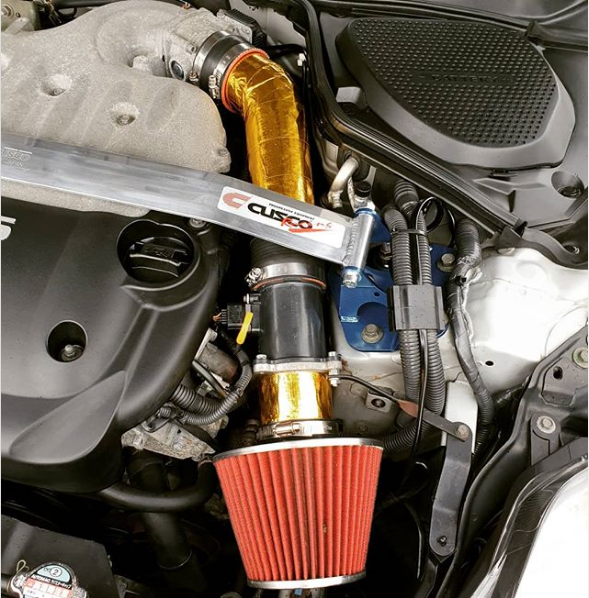
- Short RAM intake
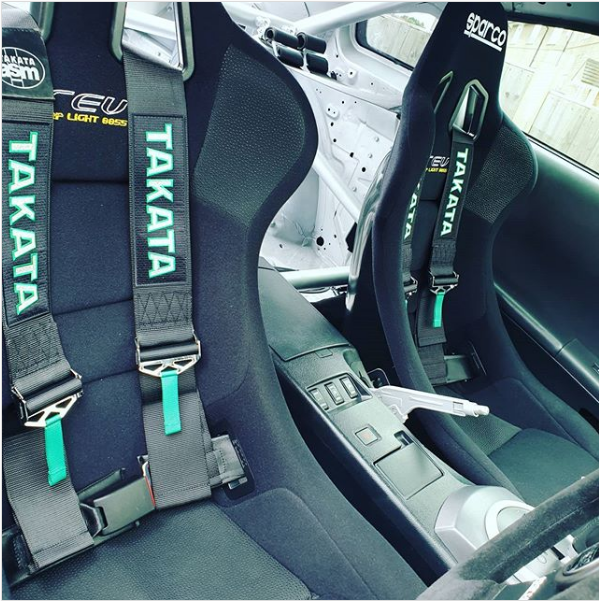
- Fully striped interior
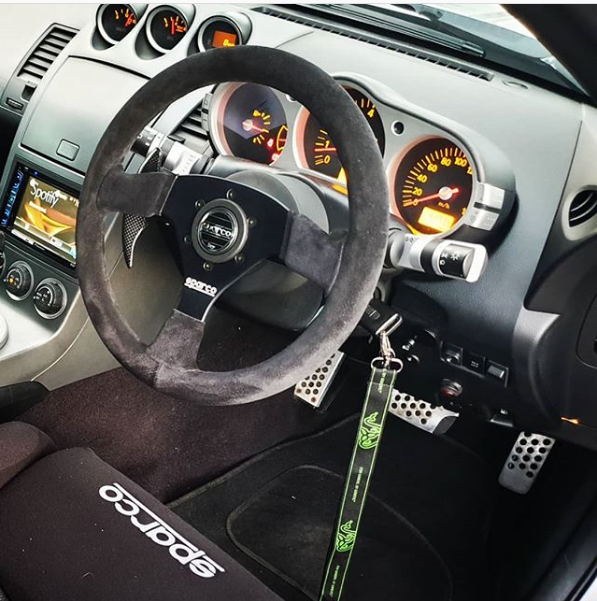
- Works bell paddle shift kit
- Sparco steering wheel
- Sparco Rev seats
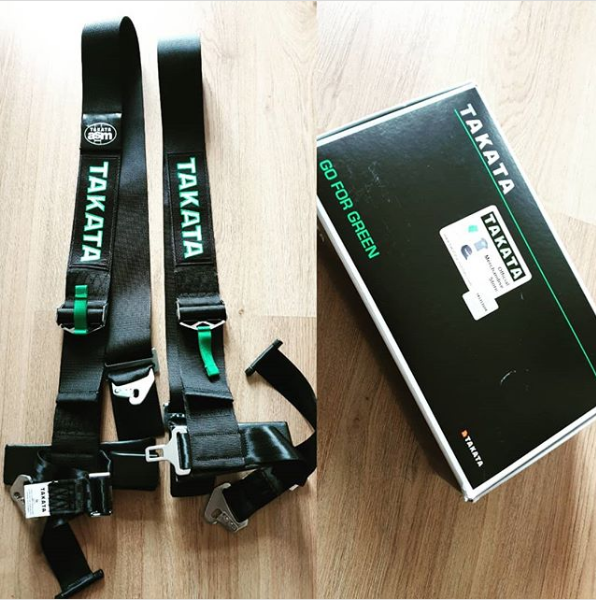
- Takata drift 3 harnesses
- Link G4 ECU
- Link lambda can sensors
- Custom half roll cage
- Fully painted and refurbished interior
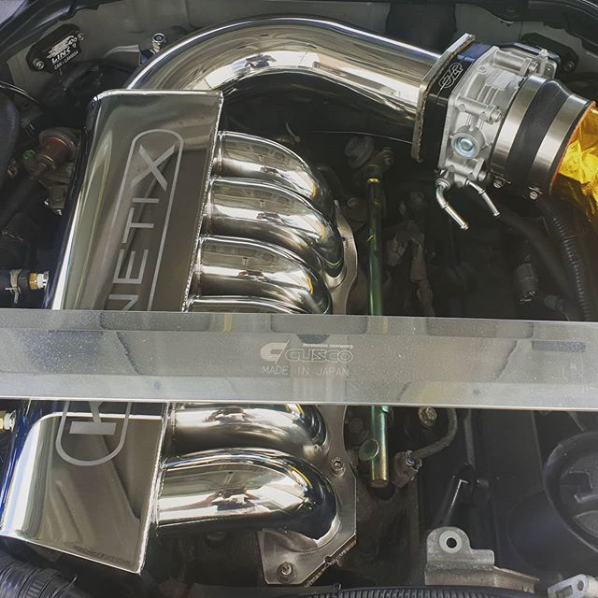
- Kinetix intake manifold
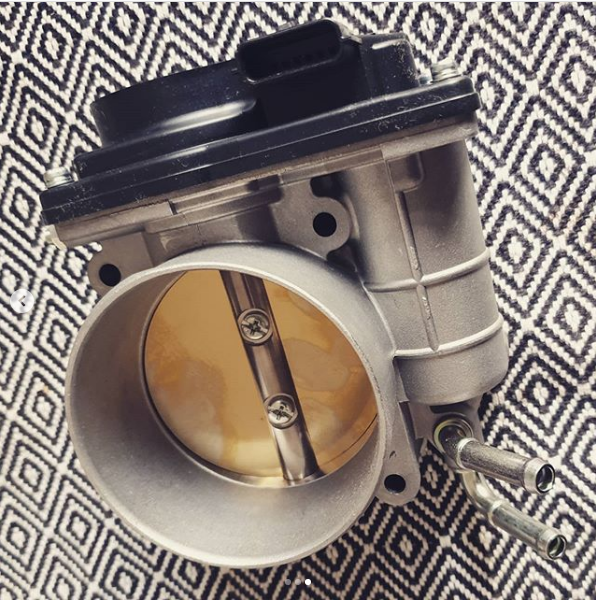
- Hitachi throttle body


-
6
-
Hi
I recently did a full flush and replacement on mine.
I used CASTROL TRANSMAX Z.
Here is the spec sheet : https://msdspds.castrol.com/bpglis/FusionPDS.nsf/Files/5318889C4CDA883380257C990001D228/$File/BPXE-9H7QZ8.pdf
Its similar to Nissan where Matic Fluid D which is used by our cars.
Been running it for almost 6 months now with zero issues.
Hope this helps.
TOMMY KAIRA STYLE BADGES...
in Member Traders
Posted
@zippypooz Do you still do these ?