
14N
-
Posts
6,196 -
Joined
-
Last visited
Content Type
Profiles
Forums
Events
Gallery
Store
Posts posted by 14N
-
-
There are plenty of threads on here where MPG is discussed. If you're expecting to get <20MPG you may be pleasantly surprised. Obviously this figure depends a lot on how and where you drive, but mid to high 20's is average and easily achievable. My car is my daily drive and I get around 26.
 to the forum. Just do it!
-
My vote would be for the drive and BBQ (as I enjoyed the last West Mids drive even though I chose to take my own route near the end
 ).
).I'm not entirely sure I can make it yet, so won't vote in the poll. Leave it with me, I'll report back
-
Ideally i want to get this done as the car is 250 miles from me
Sounds like you may have already found a potential car. Post a link up on here if you can. We (well, the forum guru's) can maybe give you some advice just by looking at the ad. It's been done many times before.
-
I thought about getting one when I bought my Zed. But when I looked into what was actually involved for a few hundred quid, I decided against it.
If you look through the list of what's included ("upto 206 seperate checks per car"), most of those checks are just visual e.g. "Fuel filler cap and seat upholstery" which can be done easily yourself. Take a look: http://www.theaa.com/vehicle-inspection ... iew%3Dtab2
Other things are covered by an MOT - so if it's got a fresh MOT, they 'should' have been checked.
I know an MOT doesn't validate a vehicle's mechanical state, but I wouldn't pay £300+ for someone 'just to have a good look'.
Your best bet really would be a local forum member. Alternatively, print the list off, pay for a train ticket and go take a look yourself.
-
Well I think I may have sorted it. I put a status on Facebook asking if any of my friends (and those I went school with that I haven't spoken to in 20 years etc) knew any painters/body shops that did mates rates.
I've come up trumps. Found someone that said their mate will do it for £20 plus cost of paint.

We'll see how good it is once I get it back, but I'm sure it'll still be 100x better than any of my DIY attempts.
Glrnet has an azure Zed with contrasting silver lip. I thought that it looked cool.

I'll post some pics of mine once fitted.
-
How much are you looking for, for the springs Tom?
-
Well, your wheel arch liners attach to the undertray, there's a risk the wind going under the car can cause your wheel arch liners to flap down and get pulled under your wheels.
So the undertray isn't that important then? Phew

With your wheel arch liners, what are they attached to at the lower front, where they sit under your front bumper?
I'm not sure. But when test fitting my new splitter, I noticed the bottom of my OEM bumper couldn't really be described as 'solid as a rock'. I'm guessing that they're (bumper and arch liners) all attached/connected to eachother. I'll have to check later today just how the arch liners are attched. Feck.

I think an ad in the wanted section might be needed....
-
Thanks for the info RT, appreciated
Kyle, I was trying to wrap in in standard black carbon. The splitter itself is already in black PU plastic, but when test fitting to see what it looked like (as you do the moment you unwrap anything new
 ), I wasn't sure I liked the look of the contrasting colour (yes I know that contradicts my attempts to wrap it in carbon) Otherwise I would plastidip it as I've seen it's good stuff. IMO in black it did look too aftermarket and bolt on. Colour coding it would (hopefully) make it look more 'part of the car' rather than an after thought. That's just my thoughts though.
Think I'm gonna get a few quotes to colour code it and depending on the costs (and my mods fund), I may just fit it unpainted (black) and se if the look grows on me. Then I can Plastidip it.
Cheers.
-
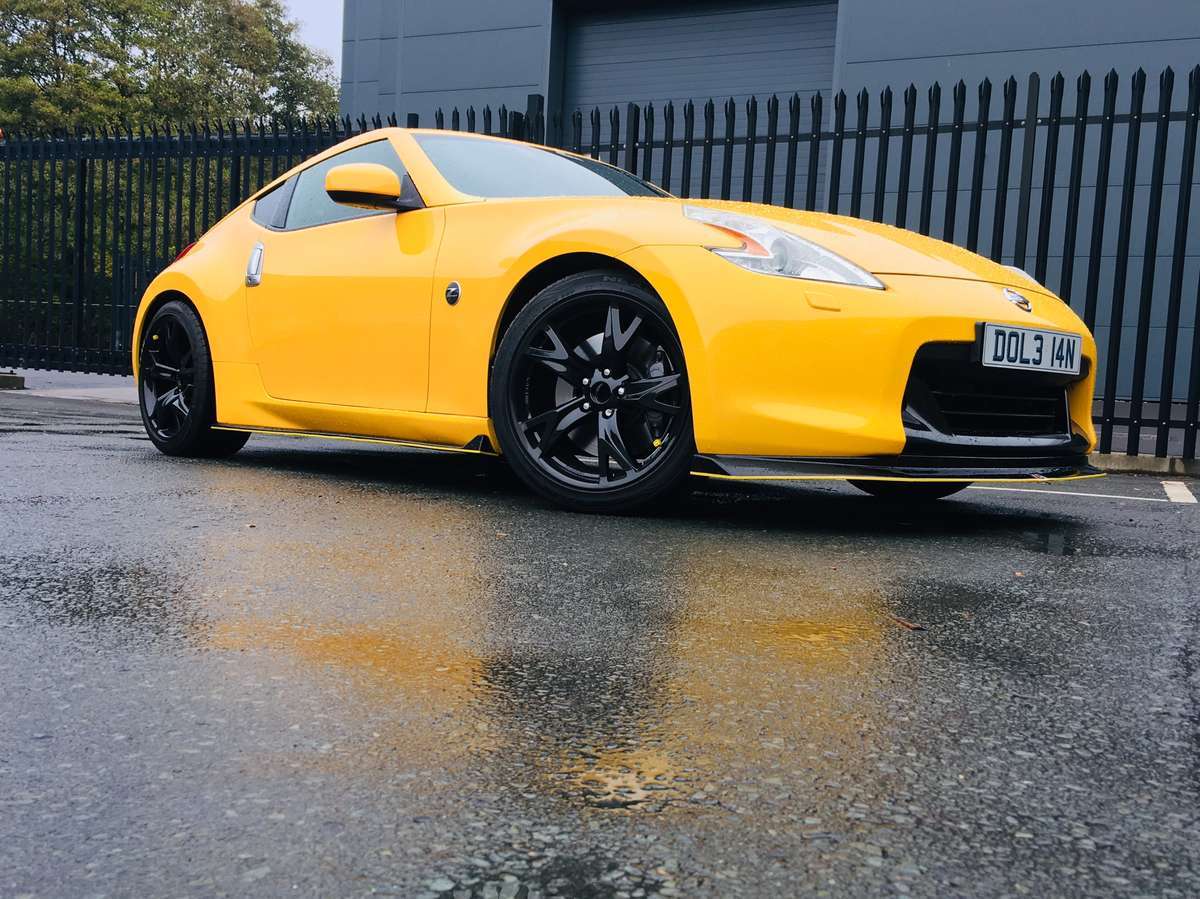
Guys, I haven't got the undertray on my Zed (it wasn't there when I bought it - I didn't lose it chasing you Wasso).

Is it something I must have and/or need, or something I can live without?
-
Hi All,
I have a paint quote quick question (+ some alliteration)!
I've recently bought a Nismo style front lip splitter (cheers Tarmac) and after an epic fail at trying to wrap it, I'm looking to get it painted GM to match my car.
What kind of ball park figure can I be expecting to pay? Is there anything I should/should not be asking for, given the location of the splitter (i.e. being prone to stone chips etc)? Is there a harder or more durable type of paint?
Any suggestions you can make to keep costs low? I've considered giving it a go myself with some aerosols.
Cheers guys
-
3 comes swiftly after 2 without warning and dries up your bank account.
Imagine your first meet being Wales and seeing near on 50 zeds of varying modifications. Although the mod world didn't hit me straight away,when it did, that's when I looked at my bank balance and the repeated "there's another delivery for you darling" you know you're a 3!!!!
My first meet WAS Wales!
My second was spent chasing you around the Worcestershire countryside
I've just text my mother to tell her to expect a large but light package (Tarmac's splitter) this week (I get stuff delivered to my 'rents as they're in all day and I'm at work).
When I told her it was a part for my car, her response was "What another"?
Think I may already be a 2.5

-
I was a happy and contented '1' for a considerable amount of time but then that changed to a '2' after my first Zed meet and drive out.
-
I pleasured myself greatly at the weekend with the help of Clark.
I hope Clark cleans that up before he lets the car go
Many congratulations on your impending new arrival.

Great news
-
Chris.... Following your last post in this thread: viewtopic.php?f=9&t=62945
Is there something you wanna tell us?

-
Excellent work
-
I've just bought one from Tarmac (yesterday so no pics yet)!
He's doing them for £125 delivered and they're not plastic or fibreglass so won't shatter on impact (if you catch it).
More details here: viewtopic.php?f=166&t=61030
-
No worries buddy. Really glad it helped
-
The hand grab was the difficult bit. I used a couple of pieces on mine, with a very slight overlap on the top edge which can't really be seen once you've finished..
This maybe difficult to explain via text, but here goes (bear with me).
If you look at the grab handle from above, with the 2 longer sides on the left and right (shorter edges top and bottom). I wrapped the top, left, bottom (and very bottom) of the grab handle first and cut around the top edge, just so it overlapped onto the top surface by a few mm. I did this first before applying the 'main' wrap. With the main piece in place, I then cut the opening for the handle on the 3 sides I'd previously wrapped, leaving a wrap 'flap' attached to the right hand side (facing you when in the car). I then used this to cover the remaining side of the handle.
You can just make out the join in this pic.
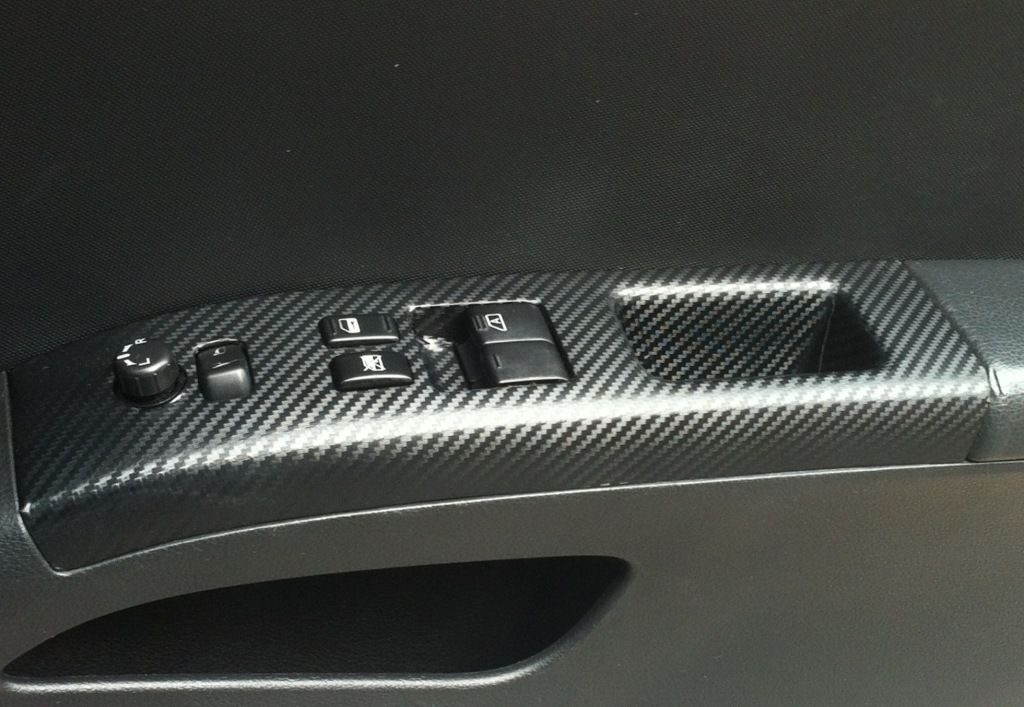
Hope this helps a little Steve. I'm no expert and I wouldn't claim it was a brilliant job, but I'm happy with the result.
-
Good job game show rules don't apply here!
"I'm afraid I'm going to have to take your first answer".
-
You've seen my attepts at this Steve. The passenger one is much easier than the driver's one. Keep practising mate.
Drop me a PM if needed and I can maybe help you out.
-
I'd be interested in the spacers (and wheels) at the right price if you remove the goodies
-
Good work my friend.
-
-
Good luck in your new venture Captain.
ATVB
Blue 350Z nr J1 M42 (Bromsgrove)
in Spotted or Flyered
Posted
Just seen a blue 350Z on my way home, it was queuing in traffic near J1 M42 island heading towards Bromsgrove. About 17:45.
Possible Nismo front bumper? Anyone? Car had a 'Wasso' look to it, but I passed too quickly to notice the wheels