zebedy Posted November 12, 2015 Posted November 12, 2015 (edited) Just a quickie to highlight to you guys the process involved in fitting one of these or even a different model vallance, the method is basically the same for all. Take the bolts off from the underside of the bumper and the two toggle push plugs and the bolts next to the rear quarters where the bumper bolts onto the quarters. Keep the bolts under the lights. so next was to dry fit the bumper vallance and mark with the sharpie the rough outline looking at your OEM bumper determine the contact points for bonding. Here Ive just scribbled some lines on where the bonding agent will go. I use two products always. Tiger seal or Sikaflex and Fibrafill or Upol P40. The fibrafill is 2 pack so you mix it with a hardner. What I do sometimes is mix it with some filler for it to go further. so basically more hardner, the quicker it all sets, use less and you have more time to fettle and move things into position. Filler, fibrafill and hardner Next, you need balls of steel. Lol. Attack the OEM bumper with my trusty ol grinder. Just scribe in some lines for a key for the tiger seal and p40 Next I only use Texscrews. Self Drilling screws with spread washers. Get these on the ready. Offer the vallance onto the oem bumper, prop something underneath, then screw a few in to hold it in place. As you can see, the screws are all in throughout the bonding area and the upper edge where the transition is between the vallance and the oem bumper. Leave to set for 24 hrs, then take out the screws and fill over. I only use UPOL FANTASTIC for this. Again 2 pack with a hardner. I use this because it goes on like cream and sands really easy. As you can see, the first lot of filler has been applied to blend in the upper to the lower. Blending in on this one takes no more that 2 to 3 inches so plrety easy to do. This first layer will be quite thick and will need longer to dry. About 2 hrs last night. You can use a hairdryer / heater to speed things up if needed. Then sand all back and apply a thinner layer of filler, feathering it in on the oem bumber. This is as far as Ive got, until tonight, when I hope itll be completed. I'll post more up tomorrow, Edited November 16, 2015 by ZZZebady 1 Quote
350zedd Posted November 12, 2015 Posted November 12, 2015 Cant wait to see what it looks like when its all finished...... In the meantime, your mrs is gonna divorce yer for spending all that time in the garage! 1 Quote
zebedy Posted November 16, 2015 Author Posted November 16, 2015 progress - rear view of OEM bumper with the ES bumper bonded on all done ready for painting this week................. Wing Mirror shells ready for paint.............. 1 Quote
monkeybrain1234 Posted November 16, 2015 Posted November 16, 2015 (edited) Snap http://www.350z-uk.com/topic/90388-my-new-look-rear/page__hl__esprit Great rear and totally worth the effort of blending it in. Cant wait to see result . . Edited November 16, 2015 by monkeybrain1234 Quote
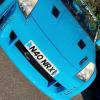
zebedy Posted November 24, 2015 Author Posted November 24, 2015 Well...managed to get some painting done over the week end. Actually quite pleased with the outcome. Hope you all like. so bumper is now back on the car. More pics tonight. 2 Quote
chirag1988 Posted November 25, 2015 Posted November 25, 2015 Good work mate, looks really good! Quote

Recommended Posts
Join the conversation
You can post now and register later. If you have an account, sign in now to post with your account.