

cyberfella
-
Posts
97 -
Joined
-
Last visited
Content Type
Profiles
Forums
Events
Gallery
Store
Everything posted by cyberfella
-
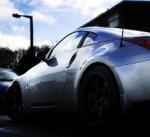
From the album: GT5 Online Drifting
Taking it online with other z's is a great way to spend a couple hours. -

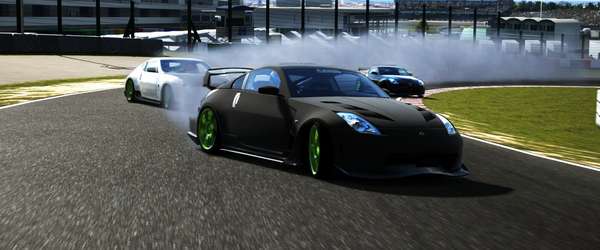
From the album: GT5 Online Drifting
Fast entry, no consequences, perfect photography. If only real life was this easy. -
I've recently had a few suspension upgrades and had them fitted via Cougar Store / All Fours Garage (one and the same) in Leicester, namely Adjustable rear camber arms and toe bolts and front and rear adjustable anti-roll bars (car was already running on lower springs). I got re-aligned at the nearby TyresGalore alignment shop. I received nothing less than absolutely superb service by both companies and would highly recommend them for friendly and very competent service. As for the results of the upgrades - a phenomenal improvement to bodyroll, accuracy and cornering far in excess of what I was expecting. I chose softest settings for the front sway bar and middle setting on the rear, but do your own research before you decide what to go for. It's always easily adjustable though). I'm so impressed I'm completing the work already done with whiteline drop links and some superpro poly bushes to replace the now ageing oem ones. I can't wait to take the results to the track for a shakedown.
-
I think this info belongs right here in the technical section. It'll help people diagnose their own suspension shortcomings when it comes to handling of their car when being drive by them, with their own driving style, so they can make more informed choices when modifying. Firstly, I don't profess to be an expert. That said, I have spent an entire day with Mike Whiddett and Frederic Aasbo talking suspension tuning in between their runs on the track. A treat I doubt I'll ever equal. Their comments reassured me that my own knowledge is solid and my findings tuning 450 different cars on Gran Turismo 5 Driving Simulator over the last 3 years for both racing and drift were indeed correct. They could not be seen to officially comment due to their affiliation with a rival racing game brand - EA Games/Speedhunters. My advice would be to get a PS3 with GT5 then get GT6 in December when it's released (it has an improved suspension model developed with KW Suspension). You will spend a lot less money learning about suspension and have a lot of harmless fun in the process. When you think you've got it dialled, get online and see if your settings actually work when the heat is on - they'll almost certainly be too aggressive and you'll back things off a bit. Then apply your knowledge to your real car in the confidence that it's right for YOU. Test it on a track, not on a road. A normal person would run out of bottle long before their suspension lets go if their setup is right but why risk it? Unlike GT5, death is real, there's no restart button. Don't spend real money and crash real cars learning about geometry when such a good simulator is available for so little money. GT6 is destined to be a PS3 title, not PS4 too, which is great. Advanced Suspension Setup, Toe? Camber? Castor? Rake? Spring Rates? Uhh?? Learn here! Front spring rate increase: More under steer; increase in proportional weight transfer to the front when rear wheel rate is not increased; reduces front traction when rear rate is not changed. Usable adjustment: 150-600 lbs/in Symptoms of too much adjustment: terminal under steer; front of car hops in corners; excessive wheel spin on inside front tire on FF cars. Front spring rate decrease: Less under steer; decreases proportional weight transfer to the front when rear wheel rate is not increased; increases front traction when rear rate is not changed. Usable adjustment: 150-600 lbs/in Symptoms of to much adjustment: Too much over steer; over steer then under steer if spring is so soft that the car bottoms out on lean, car bottoms out excessively with a jolting ride. Rear spring rate increase: More over steer; increase in proportional weight transfer to the rear when front wheel rate is not increased; increases rear traction when front rate is not changed. Usable range: 100-600 lbs/in Symptoms of too much adjustment: too much over steer; sidestep hop in corners; twitchy; pretty scary. Rear spring rate decrease: Less over steer: decreases proportional weight transfer to the rear when front wheel rate is not changed; increases rear traction when front rate is not changed Usable range: 100-600 lbs/in Symptoms of too much adjustment: car under steers; if way to soft car under steers then over steers as car bottoms out on lean; car bottoms out excessively with a jolting ride. Front anti-roll bar stiffer: more under steer Usable range: none to 1.25 inches in diameter Symptoms of to much adjustment: terminal under steer; lifts inside front tire off the ground witch can cause massive wheel spin on FF cars; also not good for most effective tire usage as inside tire is now doing nothing. Front anti-roll bar softer: less under steer Usable range: none to 1.25 inches in diameter Symptoms of to much adjustment: overstate scary; more like fun Rear anti-roll bar stiffer: more over steer Usable range: none to 1 inch in diameter Symptoms of too much adjustment: Big-time over steer. Can cause inside rear tire to lift off the ground. Rear anti-roll bar softer: less over steer Usable range: none to 1 inch in diameter Symptoms of to much adjustment: under steer; slow and boring Front tire pressure higher: less under steer by reducing slip angels on most tires Usable adjustment: up to 55psi hot Symptoms of too much adjustment: no traction- tire crowned so more under steer; adds wheel spin in FF cars; jarring ride; center of tire wears out Front tire pressure lower: more under steer by increasing slip angles on most tires Usable adjustment: not less then 20psi Symptoms of too much adjustment: edges of tire wear quickly because tire is folding over; feels mushy; tires chunk because low pressure means heat build up. Rear tire pressure higher: less over steer by reducing slip angles on most tires Usable range: up to 45psi hot Symptoms of too much adjustment: no traction—tire is crowned so more over steer; bad wheel spin on FR cars; jarring ride; center of tire wears out. Rear tire pressure lower: more over steer by incresing slip angles on most tires. Usable range: not less then 20psi Symptoms of too much adjustment: edges of tire wear quickly because tire is folding over; feels mushy; tires chunk because low pressure means heat build up More negative camber front: less under steer because of better lateral traction as tread is flatter on the ground under side load. Usable range: up to 3.5 degrees negative Symptoms of too much adjustment: poor braking; car is road crown sensitive; twitchy; front tires wear on inside edge More negative camber rear: less over steer because of better lateral traction as tread is flatter on the ground under side load. More rear grip Usable range: up to 2.5 degrees negative Symptoms of too much adjustment: more over steer; car feels twitchy in back; tires wear out on inside edge; less breakaway warning when limit is exceeded. Ride height to low (typical beginner mistake): car is twitchy with unpredictable dynamics. Bump steer make you life miserable. Usable range: usually 1.5-2.0 inches lower then stock unless car has been modified to go lower. Symptoms of too much adjustment: everything that could possibly go wrong: sudden over/under steer; twitchy due to bump steer; very harsh ride; premature tire wear. Toe in – front: car is stable going straight. Turn in is average Usable range: 0-1/8th inch Symptoms of too much adjustment: car has slow twitchiness under braking; feels odd; kills outside edge of tires Toe out – front: Car turns in well; works pretty well on FF car as they tend to toe-in under load. Usable range: 0-1/4 inch Symptoms of too much adjustment: Car is really twitchy under braking; car wanders on straight road; kills inside edge of tire Toe in – rear: car is less likely to over steer when the throttle is lifted Usable range: 0-1/8th inch Symptoms of too much adjustment: weird, slow, rocking movement in back; feels slow but still unstable; wears outside edge of tires. Toe out – rear: Helps car rotate useful in low speed and slalom courses; very common on FF pro rally cars. Usable range: 0-1/8th inch Symptoms of too much adjustment: not to good for street driving; causes lift throttle over steer; makes violent side to side rocking motions in the rear; tie wears on inside more. Positive front caster: helps stability; suspension will get more negative camber when turning; reducing positive caster reduces steering effort. (Negative caster is not usable) Usable range: 4-9 degrees positive Symptoms of too much adjustment: can increase under steer especially in cars with wide low-profile tires. Can increase steering effort. Single adjustable shock stiffer: Better turn in; better transient response; causes slower onset of over/under steer by slowing weight transfer depending on what end of the car is adjusted. Symptoms of too much adjustment: suspension becomes unresponsive; ride gets harsh; car skips over bumps, loosing traction; Causes a big delay in weight transfer resulting in strange handling like under steer then late corner stage over steer. Single adjustable shock softer: slower transient response; quicker onset of over/under steer Symptoms of too much adjustment: car oscillates due to under dampened spring motion, like a boat. Car gets twitchy in turns. Feels unstable. PARAMETER TO INCREASE UNDERSTEER TO INCREASE OVERSTEER Front Tire Pressure Lower Higher Rear Tire Pressure Higher Lower Front Tire Width Smaller Larger Rear Tire Width Larger Smaller Front Camber More Positive More Negative Rear Camber More Negative More Positive Front Springs Stiffer Softer Rear Springs Softer Stiffer Front Sway Bar Stiffer Softer Rear Sway Bar Softer Stiffer Have fun tuning your suspension. Use Toe and Camber to your advantage! Even Tire pressure helps.
-
Advanced Suspension Setup, Toe? Camber? Spring Rates? Learn here! Front spring rate increase: More under steer; increase in proportional weight transfer to the front when rear wheel rate is not increased; reduces front traction when rear rate is not changed. Usable adjustment: 150-600 lbs/in Symptoms of too much adjustment: terminal under steer; front of car hops in corners; excessive wheel spin on inside front tire on FF cars. Front spring rate decrease: Less under steer; decreases proportional weight transfer to the front when rear wheel rate is not increased; increases front traction when rear rate is not changed. Usable adjustment: 150-600 lbs/in Symptoms of to much adjustment: Too much over steer; over steer then under steer if spring is so soft that the car bottoms out on lean, car bottoms out excessively with a jolting ride. Rear spring rate increase: More over steer; increase in proportional weight transfer to the rear when front wheel rate is not increased; increases rear traction when front rate is not changed. Usable range: 100-600 lbs/in Symptoms of too much adjustment: too much over steer; sidestep hop in corners; twitchy; pretty scary. Rear spring rate decrease: Less over steer: decreases proportional weight transfer to the rear when front wheel rate is not changed; increases rear traction when front rate is not changed Usable range: 100-600 lbs/in Symptoms of too much adjustment: car under steers; if way to soft car under steers then over steers as car bottoms out on lean; car bottoms out excessively with a jolting ride. Front anti-roll bar stiffer: more under steer Usable range: none to 1.25 inches in diameter Symptoms of to much adjustment: terminal under steer; lifts inside front tire off the ground witch can cause massive wheel spin on FF cars; also not good for most effective tire usage as inside tire is now doing nothing. Front anti-roll bar softer: less under steer Usable range: none to 1.25 inches in diameter Symptoms of to much adjustment: overstate scary; more like fun Rear anti-roll bar stiffer: more over steer Usable range: none to 1 inch in diameter Symptoms of too much adjustment: Big-time over steer. Can cause inside rear tire to lift off the ground. Rear anti-roll bar softer: less over steer Usable range: none to 1 inch in diameter Symptoms of to much adjustment: under steer; slow and boring Front tire pressure higher: less under steer by reducing slip angels on most tires Usable adjustment: up to 55psi hot Symptoms of too much adjustment: no traction- tire crowned so more under steer; adds wheel spin in FF cars; jarring ride; center of tire wears out Front tire pressure lower: more under steer by increasing slip angles on most tires Usable adjustment: not less then 20psi Symptoms of too much adjustment: edges of tire wear quickly because tire is folding over; feels mushy; tires chunk because low pressure means heat build up. Rear tire pressure higher: less over steer by reducing slip angles on most tires Usable range: up to 45psi hot Symptoms of too much adjustment: no traction—tire is crowned so more over steer; bad wheel spin on FR cars; jarring ride; center of tire wears out. Rear tire pressure lower: more over steer by incresing slip angles on most tires. Usable range: not less then 20psi Symptoms of too much adjustment: edges of tire wear quickly because tire is folding over; feels mushy; tires chunk because low pressure means heat build up More negative camber front: less under steer because of better lateral traction as tread is flatter on the ground under side load. Usable range: up to 3.5 degrees negative Symptoms of too much adjustment: poor braking; car is road crown sensitive; twitchy; front tires wear on inside edge More negative camber rear: less over steer because of better lateral traction as tread is flatter on the ground under side load. More rear grip Usable range: up to 2.5 degrees negative Symptoms of too much adjustment: more over steer; car feels twitchy in back; tires wear out on inside edge; less breakaway warning when limit is exceeded. Ride height to low (typical beginner mistake): car is twitchy with unpredictable dynamics. Bump steer make you life miserable. Usable range: usually 1.5-2.0 inches lower then stock unless car has been modified to go lower. Symptoms of too much adjustment: everything that could possibly go wrong: sudden over/under steer; twitchy due to bump steer; very harsh ride; premature tire wear. Toe in – front: car is stable going straight. Turn in is average Usable range: 0-1/8th inch Symptoms of too much adjustment: car has slow twitchiness under braking; feels odd; kills outside edge of tires Toe out – front: Car turns in well; works pretty well on FF car as they tend to toe-in under load. Usable range: 0-1/4 inch Symptoms of too much adjustment: Car is really twitchy under braking; car wanders on straight road; kills inside edge of tire Toe in – rear: car is less likely to over steer when the throttle is lifted Usable range: 0-1/8th inch Symptoms of too much adjustment: weird, slow, rocking movement in back; feels slow but still unstable; wears outside edge of tires. Toe out – rear: Helps car rotate useful in low speed and slalom courses; very common on FF pro rally cars. Usable range: 0-1/8th inch Symptoms of too much adjustment: not to good for street driving; causes lift throttle over steer; makes violent side to side rocking motions in the rear; tie wears on inside more. Positive front caster: helps stability; suspension will get more negative camber when turning; reducing positive caster reduces steering effort. (Negative caster is not usable) Usable range: 4-9 degrees positive Symptoms of too much adjustment: can increase under steer especially in cars with wide low-profile tires. Can increase steering effort. Single adjustable shock stiffer: Better turn in; better transient response; causes slower onset of over/under steer by slowing weight transfer depending on what end of the car is adjusted. Symptoms of too much adjustment: suspension becomes unresponsive; ride gets harsh; car skips over bumps, loosing traction; Causes a big delay in weight transfer resulting in strange handling like under steer then late corner stage over steer. Single adjustable shock softer: slower transient response; quicker onset of over/under steer Symptoms of too much adjustment: car oscillates due to under dampened spring motion, like a boat. Car gets twitchy in turns. Feels unstable. PARAMETER TO INCREASE UNDERSTEER TO INCREASE OVERSTEER Front Tire Pressure Lower Higher Rear Tire Pressure Higher Lower Front Tire Width Smaller Larger Rear Tire Width Larger Smaller Front Camber More Positive More Negative Rear Camber More Negative More Positive Front Springs Stiffer Softer Rear Springs Softer Stiffer Front Sway Bar Stiffer Softer Rear Sway Bar Softer Stiffer Have fun tuning your suspension. Use Toe and Camber to your advantage! Even Tire pressure helps.
-

D1 Spec v3 Throttle Controller worth it or not ??
cyberfella replied to Y23DRH's topic in 350Z Modifications
Just thought I'd give a little update on this since I've "lived with it" for a few weeks now. I have to say, I absolutely love it. SP4 is where it's at. Makes the throttle response lovely and sharp but not undriveably so - that said you wouldn't let yer mum borrow the car with it left in SP4 like but for fast road driving and on the track I imagine it'd be superb if not essential. Fuel economy remains the same as far as i can tell although I've seen improved fuel economy since having my alignment done with zero toe front and rear - I've jumped from 27 to 30 mpg average on the same tyres, same route but with even more aggressive driving, so its a genuine hike in economy of at least 3mpg - nothing to do with the throttle controller though but worth noting if you're not straight and true in the wheel dept. The ec5 mode is superb for use while the car is warming up and for reversing into tight spaces and garages as it calms things right down, but I'd not use it to try to achieve better economy. I had a little fun on the way to santa pod last weekend with an Aston Martin DB9. OK, he had longer legs than me and all that, but without the throttle controller set to SP7, I'd not have stood a chance keeping with him. As it was I got a thumbs up from the guy in the passenger seat after taking it in turns a couple times to overtake one another at high RPM. I can imagine the driver saying "thats not standard" when in actual fact, it pretty much is but for a £120 gadget sat between the loud pedal and ecu making a big difference that a foot could not make on its own (i've tried). -
I got fantastic service from these folks last week when I got my adjustable rear camber arms fitted, followed by an excellent alignment service at the nearby tyresgalore.co.uk tyre shop (managed to get within one minute of a degree accuracy). Will definitely use again. Highly recommended.
-
Terrible. My condolences to their families who've lost them.
-
Another new member in Derbyshire
cyberfella replied to cyberfella's topic in Introductions & Welcome Messages
I'm not, if you meant me. -
Nice car. Although the slider in me has a weakness for that PS13 you had. Oooh. And thanks for the initial write up by the way. Really interesting, and a good effort mate. One word of warning about parking your zed or turning in to go through tight gaps -they're longer at the front than you think. I'm forever bumping mine (350Z mind you, not a 370Z) - a silly issue I've never had in any car I've ever had before. New front bumper soon I think.
-
Another new member in Derbyshire
cyberfella replied to cyberfella's topic in Introductions & Welcome Messages
Hey, thanks for the tip matey. I'll come up, deffo. -
I have some megan adjustable rear camber arms on back order via mad motors. it's been weeks now. Given that I'm on eibach lowering springs, would it be worth me cancelling the order and sourcing the eibach kit including toe bolts instead? rapid replies appreciated....
-
Another new member in Derbyshire
cyberfella replied to cyberfella's topic in Introductions & Welcome Messages
Not my choice, they're what came on the car. The thruxtons actually look quite nice on the lowered car so they can stop on the car for now, but will be getting replaced at some point as they need a refurb anyway and I'm not paying to refurb TSW's. I'm more into the looks of track/drift style rims rather than the more showy/ornate styles. I'd prefer to go JDM too, something proper from Rays ideally, but its difficult to justify when Rota produce some practically identical looking rims for a lot less and our roads are gash anyway. it'd break my heart to damage a polished rays, whereas i'd just shrug and replace a rota. I4N also has TSW's fitted to his 04 Zed... Full range of Rota wheels available, so when the time comes, do let us know... OK, cool, I will do. I figured I'd keep the TSW's and existing tyres as a spare set for drift days and have a nice, new mint set with brand new rubber on for the rest of the time, not that this is my daily driver. I aready got a stack of new tyres in my garage ready to go on em. Some people buy engine bay dressup parts and take photos of their cars, I buy tyres. What does that tell you? -
Another new member in Derbyshire
cyberfella replied to cyberfella's topic in Introductions & Welcome Messages
This is where I found it. It's amazing what folk throw away these days. -
Another new member in Derbyshire
cyberfella replied to cyberfella's topic in Introductions & Welcome Messages
Not my choice, they're what came on the car. The thruxtons actually look quite nice on the lowered car so they can stop on the car for now, but will be getting replaced at some point as they need a refurb anyway and I'm not paying to refurb TSW's. I'm more into the looks of track/drift style rims rather than the more showy/ornate styles. I'd prefer to go JDM too, something proper from Rays ideally, but its difficult to justify when Rota produce some practically identical looking rims for a lot less and our roads are gash anyway. it'd break my heart to damage a polished rays, whereas i'd just shrug and replace a rota. -
D1 Spec v3 Throttle Controller worth it or not ??
cyberfella replied to Y23DRH's topic in 350Z Modifications
Jez at Horsham Developments is where I got mine. I ended up replacing the OBD2 plug on mine for one thats not quite so tight around the OBD2 socket on the car (it was an absolute t--t to get off once I'd pushed it on). The wiring loom and general install was fine, but be aware that the two grey plugs that go together have to be fitted together in what looks like an "upside down" manner in order to be correct, otherwise it wont work, wont light up the display and your engine will stall when you start the car. The reason the plugs look upside down when you fit them together, is so that you can thread a zip tie all the way around the two plugs to hold them securely together. I also had to remove the white plastic insert in the plug between the pins. This would all make much more sense if you had one in your hand to look at while I describe my (and many others) woes. Hugely recommended upgrade though. Despite being called a 7 step throttle controller on the outside, it has 7 economy modes (ec4 or ec5 is lovely for normal driving and especially reversing) and 9 sport modes up to SP9. Just make sure there's no one about if you switch to SP7 and up because it's pretty mad, but great if its just you and the tarmac. you'll also need to google "350z CEL reset" too if you're check engine light comes on after faffing around with it and turning your ignition on and off a few times (inevitable). -
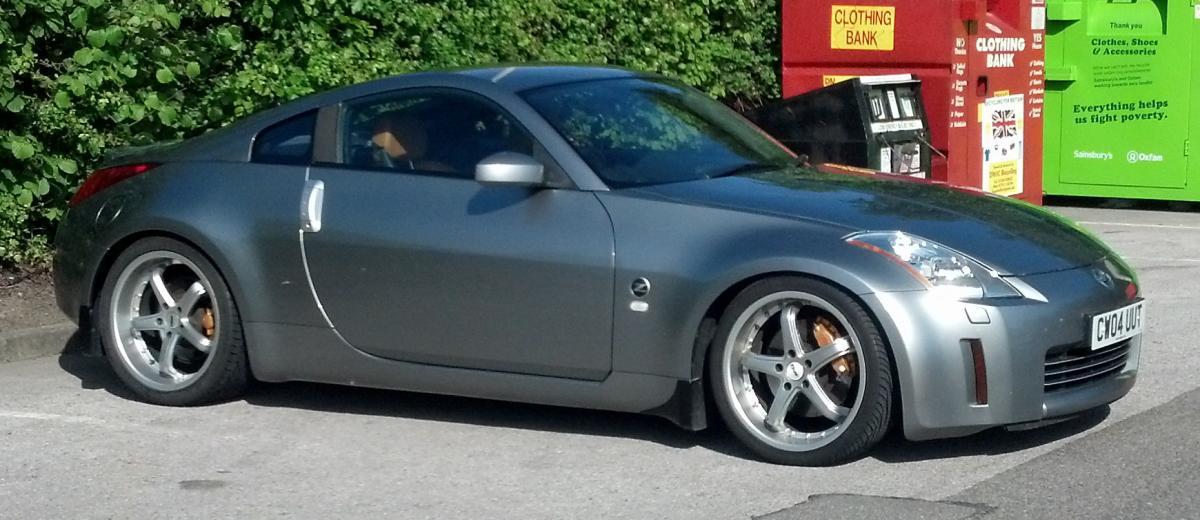
Good day to you all. I'm a new member on the forum having recently bought my project managers 04 350Z recently. I live in Derbyshire currently, but hail from the Westcountry originally. Freelance work means I move about a little. May I thank you for the very useful, well moderated and easy to find information that I have used to help me understand and overcome some minor issues with my D1 Spec Throttle Controller and rear camber.I'll endeavour to link an image of the car, but essentially it's an 04 GT in Grey Metallic, sat 40mm lower on Eibach Pro Kit springs with 19" TSW Thruxtons (8.5 front, 9.5 rear) on Avon ZZ5 rubber with a K&N typhoon kit up front and a milltek stainless out back with the afore mentioned D1 Spec throttle controller to dial in however much fun I feel like having today. Soon it'll have some Megan Racing adjustable rear camber arms to pull the rear camber back into zero at the back. It's had new engine and transmission oil change at Nissan and runs very well. Coming from a highly modified subaru, I love the low height, tall gears and NA's more linear torque curve and RWD. It's a real pleasure to drive - like a luxury go-kart or something I guess. I'm a mahoosive fan of drifting, although I keep it to GT5 on the PS3, not on real roads. If anyone wants to drift online with me in their virtual Z, then my PSN name is also cyberfella. Laters!

-
Hi, I'm a new forum member from Derby too. Enjoy your car! Be safe!


