ZaneDylan Posted May 28, 2025 Author Posted May 28, 2025 On to prettier things, the carbon hatch I had bought had a lot of scratches and defects, I wet sanded and used several grades of polish to bring the carbon back to life and take out the majority of scratches. I then gave it a healthy coat of Bilt Hamber Double Speed wax. I also took to widening some of the clip holes which allowed me to finally put the interior plastics back in - this reduced a lot of rattle and cabin noise and made everything feel a lot more OE and complete. 1 Quote
ZaneDylan Posted May 28, 2025 Author Posted May 28, 2025 Keeping with the theme of improving the interior, I wanted to tie in the head unit with some more modern touches, I know Ambient lighting isn't to everyone's taste and it can easily be overdone. I removed the door cards, separated the suede part from the rest of the door and laid in my LED strips, then I removed the glovebox and used superglue to stick the glovebox section down as 3M tape wasn't strong enough. 1 Quote
ZaneDylan Posted May 28, 2025 Author Posted May 28, 2025 This is a job I've been putting off... The intake pipe has been covered in gold heat tape - its peeling and it has been applied terribly, is bunched up in many places. I personally don't believe gold tape makes enough of a difference to intake temps to make it even remotely worth it for how bad it looks. So I first struggled with peeling it off and using a heat gun with plastic razors but that genuinely only made it worse. Then I used a chemical sticky stuff remover (goo gone wasn't strong enough) I then gave it a bath in some washing liquid and water before hitting it with a generous amount of metal polish on a drill attachment, I'm happy with the results 1 Quote
ZaneDylan Posted May 28, 2025 Author Posted May 28, 2025 As shown in the last update the timing chain cover is also pretty dull, so I gave it two passes with alubright and tried to polish everything I could reach Quote
ZaneDylan Posted May 28, 2025 Author Posted May 28, 2025 Around febuary is when I started to get frustrated with all of the little issues and decided to tackle all of them - first was the intake pipe and polishing in the last two posts. In this post is where I finally attempted to fix my squeaking chair, I removed it from the car, disassembled it and coated everything in spray on silicone. I destroyed the air quality in my house (because UK weather) but I could finally drive my 70 in peace 2 Quote
ZaneDylan Posted May 28, 2025 Author Posted May 28, 2025 Part 3 of the little things, the side skirt extensions 1) aren't to my taste 2) make it harder to jack up the car 3) were battered and loose in places So with a variety of 10, 8 and 7mm self tappers being removed, I took those extensions off and sold them for dirt cheap on market place 2 Quote
ZaneDylan Posted May 28, 2025 Author Posted May 28, 2025 To show off the 2nd coolest mod on the car (boost), I decided to put my genuine Nismo V2 front bumper under the knife. I cut out the grill section and gave my charge cooler a clean and a coat of VHT silver. I used a multitool and a Dremel to perform the surgery and in all honestly its way cooler to see the cooler. I need to cover up those old license plate holes too. 2 Quote
ZaneDylan Posted May 28, 2025 Author Posted May 28, 2025 (edited) I swapped out my spark plugs for some GTR plugs (one step colder) then went off the PetrolHeadism and took plenty of pictures that weekend, had a great time with great people Edited May 28, 2025 by ZaneDylan 2 Quote
ZaneDylan Posted May 28, 2025 Author Posted May 28, 2025 The car from the beginning was giving me an intermittent limp mode issue, it wasn't very often in the beginning, but became more and more frequent, all 4 fault codes it was throwing was pointing towards one thing and unfortunately it is a fault with the stillen supercharger kit. Luckily for me Horsham Developments make a replacement loom for the throttle body and they fixed the issue quickly, as well as my exhaust leaks. I do have the say the new loom not only fixed the issue but also looks a lot nicer, so massive shout out to them. While I was there and now the car was running better than ever we decided to do a dyno run to see if the 530hp I was told when I bought the car was a fib like I thought it was... 2 Quote
ShortPaul Posted May 28, 2025 Posted May 28, 2025 Great work mate,the car is looking much better now 😁 1 Quote
ballistic Posted June 1, 2025 Posted June 1, 2025 (edited) On 28/05/2025 at 12:56, ZaneDylan said: This is a job I've been putting off... The intake pipe has been covered in gold heat tape - its peeling and it has been applied terribly, is bunched up in many places. I personally don't believe gold tape makes enough of a difference to intake temps to make it even remotely worth it for how bad it looks. So I first struggled with peeling it off and using a heat gun with plastic razors but that genuinely only made it worse. Then I used a chemical sticky stuff remover (goo gone wasn't strong enough) I then gave it a bath in some washing liquid and water before hitting it with a generous amount of metal polish on a drill attachment, I'm happy with the results The legendary finger test! Youve done loads of little snagging bits and general tidying. nice work. Edited June 1, 2025 by ballistic 1 Quote
ZaneDylan Posted June 3, 2025 Author Posted June 3, 2025 Results - I've included both the power graph and the air/fuel - boost graph too Overall it meets my original expectation from when I first bought the car around mid-4s, still very strong numbers out of this kit 467 isn't bad at all and I will be back to Hdev at some point with goals to climb towards the mid-5s Overall the power looks to be super linear and the torque curve looks nice and flat which is definitely a positive for how I intend to drive the car 3 Quote
ZaneDylan Posted June 4, 2025 Author Posted June 4, 2025 Shortly after my visit to HDev I attended JapFest and had a short blast on track- the car feels great in the straights however a couple issues are still prevelent and I ran into a problem I found out about after being on track - the 370z's fuel surge issue I went out there with just under a half tank - meaning on the RH turns the fuel pump was being starved. Seen the kits go for £800+ so I doubt I'll be fitting one anytime soon and will just top up my tank before going out on track from now on. I also am still experiencing some wheel wobble at speed and harsher wobble under acceleration. I'm plan to lower the front suspension a tad for better fitment and then get an alignment and start looking into swapping out a lot of my brake parts. 2 Quote
ballistic Posted June 4, 2025 Posted June 4, 2025 How low do you have to be on fuel for it to be an issue? Quote
ZaneDylan Posted June 9, 2025 Author Posted June 9, 2025 On 04/06/2025 at 16:49, ballistic said: How low do you have to be on fuel for it to be an issue? So for me it happened at around half a tank so I'd guess around there - on public roads I've never found that limit even on spirited drives. Tracks are much higher Gs I guess, Z1 Motorsports makes a kit which I'll do later down the line, if I'm still committed to tracking the car by the time its in the budget ;( 1 Quote
ZaneDylan Posted June 9, 2025 Author Posted June 9, 2025 Bonnet upgrade, the seibon bonnet on the car being painted really bothered me and since I didn't feel like stripping the paint off and seeing what was underneath I ordered a very aggressive and imo better style of vented bonnet. I picked this one not only because I liked the way it looked but also that the louvers on it and the placement make sense aerodynamically to pull more hot air out of the engine bay and hopefully pull cold air through the rad and coolers. Theoretically (because there's no wind tunnel testing for this bonnet) the louvered design will create a low pressure zone over the vents resulting in the air being pulled out of the engine bay as well as creating a little bit of downforce. What steered me away from the ams and seibon styles was that the vent placement made no sense for cooling. Overall, install was pretty straightforward with the help of Ballistic, fitment was genuinely really good for a carbon part, the only problem was one of the latch threads was damaged when installing but a quick tap and its on 2 Quote
Keith D Posted June 9, 2025 Posted June 9, 2025 I'm close to pushing the button on a carbon bonnet, how do you find the OEM catch? Any issues? Do you think it needs bonnet pins? Interested in your experience Looking good btw Quote
ZaneDylan Posted June 9, 2025 Author Posted June 9, 2025 (edited) 16 minutes ago, Keith D said: I'm close to pushing the button on a carbon bonnet, how do you find the OEM catch? Any issues? Do you think it needs bonnet pins? Interested in your experience Looking good btw The bonnets lighter so you need to push it down a little while pulling the catch to open, imo there's 3 points of contact up front so I feel pretty confident in it not lifting, but others probably have different opinions Install is definitely a two person job but its straightforward otherwise something to think about is how you intend on doing the window washers as I don't have any atm Edited June 9, 2025 by ZaneDylan 1 Quote
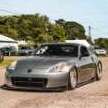
ZaneDylan Posted June 11, 2025 Author Posted June 11, 2025 Had this for a while but forgot to post it on here, my custom show plate the kanji on the bottom left is a "Z" the word up top says Nissan, 34 because its a Z34 and 370 for obvious reasons. I'd really like a different spoiler - something more like the one my friend with the skyline has in this pic - anyone got any recommendations? 2 Quote
Keith D Posted June 11, 2025 Posted June 11, 2025 (edited) Torqen have the spoiler off their demo, drop them an IM. Think it's along the lines of what you are looking for. I did have a look at it but I'm after a carbon duck bill myself. Edited June 11, 2025 by Keith D Quote
ZaneDylan Posted June 11, 2025 Author Posted June 11, 2025 2 minutes ago, Keith D said: Torqen have the spoiler off their demo, drop them an IM. Think it's along the lines of what you are looking for. I did have a look at it but I'm after a carbon duck bill ideally. lol you're welcome to buy mine after I get something else Quote
ZaneDylan Posted June 18, 2025 Author Posted June 18, 2025 For the longest time my ride heights been a little funny, the front being way higher than the back. So I bought the right C-Spanners from BC and adjusted it... At first we made it far too low, I loved the way it looked at this height but I was scraping on any change in the road surface (RIP flexies) So I went back in and fixed it (about an inch lower than original and 1.5" higher than the too low) - while in there I found that one of the previous owners had overdone the preload by over 2"s lol - so I reset that to the BC recommended 5mm - so as well as ride height looking a lot better my ride quality has vastly improved too. I set my rebound to 5 clicks stiff of centre in the front and dead centre in the rear unfortunately compression on nearly all of the struts is seized so I can't adjust that for now. 4 Quote
ZaneDylan Posted June 19, 2025 Author Posted June 19, 2025 Following on from my last post I went for an alignment after playing with my suspension. Everything is mostly straight now however my front upper control arms despite being adjustable are seized to the point where I'm going to need to replace them in order to run the specs I'm after 1 Quote
ZaneDylan Posted July 2, 2025 Author Posted July 2, 2025 It was time to prep for a 2000 mile trip through Europe and back for Ultrace First up was the o2 sensor that was throwing a code and then was a replacement ac unit as the clutch was broken on the last one - unfortunately there's a leak elsewhere in the system which I didn't have time to fix before the trip (it was hot) there'll be updates on the rest of the trip soon 1 Quote

Recommended Posts
Join the conversation
You can post now and register later. If you have an account, sign in now to post with your account.