


polaris
-
Posts
157 -
Joined
-
Last visited
Content Type
Profiles
Forums
Events
Gallery
Store
Posts posted by polaris
-
-
I forgot to mention the results of having the fuel injectors cleaned, which a few people might find interesting. I used Mr Injector UK at a cost of £141.48 (incl. delivery) for all six injectors.
Fuel Injector Service Report
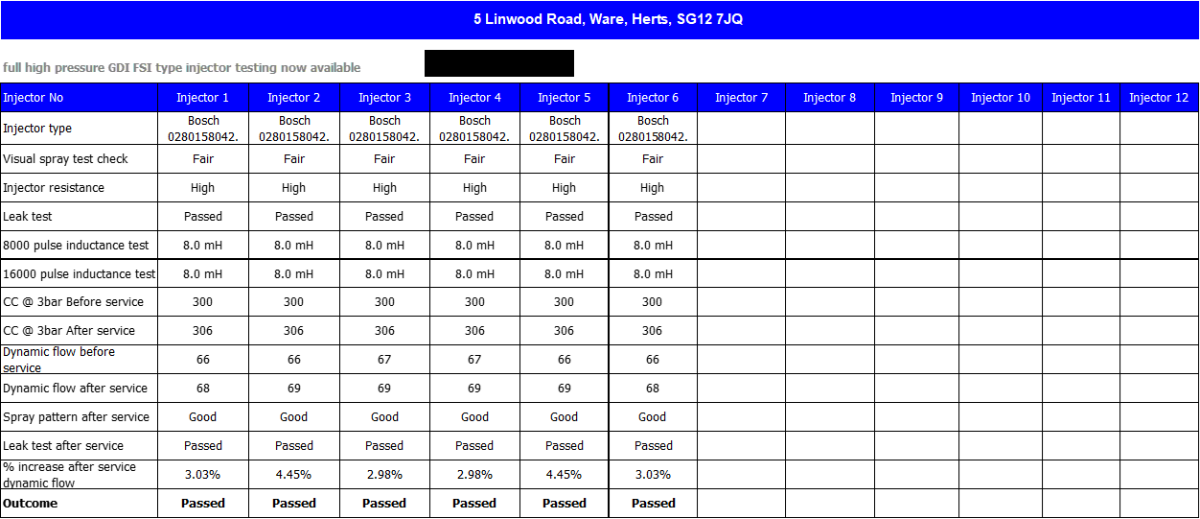
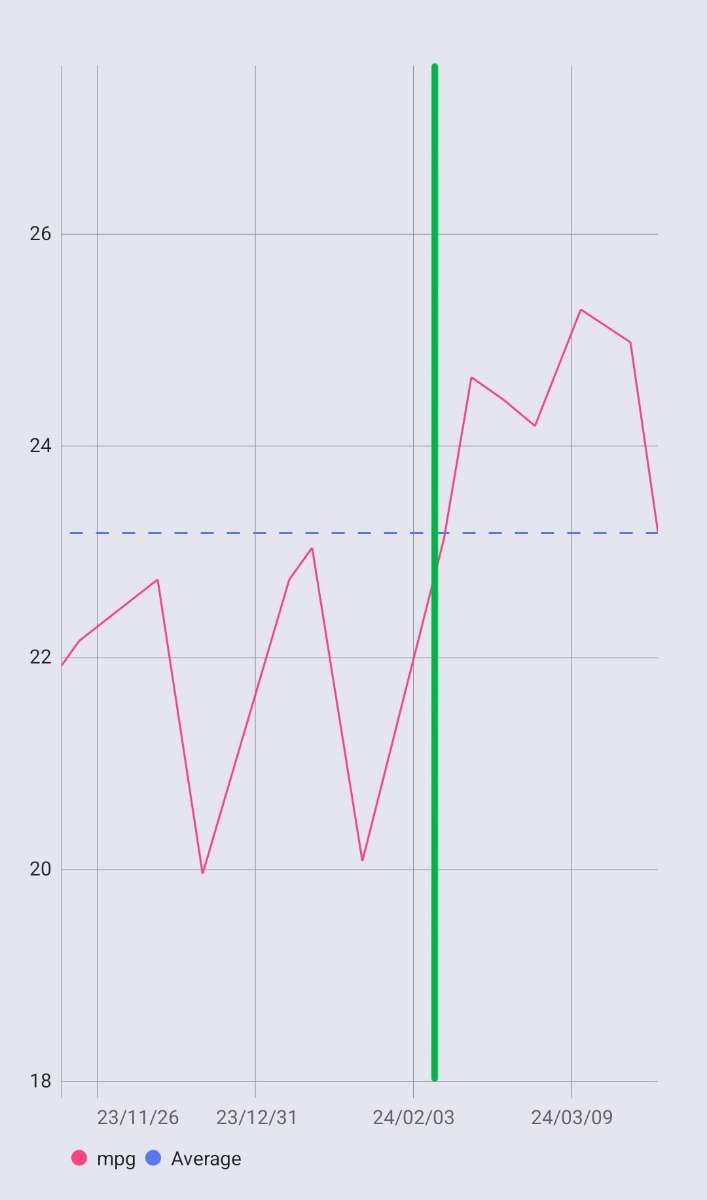
As you can see, they were in pretty good shape to start with. However, there's been a noticeable improvement in fuel economy. I know correlation doesn't imply causation but I think it's valid to say in this case. The last six fill-ups have all shown above-average MPG.
The green line is when they were cleaned.
Fuelio
-
 3
3
-
-
On 10/04/2024 at 07:50, davey_83 said:
Any updates? ☺️
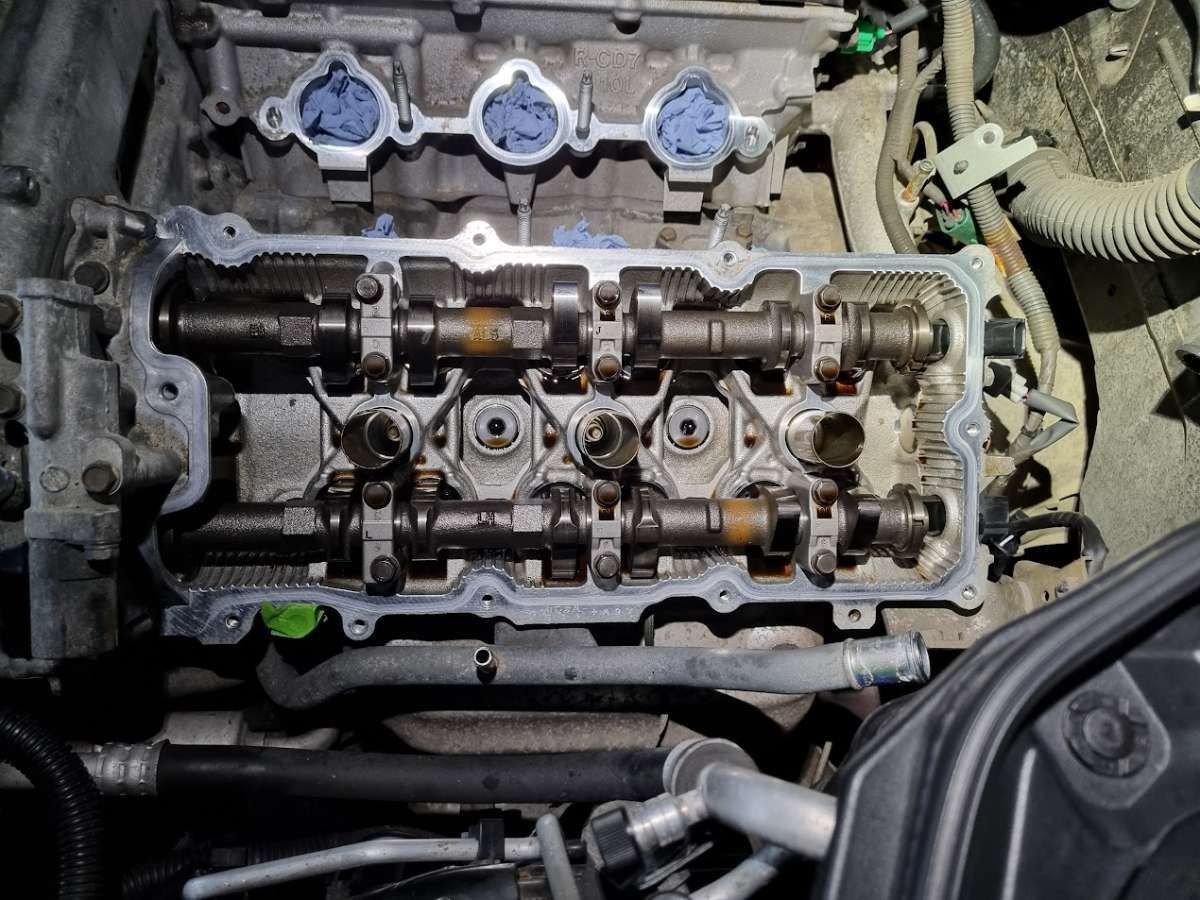
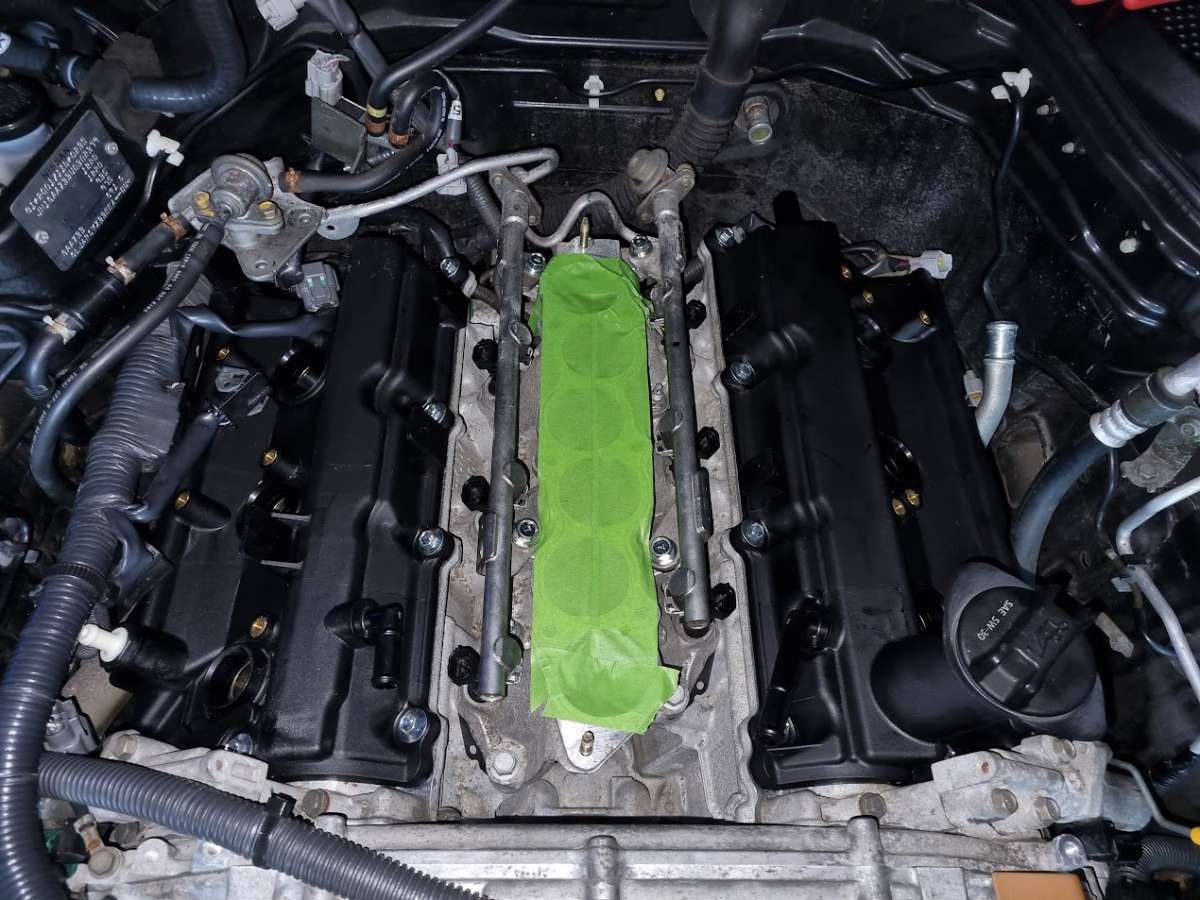
My bad, I've been slacking. I've had my hands full with this restoration and the dreaded work. I finished the valve cover job in the end and completed everything else I set out to do. The cams on both sides looked spotless and I couldn't see any wear on the lobes. I must've spent the good side of two hours cleaning all of the surfaces before putting the new valve covers on. All of the parts used were Nissan OEM direct from Japan. It's been over two months now since I did this job and it seems to have fixed the oil leak.
D/S Cams
A small pea-sized amount of Permatex RTV in the corners like the FSM states.
New Valve Covers On
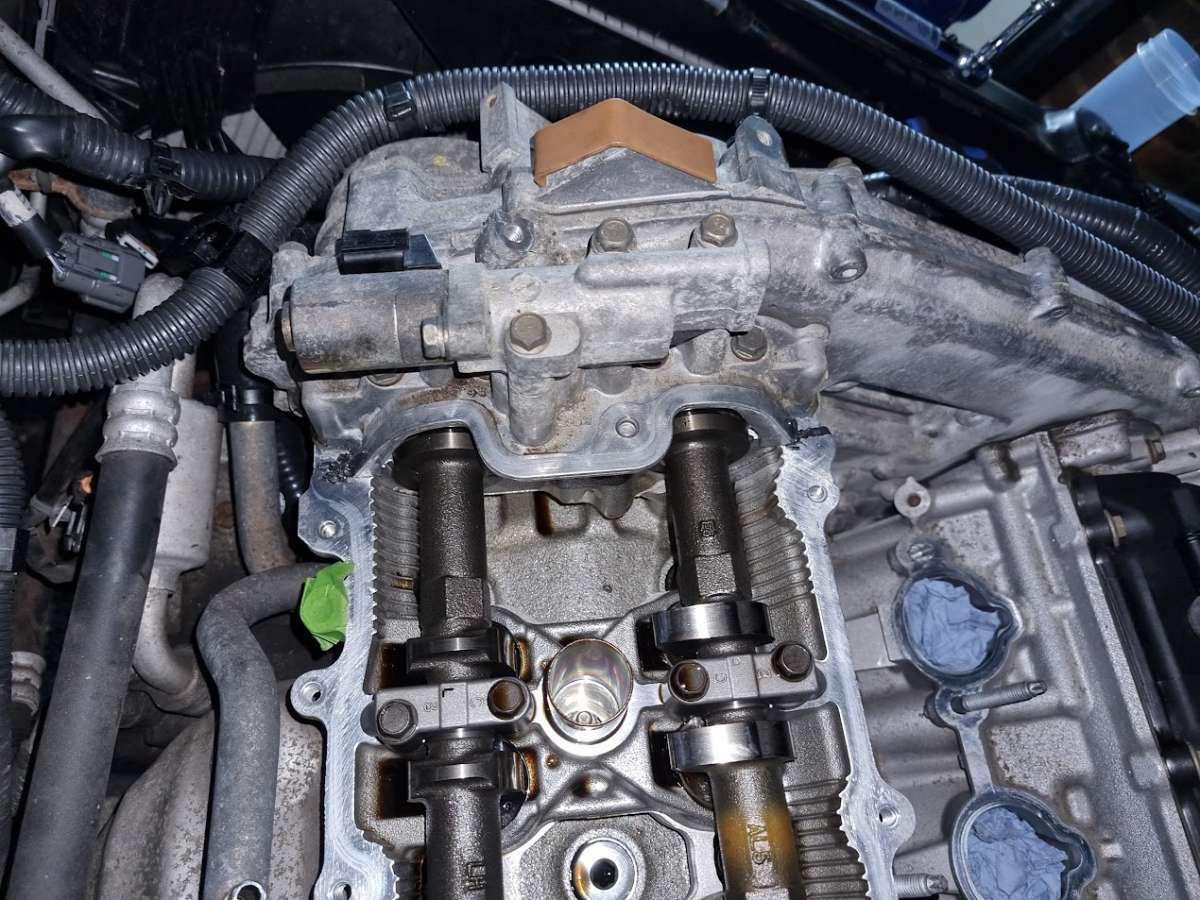
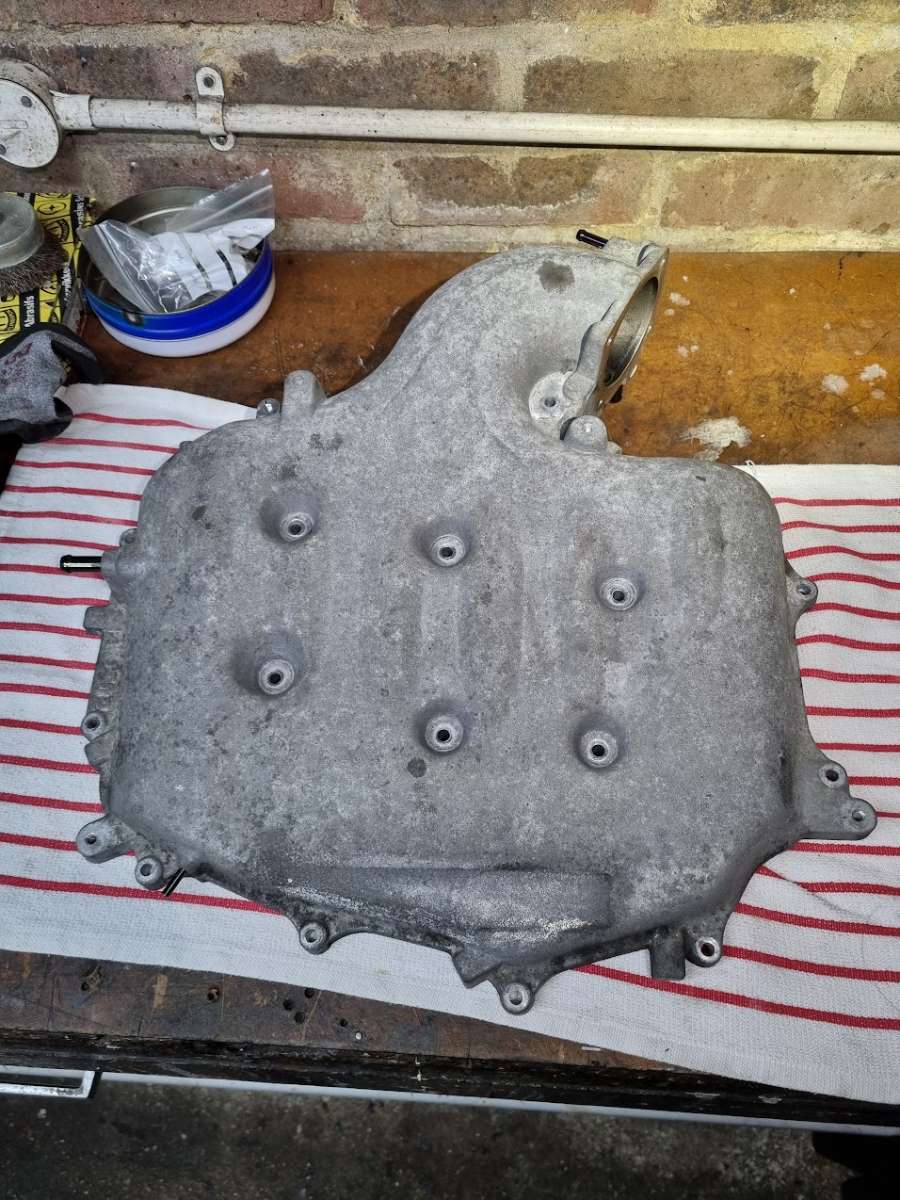
Upper Plenum: Before
Upper Plenum: After
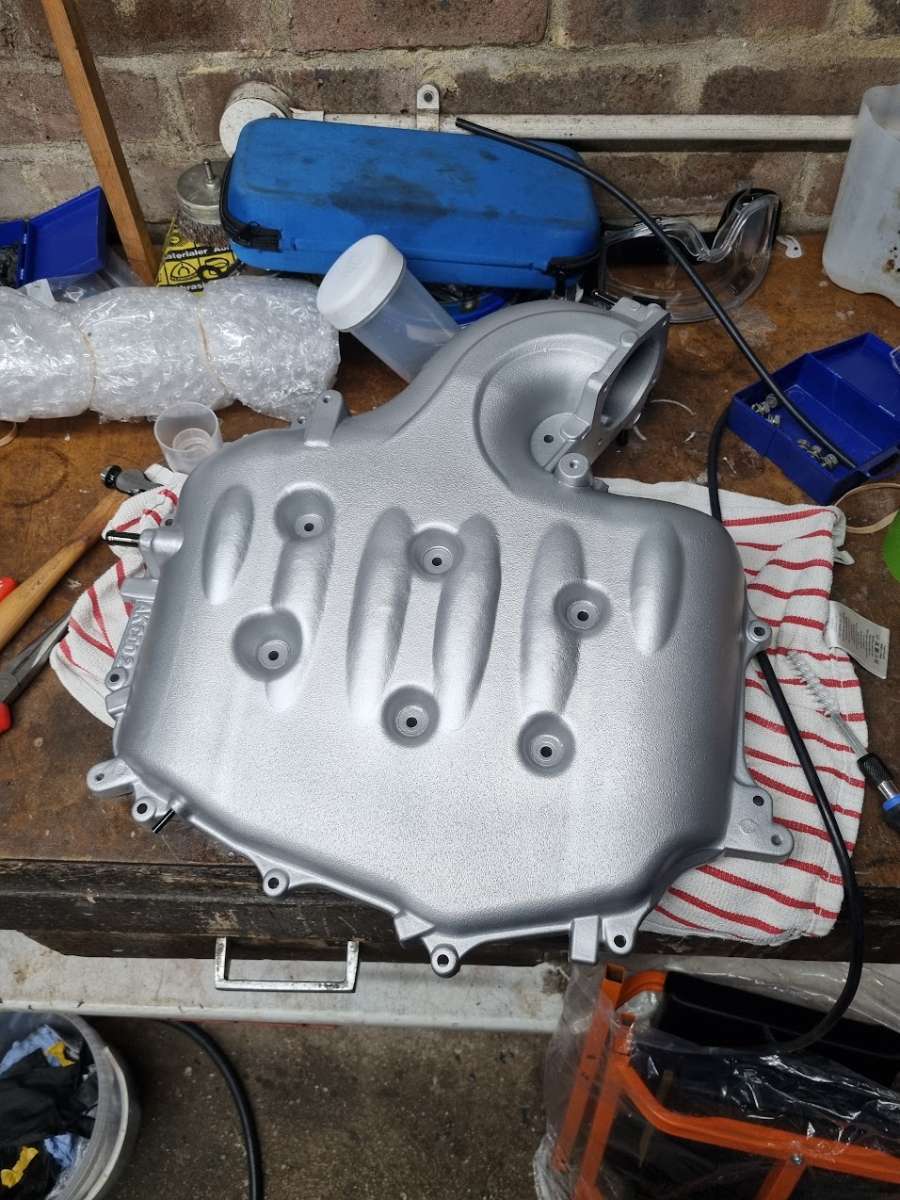
It was vapour blasted if anyone wants to know. I applied XCP Rust Blocker Clear Coat so it should stay nice and shiny for years to come. Separately, I had the strut bar and all of those small brackets (incl. PS reservoir and coolant tank) around the engine bay powder coated.
Engine Bay
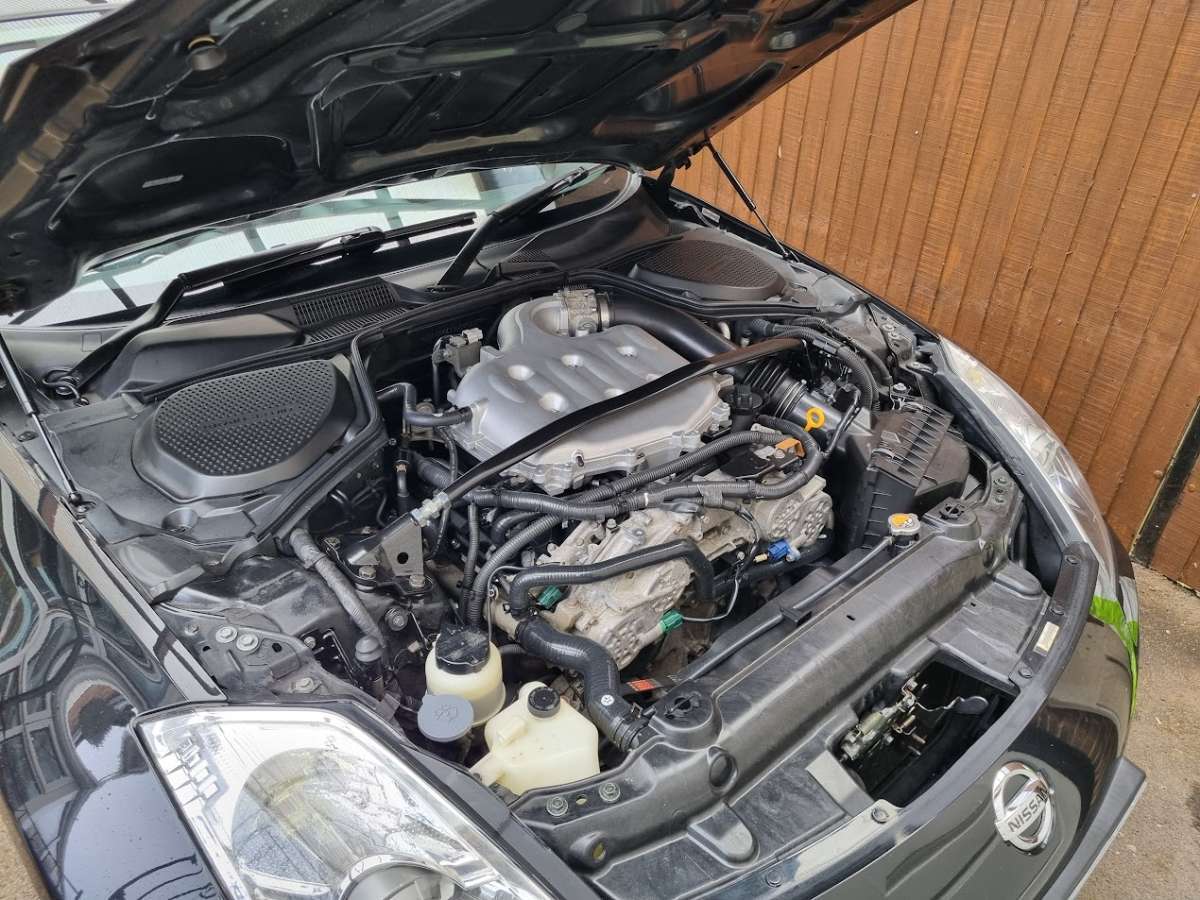
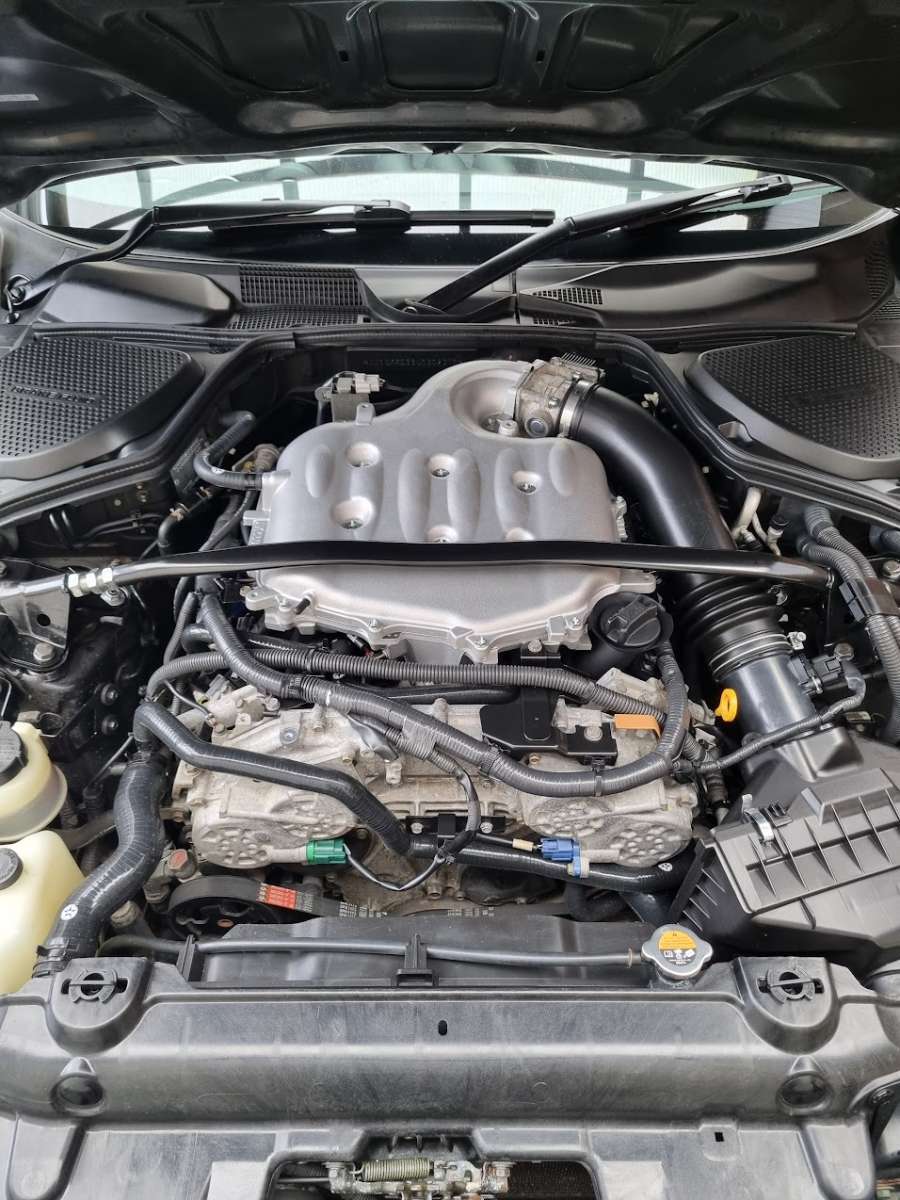
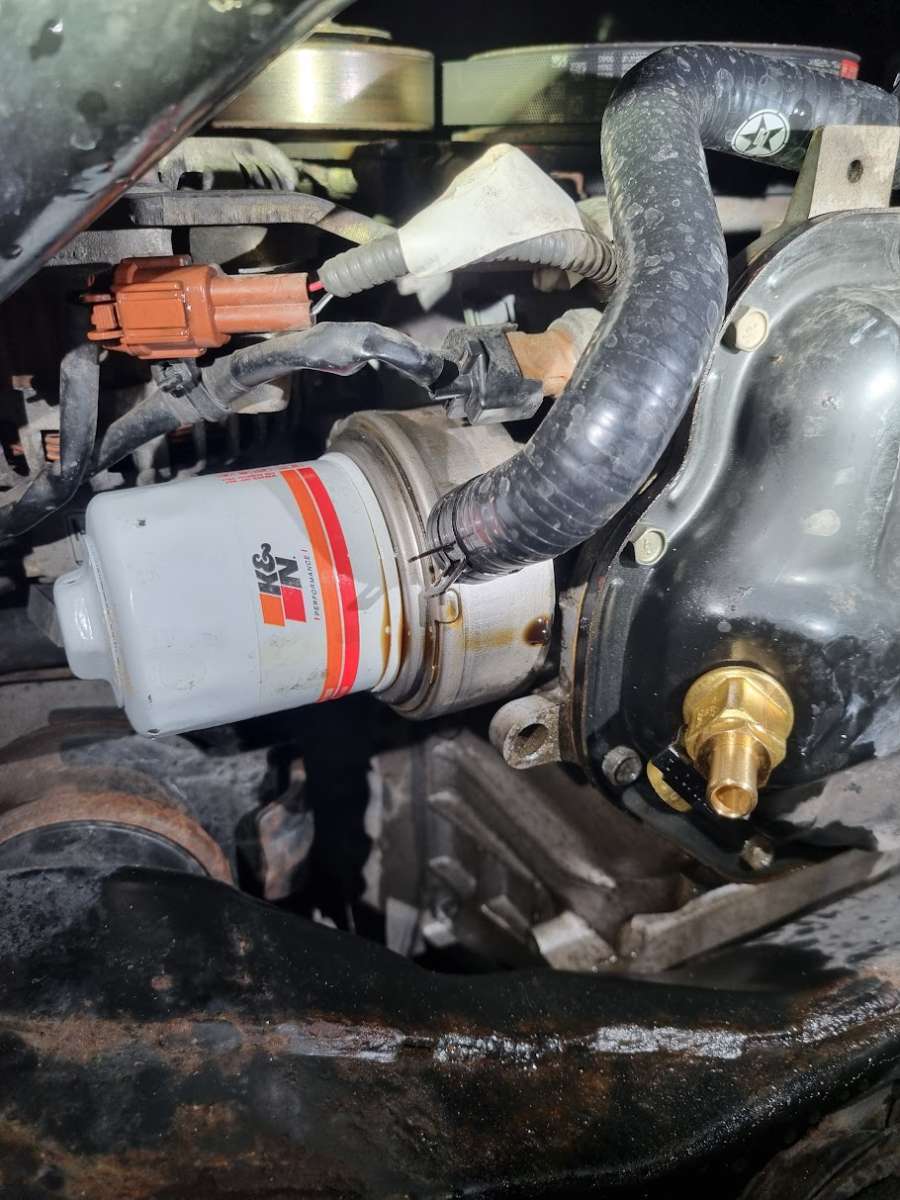
I forgot to mention that I also replaced all of the old hoses with silicone hoses. The two hoses for the heater core were absolutely welded on! I had to break out the scalpel and use plenty of elbow grease. I also had a small oil leak around the oil cooler after a routine service using Castrol 5W-30 and a K&N oil filter (HP-1008). I followed the usual steps: primed the filter, applied a bit of new engine oil to the gasket and torqued to spec, so I'm not sure why it started leaking.
Oil Leak
I thought it might've been the oil cooler gasket so I replaced that. The photo is pre-replacement.
Oil Cooler Gasket
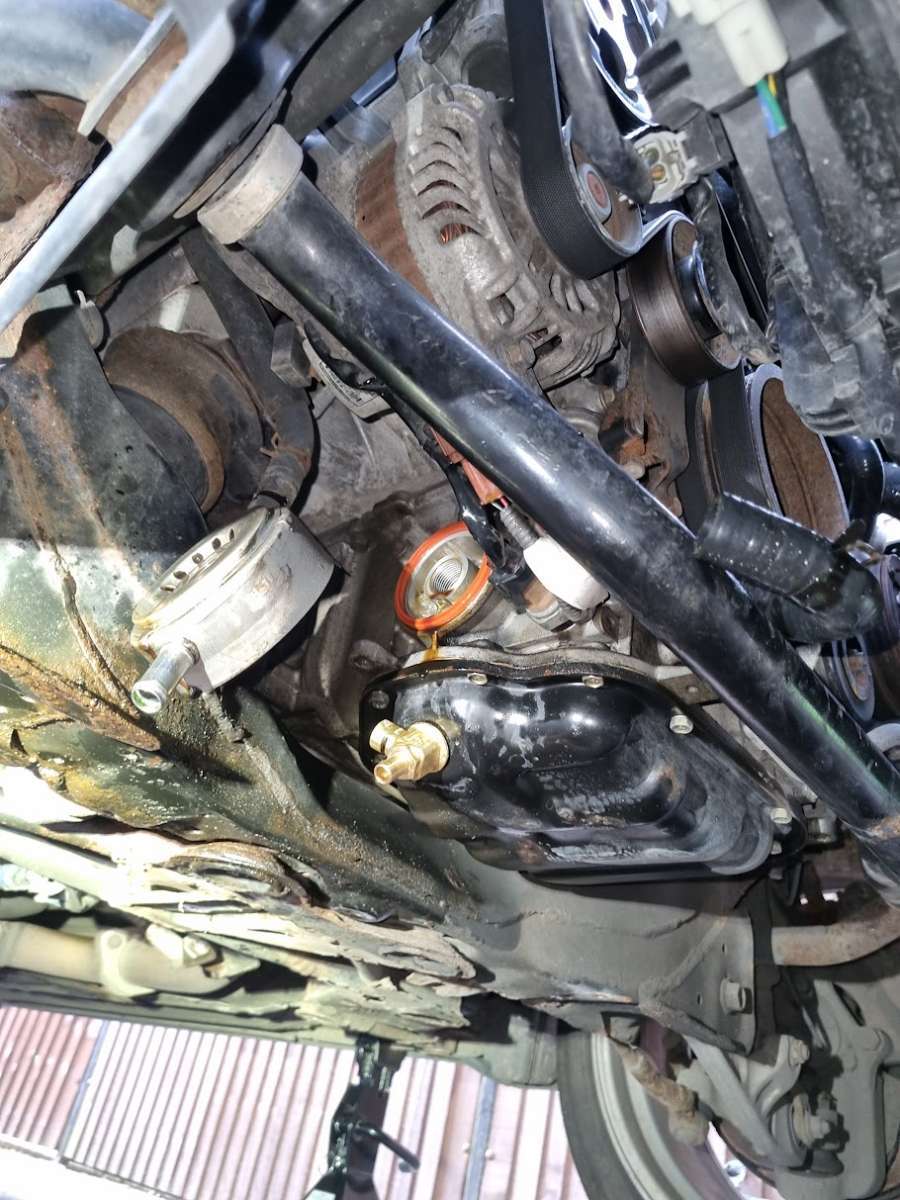
However, that still didn't fix it. In the end, I just bought a new Nissan OEM oil filter from eBay and put that on, which sorted it immediately. I can't say I'll be in a rush to buy another K&N filter anytime soon.
Bonus Photo
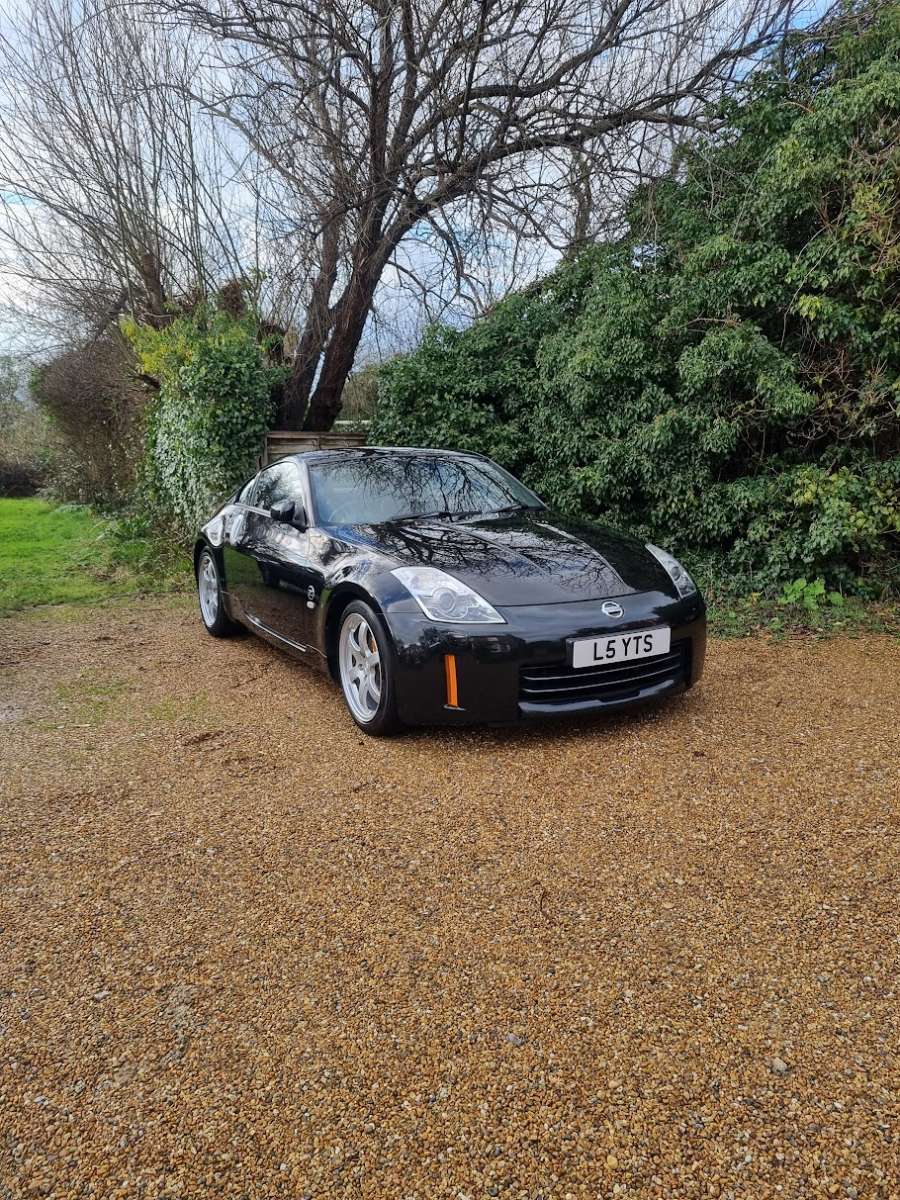
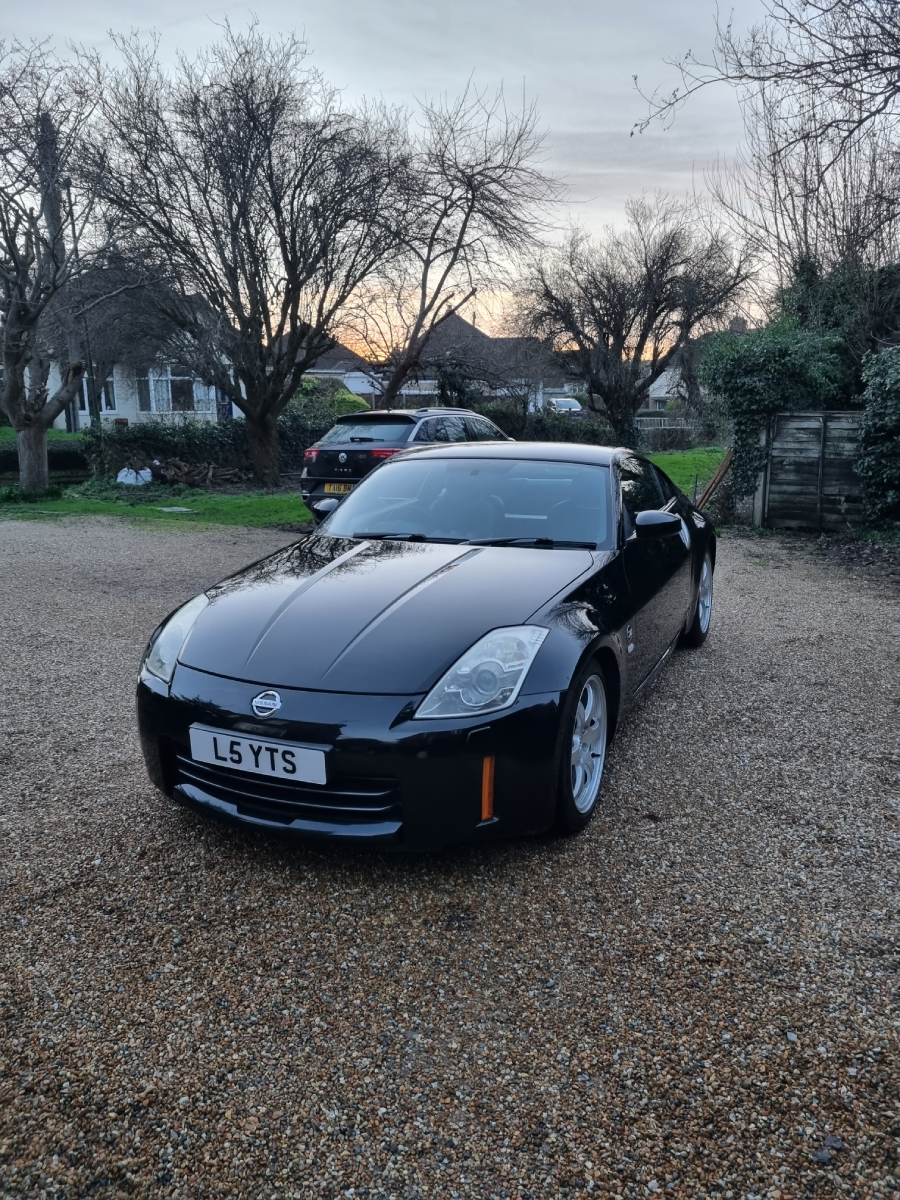
It's been over two years now since I bought my Z. Worth every penny...
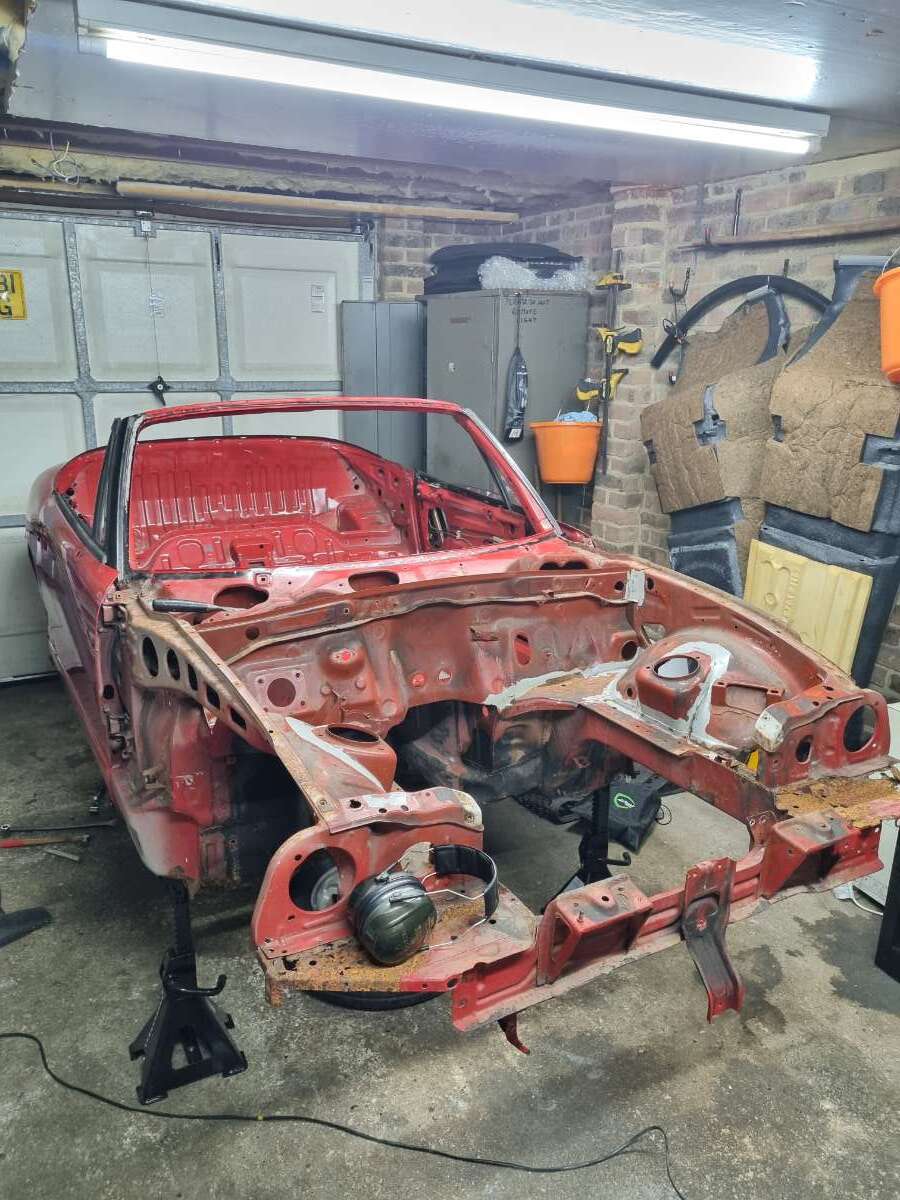
Now, for the Cappuccino...
The Kebab
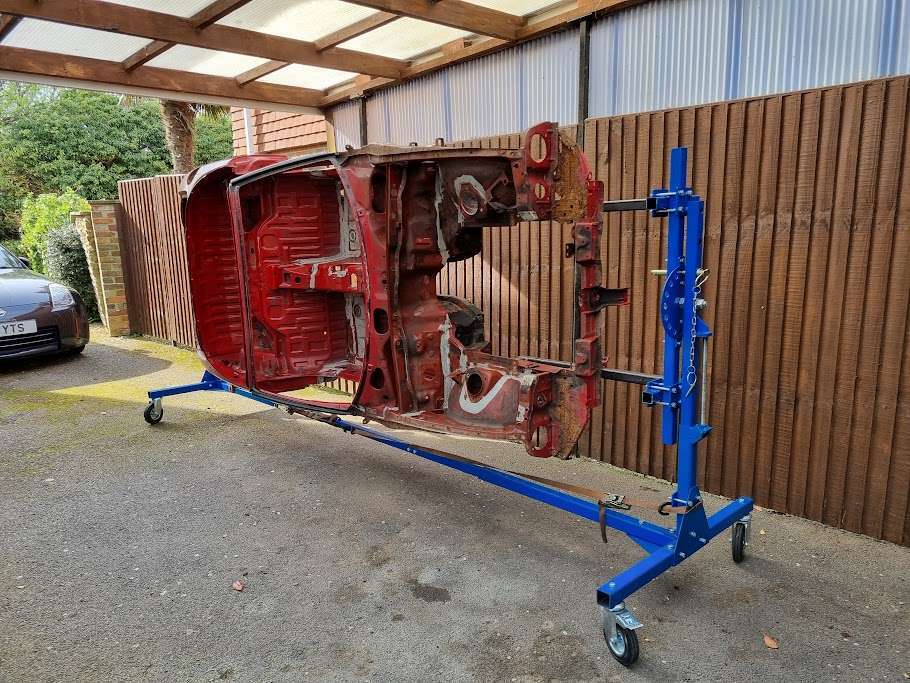
Hopefully, it's heading off for sandblasting, welding and paint later this month but getting everything organised and lined up is proving to be difficult.
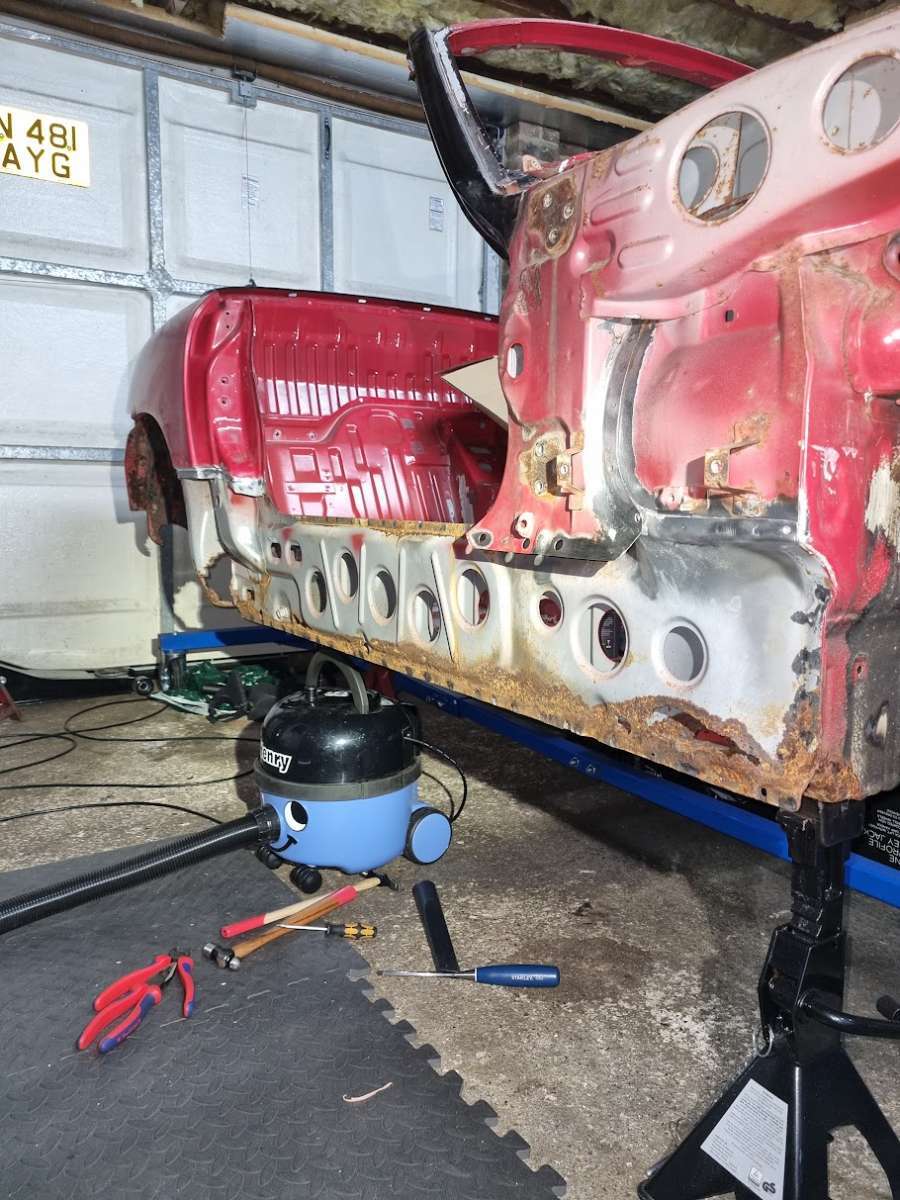
I also removed the rotten sills as it just made sense to do it before it went in for sandblasting.
There is an Instagram account I created to document the full restoration. Feel free to follow along at @thesuzukicappuccino.
-
3
-
-
8 hours ago, Cosmic73 said:
Hi, I know there's been a few posts of coolant leaking into the spark plugs but not oil, maybe try nipping up the rocker cover to seal it? I had a GTIr a few years back and the same thing happened because of the rocker cover.
Visually the valves look ok but that won't tell you what condition the valve seals and guides or in. Guides will probably be ok, but seals can wear and harden over time.
Coolant leaking into the spark plugs? I've never heard someone have that issue before with a 350Z. Are you sure you don't mean oil? There's loads of posts about it
I've got brand new OEM Nissan valve covers and gaskets ready to go on so hopefully that'll fix it
-
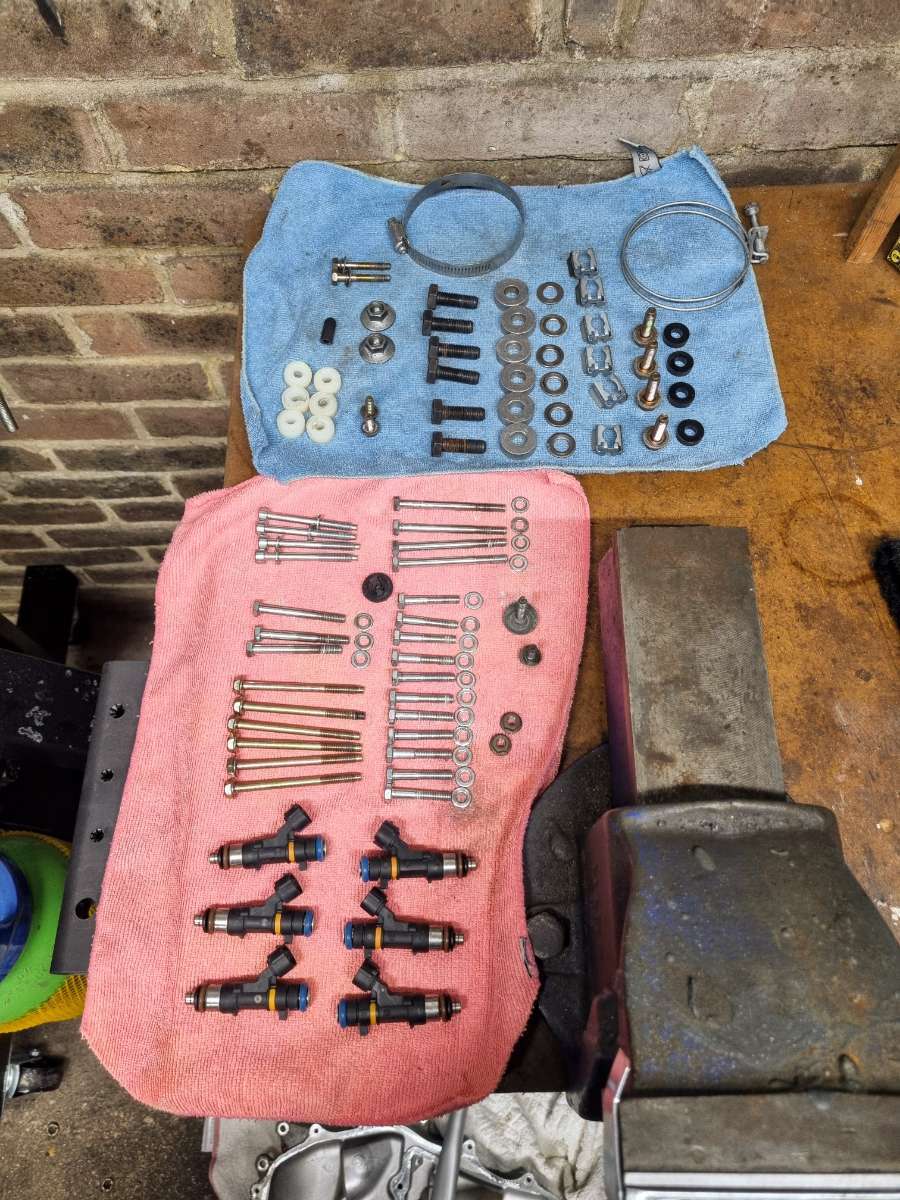
An update on the ongoing developments with the 350Z and a couple of questions for you all. A while ago, I noticed a small pool of oil in the spark plug well of cylinder 6. Upon further investigation, I also found some oil condensation/moisture toward the rear of the P/S valve cover. Moving to today, I've got some nice new OEM parts (valve covers, gaskets, bolts etc.) all ready to go, and my plan is to replace it all next week. Meanwhile, I'm sending off the fuel injectors to get cleaned and flow tested. Additionally, I'm having both the upper and lower plenum vapour blasted and coated, with the strut bar getting a fresh powder coat.
Current checklist:
- Fuel injectors cleaned and flow tested
- Upper and lower plenum vapour blasted and coated with XCP rust inhibitor
- Strut bar powder coated (still deciding on whether I should stick with the grey...)
- Valve covers and gaskets
- Gaskets: throttle body, air intake manifold, upper air intake plenum and plenum spacer
- Fuel rail refurb: bolts, injector clips, spacers
- Replacing various rusty bolts around the engine bay
Here are a couple of photos:
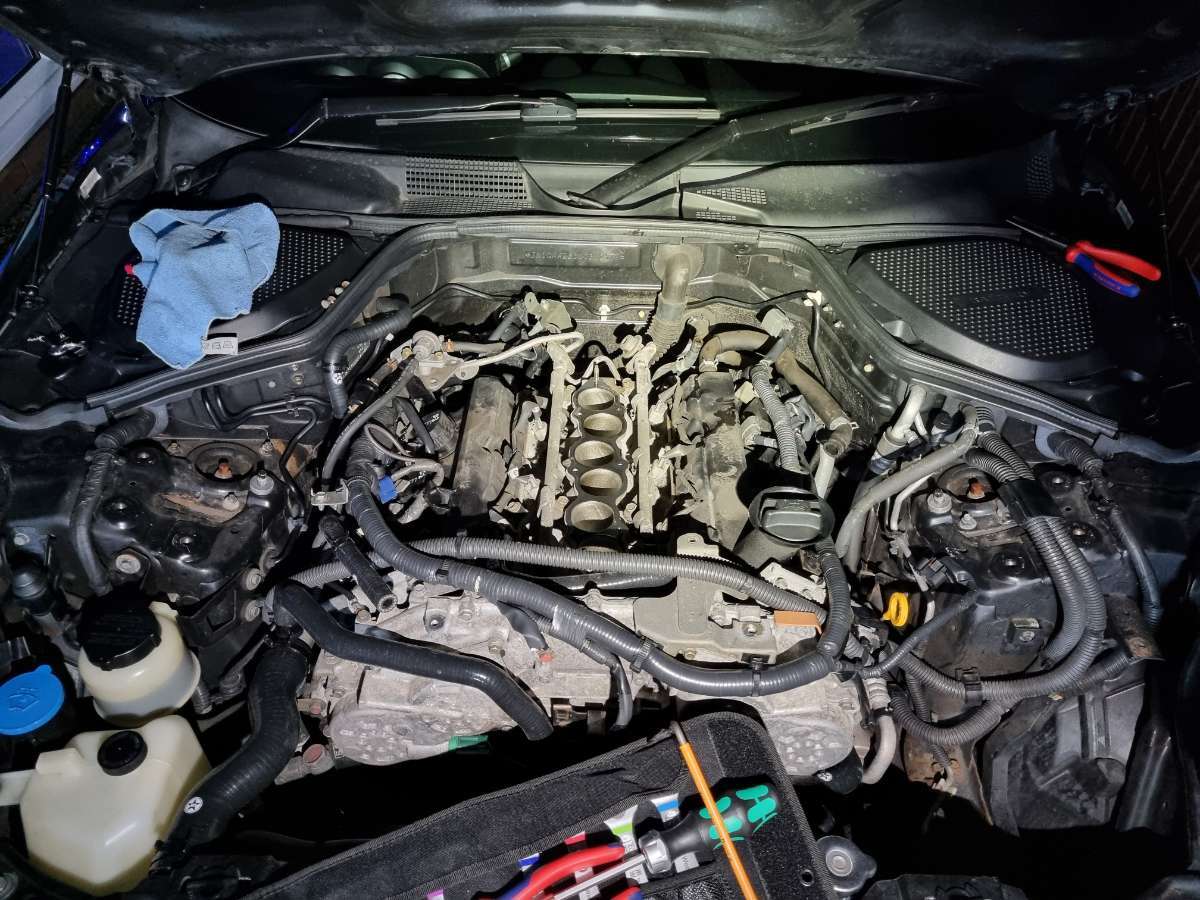
I've got two questions:
I found some oil in a few of my fuel injector harness connectors. I assume this is just oil leaking from the valve covers and wicking up the harness? I've never had any problems or codes pop up.
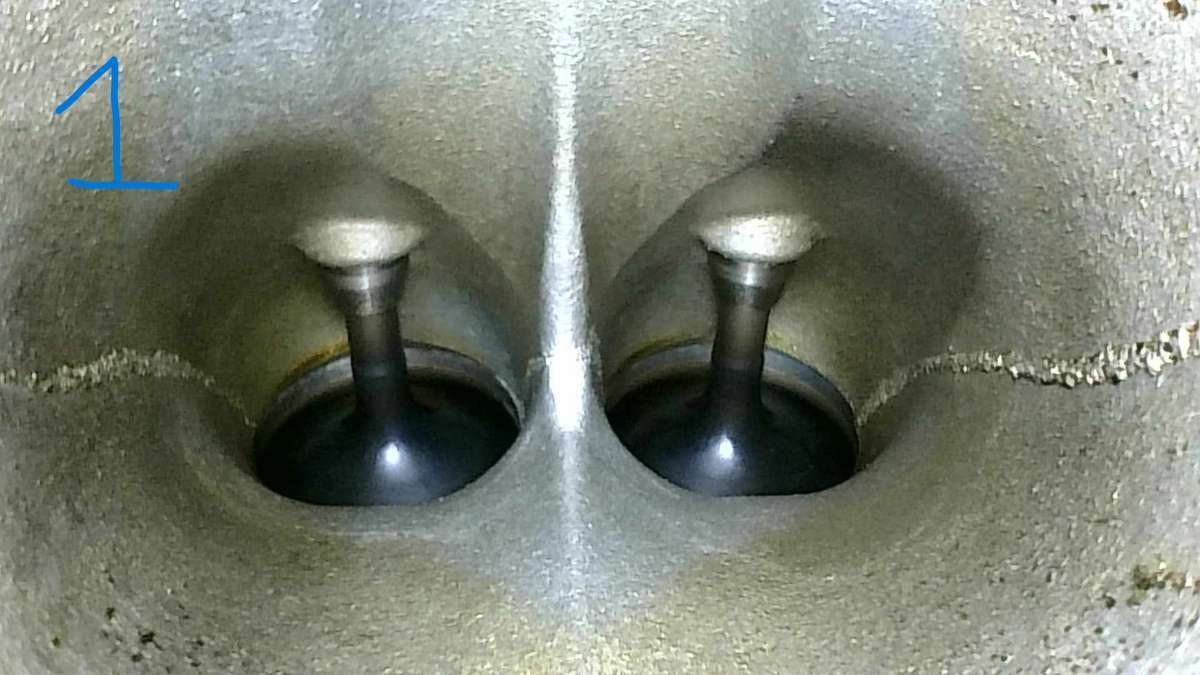
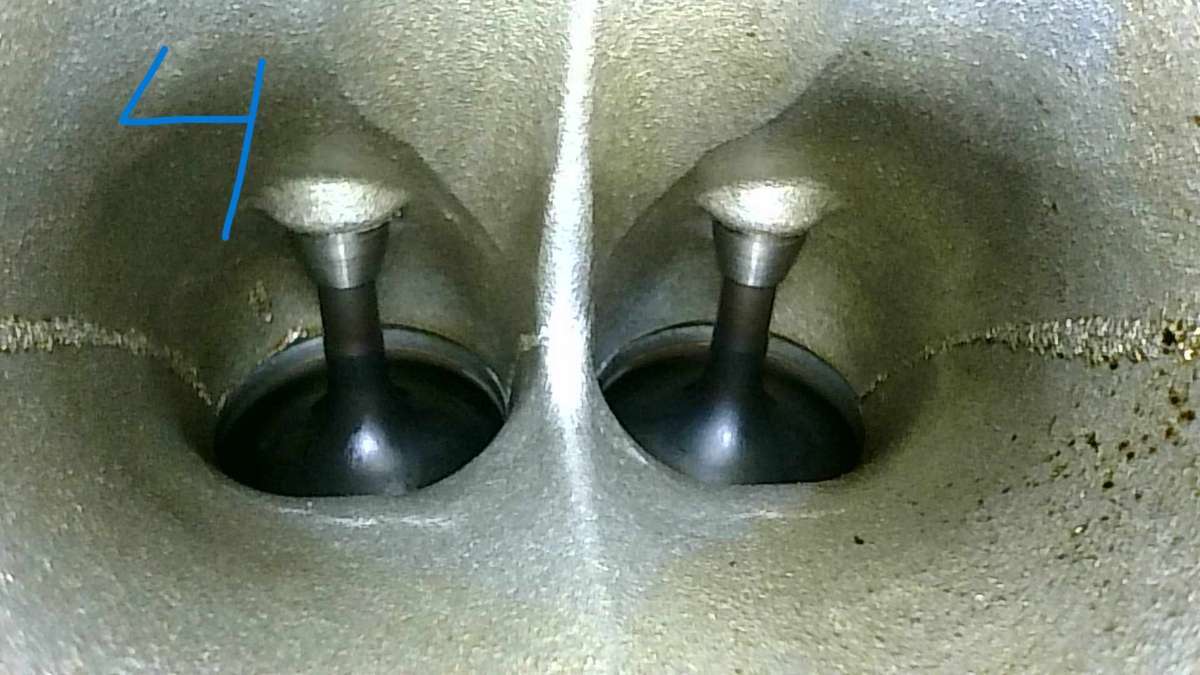
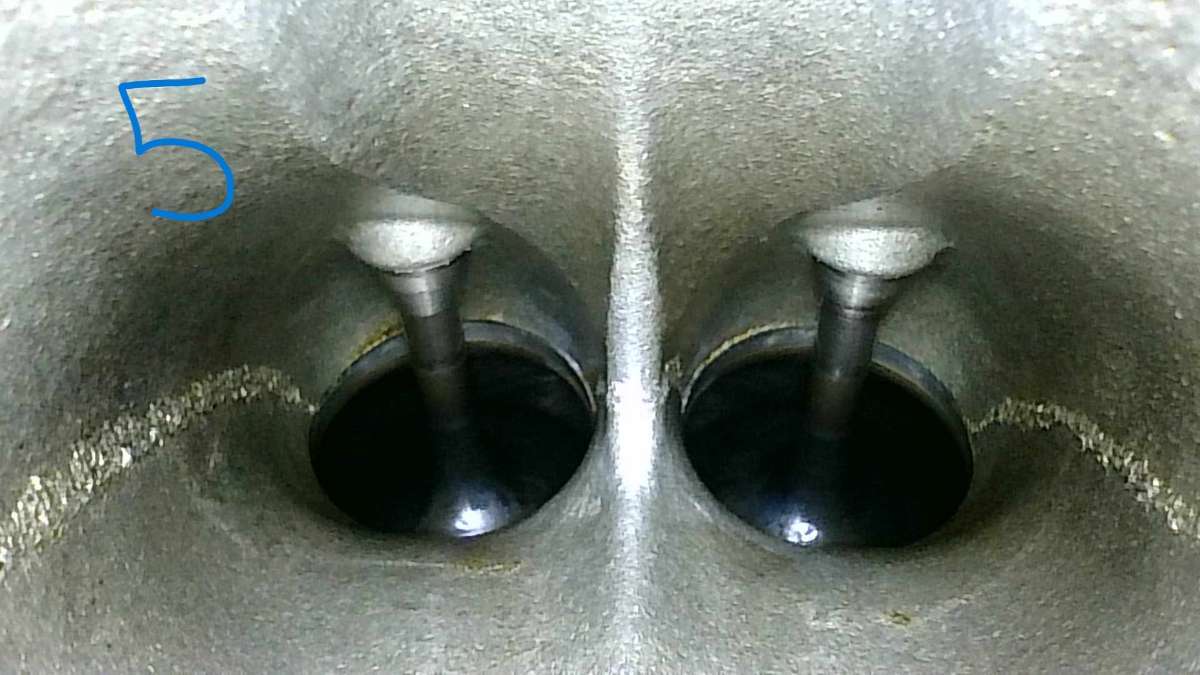
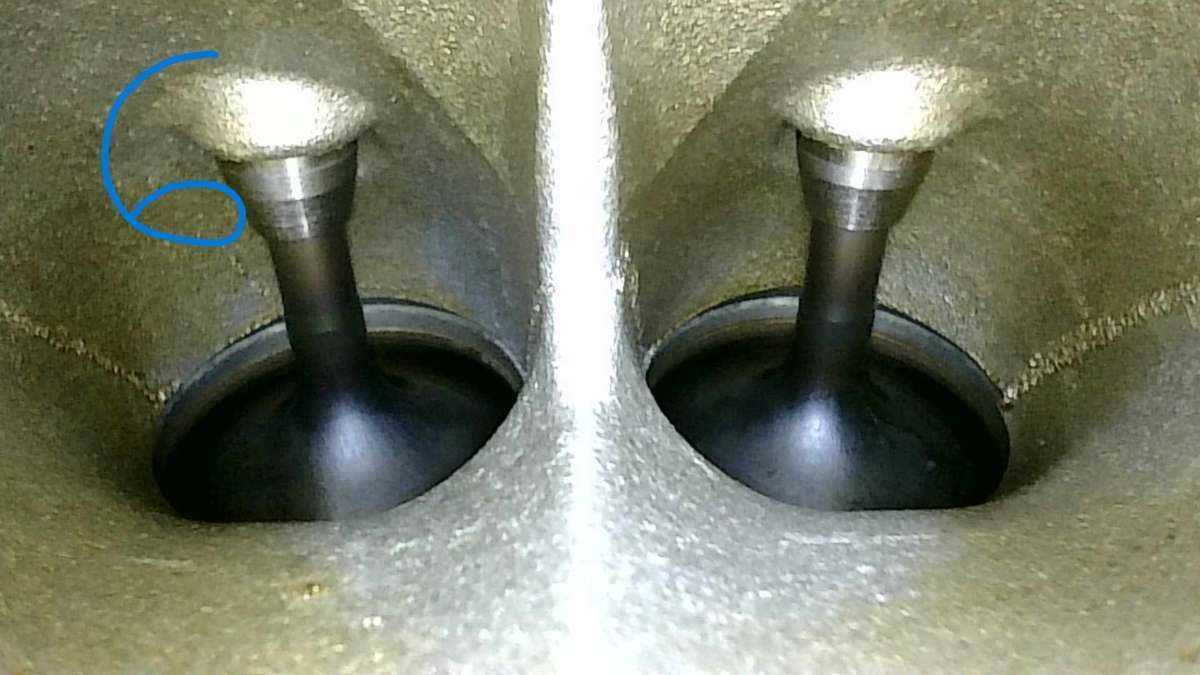
Do these valves look ok? I've just passed 70k miles.
Cylinder 1:
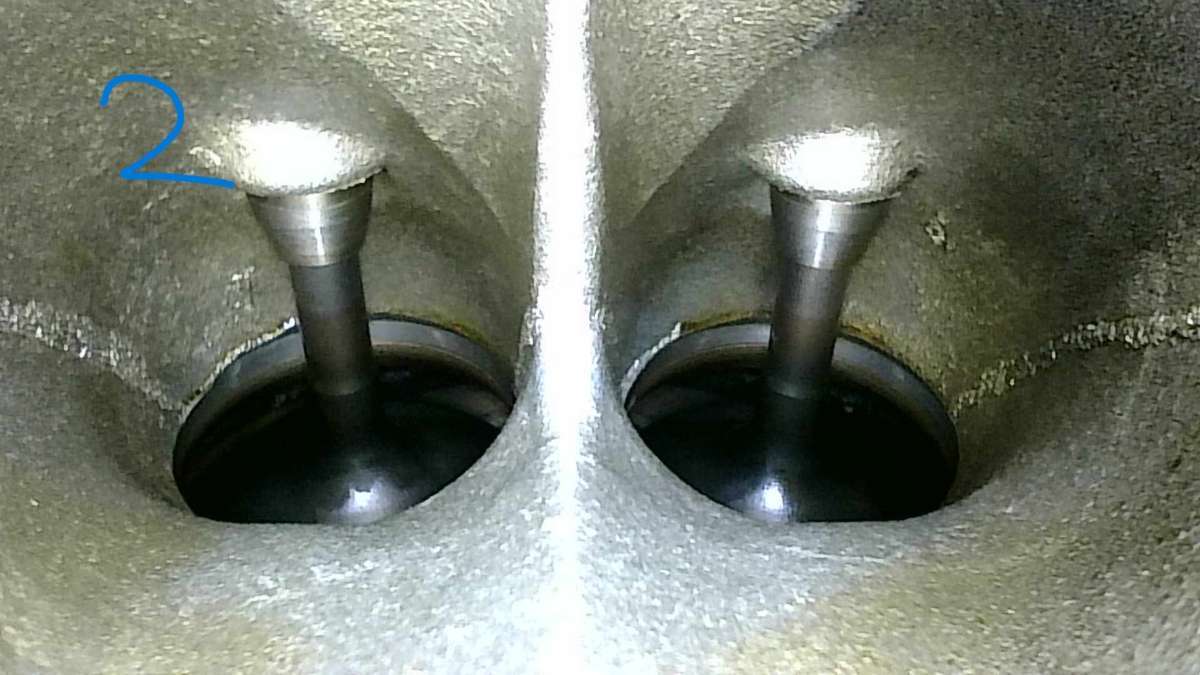
Cylinder 2:
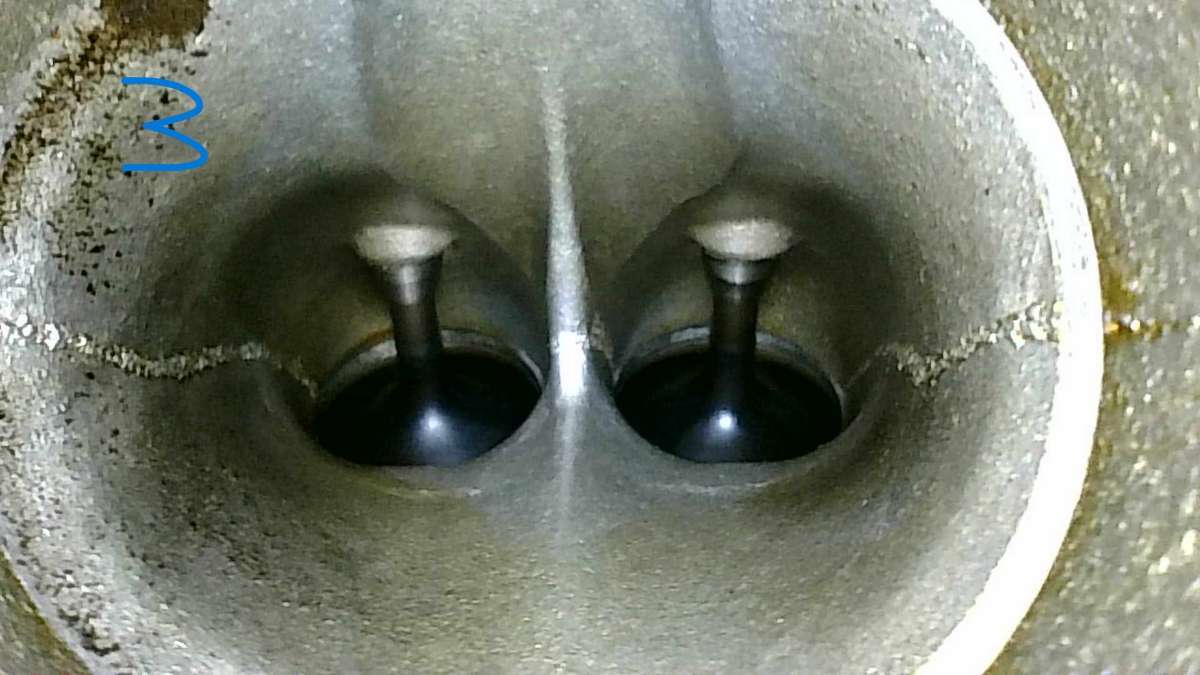
Cylinder 3:
Cylinder 4:
Cylinder 5:
Cylinder 6:
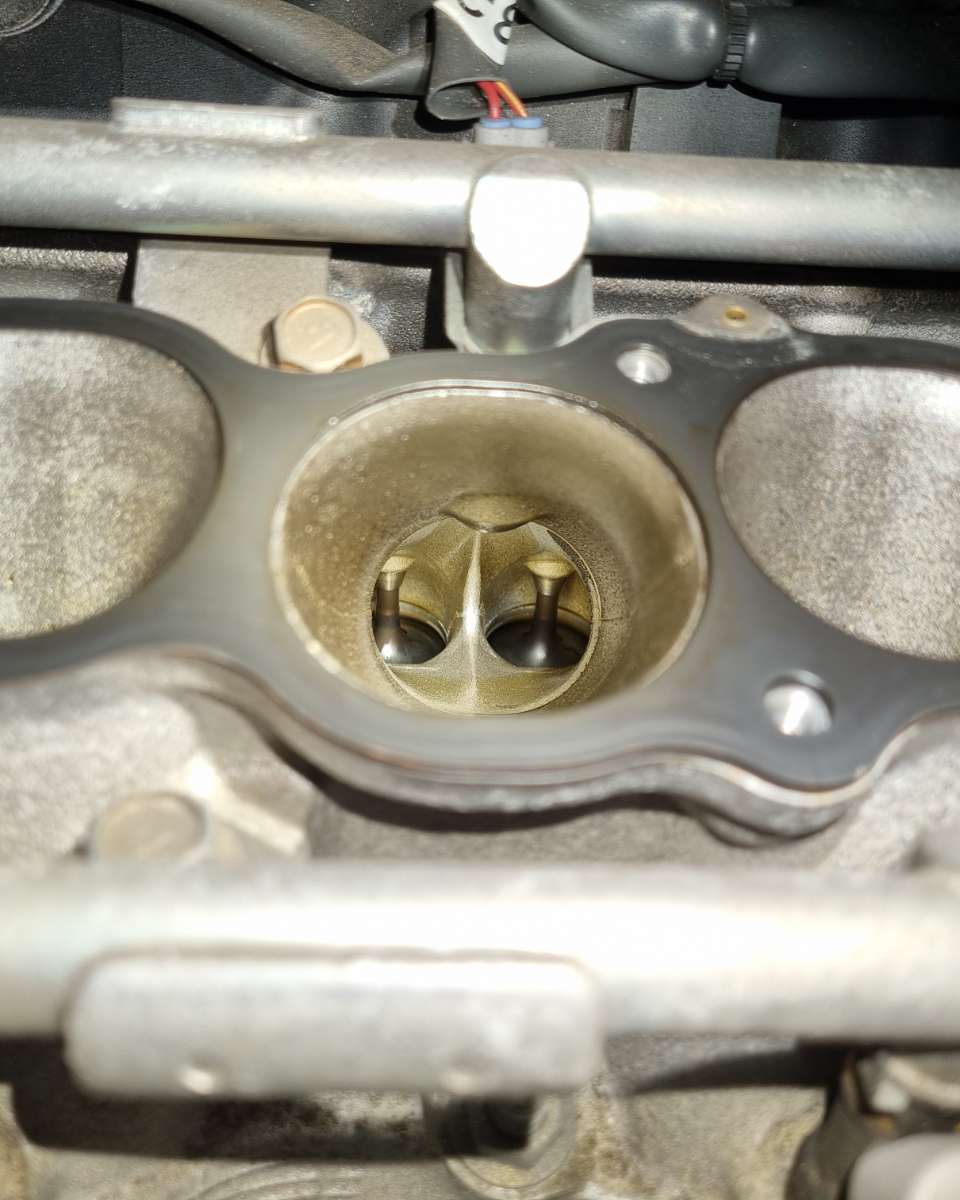
Aerial photo of Cylinder 4:
-
Ok, let's try this again. Big thanks to @Stutopia for sorting it out.
It's been a while since I last updated you all on the Z. I always seem to be buying something or working on it here and there.
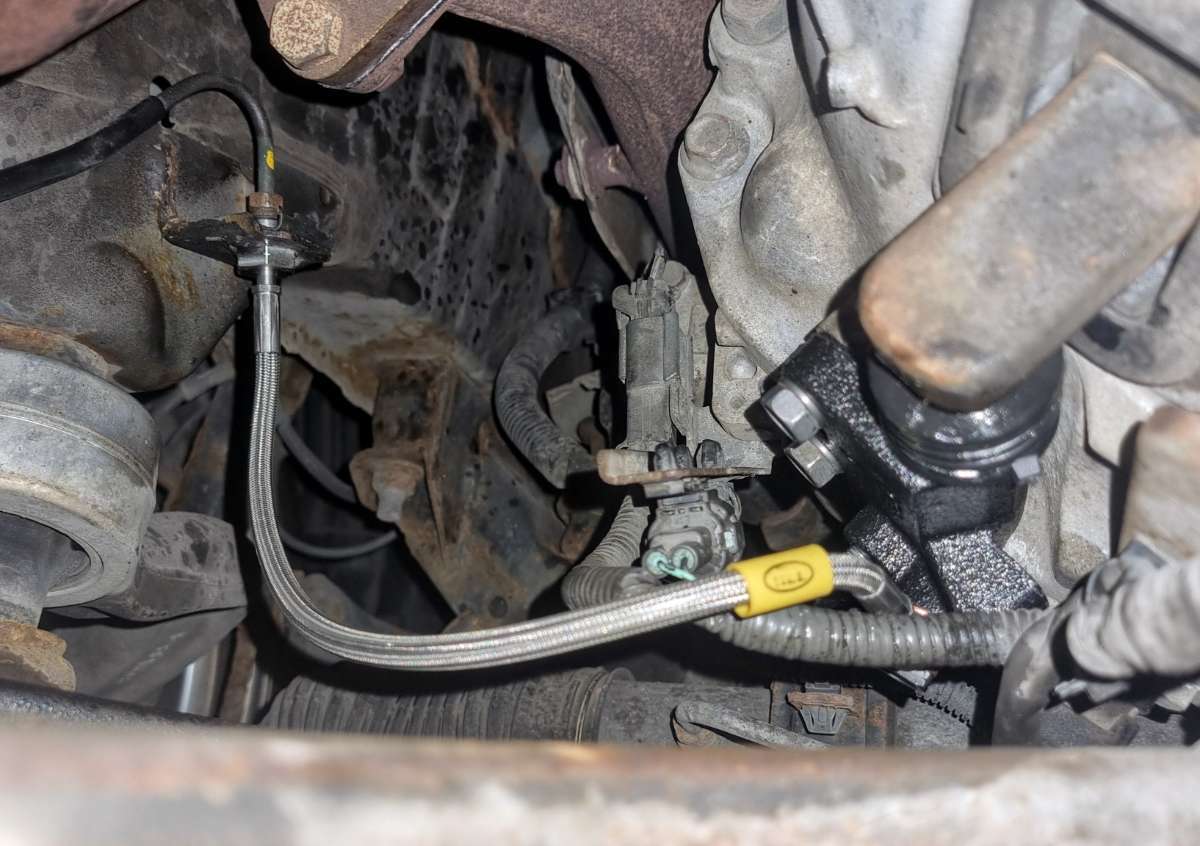
First item on the agenda: sticky clutch pedal. I noticed my clutch pedal sticking in hot weather or in stop-start traffic so I bought a clutch service kit from Tarmac Sportz. This includes an uprated slave cylinder, HEL braided line and Motul RBF 600 clutch fluid. This seems to have sorted it as no more sticking!
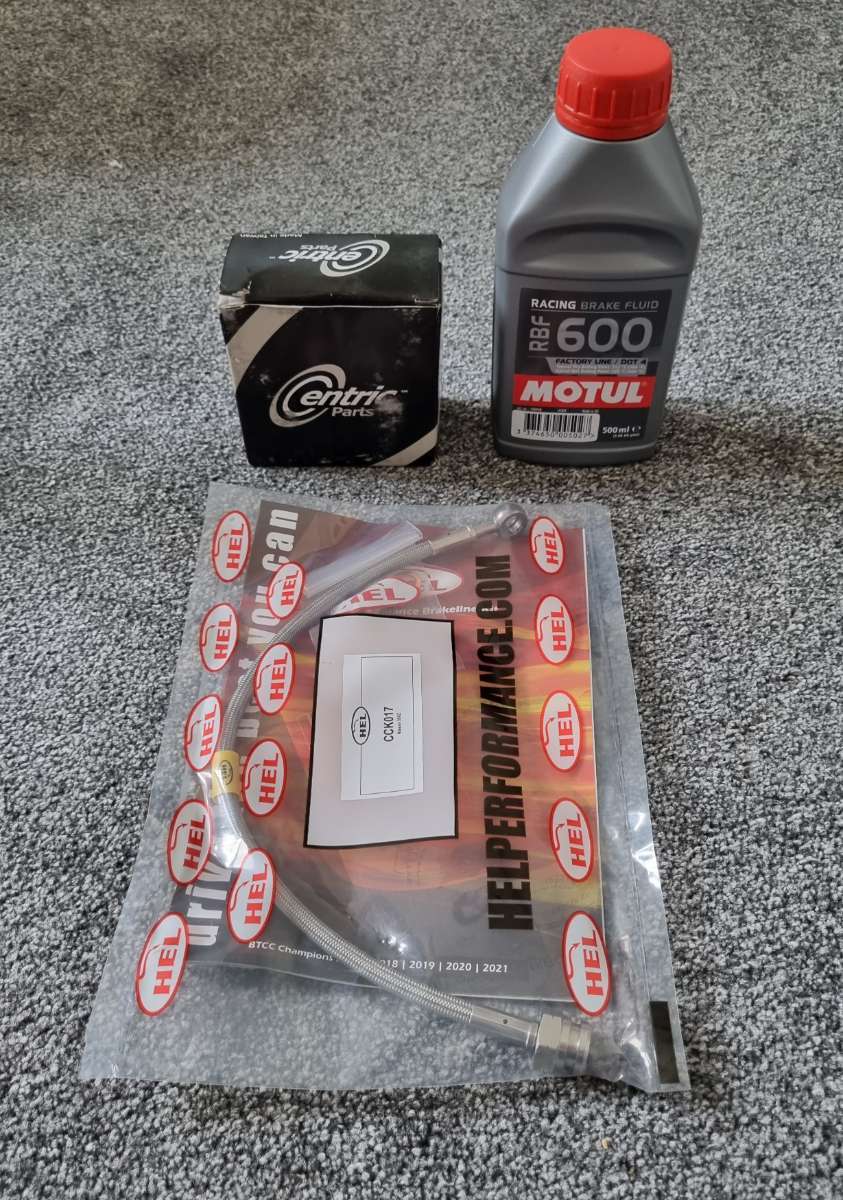
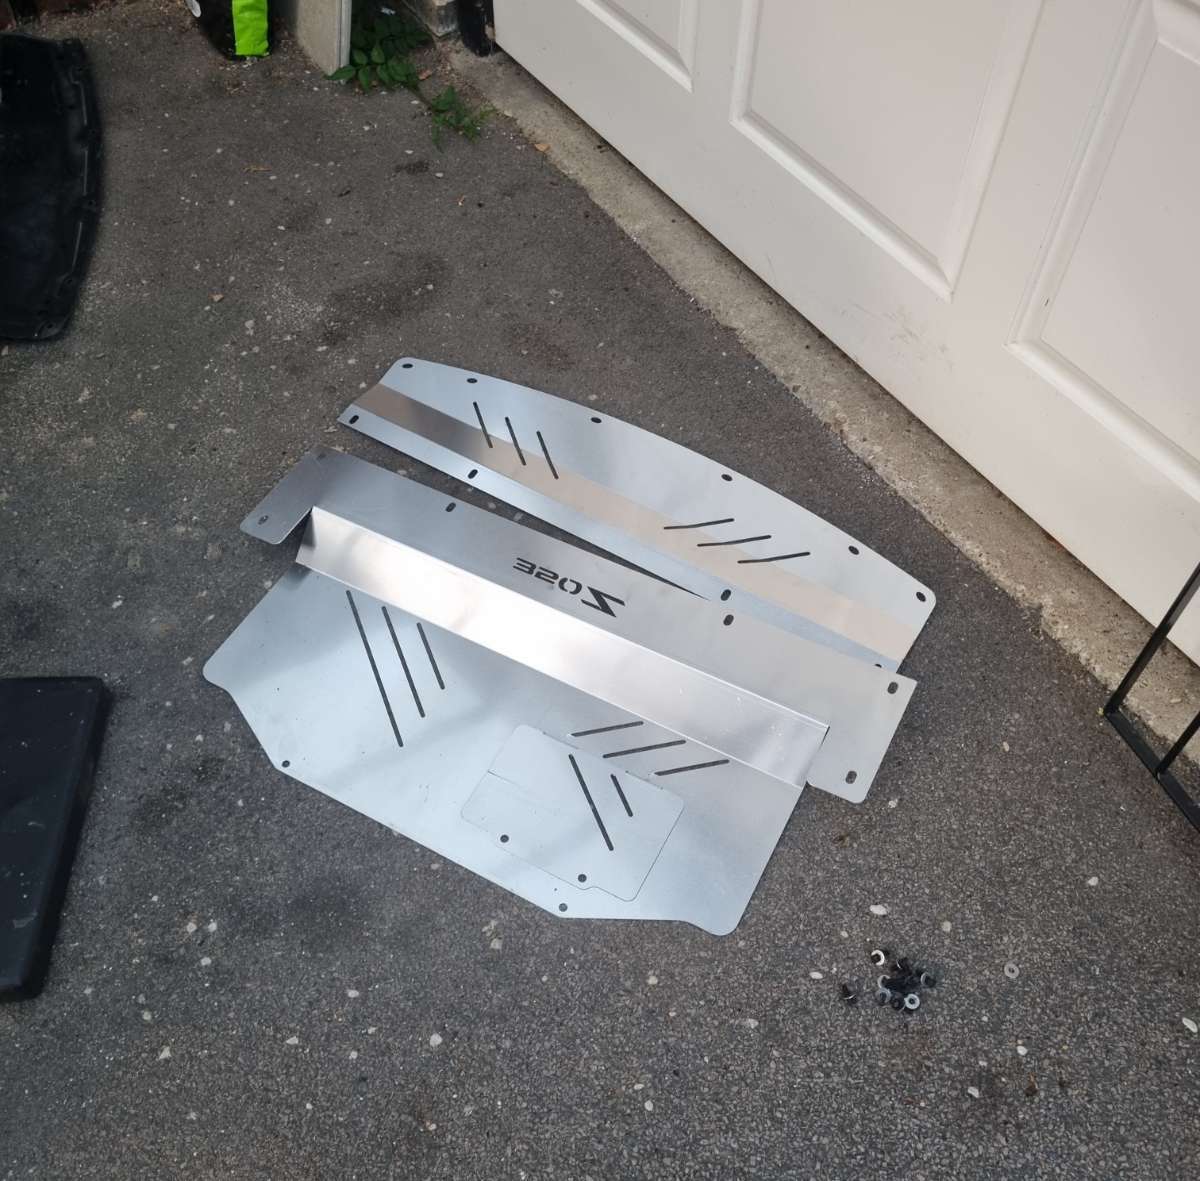
At the same time, I fitted a run-of-the-mill aluminium undertray from Tarmac Sportz.
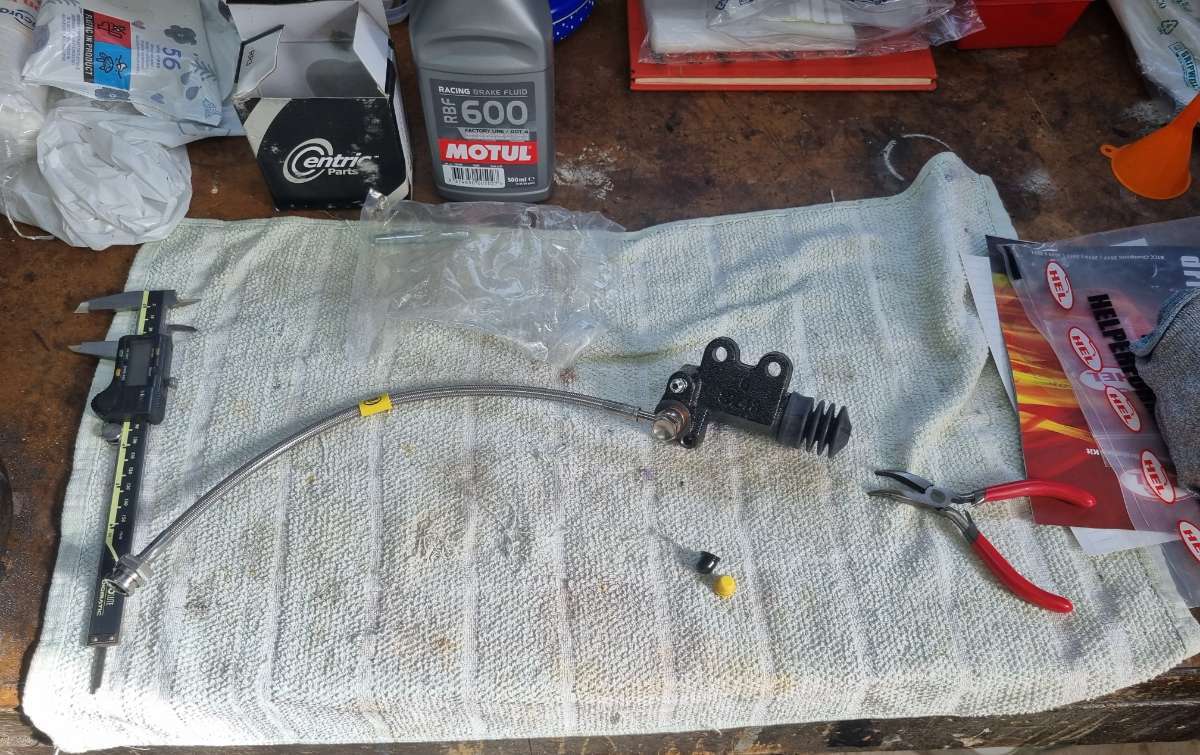
The new slave cylinder and line.
As you can see, the original doesn't look a day over 70...
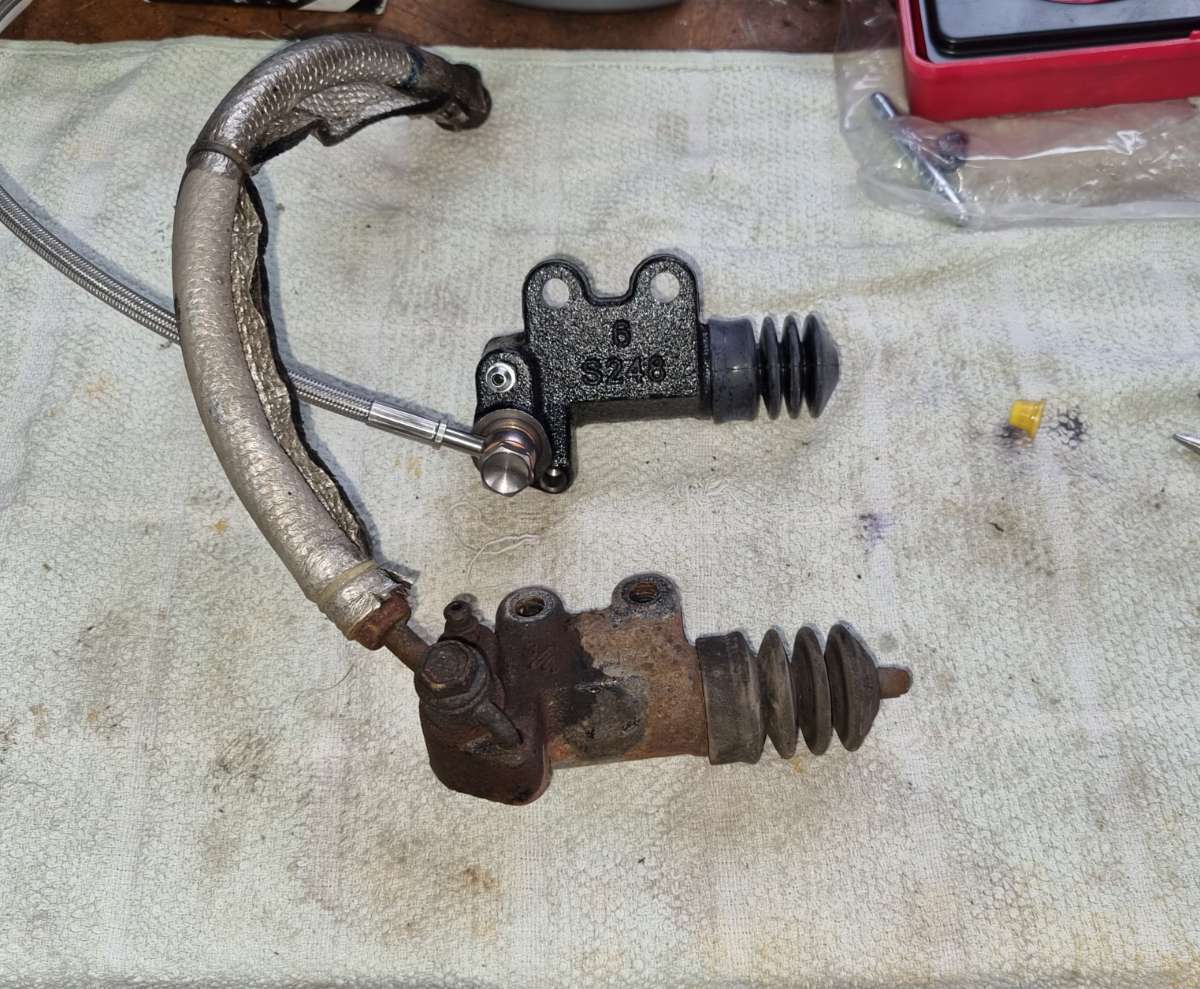
As it stood.
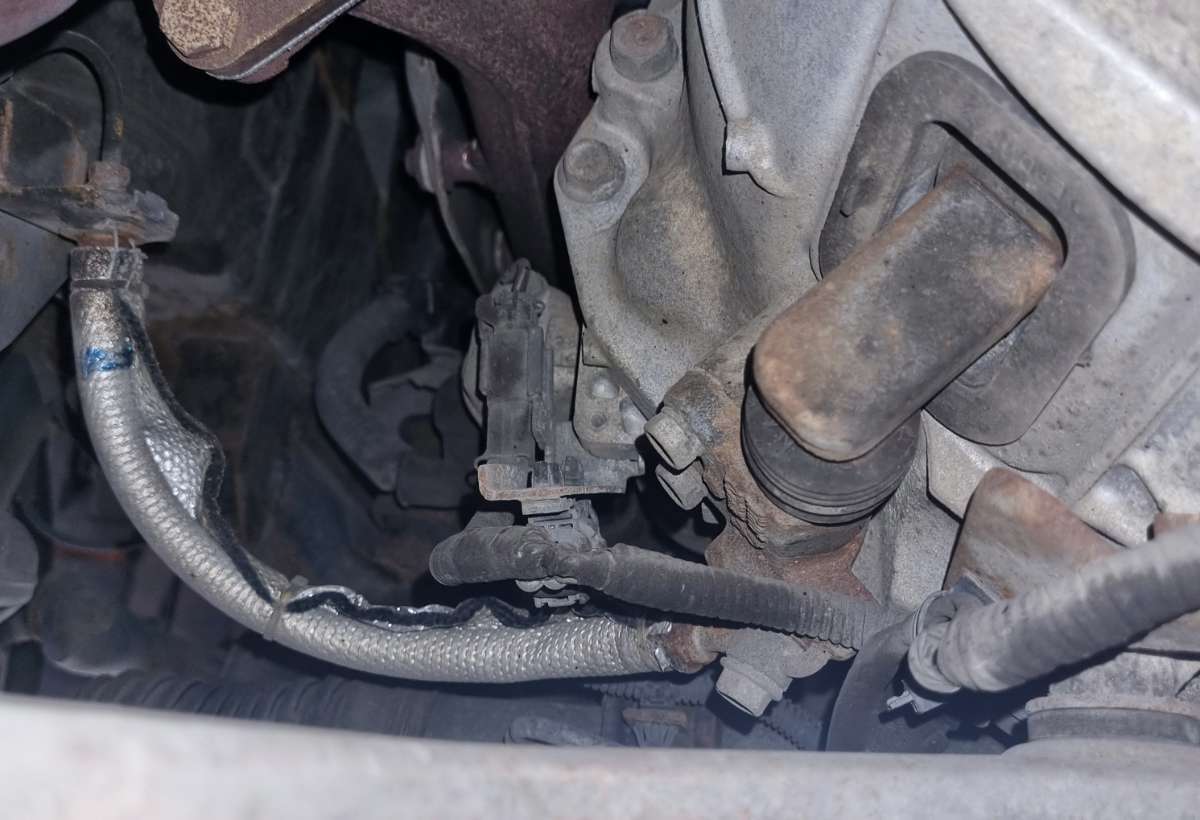
After messing about for three hours trying to bleed the bloody thing properly! Applied a thin layer of grease around the rubber boot to make it last that little bit longer (likely makes no difference). I realised I routed the line the wrong way so when I get the chance I'll sort it out. Fear not.
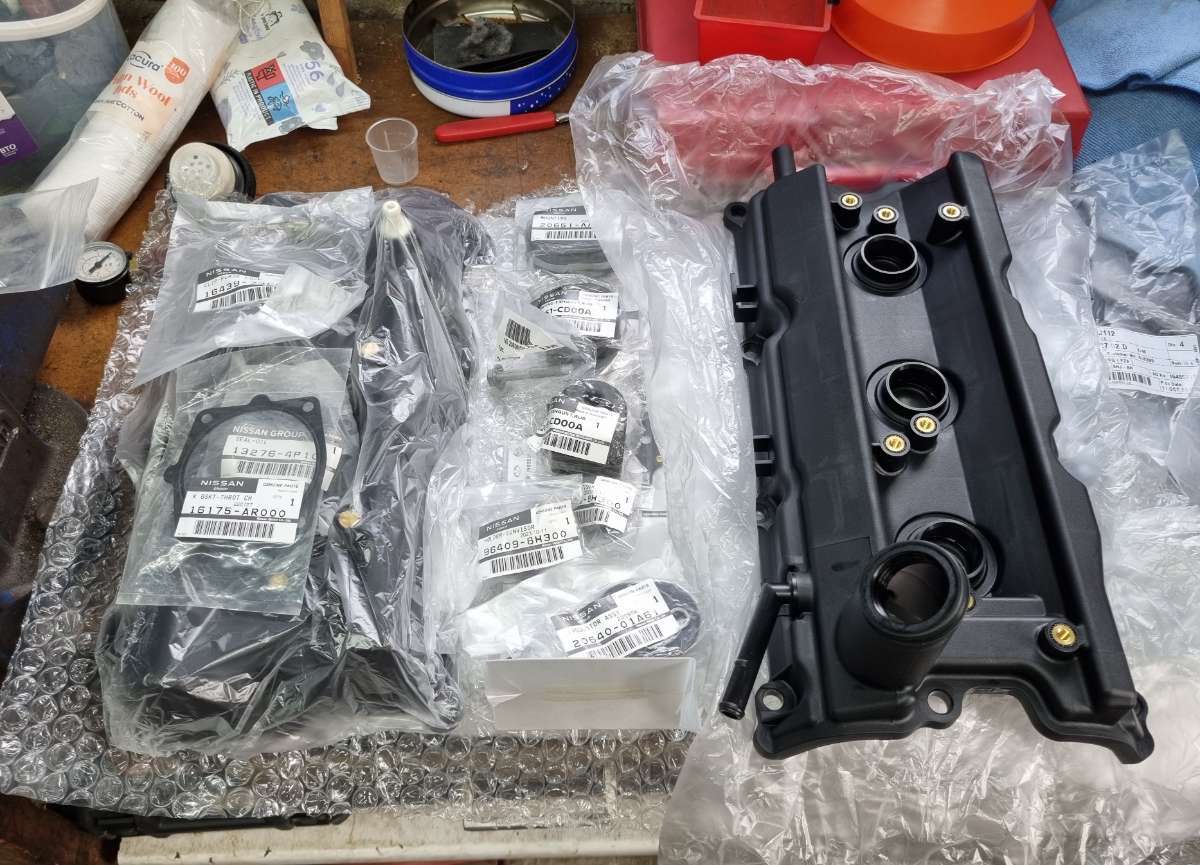
Bought loads of Nissan OEM parts from Japan in preparation for 'the big job'. Who would've thought it's cheaper to get parts shipped all the way from Japan than to buy them in the UK?
- Valve covers & gaskets
- Rubber exhaust mounts (already fitted; see below)
- Sun visor clips (both of mine had broken; already fitted)
- Rubber oil cap filler neck
- Fuel cap (the plastic line had broken on mine so I couldn't 'dangle' it off the filler cap; already fitted)
- Red battery positive terminal cover (half of mine was missing for some reason; already fitted)
- Gaskets: Throttle body, air intake manifold and upper air intake plenum
Replaced all the exhaust mounts and gaskets (obviously not pictured). Nissan OEM mounts and original Milltek 3" gaskets to go with 8.8 zinc-plated bolts. Pretty sure I had a minor exhaust leak on one of the gaskets.

My true ground-up project, a 1995 Suzuki Cappuccino, all stripped down in preparation for sandblasting early next year.
-
3
-
-
On 12/08/2023 at 08:12, davey_83 said:
It's been broken from a previous repair
I thought that too but I couldn't see any evidence that there had ever been tabs to begin with. Thanks anyway
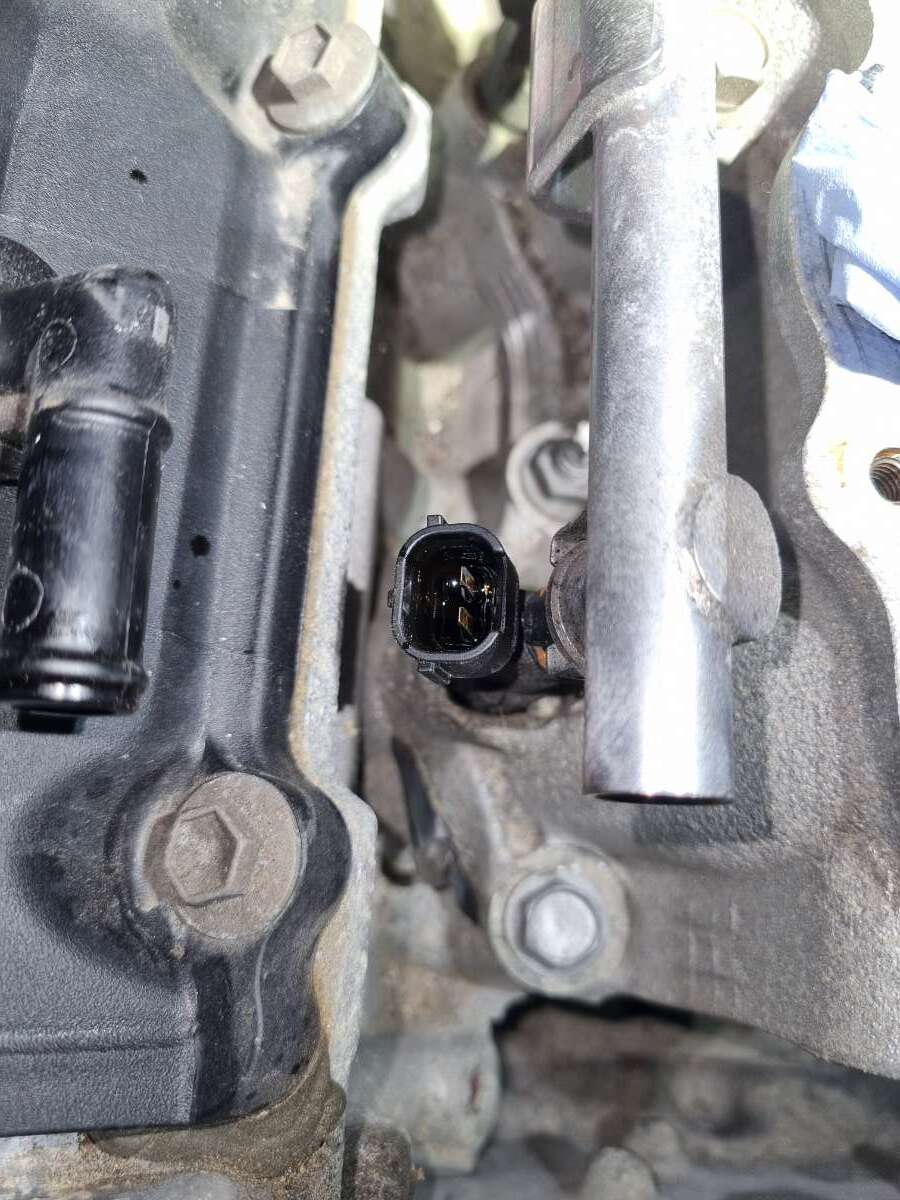
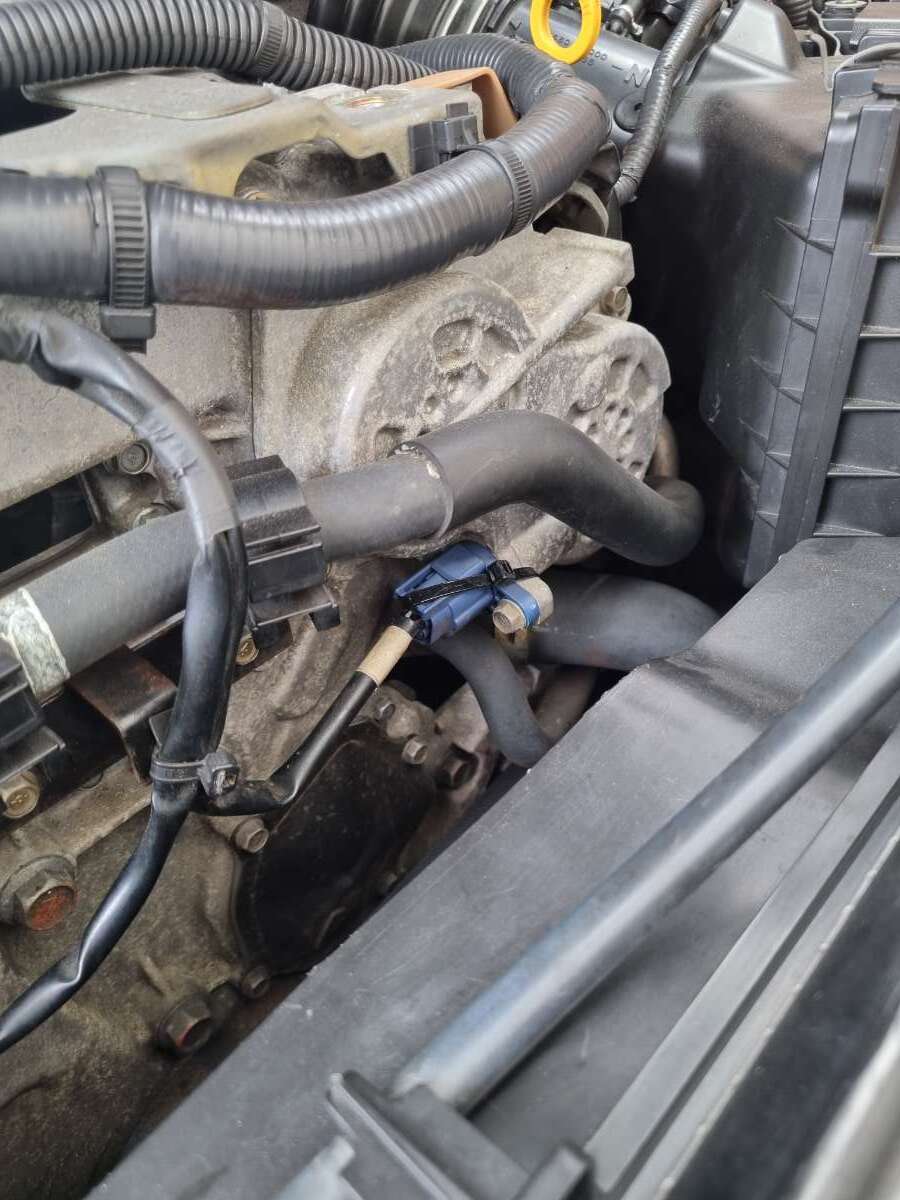
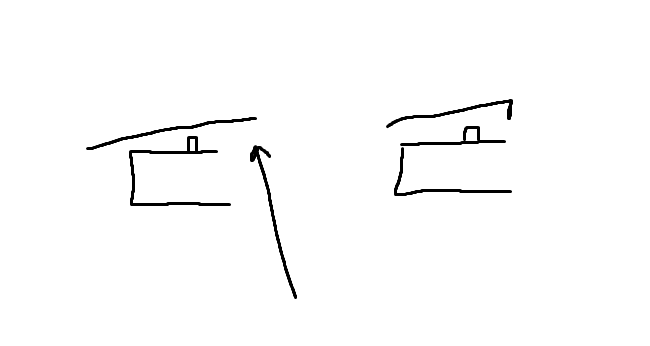
-
I'm back again with more questions. For some reason the connectors from the engine wiring loom don't 'click' into place on the VTC solenoids. The little tabs are there on the male VTC connector but the long tabs on the female wiring loom connectors are flat (I've tried to illustrate this below). It wouldn't be an issue if the connectors didn't slowly work themselves loose over time. To stop this I've just zip-tied them together. Anyone else had this issue? From what I've worked on previously on the Z, all the other connectors click into place.
Zip-tied both connectors together
Left (missing the 'click' tab) vs. Right (how I think they should be)
-
Hello and welcome. Sony do some nice double DIN head units; I had the XAV-AX5650 installed in my Z. You can find it on my build log.
-
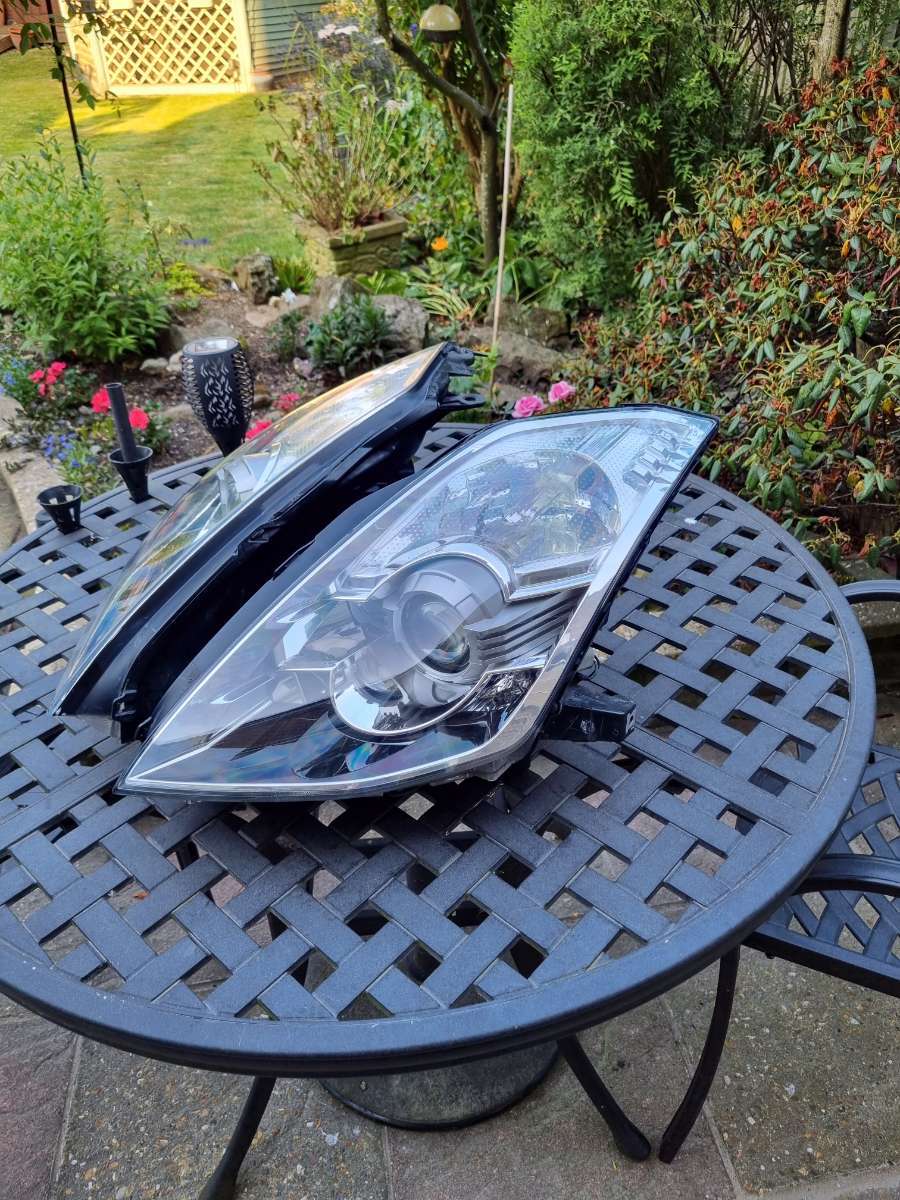
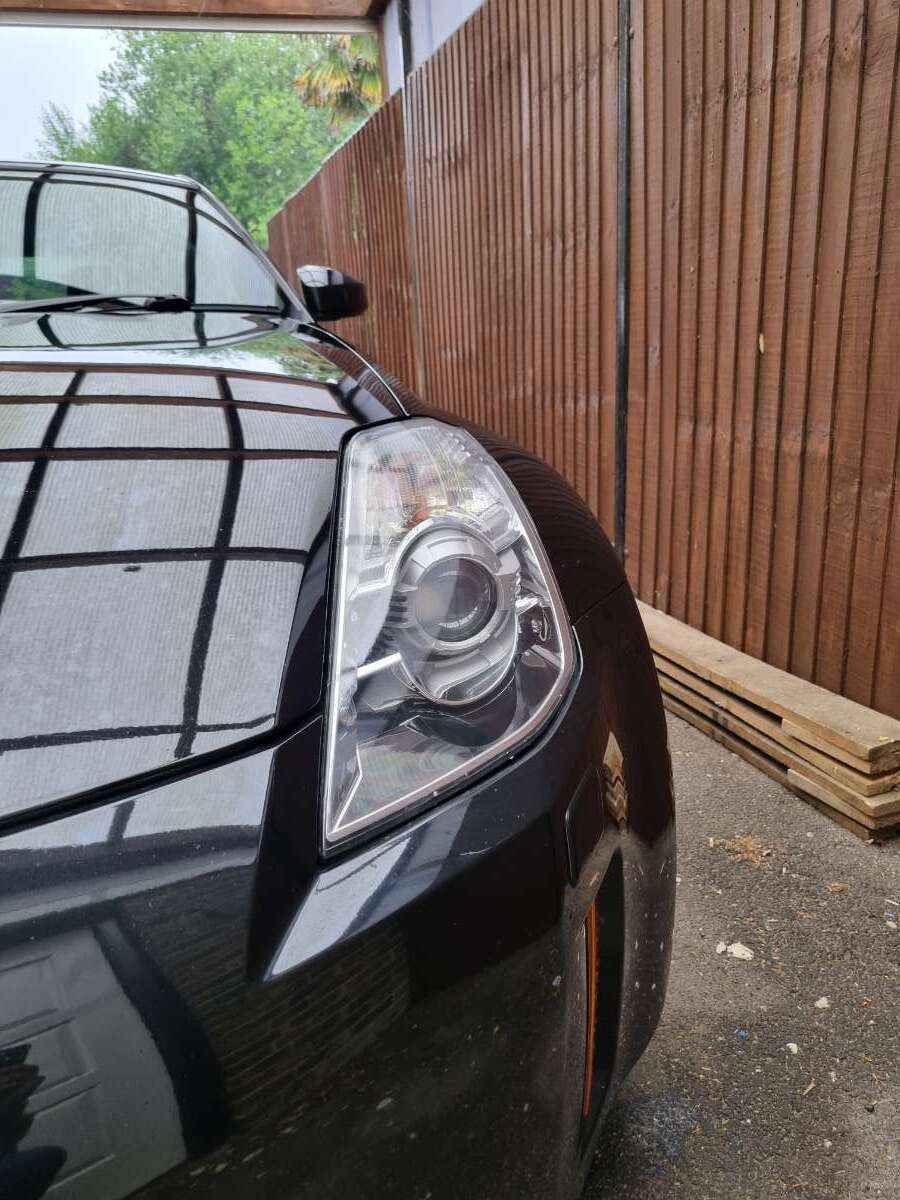
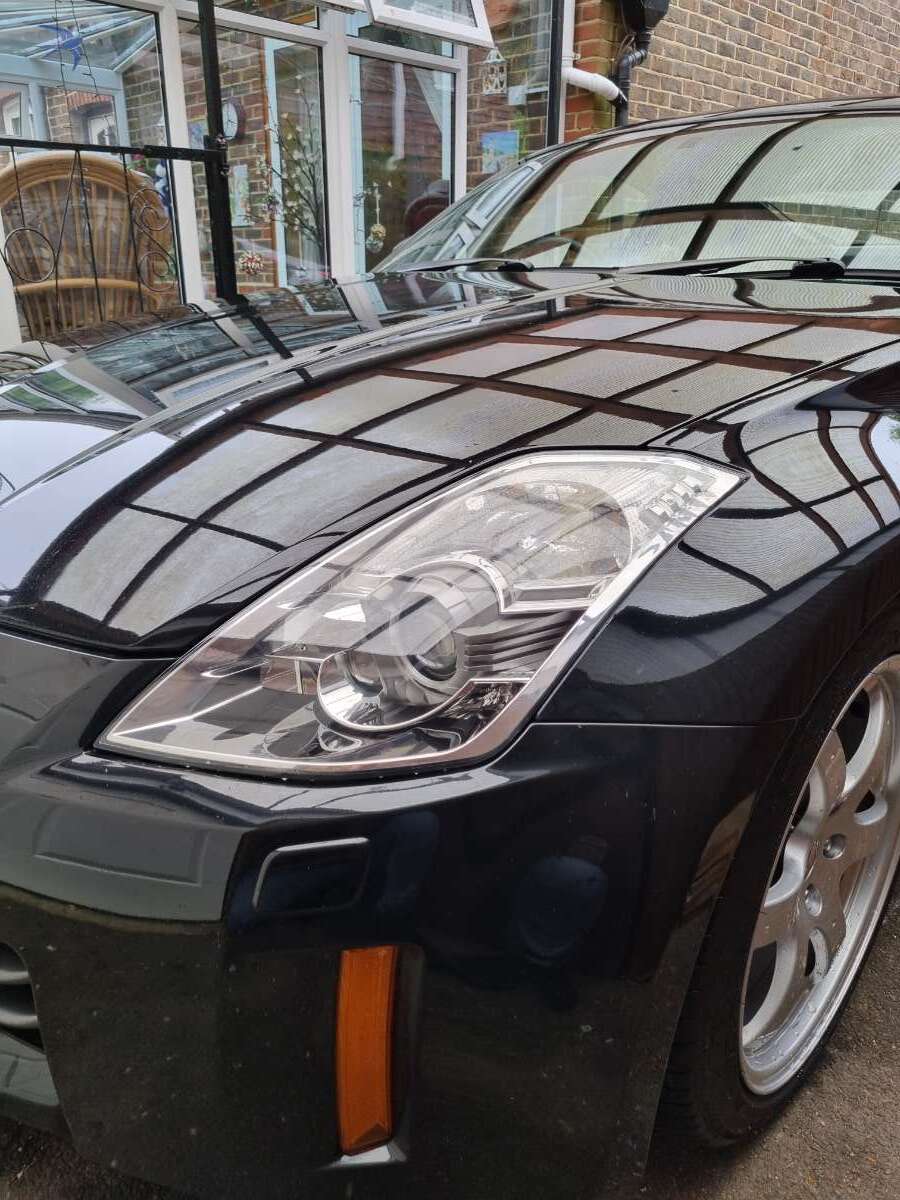
A proper headlight restoration. Lights were sanded back and then automotive clear coat was applied. Done by a friend of the family so didn't cost me a penny. Really makes the entire car look better.
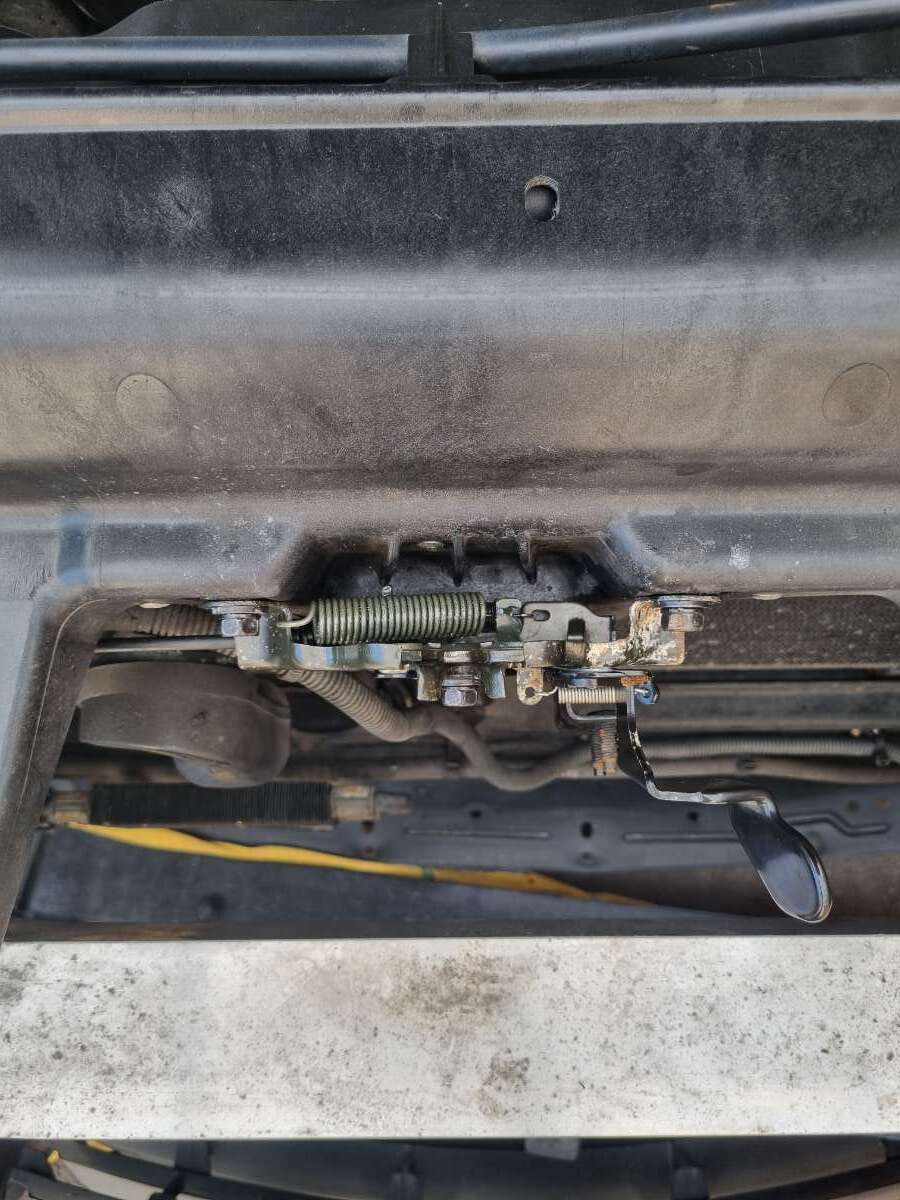
Noticed the bonnet latch assembly was pretty dirty and full of old grease so I cleaned that up too. Fresh grease was applied to the contact points and moving parts.

P/S Before
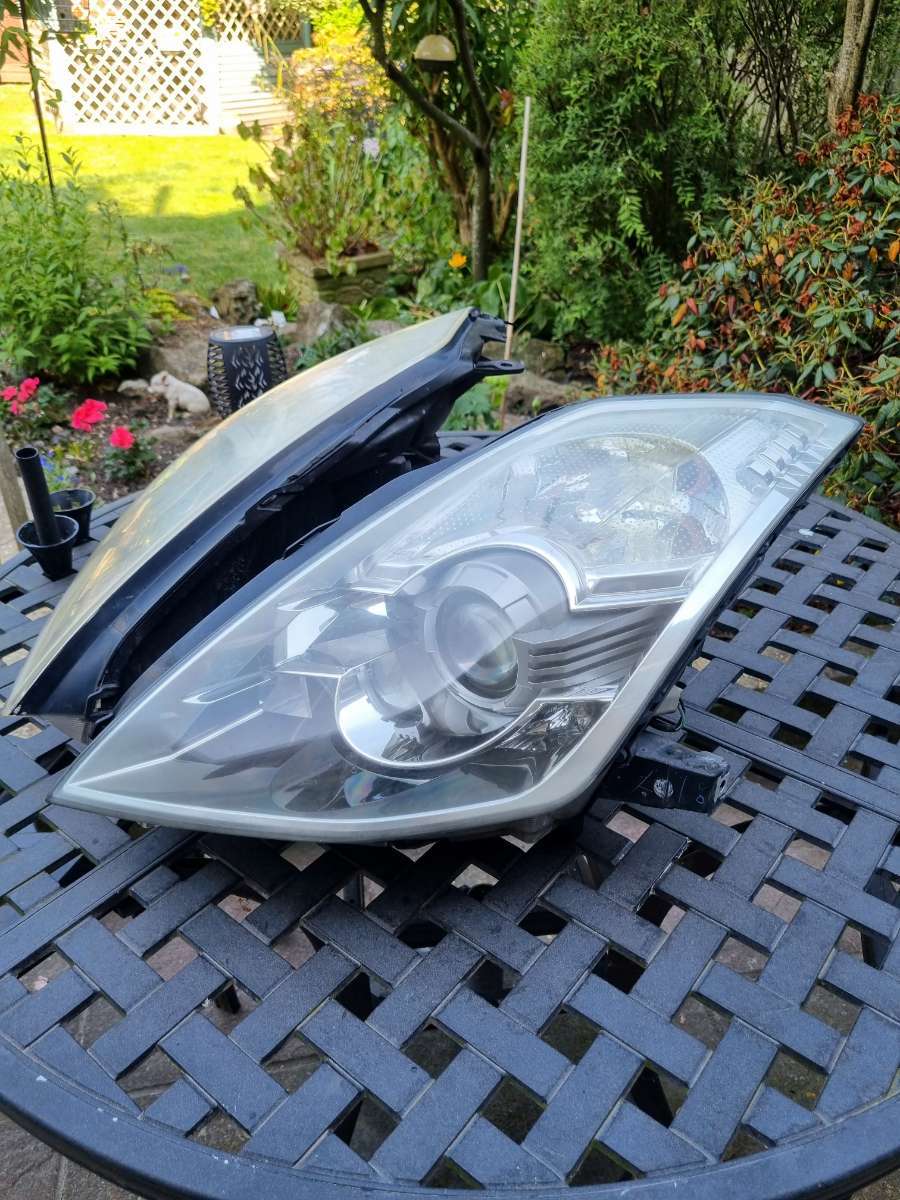
D/S Before

D/S After
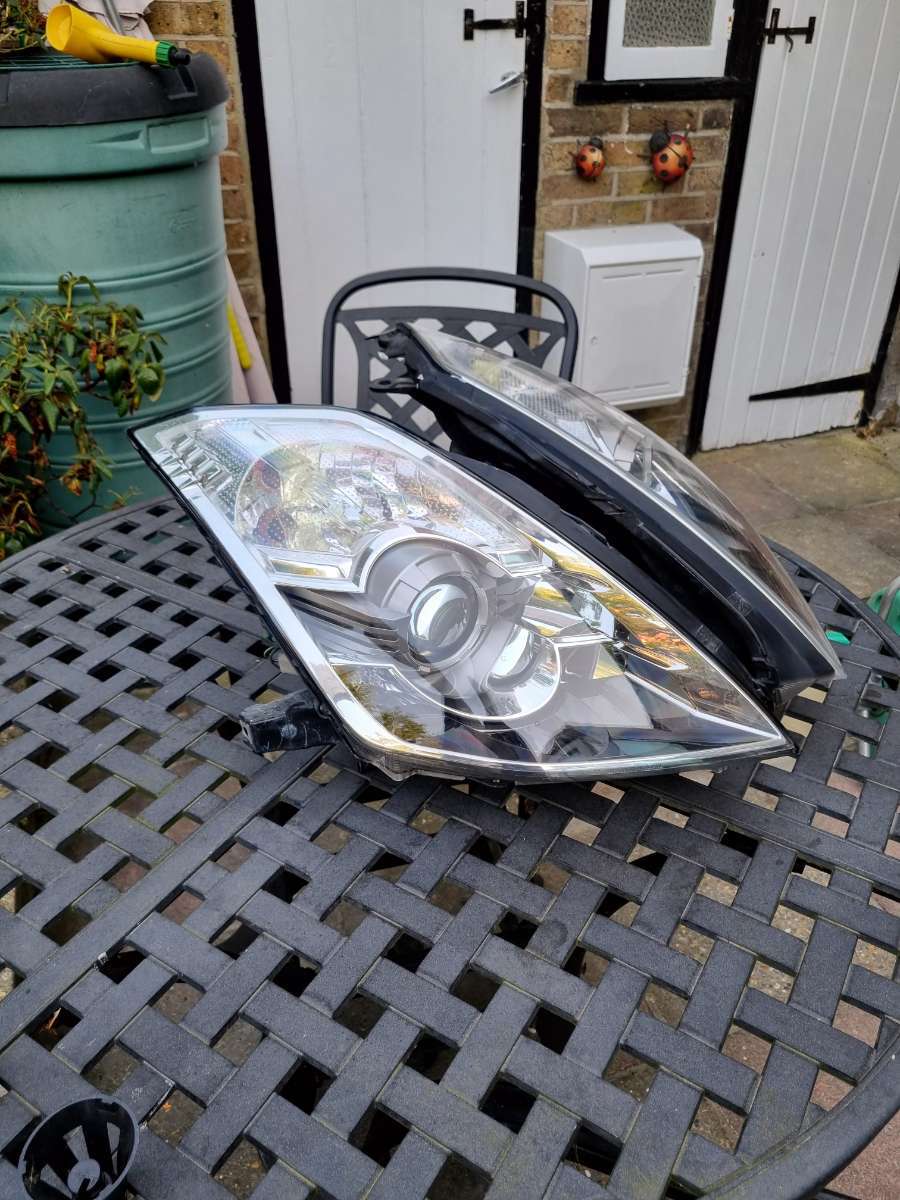
P/S After
After
After
Before

After
-
3
-
-
2 hours ago, Loopymartin77 said:
I have just been through your build post, and i think I will prob be picking your brain quite a lot in the coming months, I hope you don't mind. a hair off 300 like yours is what I am after.
No worries, just let me know
-
38 minutes ago, Loopymartin77 said:
thanks, I really can't see the point in spending stupid money (like snap-on) on tools that just turn bolts.
I might be thinking too far forward at this point, but what is the best way for me (without boosting it) to get more power out of it
For some tools it's worth it. My Knipex and Wera tools, for example, will last a long long time. Much more enjoyable to use also
I've just had my Z UpRev'd, find more info here
To summarise, you can't get much more out of them without going down the FI route
-
42 minutes ago, Loopymartin77 said:
hi,
this is exactly the kind of stuff I'm wanting to be learning from, thanks. Also, Tools, all my old tools (VW stuff) have gone to better homes. what are the generic sizes (sockets and spanners ect) that I should get hold of for the every day keeping it going kinda work - I don't want to buy a load of metric and then find out it's all imperial.
350Z's are metric. There might be some JIS screws but I haven't come across one yet. My Cappuccino, on the other hand, is full of them.
Can't go wrong with a Halfords Advanced set. Think I bought the 175pc, good quality
-
I'll take the Brake cover, mine has a broken clip. Is it in good condition?
Happy to pay postage, let me know. Thanks
-
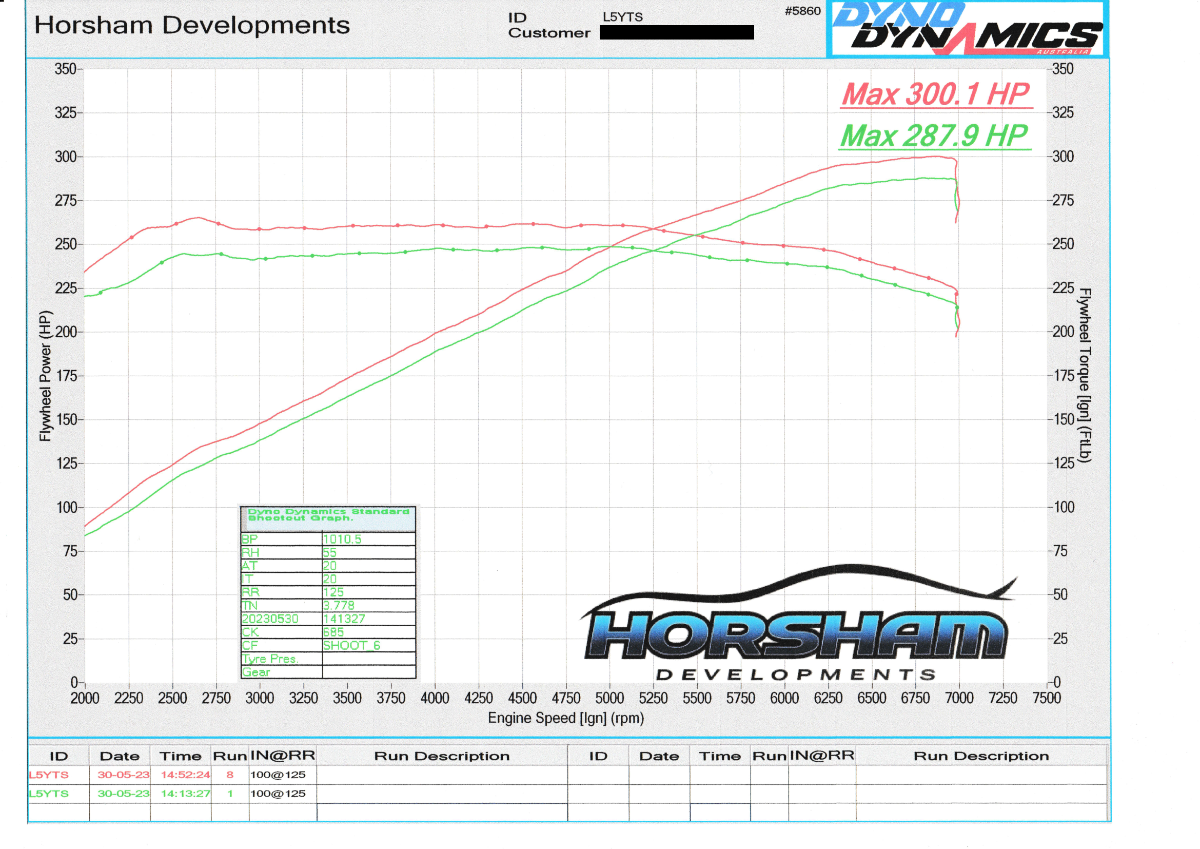
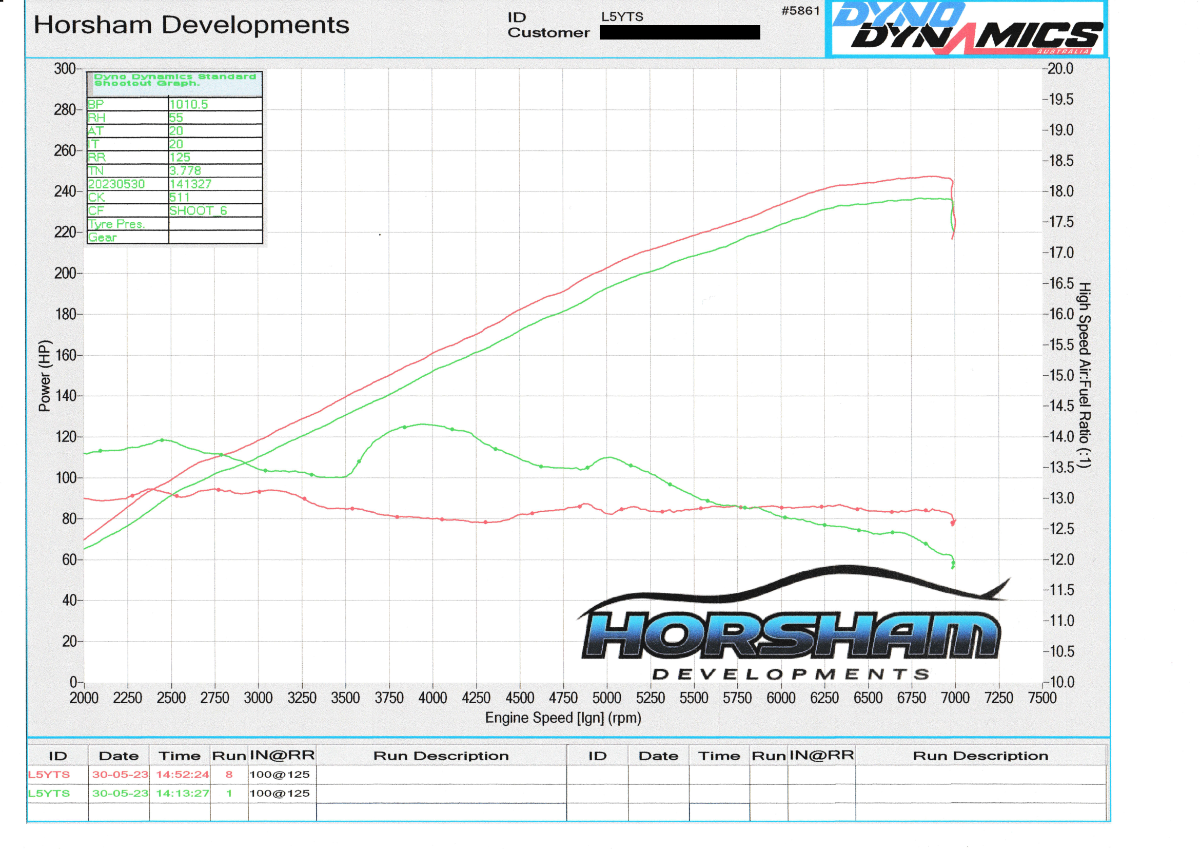
UpRev tune today @ Horsham Developments. Final result was a hair over 300 HP. I thought it be best to get it UpRev'd as I'd done a few breather mods. I'm not sure how this compares to other 350Z RevUp's but Jez said it was putting out a good number. Car also feels much happier to build RPM in lower gears.
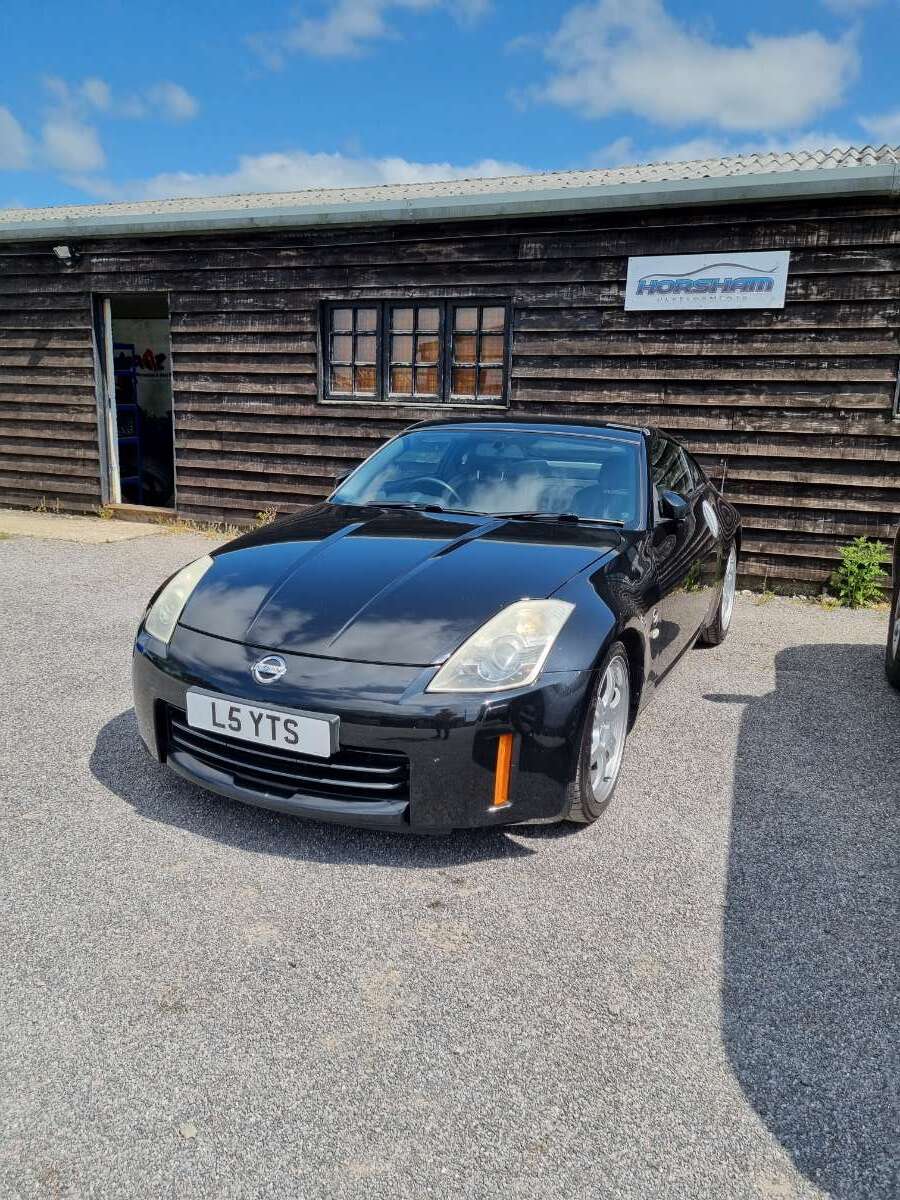
Modifications:
- HKS air filter
- Berk HFCs
- H-Dev plenum spacer
- Miltek cat-back exhaust
Flywheel Power (HP)
Power (HP)
-
2
-
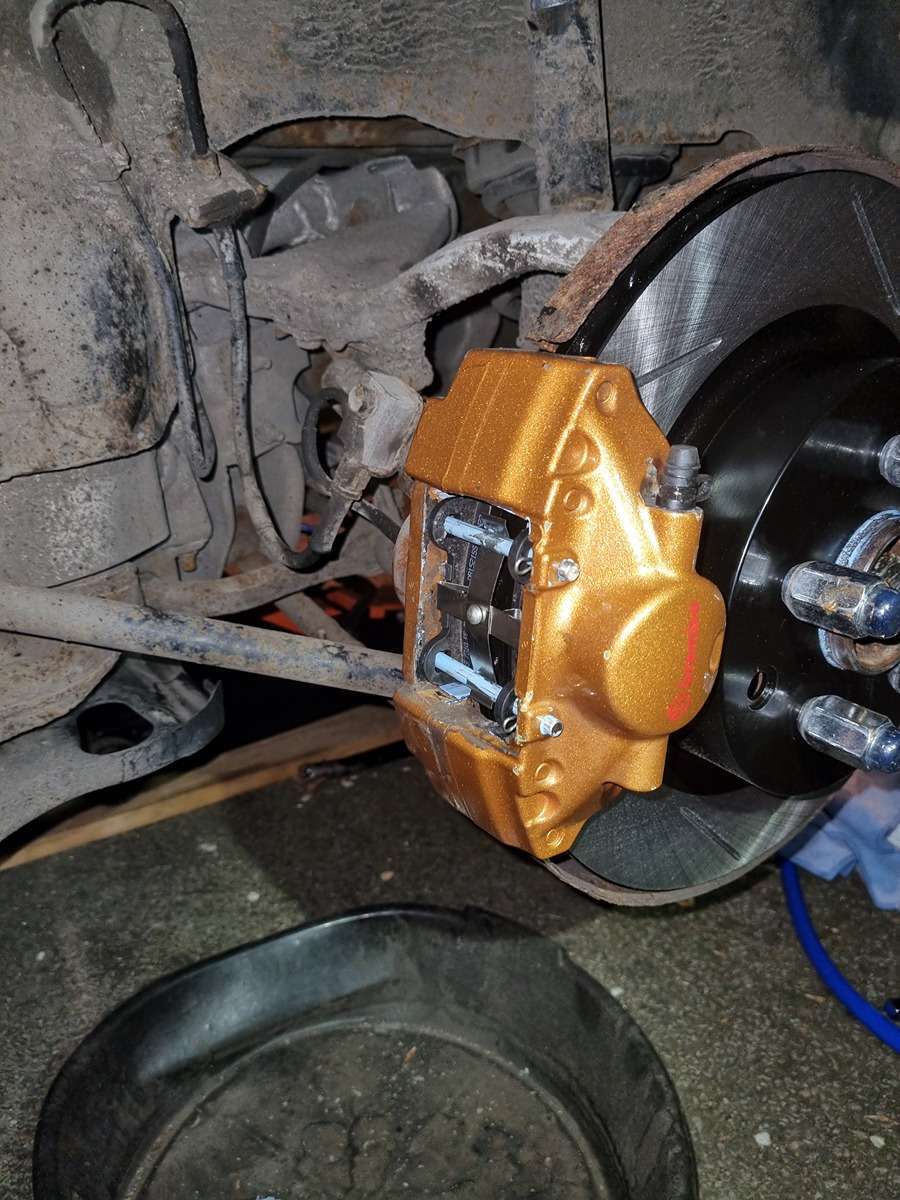
Another busy week with the Z.
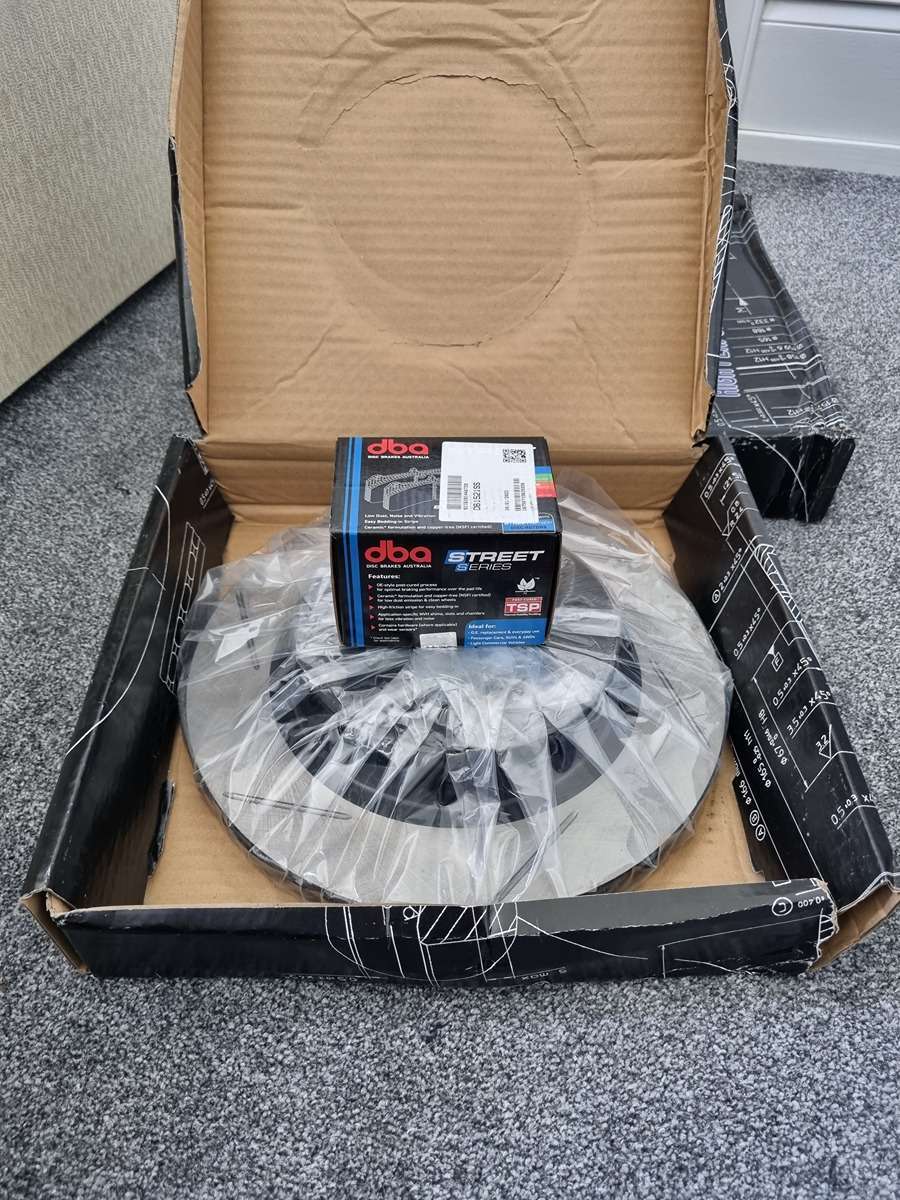
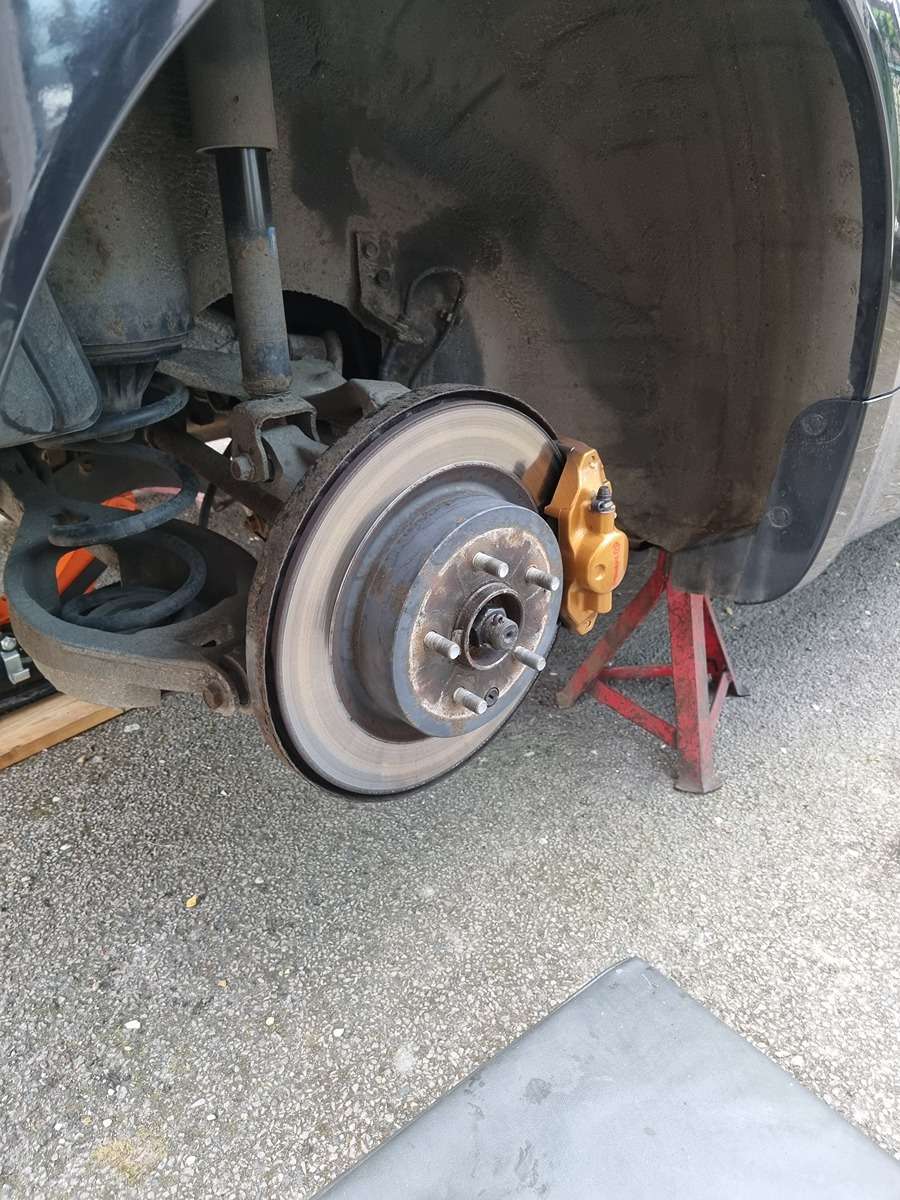
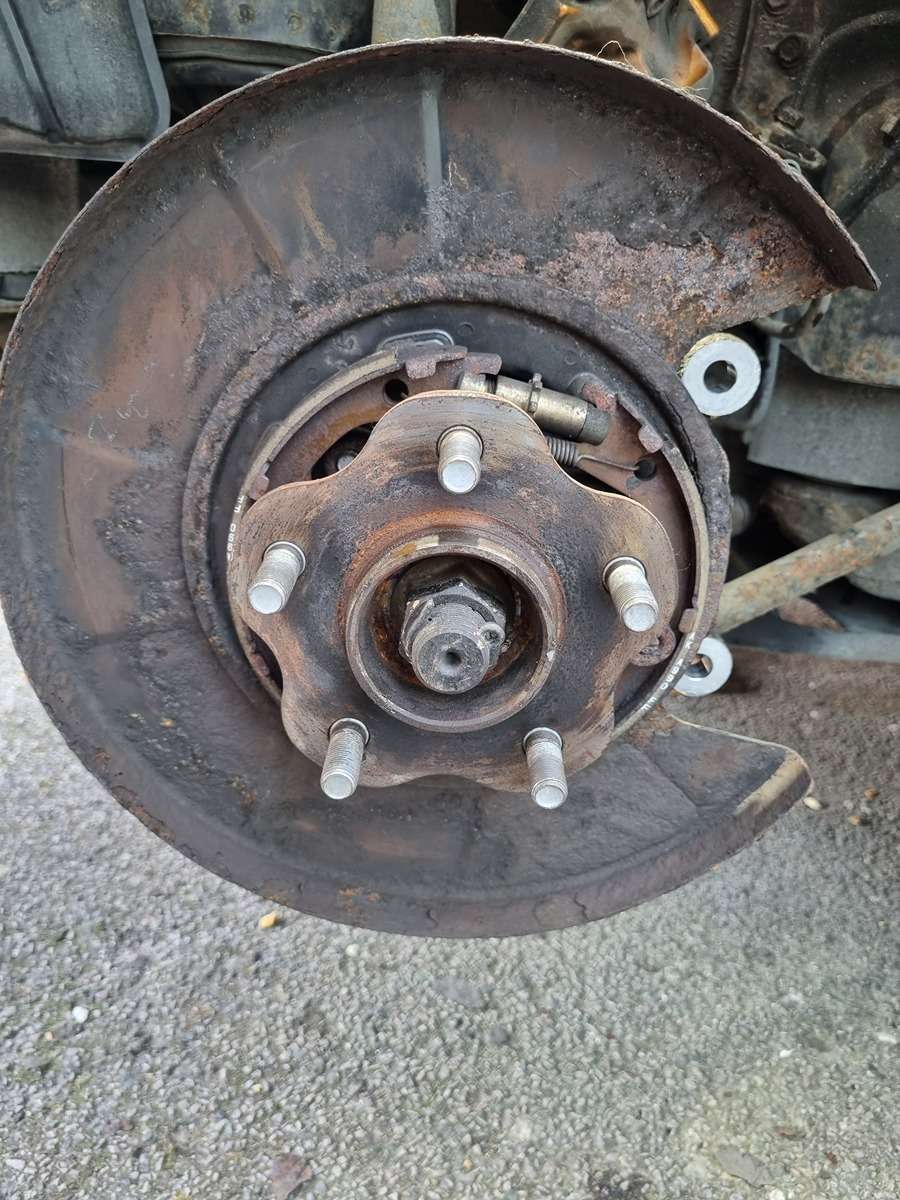
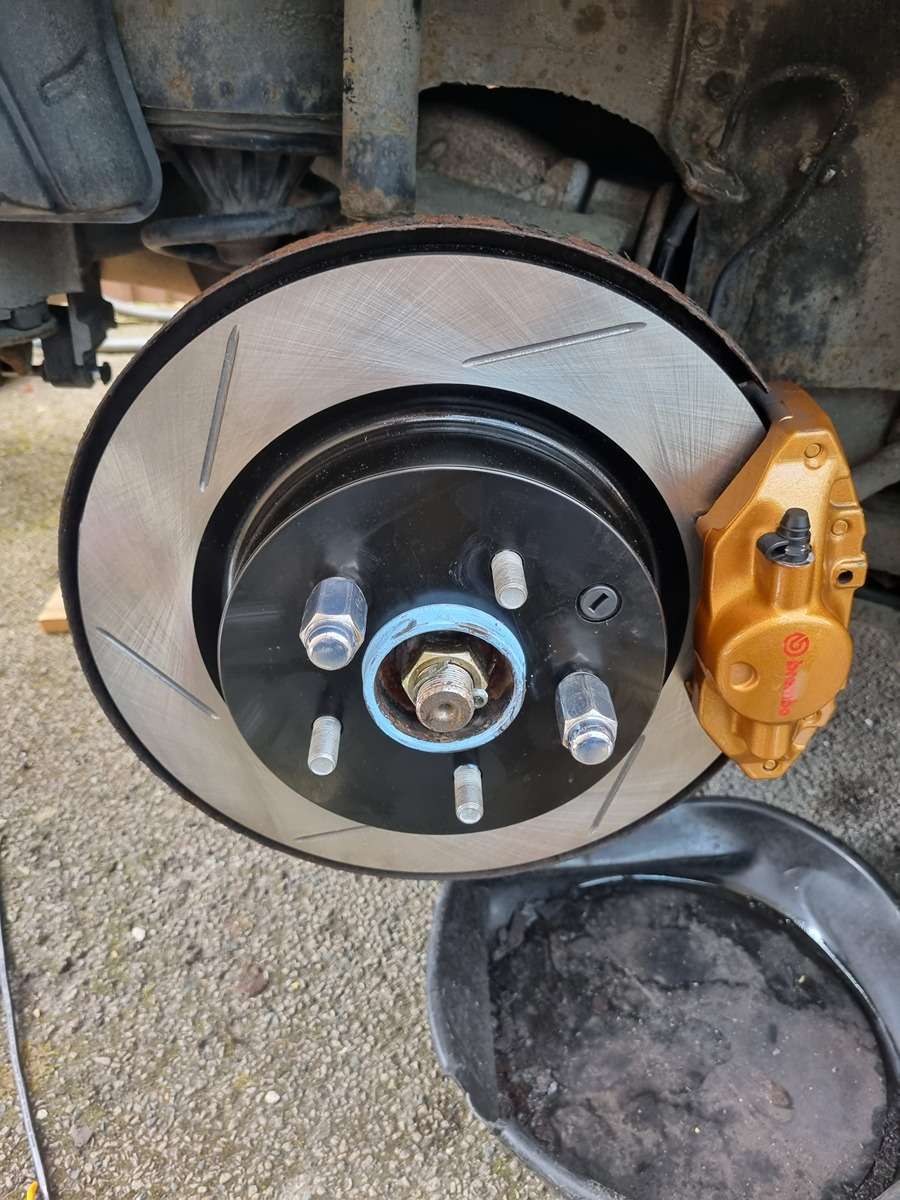
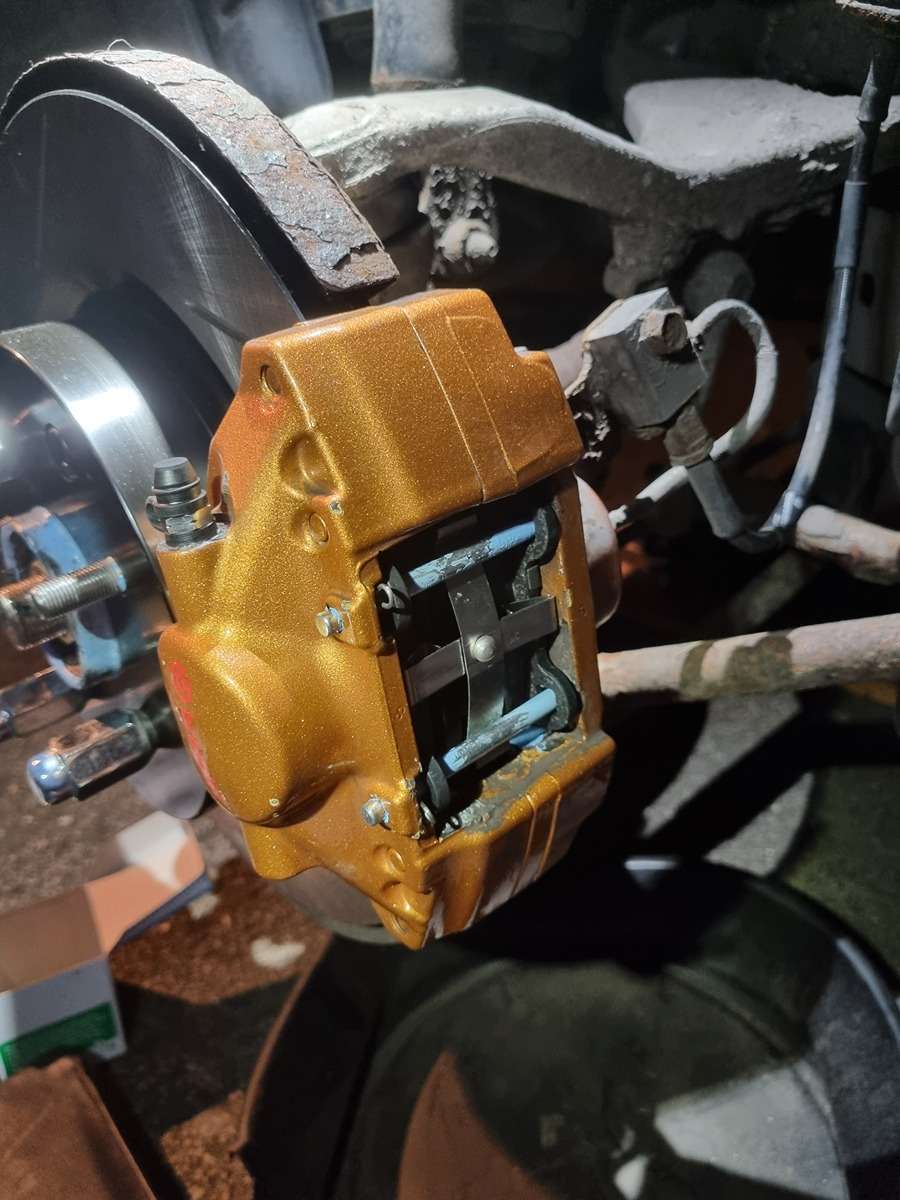
The wear sensor on one of the D/S rear pads started grinding against the disc. I then realised that they were the OEM discs from the factory! Quite a large lip had developed from the many brake pads over the years so I knew they had to go. I don't like taking half measures so I went with some nice StopTech slotted discs and DBA pads from Tarmac Sportz. I also bought new calliper hardware (pins, cross springs & clips) from TORQEN.
Big thanks to Chris @ Tarmac Sportz. He sorted me out with a great deal on short notice.
All 4 brake dust shields are crumbling away. I plan to powder coat some new dust shields so they should last much longer and look the business.
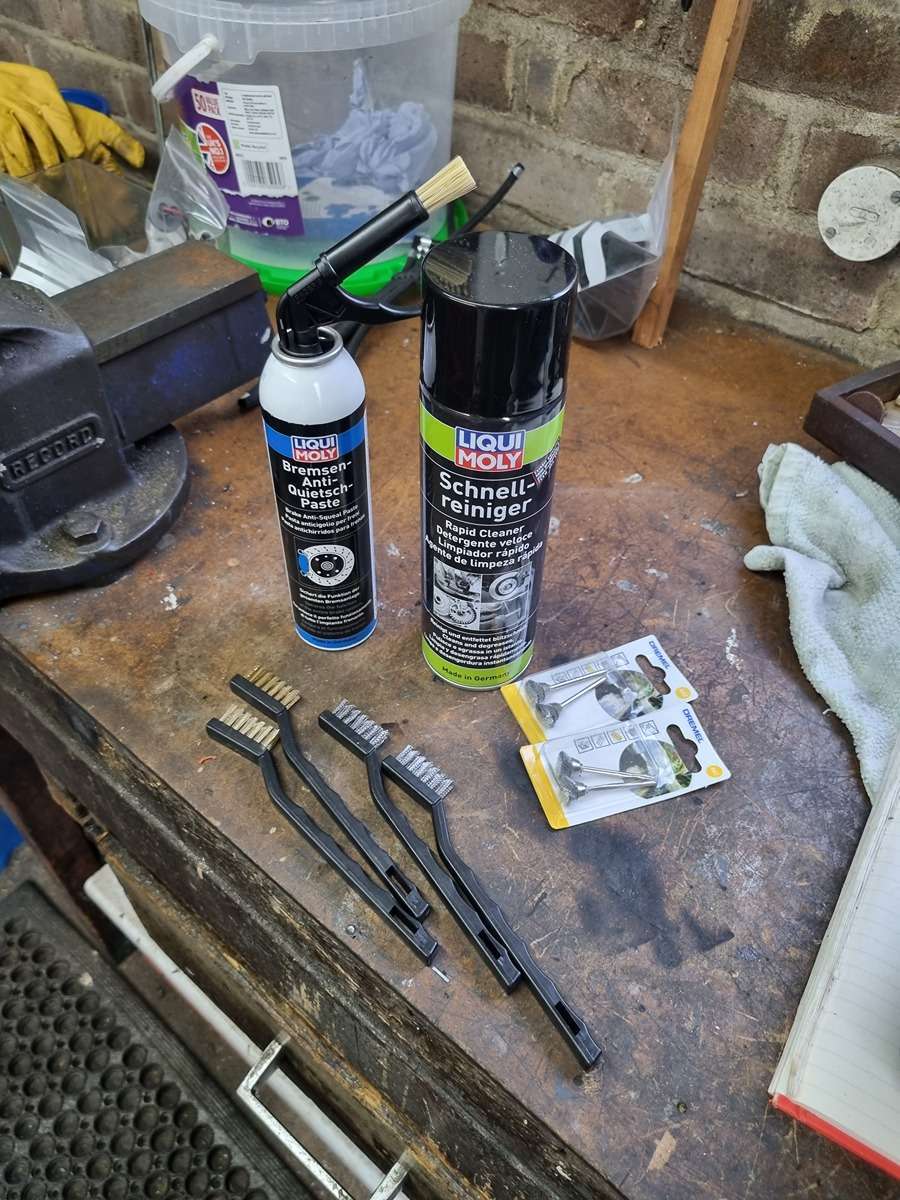
Products
StopTech Slotted Discs (ST126.42079SL+R)
DBA Street Pads (DB1521SS)
Liqui Moly 3074 Anti-Squeal Brake Paste
Liqui Moly 3318 Rapid Brake Cleaner
Brass & steel wire brushes
Dremel 442 carbon steel brushes
StopTech Slotted Discs & DBA Street Pads
Products
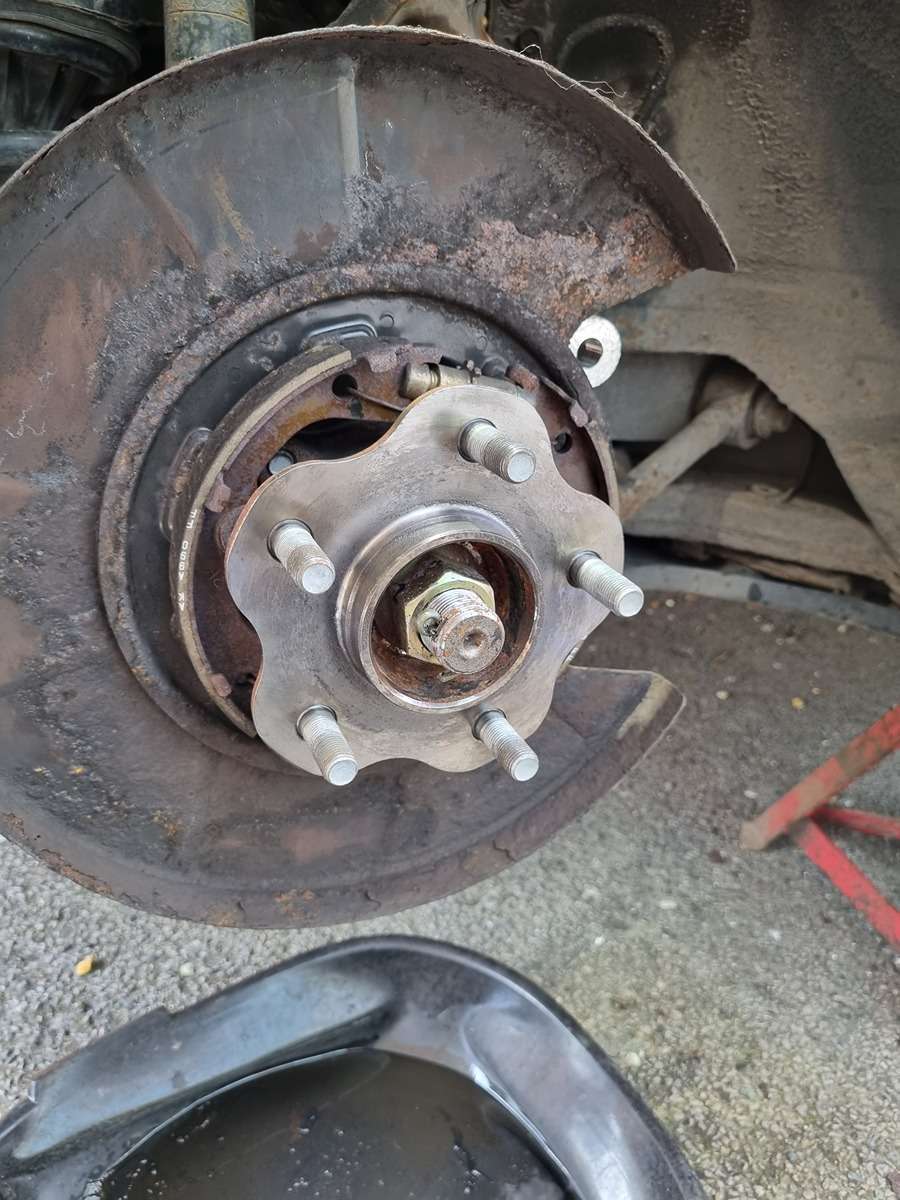
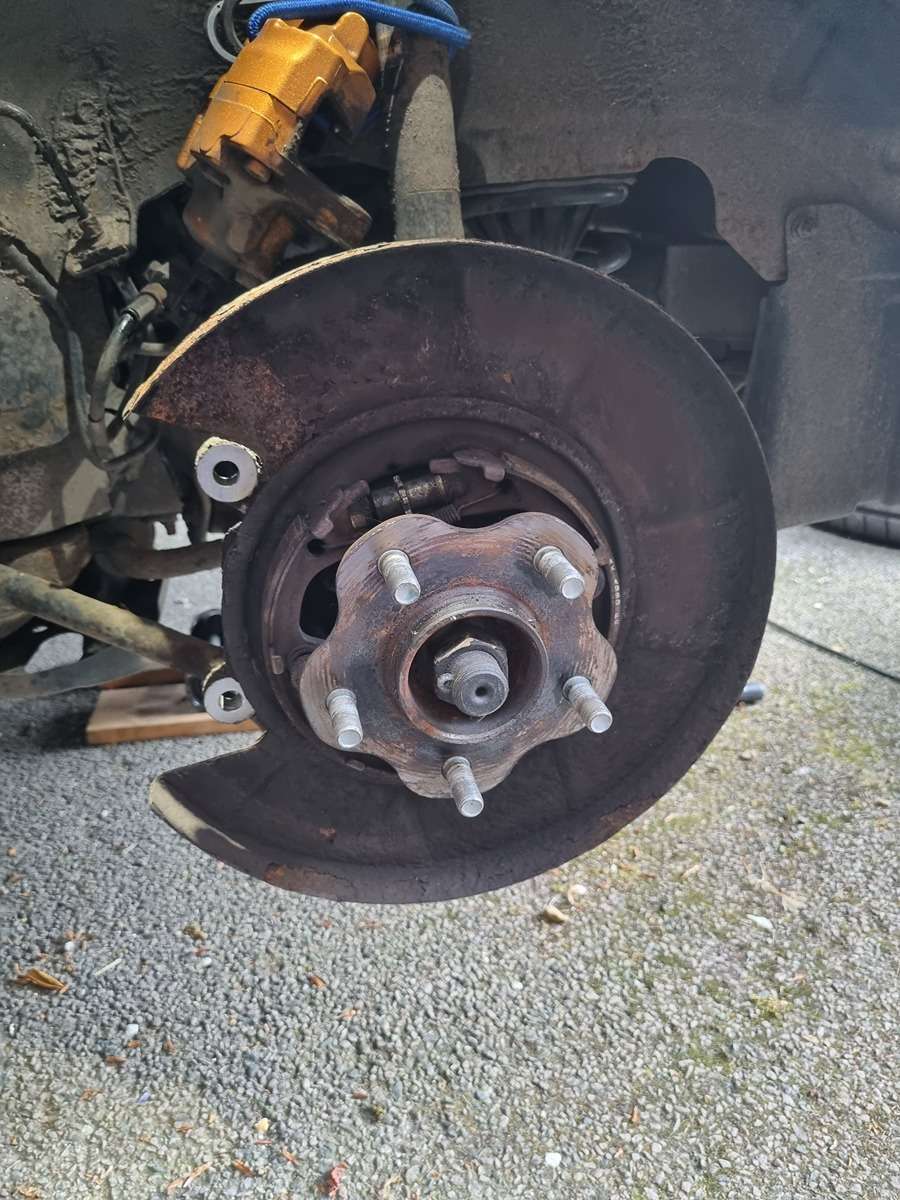
I assumed the contact point between the wheel hub assemblies and discs was going to be pretty rough. Bought some brushes and carbon steel Dremel attachments to get them back to clean and shiny.
The beginning
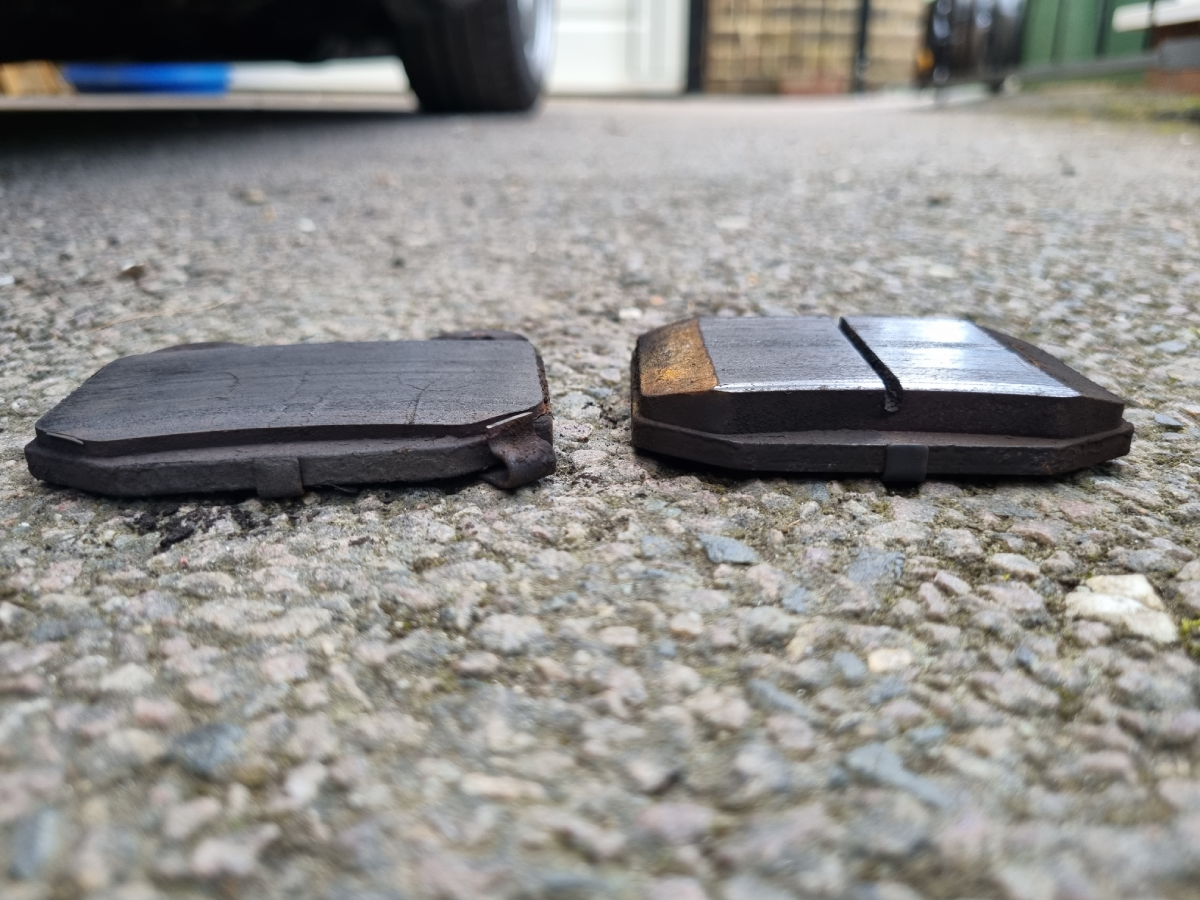
Old D/S Brake Pads
Either one brake pad was replaced and not the other or maybe it froze it place? Possibly the previous mechanic didn't properly clean, prepare and grease the pads?
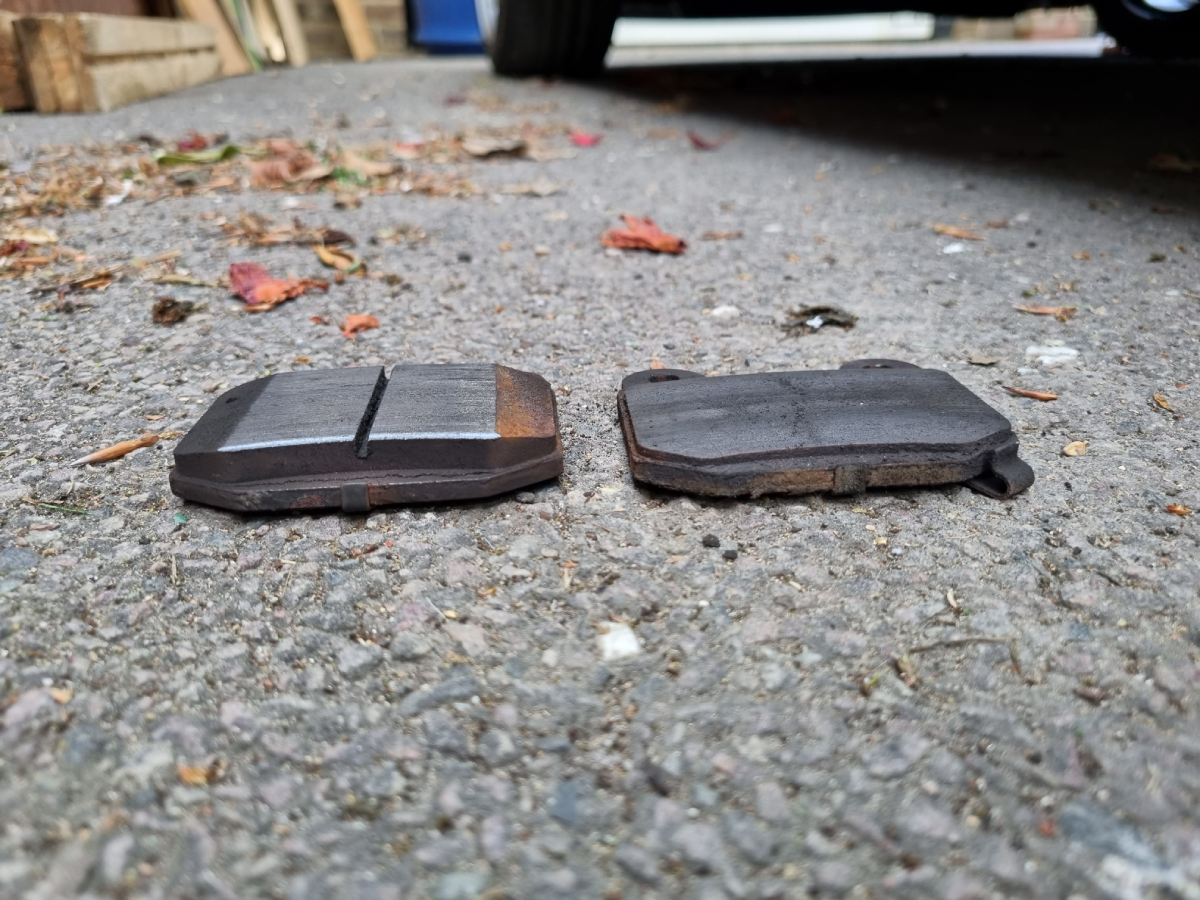
Old P/S Brake Pads
Same story. Could one of the calliper pistons have seized up? I'll keep a close eye on the new pads.
D/S Wheel Hub Assembly
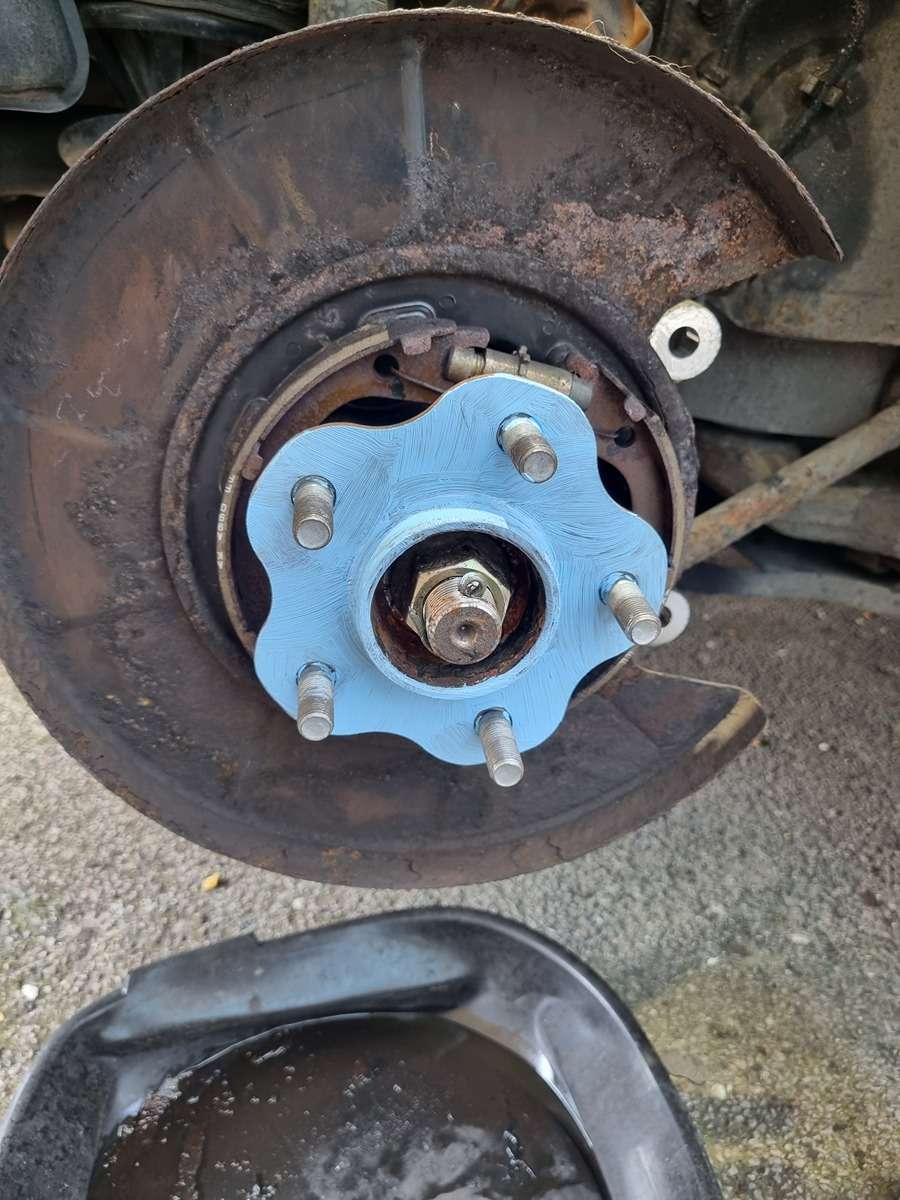
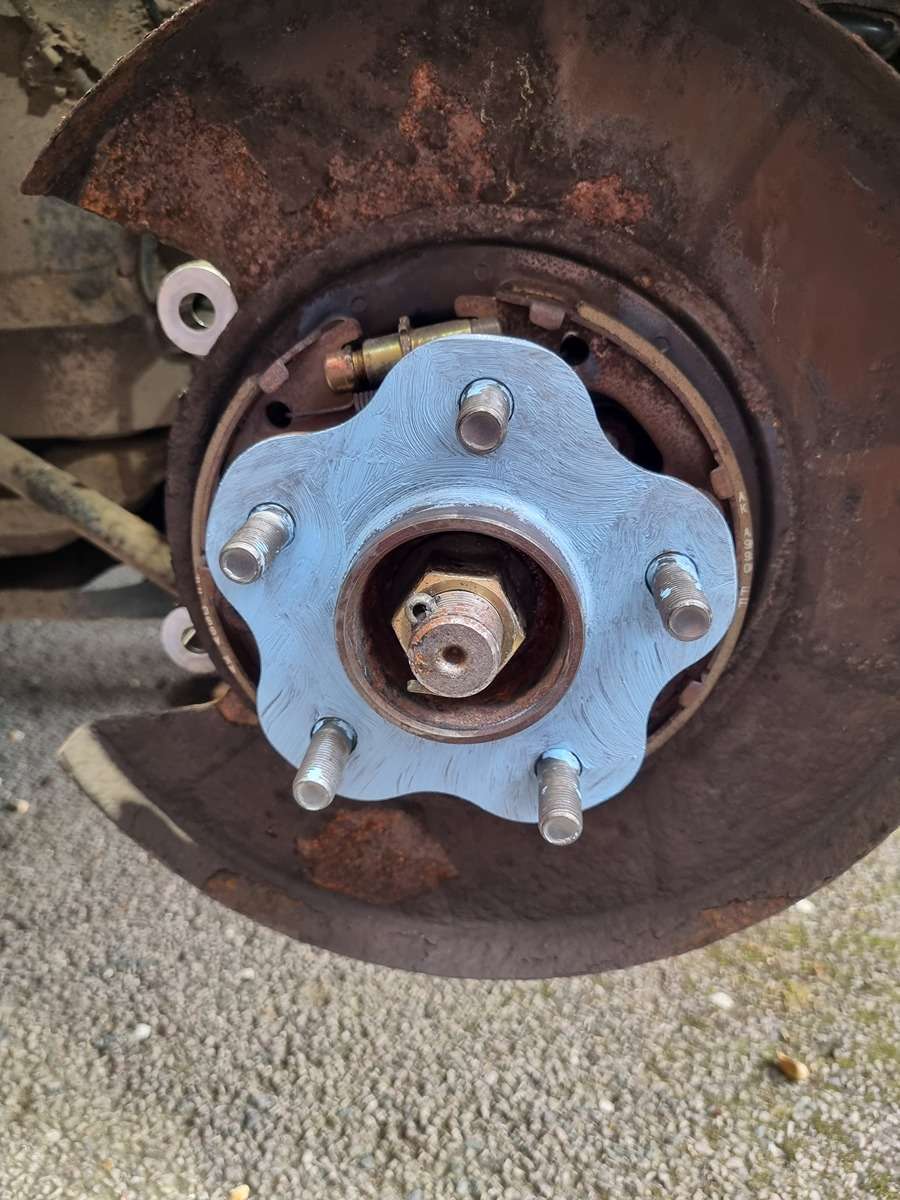
After cleaning
Liqui Moly Anti-squeal brake paste
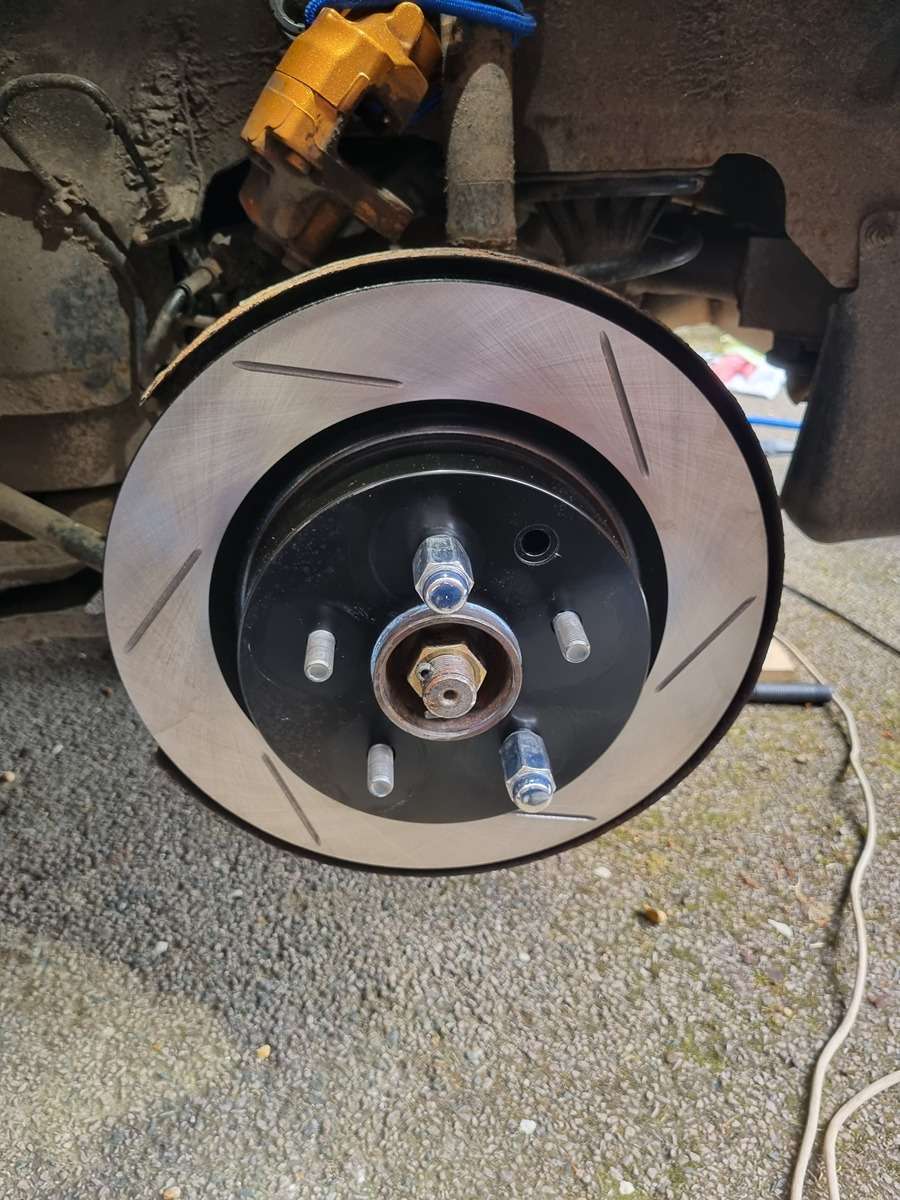
Disc & calliper back on
Brake pads in
P/S Wheel Hub Assembly
Cleaned and lathered up
New disc on
Same as D/S
-
2
-
-
1 hour ago, davey_83 said:
Internet hearsay as the VQ35 is internally balanced. Z1 Motorsport (the biggest name in Z scene worldwide) supply and fit lightweight crank pulleys for our engines and have done for years and years. If folks were complaining about engine failures, rightly seeking compensation they wouldn't still be selling them, poor business model.
I have the VMS unit on my DE and have done for a few years, no issues at all. Fast road driving, Dyno pulls, recommend it to anyone.
Looks like I'll get a set then! Do you notice any difference? Reckon I should import Z1's or just get Tarmac's? TORQEN also do a few different brands. What do you recommend? Thanks
-
1
-
-
3 hours ago, davey_83 said:
A job well done, nice preventive measure. Not seen an aux belt go like that before too. Nice lightweight crank pulley would have done the trick while you were down there 😁
Thanks. I did consider a lightweight crank pulley but I read somewhere about losing the harmonic balance? Tarmac do a nice full set so I might replace them when I sort the tensioners.
-
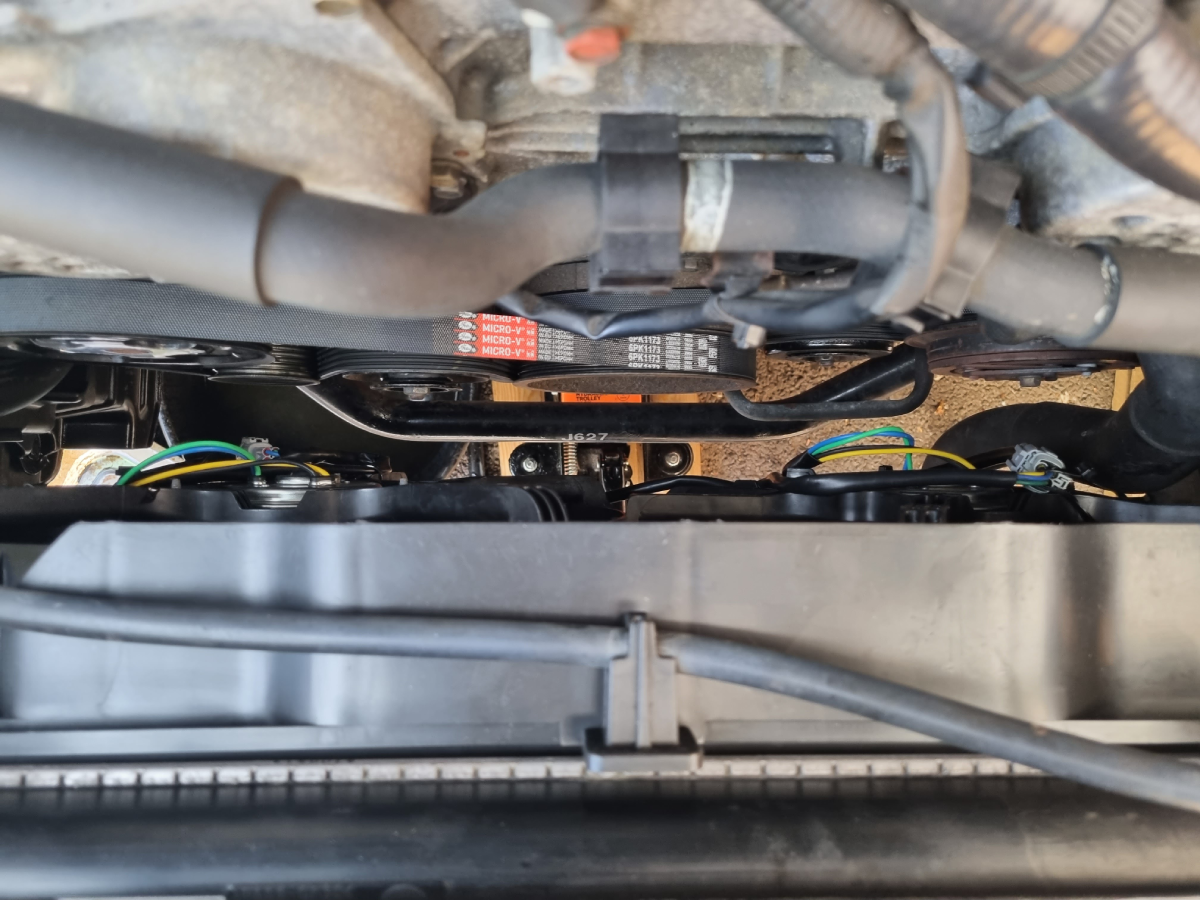
It's been a minute. I've been quite busy keeping the Z on the road.
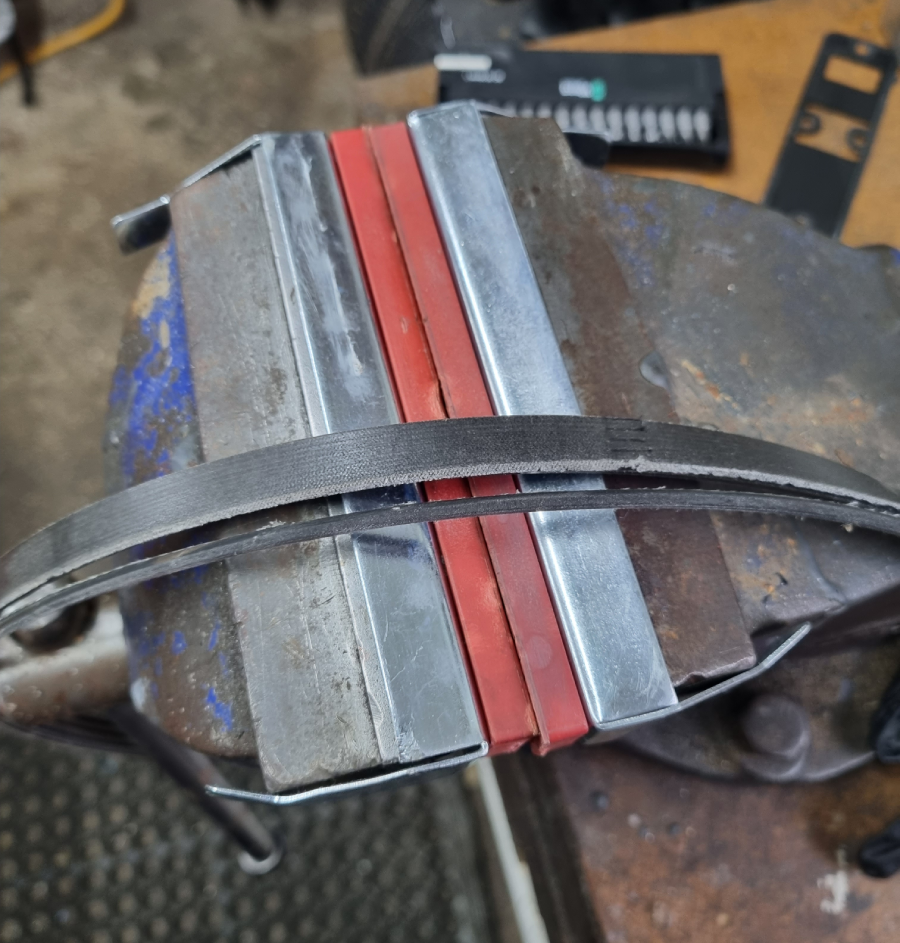
First, the A/C belt split right down the middle. I think the tensioners are worn but I didn't have new parts to hand so I cleaned them up the best I could. Replaced both belts with Gates. I'll also replace both tensioners soon.
Split A/C belt
New dual-channel belt technology
Gates belts
.png.670a8b8bc0c2127946087399145d4165.png)
All fitted

Nice and clean tensioner
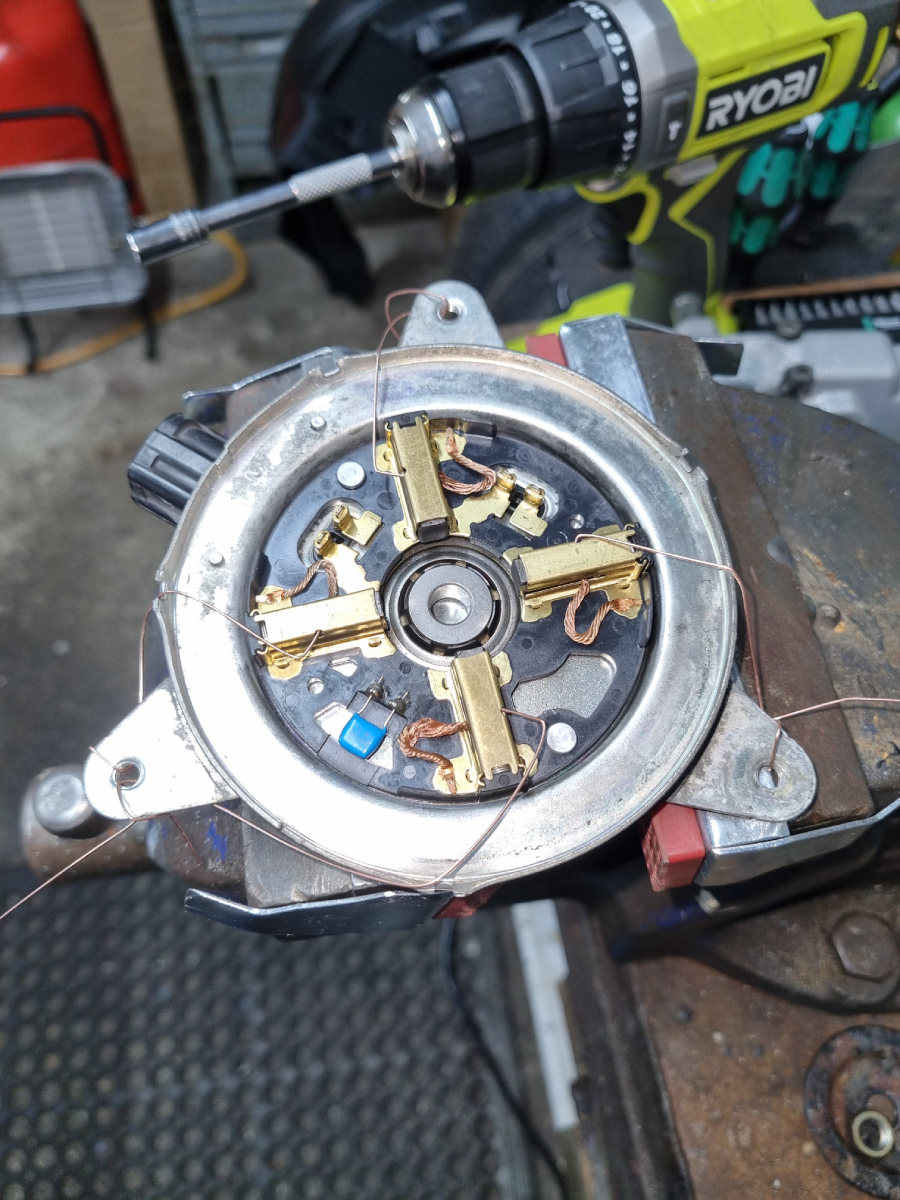
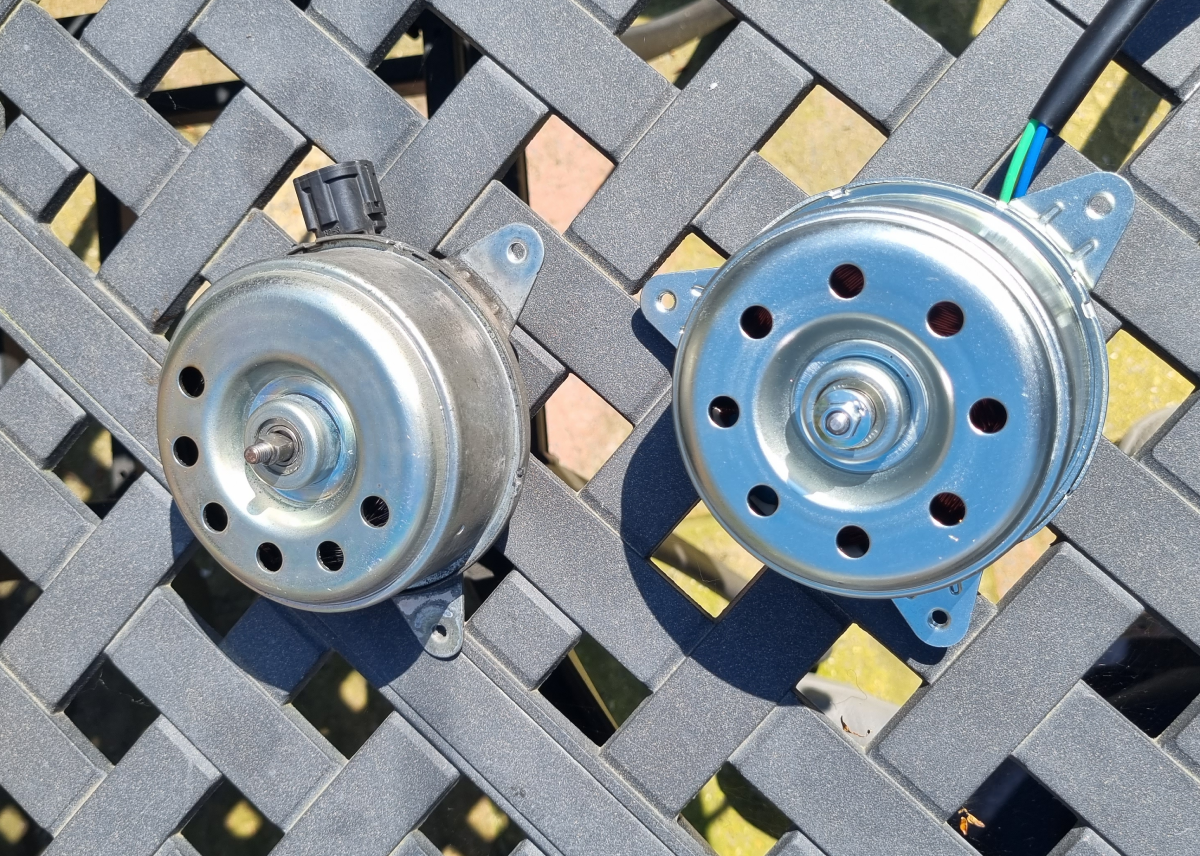
Second, I noticed the P/S radiator fan wasn't spinning and the D/S fan was a bit slow. I followed the forum guide to fix them but to no avail (funnily enough, the D/S motor stopped working and the P/S motor started working). Nissan wanted something ridiculous like £250 per motor but you can get near identical replacements on eBay for £40. The only negative I found was that the wiring is slightly longer.
Failed fix attempt
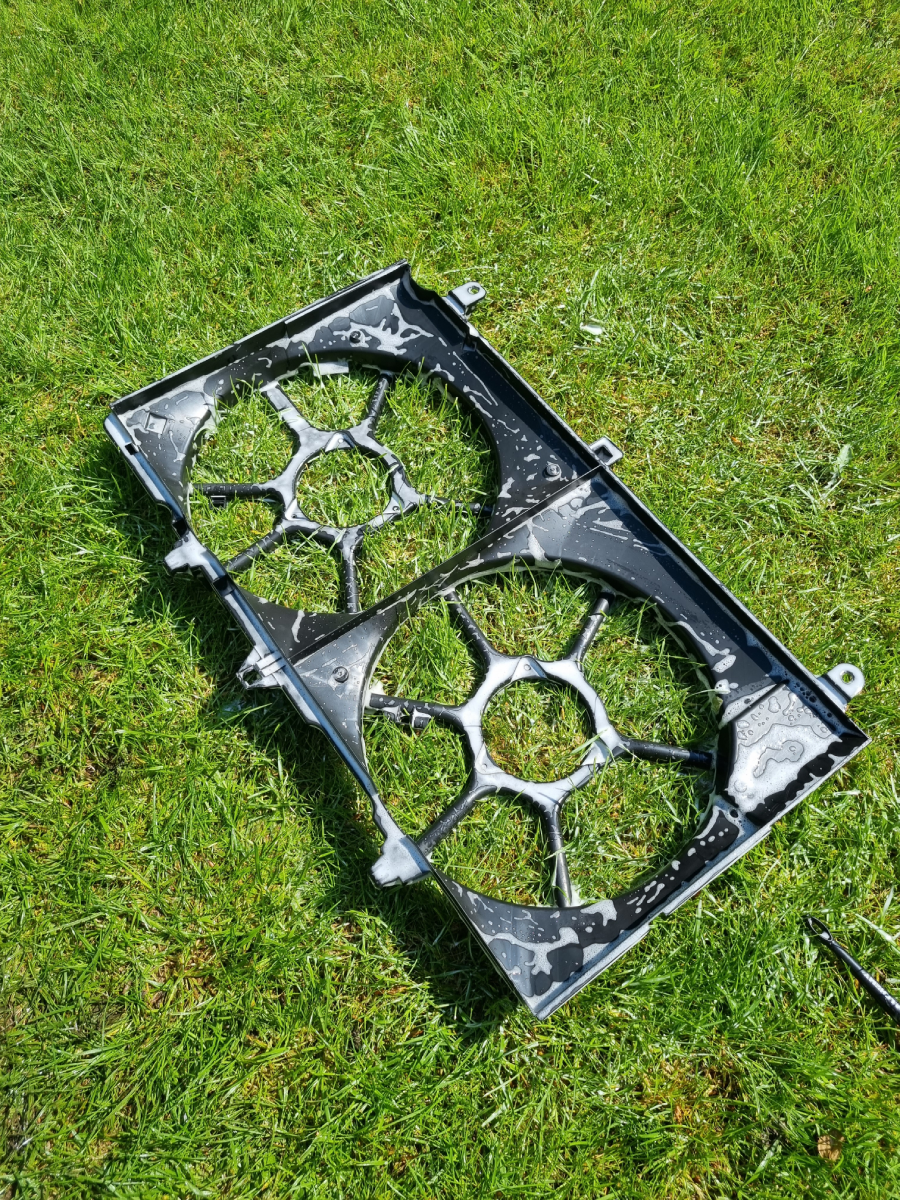
Cleaning the radiator shroud
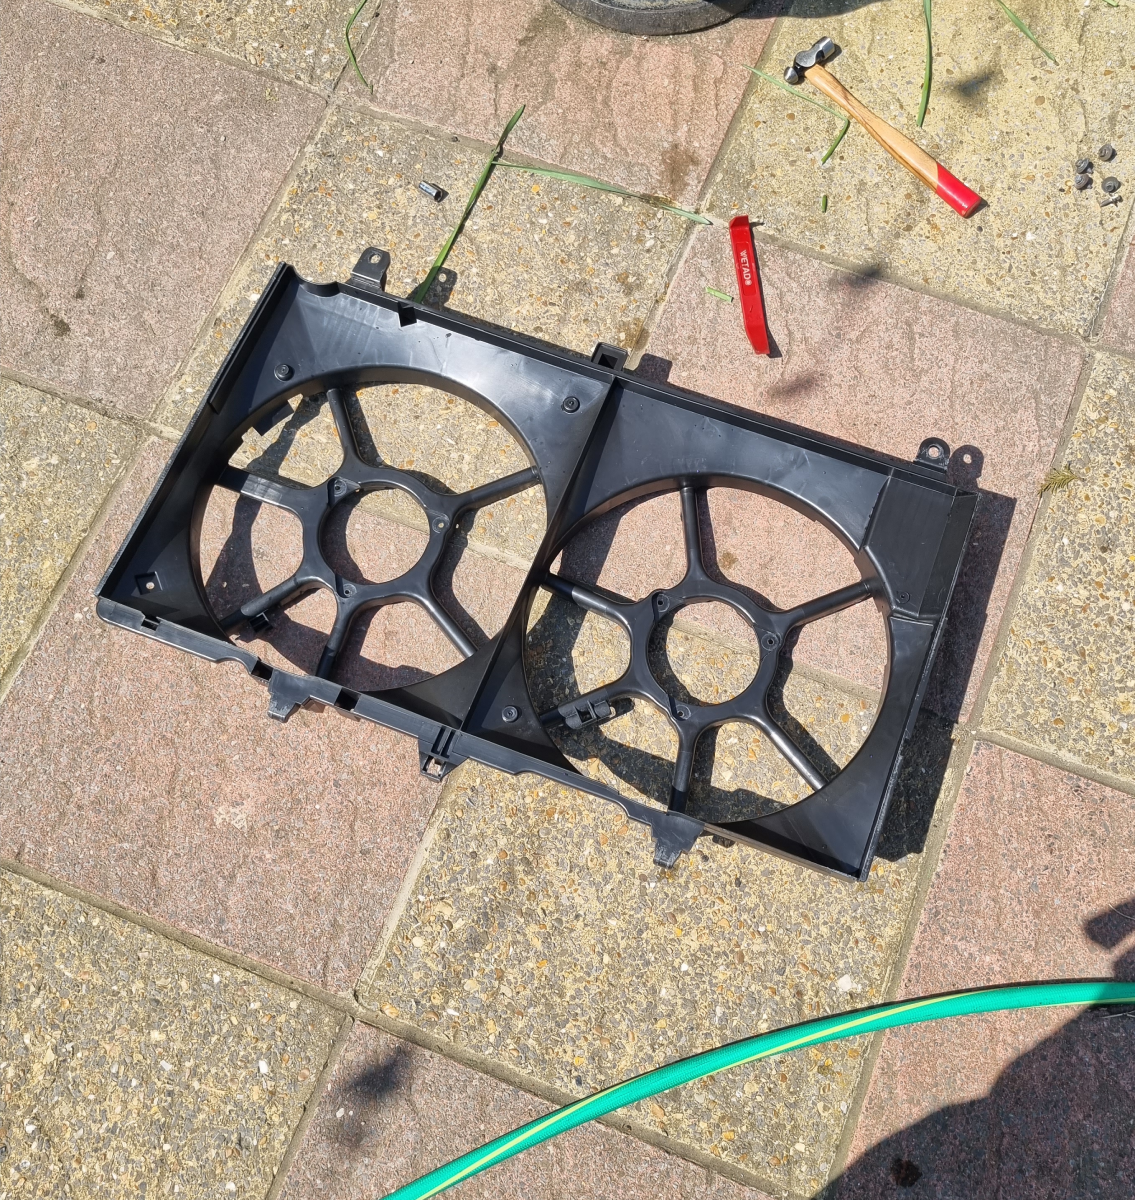
Spotless
OEM Motor (left) vs eBay motor (right)
New motors fitted
-
3
-
-
Roughly a year since I bought my Z
-
5
-
 1
1
-
-
Could someone give me a hand identifying which parts I need for my Z. It's a late production Rev Up as the date of manufacture is 10/2006 although some VIN decoding websites say 08/2006. I'm using amayama to find and buy these parts.
Looking to buy: OEM A/C & serpentine tensioner (whole assembly for both) and both OEM belts
A/C belt is easy as there's only one available for my car, 11920-AG900
A/C pulley has two options (11925-AG300 and 11925-AG30A), I'm assuming AG30A is the one I need?
Alternator pulley (serpentine) has two options also (11925-AL500 and 11925-AL50A), AL50A again?
Alternator belt is the trickiest one. Two options: 11720-4P10A and 11720-4P102. Nissan.co.uk say 11720-4P102 but TORQEN say 11720-4P10A with this on their website 'These belts are for vehicles between late 2006 models (after production date 08/06).'
Anyone know what I need? Thanks all
-
3 hours ago, mr v6 said:
I'd remove the A/C belt & run it again. Easy enough to remove. If the noise goes then you know where to start the diagnosis.
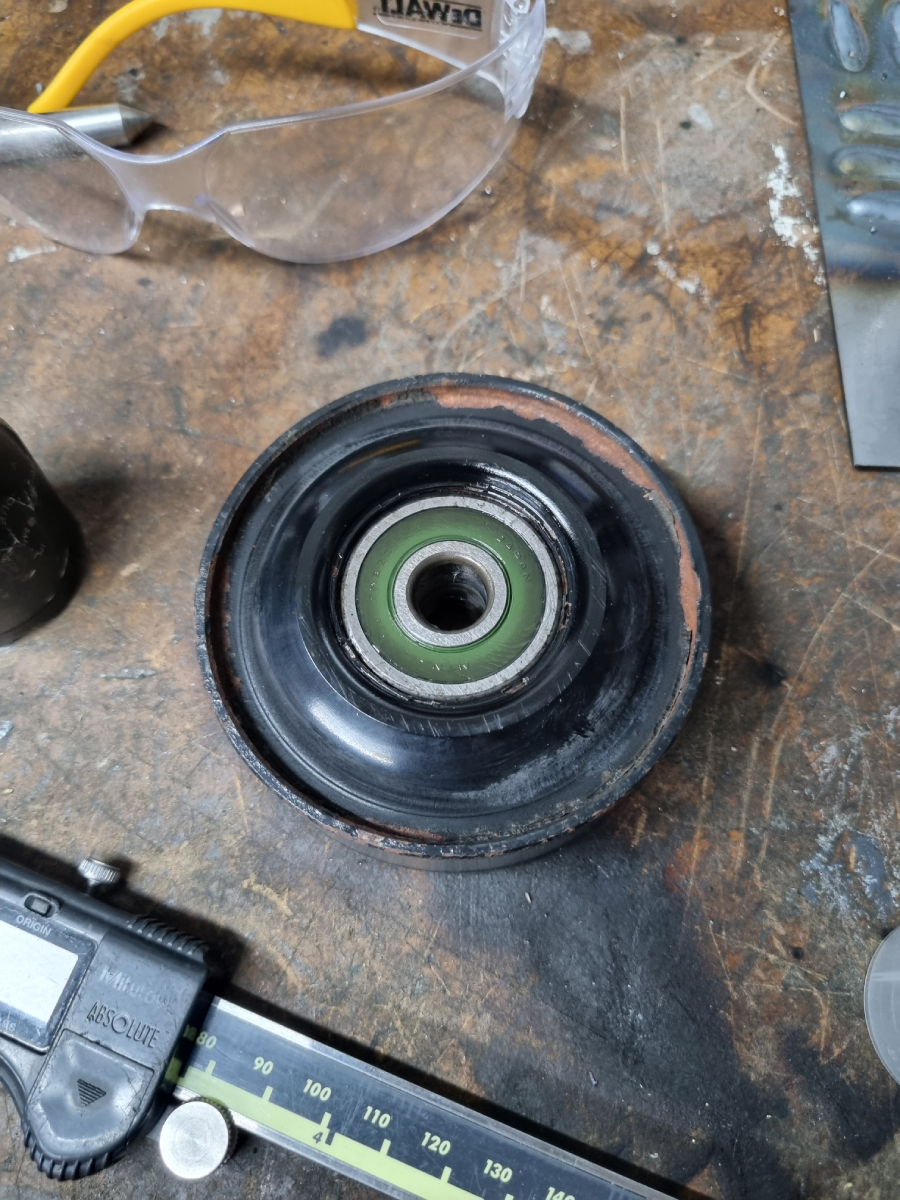
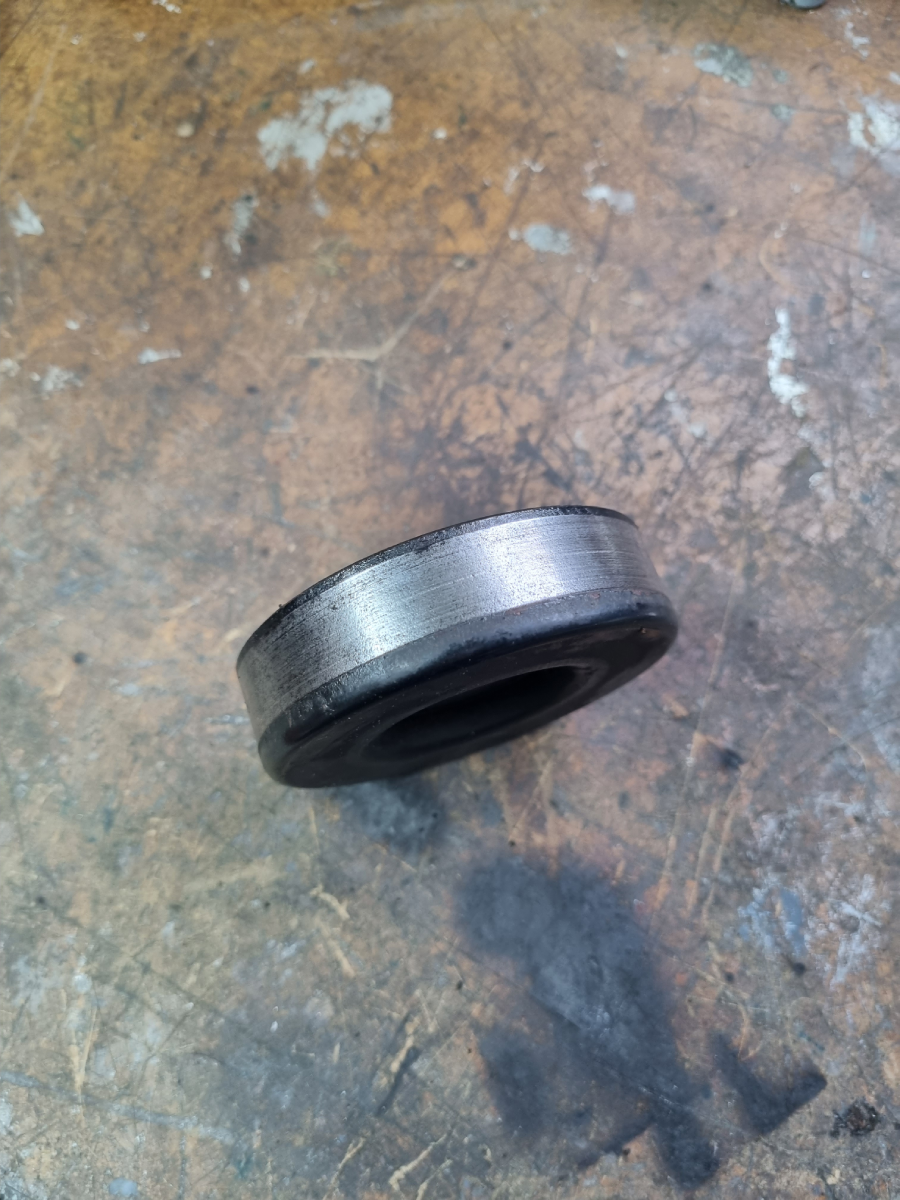
Just done it. Removed the A/C belt and tensioner. Think I've found the problem. I was really worried for a second as a sounds like these are usually followed by a large repair bill!
I'm going to replace both tensioners and both belts. Surprised me really as the belts were replaced in 2021 according the service history. No idea when the tensioners were last replaced; could possibly be original...
Worn tensioner
New dual-channel A/C belt design
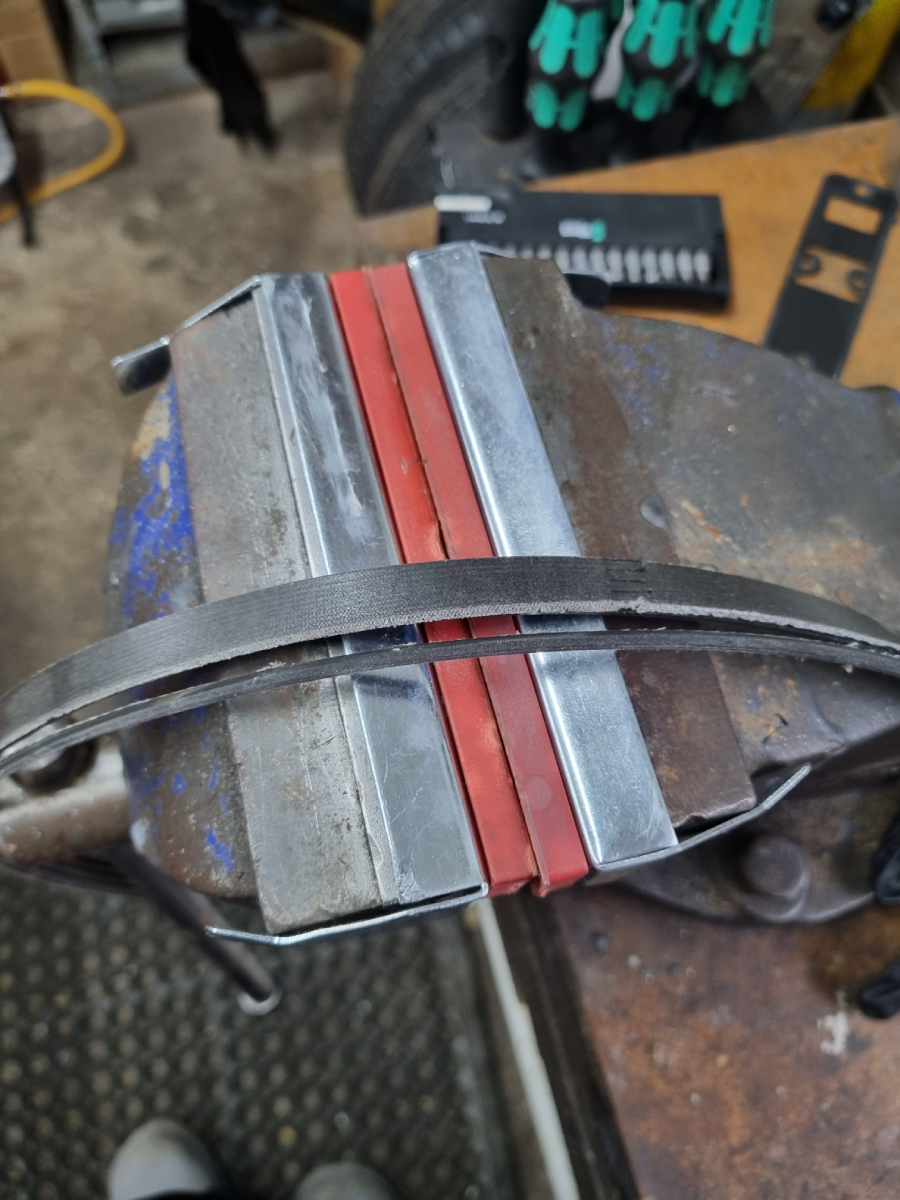
Less belt contact = less friction = more power?

-
Hi all,
Started my 2007 350Z Rev Up this morning and it doesn't sound right. Watch both videos and let me know what you think.
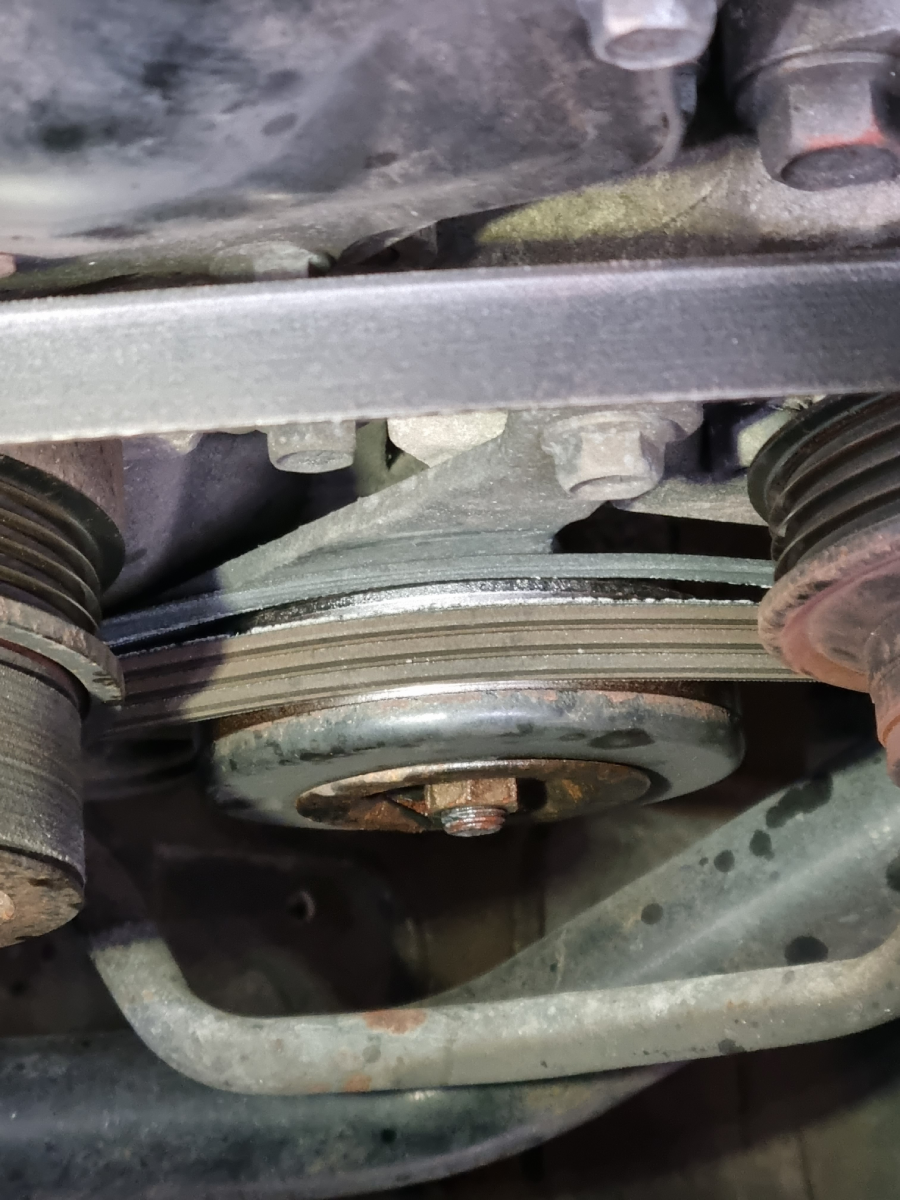
No CEL; no codes either. A/C on/off doesn't seem to affect the pitch or frequency. I can't exactly pinpoint where it's coming from but it sounds like it's coming from near the crank/A/C compressor area? Frequency changes with RPM. There's also a weird white notch/line in the A/C belt which I can't remember being there which is possibly related.
I've already booked in to see a local mechanic tomorrow but I'm hoping one of you lot have had this issue before. Slightly bricking it!
-
4 hours ago, Olly350z said:
Have you checked the small drainage tub on the headlight normally located on the bottom? Will be a small rubber tube about an inch long with a 90 degree bend, designed to let the headlight breath. I wonder if that's blocked
I'll have a look. Cheers
-
Received and fitted parts. Confirmed no condensation in the P/S headlight. Just checked today and I can see some moisture building up again

Next steps?
polaris' '07 350Z GT Log
in Member Build Projects
Posted
I just dug out the original email he sent me, and yeah, he has put his prices up. Still worth it though.
Original Email