


Falcata
-
Posts
107 -
Joined
-
Last visited
Content Type
Profiles
Forums
Events
Gallery
Store
Everything posted by Falcata
-
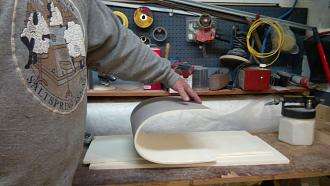
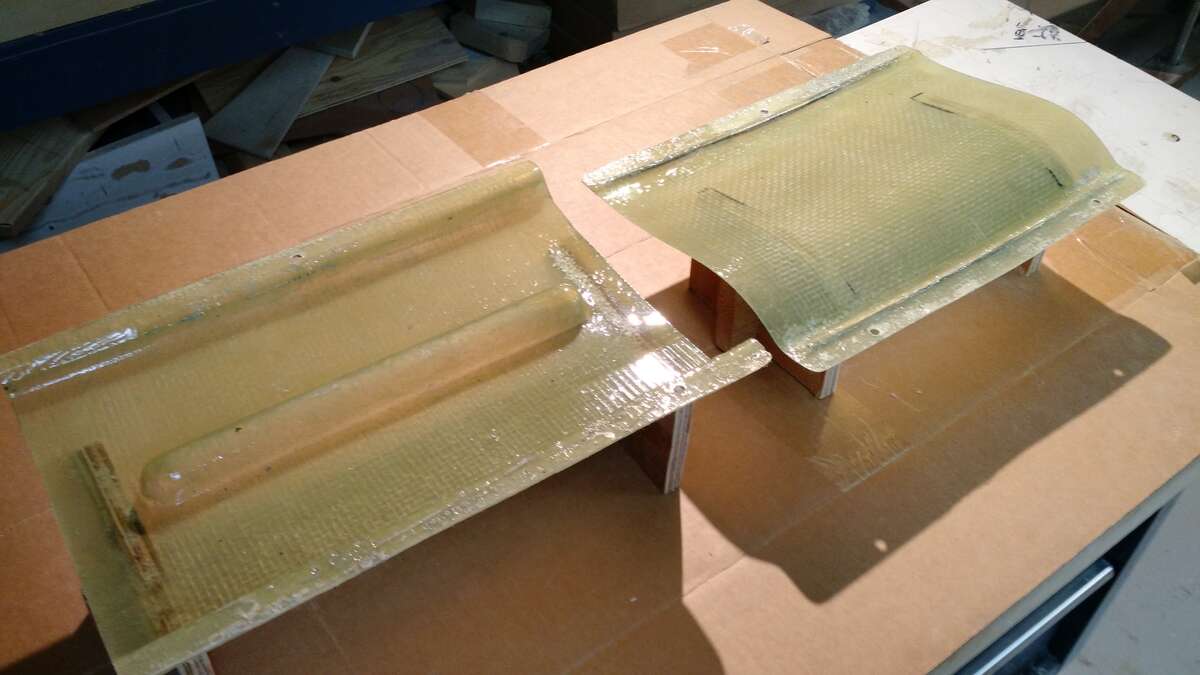
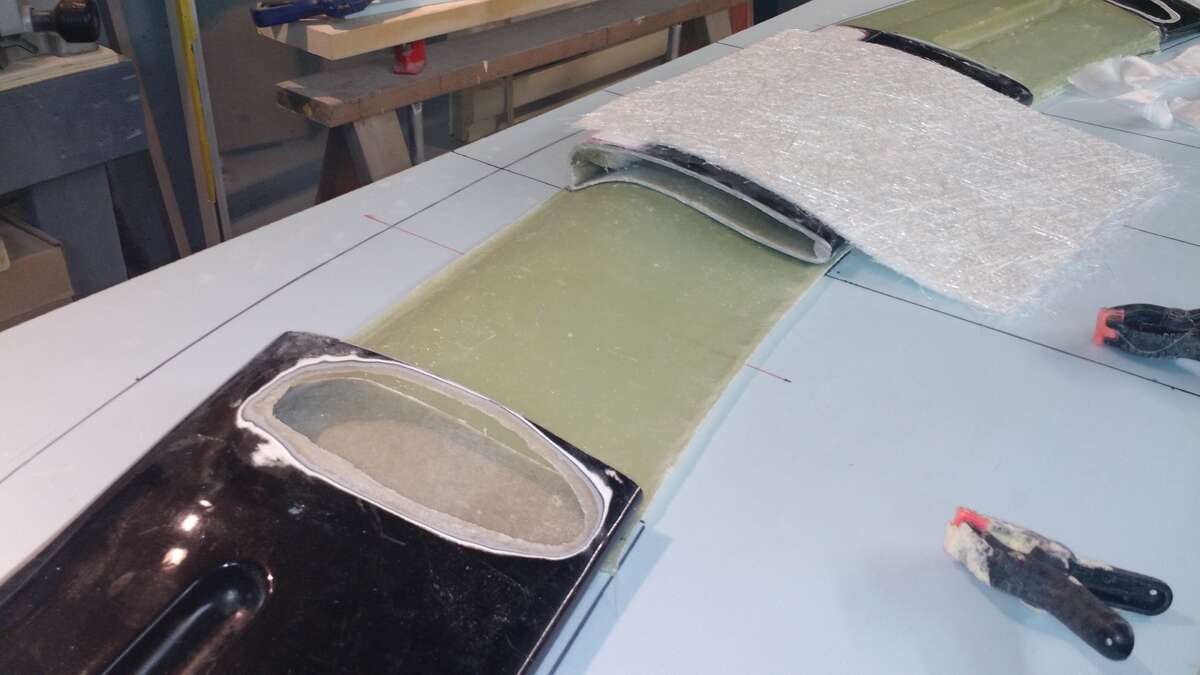
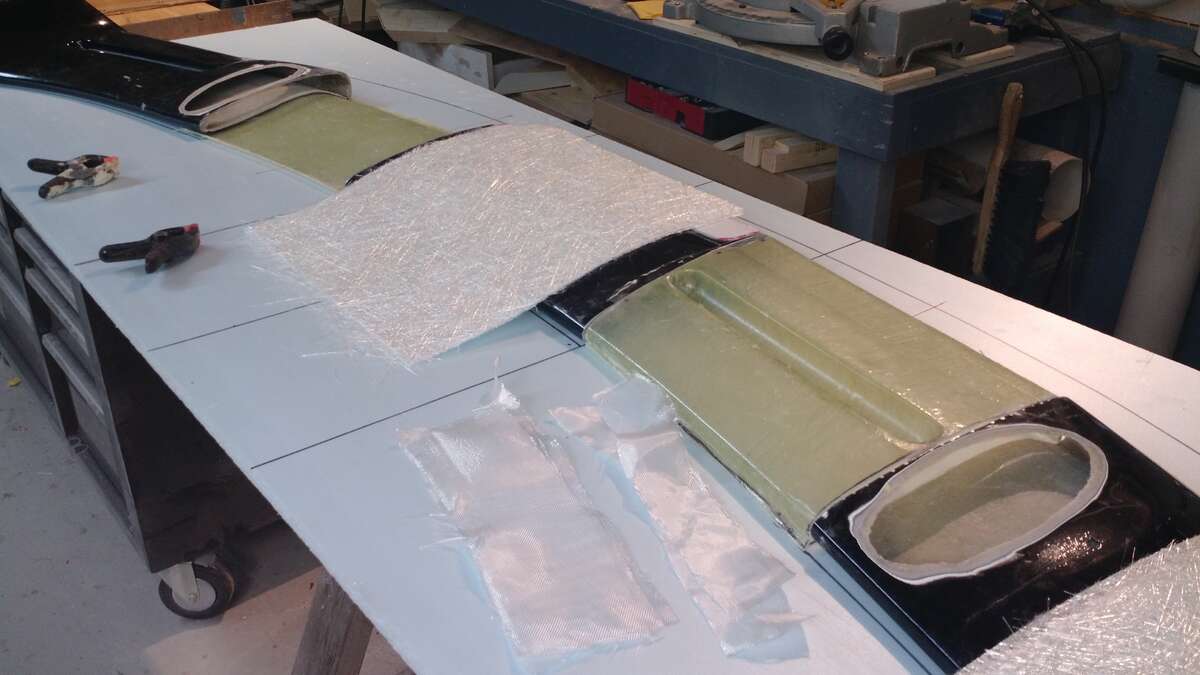
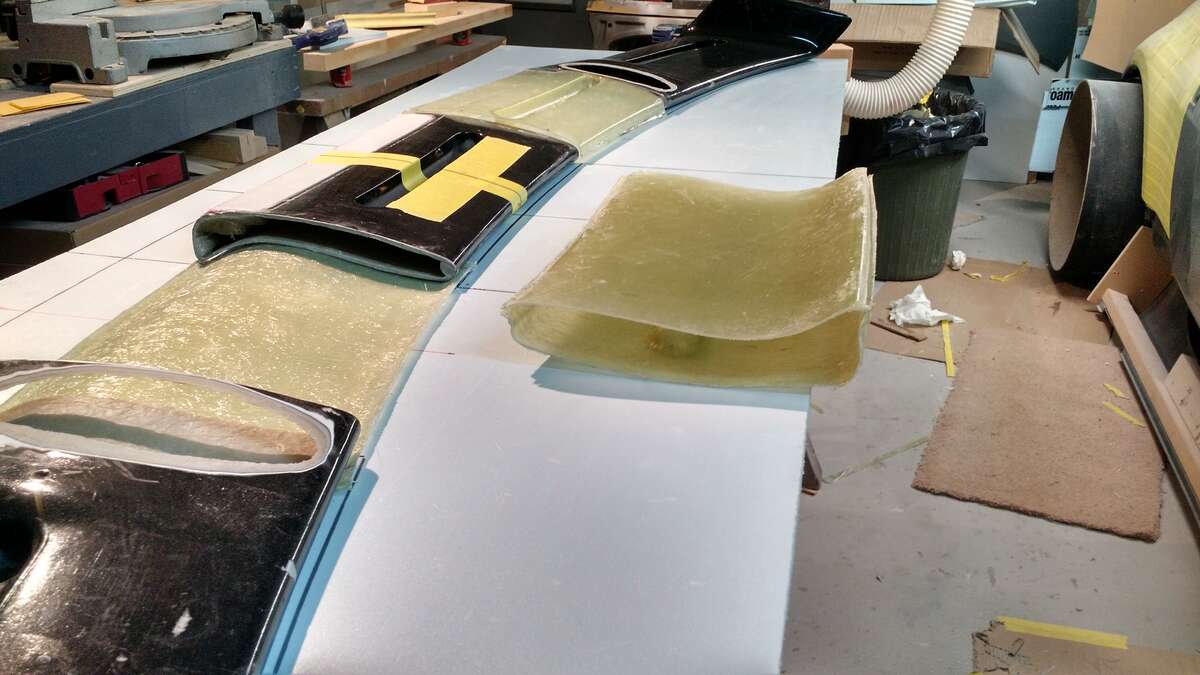
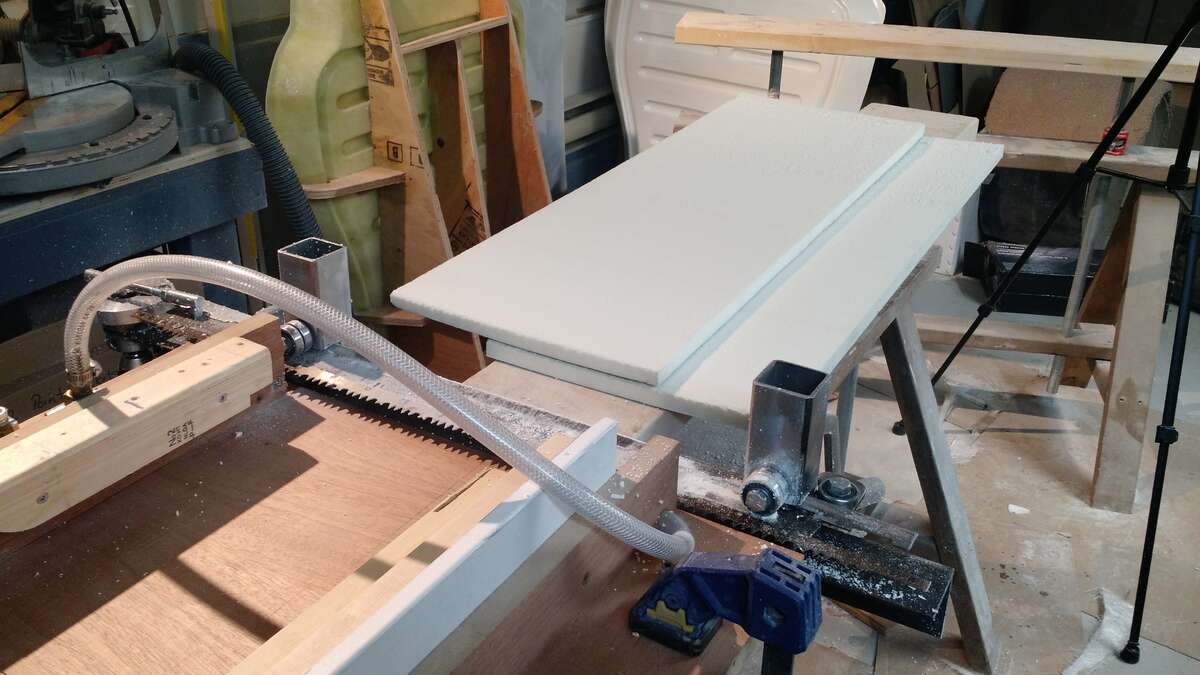
Started using the new foam , its going to help a lot , I can cut the foam with the new saw I built and then run it through the thickness planer to what ever thickness I need . Here you can see how malleable it is when thinner .
-
Hi DoogyRev Yes I am in Canada , I live in Victoria on Vancouver Island .
-
Hi I am planning on making really good tough durable molds , I have a buddy who wants one , plus you are right about being able to make more parts in case of a crash or something . Thanks for your interest .
-
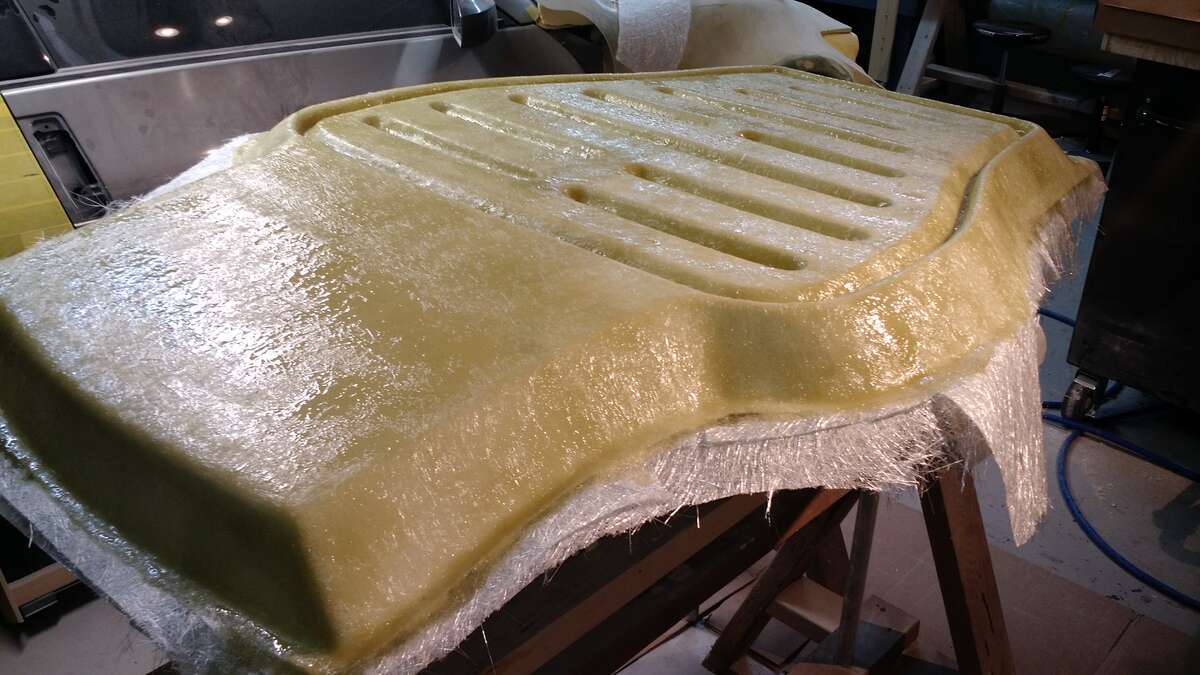
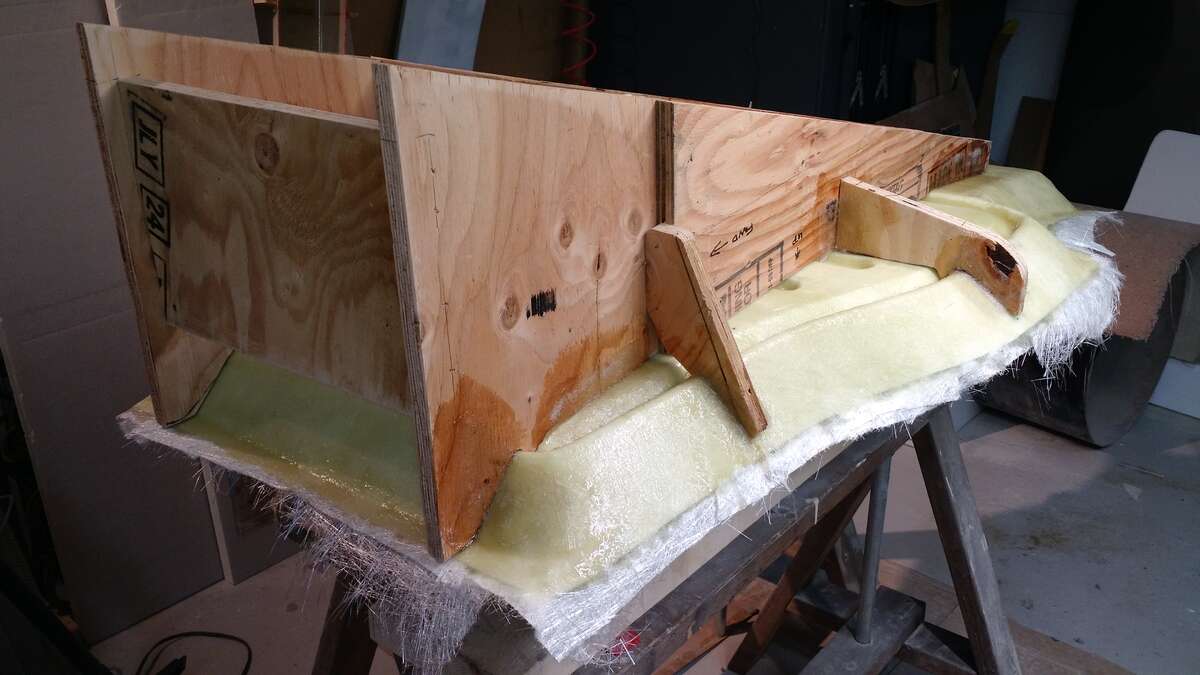
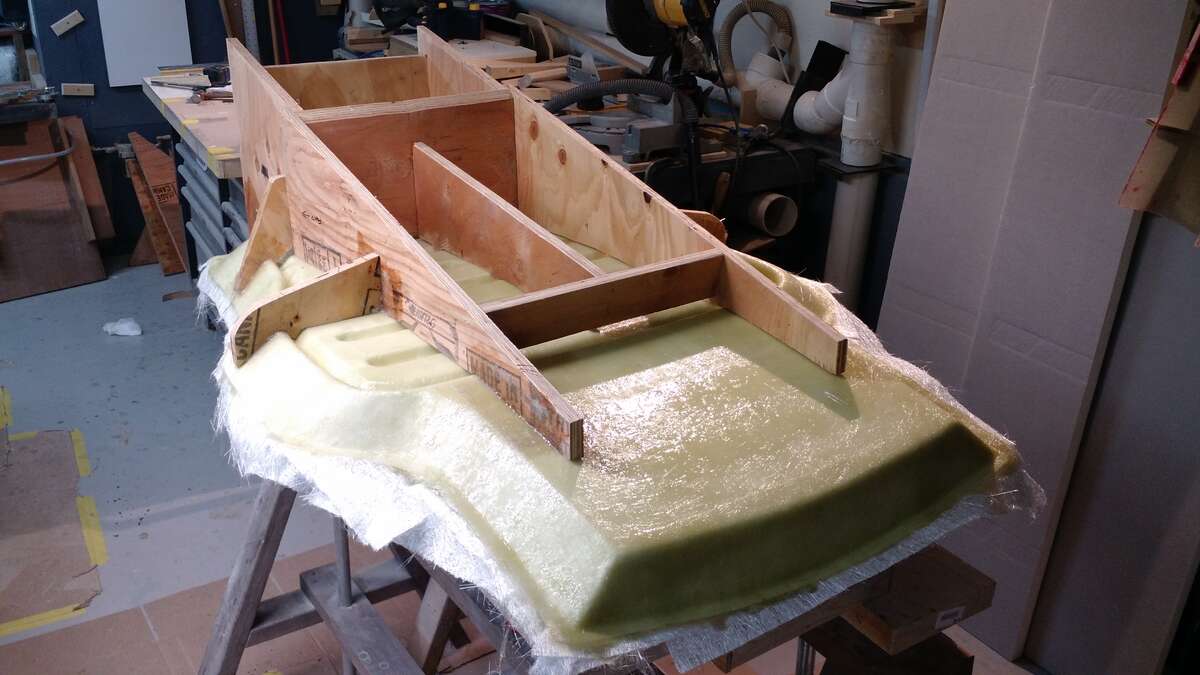
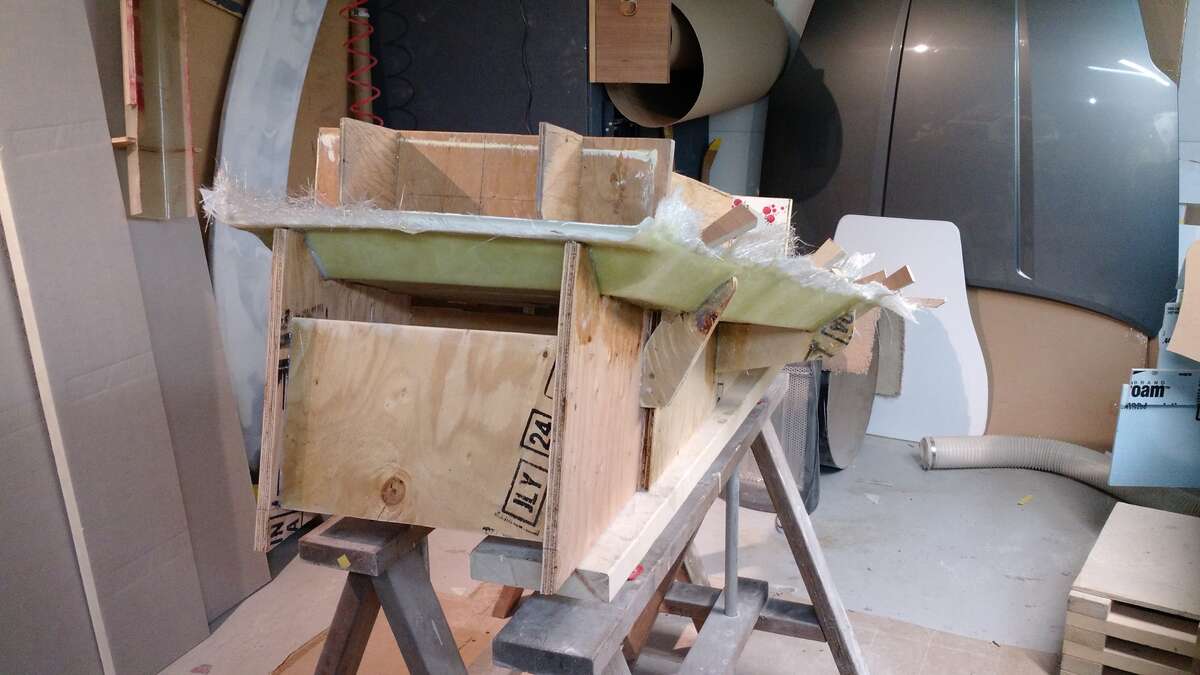
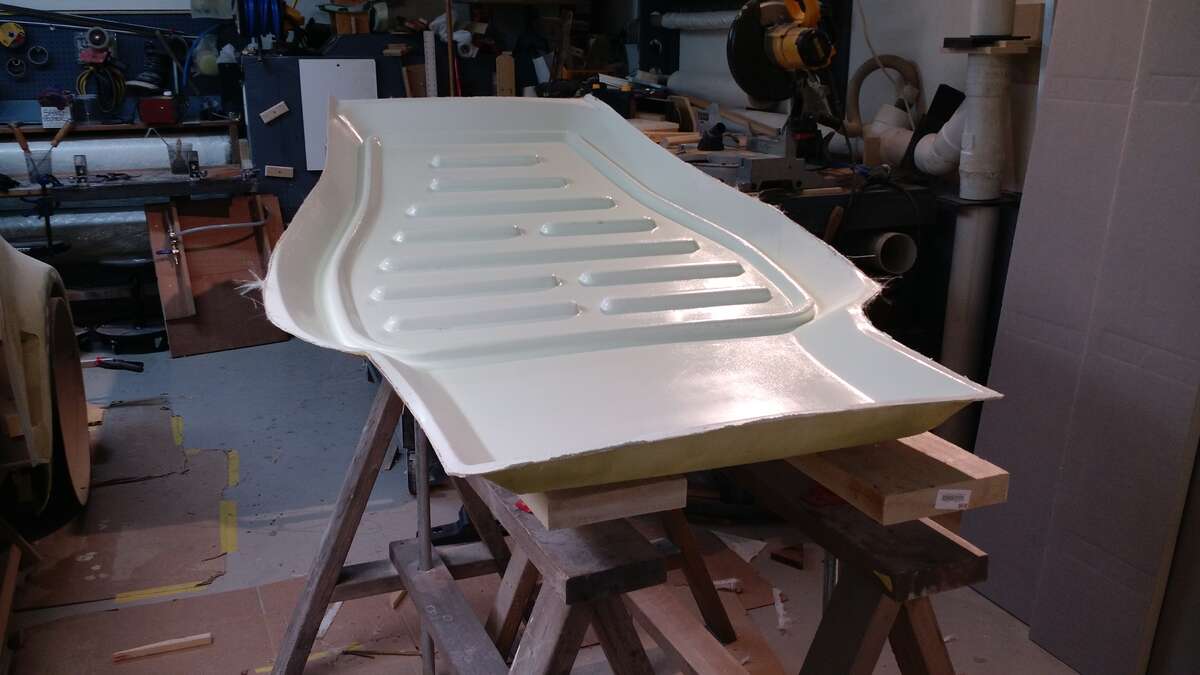
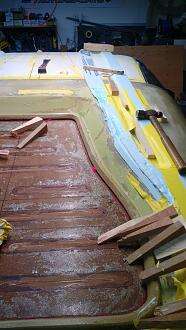
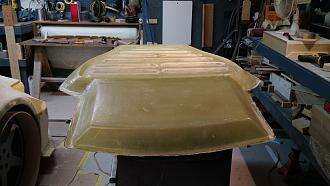
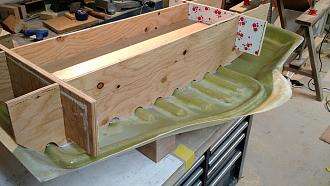
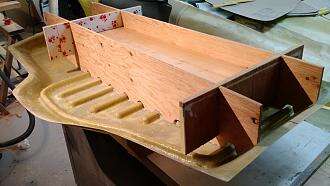
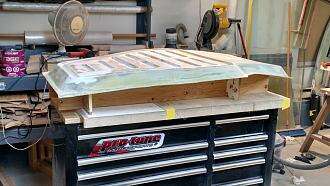
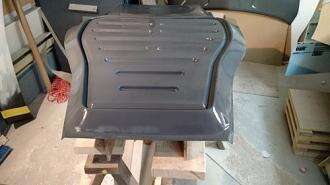
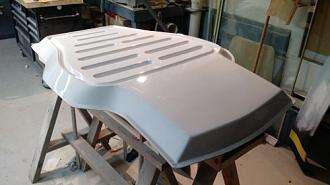
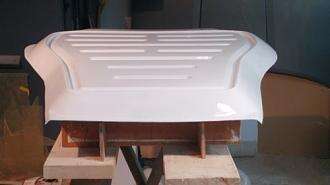
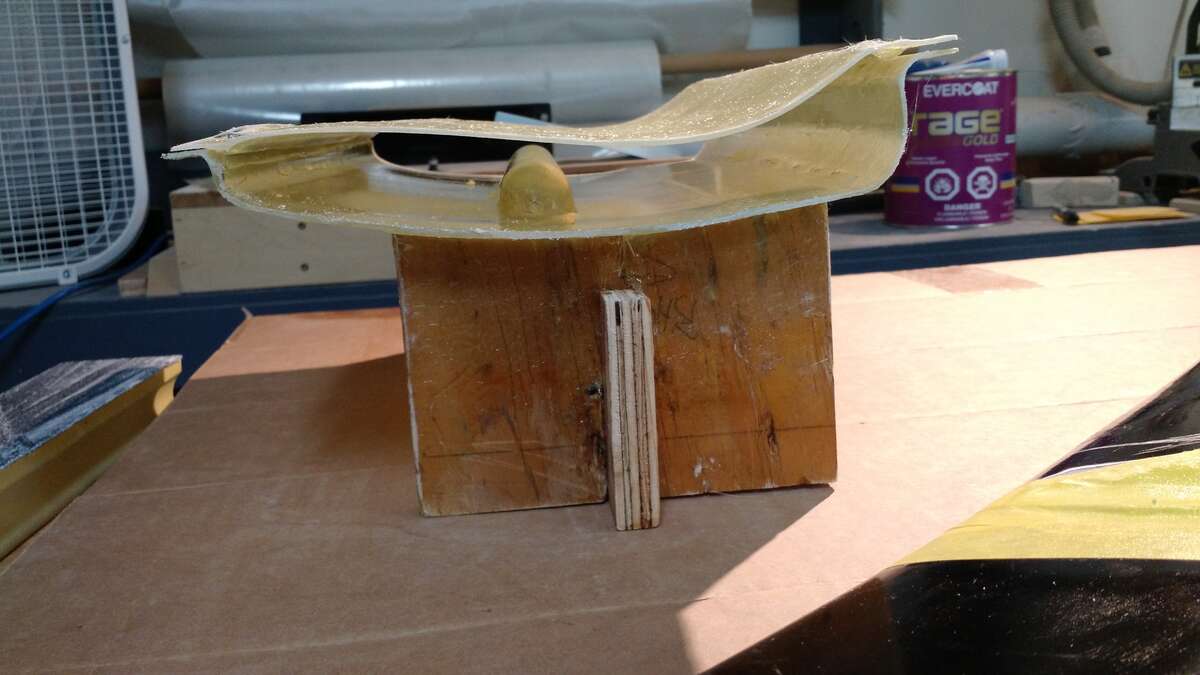
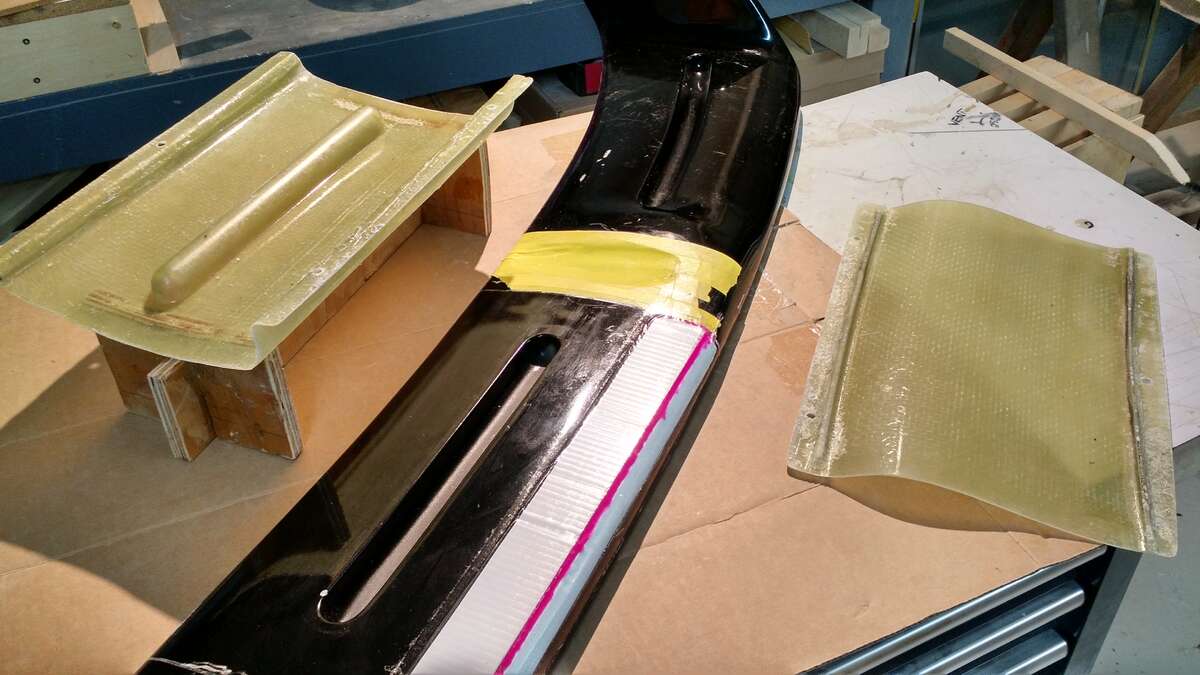
the trunk area copy , now this will be easier to walk around and work on . Here is glassing the part Yes another base this one is important because it will also hold the part at the proper angle so it will look right on the car . Here are the two pieces being separated from one another .

-
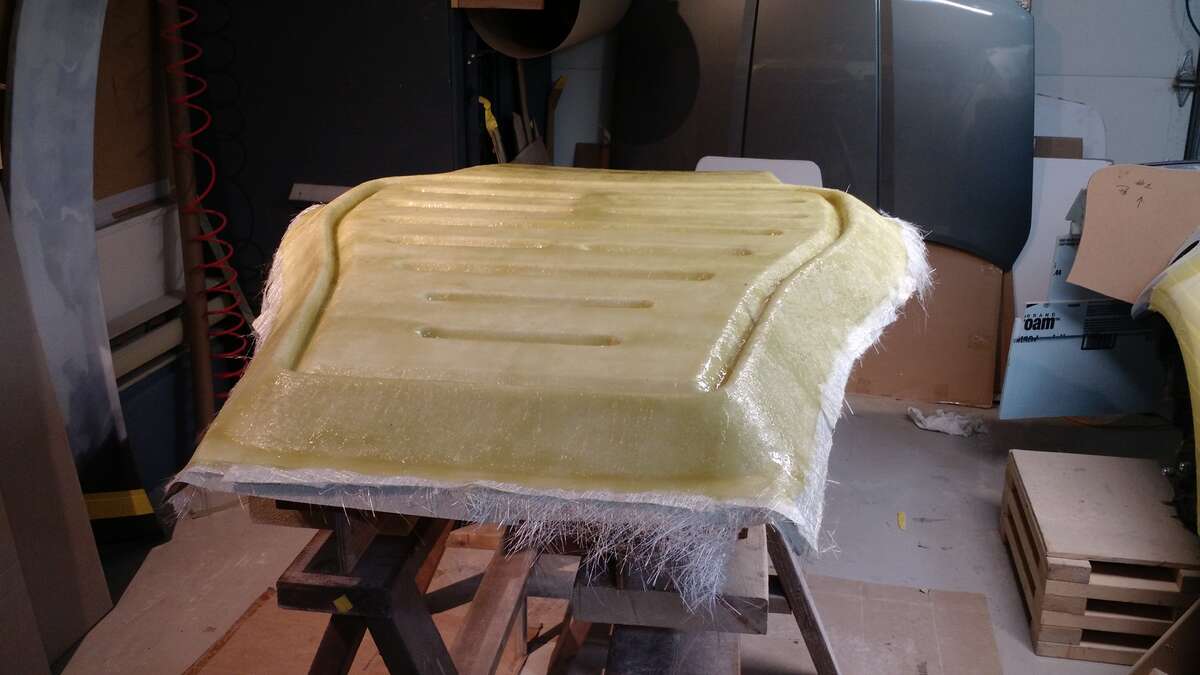
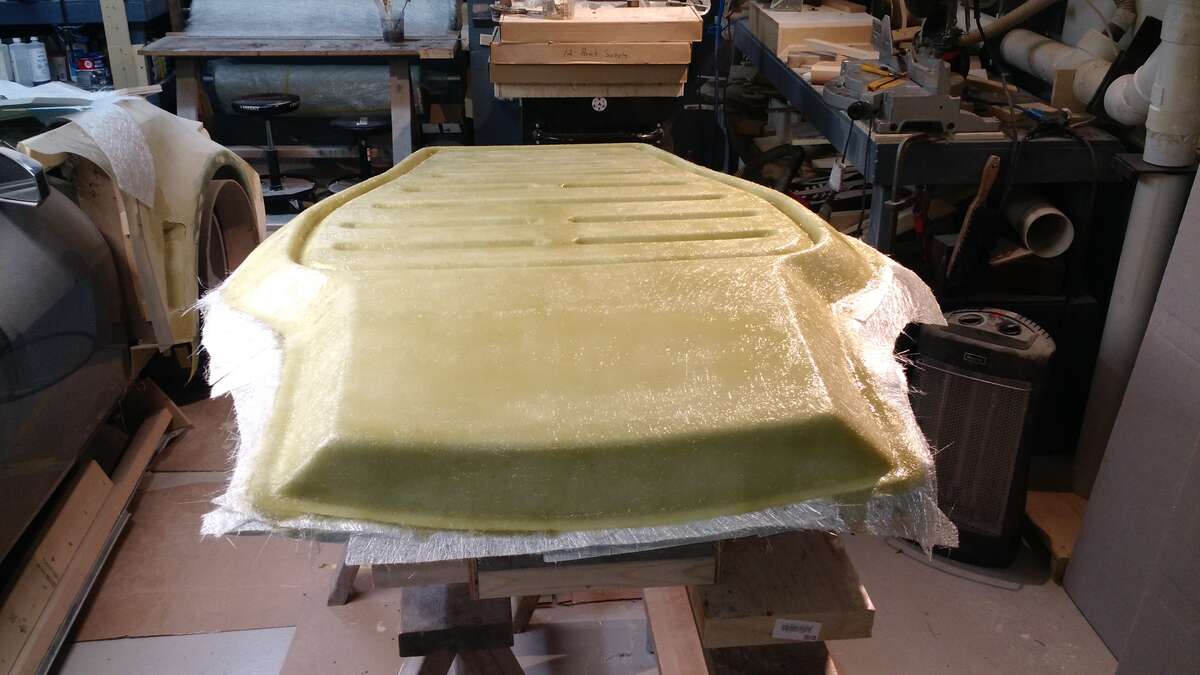
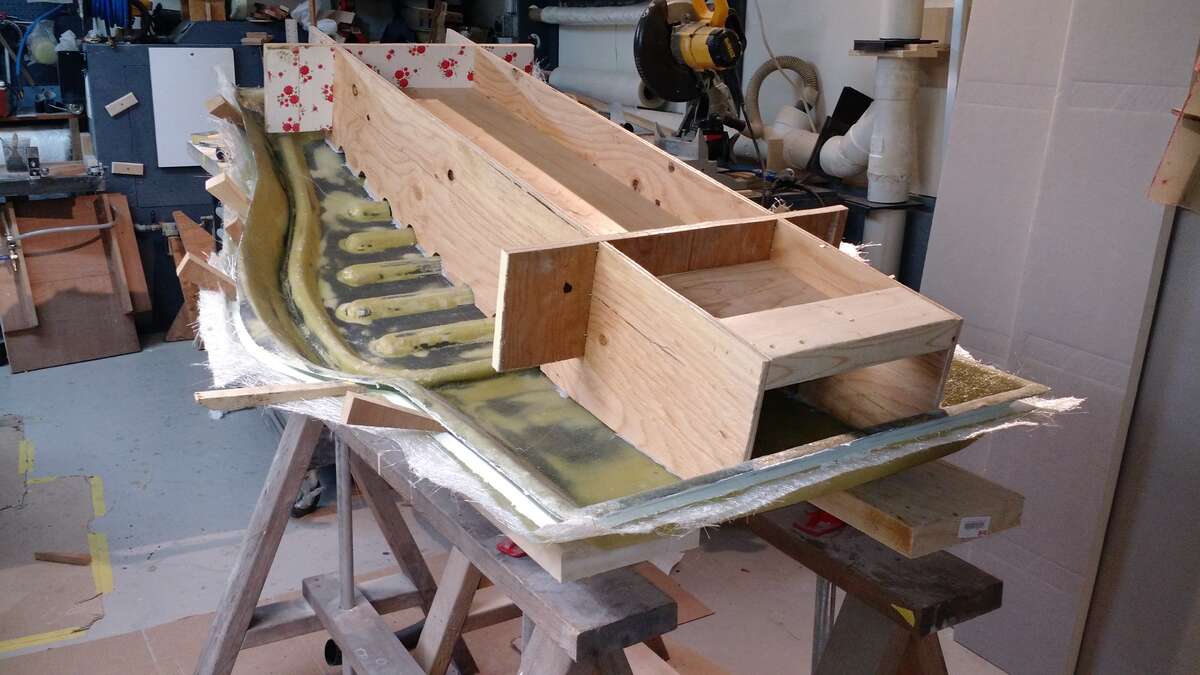
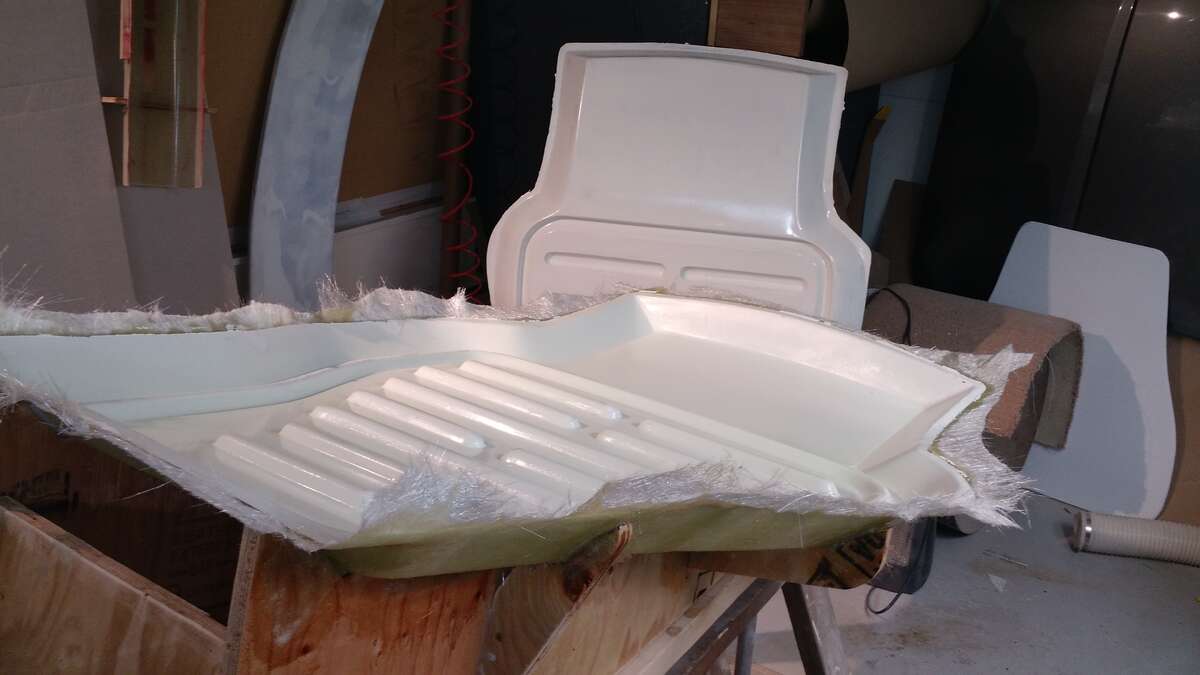
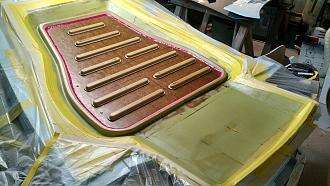
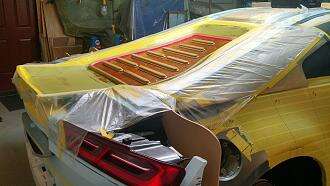
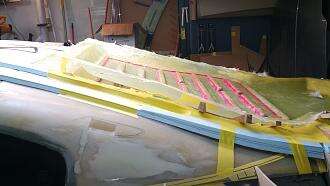
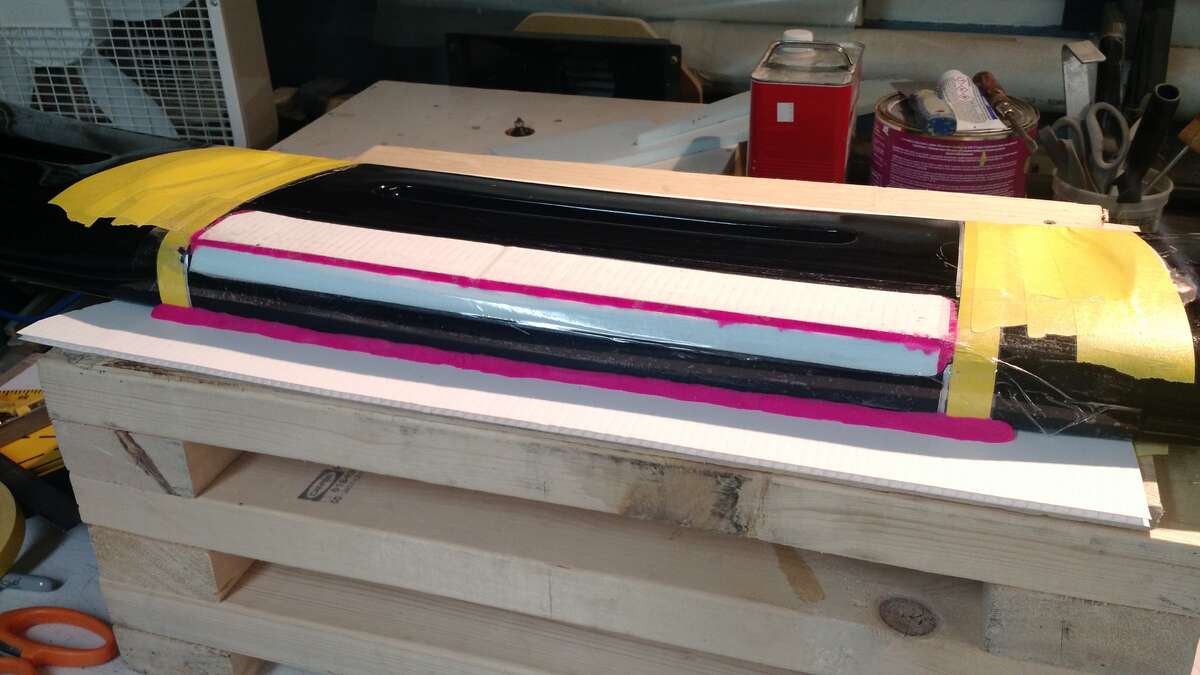
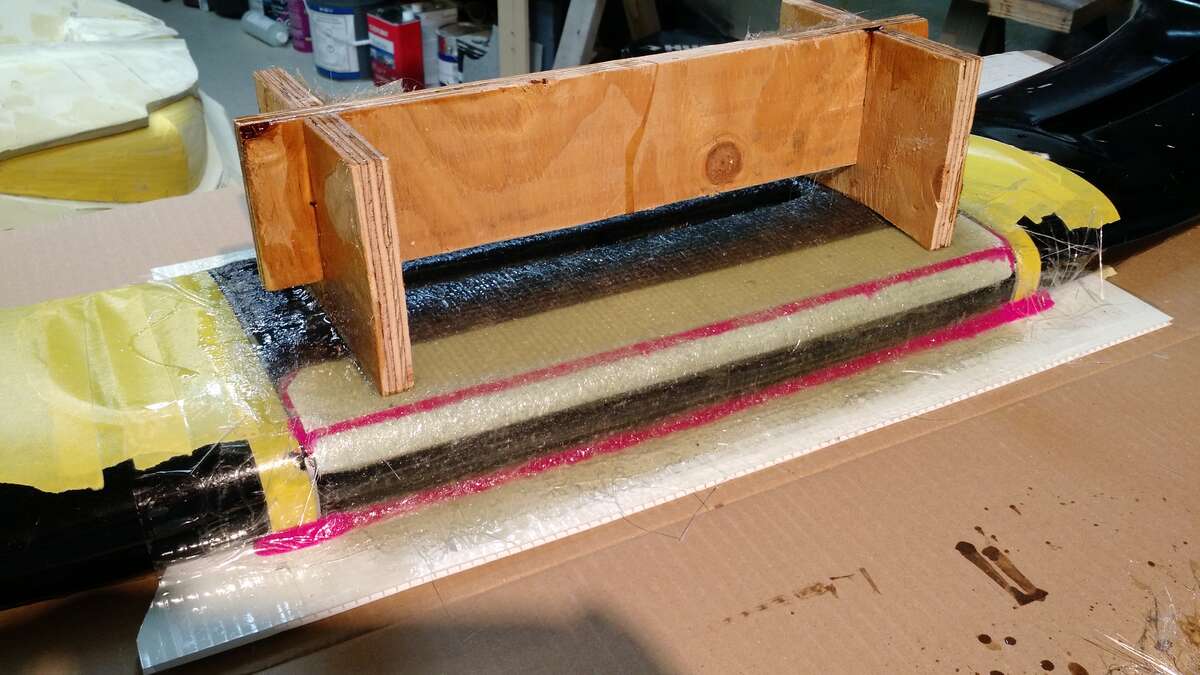
Back to the rear deck lid or trunk , I needed to make a copy of the deck lid trunk area so I can build the trunk lid top and bottom off the car , it's so wide that it's just too awkward to build on the car . So I prepped the area with wax and PVA as usual , but something went wrong , still not sure what happened , as I was laying up the fiberglass on the third layer, I was half way down the lid and it started kicking off and I wasn't going to be able to steel roll out the air !!! So I was freaking out thinking it's going to be a big mess with air pockets and voids !!! I would have to grind it all off so I pulled all the layers off and tossed them away , leaving a bunch of little glass hairs everywhere to deal with . I got it cleaned up as best I could and re glassed it. Here you see popping it off the car Here you can see the blue foam melted from the heat and some resin got past the plastic and tape , and the part was not great and needed a ton of body work to rescue it I built a base for it , makes life so much easier to work on it . so now this will get glassed and become the the simulator for the rear trunk area , so I can work on building the lower and upper halves of the trunk lid with out hanging over the car for hours .

-
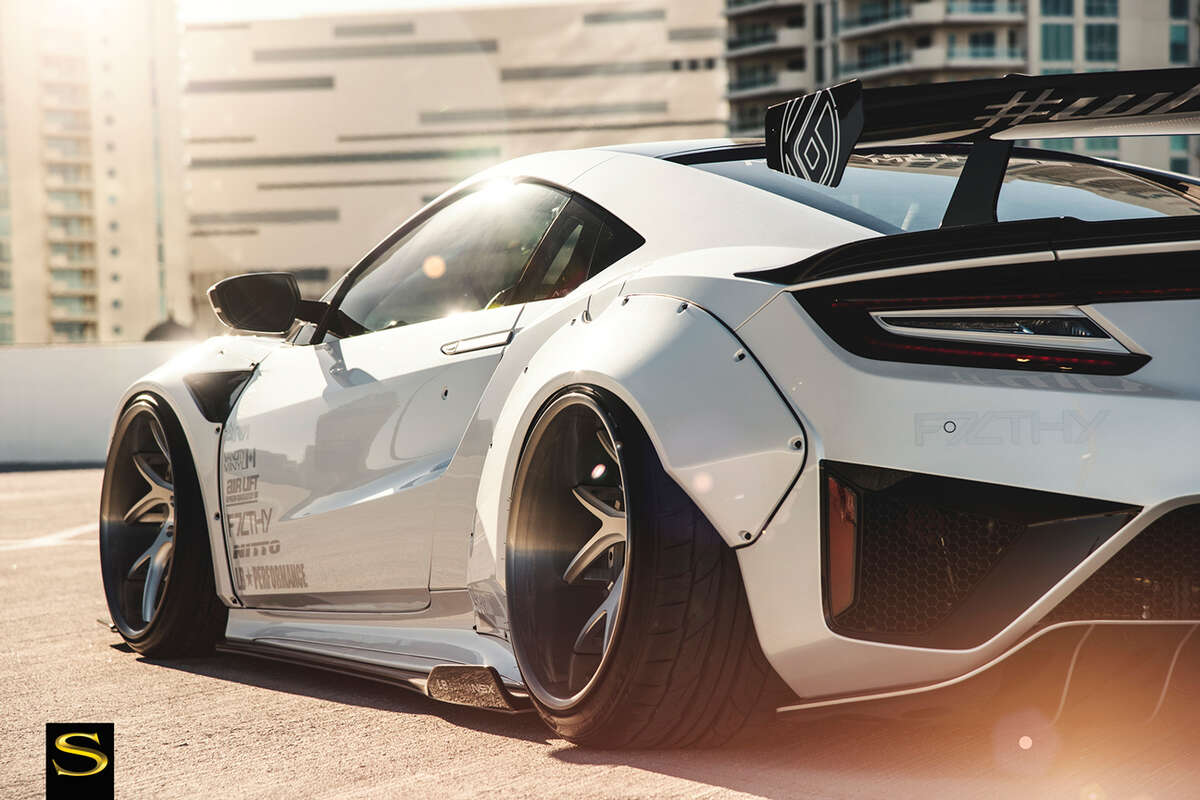
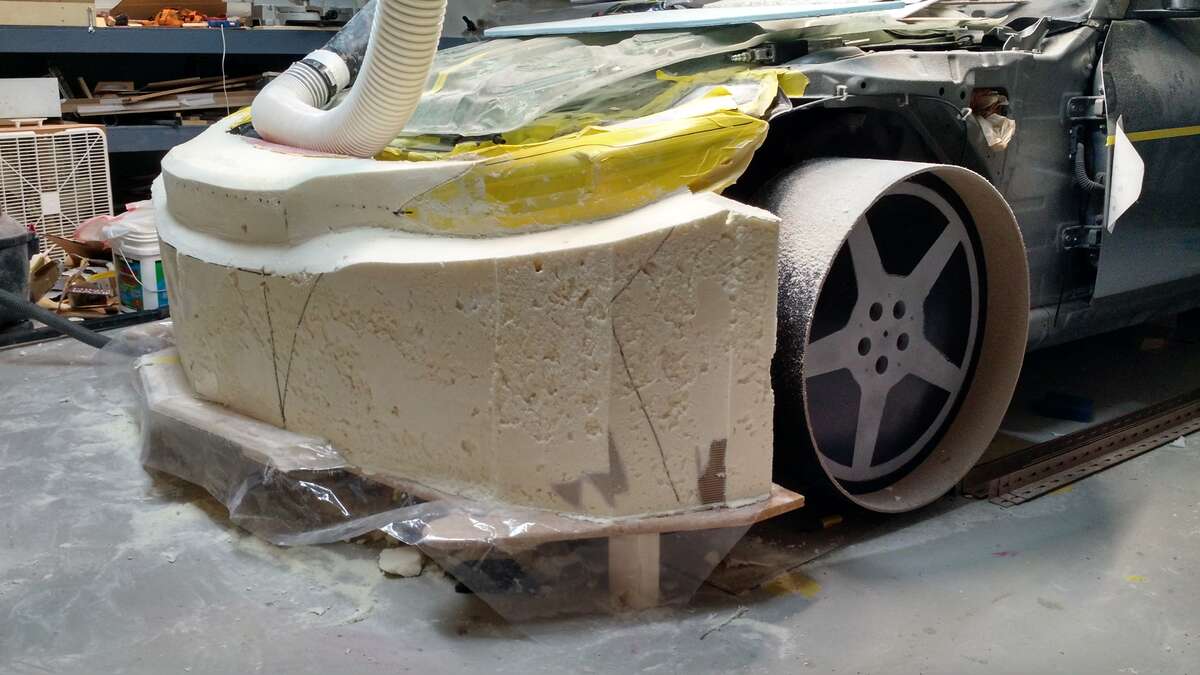
I have picked Savini wheels , I went to SEMA in 2018 and saw these there . (I have never seen so many wheels in my life in one place) The rears are 22 X 13 and the fronts are 21 X 9 1/2 with tires they cost $6800.00 Canadian . So that's why I built wooden ones to work on the car , the wooden ones are 24 inch ( but no tire the blue foam represents the full size )

-
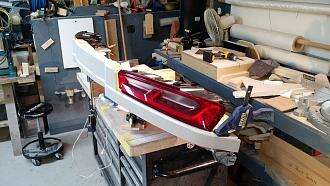
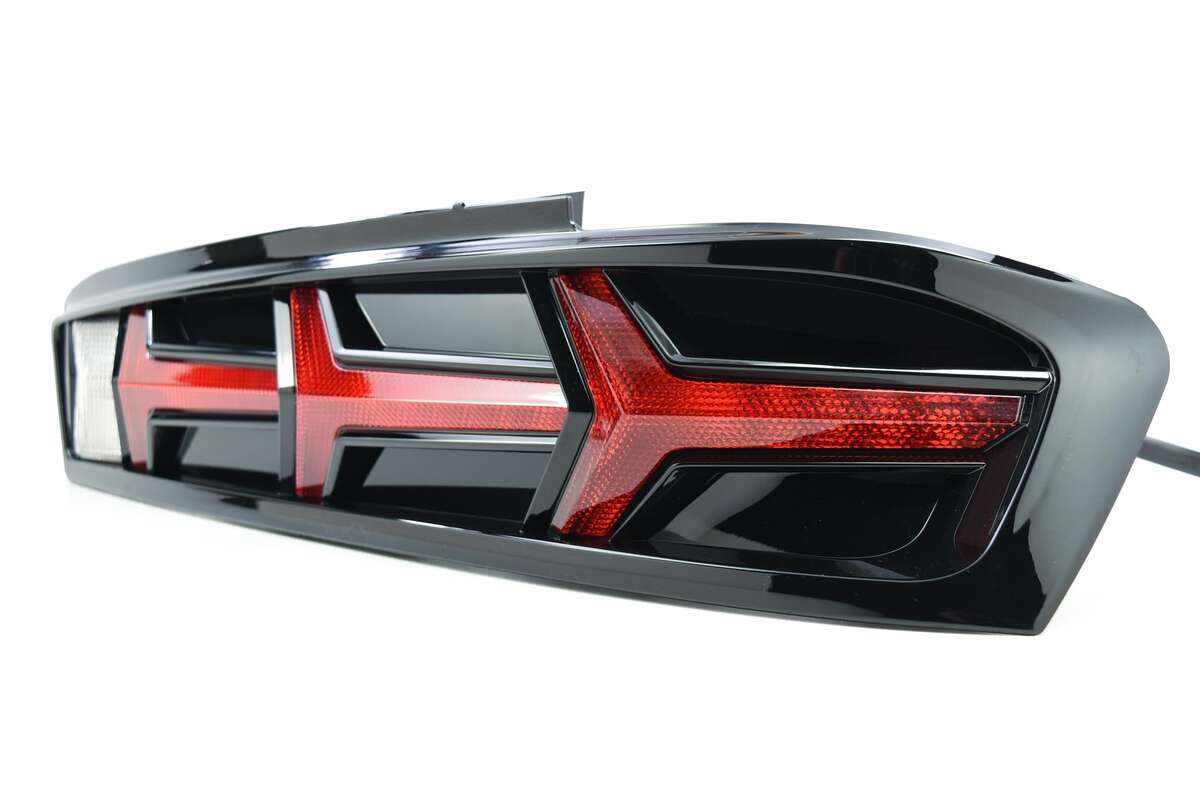
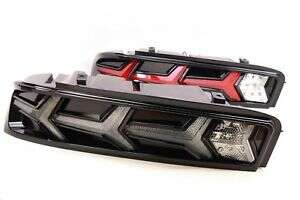
the tail lights are from a 2017 Camaro , the ones on the car right now are the stock ones ,they were brand new take off's which I picked up to build the car with .these are the lights that will go on the car when it gets assembled . They are sequential ,they also come blacked out . I am a dealer for them now and they are a little expensive so I didn't want to use them for building the car.
-
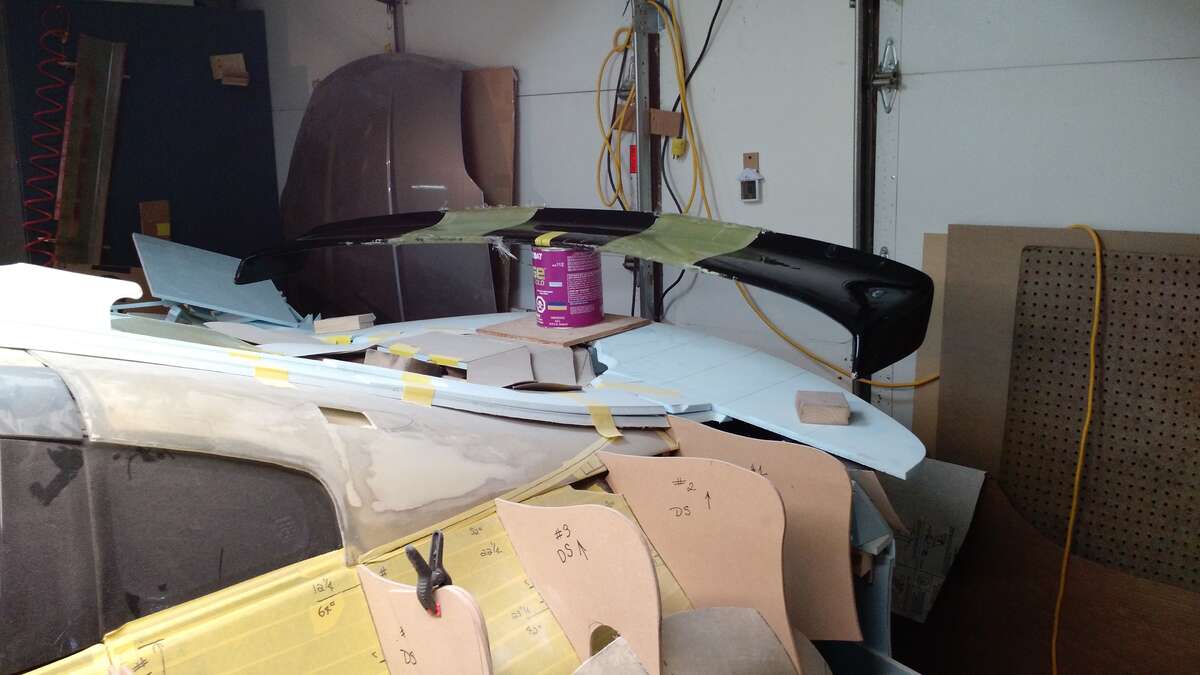
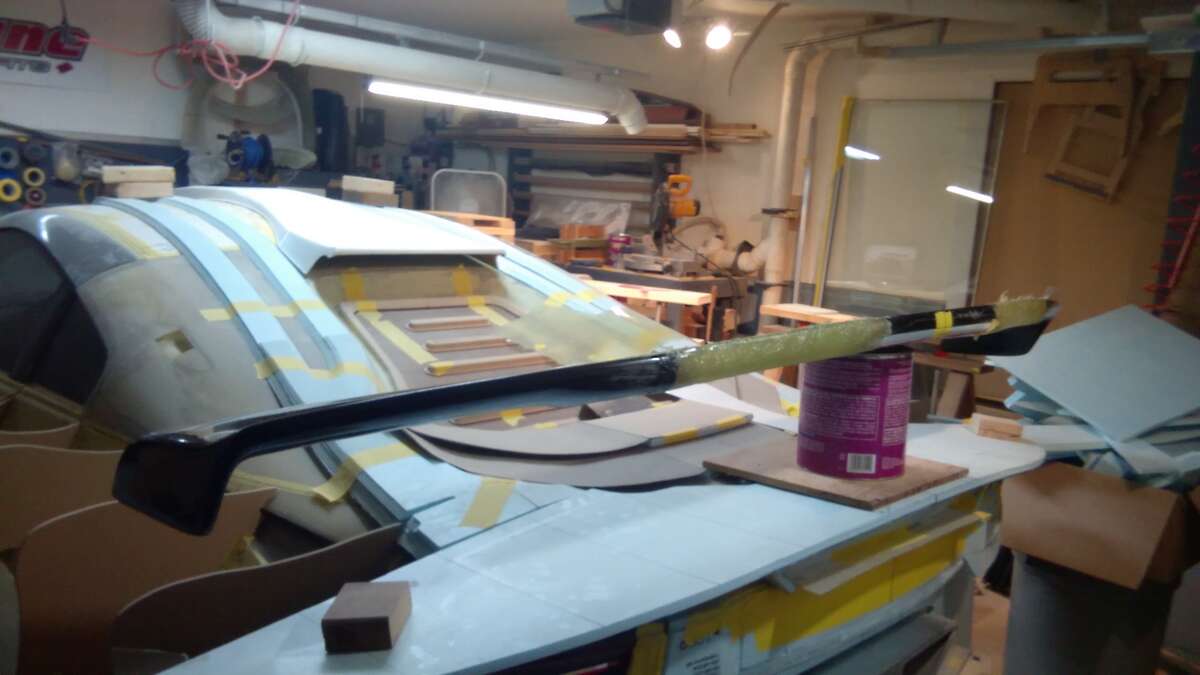
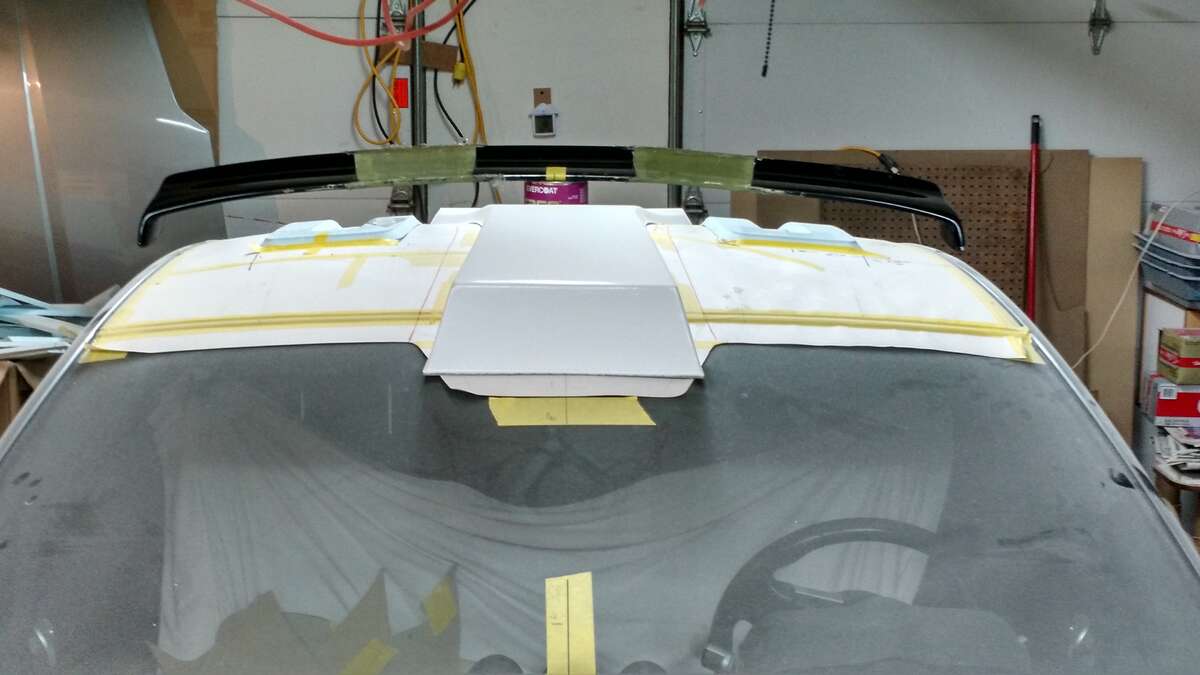
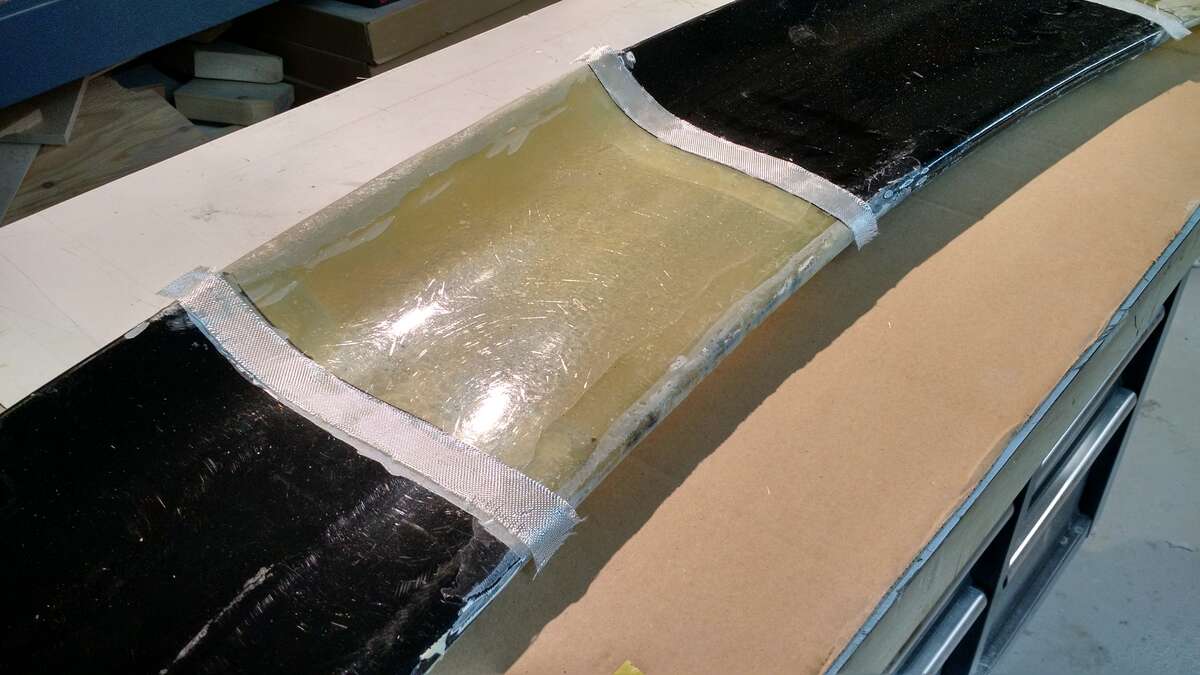
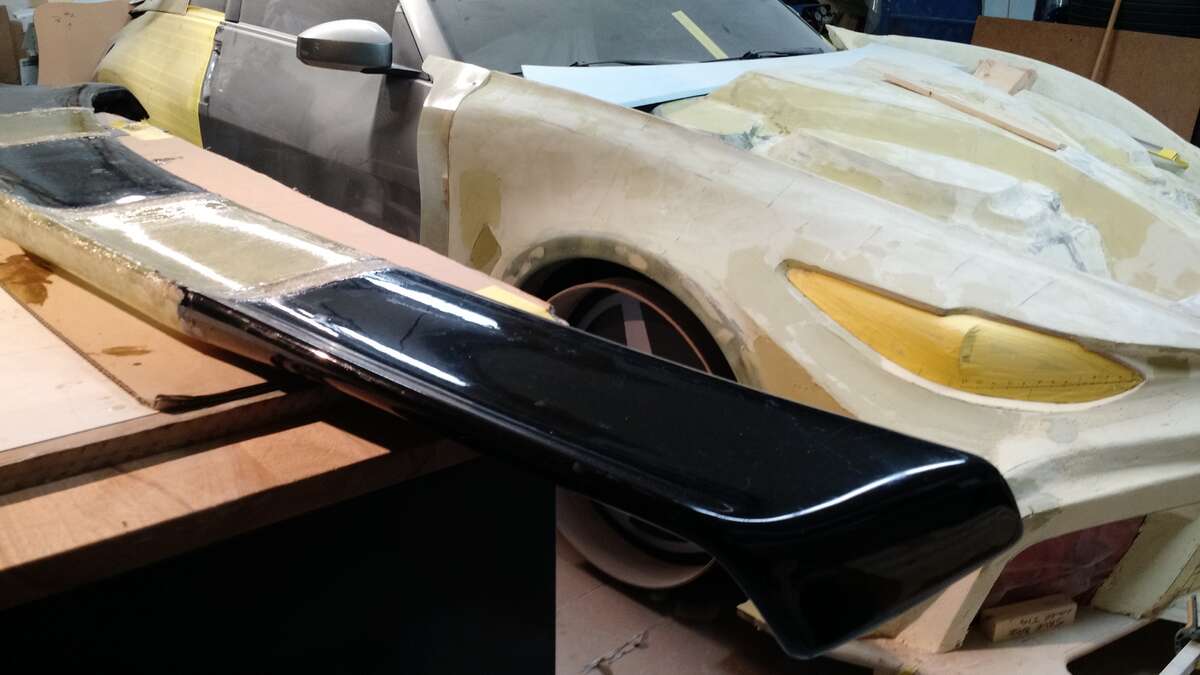
Can't have a GT3 type car without a decent wing . I was going to just buy one , but then i would have to modify it to fit the car anyway ,there aren't many wing over 72 inches that I can afford , so I had this old wing hanging around the shop I think it's from a Mustang . The shape is close except for it's 2 feet too narrow . so I am going to take a mold of the middle and copy that twice and add a foot to each side , I know it sounds easy right . I will probably cut the ends off and make Aluminum plates or Carbon ones
-
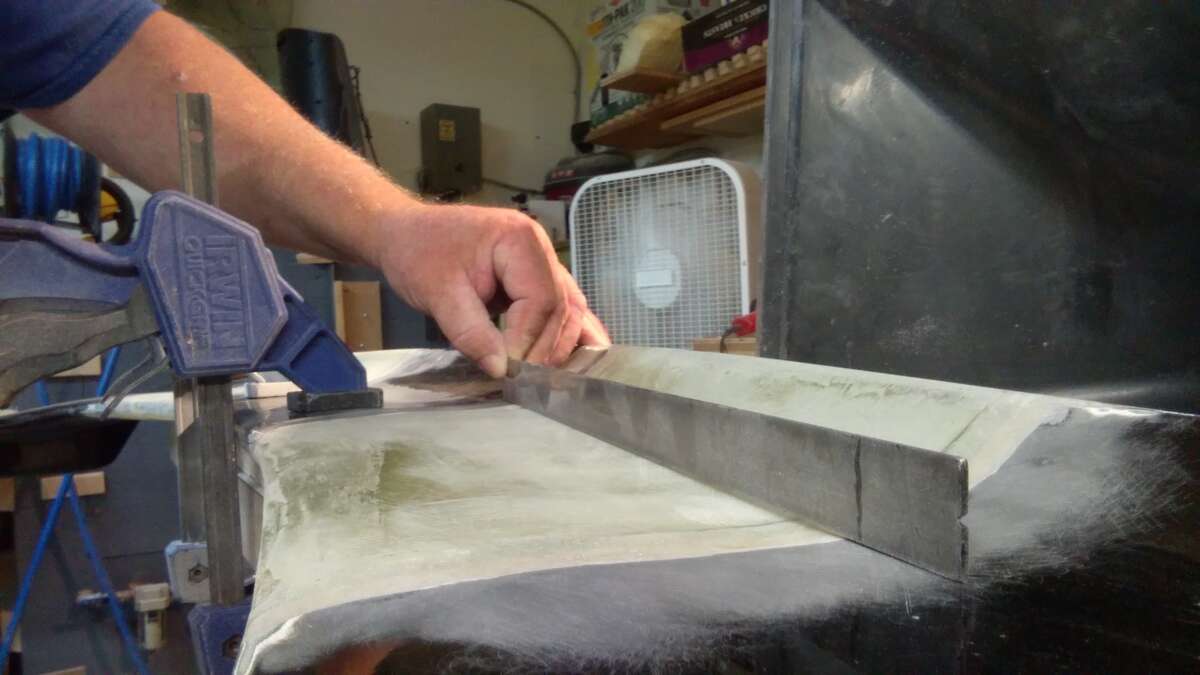
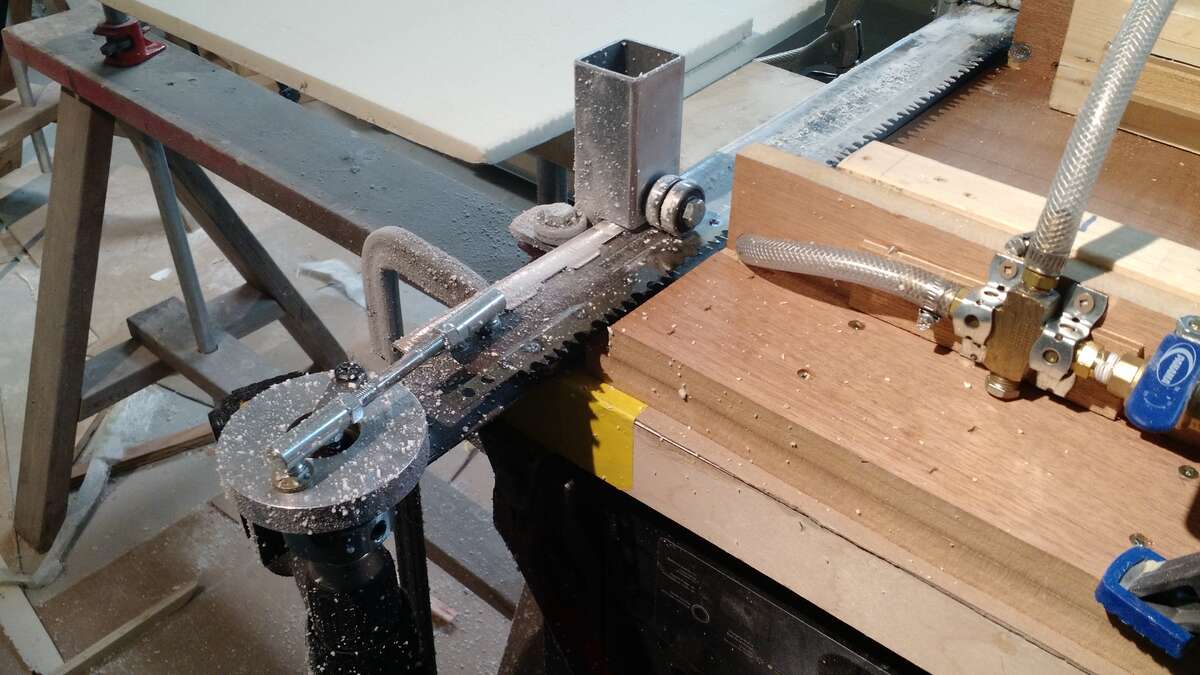
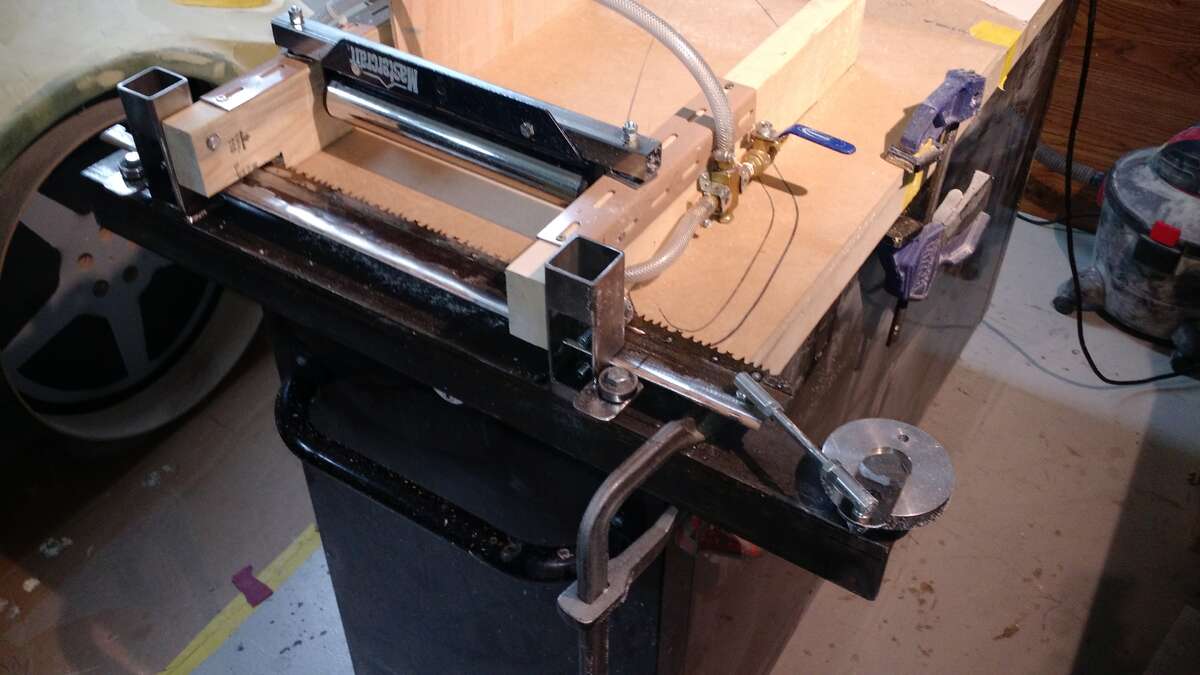
Back again , and thanks for all the great feedback , I am sure not everyone's going to like it ....... Onto the new polyurethane foam , it great But it only comes in 4 ft X 8 ft sheets with 3 choices of thickness 1 and a half inch or 2 or 3 inch , so the problem is it won't bend ( ok if your building a Lambo everything is basically flat ) So I have to find a way to cut it thinner and see if it works . I need pieces minimum 12 inches wide . I can't afford to farm it out it's $100,00 setup fee and $120.00 per hour , and a large enough Band saw is $3K plus and where do I put ? so that's not going to happen just to cut some foam . So decided to build my own Foam Saw from scraps from my shop . Here is a link to a video of it and version 2.0 lol
.jpg.5b64b847af0a0c9ecf13d0a864b5d051.jpg)
.jpg.8120dec1468e46c64cdafc8374075e77.jpg)
-
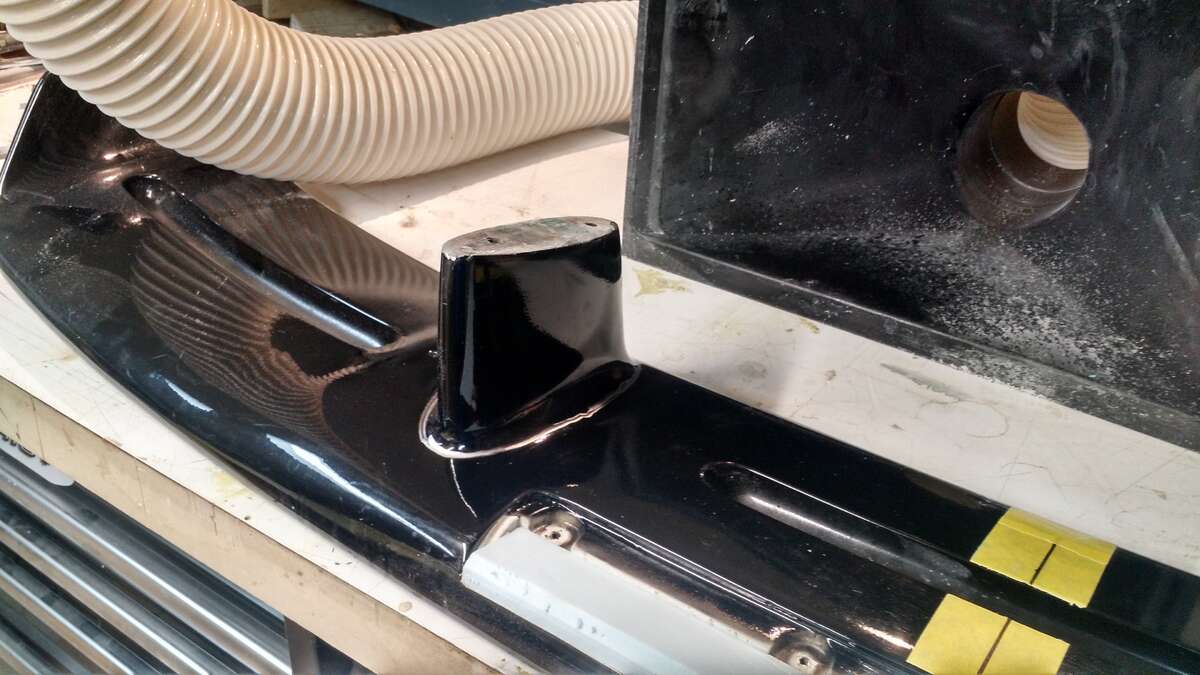
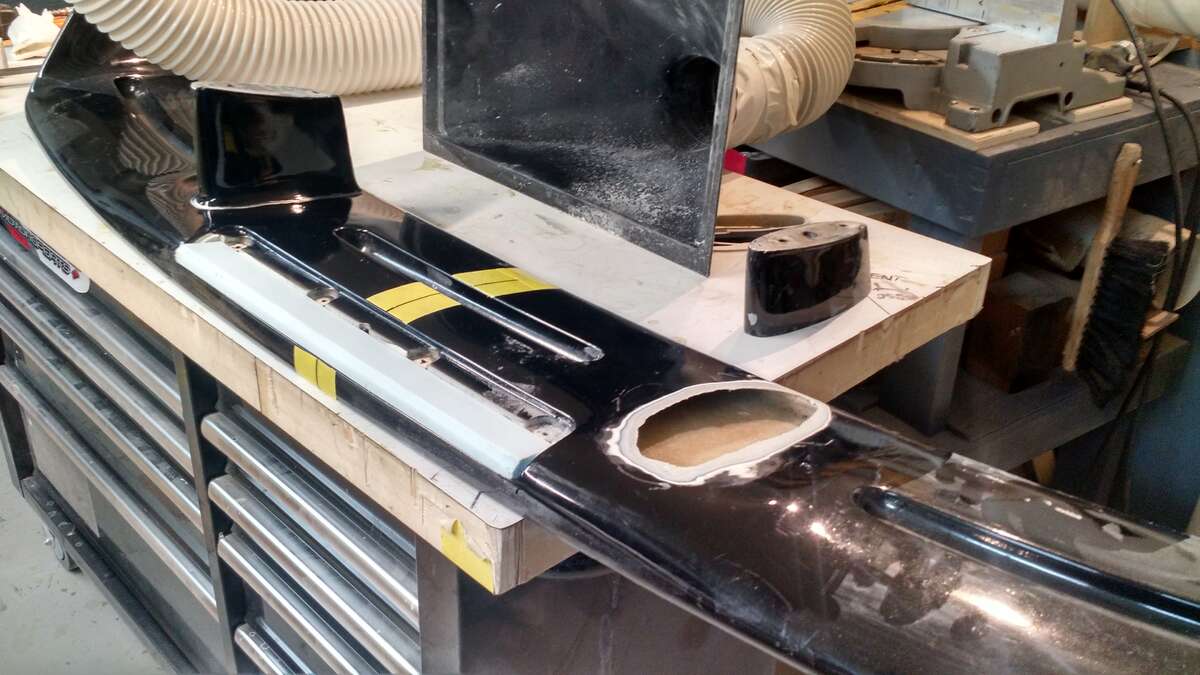
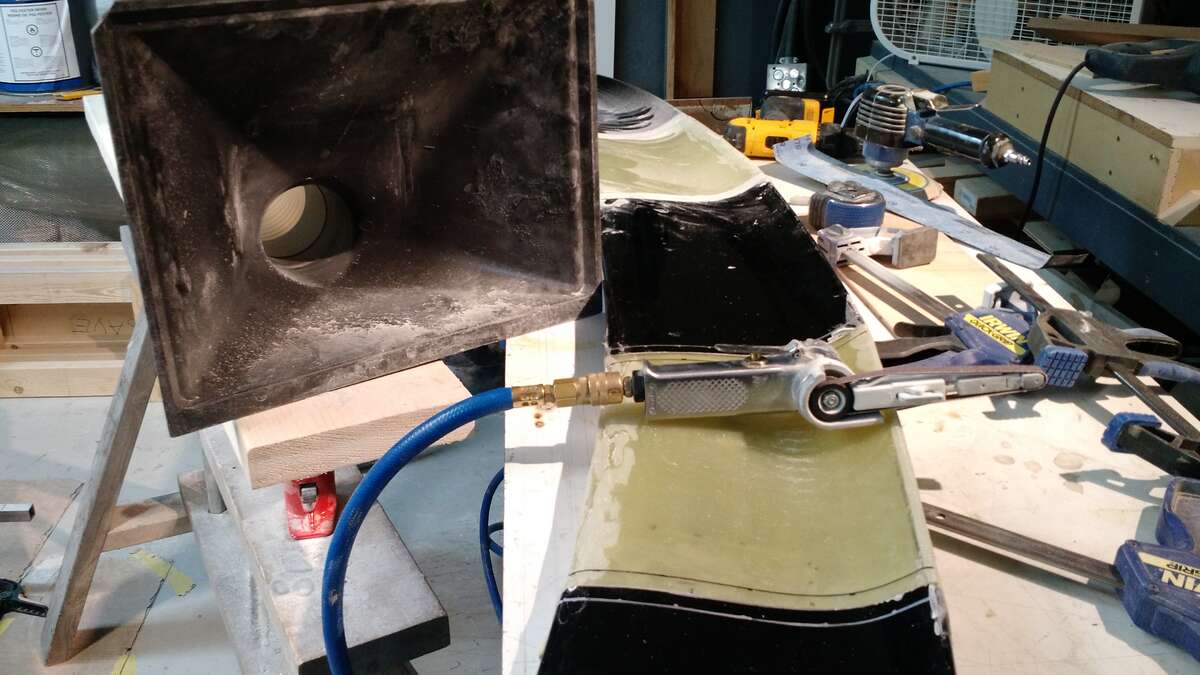
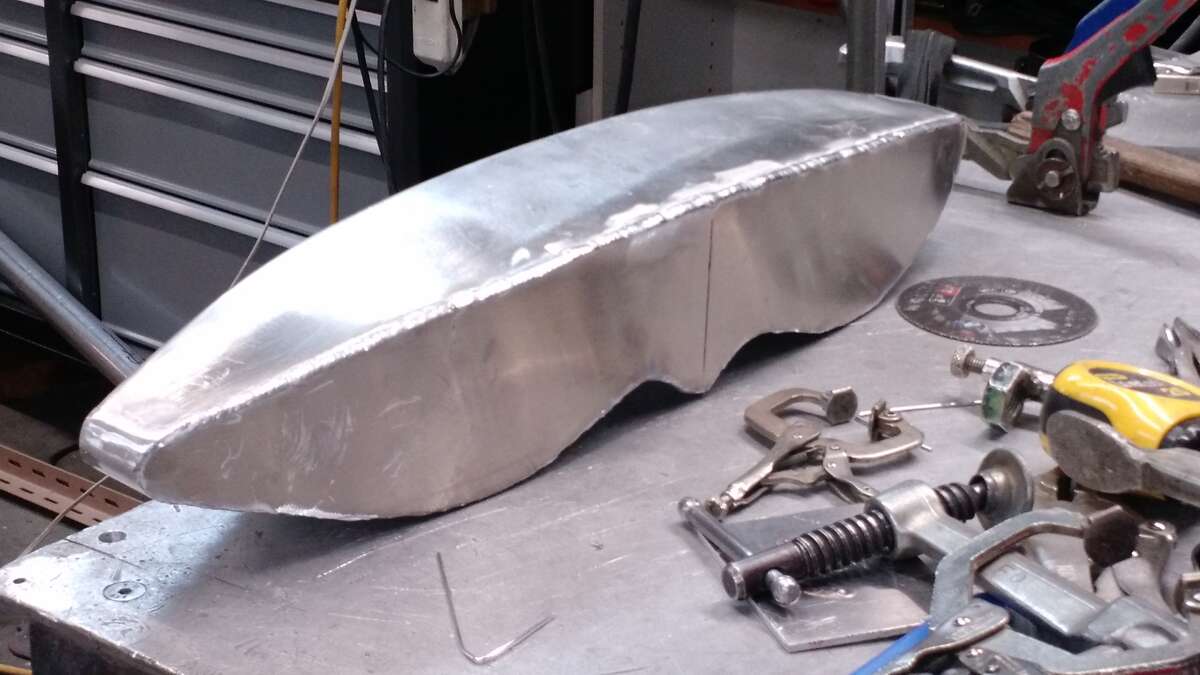
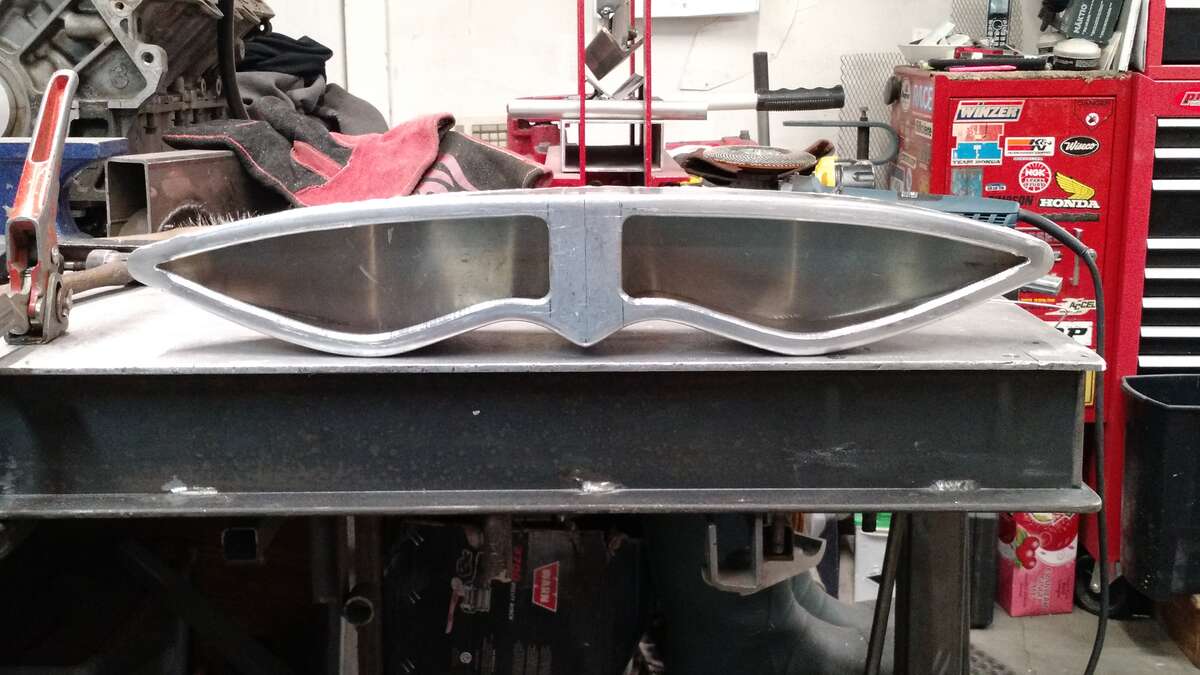
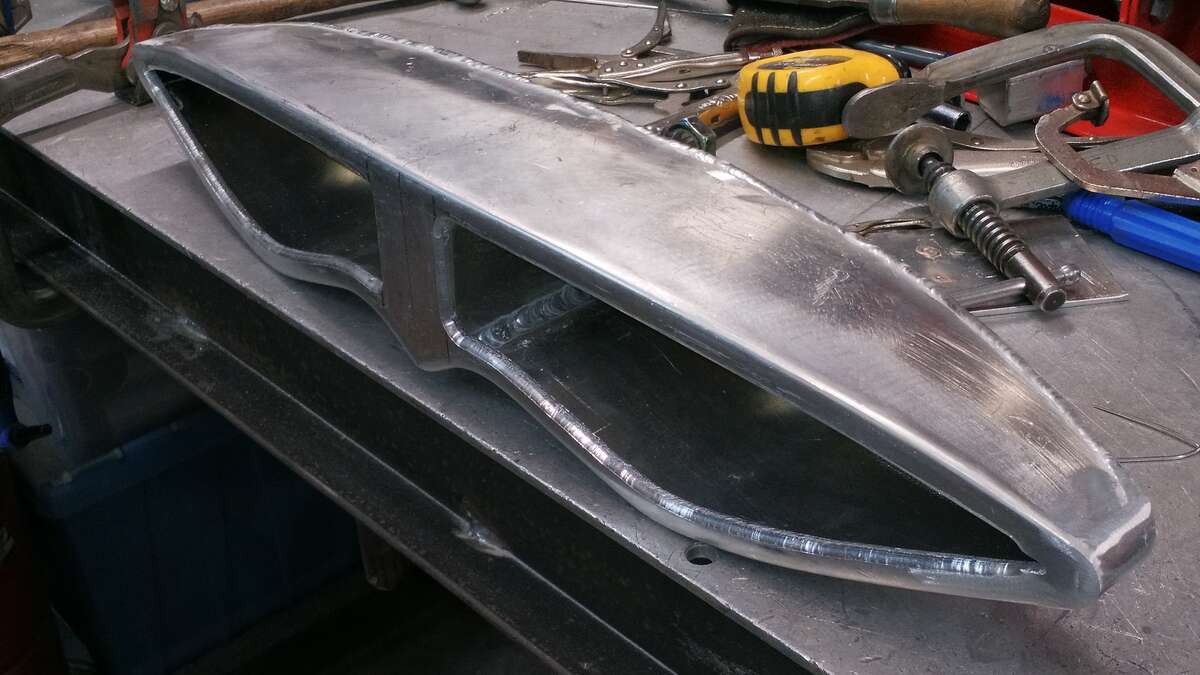
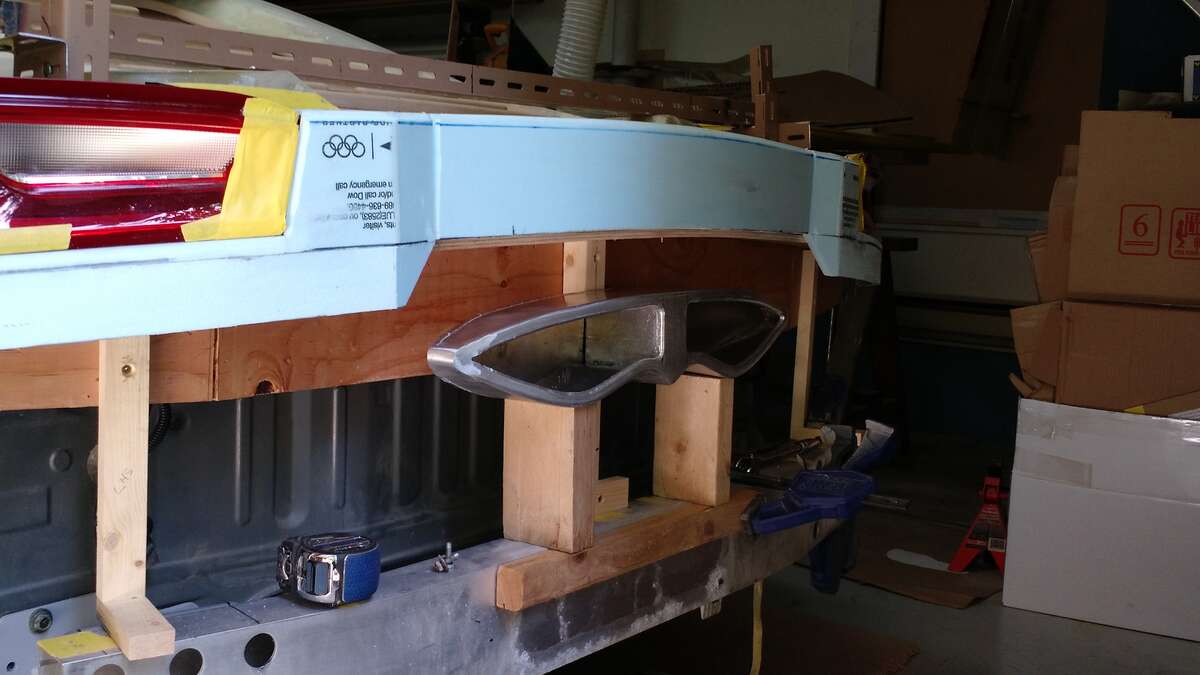
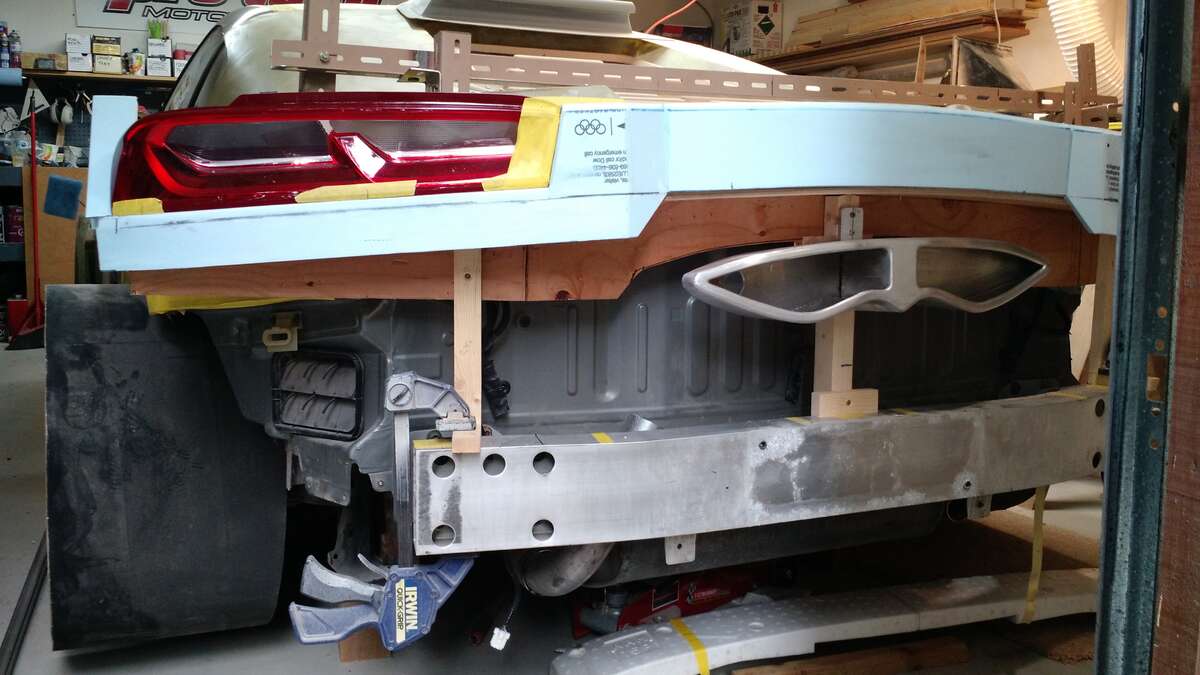
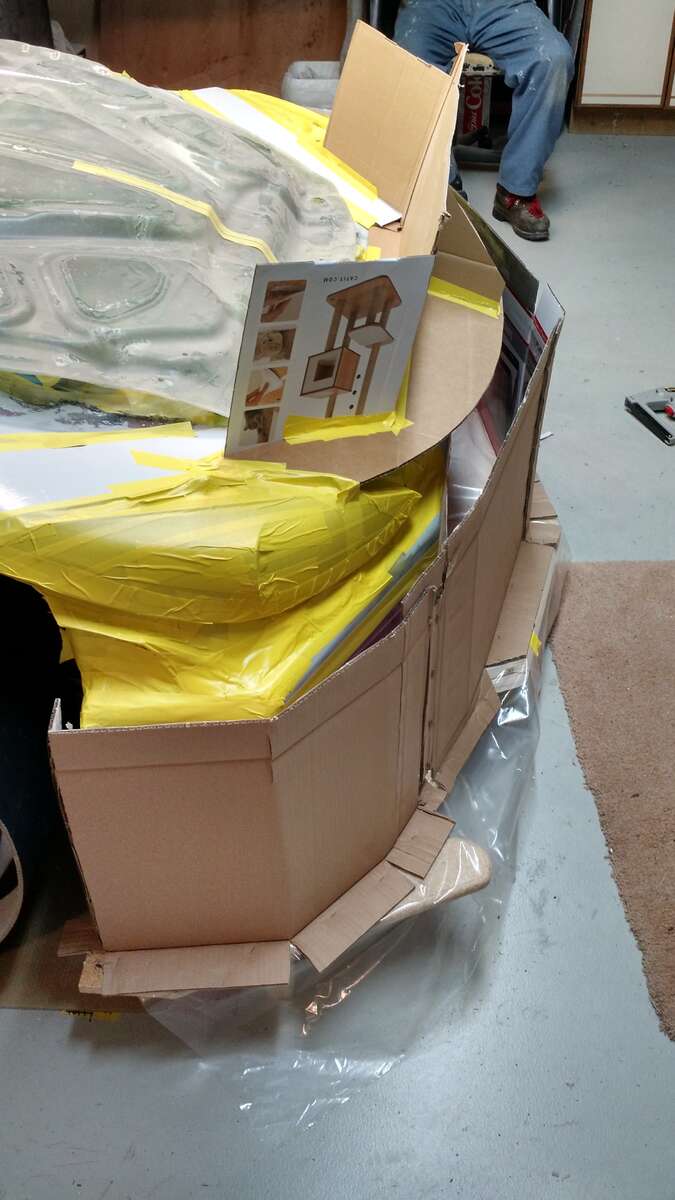
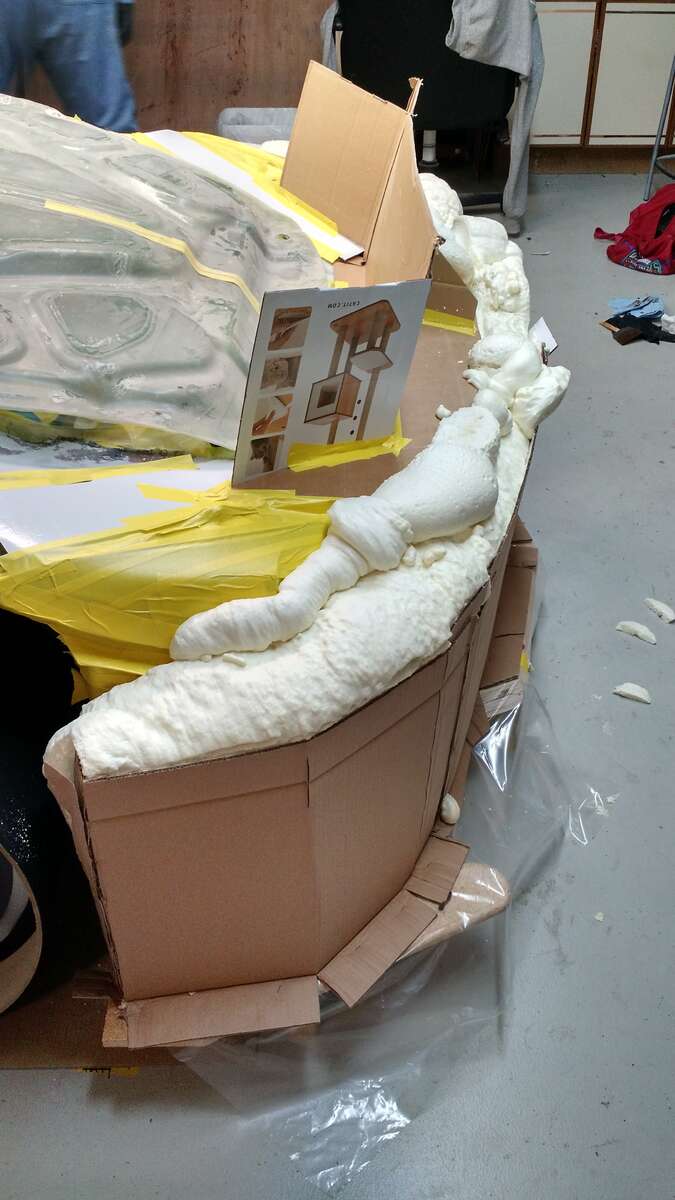
Next is the Exhaust surround , because the back panel below the taillights is curved the exhaust tip needs a surround to make it more of a feature , instead of it just sticking out of a hole . So i built a plug for that piece and when i make the rear mid panel i will insert it into the panel . So you can see in the first pic at the outside edges of the tip there is a gap , so the surround will fill that and still maintain the look of it sticking out of the mid panel . Once the mid panel comes out of the mold the center of the surround will be trimmed out . Ok this blue foam as i mentioned earlier is a bit of a pain , because everything melts it , unfortunate because it machines very well , flexible but firm and the best part is it's $ 8.00 for a 2 foot X 8 foot sheet . Through networking a Wayne and Don fellow Canadian car builders have introduced me to another source for some Polyurethane foam which is fiberglass etc friendly But , yes there always a But . I will explain in my next post .
.jpg.c5196392df2fad7a17ee41bb8353f011.jpg)
.jpg.32f6d07305773f259d4a78630d132249.jpg)
.jpg.a0959107cbd1a459a7e89f50f70a75f1.jpg)
.jpg.e4dc3dfb741d8ab348e915dabbe6edd9.jpg)
.jpg.d226067390f60274146fe40194f73a38.jpg)

-
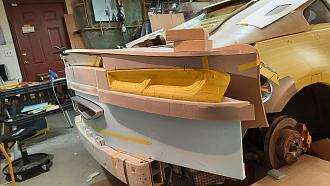
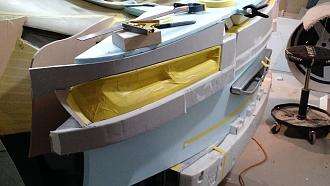
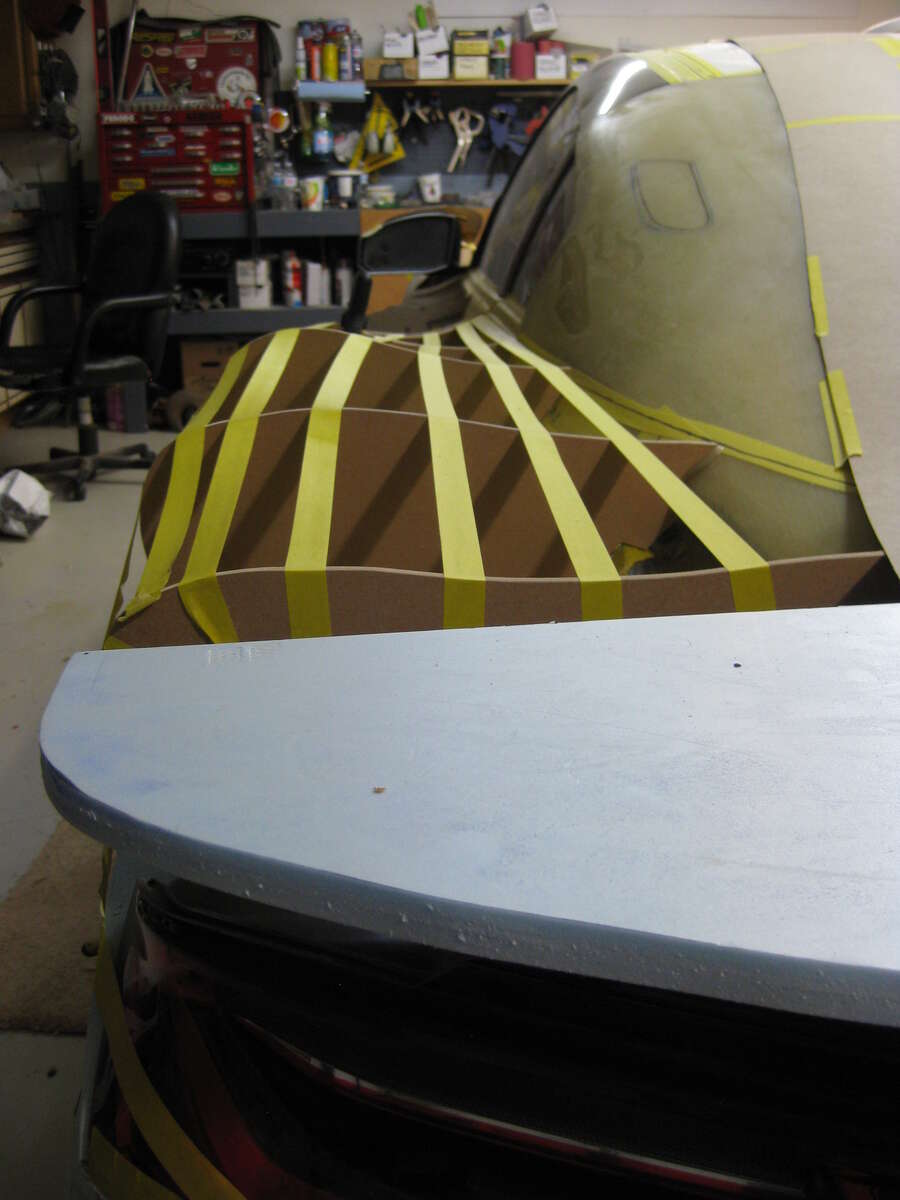
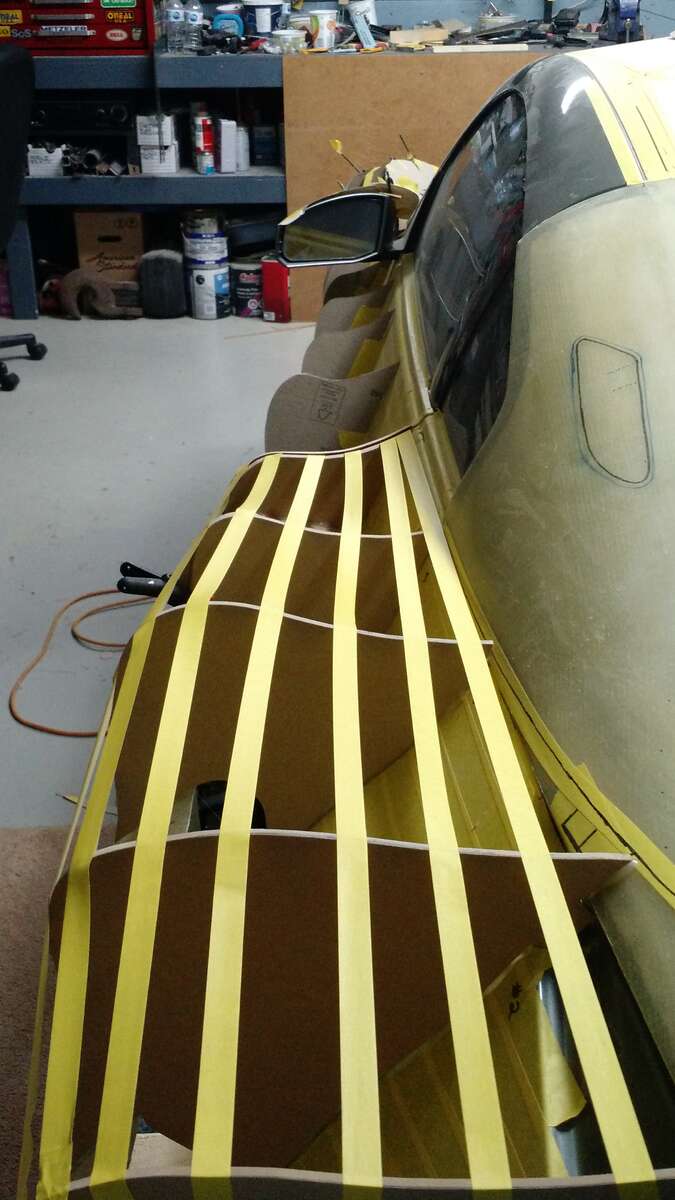
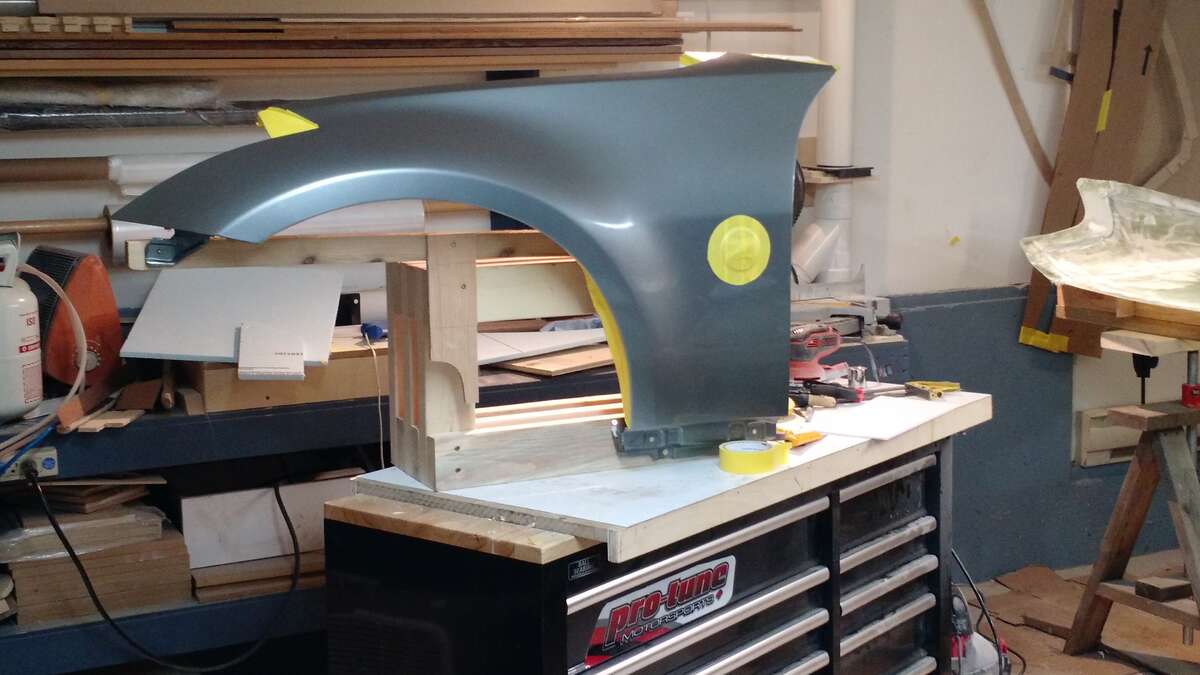
Hi everyone The new fuel filler location More on the back of the car , the quarter panels , I designed the shape of the quarters to be able to accept the use of the factory Gas door . The yellow masking tape is for me to get a visual of the contour .
.jpg.fbdcc3fbcb1ac8bb14e7ad2a64f17a8c.jpg)
.jpg.5d48bb0684c6b5063131fd929625cbd6.jpg)
.jpg.ed05fae131ea80522fb93a05e0ee9767.jpg)
.jpg.84e5e69035d2c0aea5ab2ff09d4dccf7.jpg)
.jpg.4452bc6cba0ec8a67017c5c20d644983.jpg)
.jpg.2b000111e9d6fb89414723cb4f185142.jpg)
.jpg.2b0a26889bbbd68f0c4ec388c4217e96.jpg)
.jpg.dfc5352b807b4de1bb575d9b220a9cff.jpg)
.jpg.8ca94367ff0a451e6798c3d8bda67537.jpg)
-
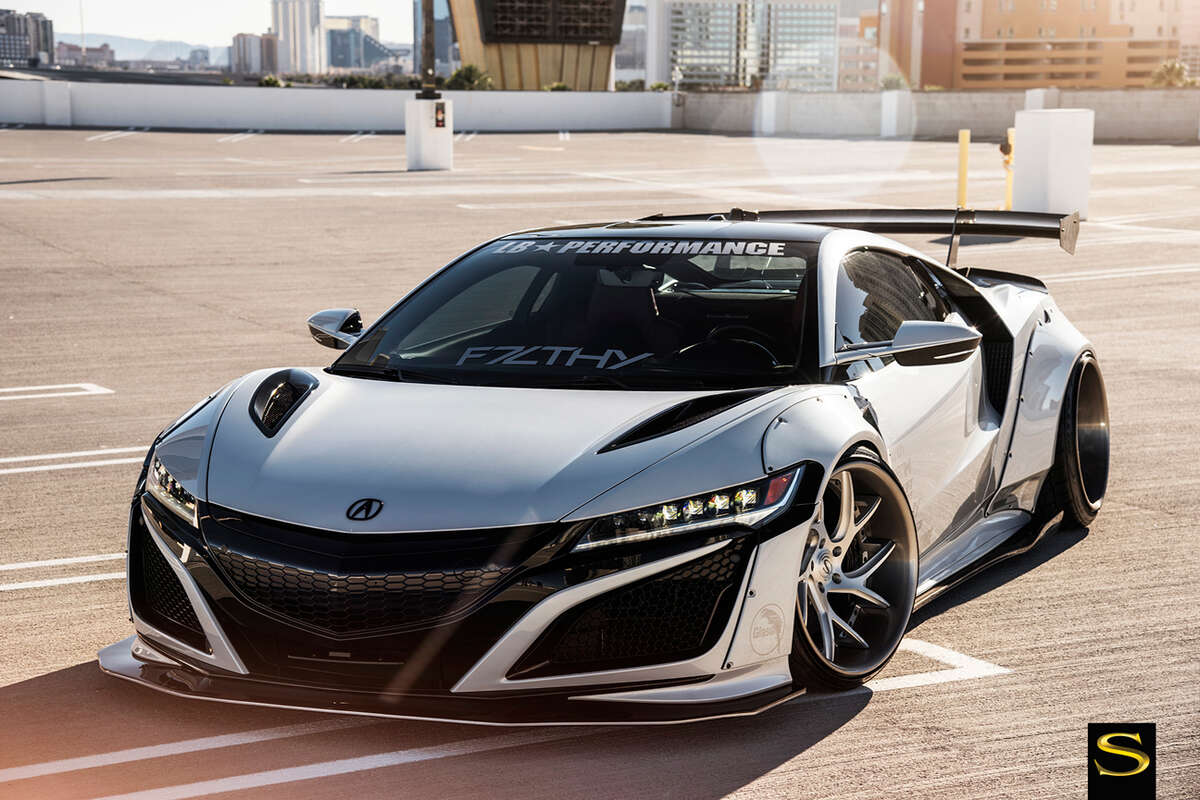
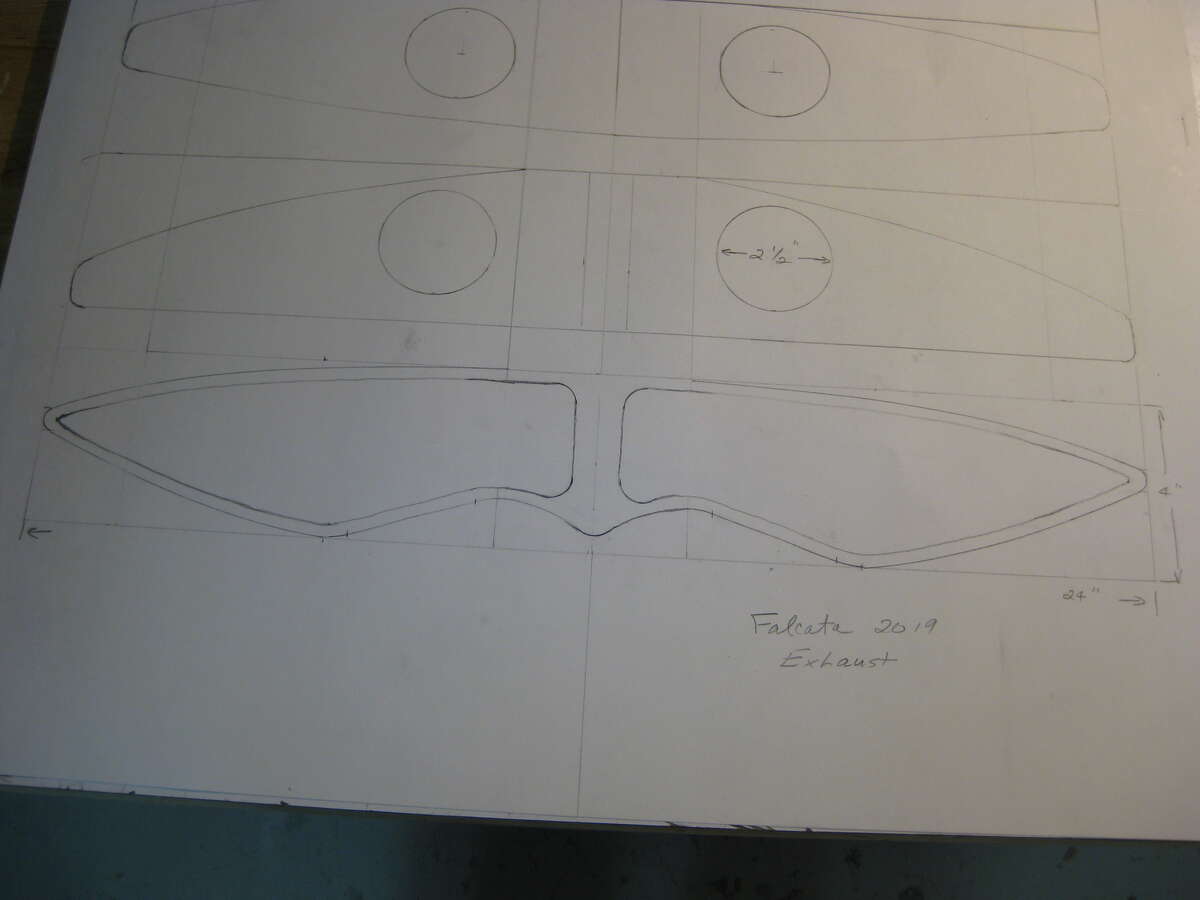
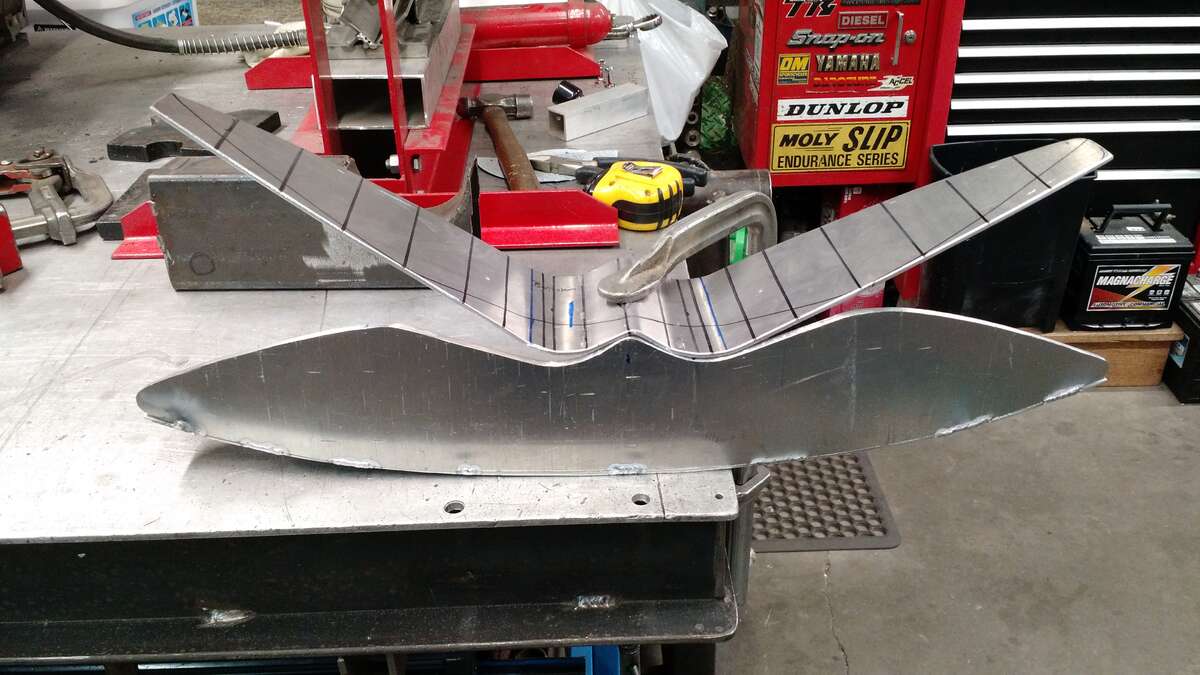
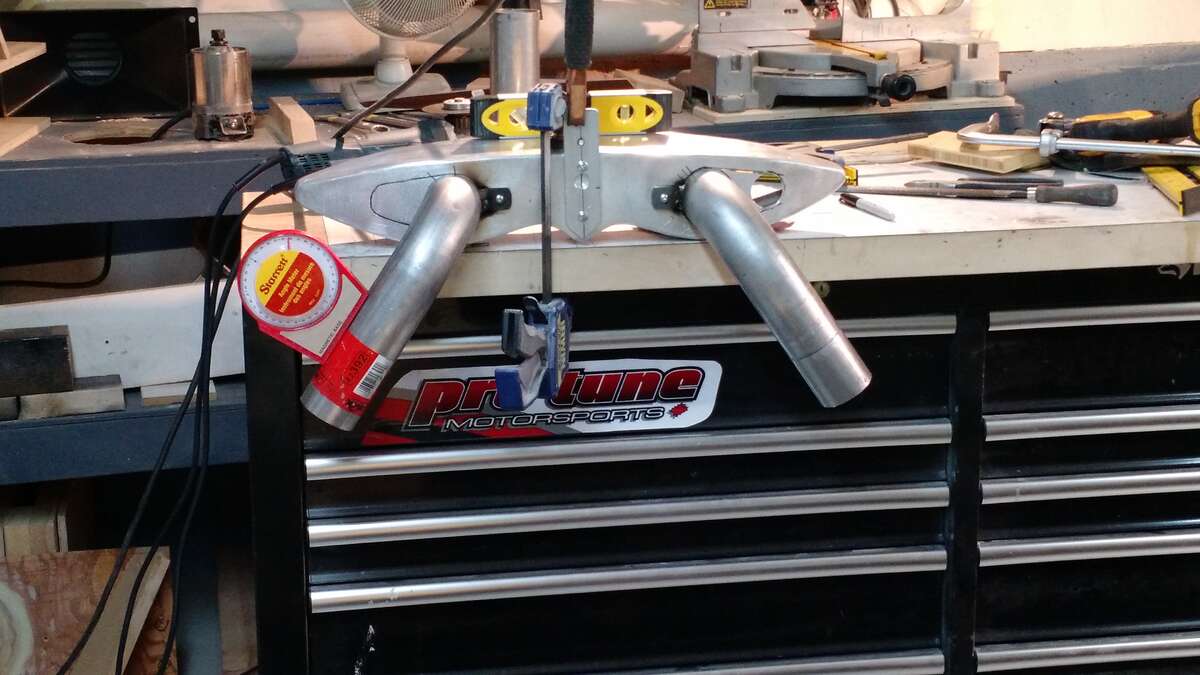
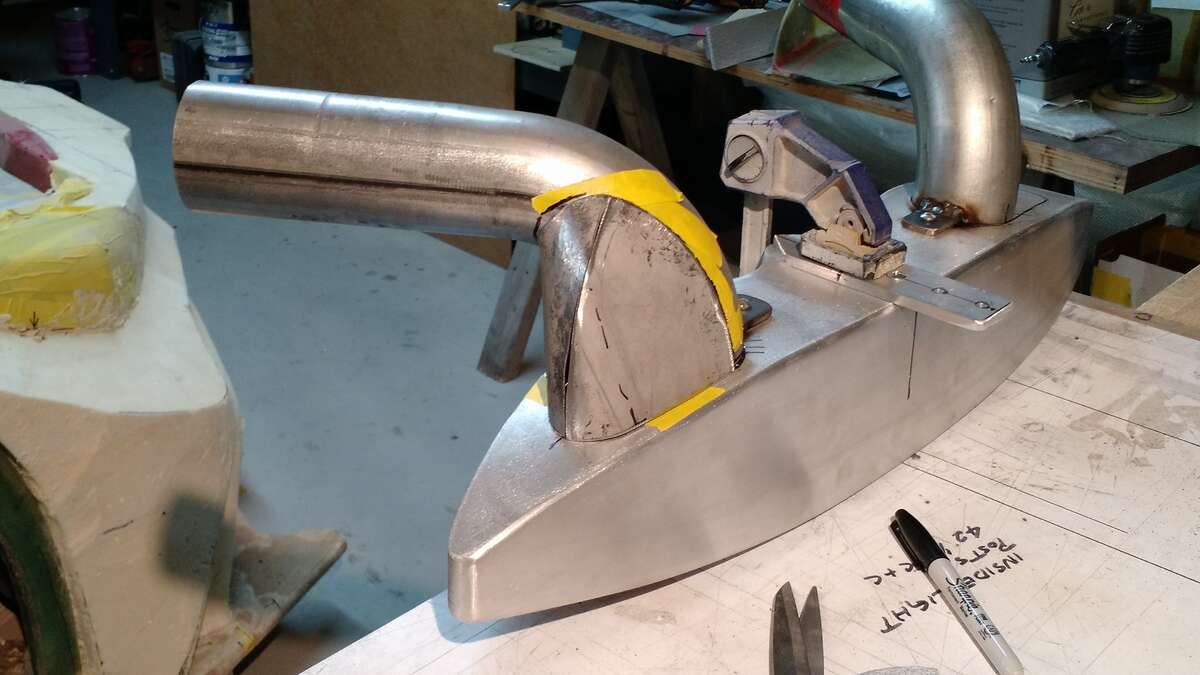
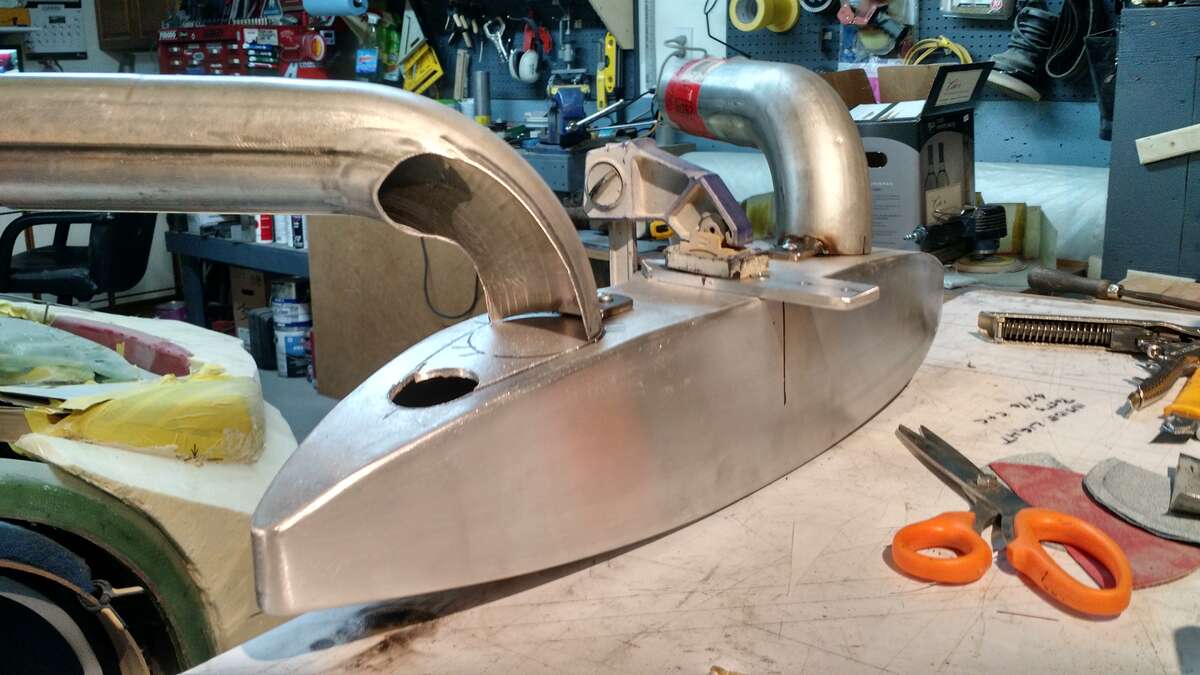
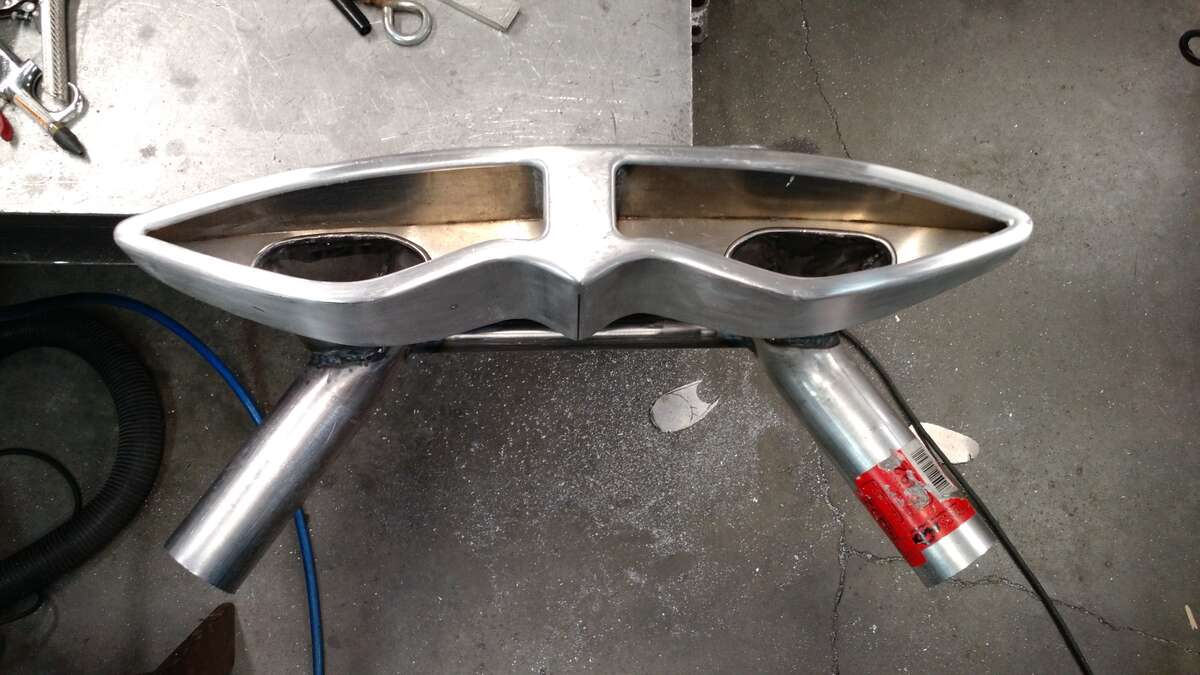
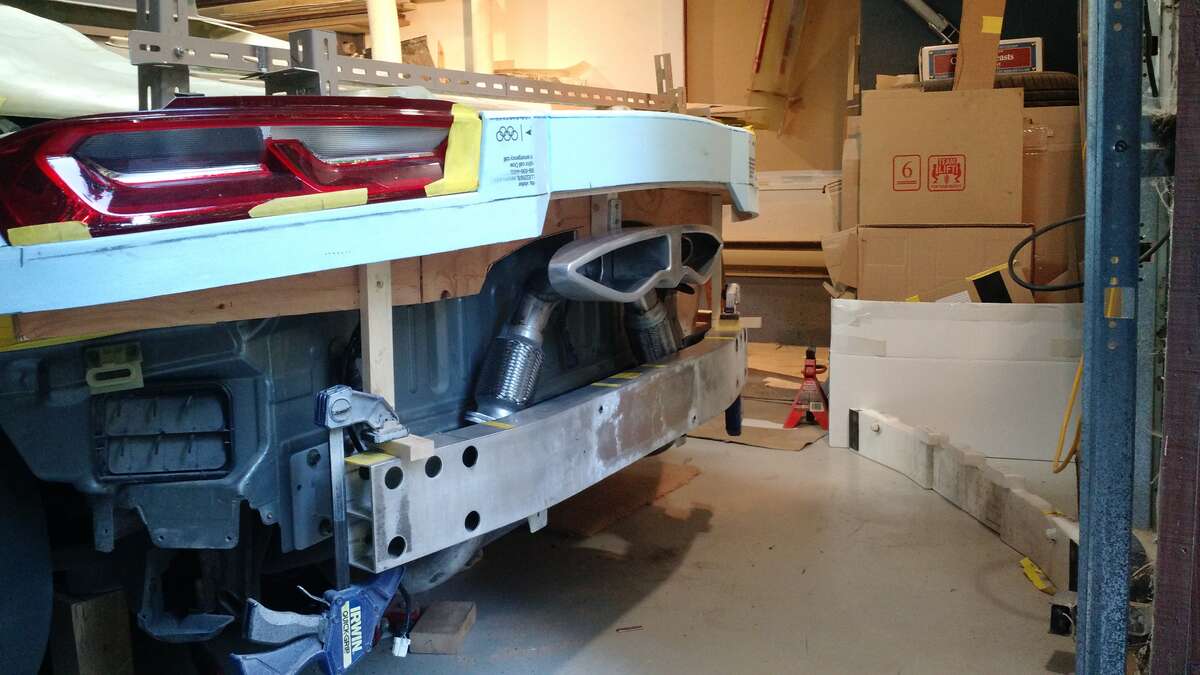
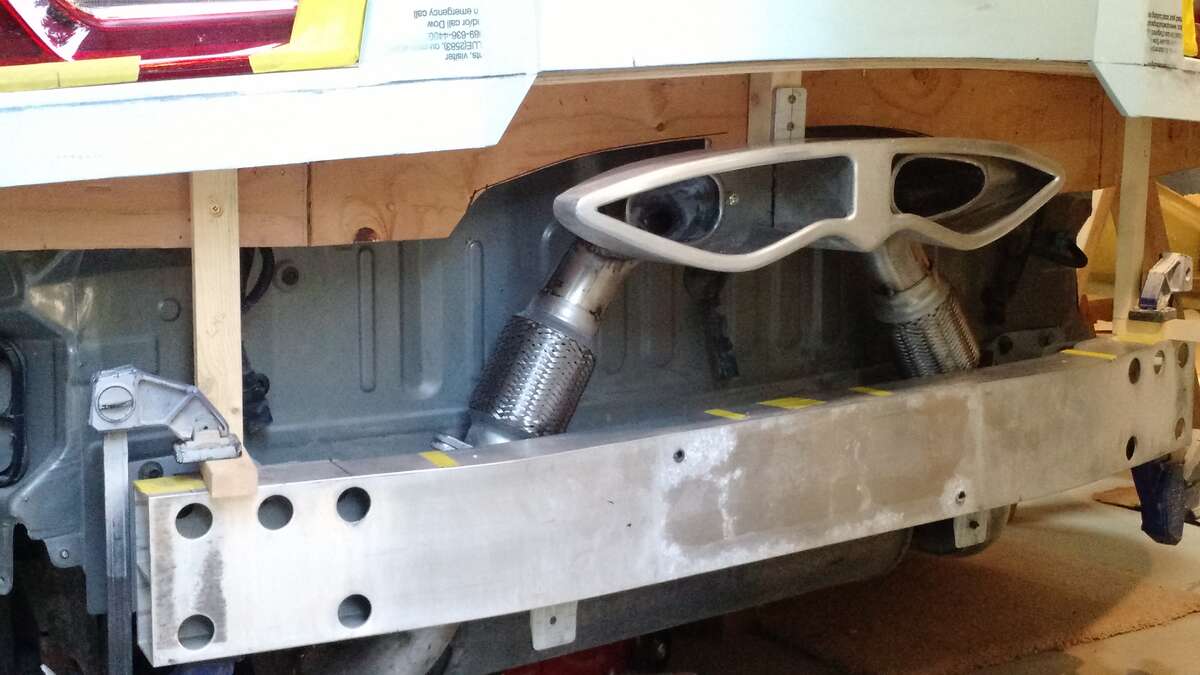
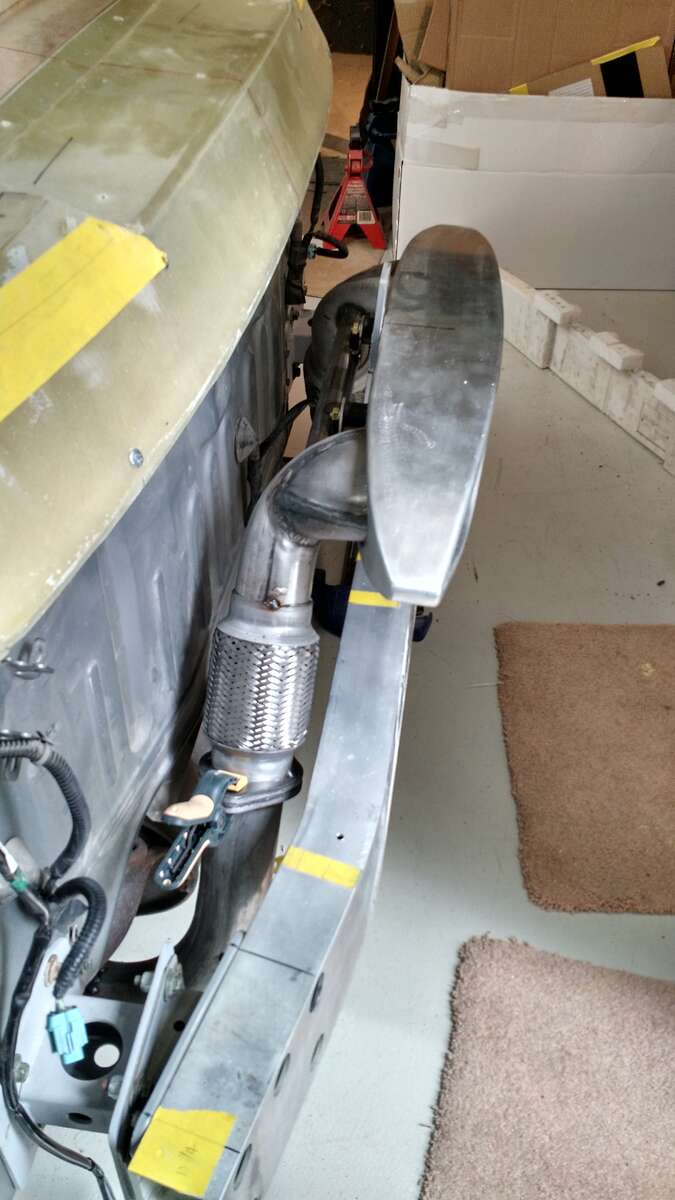
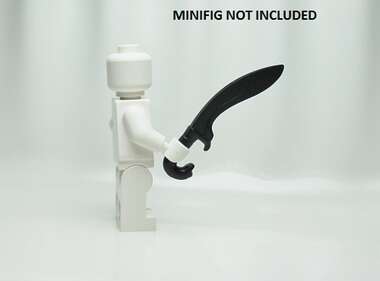
Ok lets go to the back of the car for a change of pace .Falcata is the name of the car , I named it after a Spanish Sword It was considered a very deadly weapon .So the logo (emblem or Badge ) for the car is two sword ends put together , I designed the exhaust tip from this idea , the first pic is a little solder holding a Falcata and here is the signature exhaust .It's 24 inches long and 4 inches tall First I built some spacers to extend the rear bumper out 3 inches to make room for the pipes to go up
.jpg.b417f037b3d788e3e2dab3df3c8dfb26.jpg)


-
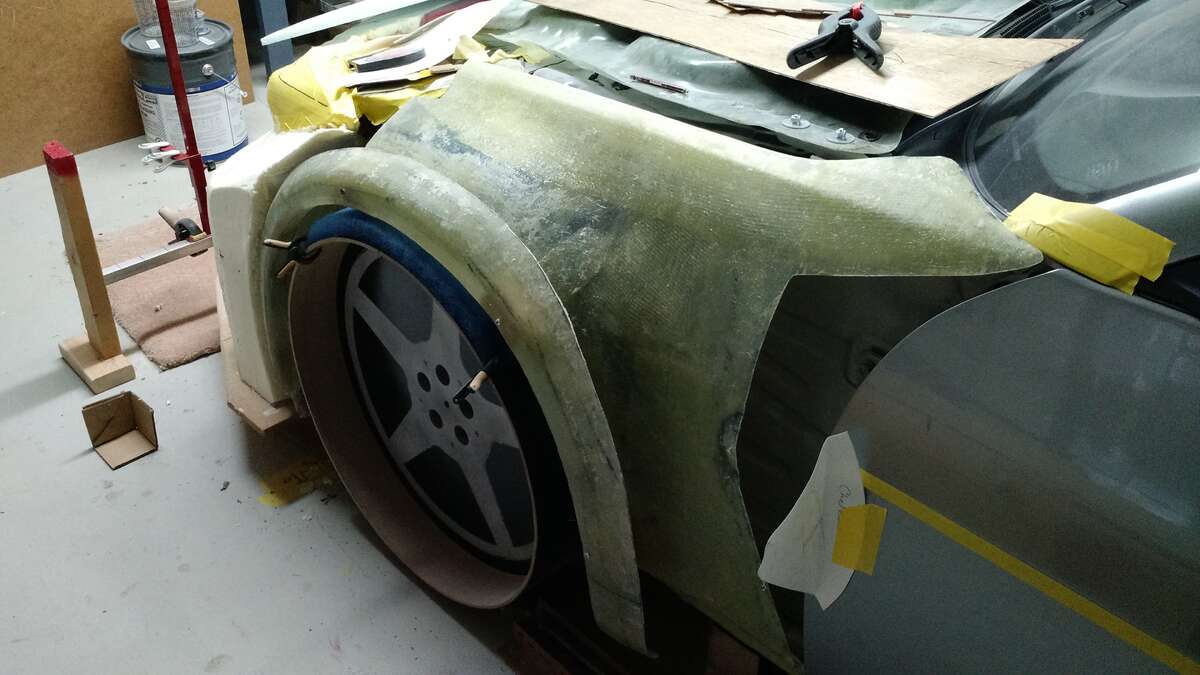
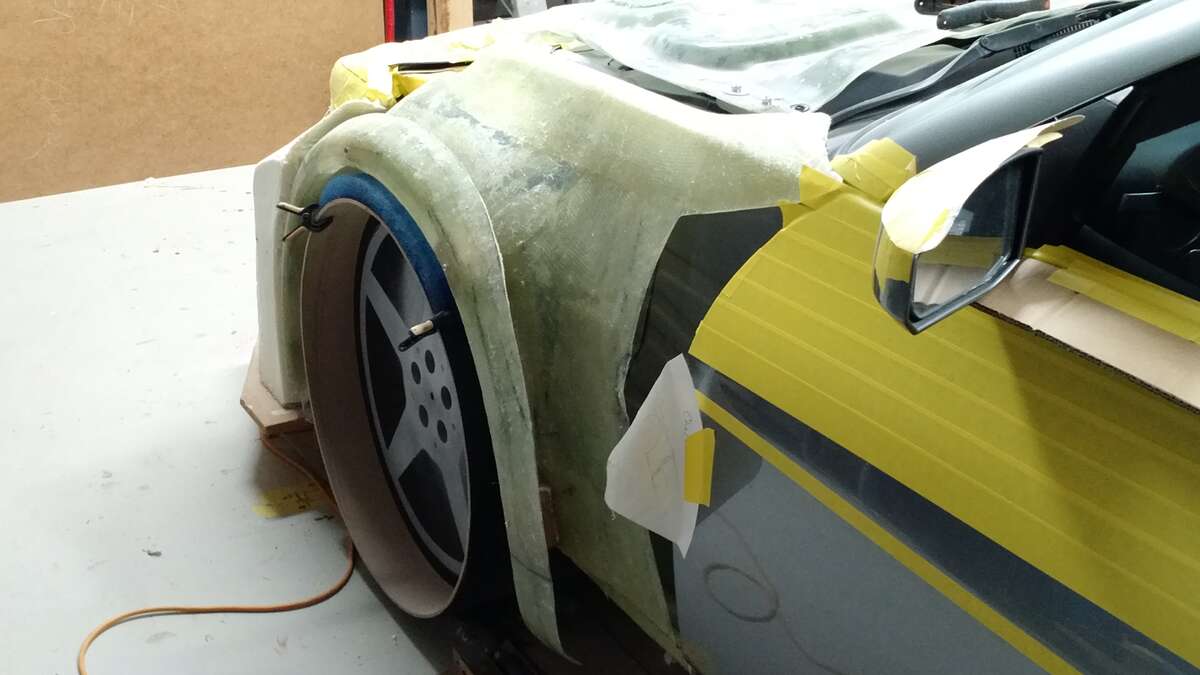
Alright some more on the front fenders . Here is a view from inside Still just roughed in here , this is why I didn't totally finish the nose , in case I wanted to make a change or lucky for me , I had some problems with the foam on the drivers side and it ate the foam below the headlight and I had to redo it.
.jpg.b3b6216432a266a8c82cbc00f1c0a75b.jpg)
.jpg.8438f03bcc5798e8a54cbe58a2d90d3e.jpg)
.jpg.56a709d89564b6dbef0f0e670f444a5b.jpg)
.jpg.df1dfbed2200046a290476865c145869.jpg)
.jpg.5a1f9703ddbd65e9a5d7f1b09ce05914.jpg)
-
Hi and thanks ...........not looking for the poor mans roller look here , it's going to be raw GT3 on the street !! I did make a few renditions the one for the front has changed , but this is the one for the back , I am no artist .

-
Hi I am shooting for late this spring , early summer , even if it's done , but with out some vent covers or inner grill , just to get it out there , I really miss driving the car . Thanks for your interest
-
Hi and thanks for the comments and no not on insta I do have the build on another site .I don't have time to figure out some of the sites are a pain , i tried a few and got so frustrated i gave up . There's not many pic's because it only lets you load 5 at a time , it wont be long and you will be caught up on here .
-
Once the shape is how I like it I make the bucks out of 1/4 inch MDF Here you can see I made the fender cover the top of the light , makes it more sinister looking . These were tricky to make as the light has a lot of shape . the bucks were made to interlock , this gives it some real strength for sanding and working with the foam The difference between the ram board and the real wood , made for some challenges for left and right and angle etc This pile was not making the cut so to speak .... I used aluminum flashing to make the shield for the foam around the headlights this long silver part is ram board covered with aluminum tape and release wax to prevent it from sticking here the fender ends short for a reason , you will see that later All prepped and ready for foam here you can see how the flashing around the headlight prevented it from being buried Well I hope you like it so far there is lots more to come , that's all the time I have for tonight . And if there are too many pic's just let me know . Cheers
.jpg.deaa462964257a62636f4f8016c44ce3.jpg)
.jpg.1f02f8c8824839edf68c92a3ec0b7b87.jpg)
.jpg.f7b91e568f2dbfdb46328d33e04c7e24.jpg)
.jpg.b43588ec612c5aba59a707f04bed1d18.jpg)
.jpg.560a8bc94fd4627735e7c4cb5cc5e36a.jpg)
.jpg.ccb65547943f50bb404dafb8debcdbff.jpg)
.jpg.f62f7b32e7a229d0a2381943ff43adfb.jpg)
.jpg.bbd829e8e2fc852aef9e27fcab33f29b.jpg)
.jpg.03d026c4dbcb0d22d3eebb525f14e34e.jpg)
.jpg.d6ff3b56485ec2a97d51a80f18c6323c.jpg)
.jpg.23c5f649b95cb5cb2491cbb0599a1cb7.jpg)
.jpg.f6cfc30441e73ece3934f2c10e9a3357.jpg)
.jpg.f4bf07a8a82082df9a191537ebb51fce.jpg)
.jpg.e3eb95a8a5ddc2d4a8ef9c7c117648ac.jpg)
.jpg.fef3ef83c6d726dd1a43026555202e98.jpg)
.jpg.26b18f4cfc0105f4ec5200fc7d81820a.jpg)
- 259 replies
-
- 10
-

-
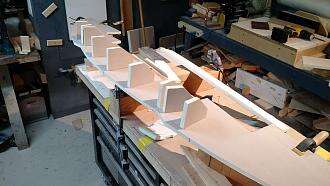
Next is the bucks for the shape , I made patterns out of Ram board ( its used to protect flooring when doing construction in homes ) Comes in a 50 or 100 foot rolls x 38 inches I believe . excellent for large patterns .
.jpg.20be8a3fbb6734aa9558e025f7e5d71a.jpg)
.jpg.f098b1a358cc871fc60220f64e930058.jpg)
.jpg.fd5b5497ef32740e933941c0f610ae31.jpg)
.jpg.98f1a27eaf2d2acaac30861bd048ef1f.jpg)
.jpg.3da93e8b7e7dd6d21ac084eafad8276e.jpg)
.jpg.1576b2bc743be3c3a40469ae6a54ae3a.jpg)
.jpg.9cc5ce694595730ed2af69d4d8690d77.jpg)
.jpg.a797dddf29edb6a727208aca3e1f34f6.jpg)
.jpg.c629e2d9df0dba9f5e0f34da3d0d6b9c.jpg)
-
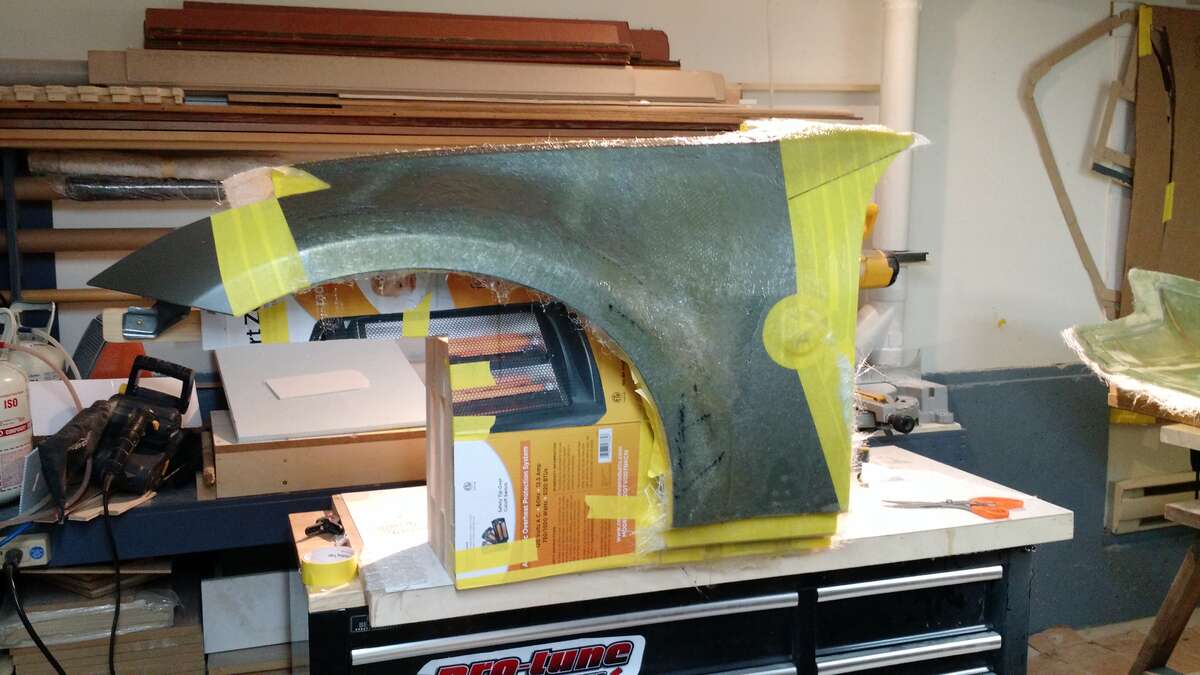
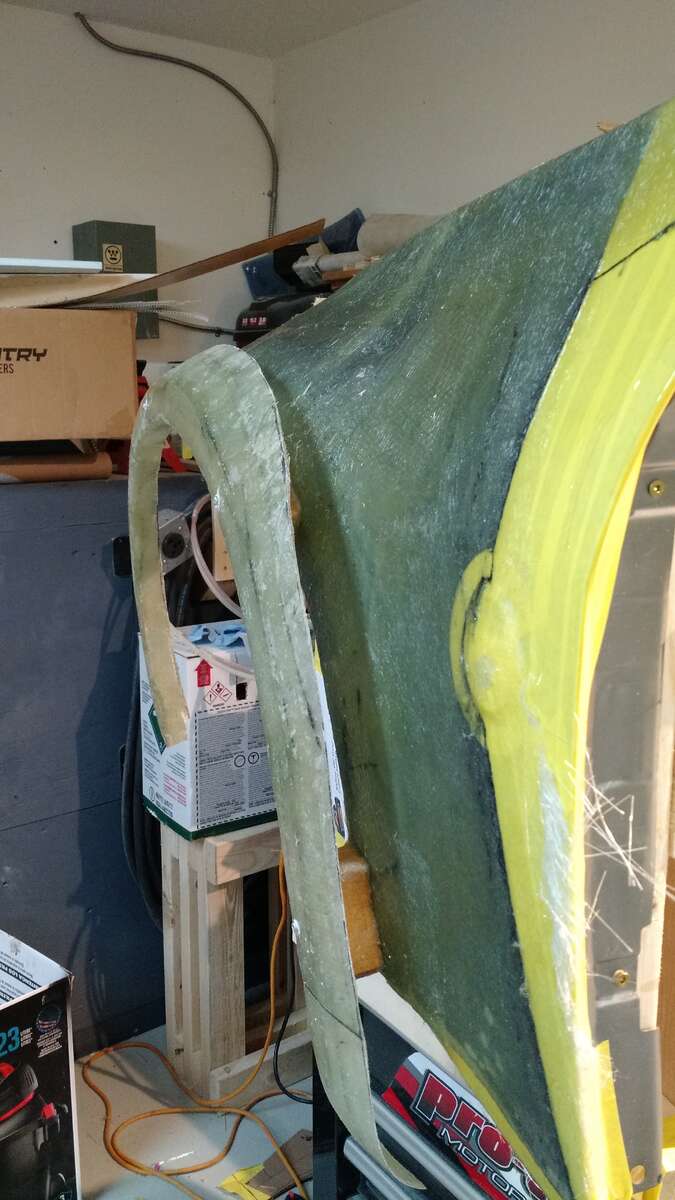
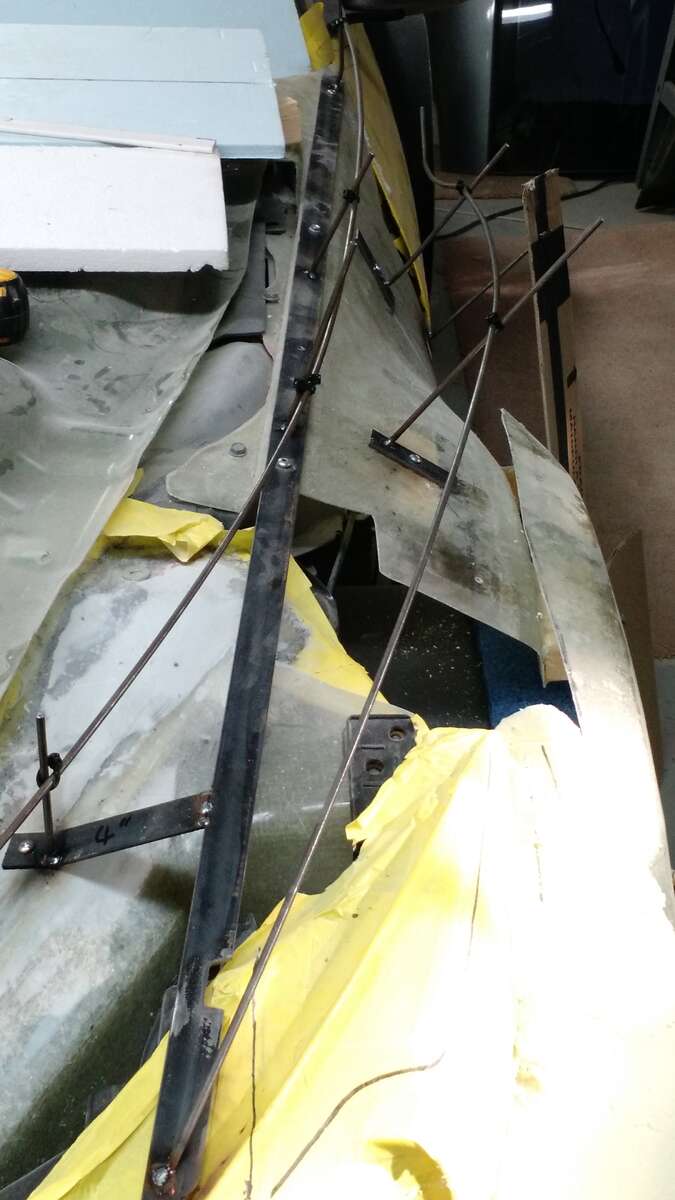
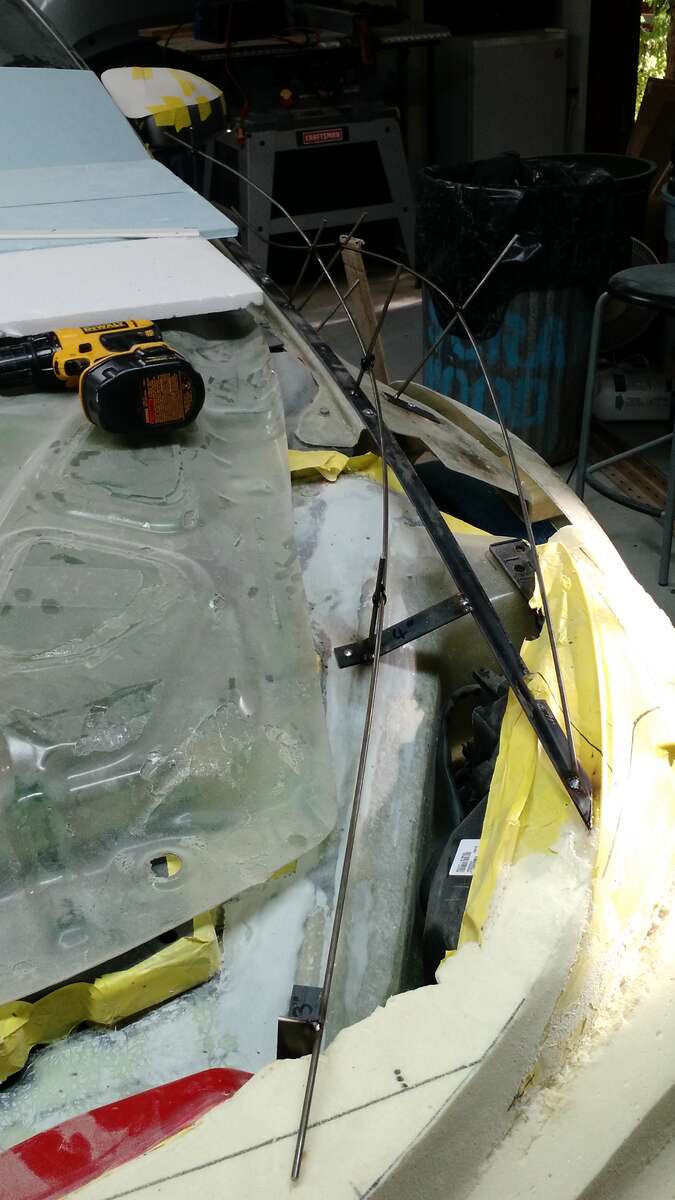
On to the fenders I made copies of the factory ones for a couple of reasons . First I want to use the factory fastening for most of the top and bottom , and second the wheel arch size , shape and it helps with location for the new one . Next I used some 1 x 1/8 flat bar and 3/16th round bar to set the shape of the new fender , once I was happy I tack welded them in place .
-
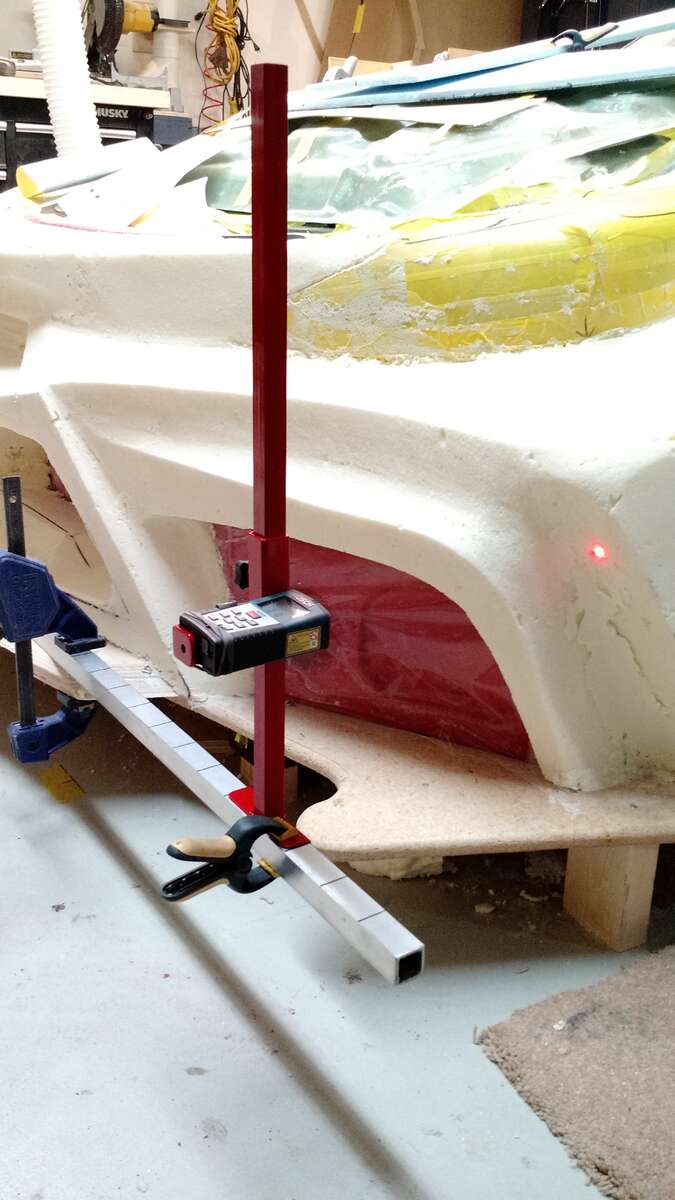
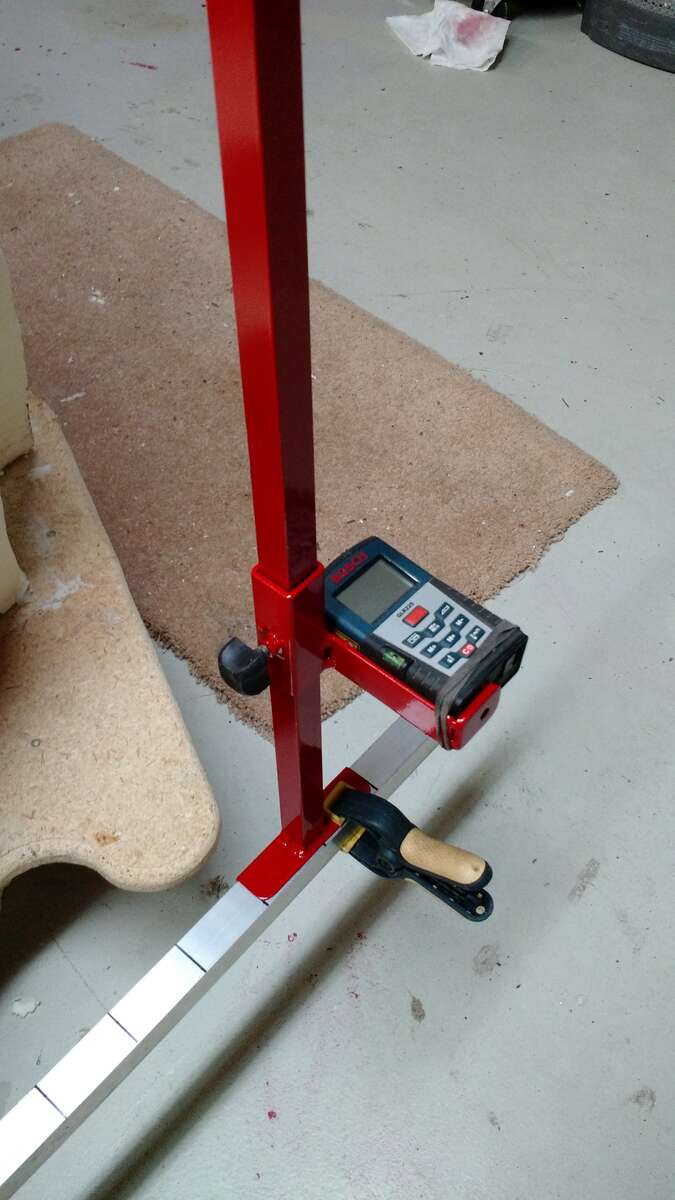
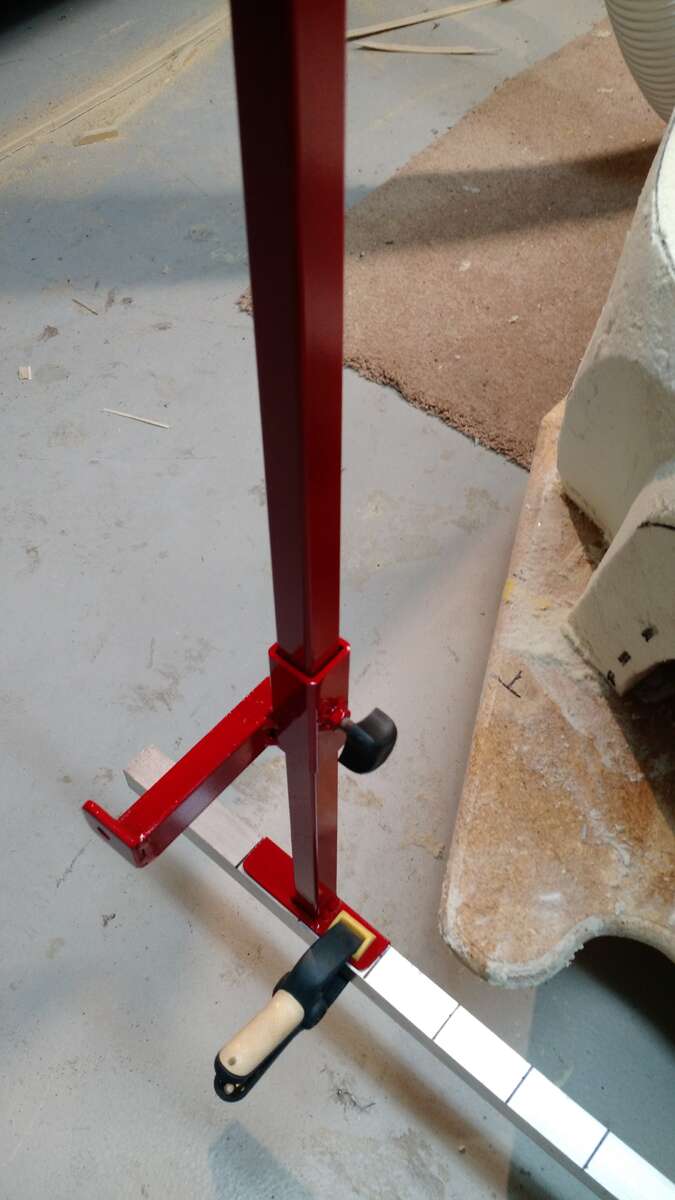
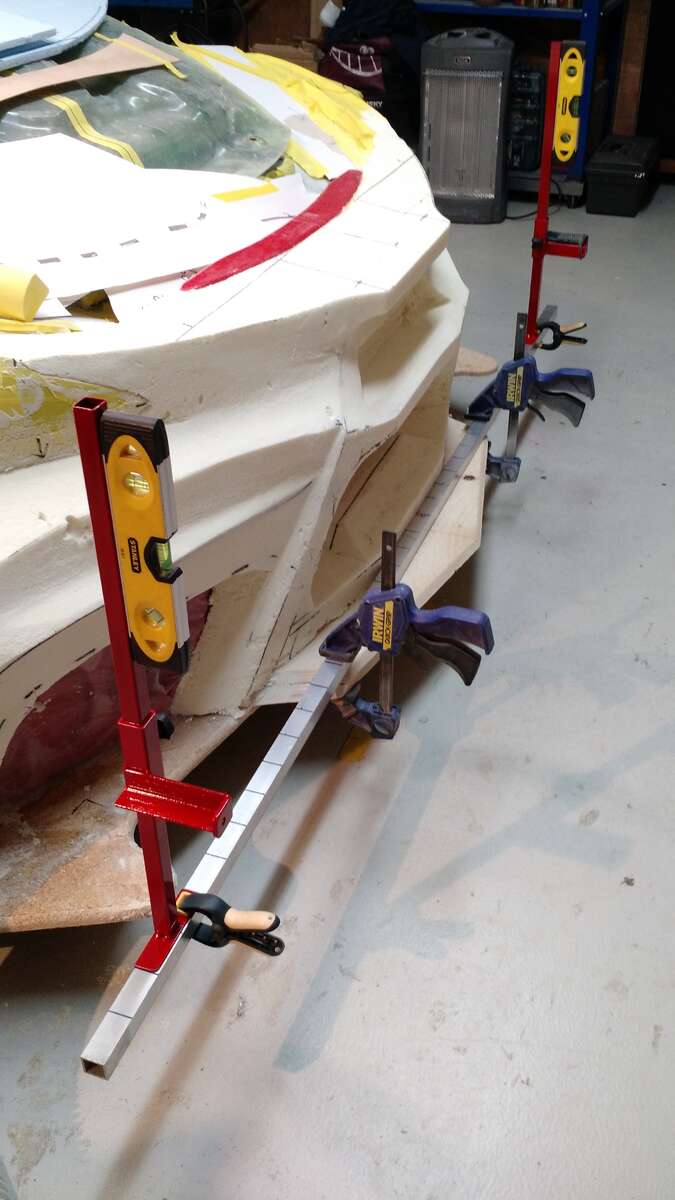
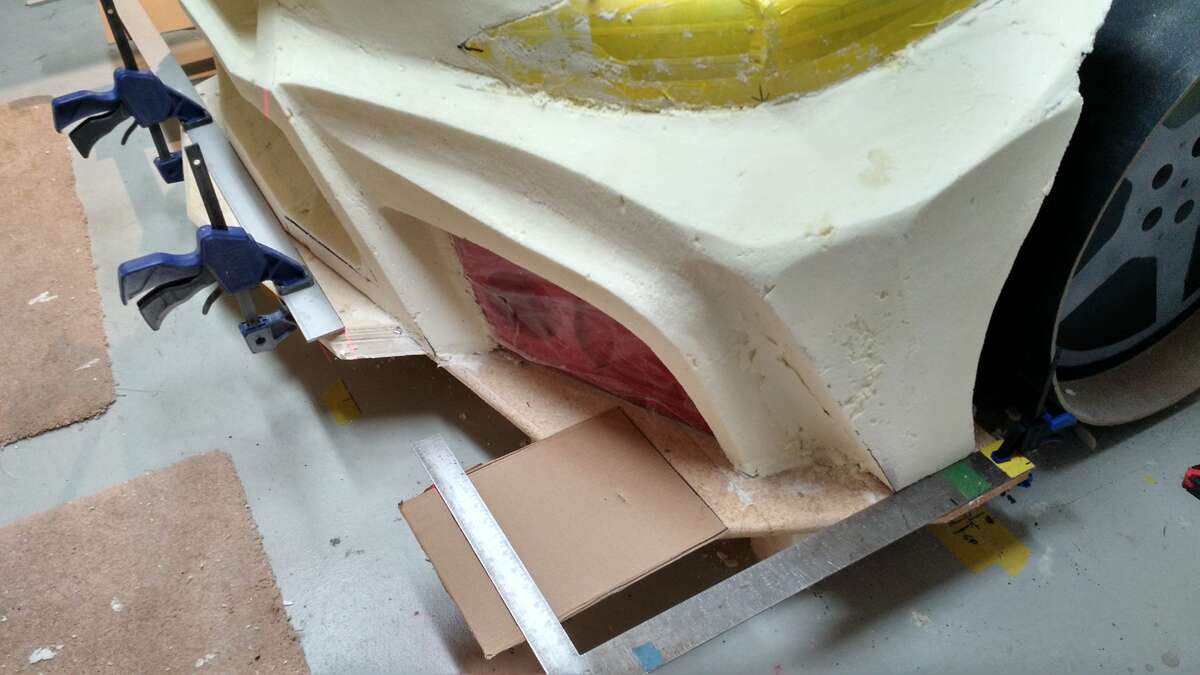
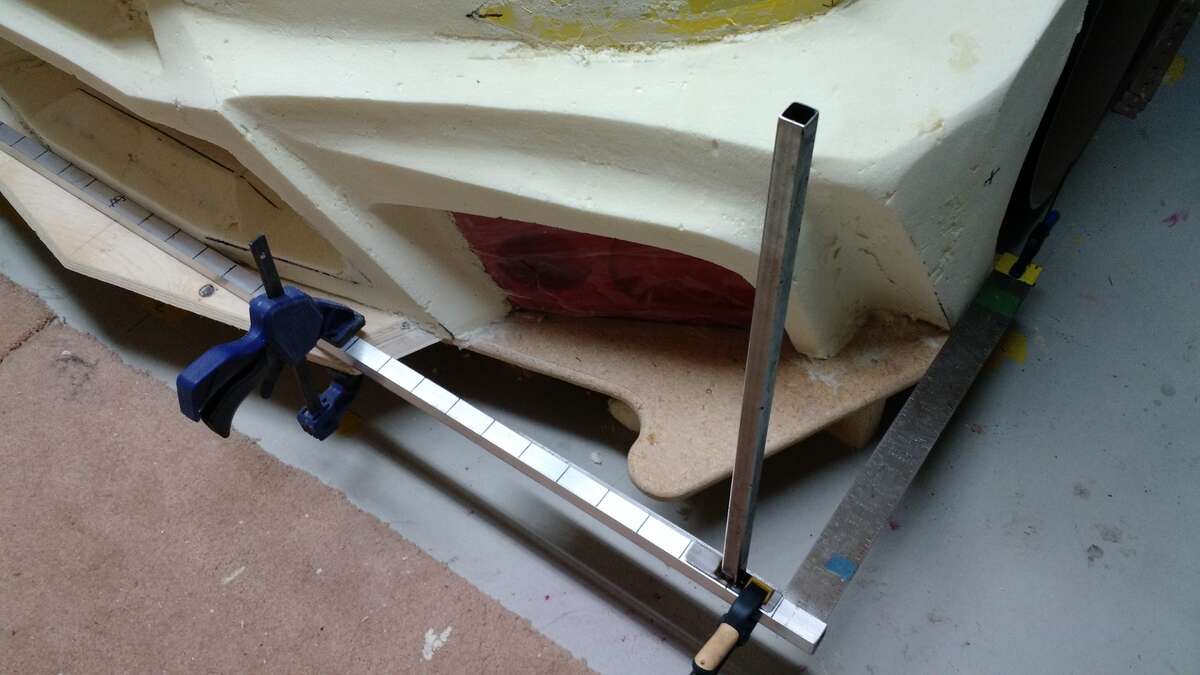
I must thank everyone for all the positive feedback , it helps two years in 7 days a week . Some more of the front shall we . I built this device to measure to insure both sides come out the same . I might look int lasers and scanning before the final filling and sanding .
-
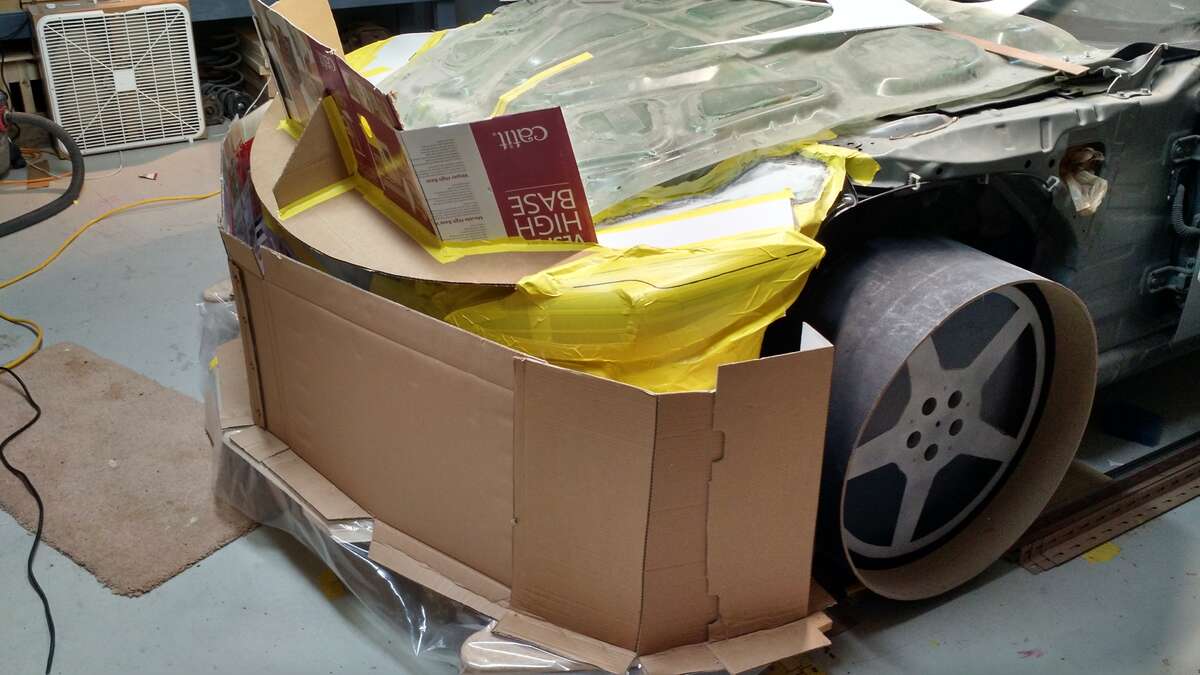
Hi Fellow Foamer Wow , you are pretty trusting not to get that foam on the wheels or anywhere else , nothing takes it off !!!! I got some on my tool box and its there for good , I will check out your car after i post some more stuff . I don't know if you have tried this but I learned a trick when doing my front fenders , take the time to put that clear packing tape on the inside of your cardboard dam and put mold release wax on it , helps the foam spread and stops the cardboard from sticking !!! comes out smooth . Cheers
-
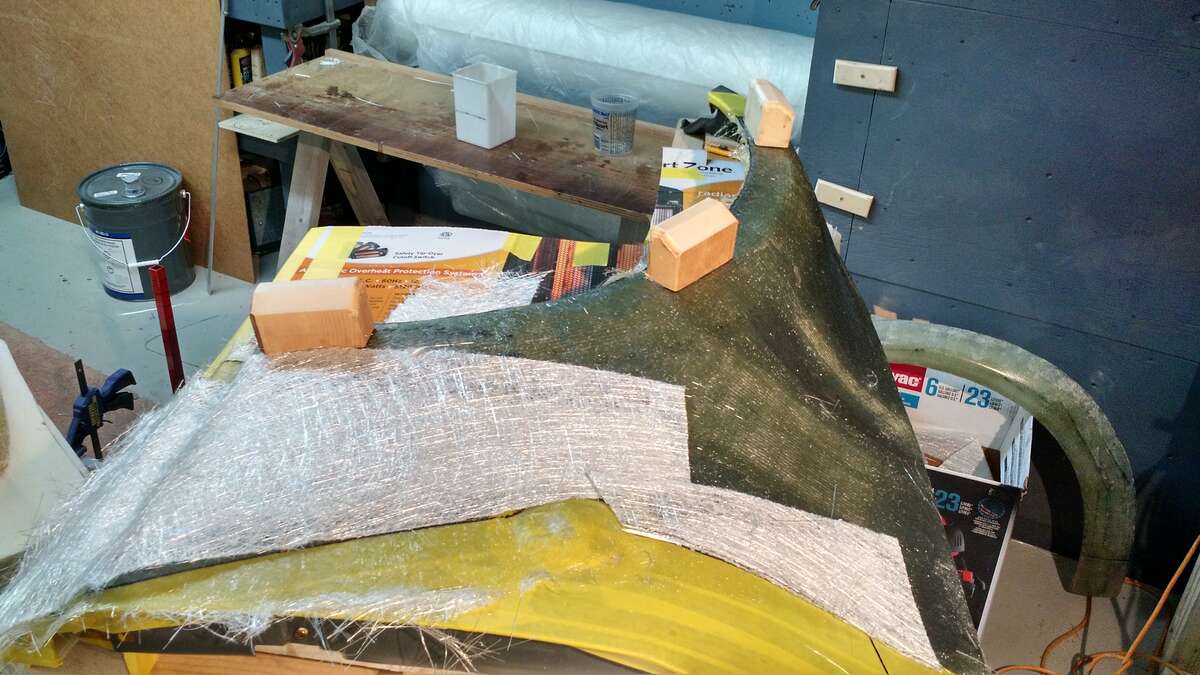
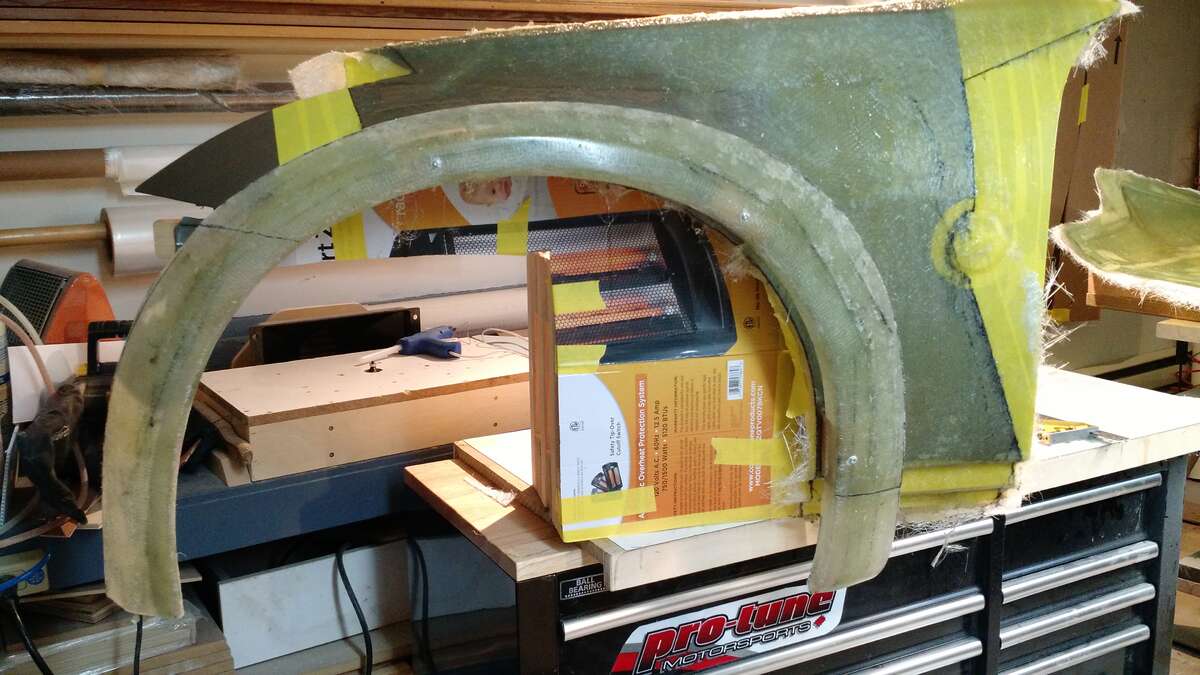
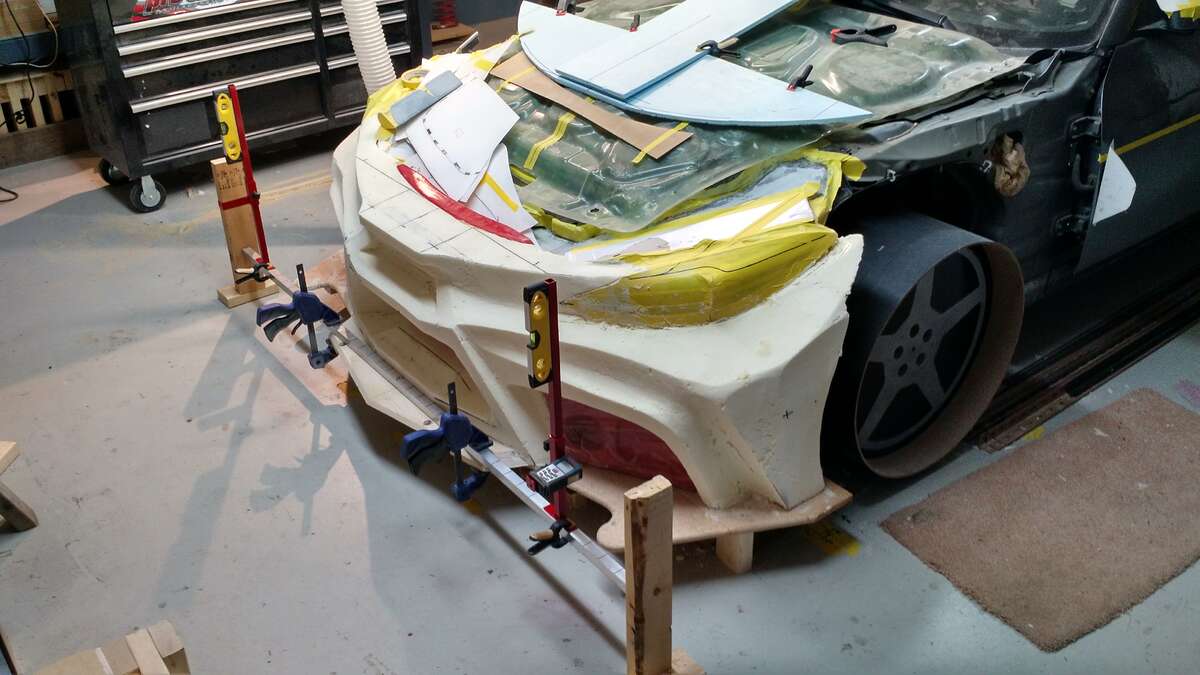
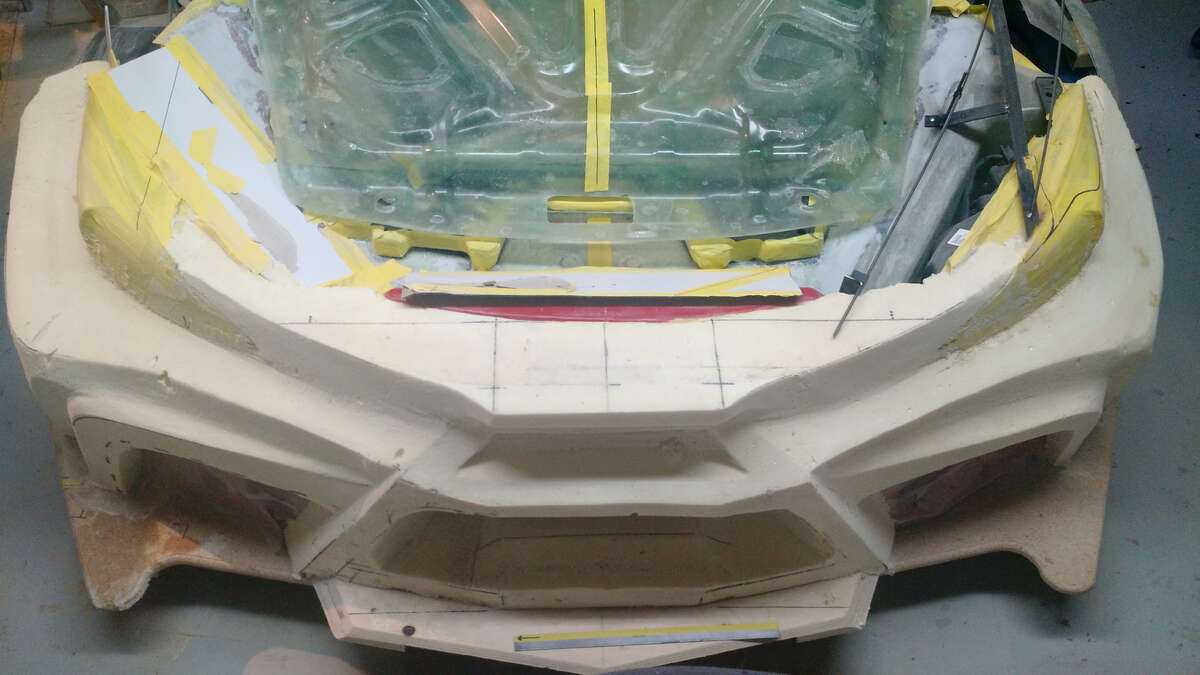
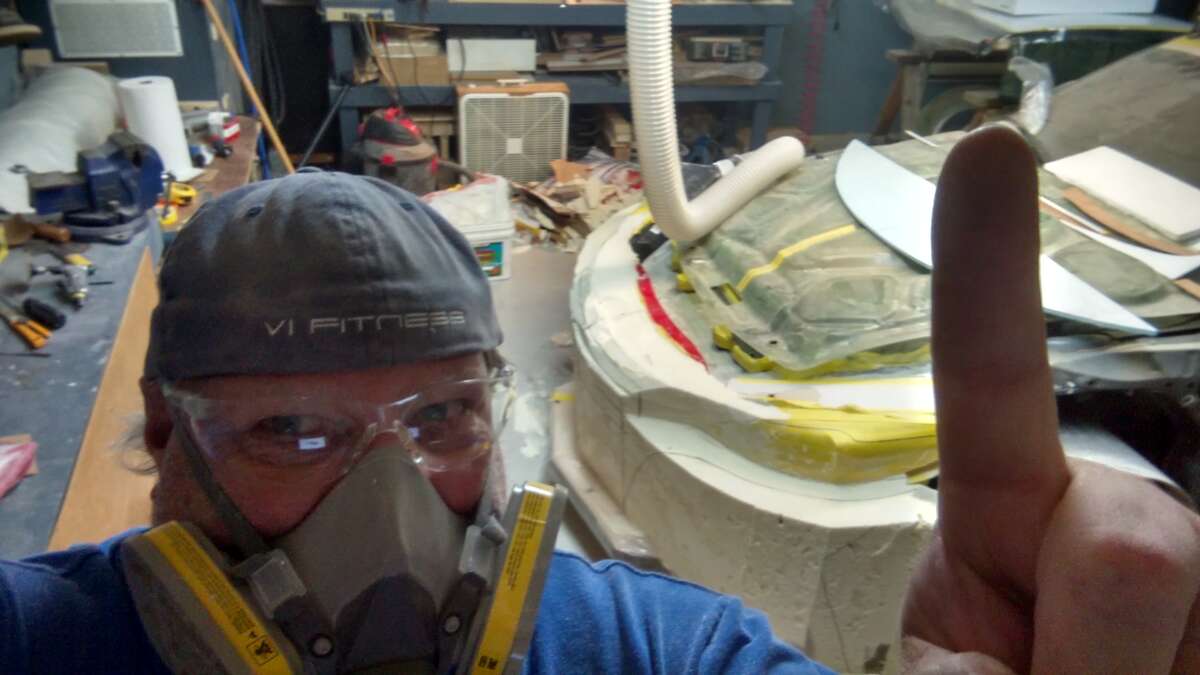
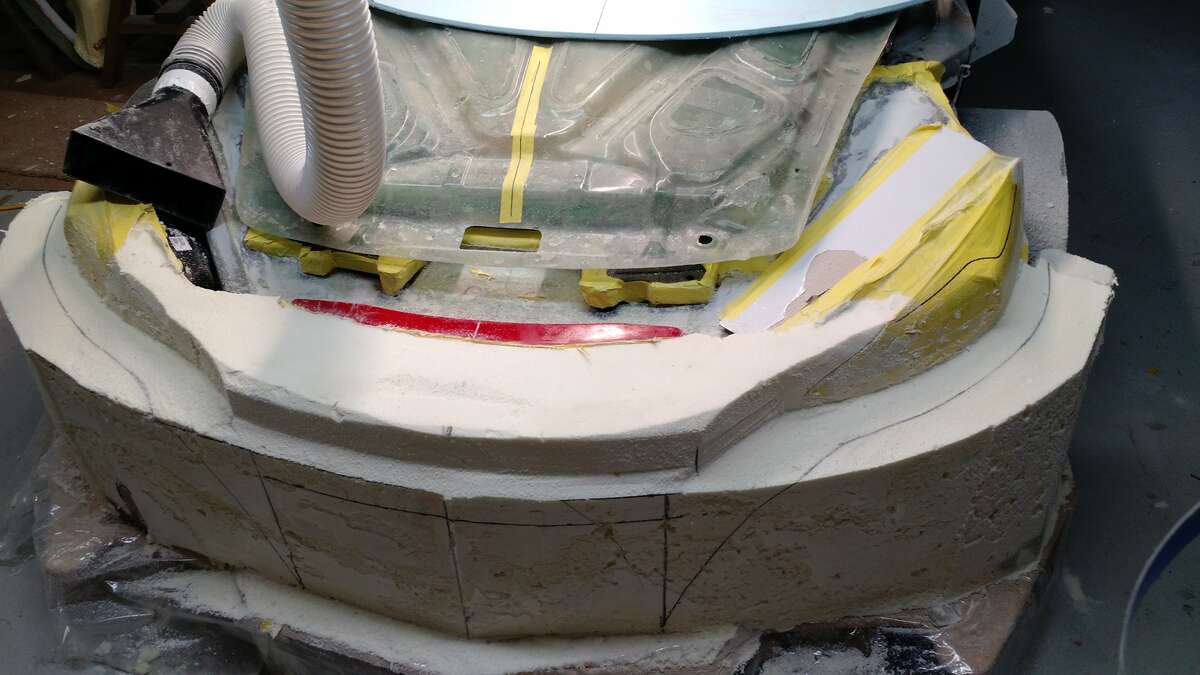
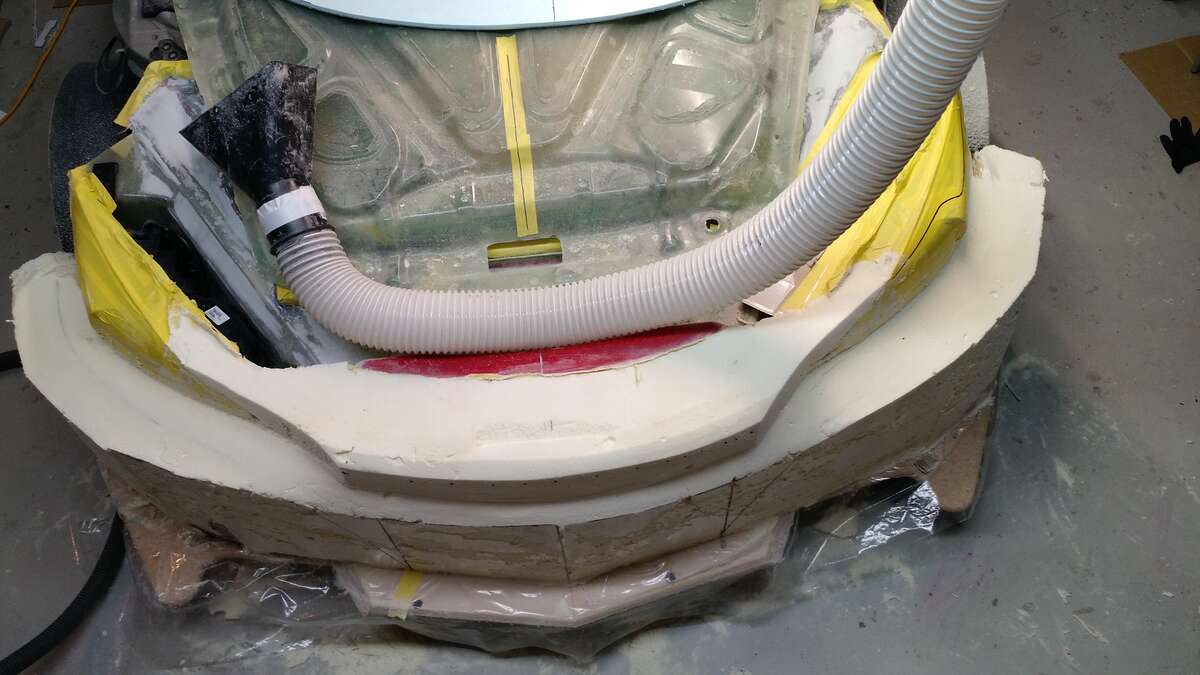
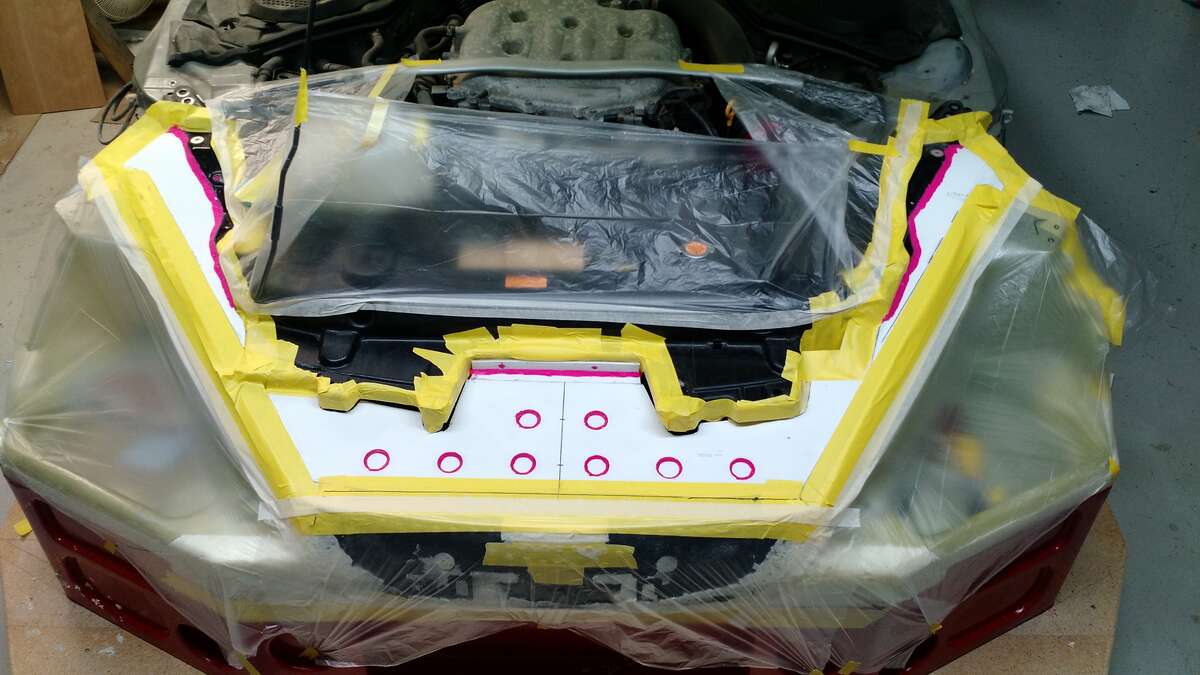
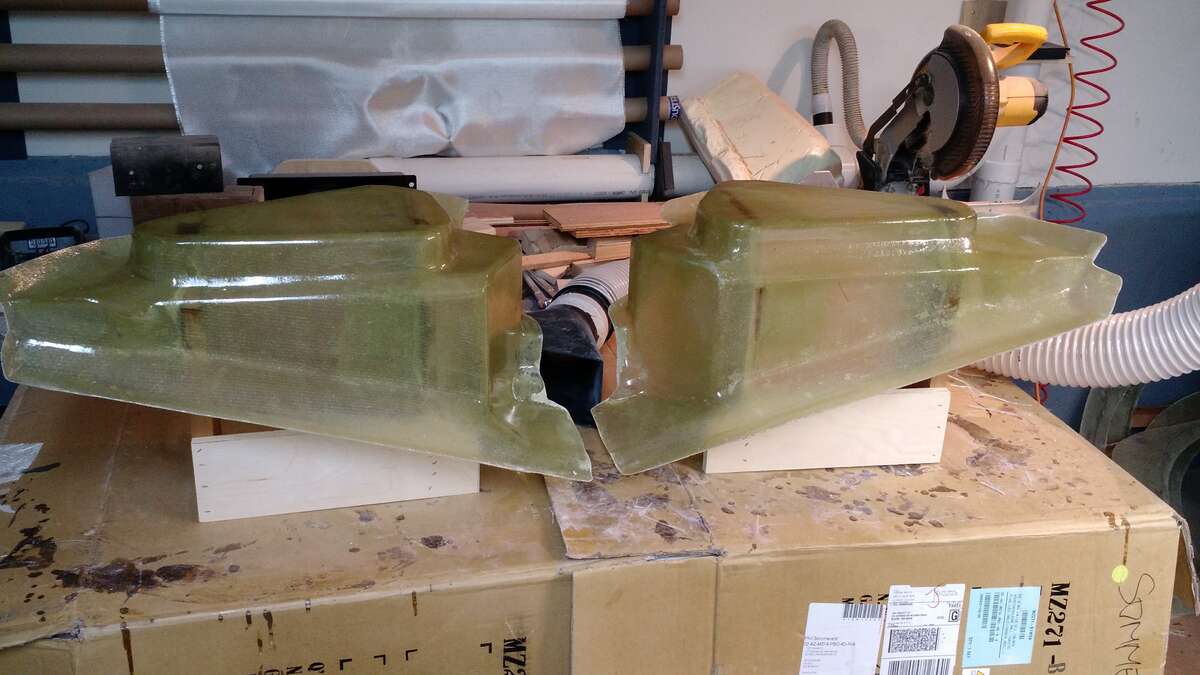
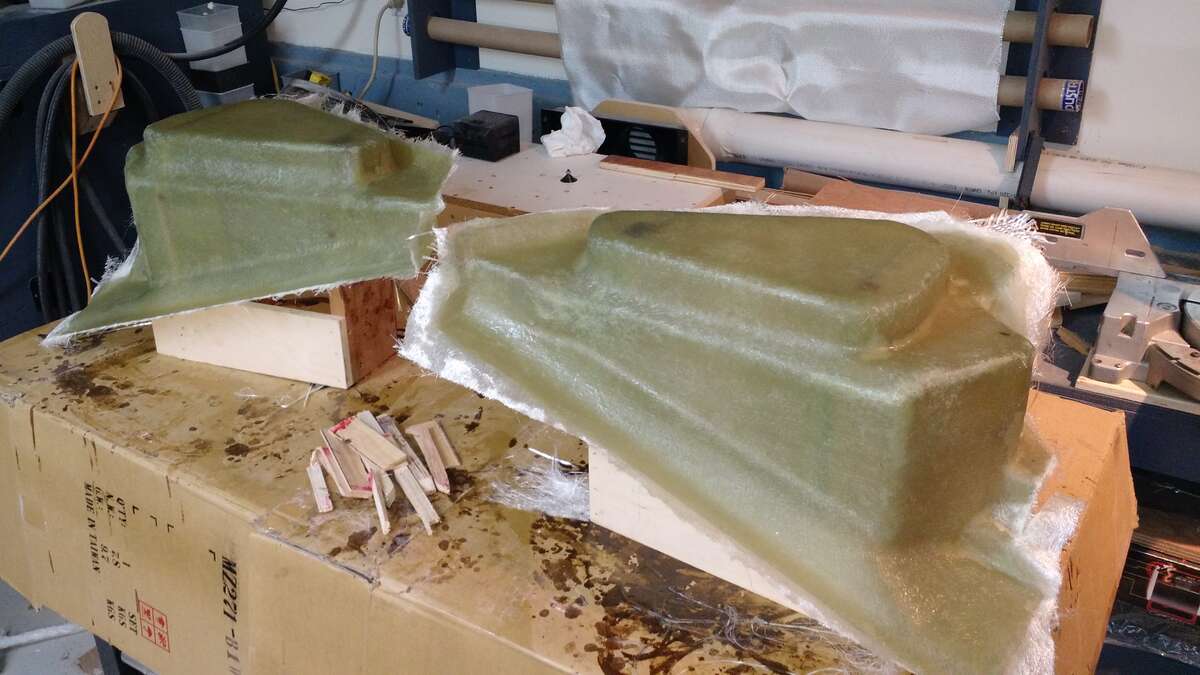
I have time for one more post before heading to the shop to work on the car ( everyday ) I should have glassed this front sub structure at this point , but I was too excited to see some shape in the car More front end ....Fun with foam !!!!!! the foam cuts and sands like butter , it's very easy to go too far . Here you can see making a moat for the two part Polyurethane foam I carved this all by hand , a large bread knife works quite nice for the initial shape I built a device to measure , its like trying to measure an egg .
-
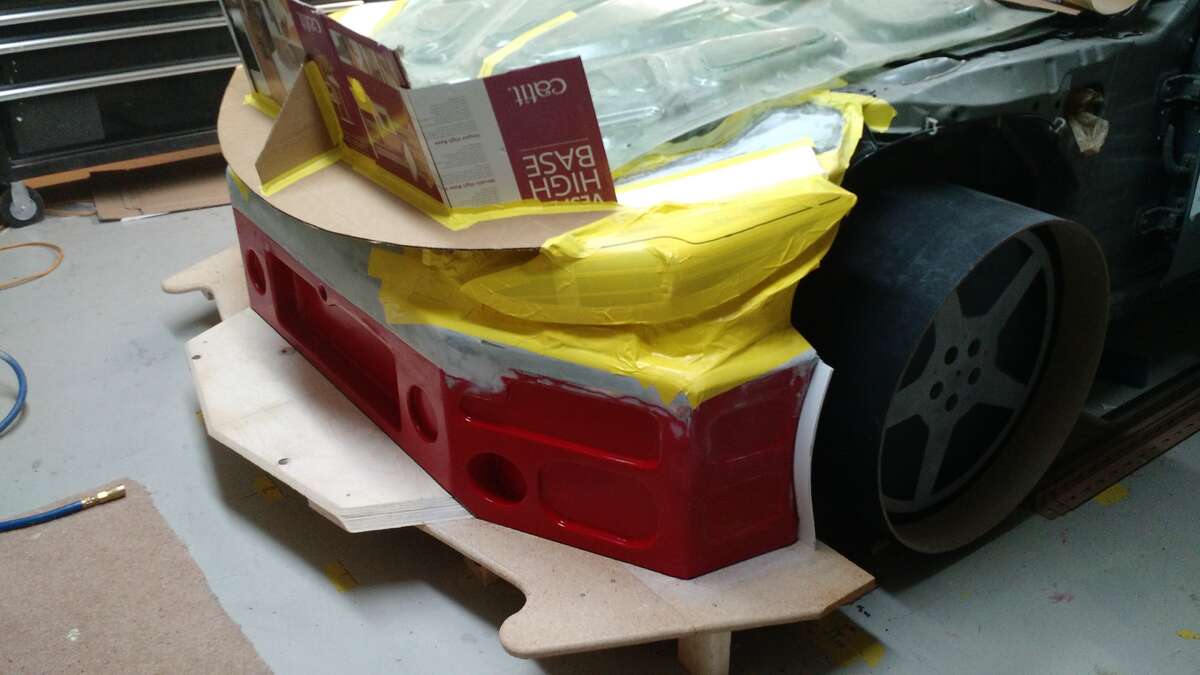
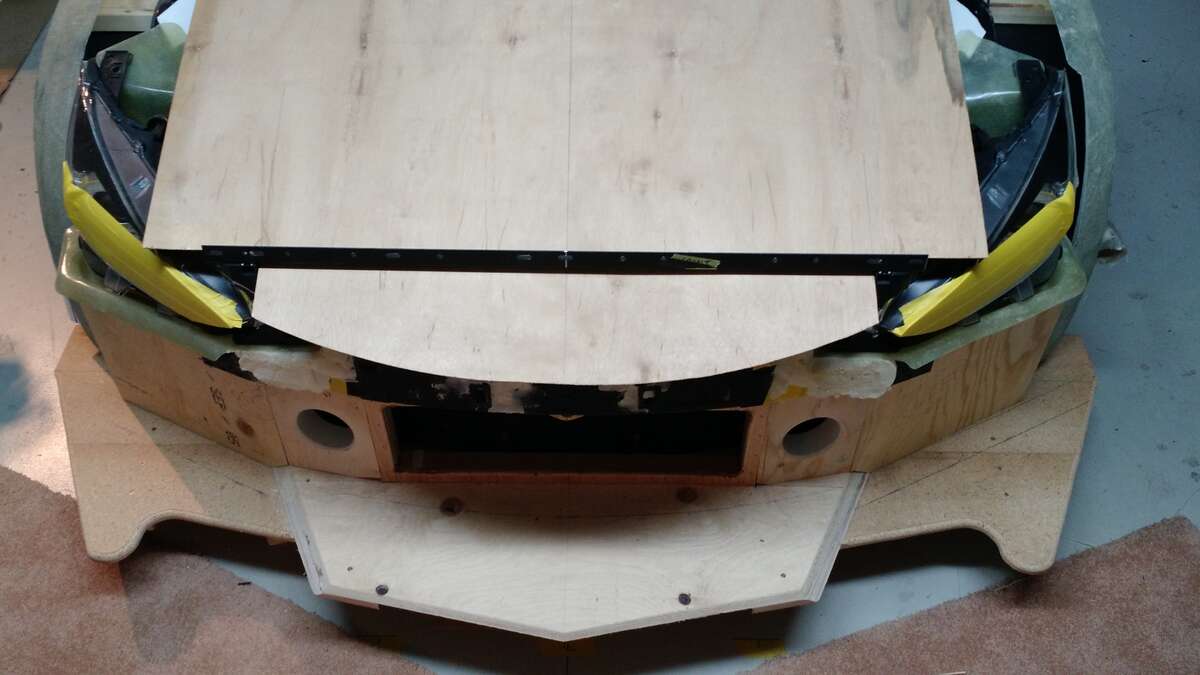
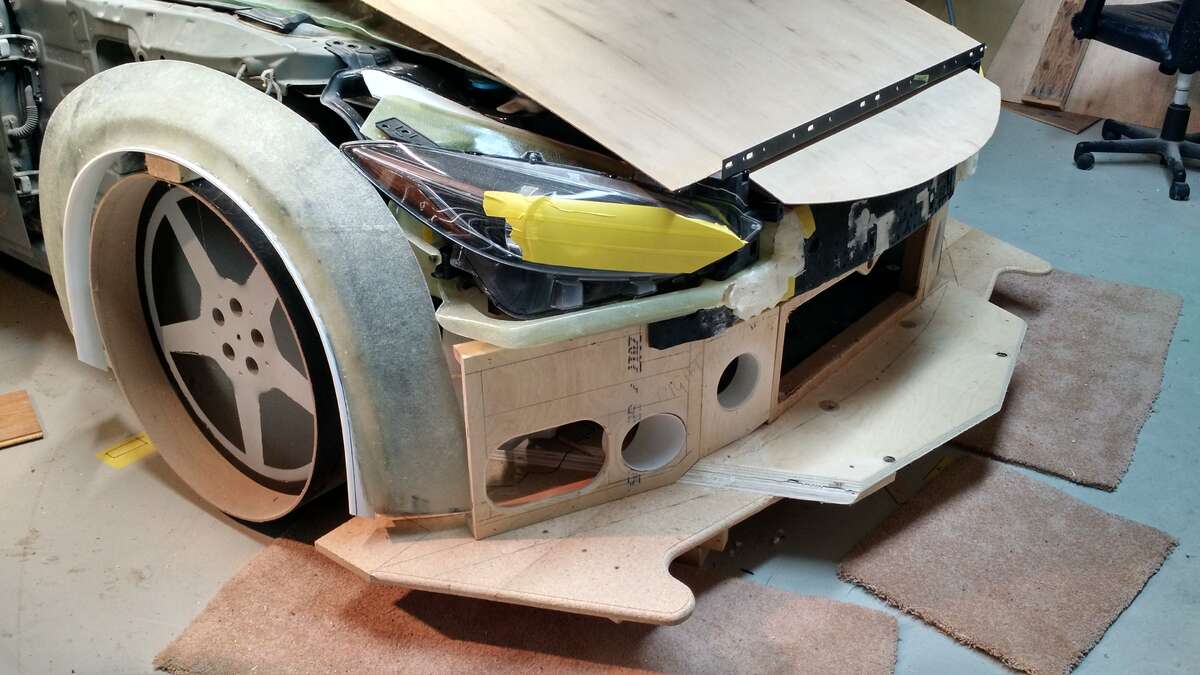
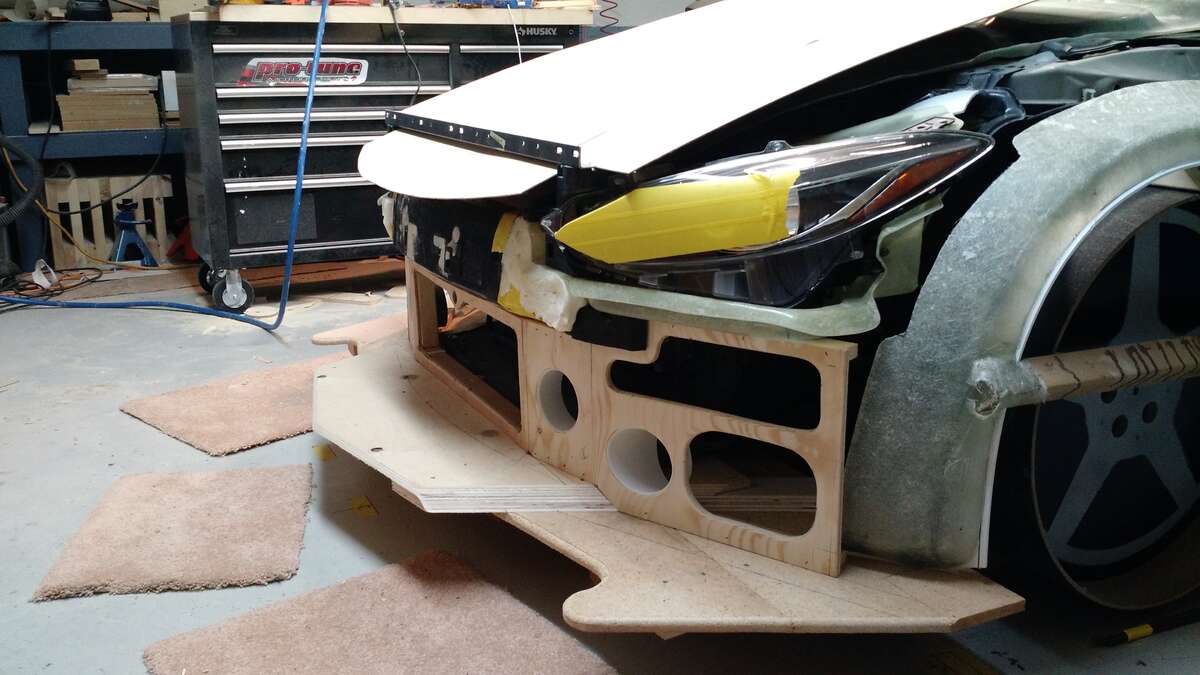
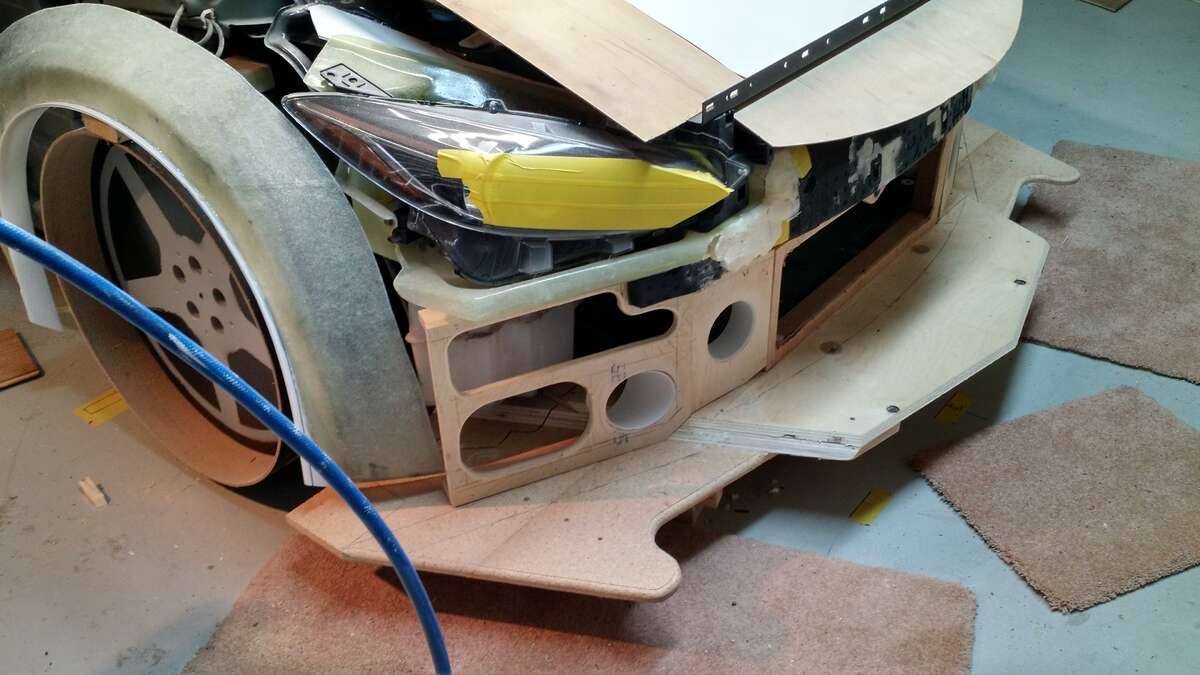
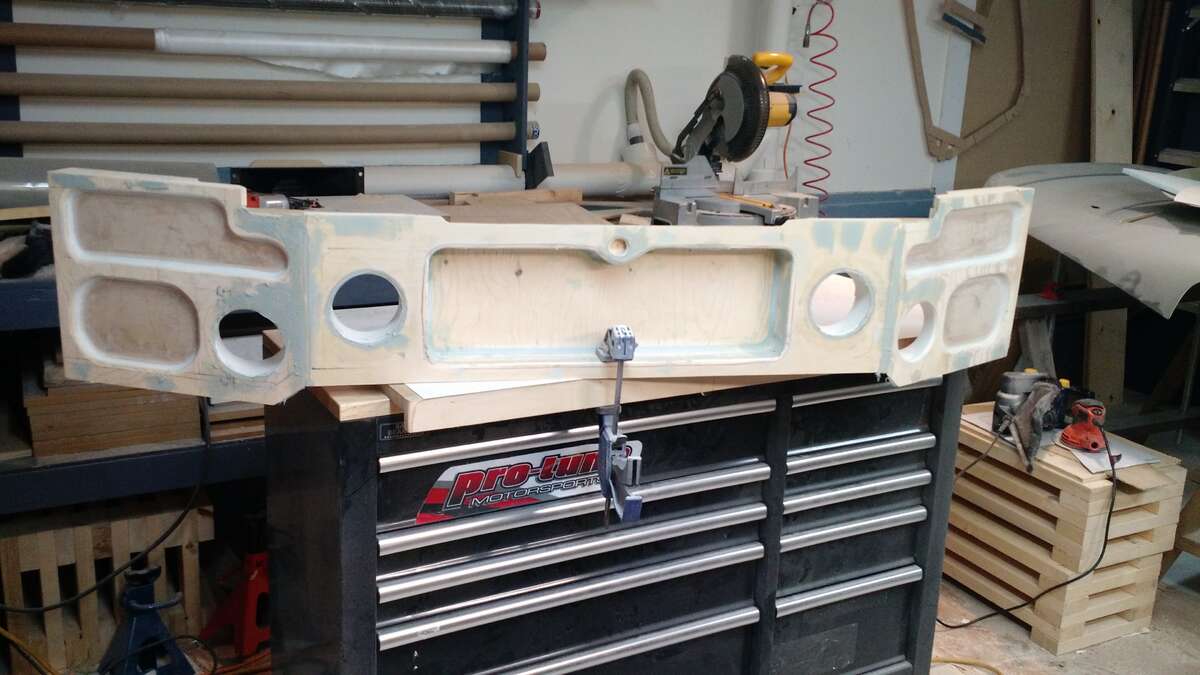
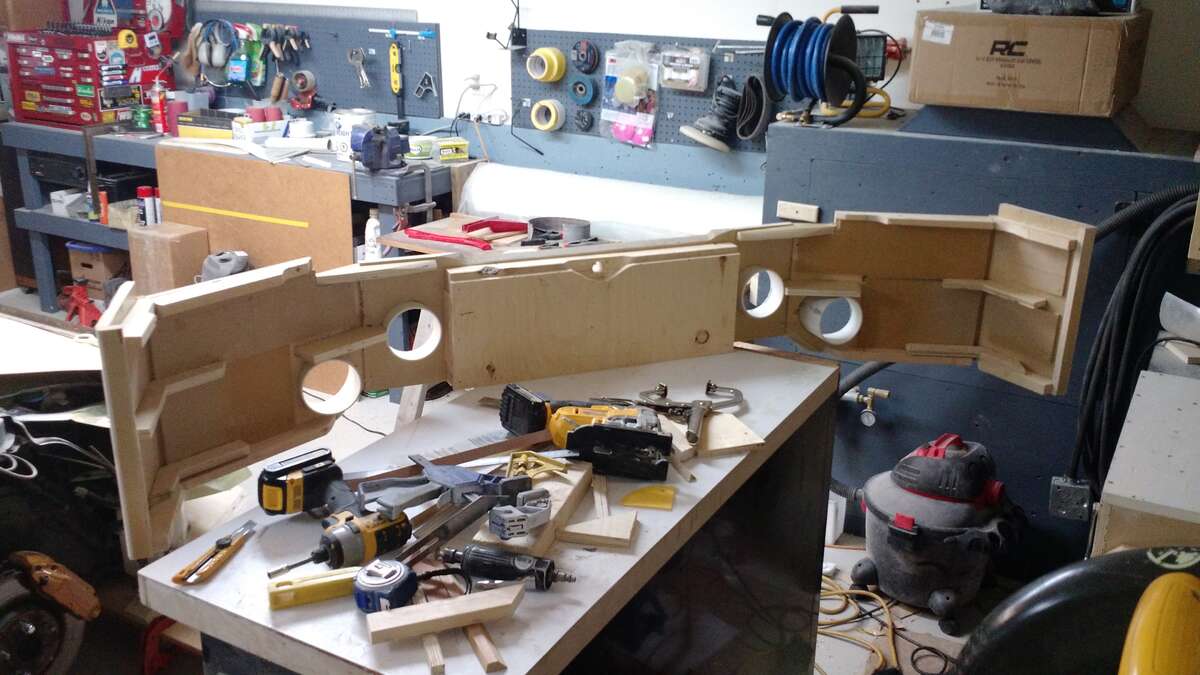
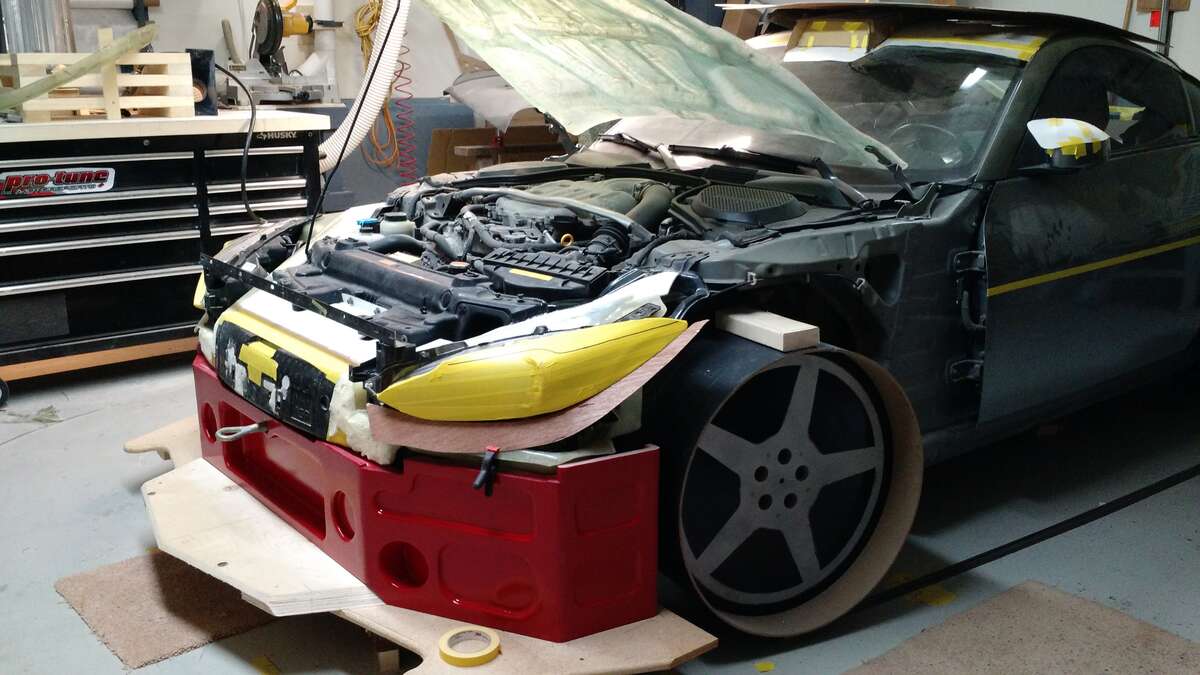
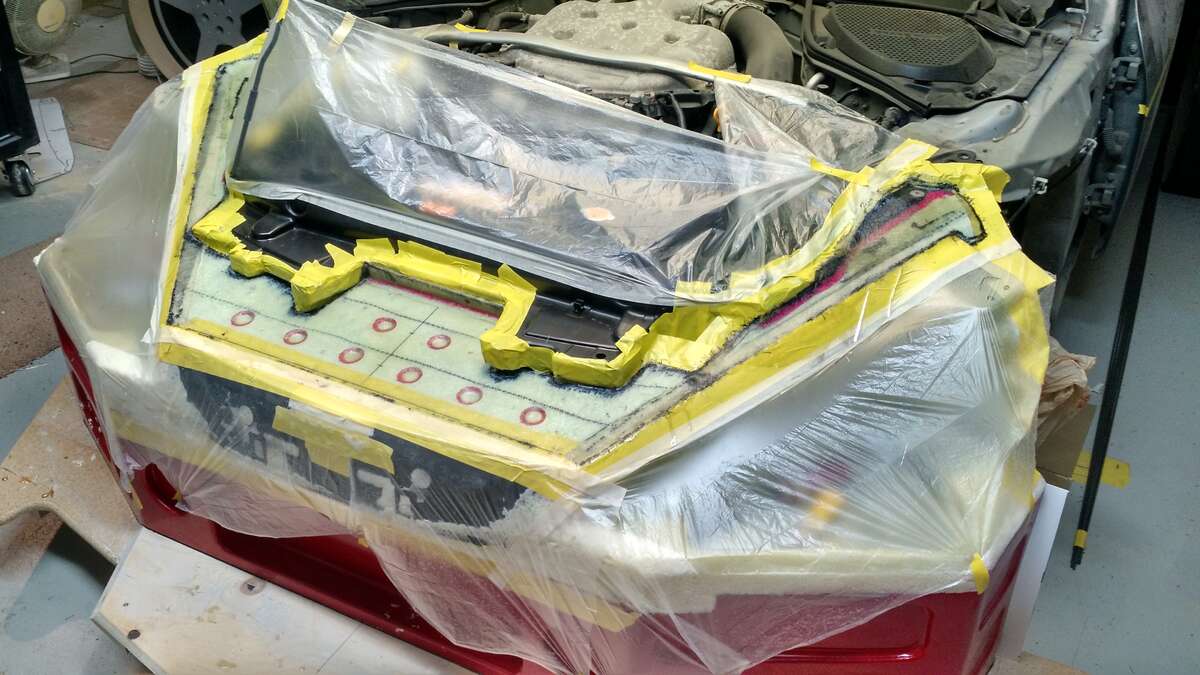
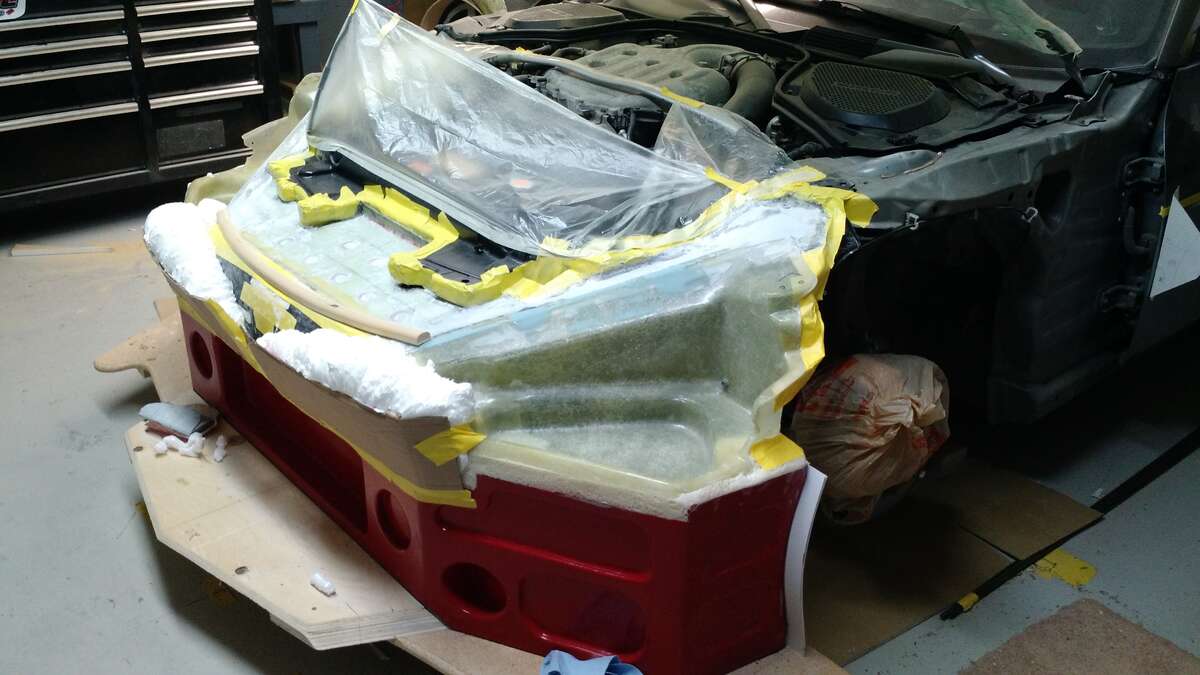
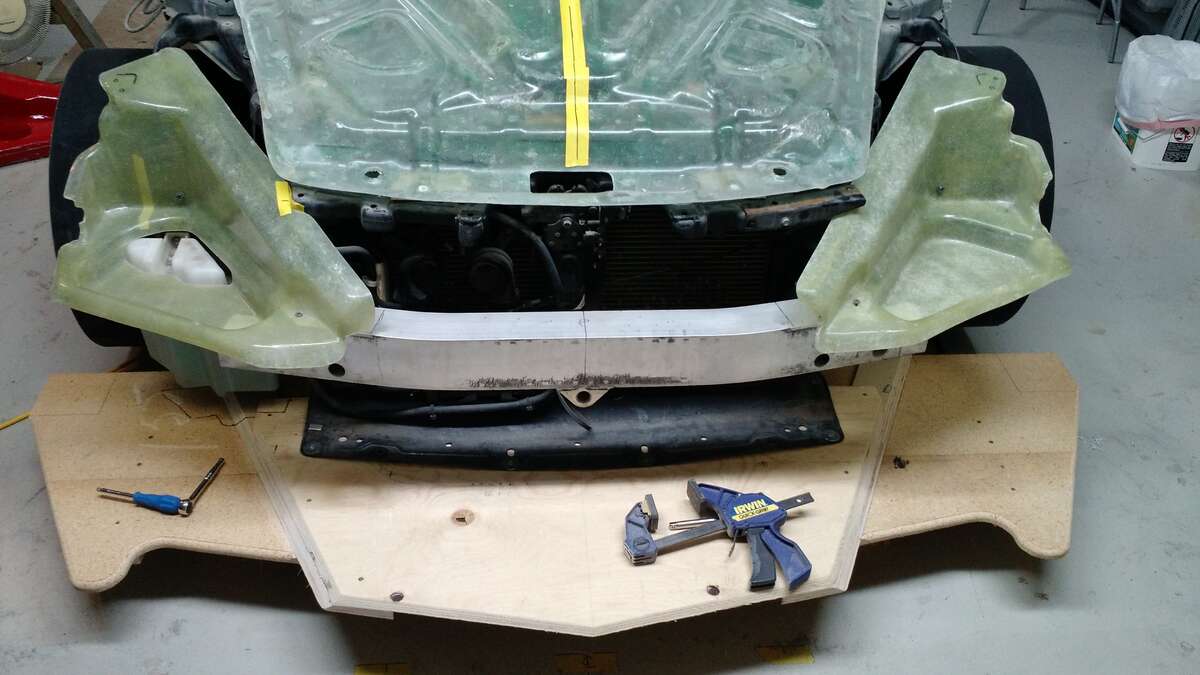
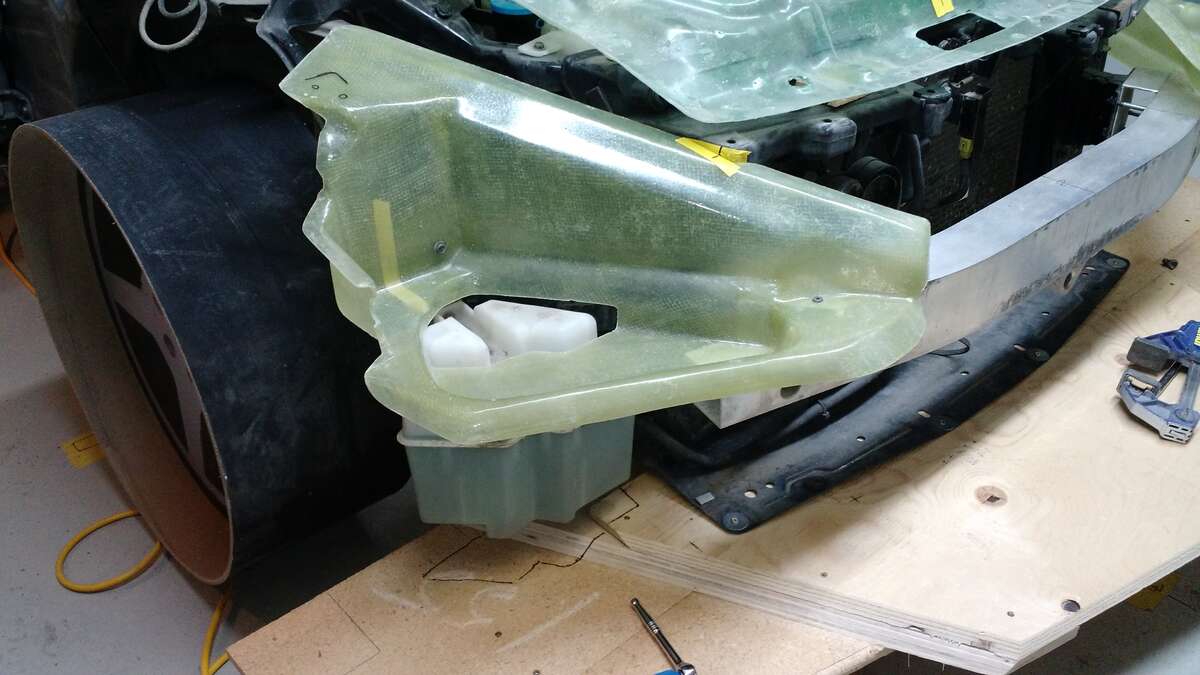
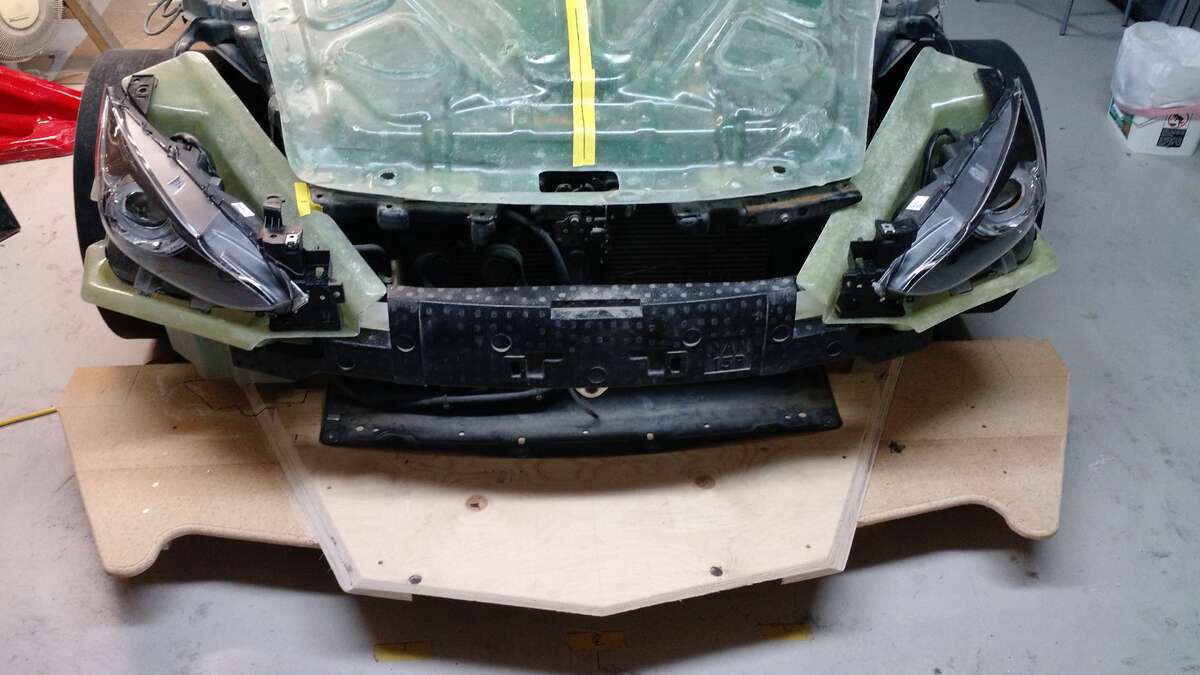
More front end , i decided to build a one piece structure to support the headlights and the front fenders and the bumper cover and the splitter , with fixtures for the air ducts . Again wood.....not the best because it's so porous it soaks up everything so it needs to be sealed before filling , painting etc . I have spaced out the factory bumper 2 1/2 inches to make extra room for inter coolers and or oil coolers . The factory impact foam will be retained also it's a shame all these pieces being made to form the fiberglass all go in the bin when the car is complete I made a copy of the bottom of the factory hood so I could see for clearance to add or remove space , I had some old resin that had some chunks in it from being in the cold , so the quality is bad but is going in the bin later anyway . Also retaining the factory tow hook !!! This is the upper section of the substructure .

.jpg.07bc597a79a64f87ac17334dddd5fb5e.jpg)
.jpg.489feecb9e07b7d396357a0b75ec8b22.jpg)
.jpg.7f42dad387c0a924c362628d6d592eb5.jpg)
-
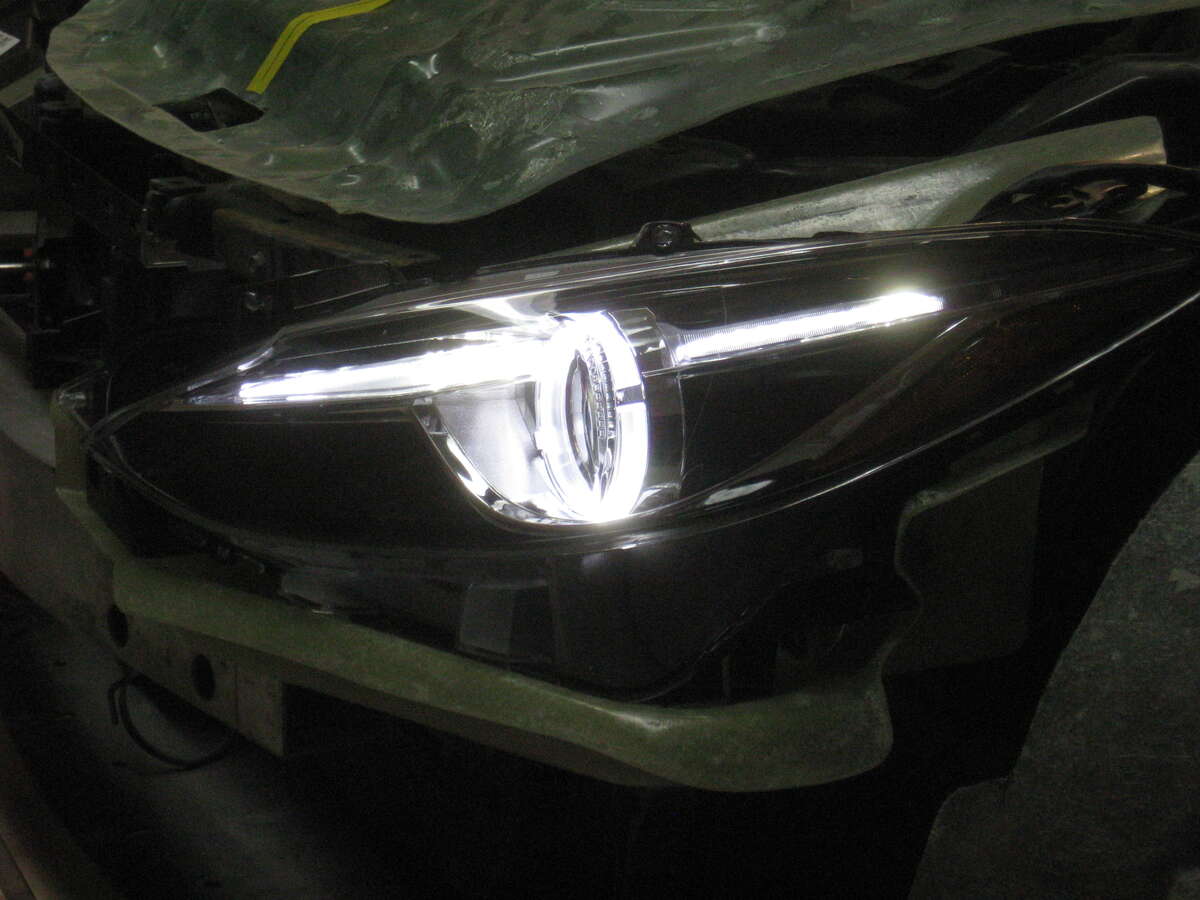
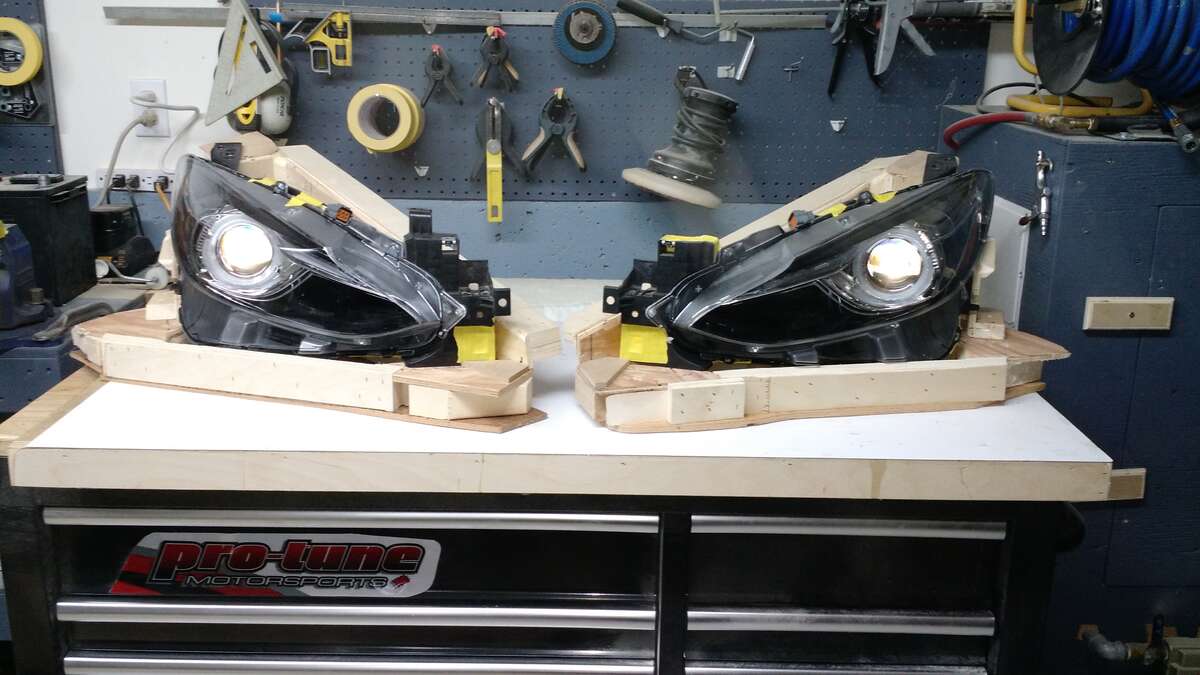
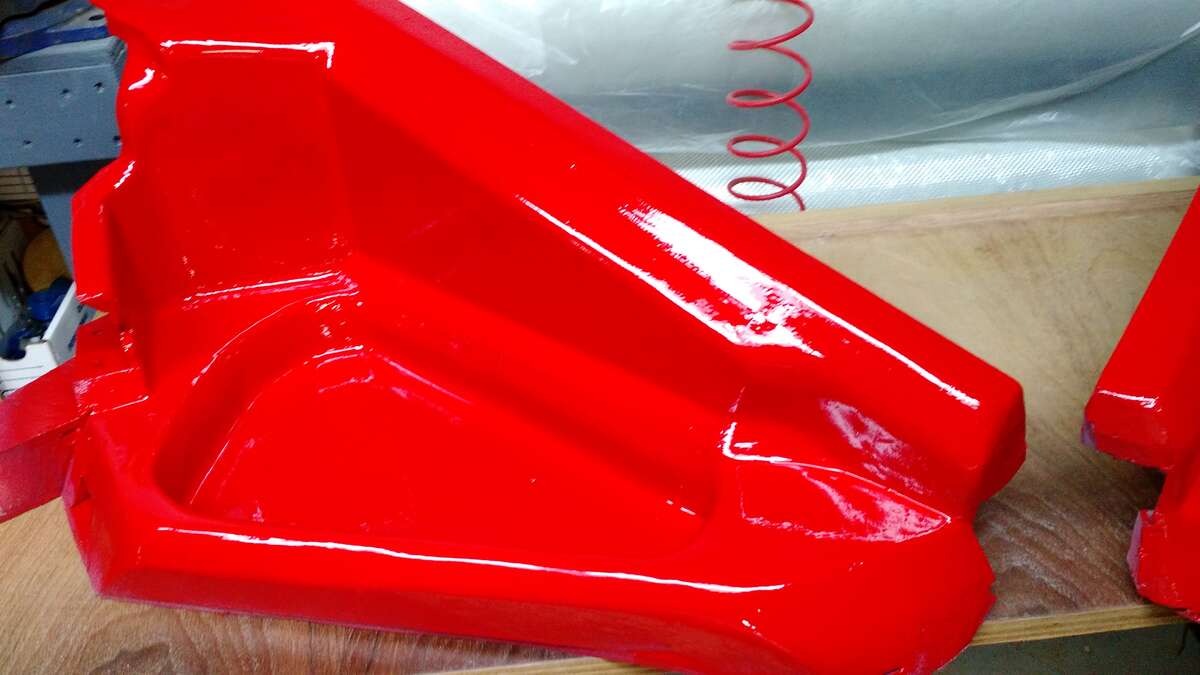
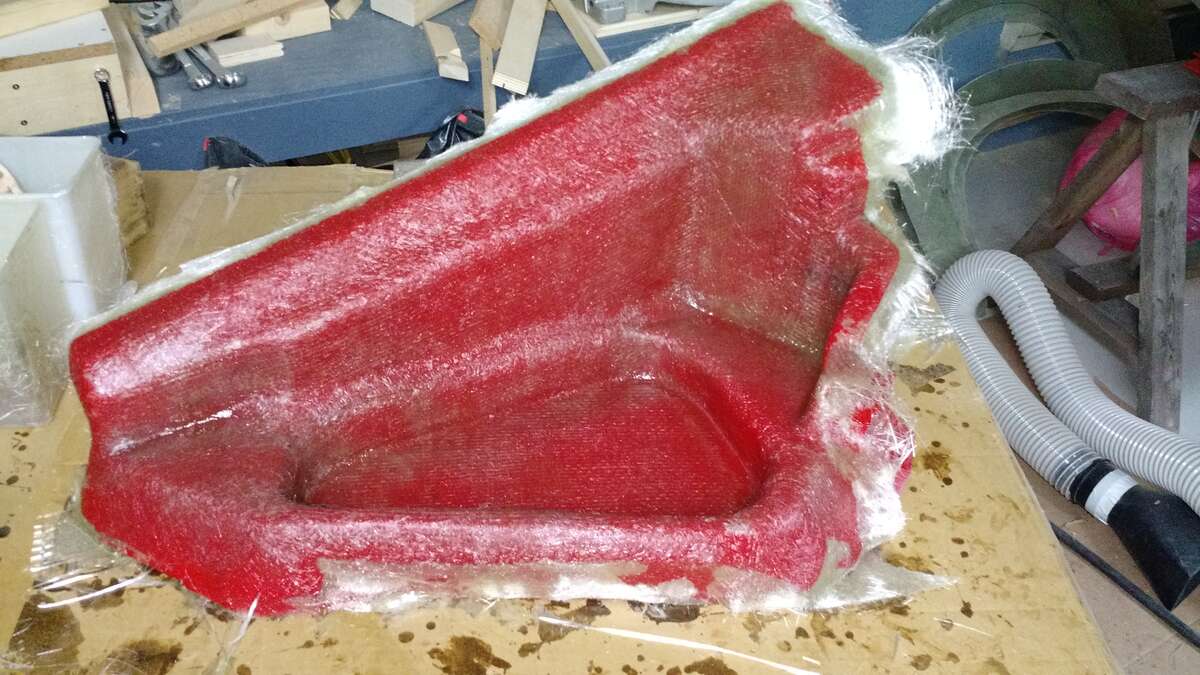
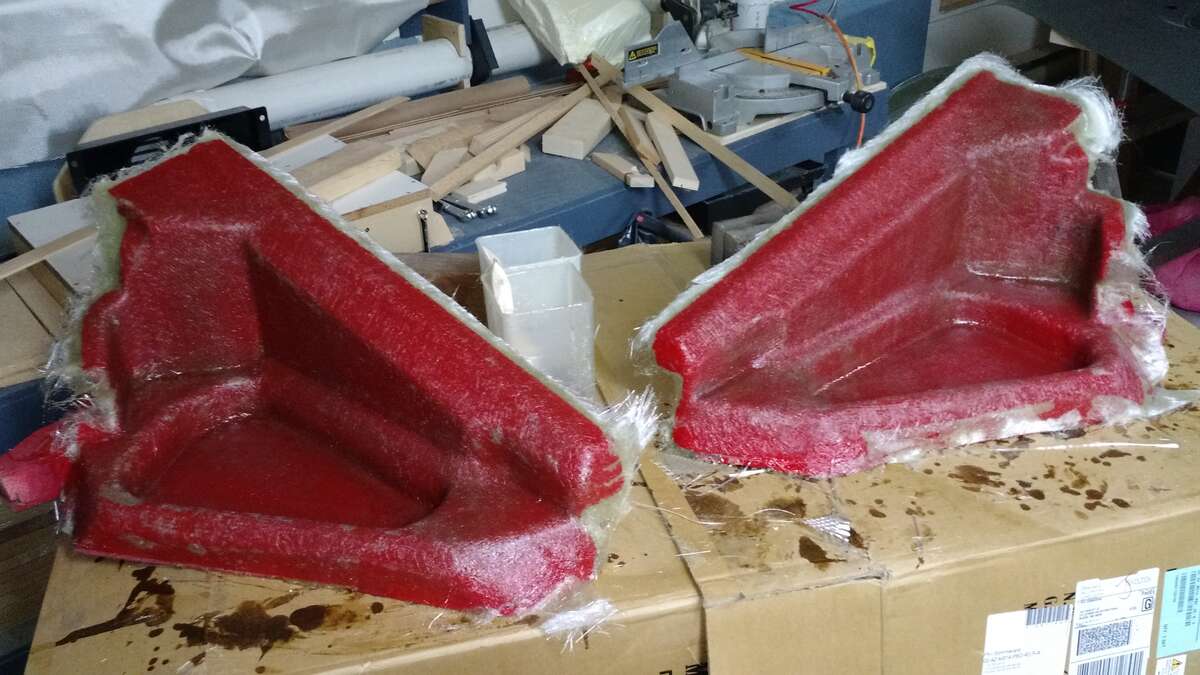
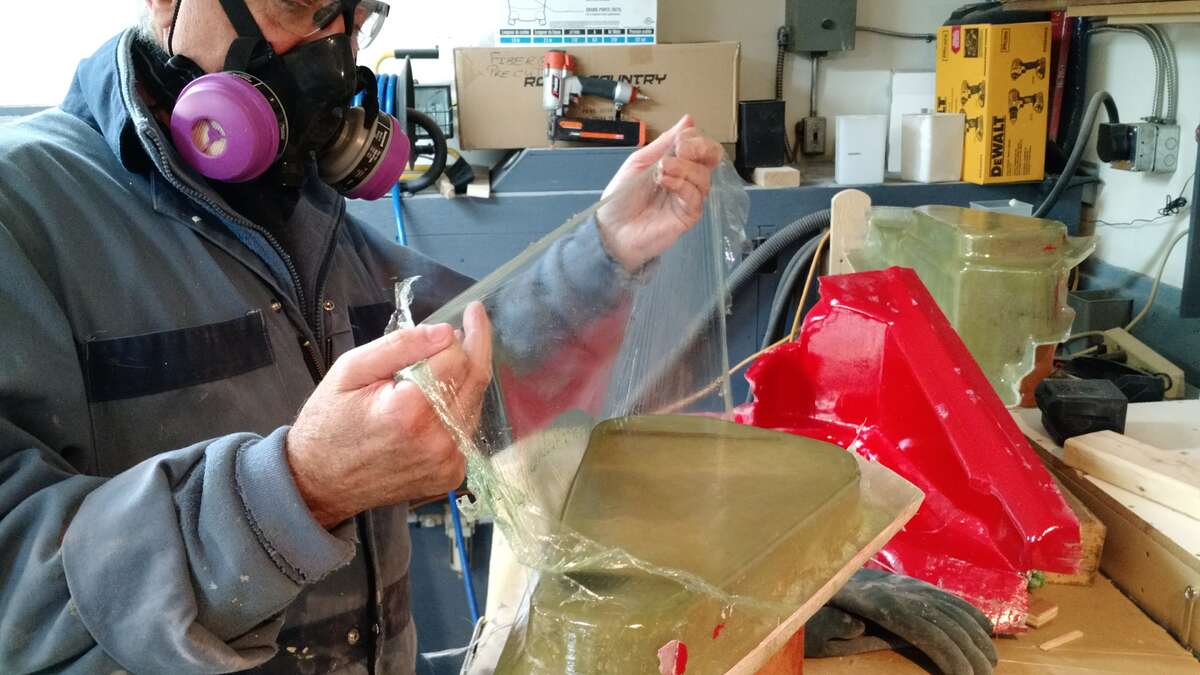
Thanks for the kind words , this project is a huge undertaking , I am not a composite expert by any means , i worked in a custom yacht place over twenty years ago , now of coarse there are many new products and Technics . So lets move to the front of the car . Headlights are Mazda 3 the aftermarket Angel Eyes ProjectorsHad to make pots for them to bolt into , I tried to make the Plug for pots with two part foam , that didn't work very well , so I made them out of wood , as usual that was a pain in the butt , and a ton of work to make one part , as these pots will become integral with the substructure .

-
I decided to make the mold two parts so I wouldn't bust the part trying to get it out . I made the end cap removable here I am taking the plug out Here is the mold with the black tooling gel coat the mold prepped to make the first one white Gel coat laying up the fiberglass removing the part roughly trimmed up and on the roof I made this part in the winter and had some issues but it still very serviceable
.jpg.51eb9dcc0659c45f0acfb4bc0d665d93.jpg)
.jpg.f62c44577f2884090367814eadef26cc.jpg)
.jpg.dafb8a958449564503ea713f79b2aed7.jpg)
.jpg.27b9d15ae5b09e0c4f95a35bc20fdcf3.jpg)
.jpg.ab5a69506034bc3f47cd18ac4004f757.jpg)
.jpg.7d4aeb9879d79fce9b9d9f710525e53e.jpg)
.jpg.aa3c002d426a3769b0a634d30a32dfcb.jpg)
.jpg.23dca31487404a575aa43dd2f9667817.jpg)
.jpg.11f11d5def8173d485904497e5cd006b.jpg)
.jpg.6572b832705c6a37feb28d5119b55c4e.jpg)
.jpg.4cda09b58a35d1f89e87745e7d8a6e74.jpg)
.jpg.0a4ebee6504cc774102dbde9b0694475.jpg)
.jpg.500d1547f7efb4ad247ecec6e79efcf4.jpg)
.jpg.bab474a18b5a1415dee561c7ec7fffd5.jpg)
.jpg.8c757ce0074a1220b59caafc26f09766.jpg)
.jpg.d3d5dd0f3d638ca13b20170770609e24.jpg)
.jpg.8f6c22535bd71695f05e9a84a91e5176.jpg)
