ZaneDylan
-
Posts
118 -
Joined
-
Last visited
Content Type
Profiles
Forums
Events
Gallery
Store
Everything posted by ZaneDylan
-
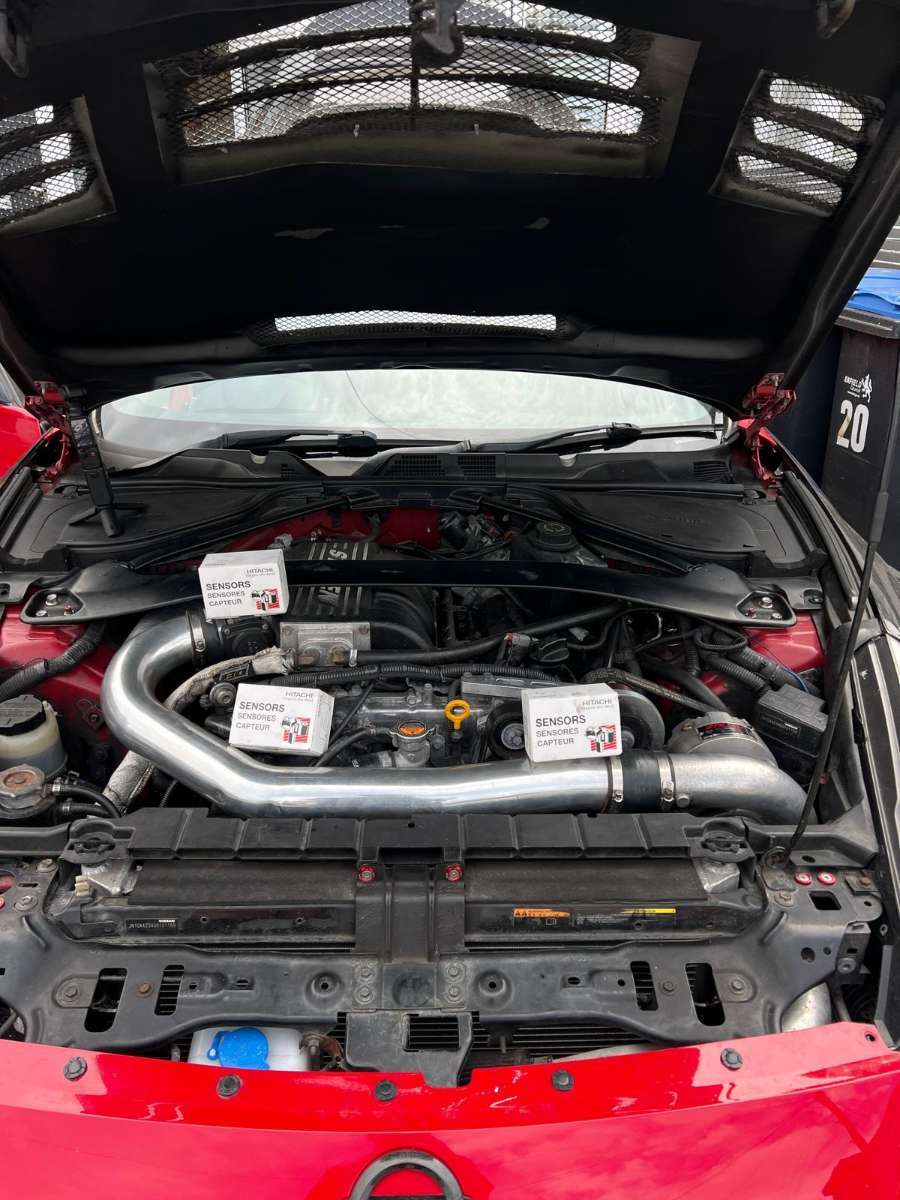
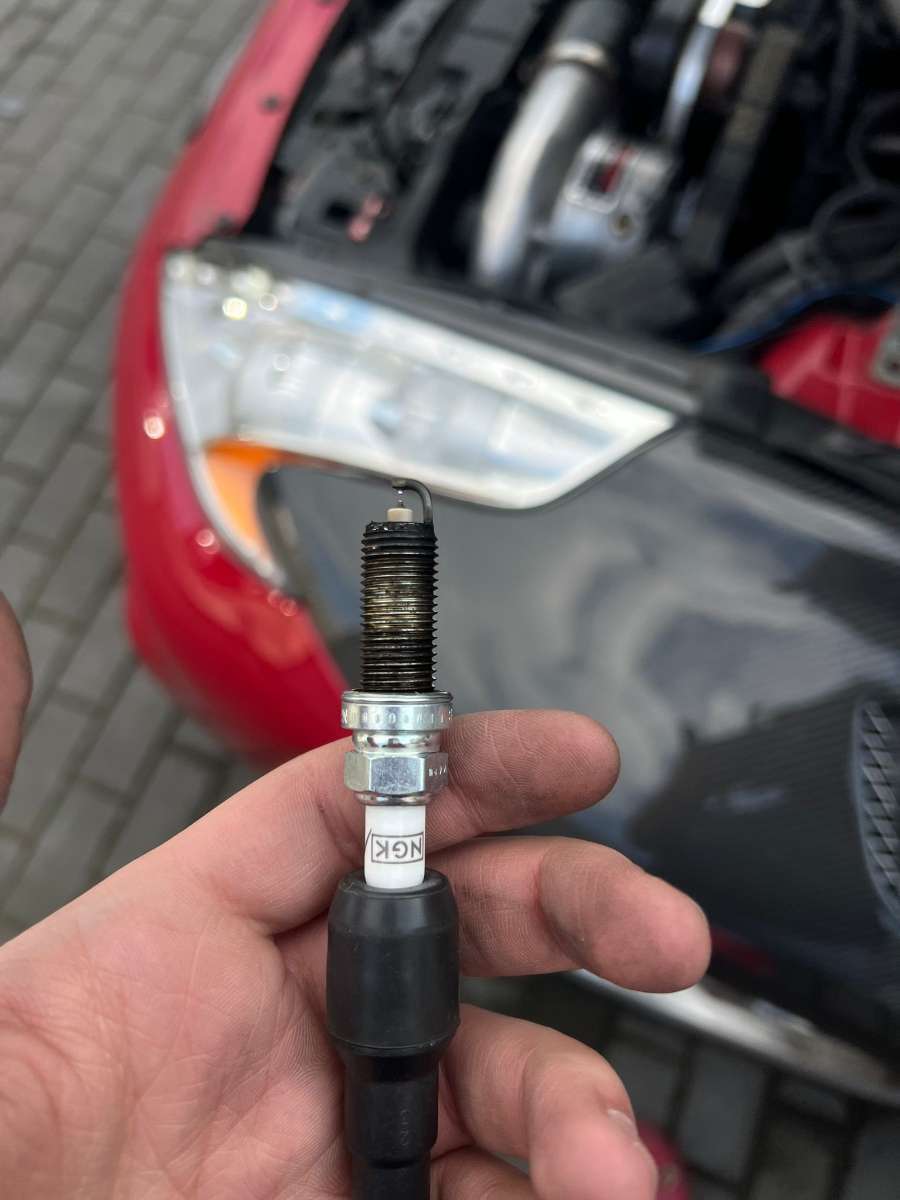
Next it was time to address some issues I found during the trip, there was a misfire low in the RPMs (around 2.5-3k rpms) so I replaced both CAM Position sensors and the crank position sensor - the crank sensor especially looked really worse for wear
.jpeg.d484ef8c59391128351673dd7d279ebe.jpeg)
.jpeg.de33800a27941b90a5a9508db267f502.jpeg)
-
First job when the car returned was to give it a good clean - the wheels especially were filthy after 2000 miles
.jpeg.147d8c95e535b4f83e13ae10416dc8c1.jpeg)
.jpeg.f58338737796105f1acd839975b86d9a.jpeg)
-
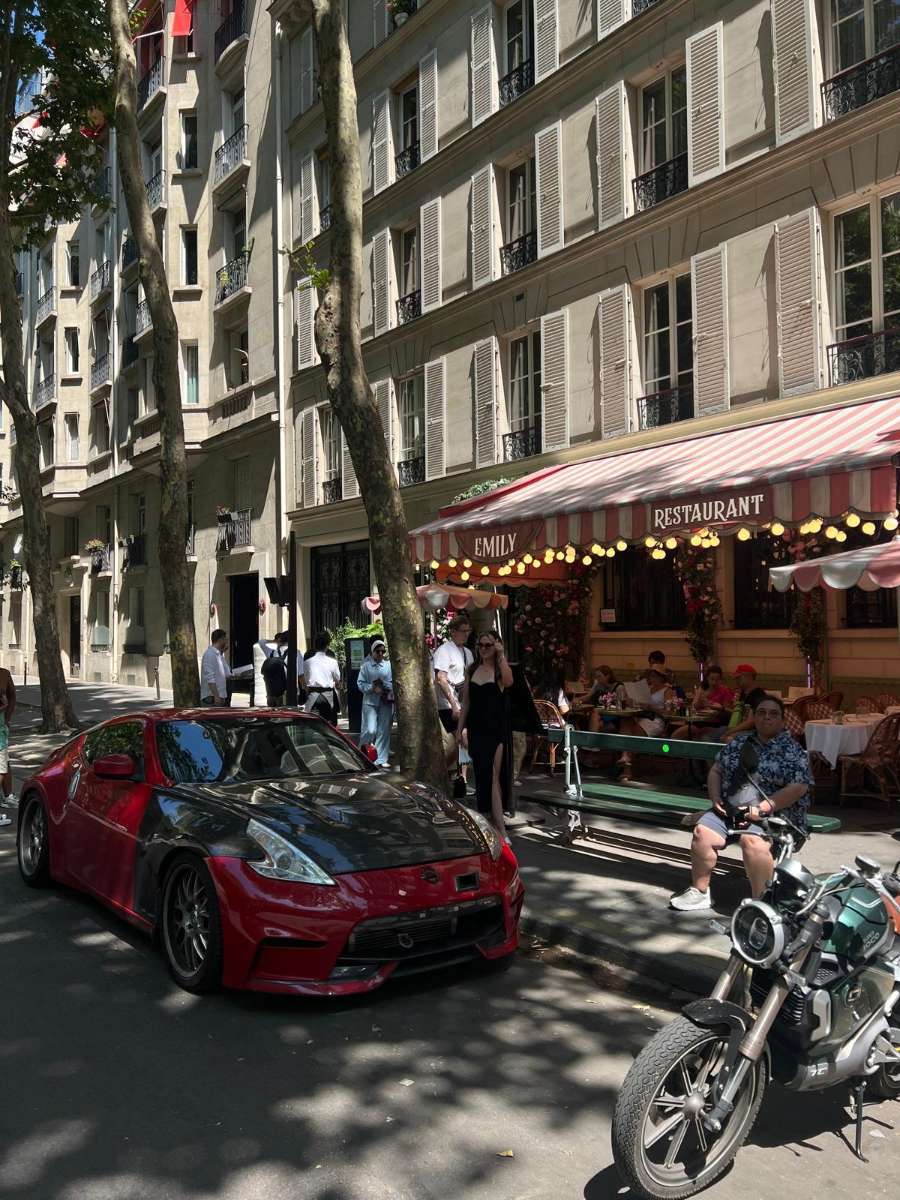
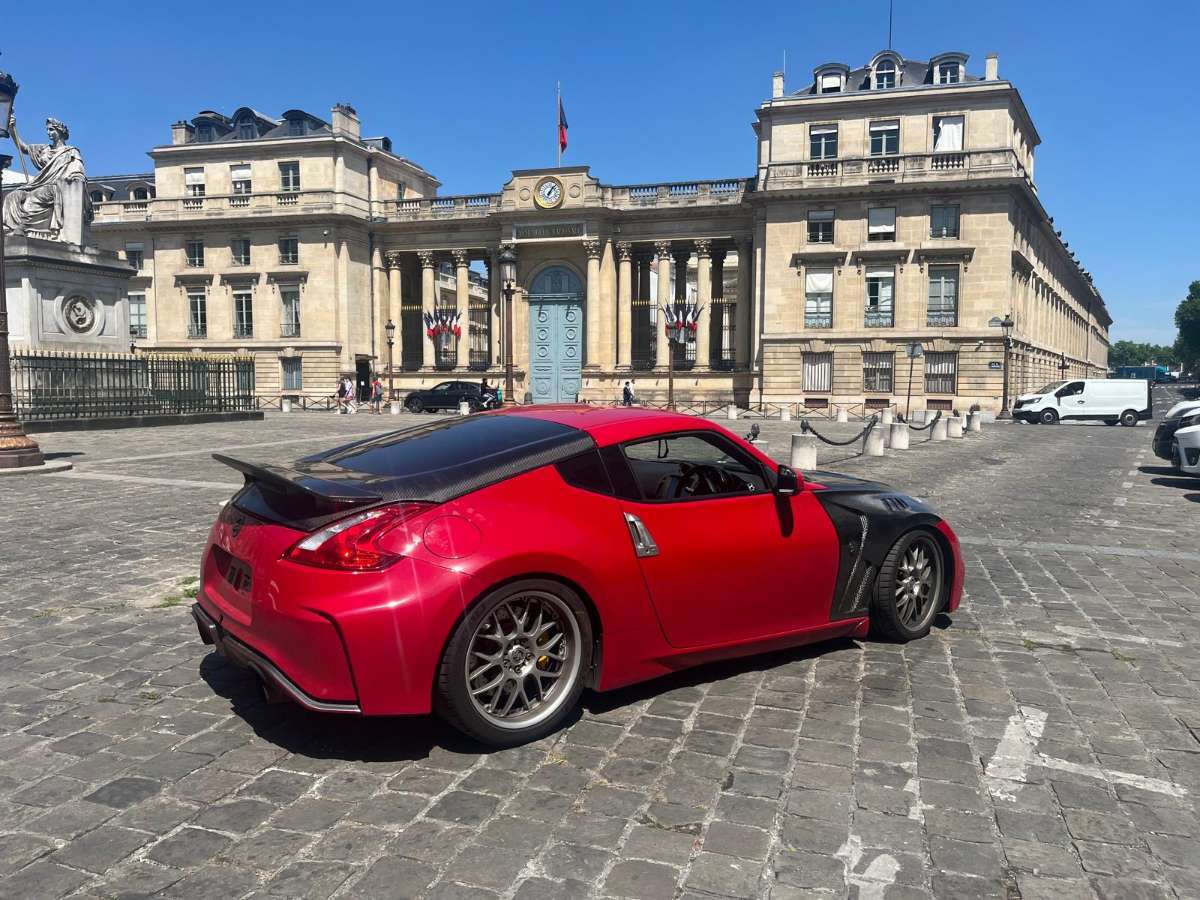
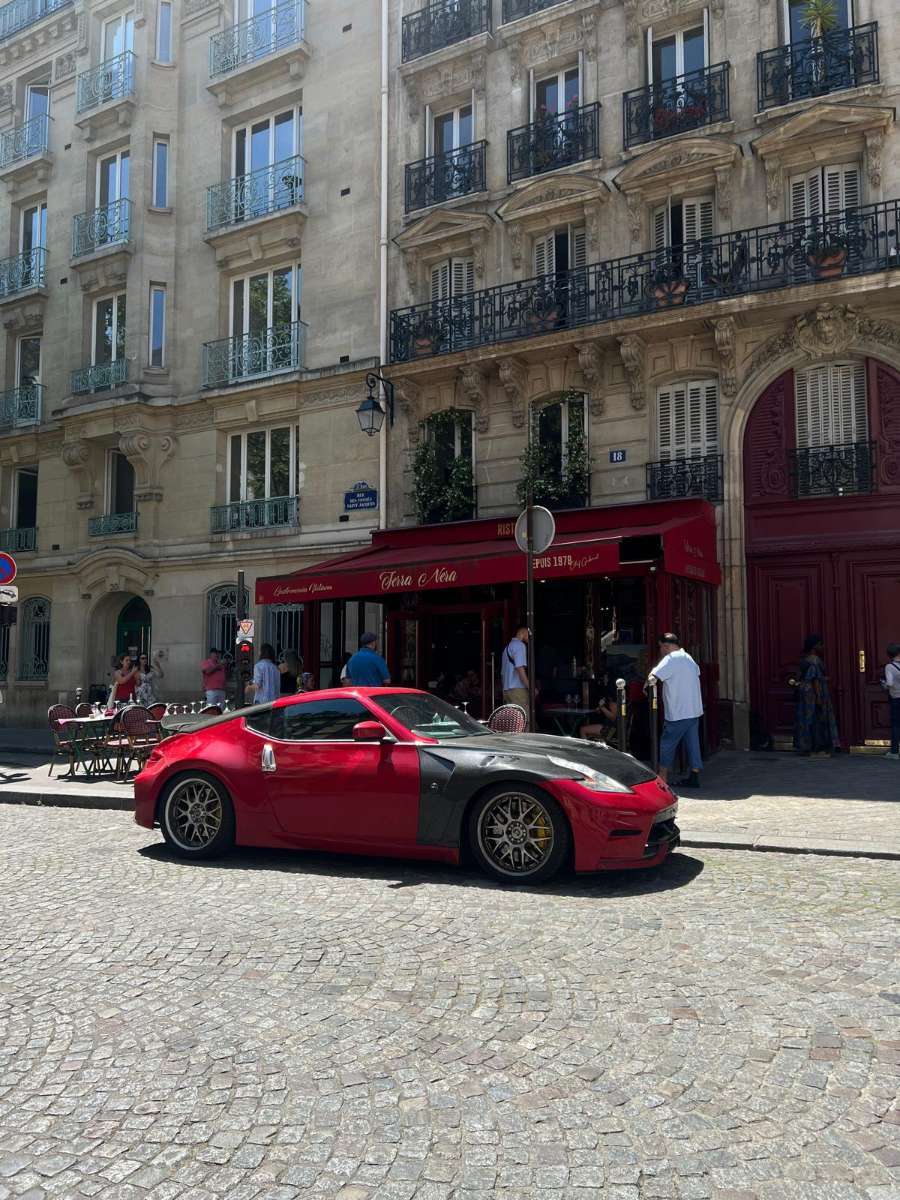
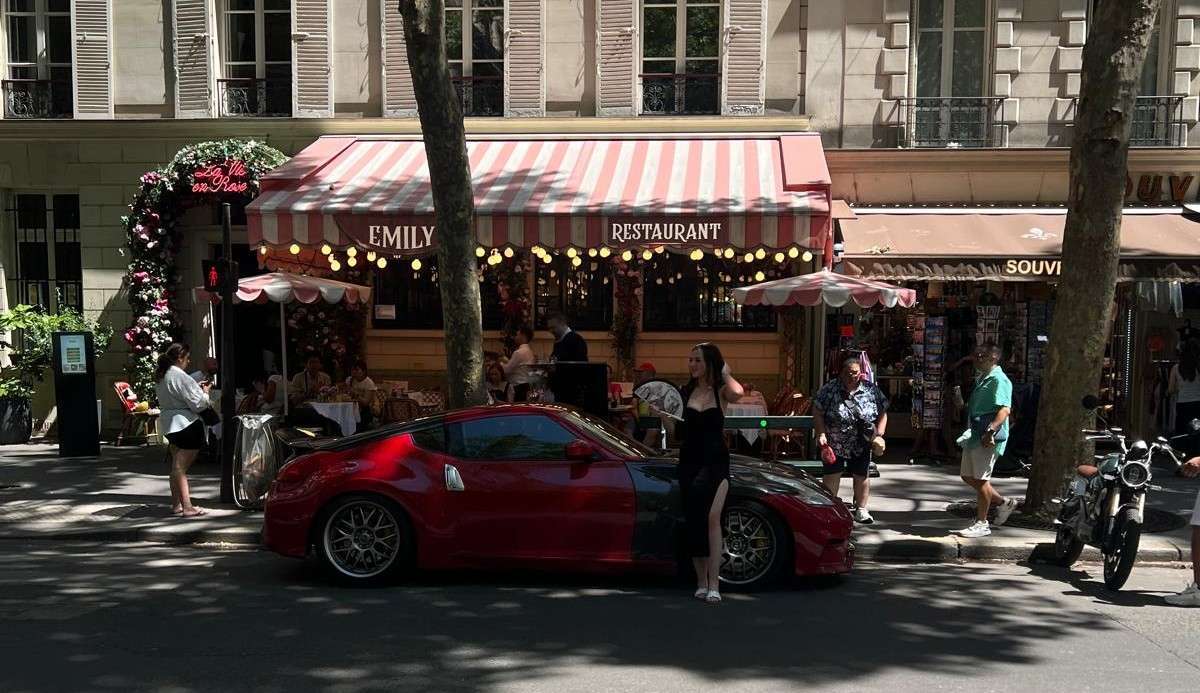
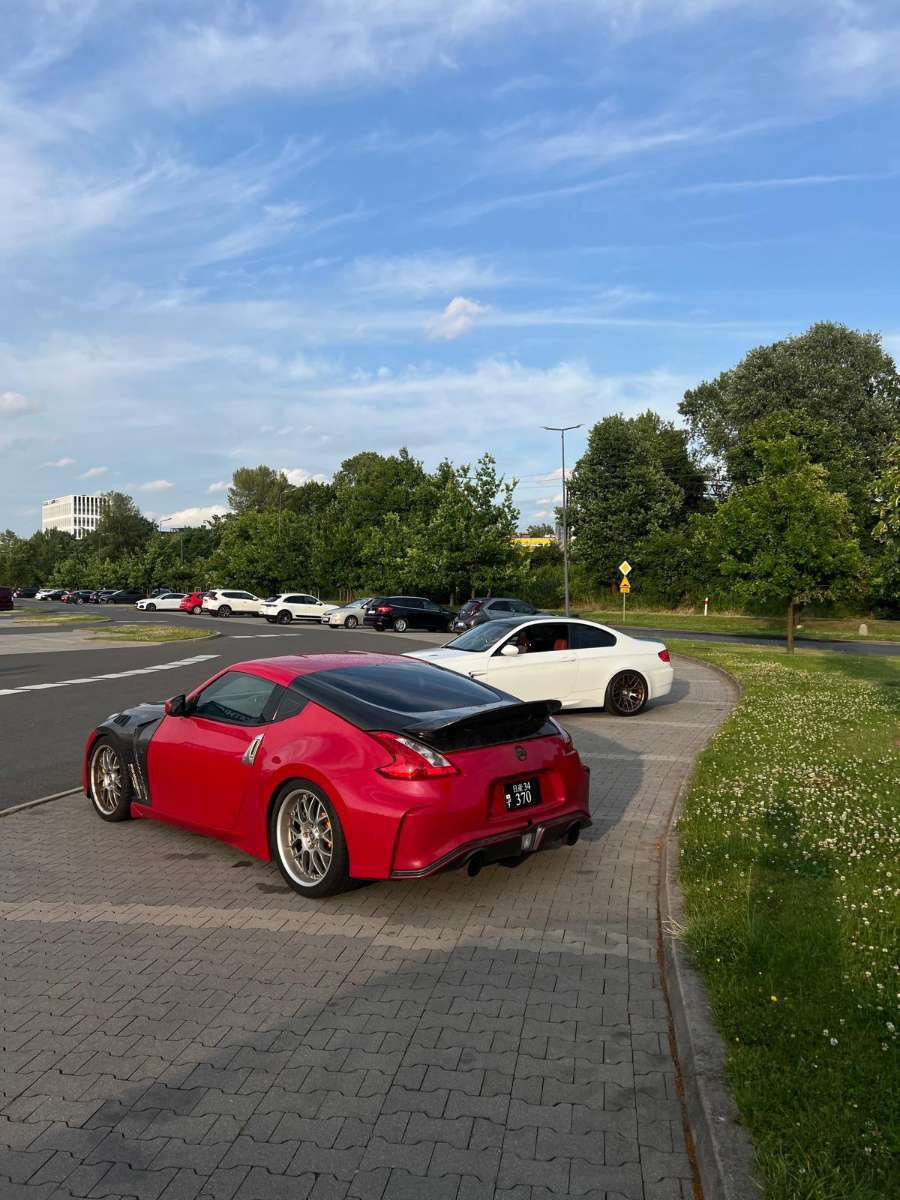
ULTRACE Part 4 We left Poland early and headed towards Paris for a day there, we took pictures by what I was told by the missus were landmarks of her favourite tv show before escaping the worst city in the world I did manage to get "parked" right outside everywhere we went though - confidence and foreign license plates go a long way in keeping your car nearby without having to pay for parking lol

-
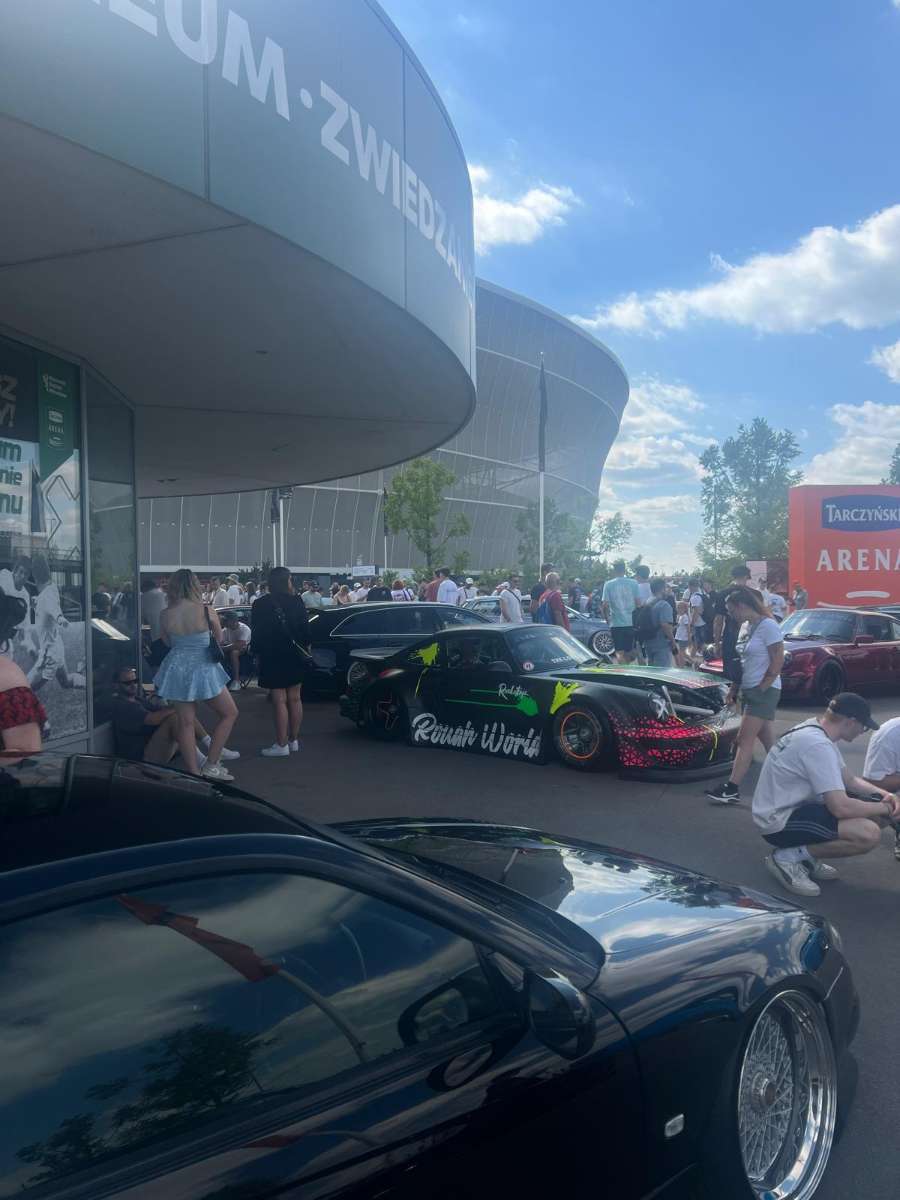
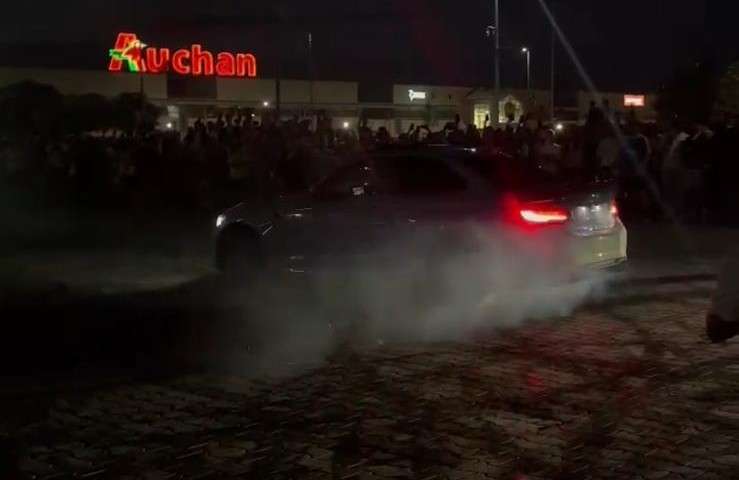
ULTRACE Part 3 The car show itself was unfortunately underwhelming - some great builds there (not very many z's aha) but it was poorly planned so we spent more time looking for water than at the cars. That evening though we attended a car meet that was straight out of a NFS game.
-
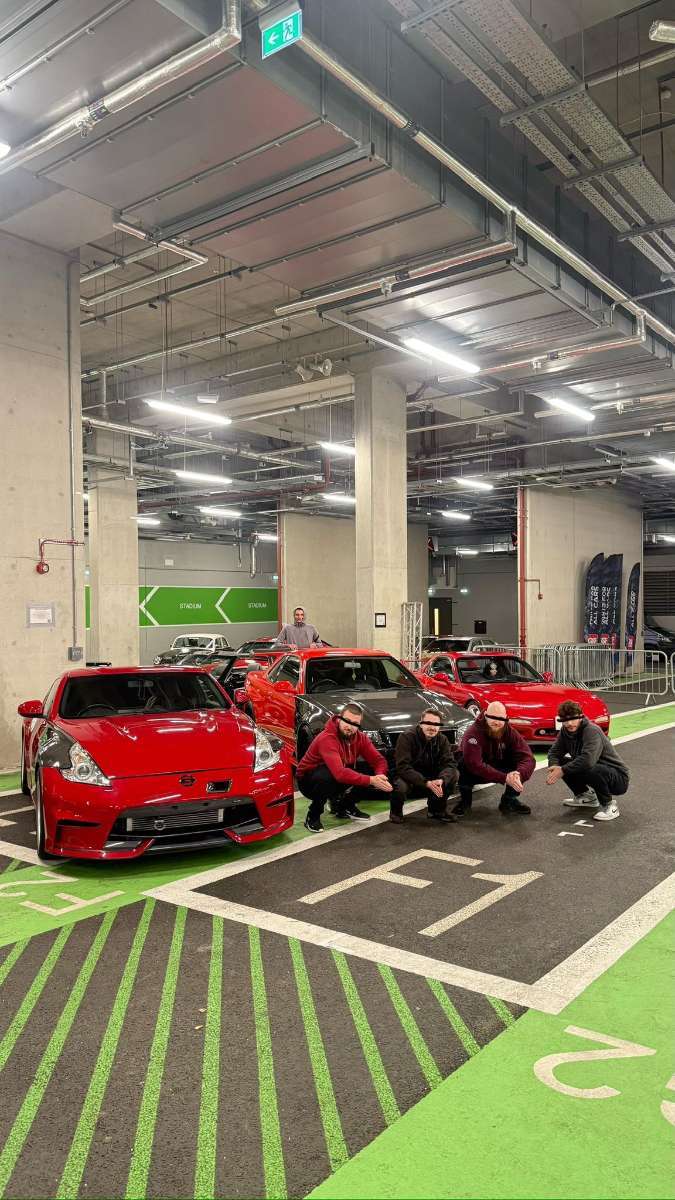
ULTRACE Part 2 After finally getting some rest we had a day free before the show so we went on a shopping trip, took plenty of pics and videos of the cars before a drunken night that ended at 6am after the sun had risen

-
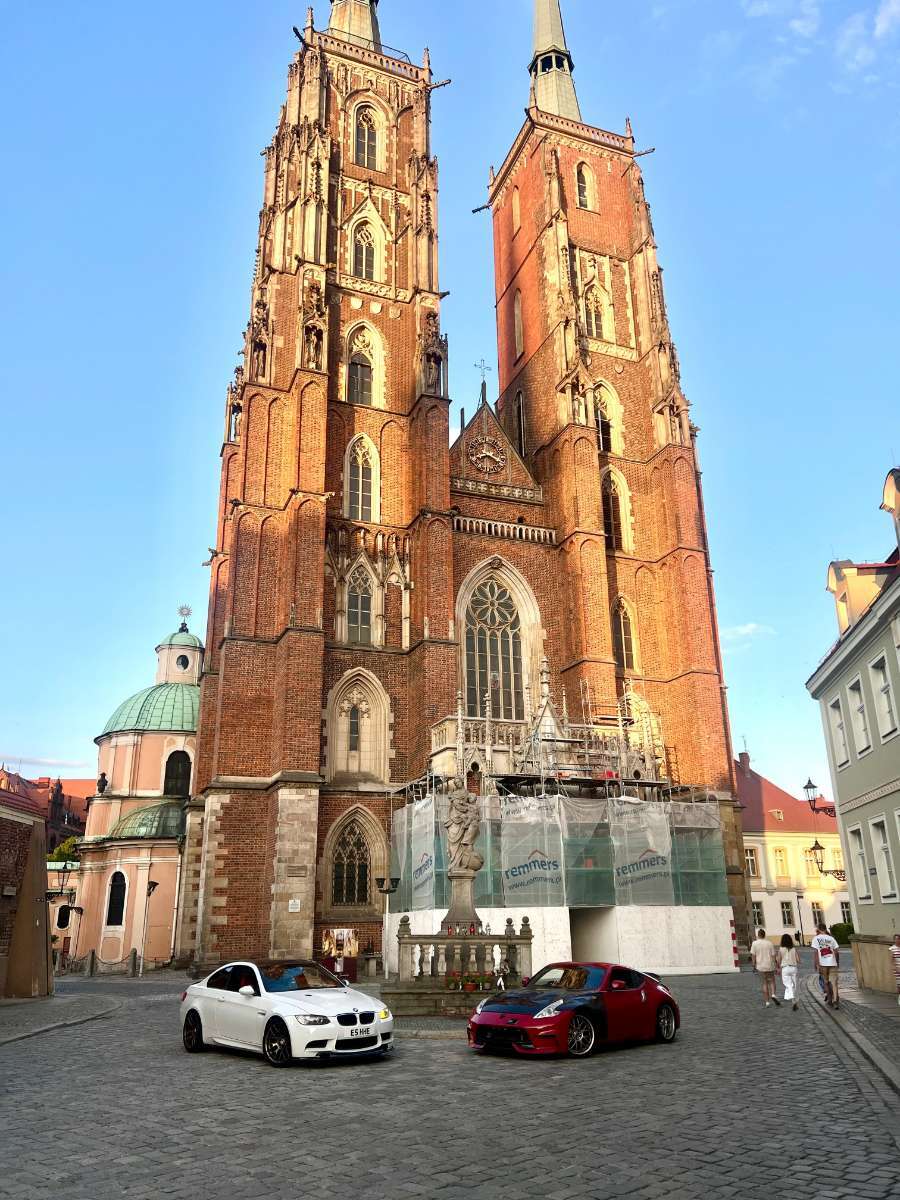
ULTRACE Part 1 Firstly impressed with how much more you can fit in the boot of the 370 compared to the 350. We drove down as a convoy of 4, two red nissans and two white BMW M cars, got on Le Shuttle with no issues but ran into tons of weather and traffic - staring off with rain/thunderstorms through france to a 40 degree heatwave through traffic jams in germany, but we eventually made it after 28 hours of driving and 40 hours of being awake. I really wished I had functioning AC during this trip...
-
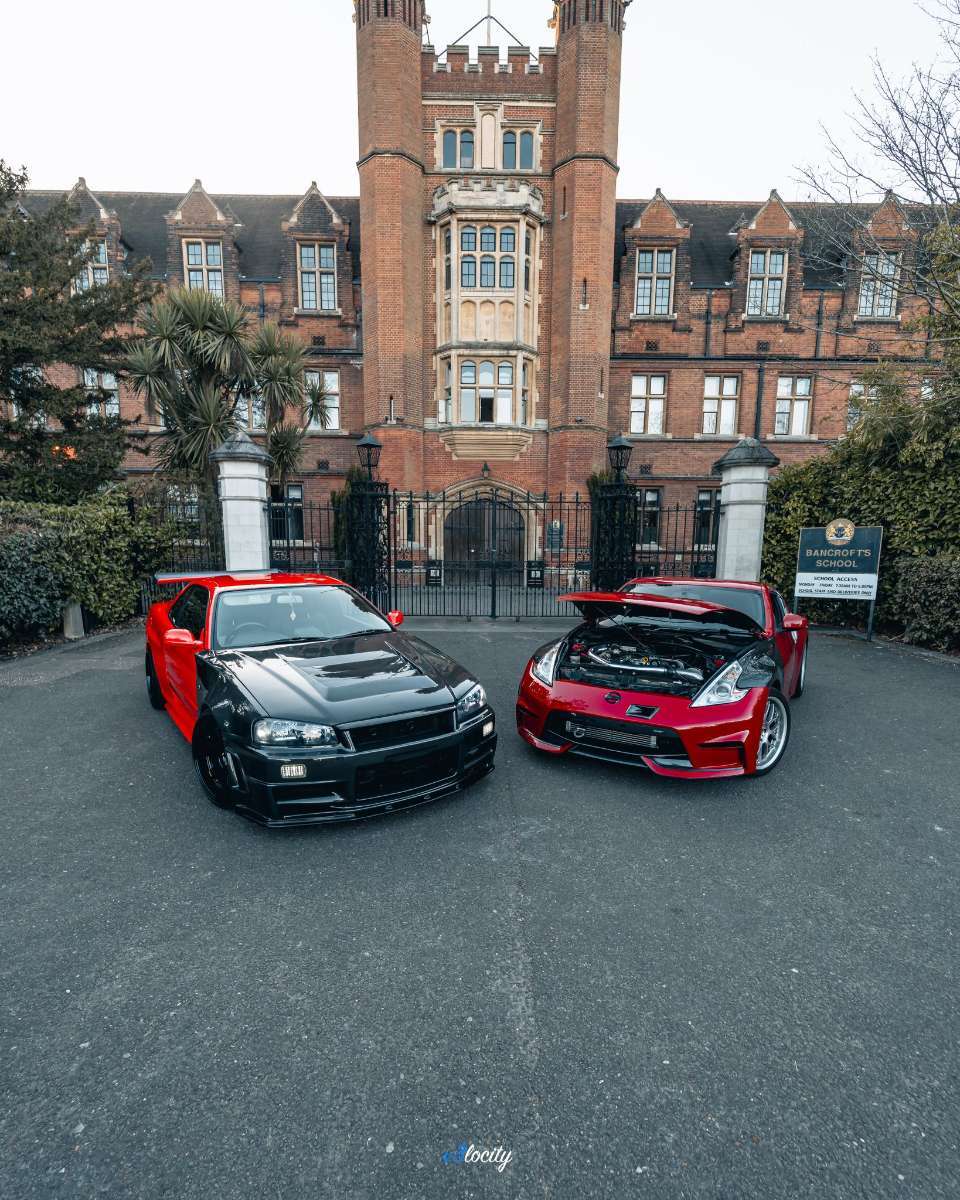
This being a bit of a project car and due to carrying a fire extinguisher being a legal requirement in Germany I decided to hardmount a fire extinguisher in the Z. I tried to do as clean a job as possible and kept the top carpet off so that I can remove the extinguisher mount and cover up the holes if I choose to.
.jpeg.b68c37be057524db8d2091a084ad9174.jpeg)
.jpeg.b435543572de4e5857c65ec0a3327cf0.jpeg)
.jpeg.08364dd83118f5412259a4ced56dfdb1.jpeg)
.jpeg.901c611383fb44d4c269636c40bb5d8a.jpeg)
-
speak to customICE in Chingford - he bypassed my 350s amp for £40 iirc
-
It was time to prep for a 2000 mile trip through Europe and back for Ultrace First up was the o2 sensor that was throwing a code and then was a replacement ac unit as the clutch was broken on the last one - unfortunately there's a leak elsewhere in the system which I didn't have time to fix before the trip (it was hot) there'll be updates on the rest of the trip soon
.jpeg.d9fdd941dcc2013f039bca8d1c87c640.jpeg)
.jpeg.653906d4c61e308a53c4cc0fa3185979.jpeg)
.jpeg.205d748eea20a8e1f62140cbb4bcb12e.jpeg)
-
Iirc its just adding a vent hole for the condensation
-
Depo are good - you have to do a small mod to them to stop the fogging though
-
Hi, Was wondering if you had info on what discs are compatible with the Monster kit as I'm struggling to find something floating in a 356mm
-
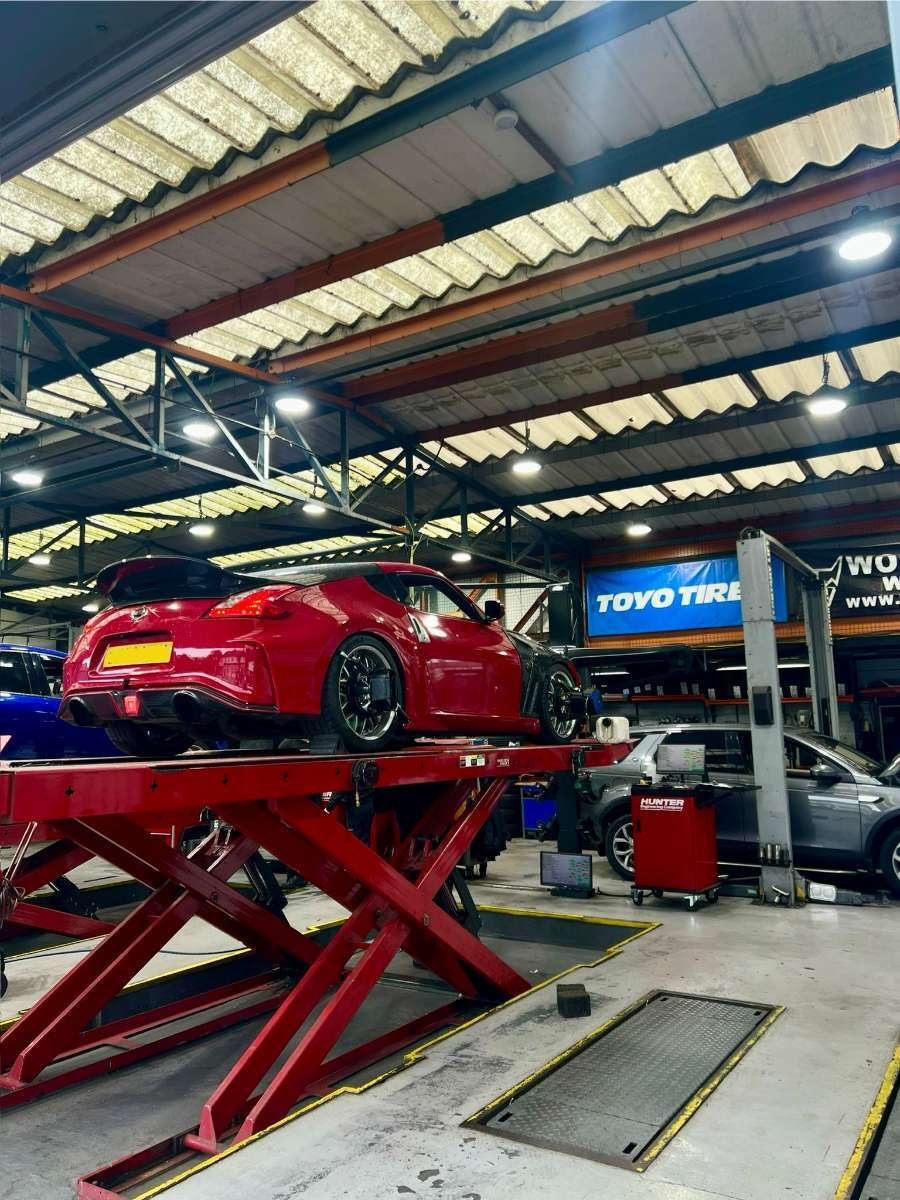
Following on from my last post I went for an alignment after playing with my suspension. Everything is mostly straight now however my front upper control arms despite being adjustable are seized to the point where I'm going to need to replace them in order to run the specs I'm after
-
For the longest time my ride heights been a little funny, the front being way higher than the back. So I bought the right C-Spanners from BC and adjusted it... At first we made it far too low, I loved the way it looked at this height but I was scraping on any change in the road surface (RIP flexies) So I went back in and fixed it (about an inch lower than original and 1.5" higher than the too low) - while in there I found that one of the previous owners had overdone the preload by over 2"s lol - so I reset that to the BC recommended 5mm - so as well as ride height looking a lot better my ride quality has vastly improved too. I set my rebound to 5 clicks stiff of centre in the front and dead centre in the rear unfortunately compression on nearly all of the struts is seized so I can't adjust that for now.
.jpeg.31b127cd3d29d60a39d11f9cc9c72965.jpeg)
.jpeg.55a22ded4b502cf46f344ed8efca7bdd.jpeg)
.jpeg.8a380010751cd6d6c8892358fb03f8f1.jpeg)

-
lol you're welcome to buy mine after I get something else
-
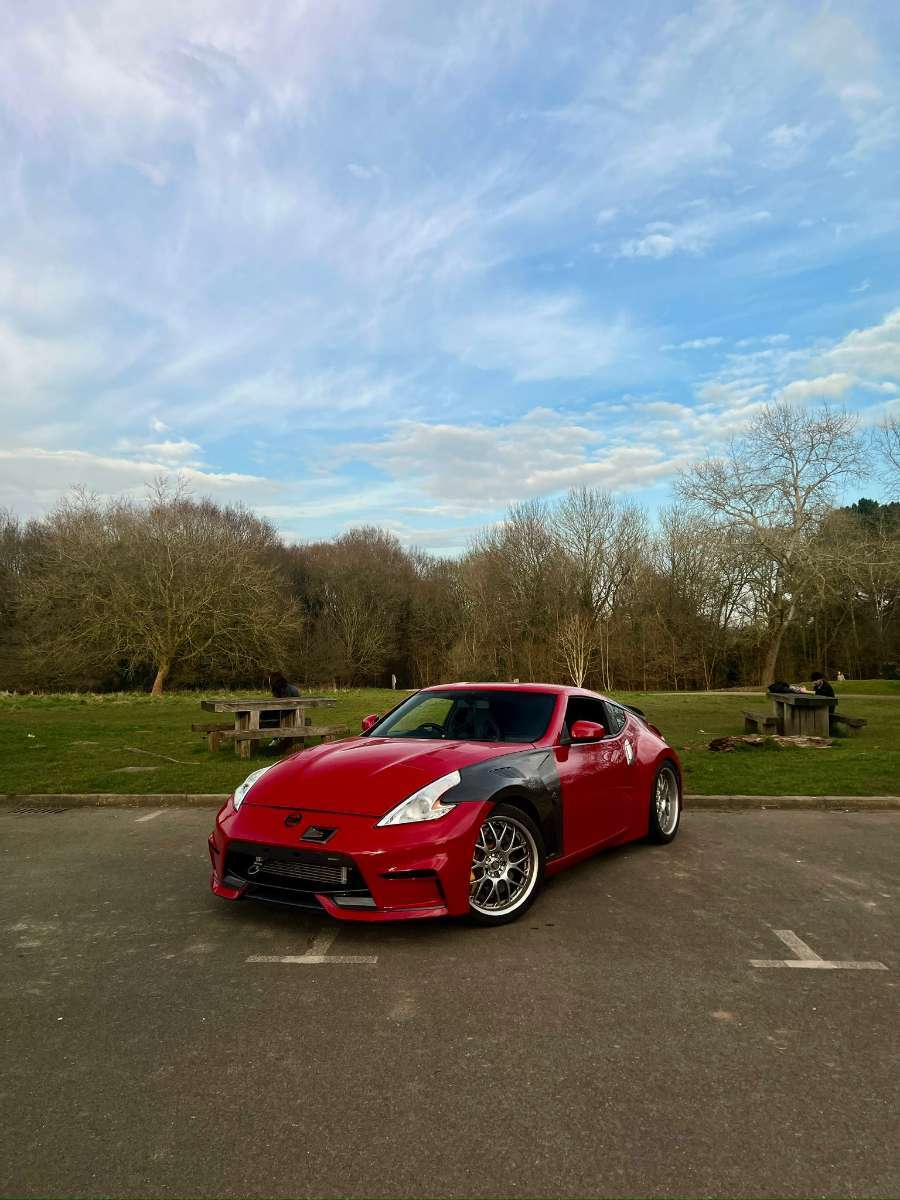
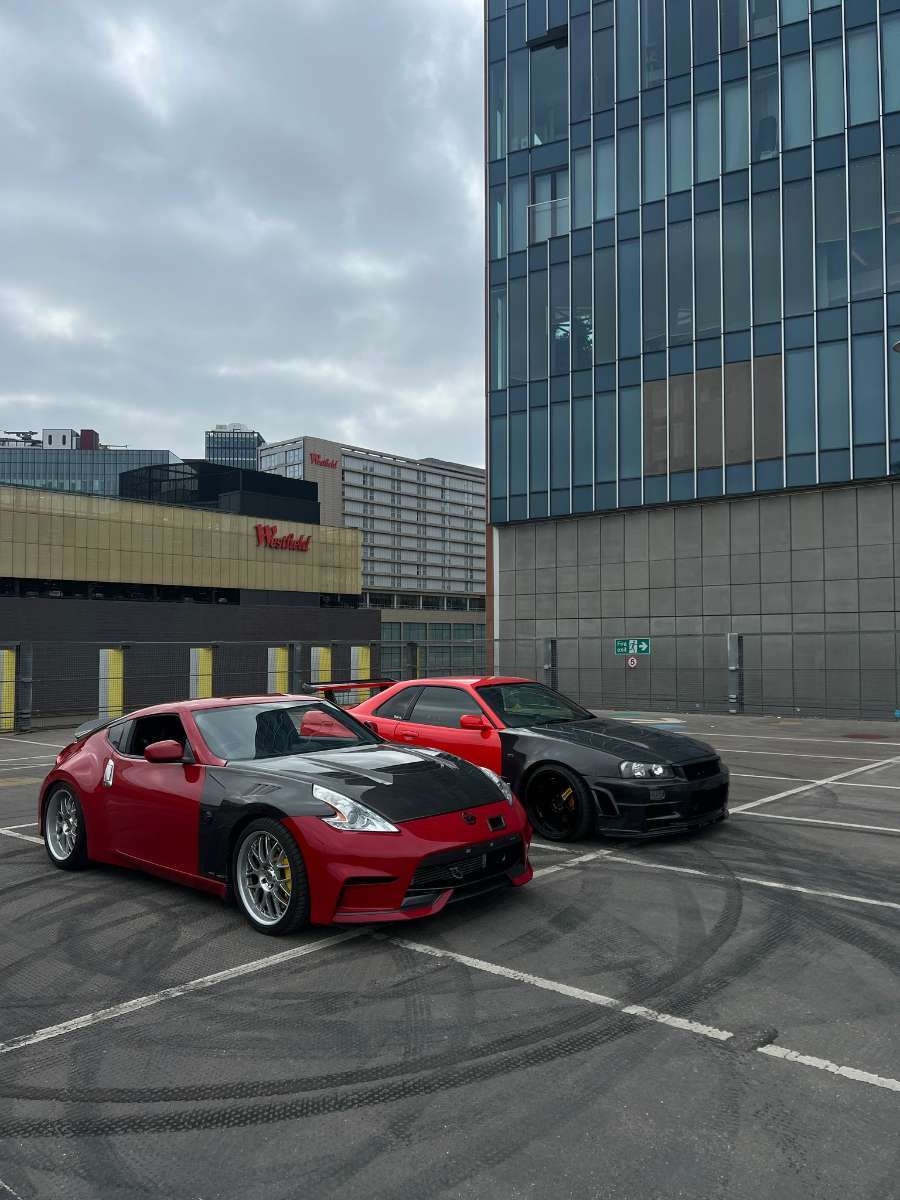
Had this for a while but forgot to post it on here, my custom show plate the kanji on the bottom left is a "Z" the word up top says Nissan, 34 because its a Z34 and 370 for obvious reasons. I'd really like a different spoiler - something more like the one my friend with the skyline has in this pic - anyone got any recommendations?
-
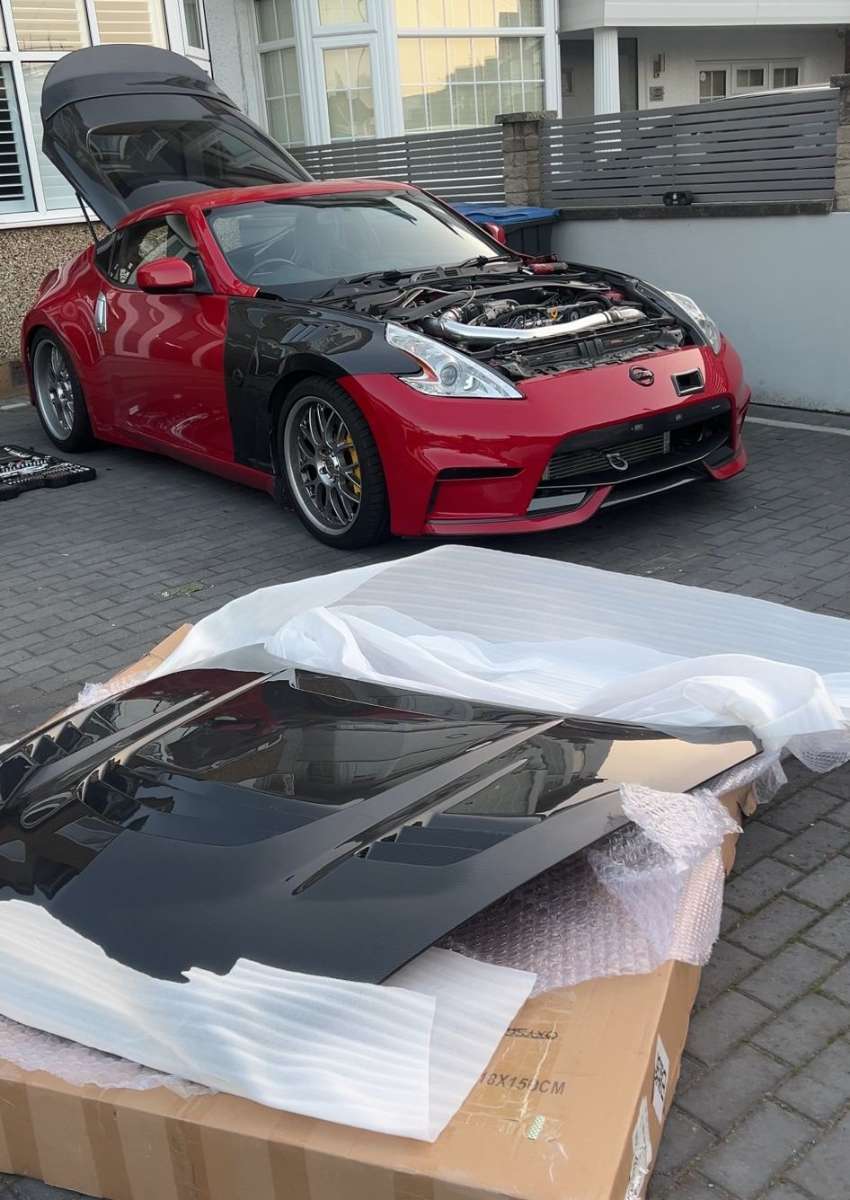
The bonnets lighter so you need to push it down a little while pulling the catch to open, imo there's 3 points of contact up front so I feel pretty confident in it not lifting, but others probably have different opinions Install is definitely a two person job but its straightforward otherwise something to think about is how you intend on doing the window washers as I don't have any atm
-
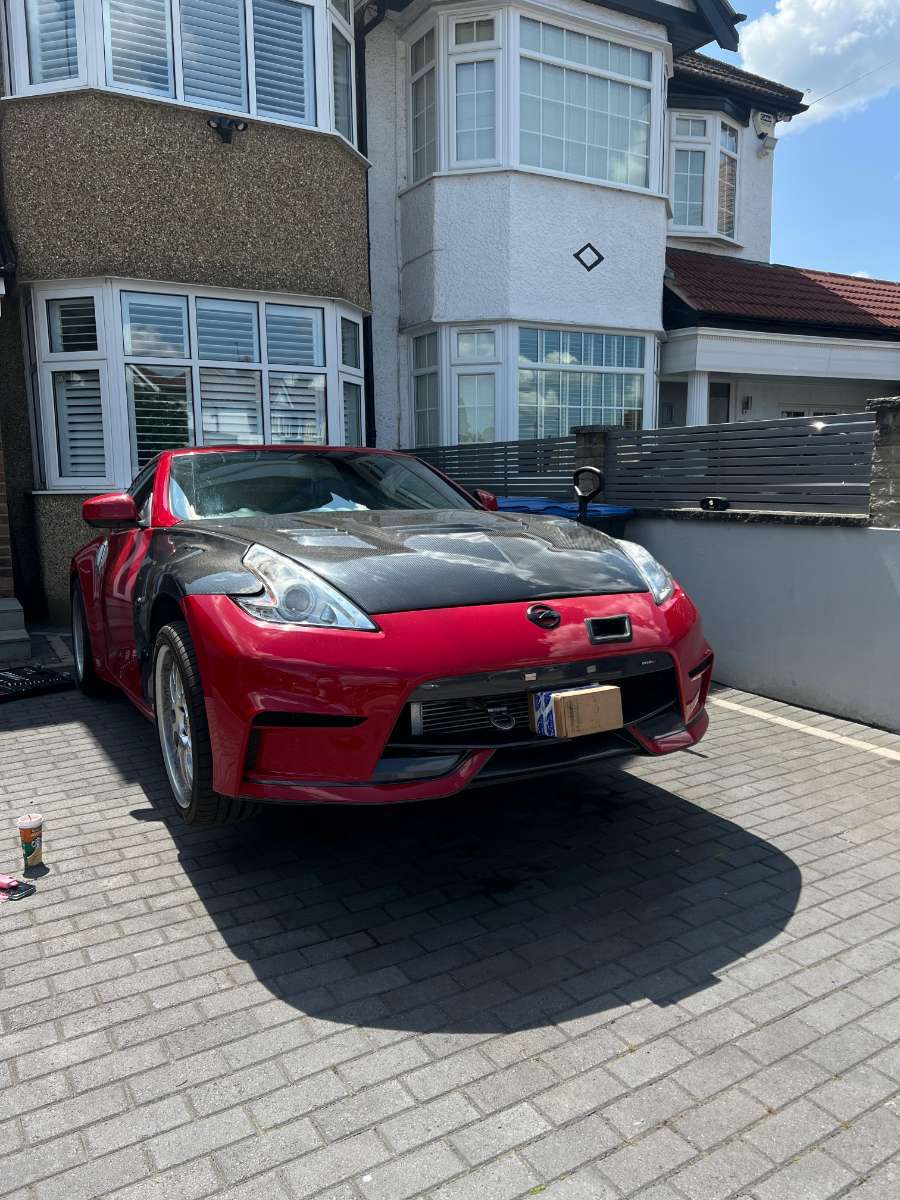
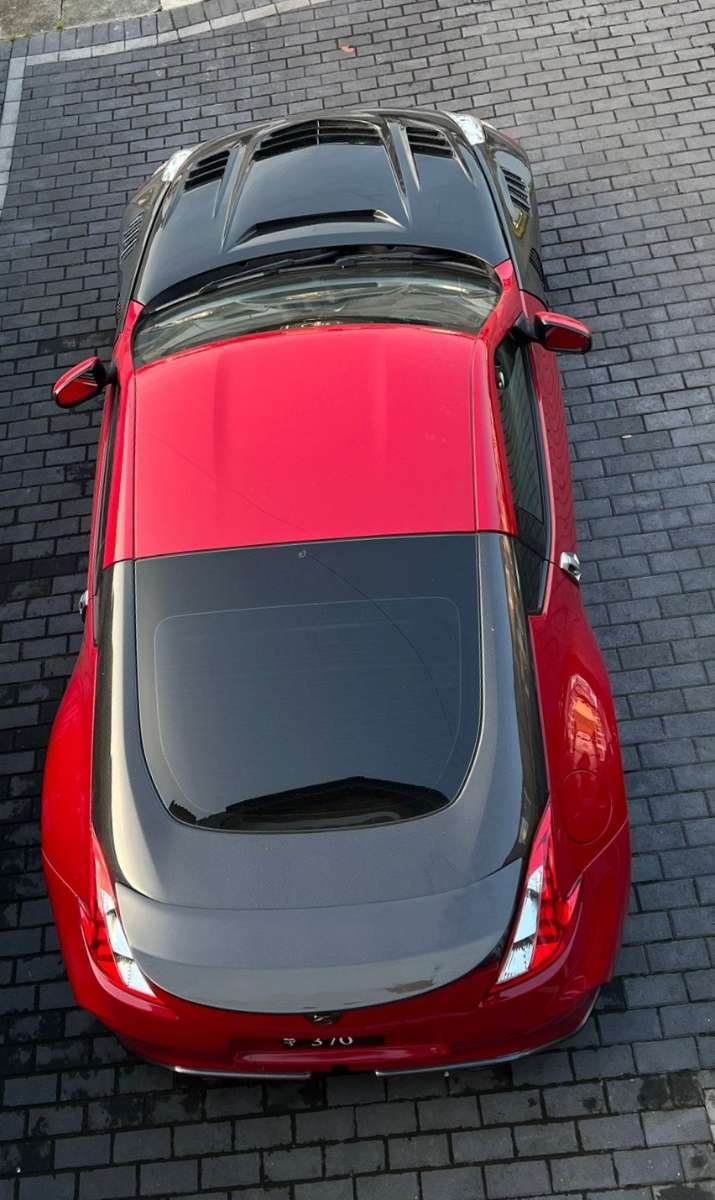
Bonnet upgrade, the seibon bonnet on the car being painted really bothered me and since I didn't feel like stripping the paint off and seeing what was underneath I ordered a very aggressive and imo better style of vented bonnet. I picked this one not only because I liked the way it looked but also that the louvers on it and the placement make sense aerodynamically to pull more hot air out of the engine bay and hopefully pull cold air through the rad and coolers. Theoretically (because there's no wind tunnel testing for this bonnet) the louvered design will create a low pressure zone over the vents resulting in the air being pulled out of the engine bay as well as creating a little bit of downforce. What steered me away from the ams and seibon styles was that the vent placement made no sense for cooling. Overall, install was pretty straightforward with the help of Ballistic, fitment was genuinely really good for a carbon part, the only problem was one of the latch threads was damaged when installing but a quick tap and its on
-
So for me it happened at around half a tank so I'd guess around there - on public roads I've never found that limit even on spirited drives. Tracks are much higher Gs I guess, Z1 Motorsports makes a kit which I'll do later down the line, if I'm still committed to tracking the car by the time its in the budget ;(
-
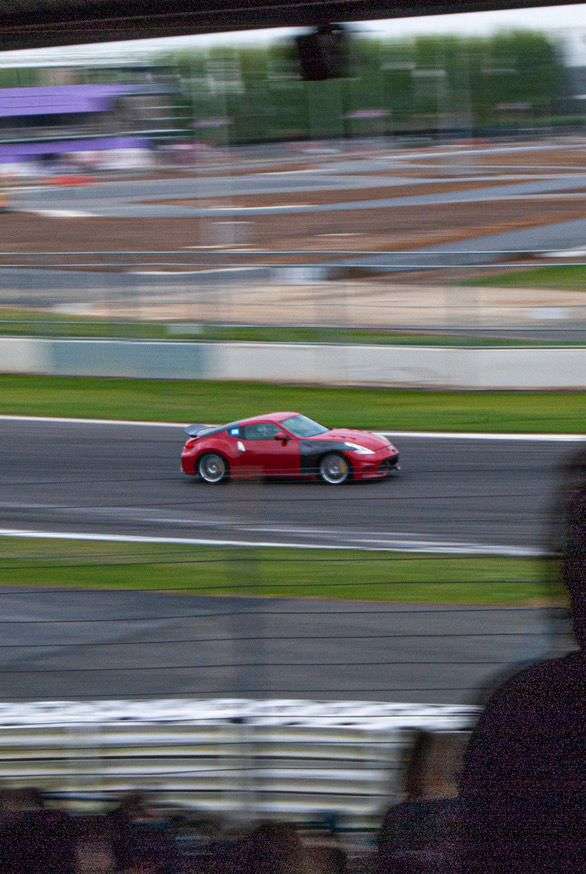
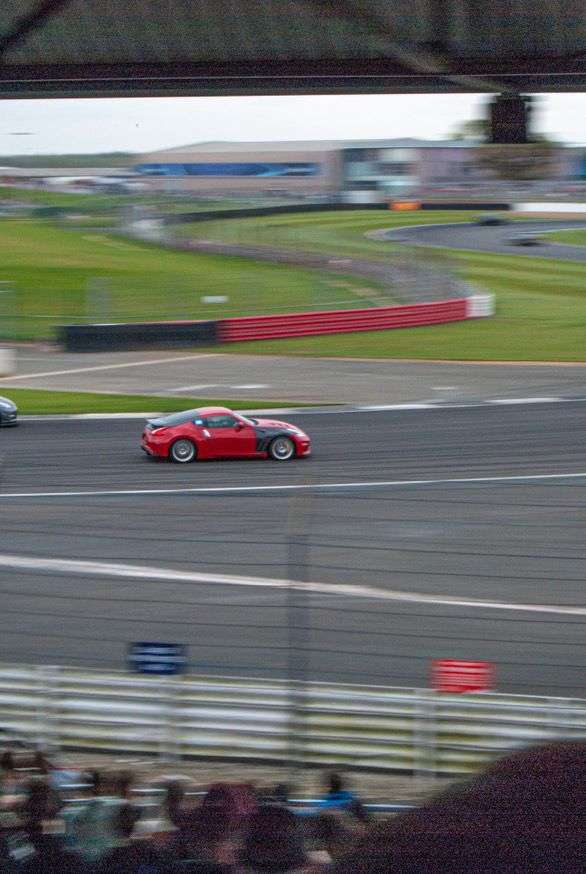
Shortly after my visit to HDev I attended JapFest and had a short blast on track- the car feels great in the straights however a couple issues are still prevelent and I ran into a problem I found out about after being on track - the 370z's fuel surge issue I went out there with just under a half tank - meaning on the RH turns the fuel pump was being starved. Seen the kits go for £800+ so I doubt I'll be fitting one anytime soon and will just top up my tank before going out on track from now on. I also am still experiencing some wheel wobble at speed and harsher wobble under acceleration. I'm plan to lower the front suspension a tad for better fitment and then get an alignment and start looking into swapping out a lot of my brake parts.
-
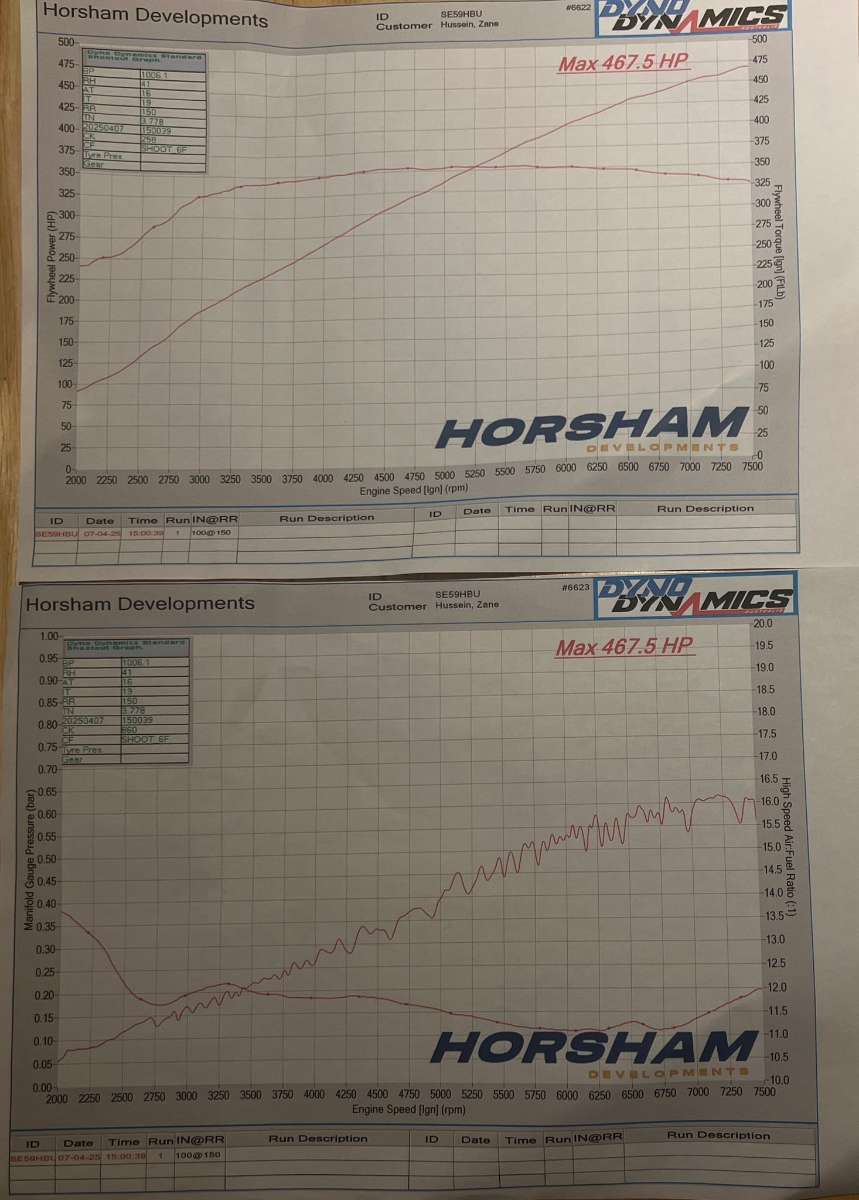
Results - I've included both the power graph and the air/fuel - boost graph too Overall it meets my original expectation from when I first bought the car around mid-4s, still very strong numbers out of this kit 467 isn't bad at all and I will be back to Hdev at some point with goals to climb towards the mid-5s Overall the power looks to be super linear and the torque curve looks nice and flat which is definitely a positive for how I intend to drive the car
-
Considering the kit is from Z1 you'd likely find it cheaper to buy from Z1 directly - usually their stuff is quite good anyway
-
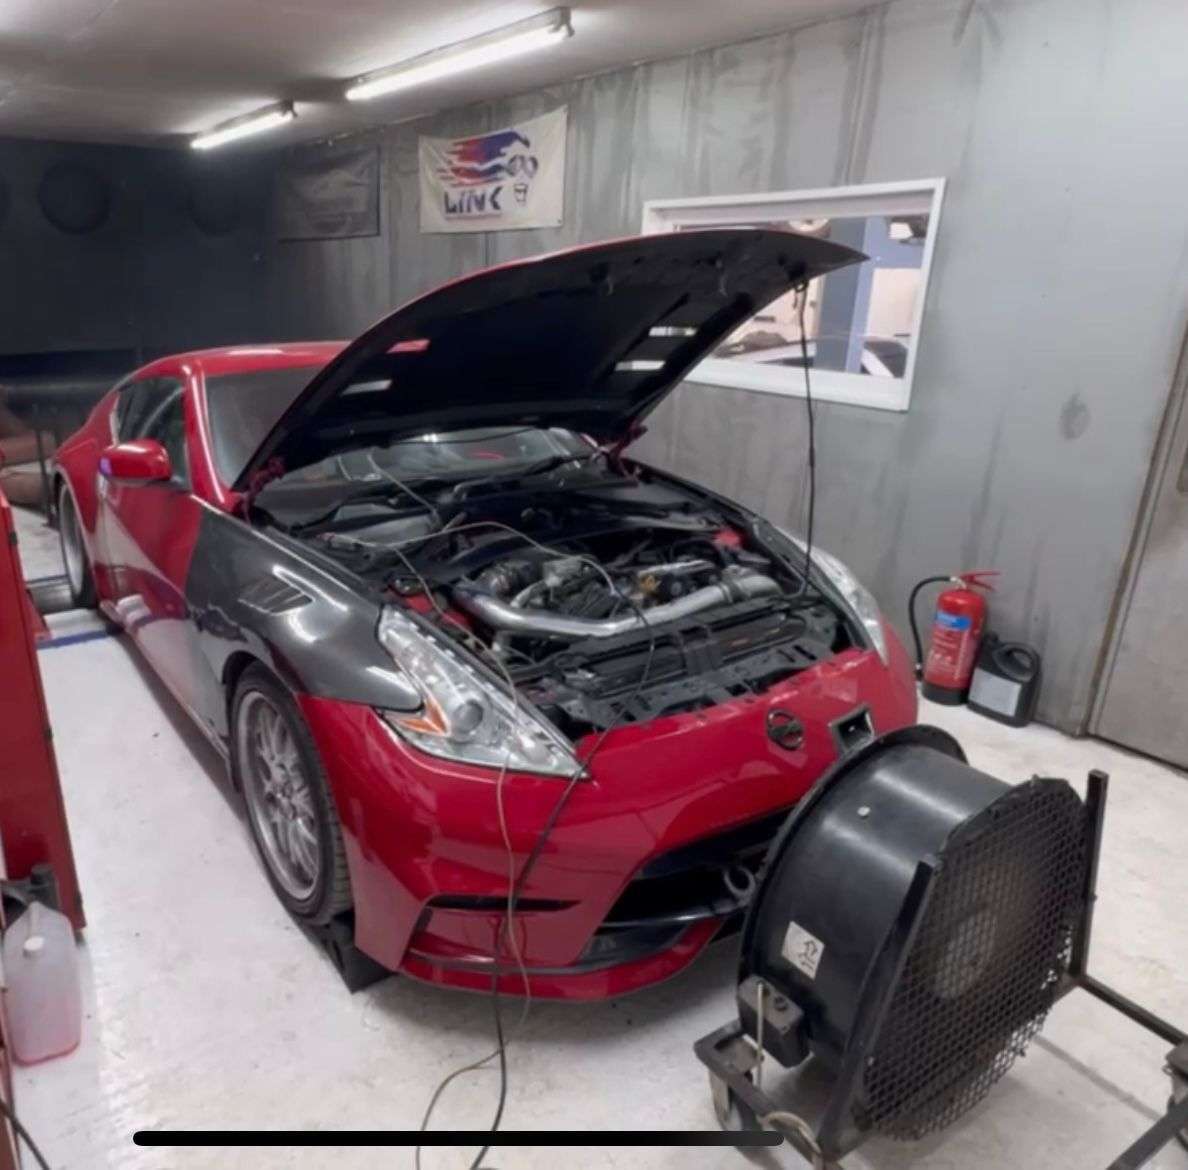
The car from the beginning was giving me an intermittent limp mode issue, it wasn't very often in the beginning, but became more and more frequent, all 4 fault codes it was throwing was pointing towards one thing and unfortunately it is a fault with the stillen supercharger kit. Luckily for me Horsham Developments make a replacement loom for the throttle body and they fixed the issue quickly, as well as my exhaust leaks. I do have the say the new loom not only fixed the issue but also looks a lot nicer, so massive shout out to them. While I was there and now the car was running better than ever we decided to do a dyno run to see if the 530hp I was told when I bought the car was a fib like I thought it was...
-
I swapped out my spark plugs for some GTR plugs (one step colder) then went off the PetrolHeadism and took plenty of pictures that weekend, had a great time with great people
.jpeg.96eab6793bec195602c7d731854703a7.jpeg)
.jpeg.772257f8a8c044d4e4af37f757e9f8e9.jpeg)
-
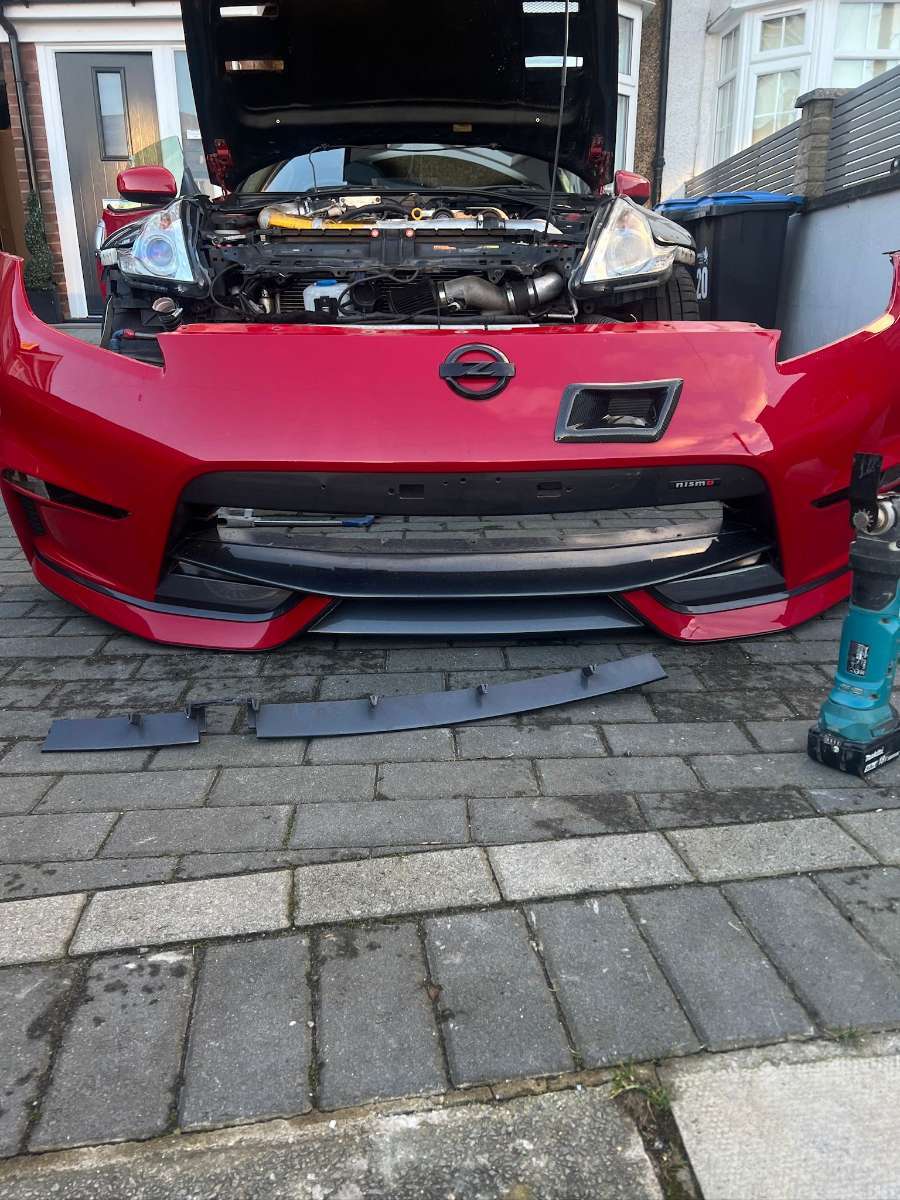
To show off the 2nd coolest mod on the car (boost), I decided to put my genuine Nismo V2 front bumper under the knife. I cut out the grill section and gave my charge cooler a clean and a coat of VHT silver. I used a multitool and a Dremel to perform the surgery and in all honestly its way cooler to see the cooler. I need to cover up those old license plate holes too.