


Ortega_9
-
Posts
449 -
Joined
-
Last visited
Content Type
Profiles
Forums
Events
Gallery
Store
Posts posted by Ortega_9
-
-
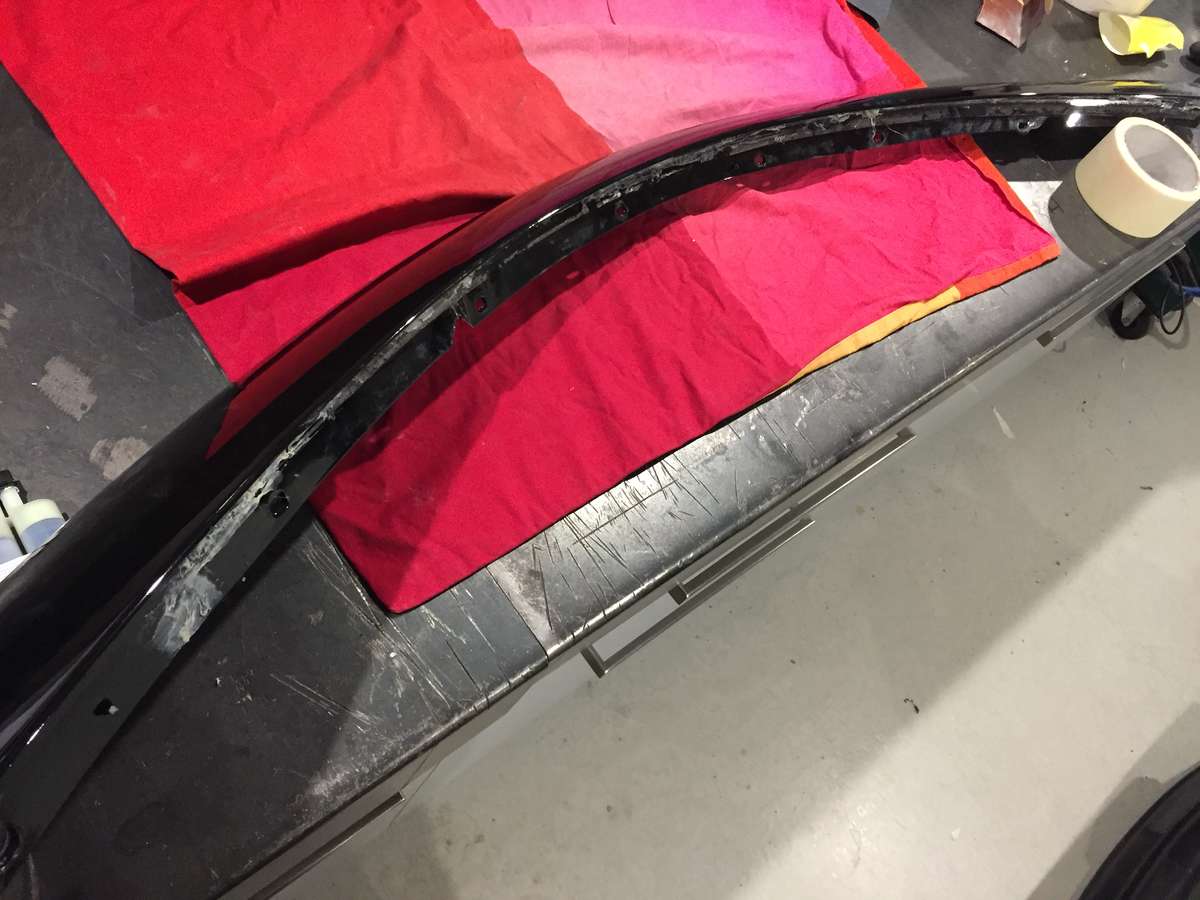
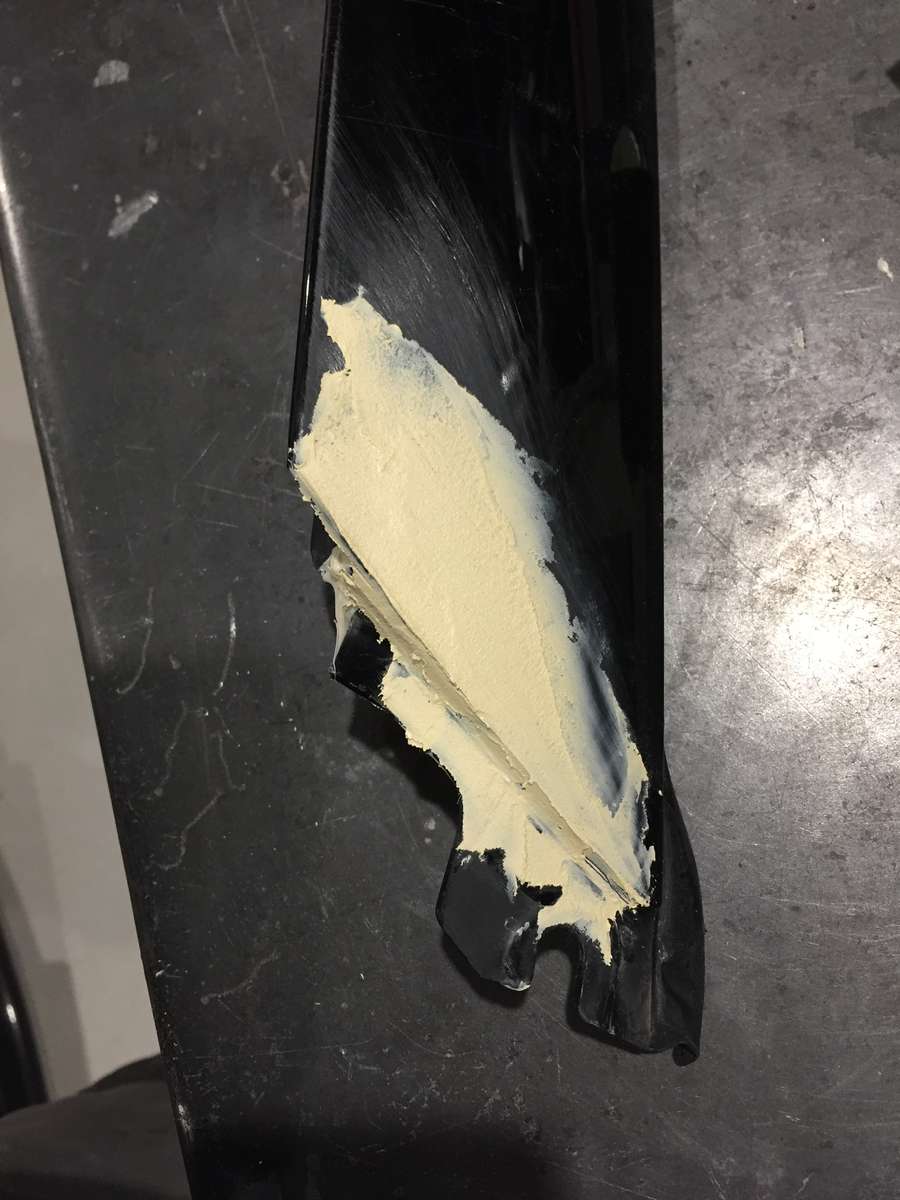
I'we always had a cracked A-pillar, so when having so much going to paint i thought that i Would try to mend it and get it painted too.
It turned out that te whole rubber seal has been pulled of when changing the windscrean, and the entire lenght of plastic had been cracked all along the piece on the inside. Aswell as the damage to the bottom of the pillar.
so i cleaned it up as much as possible, and glued it back together with a 2 component epoxy. Also did a layer on each side when the first one had cured.
Now I'm trying to get the right angle on the bottom corner as the pieces didn't go together as before it cracked.
what a job.

so far it's going ok, but there is a long Way home if this is going to work..

-
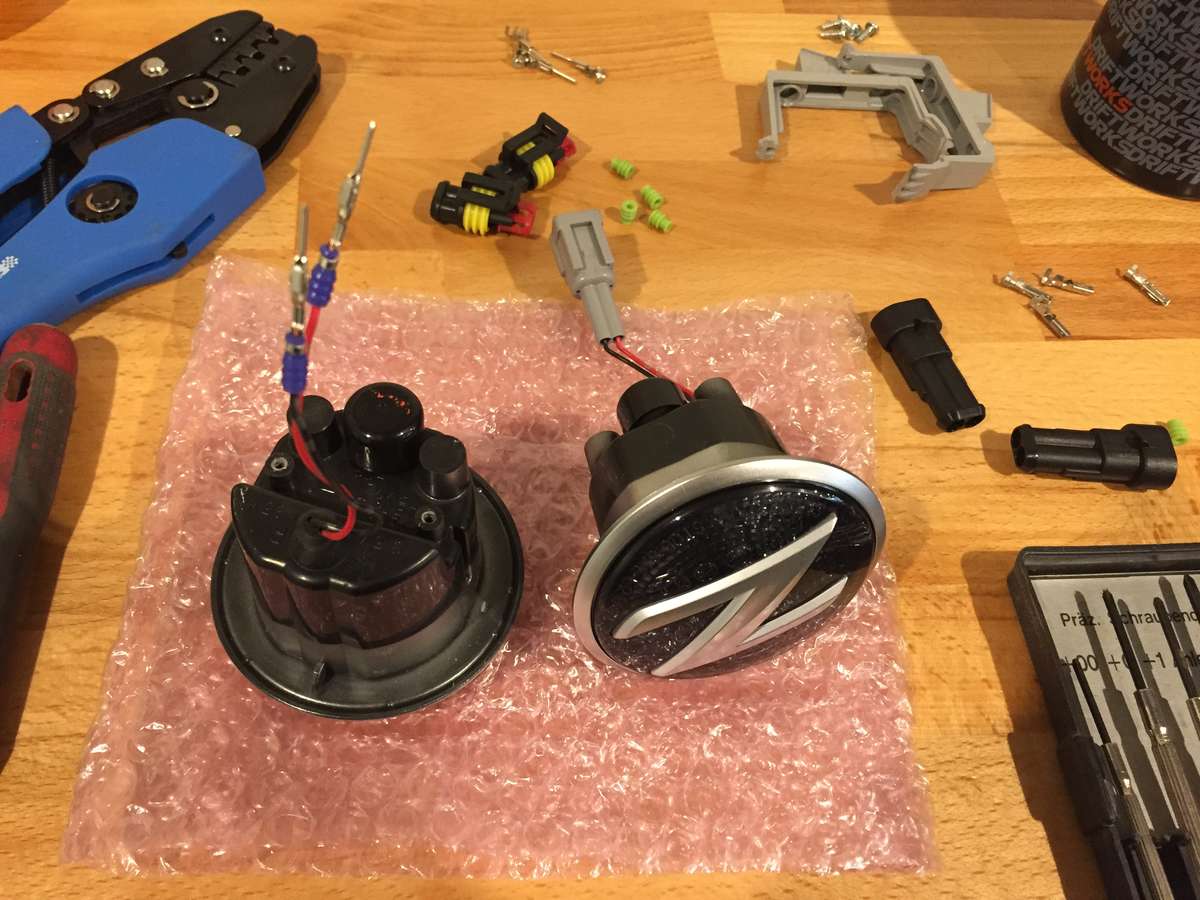
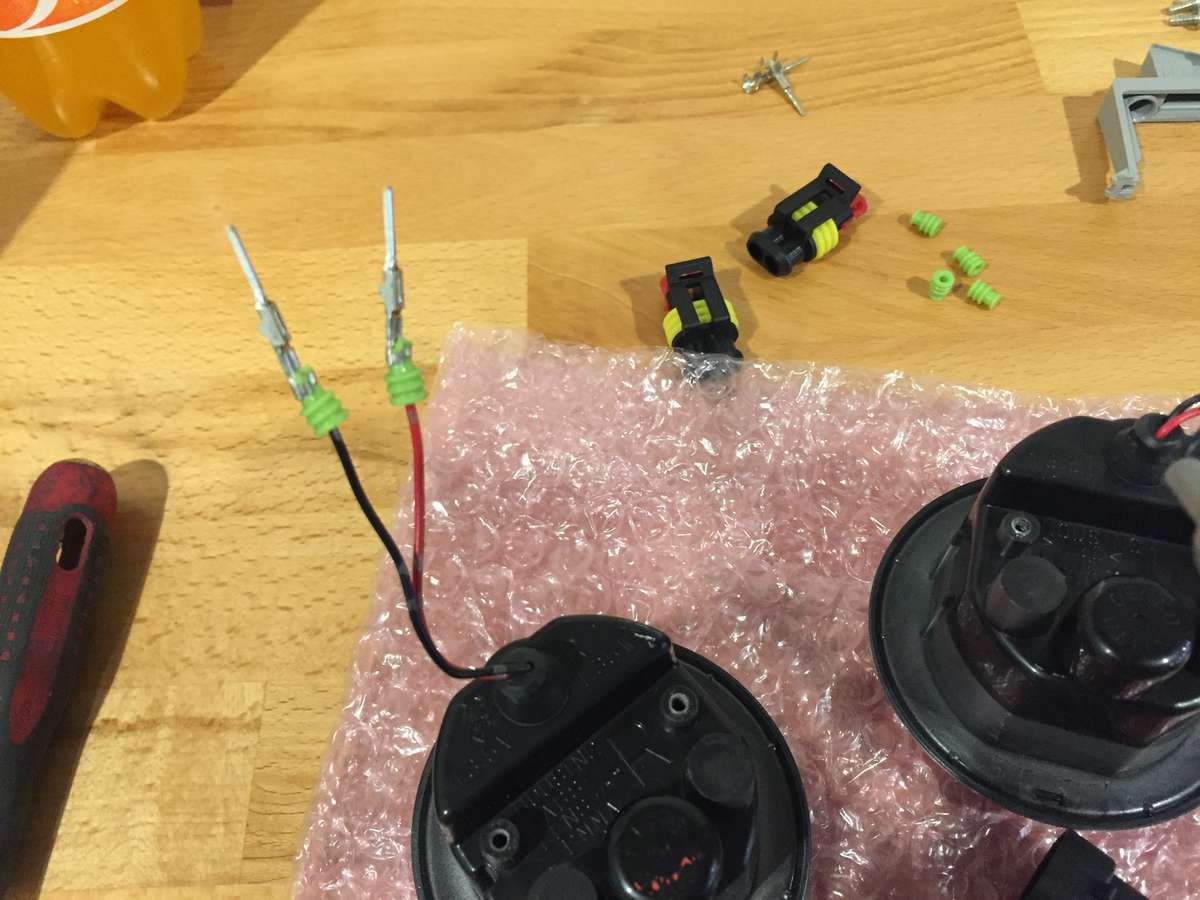
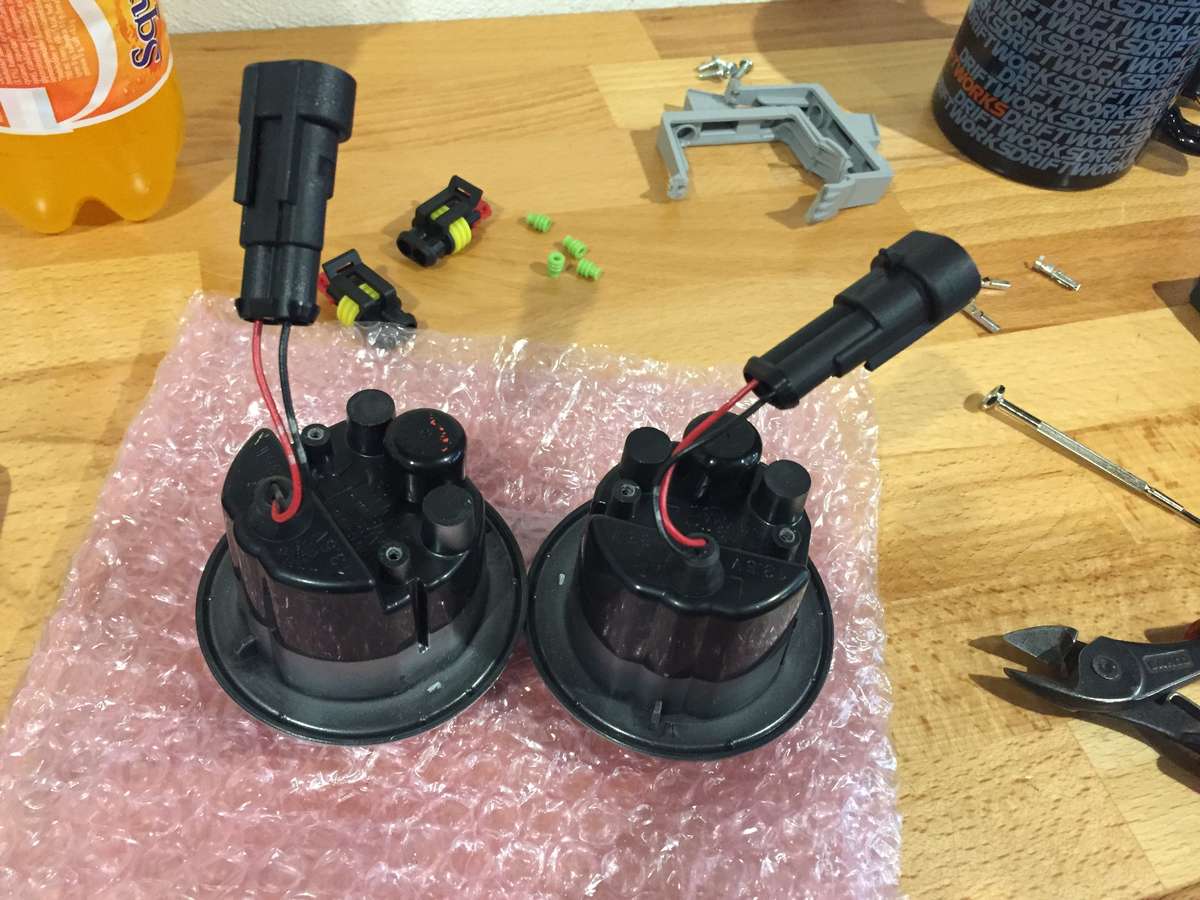
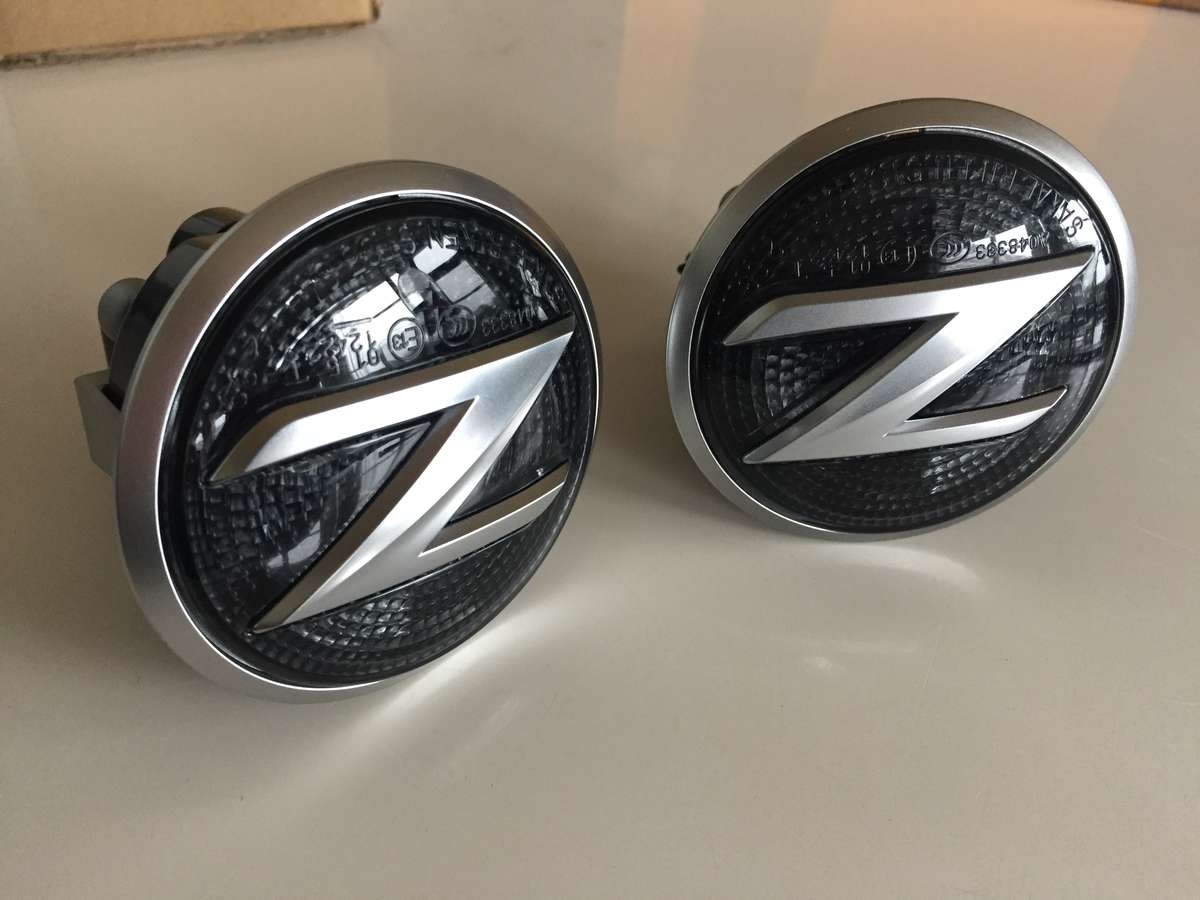
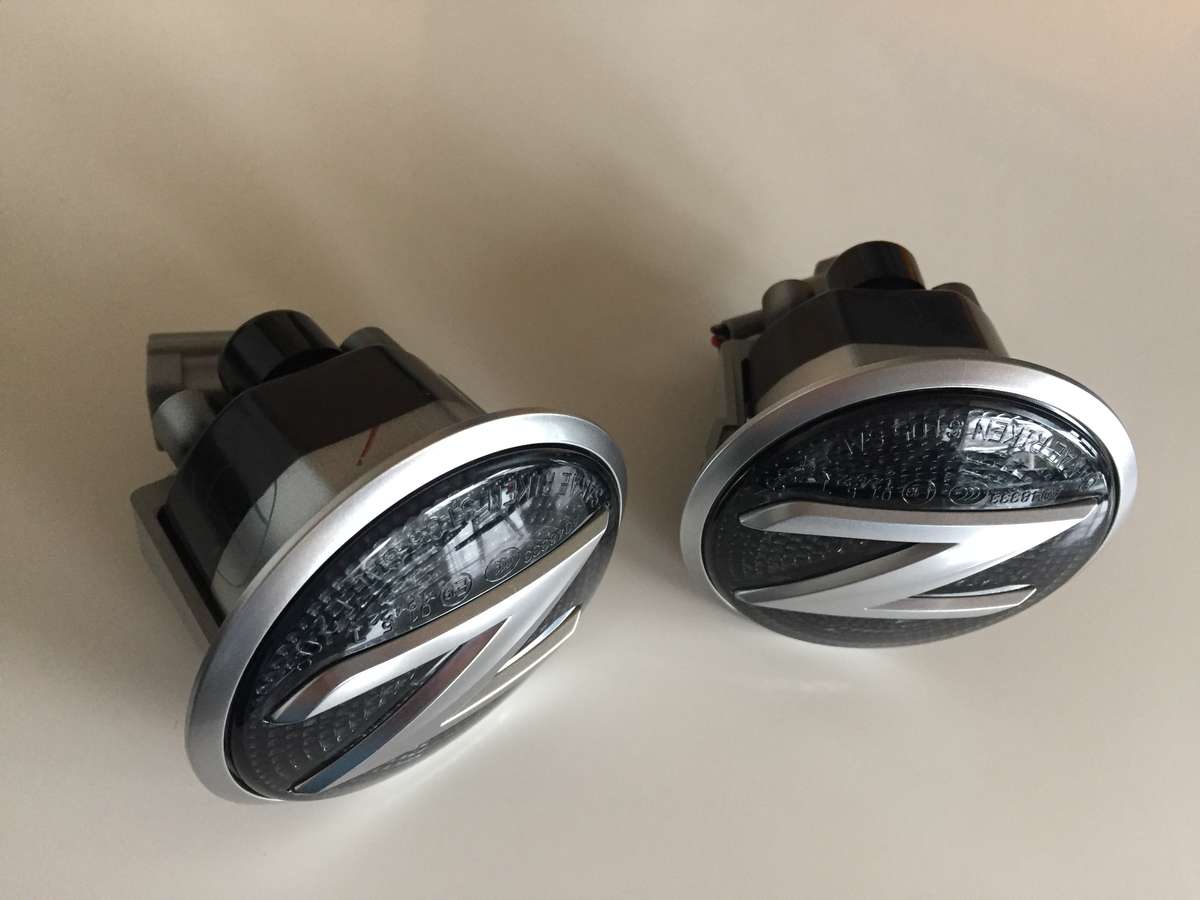
Replaced the Stock Nissan connectors with another type and the 370z blinkers are ready to install when the wings get back from paint.
-
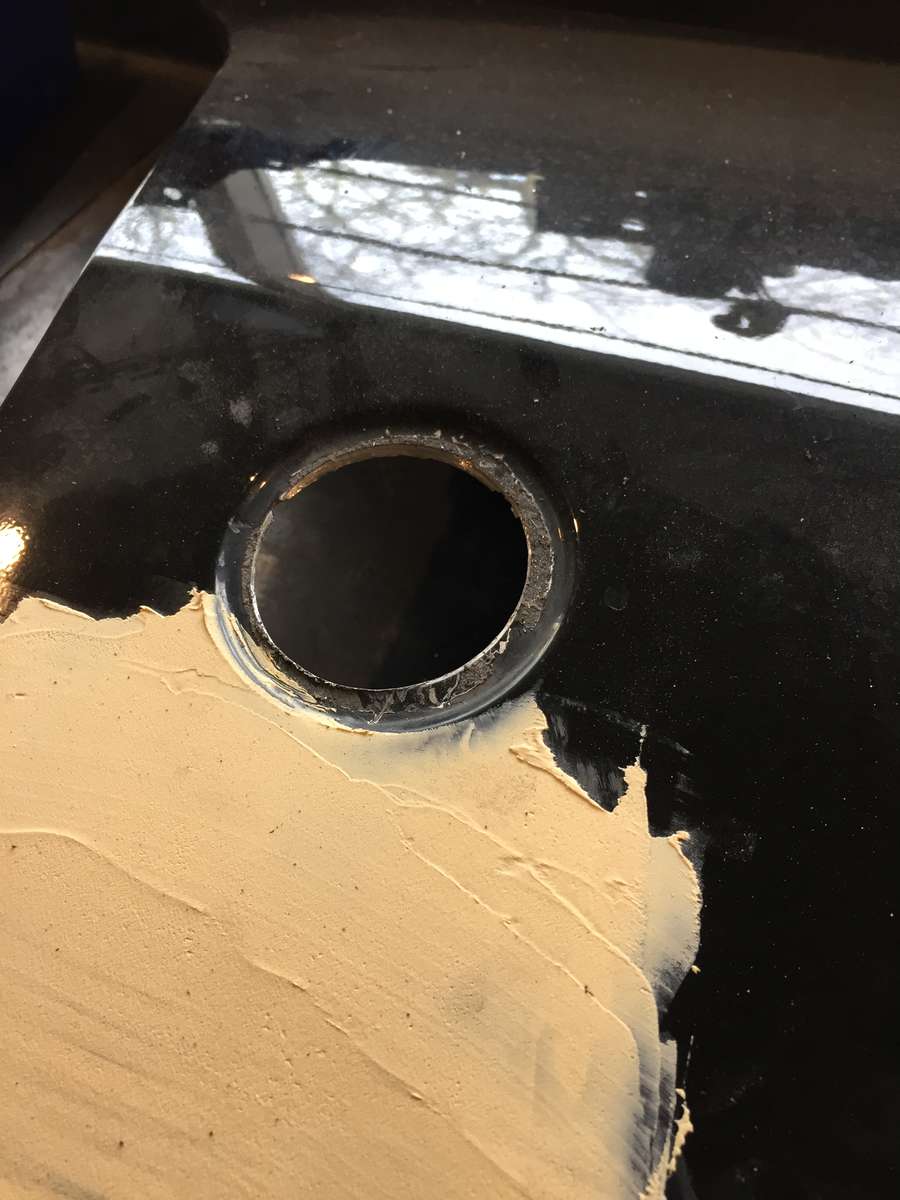
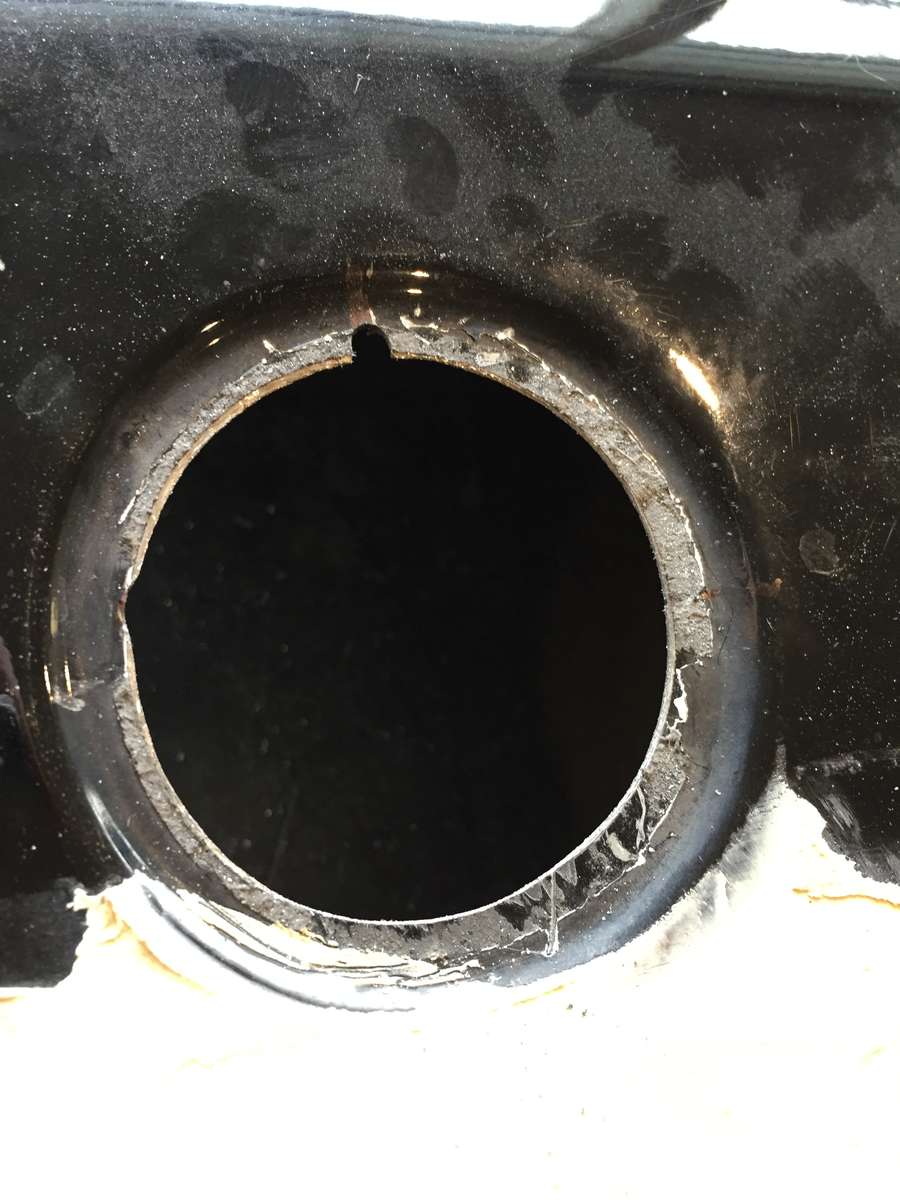
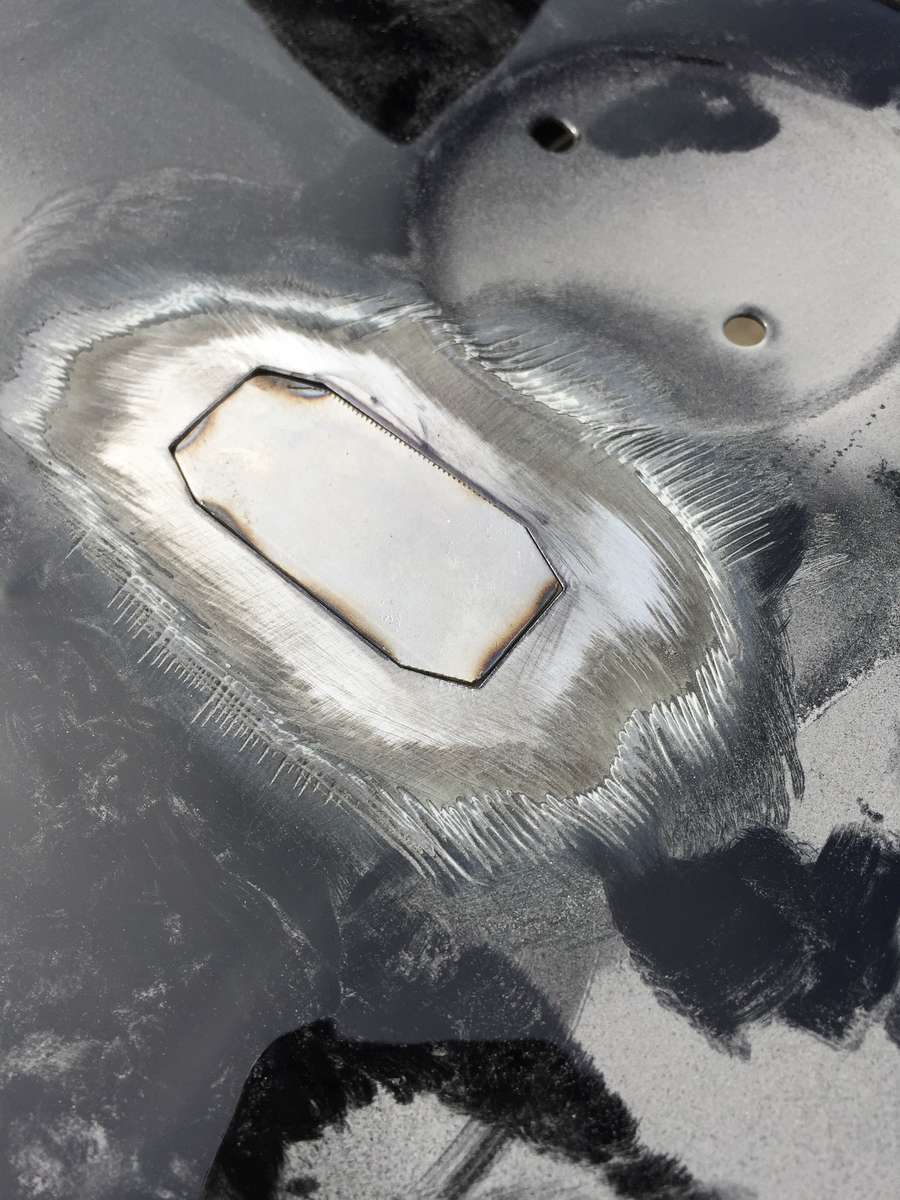
Cut a hole with a 54mm hole Saw.
to fit tight it needs to be ~55 ish. So trimning around the edges and making the small cuts to position the light correctly.
and it fits perfekt.
I decided to make a bracket to fit the light to the back of the wing instead of gluing as many other have done.
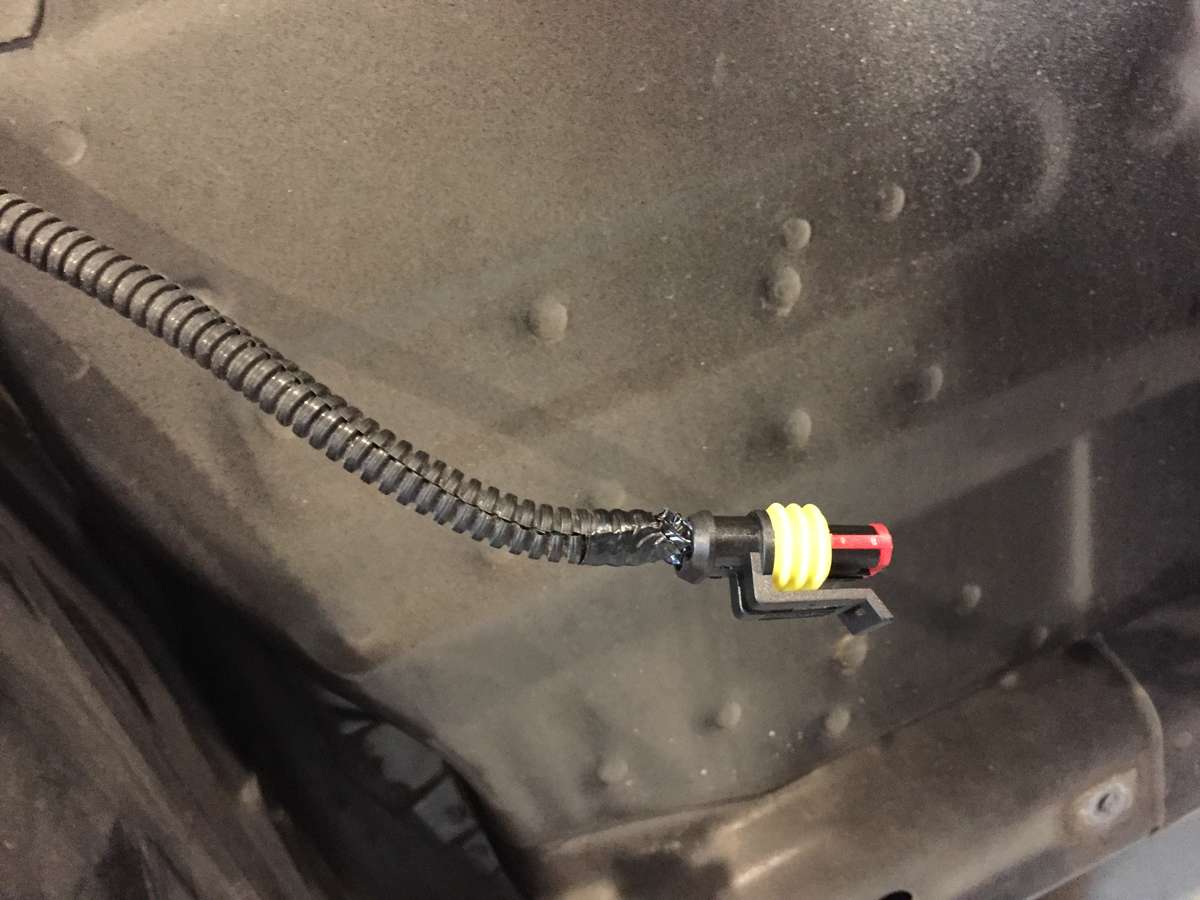
also doing automotive connectors for easy removel and watertight connections.
-
 1
1
-
-
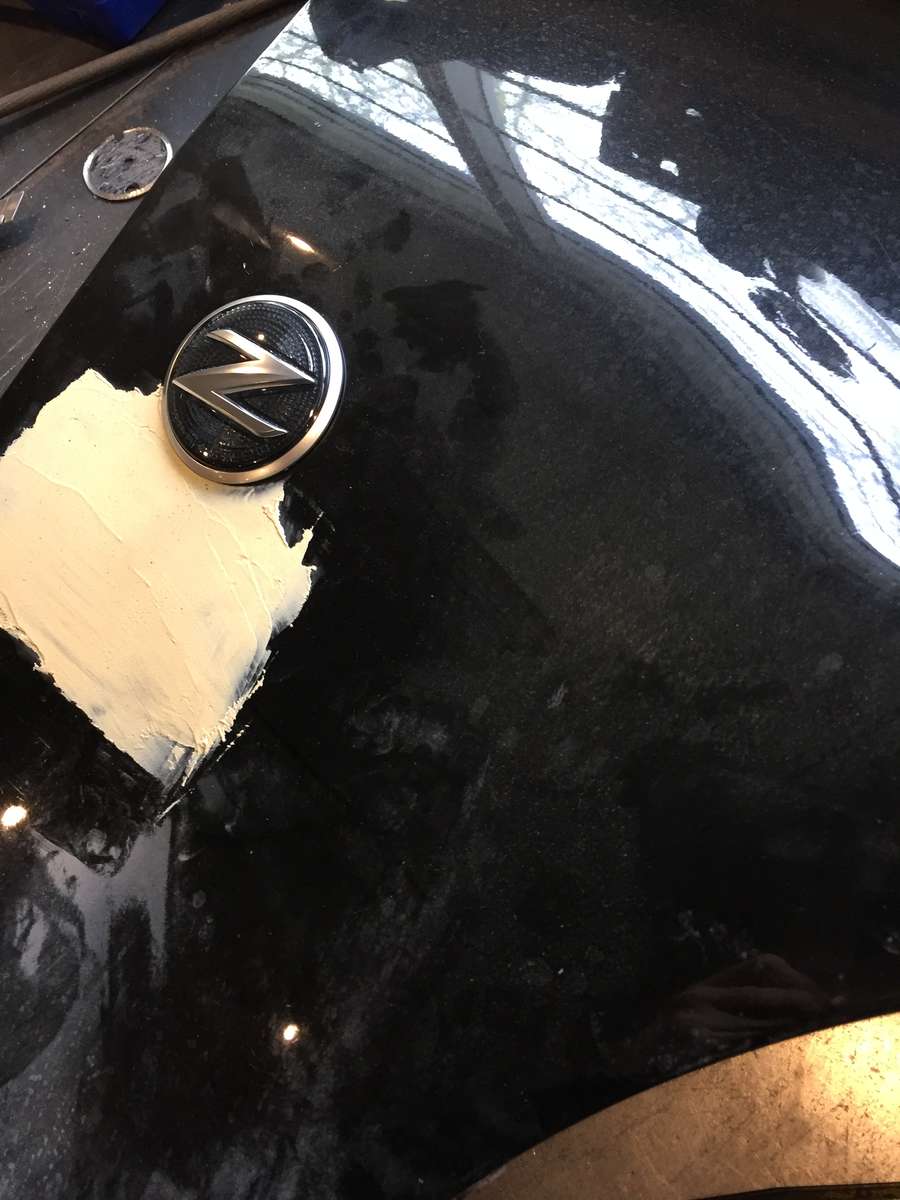
Also theese just Got here.
I'll have to see how to fit them as the Stock brackets calls for at flat lip and not like the "hole" that holds the z emblem in the 350z front wing.
-
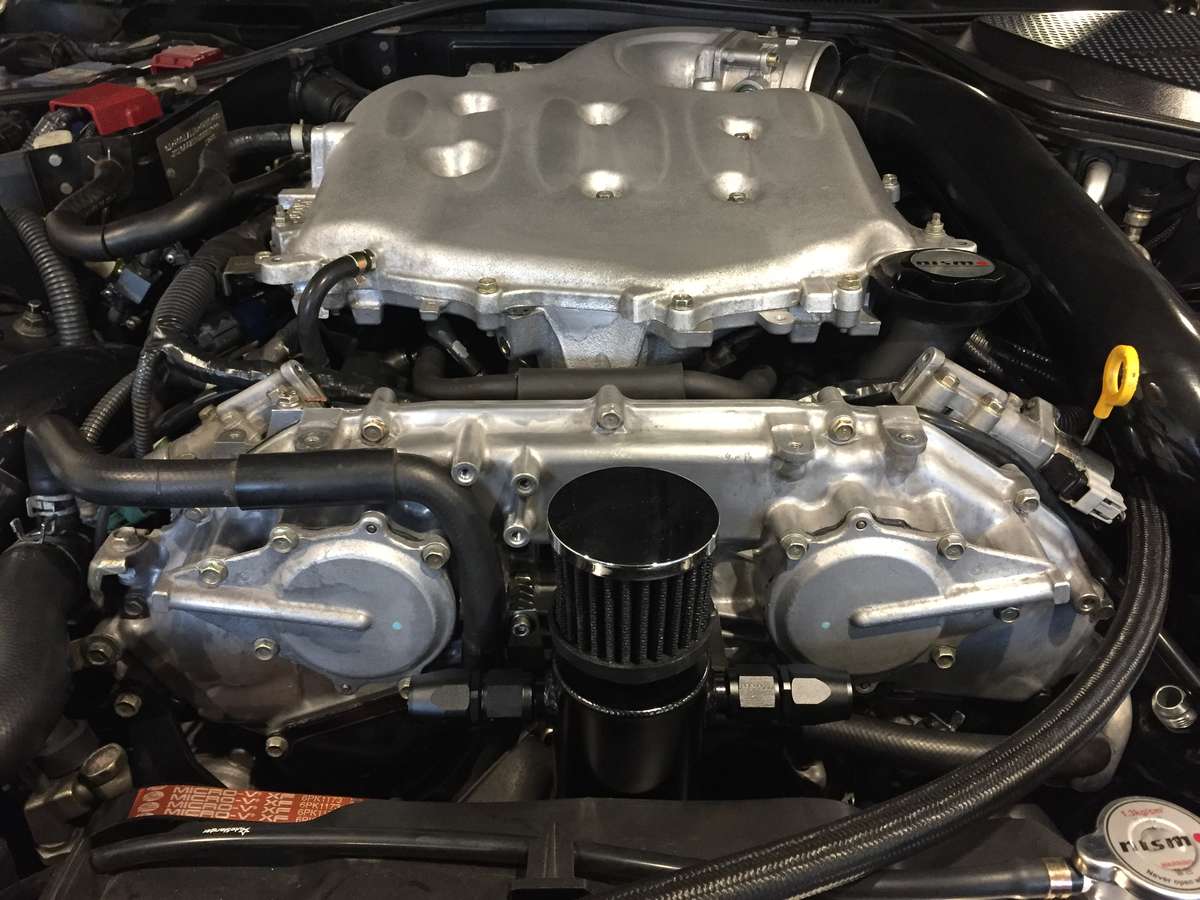
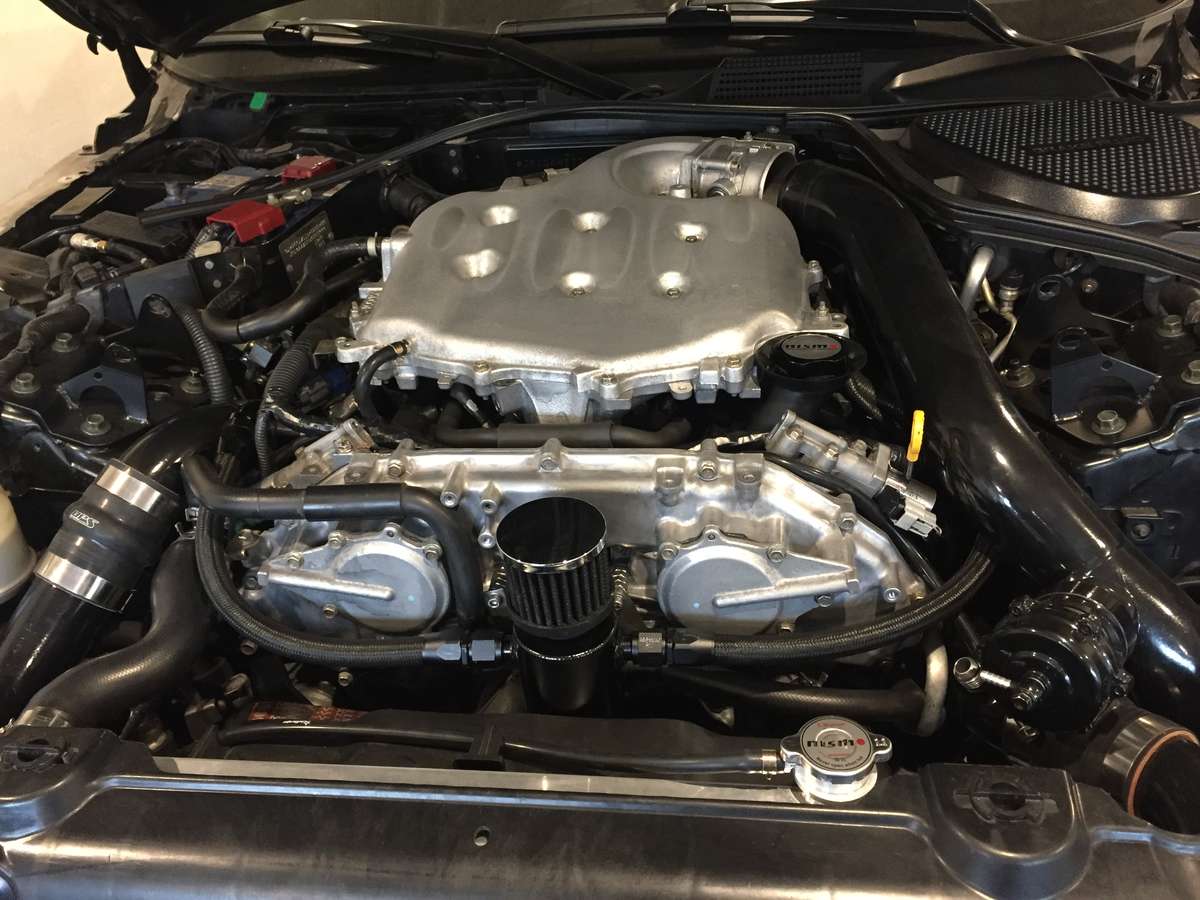
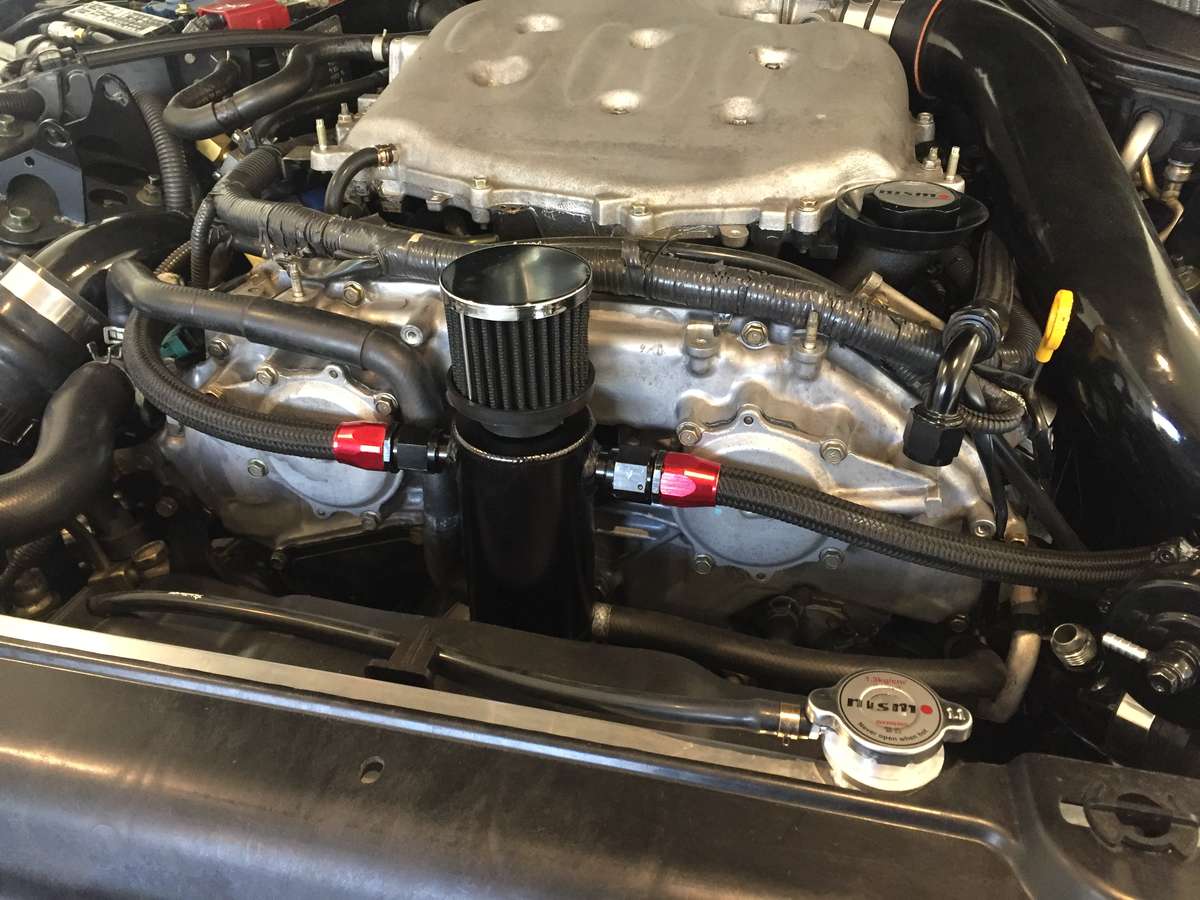
And the catch tank setup ended up beeing like this.
just a touch off-center to make room for the cirkulation water hose, and for not having to cut anything on the fan scrouds and so on. A true bolt on kit . With all AN fittings, pcv-delete fitting, baffled catchcan, brackets etc.
I'll do another bracket for it to make it sit in this place, and look good.
right now it's just spaced ud with bolts to hold it in place.
-
1
-
-
10 minutes ago, SuperStu said:
You are a busy bee!
I was thinking just that.

But I have some time to get things done now. So I'm hauling

-
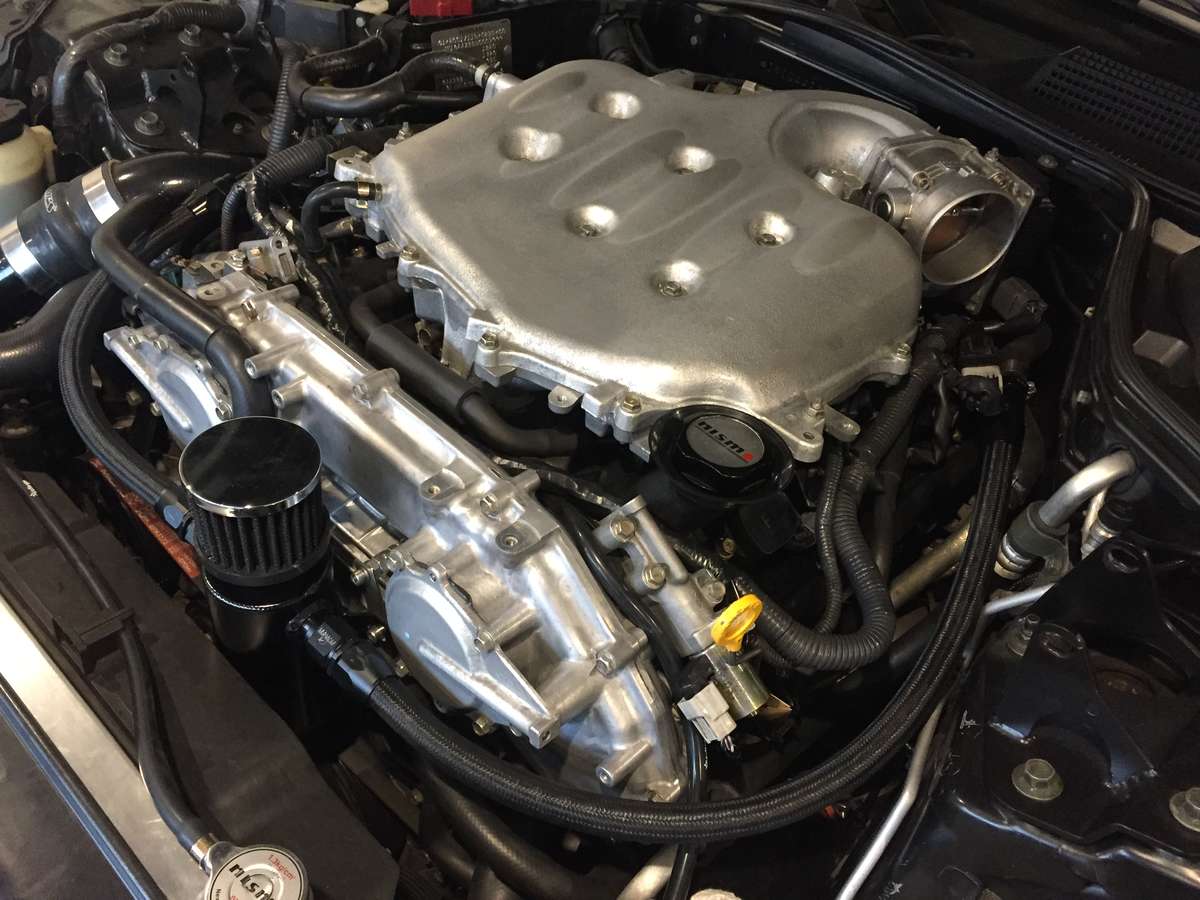
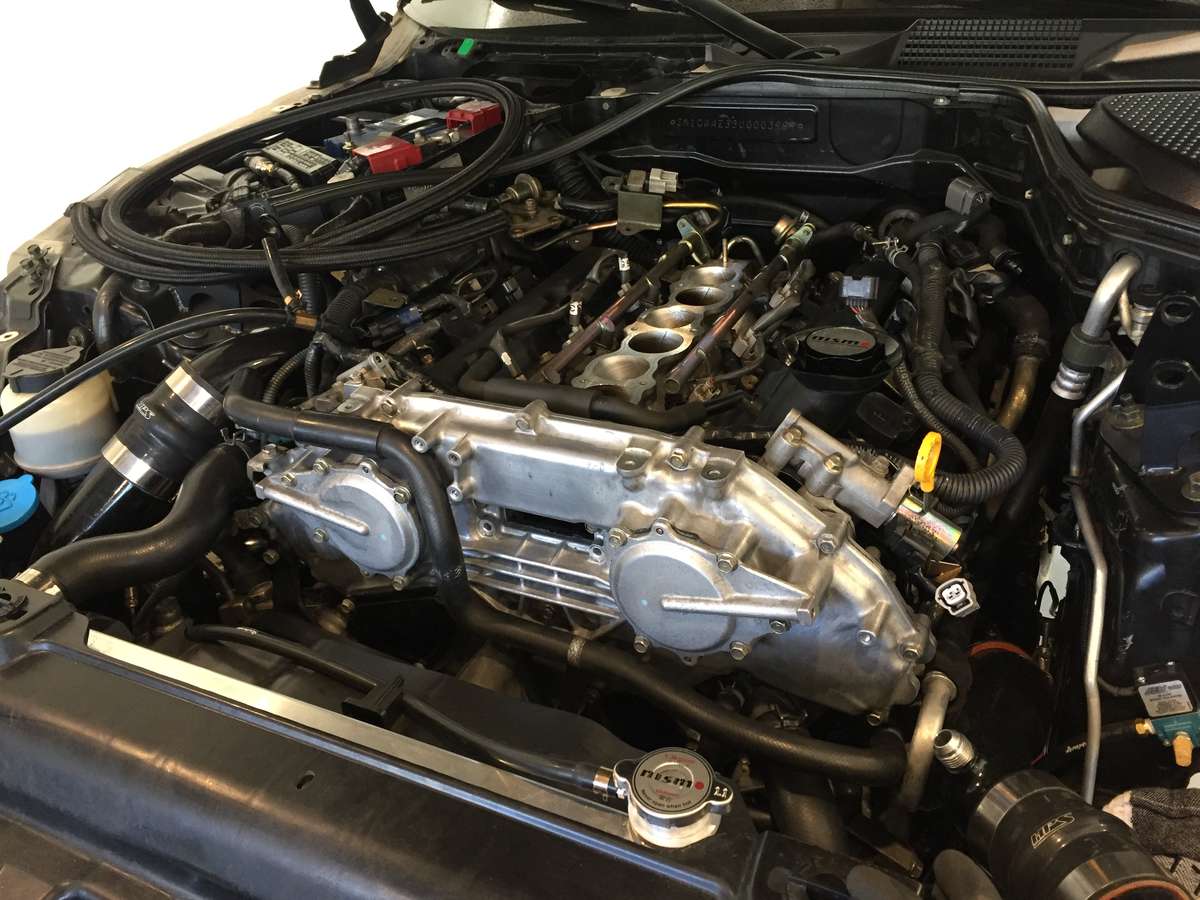
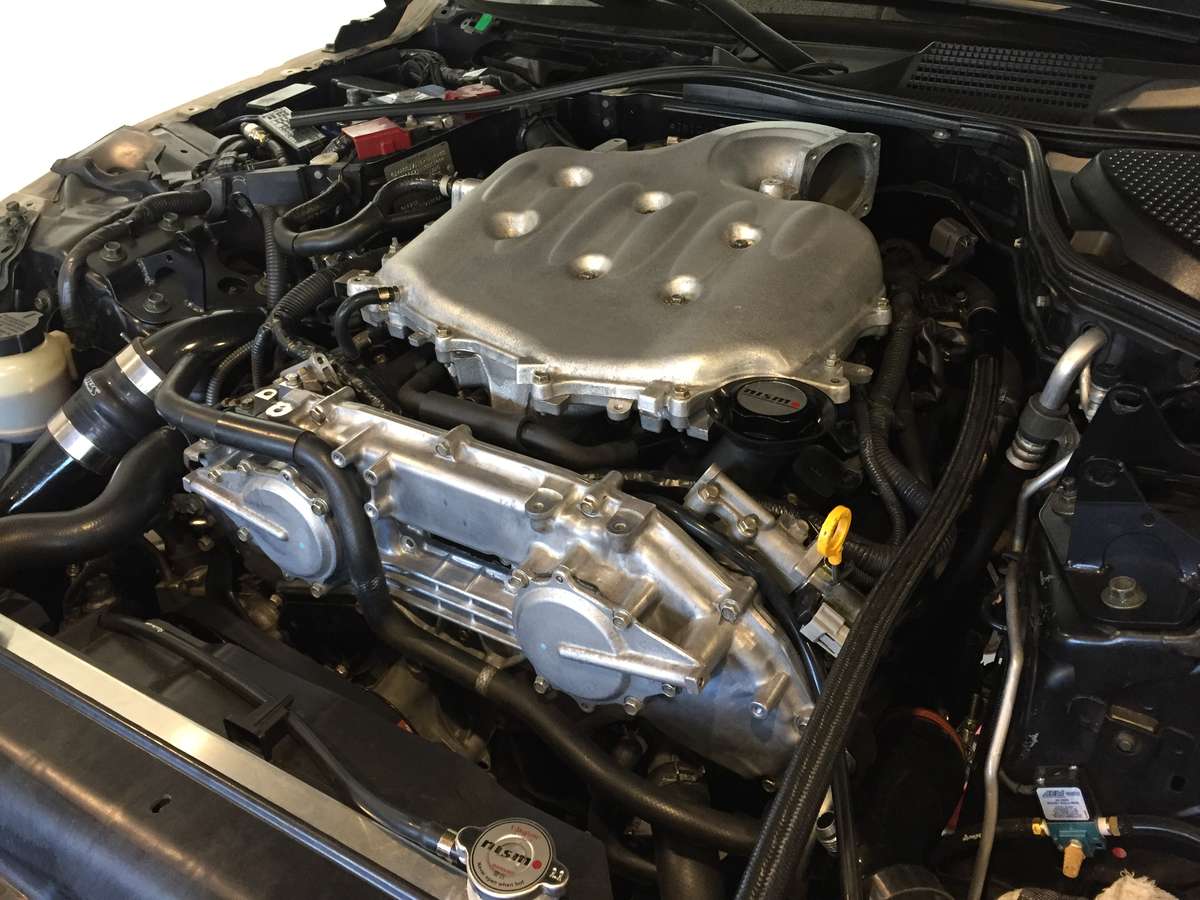
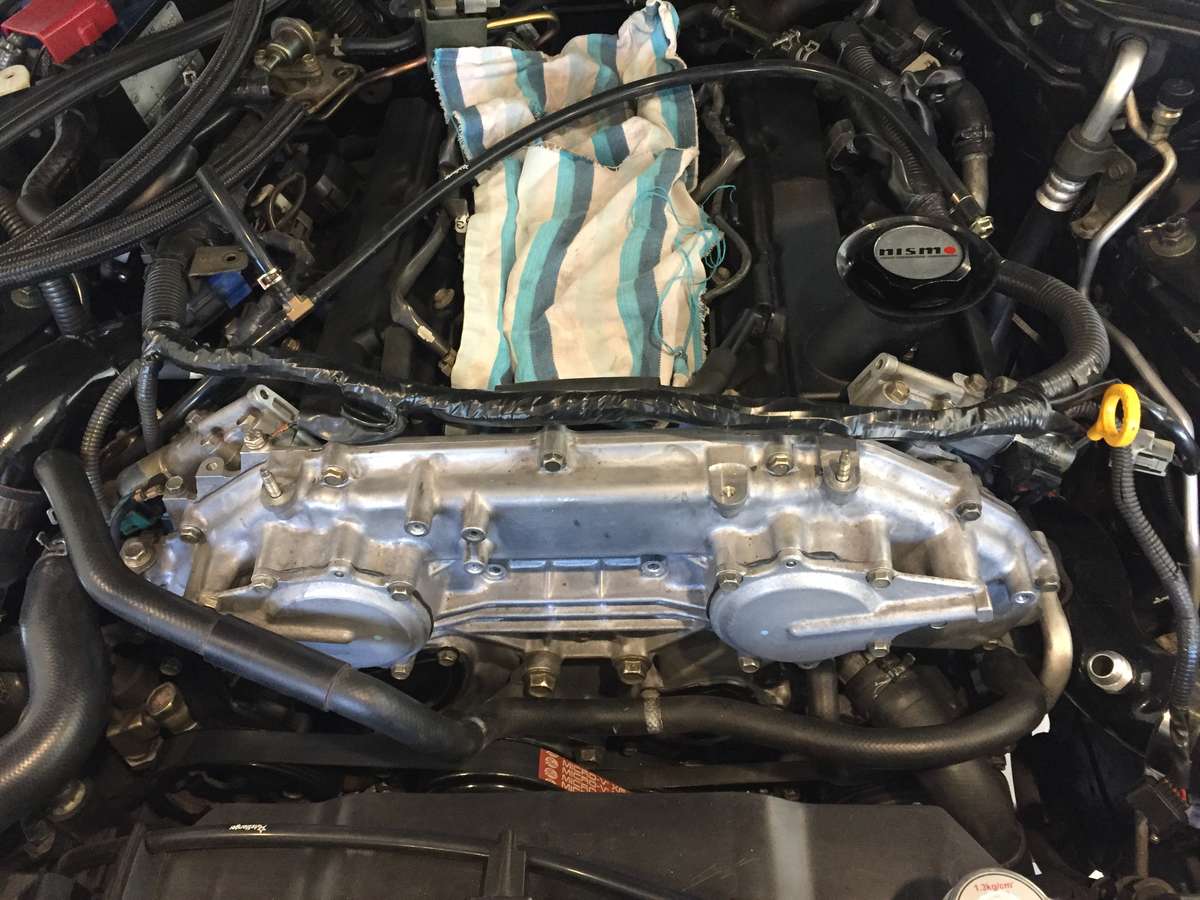
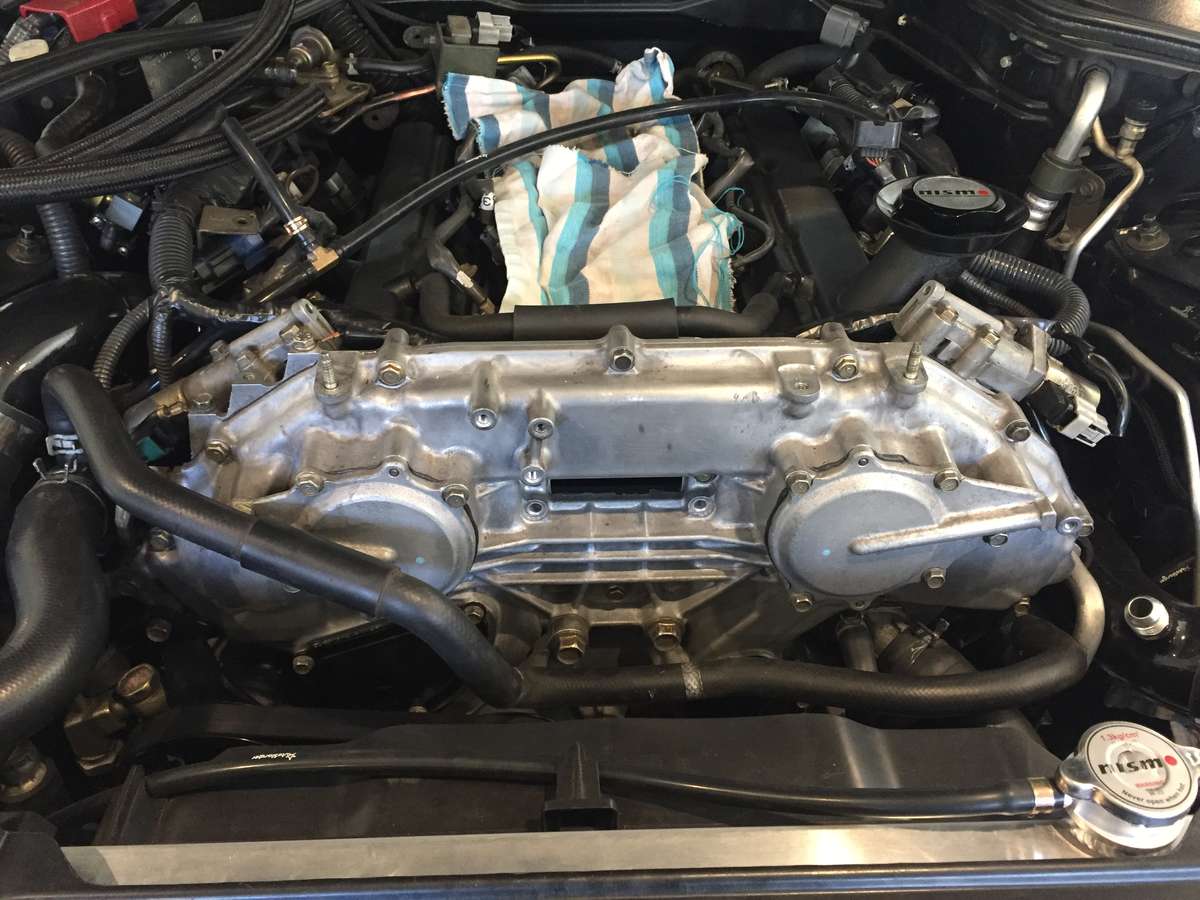
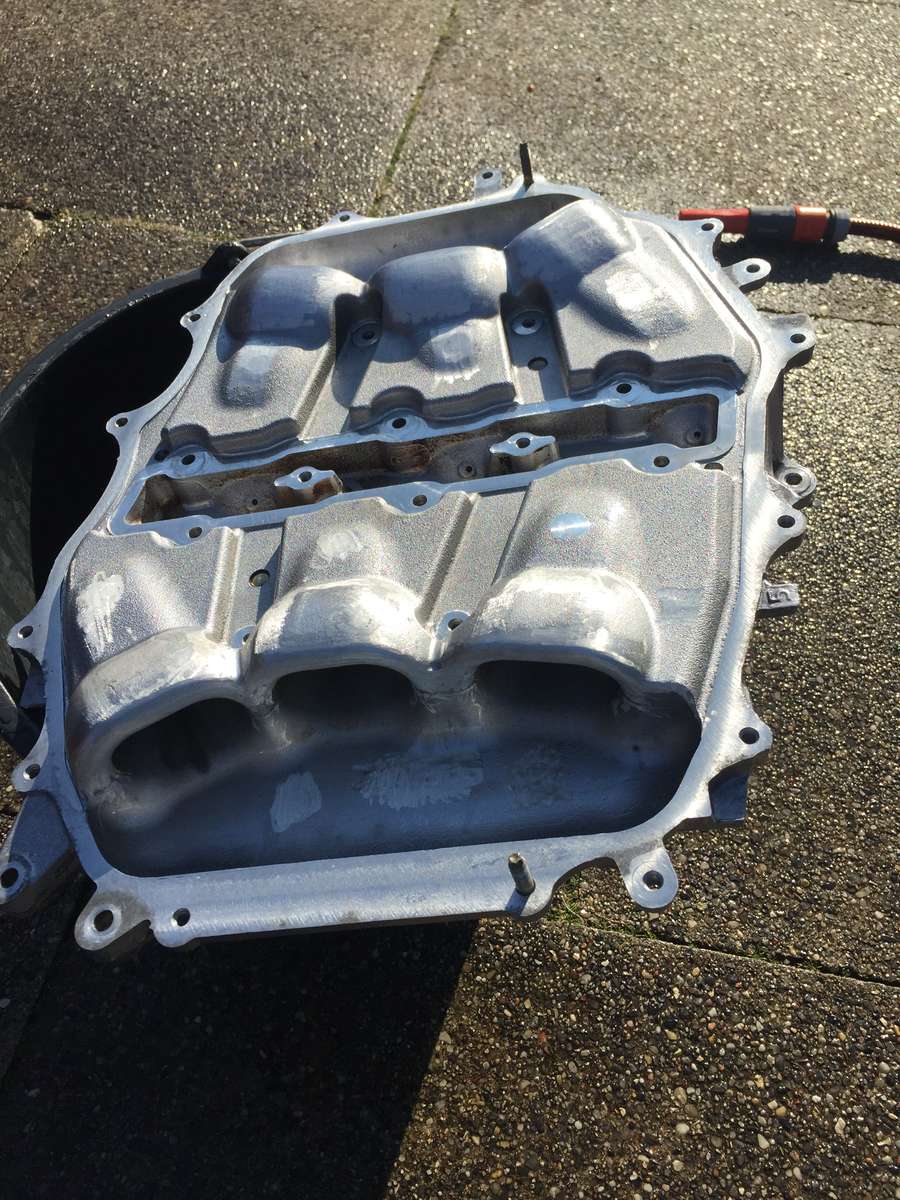
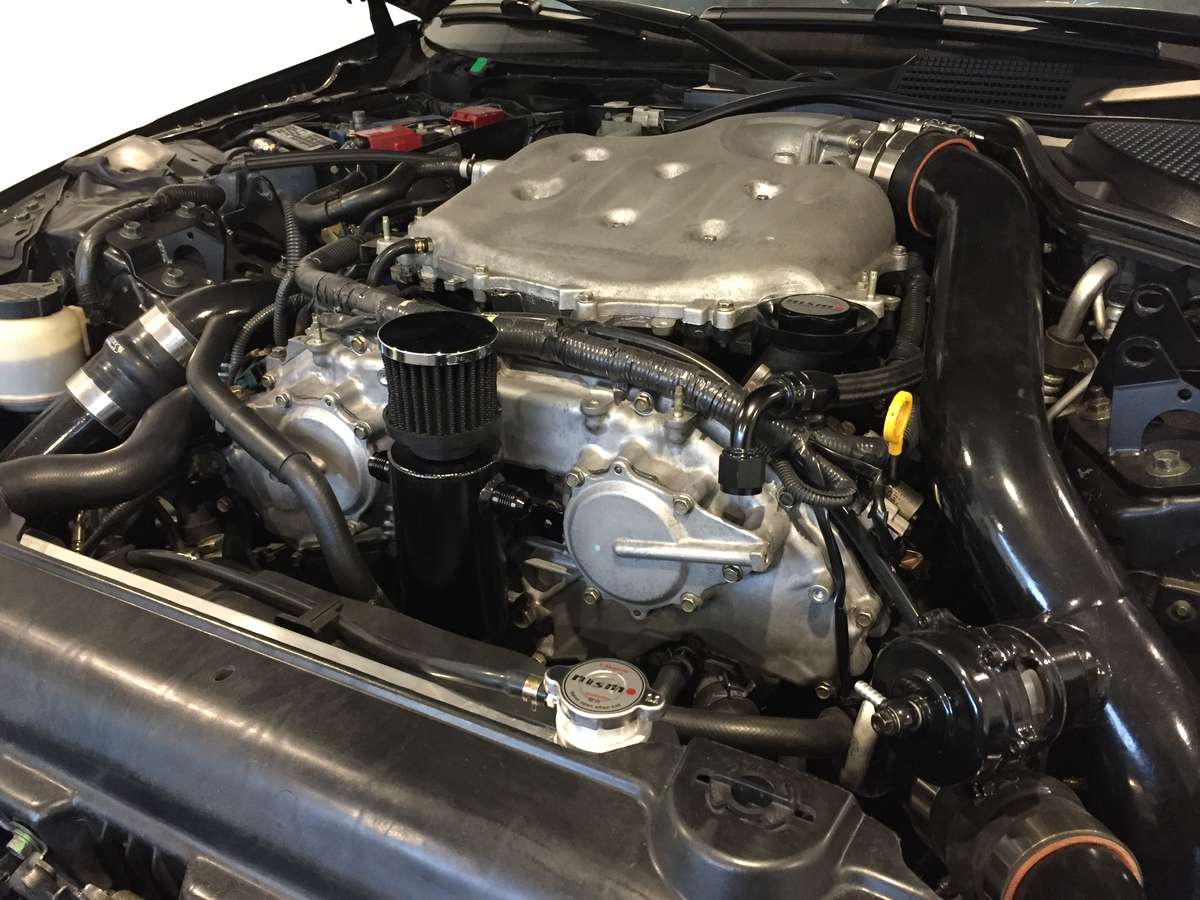
And Got the intake back on.
I wanted to paint the intake top Black or red, as it was so ugly and dirty, but after having the whole lot cleaned and washed with acid it absolutely looks good again!
Also just had it fired ud. Still a slight rattle when starting up after sitting 24hr.
so i gues the next thing is either the vvt sprockets or simply a new chain that might shorten it up abit and not hit the sides when starting.
-
2
-
-
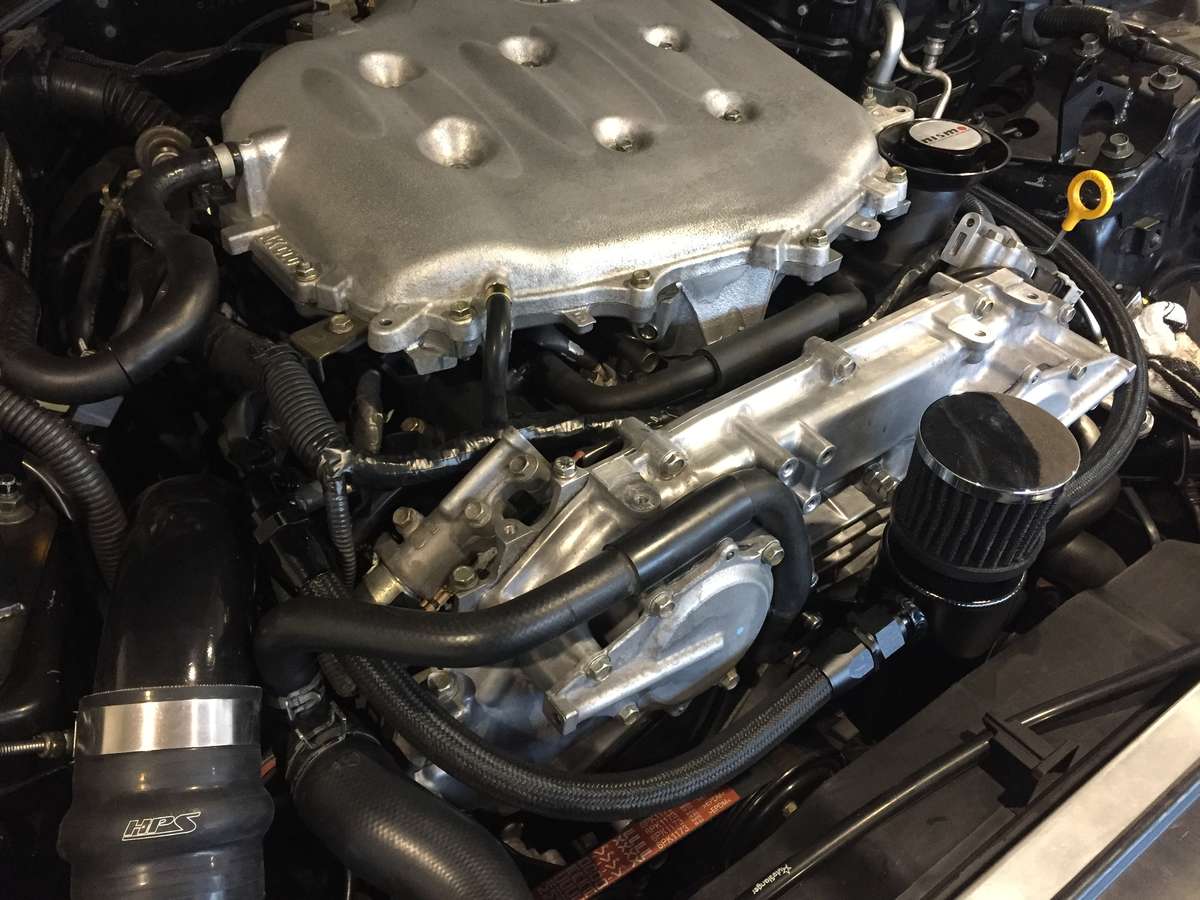
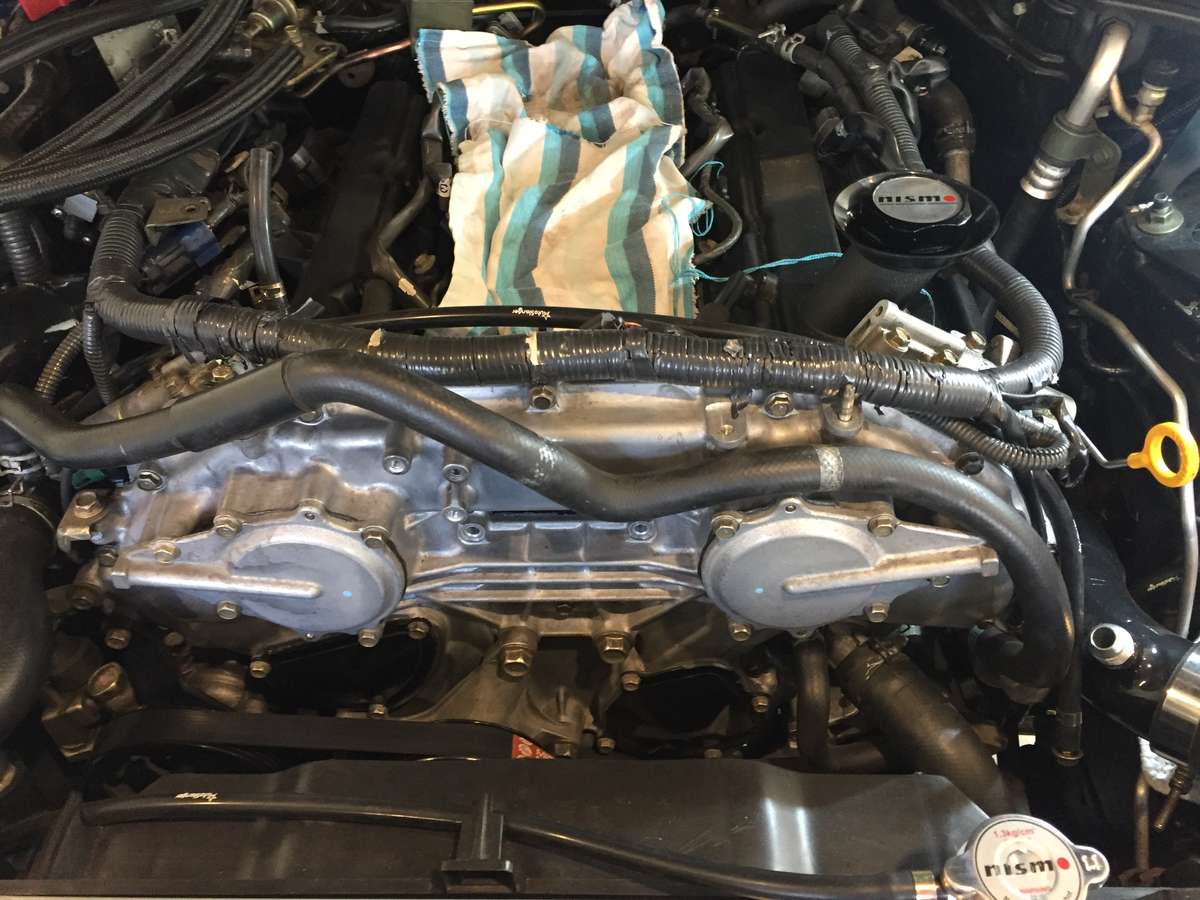
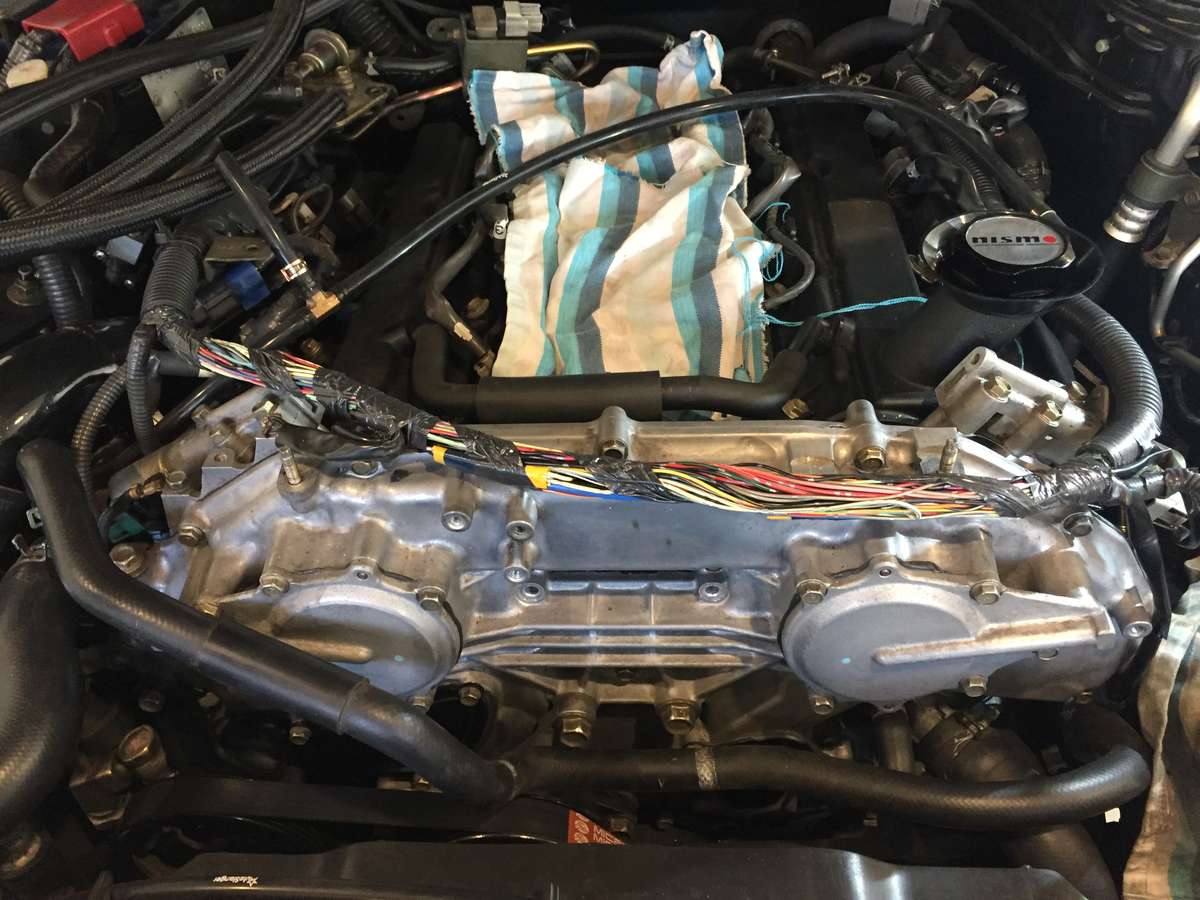
And with the front engine cover not going back with the catch tank setup, i kinda needed to tuck the wireing loom, as I Think it looks out of place with the wire loom "hider" and also with just leaving the loom visable.
so took the loom cover of, covered it with 3 layers of electrical tape, making sure to arrange the leads in the loom so that they Would fit where I Would run it.
actually really clean look when done.
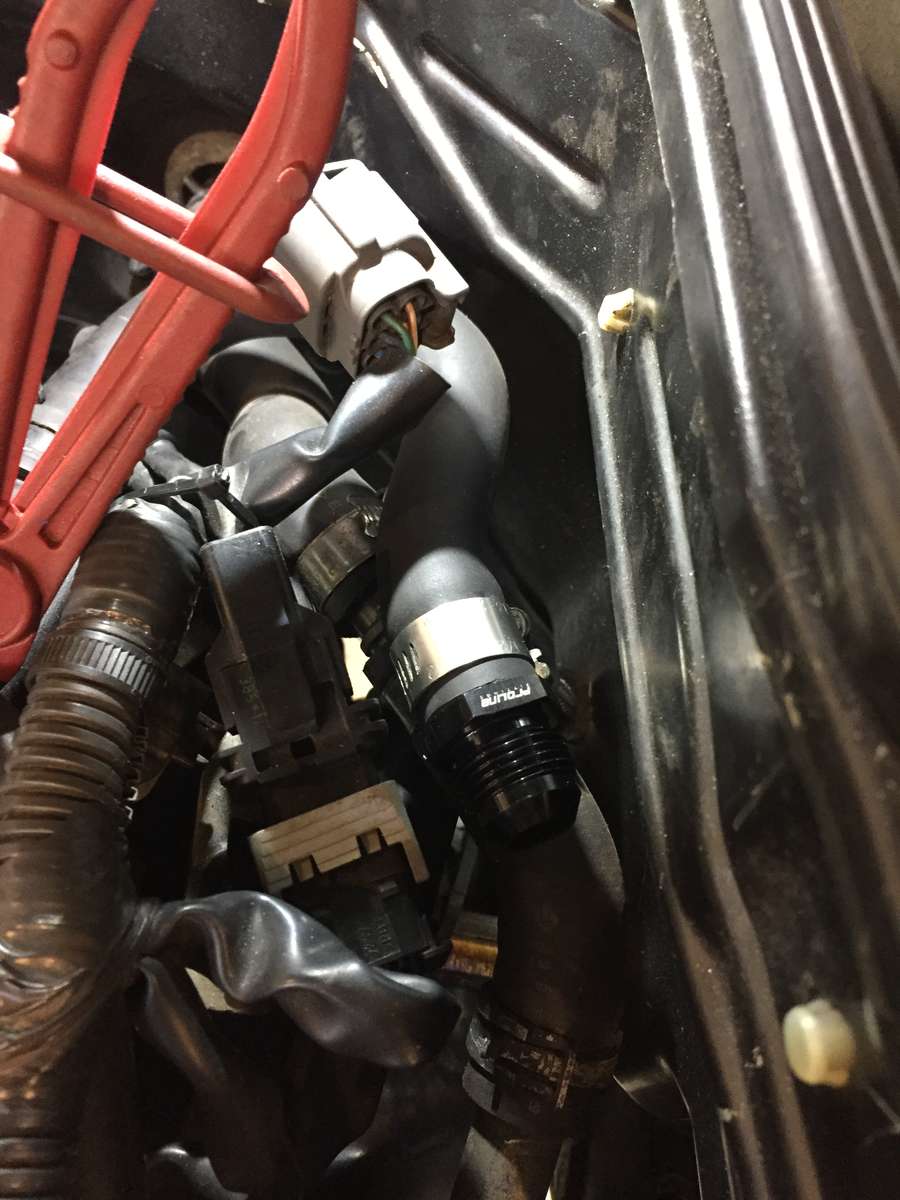
also fitted a hose/An10 fitting to the rear engine breather hose. To fit the new breather setup.
I choose not to fit the stainless reinforced An10 hose directly to the cam cover Because of the bends on the piece of breather hose that places the an fitting where it's accecable, and if i do a kit for sale, it needs to be fitted without having the entire engine apart. I Think...
-
1
-
-
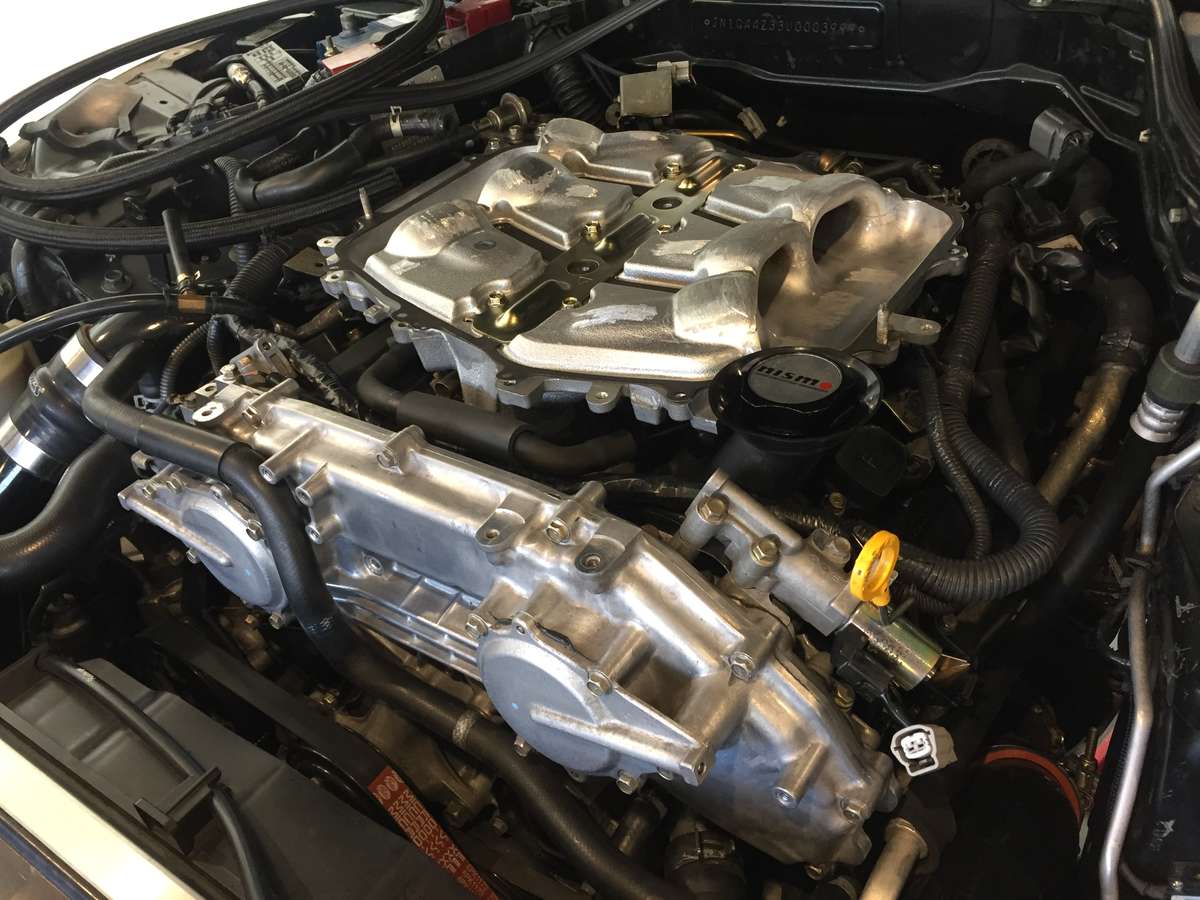
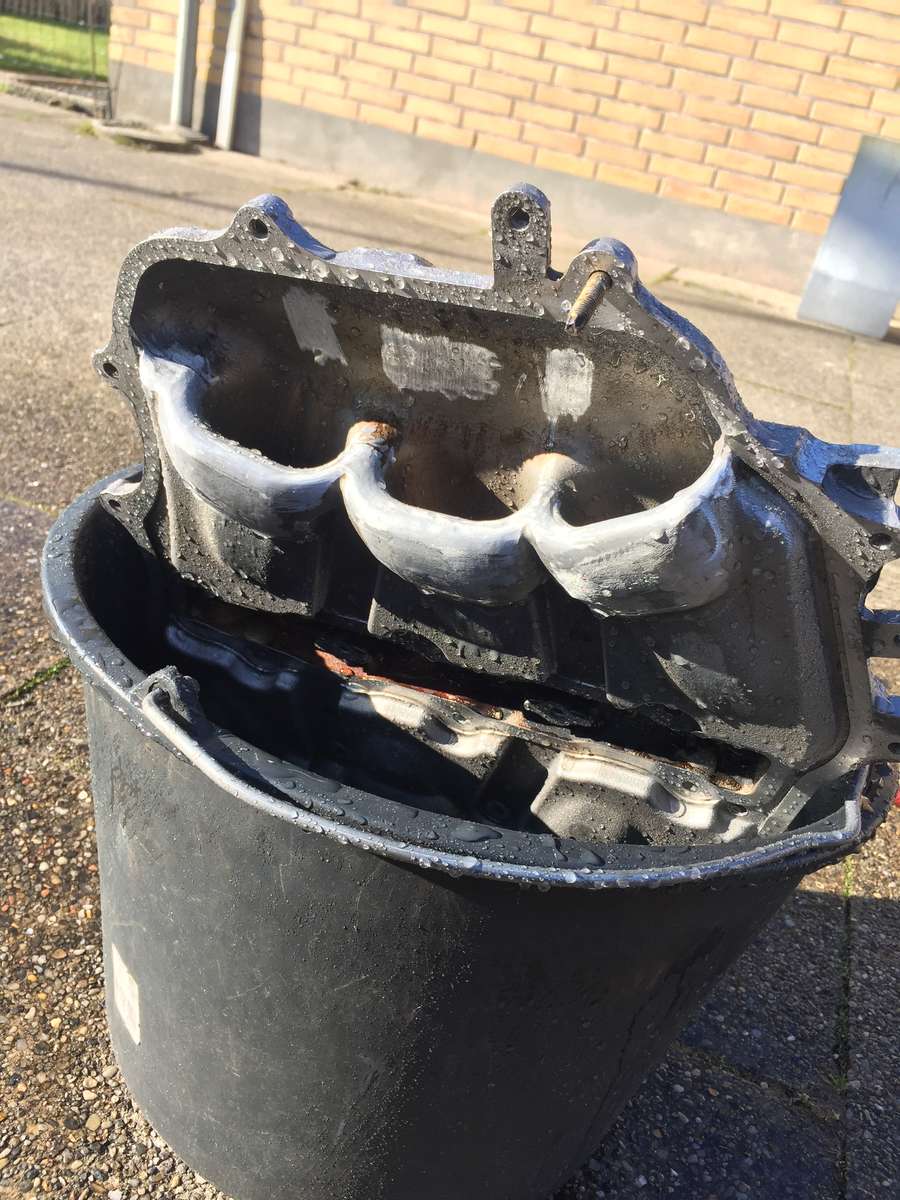
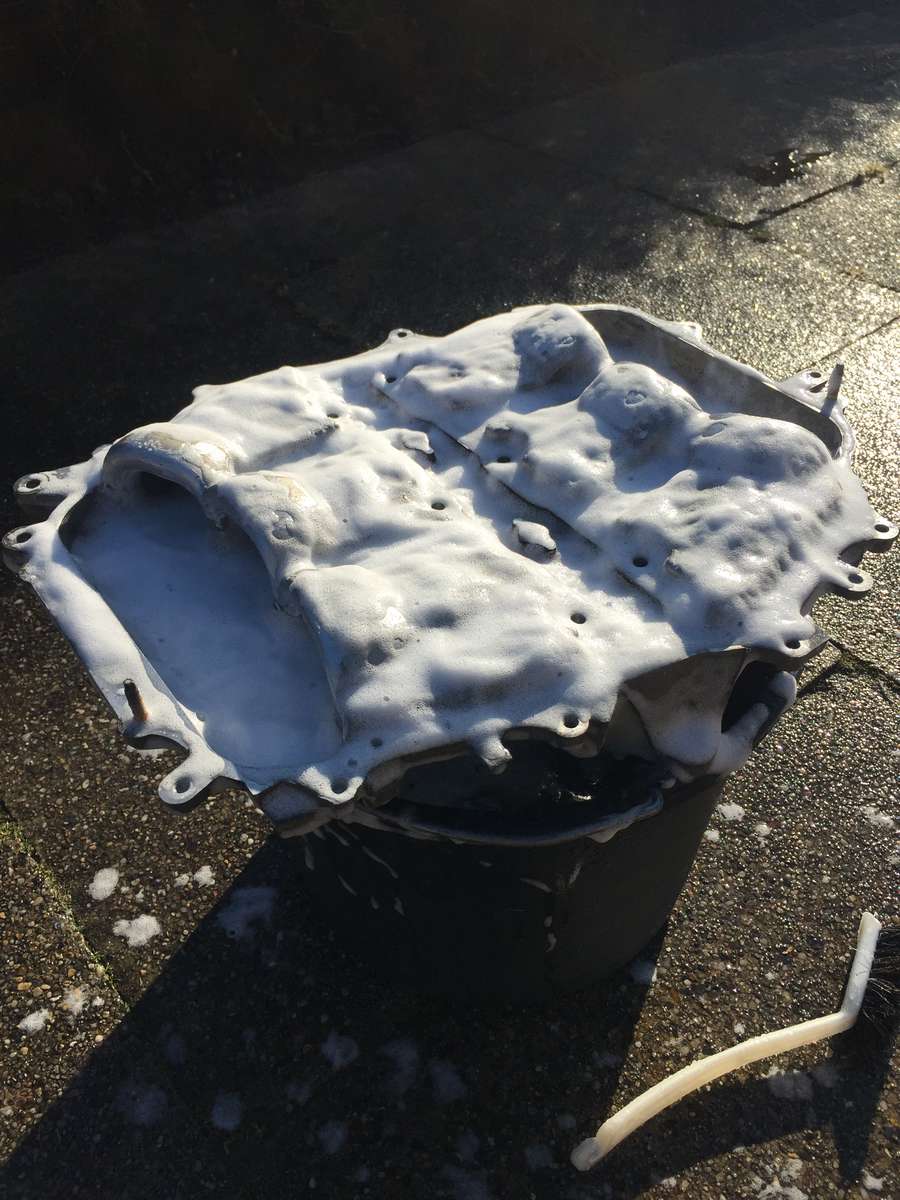
And Got the intake taken apart and washed from all the Oil and build up @*!#.
I also deborred the inside of the bottom half as it was really bad finished.
And a Quick acid wash and it's like new.
i had it apart and cleaned before fitting the turbokit, and allready there is alot of Oil and Black crap inside.
so I'll take it apart again later to see if the new catch tank system does a difference.
-
1
-
-
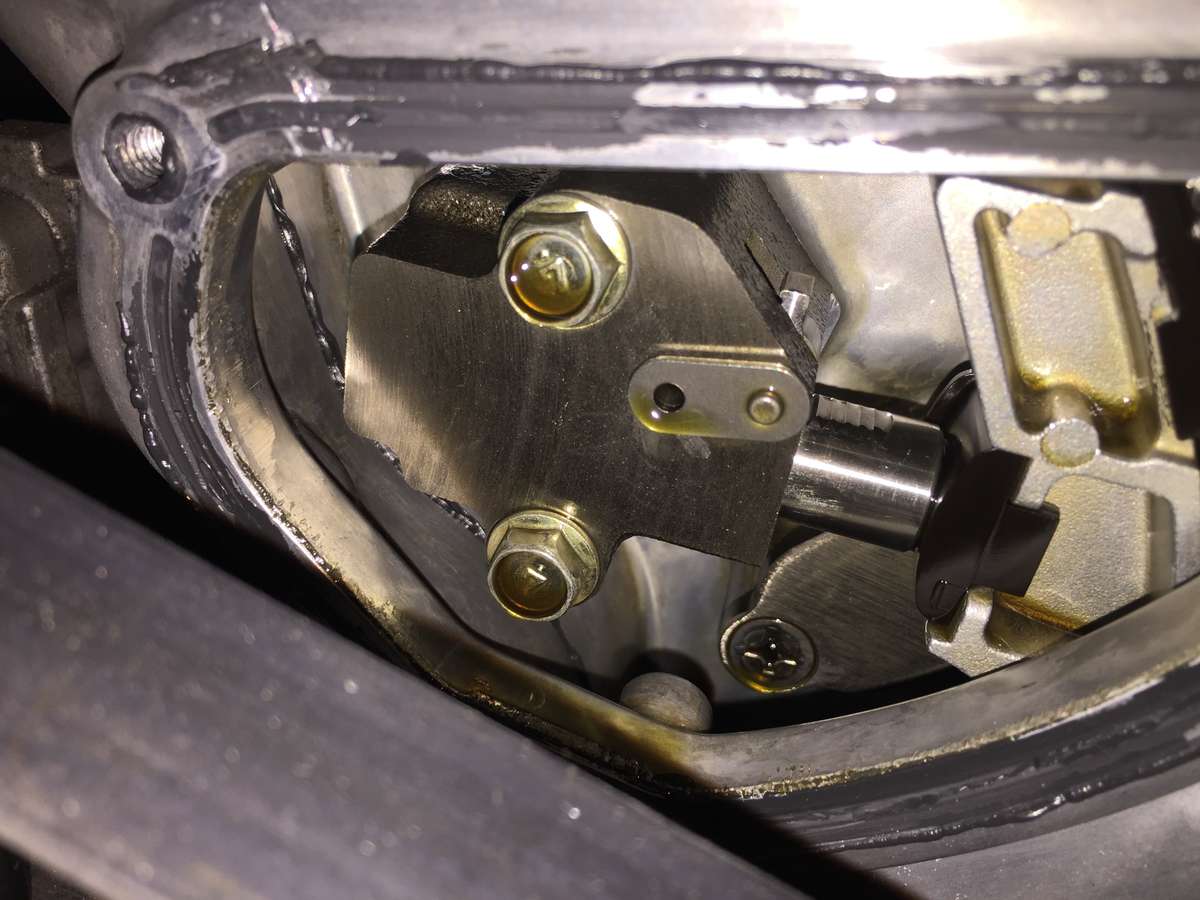
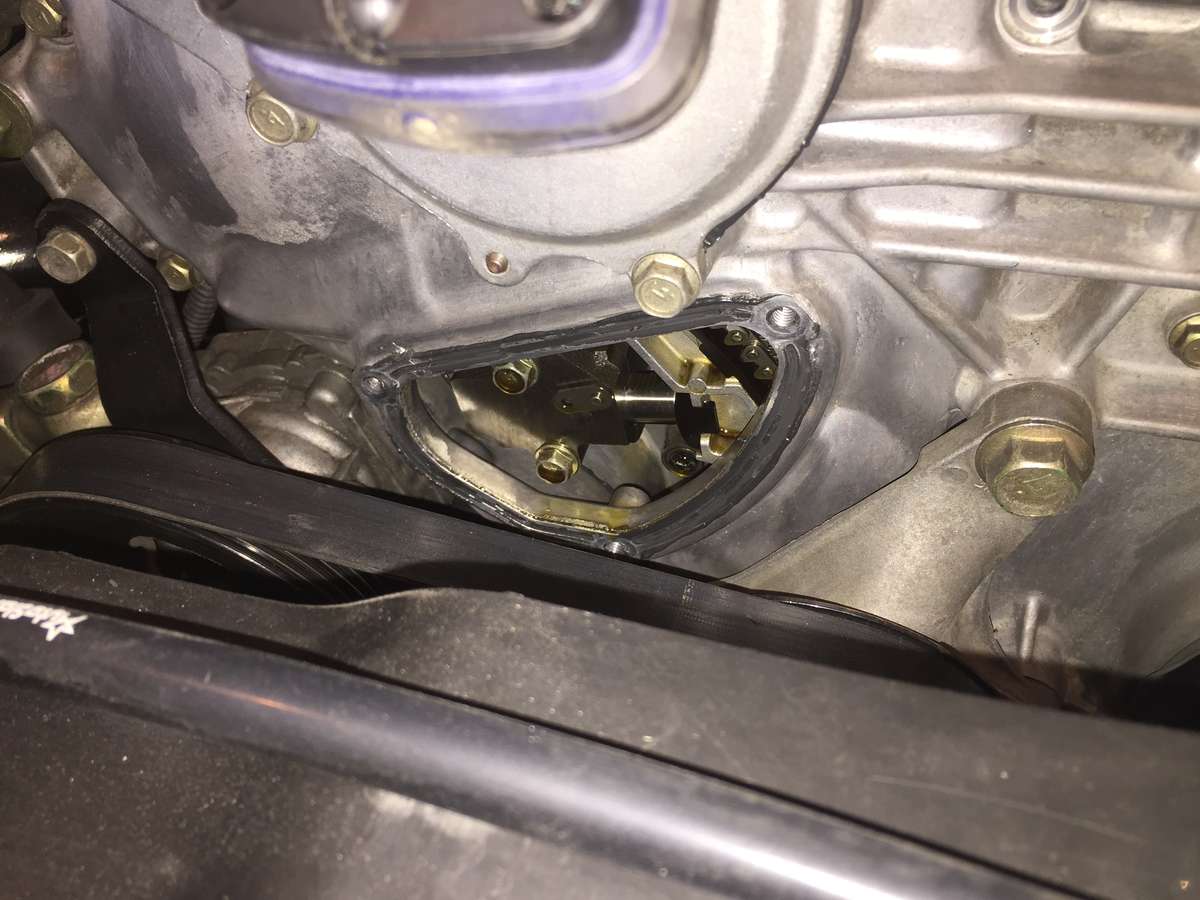
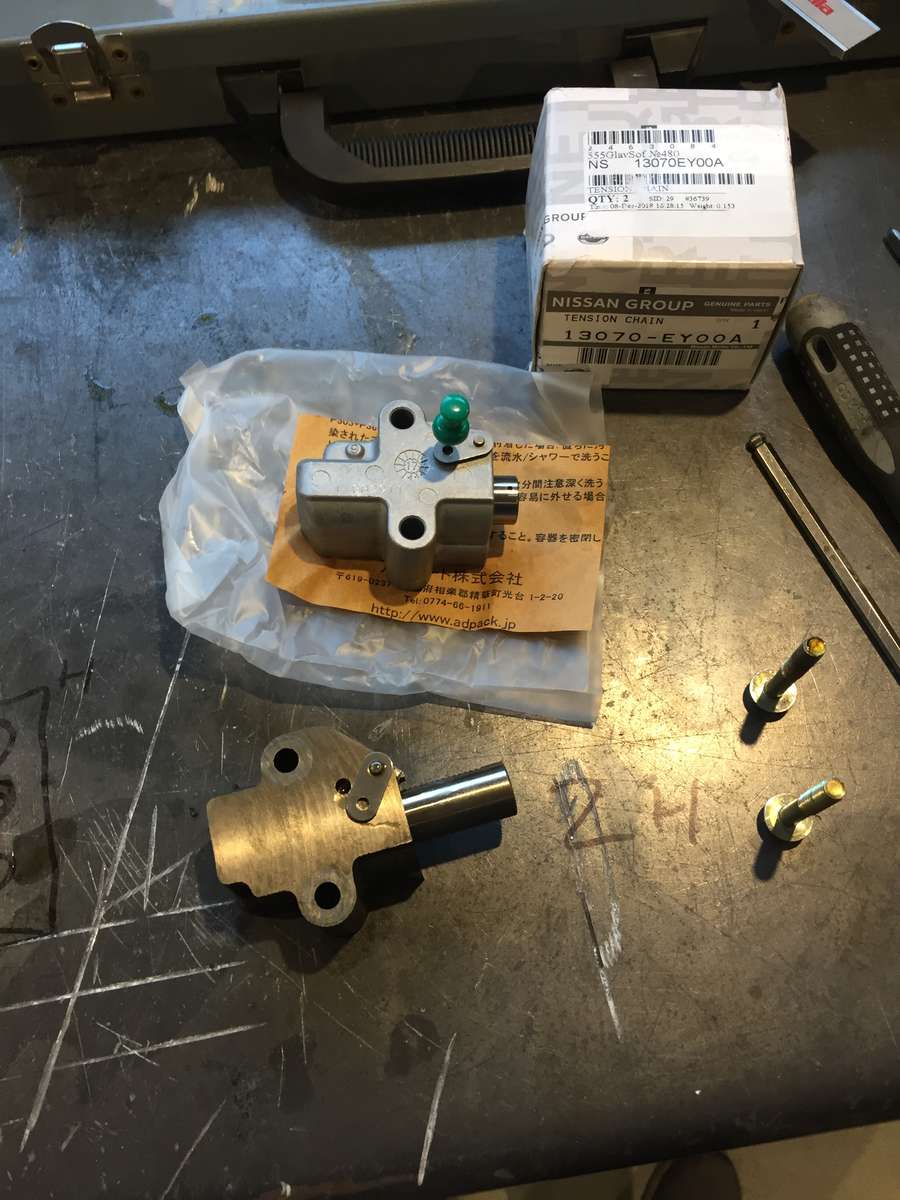
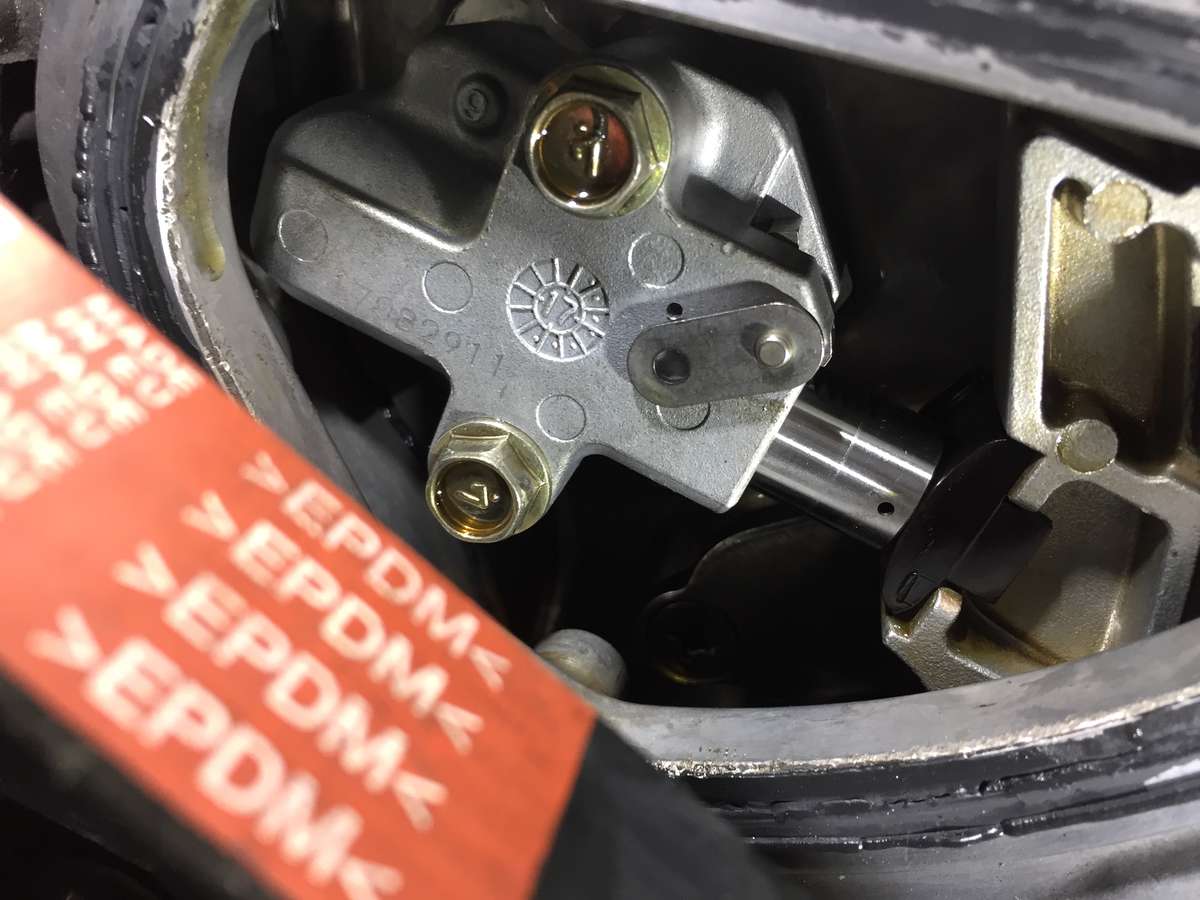
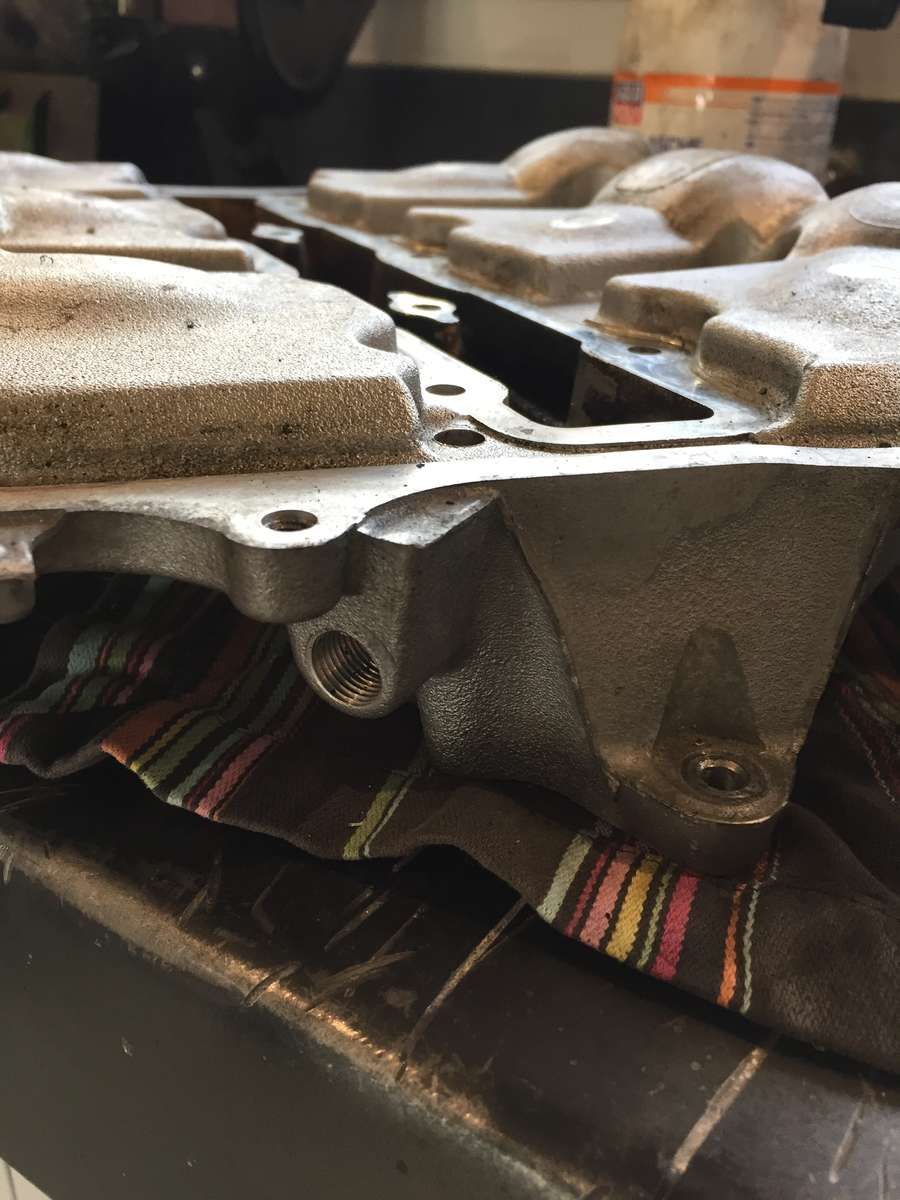
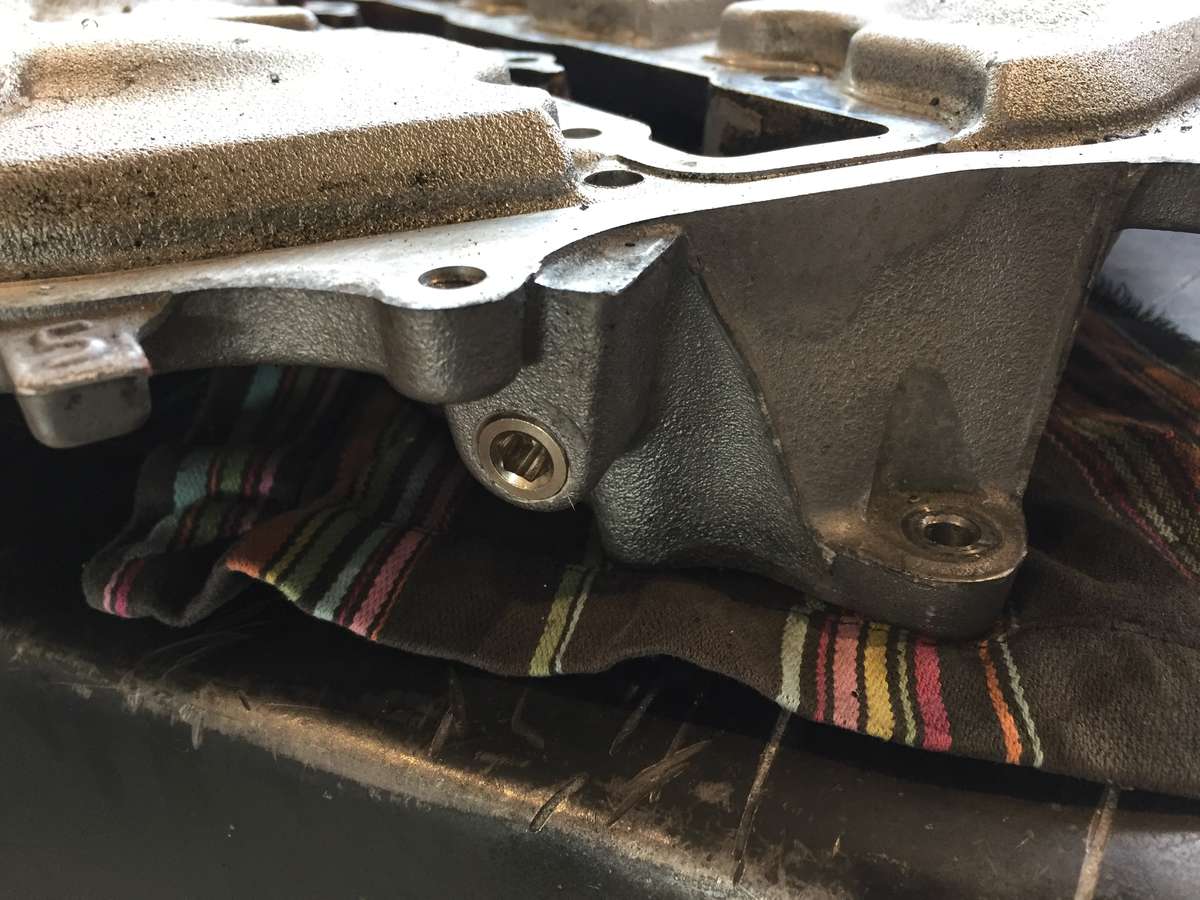
The main timing chain tensioner just Got here.
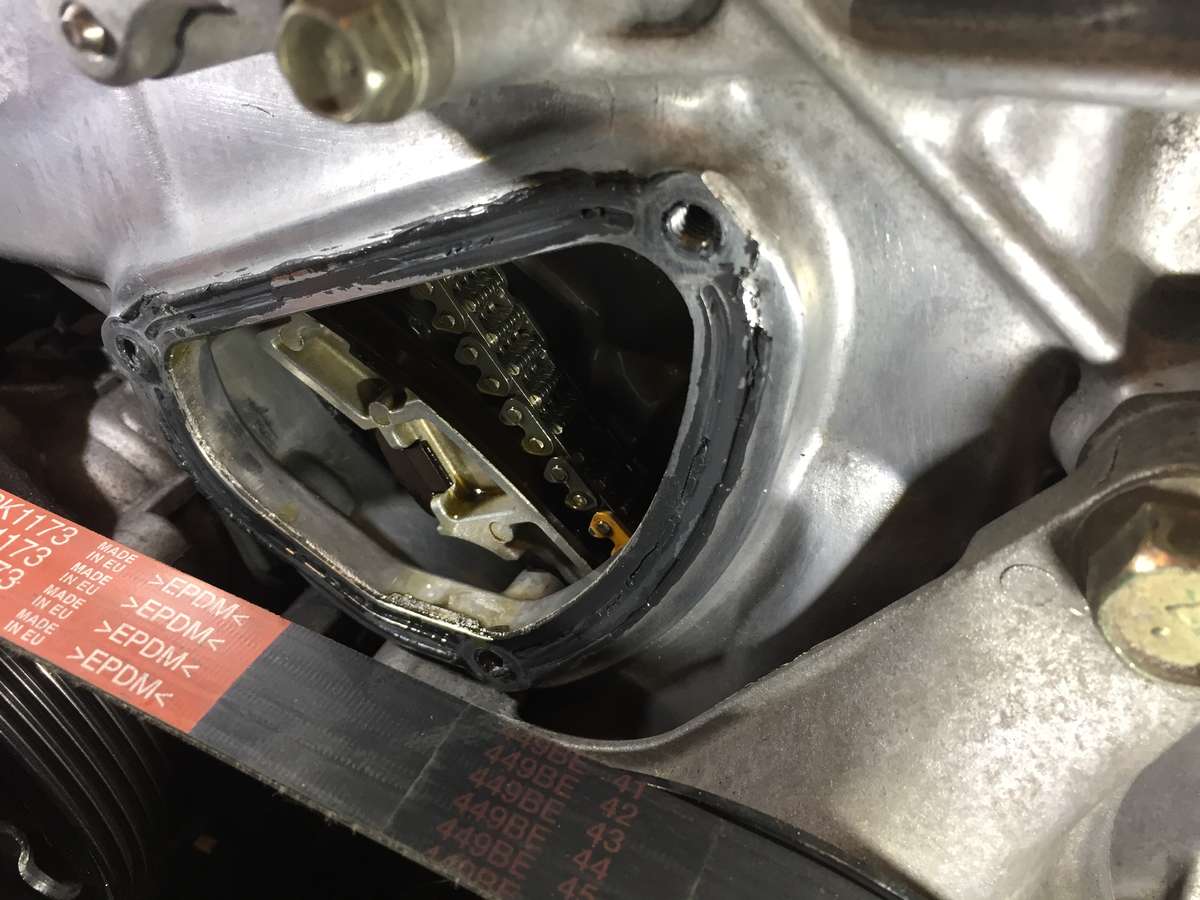
I turned the krank to TDC, to make sure the cams won't snap, and opened the service hole in the front cover over the tensioner.
everything looks fine, the guide looks fine and there is some tension on the tensioner, witch is no where near fully extended.
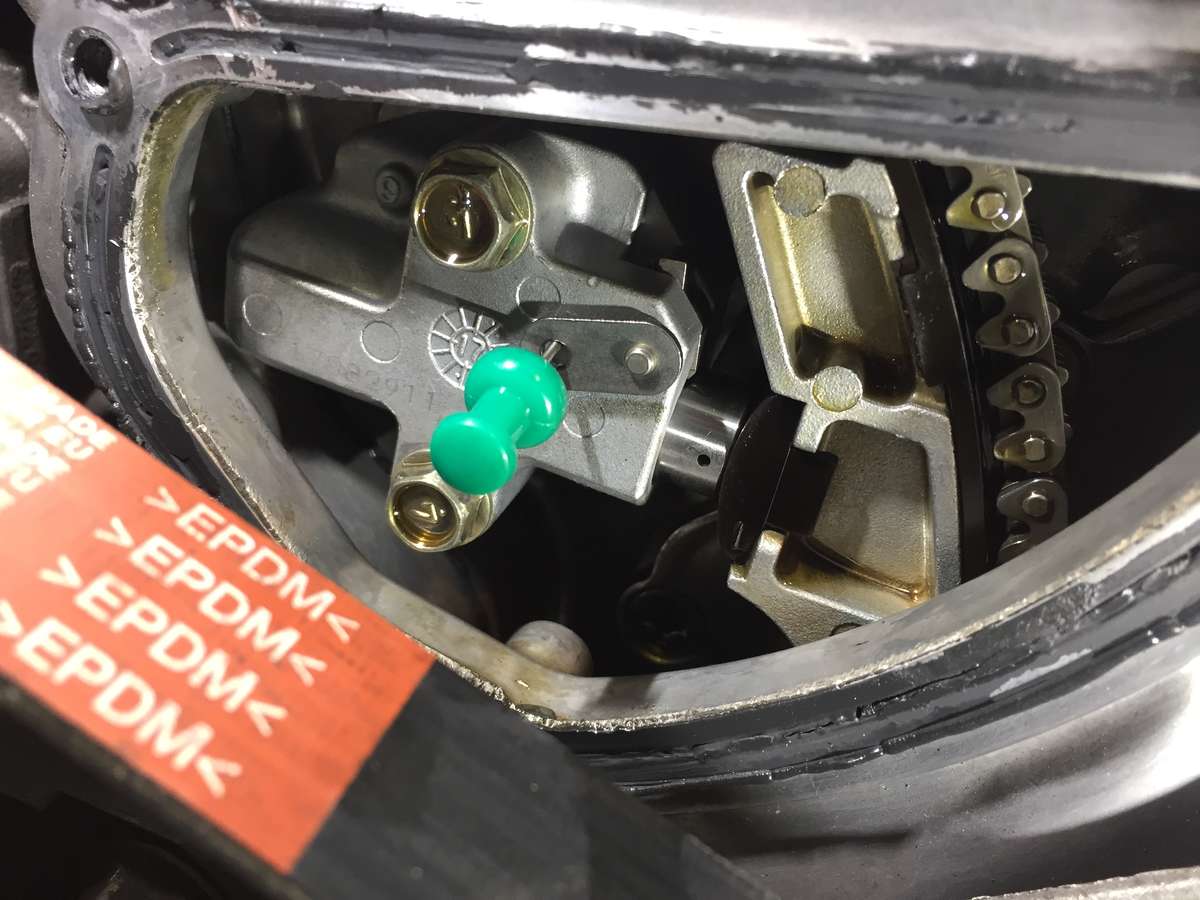
i went ahead and removed the old one, swapped in the new and pulled the pin, it tightent right back up. Then i spun the krank a few times by hand, and everything is fine.
If anything, I Would say that the new tensioner is a little bit more extended and puts a little more tension on the guide. I have no idea if that tranlates to a rattle free start.
Now i just need to clean and reaply the silicone gasket and then I'll fire it and see if it made a difference to the start rattle.
In all, about 30-45 min. From start to finish.
i'll have to get back with the result, as i have so much gooing on right now.
-
1
-
-
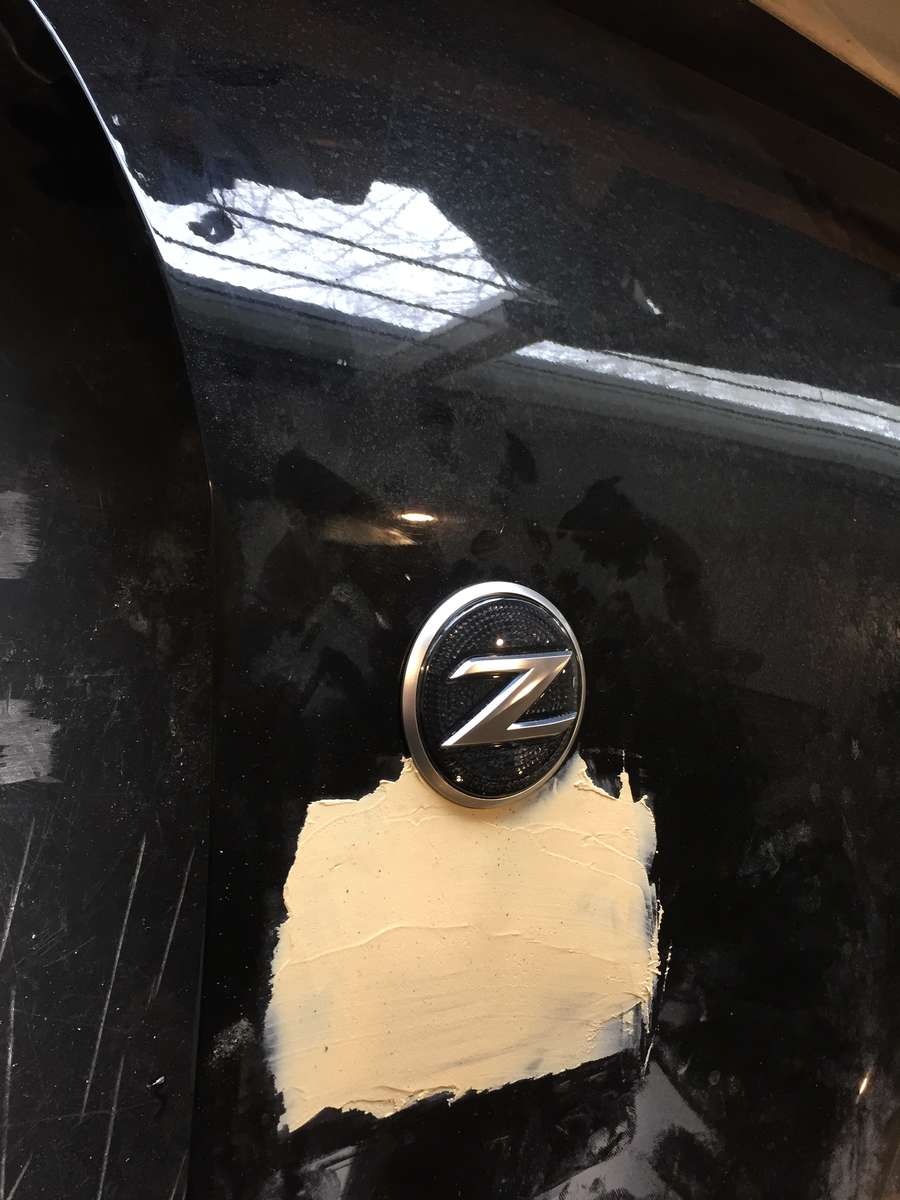
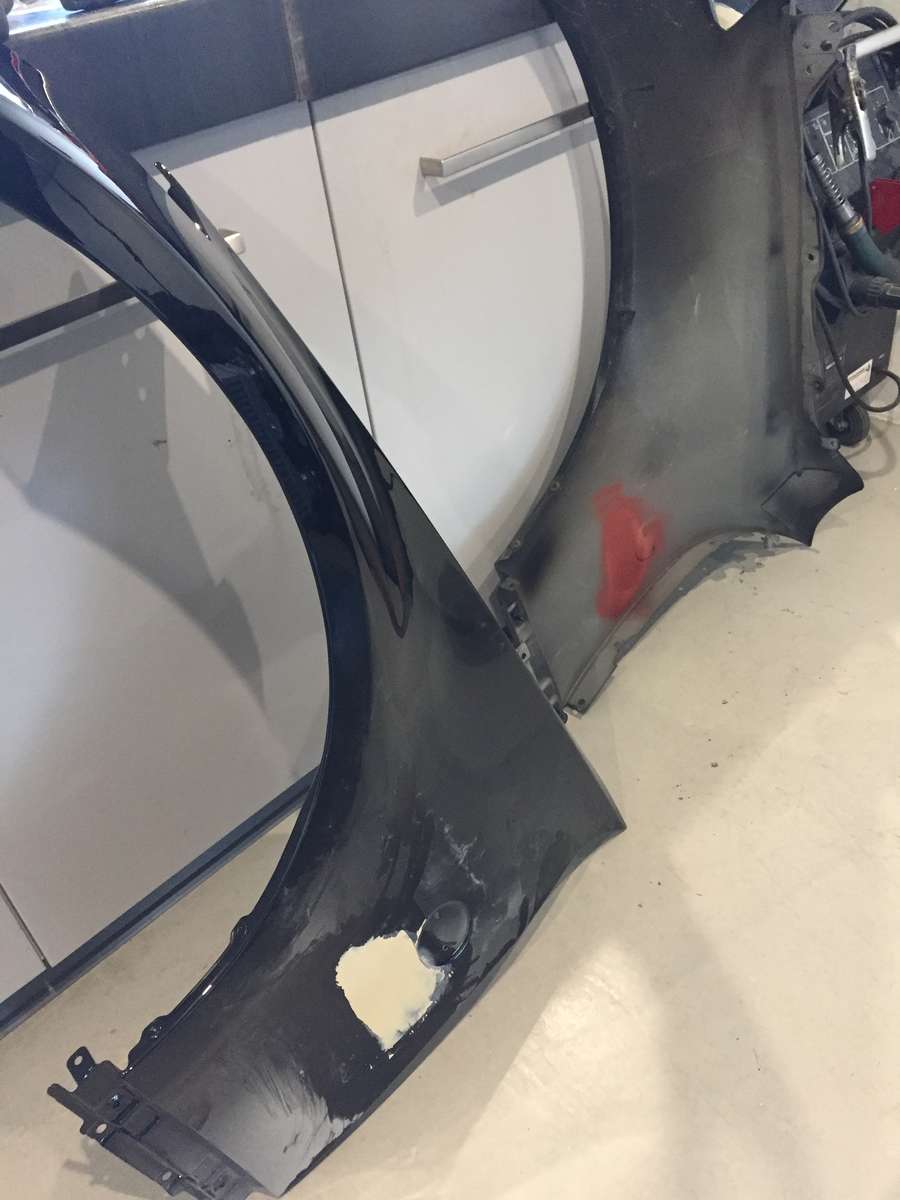
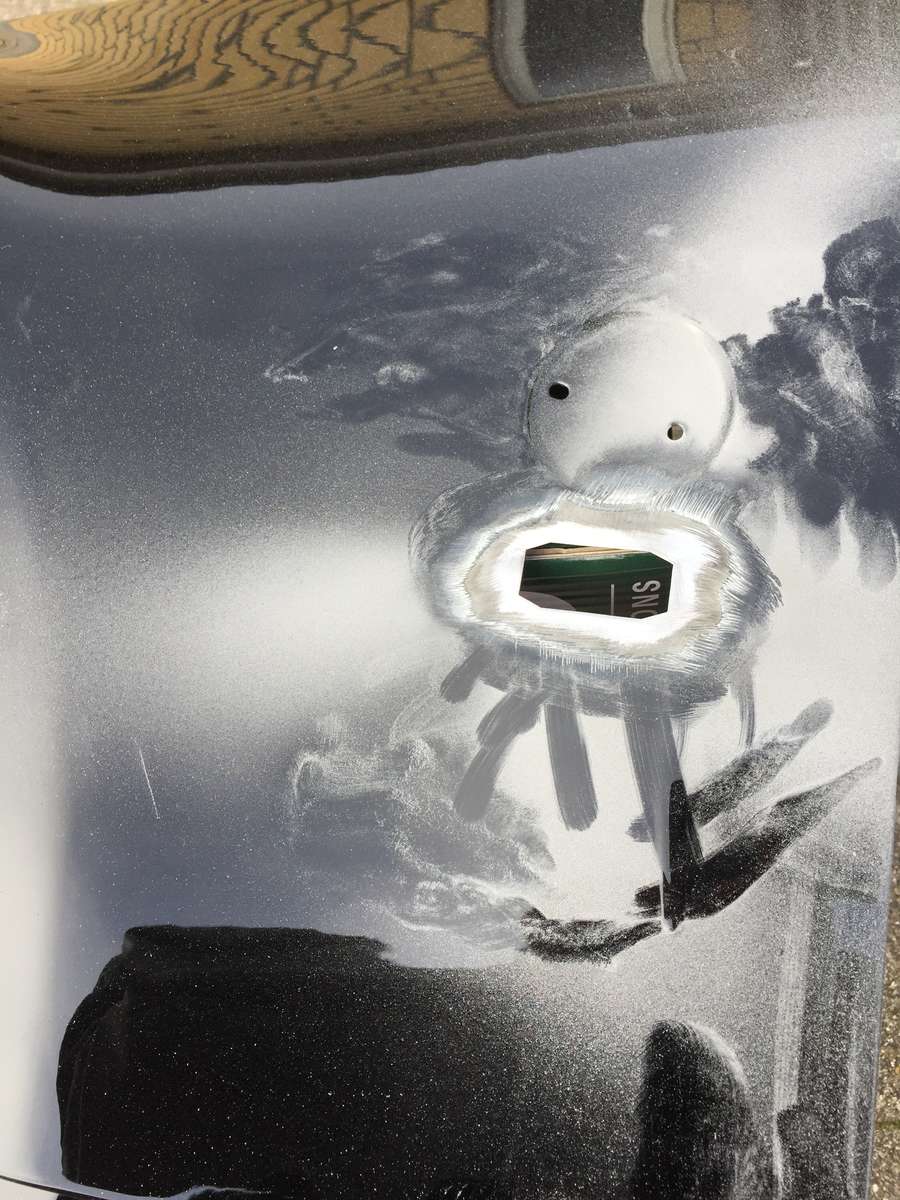
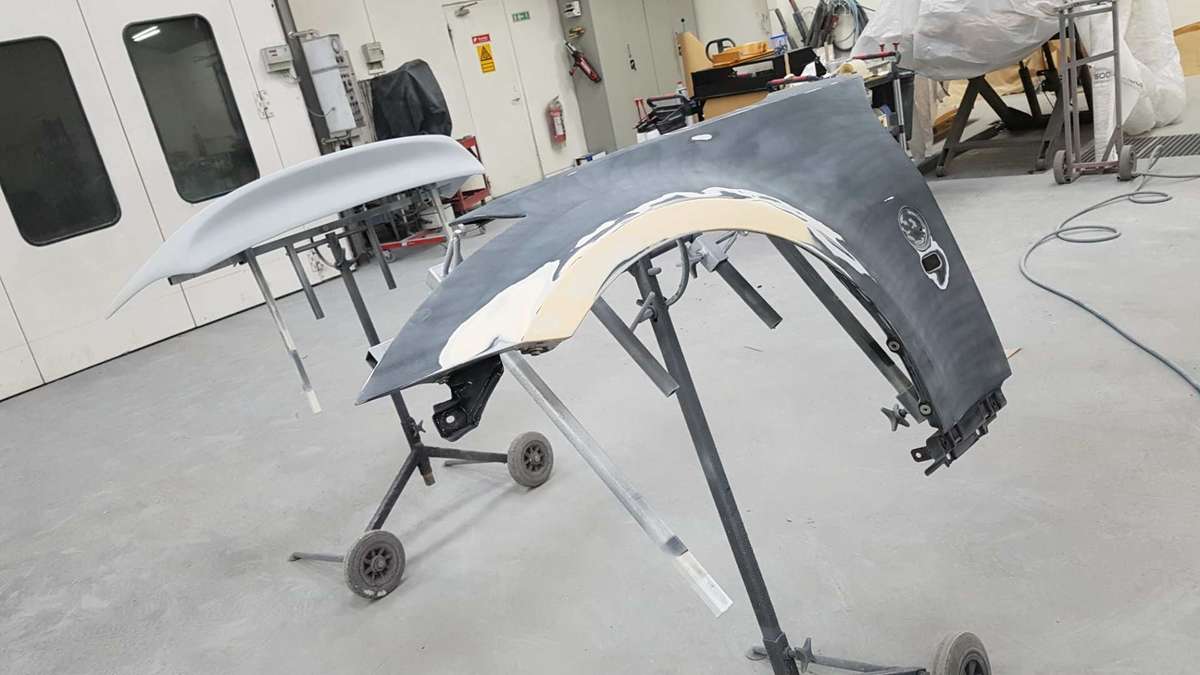
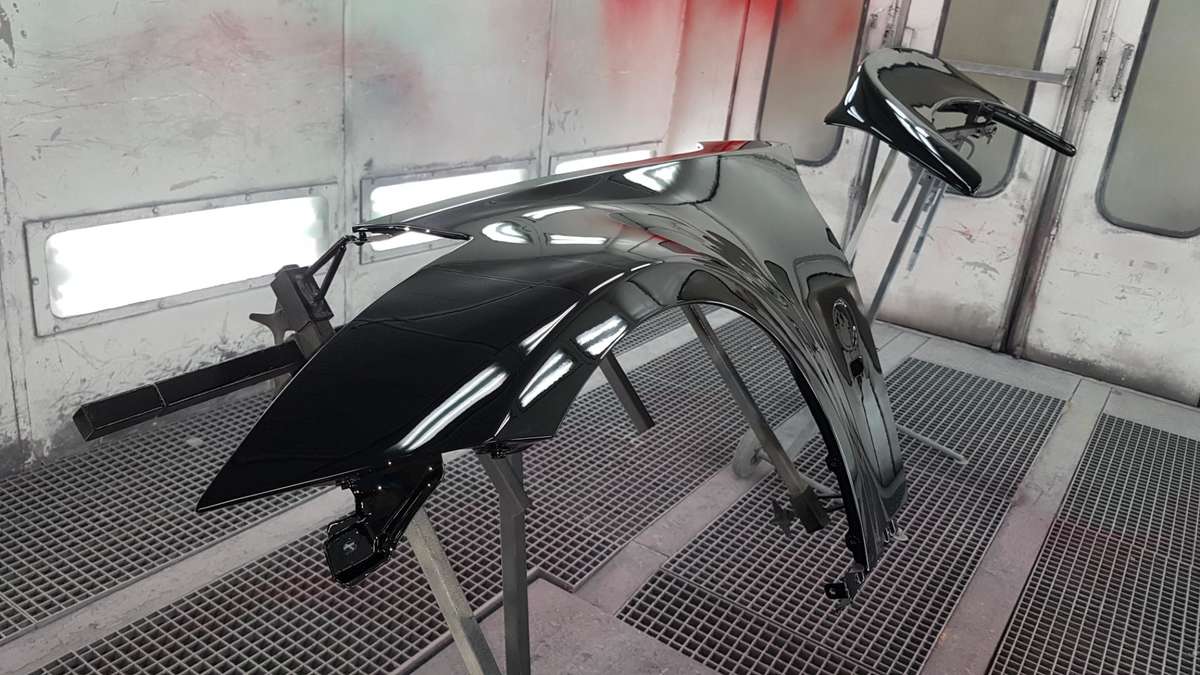
And two wings done.
now i need to cut holes for the 370z indicators
-
Also test fitting this thing and making brackets and so on while the wing cools down in between Welds and grinds....
-
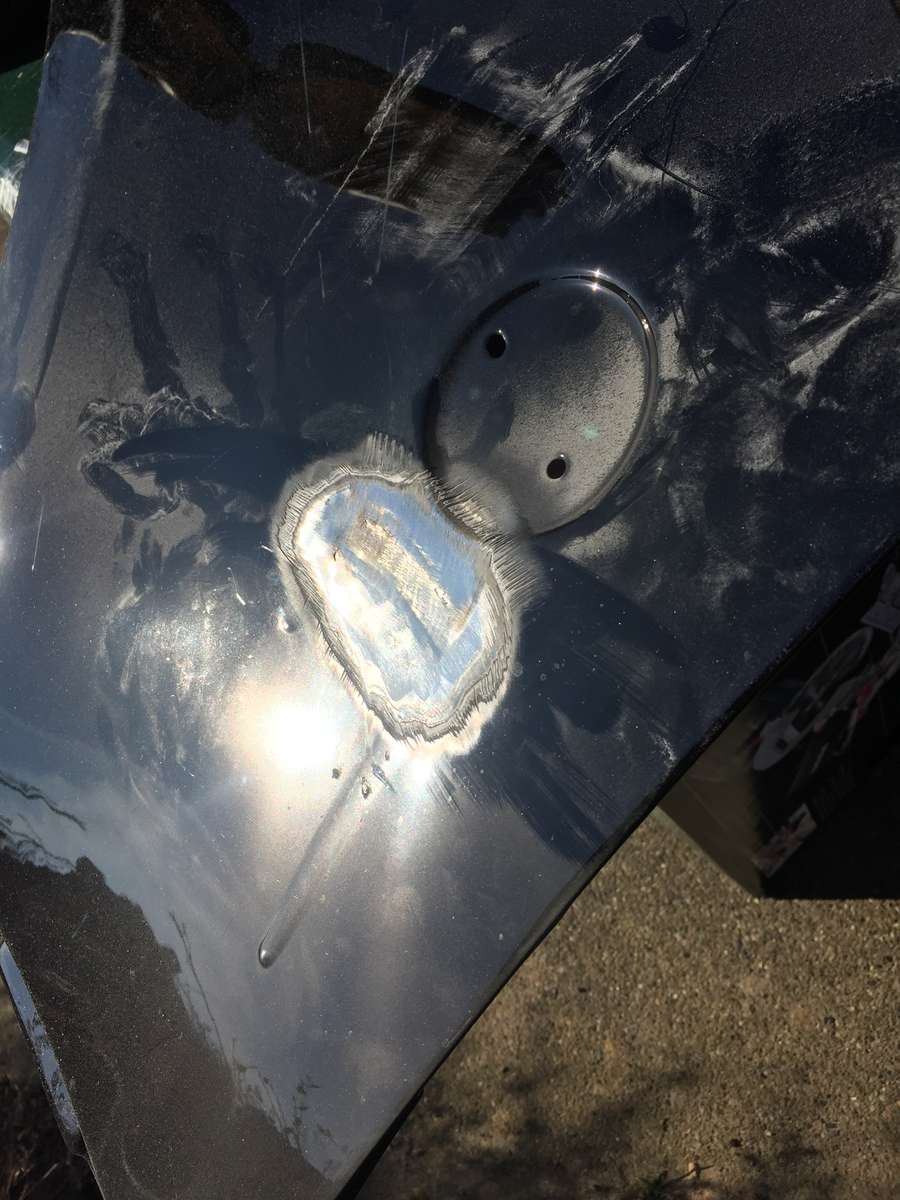
And plug made and ready for welding.
-
4 minutes ago, Jack94 said:
https://www.tarmacsportz.co.uk/350z-z33-nismo-v3-front-bumper-oem-nissan.html
Pricey, but I guess if you're after genuine/oem you kinda have to expect that

Thanks.
i allready wrote them for a lead time and shipping price, but no reply.
they are kinda hard to come by. But i like the look of it and the fitment of an oem part. Especially when bolting up to a car that sees some pretty high top speed...
-
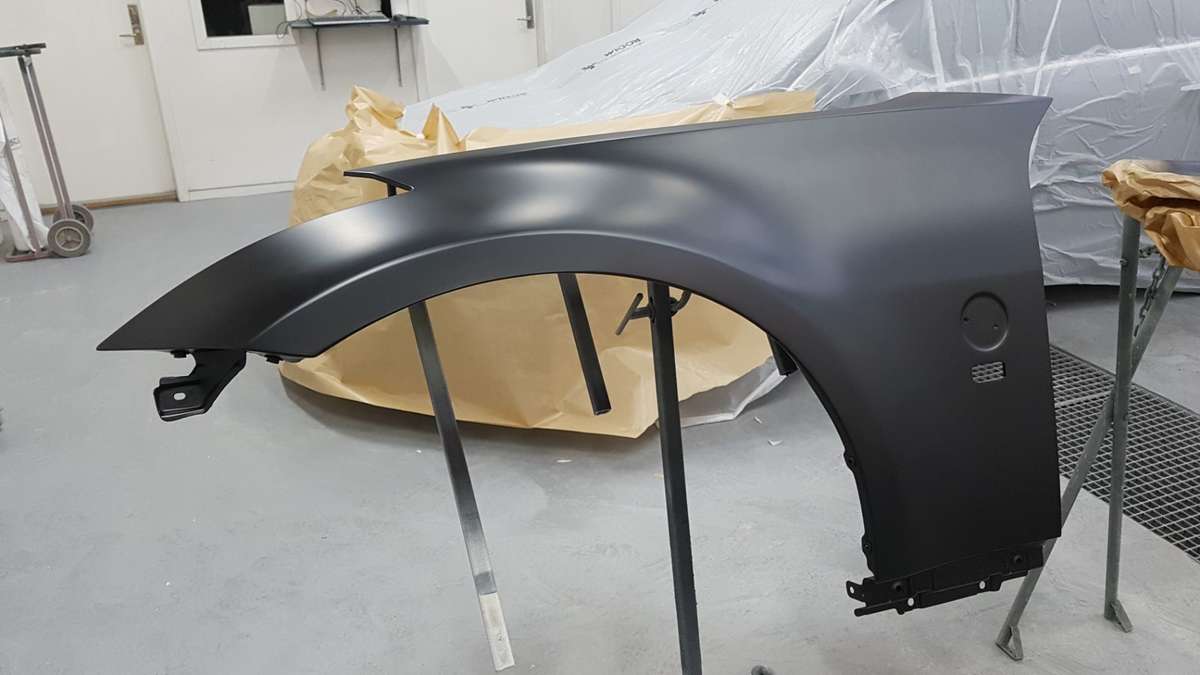
And alway Nice to cut into a freshly painted wing

-
11 hours ago, G1en@waxandshine said:
@ZMANALEX should have some used led rear lights.
I got my new replacement from clark motorsport.
You will have to check if they can post to you
Thank you. Great with a little help.
Also looking for a genuine nismo v3 front bumper... anyone Got a lead on one of those?
-
Pm send.
-
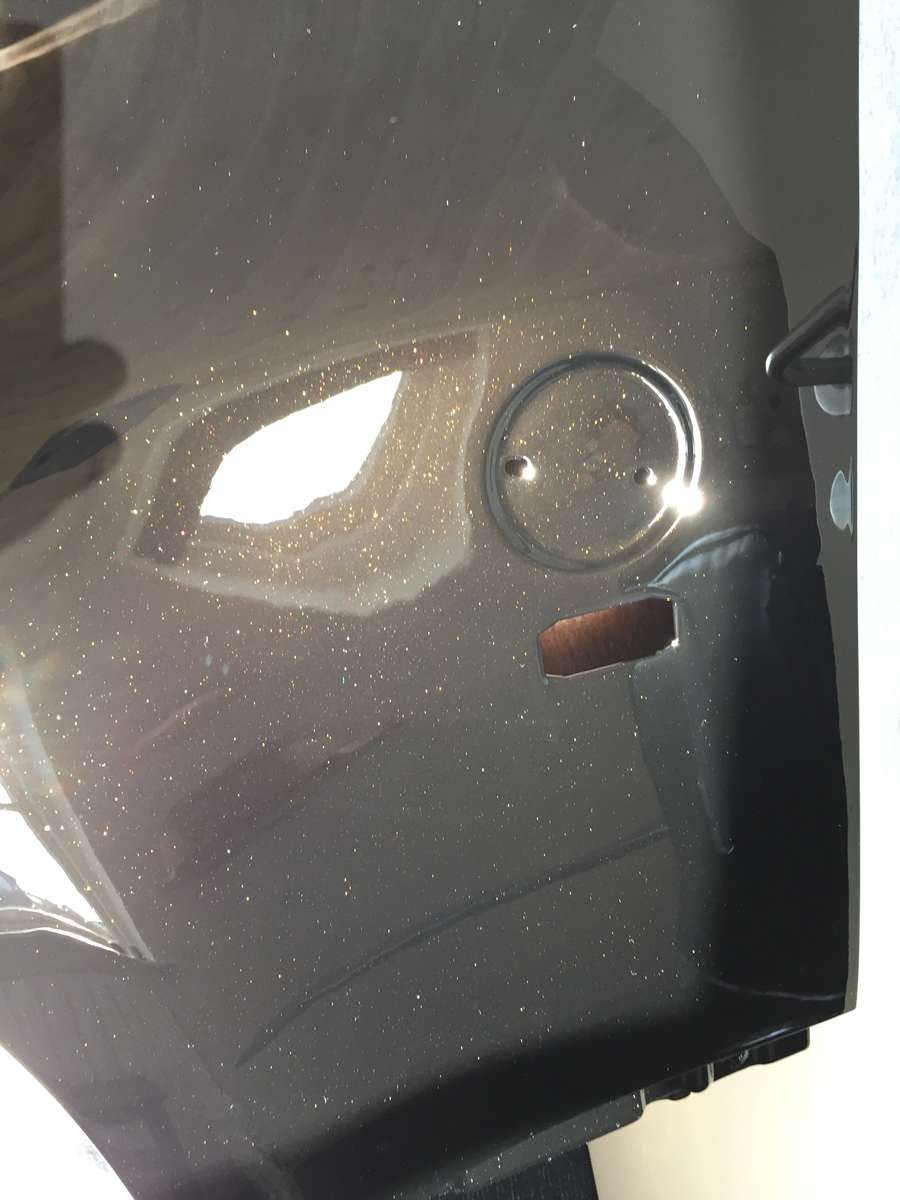
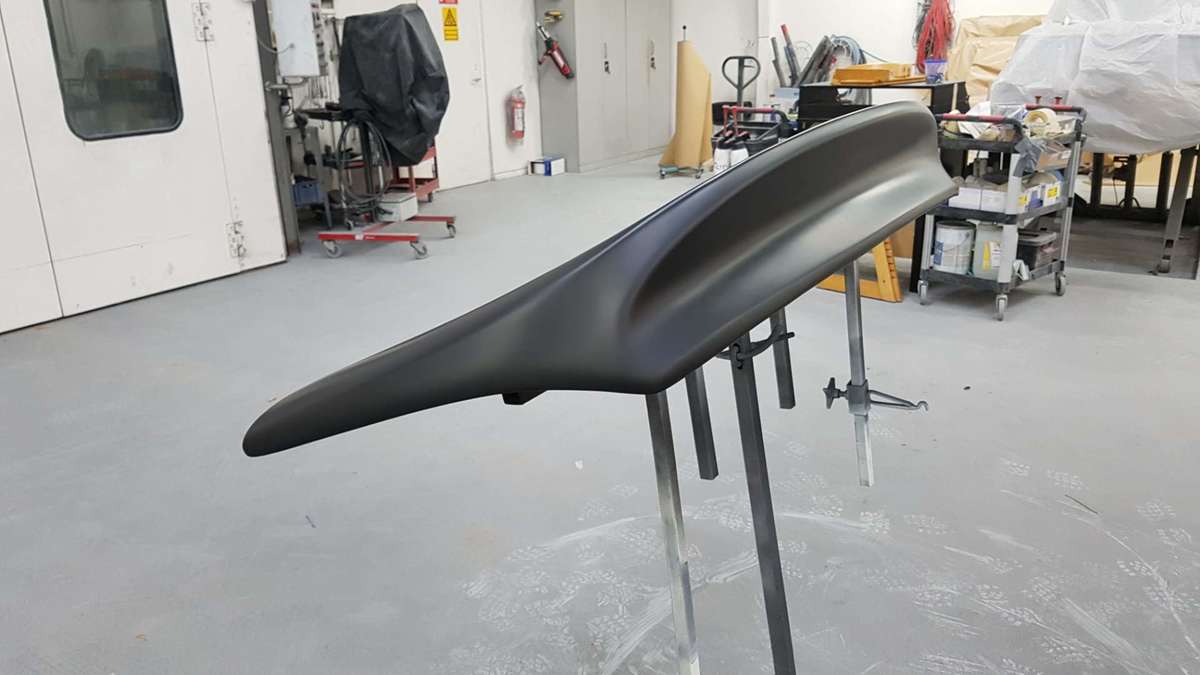
And the ings spoiler is on, and fits like a charm.
but the front wing was painted with another piece, and is now metallic

So that needs redoing....
Aaaaaand me being me, i'we decided to install 370z indicators in the wings. So I'll redo both front wings, cover up the Stock indicator holes and make holes that will fit the 370z indicators. And add alot more parts to paint, sideskirts, a piller trim etc....

is there anybody that has any leads on a pair of 350z facelift led rear lights.?
-
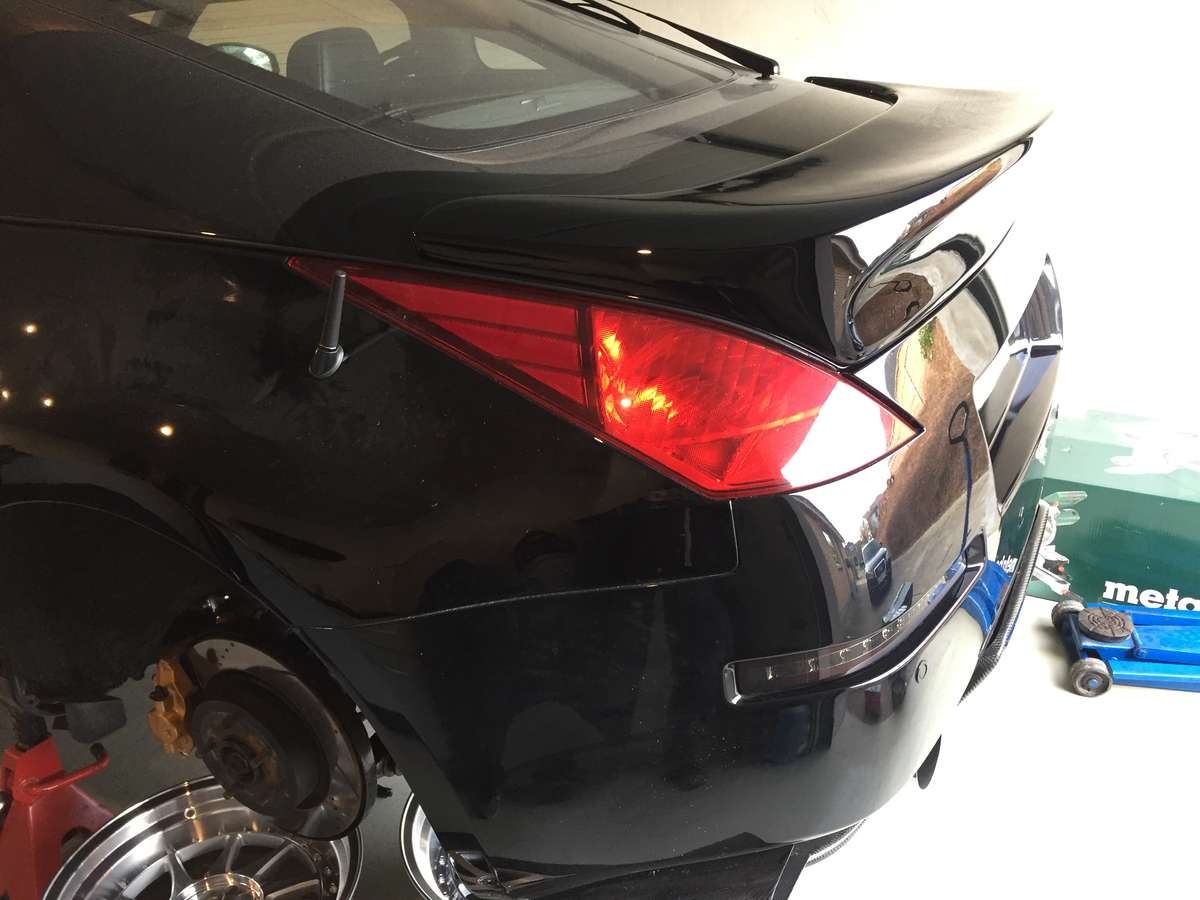
And my painter have been busy the last couple of days. Hoping for this to be dry and buffed by sunday.
can't wait to get the ings spoiler on the car.
-
And with everything Else going on, this showed up.
I'm not sure about the hood clearence, but the plan is to fit it there.
i'm thinking about putting a whole kit together when done with the breather setup and putting it up for sale.
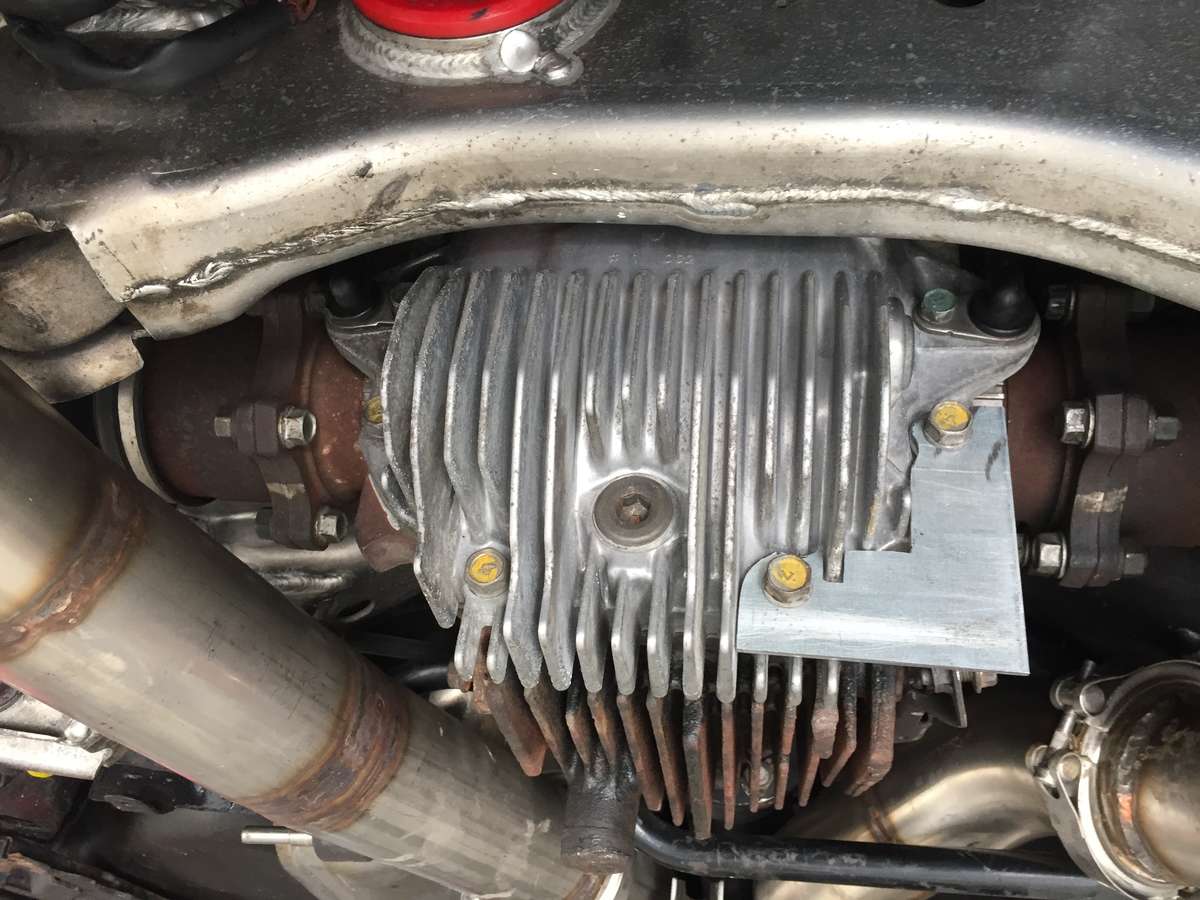
also started on the diff brace.
i'm also doing something a little diffrent here, and when done, i'm gonna do some R&D with it and maybe also make a complete kit here aswell.
-
2
-
-
And getting started with the breather system.
loosing the Stock vacum evac system i need to do away with the vacum port in the lower intake manifold, and decided to just thread it and put a plug in it.
That will also do away with the sludge/Oil fumes and other gunk going back into the engine, and beeing FI the blow by will evac the sump. I'm gonna have to see how, if any, it will smell.
Also, the pcv delte AN fitting, catch tank and Lines is on there way from the States.
-
2 hours ago, tony420z said:
That's one job i hate doing getting the front cover off so many bits in the way.
Hope you get it fixed easily.
Me 2.
And especially after just having put it all back together
i'm gonna have to see how much that needs to come off when i get the new tensioner. I had decided on not wanting to spend more time on it, but that rattle drives me crazy when everything else is beginning to be so good.
Then besides putting the painted parts back together, i Think the only thing left on the list is catch tank setup, rear diff brace, alignment, chain tensioner, M/T tyres and getting my worn leather seats refreshed.... and maybe... just maybe, cutting my exhaust for the fourth time to quiet it more down
and knowing myself, I'll probally throw a few more things in the mix before it's spring.
-
1
-
-
i have had a slight chain rattle on cold start ever since i Got the car. I replaced the two top chain tensioners when i did my worn cam follower. So i know there good.
i never replaced the main tensioner, and even thoug it didn't Seem to have slag, i'we been Reading about the problem, and many have had a "good" main tensioner replaced, and the problem was solved. So went ahead and ordered a new one. 41£ from Nissan, and I'll go ahead and change it and see if it cures my start up rattle.
-
And found some pcv valve an fittings.
cjm had them. @ 100£ for two shipped..

SATIN SILVER 350Z 'Z' EMBLEMS
in 350Z & 370Z Z Emblems Accessories Sales
Posted
Hi.
i'll grab one please.