


Ortega_9
-
Posts
449 -
Joined
-
Last visited
Content Type
Profiles
Forums
Events
Gallery
Store
Posts posted by Ortega_9
-
-
Can't do 20£ Sorry.
postage alone from Denmark cost med 25£.
And thats also why they are in km/h.
-
25 minutes ago, andybp said:
Damn I hate bodywork

Amen!
there's something about taking a grinder to a shiny car....

-
AAAAANNDD already fed up with the noise, so just ordered 2x 200 cell catalytic converters to go on.
also the aircon system busted a hose this morning with a HUGE hiss and steam/gas cloud to go with it... lovely.
-
1 minute ago, andybp said:
Maybe I need to stop ignoring mine

")
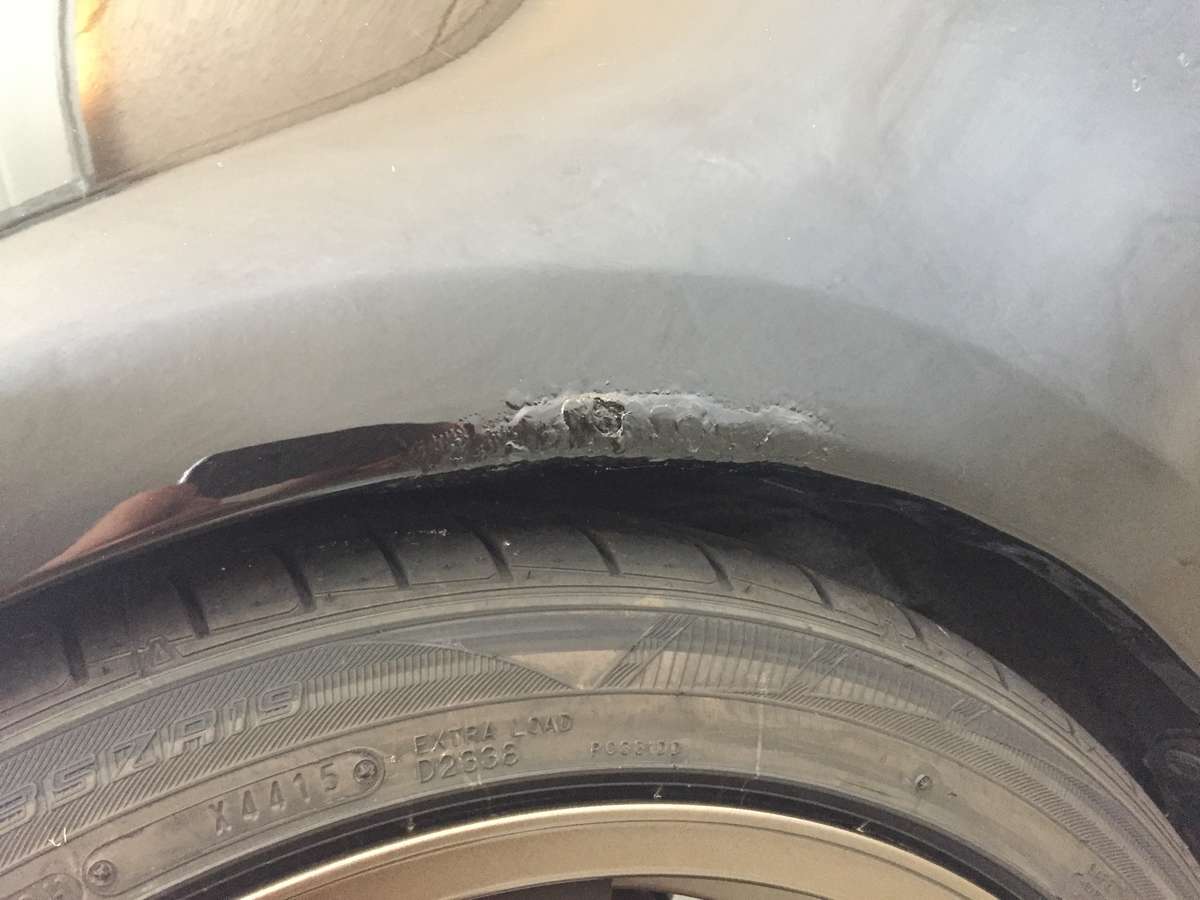
I was suprised how bad it was.... thought it was a bad Stonechip that just needed to be Ground down and maybe tinned and painted. But it was pretty rotten underneth.
-
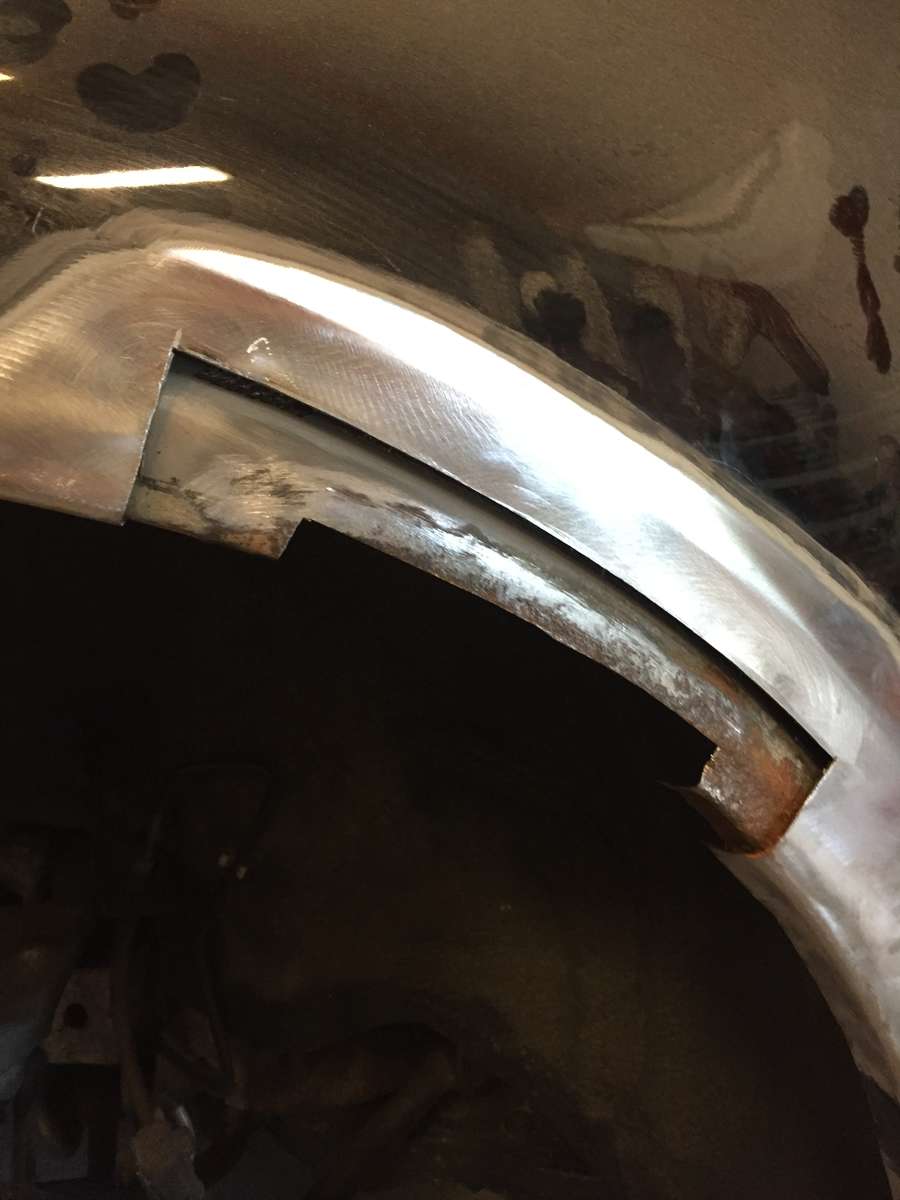
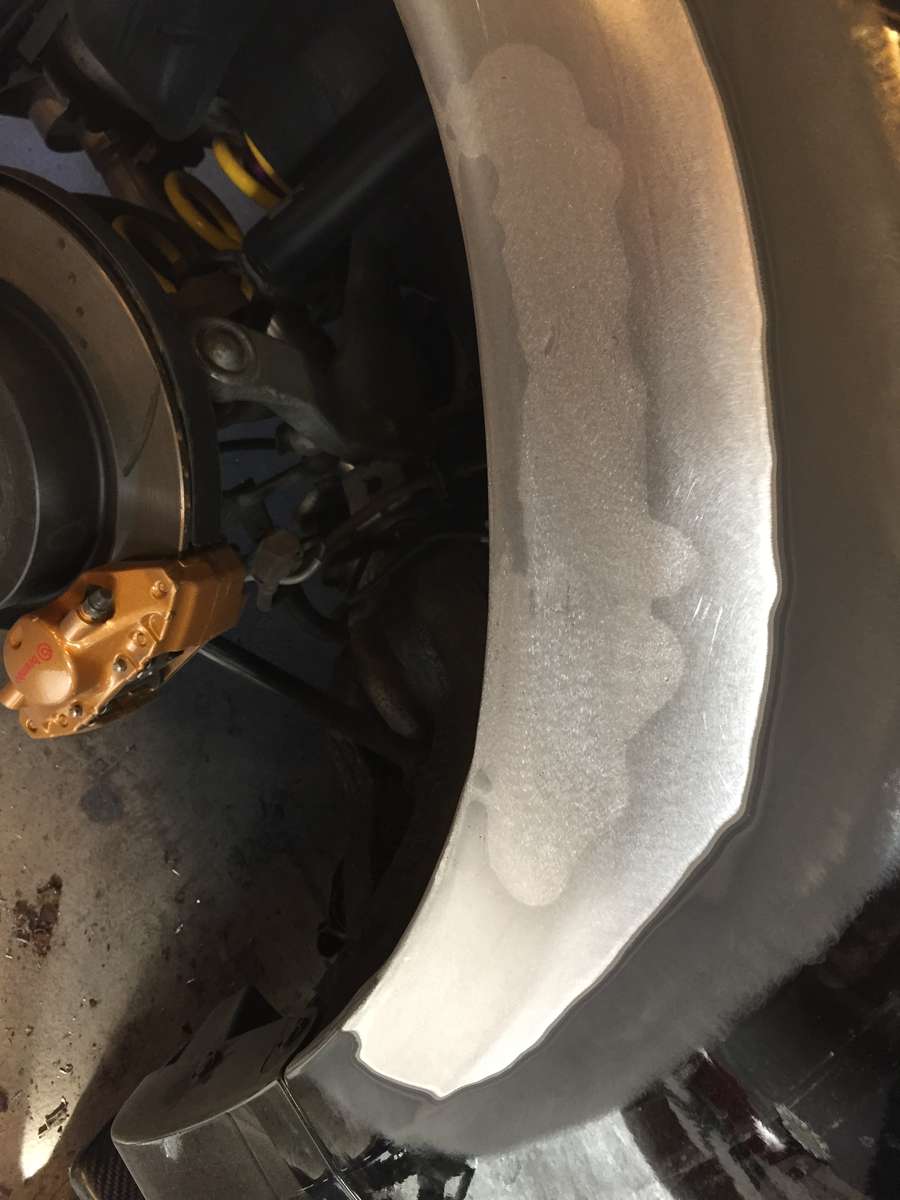
Just took my freshly build car and decided that i wanted the rust in the rear arch gone. So put a grinder to it to see how bad it was....
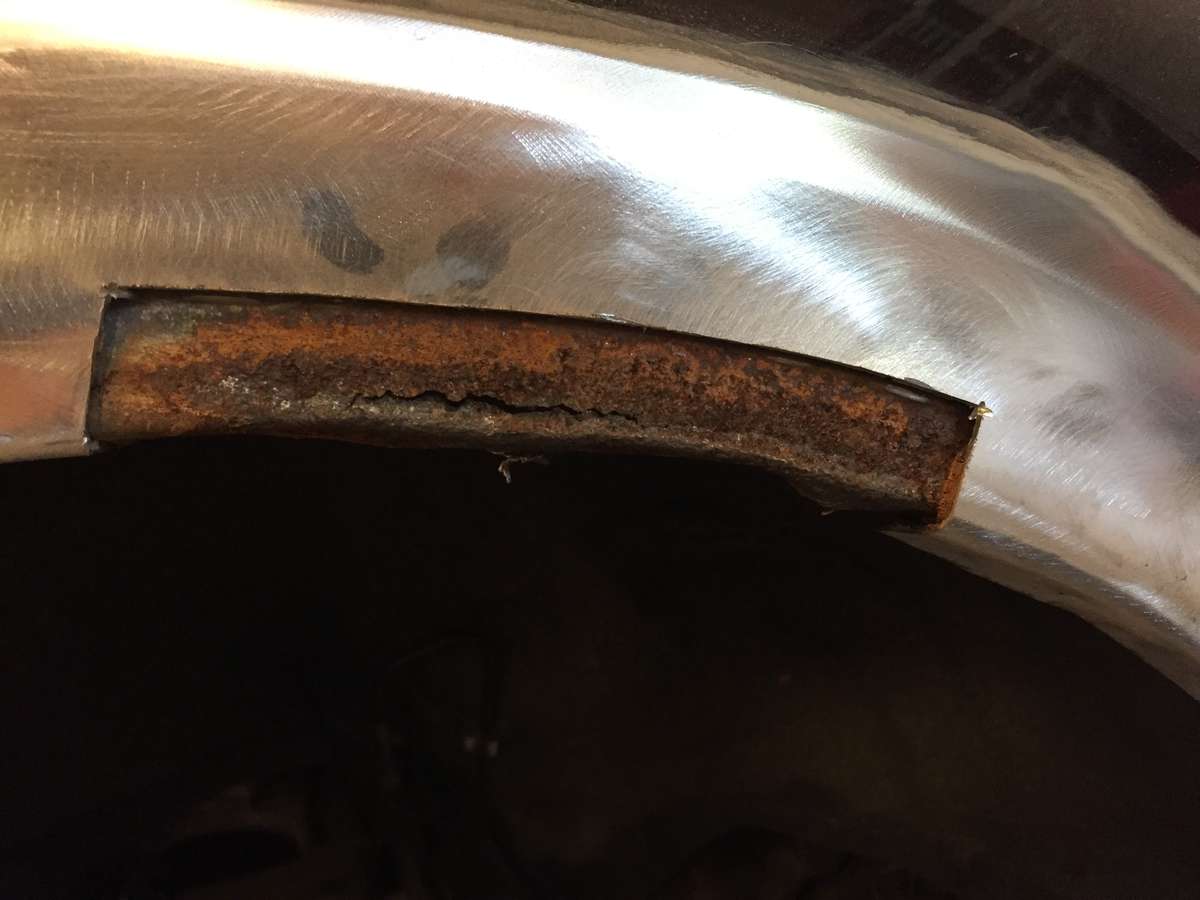
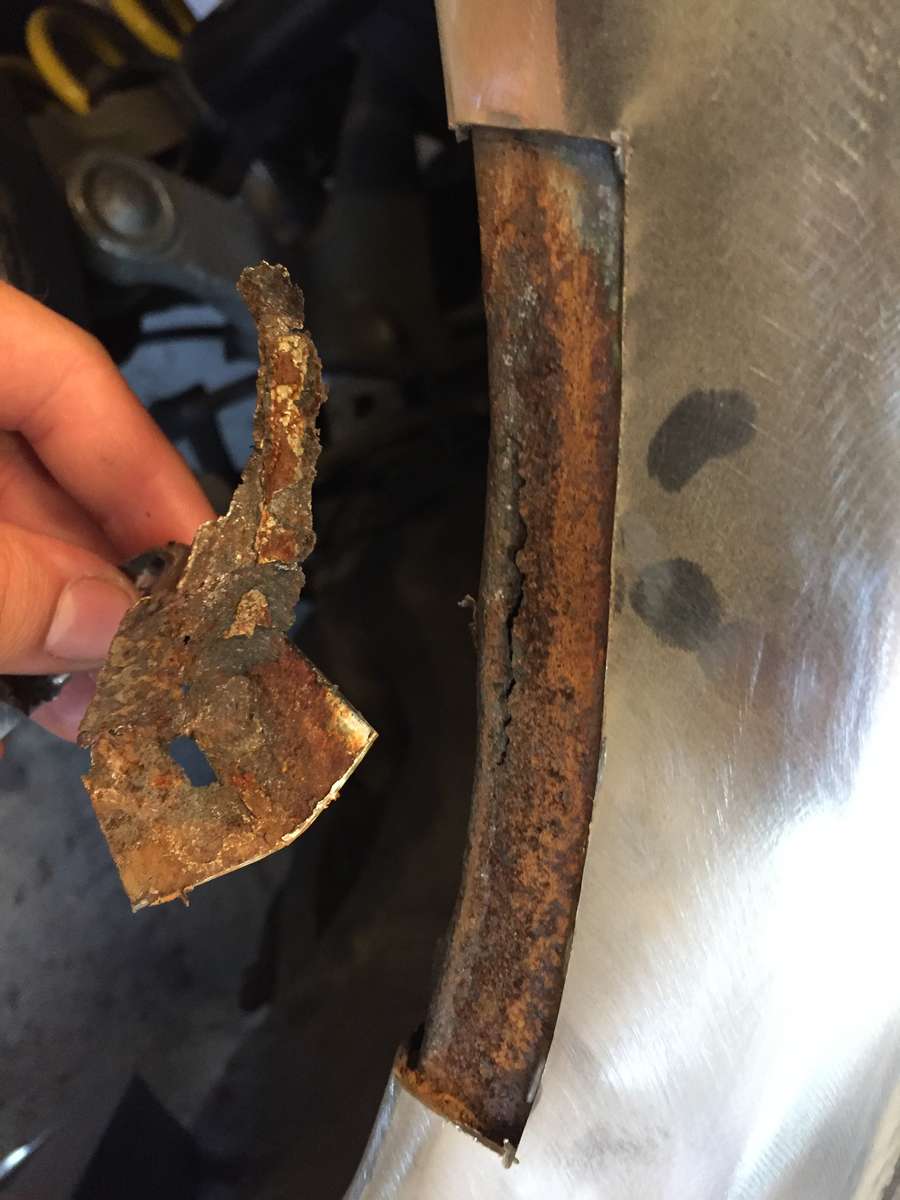
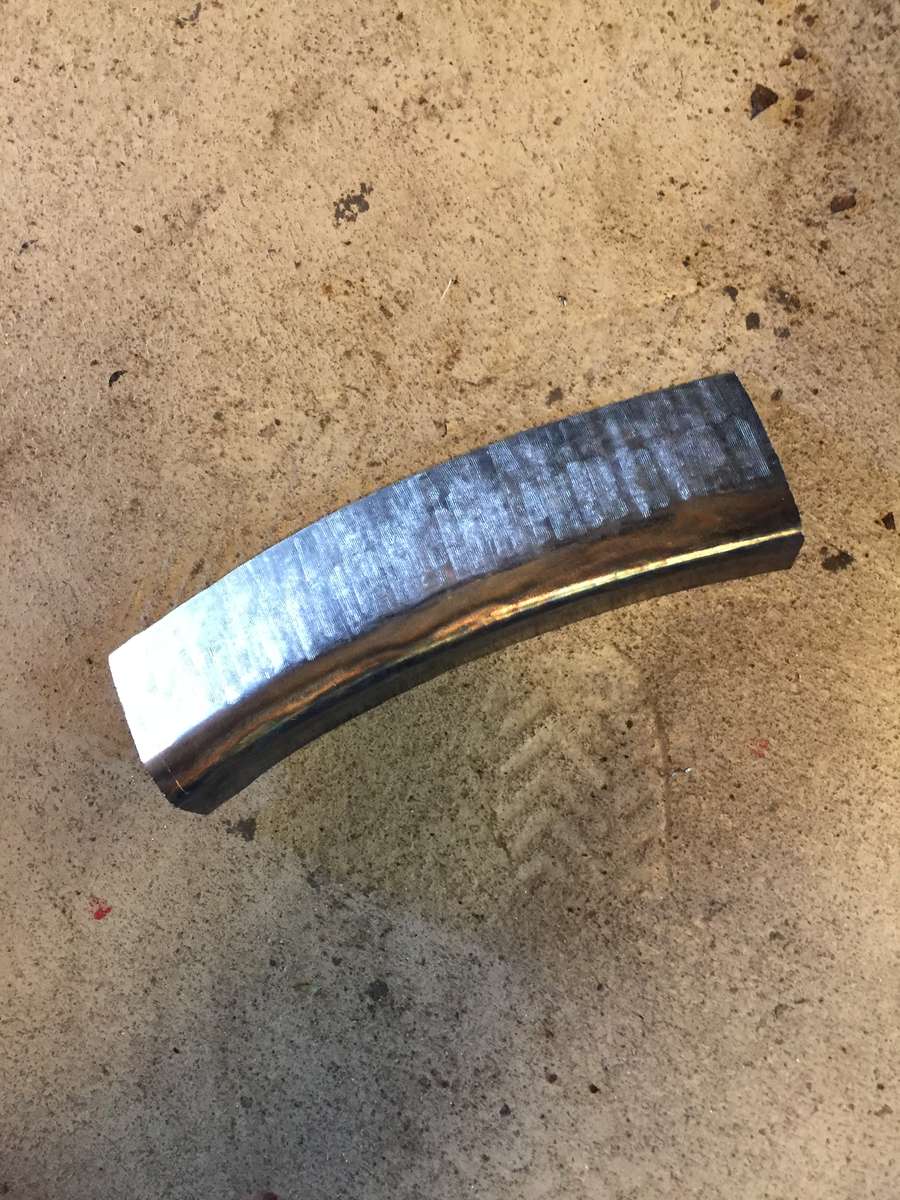
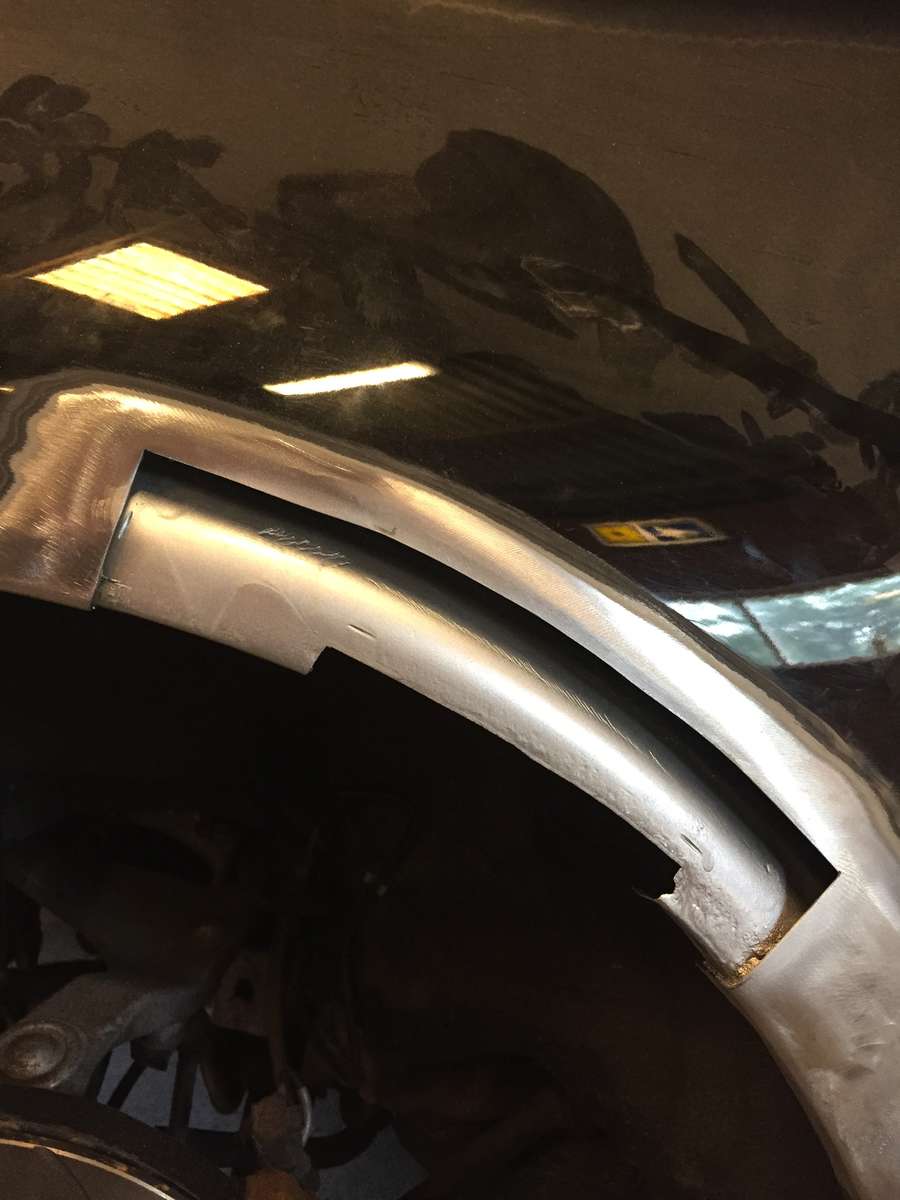
and it was a bit worse than i had hoped for. It seems that the 2 layers of metal had opened between the spotwelds and held water. So it had corroded from the inside, and ran down between the metal, so bad that the outside was only the tip of the iceberg, and we ended up cutting a 10-12 inch piece out and had to make a new one from scratch.
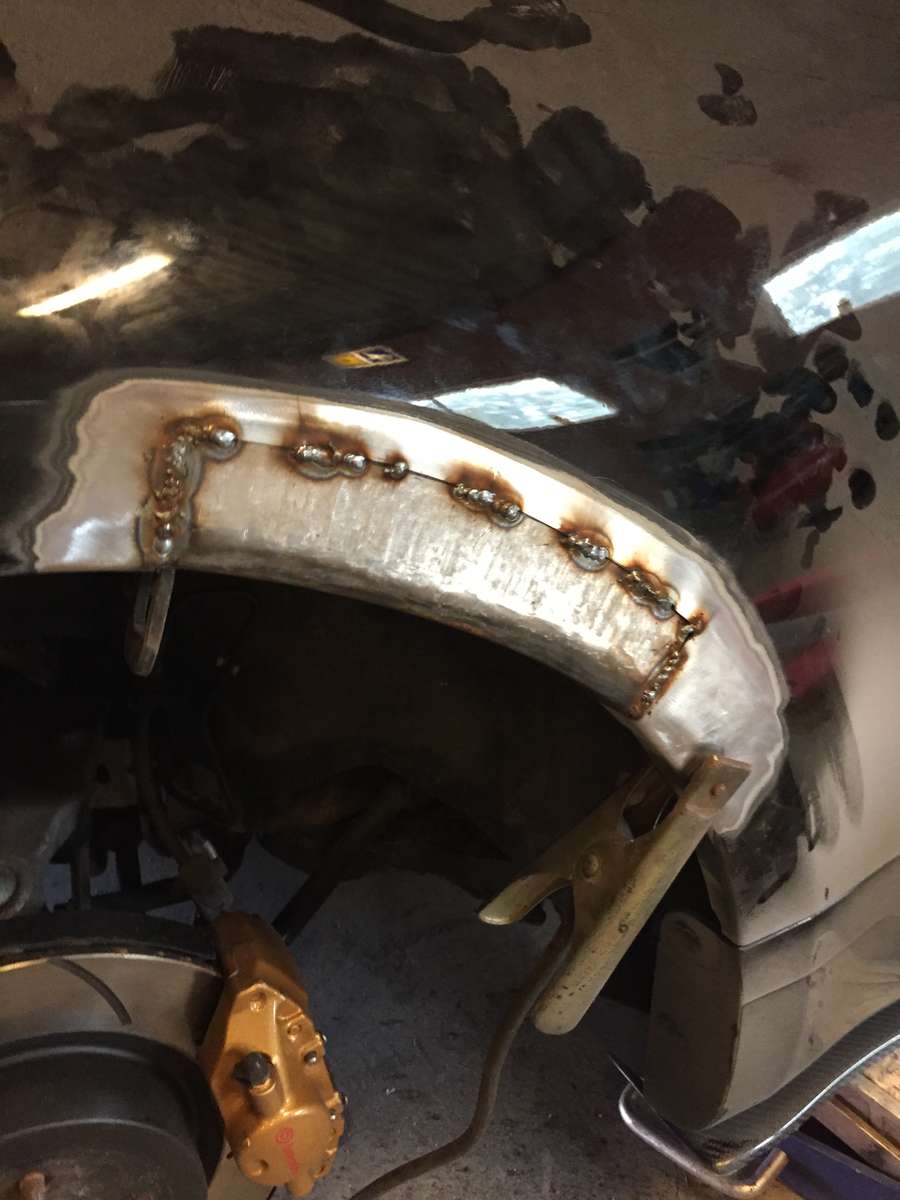
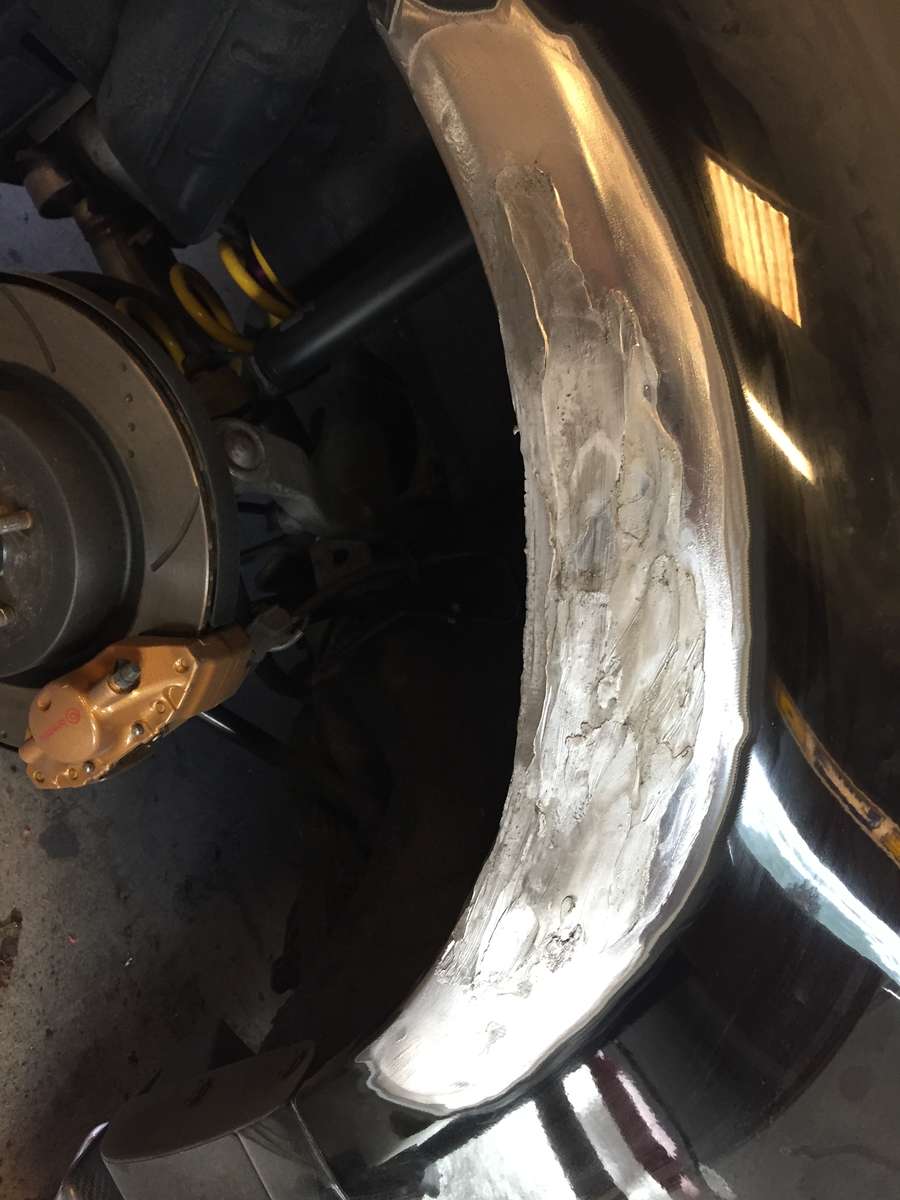
welded it in and tinned it up. Then paint is booked for monday, and getting both rear quarters painted as we also folded and rolled the arches.
Originally hadn't planned on Rolling the arches as i have no clearence issues, but wanted to see if there was any rust between the spotwelds on the other side aswell.
both sides had beginning rust issues. So i guess it's a problem on the 350z
-
 1
1
-
 1
1
-
-
23 hours ago, Foo56 said:
The reflectors for HR or DE?
Didn't know they were difrent.
it's for a 2004, so DE
-
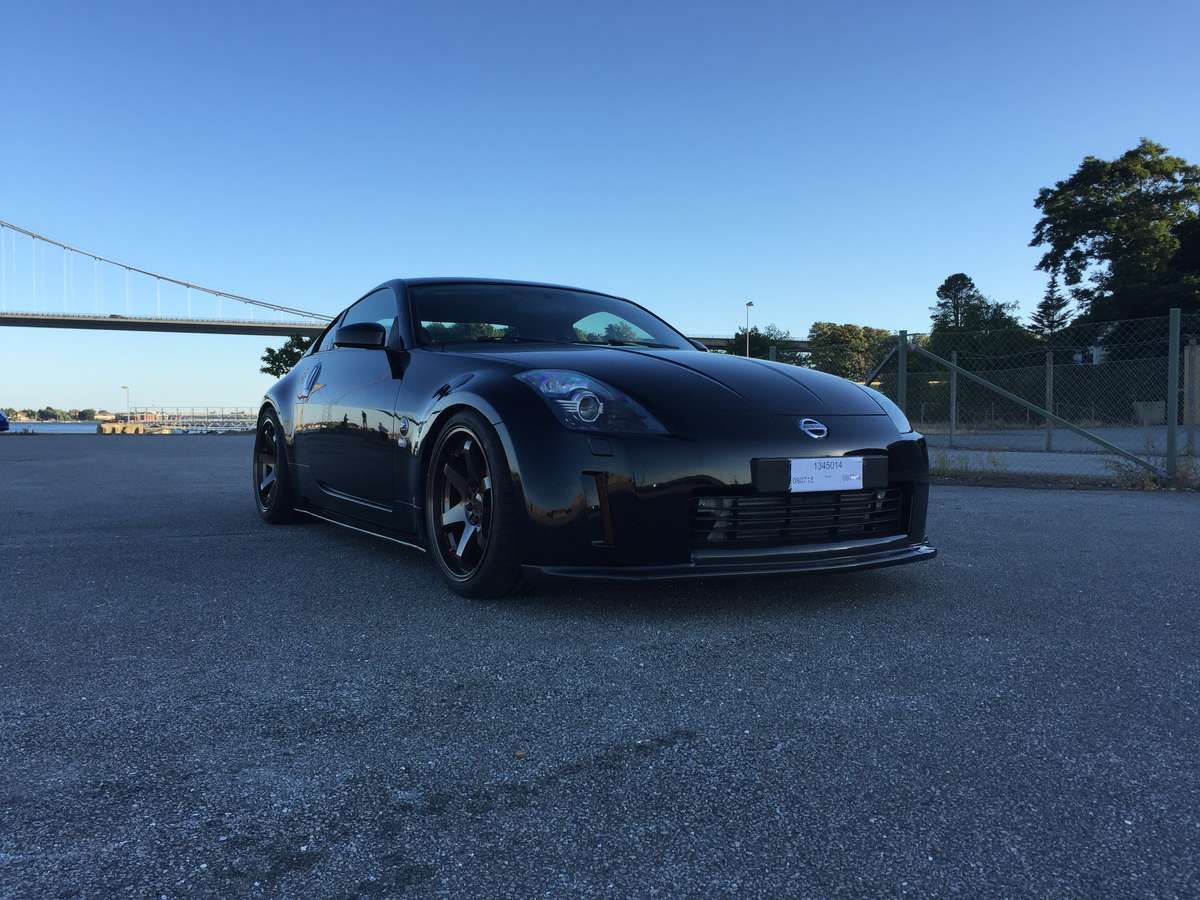
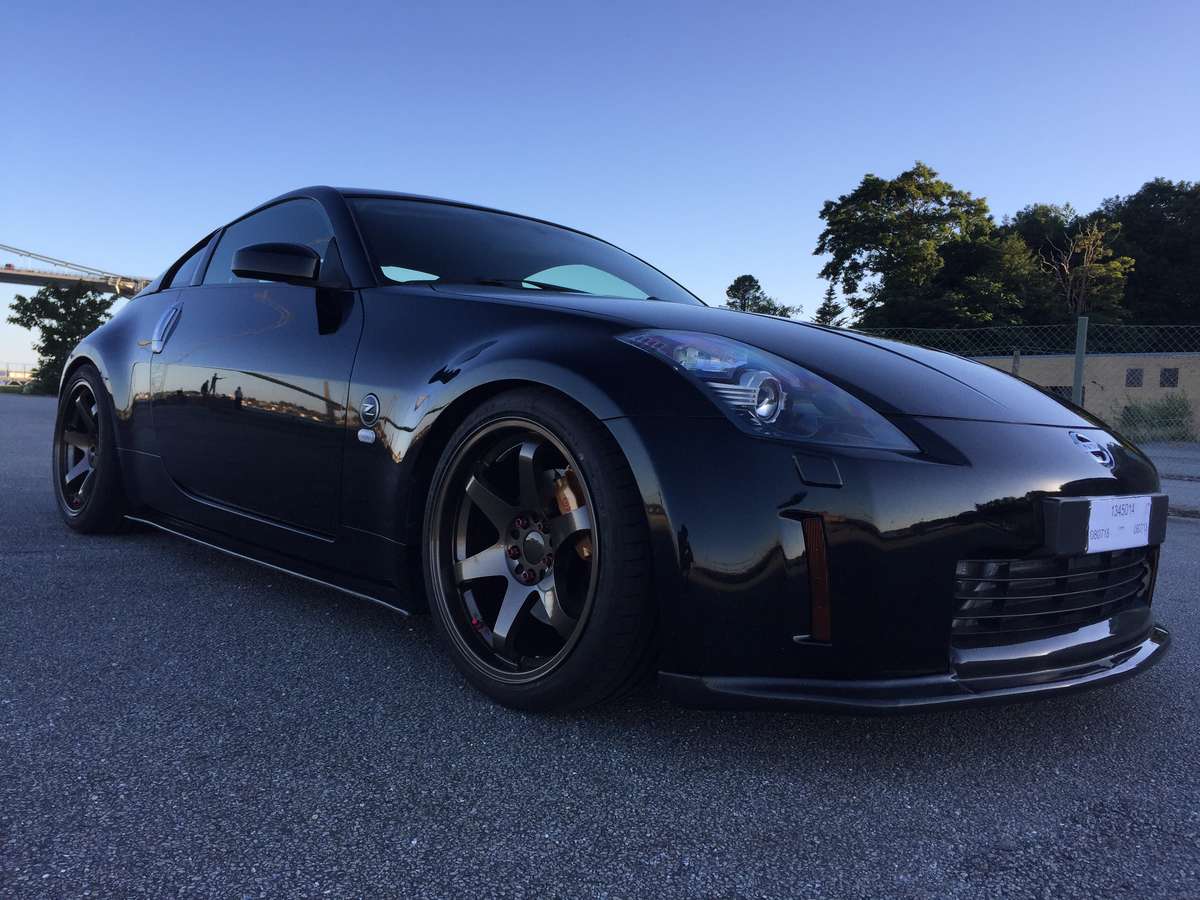
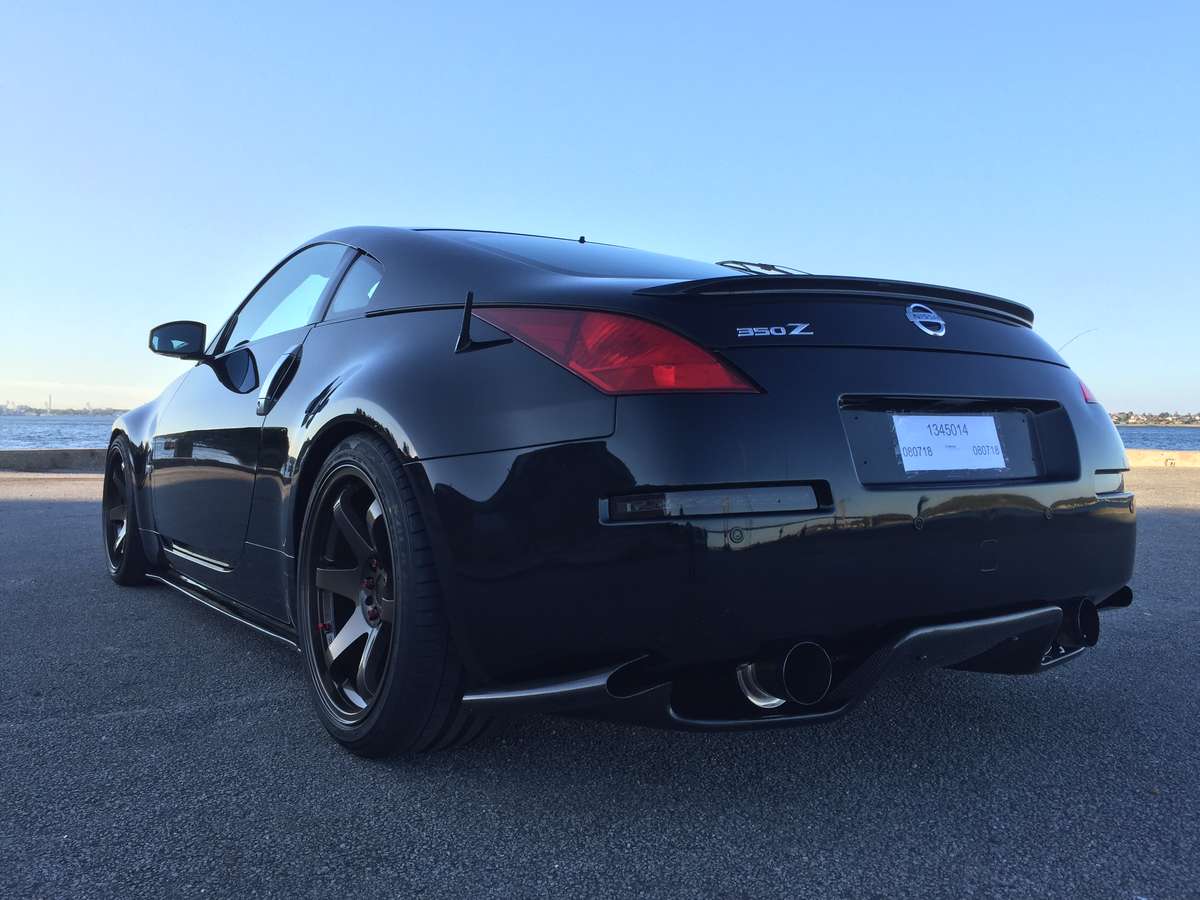
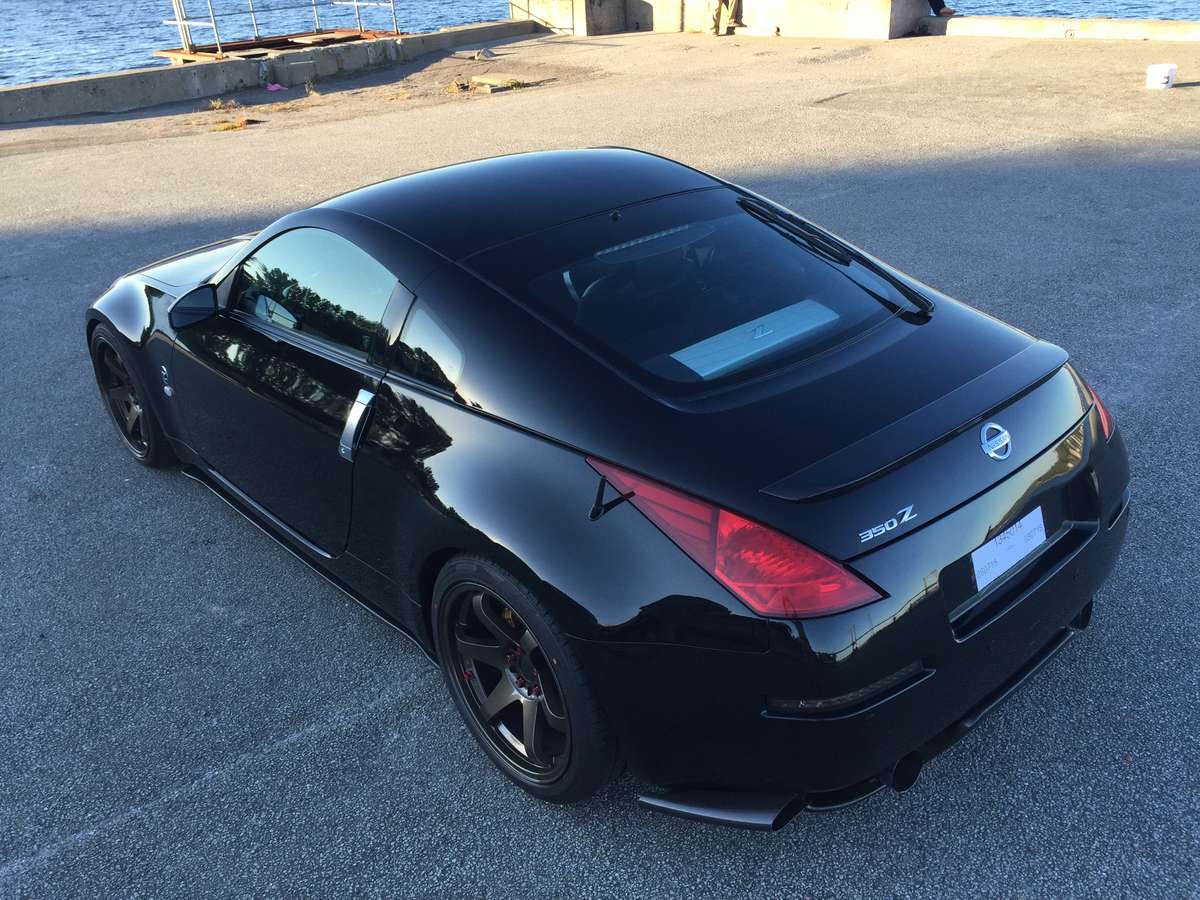
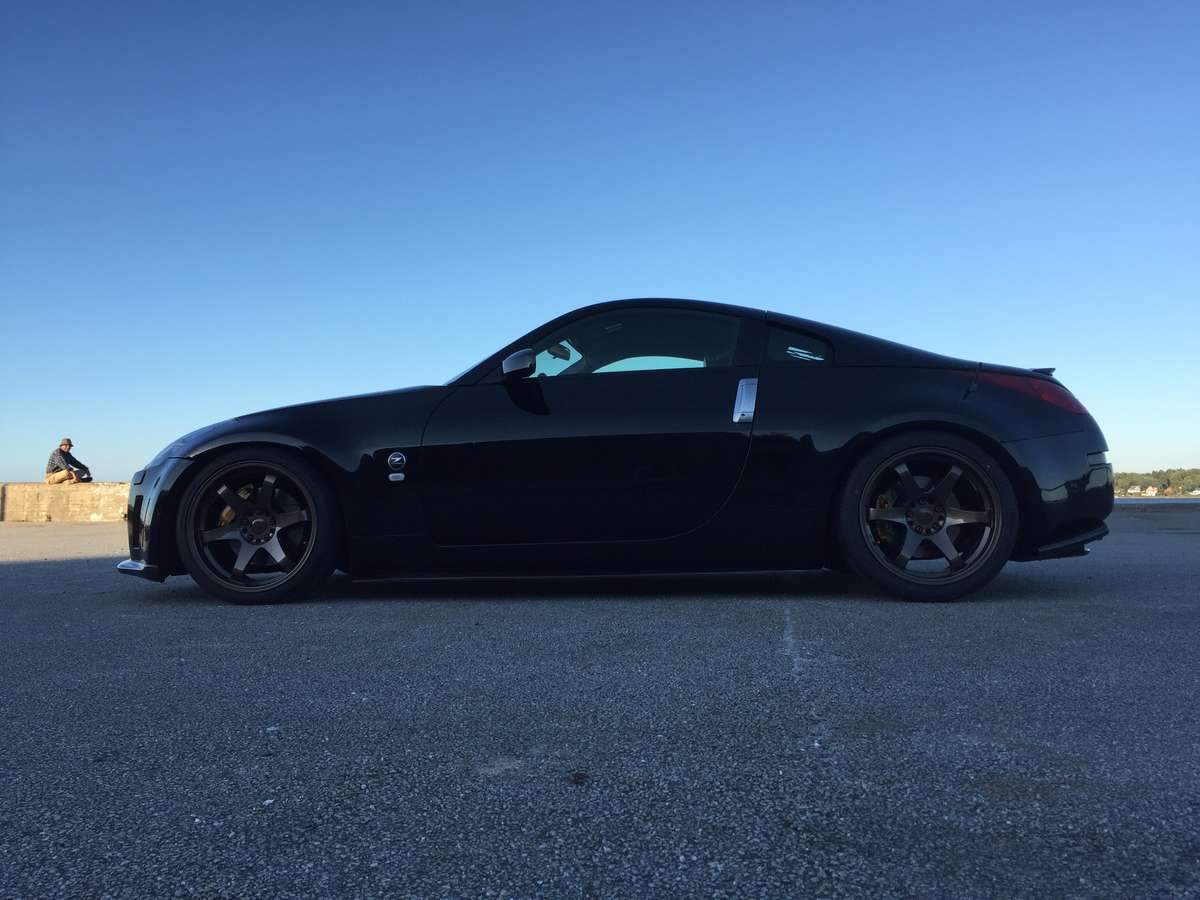
And all done!
the last pieces of Carbon just went on, and i took it for a spin...
result 460 PS, 680nm @10 psi.
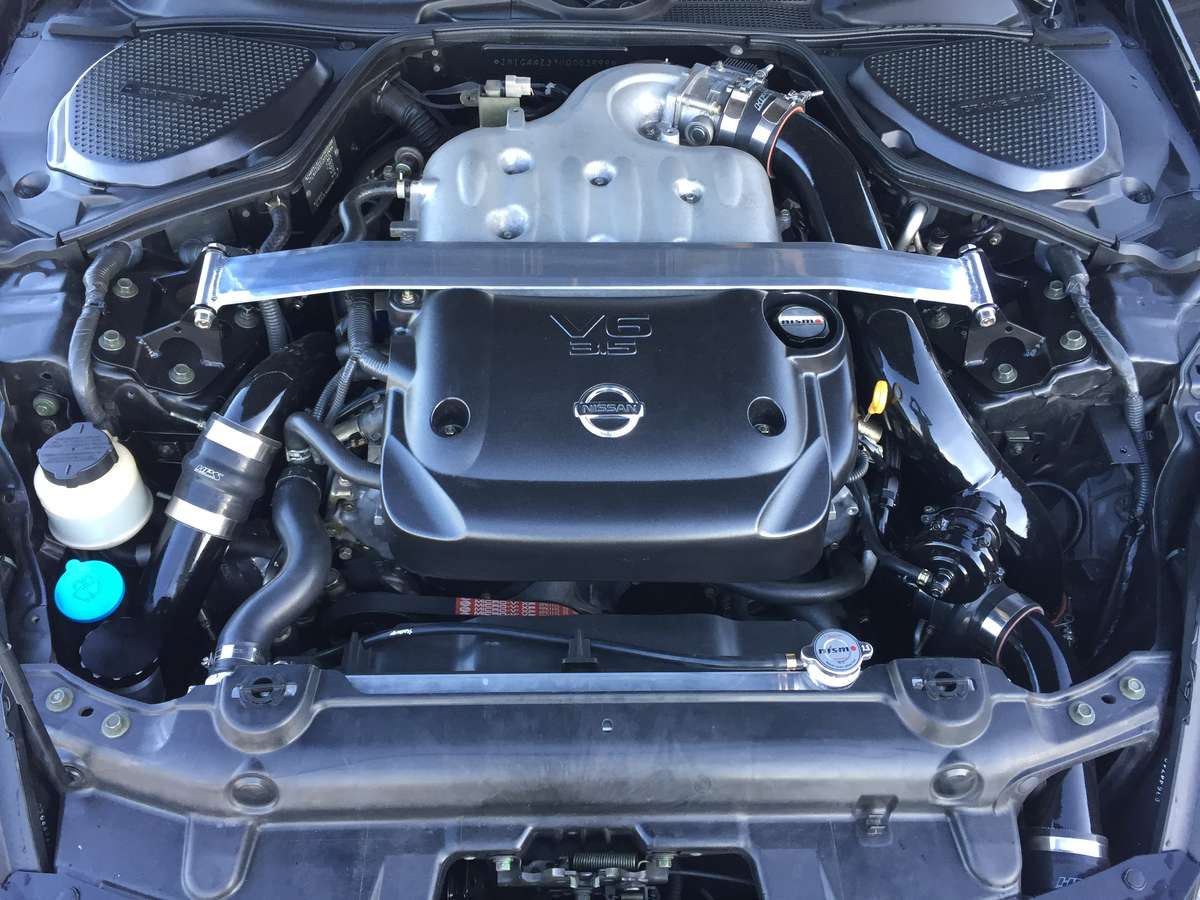
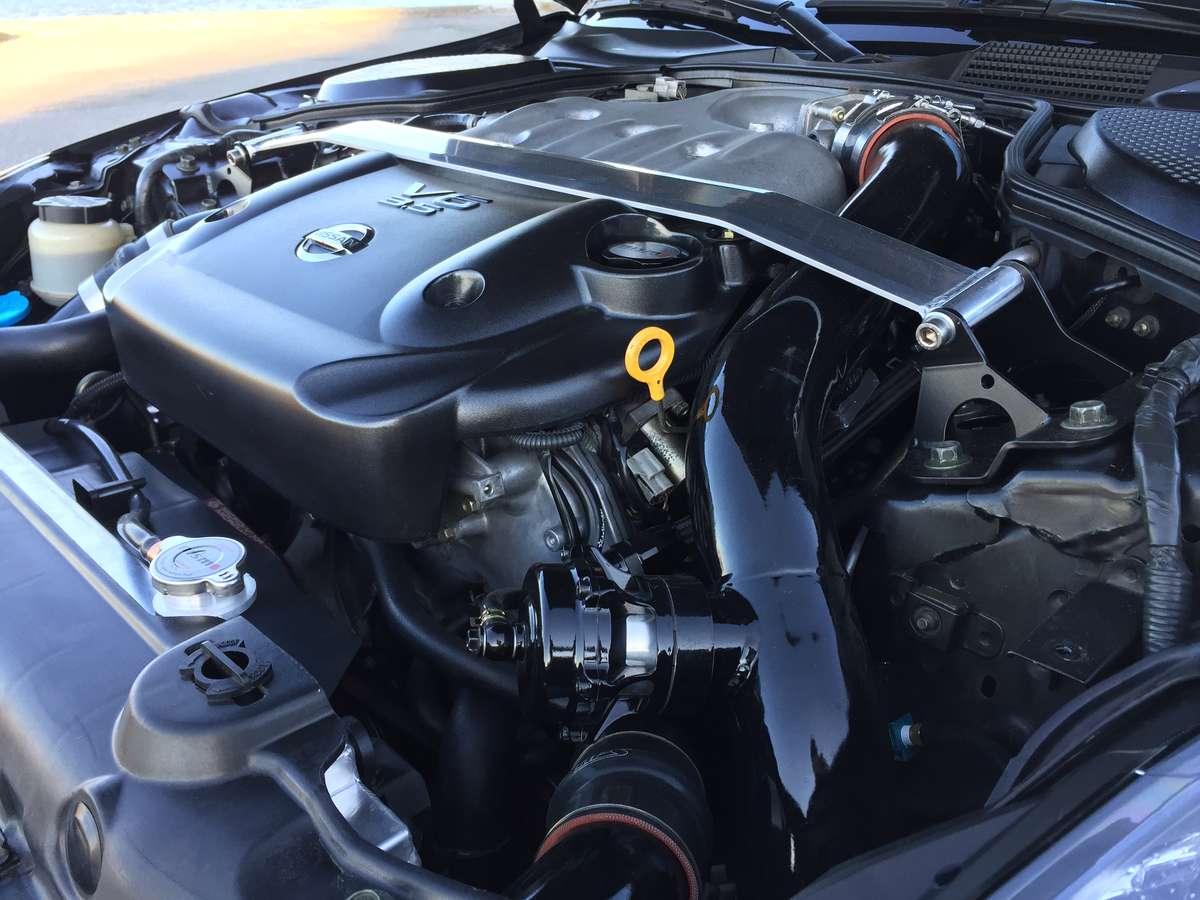
Power mods:
-Gtm stage 5 tt complete kit.
-stainless manifolds
-2x garrett gt3076
-hps aluminium hardpipe kit.
-hps Black silicone hoses.
-2x tial 38mm extern wastegates
-tial 50mm bov
-Dual 3" stainless exhaust
-fuellab 340lph in tank fuel pump.
-DW 600cc injectors
-AEM infinity ecu, sensors, harness etc.
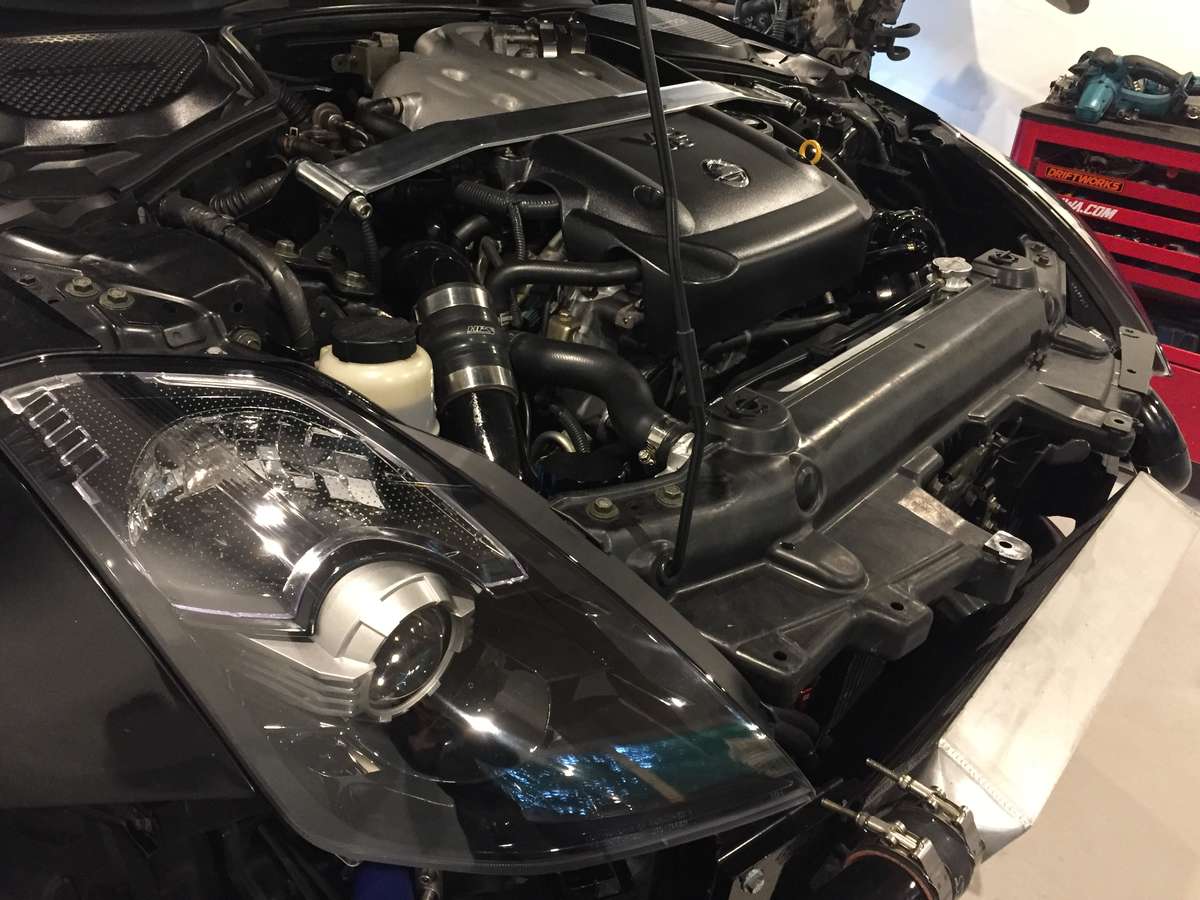
-2" aluminium radiator
-OMS Oil cooler setup
-AAM Oil pan spacer
-os gikken stage1 clutch
-os gikken lightwheight flywheel
Other mods:
-kw variant 1 coilovers
-homemade Carbon for dash, doorhandles, steeringwheel, and center gauges.
-homemade Carbon front splitter.
-flatbottom 370z style steeringwheel in suede.
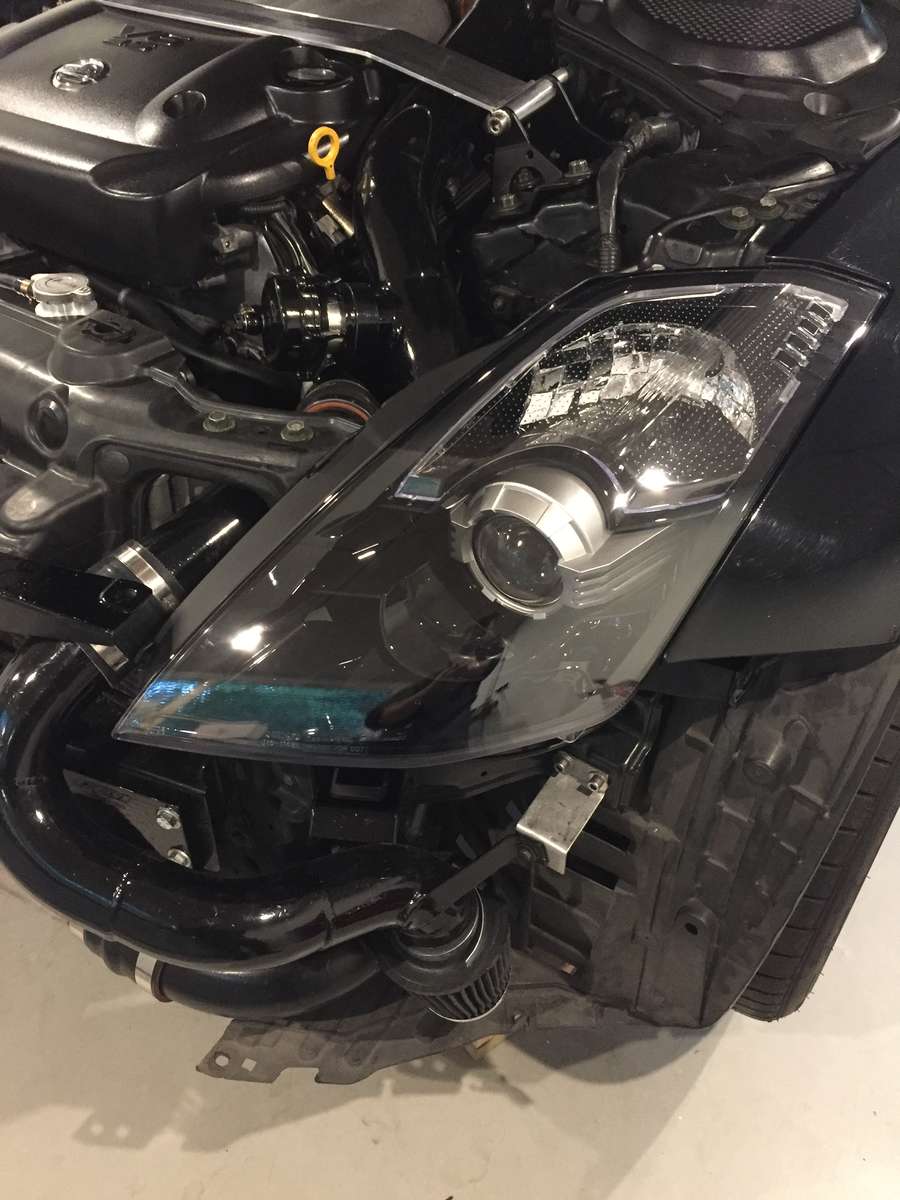
-depo bixenon headlights.
-led rear bumper lights.
-all bulbs are osram nightbreaker /led.
-Carbon sidesteps and rear diffuser.
-new brembo discs, ferrodo 2500ds pads all round.
-JP wheels in 19", 9,5" front and 19" 10,5" rear
-Toyo tires.
-tein strutbrace.
-nismo Oil filler, radiator cap.
-nismo Mats.
-nismo throttle pedal.
-nismo shifter knob
-Defi gauges, Oil temp, Oil press and boost!
And alot of other parts made along the Way.
16 month from purcharge to this.
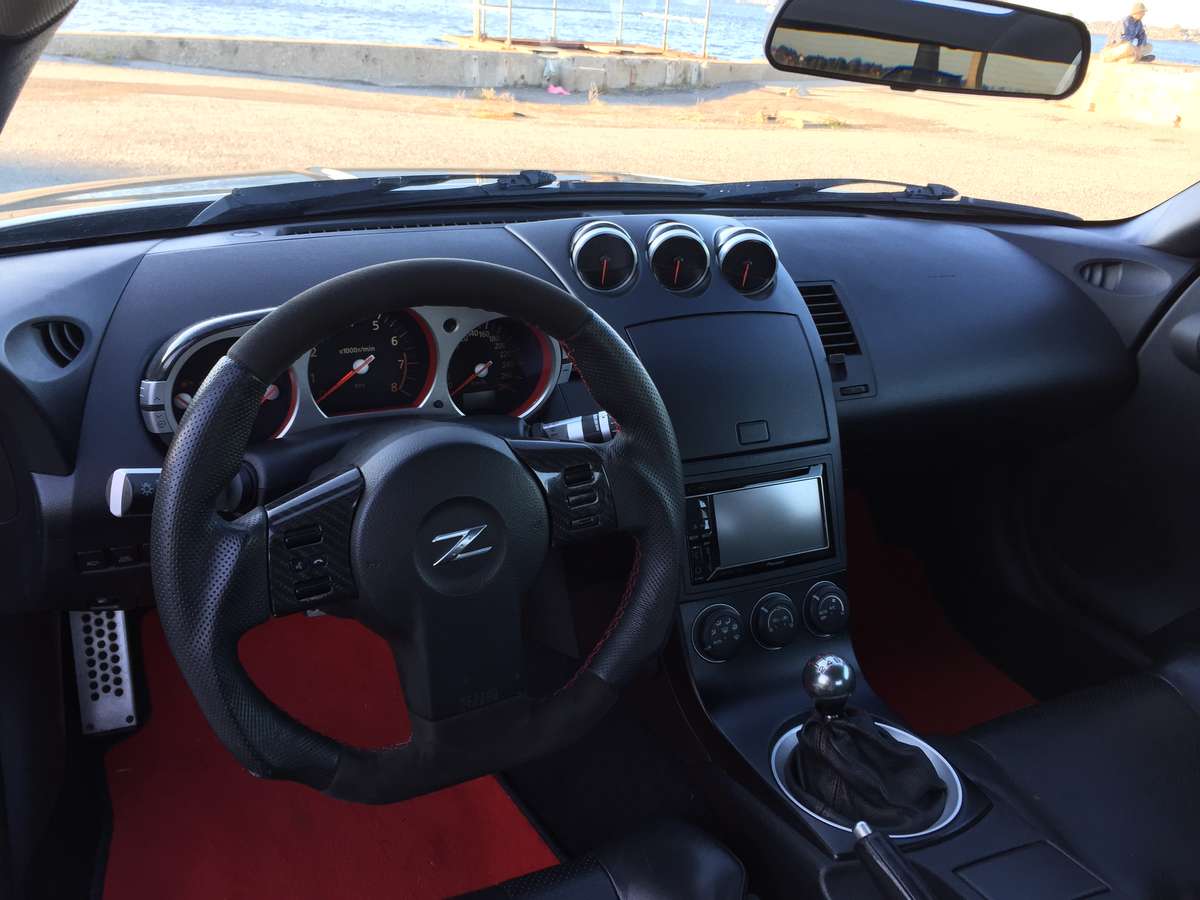
Now I need some sleep!!

-
2
-
 1
1
-
-
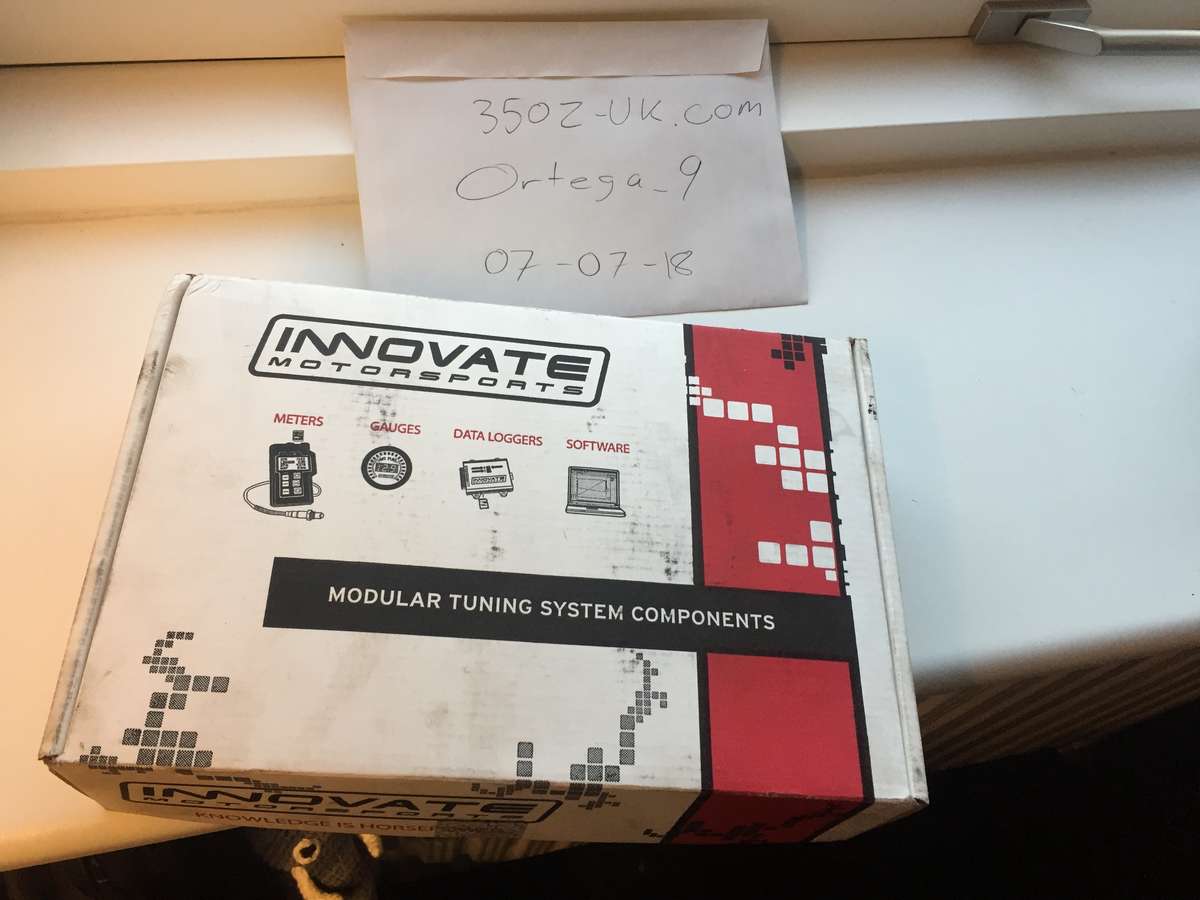
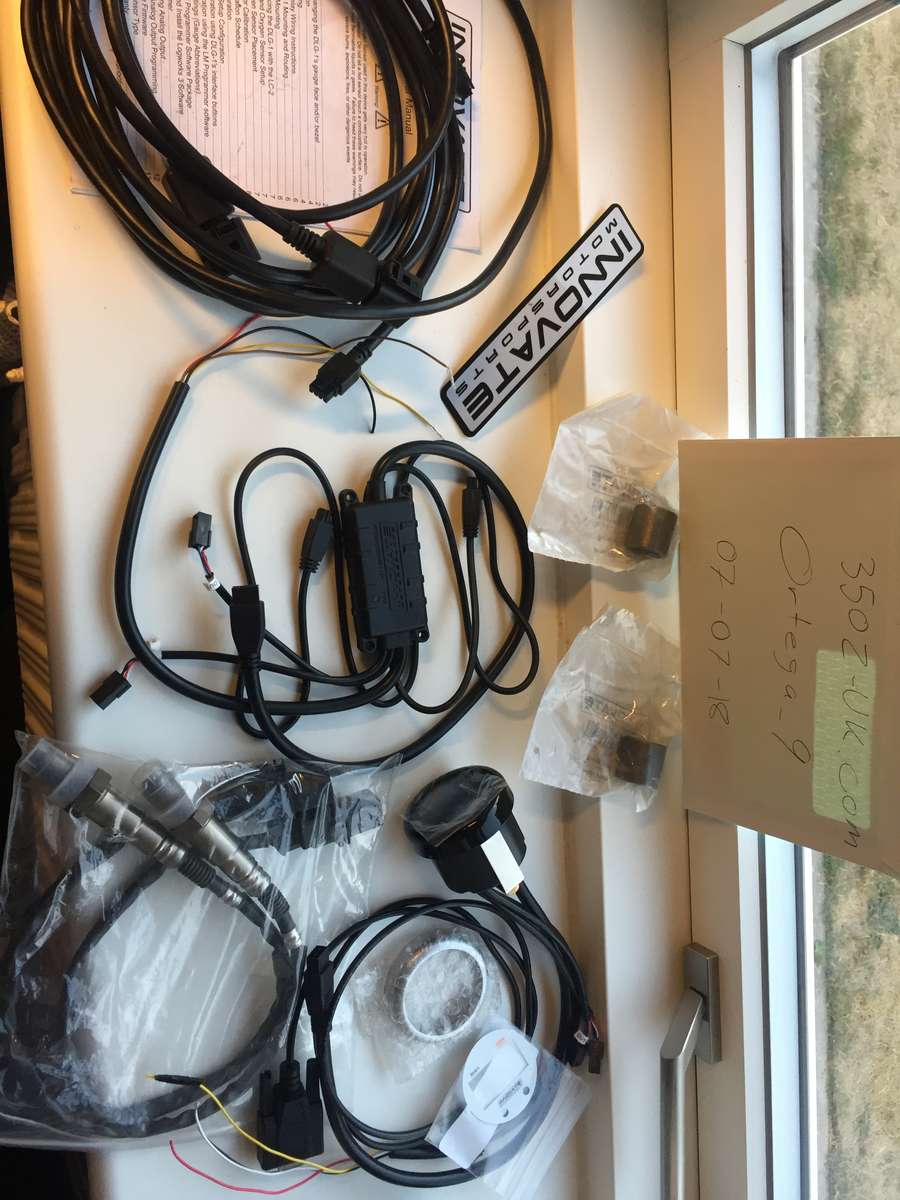
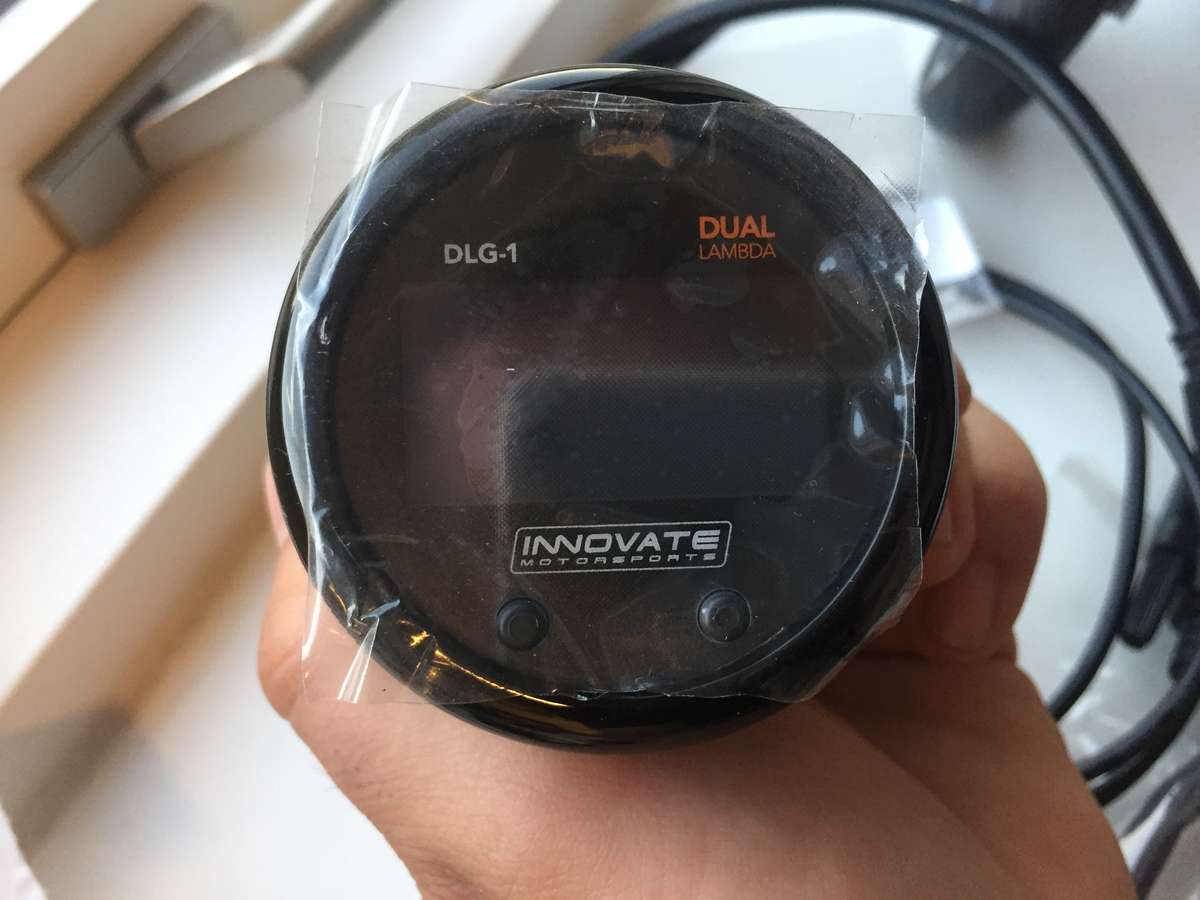
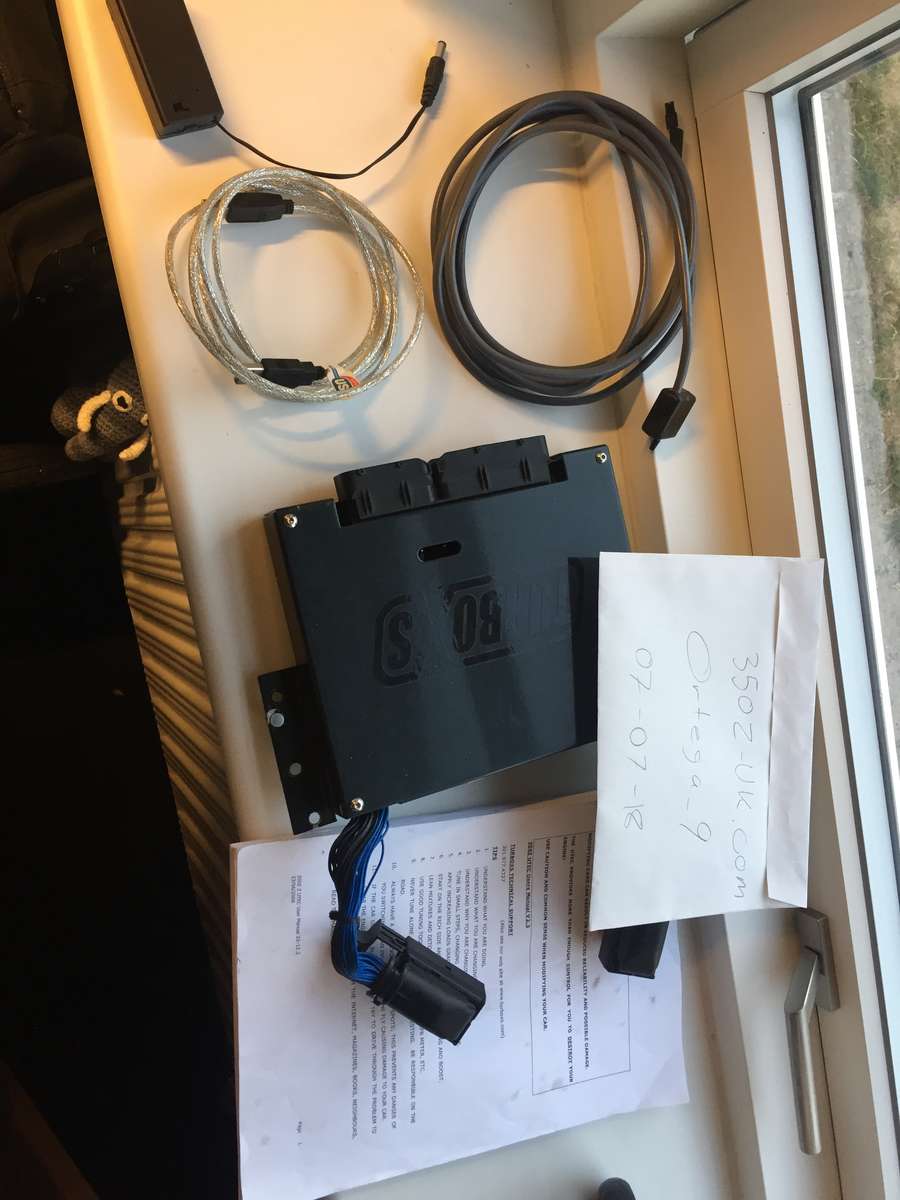
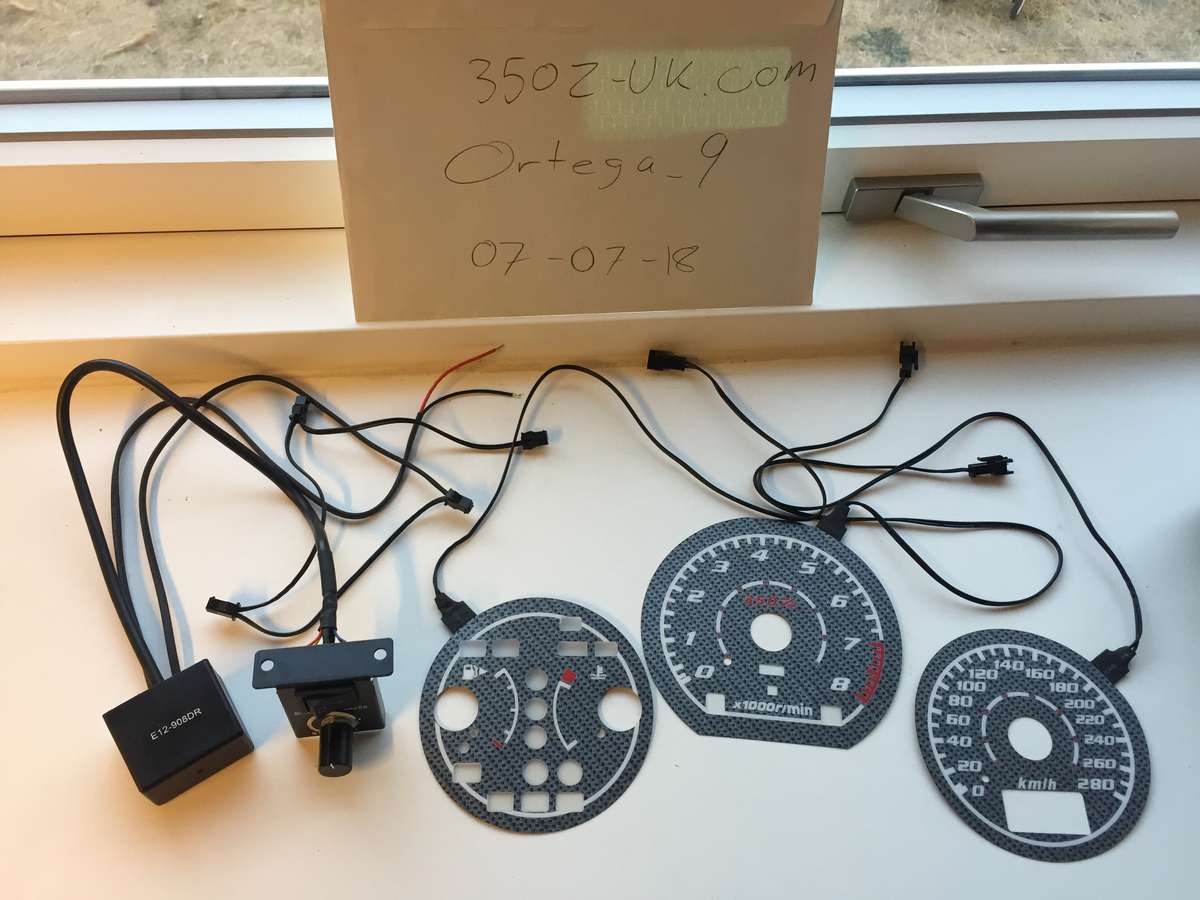
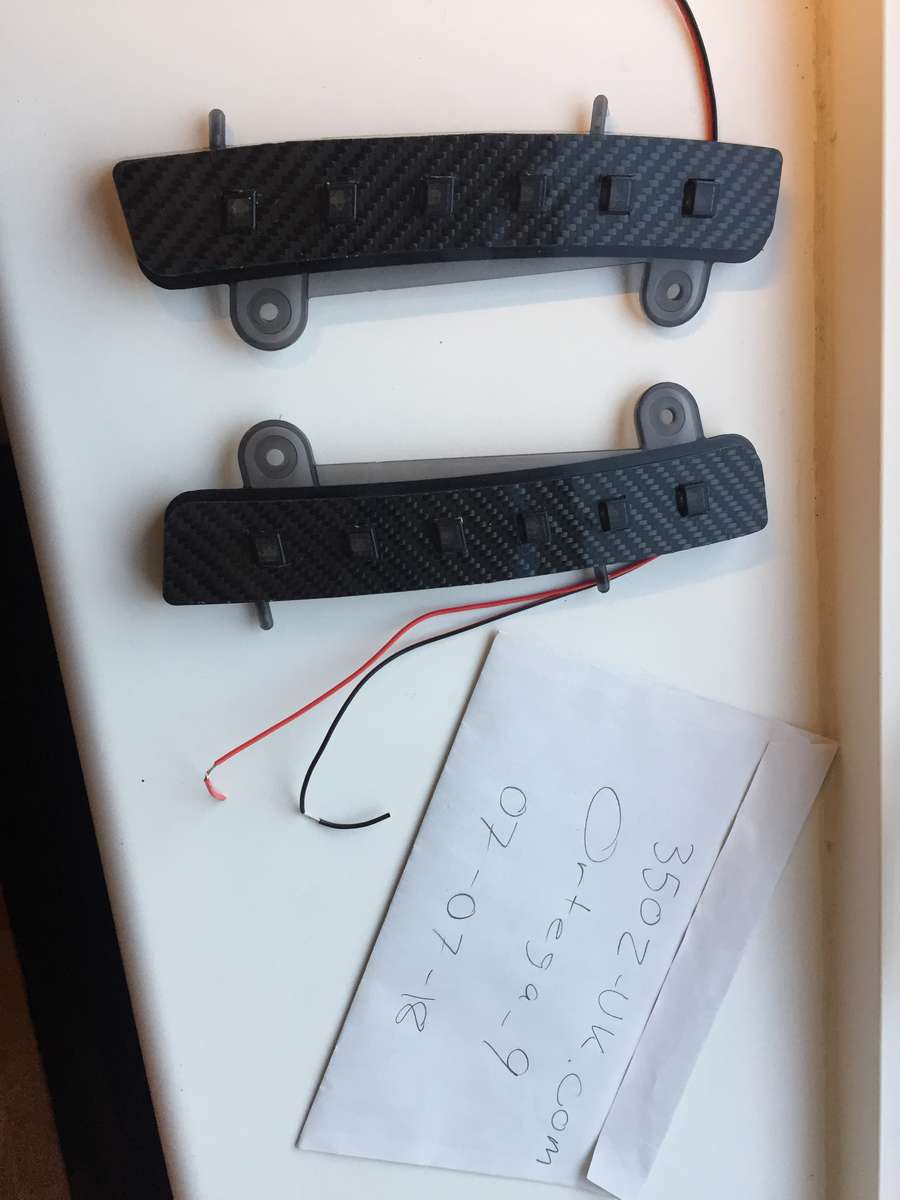
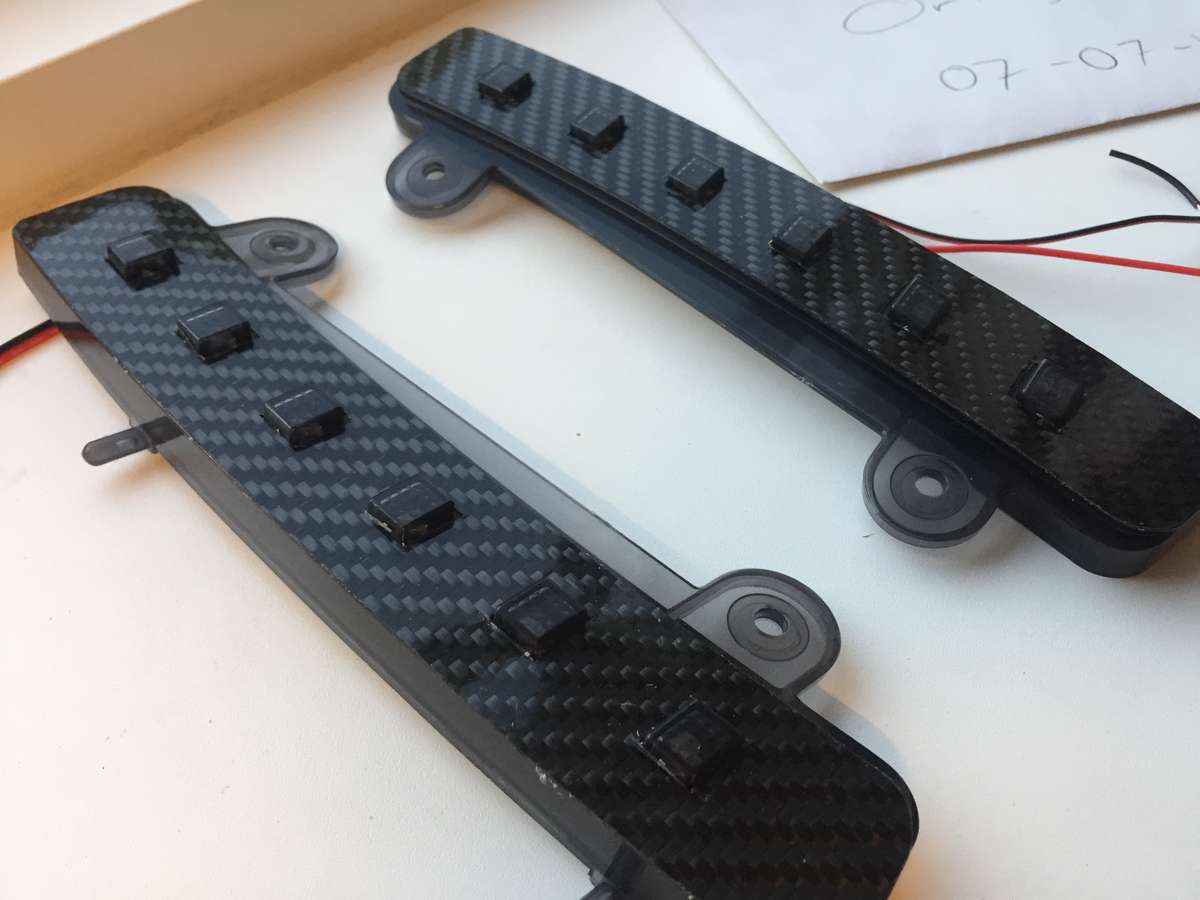
Hi, beeing done with my 350z build, i have Got a few things i haven't used, and need to go.
- Innovative motorsport DLG-1 Dual lambda wideband, new kit, only been test fitted, not beeing used due to running aem infinity. 350£ posted
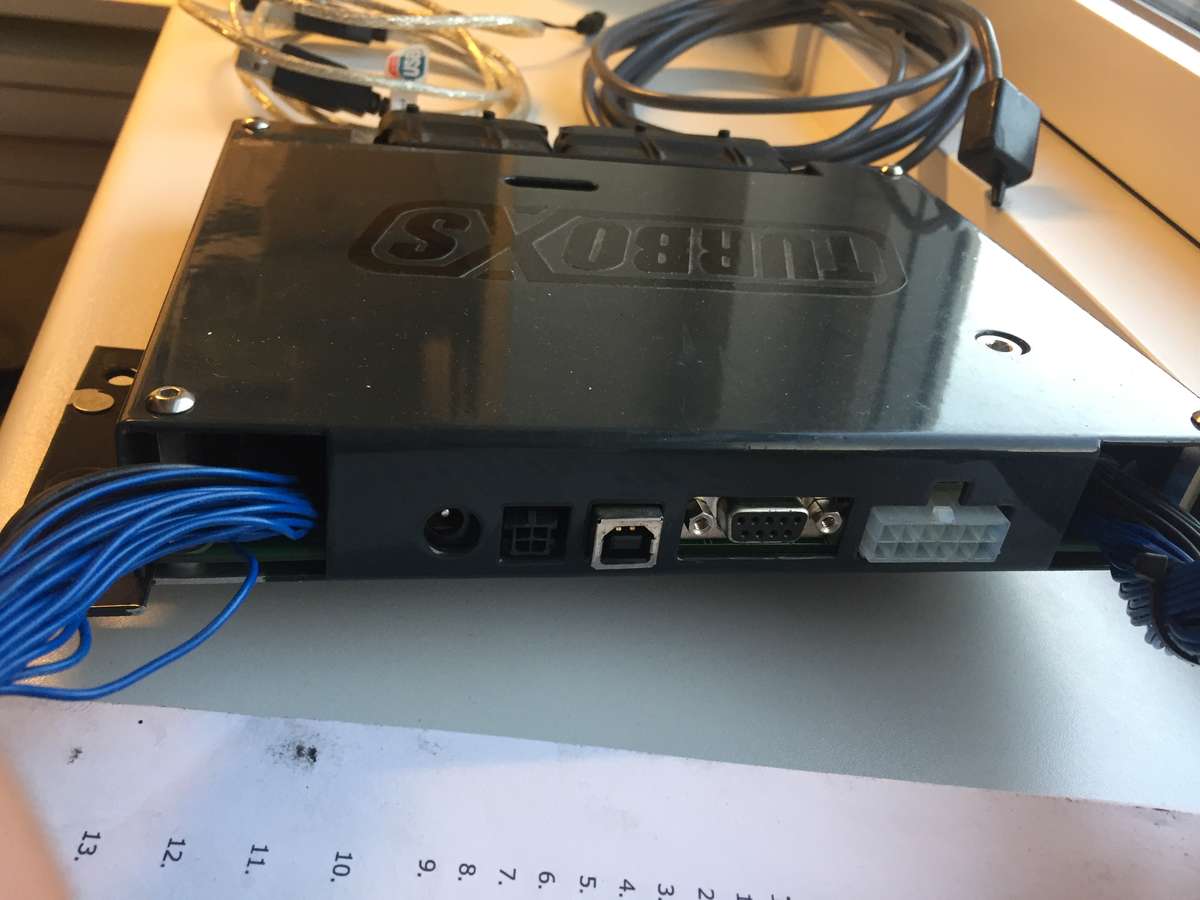
- Turbo xs UTEC ecu. With programming cable, 3bar map sensor, external battery and a complete manuel 200£ posted
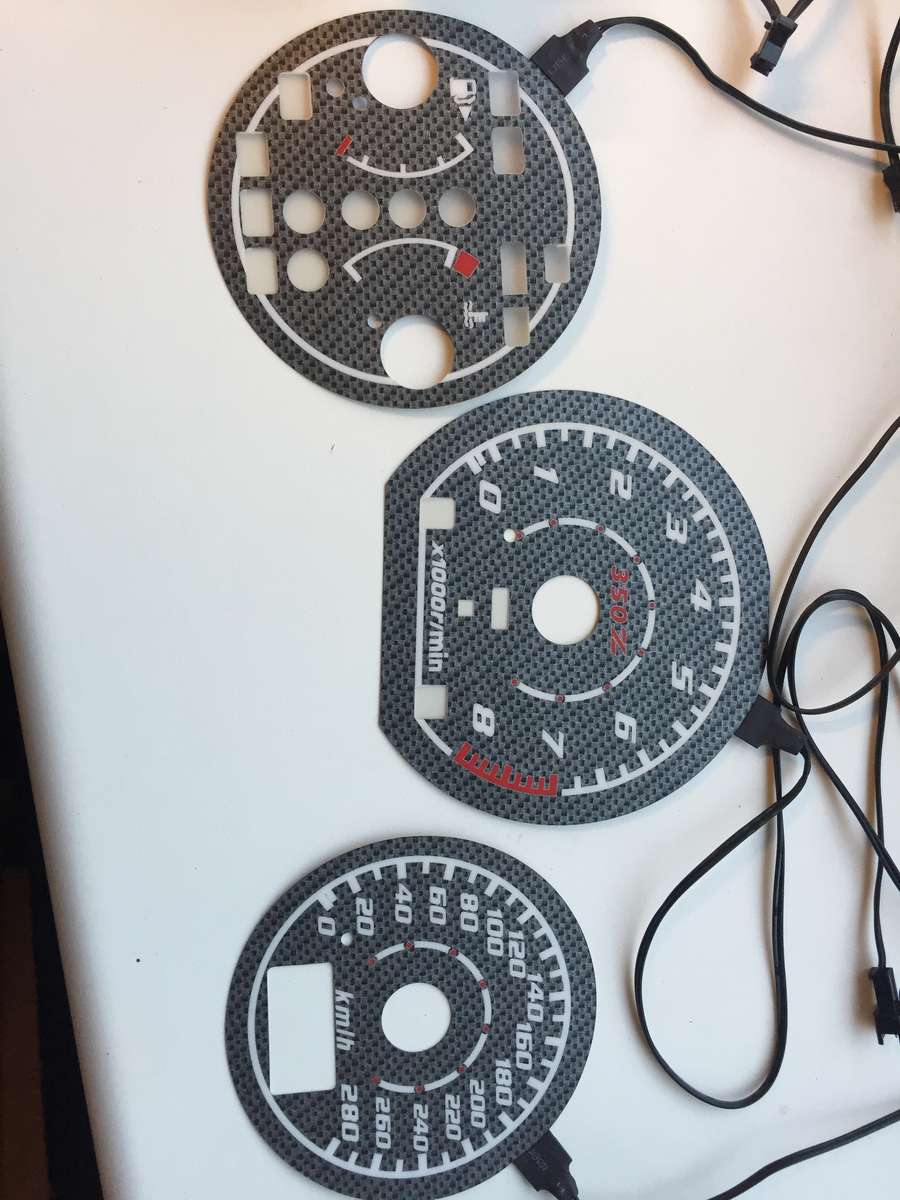
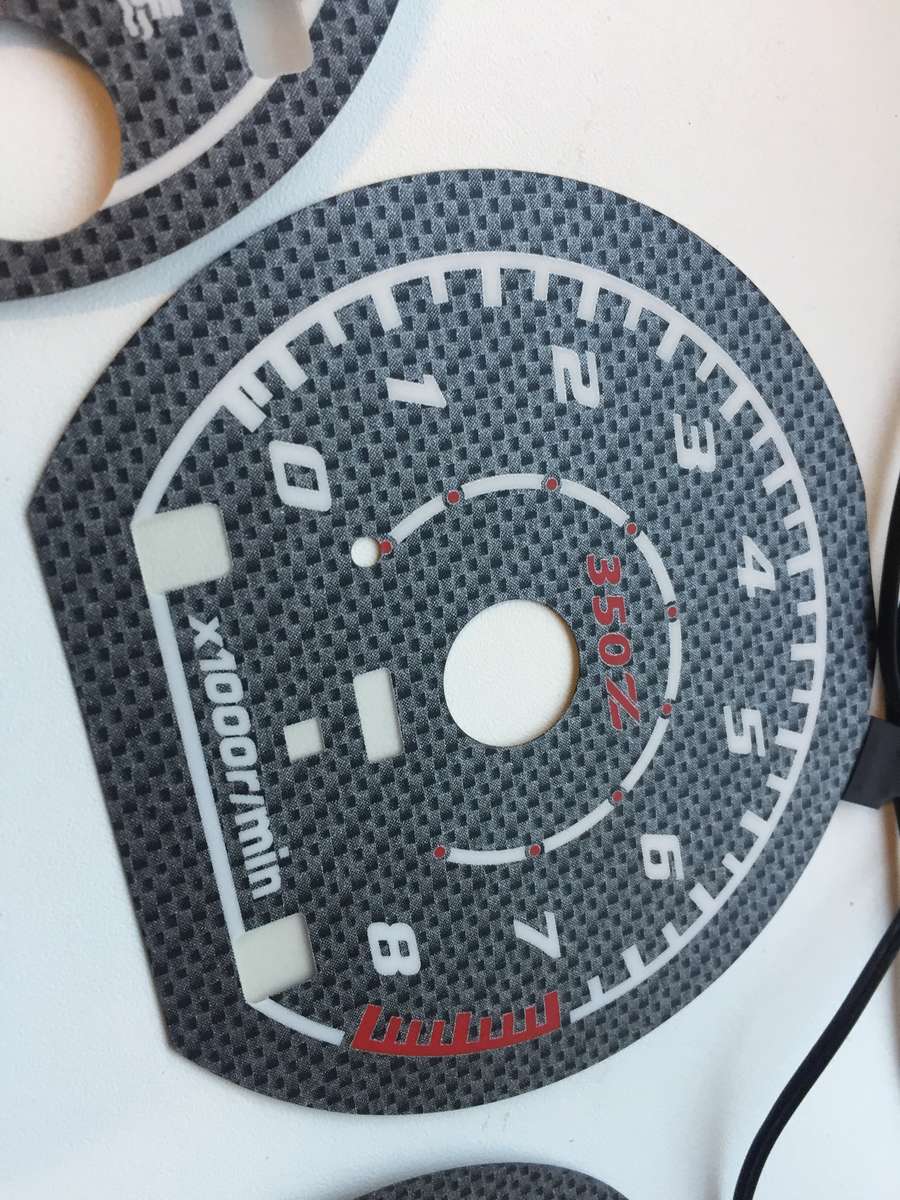
- Plasma speedo/watertemp/fuel and rev.
in Carbon look. 50£ posted
- strutbrace 50£ I'll have to look into postage price.
- Front bumper LED lights, Real Carbon.
50£ posted
-
3 hours ago, wizard said:
This is great. Do you think the exhaust will be more restrictive? What's the setup and the silencer brand?
Thanks.
there is no brands involved, it's all noname. 3" stainless pipe, 4" stainless made into silencers, and some 3" backboxes i stumbeled on a few years ago and wanted to use for something since.
And that keeps cost down. So total cost so far is about 500£ for the exhaust. And a few hours of torch time and fingureing @*!# out.
I actually Think it will be about the same.
my tuner told me he didn't Think there was any reason for a retune after dooing this.
The H-pipe piece should do alot for a more uniform sound and not much more i Think, on a FI Z. And the silencers should remove alot of resonans and the drone, making it a deeper growl and not so loud as before.
But I have no idea how it will pan out, but i hope i get it sounding more Z like and less two 3-cyl aygo's arguing without an exhaust like.
i'll put the last pieces together tomorrow and fire it up.
-
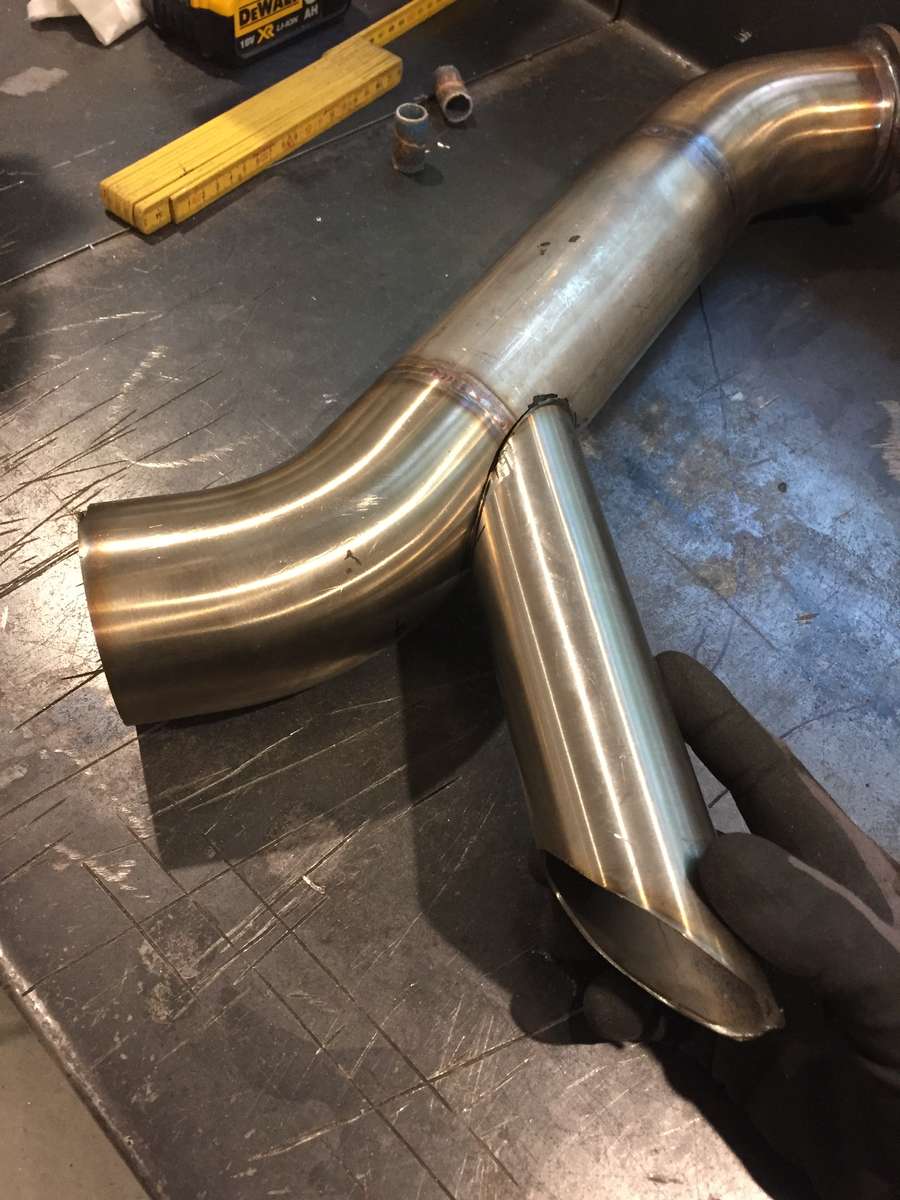
Just need to weld the H-pieces and put the Carbon back on...
then hopefully it's done!!!!
-
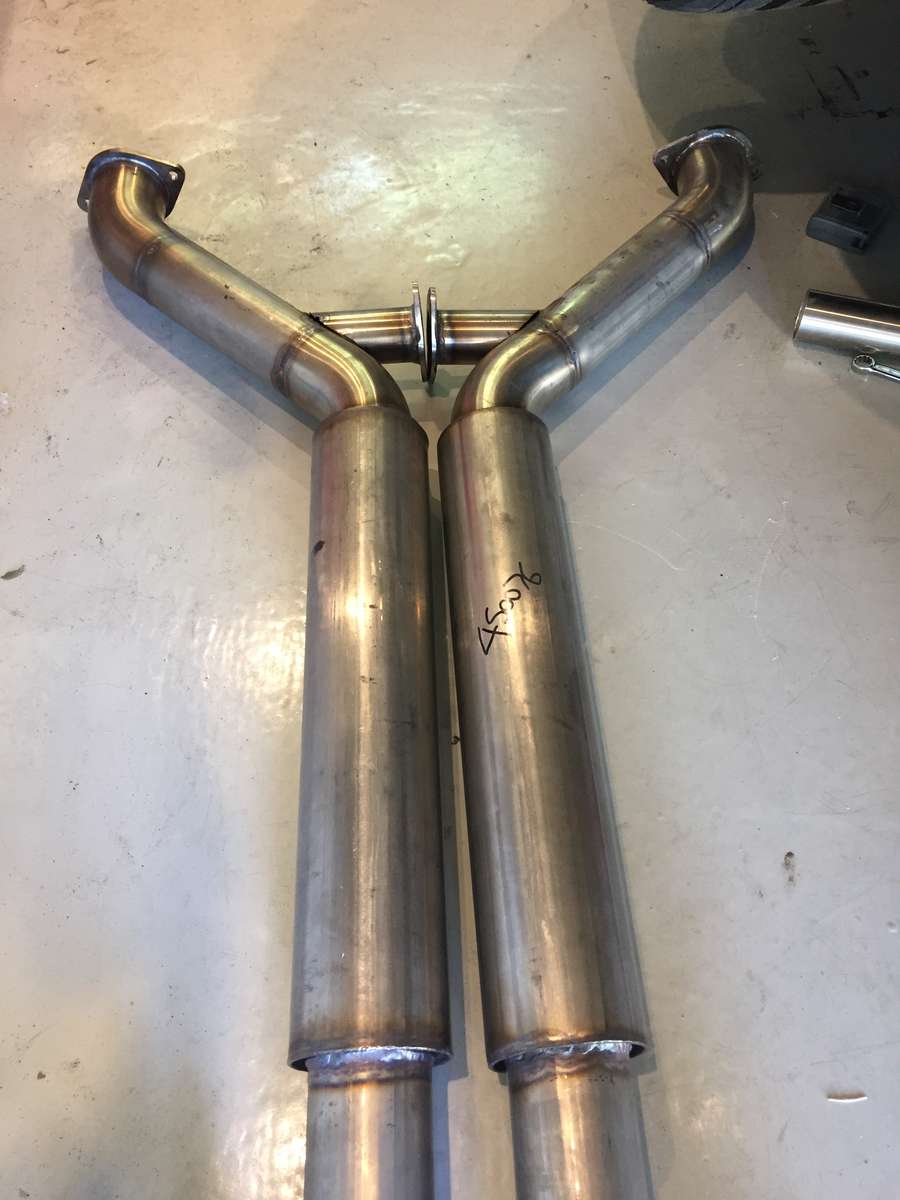
One side cut and ready to be put under the car for fitting and welding back together.
i'm doing a couple of 500mm long 4" dia. Resonator/silencers and a 2" H-style pipe to equalize the pressure and take some of the Sound.
-
Love to chop a freshly build exhaust


-
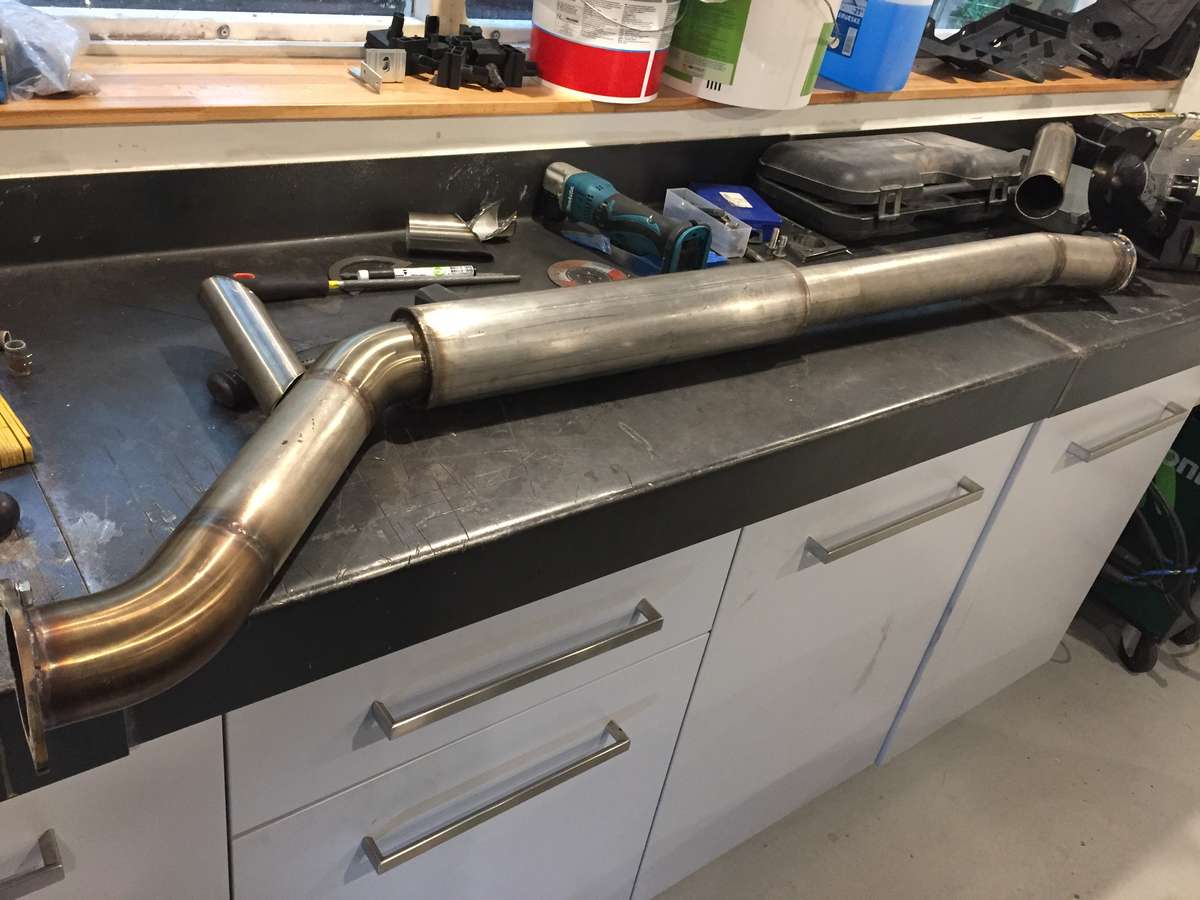
Allrighty then....
last pieces of the puzzle just showed up. So i Can get the exhaust quiet down abit.
-
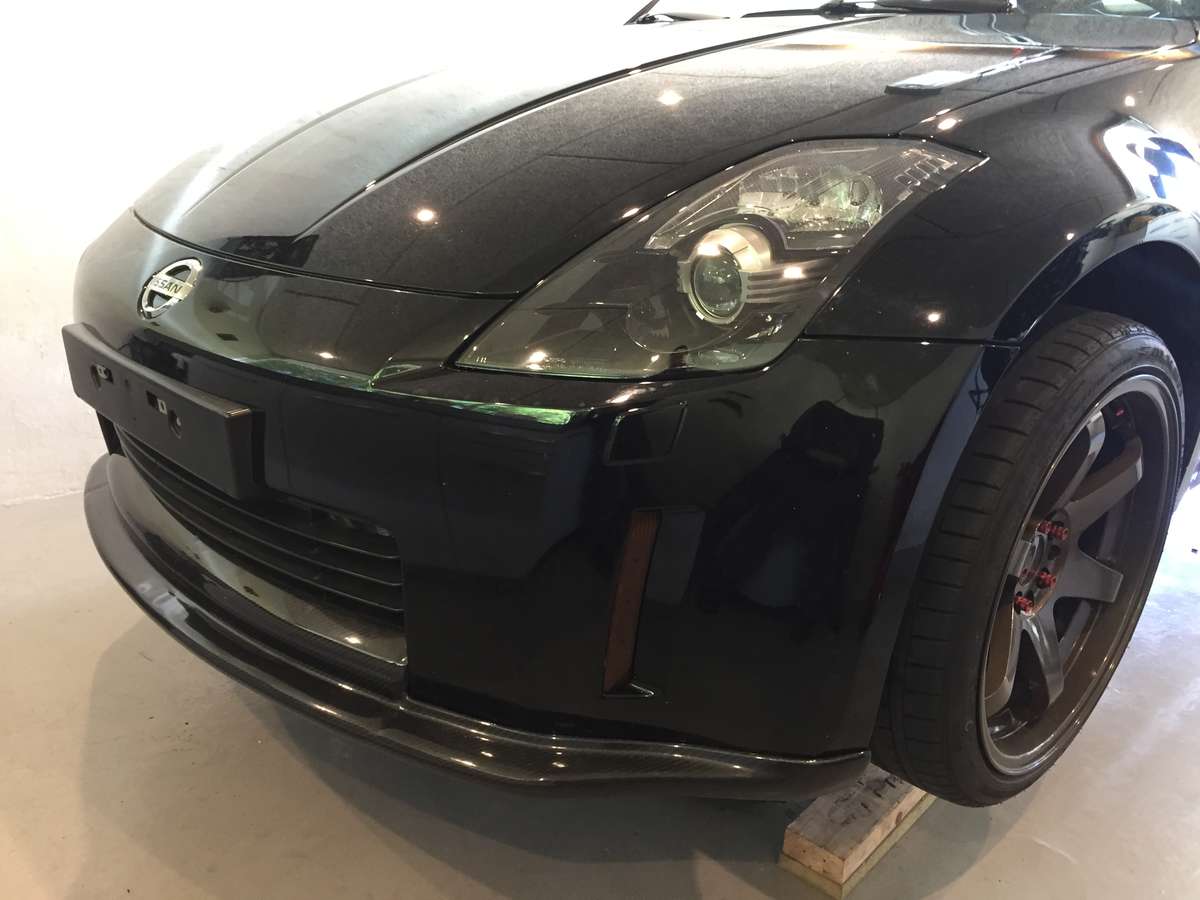
Front put back together and hopefully done.!
now there is only the exhaust left...
-
8 hours ago, wizard said:
WTF?!
I'm not shitting you..
there is an insane car tax in Denmark.
-
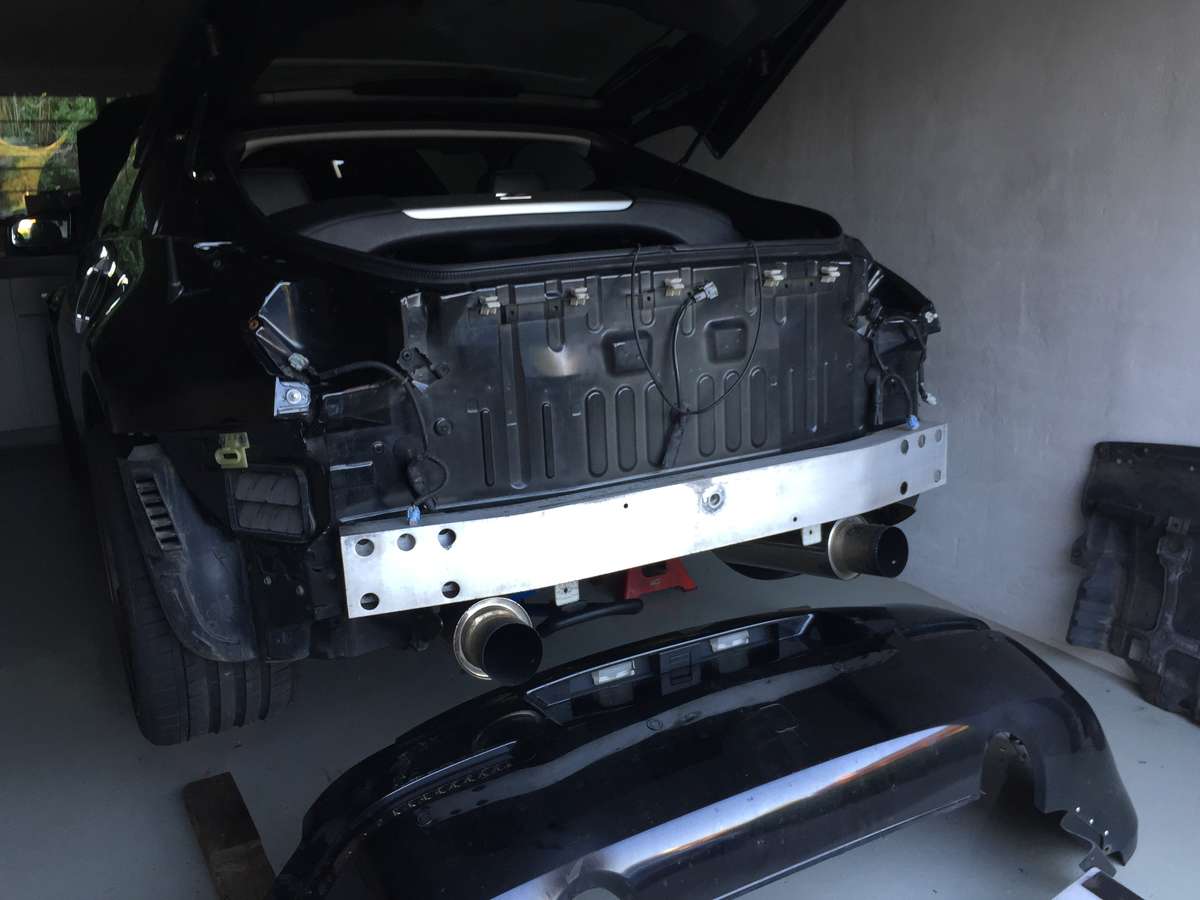
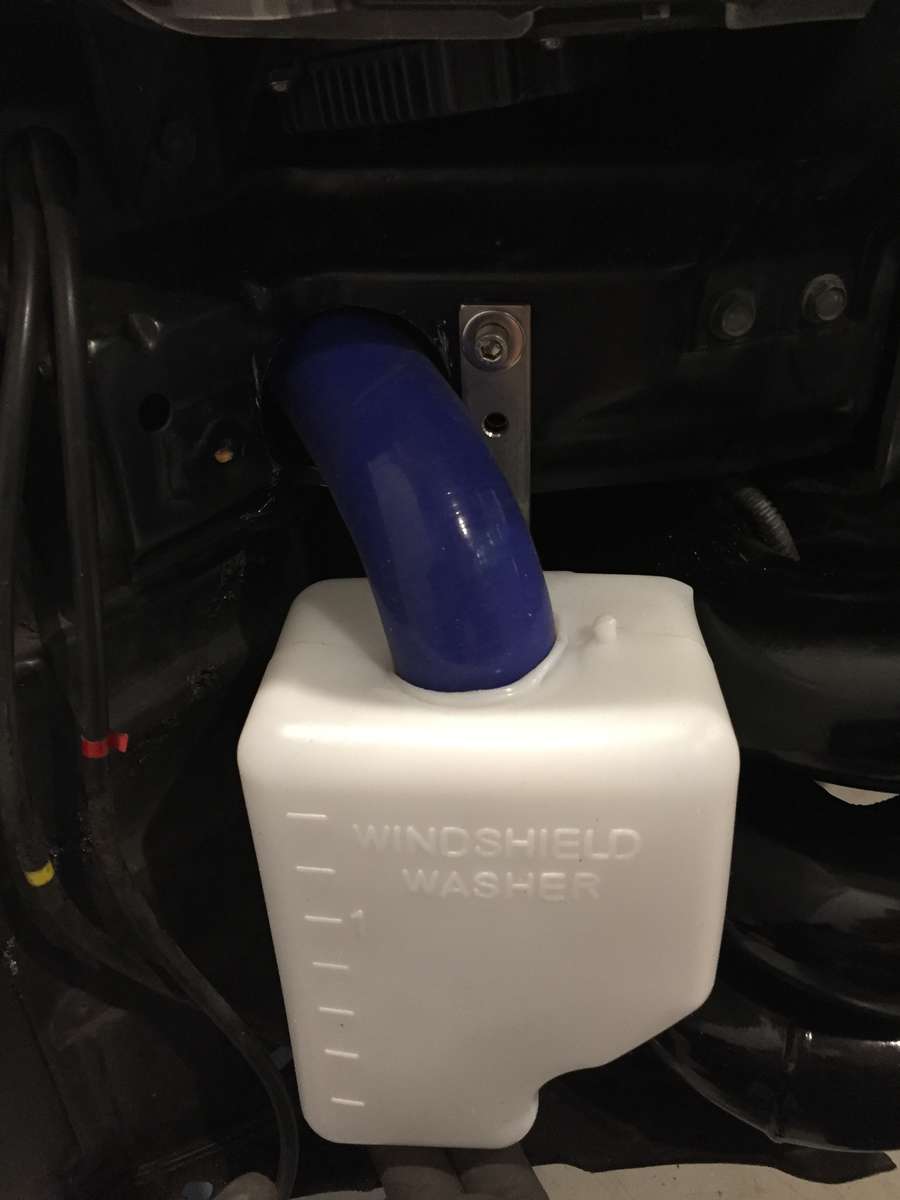
Backend all back together, blacked depo's on and everything works. Washer bottle, pump etc. Is leak free and working, and the last parts for the exhaust is on the Way.
only two more things to do before hitting the street now!
-
Just pulled the rear lights and bumper.
and cleaned everything and gave it some cavity wax.
and fitted my new led bumper lights....
not really sure if i like them, but they are blacked, and led turn and reverse. So i might not use the running and brake light funktion that it also has.
Also fitted some new osram nightbreaker hid's in the new depo front lights. No point in not putting in some decent bulbes when it's all apart anyway.
-
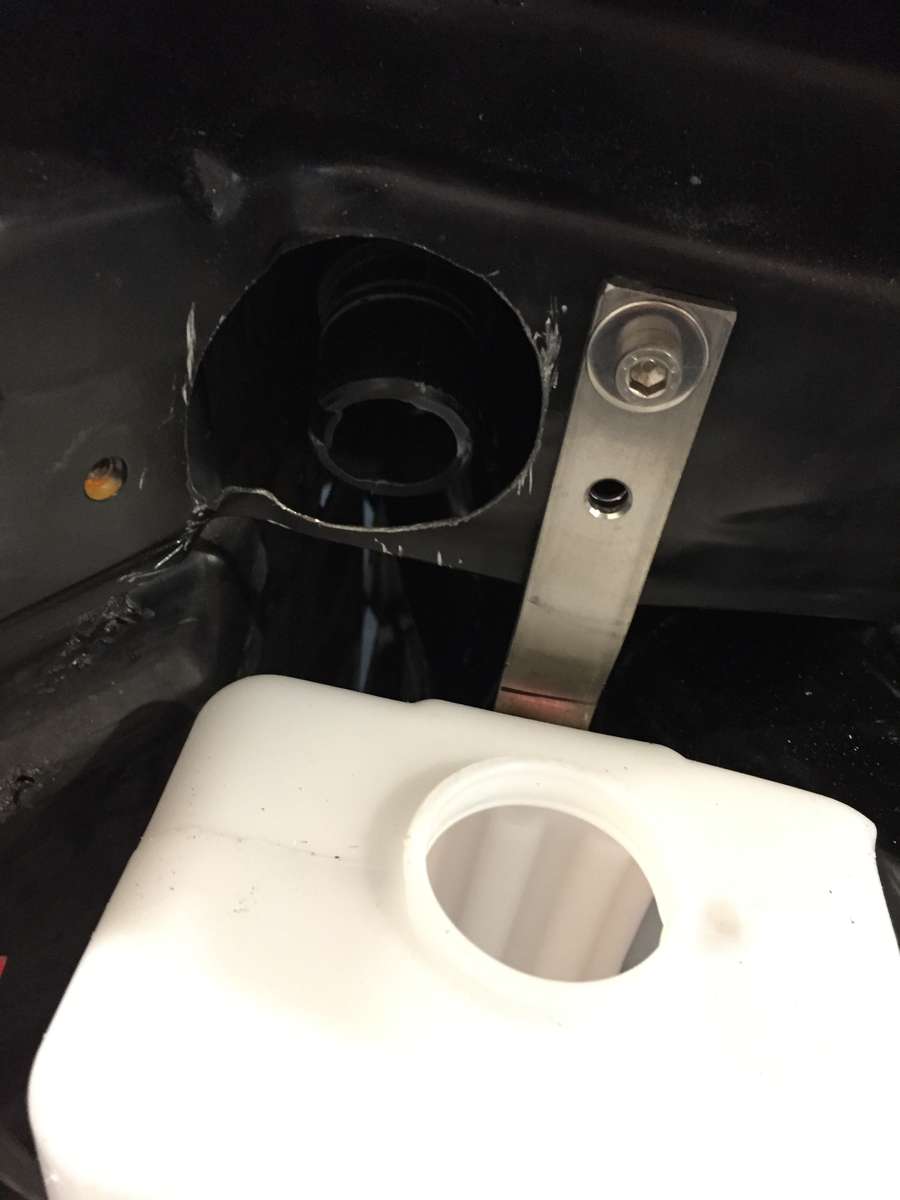
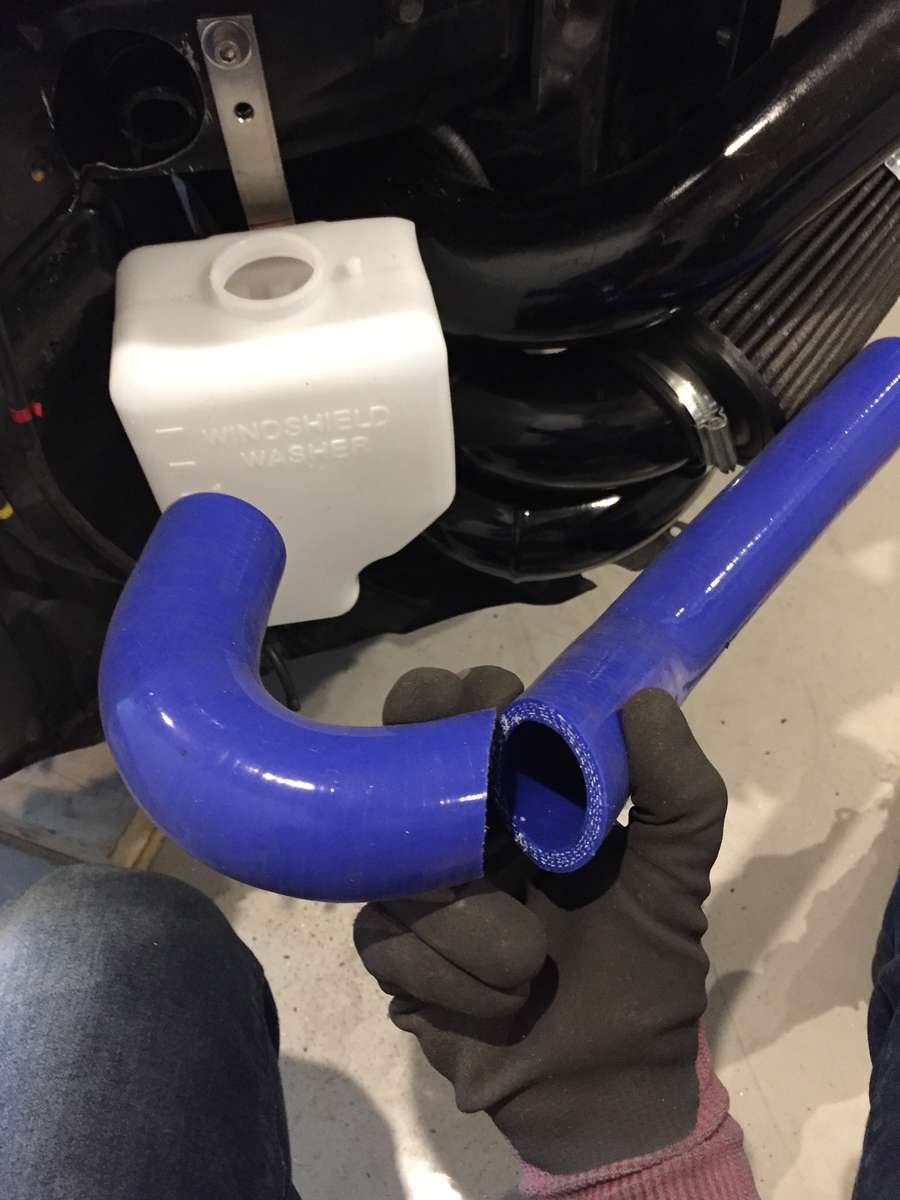
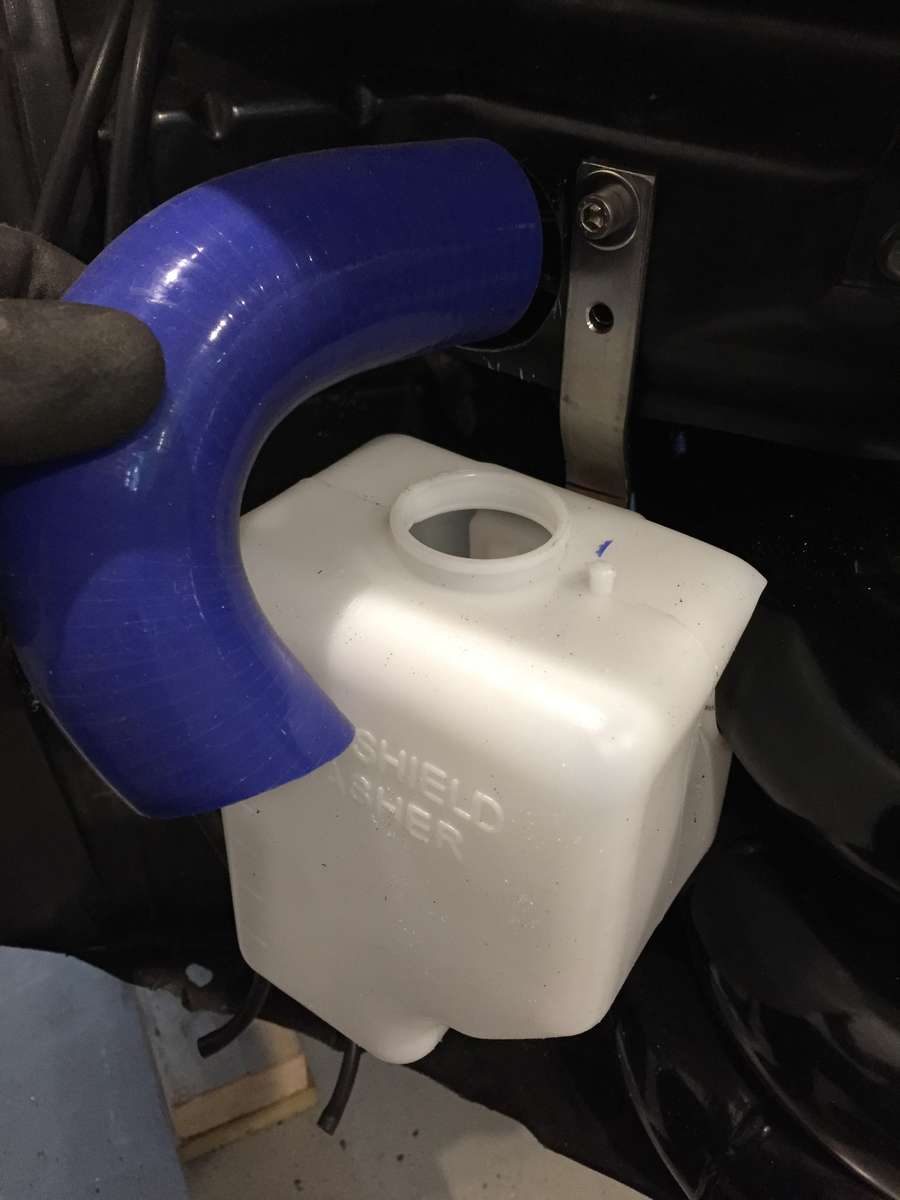
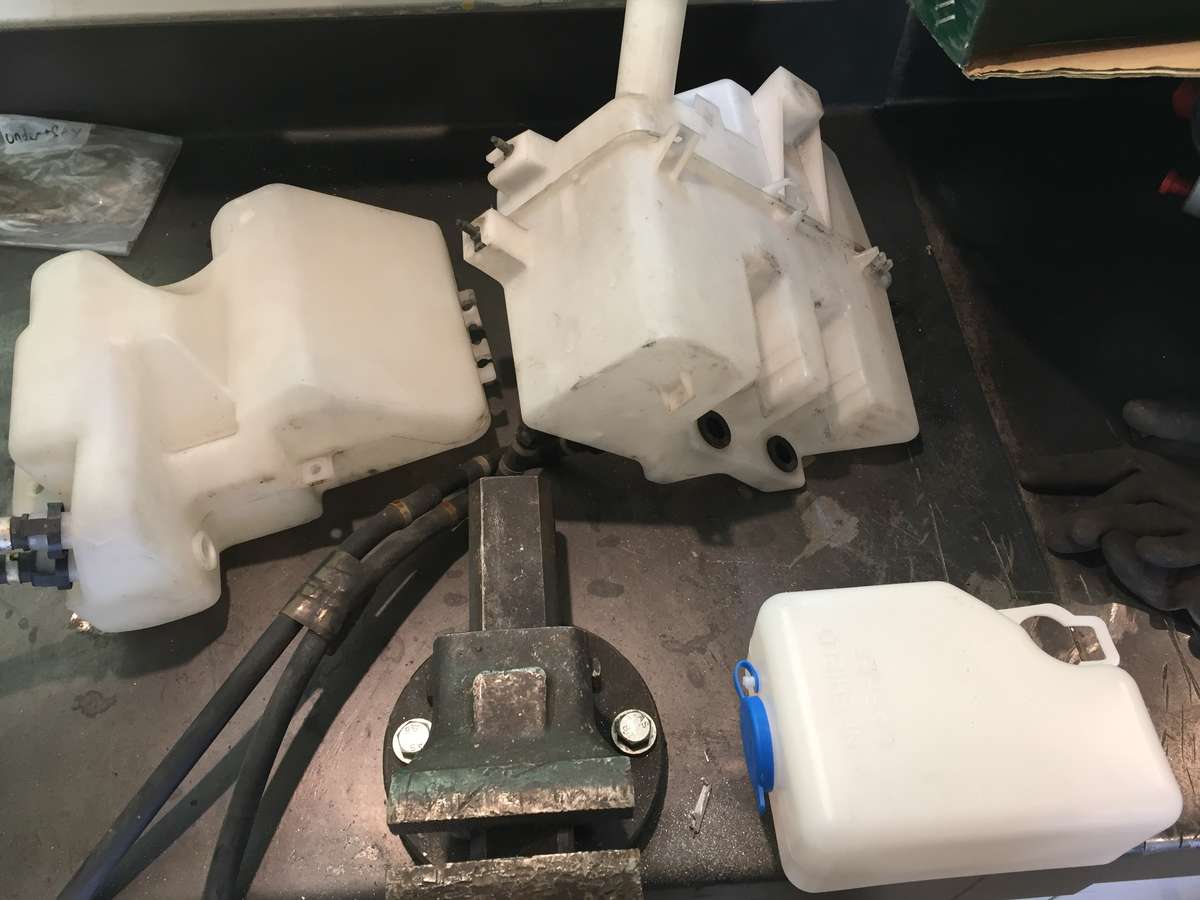
I used a heatgun to reshape the Stock filler neck, and a hole saw to make room for some ca18det radiator hose that will fit.
then used the heatgun to heat up the washer bottle just enough to get the silicone hose snug inside. And the aplayed aquarium silicone gasket.
then i need to make holes for pumps and make new Lines.
-
1
-
-
Washer bottle brackets done, now I'll be cutting the Stock fillerneck to be connected to a hose Wich will go into the washerbottle.
then i just have to work out how to get the pumps attached
-
Allright.
back on jackstands for the final touches before getting licens plates and paying the awesome Danish car tax. Wich is about 12000£ just for licens plates, to drive it in Denmark.

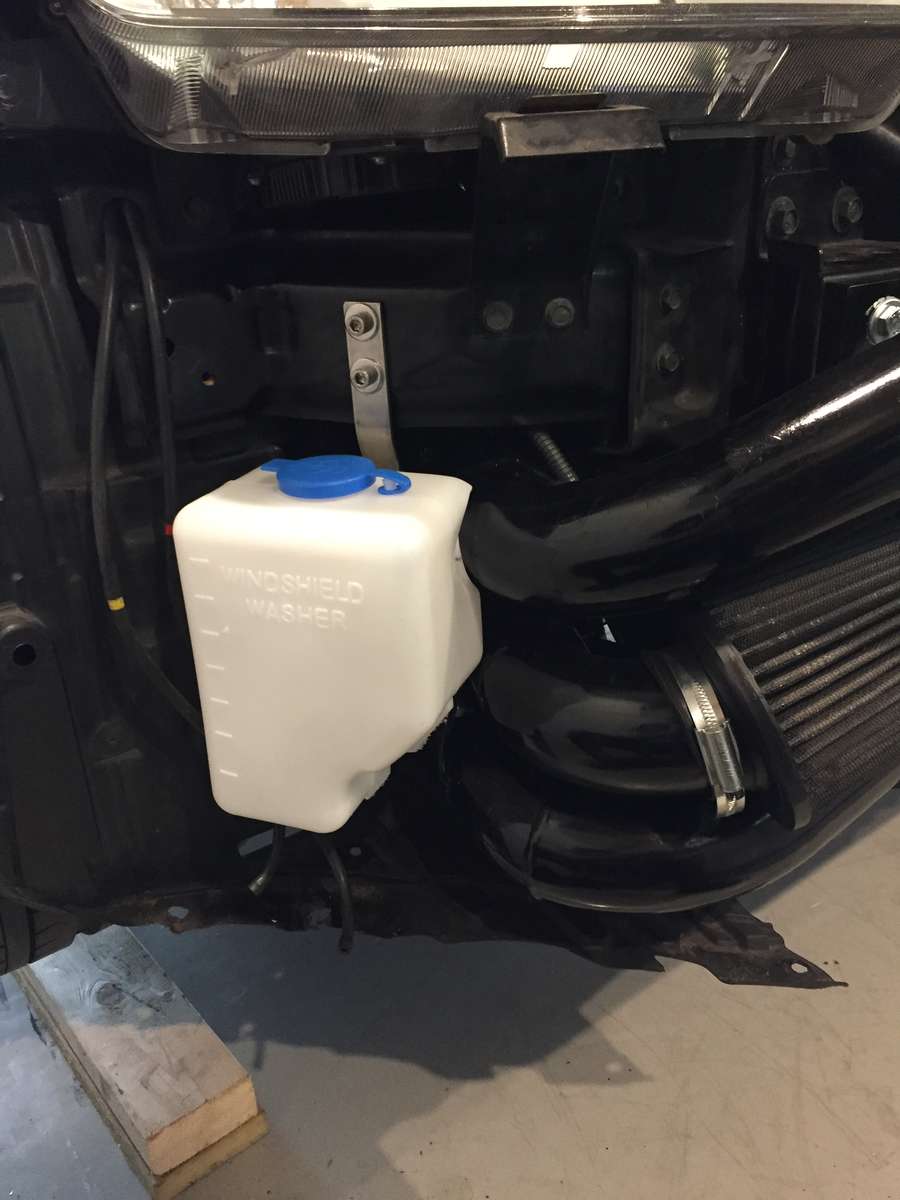
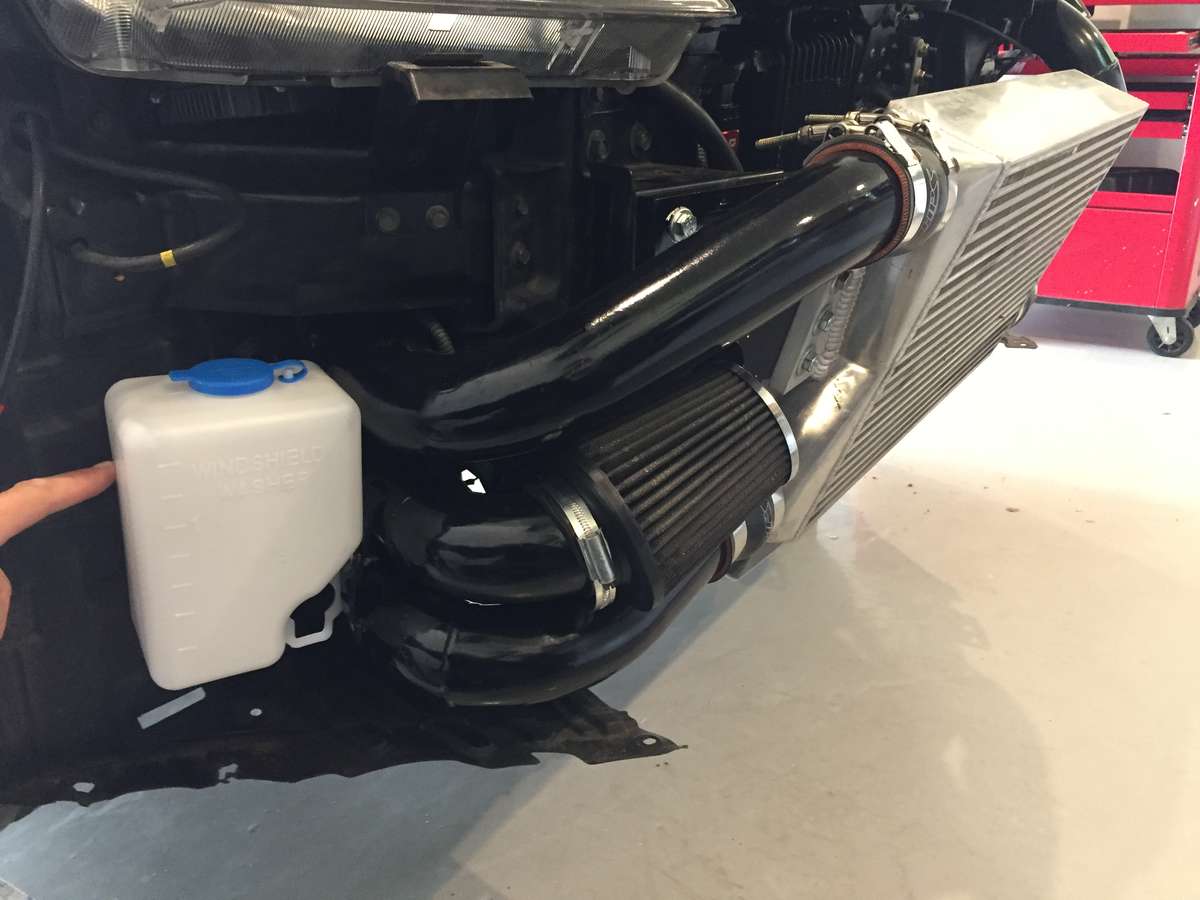
i'm dooing a 1,2L washer bottle, as it suck to be without it the few times u need it.
its going in the right front wing.
also swapping out the headlights for Black depo.
-
1
-
-
25 minutes ago, scobie140 said:
Sounds wild and looks a handful to drive
It's actually very predictable, just overpowered when launching...
-
1
-
-
Video of launch with full launch control.
Only building 0,5 bars of boost and lots of pedaling, spinning the 275 tyres all the Way to 4th when in boost.
have to fiddle some with it maybe lower launch rpm, and more traction control in 1-3 gear
-
2
-
-
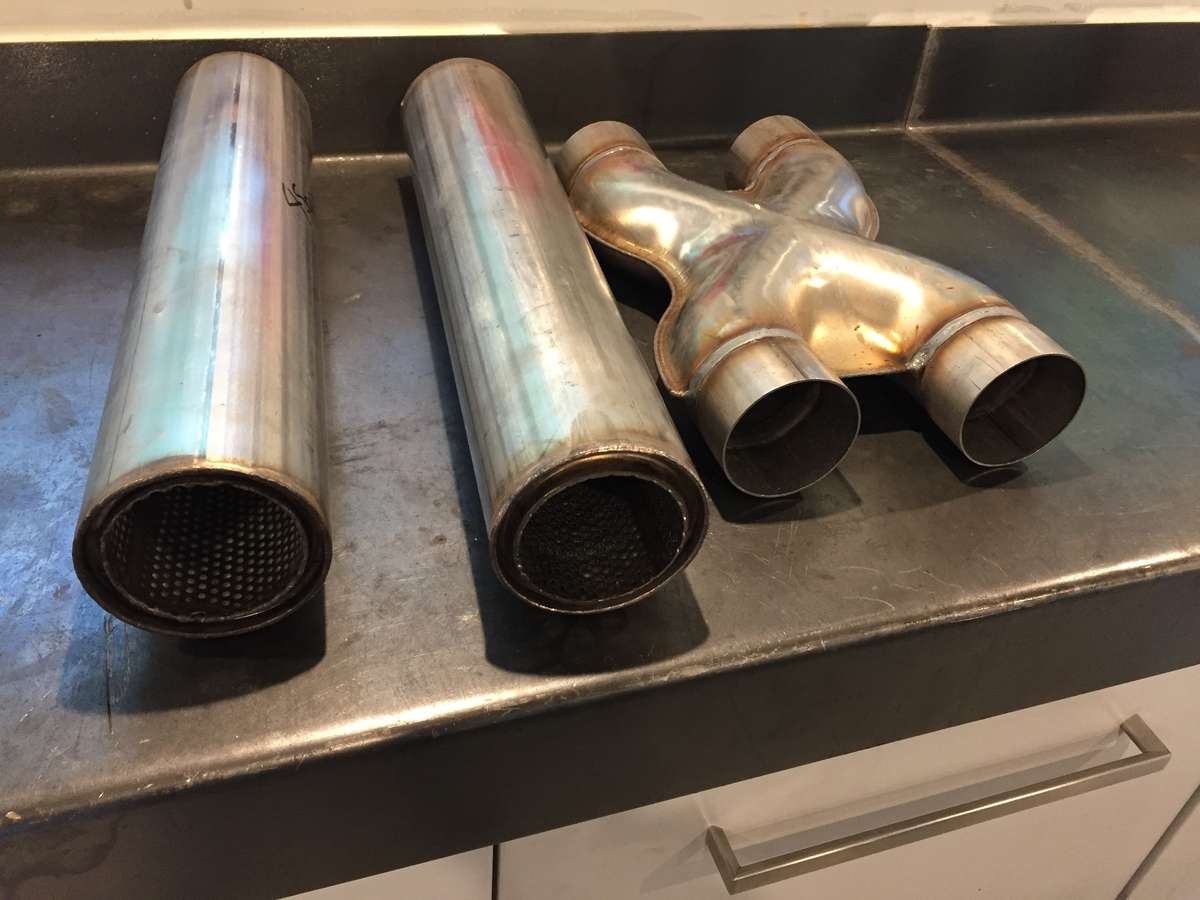
Silencers and an X pipe on the Way for the exhaust.
And i also still need a windscreen washer bottle of some kind. I Think I'll do a 1L tank that will fit under the bumper and be done with it.
I think that's the last few pieces in the puzzle for now.
-
1 hour ago, Jack94 said:
Great thread, good to hear all your hard work paid off

Thank you.
And me too. The z is truely transformed
Rear arch rust repair
in Bodywork
Posted
And all naked and ready for paint.
had to get rough with the antenne to get it off. The aluminium had ceased pretty god.
i'll have to get a new one.
and pulled the Stock sideskirts also, and found some surface rust that i will fix before putting it back together.
there's always something!