

taras
-
Posts
1,018 -
Joined
-
Last visited
Content Type
Profiles
Forums
Events
Gallery
Store
Posts posted by taras
-
-
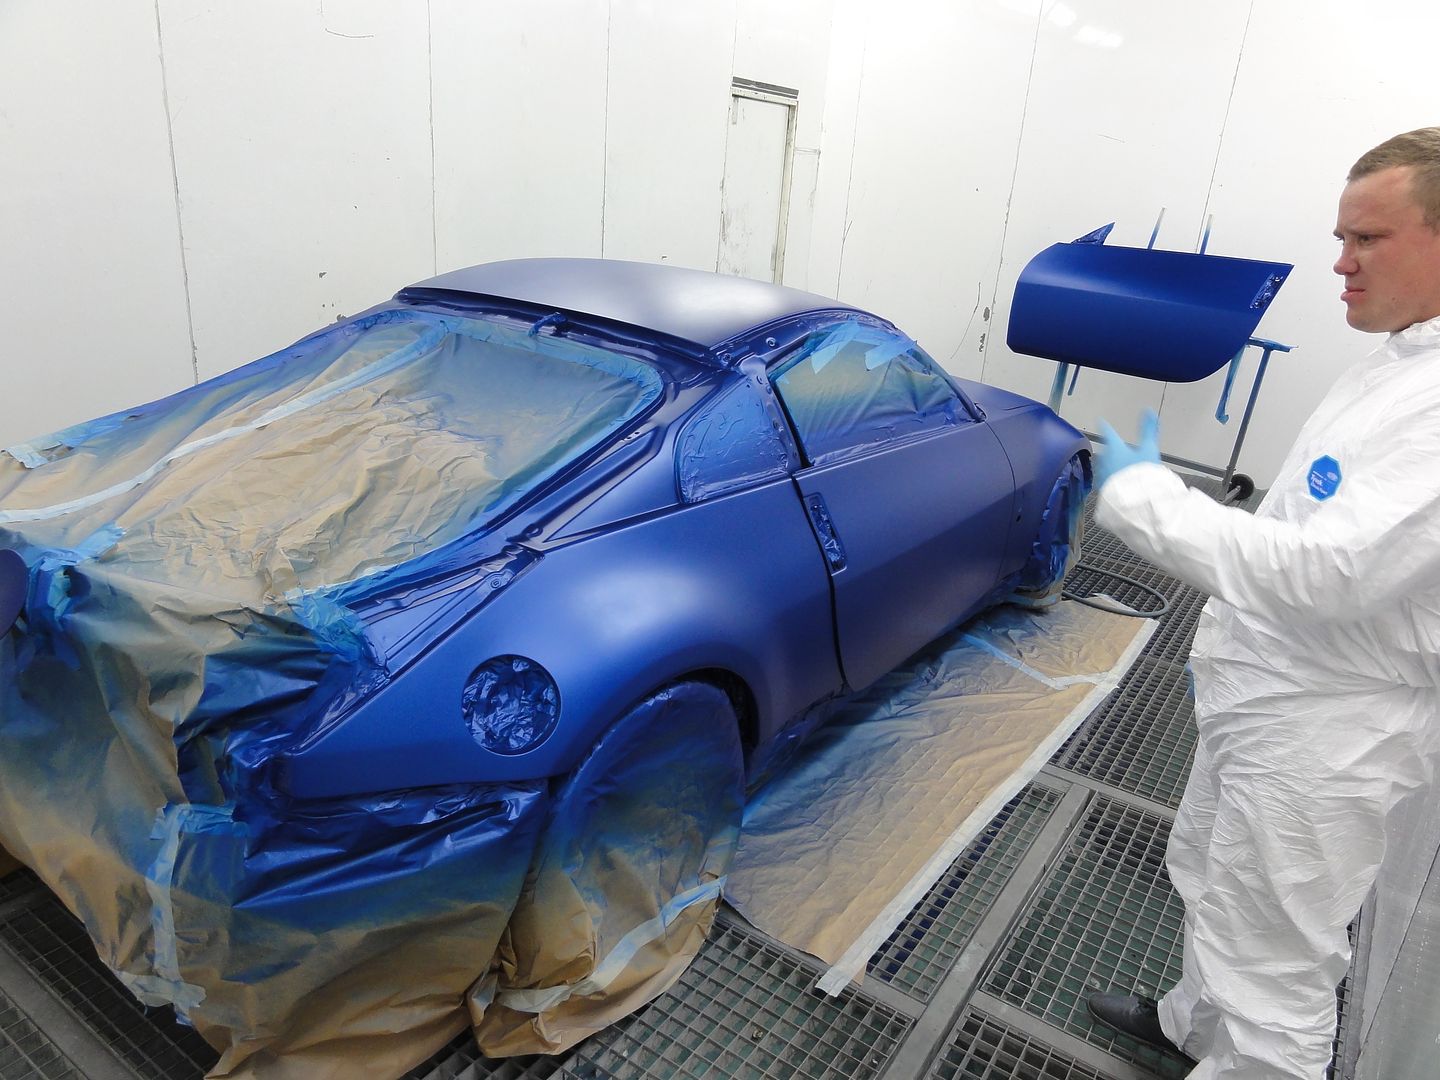
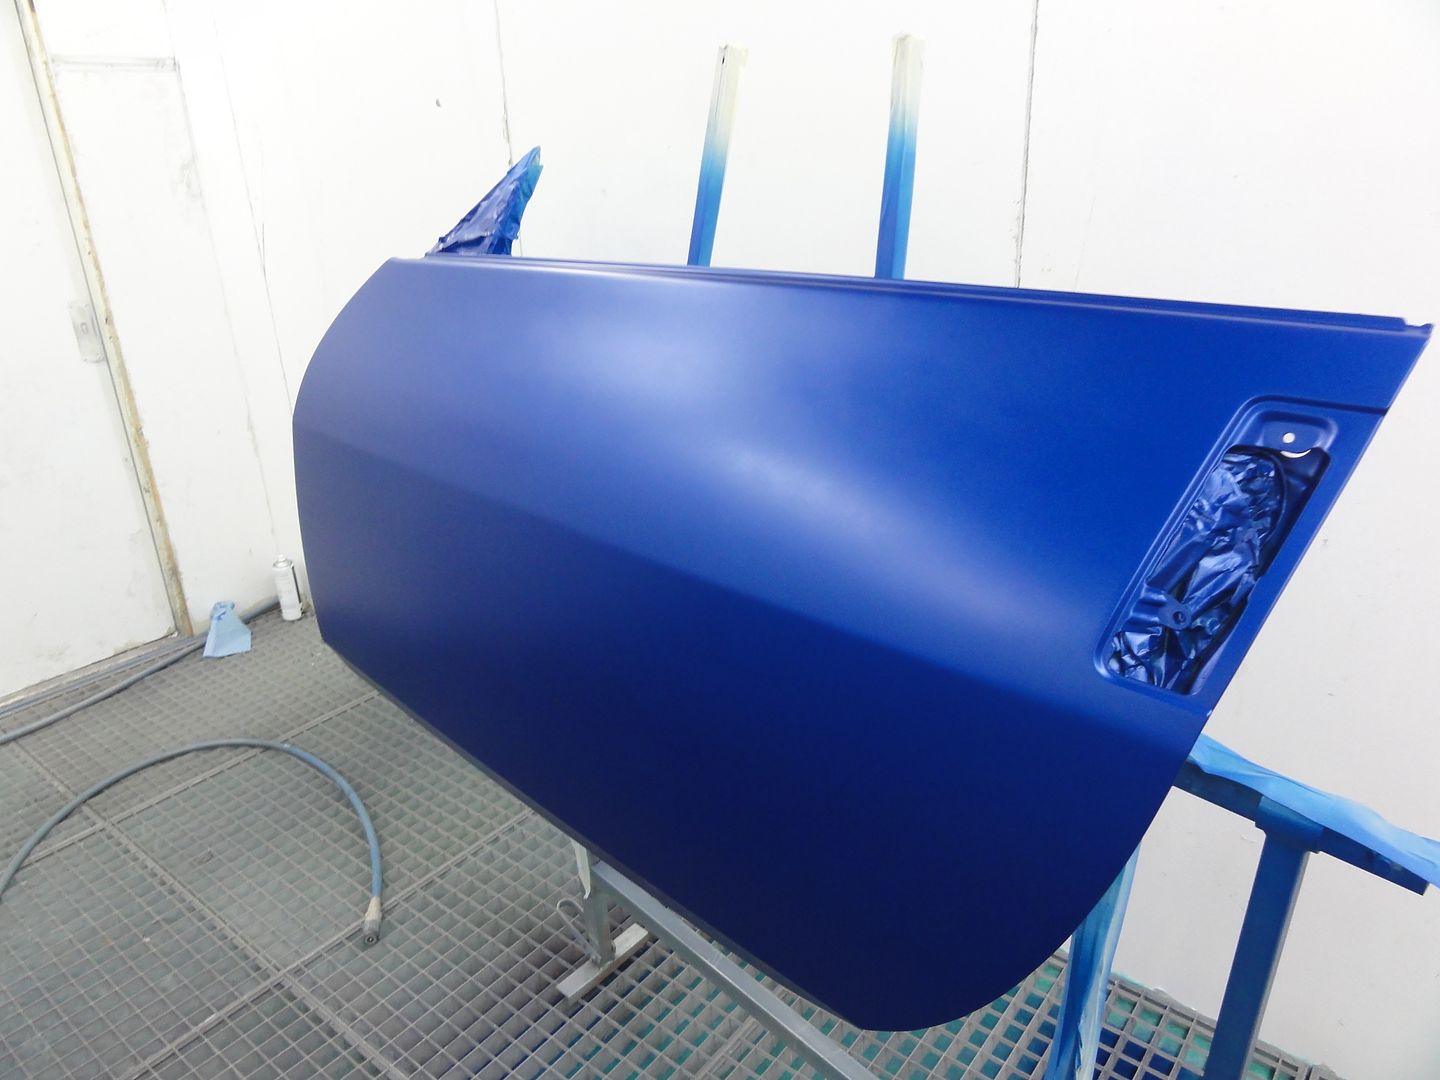
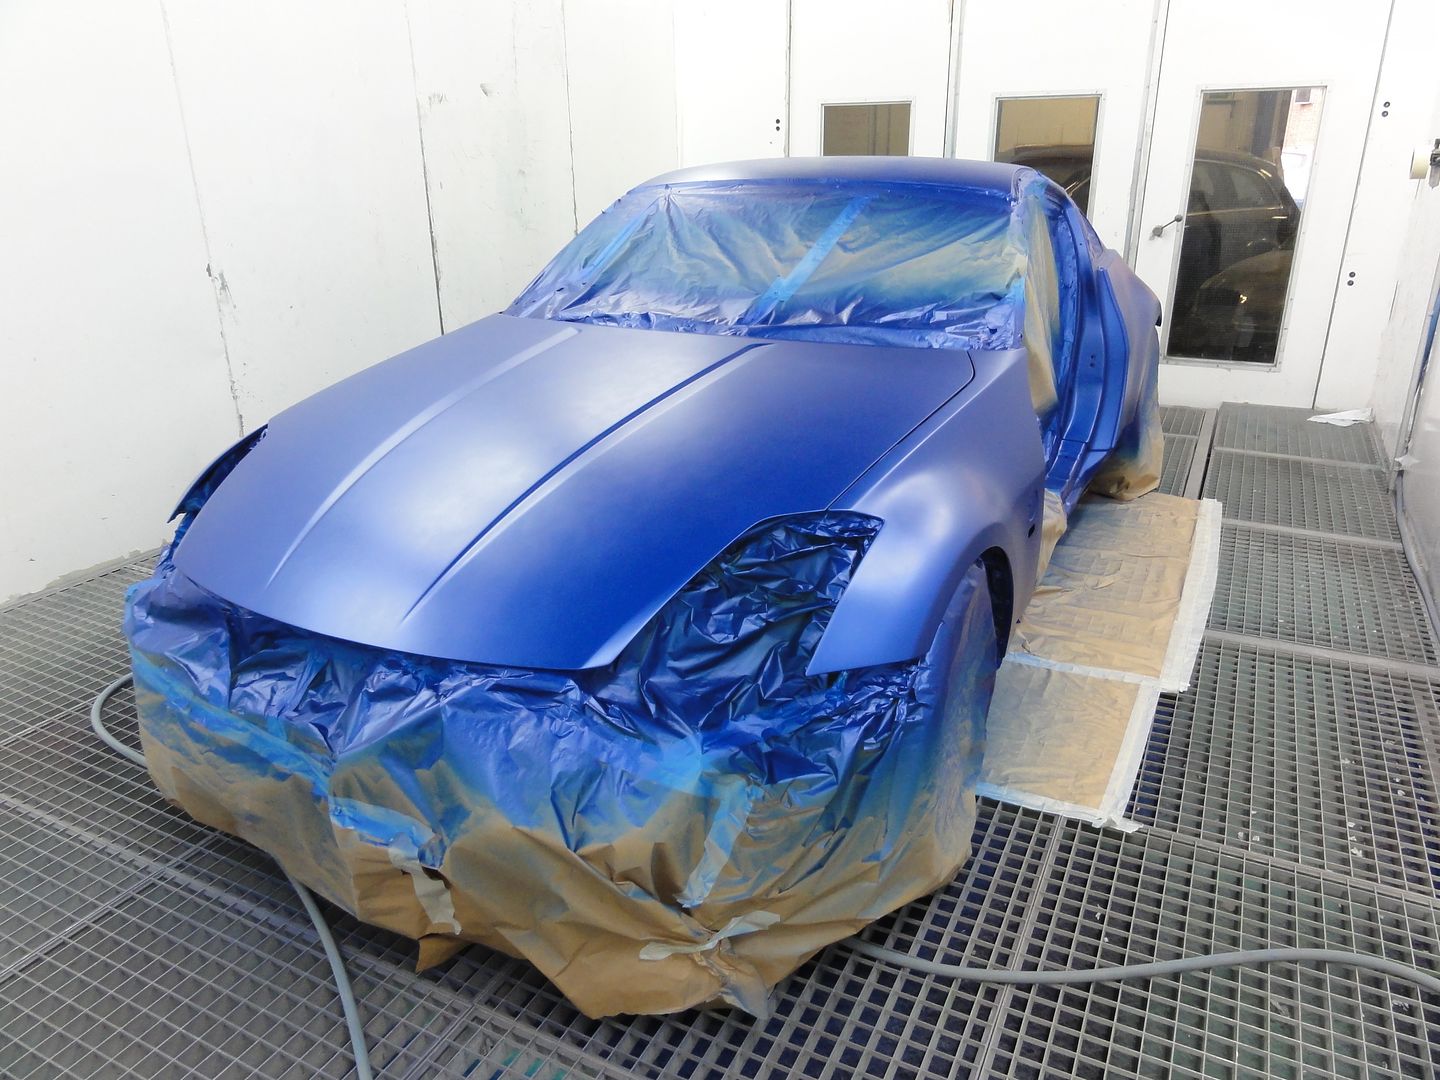
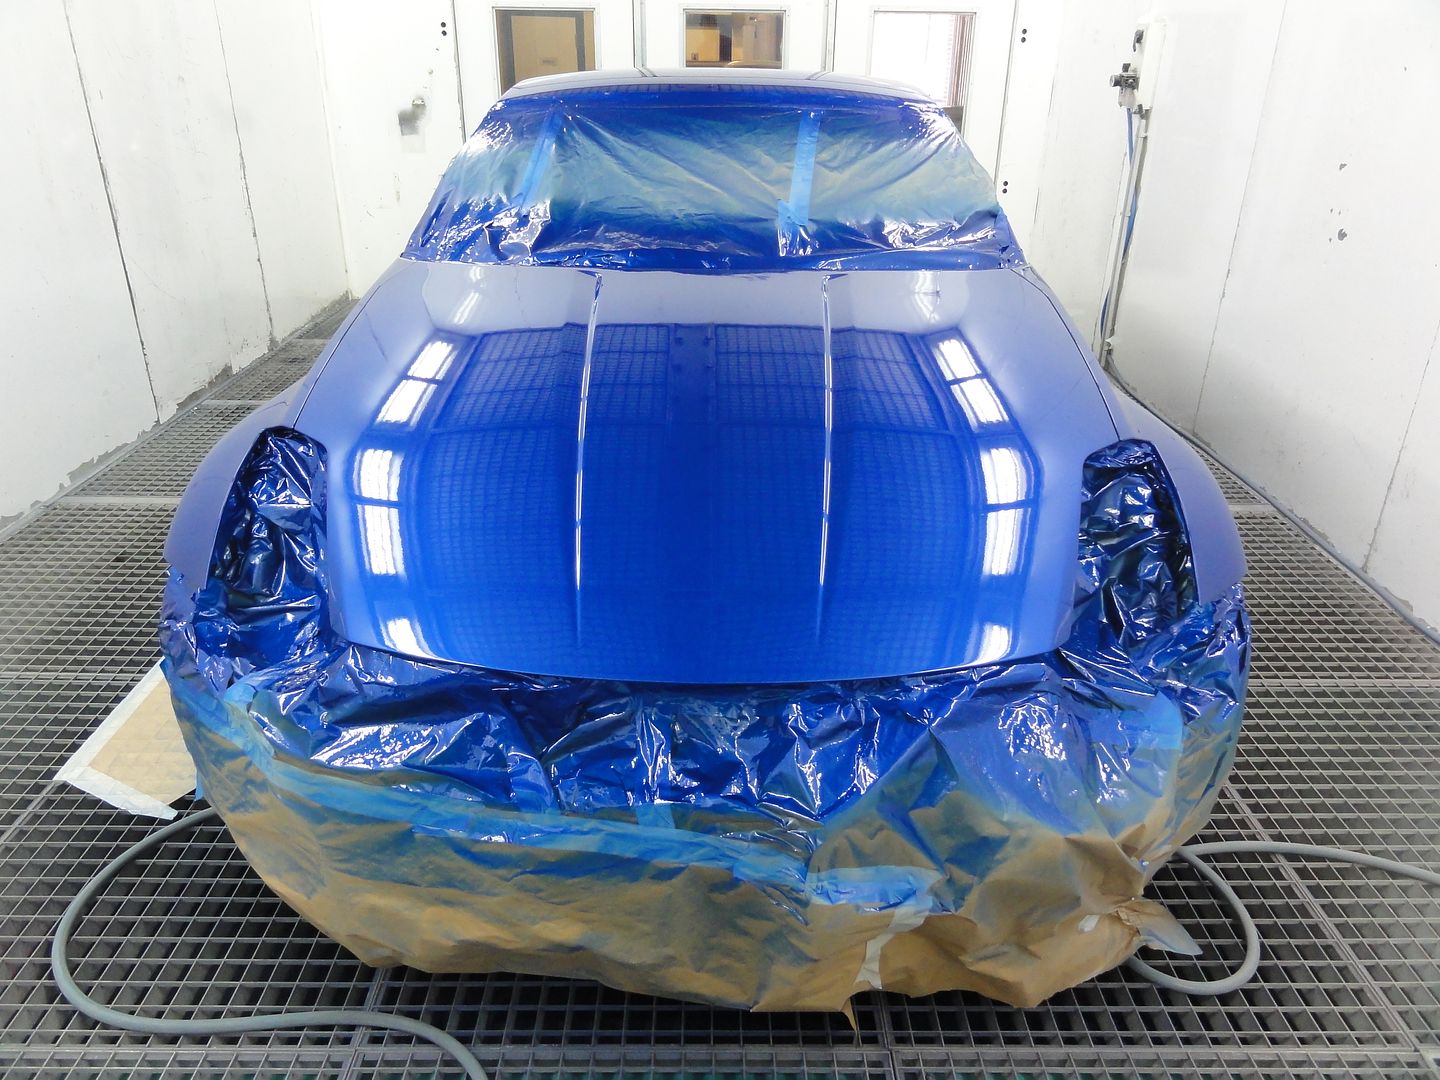
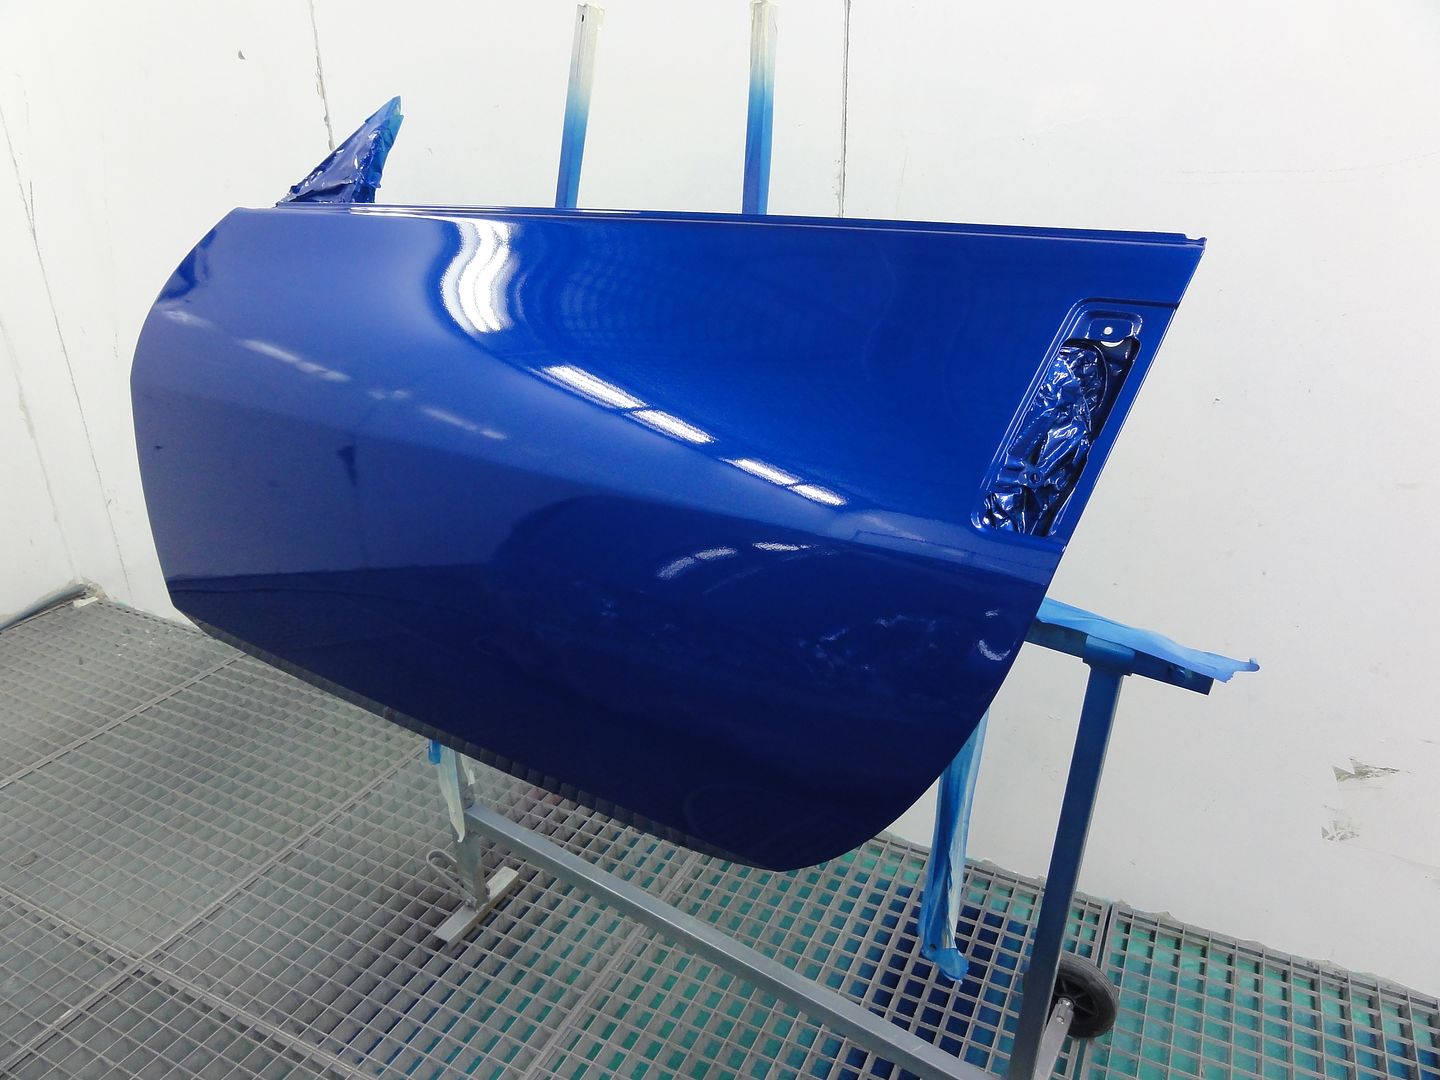
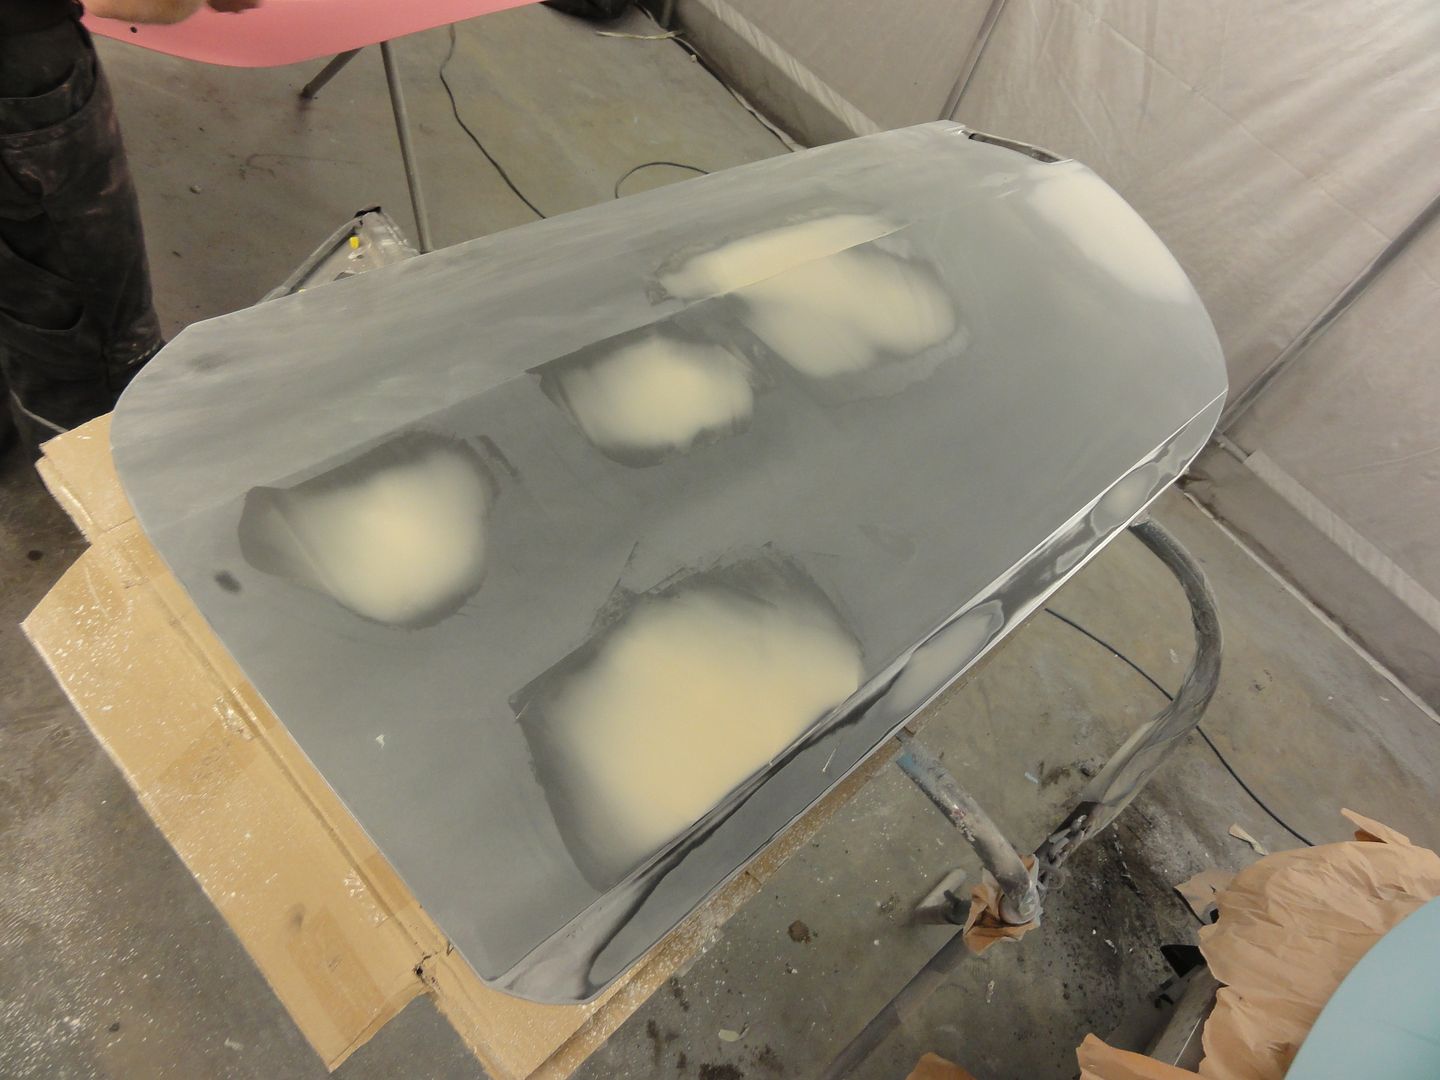
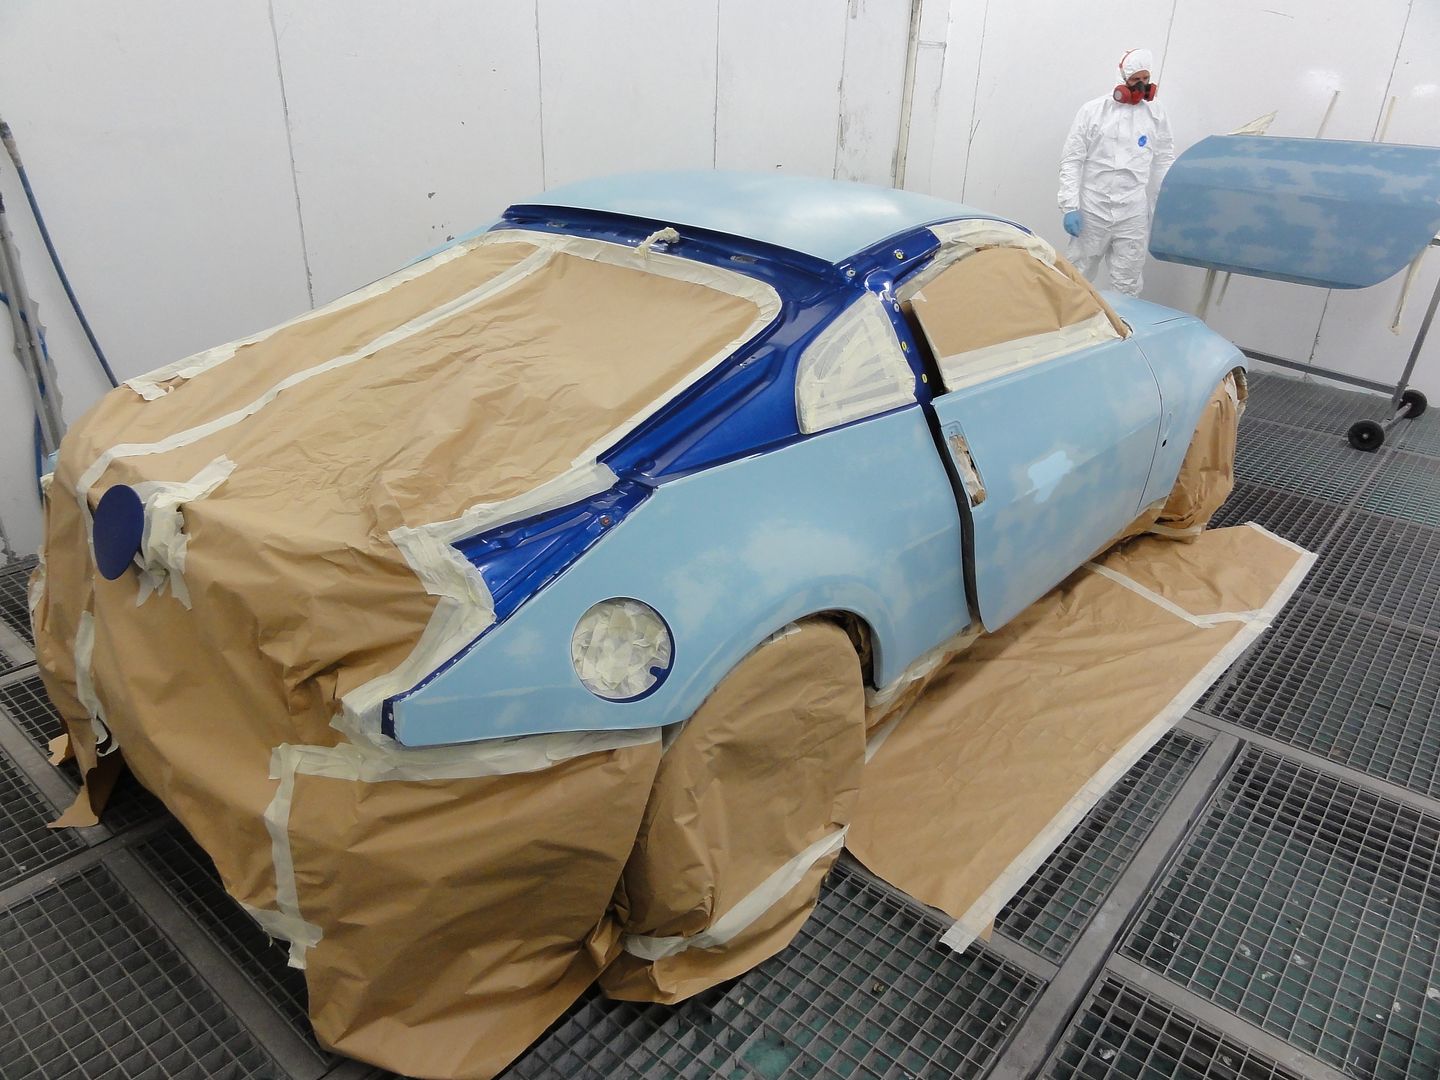
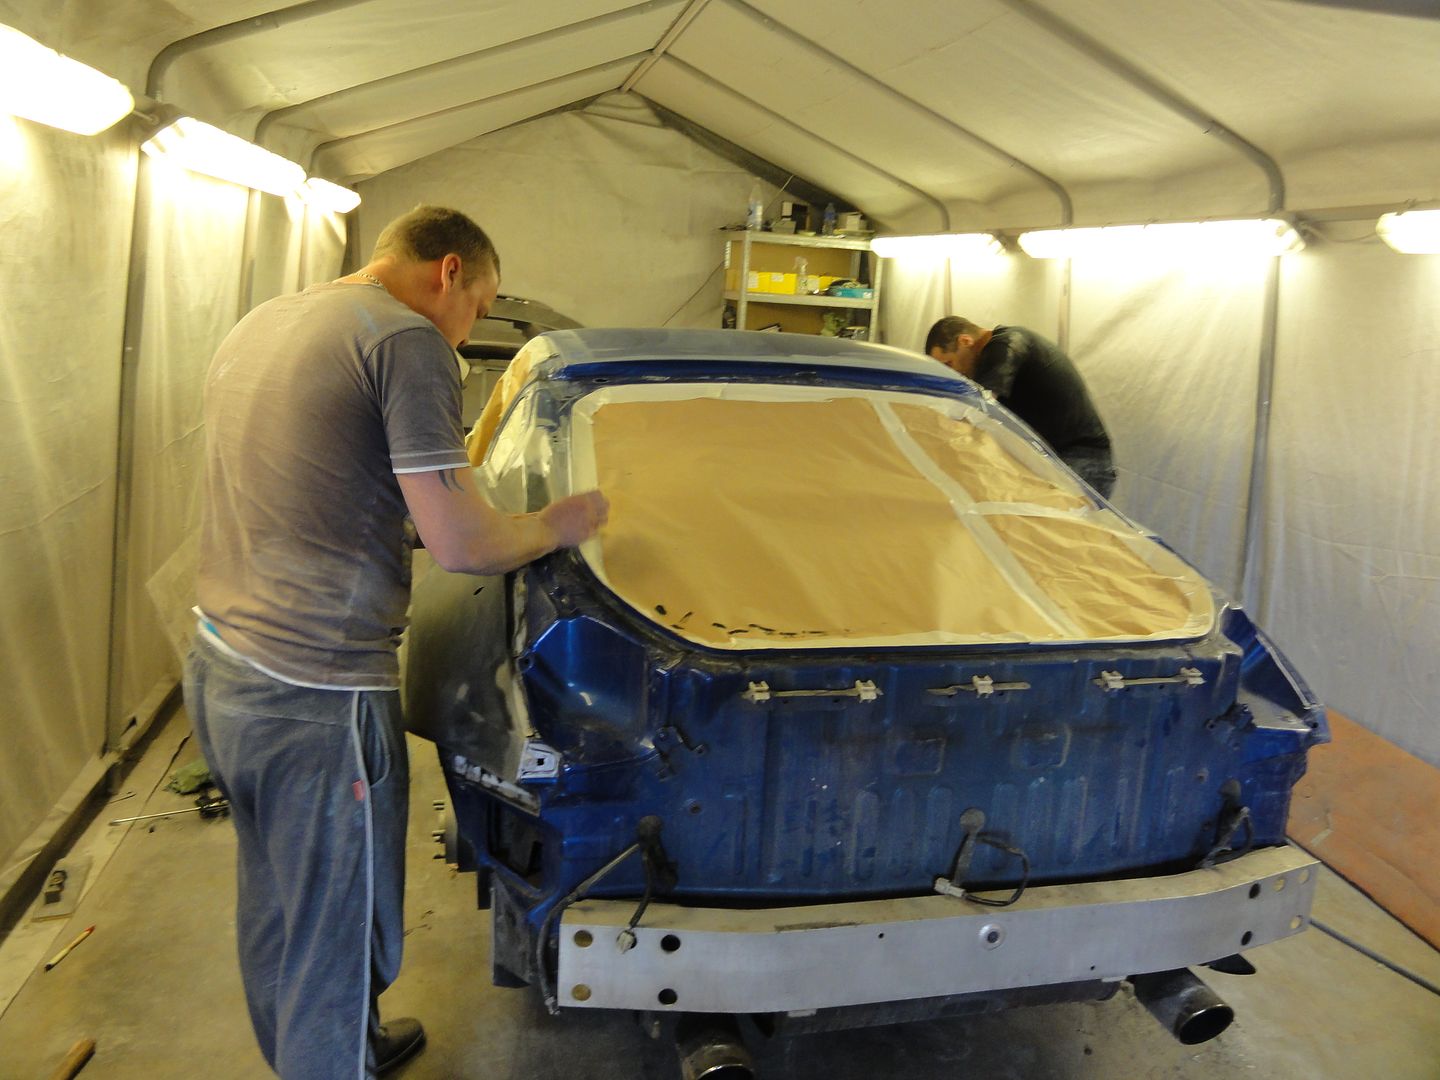
The colour remains Azure Blue. We selected the most common shade used and because the entire car is being sprayed the same colour, we wouldn't have to worry about colour matching no more.
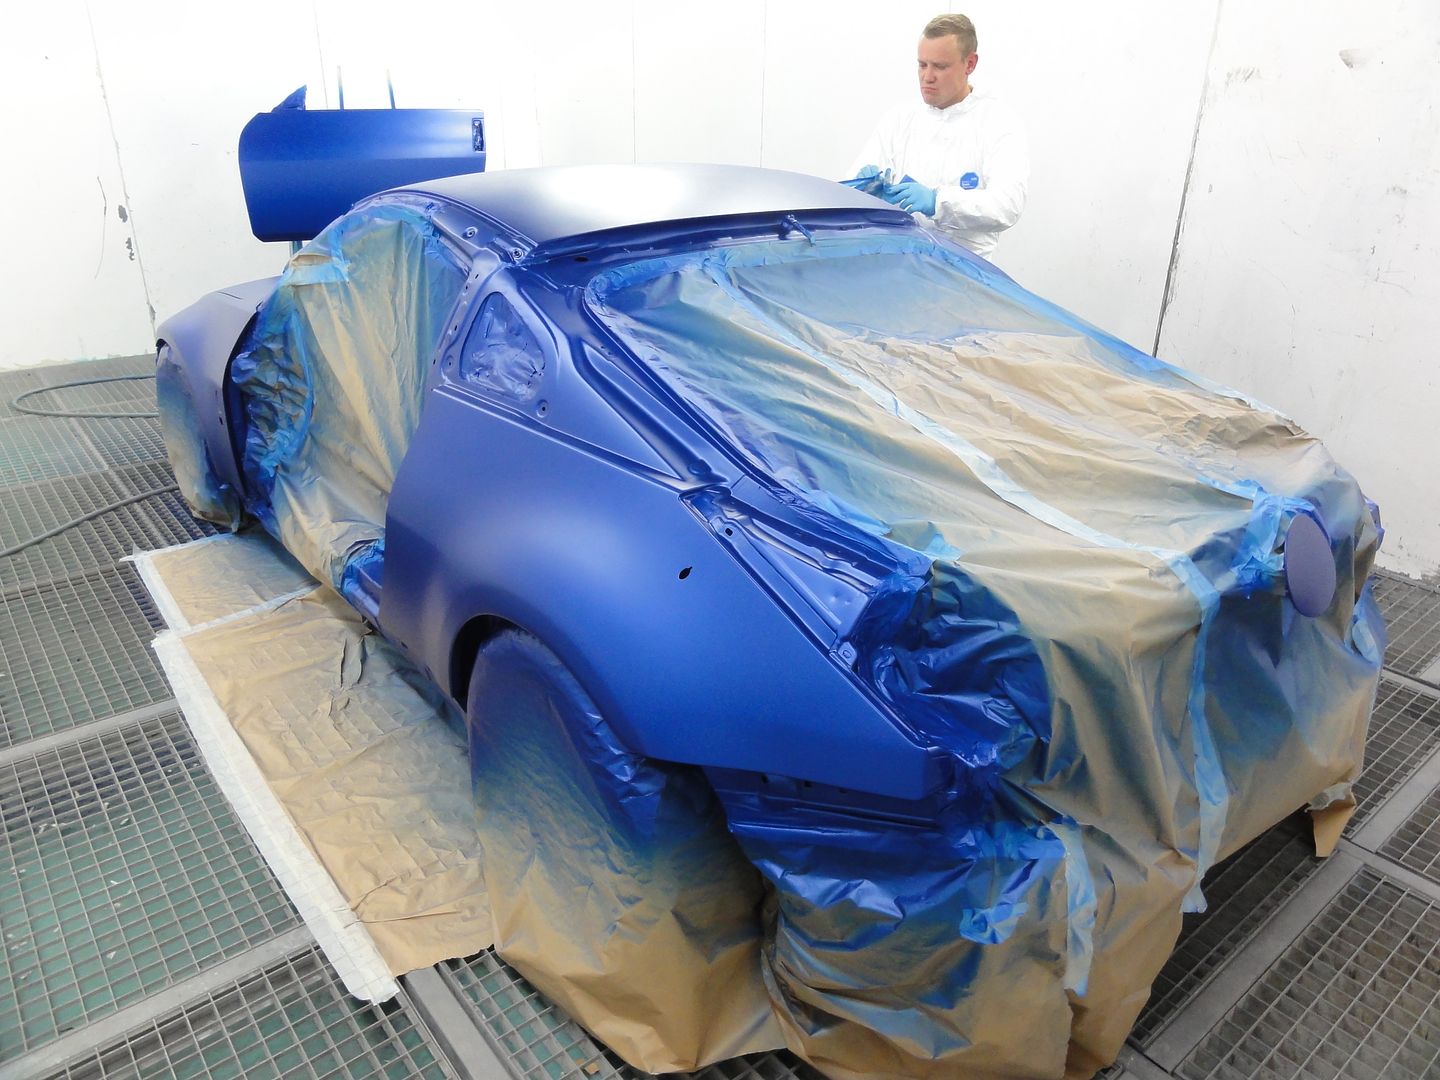
Then a nice thick coat of clear coat and beaked
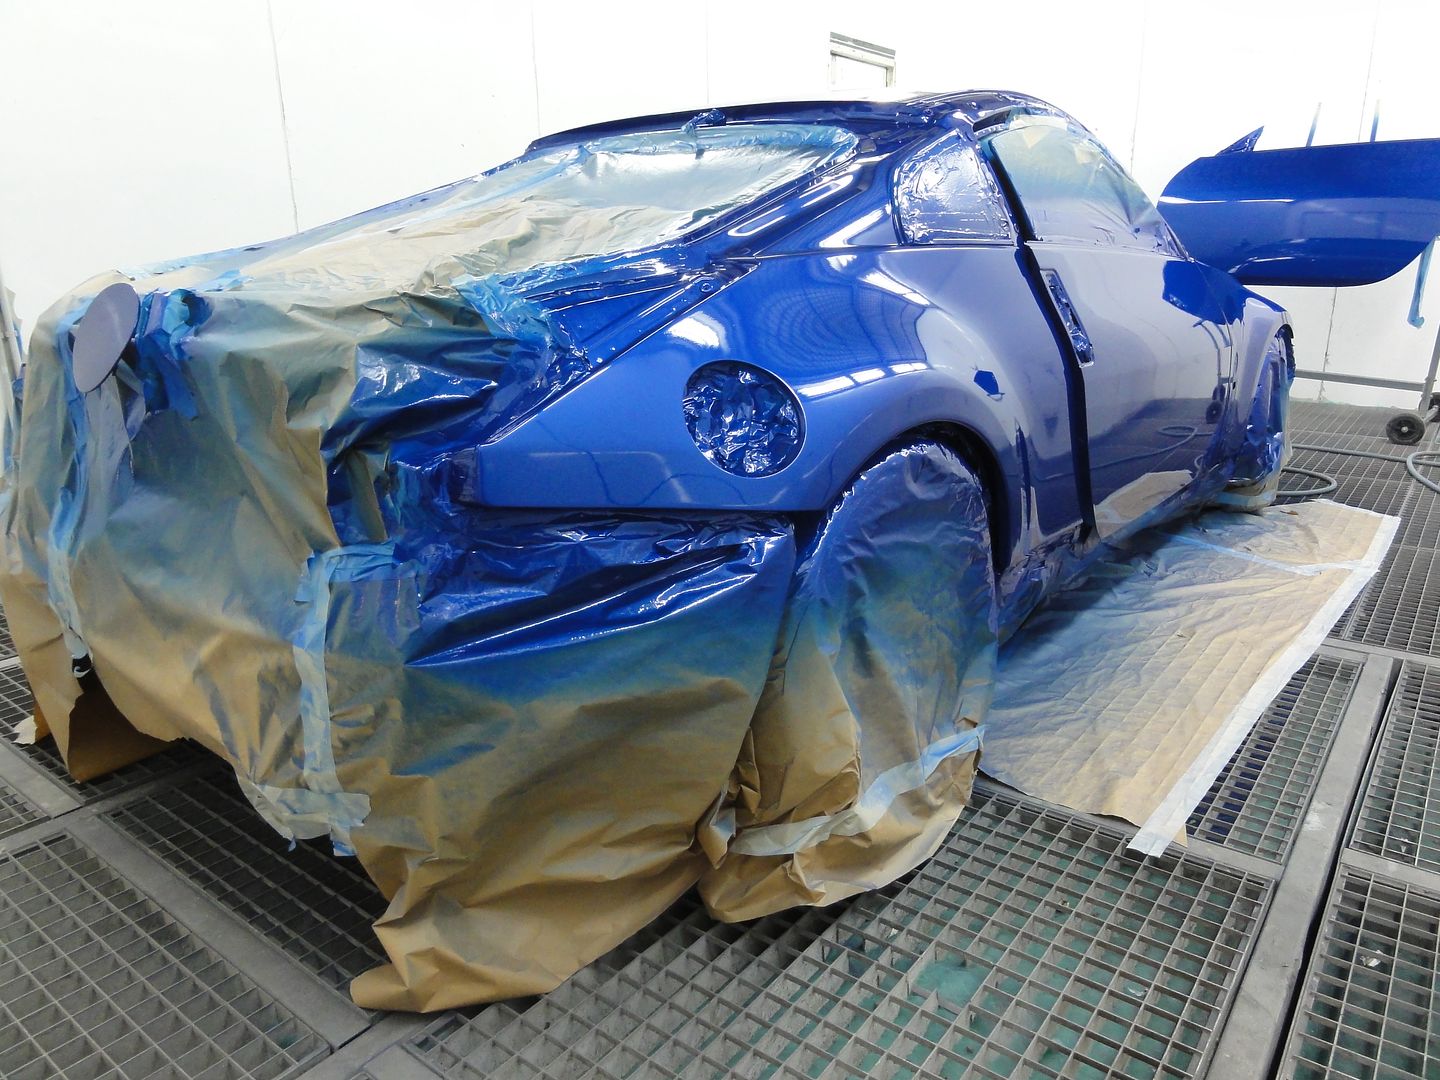
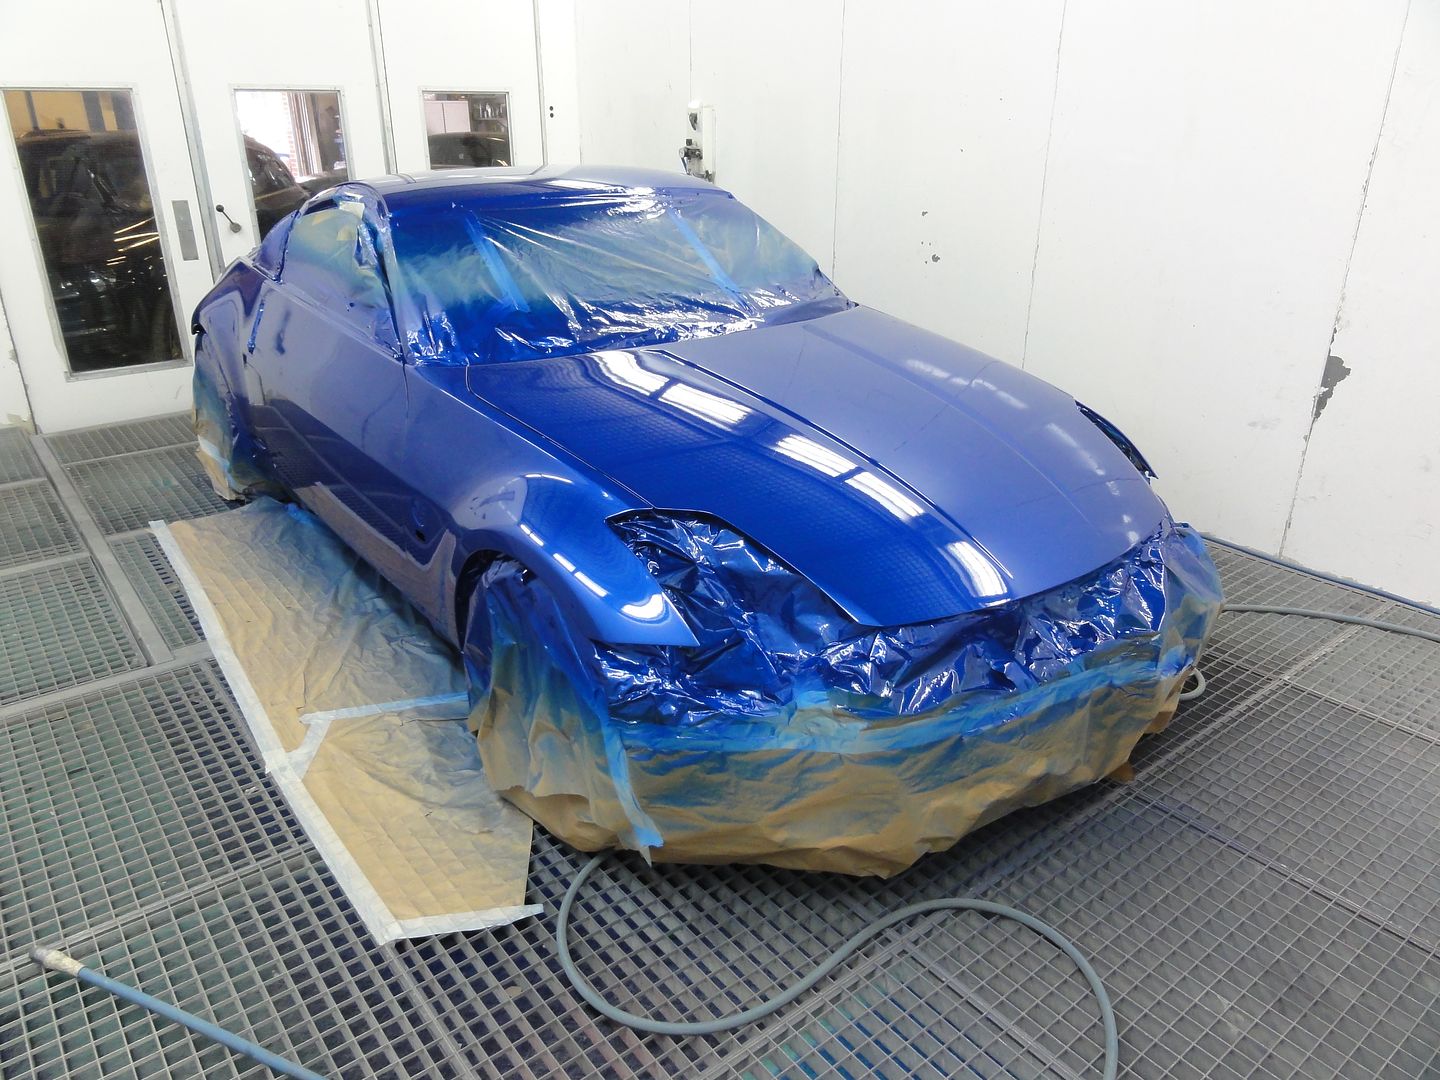
As if it never happened
-
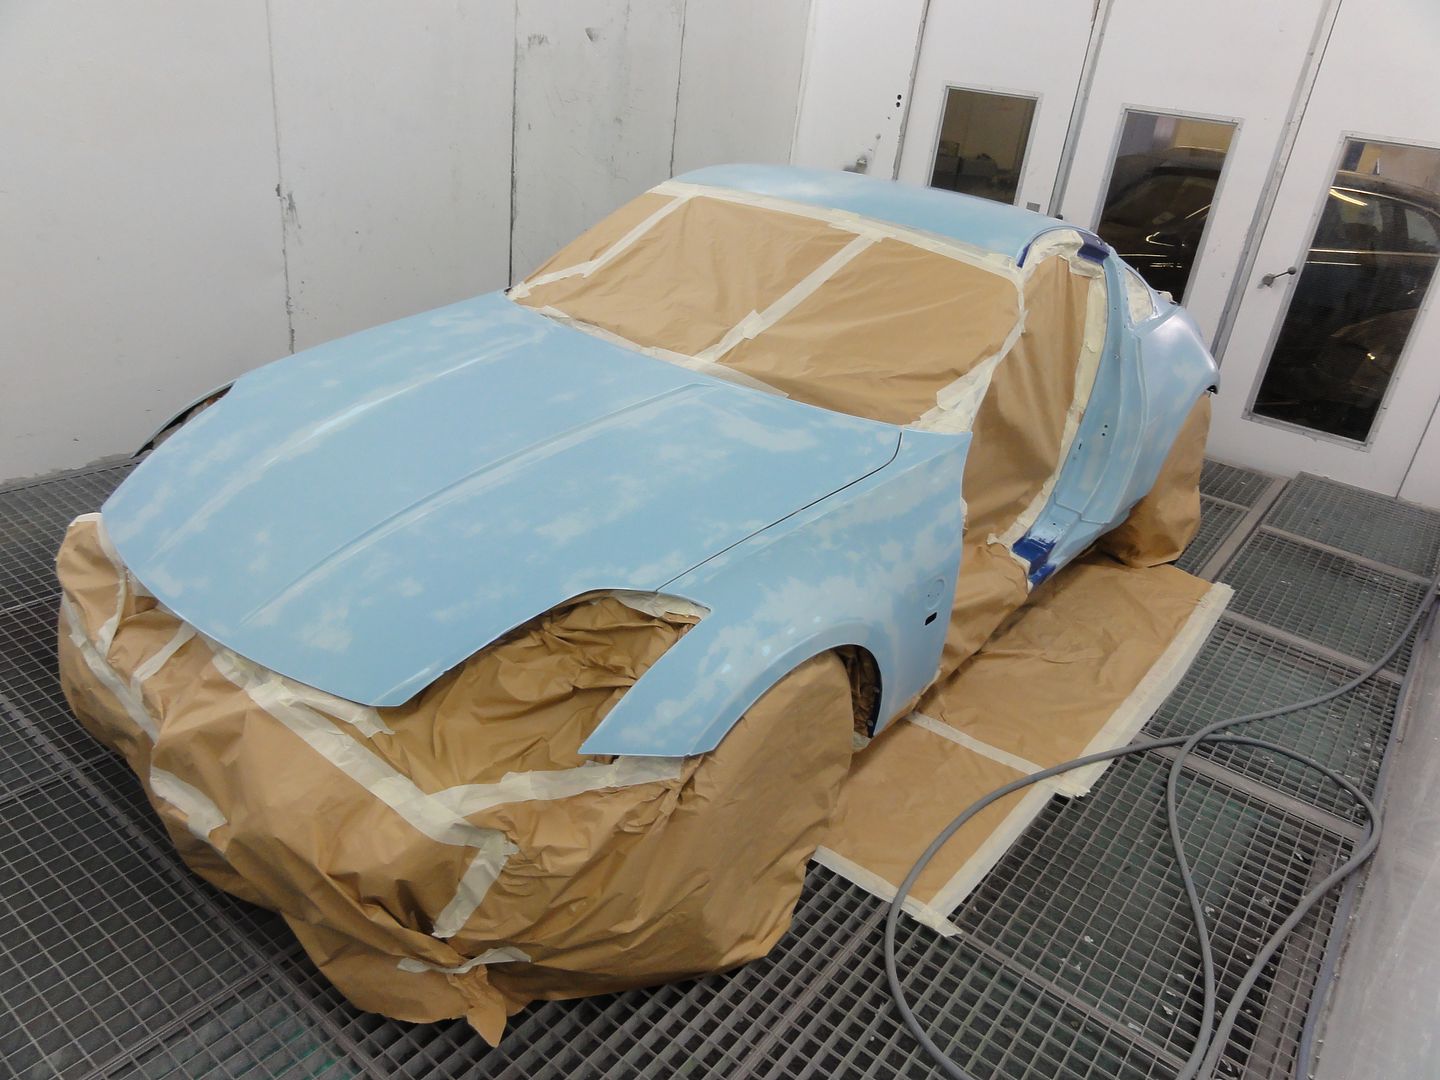
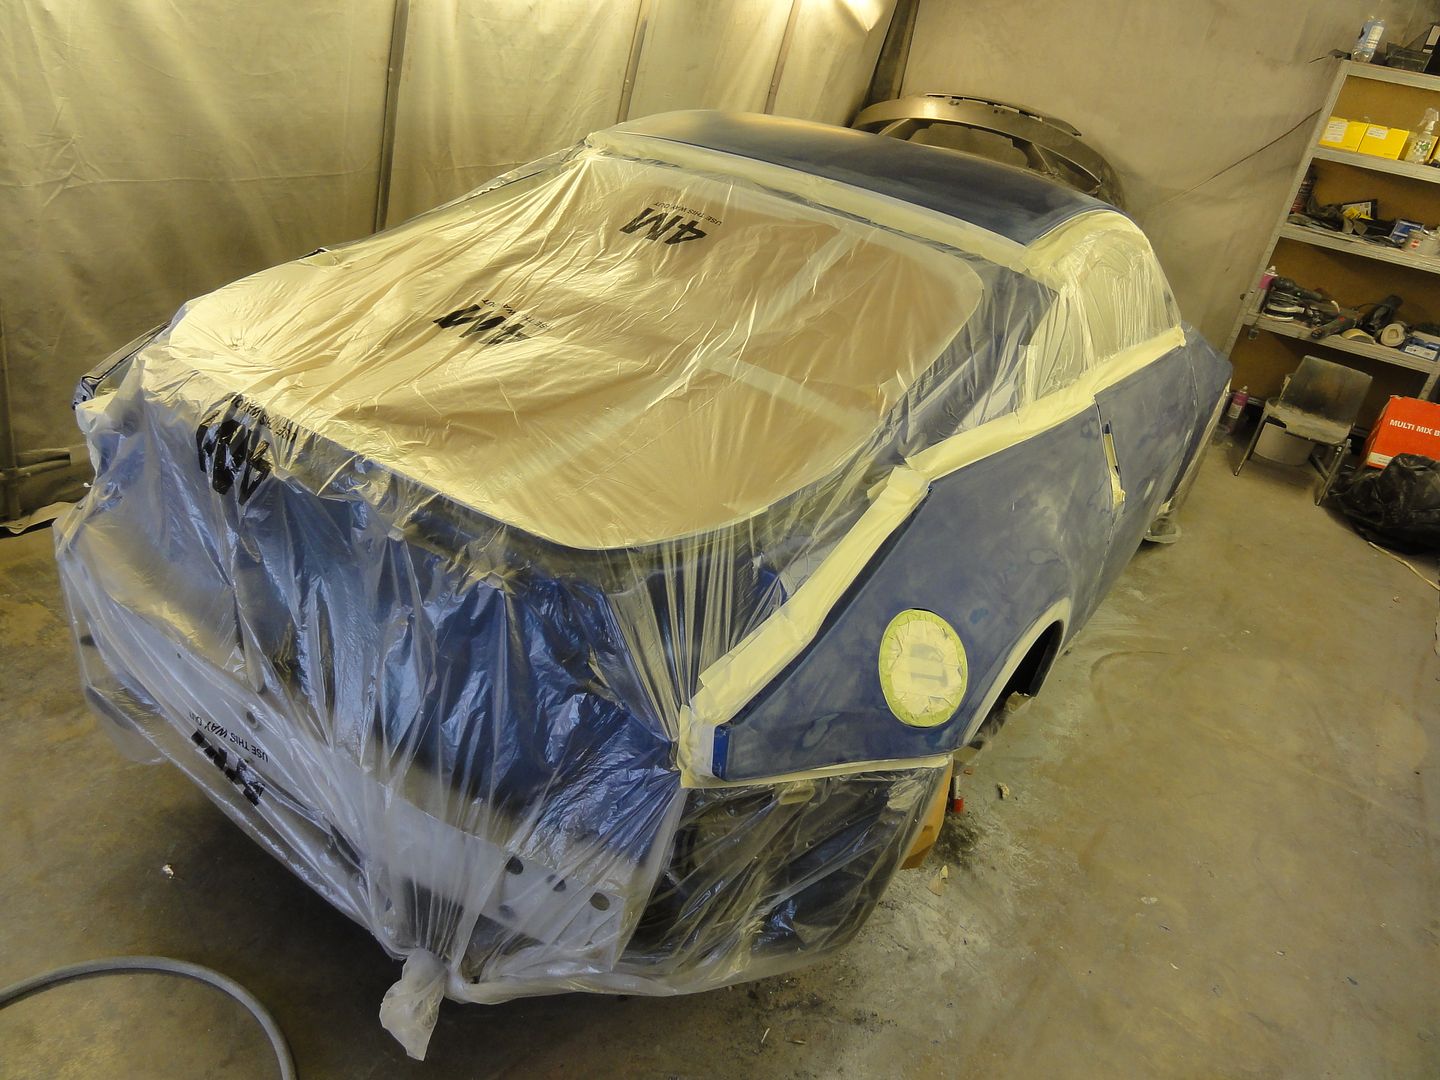
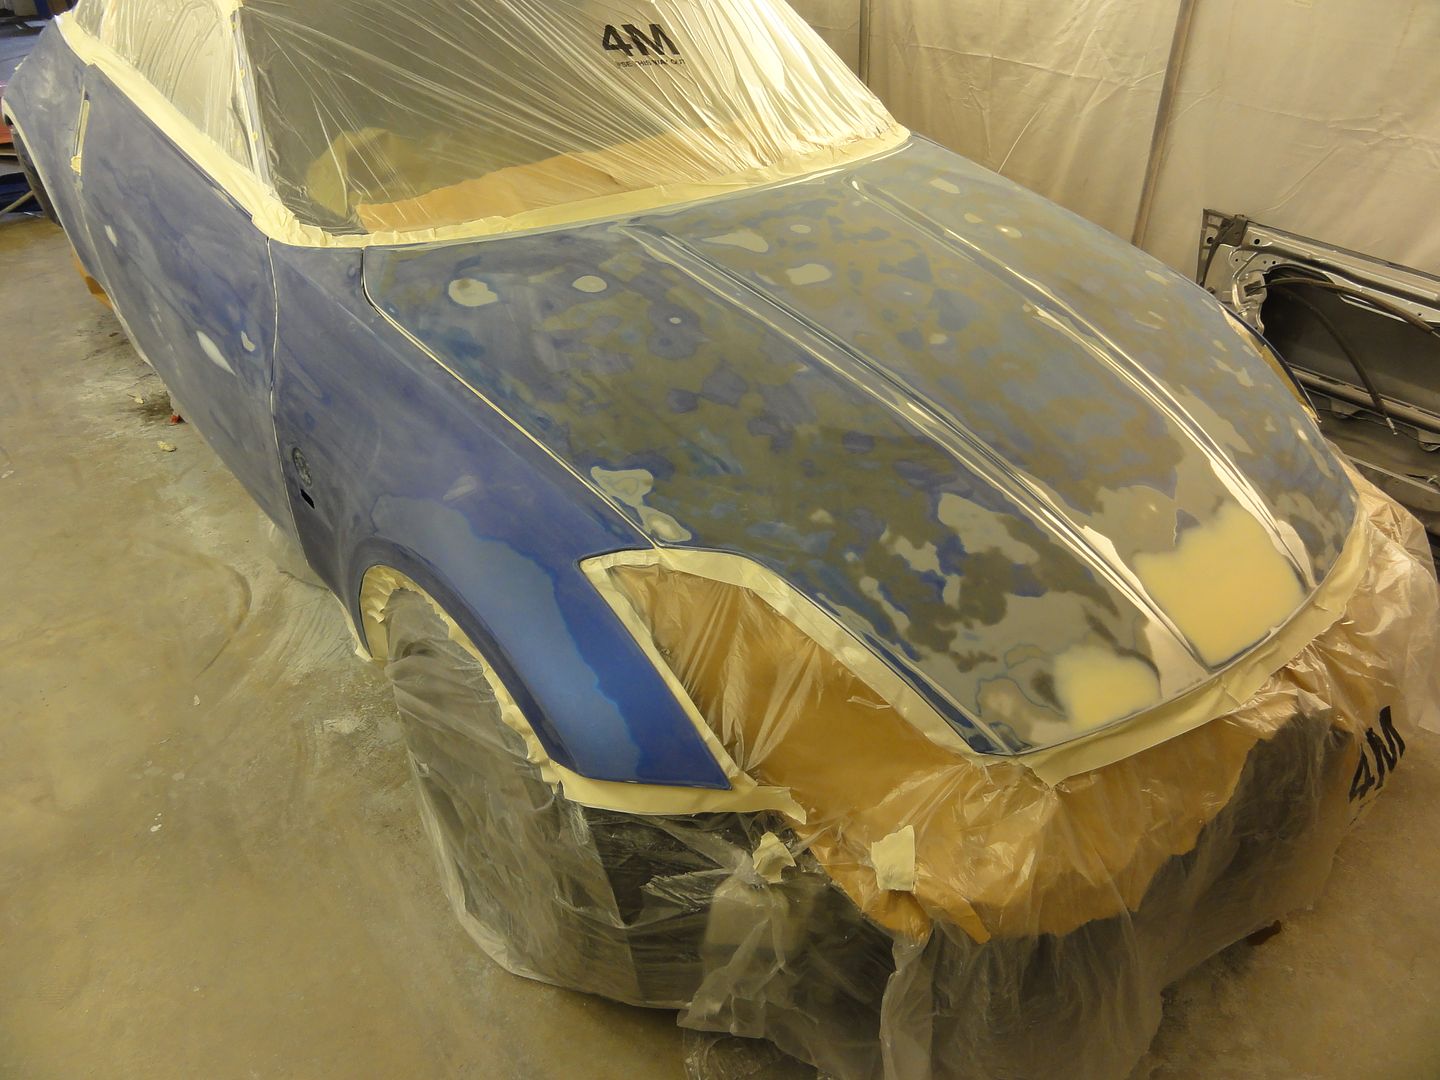
Here it is primed
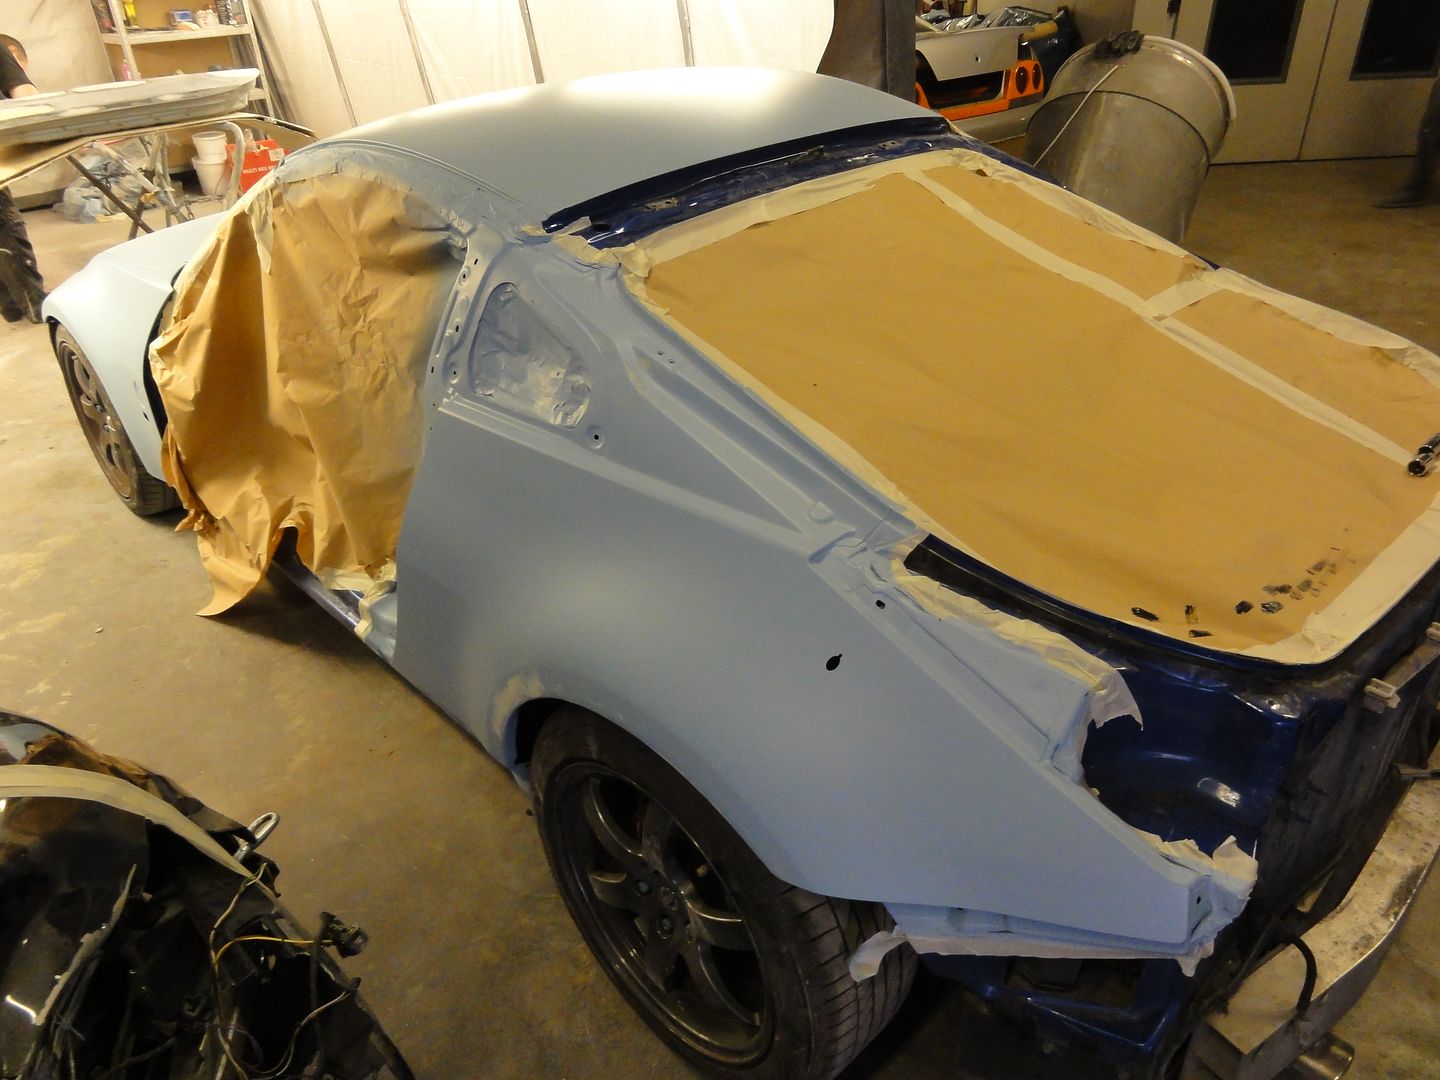
And the door
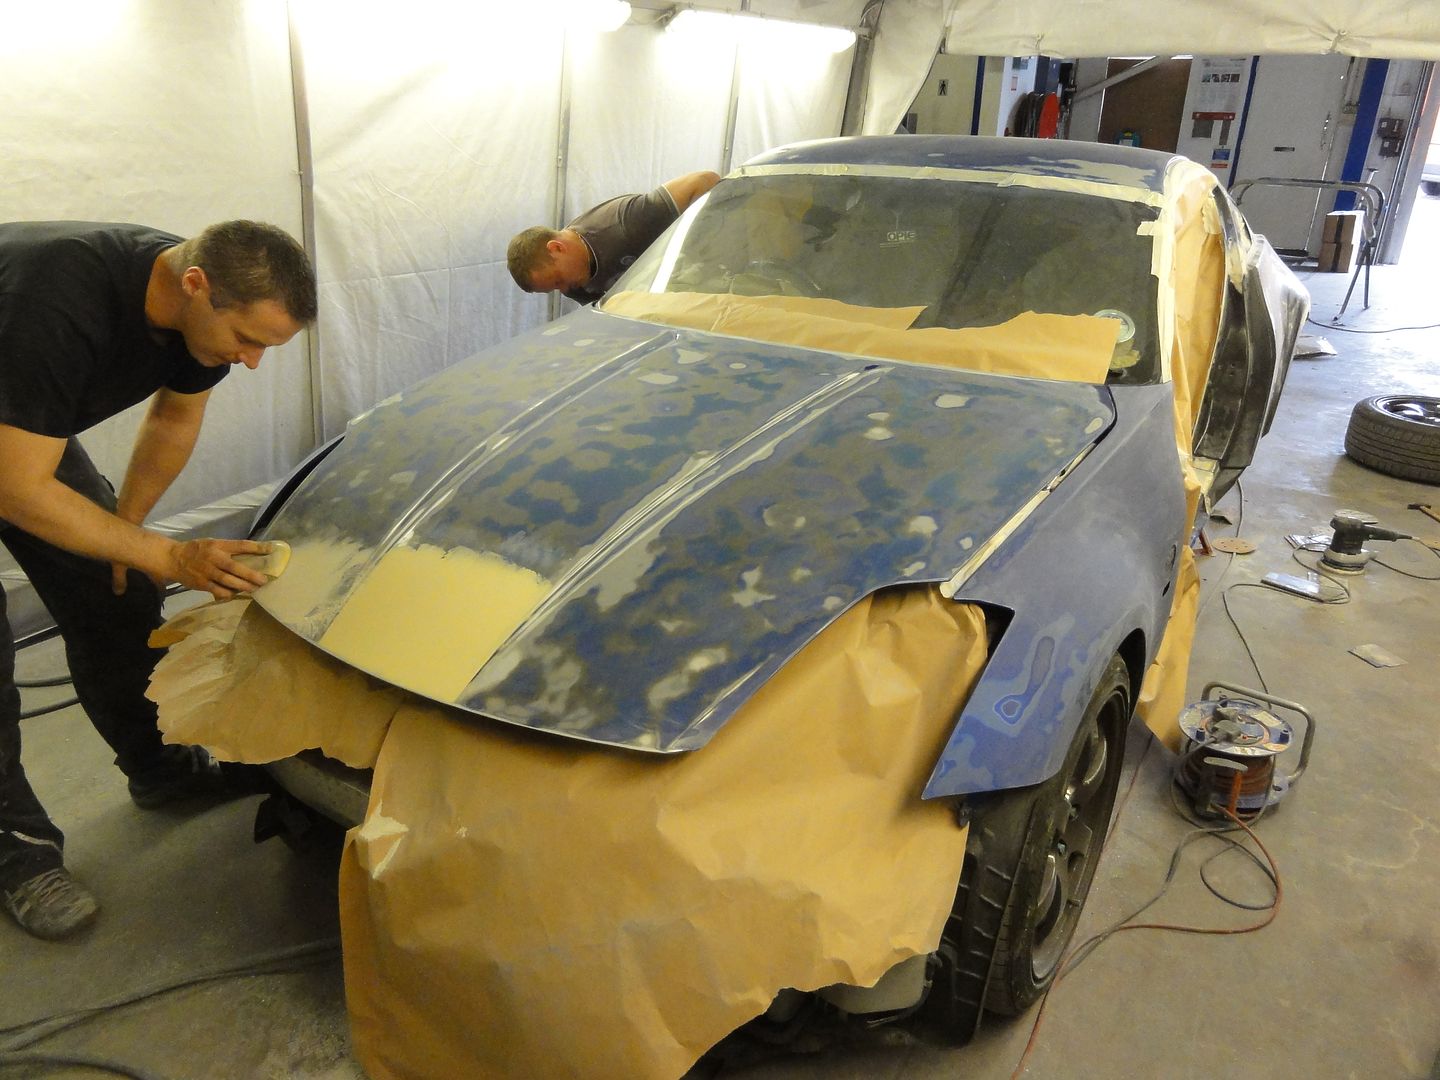
Preparations for spraying

-
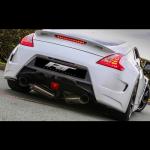
Hurry up and post the rest, I want to see the new rear bumper!
Just for that I'm going to have to string you along much longer.

-
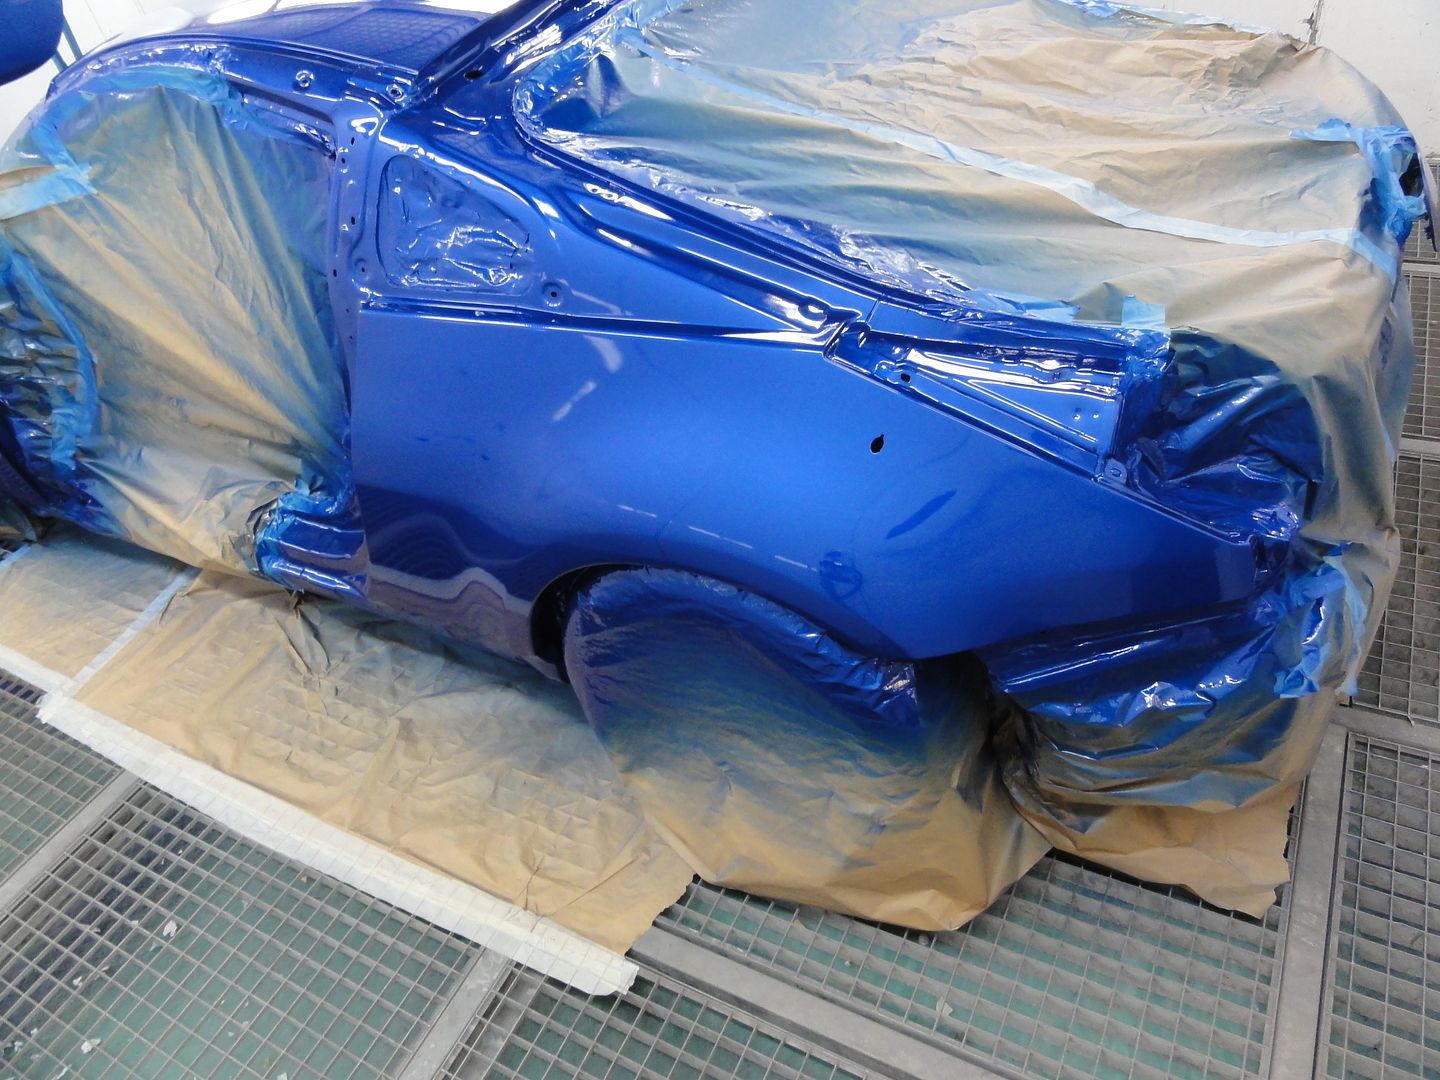
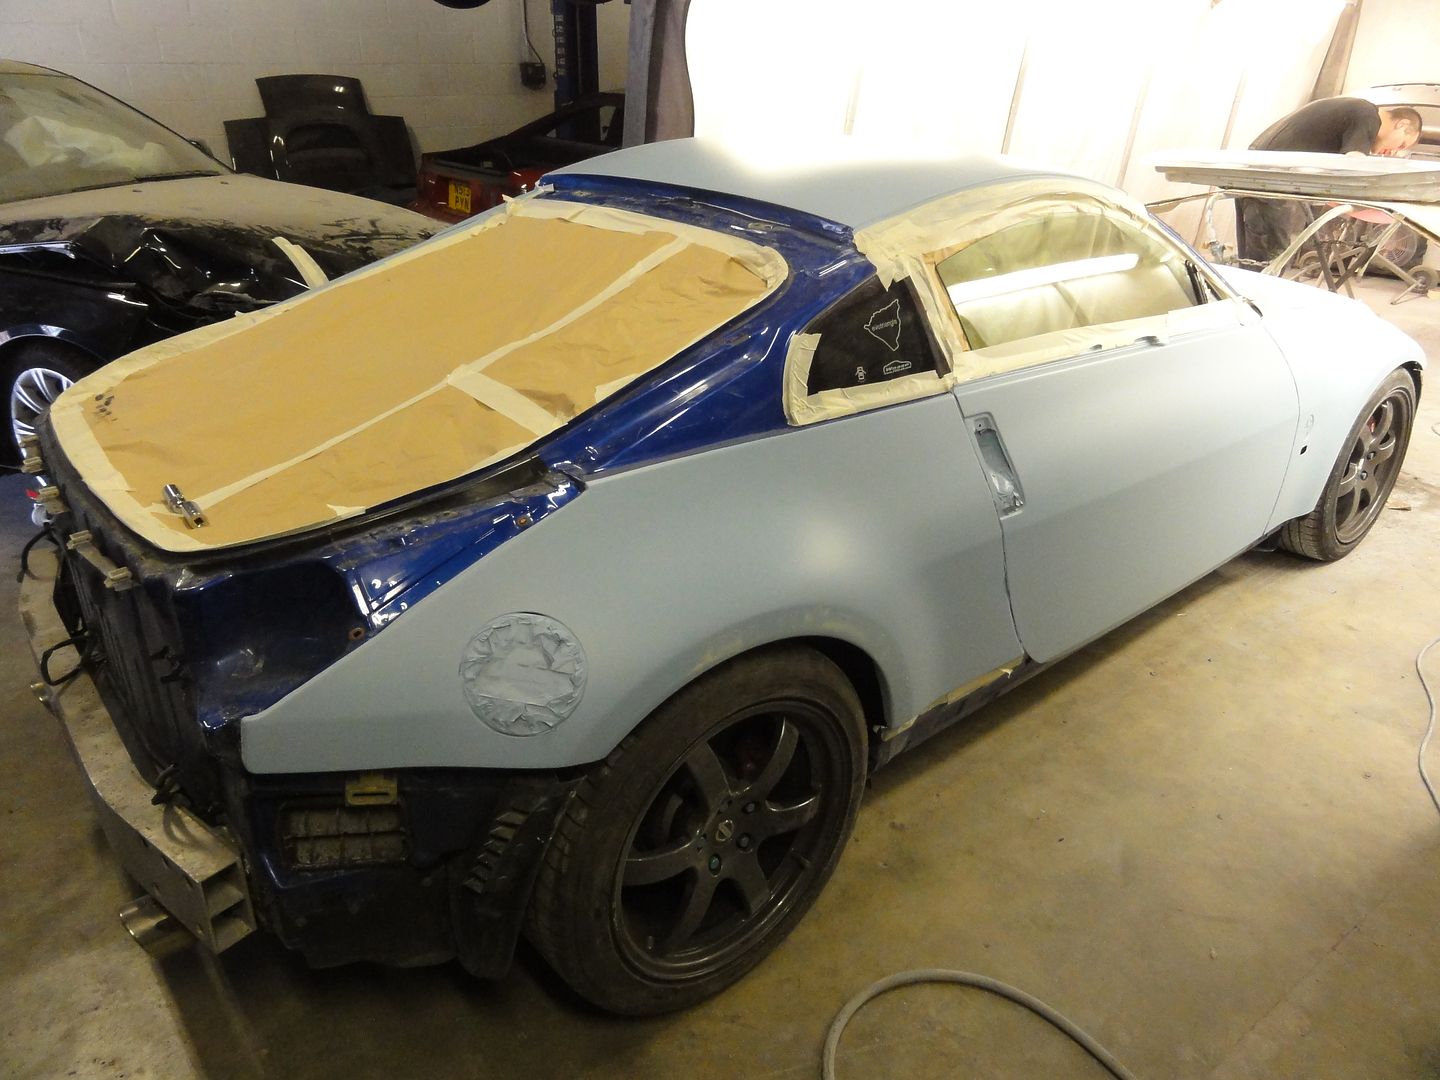
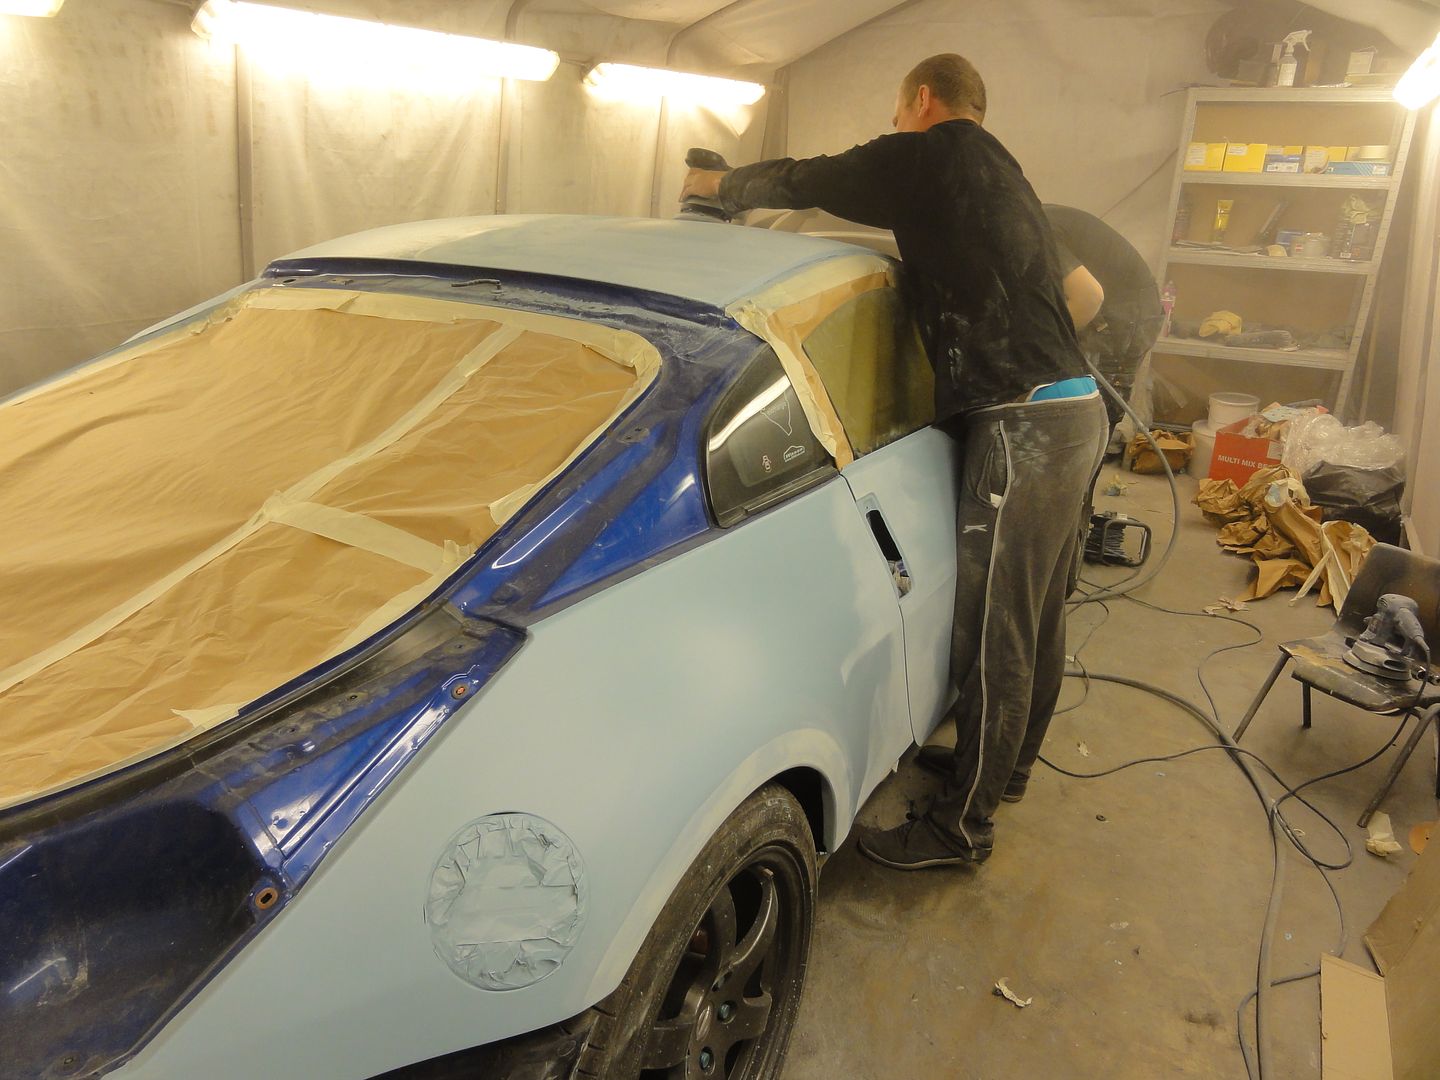
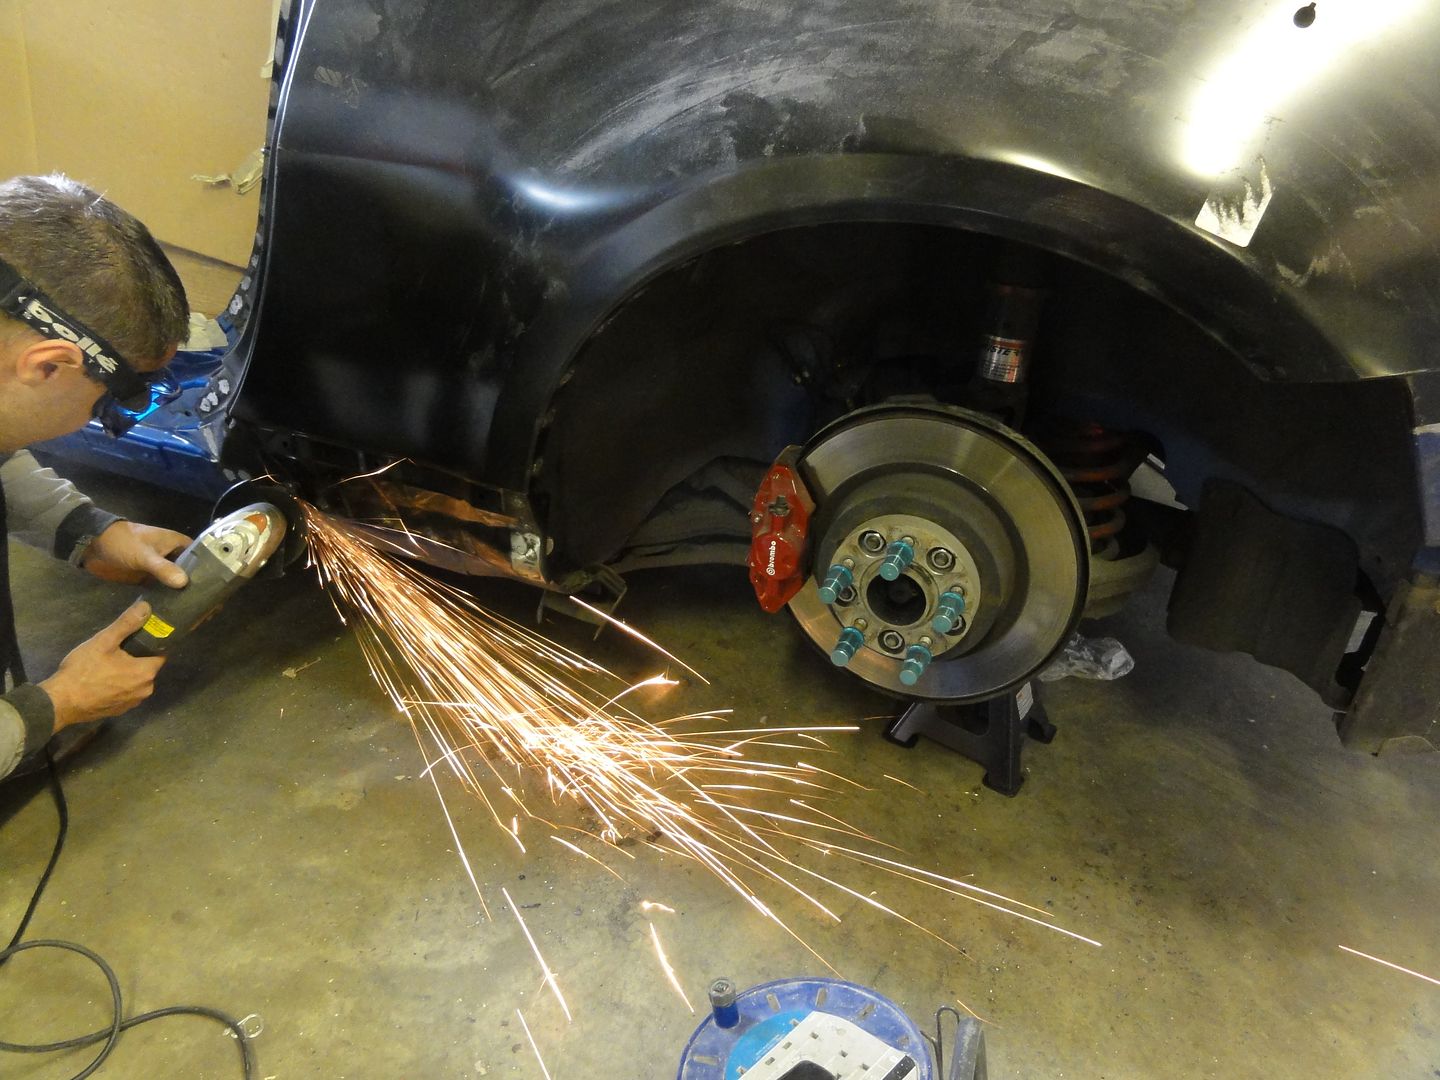
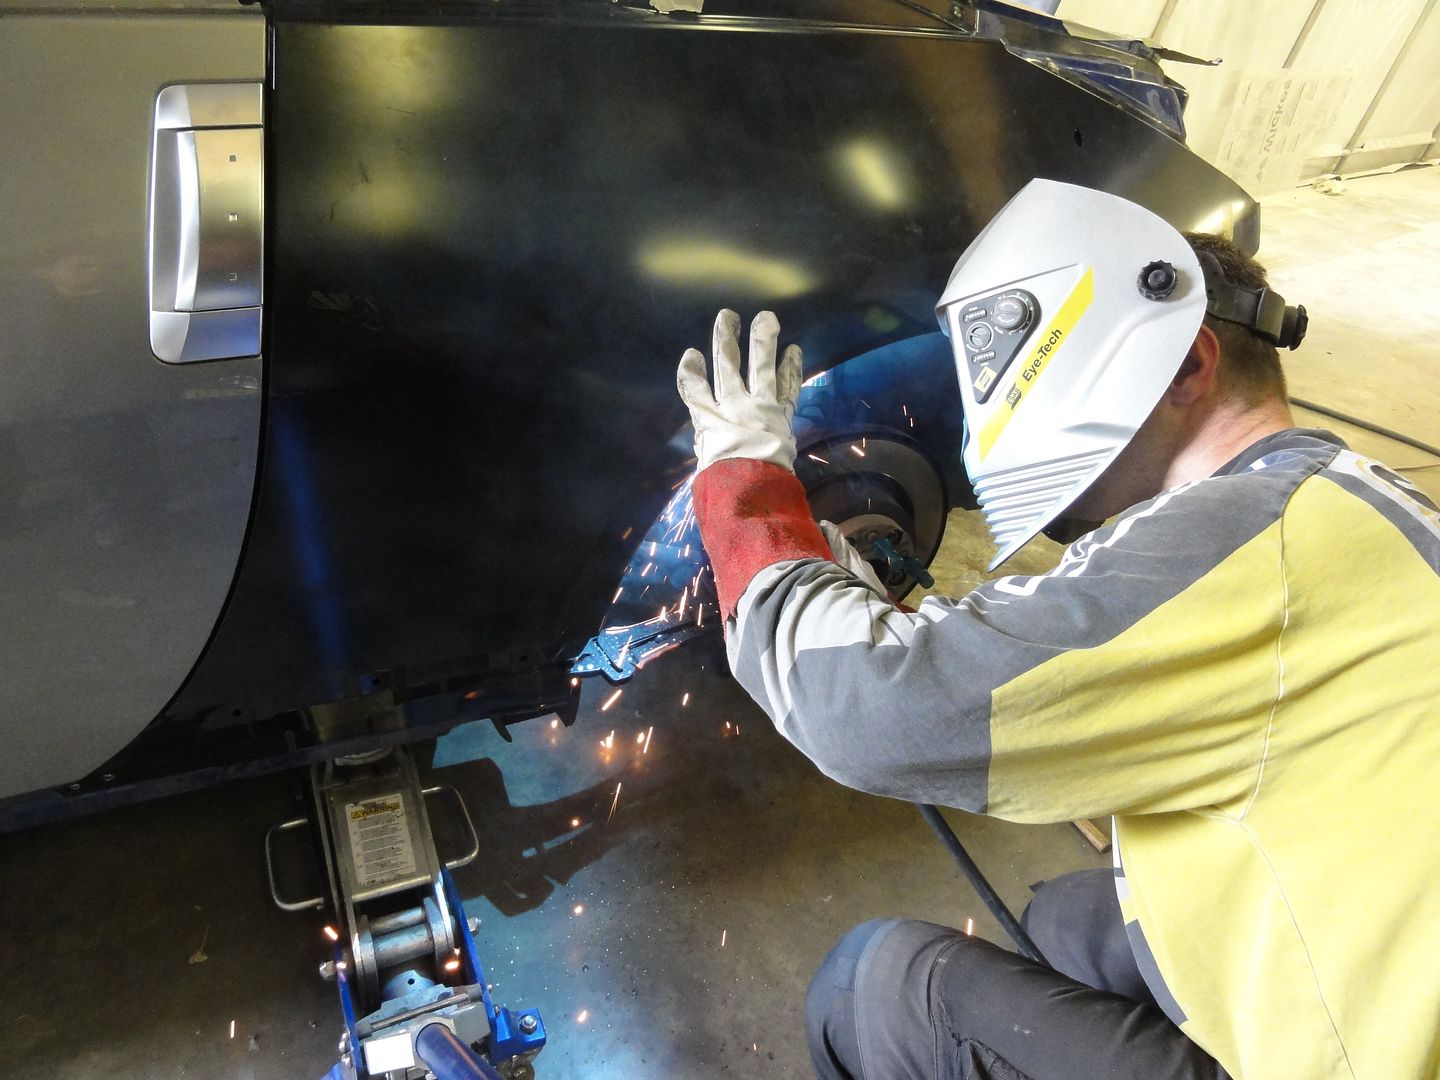
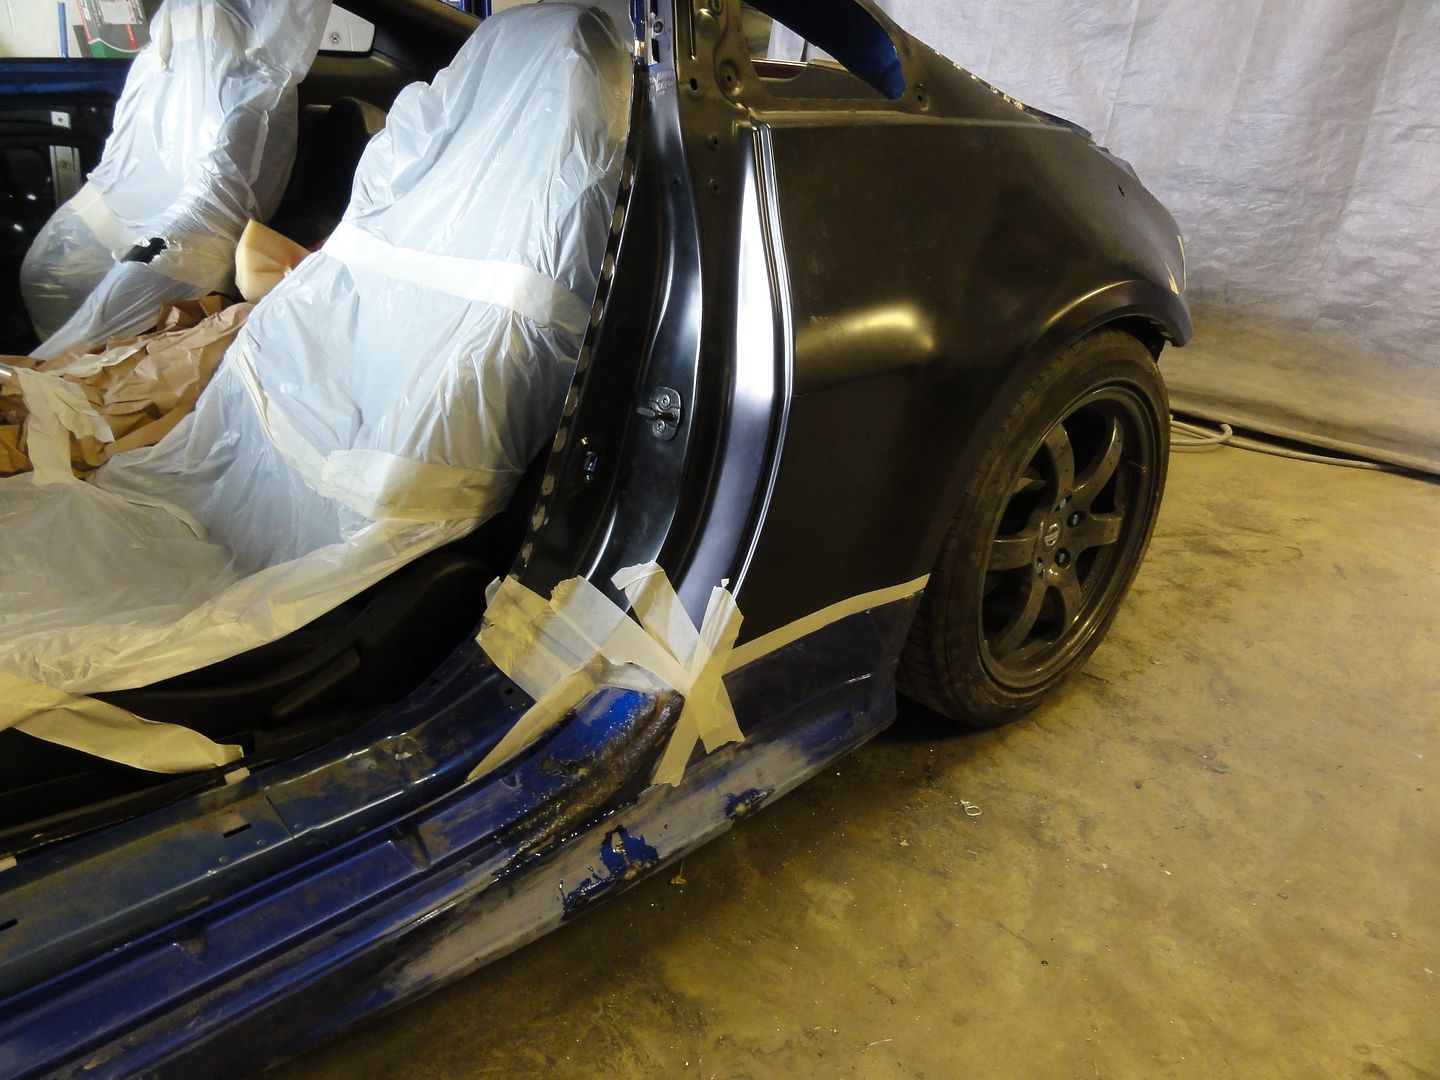
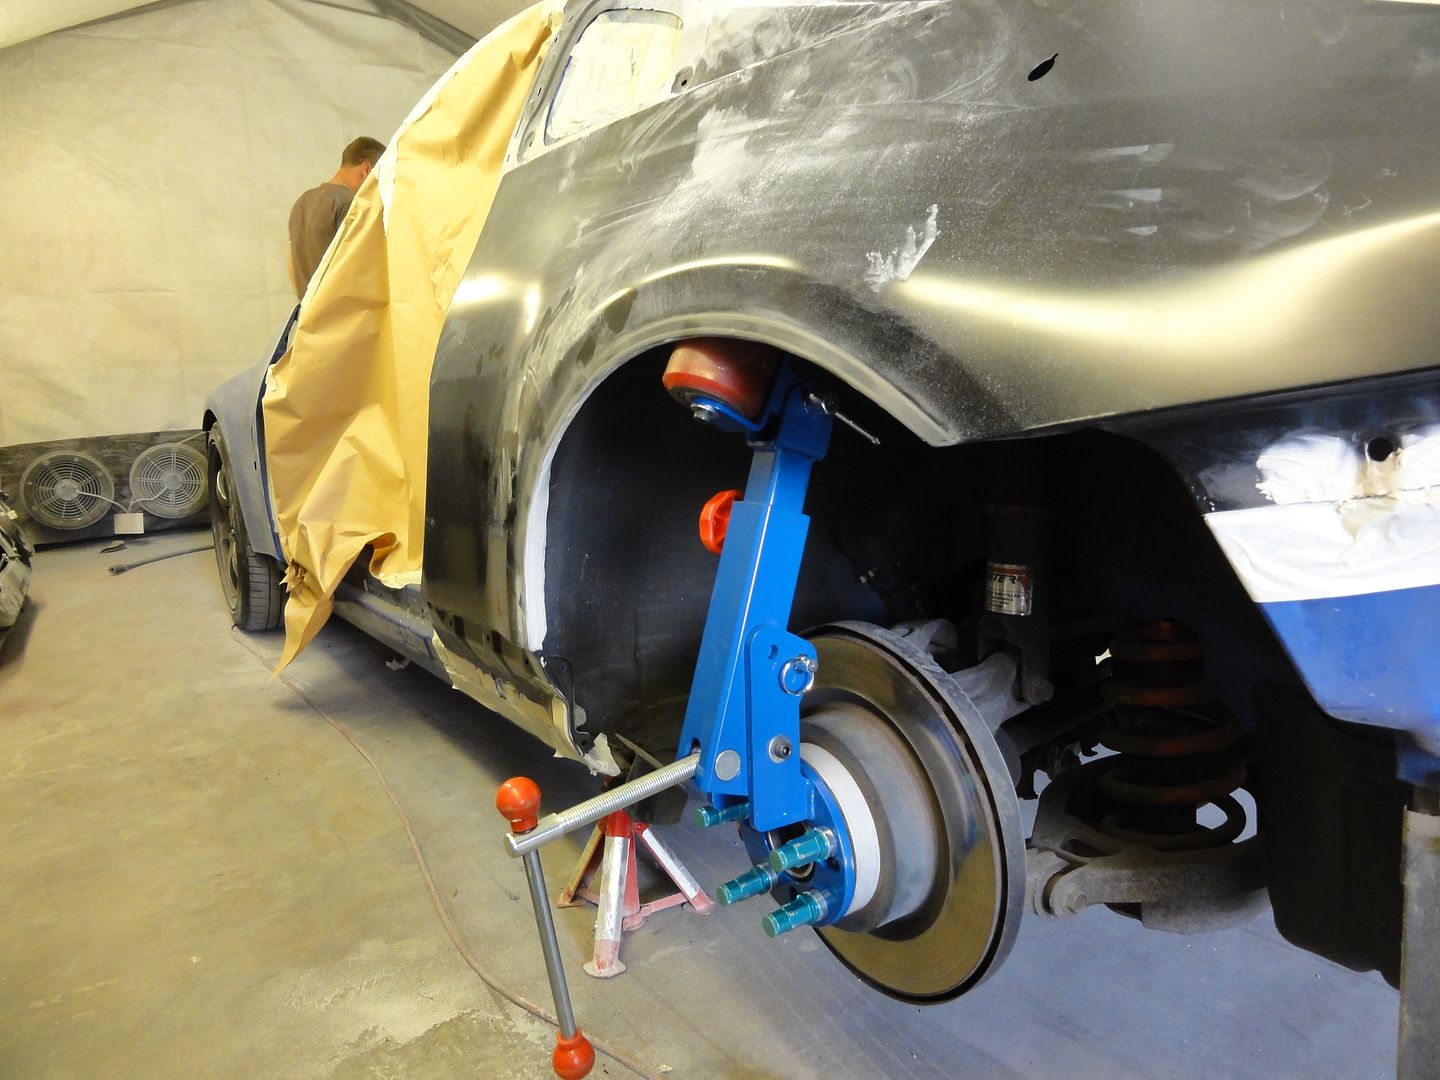
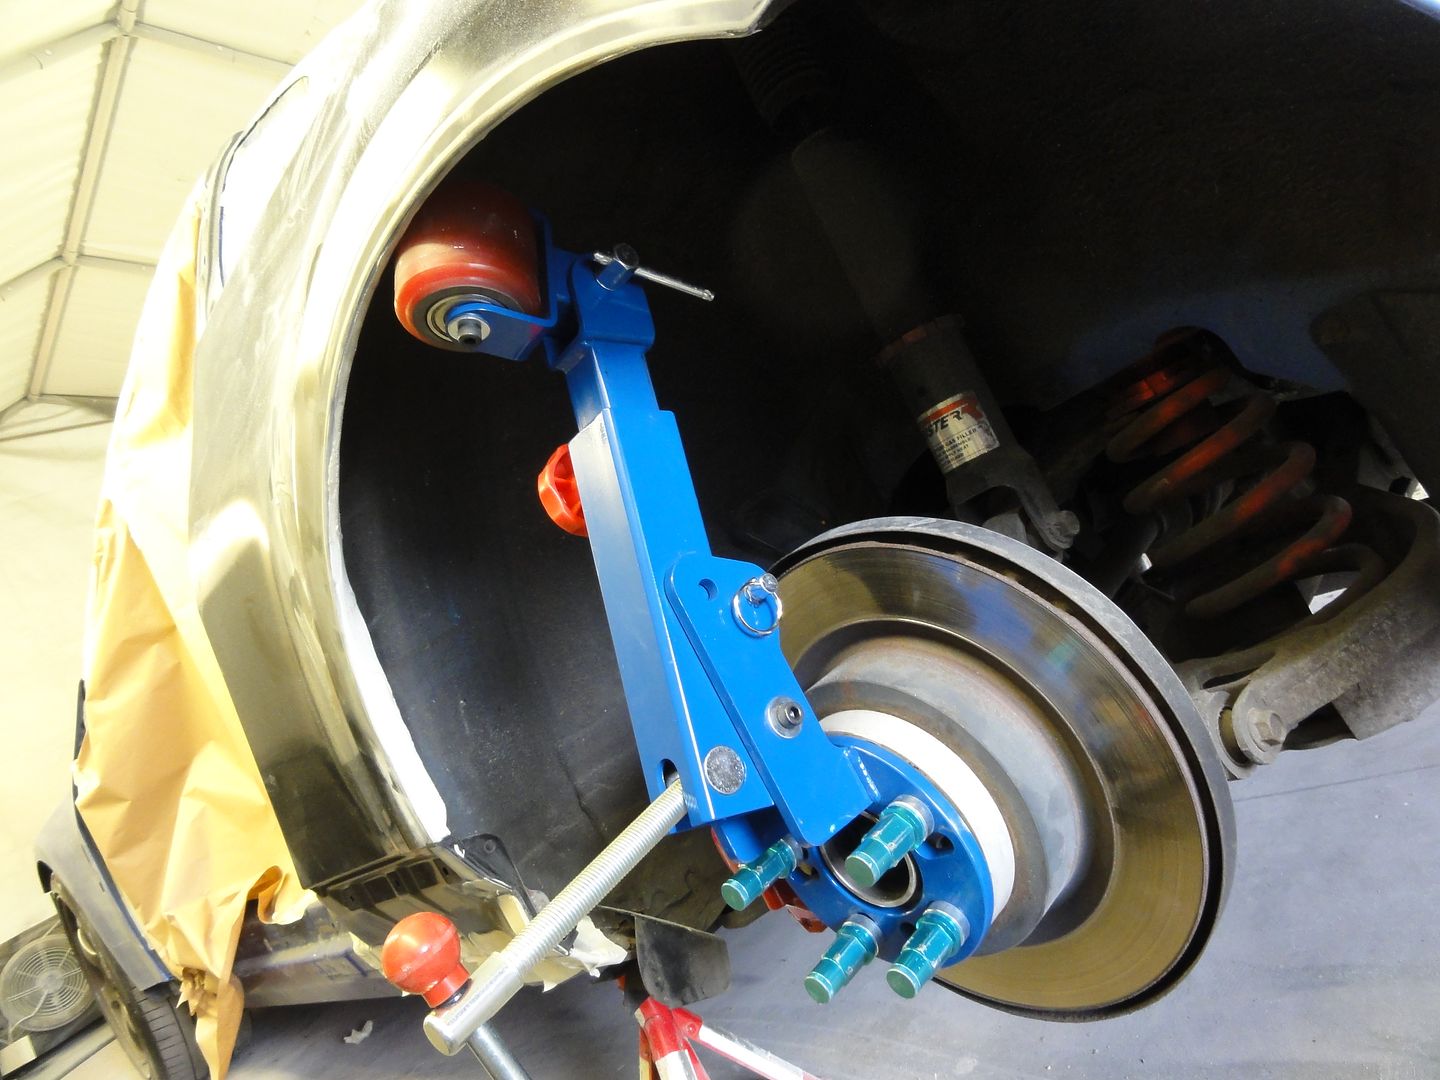
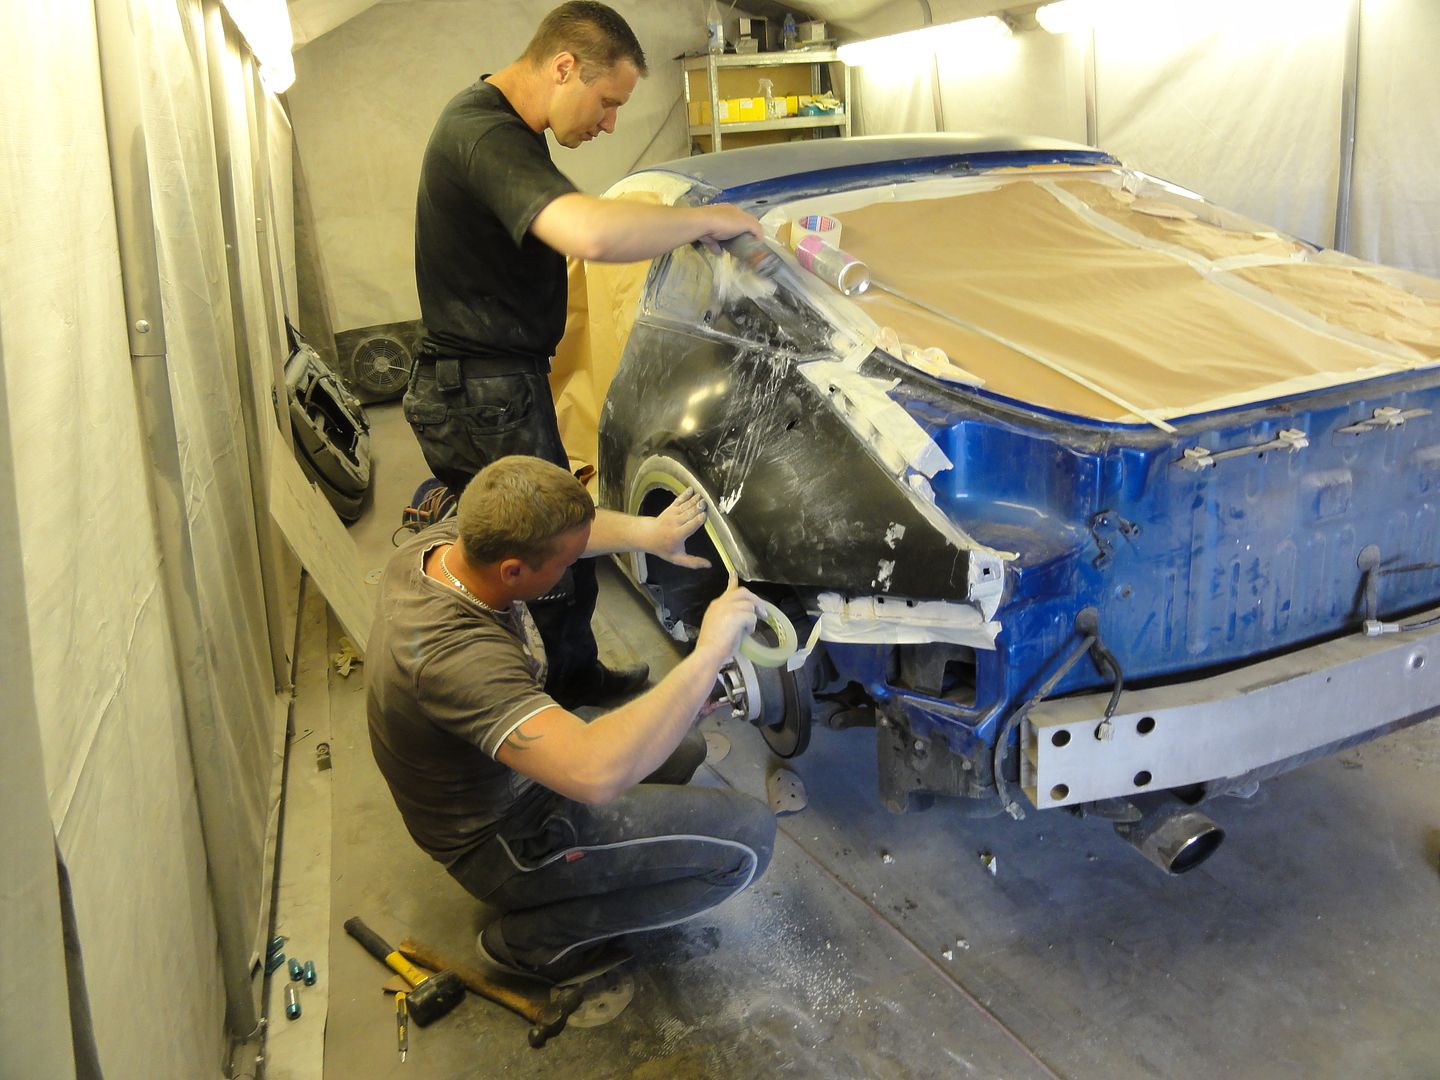
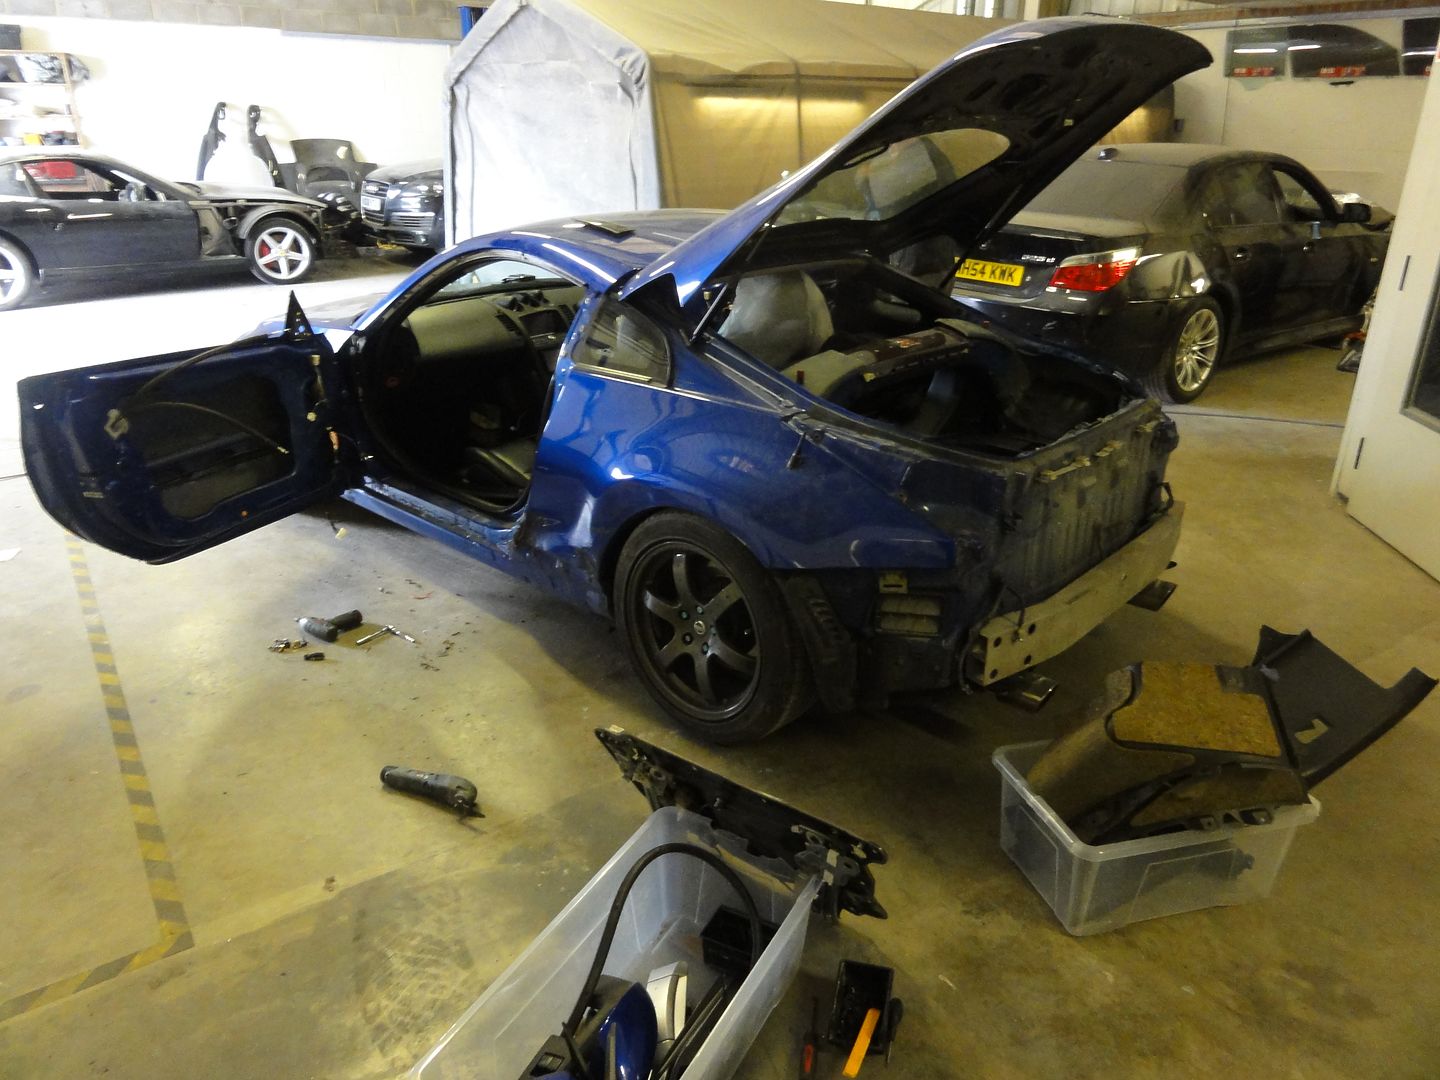
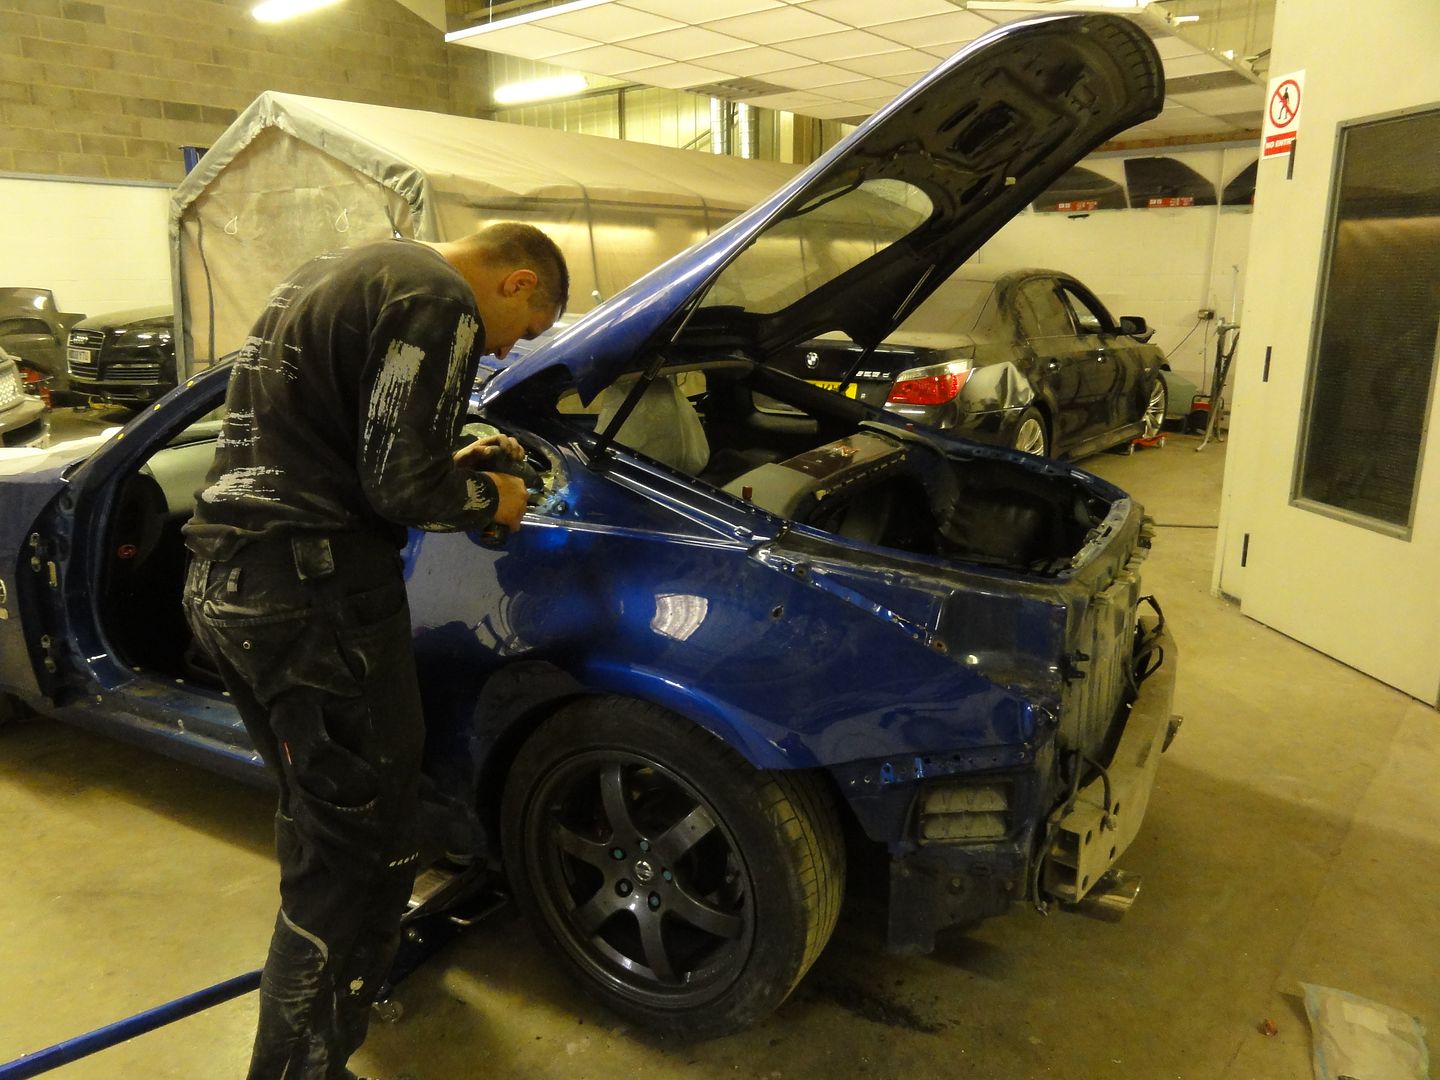
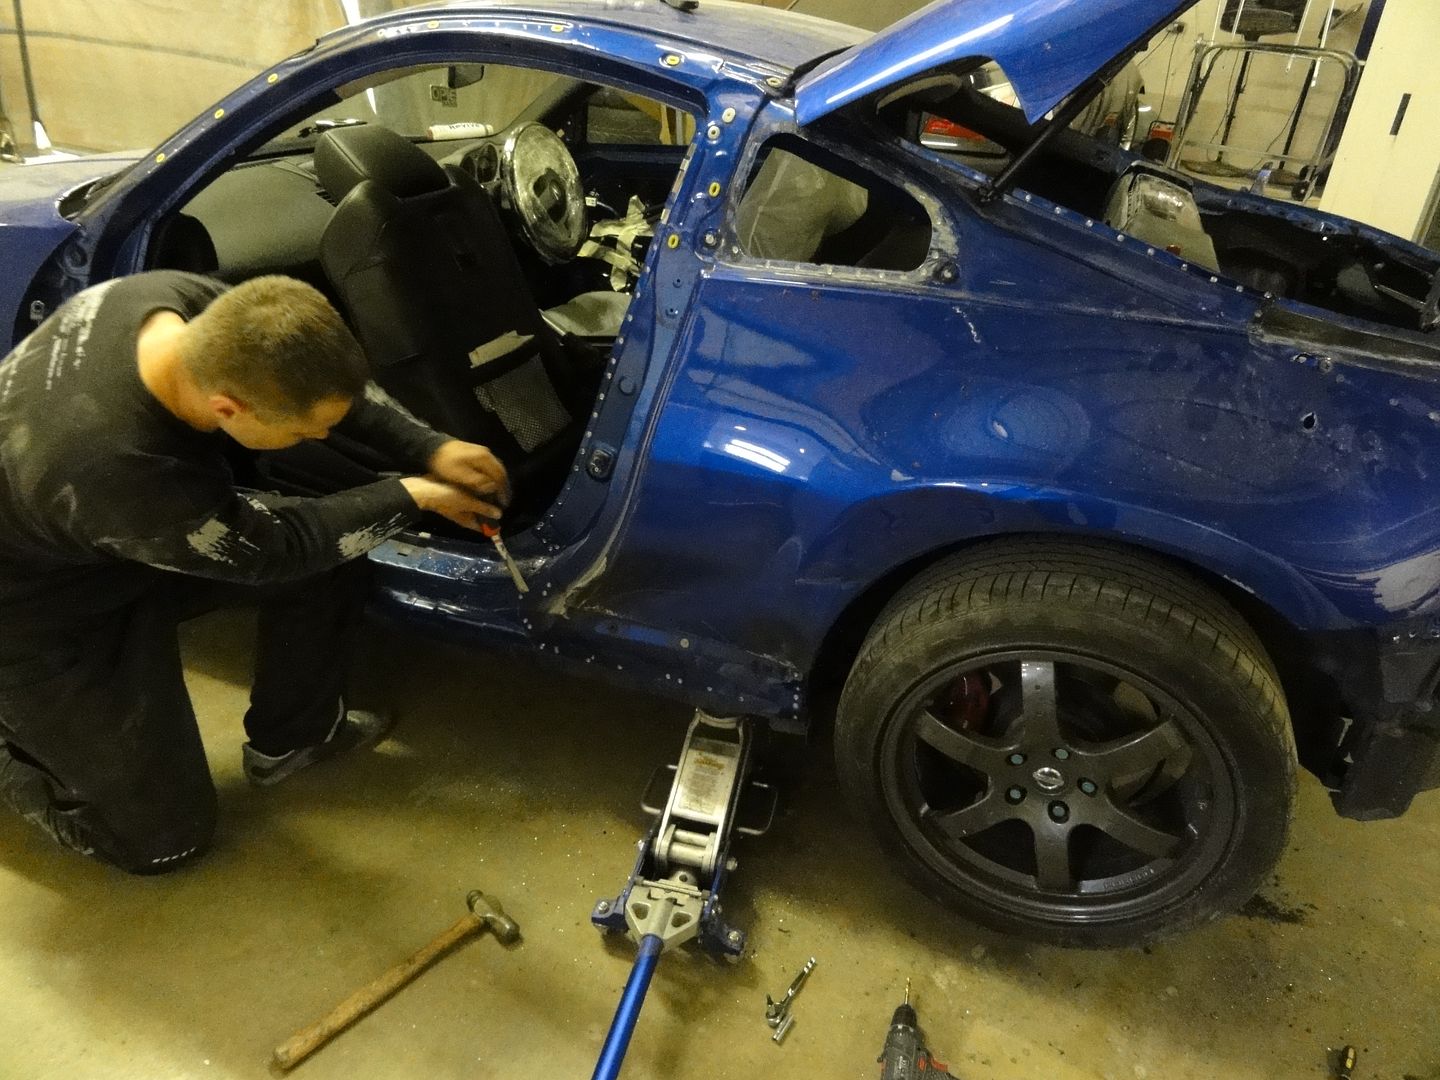
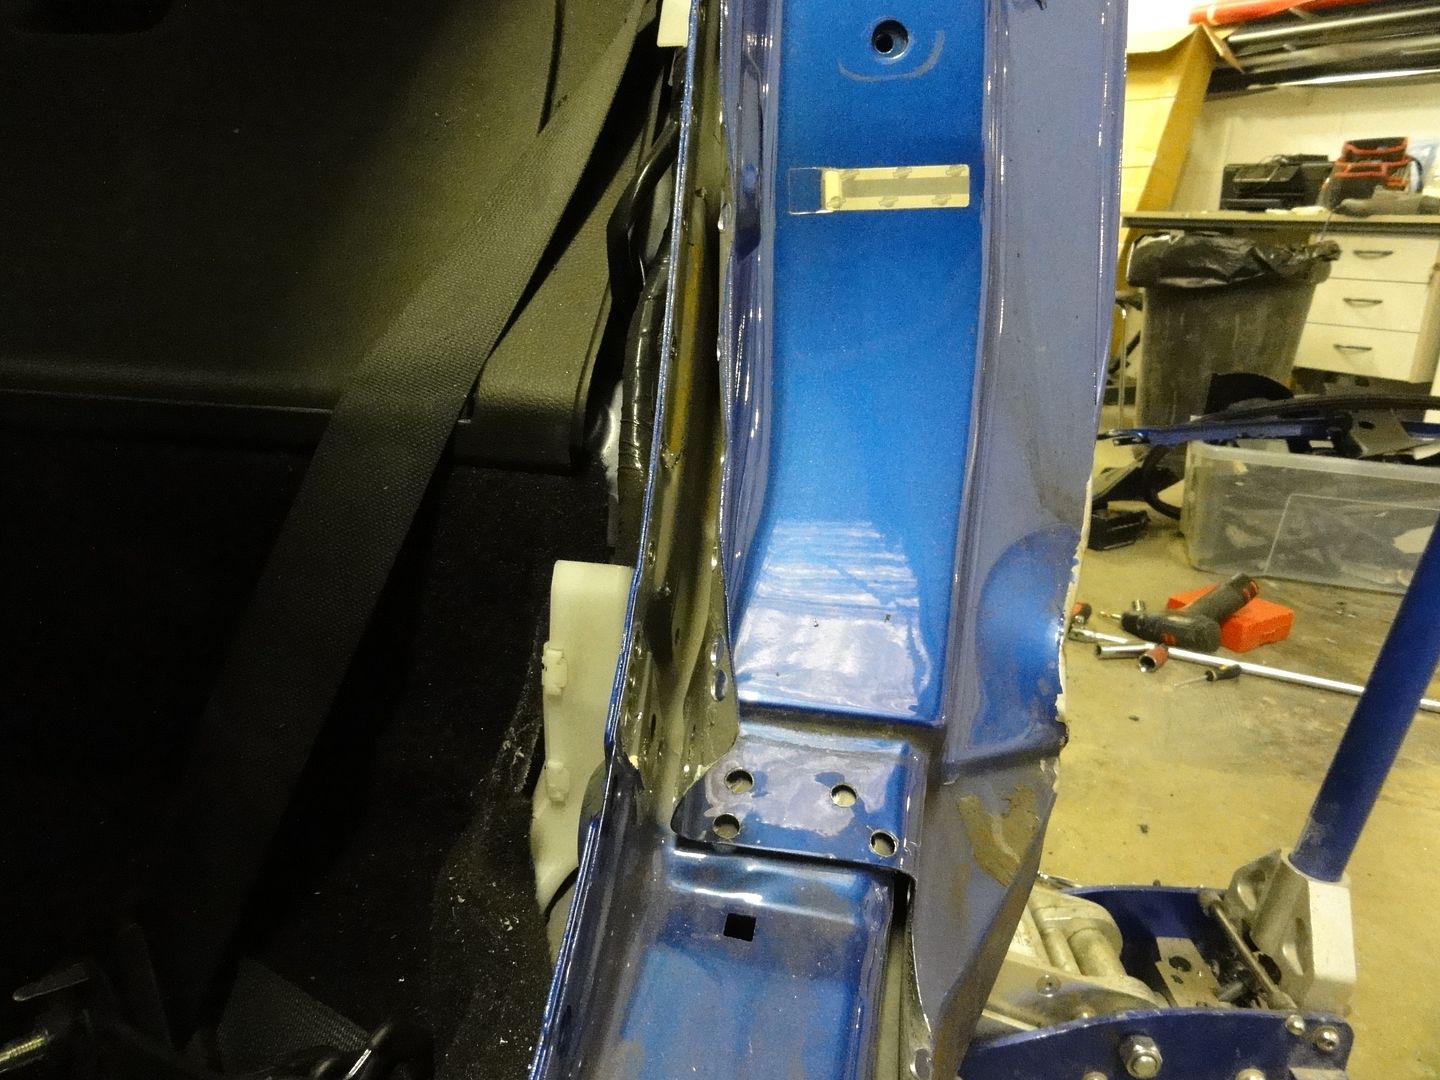
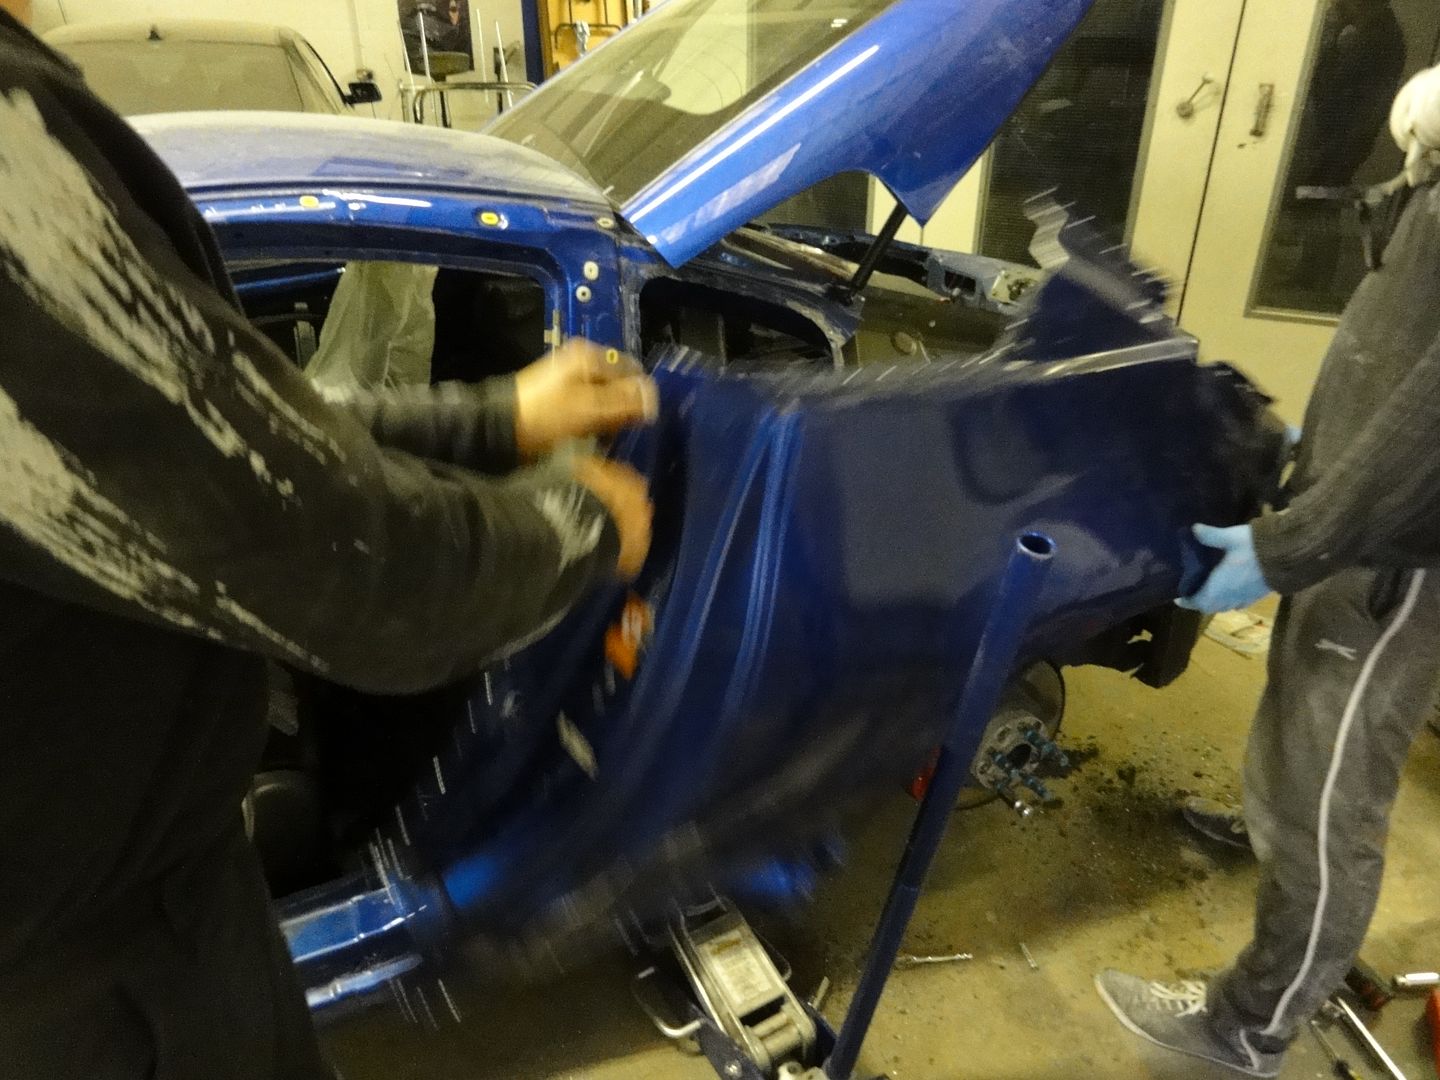
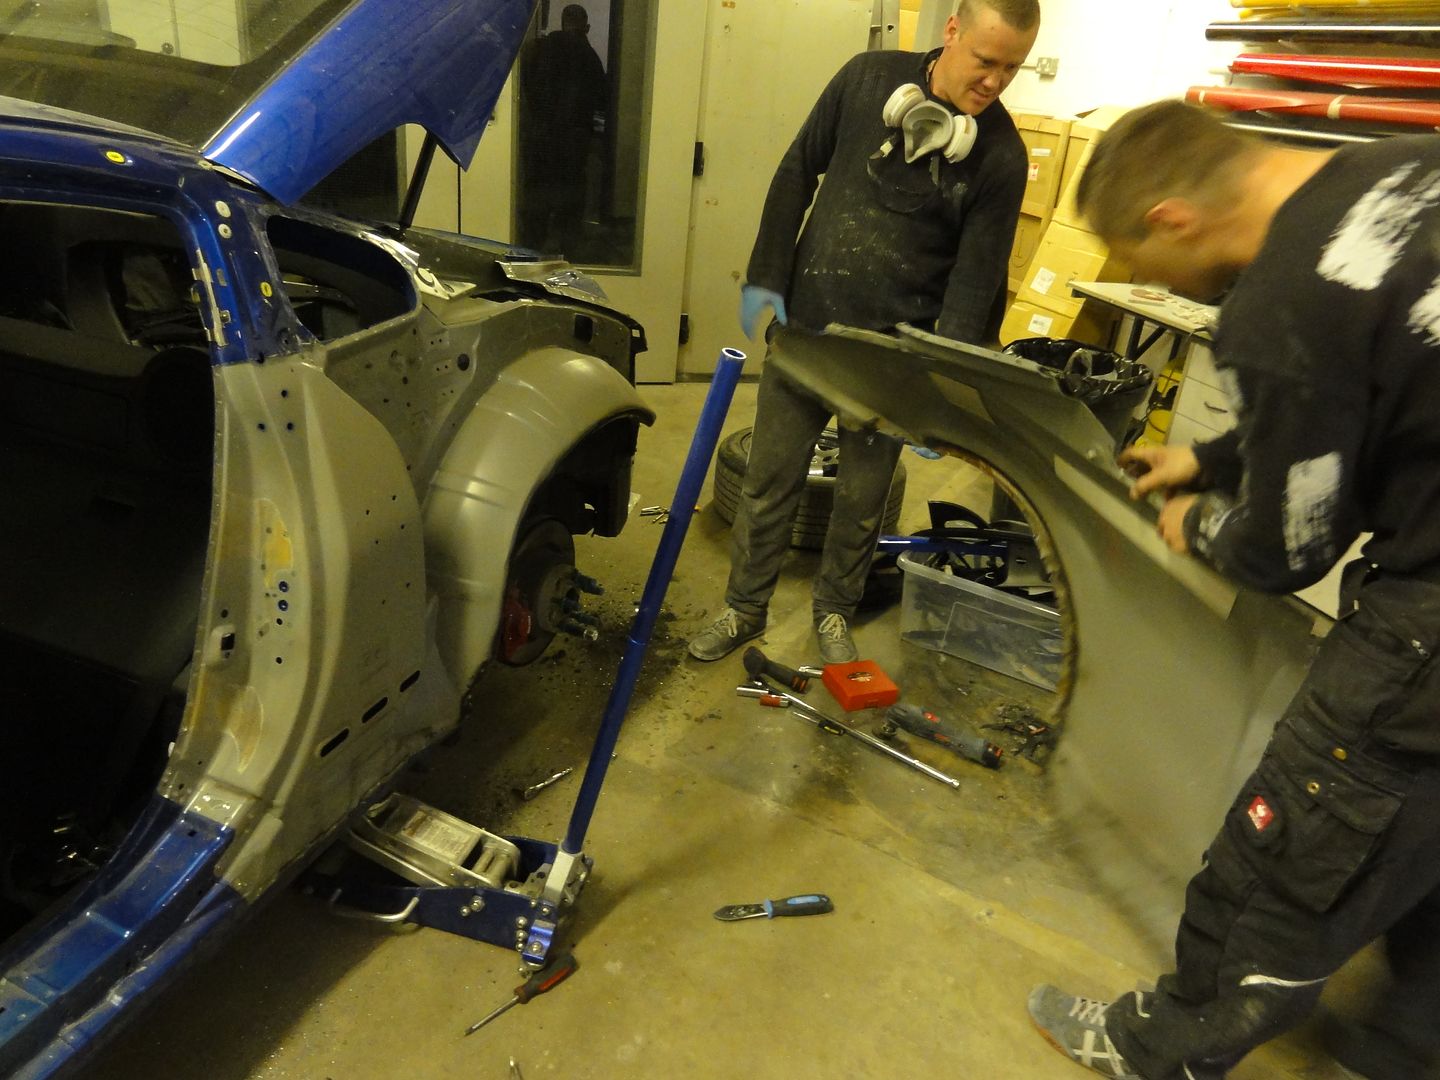
With the quarter off, the transplant begins.
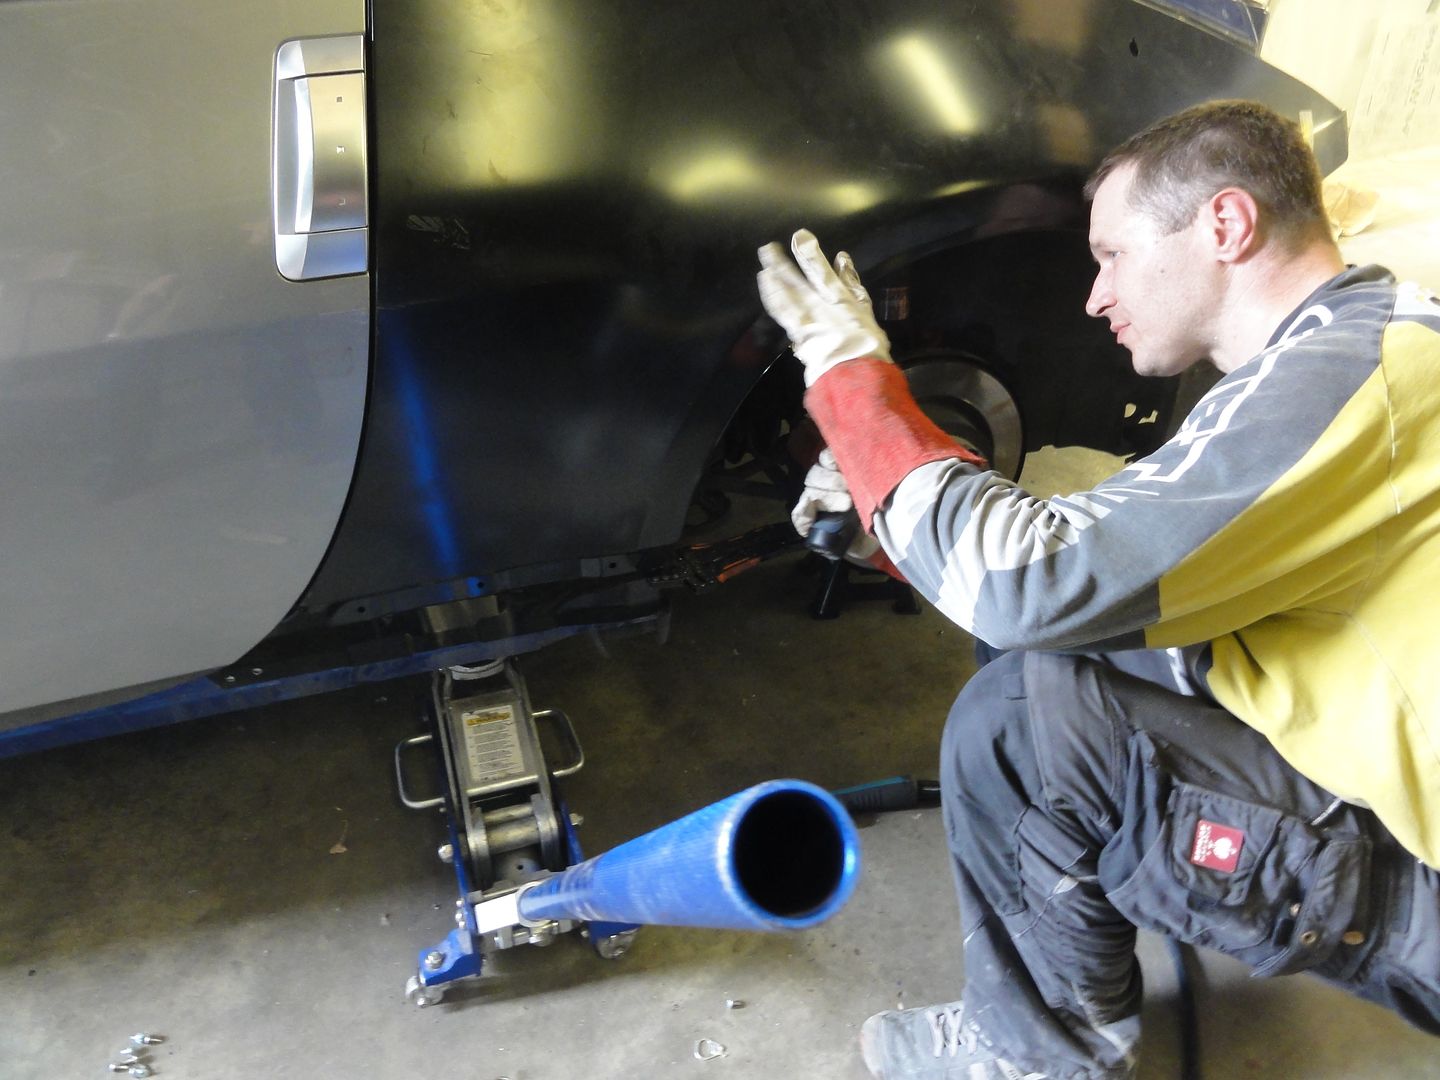
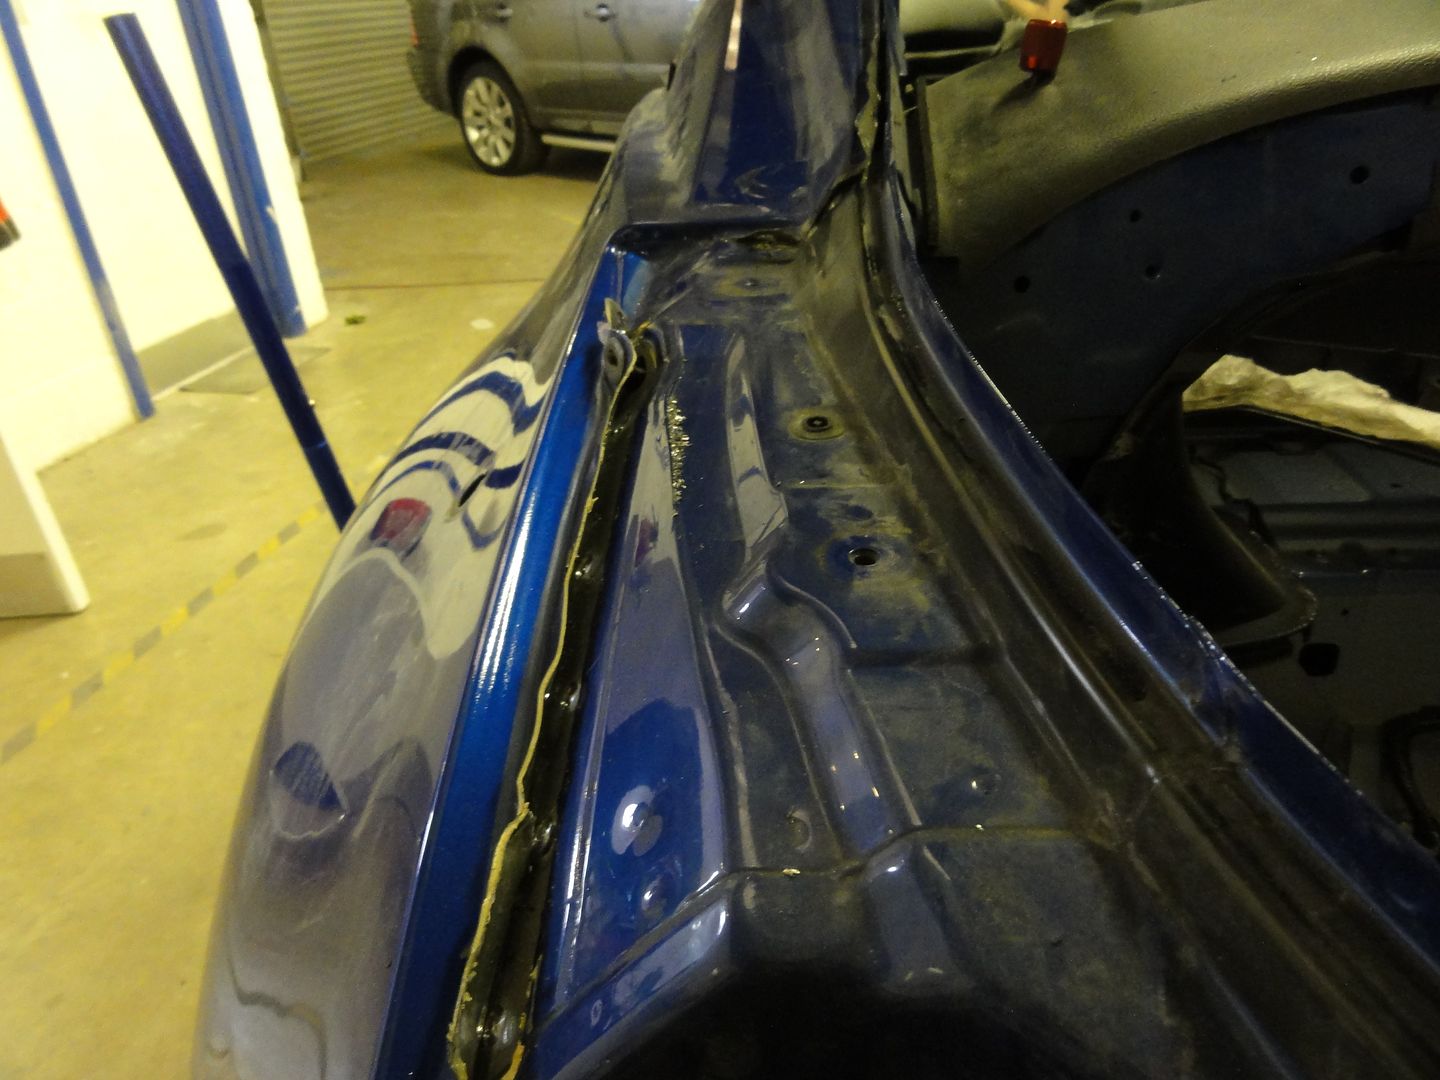
Then the skirt rebuild
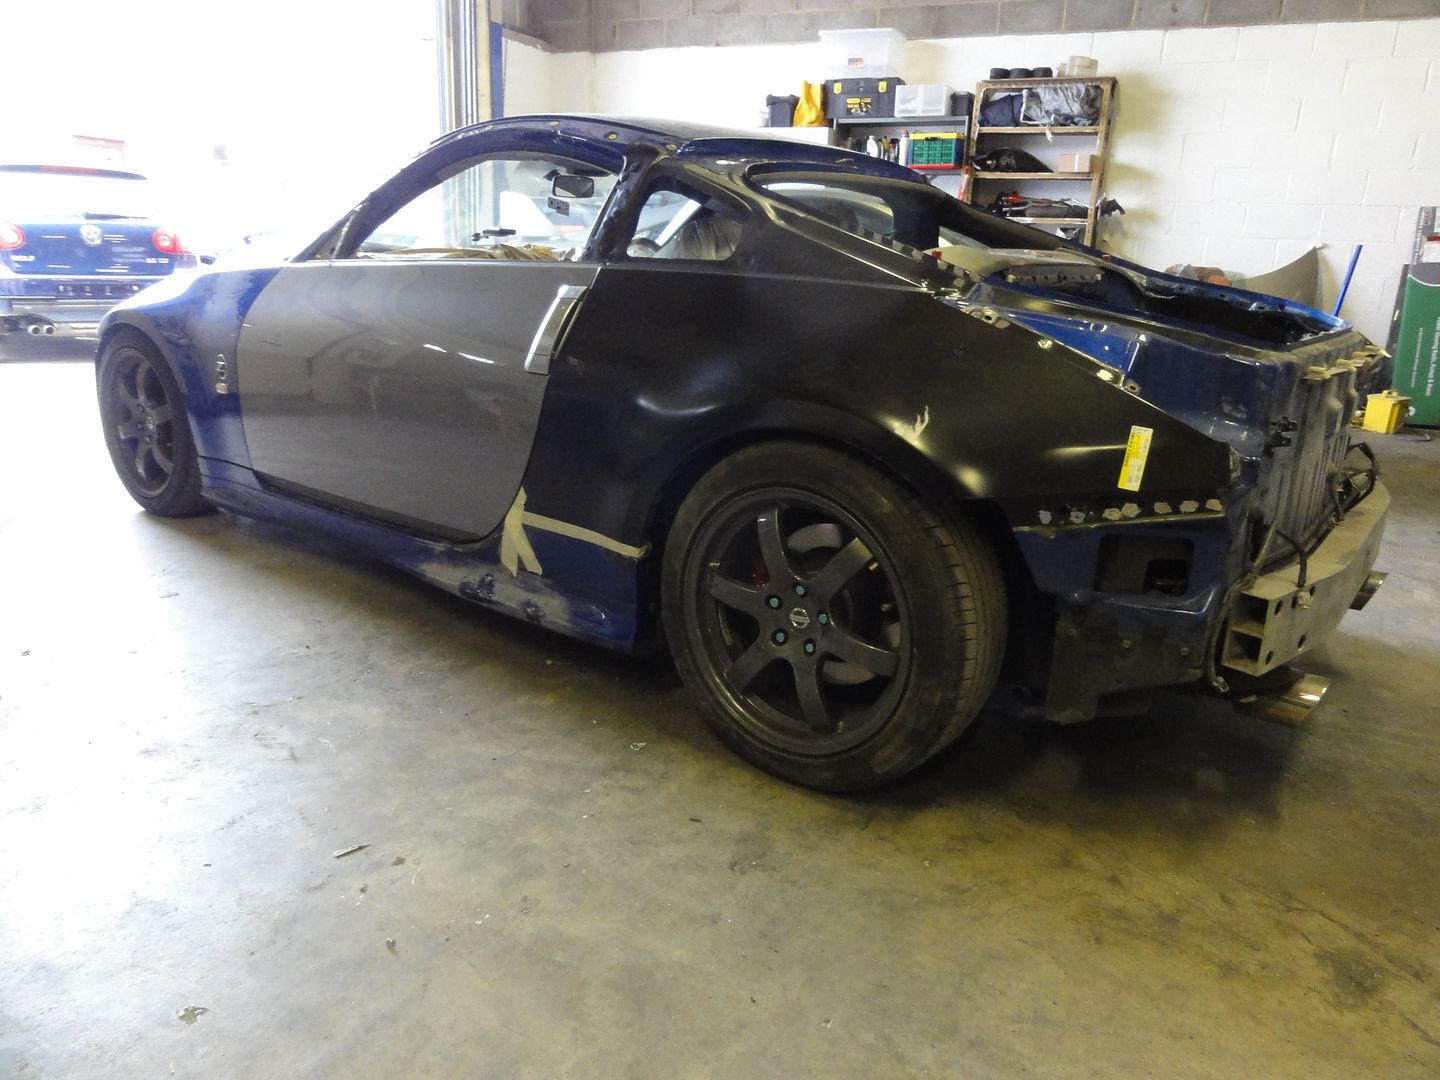
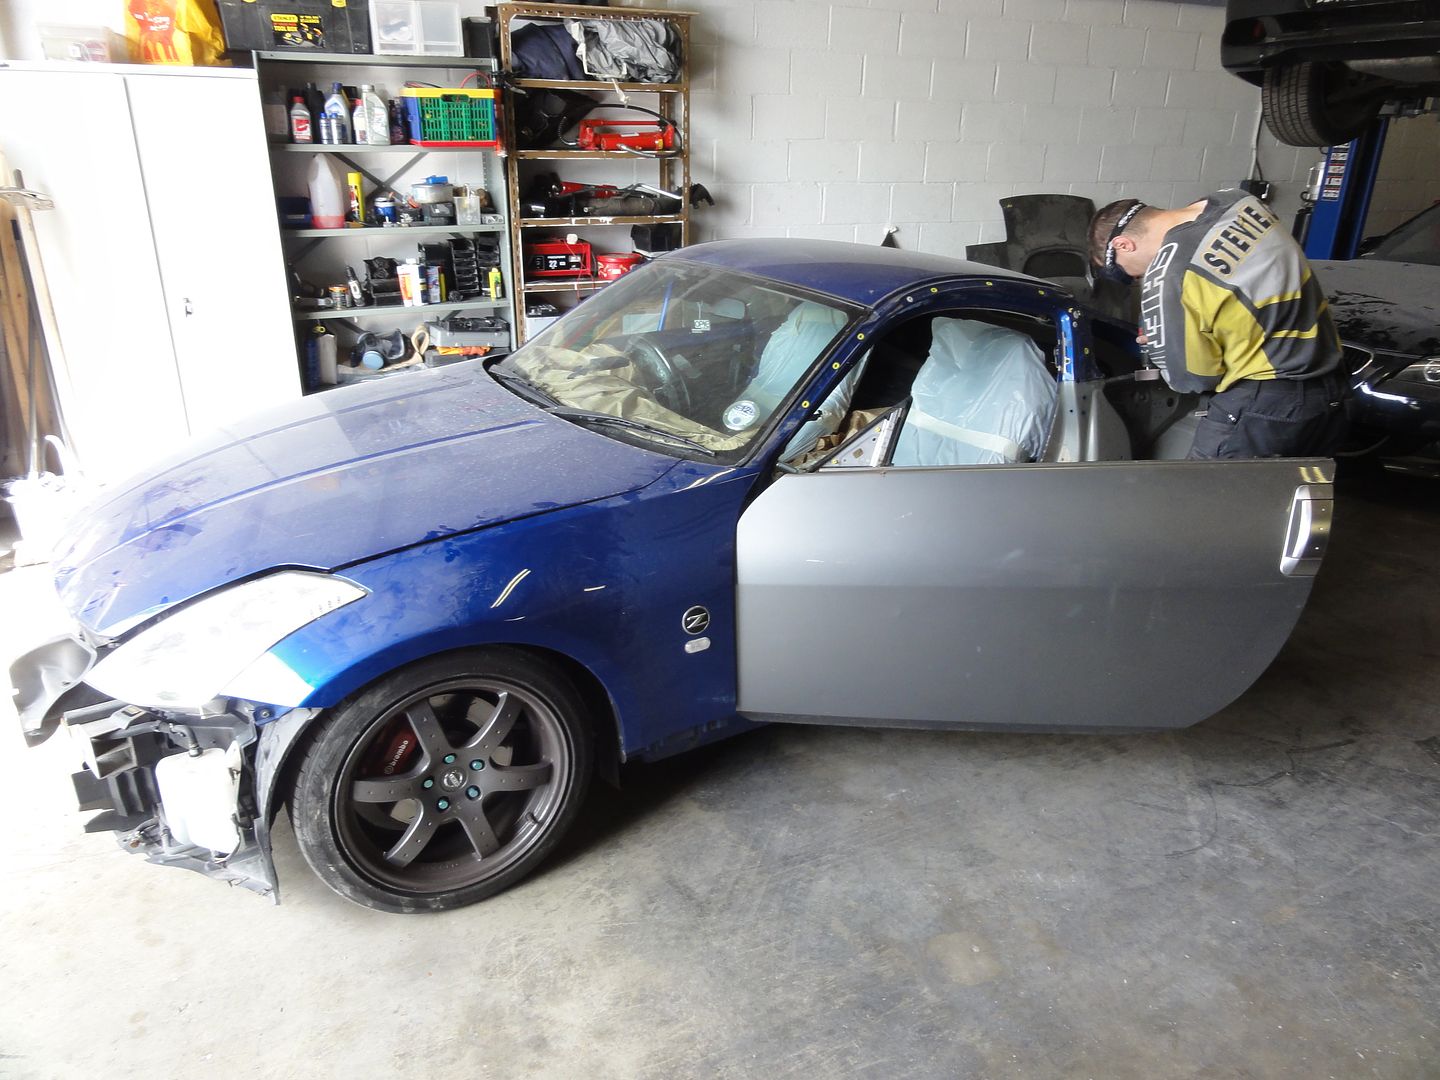
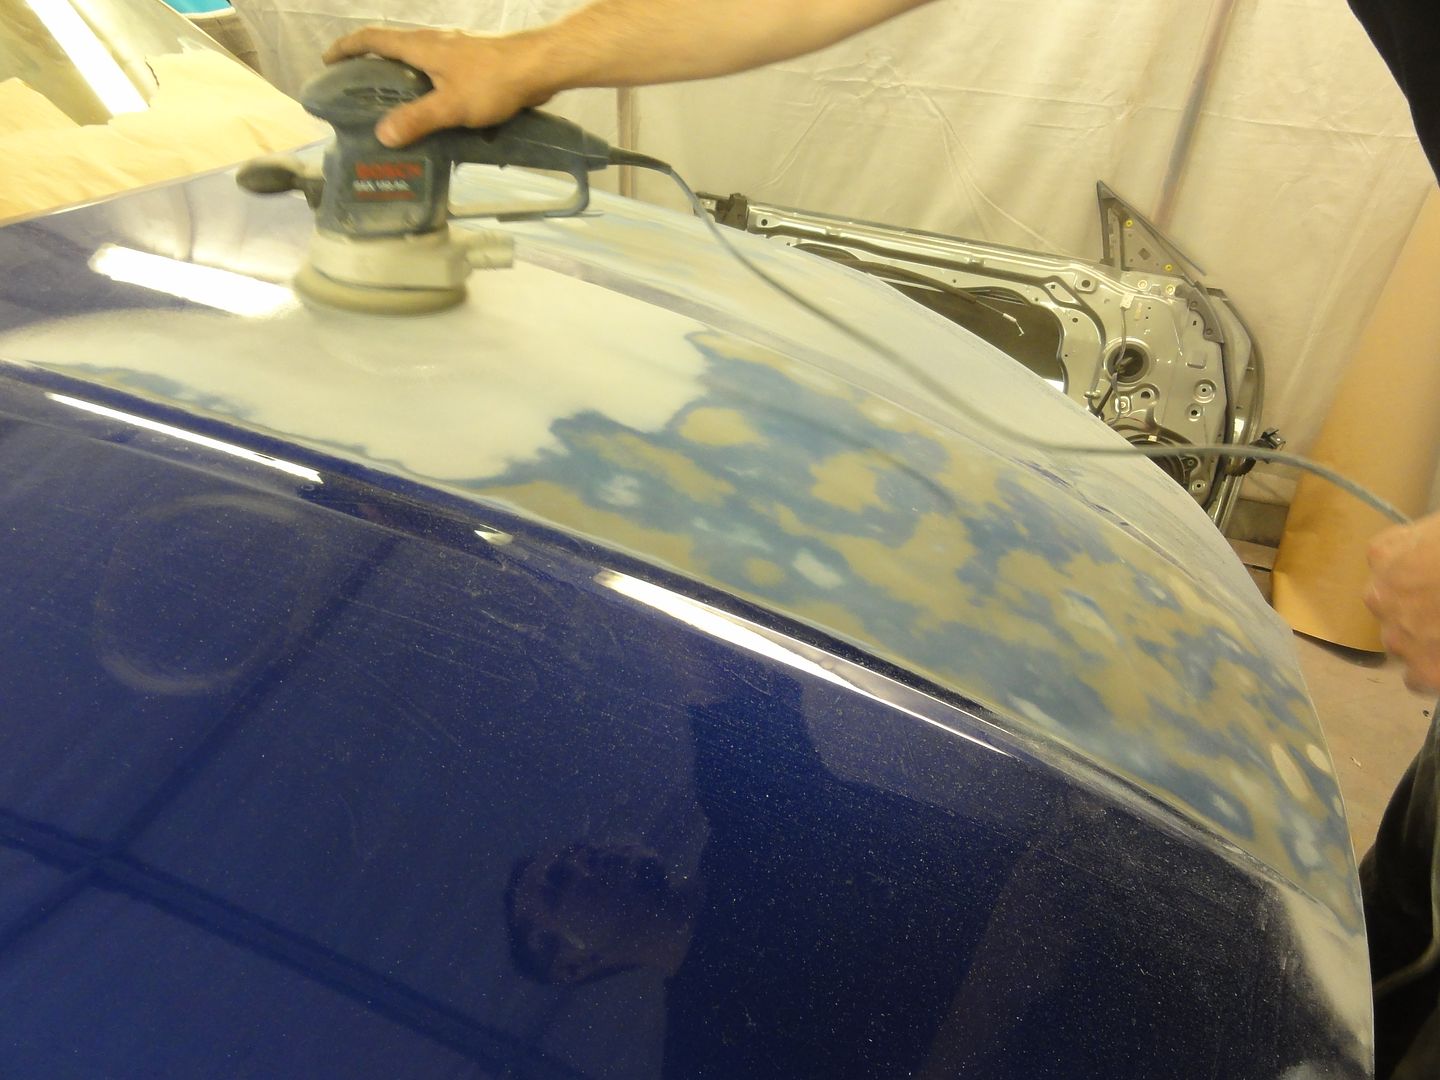
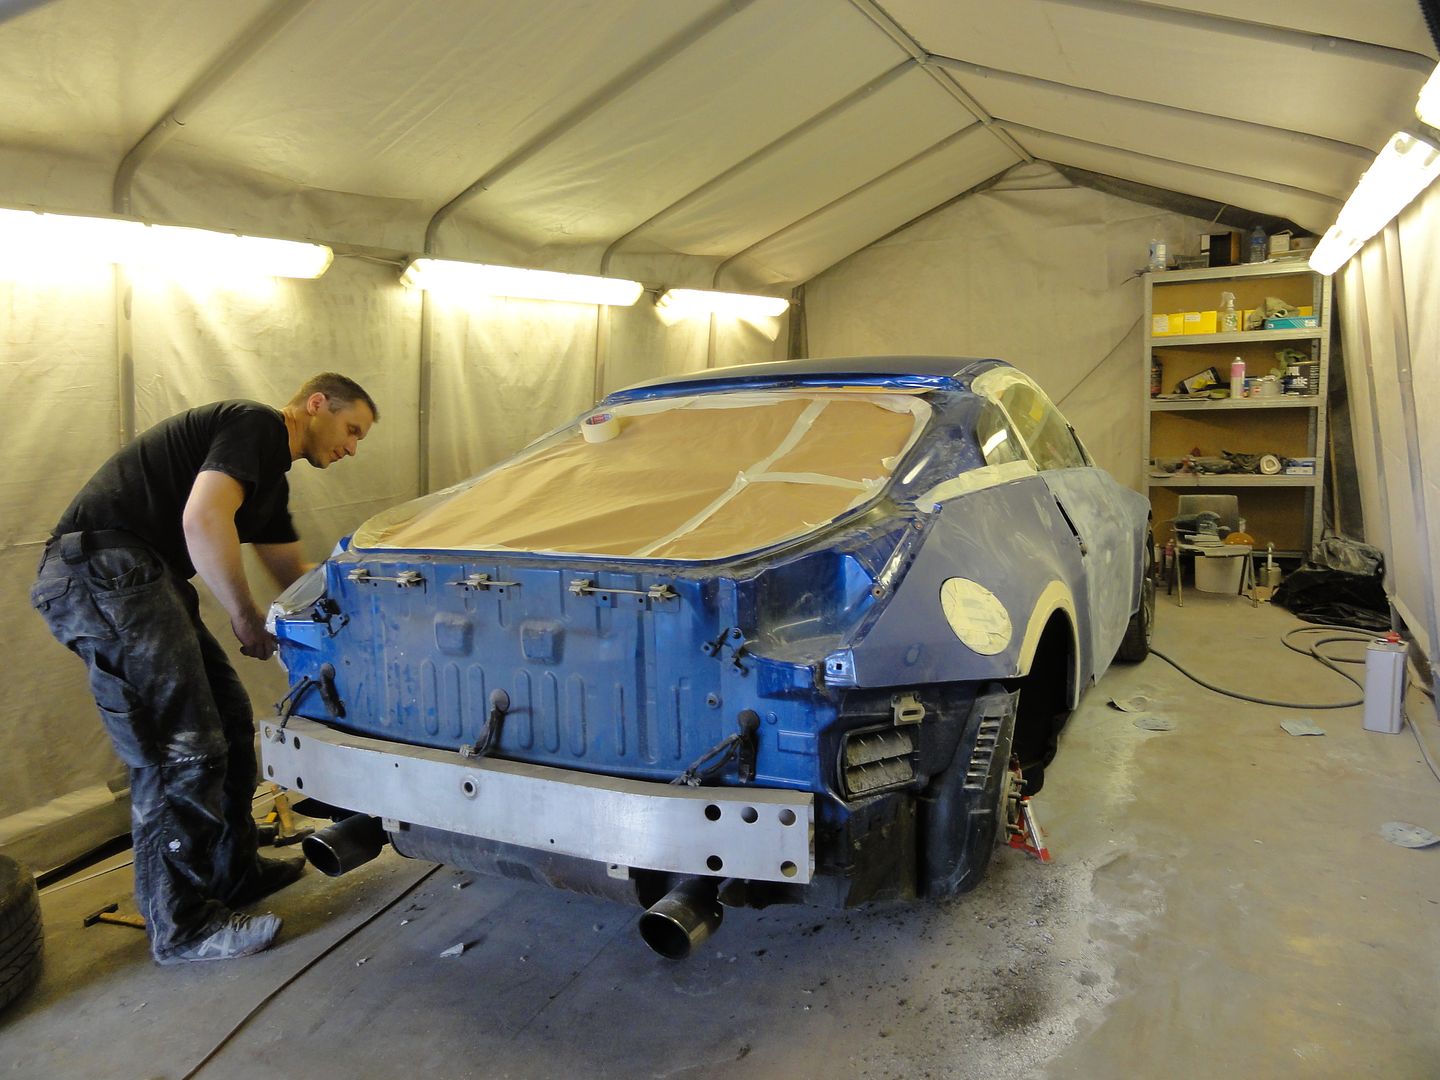
With the transplant done and the car stripped out, we then began with what it was originally here for. A full respray.
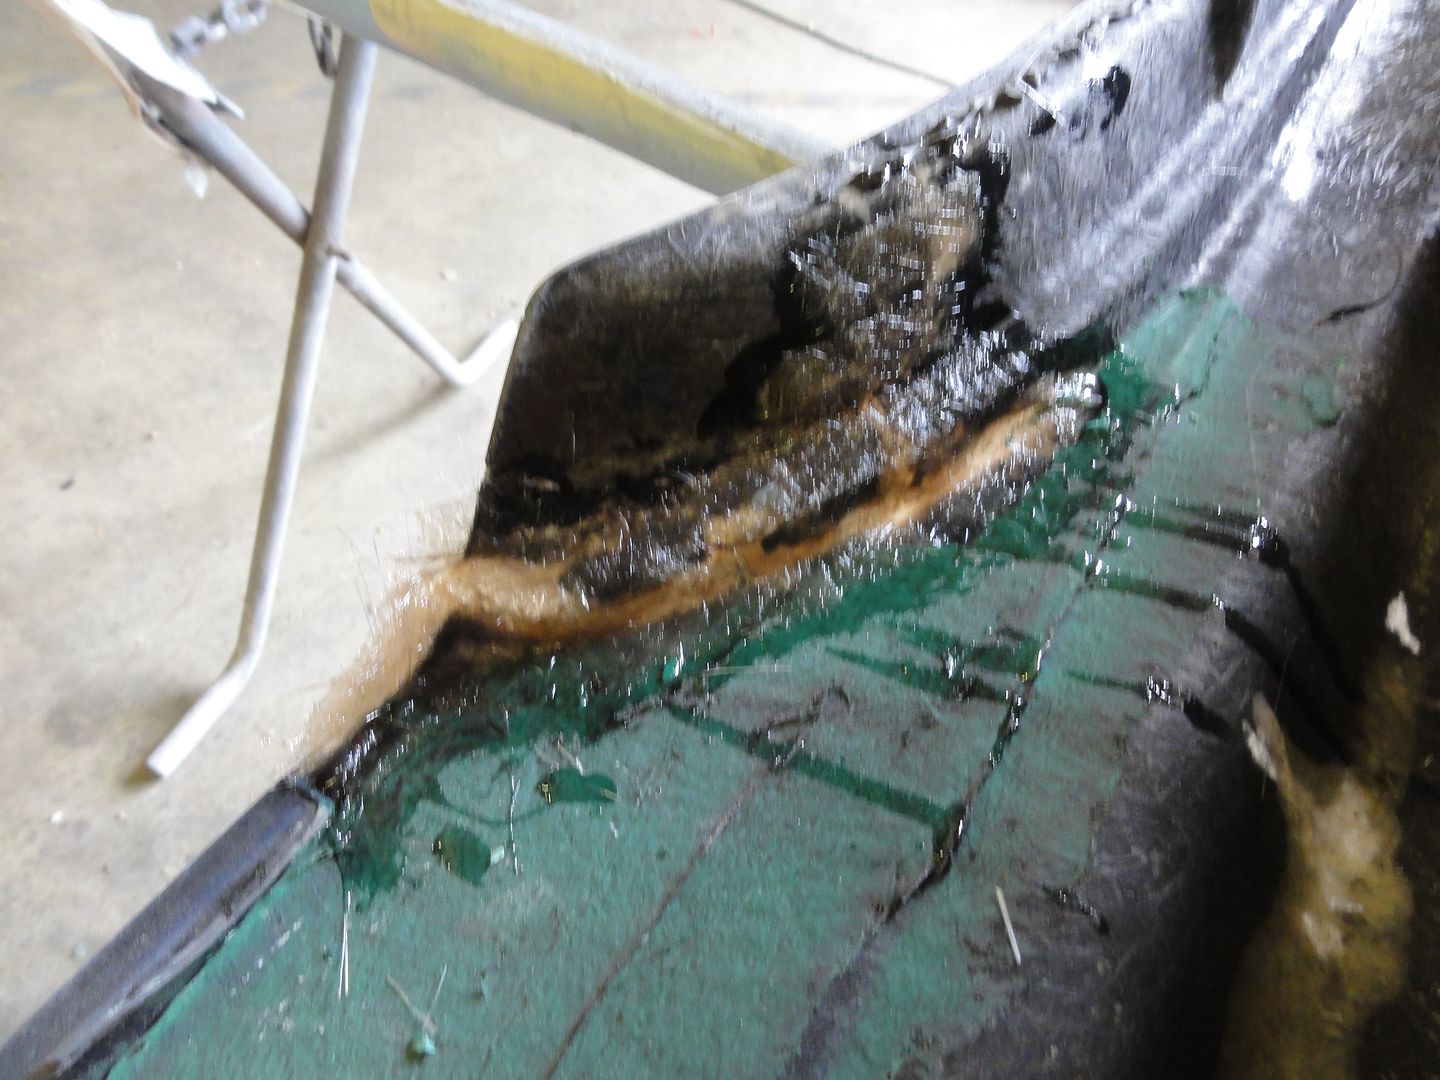
And for future investment, we rolled the rear arches too.
Then the final preparations for priming.
-
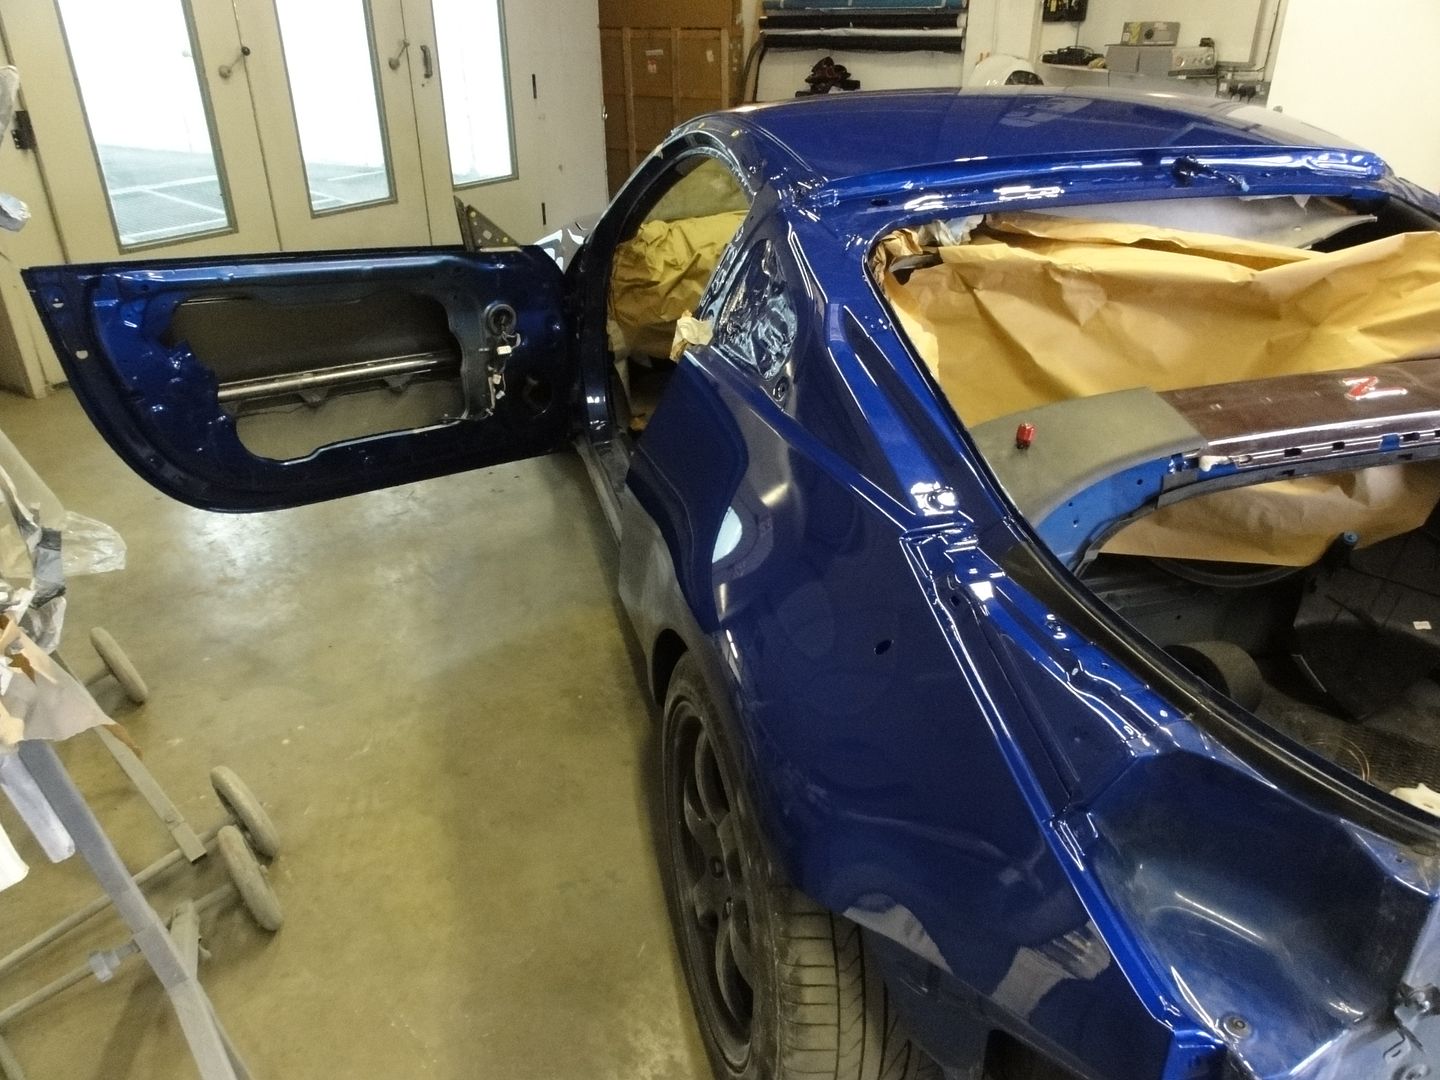
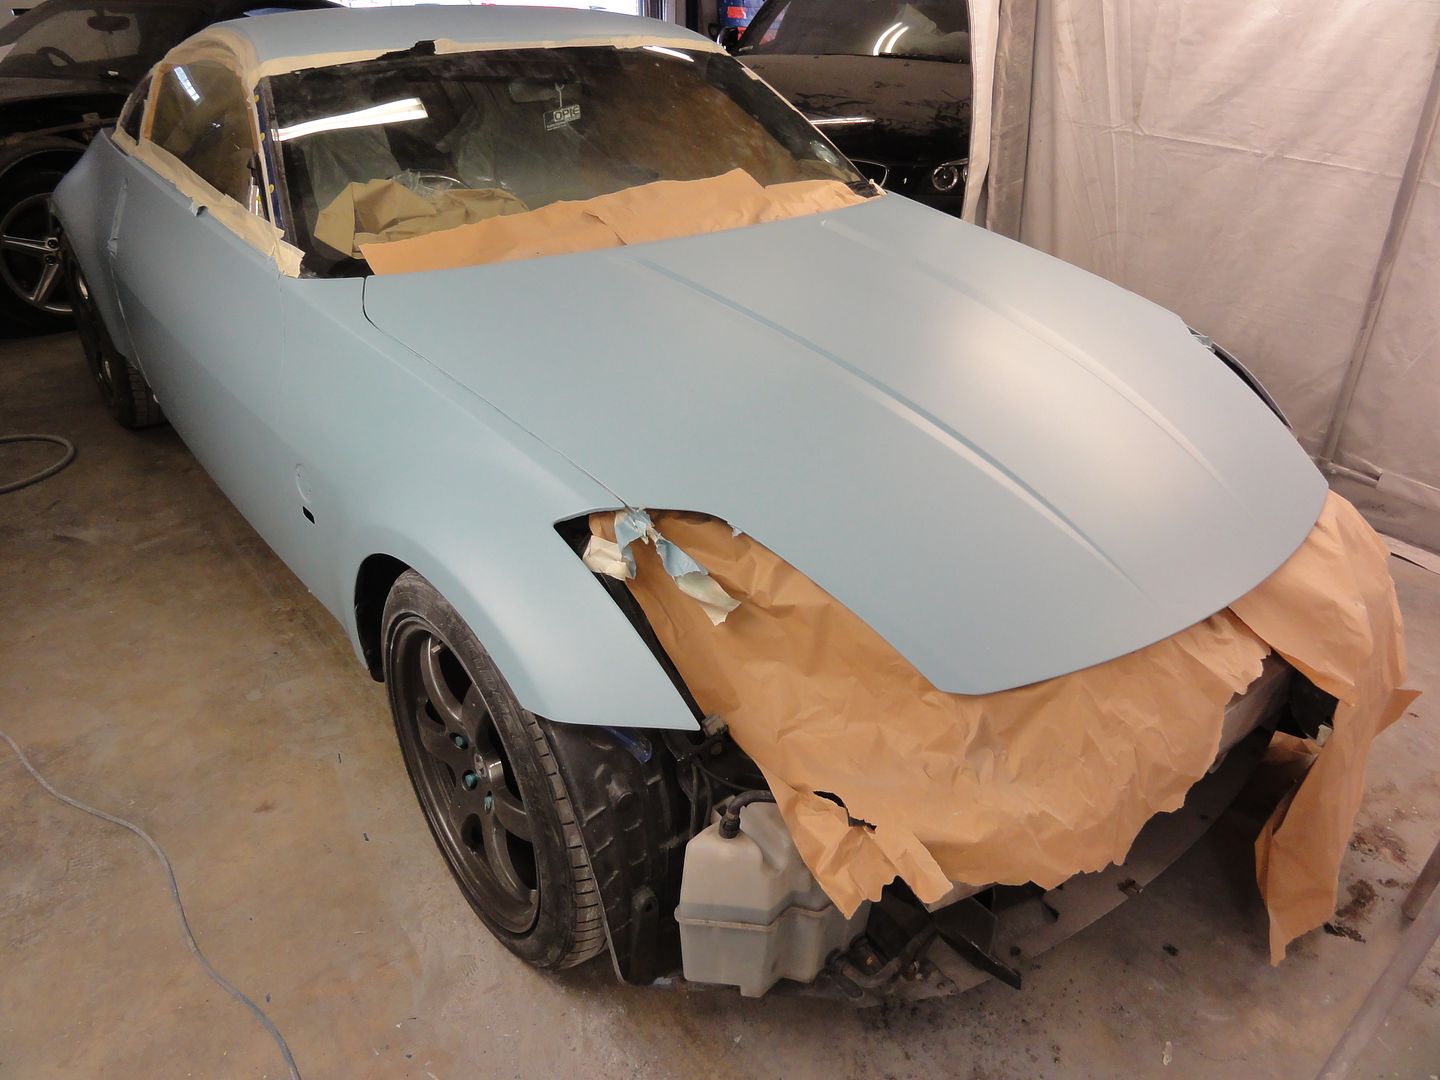
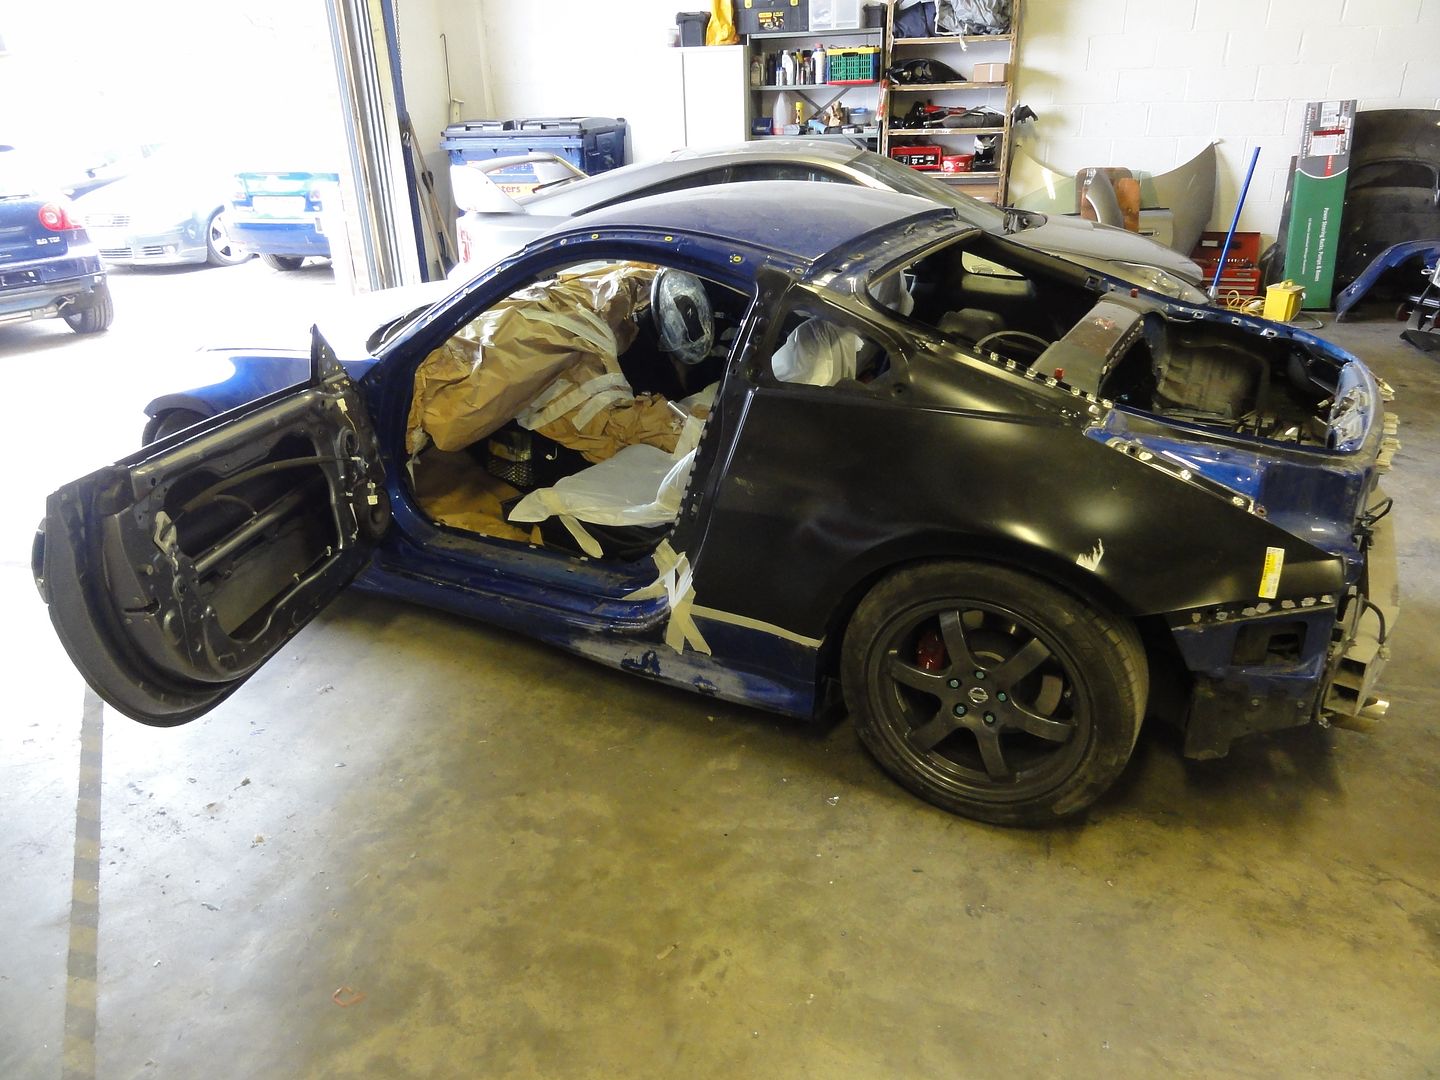
Many of you have heard the story.
It all began with a simple correction but when Ian came to drop off his car, this happened to him:
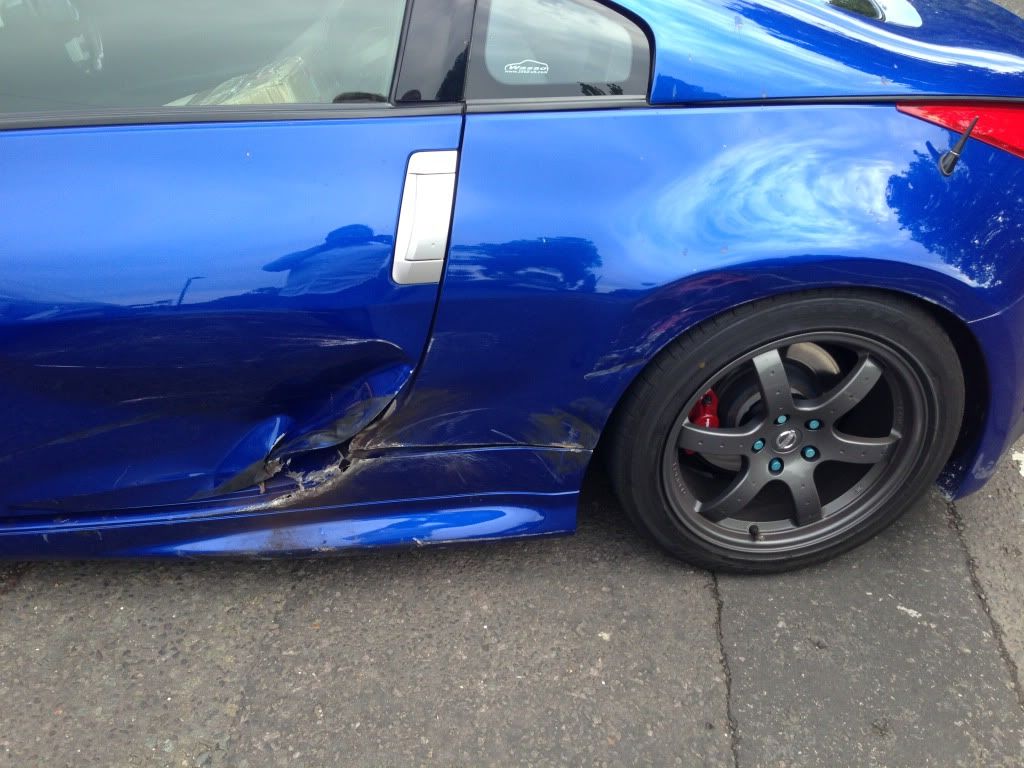
It was a hit and run and the damage was devastating.
Fortunately, Ian was safe and prior to arrangements with us, he had a car we could lend him to drive home in and to use through out the durations of the repairs.
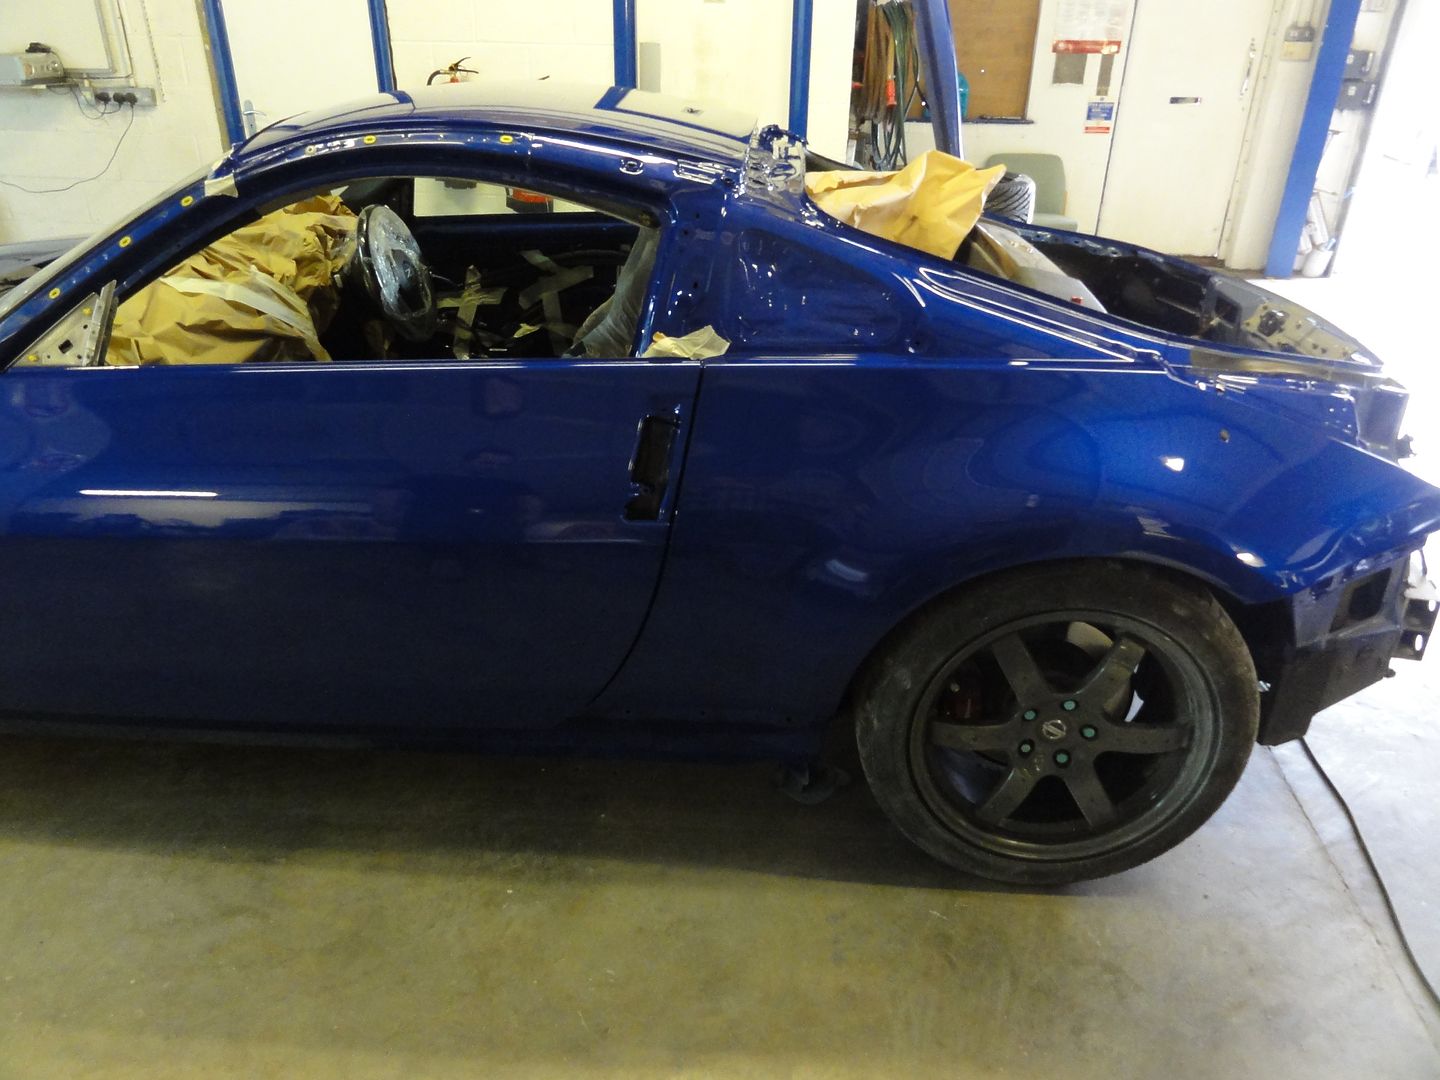
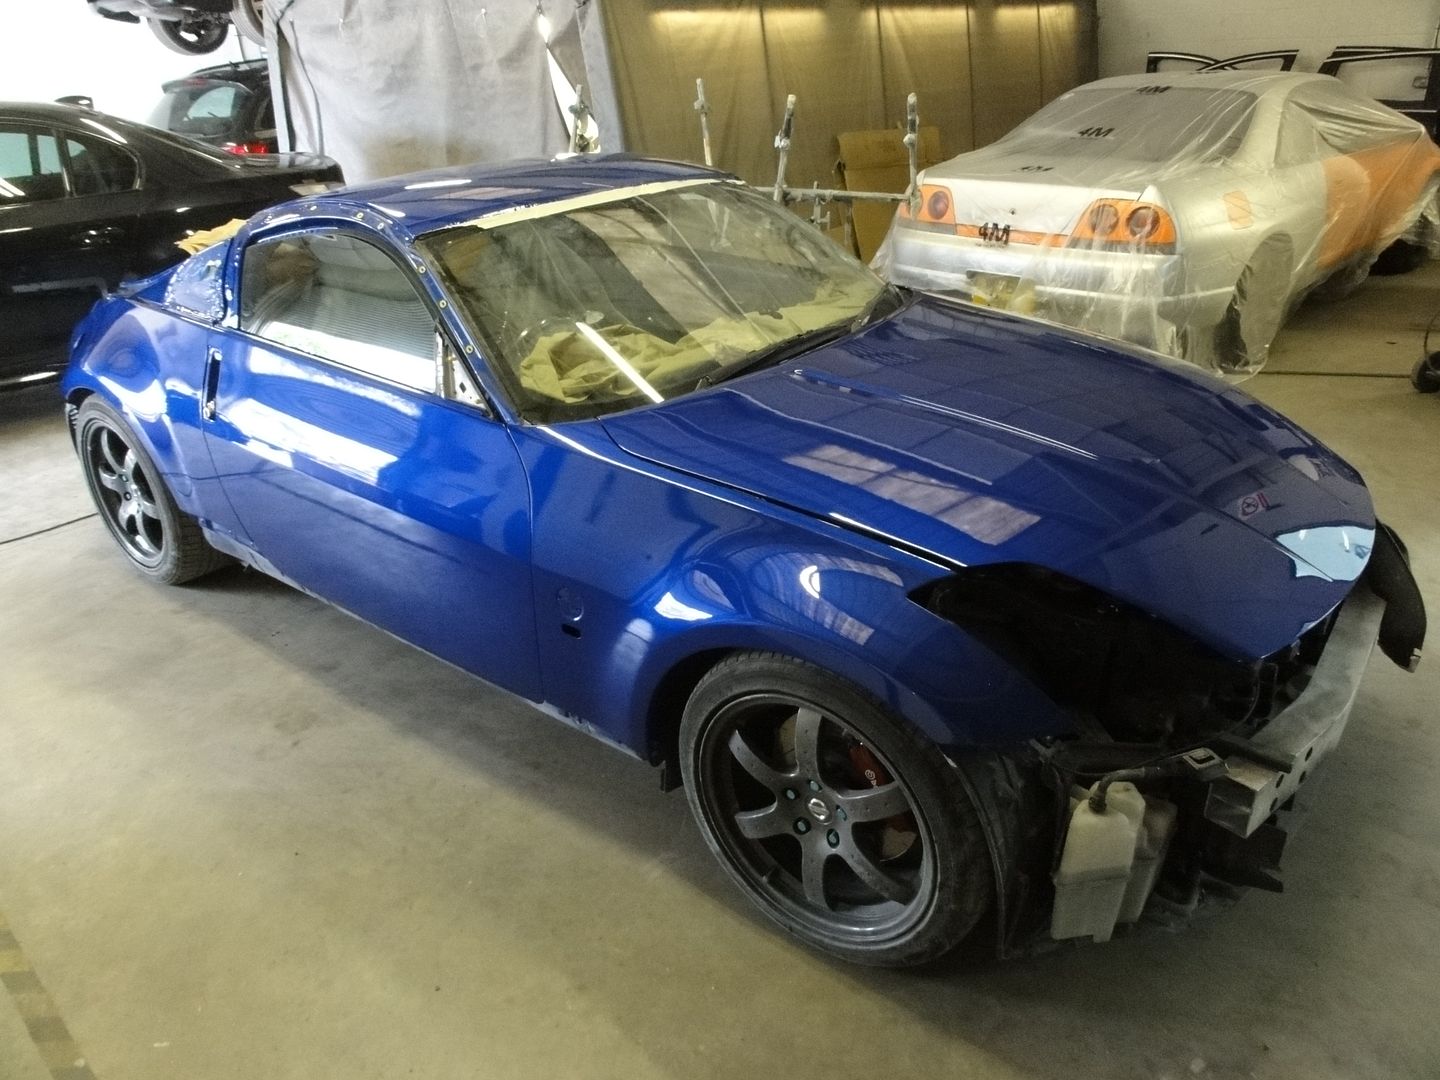
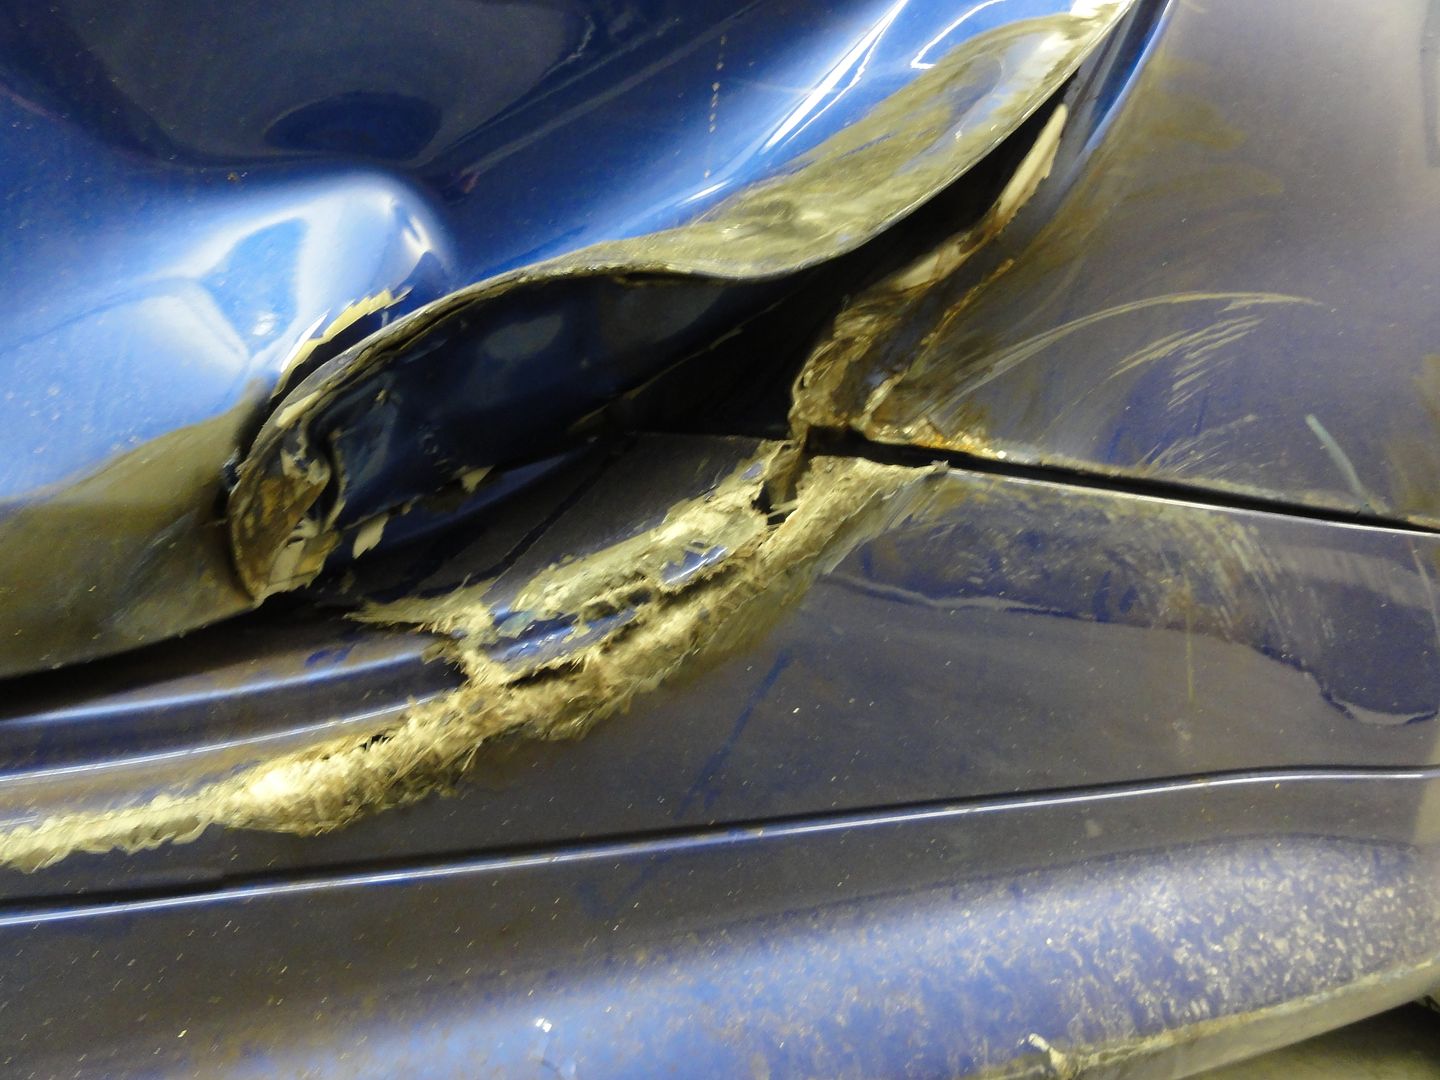
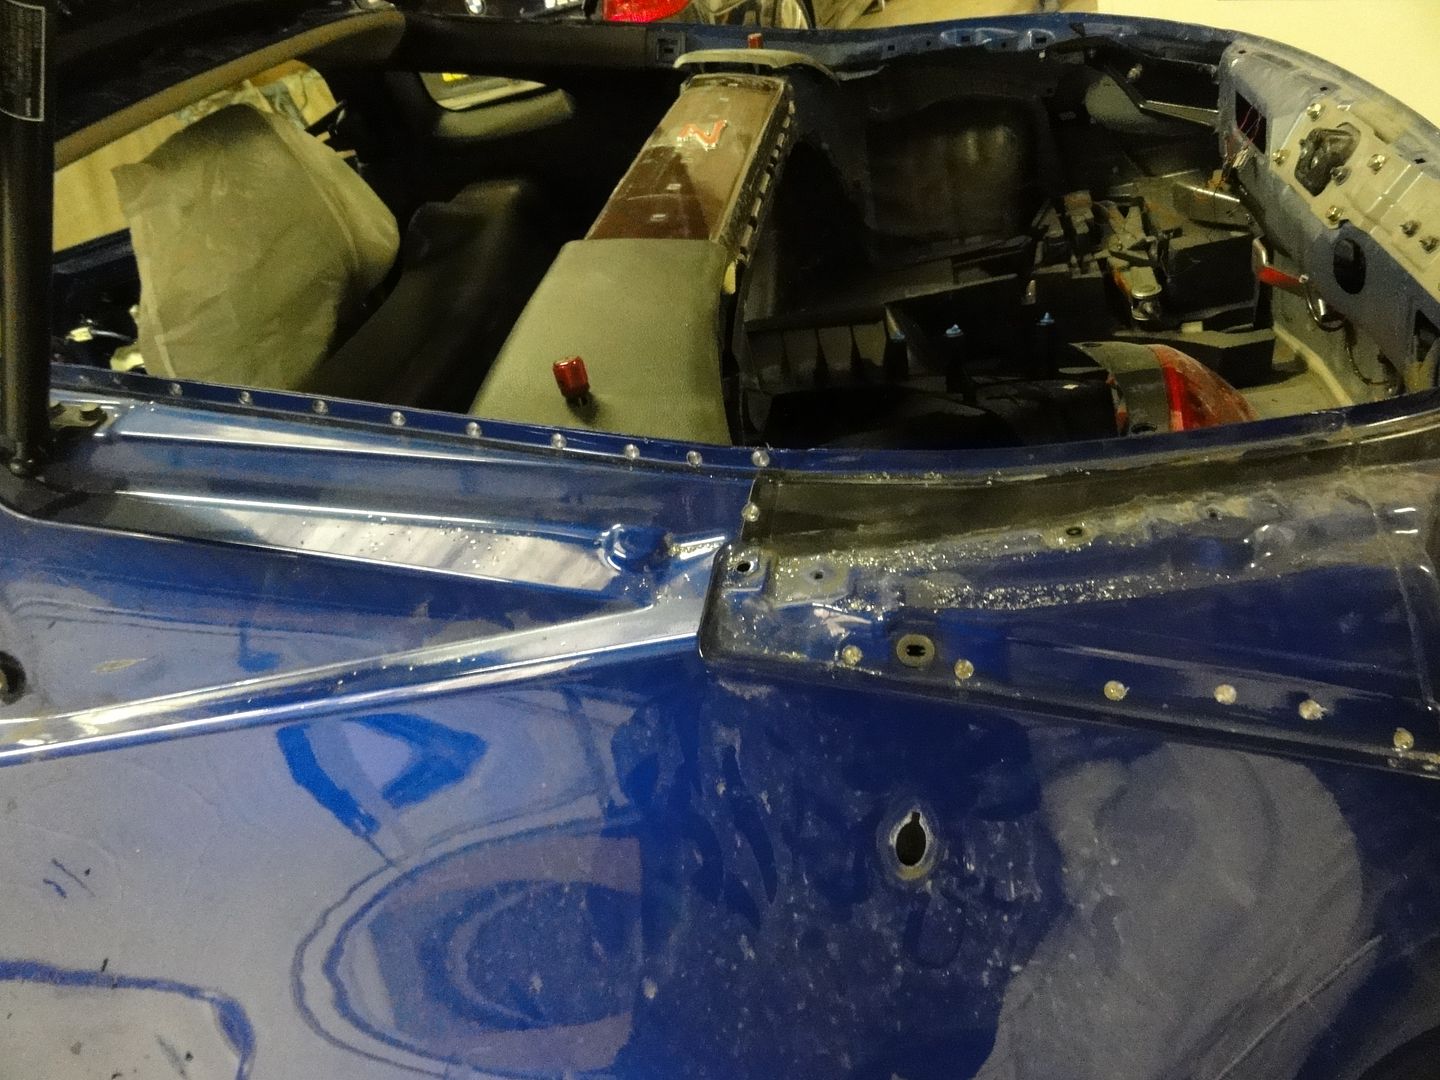
Though the damage was substantial, the car was repairable and suffered only exterior superficial damage.
What was required was to transplant a new rear quarter panel, transplant a new door and repair the nismo skirts.
-
what was you trying to buy from them?
-
I have a set for Auto 03-06 if anyone wants to buy them.
-
How cheap?...
Depends on how many we make at one go.
If I produce a batch of 5 then it'll be in the region of £110 posted in the UK.
-
Are you talking about these?
If so we can get hold of them much cheaper.
-
Screw from inside edge of the wheel arch with a self tapping screw. If you dont want to bond it, use double sided foam tape in the middle.
-
Mines style carbon Front lips are now in stock.
-
Cleared customs and our cargo is here being sorted as we speak.
I'll be sending these out tomorrow for you all. I appreciate your patience.
-
I need to buy 1 of Mines Style Front lip Fibreglass £170 for 03-06 can you send for me the details to my mail : ay_manoo@hotmail.com
sending you a PM
-
Ive seen quite a few Bentley front bumper conversions on these too.
-
It would had been easier if it wasn't so badly chipped away. Whilst it was rounded, you had more options to get it out.
At this point you only have 2 options.
Remove the hub then clamp it down and drill out the entire stud.
Remove the hub, grind away the backing of the stud and press/hammer out the stud.
The second is the easier option. Either way you will need to change the stud.
-
Ive just taken it down to a local garage. We tried everything until eventually we decided the spacer had to be sacrificed. Hes going to cut it off. I've been told to head back around 4.....Slightly nervous as my rotors arent cheap. We shall see!
Seriously? Why not sacrifice a single stud instead of an entire spacer?
-
It would had been easier if it wasn't so badly chipped away. Whilst it was rounded, you had more options to get it out.
At this point you only have 2 options.
Remove the hub then clamp it down and drill out the entire stud.
Remove the hub, grind away the backing of the stud and press/hammer out the stud.
The second is the easier option. Either way you will need to change the stud.
-
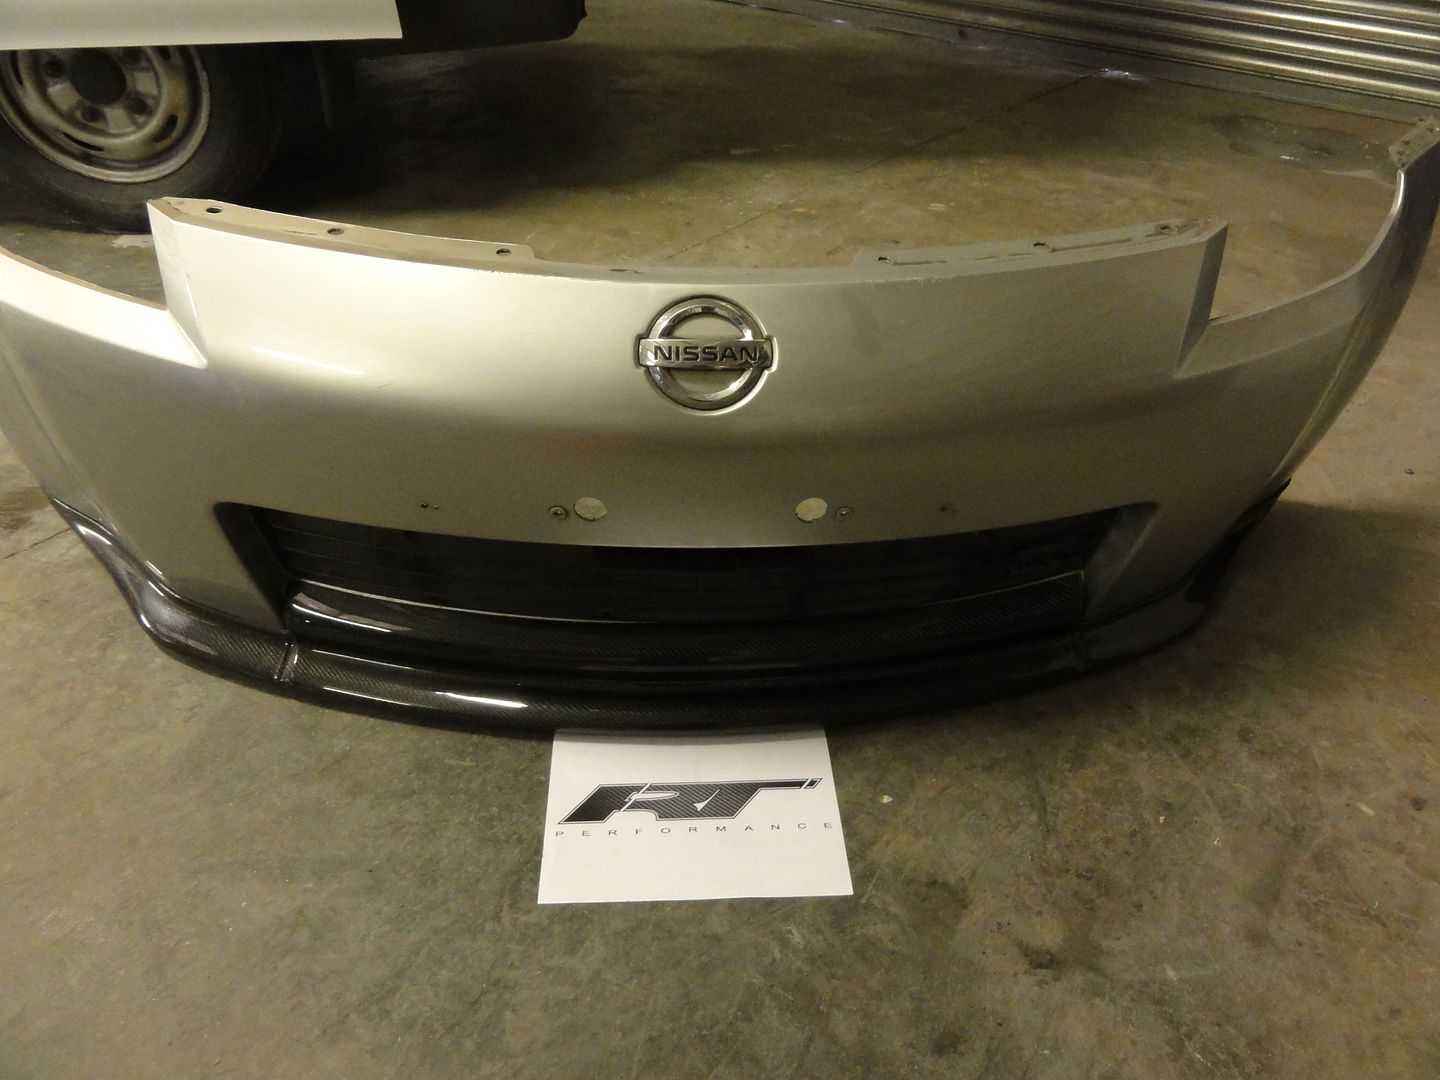
Due to popular demands of flushing the badge hole, our V2 bumper will now only come smoothed.
-
lol. then you wouldn't want to see how it was done then?
http://www.rt-performance.co.uk/blog/22-hemi-v8-chrysler-300-full-body-wrap-and-customization
Seriously. When you hear a V8 in the UK roads, its jaw dropping.
-
If he's thinking of selling that let me know!
You just missed it. He sold the beast last week for just 9K.
-
I only like this Hemi which is a customers of ours. Picture was taken at our BBQ last month.
The car sounds amazing with it's straight through system and a V8.
-
Thanks for the post RT i'm not unhappy with the product at all, just wondered if it was normal.
yes this is normal.
-
The visible exposure of the original colour is more visible on pre-facelift then the facelift.
Unfortunately this is how the original product was hence the replication was exactly the same.
To amend that would mean adding to the cost and our aim was to sell what was out there at a lower price.
After trying 3 front lips we chose the one with the best fit to the bumper to replicate.
The most common way for people to overcome this was to paint or change the colour of the lip to black as stated above.
-
here you go. I think this is the one with temp sensor plug blocked off.


RT-Performance's build on Wasso's car - Here's how we did it.
in Styling
Posted
Next off was to do the rest of the removed parts which fallows the same process
and not to forget the black lip
and the repaired skirts?