

.jpg.87a4f24e50a871c5b3627ab0177c7645.jpg)
dave_7
-
Posts
203 -
Joined
-
Last visited
Content Type
Profiles
Forums
Events
Gallery
Store
Posts posted by dave_7
-
-
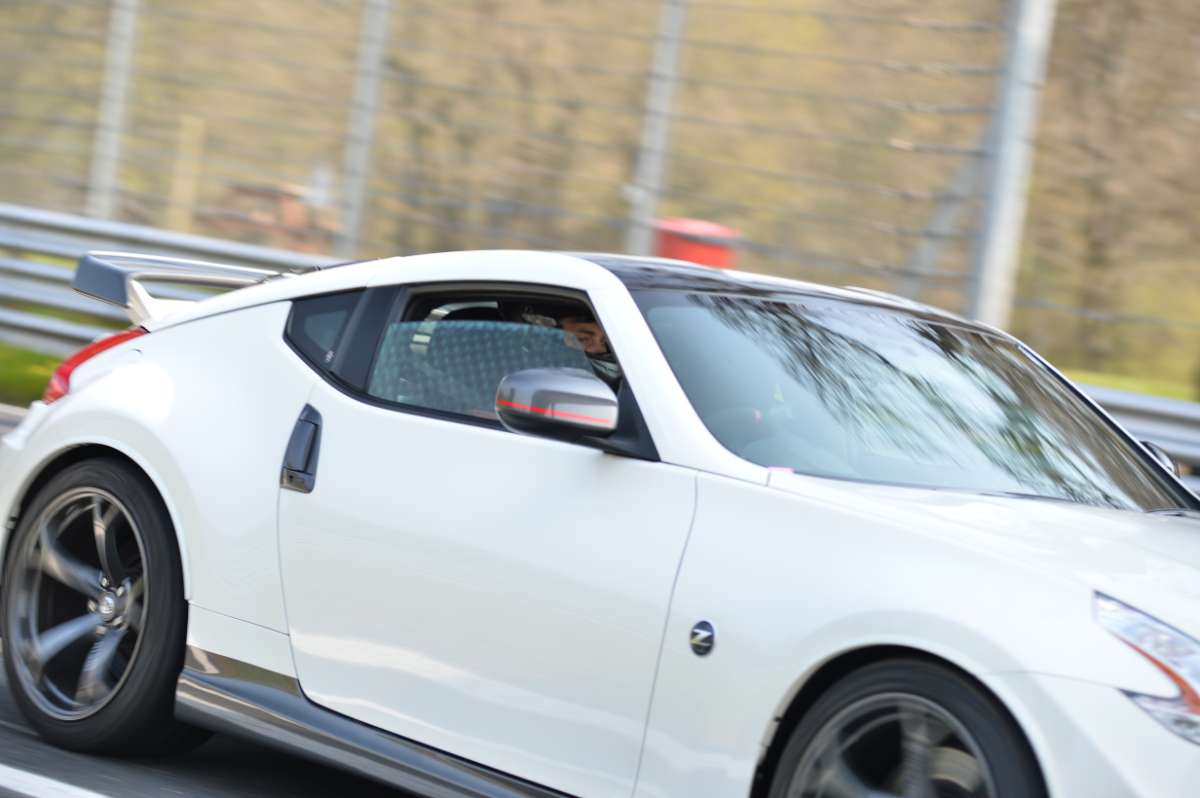
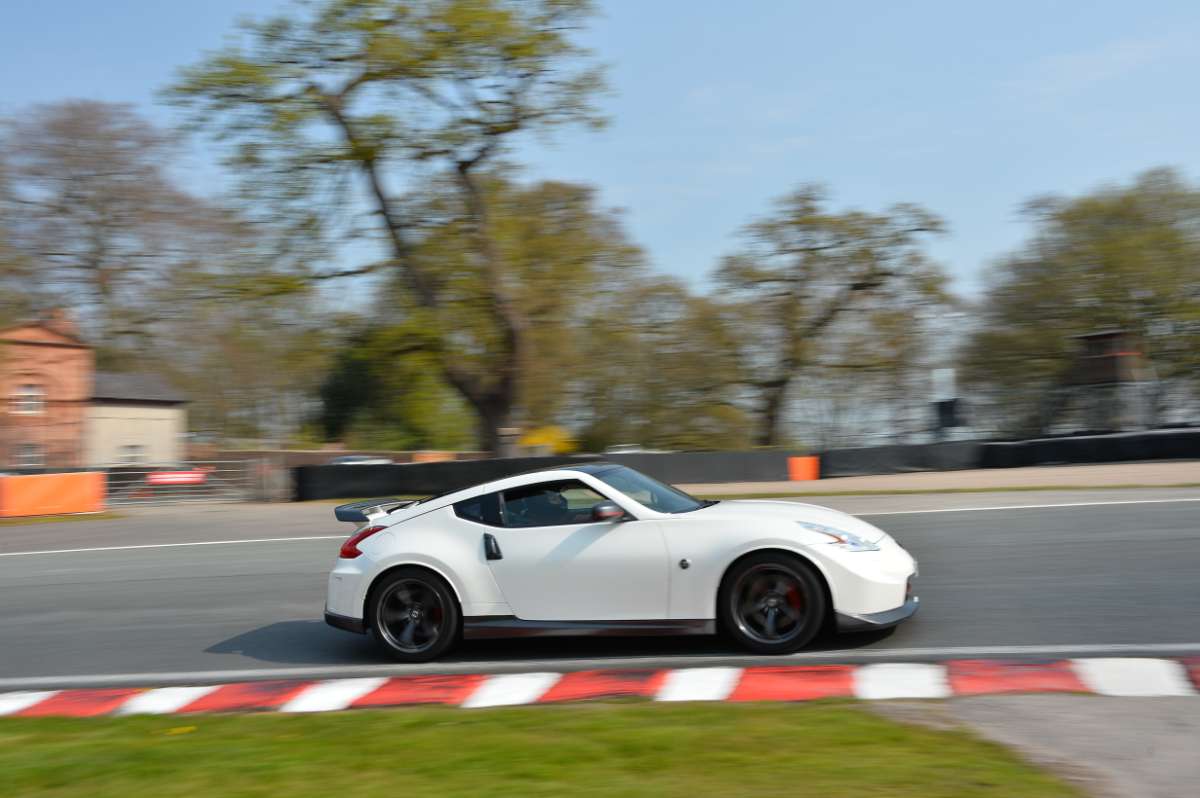
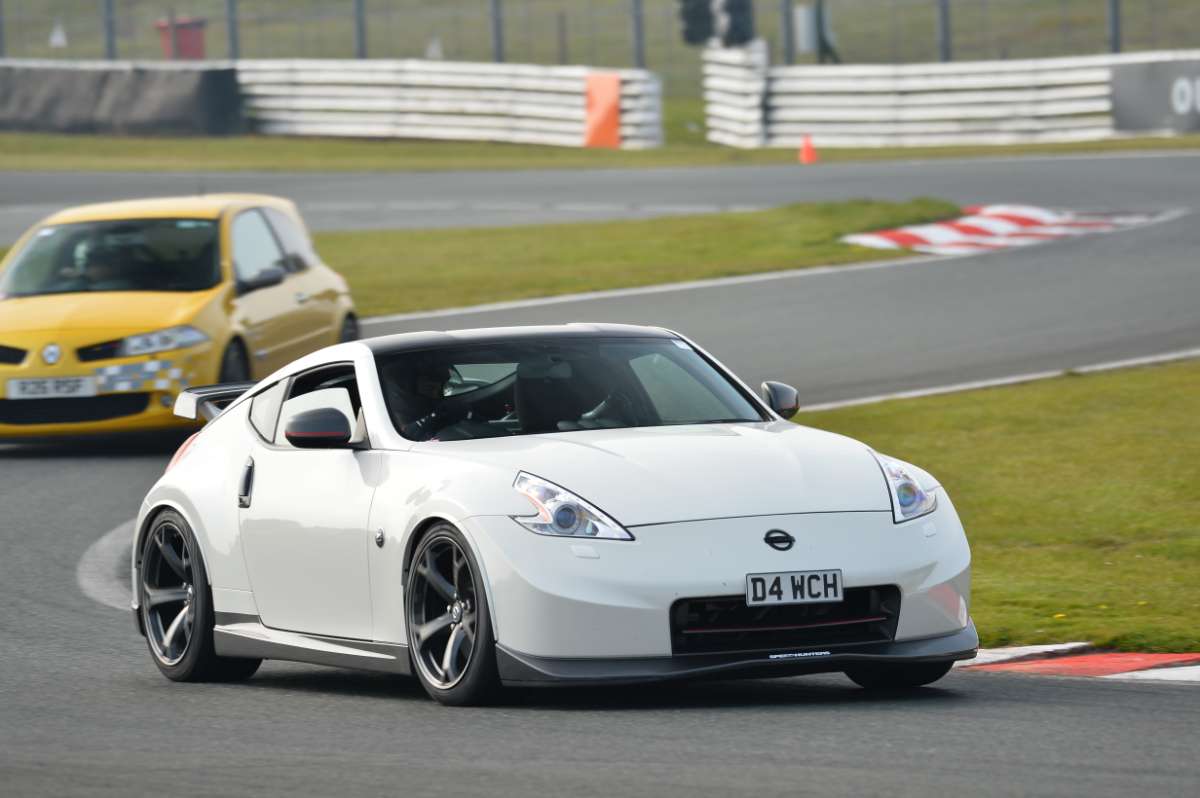
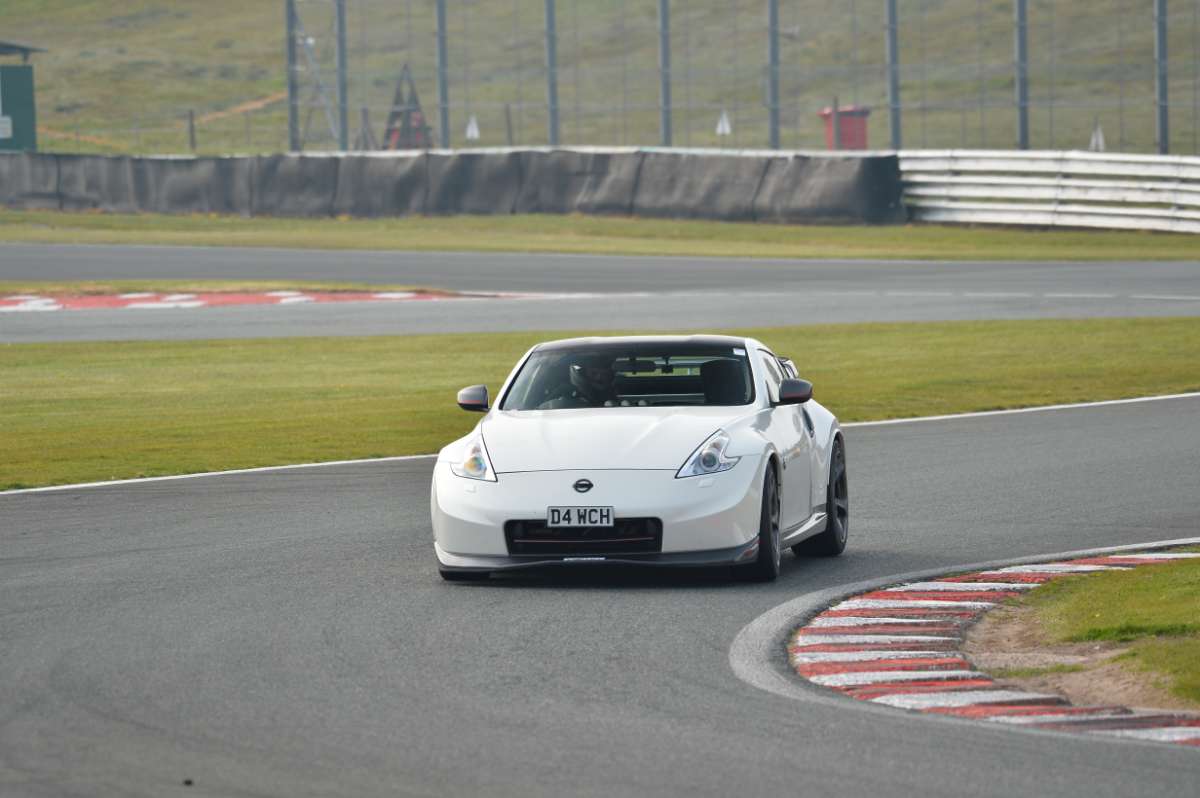
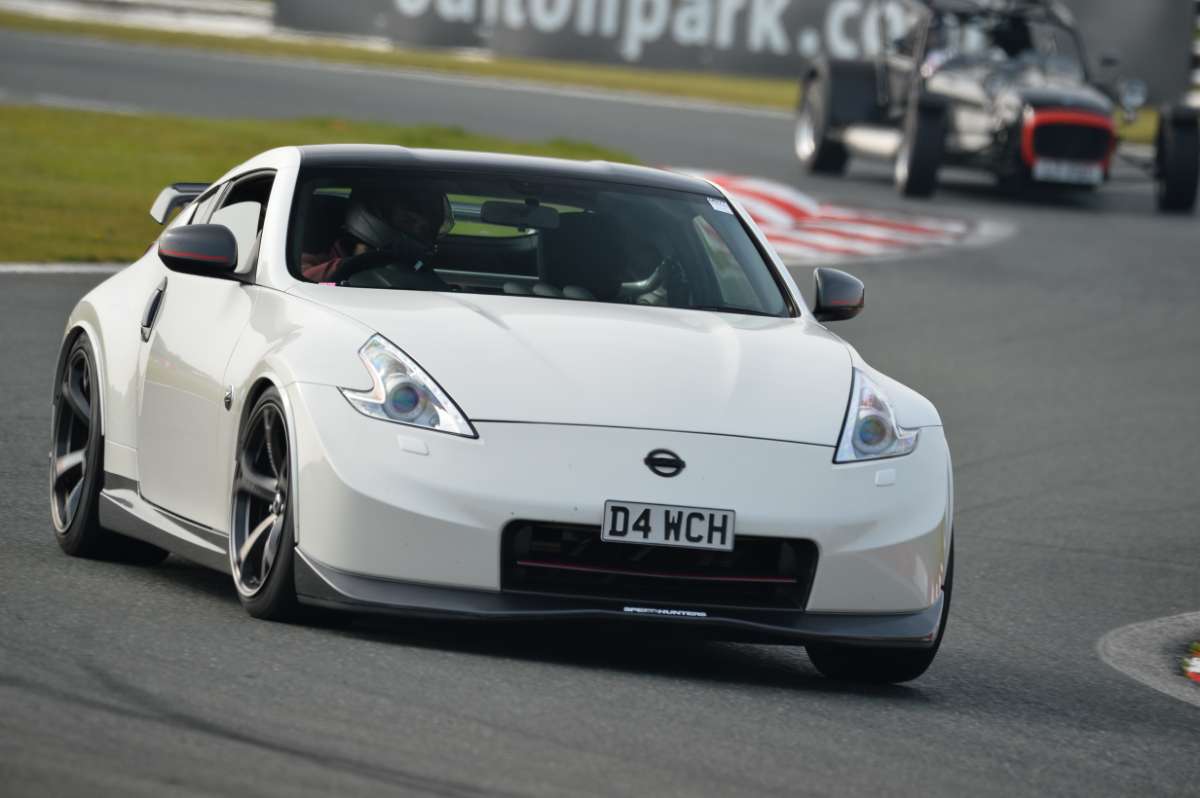
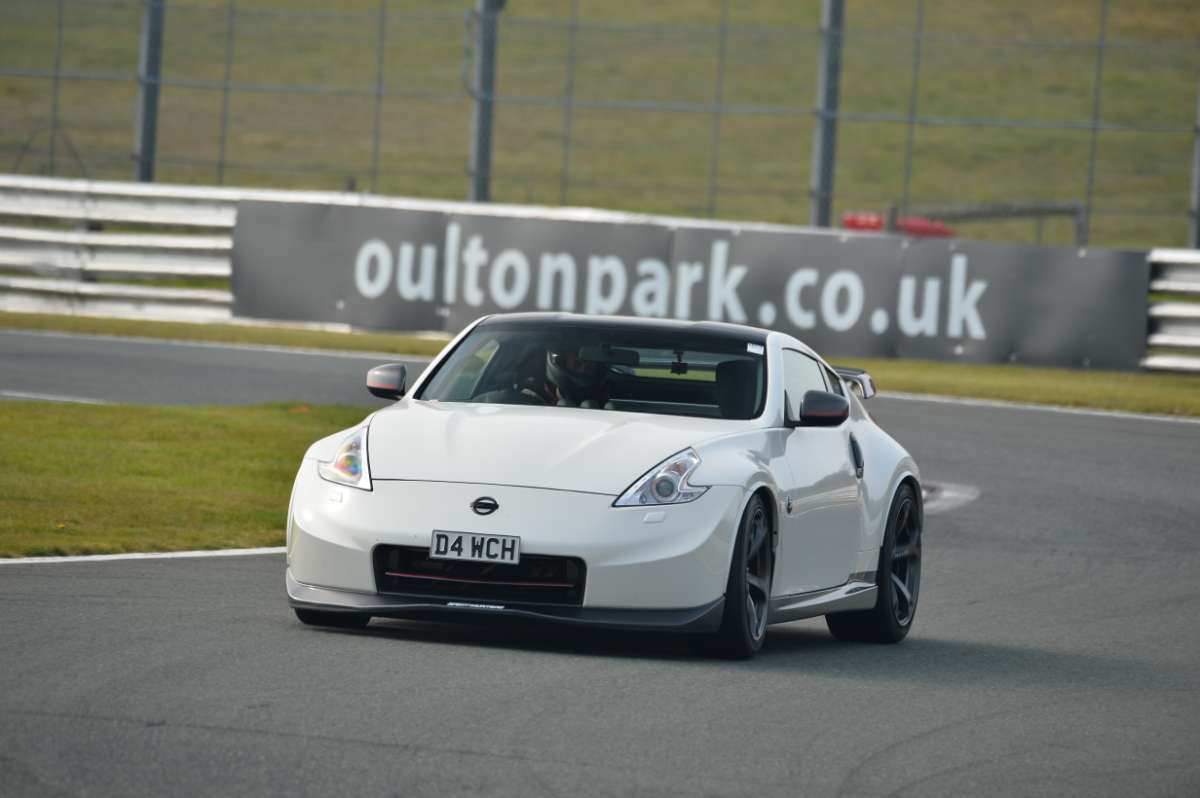
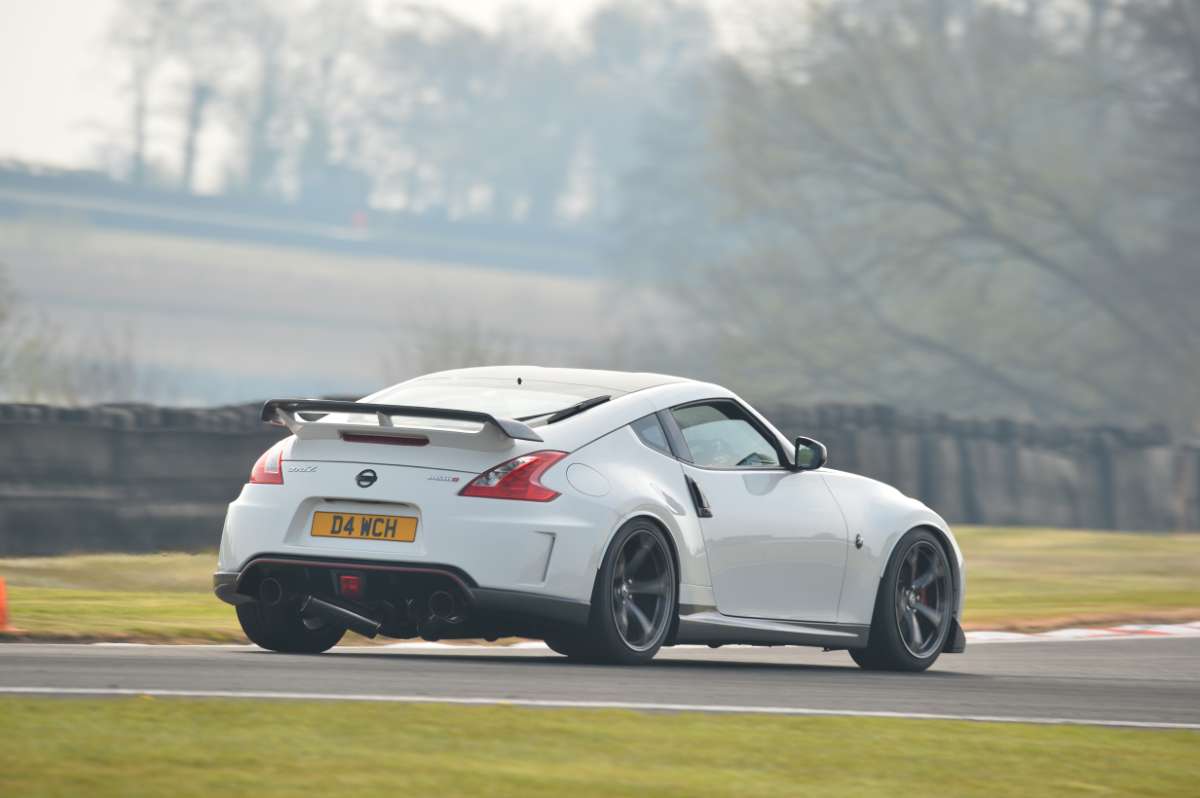
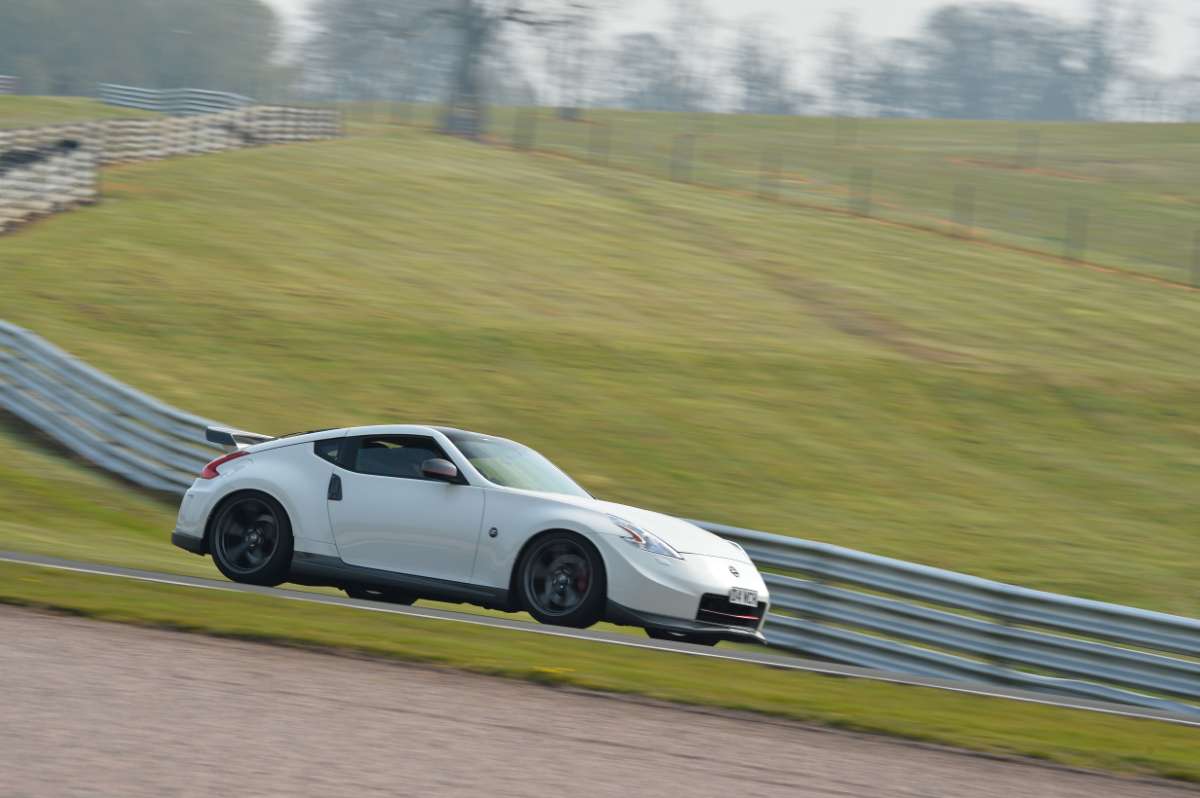
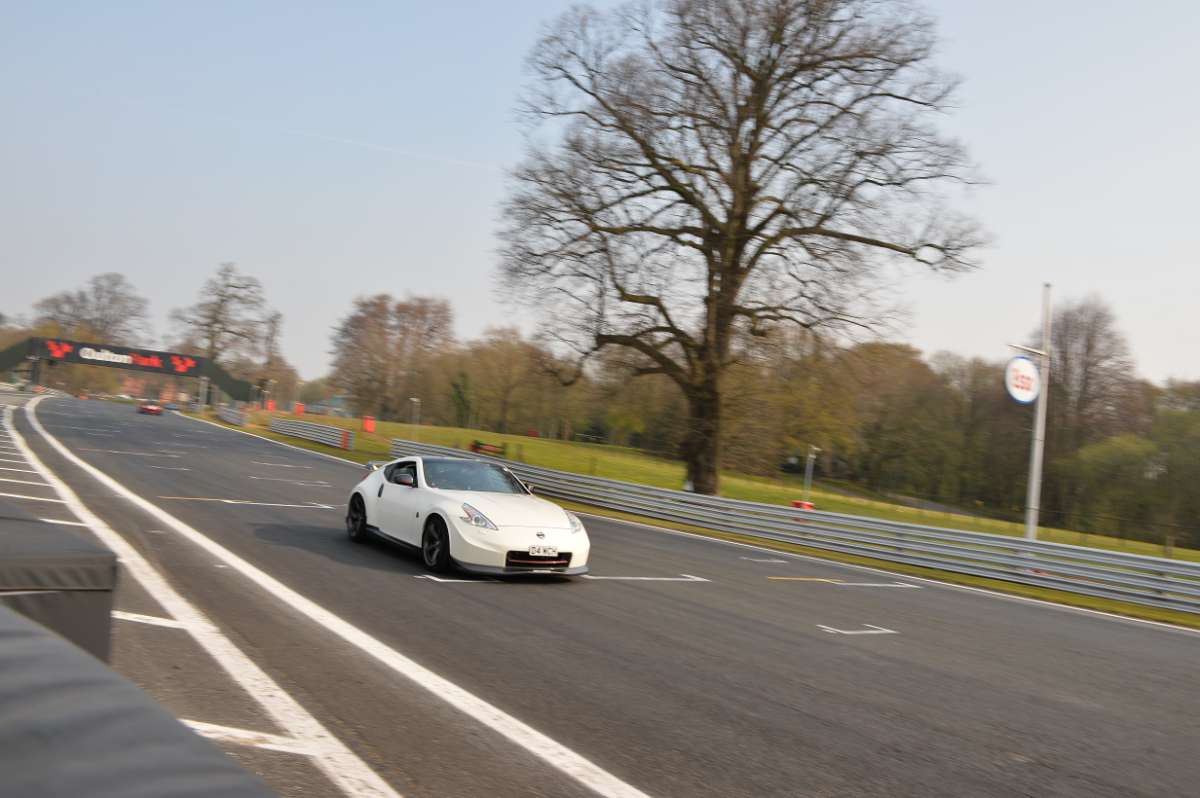
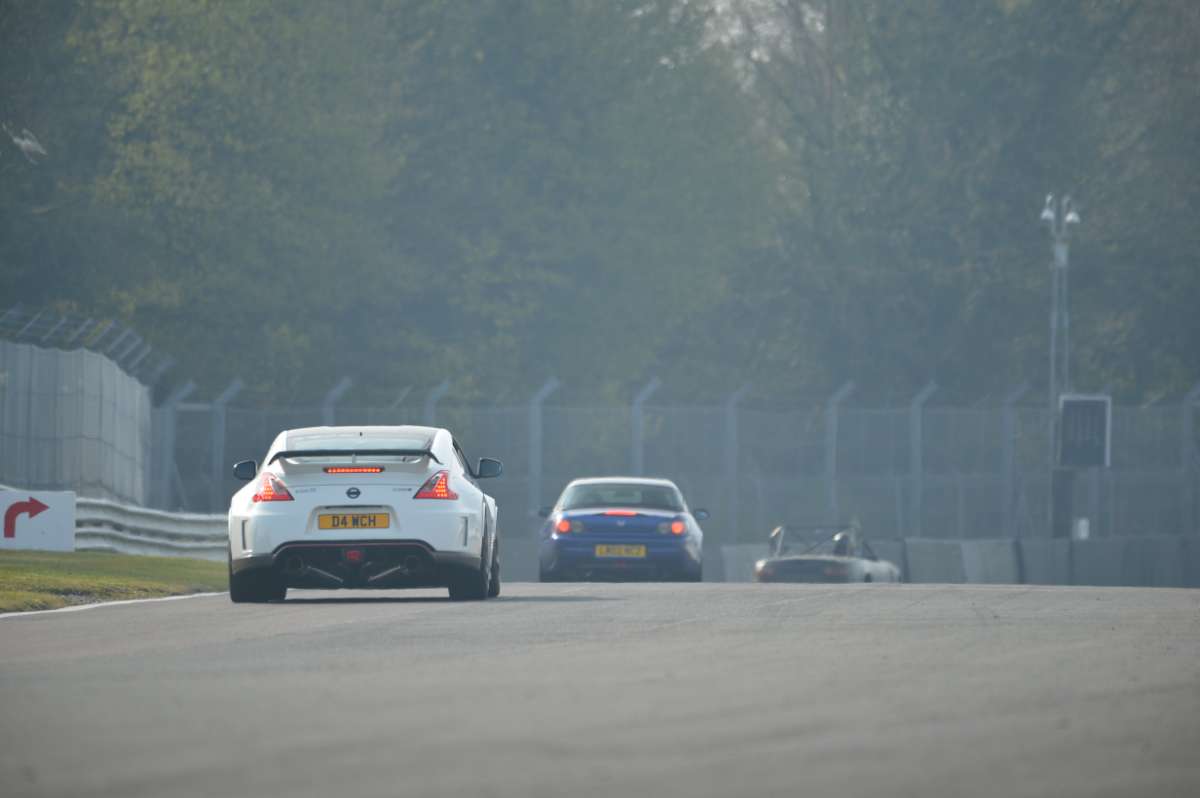
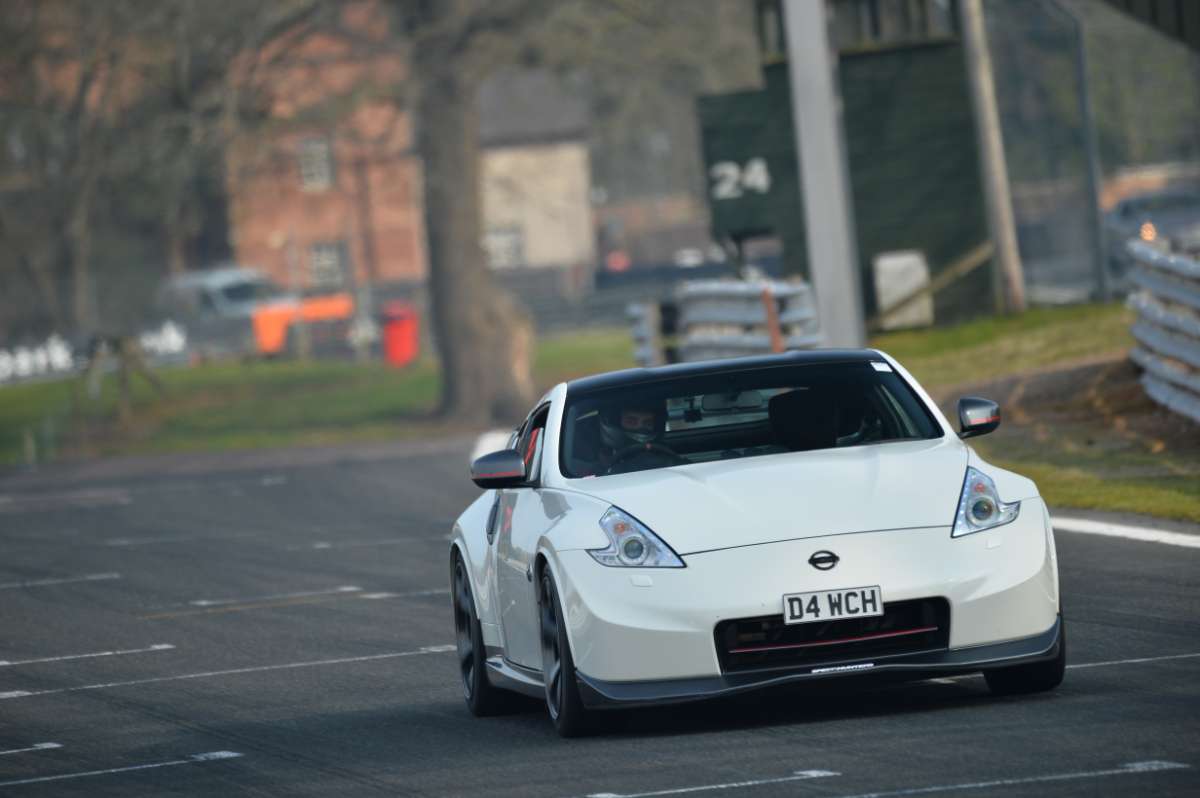
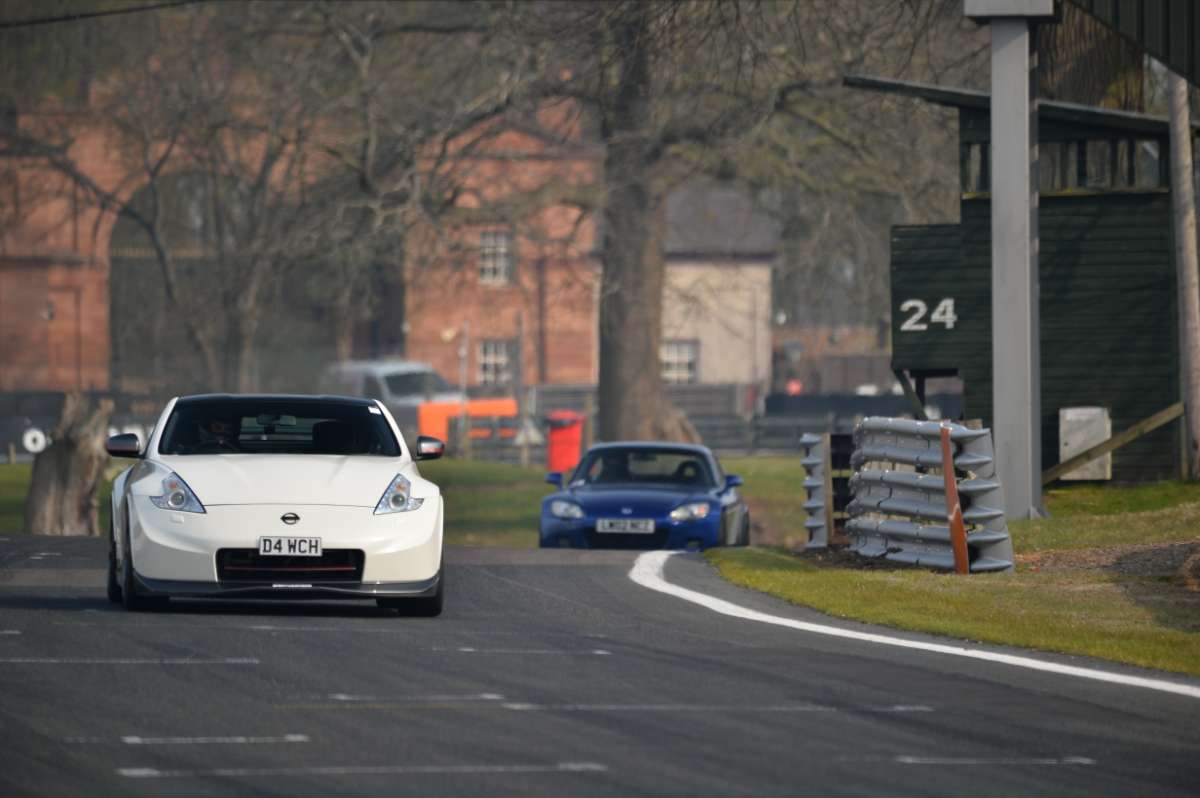
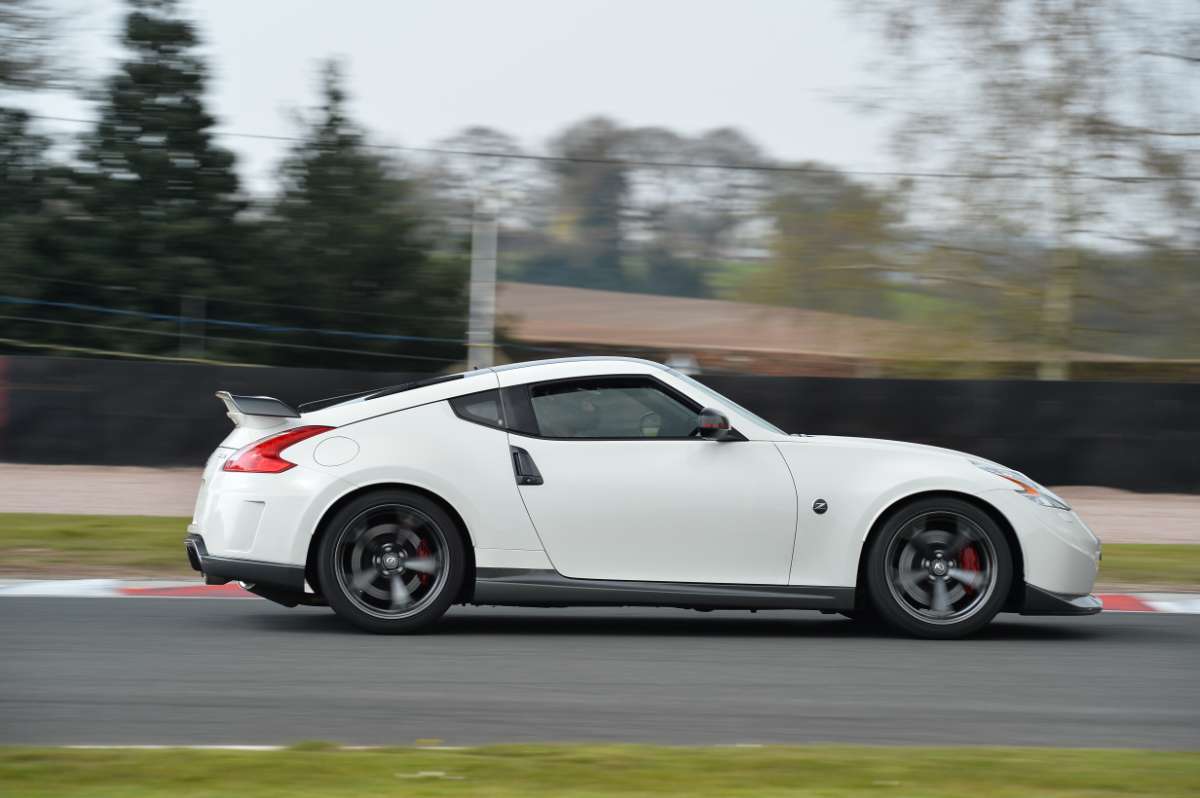
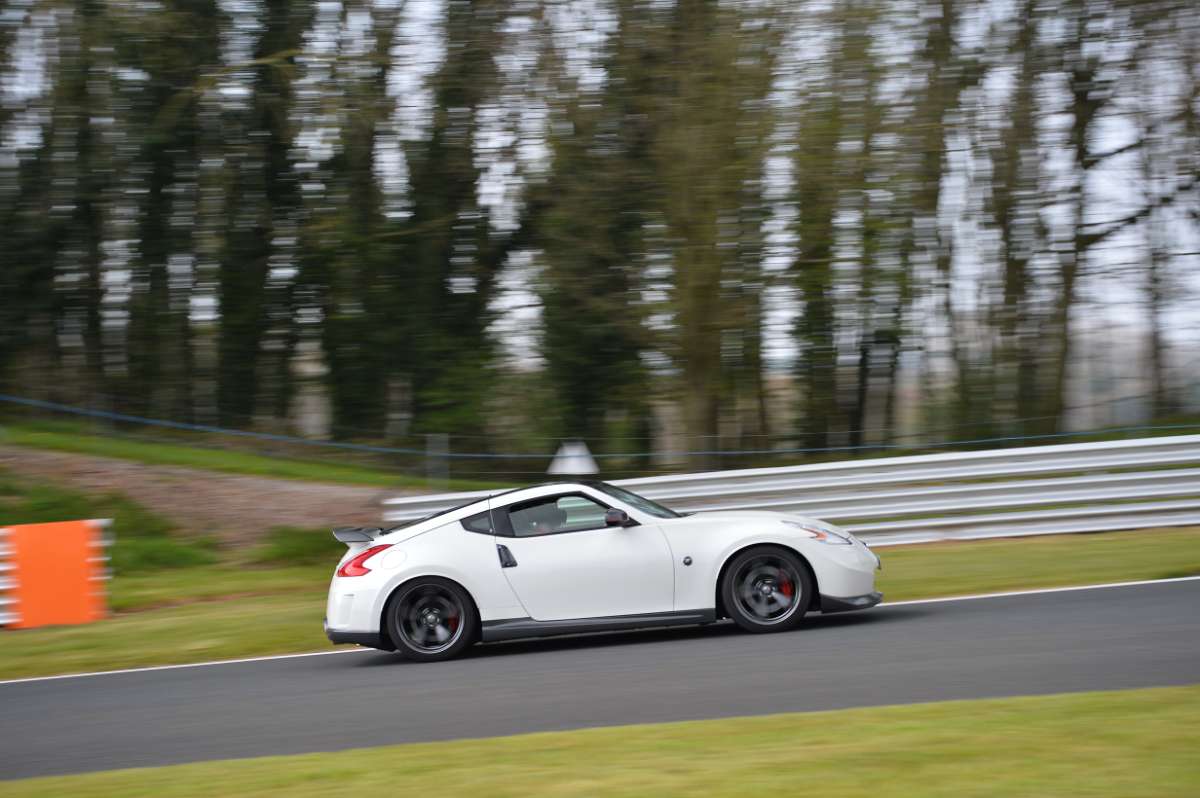
Pictures from Oulton last week (always seem to go down well on here so give the people what they want)
Top day and car was faultless all day. Really good to get back out there after what feels like forever.
Big fat hardrace front roll bar made a massive different to the front end, so much so it took me most of the morning to re-learn the car!

-
 4
4
-
-
21 hours ago, davey_83 said:
How is best to go about setting up adjustable drop links on the drive for example?
Drop links are fairly easy to set up, ultimately you want to set them up with the suspension under load from the weight of the car (car on ramps and not stands) and set them so there is not load going through the roll bar via the drop link with the bar in a neutral position (parallel ish to ground). Literally just adjust the length of the drop links so they will pass through the bar you are using and make sure the joints are can articulate freely. Easy peasy
-
2
-
-
nice work, these look better than new!
-
1
-
-
Congrats pal

Seats are going to look awesome as well once the chaos subsides
-
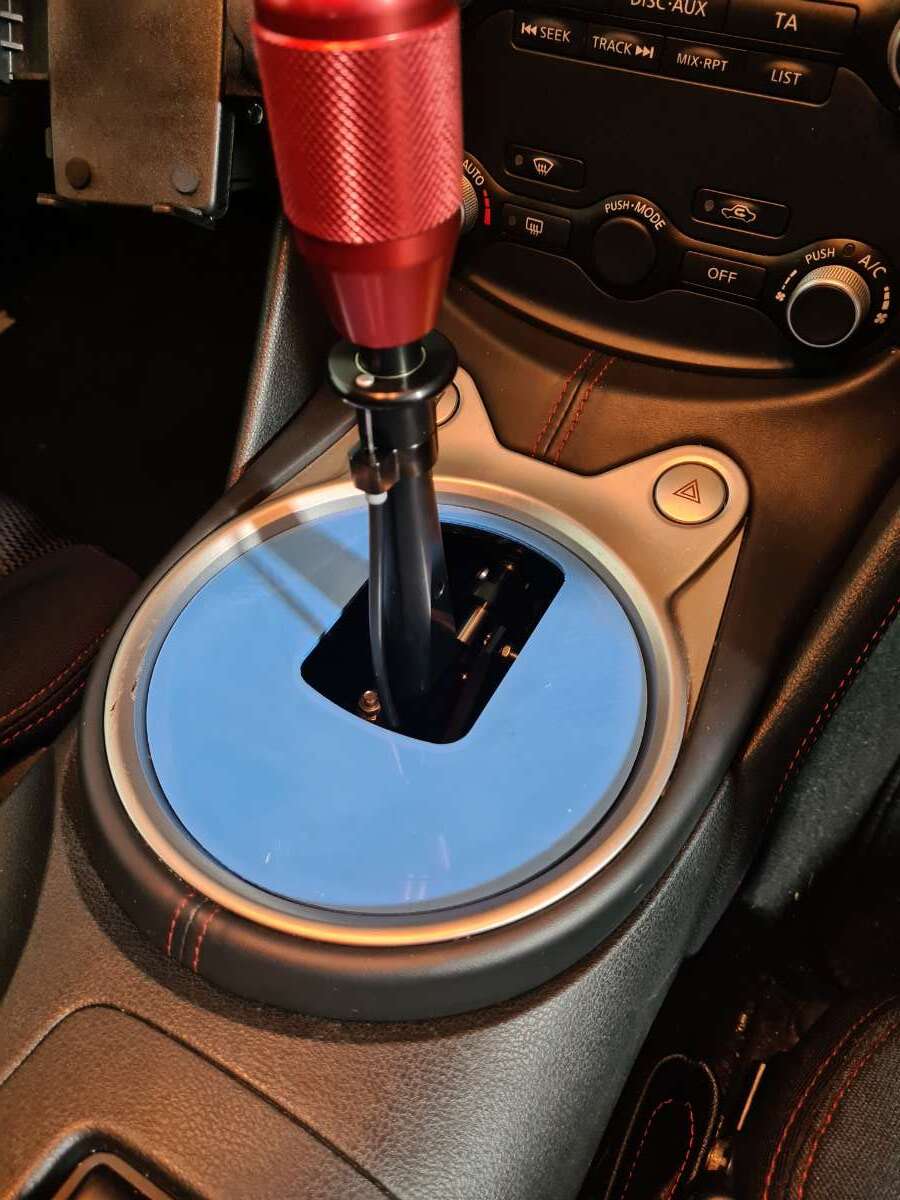
Quick update for those interested...
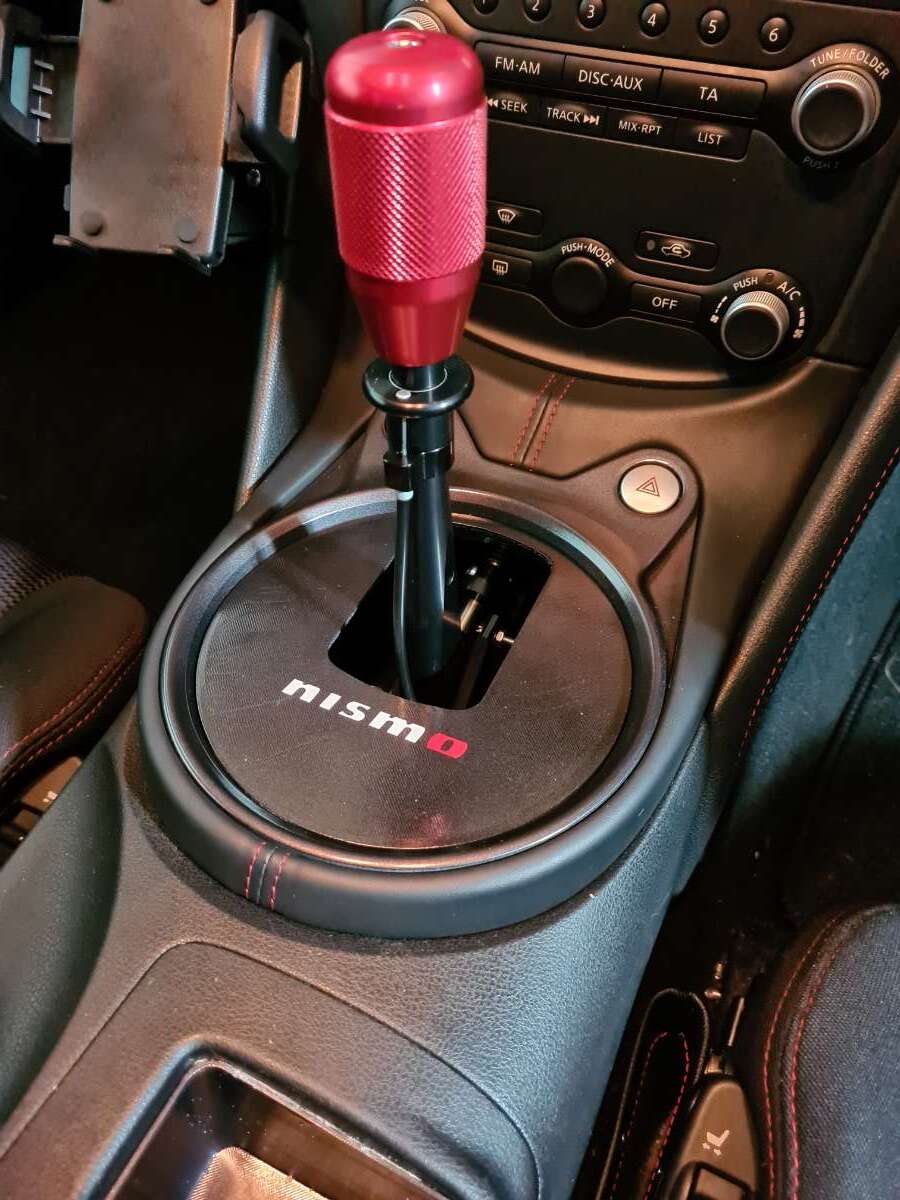
3D printed a little something to tidy up the new shifter and painted it and the trim. made a nice difference to the inside of the car really happy with how it turned out.
this is how is started before paint. Printed from ABS
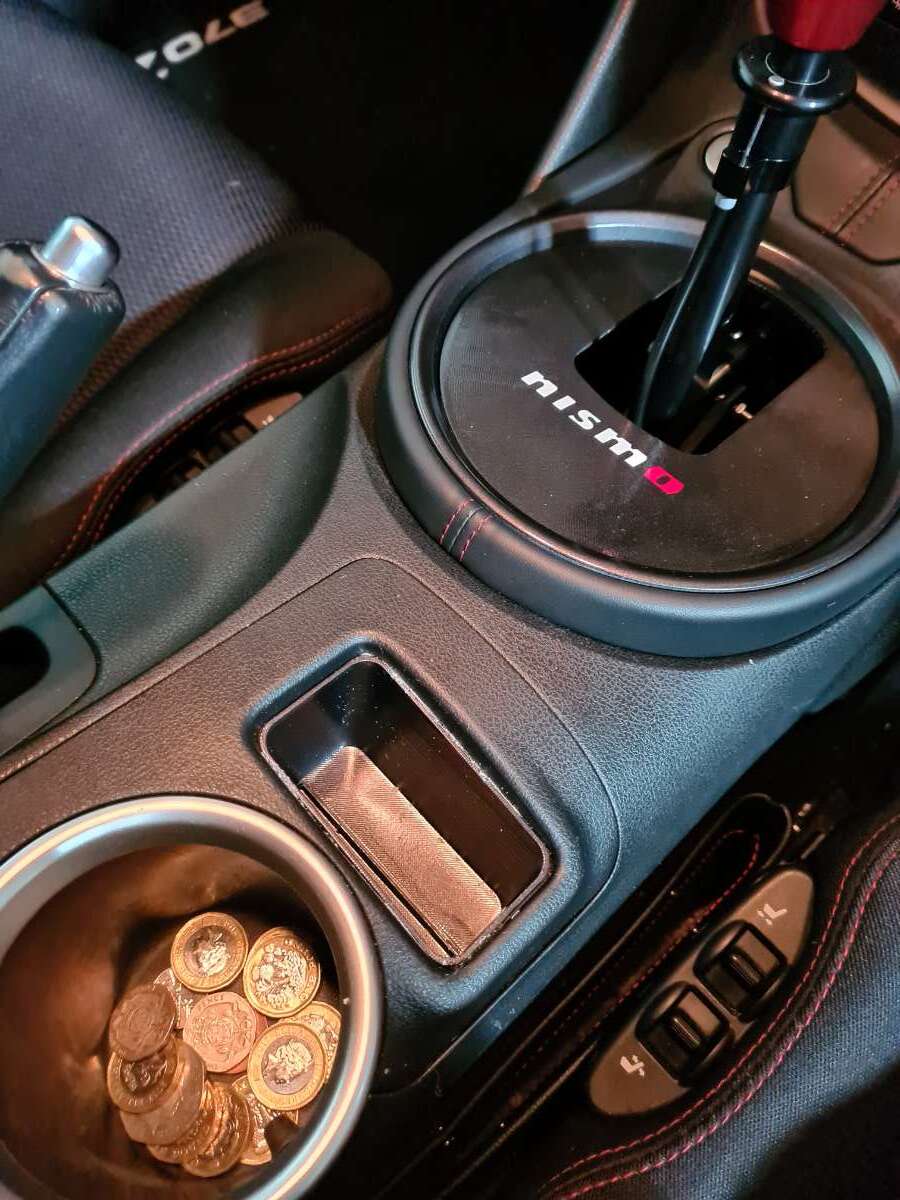
also printed and painted a little cubby from an stl file i found online to replace the button blanks.
On the seat, front I am booked into GSM on the 26th to try and and hopefully order a pair of fixed back buckets.
Also fresh from Z1 which arrived today...
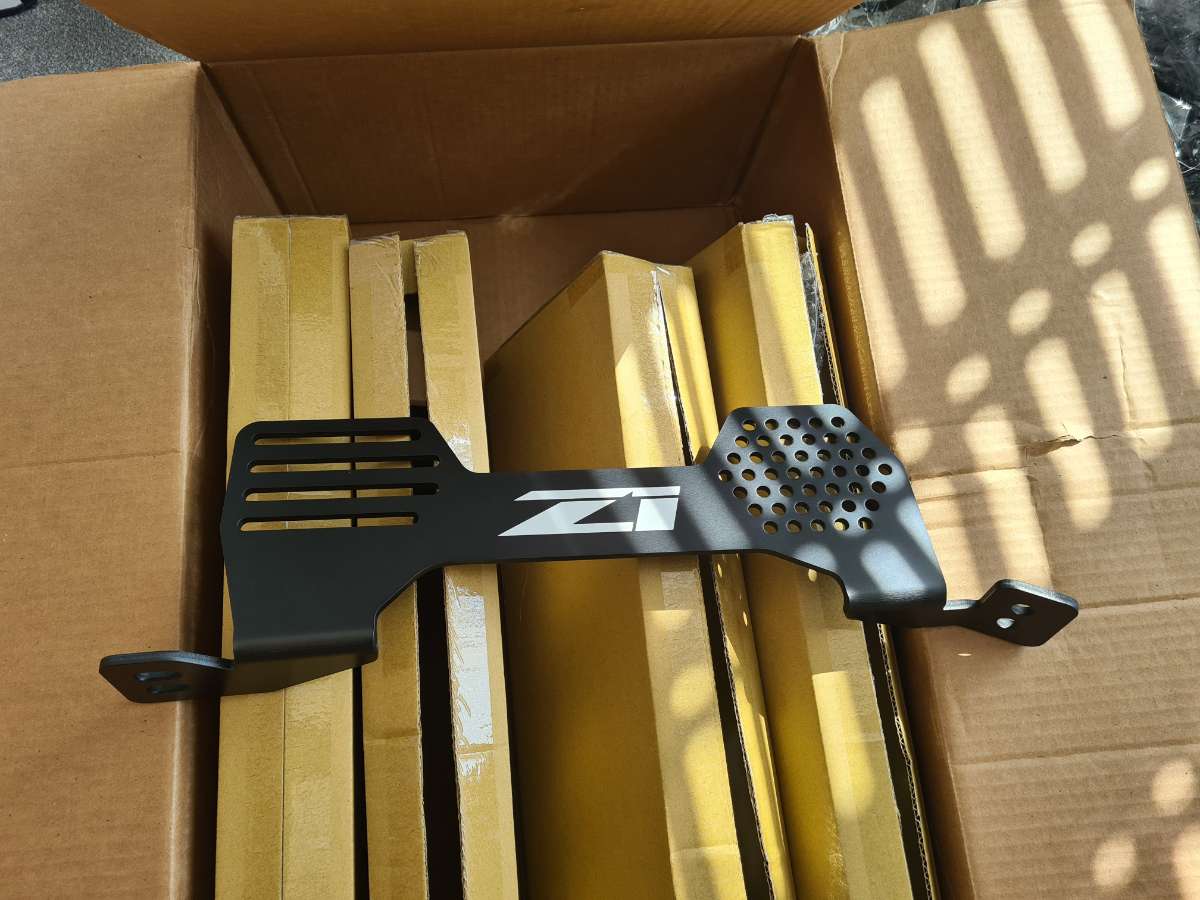
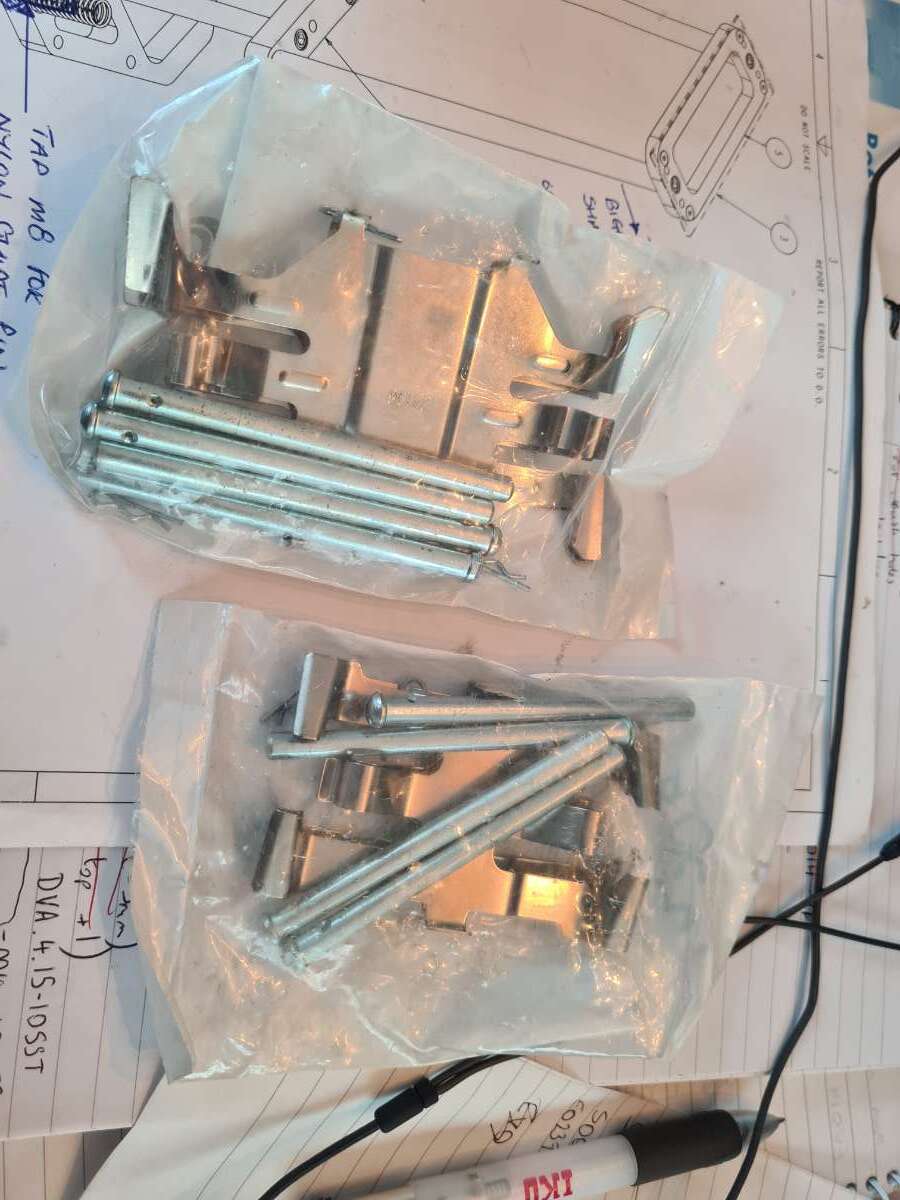
their new seat mounts. these were only release last week but as soon as i saw them i knew they would be perfetc what what i am going to need so double checked with them that they'd fit a RHD car and pulled the trigger. Quality is really good and super light weight. I'm sure they are going to get me as low as possible and have plenty of adjustment in them.
I am at Oulton park next Tuesday for my first trackday since August so I'm chomping at the bit to get back out there.
Had the car up in the air and give everything a good checking over (decided to do it outdoors as the weather was nice) before taking her out for a good old Italian tune up

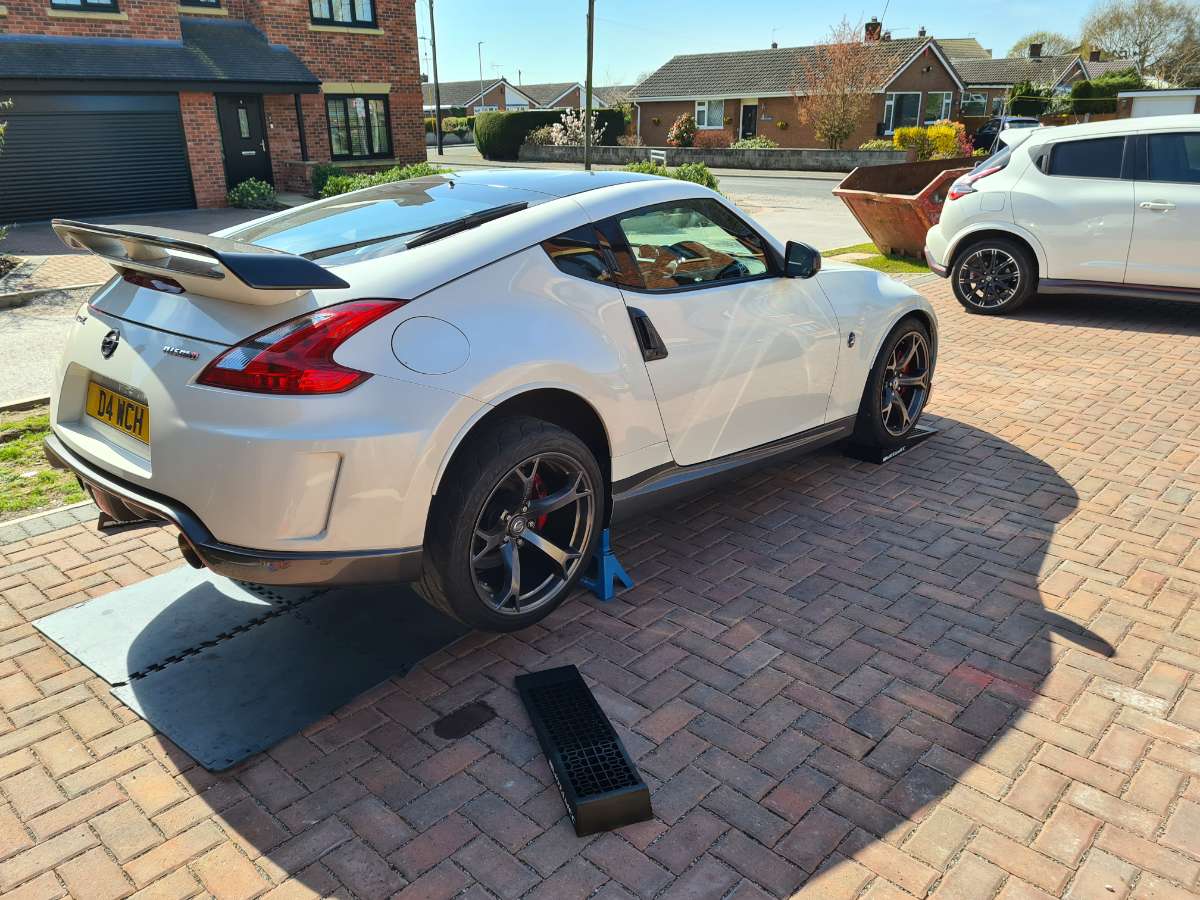
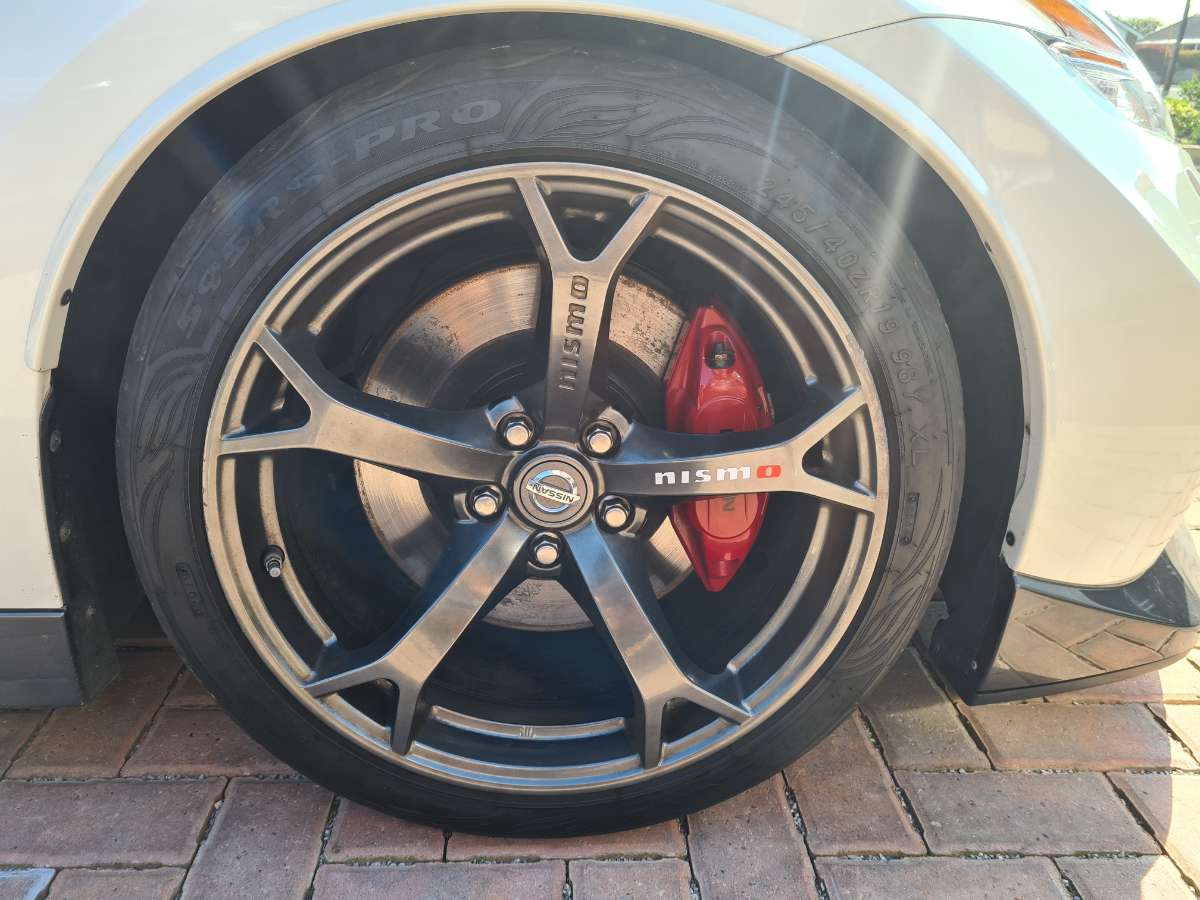
Also picked up fresh brake hardware from Torqen to swap out after Oulton (I always whip the pads out after everyack day to give everthing the once over).
-
1
-
-
Ok, thanks. Shame as I'd like to monitor the oil pressure as well for obvious reasons.
Looks good regardless
-
This looks great.
Can you show oil pressure using this?
-
my ark grip V2 fits my Nismo no problem (albeit a mk1 but makes no difference). Had it on and off a fair few times myself to carry out other work and its always gone straight back on with minimal fuss.
-
2 minutes ago, davey_83 said:
Ahhh detailing indoors, must be bliss 🤲
oh you've got no idea, its an absolute game changer after almost 15 years of of battling the elements
-
33 minutes ago, Andy_Muxlow said:
That looks fantastic Dave. Nice job.
cheers mate, its all coming together now in time for the summer.
Doesn't scrub up too bad for a track sl*g

-
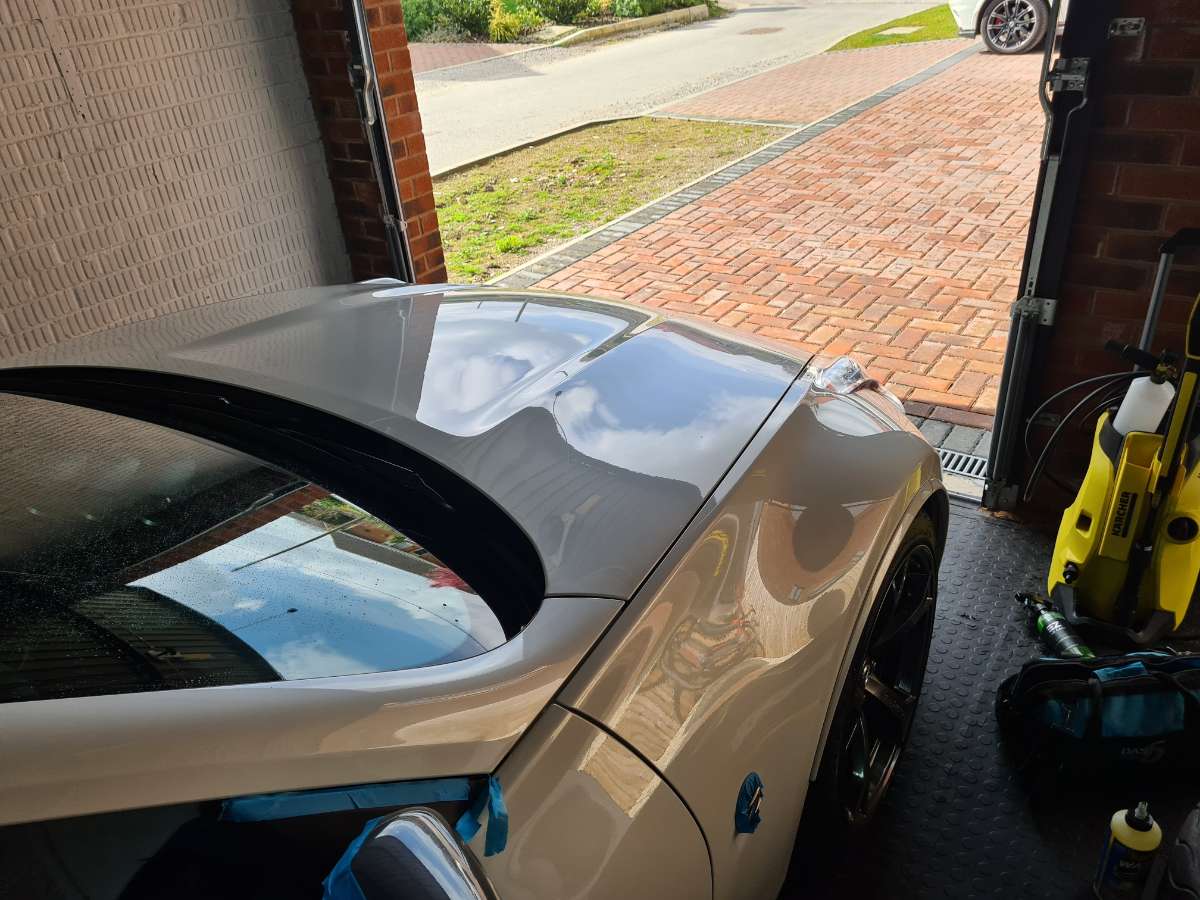
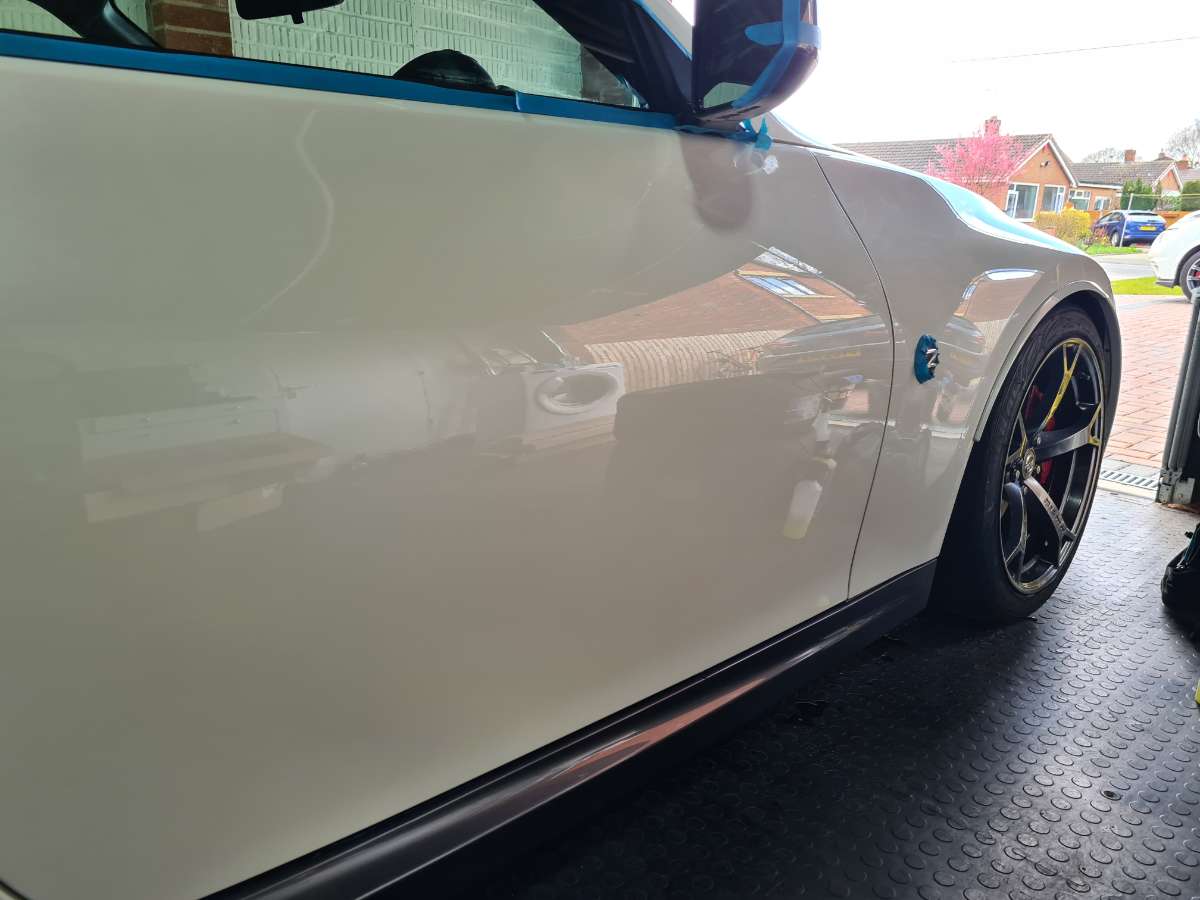
Inspired by @Lewis Schwier and to celebrate me having the car four years i decided to give the paintwork a little refresh.
This was by no means a full details rather just working on the paintwork. Wheels will be coming off at some point for a good going over.
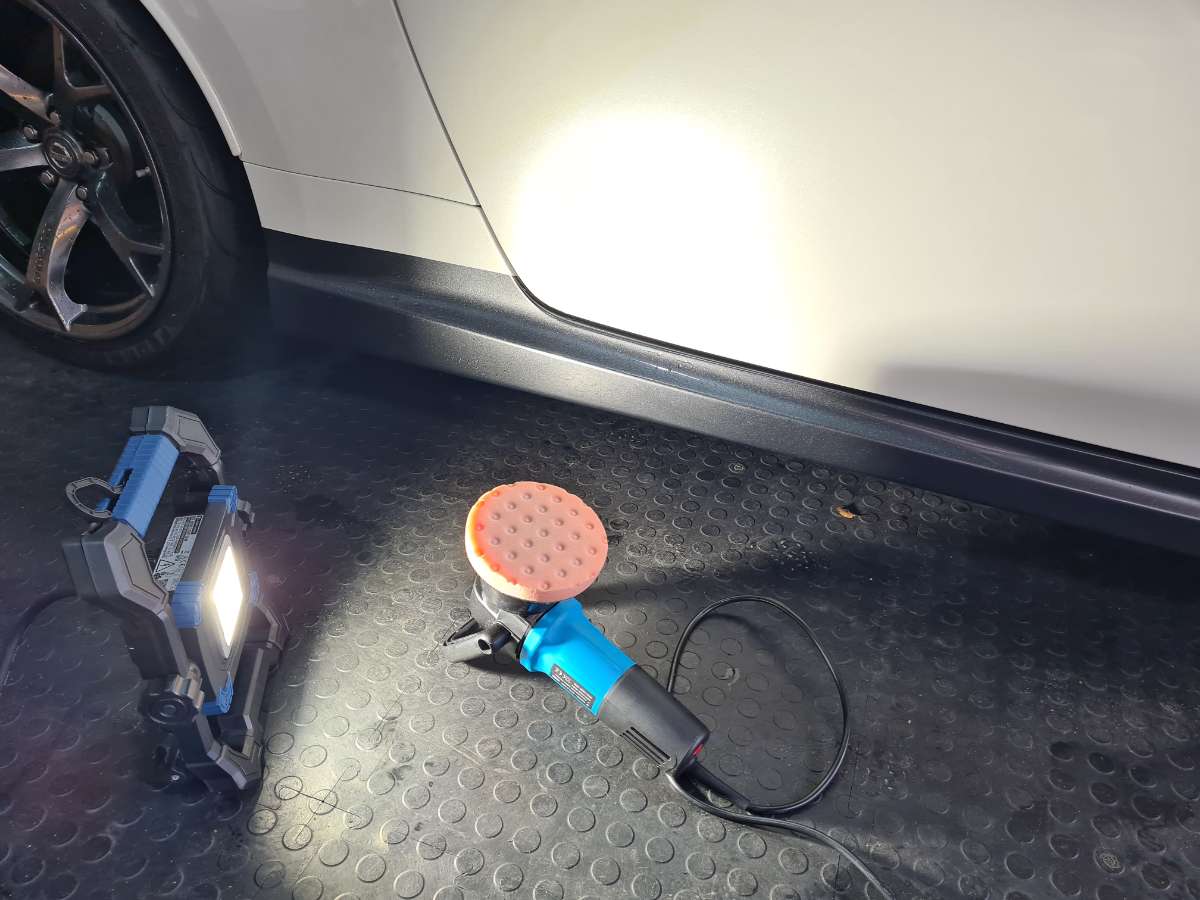
I've been a keen weekend warrior on the detailing front for as long as I care to remember to the paintwork has always been well looked after so was in good shape before i started. First time being able to machine polish in the new garage out of the elements which was great.
For those interested this is what I did:
- snow foam
- maguires wash plus (first time trying this and really liked it)
- glue & tar remover
- fallout remover
- clayed using carbon collective exfoli block
- Single stage correction with a da using sonax perfect finish & lake country orange pad (some areas needed multiple passes but nowhere was bad enough for me to need to breakout the meguires 105 out)
- IPA wipe down
- 2 coats of Autoglanz P1 lite ceramic - first time using this so the jury is out but the finish is great
Pre-polish
post polish
post ceramic

Really pleased with how it turned out, I've added the pictures but they don't do it justice to be honest but you get the idea.
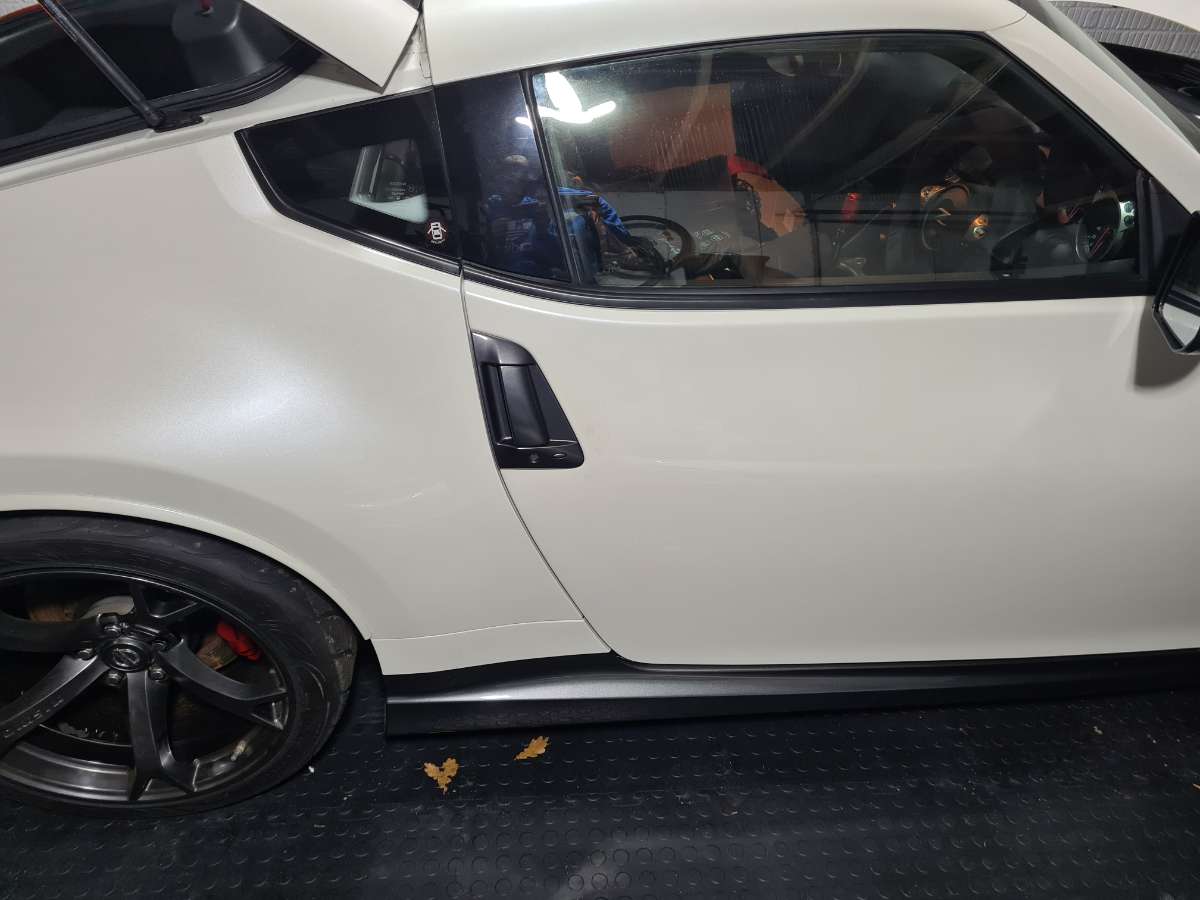
I also wet sanded and polished the freshly painted door handles a few weeks back to they look much better now too.
-
5
-
Will be worth the wait. At least they have been open and honest which is more than can be said for most. Like you say absolutely everything is like this at the moment
-
1
-
-
These are still available and ready to go
-
1
-
-
this has been on my radar for a whilst too. Interested to see which way you go with it
-
On 08/01/2021 at 09:08, nissanman312 said:
Hows the coolerworx feel have you had chance to road test it ?
Keen for your review on it
")
I've done a hundred miles or so now with the new shifter over the last week.
First impressions are i really like it but it will take some getting used to. Its got a really precise mechanical feel to it, throw is super short as expected and requires more force. I don't think i would want to daily it mind, but for people who really like to drive their cars its really worth considering.
Only down side is when my gearbox is stone cold 1st to 2nd has never felt great and with this setup only exaggerates that as now everything is more more solid, but after a couple of miles isn't an issue.
-
could be a stretched cable
-
20 minutes ago, nissanman312 said:
https://www.pci-racing.com/product-category/seat-mounts/
These are good mounts I was going to go with these if I went fixed
Cheers, they look great and still easily adjustable if not using rails
-
49 minutes ago, nissanman312 said:
I've gone for all recaro
See how we go from there
I've read a few things about those planted basses not fitting properly and level
Are you going recliner or fixed ?
i'm going full on fixed back side mounted.... not particularly practical but hey ho.
Not done too much research on the mounts yet but i'll bear that in mind about the planted ones. I'll also see what GSM recommend when i'm there
-
14 hours ago, davidv10 said:
Just on Ebay, and they werent expensive at all:
Also you cant really see from the pics, but they have a thin layer of metal in them so they arent flimsy at all.
cheers mate, as long as they're nice and sturdy
-
15 hours ago, nissanman312 said:
Yeah this is a concern hence why I nearly went for poles and side mounted them
But hoping I can get these somewhere near stock at least
I would of thought if its mainly you driving the car its not an issue but on European trips etc when I share the car with people it wouldn't work to be fixed
yeah its just me who drives mine so I'll happily trade it for that extra inch of head room. Which seat brackets are you going for? A lot of people seem to go with the Planted ones
-
26 minutes ago, nissanman312 said:
Yeah they are realy comfortable
I'm just working on that at the moment I definitely want to be able to slide it
I was tempted by a pair of pole position but these came up to cheap
i may pick your brains once i get my seats further down the line mate. I think i'll have to hard mount mine to the floor as I'd really like a bit of extra room for my helmet
-
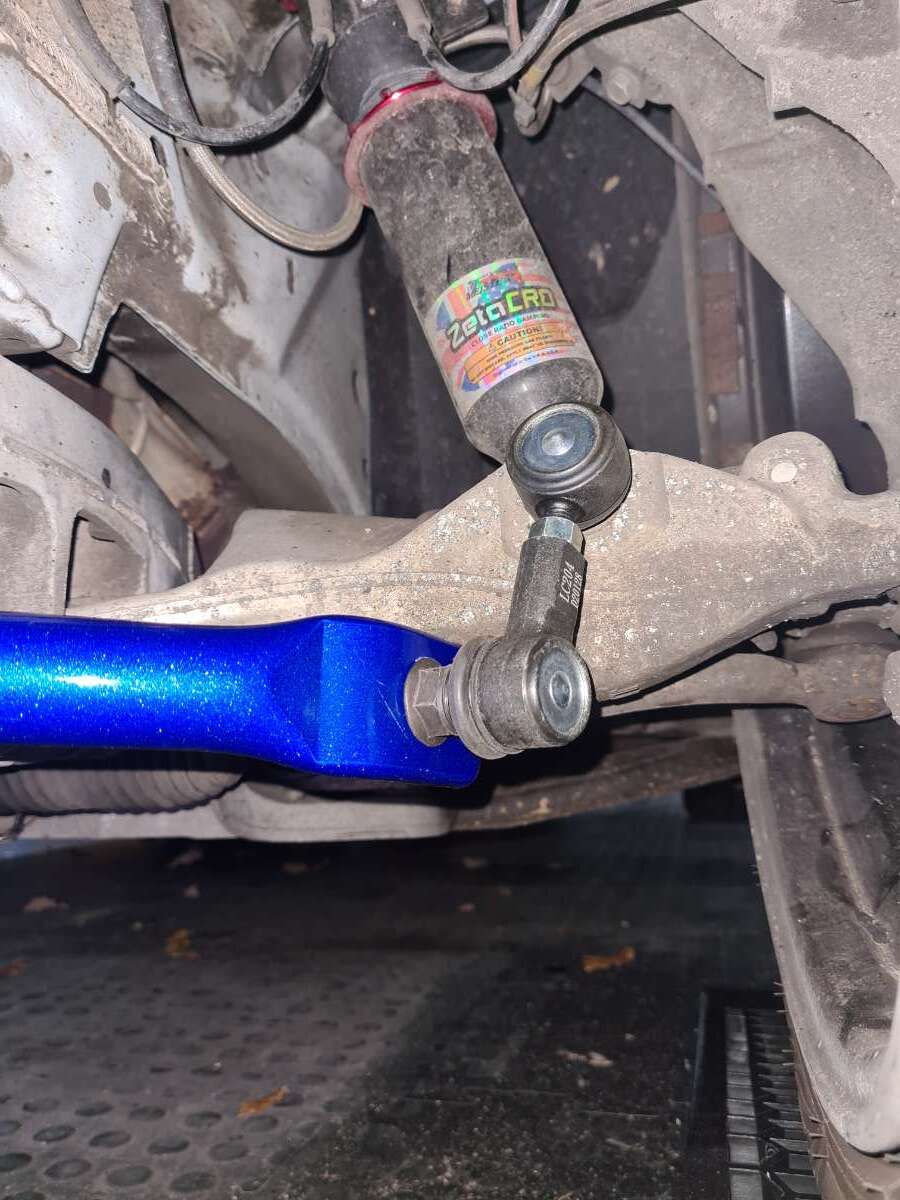
Big list of updates this time
first up, whiteline drop link set to the new ARB... coilovers could do with a clean
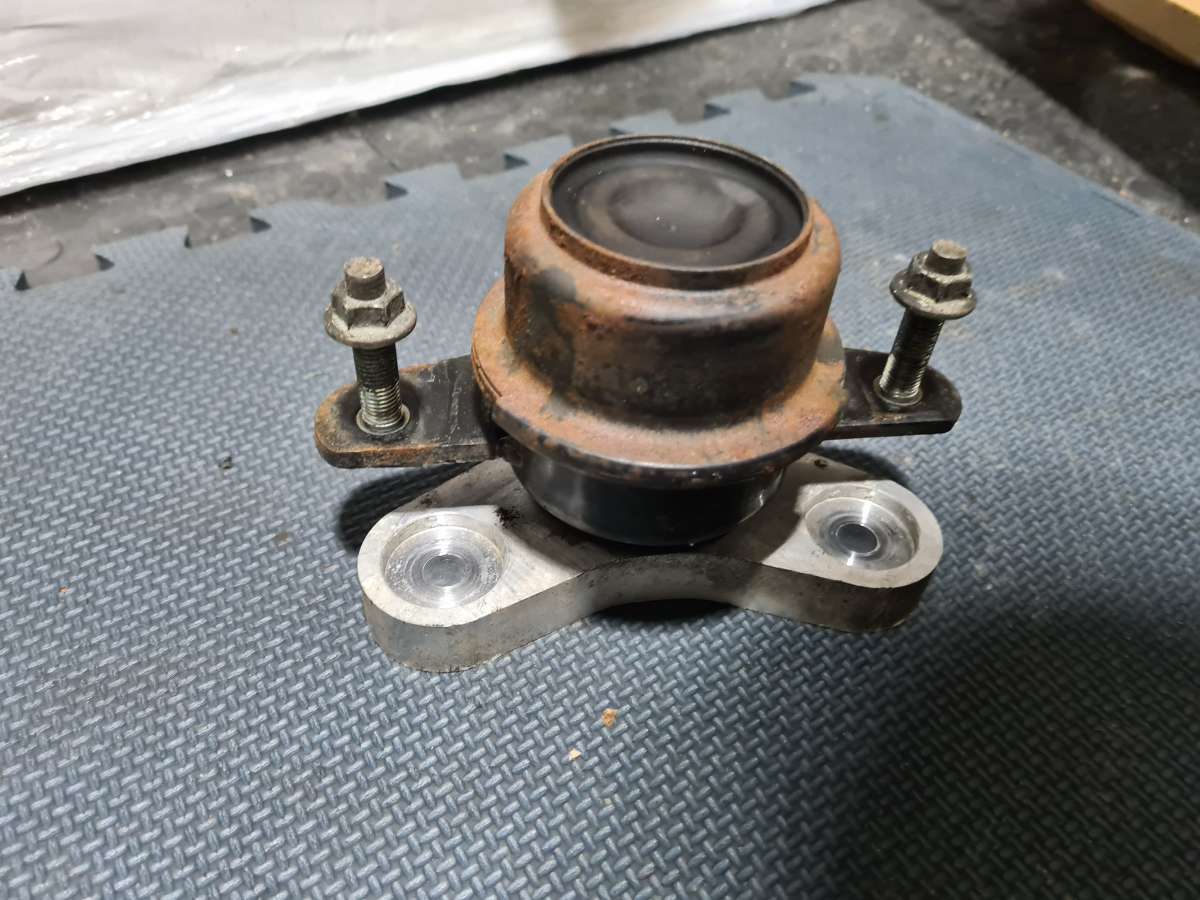
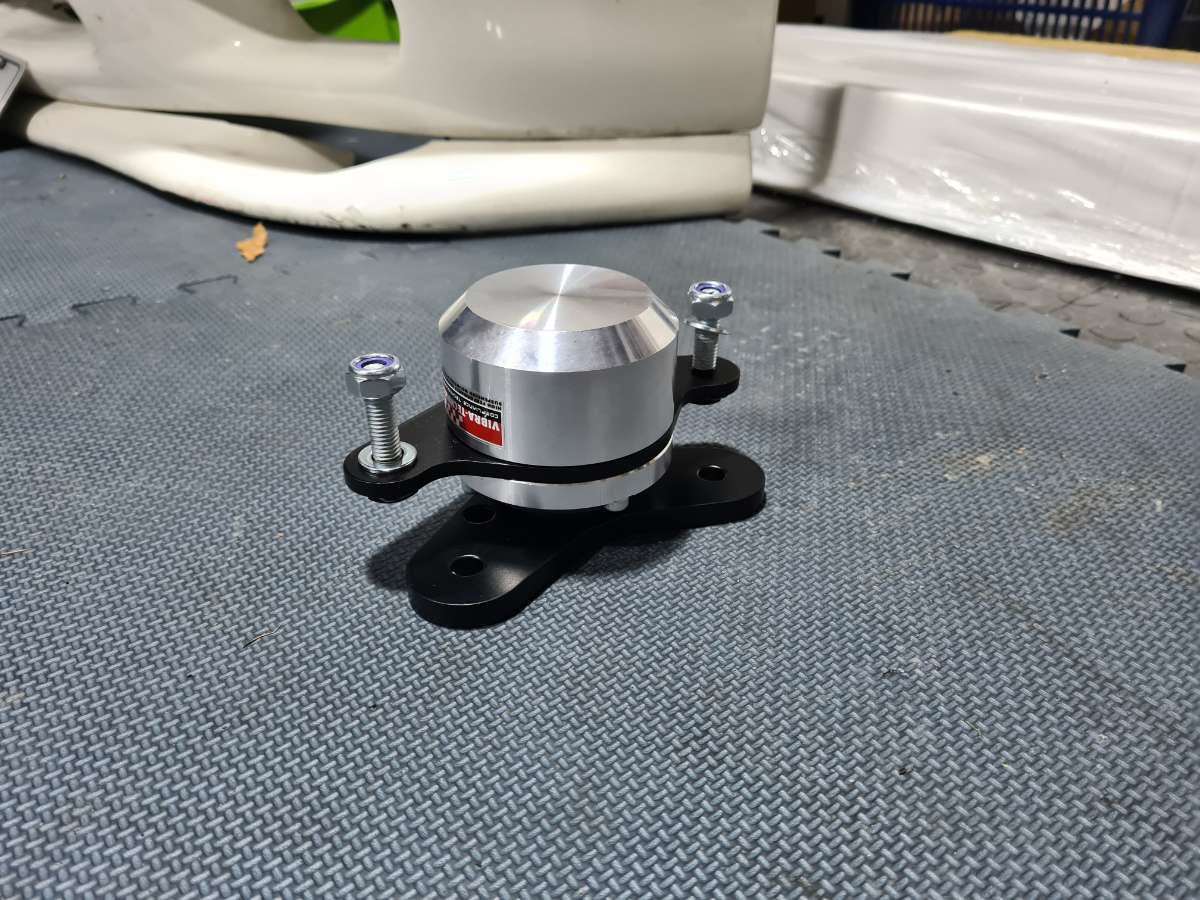
then swapped out the gearbox mount for the new vibratechnics one
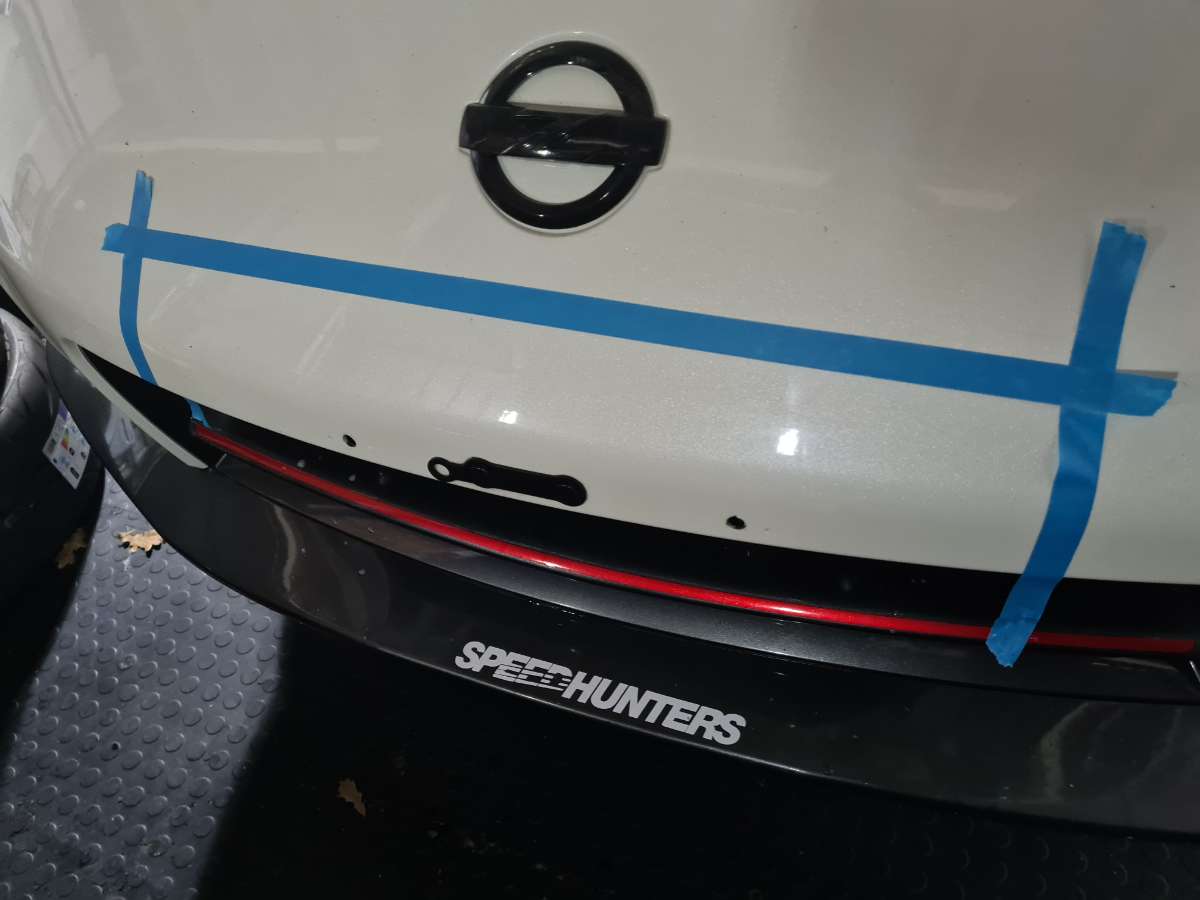
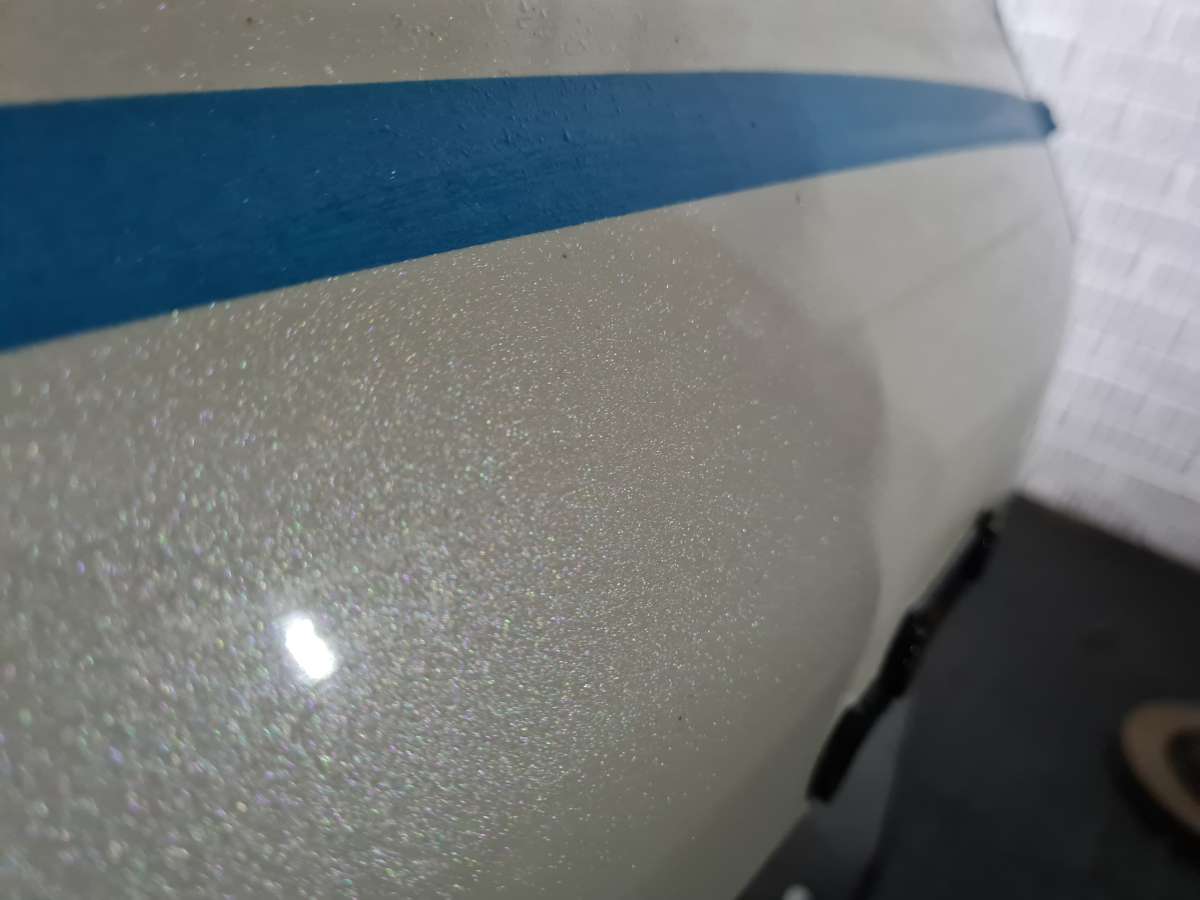
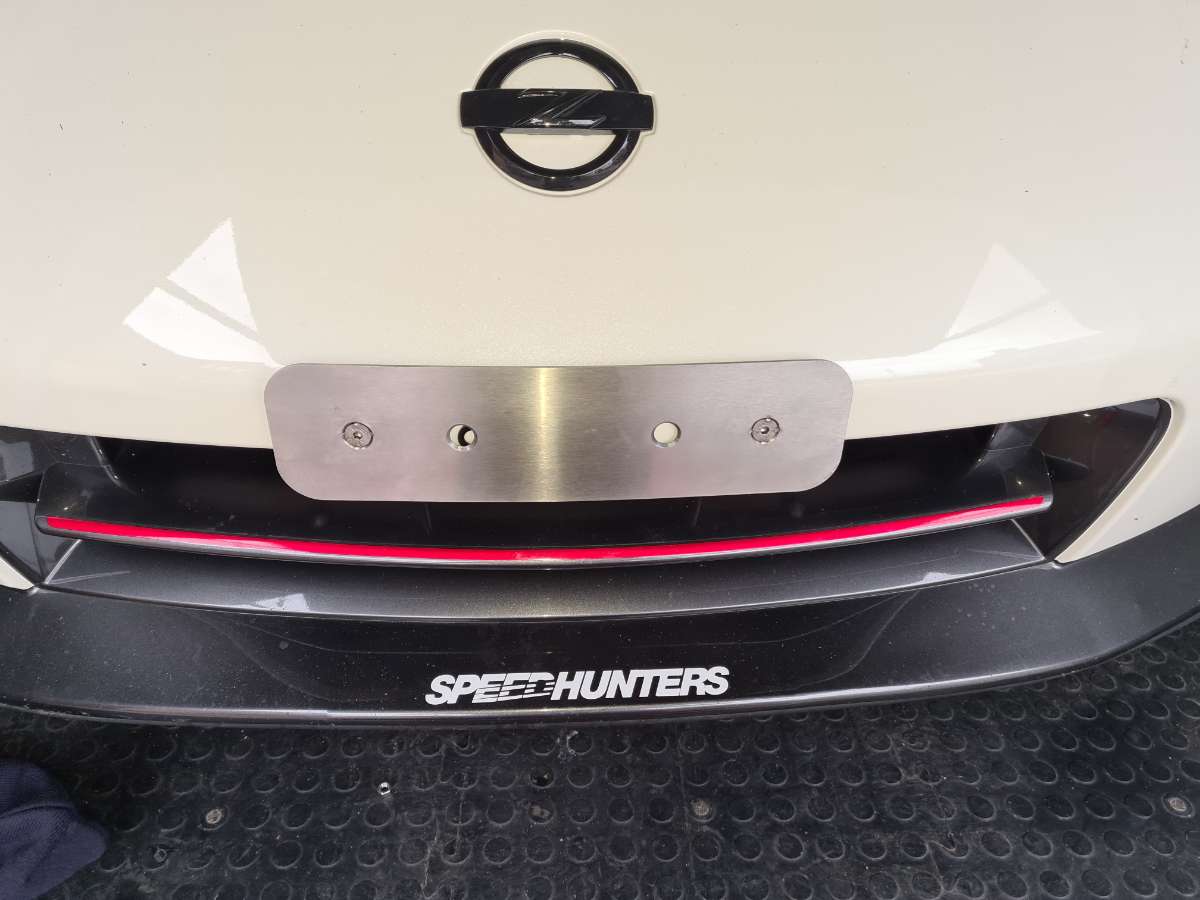
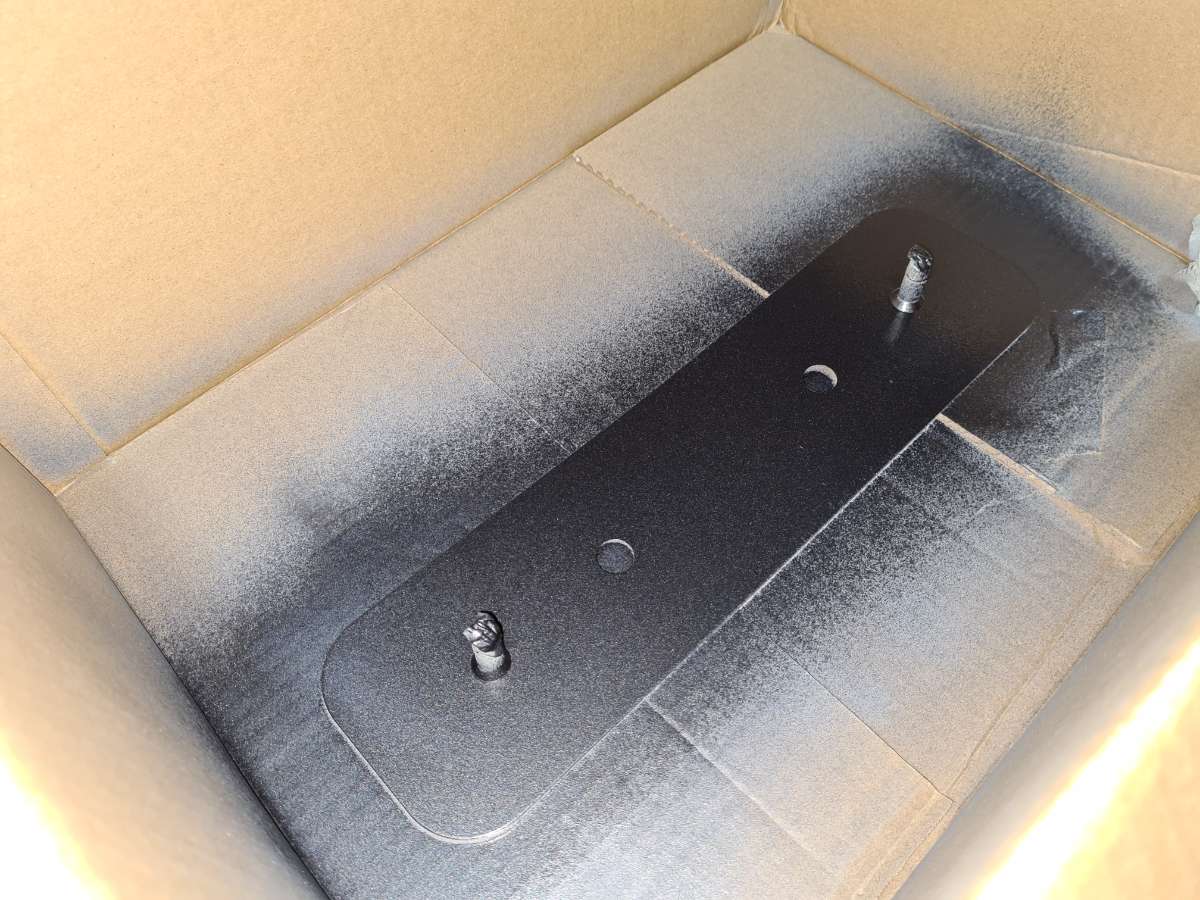
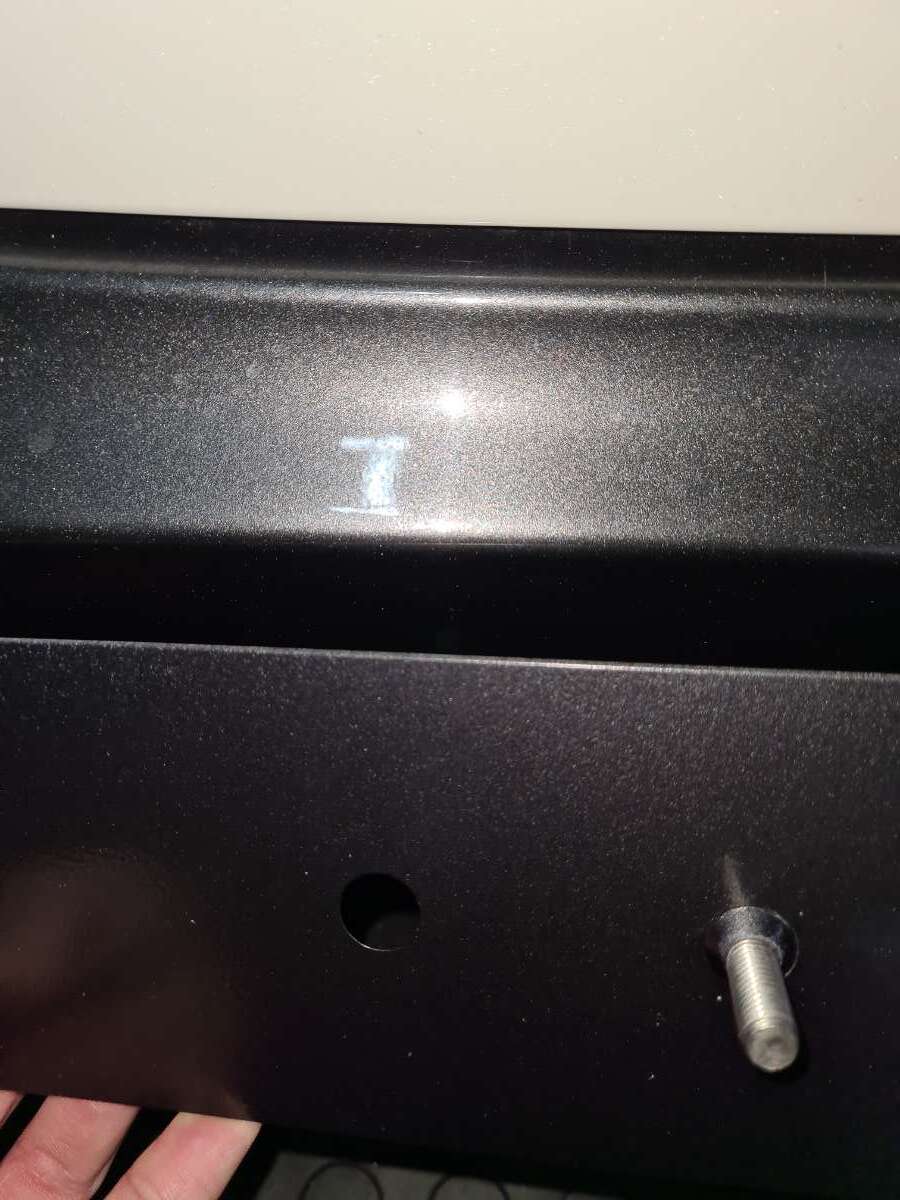
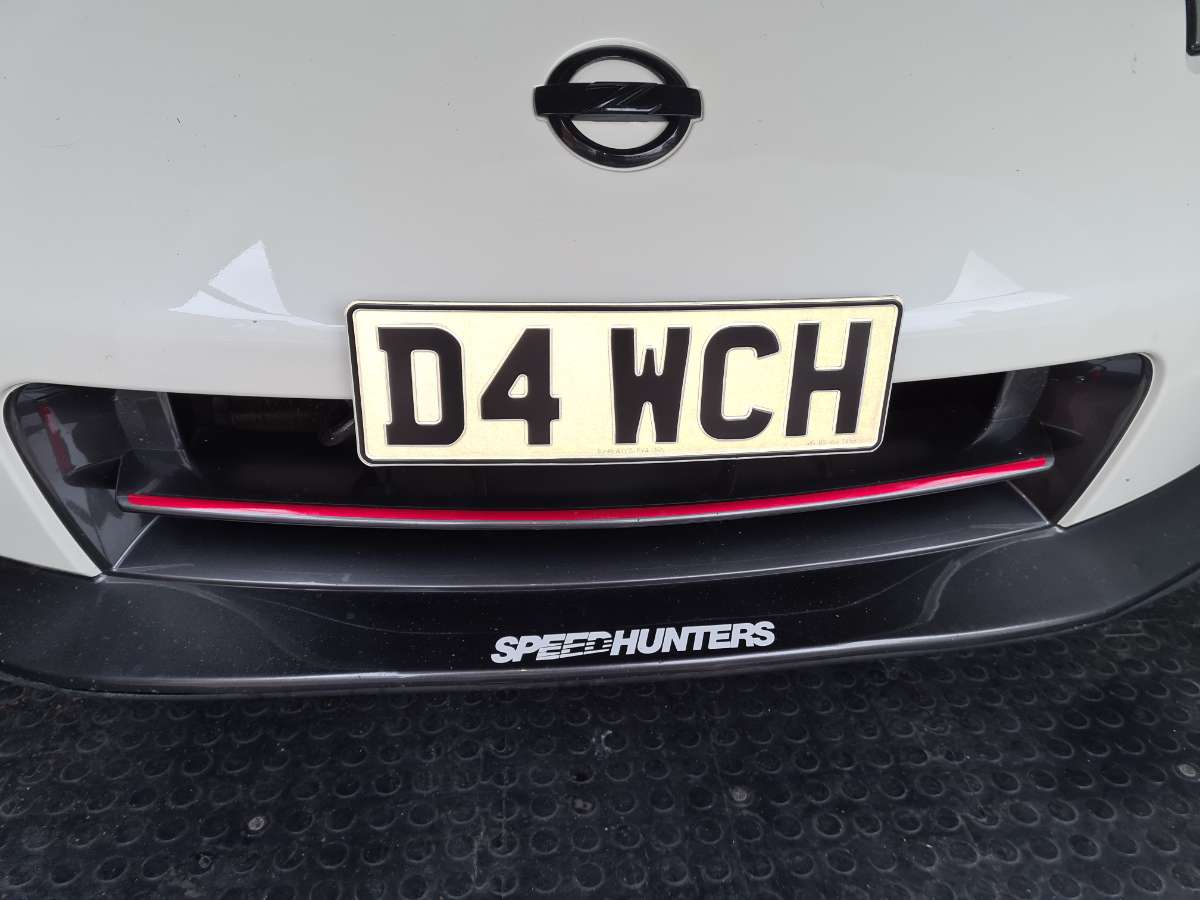
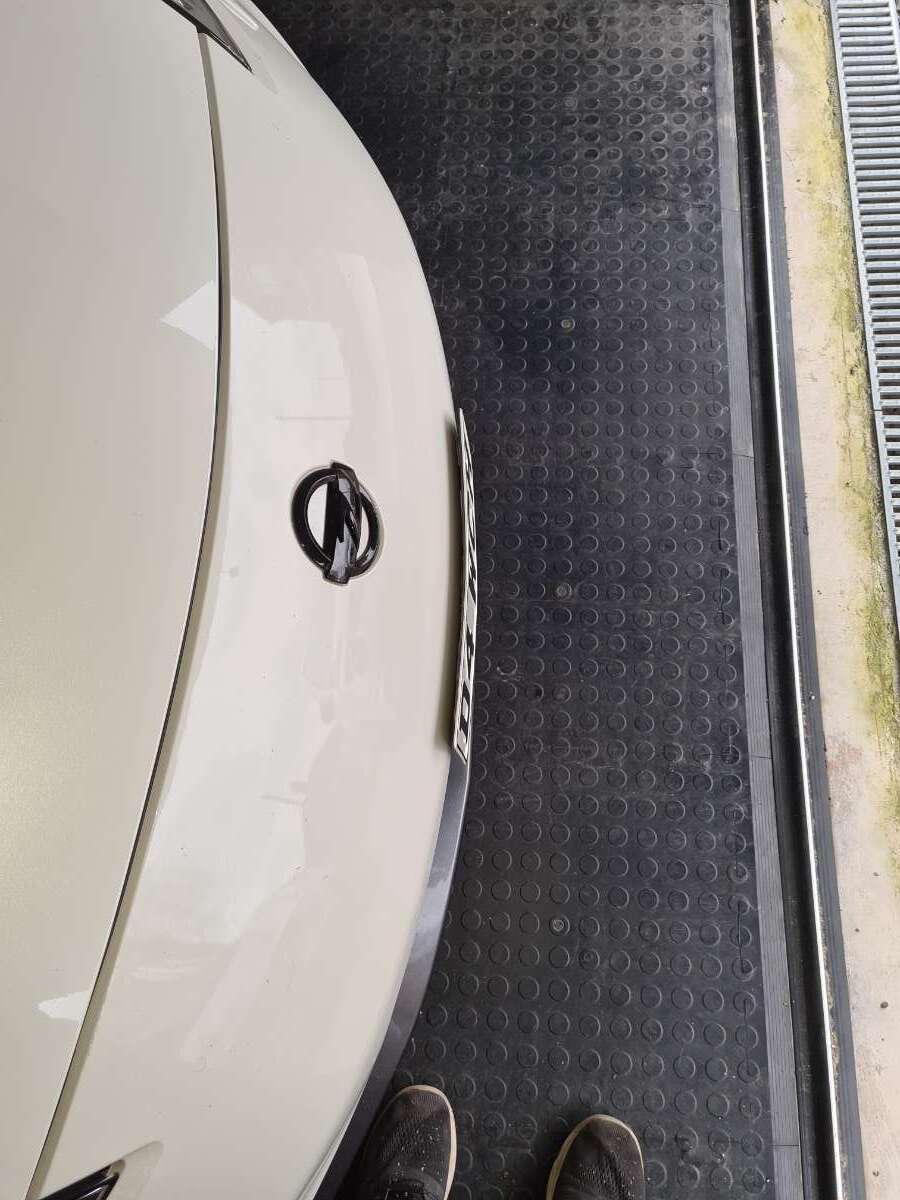
got rid of the big daft plastic number plate surround off the front bumper. Made a new one from some stainless and welded some countersinks in place to mount it. Also painted it to match the nismo bodykit (relally happy with the paint match) and machine polished the area around where the original mount had rubbed and scratched the paint. Mounted with rubber gaskets between the bumper and new mount to stop any chaffage. New plate is shorter to suit 5 digits.
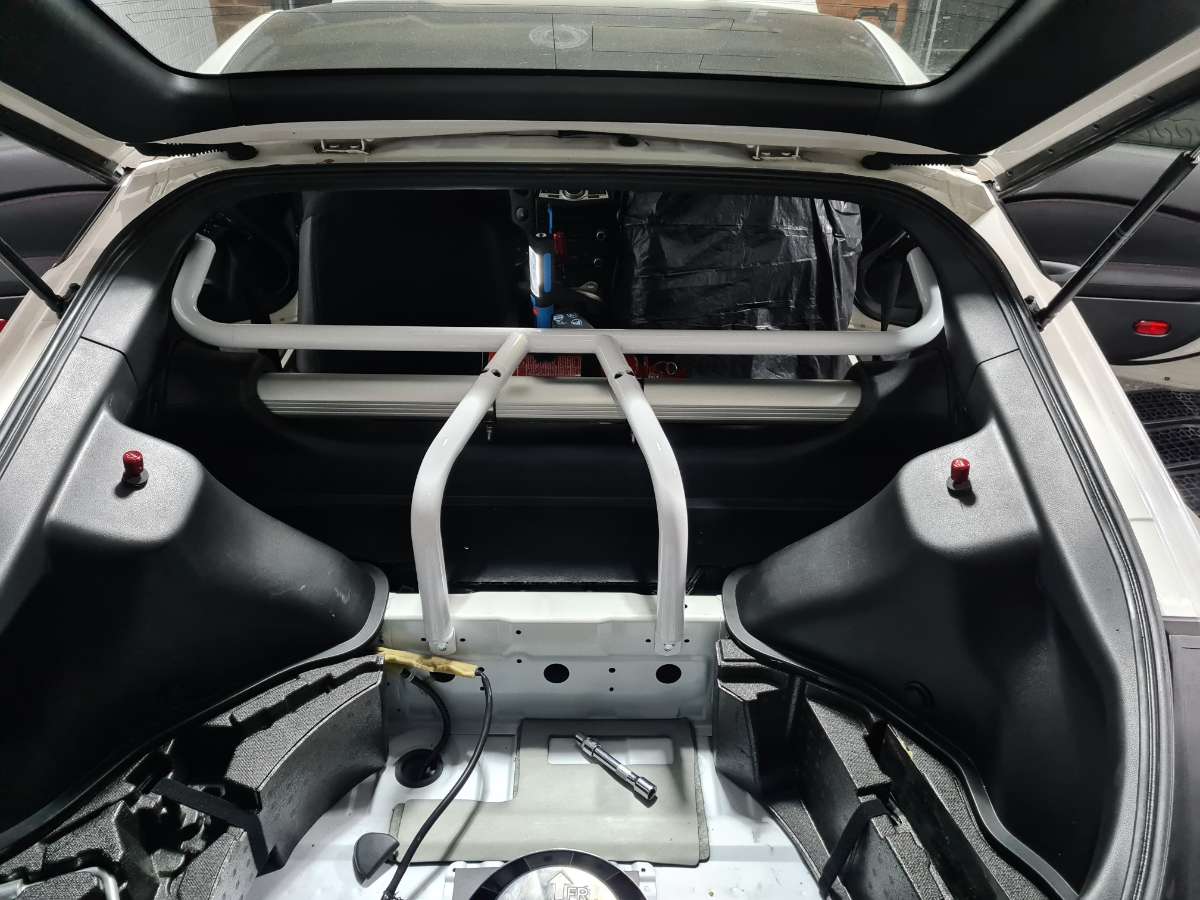
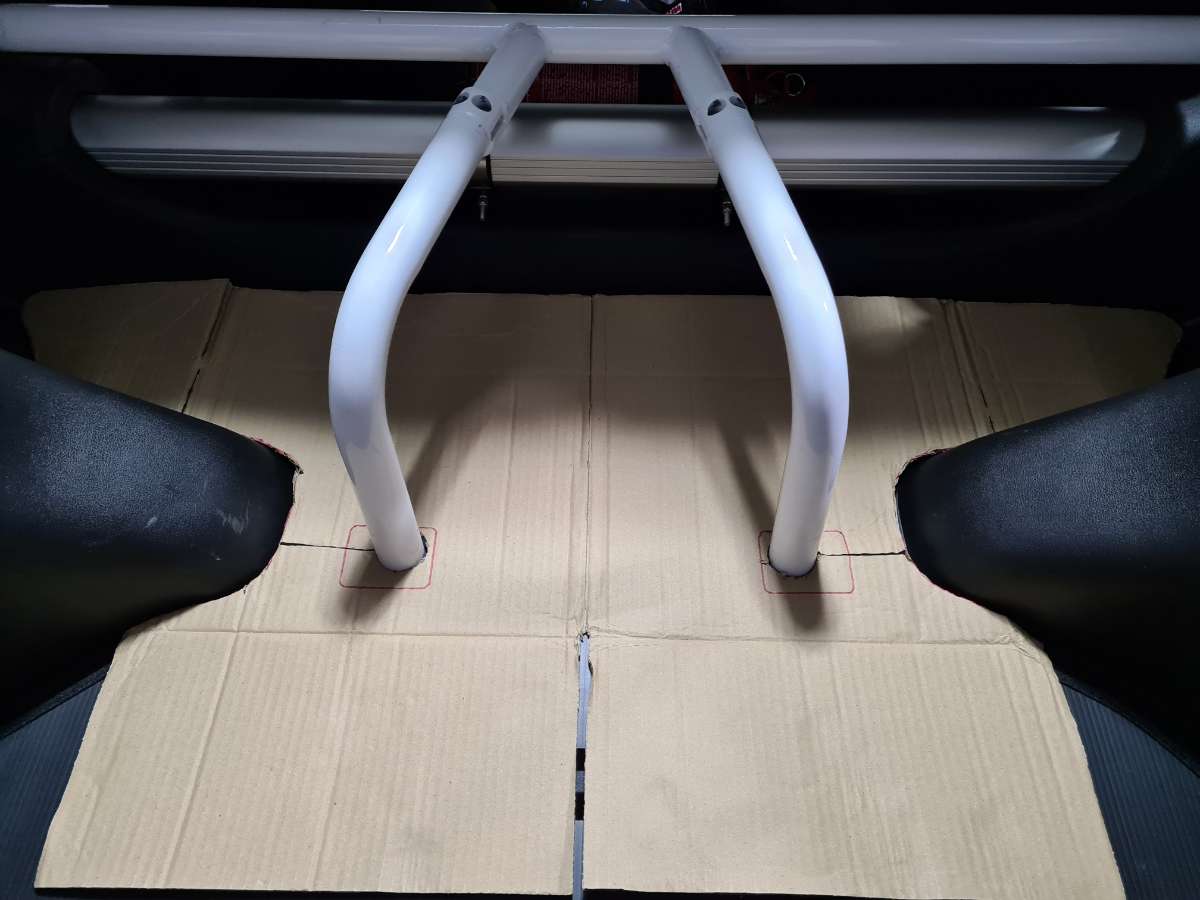
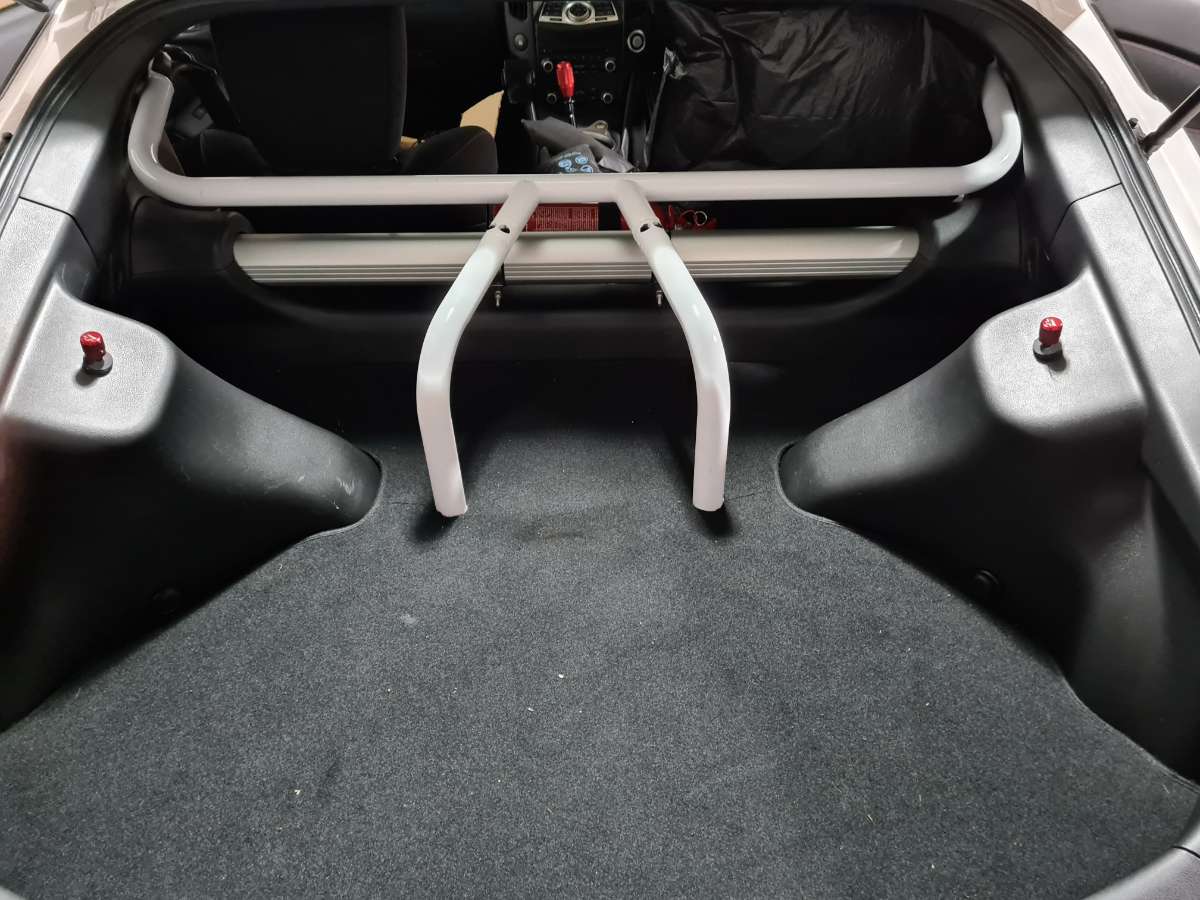
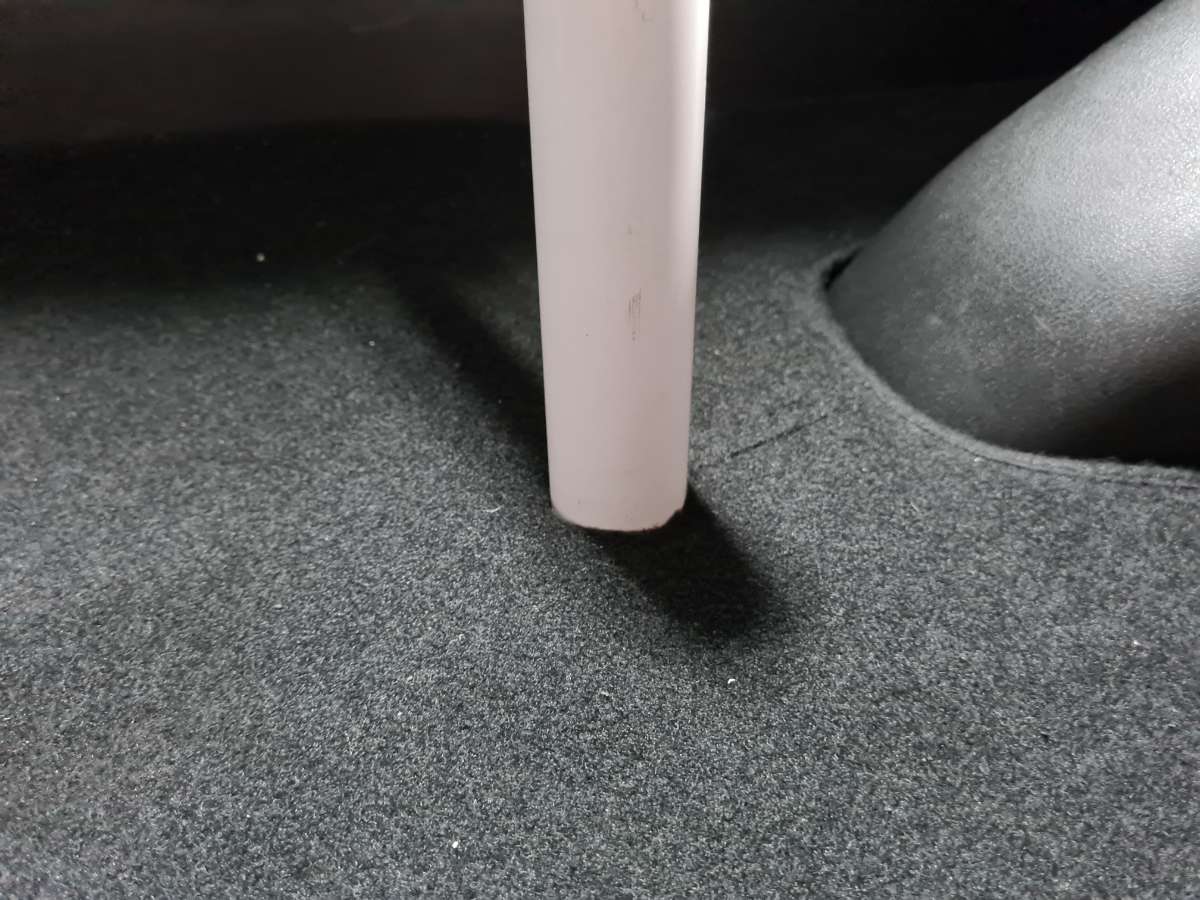
Fitted the Braum harness bar. I am pleased with the outcome but dissappointed with Braum really. No problems with the bar itself, good and sturdy and mounting points are suitable, but the finish on the paint is crap (loads of imperfections under the surface) and flakes as soon as you touch it... really poor for the price of it. On top of that came with NO instructions so took a lot of figuring out on hope to use it and retain the stock 3 point belts for road use as well (if anyone has taken the stock belt assmebly apart you'll know what i mean).
Made a cardboard jig before taking a hole saw to the boot carpet (i've kept the top carpet and stored it and just cut through the thicker bottom carpet).
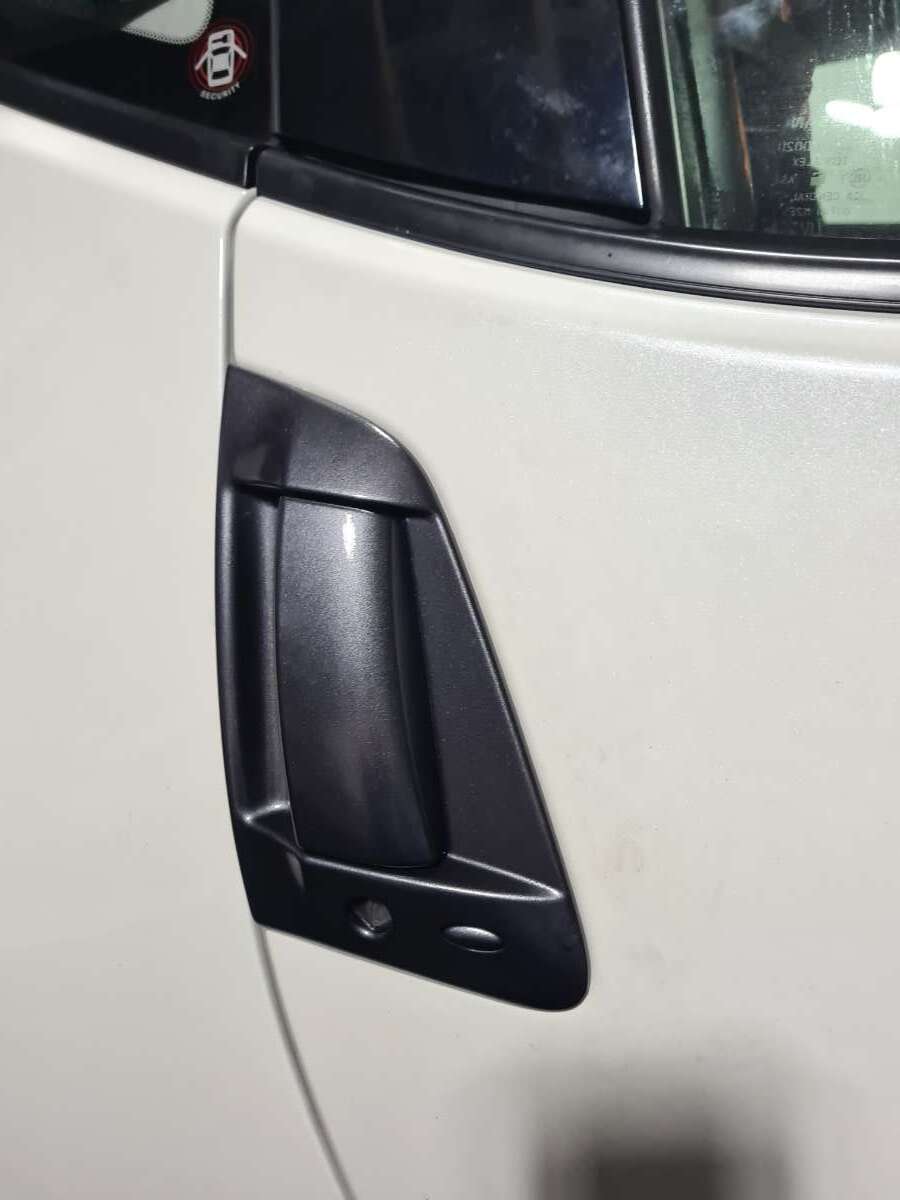
Last up I removed and painted the door handles again to match the nismo body kit. 3 coats primer, 4 paint & 4 lacquer. Has made a big difference for me, the stock grey handles didn't match the car at all. Also a bit different that the usual black others have gone for. If anyone wants the paint code i can dig it out.
That's its now for my winter updates apart from the seats, which i wont commit to until i have sat in a load at GSM once restrictions have lifted (I'm 6ft 5 so its important to make the right seat choice for me).
All that's left to do is machine polish the entire car come spring time
-
4
-
-
On 14/02/2021 at 21:34, davidv10 said:
Tiny update this one. I have looked around for ages for Nismo centre caps but no-one seems to make them for the 370z alloys
 (54mm off the top of my head). I did however see Nismo adhesive centre cap toppers, that were slightly larger than the centre caps.
So i decided to get creative, got another set of standard Nissan centre caps that looked like the Nissan badge just popped off, and it did. So i popped the nissan badges off them and then stuck the Nismo toppers onto them and popped them in to the alloys. The way the alloys are, they are fine being a little larger than the centre caps and sit perfectly. The adhesive seems strong and they shouldnt come off.
And so i now have Nismo centre caps...
Excuse the distorted picture, but this is what they look like.
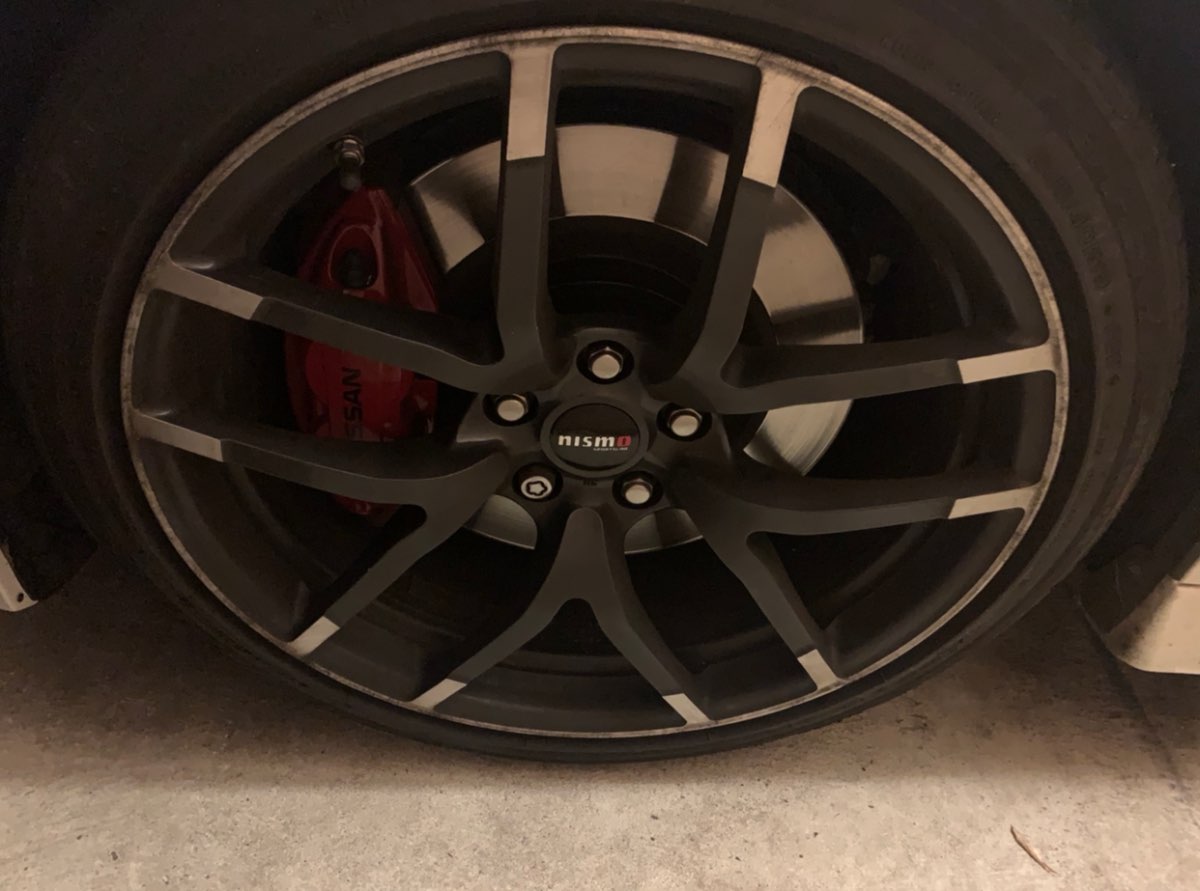
this looks great! where did you get the cap toppers from?
-
be worth the extra time and effort when its all done... its basically the 1 seat that can do a bit of everything!
Any plans for how you're going to get it to sit as low as possible?
-
1
-
370Z Nismo Mk1 - Fast road/track build
in Member Build Projects
Posted
Also finished off the fronts... save to say they'd had a hard life