Keyser
-
Posts
9,959 -
Joined
-
Last visited
Content Type
Profiles
Forums
Events
Gallery
Store
Everything posted by Keyser
-
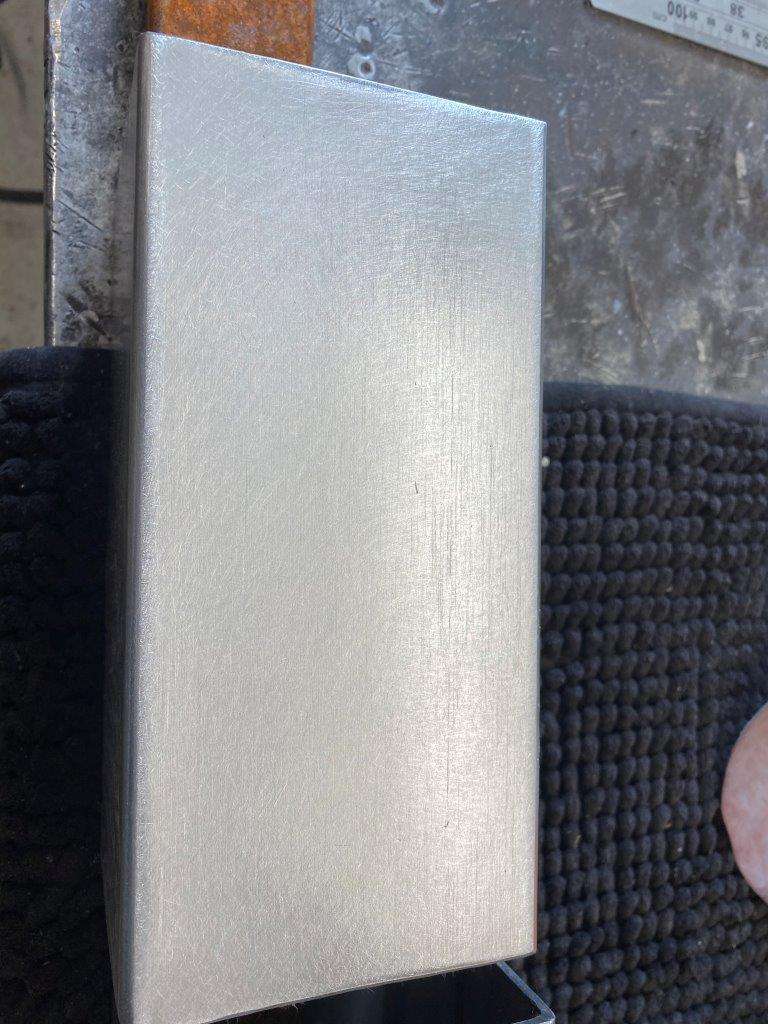
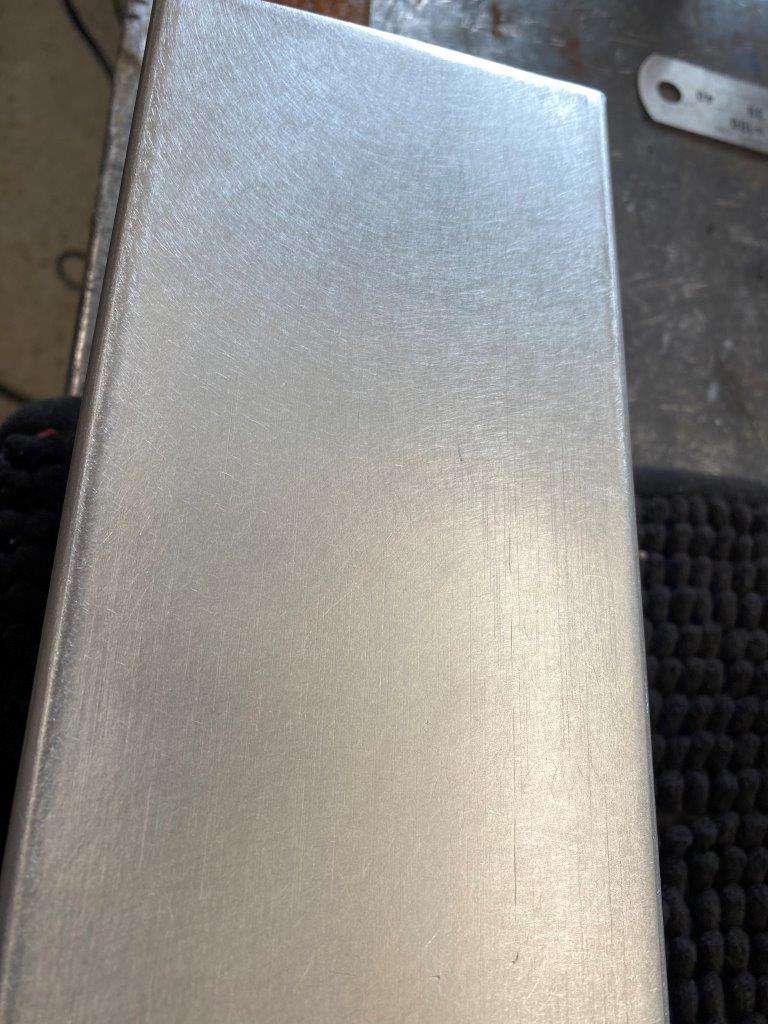
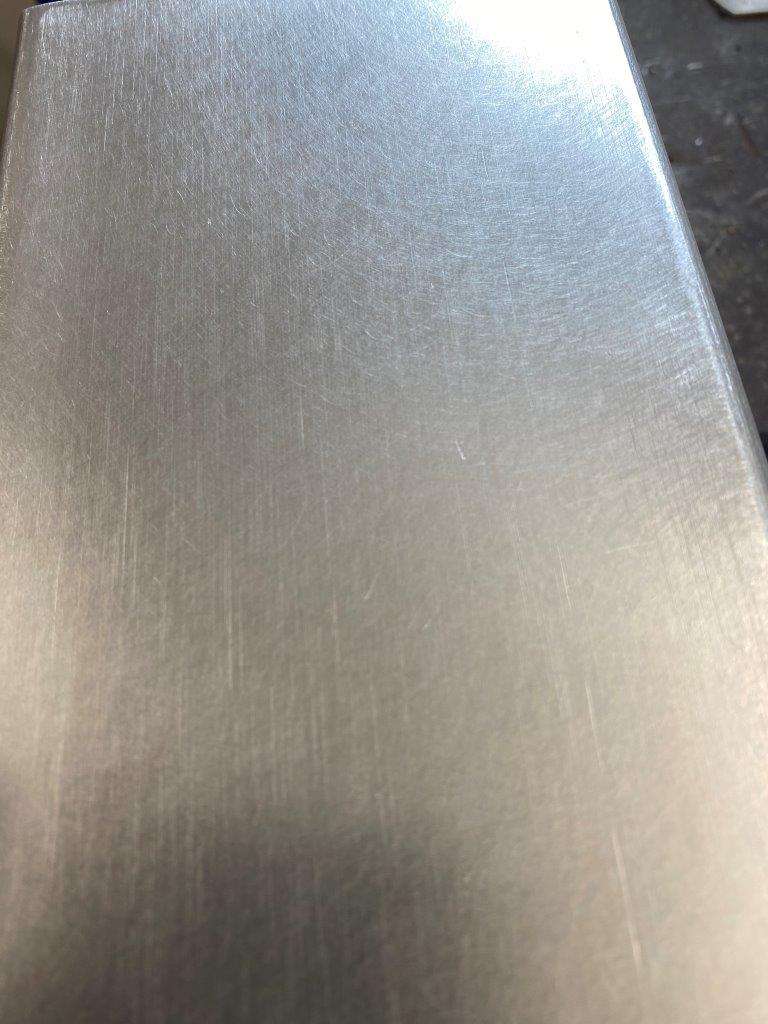
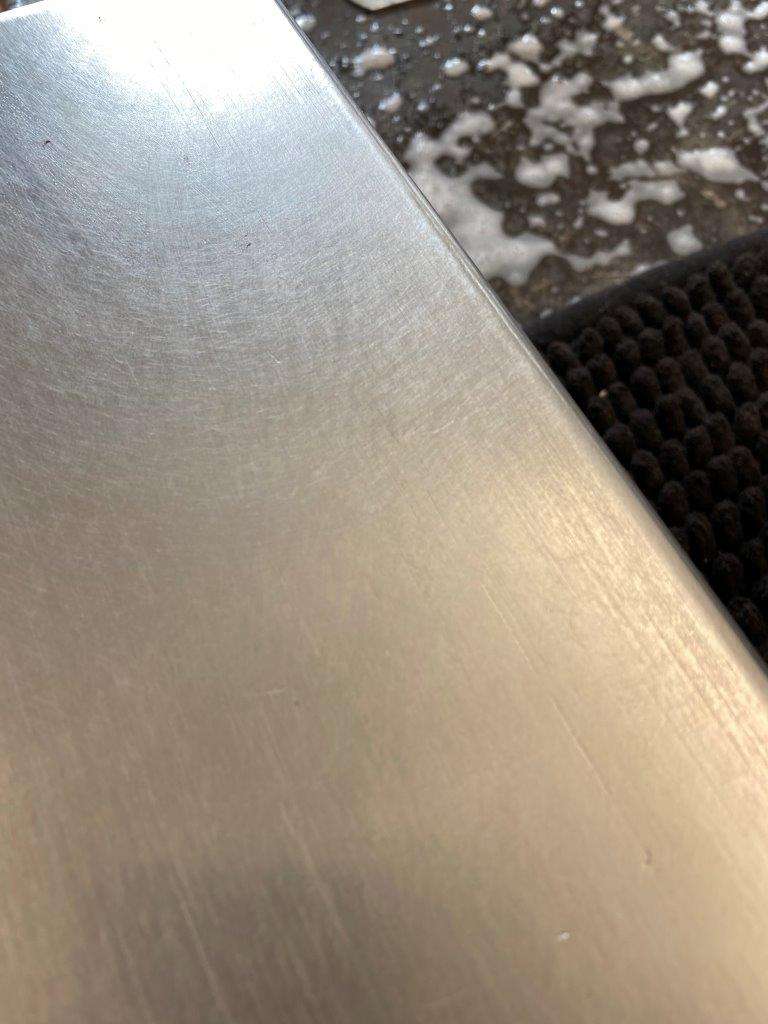
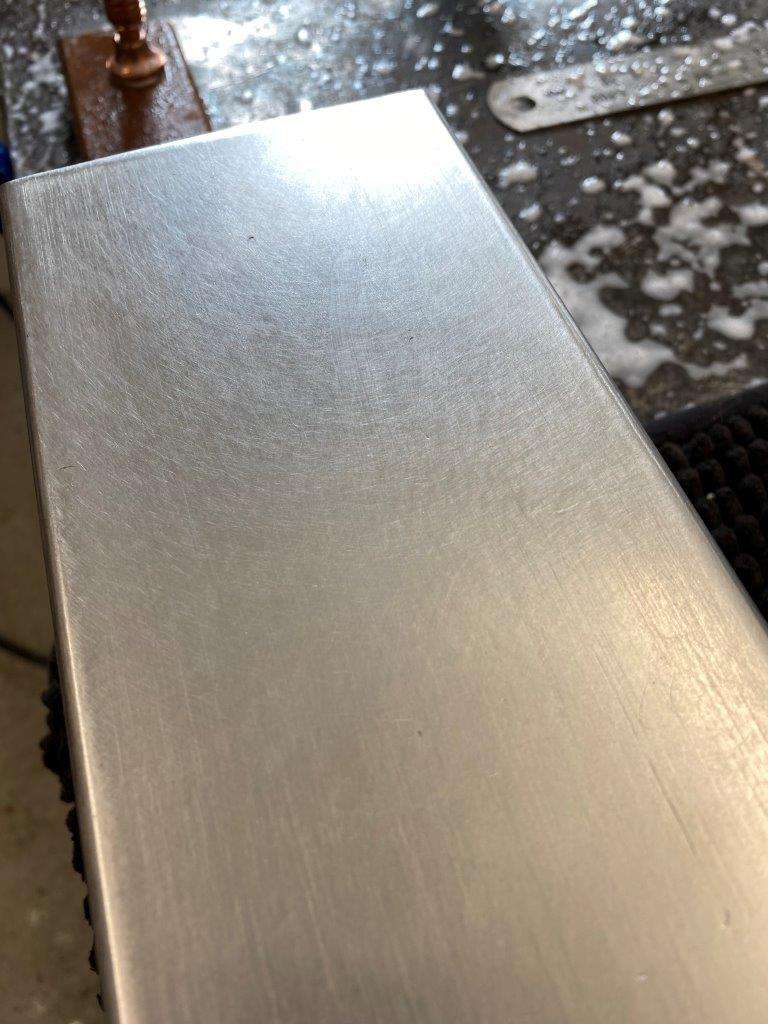
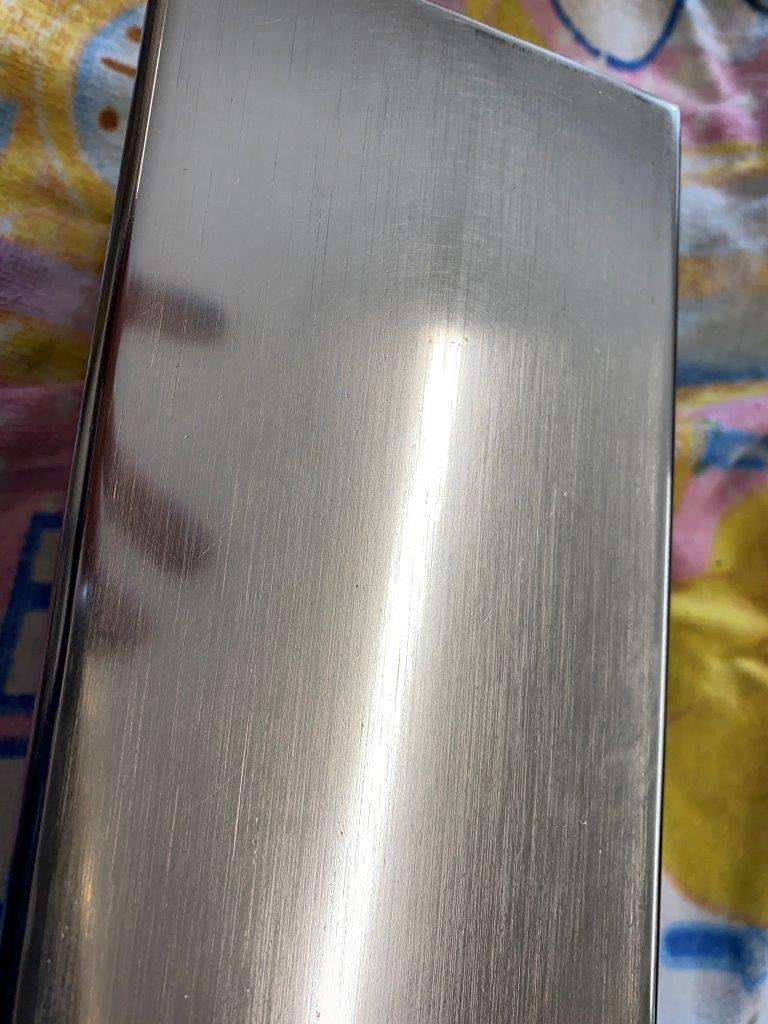
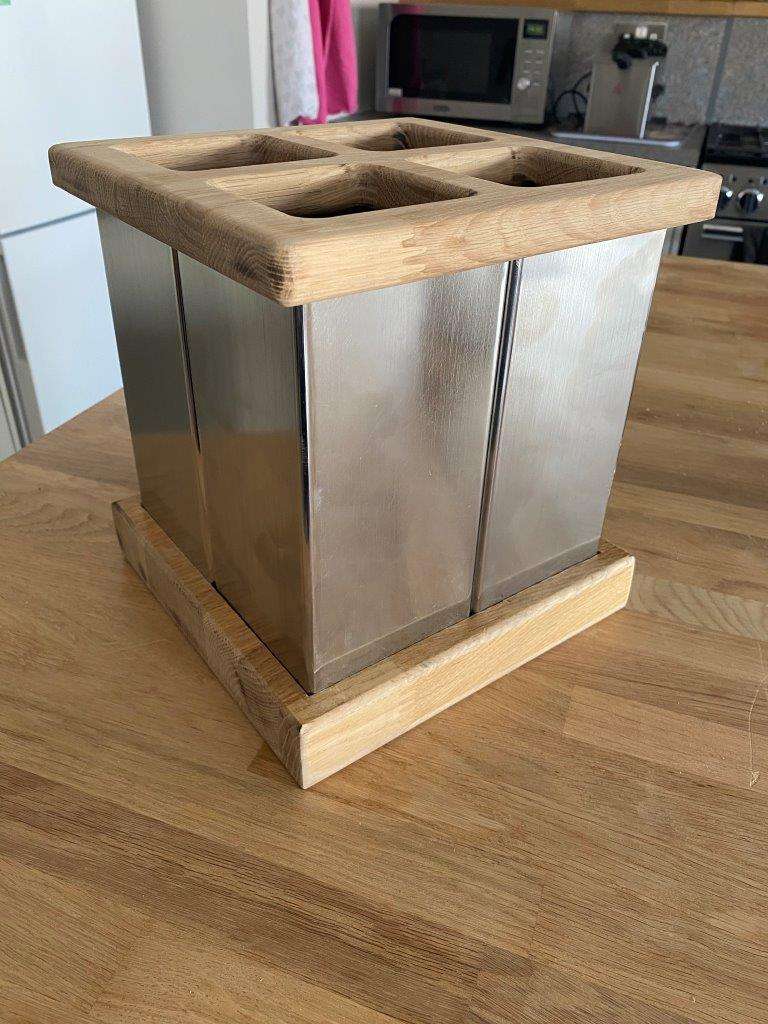
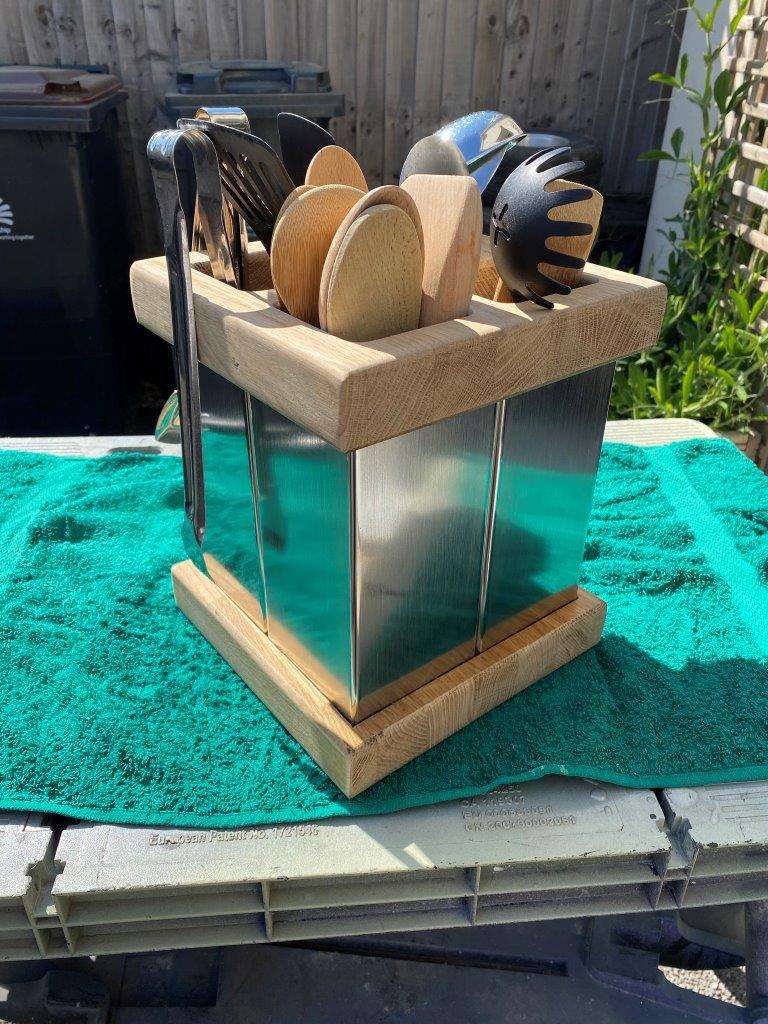
Ha Ha – Percy Verance that well known chap – No idea it’s random some work some don’t but eventually I got them to upload – couldn’t have you missing out on the fun in the Shed could I – I feel like its an obligation now This was the post (I saved it ) Good morning, Yet another day in lockdown, Work is slow at the moment only 3 jobs yesterday and 1 for today !!! Got loads piling up for when we come out the other end though so at least that’s something. Meanwhile today we have a tribute post for your amusement, Many of you that attend the Annual (may not be one this year) Zed Shed BBQ will know my wonderful and long suffering wife, Wekll she wanted something made for the kitchen and I thought it only fair that I over engineer something for her We start with – A piece of stainless-steel box section and an off cut of the old kitchen work surface Box section cut in to 4 Wood in half I even checked my milling machine before I started Then I used the milling machine as a router – cranked it up to full speed on the spindle, this is slow compared to a router but tests proved it worked OK Bit of time later Hand tools This now takes the 4 pieces of box section Then a 3mm metal working bit – as I don’t have any wood bits that size To get this cut out And then a wood bit to cut through Now this is dedication All lined up and sanded with 240 Then down the grades – this is brushed finish and I’m not resurfacing so it won’t be a mirror finish Phew!! Finished it looked like this But we decided the top looked too “heavy” so it was cut down a bit to give Just needs some varnish now Well there ya go, I’ll be safe to carry on in the Shed for a few more weeks now Be Safe Keyser - “To be sure of hitting the target, shoot first, and call whatever you hit the target.” – Ashleigh Brilliant


-
No update today - I can't upload images No Decode Delegate For This Image Format - I tried pics I uploaded yesterday as well - still no joy
-
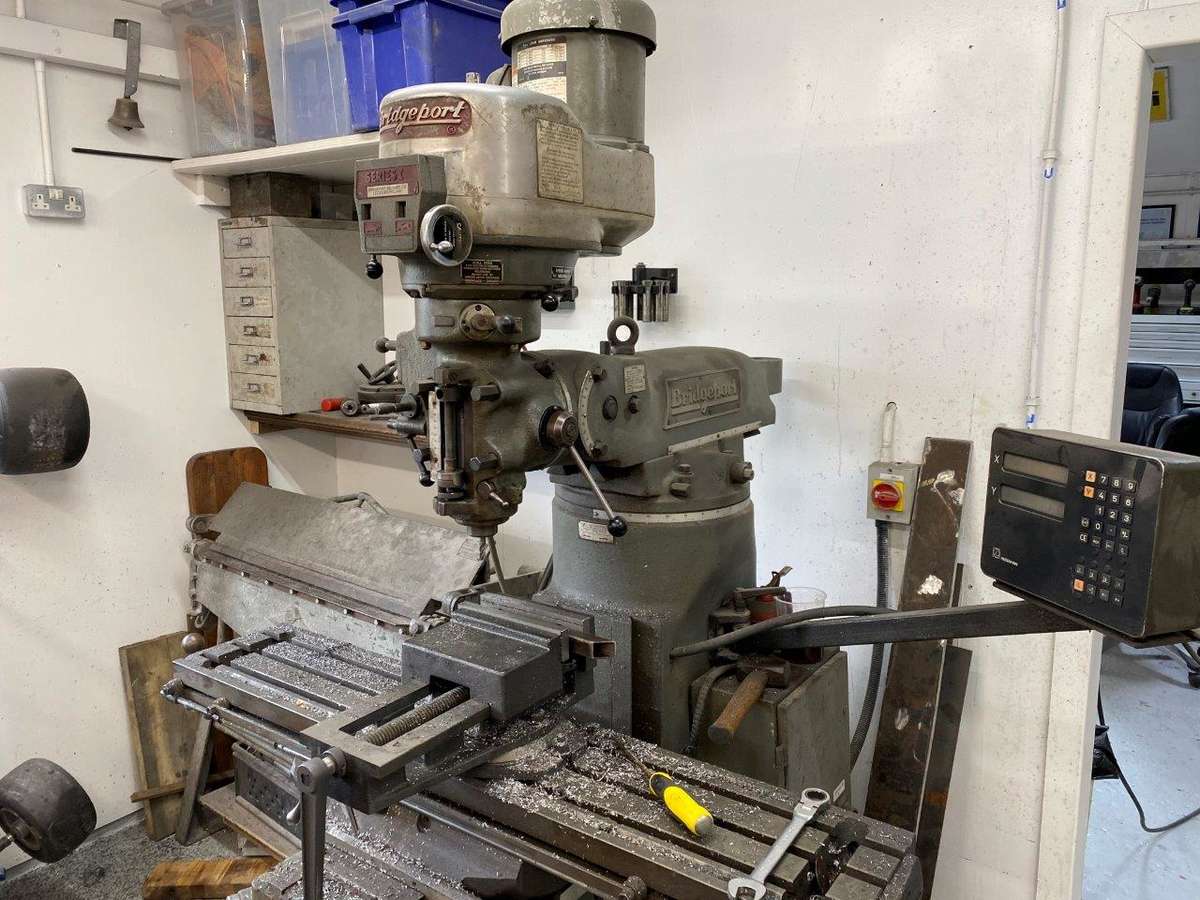
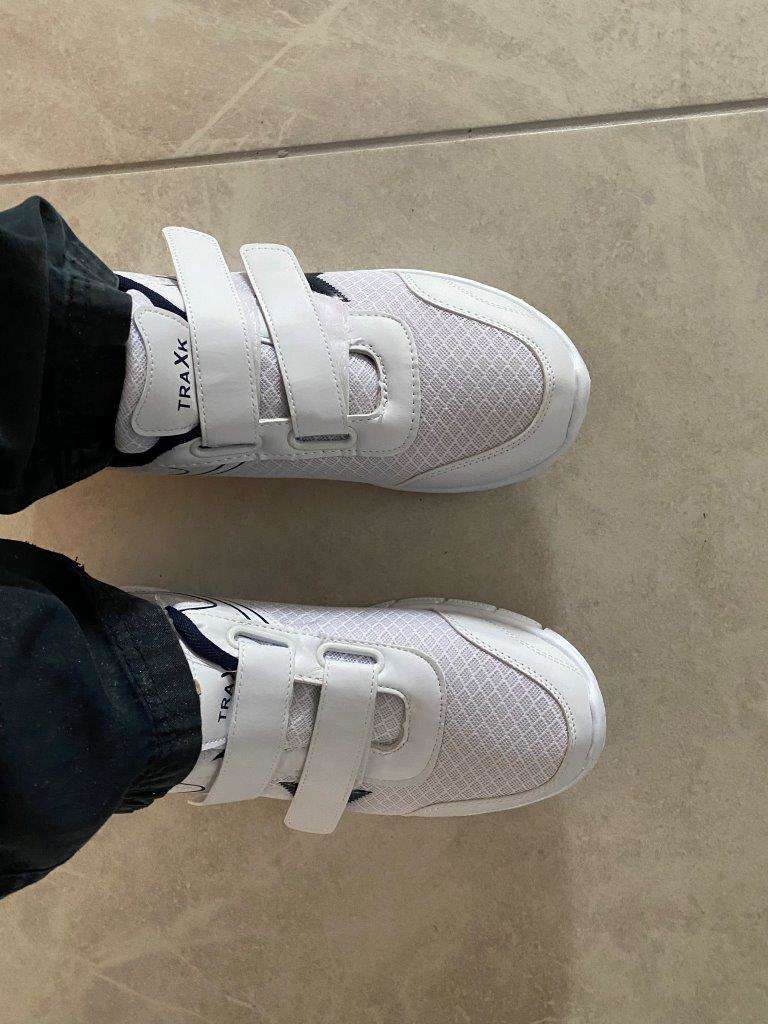
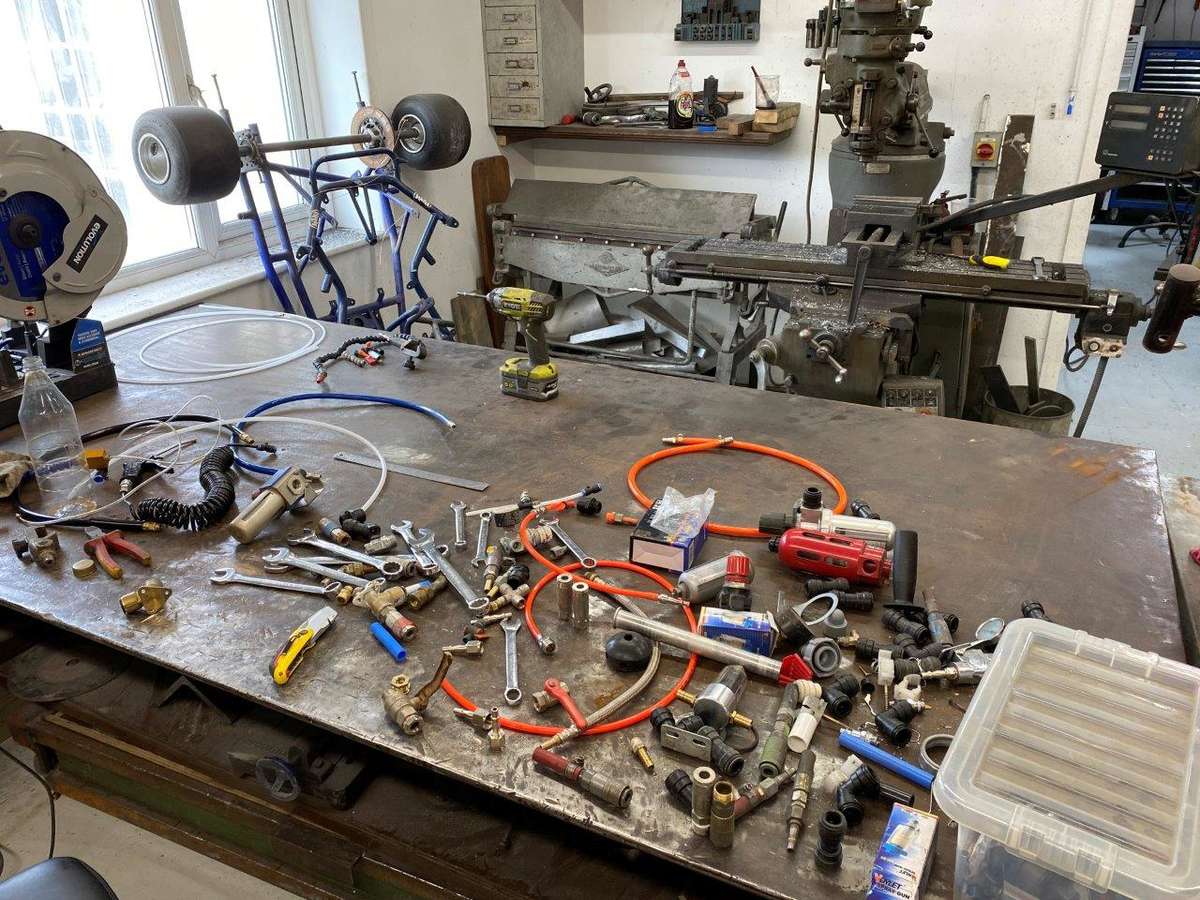
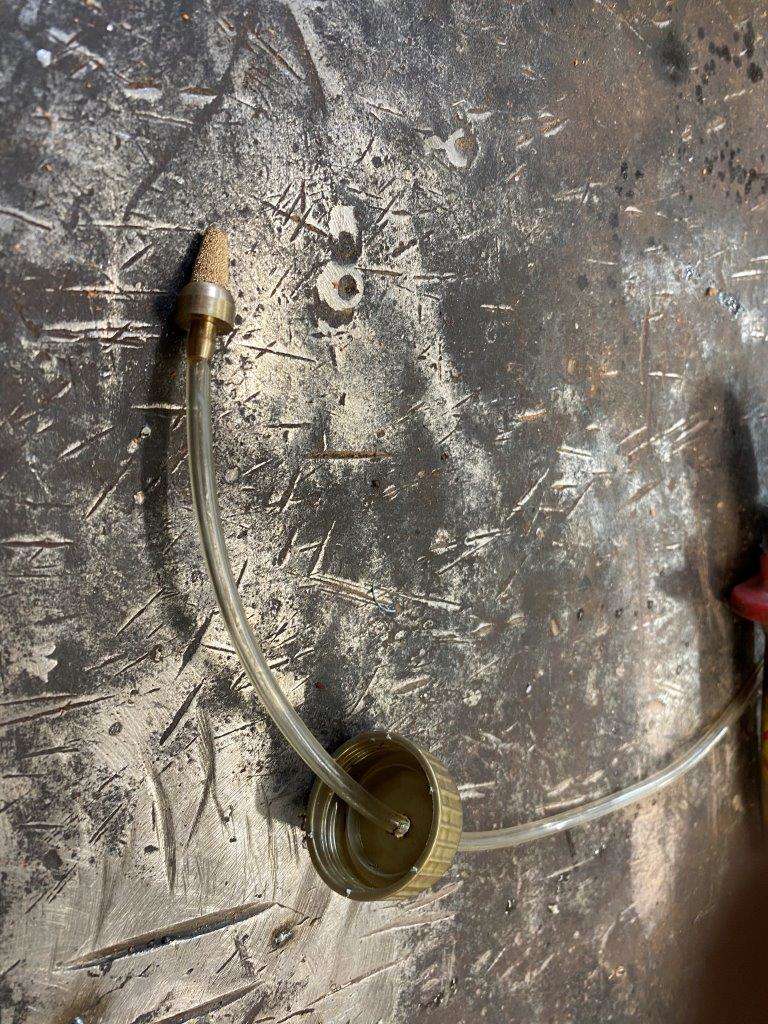
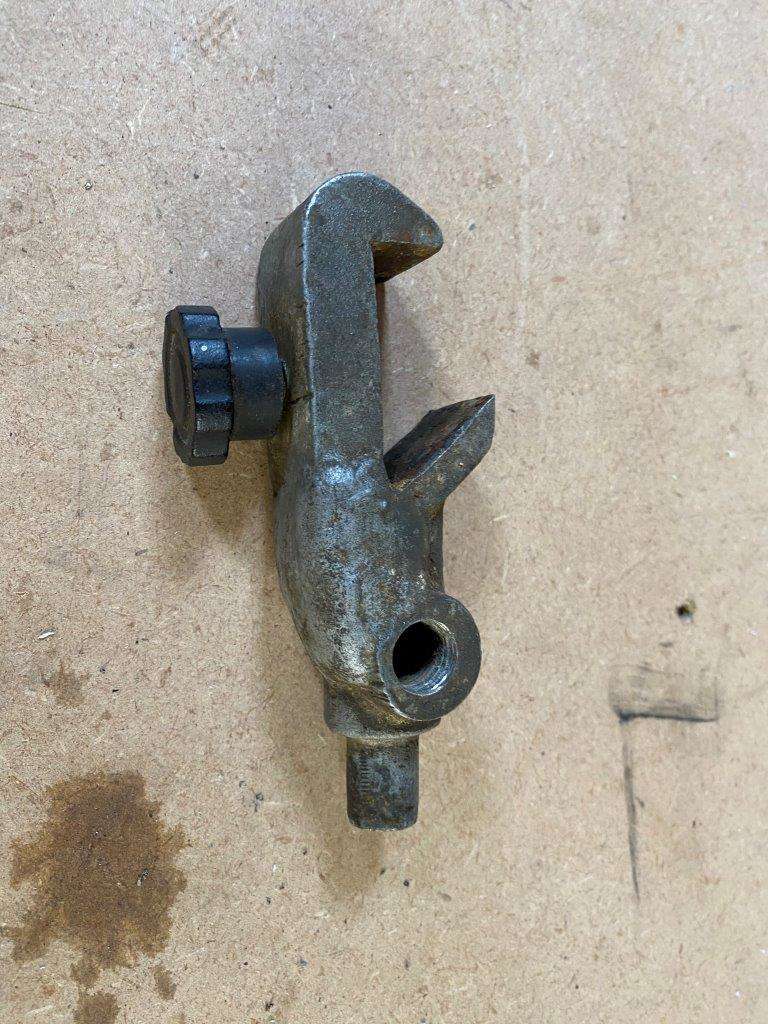
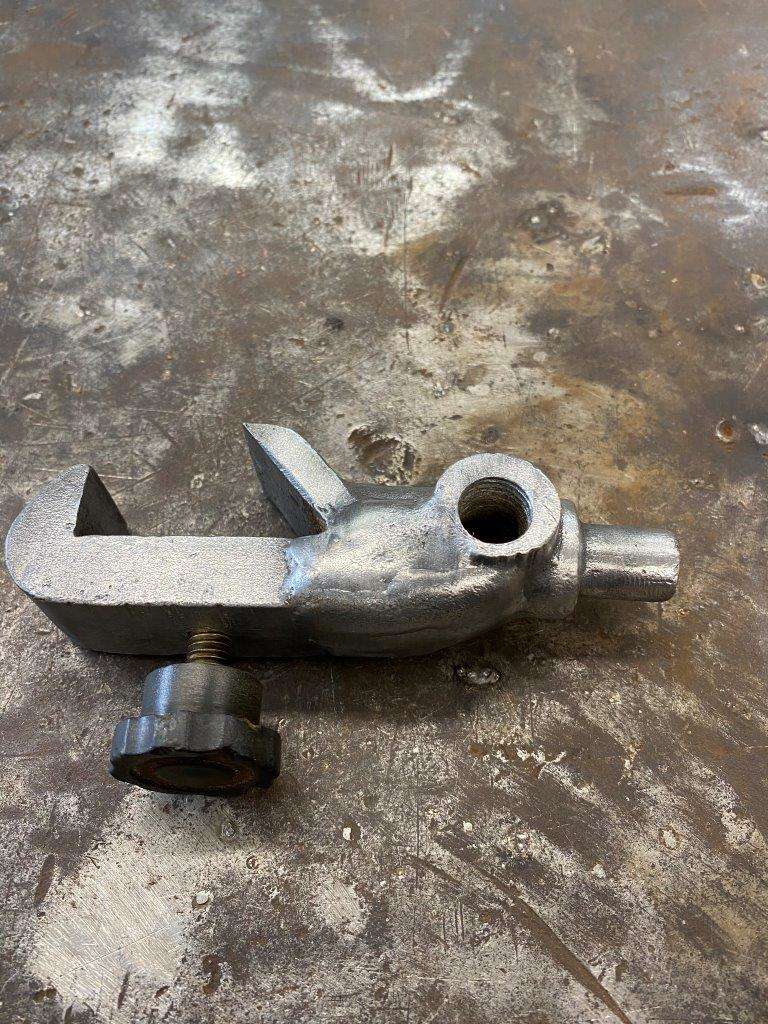
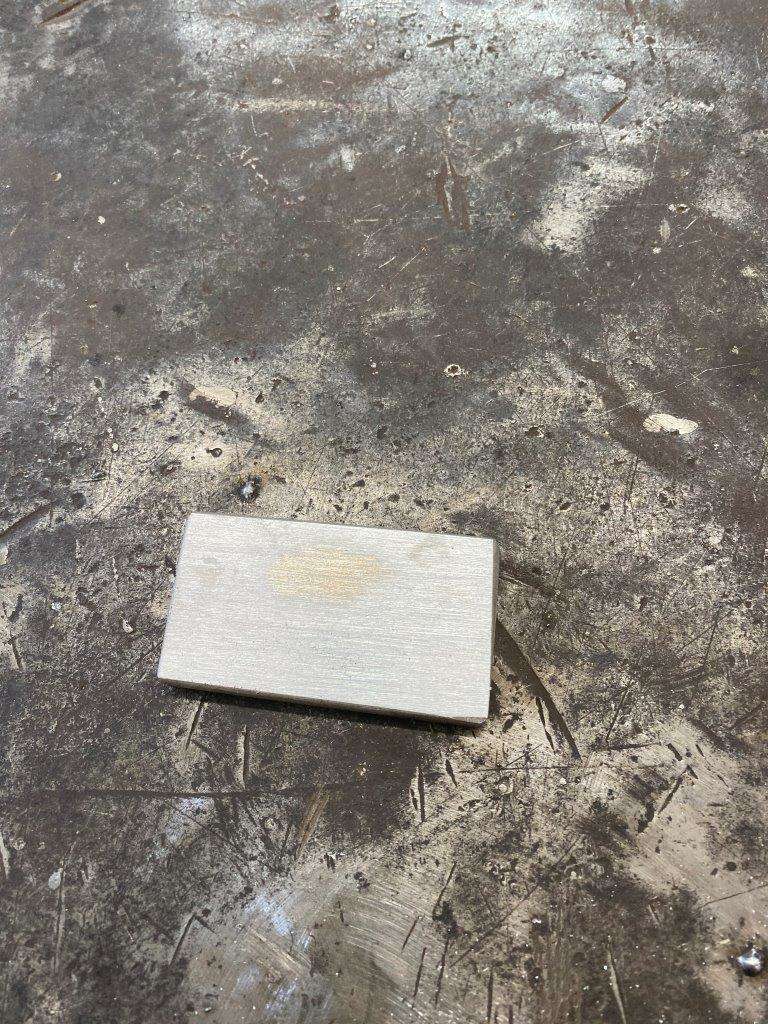
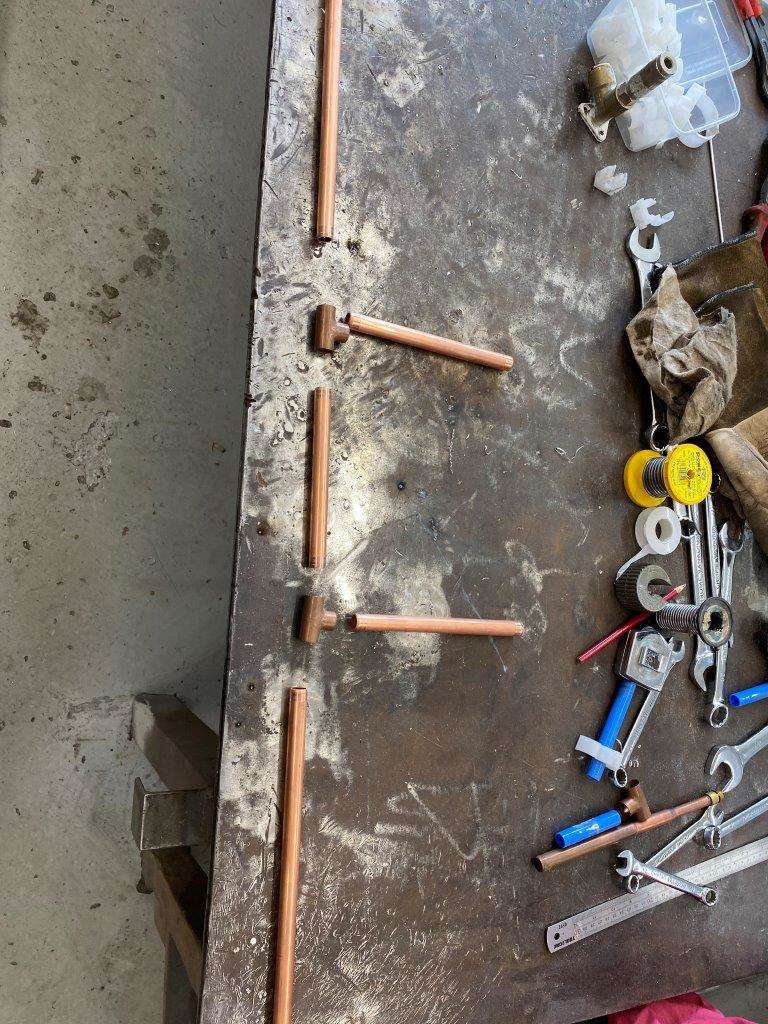
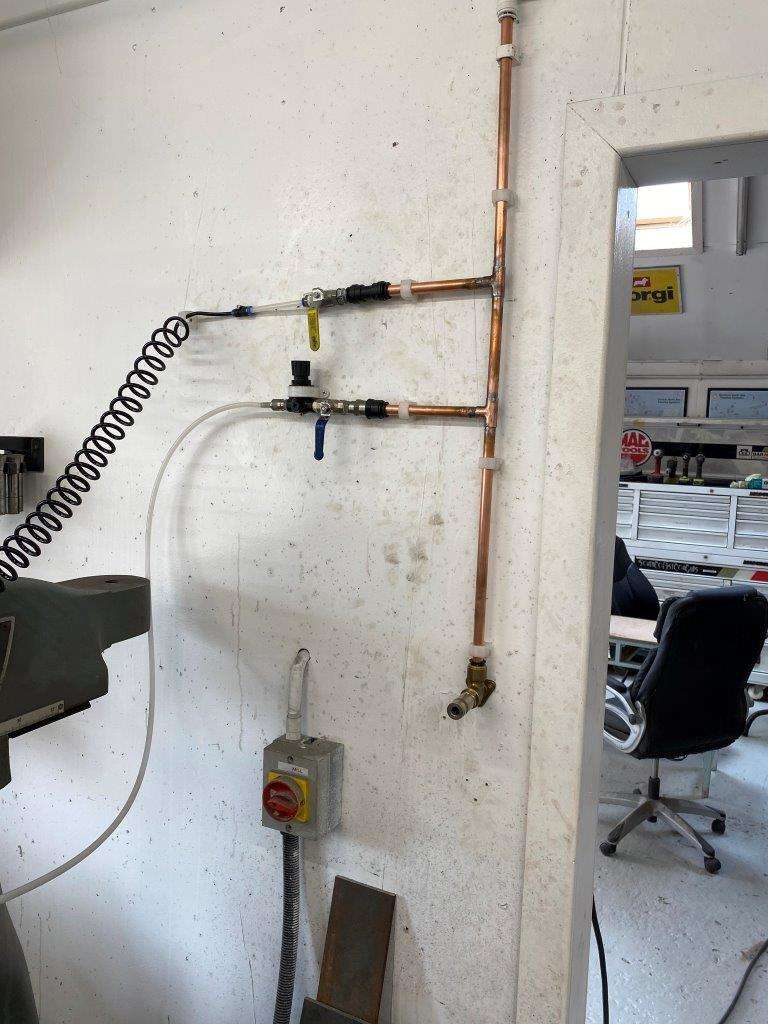
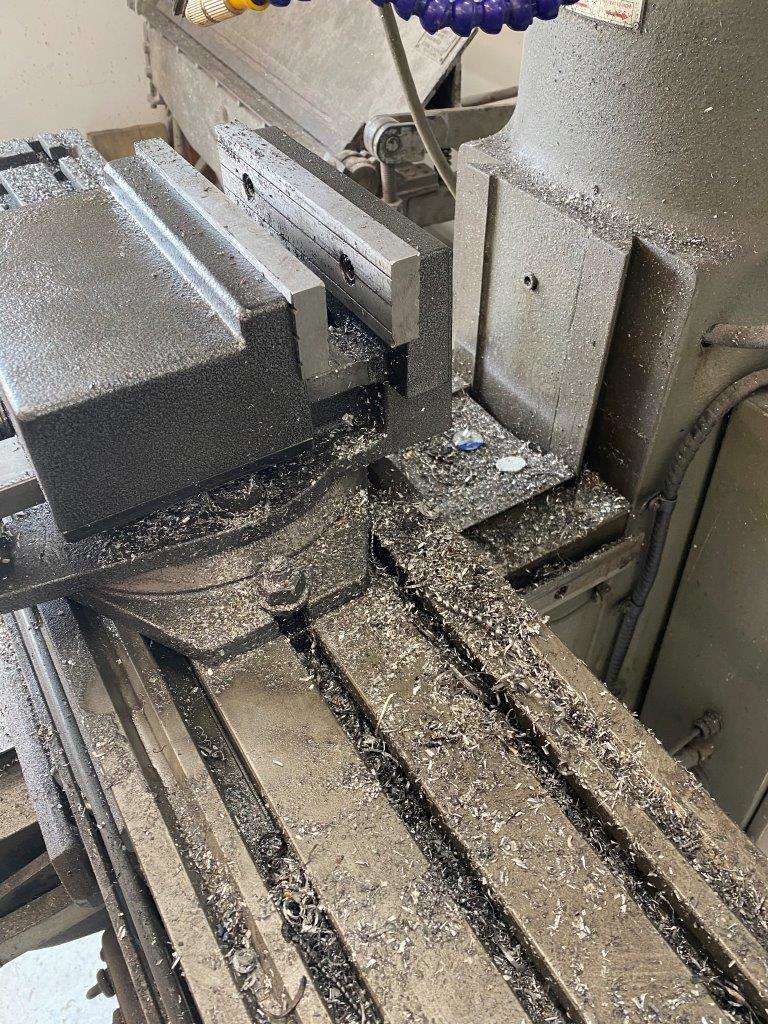
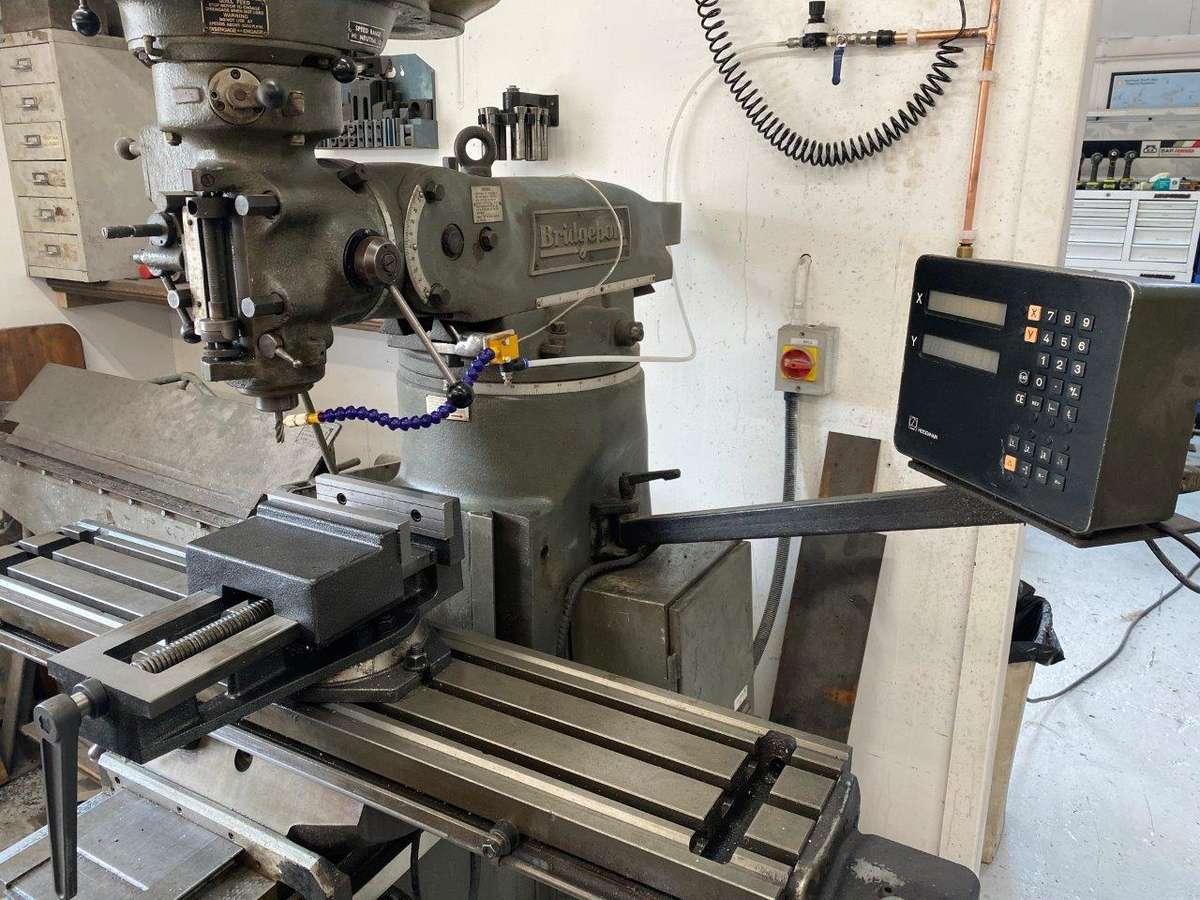
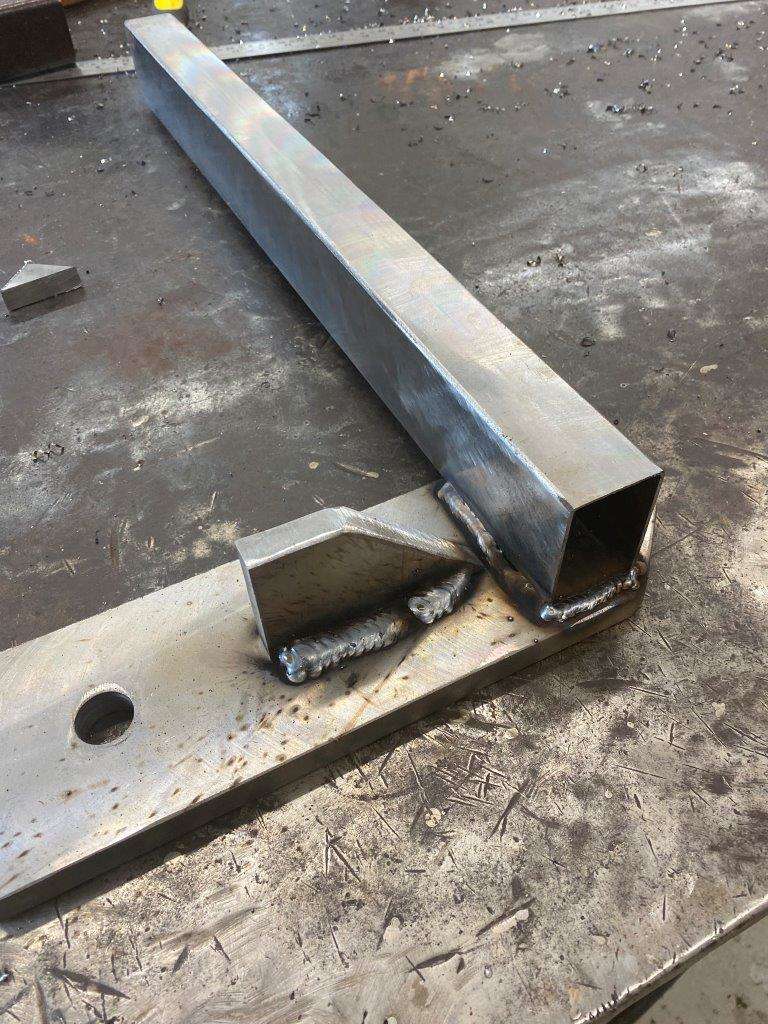
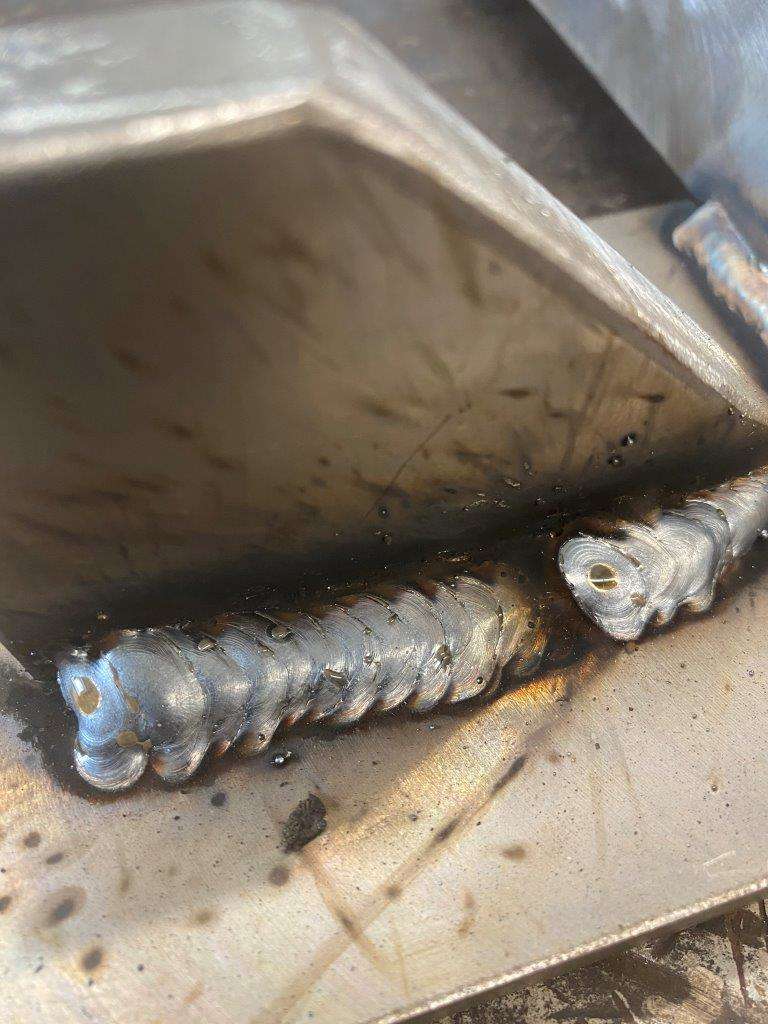
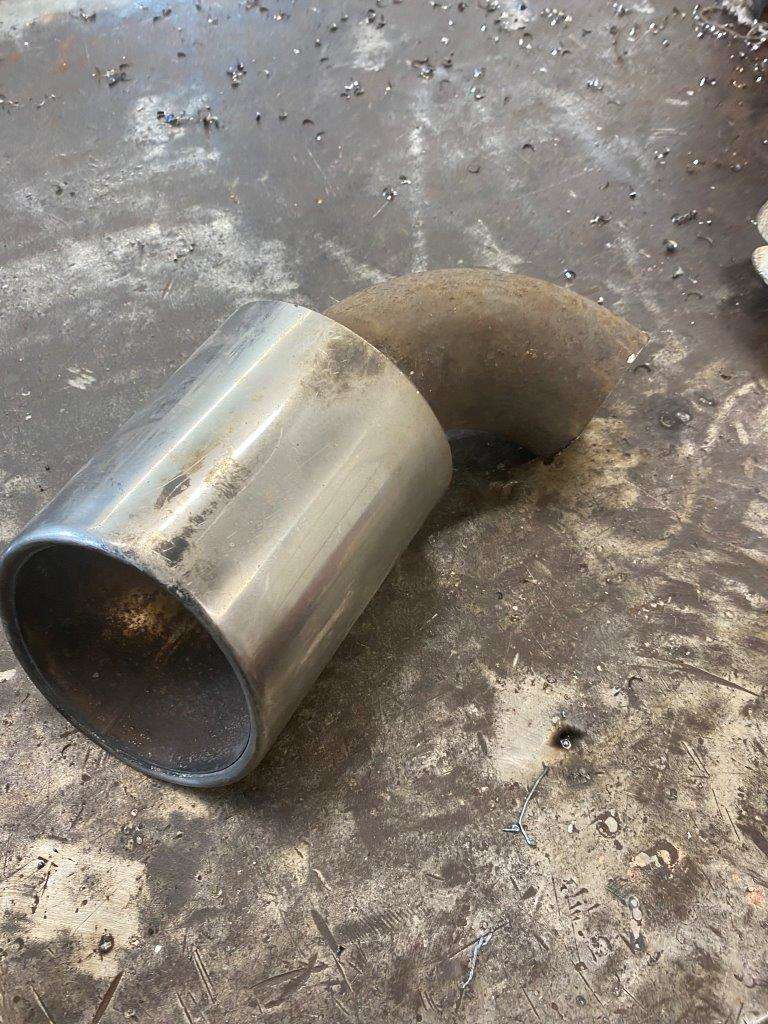
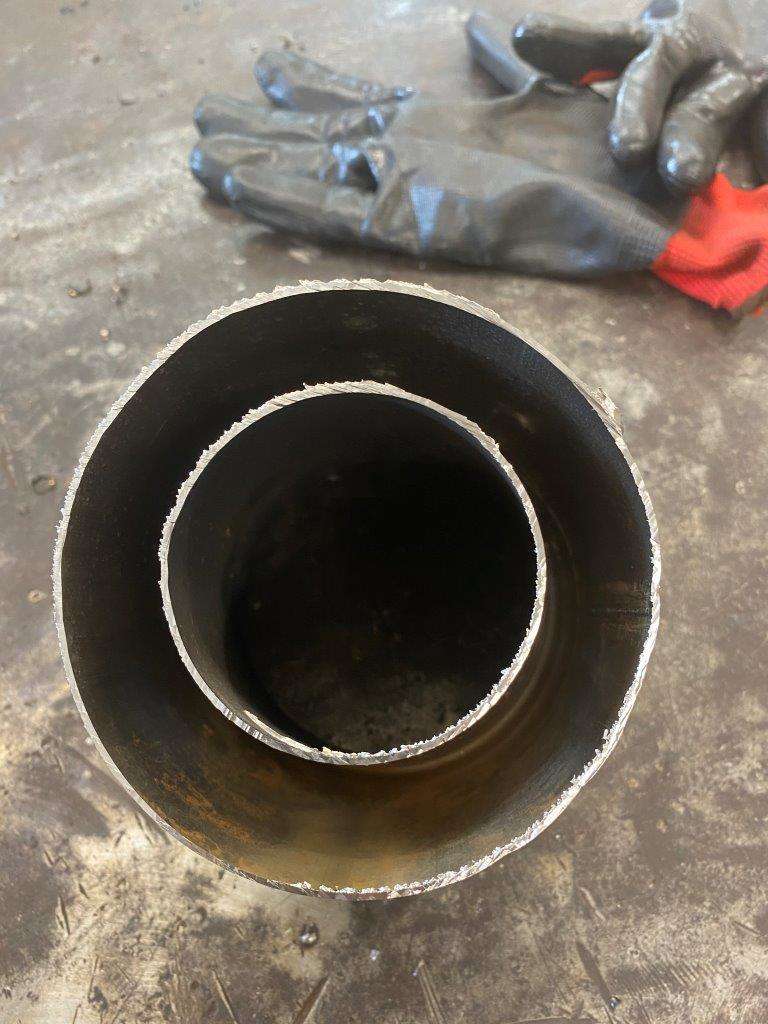
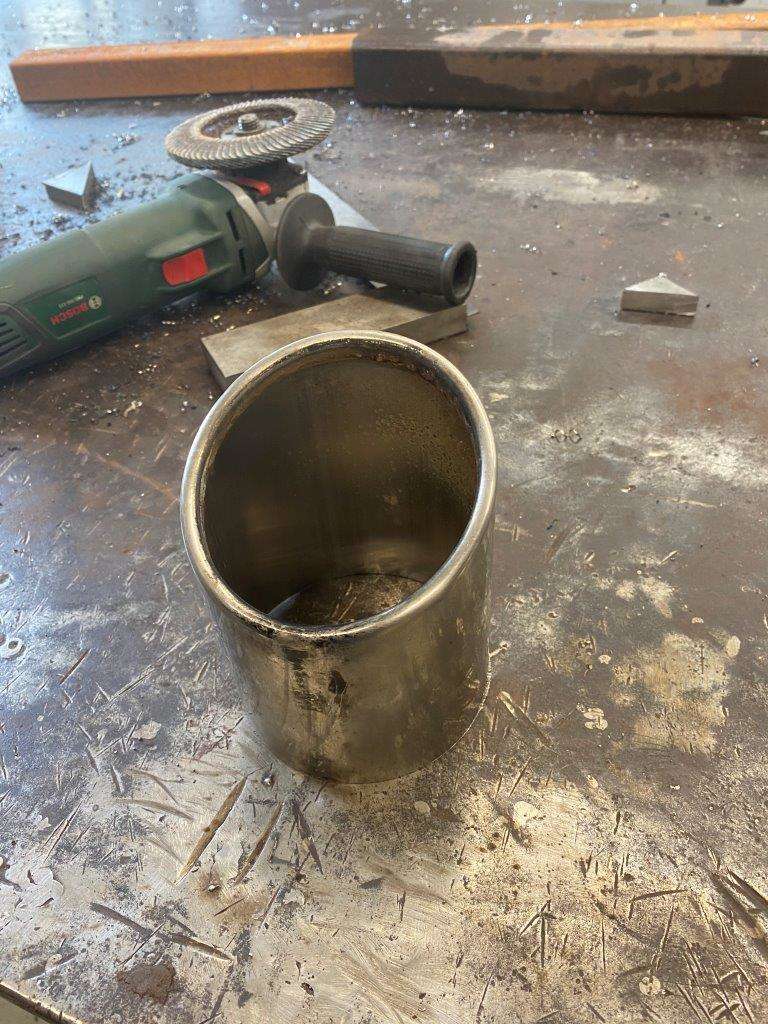
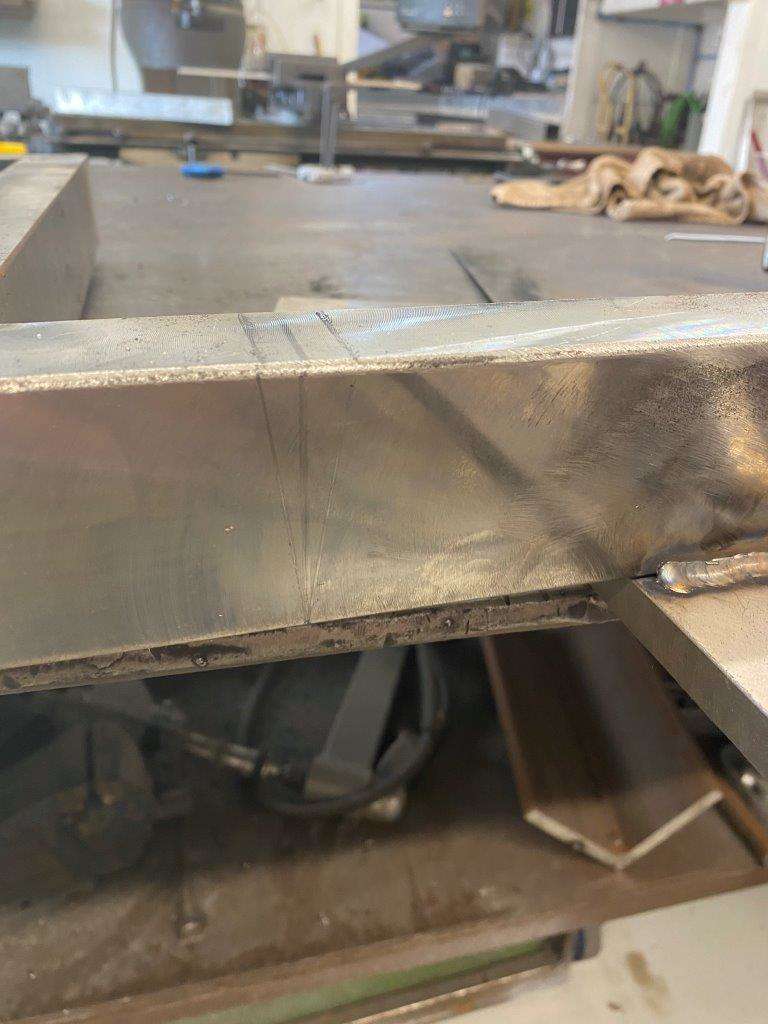
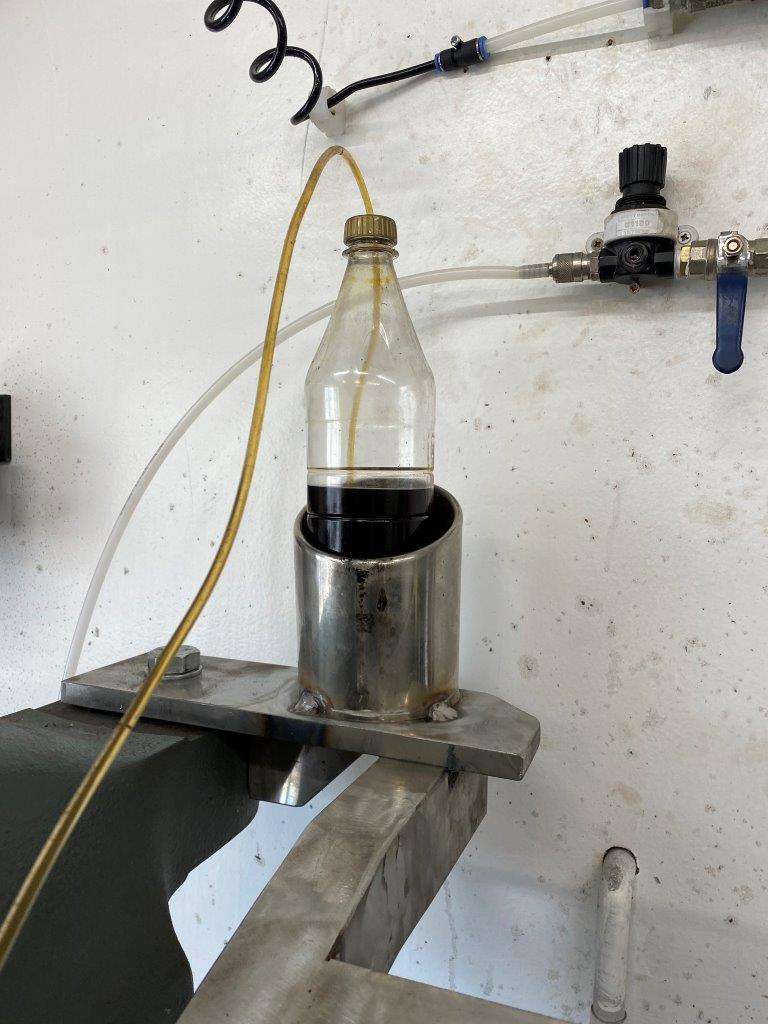
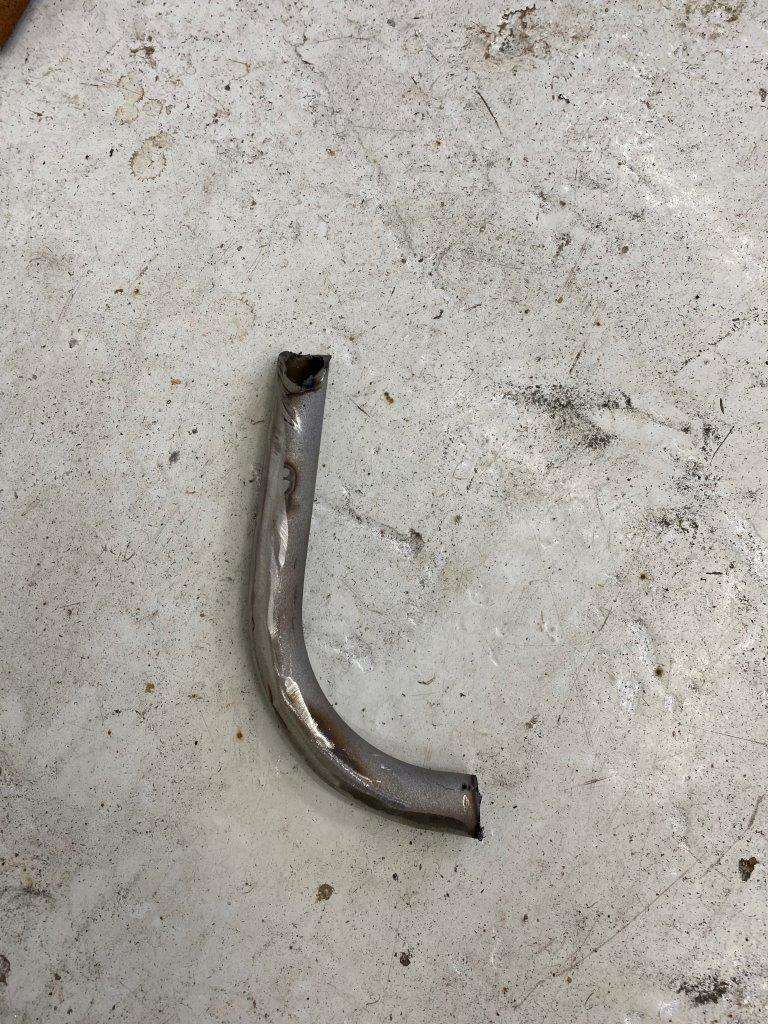
Hello again, I’m still at it but as promised I’m gonna mix it up with a side project, which you may or may not find interesting Long Pic Heavy Post follows - I decided to have a play with the milling machine I got a fly cutter with the first milling machine that I have never used but to use it I needed an oil feed and cooler, as I don’t have a catch tray on my mill I cant use the recirculating pump. To solve this I ordered an atomiser from China (because silly cheap) last year it took 3 months to get here and has been sat in the draw ever since. So I got me brand new BLACK! eBay trainers, purchased just for the Shed – with Velcro so I can take them off easily to go in the house (I keep bringing metal bits in ) Lovely shade of BLACK are they not? I started by getting out my box of airline connectors and found a load of bits Drilled a hole in a bottle top and fitted the oil pick up line Found this old clamp Cleaned it up and welded this plate to it So I had something to hold the atomiser steady That goes like this Side Note – Angle grinders are strange – blow up 1 get 2 back Made up an air feed with regulator I use plastic airline, but don’t have any, it just so happens the connectors work on 15mm copper and I did have some of that – That gives me all the connections I need Next to the Mill itself Needs a clean …. Ta Da Now to test the fly cutter on a bit of old steel That I cut off the mobile welding table I made…. This one Using this If that’s not a recommendation for these saw’s I don’t know what is To the Mill – first side Some time later Wow – I like it A hole is needed Then some more old box section Back to the mill and some more time later Now weld a support bracket onto the first bar And the box to the bracket I love welding heavy metal Warning – the following contains the destruction of 350z parts – viewer discretion is advised Old exhaust end If you cut the back off You can take out the inner bit To leave More old box Yes even more time later Weld that all together Then change the design And hide the evidence Add some straps Add the stainless exhaust – first time welding stainless to mild steel and something that thin to something that thick but it Tig’d up OK Off cut of worksurface from Mrs K’s kitchen refurb And we have ……………………… Now I can keep my tools to hand at the Mill And the oil won’t get knocked over Over engineered? Probably but it was good practice and I now know that my Fly Cutter works Be safe all. Keyser - “Better to remain silent and be thought a fool than to speak out and remove all doubt.” – Abraham Lincoln (maybe I should have listened to Abe? )


-
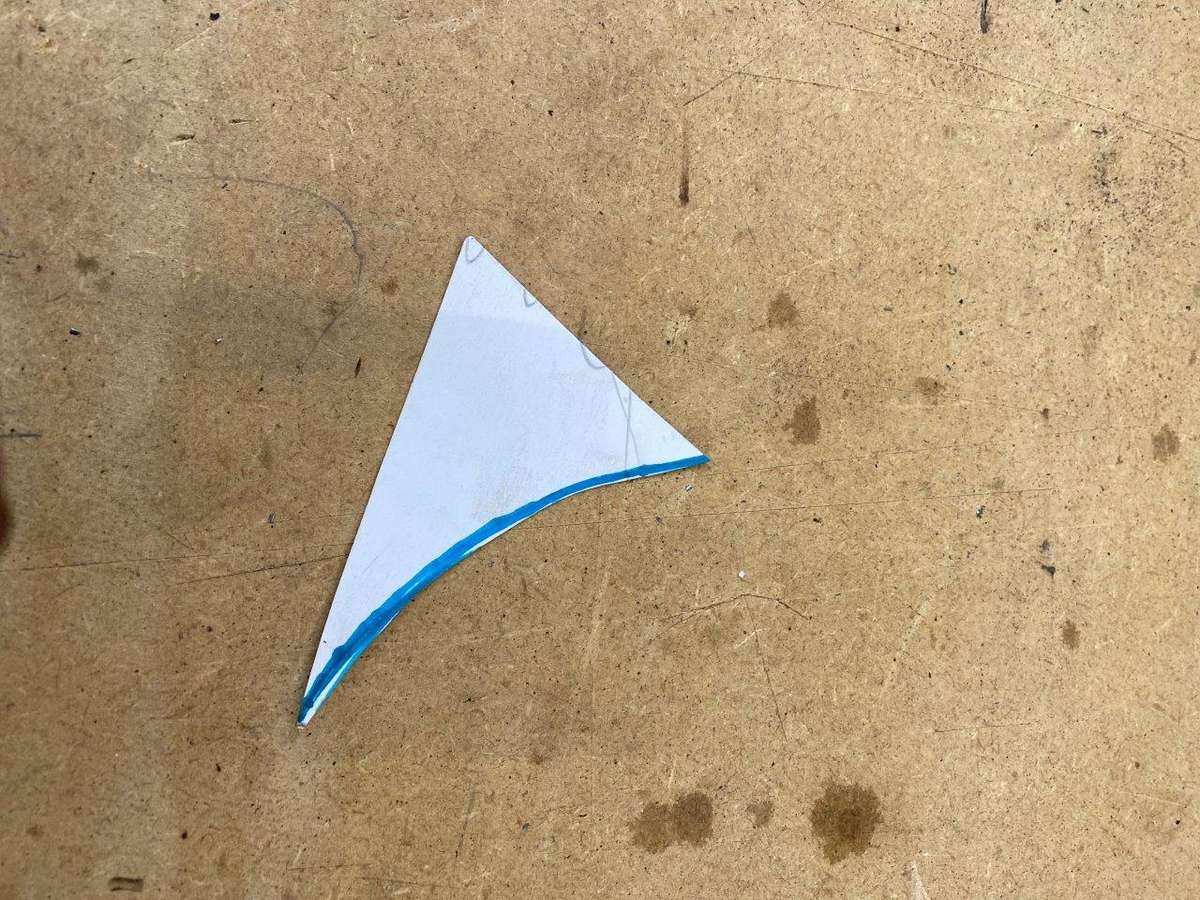
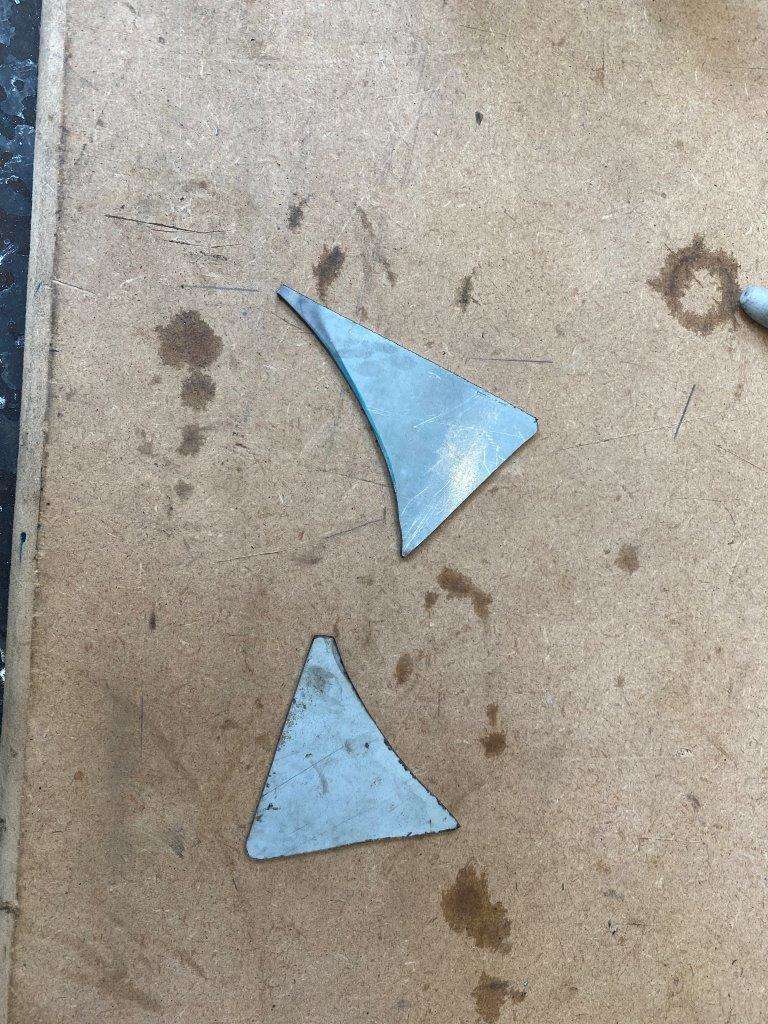
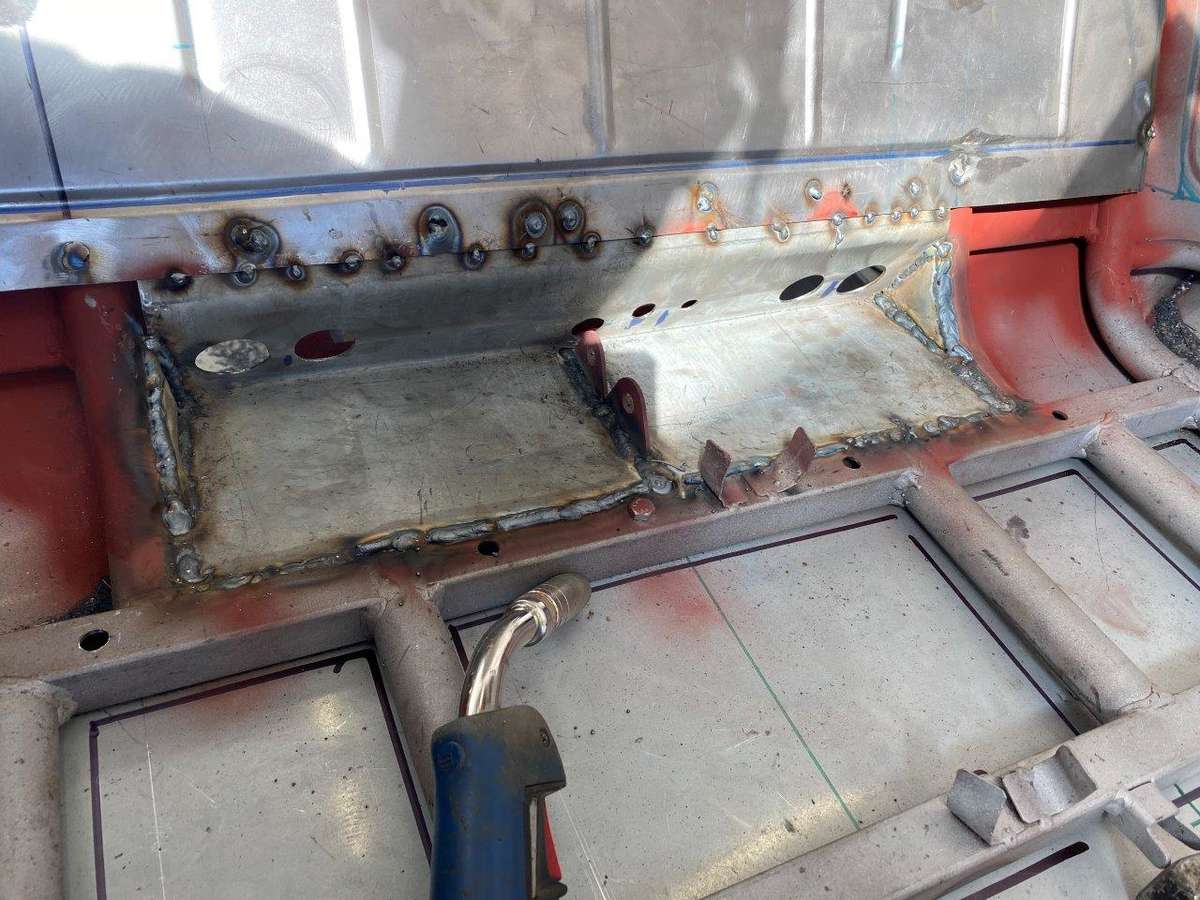
Now it had all the holes in it I tacked it in place From the back it looks like this Then some filler bits for the corners Here is something fun, I have a rather nice saw bench for wood, after a bit of research apparently you can use it for steel as long as you change the blade of course, it took some searching to find a compatible blade but I sorced one and have been using it, it does small bits well and gives a lovely clean cut Used it to cut these, the curve was done with a flap wheel on the grinder Welded those in and finished the rest of the welds That just left these holes that need to be at least splash proof Marked up some 1mm To make these Which I didn’t photo fitted – use your imagination Bored of saying stay safe so Have fun instead Obut do stay safe Keyser - “I never really understood the word ‘loneliness’. As far as I was concerned, I was in an orgy with the sky and the ocean, and with nature.” ― Bjork (lets just not go there )

-
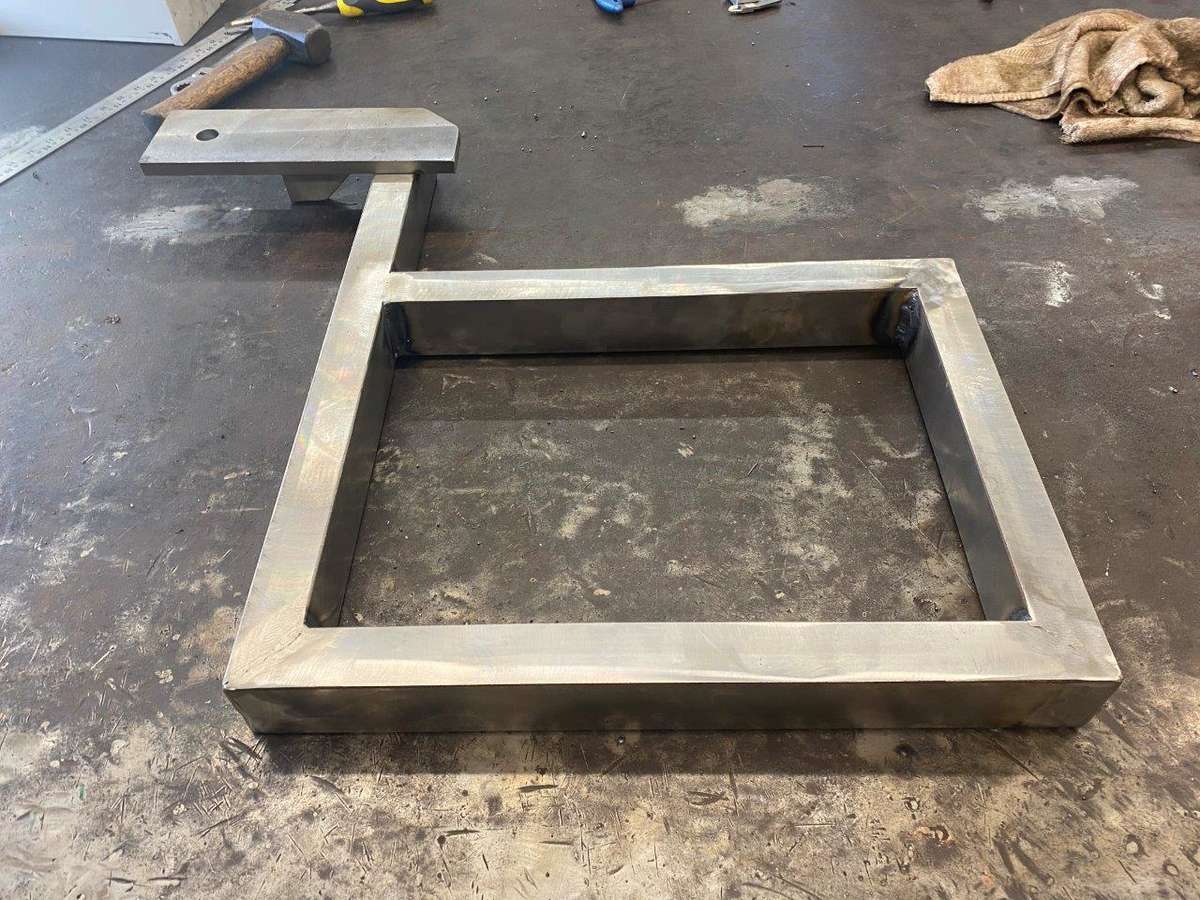
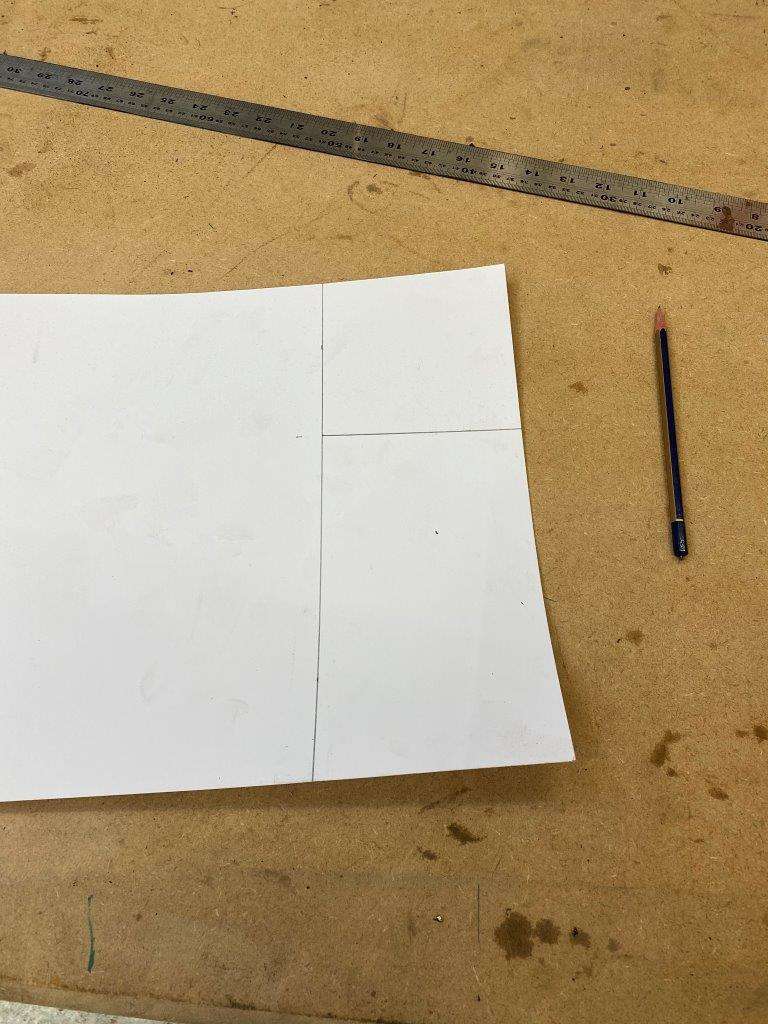
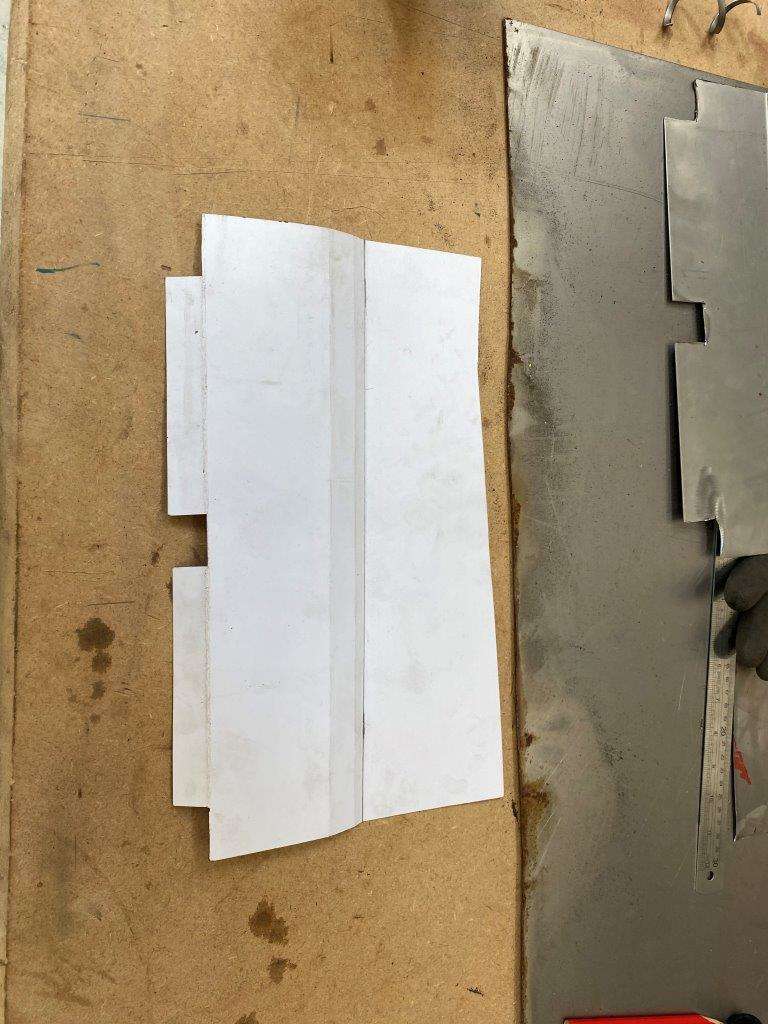
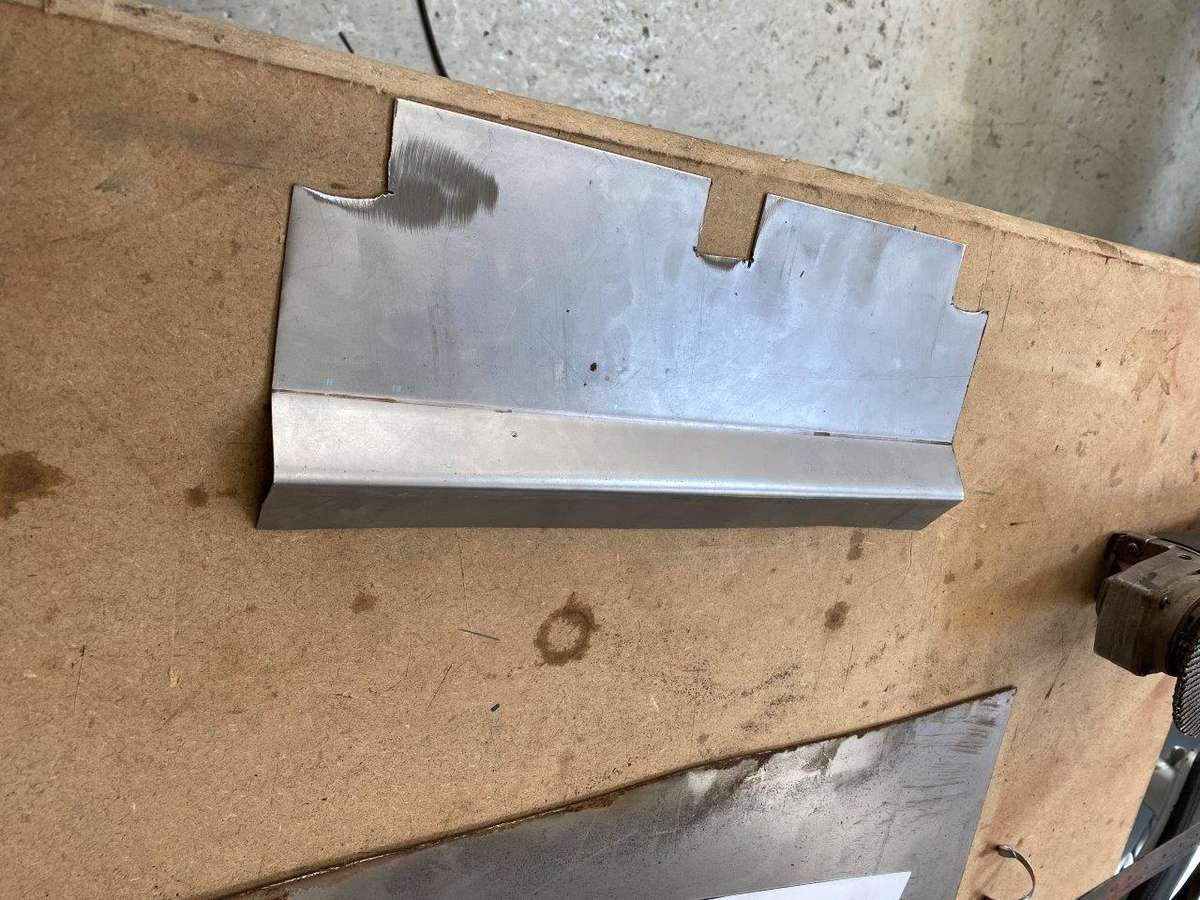
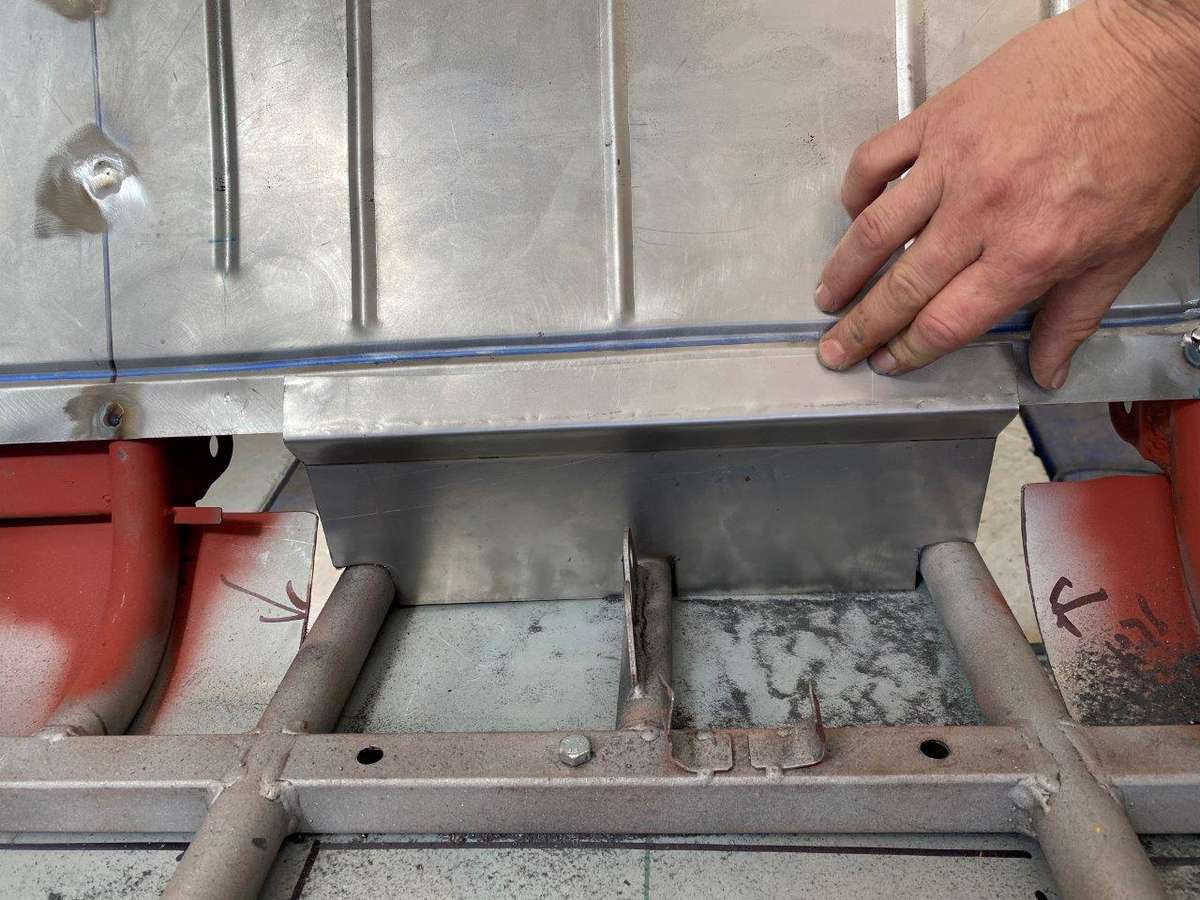
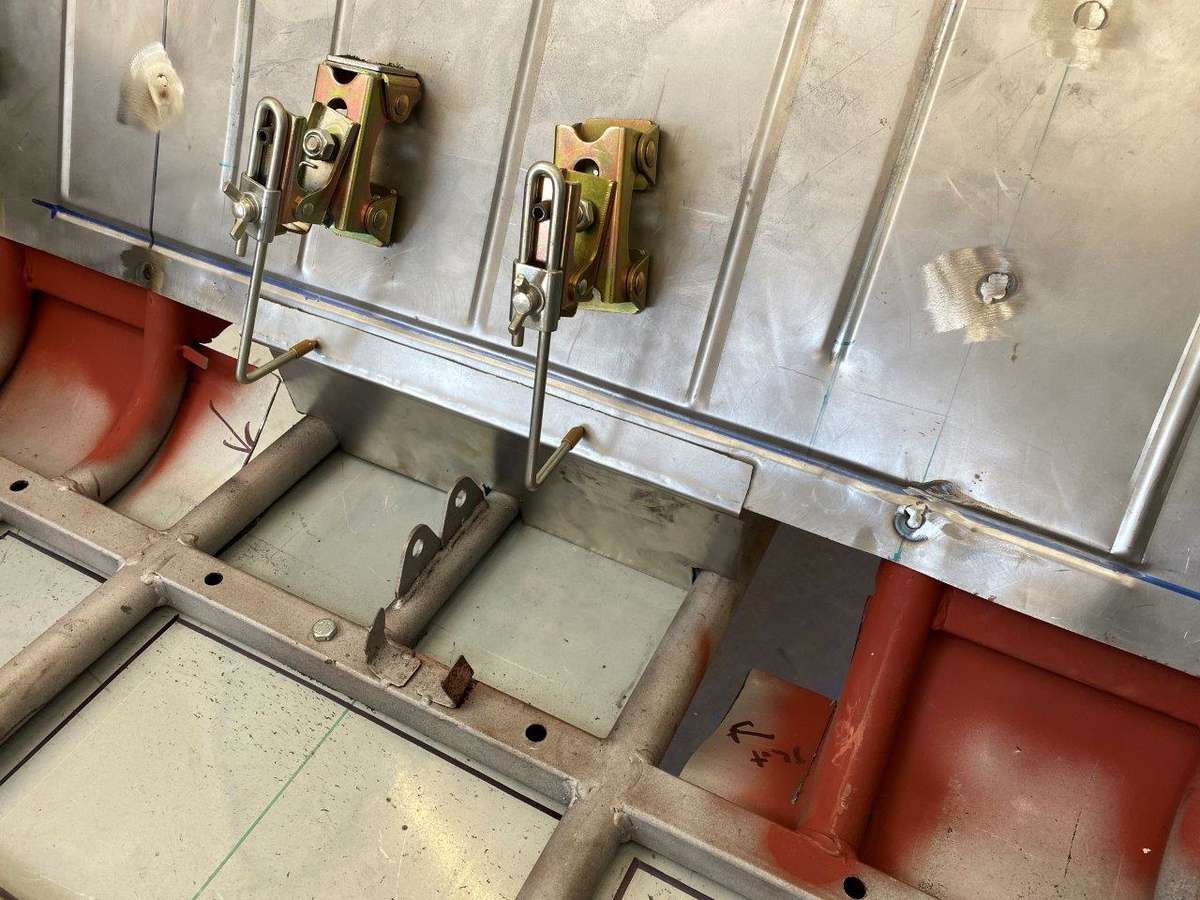
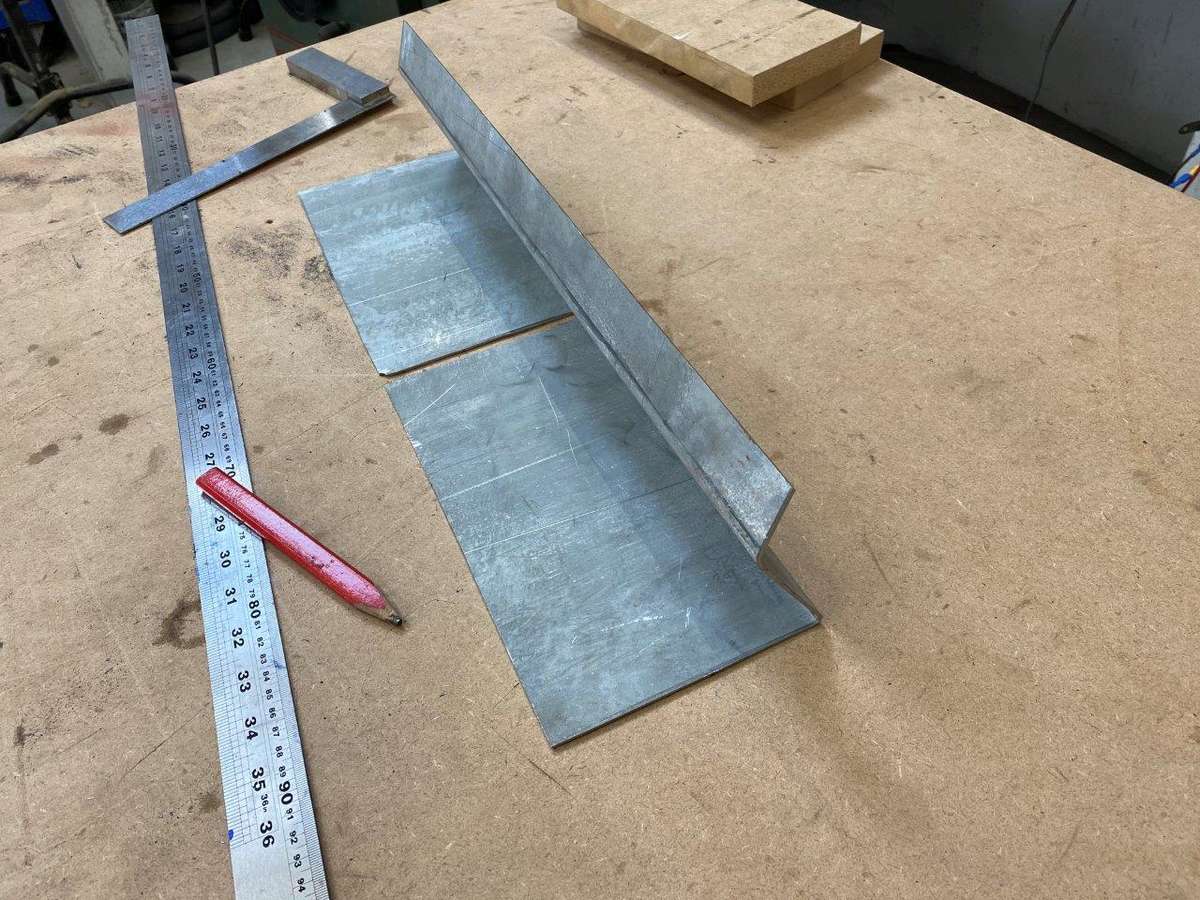
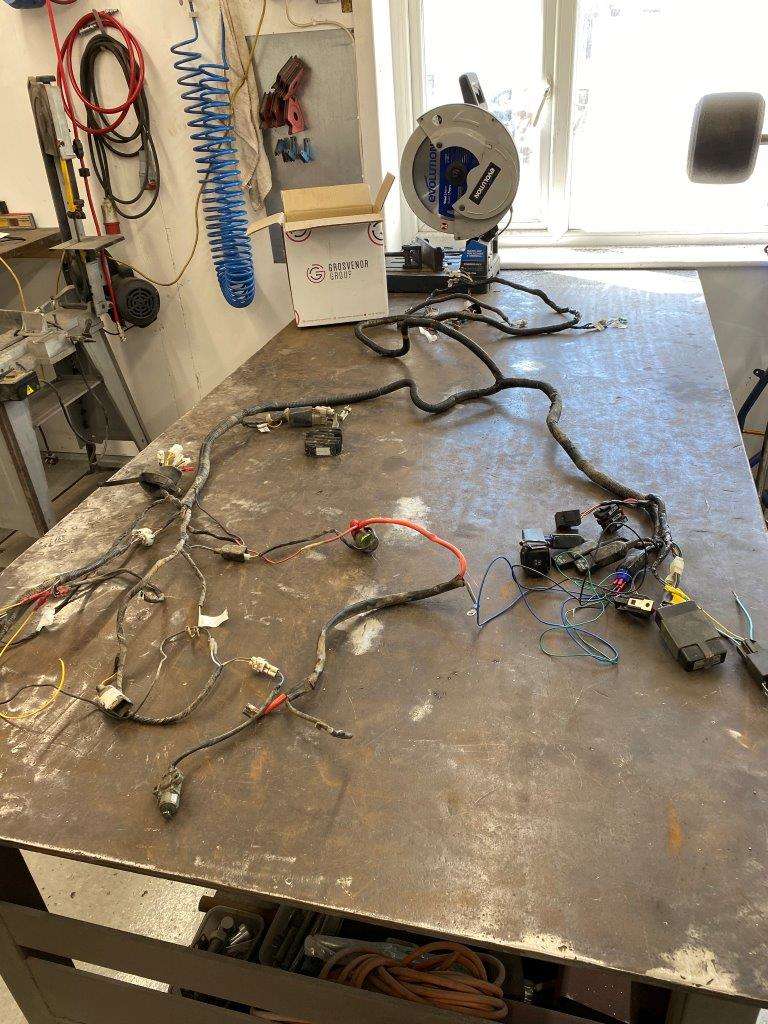
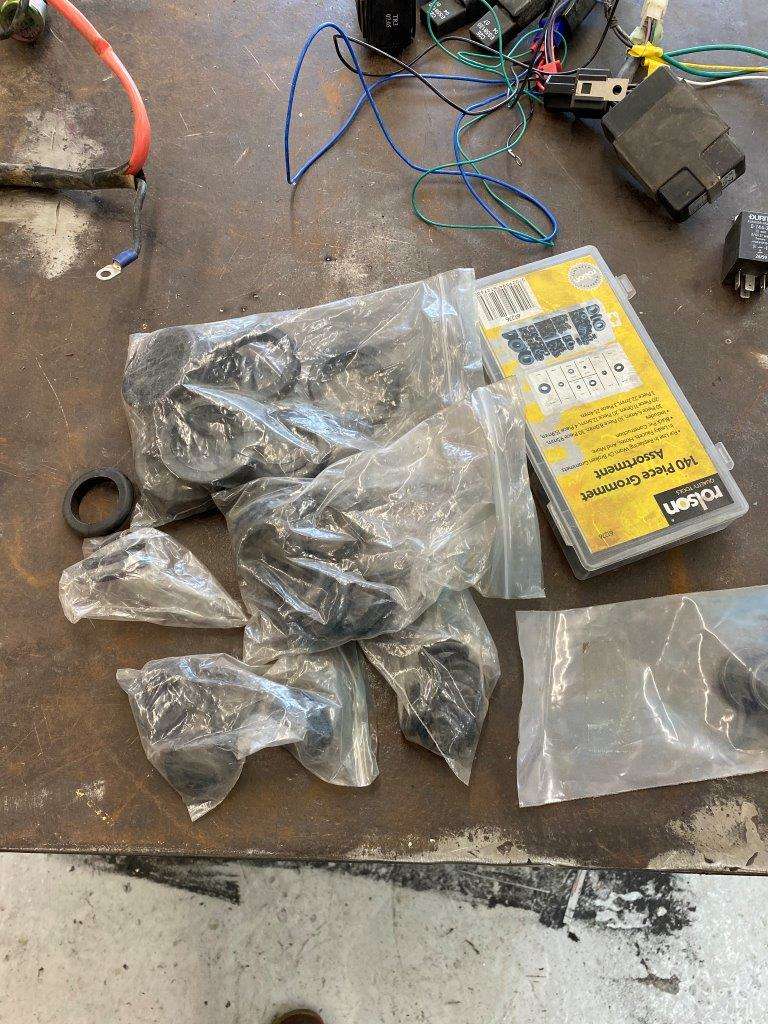
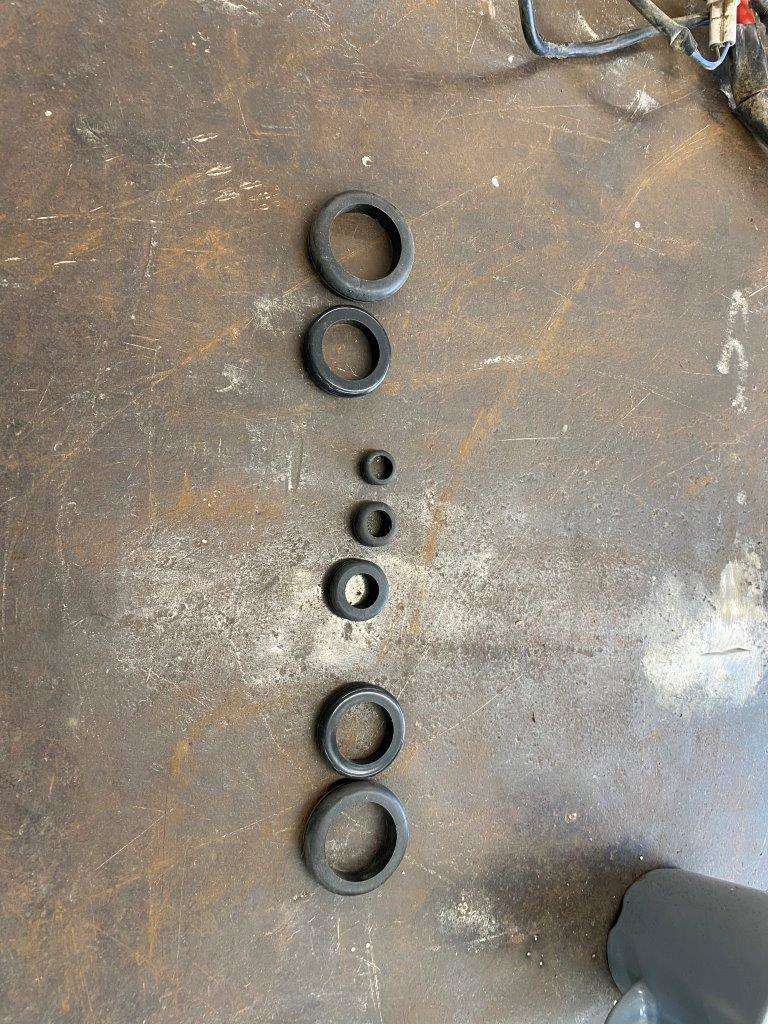
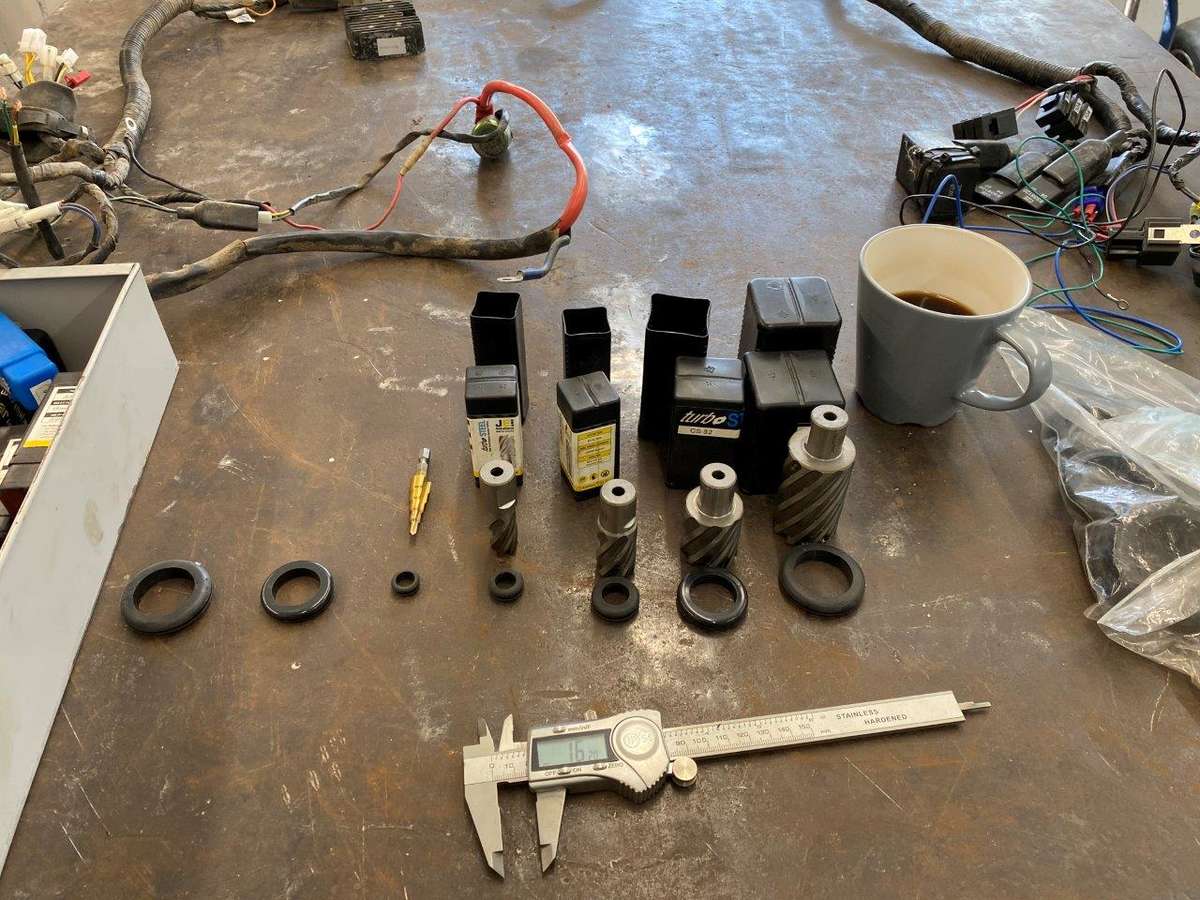
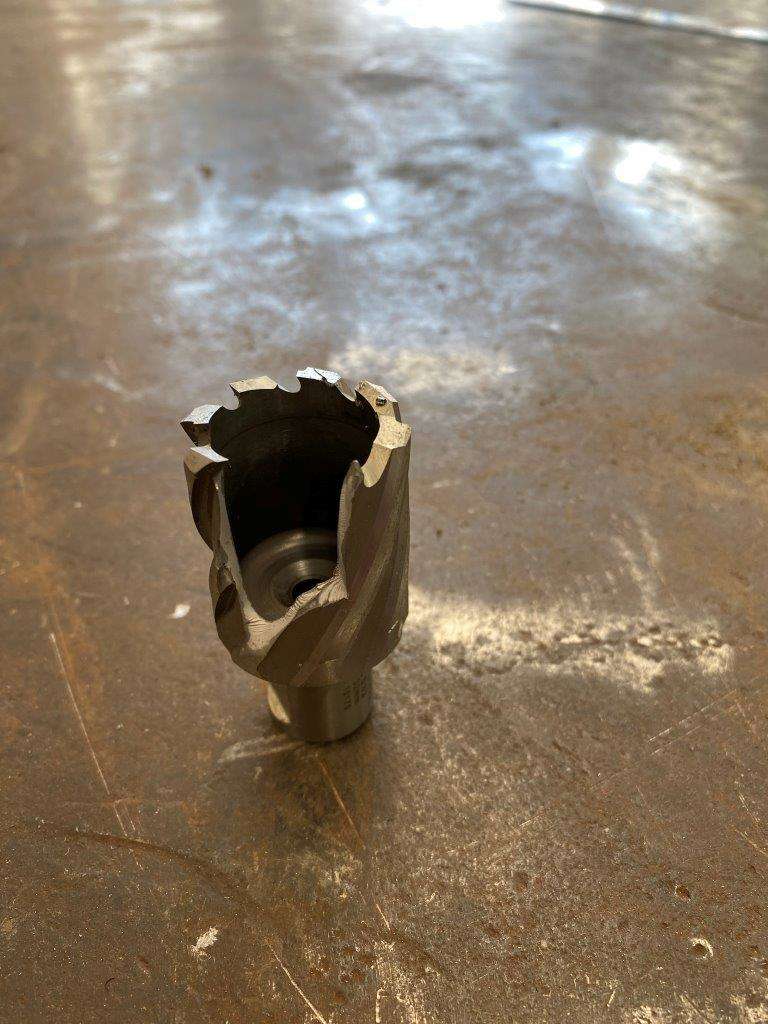
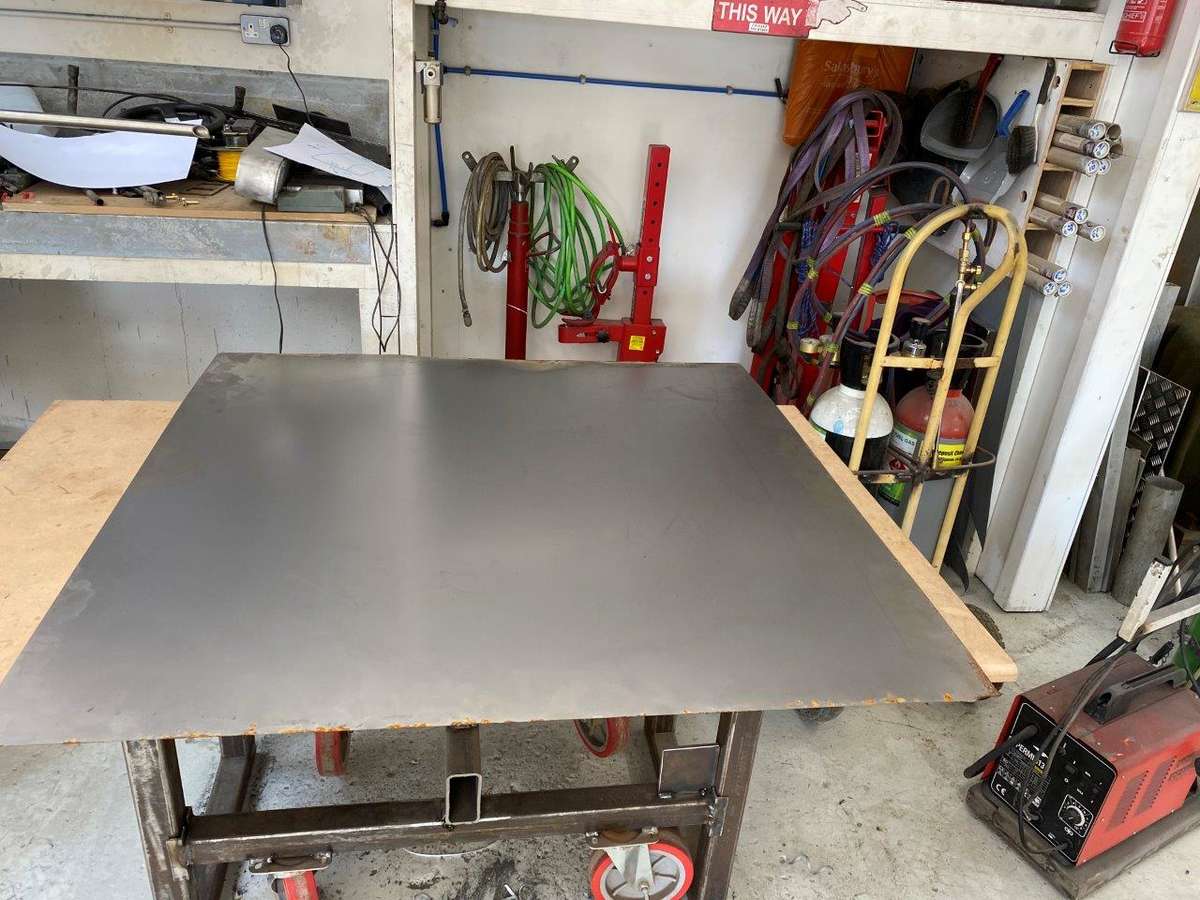
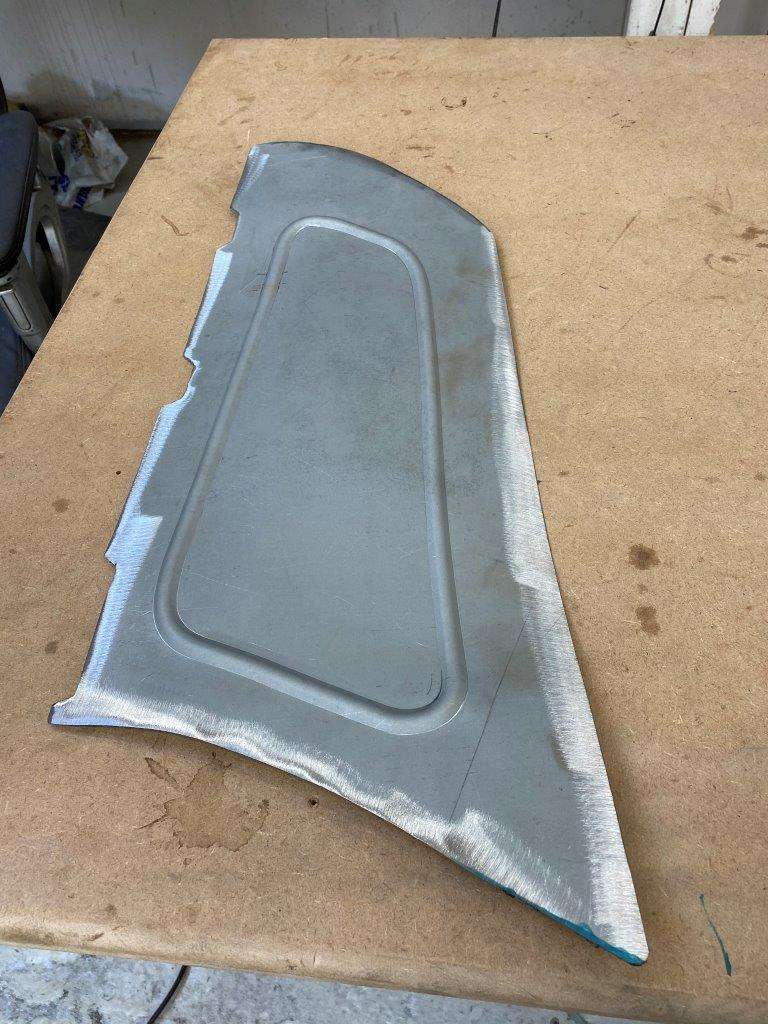
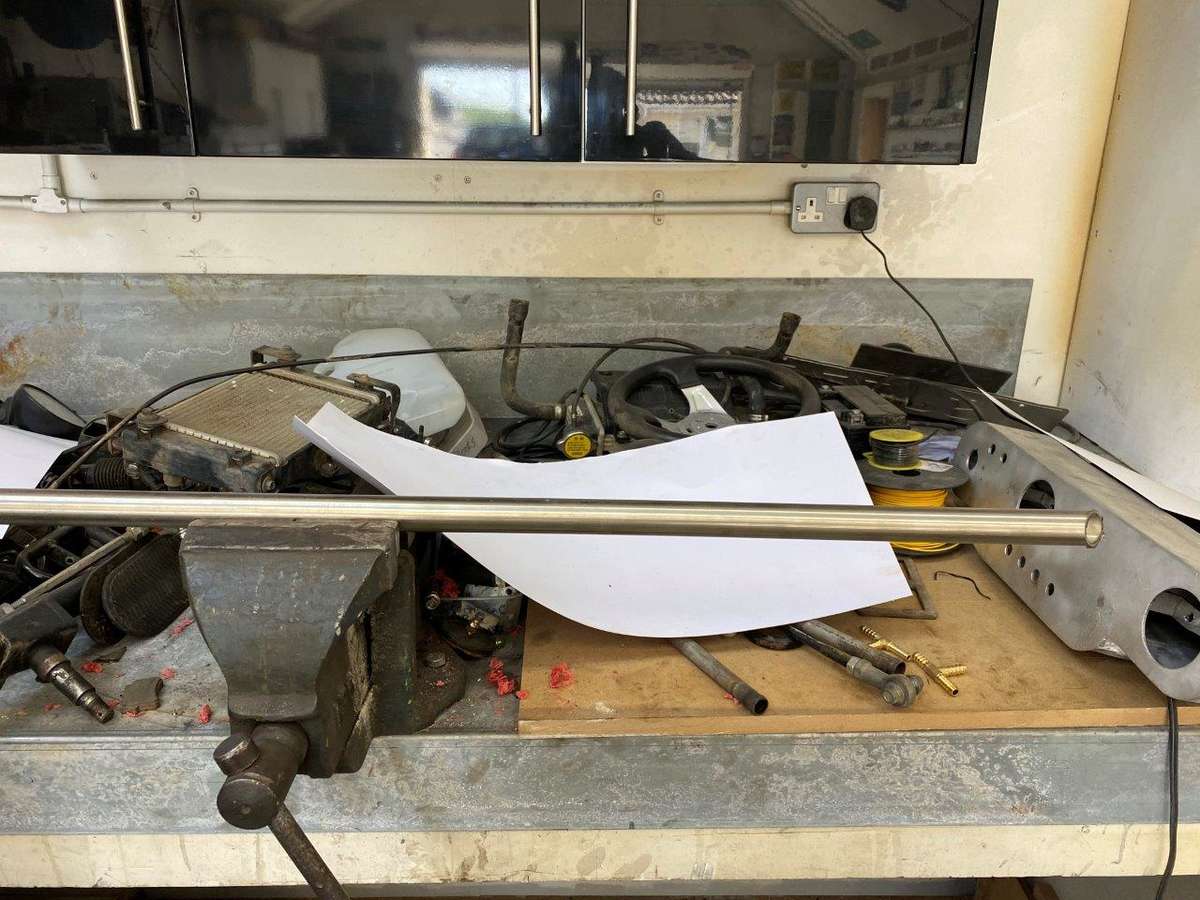
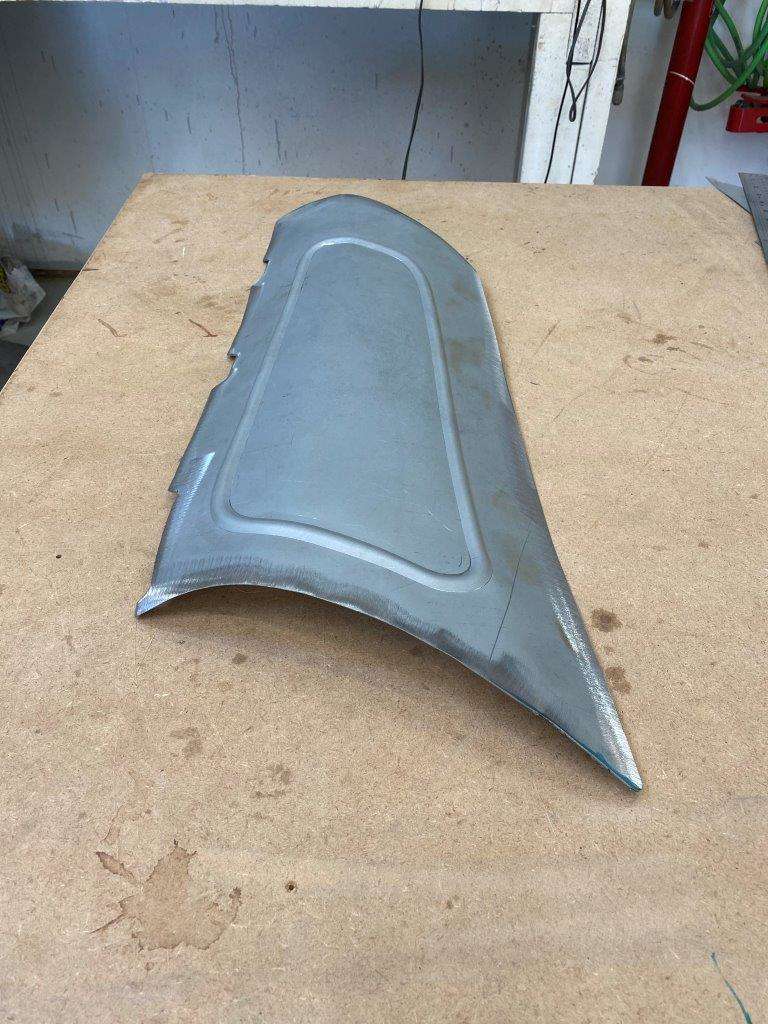
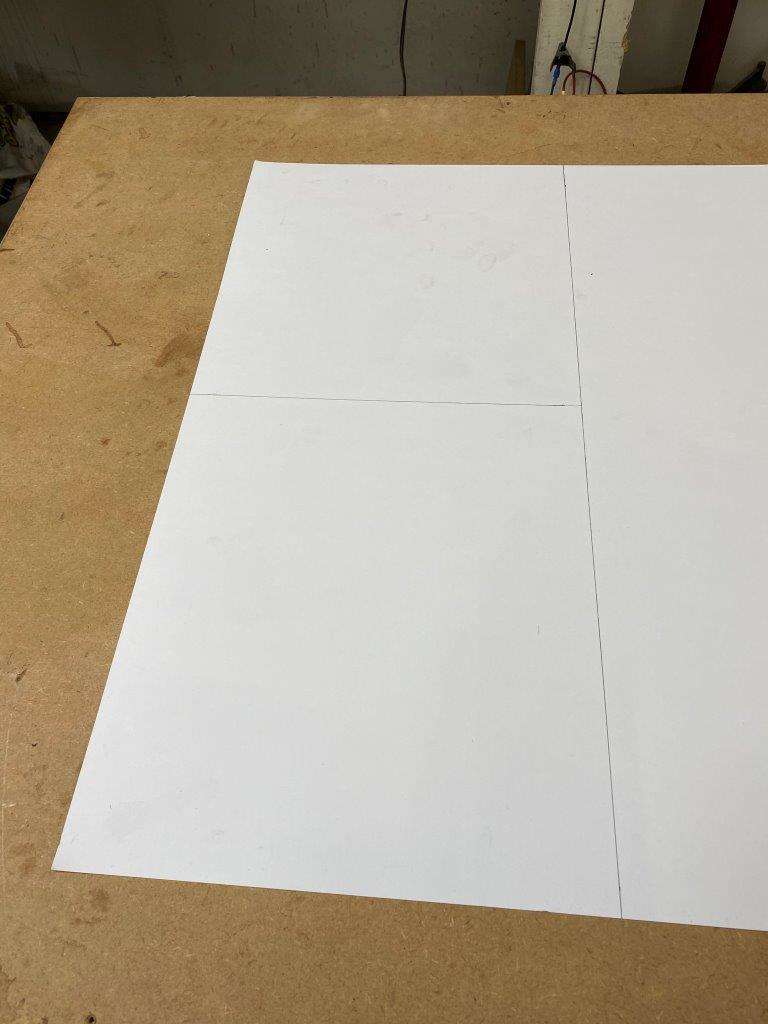
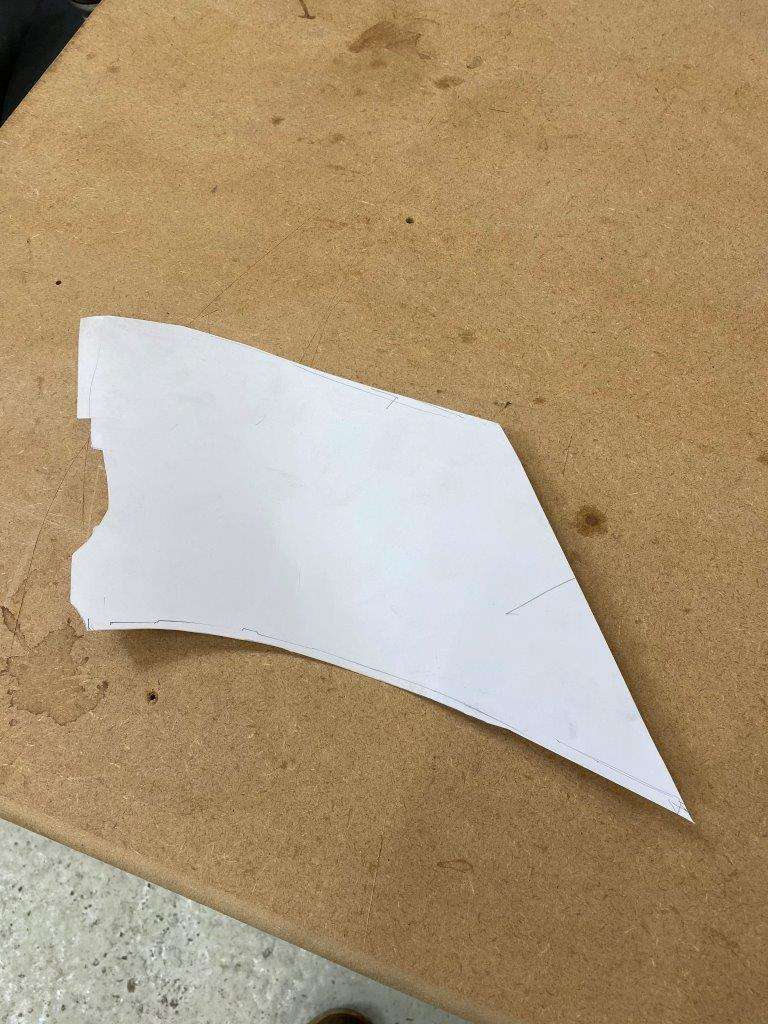
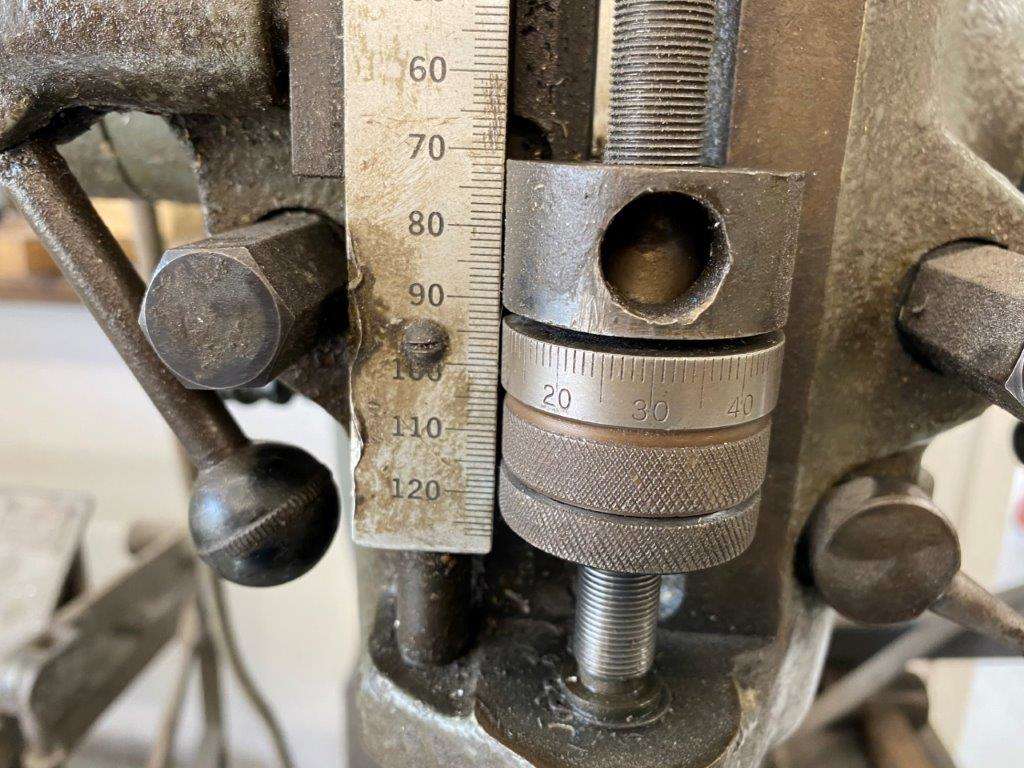
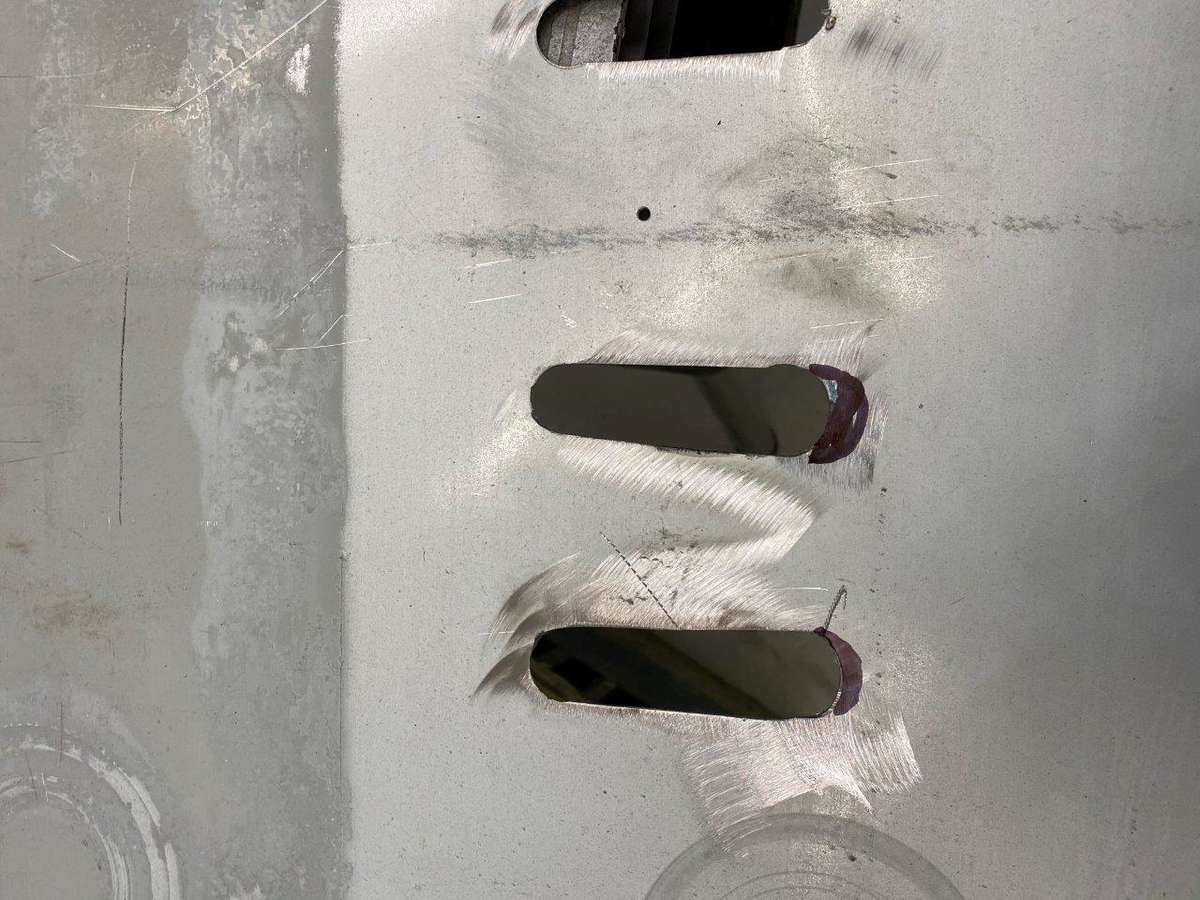
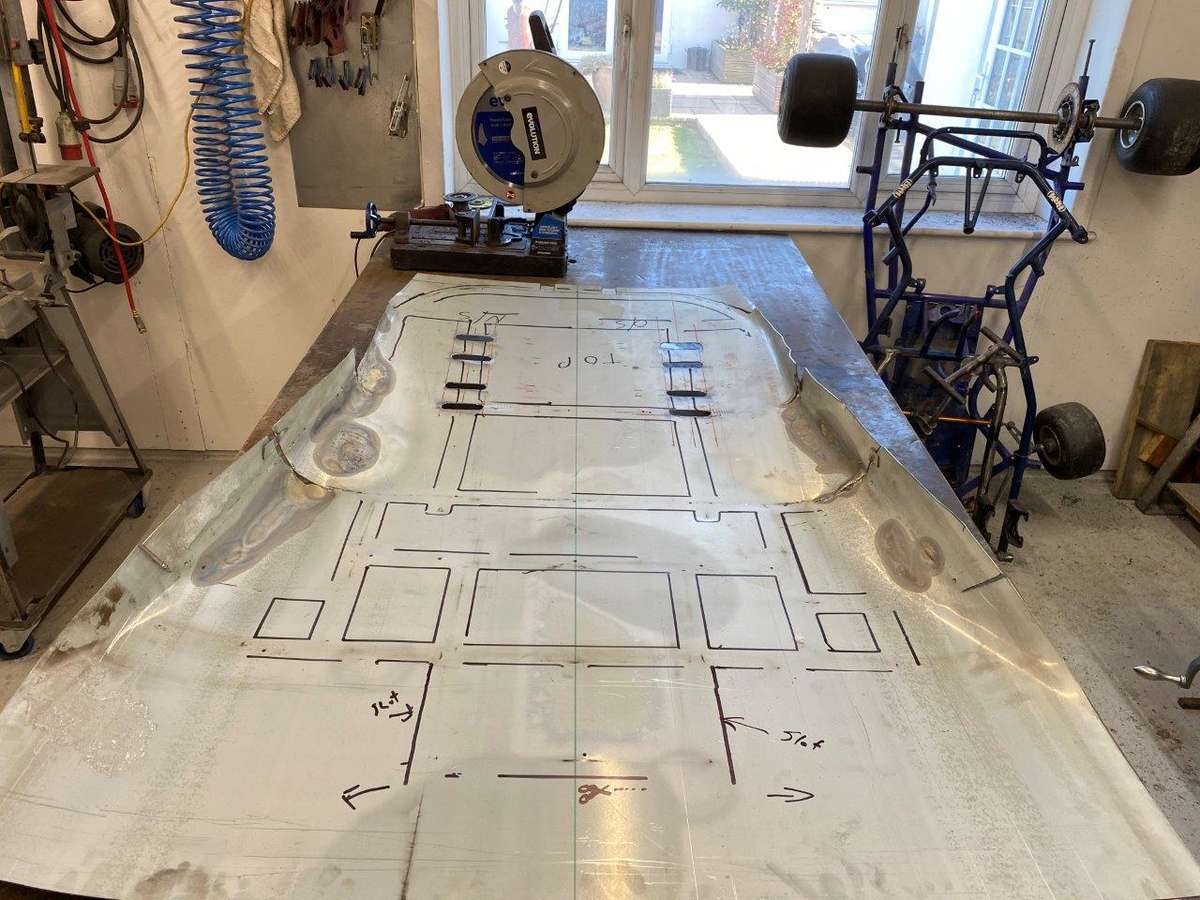
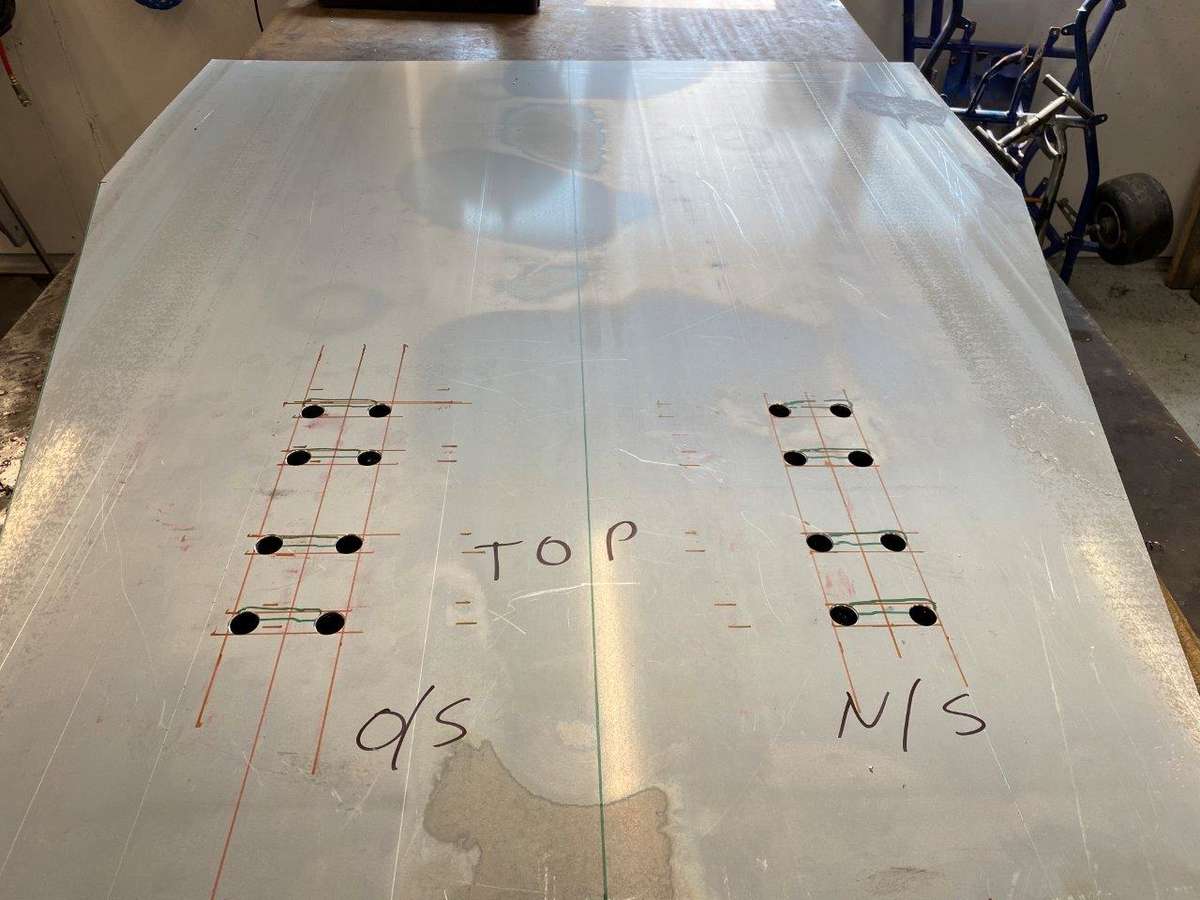
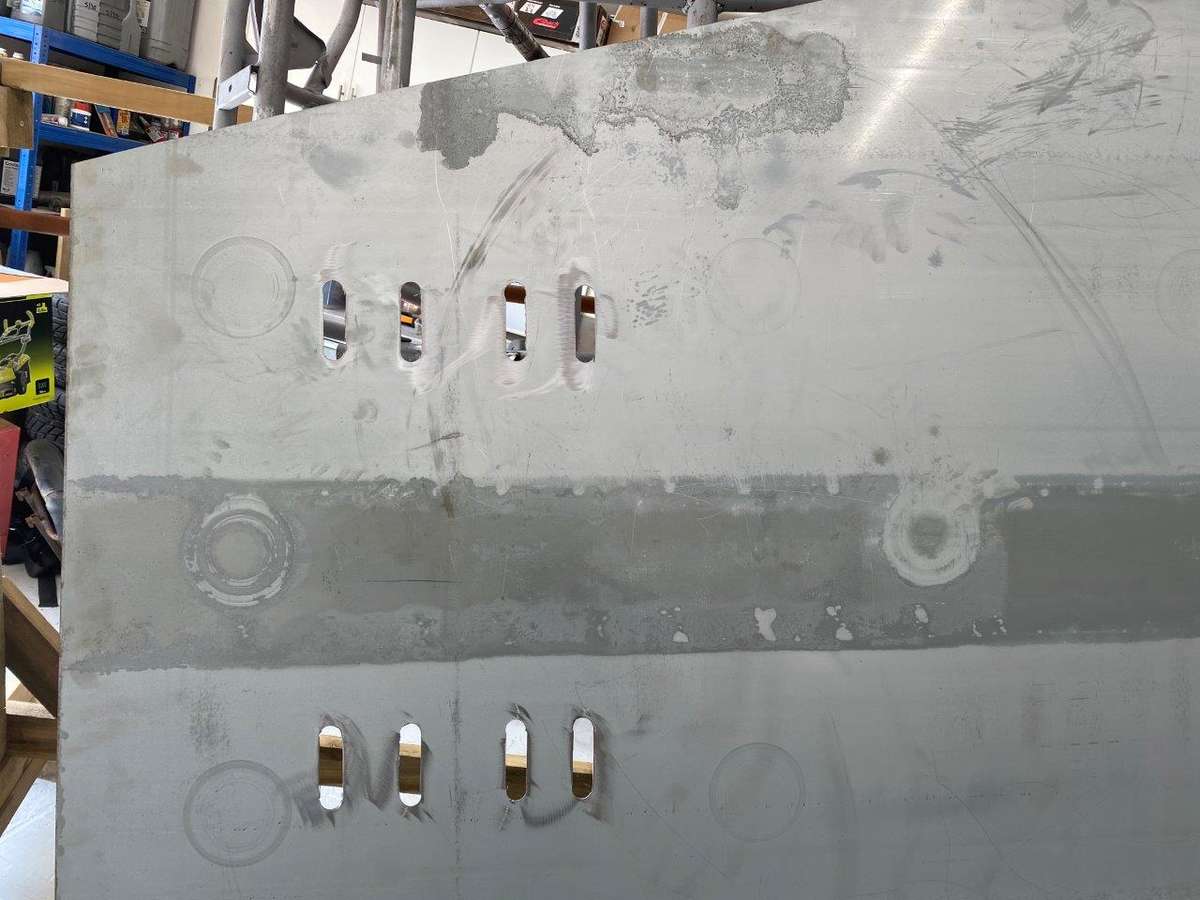
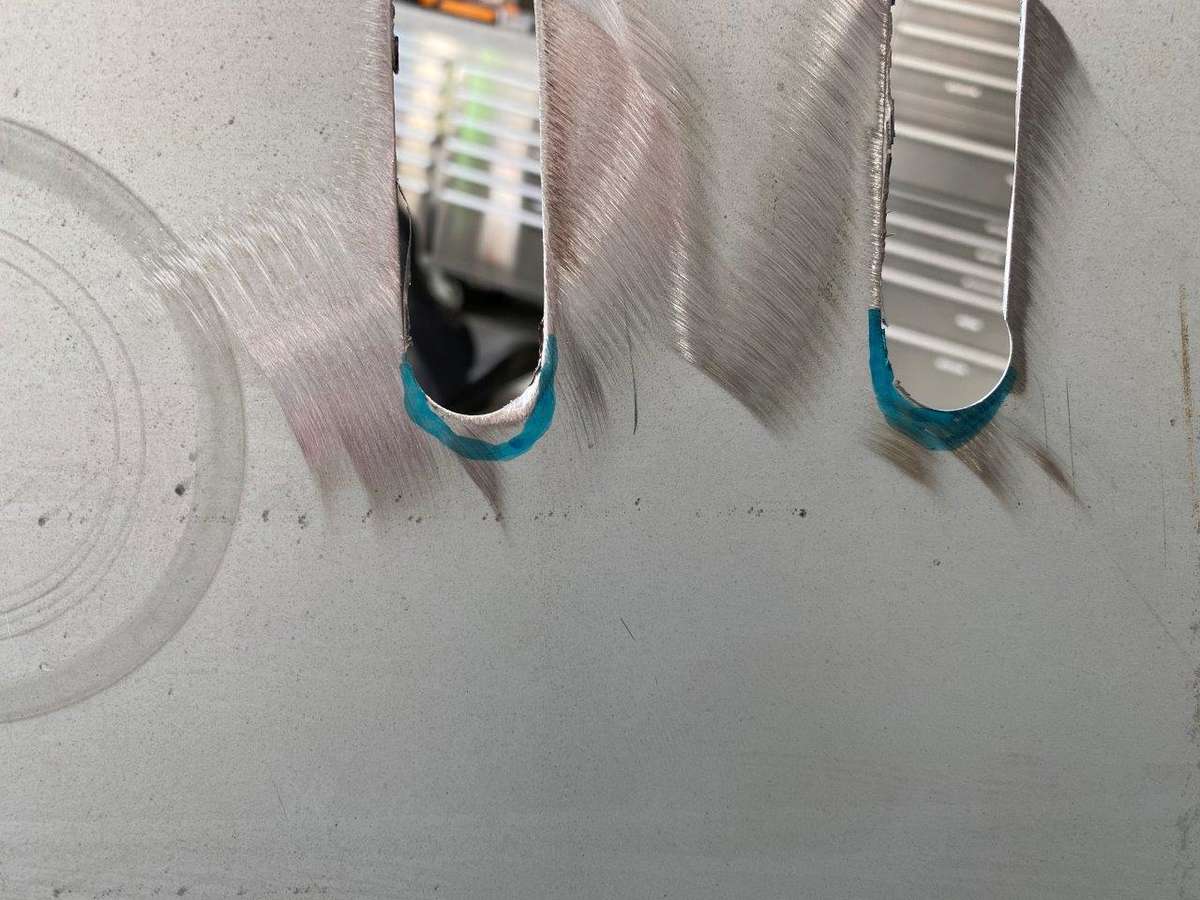
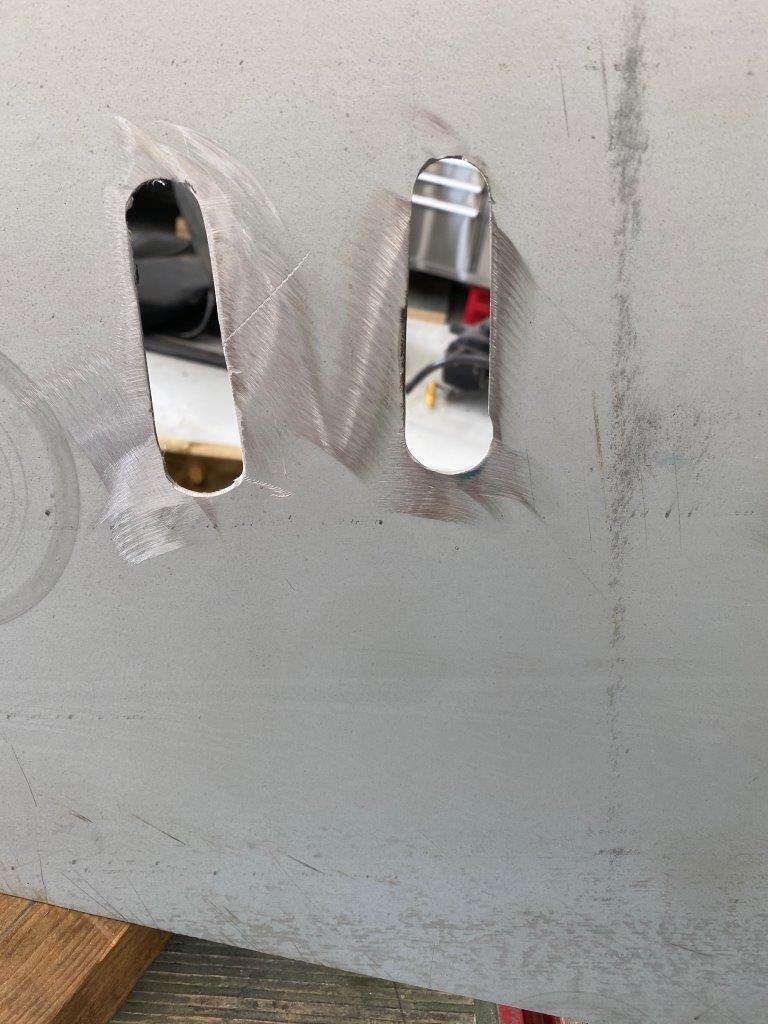
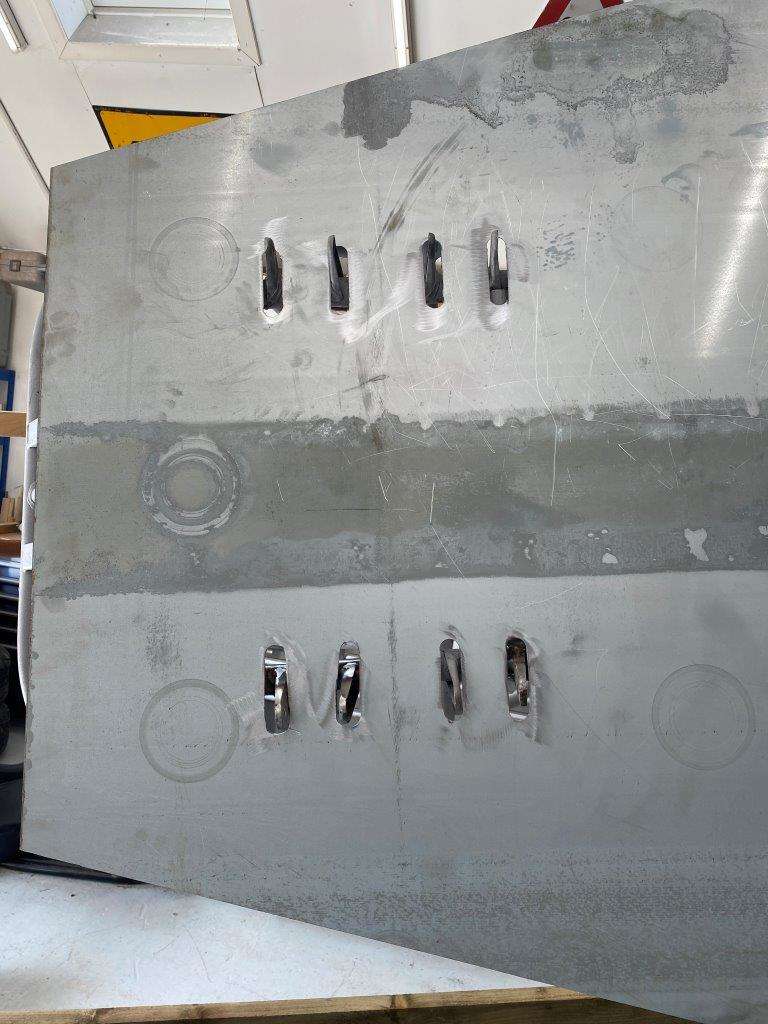
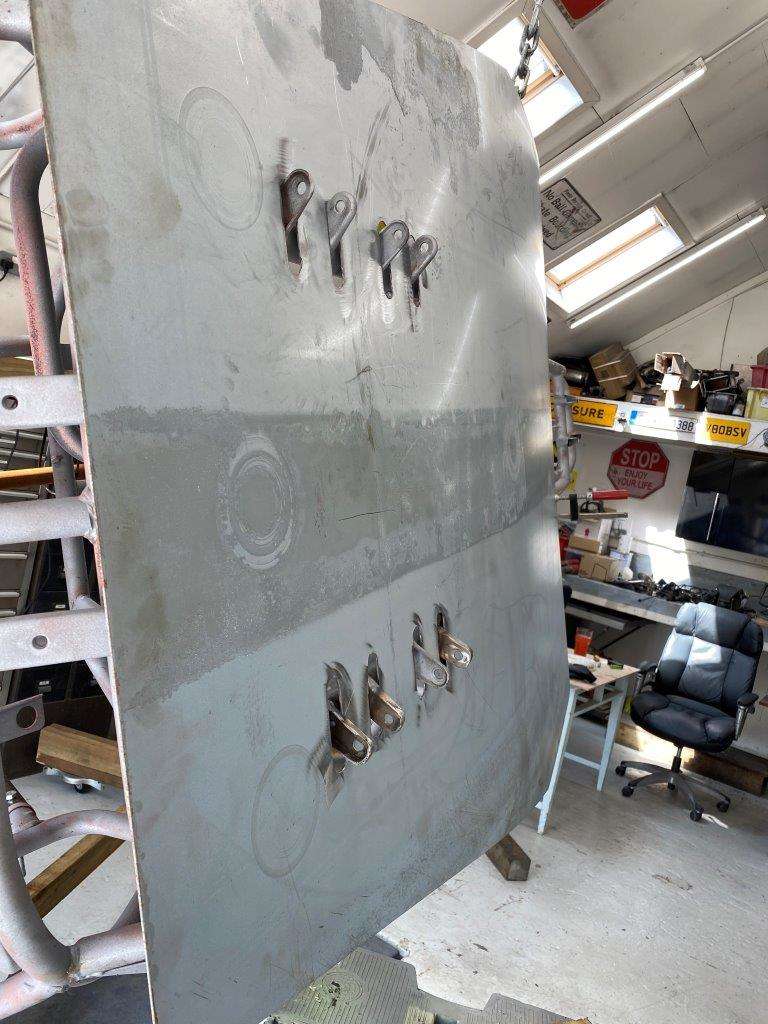
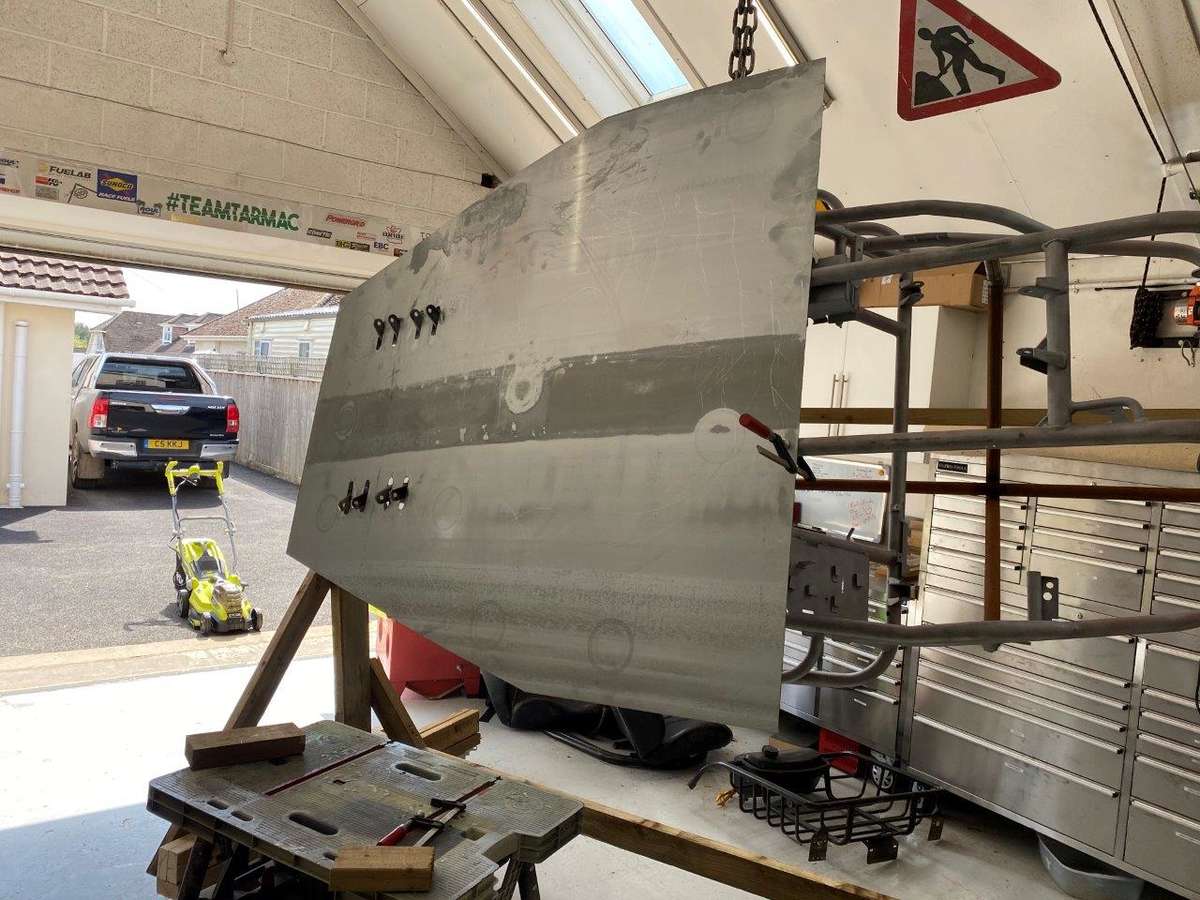
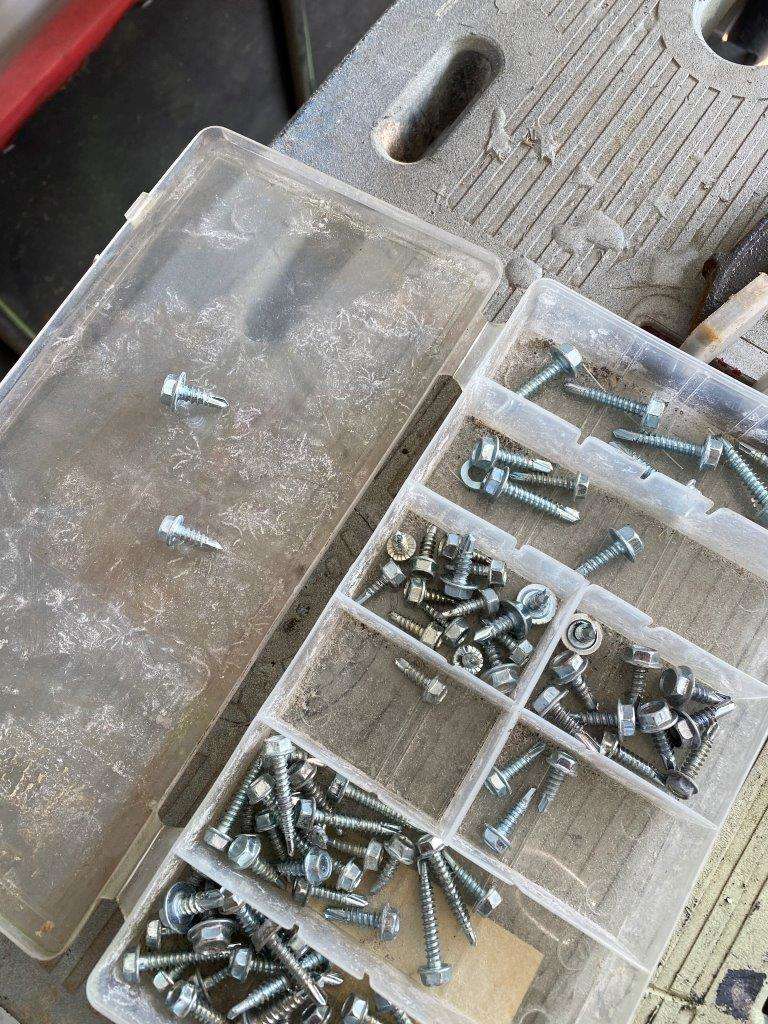
Morning folks, Weekly update from the Zed Shed – no work on The Bug this weekend as I decided I needed to sort a few little jobs and got into a couple more side projects – more on those in later posts But at the end of last week I finished the firewall So the job was to do this bit at the bottom, A good old paper template was needed Transfer to 1mm stee, bent and trimmed to shape Fits like this I used my magnetic “crickets” to hold it in place As I had my obligatory coffee before moving forwards, I was looking at the new panel and it just didn’t work for me – not sure why but I just wasn’t happy to carry on with it like that Its mostly as I have to tie it into the floor pan but can’t weld it as the floor pan is now removable So I binned it and went for a new design in the 3mm steel like this Now before I can fit that I need to take a look at the wiring loom and allow for the pipes, linkages and wires that need to pass through the firewall, it will be a lot easier to do that now rather than later, I did take some pictures to help me keep track, no doubt I will have forgotten something Wiring loom laid out Got my grommet selection out I settled on this lot Then a selection of annular cutters to make the holes (and more coffee) And finished with grommets tested for fit An annular cutter was harmed in the making of this post More coming ………………………..

-
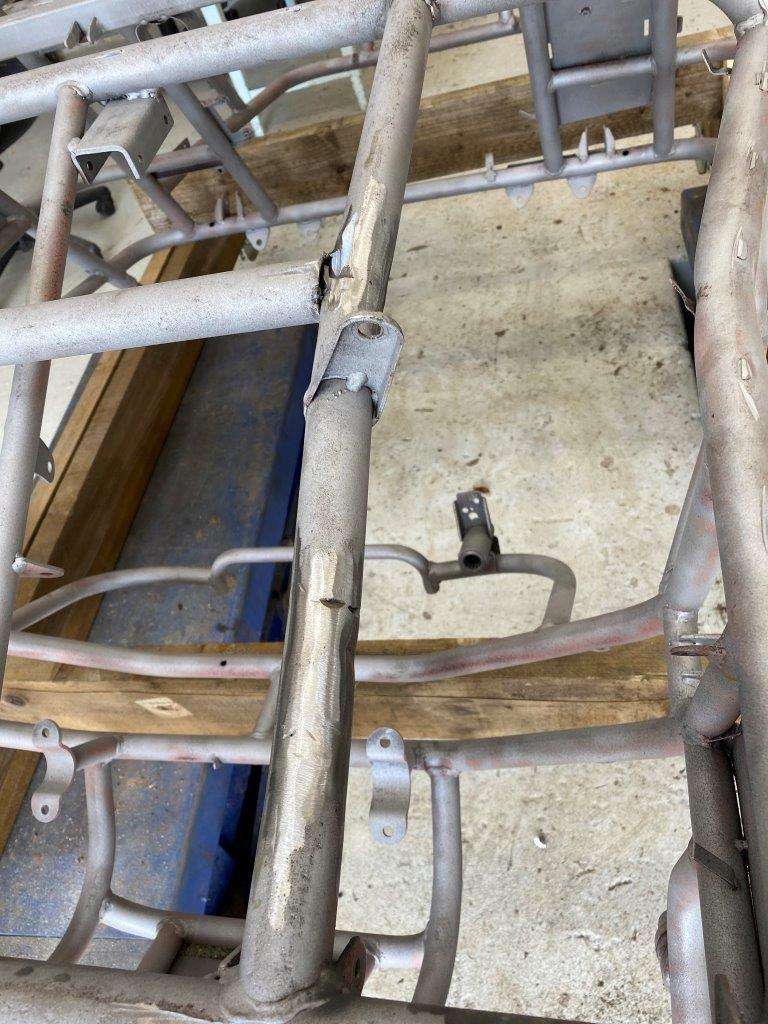
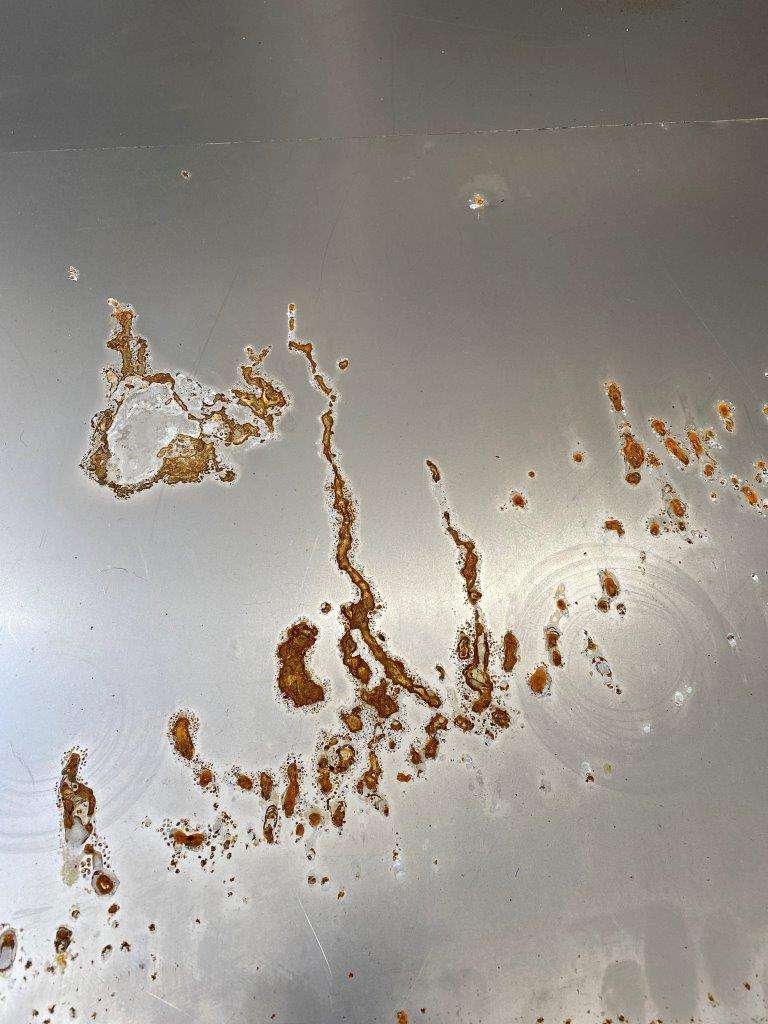
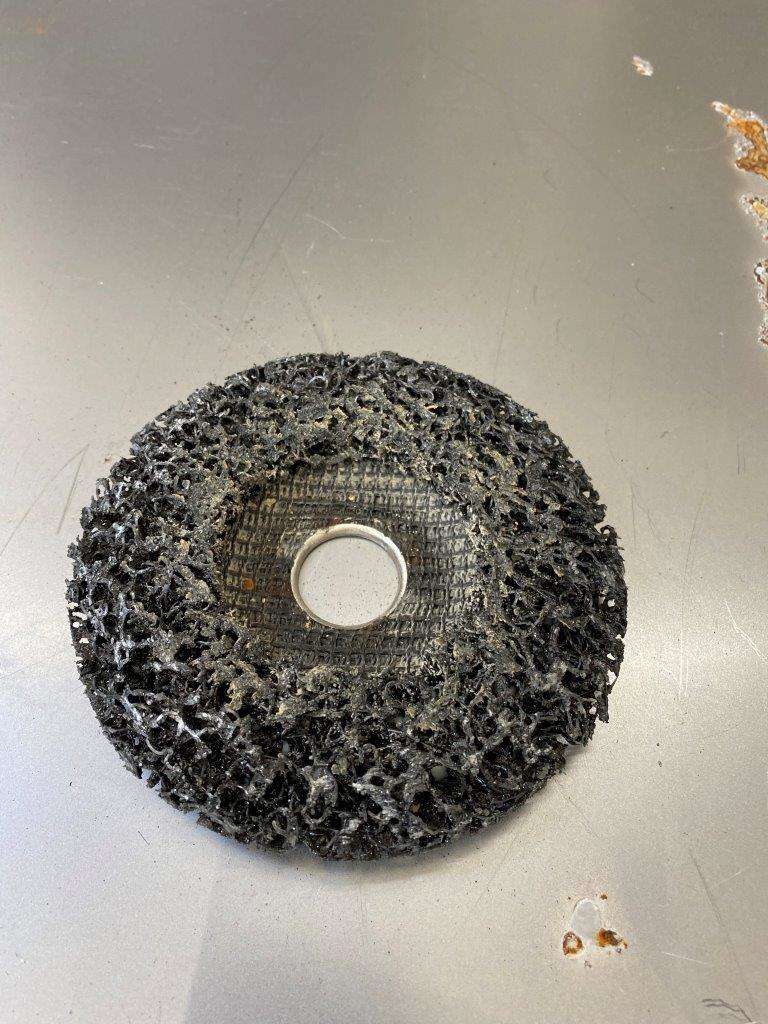
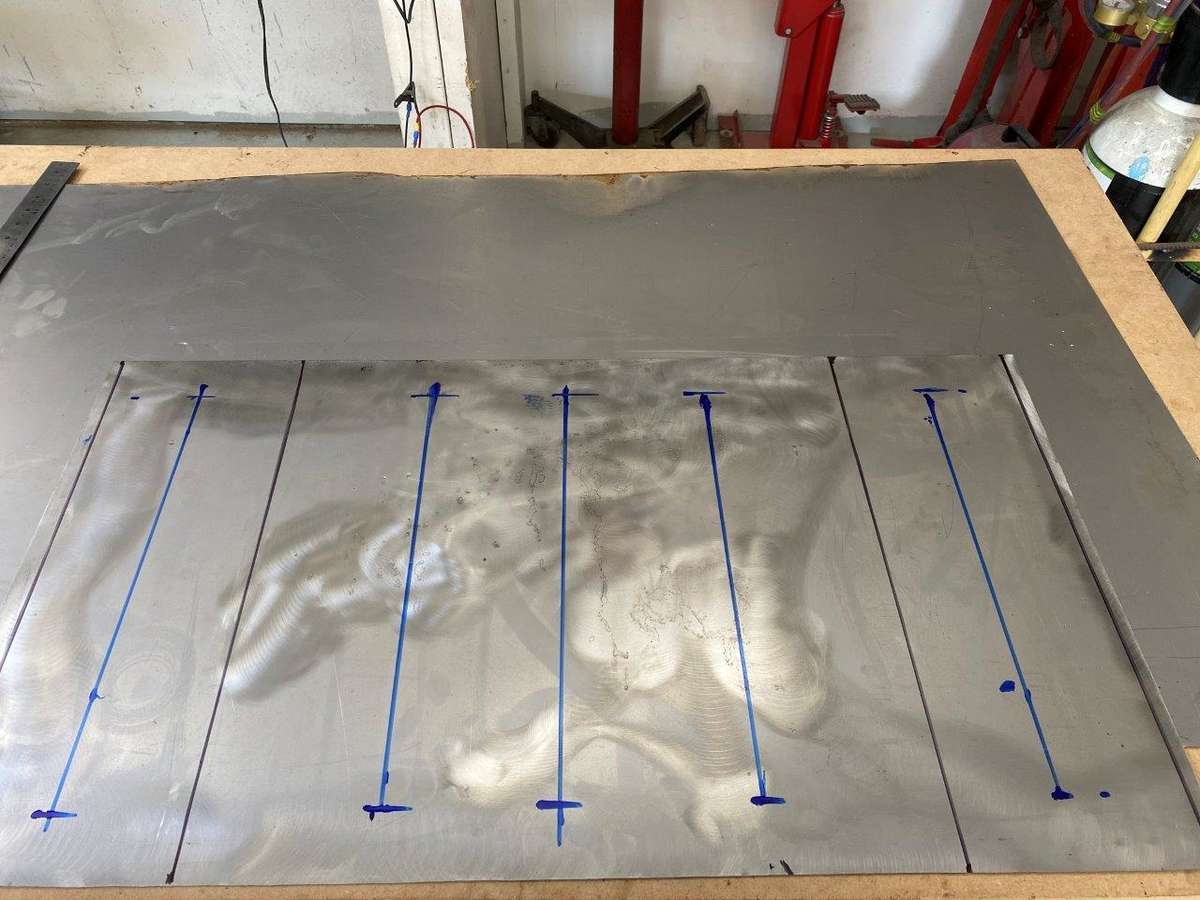
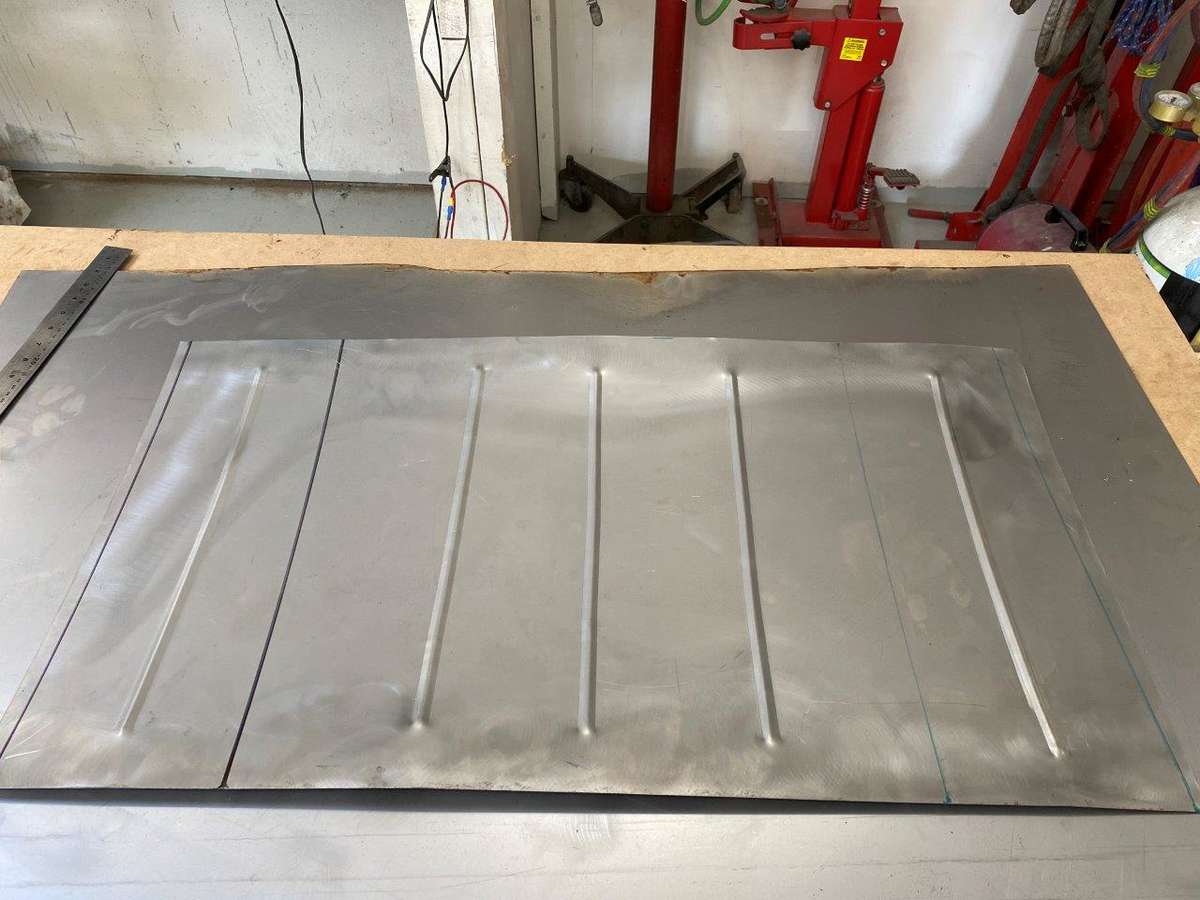
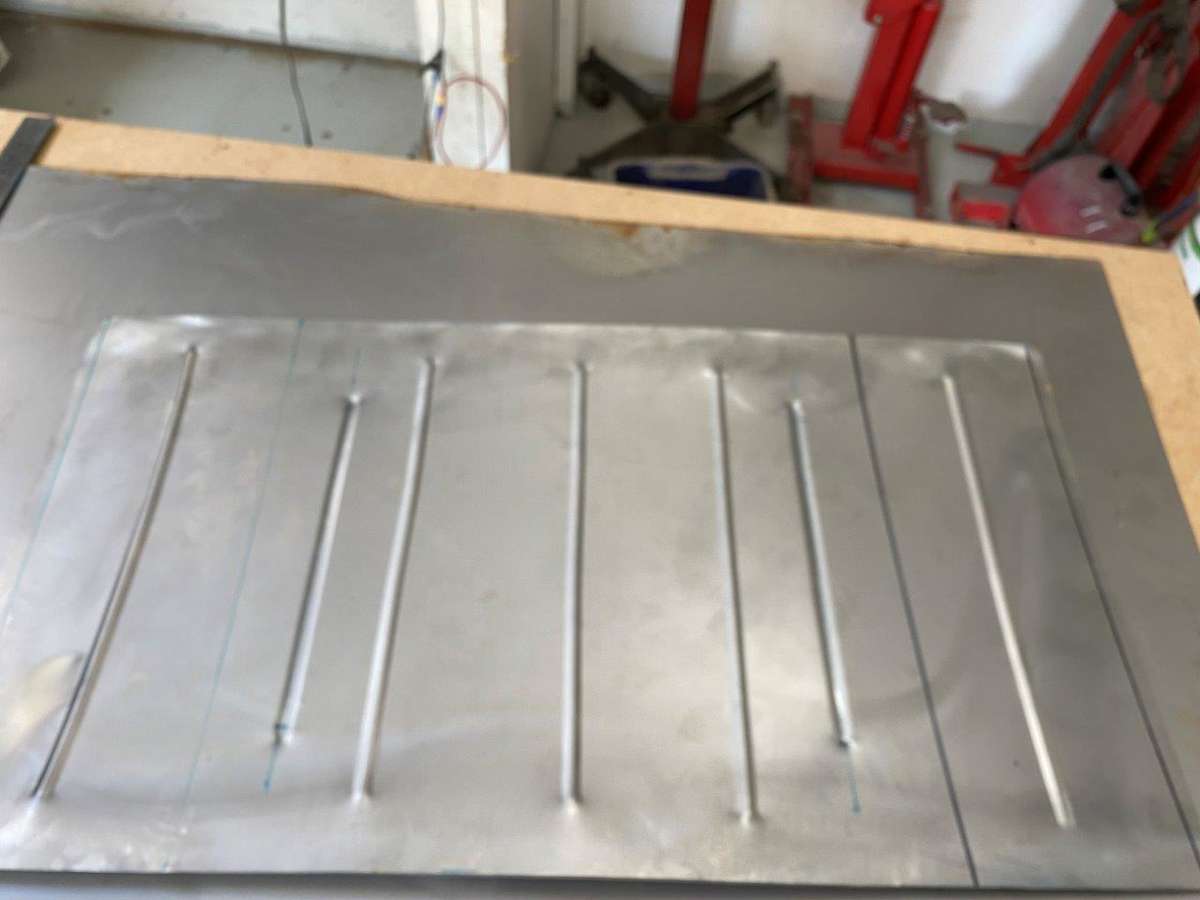
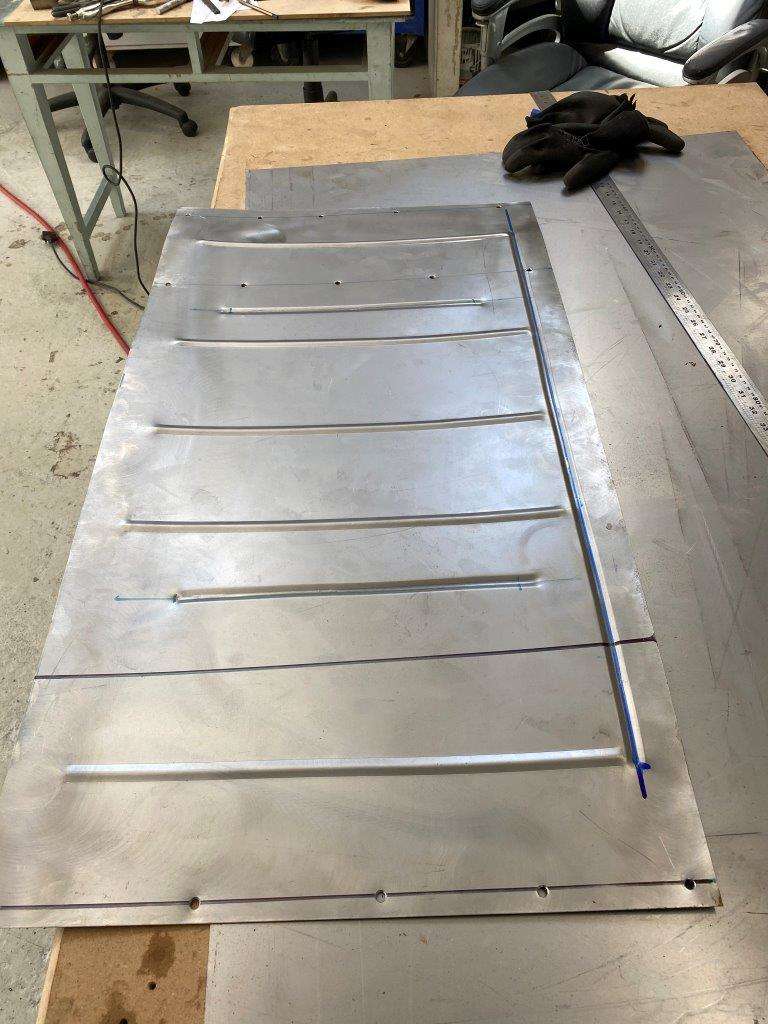
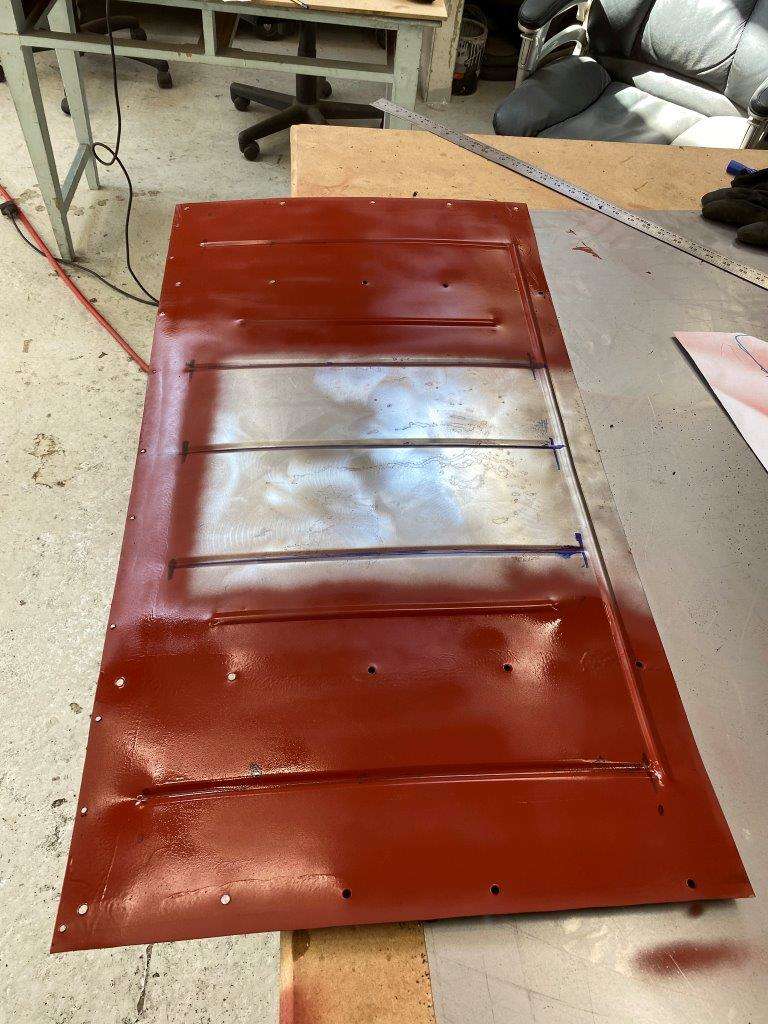
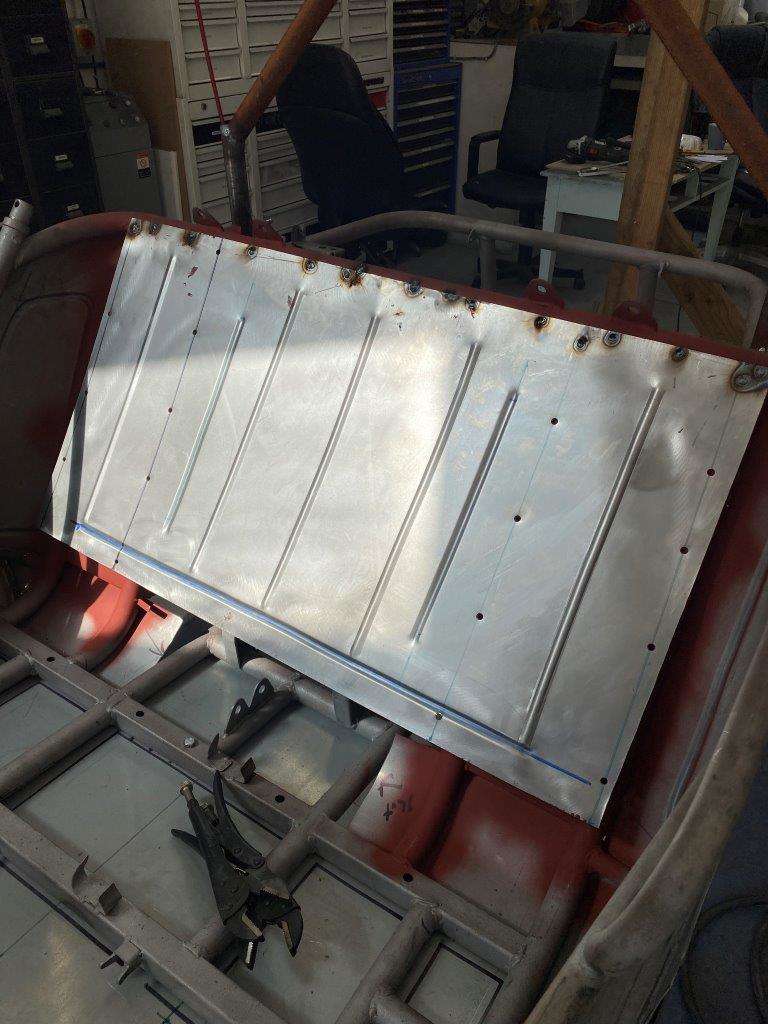
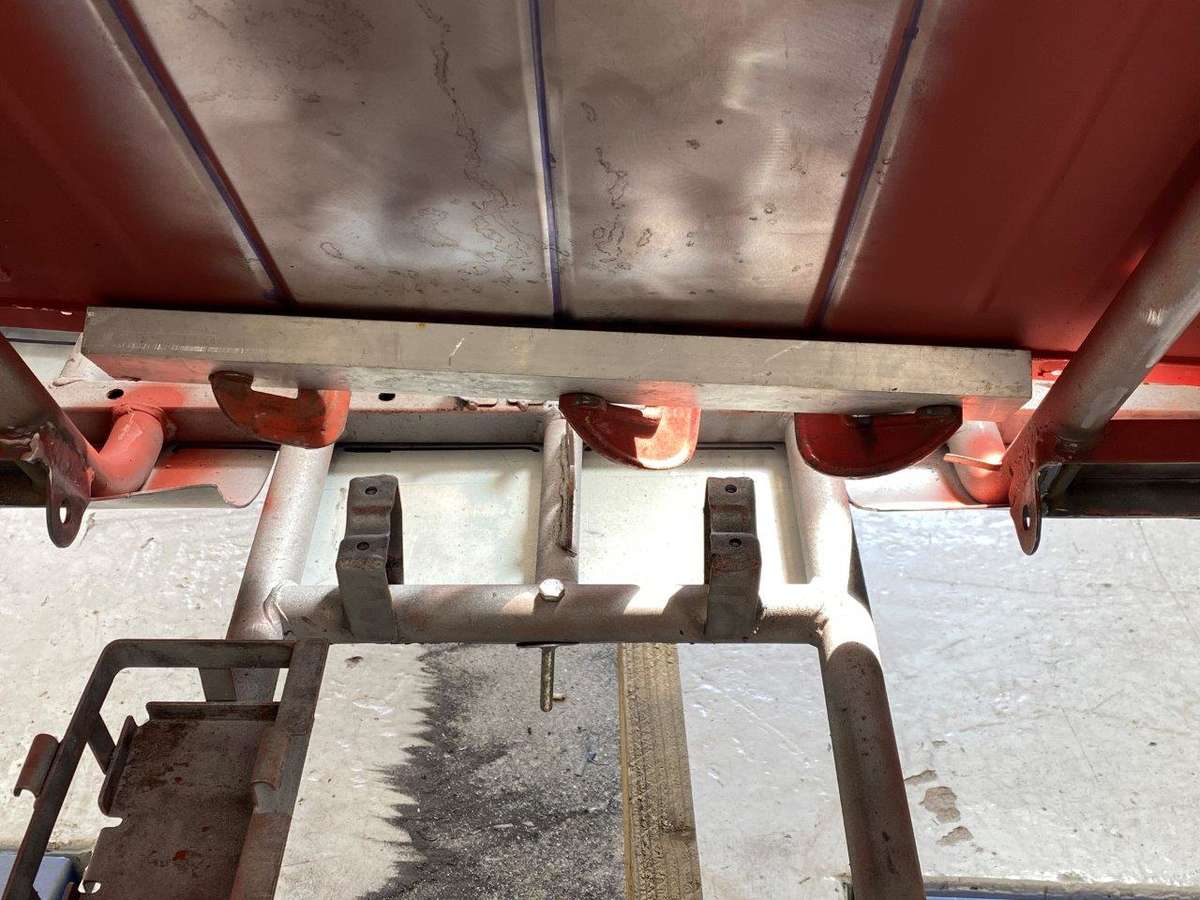
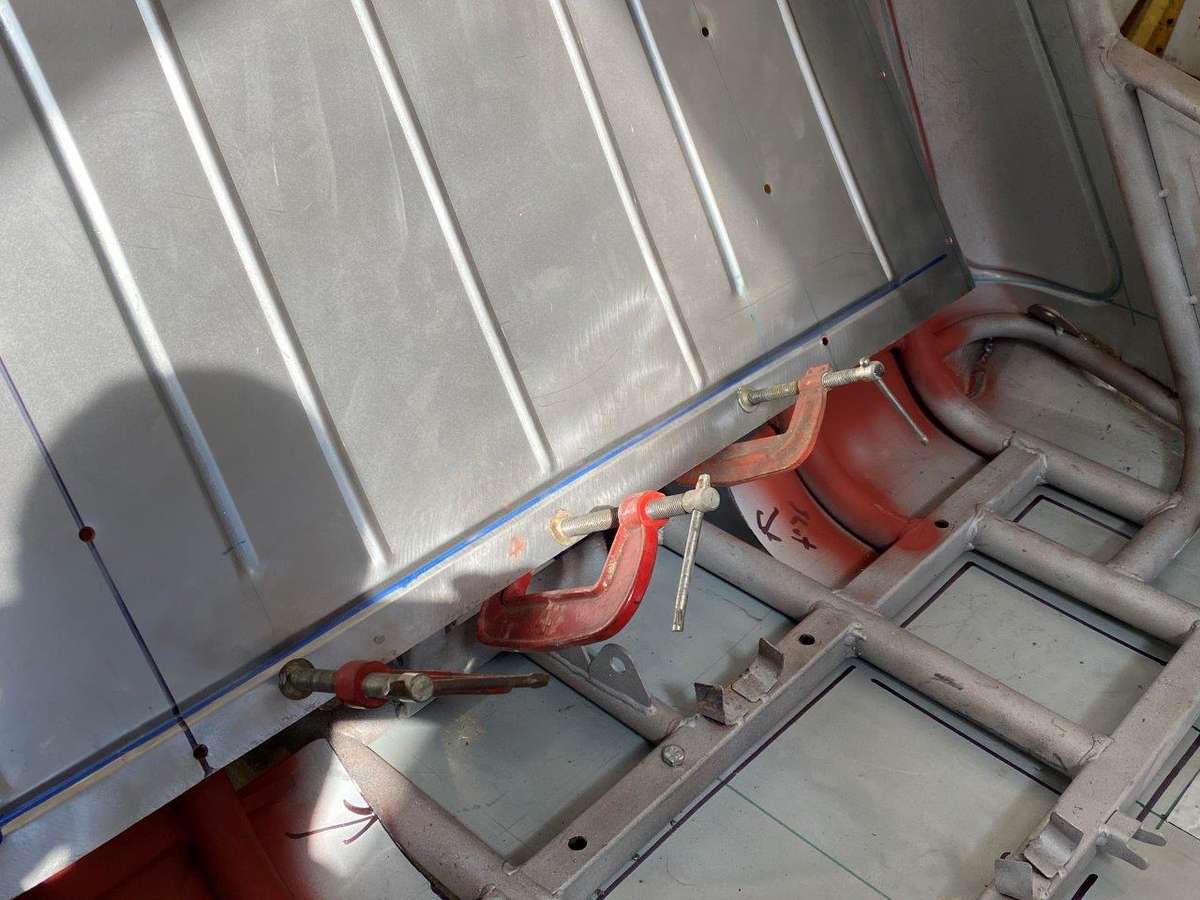
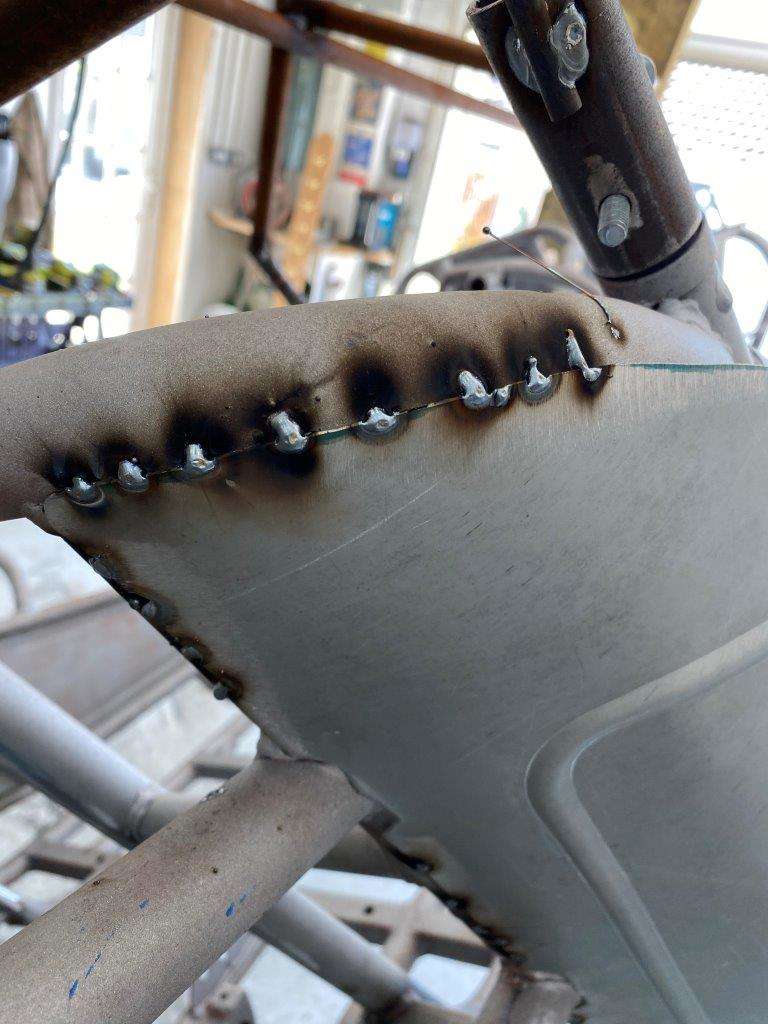
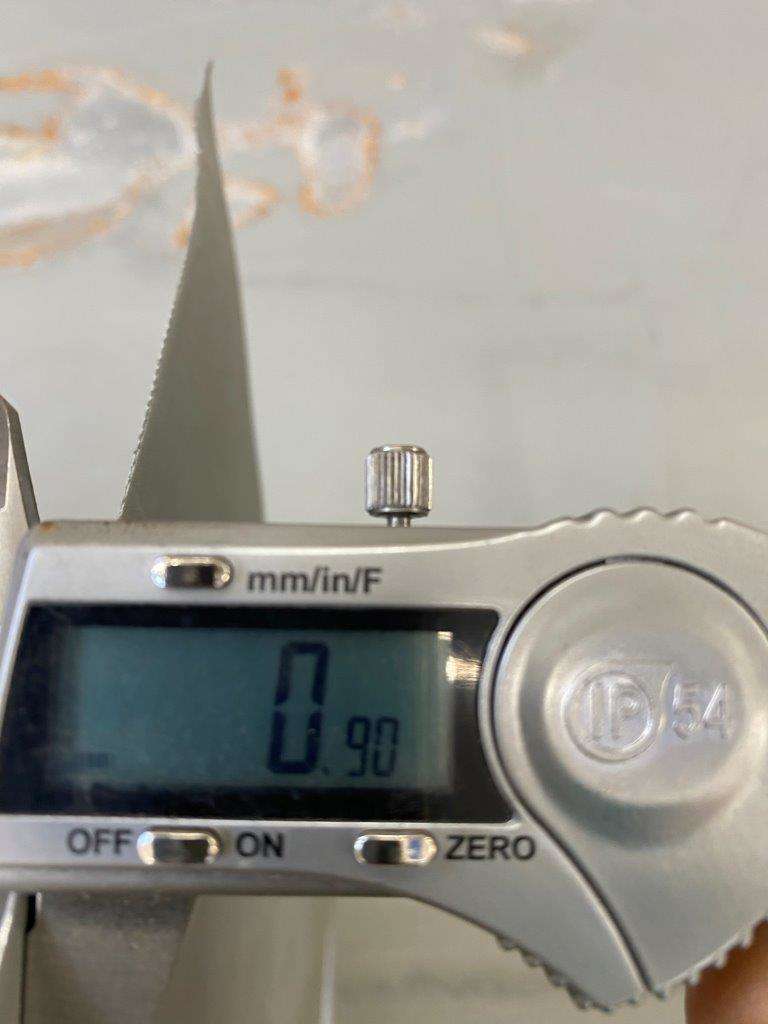
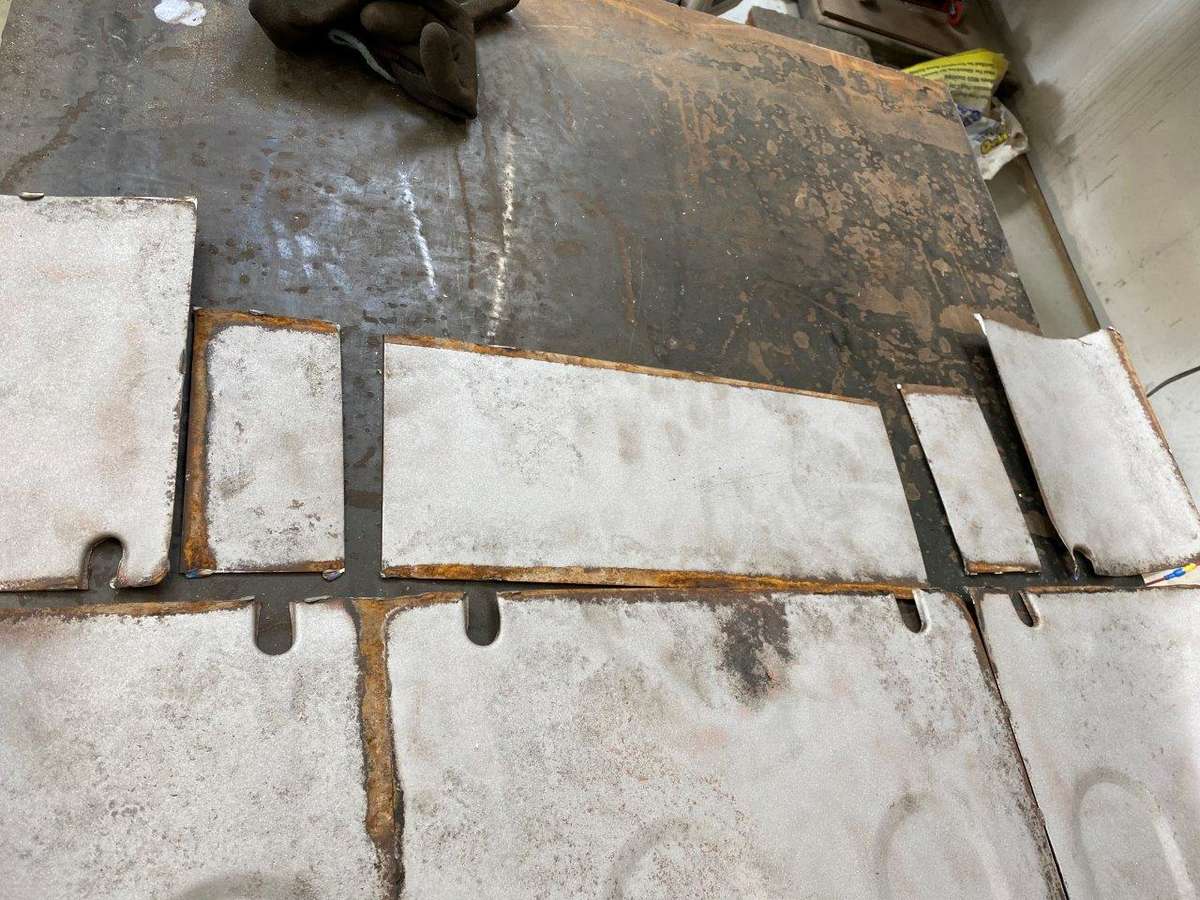
Good morning all, got a couple of hours in again yesterday and have a plan for the weekend but first I need to bring you up to speed on the firewall installation. So starting at the scrap pile I selected a sheet of 0.9mm mild steel – this is just standard sheet no coating so I thought best to use it before the rust gets to it. Well the rust is creeping in I used one of these paint removal disks for the grinder as this is only thin sheet and any hard sanding will weaken it. Got the surface cleaned up OK though I took a few measurements then put some weld through primer on the frame as again paint wont get a good hit on the back edges after the panel goes in. I started by cutting to size then marking where the frame rails will sit Then I marked up for some strengthening beads Ran those in As you can see this starts to put tension in the sheet causing a slight bow I then added 2 from the other side to help counter the bow Then one along what will the bottom as this does not have a rail to support it (yet) I also drilled it for the spot welds Some primer on the back face Clamped it in place and welded the top edge Then I clamped on a spare bar to keep the bottom edge flat before welding Then finished the spot welds and linished back Next I have to sort out the gap at the bottom and tie it all into the removable floor pan. Be Safe Guys n Gals – have a great weekend I will have hopefully have more on Monday for you. Keyser - “Do not whine... Do not complain. Work harder. Spend more time alone.” - Joan Didion

-
Trying to avoid filler if possible - I dont mind a thumb full to hide a weld line but don't want to shape the panles with it - It's probably me but the rugged off road thing keeps me away from filler I want steel - but Thanks for the input all comments welcome
-
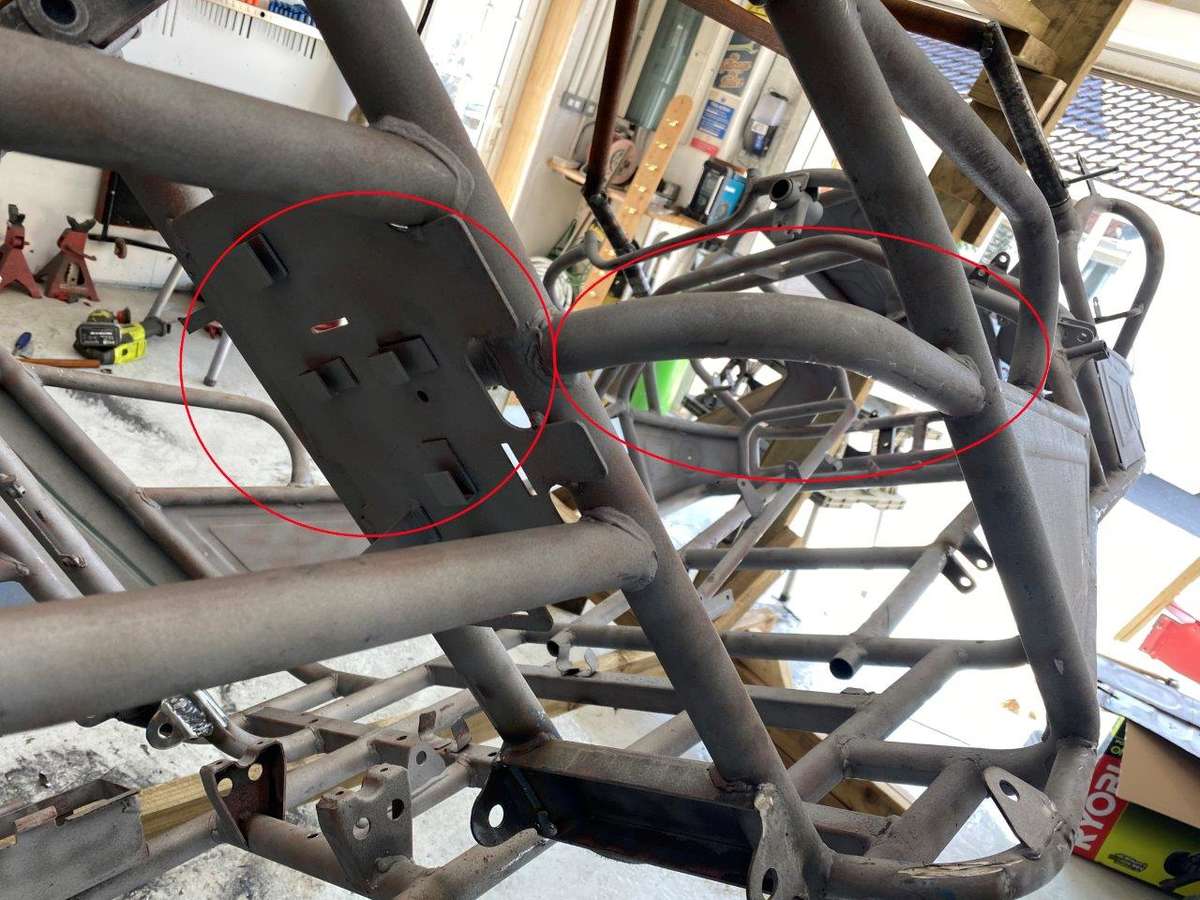
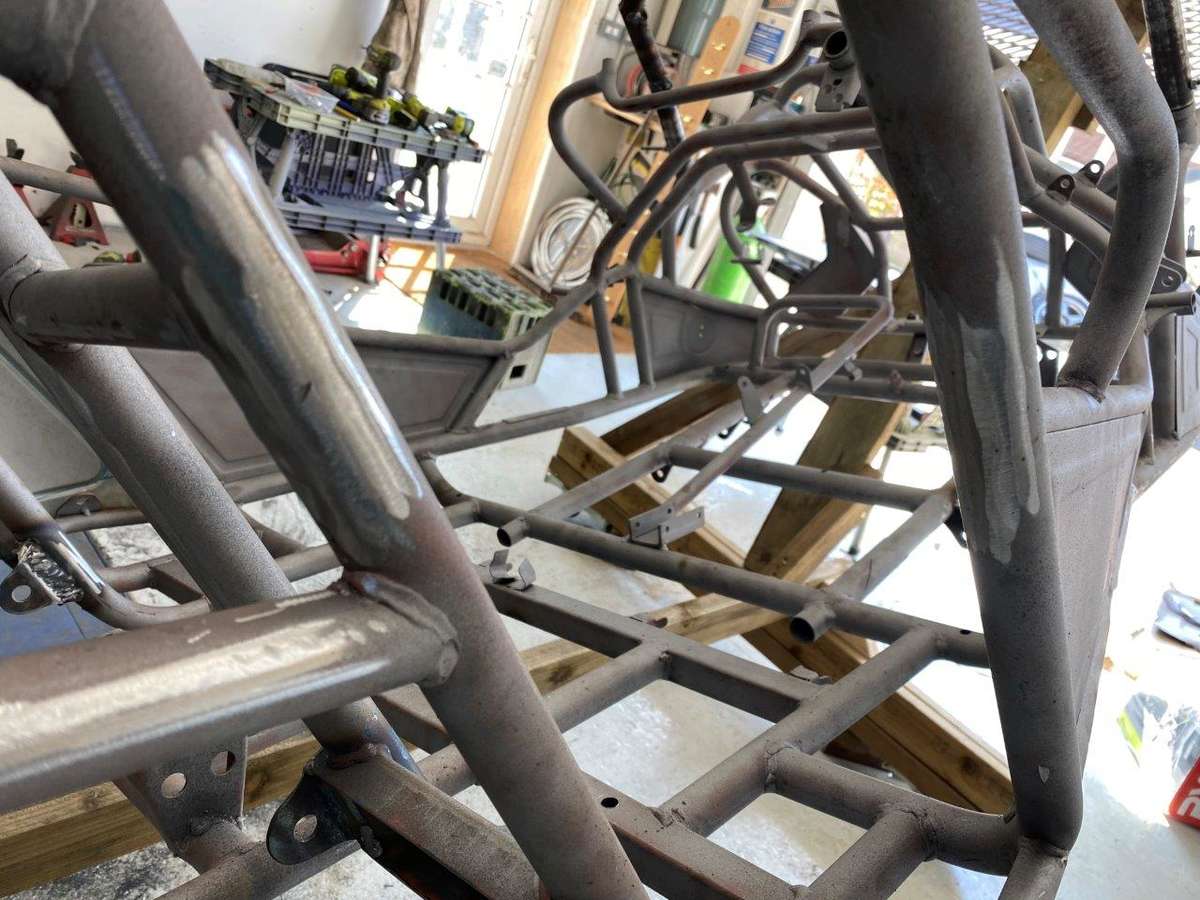
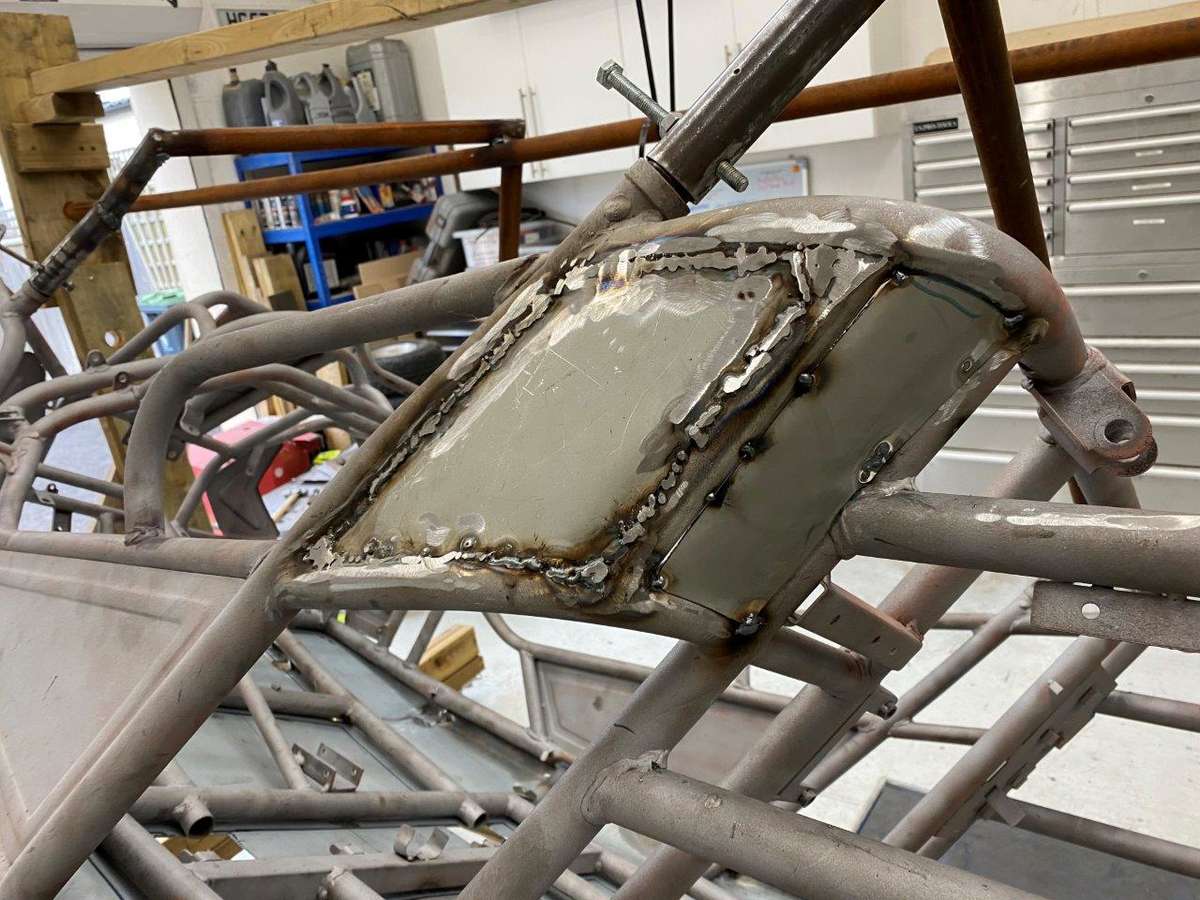
Now by this point I was losing it, stomping about the garage and generally being a bit of d**k, even Mrs K pointed out that if it wasn’t fun I probably shouldn’t be doing it ……. She is the voice of reason, so I walked away for a bit, but I’m a stubborn sod and really wanted quarter panels and a firewall, so with a coffee in hand I sat on my comfy chair and re-thought the problems, The top, bottom and middle rails create a flair as they go up so the top of the cockpit is wider than the bottom, a sensible design feature, but each rail is a different diameter and radius this cause issues in itself with the shape, secondly I was trying to copy the original panels which are set just inside the curve of the rails Although due to lack of quality control they couldn’t get that right or at least not hold it square while welding Made me feel better So I decided to approach it from a different angle thinking outside the box so to speak, This is now the off side as I didn’t photo all the nearside fabrication as I wasn’t sure this would go any better than the previous two disastrous attempts My biggest problem is the multiple radius so the bar in the middle was removed along with the metal plate (both circled in red above – other colours available) the that metal plate is the backing board for the electrical components but it’s in my way, I want to modify it and I wont be able to paint the back after I finish the firewall so I’ll come back to it later Offending rail All gone Then a quick repair to some damage I did when cutting the floor pan to shape No one will ever know A new template Transfer to metal Cut out Marked and onto the bead roller Gives us I needed a different dolly for this job – I just happened to have this very special one in the Shed It’s a custom dolly OK not just a bit of pipe in the vice Anyway it worked Now as I have overlapped the panel onto the frame you can cheat when you weld by starting the weld on the thicker frame then you “push” the weld pool quickly onto the thin metal and power off before it melts (well that’s the theory) Bottom rail weld Side bar Top bar Join the dots OK I’m engaging smug mode now – I actually think that’s pretty neat welding I can’t do to much linishing as it will weaken the ridiculously thin metal I’ll probably just use high build primer and a spot of filler to blend it before paint Any way it looks like this And the nearside got the same treatment Inside And the finished pair Thank you very much What a relief. Tomorrow I may post the firewall build, but I may put some time into the 2nd side project I have (I did mention it earlier) as I need that for the weekend – either way something will happen and the results posted for you to review Keyser - “He succeeded in being considered totally uninteresting. People left him alone. And that was all he wanted.” ― Patrick Suskind I hope he wasn’t talking about me
-
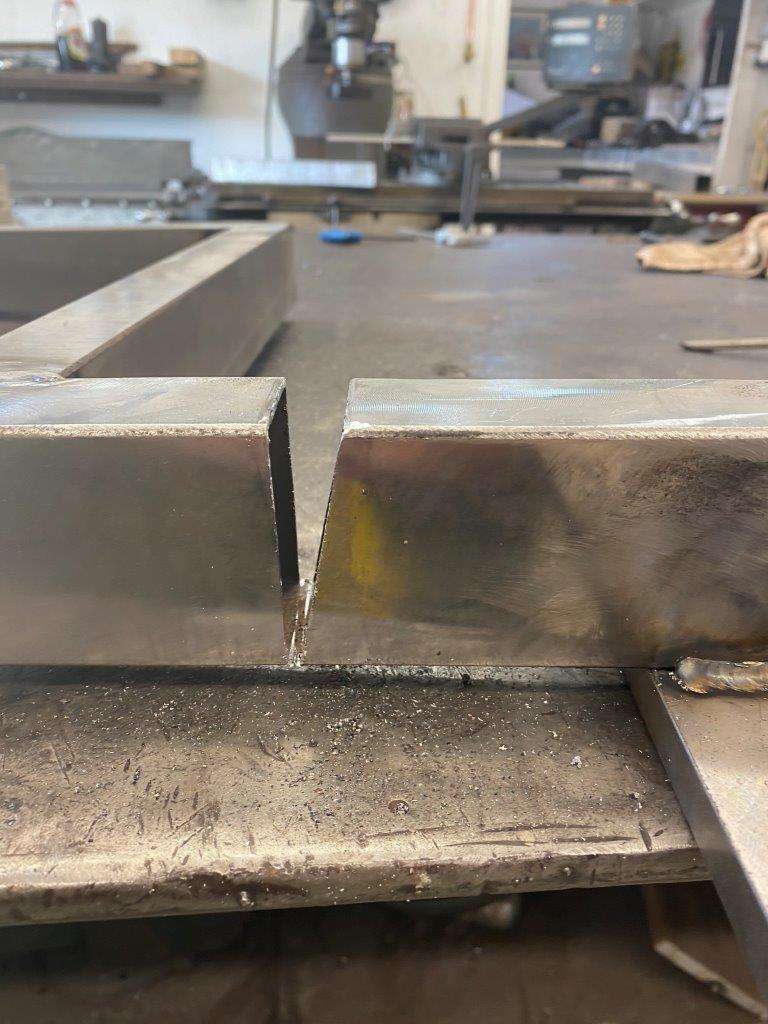
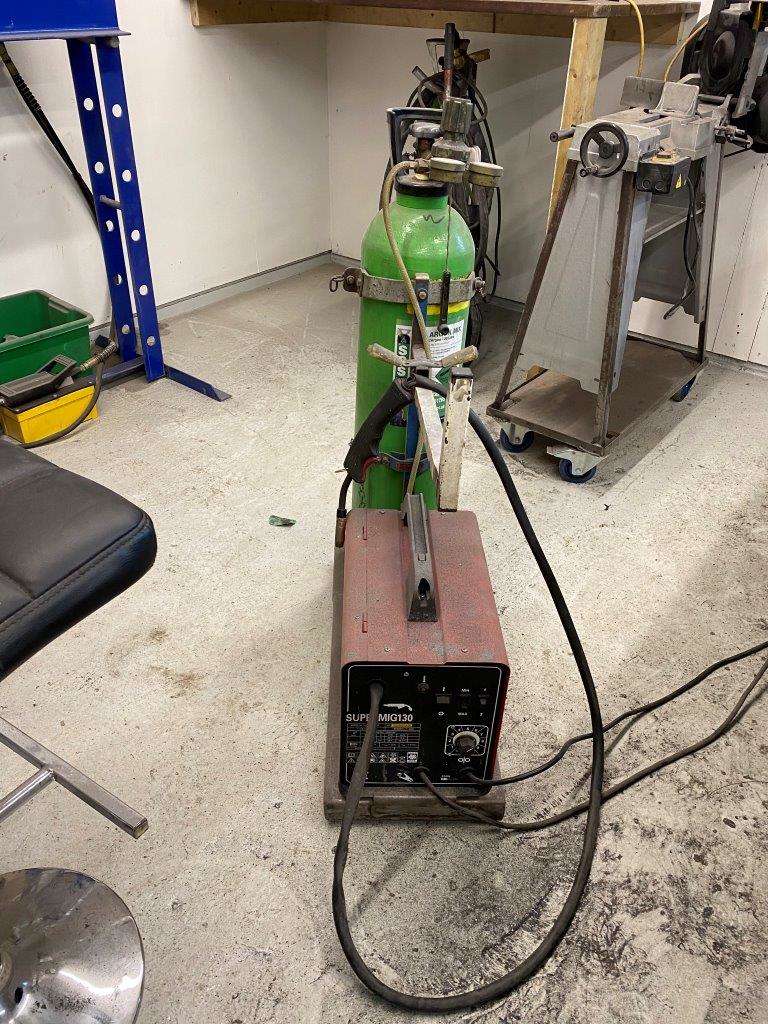
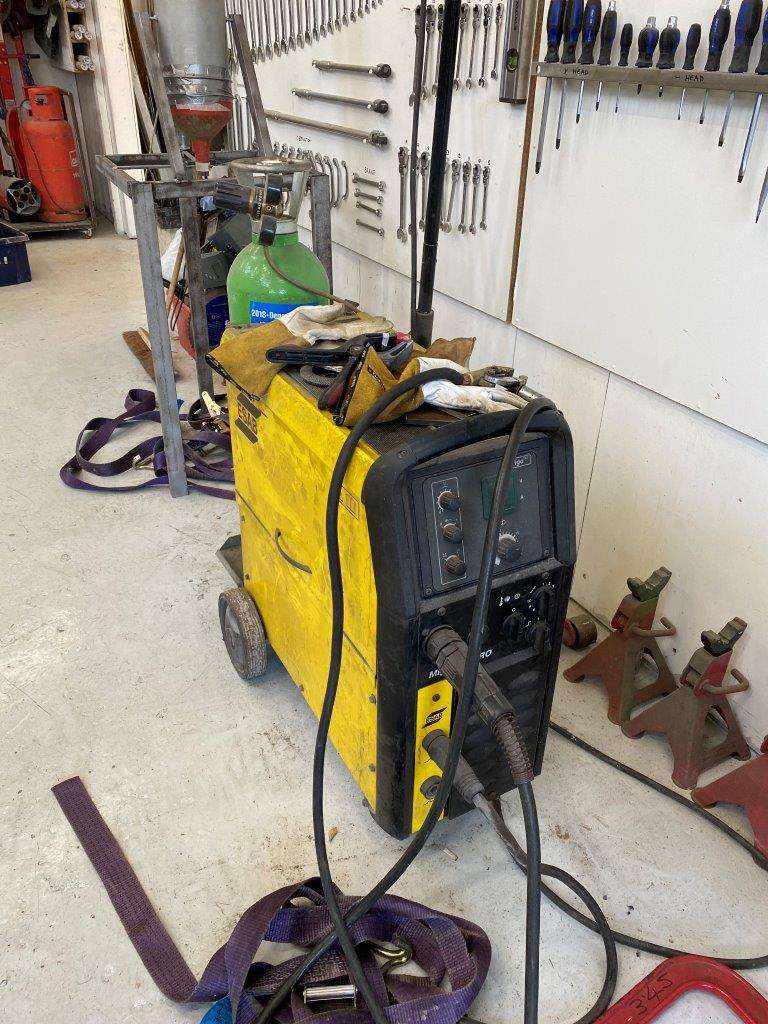
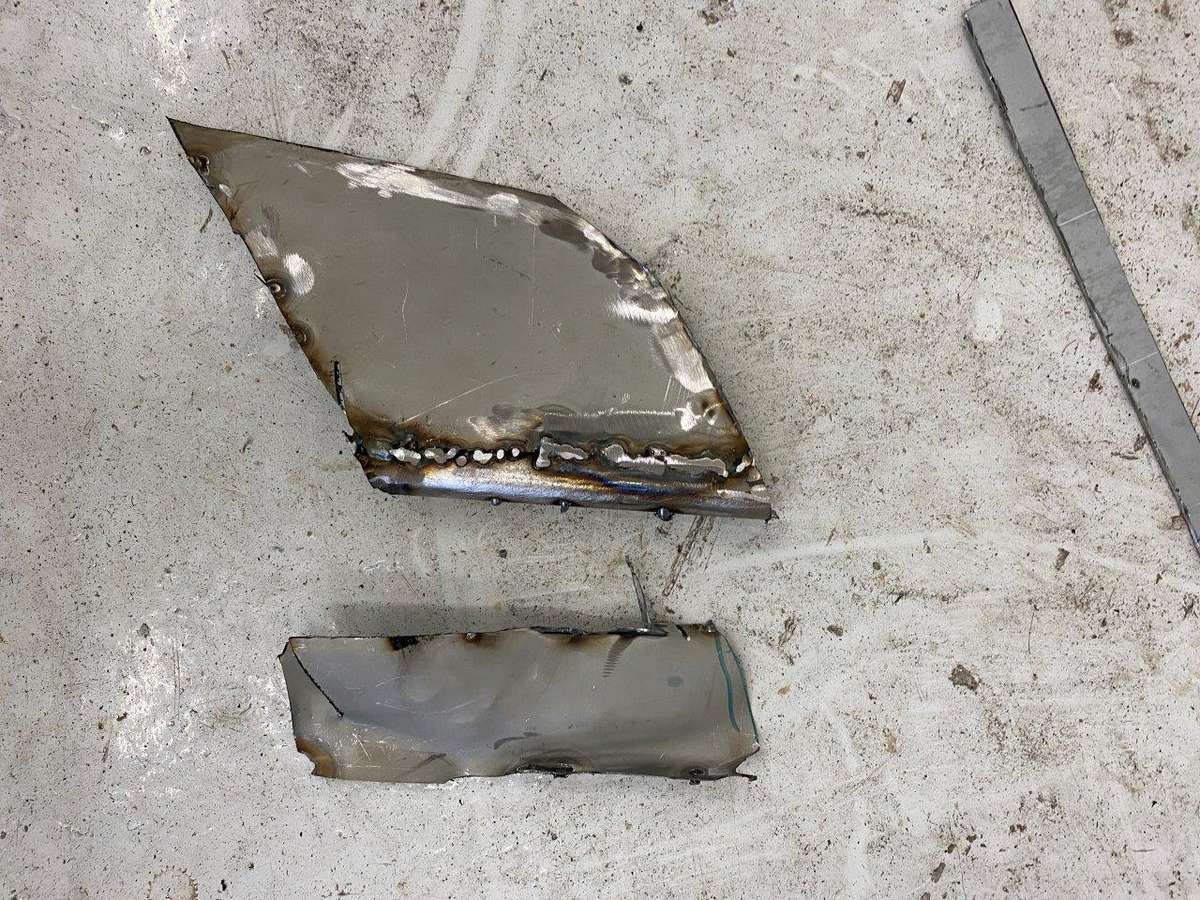
Another day another dollar as they say, or in this case another post. This is not only another big post, well multiple posts as it is hard to keep track of the pictures after 10 – I run out of fingers this is in fact a complete waste of time!! But as you lot have stayed with the build so far I thought it only fair that you had a blow by blow account of the failures as well, I’m not perfect and these modifications are not some bolt on part with instructions and maybe a bit of fiddling to get them to fit. Each part comes from the depths of my mind – that’s a bad place top start and are then built from scratch, and as much as I really appreciate the complements on my work, the pedestal some of you have put me on is completely unjustified cause I can **** it up with the best of them That’s were the famous saying “something will happen” comes from as both @Beb and I are willing to try, the result may be good bad or anywhere in the middle. So please join me in one that I deemed a total failure……….. The plan is to make quarter panels to again reduce the mud splash, protect the seats and ultimately allow me to link them into a firewall as these don’t have one out of the factory – I say factory I think it’s a garden shed somewhere Starting with some good old card To make a template Transfer to metal The lovely shape was gained using a knee, a hammer and a dolly – meet dolly Gets this sort of thing Then I marked it out for some bead roller action – that’s this thing, I added a motor to it ages ago so it’s a one-man operation Marked out for said roller No pic of it rolled That was then welded into the frame I know you are most likely thinking that it looks s**t – I know I was!! The weld is bad – I’ll explain that in a moment – and it’s not a uniform curve, this is because the top frame rail and the one below it are both a different diameter and a different radius, I can do very basic panel beating but this needs the art of shrinking and stretching, a lot of it and I’m not that good, if these were mass produced they would be done in a HUGE 1000 ton plus preformed press, but I couldn’t find one cheap on eBay so after many hours trying to make it look good I gave up and ripped it out I thought I know if I put a separating bar in the corner and make 2 panels it will look much better Apparently, I couldn’t have been more wrong that looks worse than the first attempt!! The welding is ugly because I’m using 0.9mm steel so it is light which is fine, the issue comes from welding it to the heavy frame at the edges, I have 2 Mig welders my favourite This is my 3 phase Esab and it is an amazing welder, I acquired it cheap from a cattle grid fabrication factory that was shutting down, The fact that it is 3 phase leaves a very small customer base and keeps the price down, but as I have 3 phase I win Then I have my Hobby welder This is your average £150 Mig welder it is a SuperMig 130 (nothing super about it) it is OK……. just. Now the Esab runs .08 to 1mm wire and the heat it generates to melt the wire literally melts the thin metal before you can run a weld, the 130 runs .6mm wire which is about right for 1mm steel, the problem is getting it to run hot enough to achieve penetration on the thicker frame steel. Well that’s my excuse, you could also argue a bad workman blames his tools so I’ll let you decide if its me or not Anyway back to attempt 2 Yup that got cut out and binned as well! I told you it was a waste of time. More coming ……………………………………………..

-
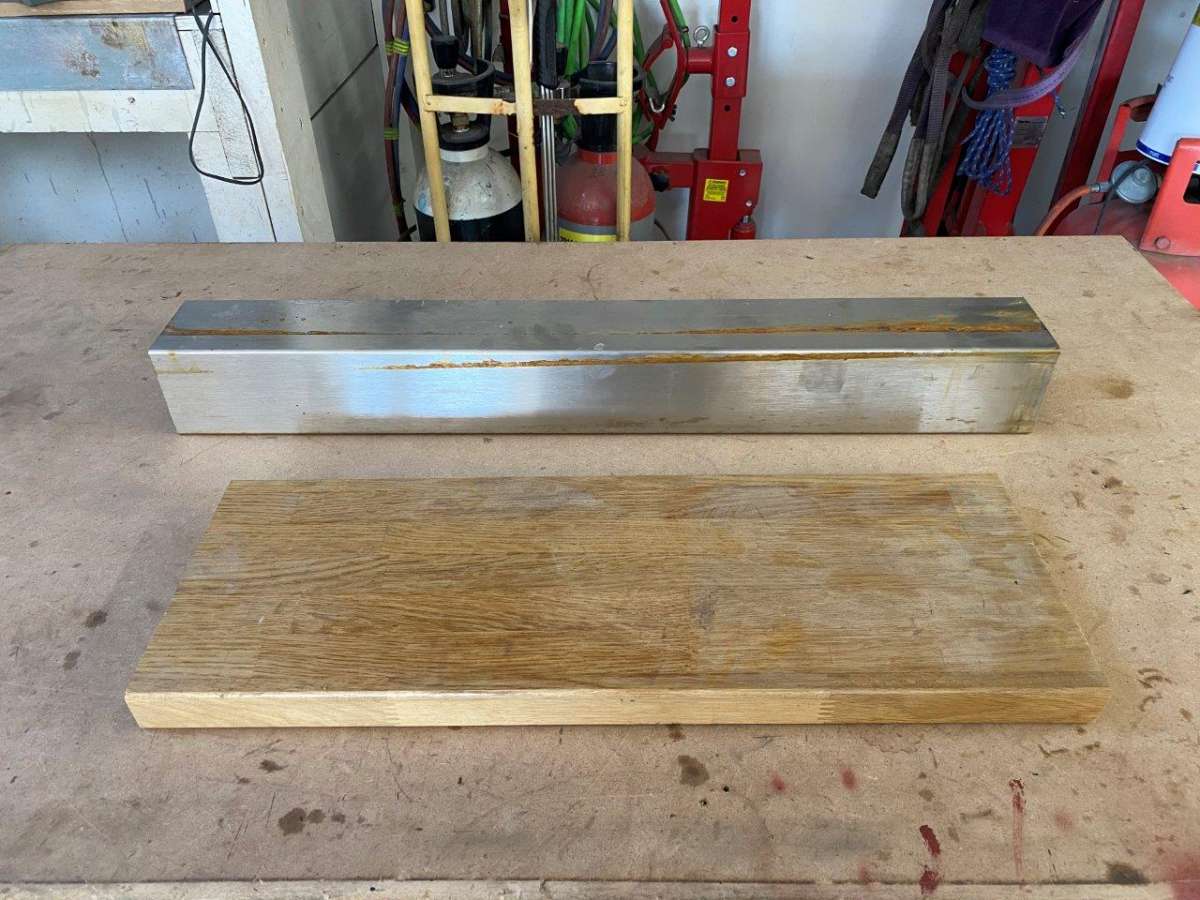
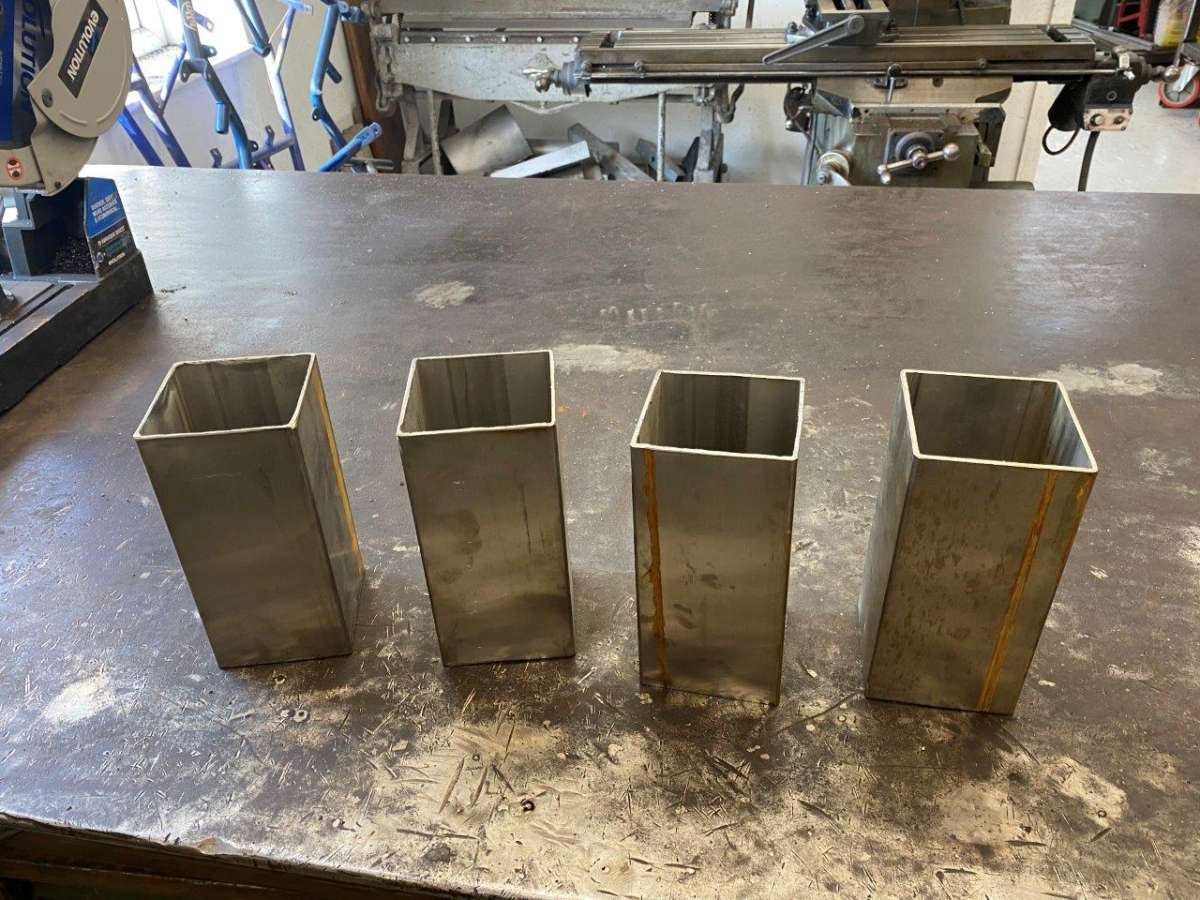
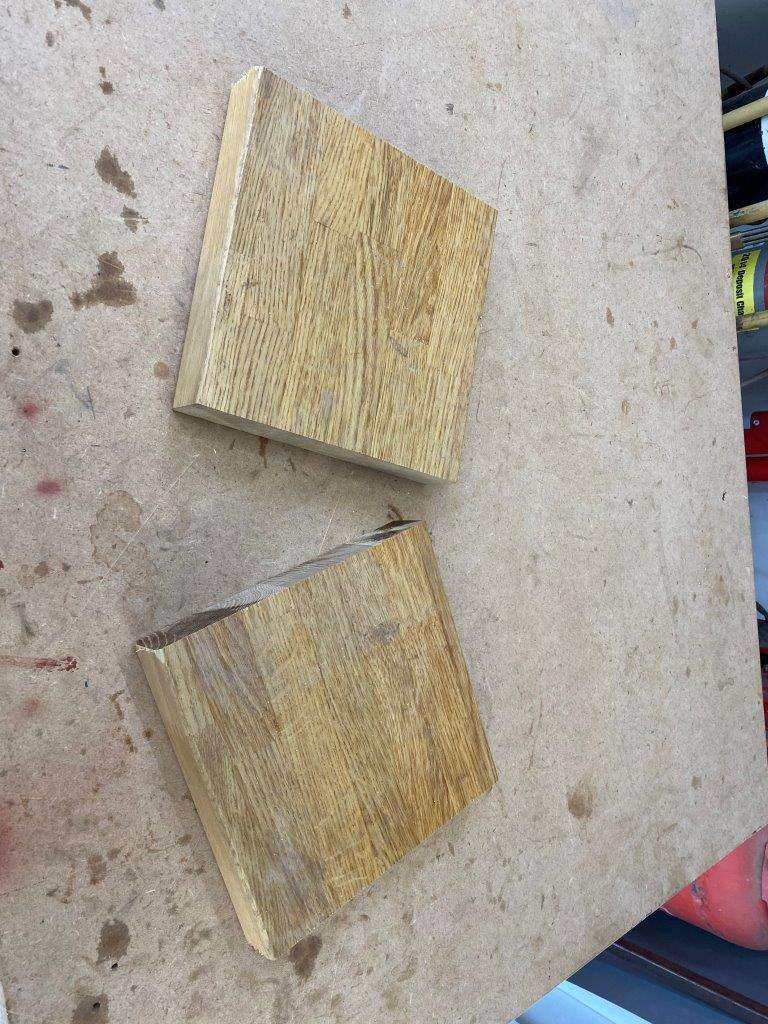
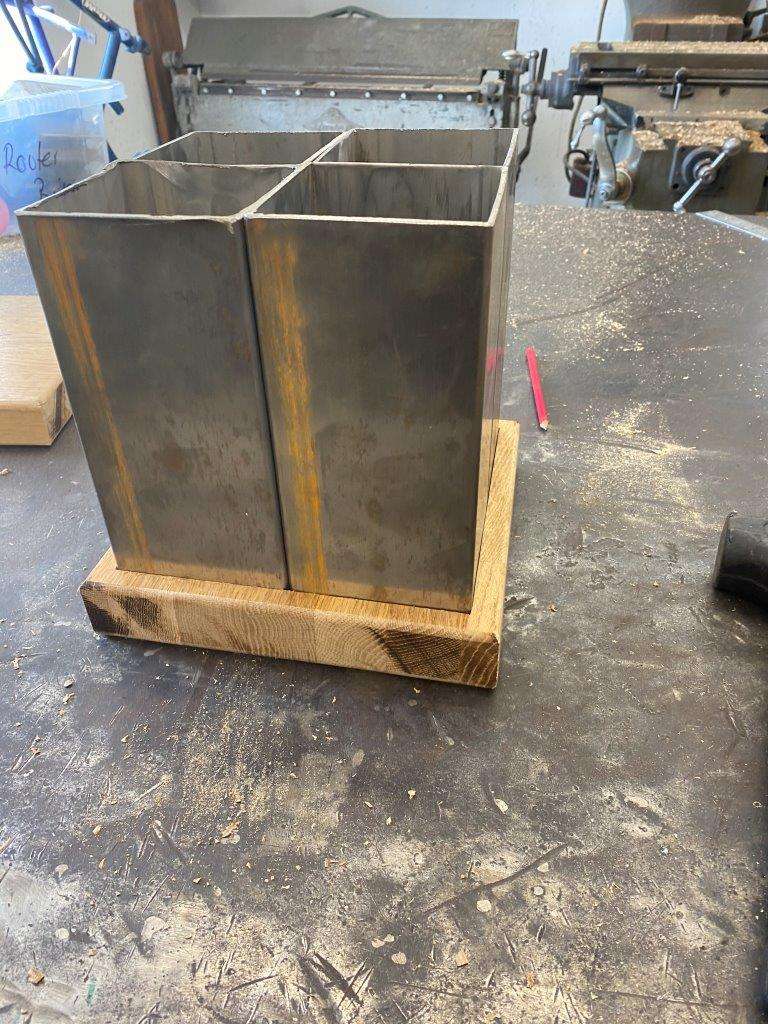
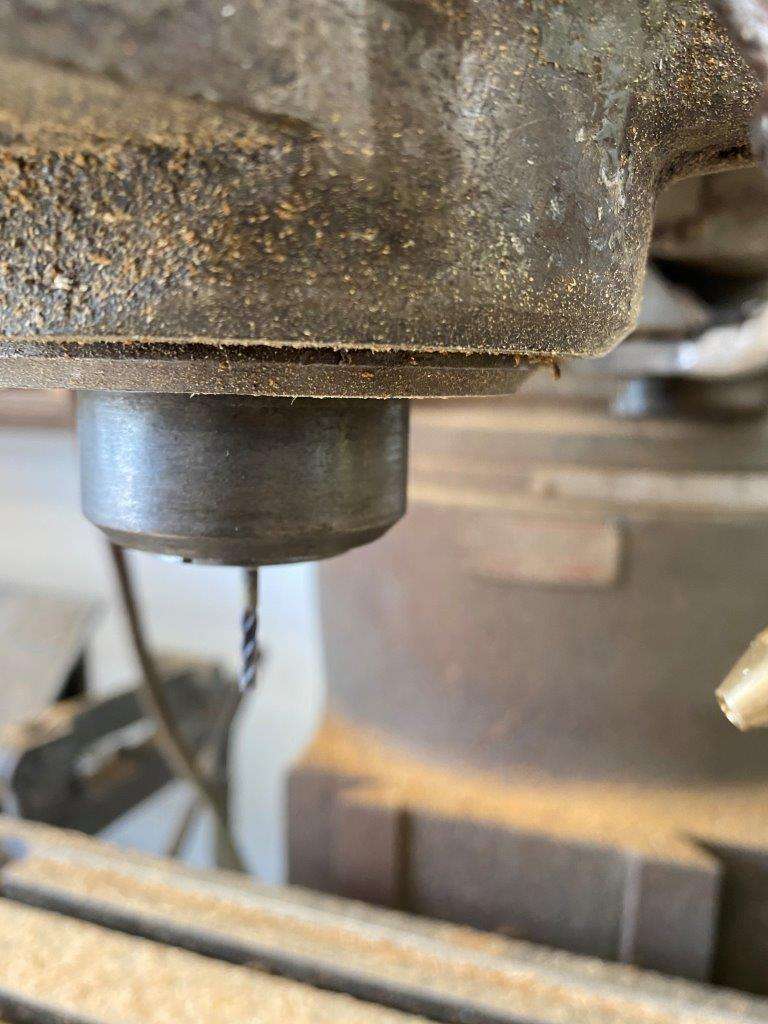
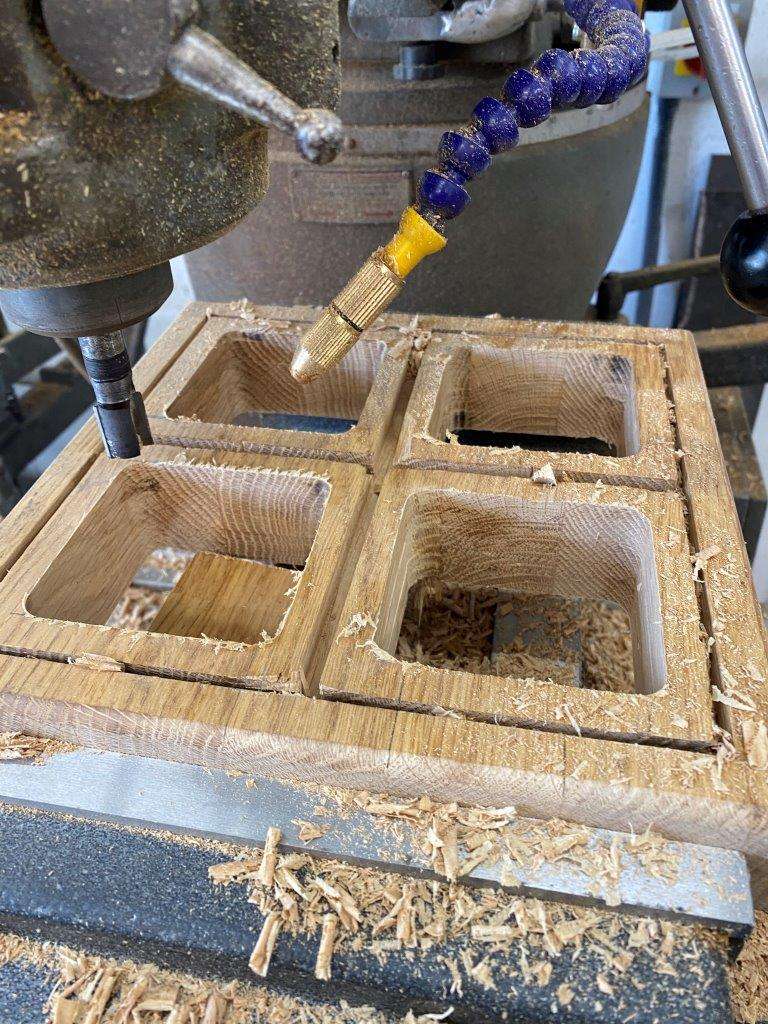
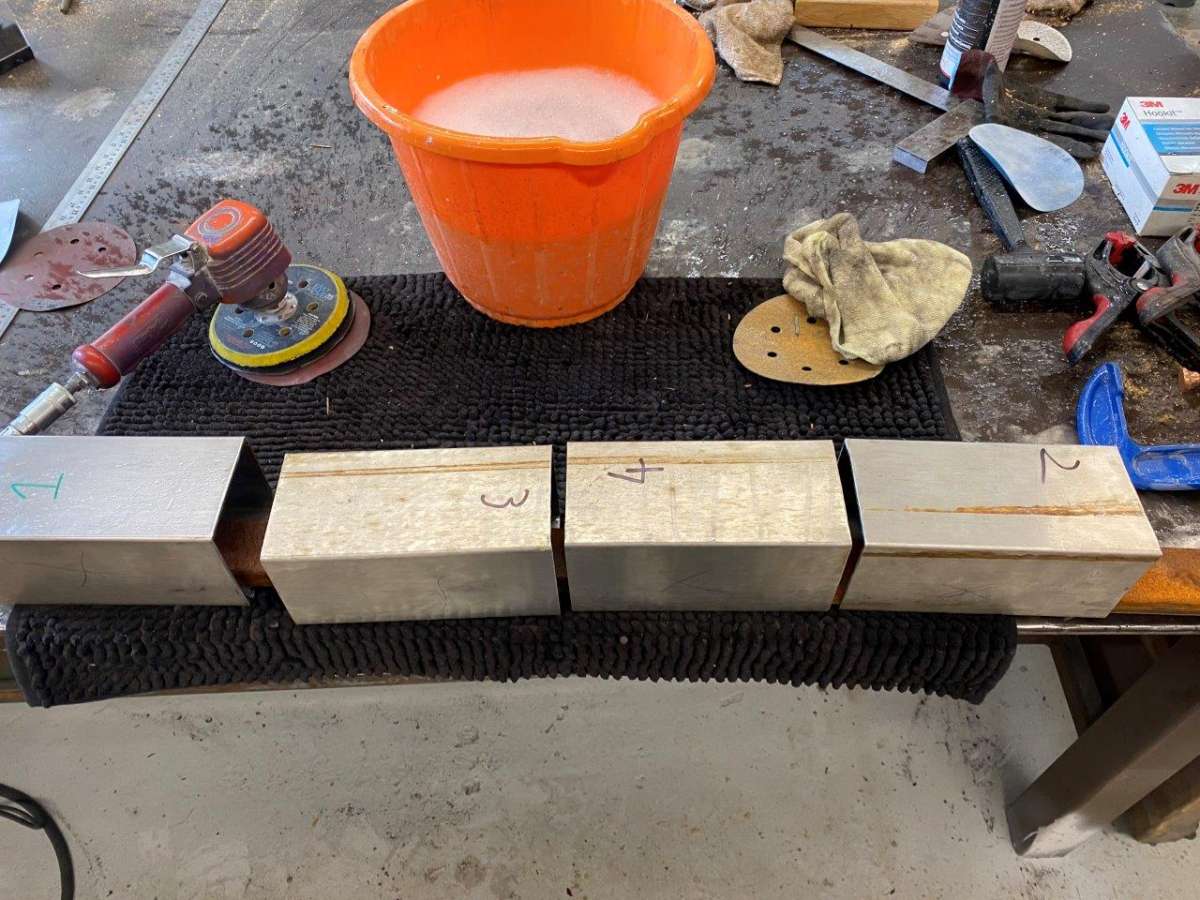
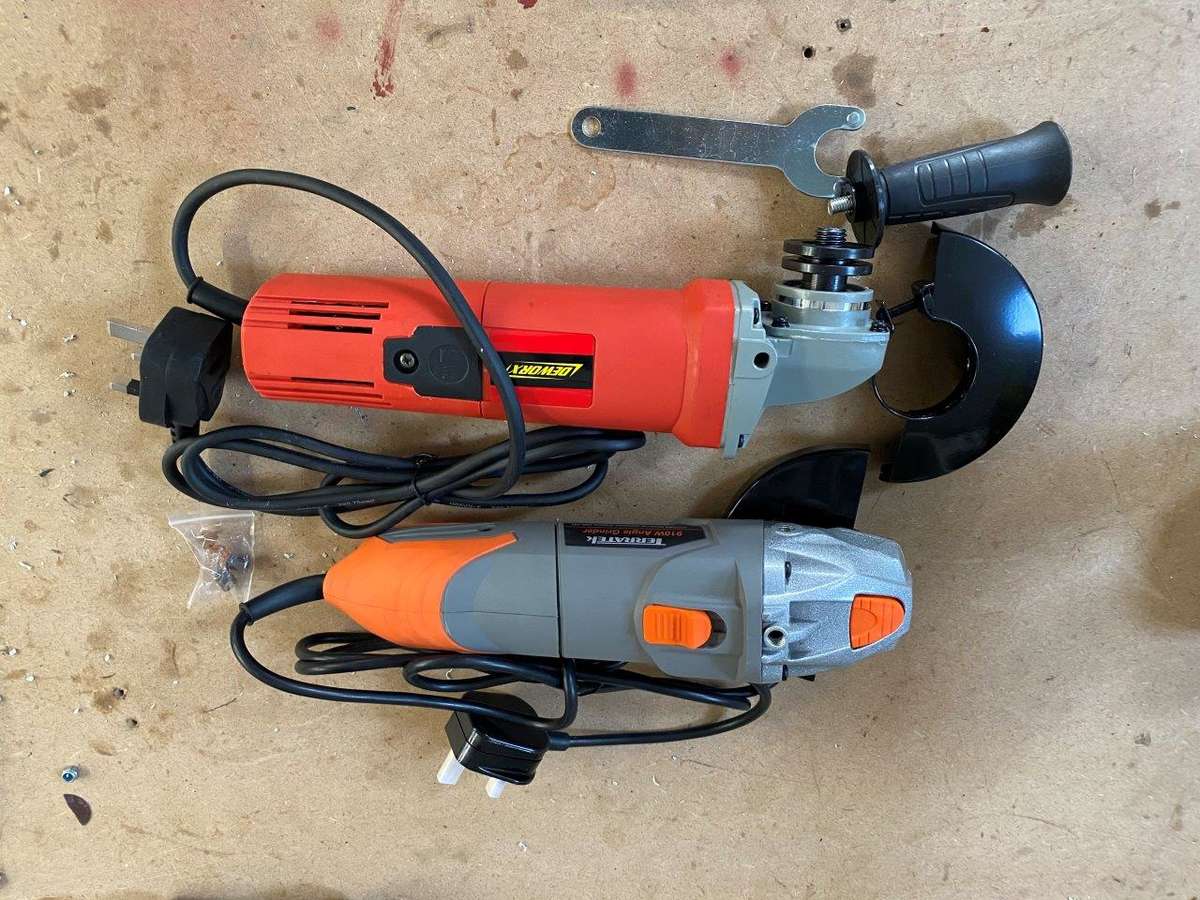
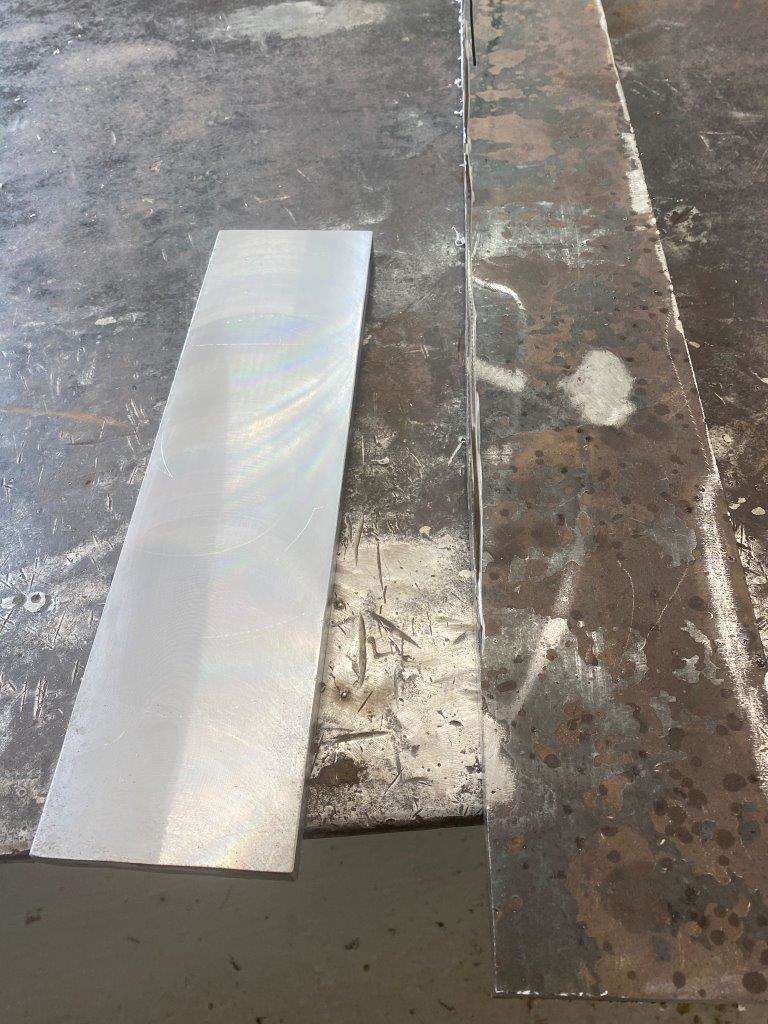
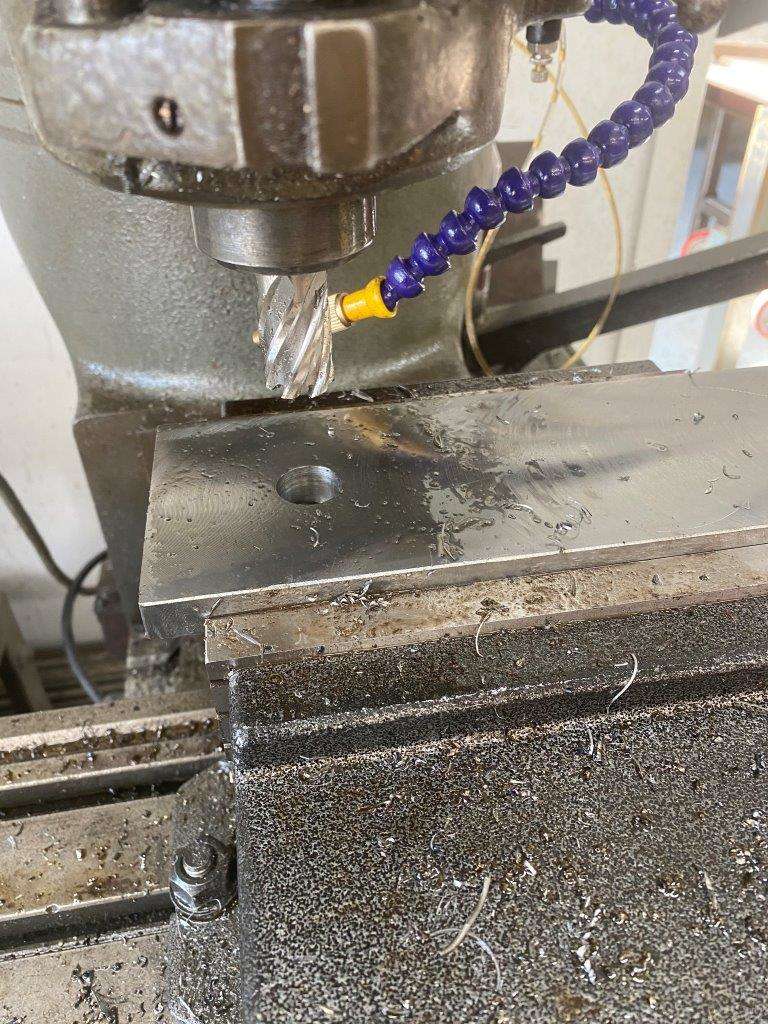
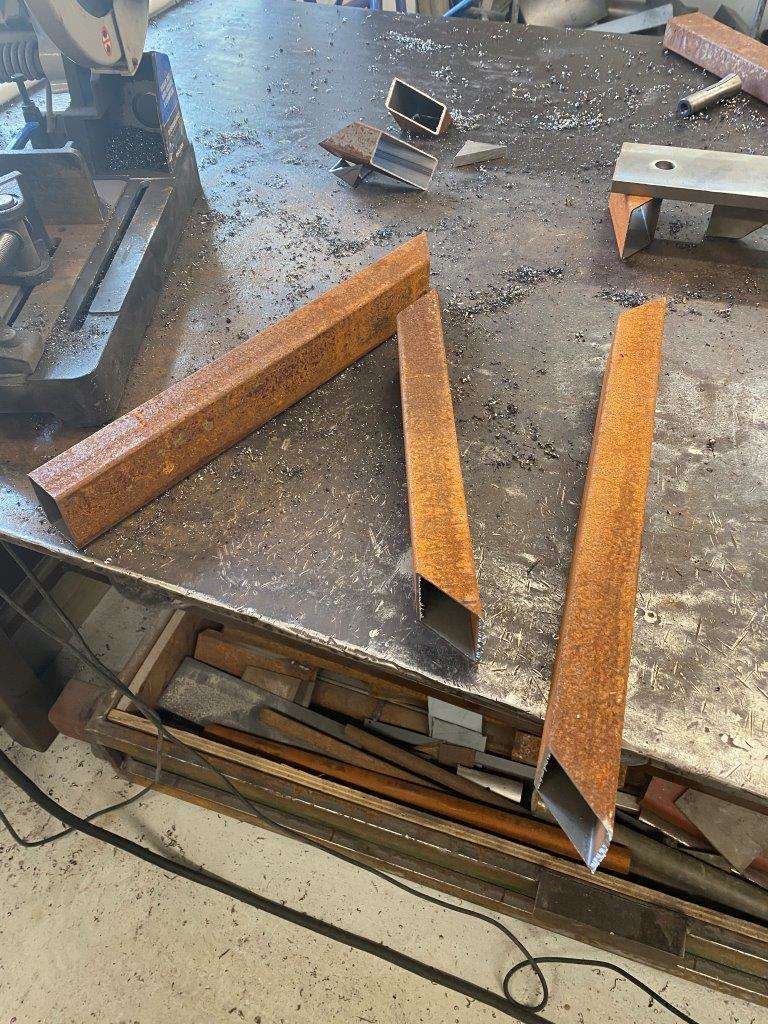
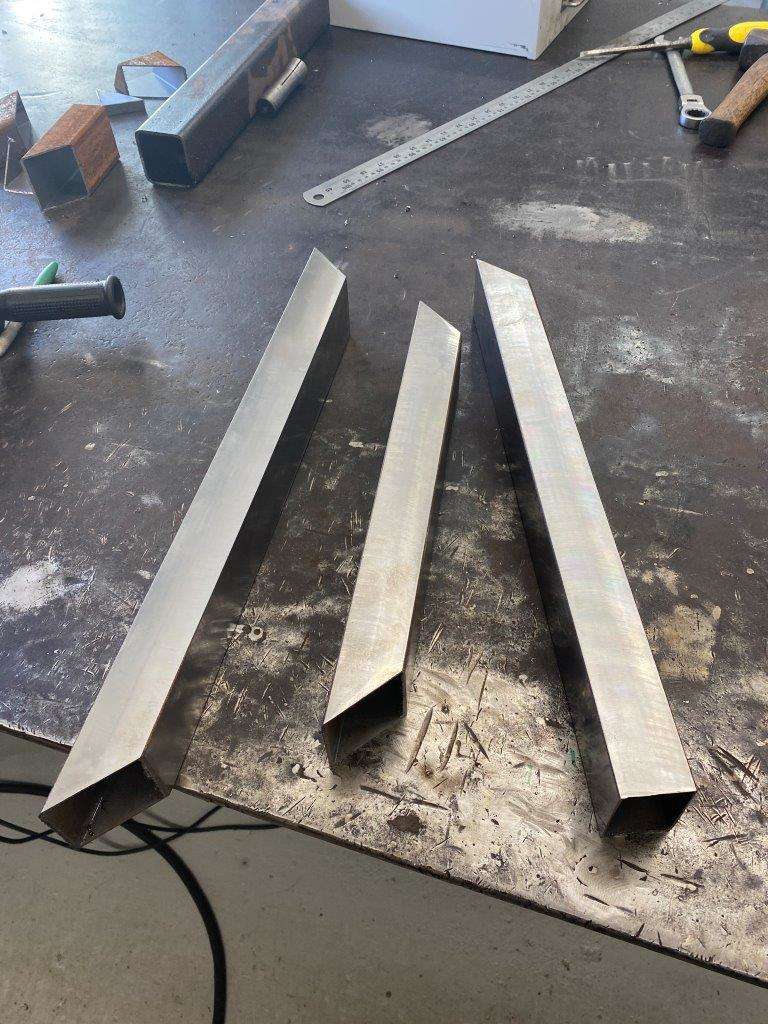
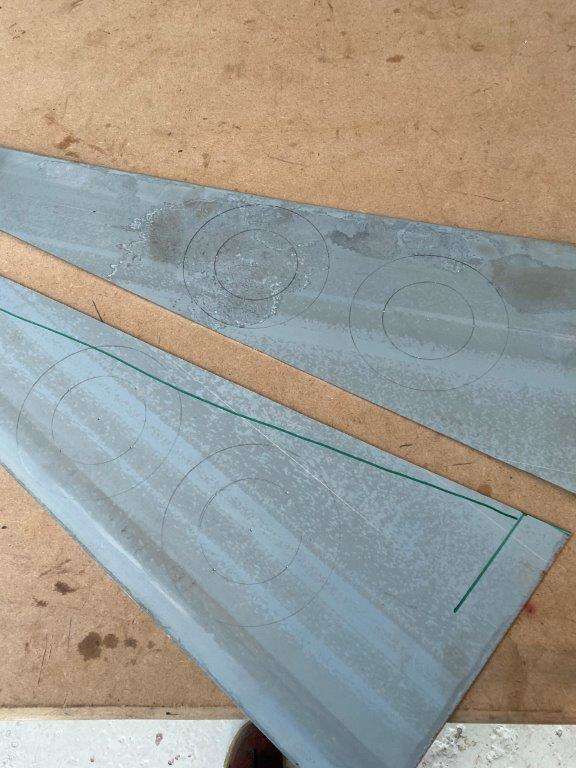
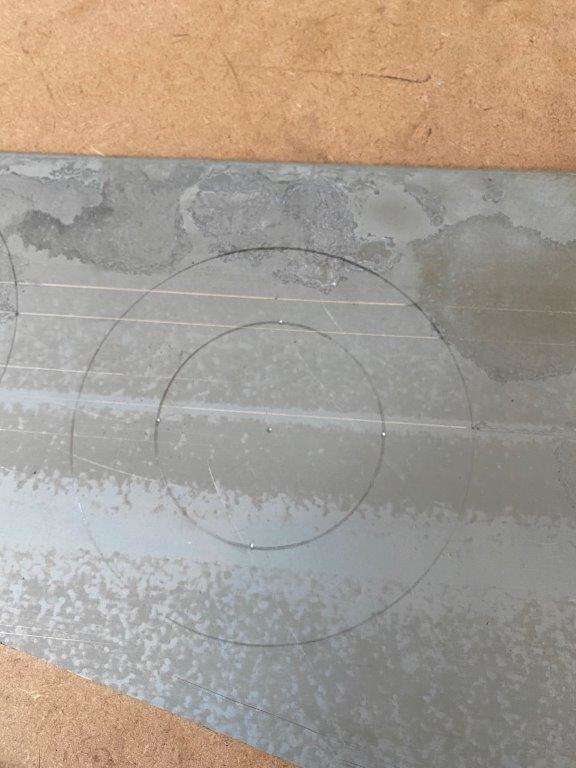
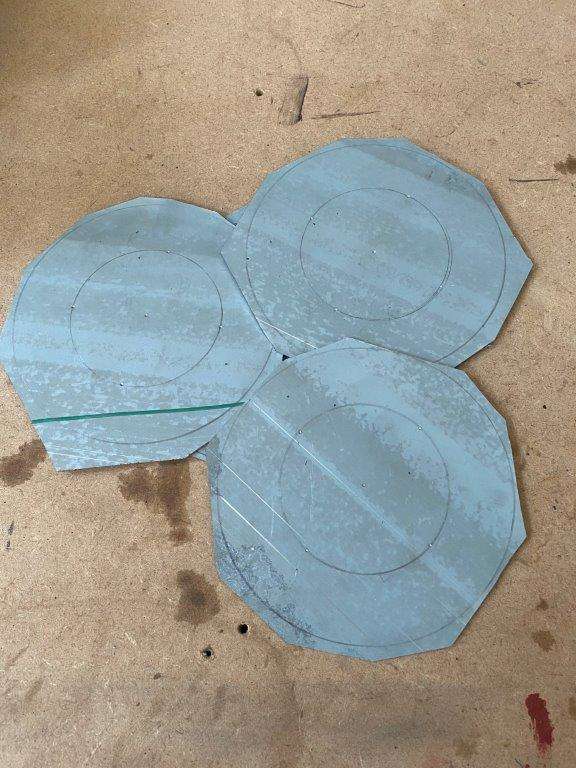
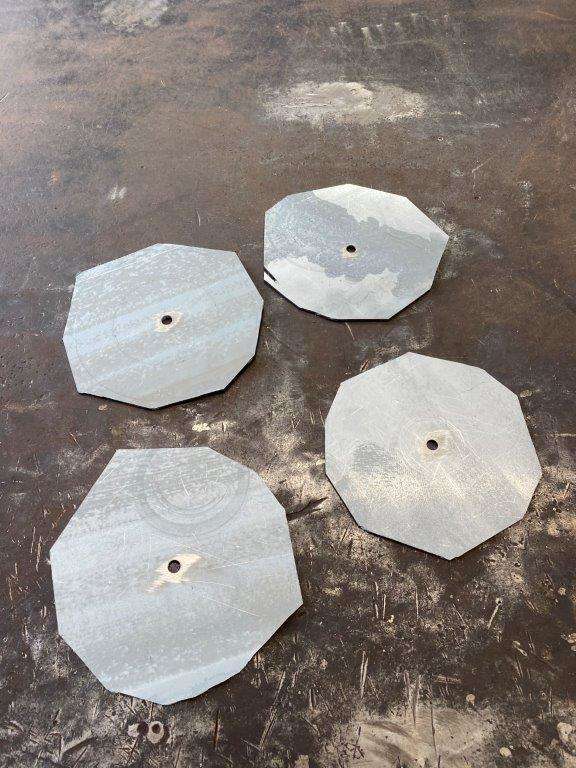
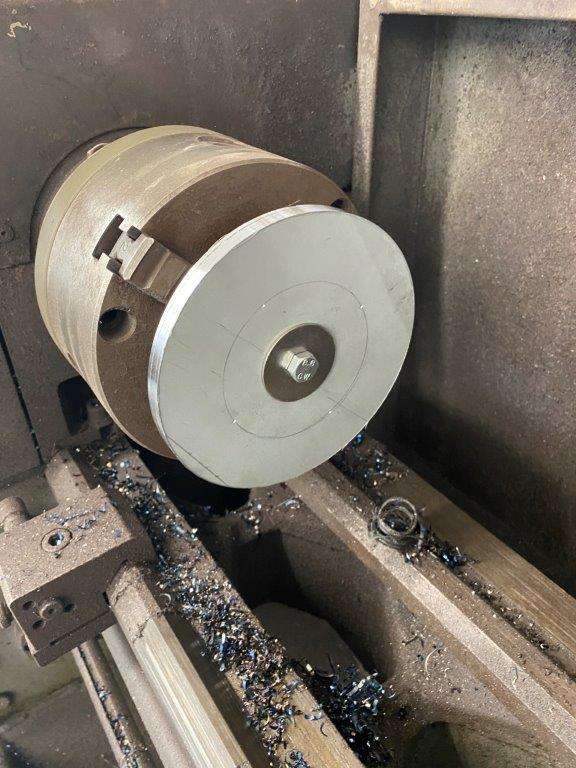
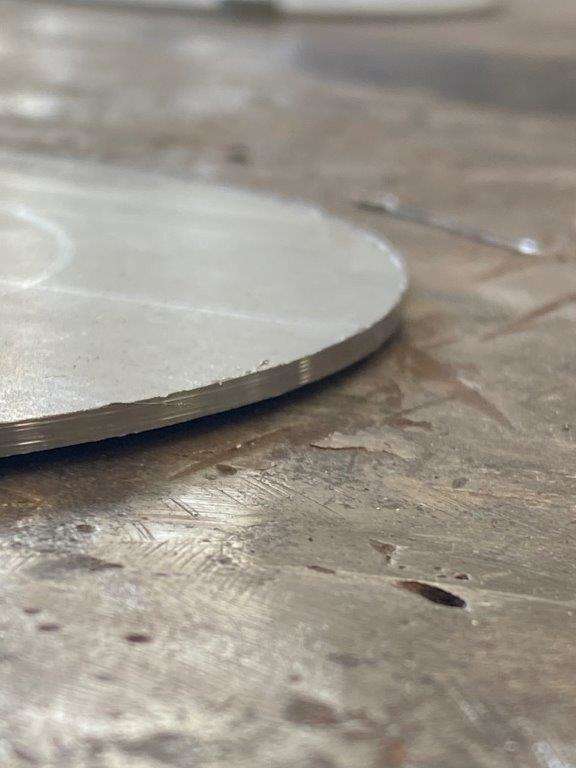
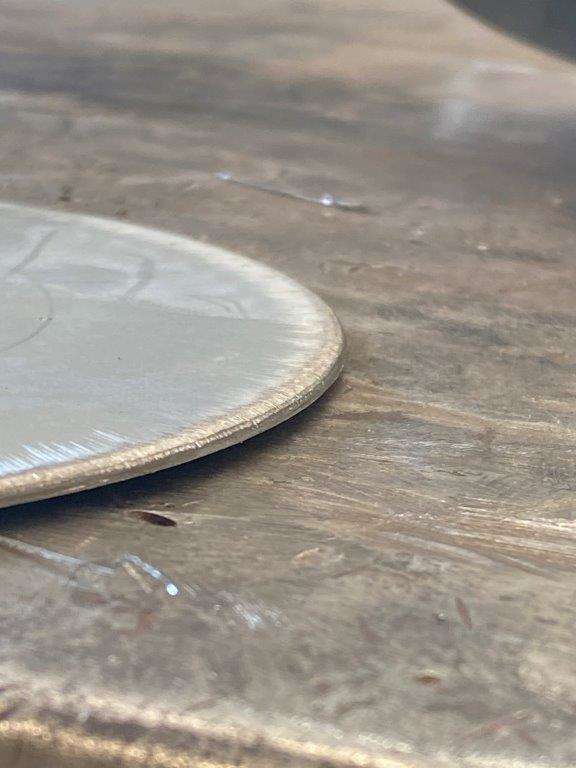
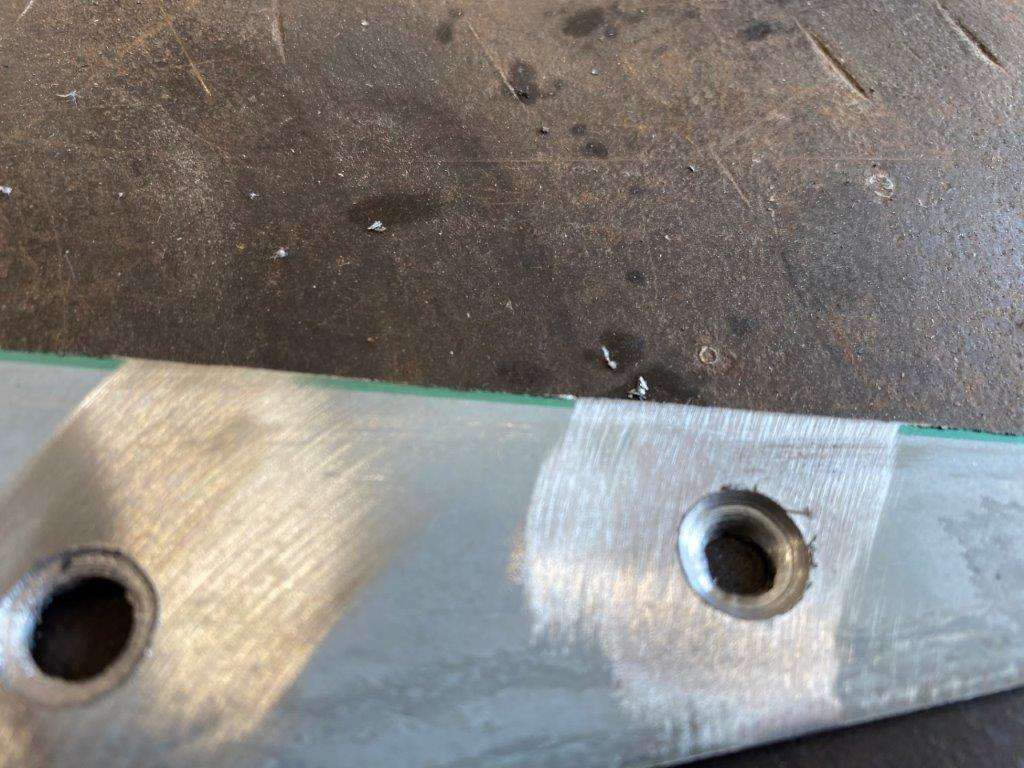
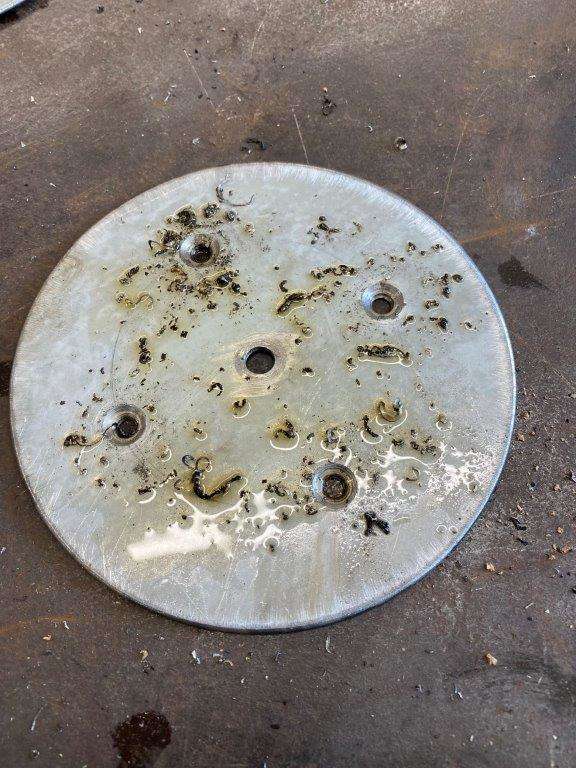
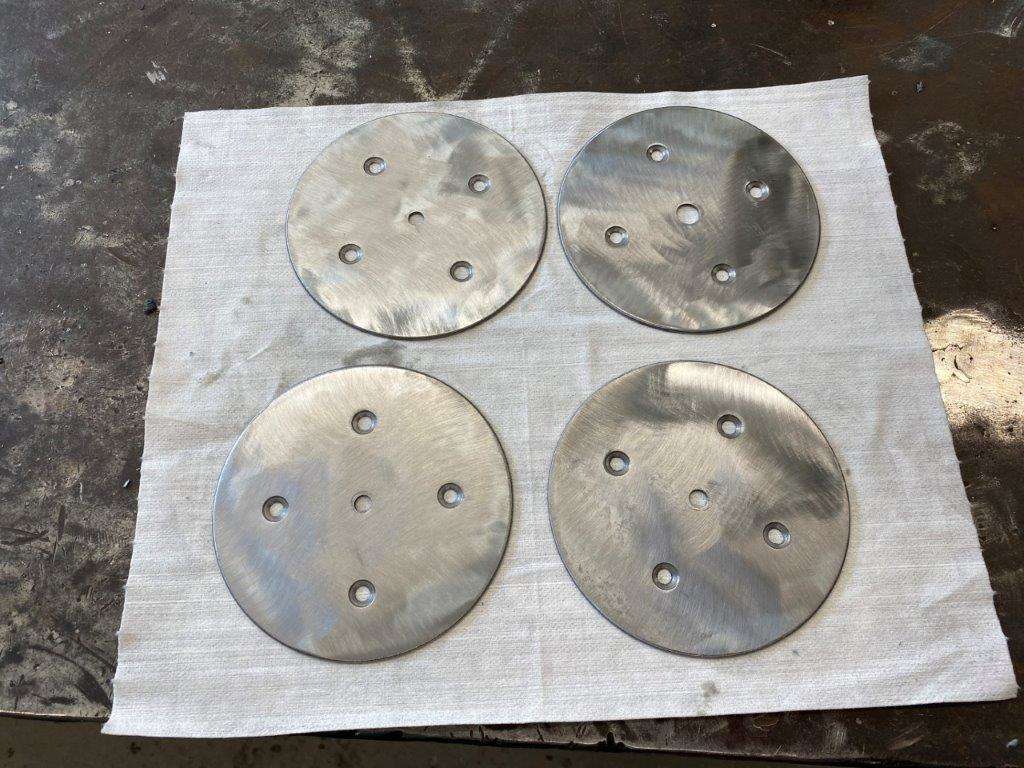
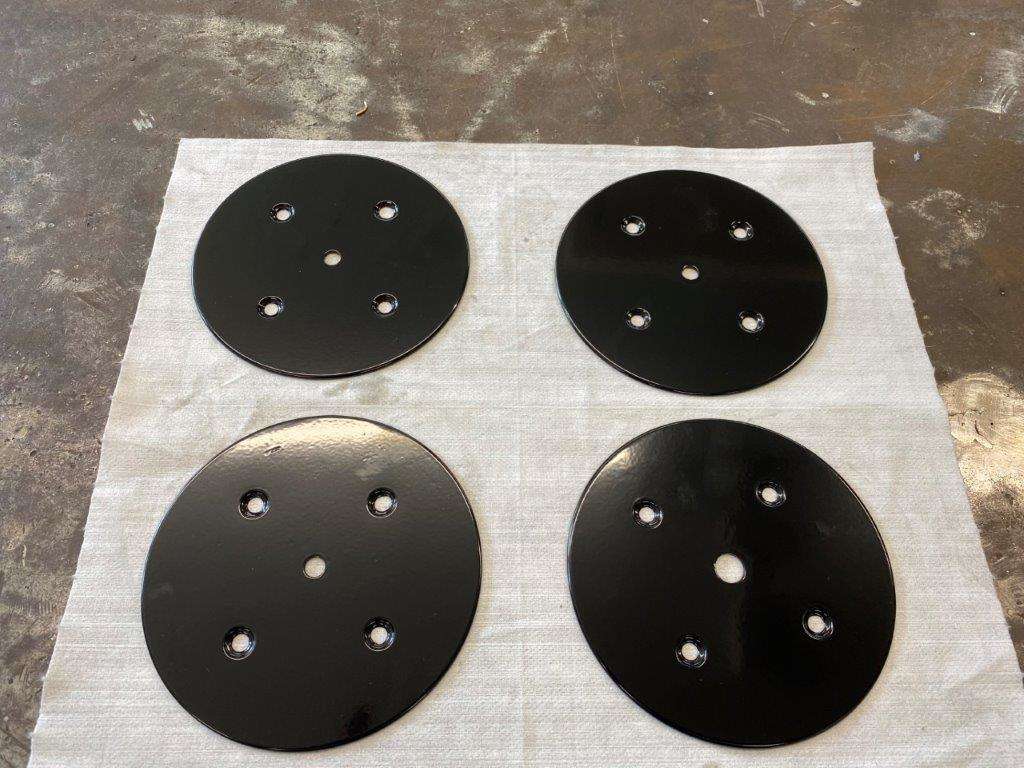
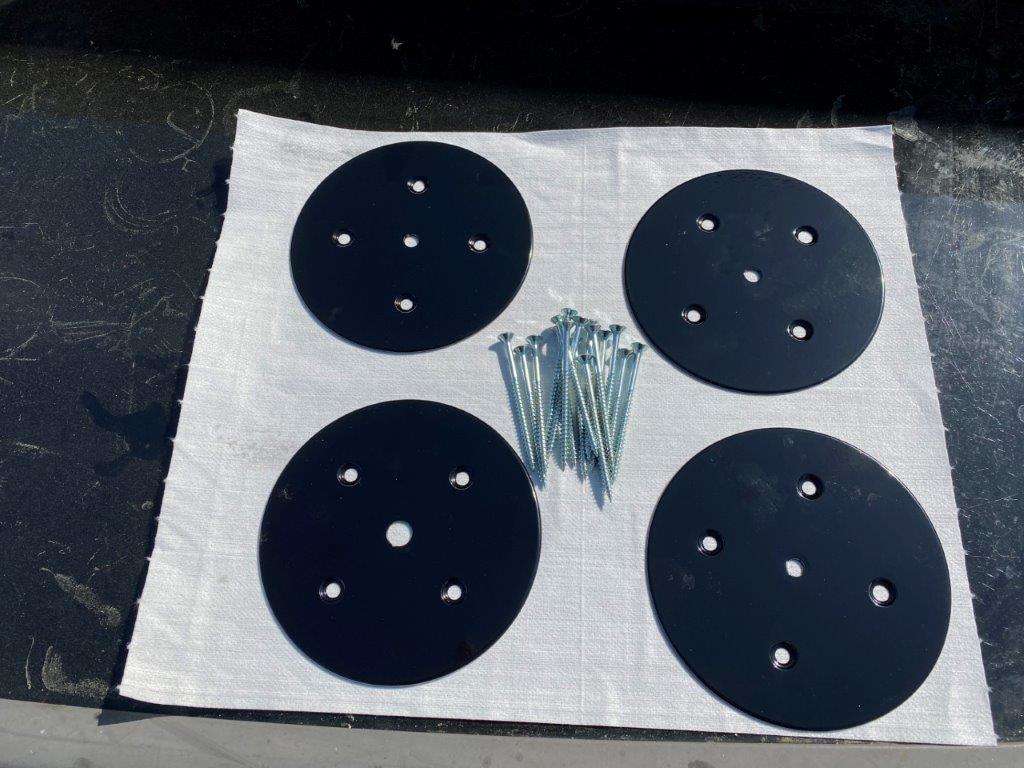
No progress on The Bug today...................actual work squashed my plans I did however have a couple of hours this afternoon available before other commitments with daughter No 2. I thought, rather than start on the next bit of the bug, I’d get a couple of side projects moved along a bit. Side Project 1 One of our more senior members spotted that there maybe some off cuts of that 3mm steel and as the eco-friendly guy he is he would feel remise if he did not suggest they be repurposed for a small project of his own, after all this would be much better than them going to the scrap yard After a brief email chat (he sent me the spec) I thought I’d see if I could make up some bits that would let him finish his current project. First requirement was 4 x 14cm disks in 3mm steel So the two bits from the rear corners of the floor pan were pulled from the scraps bin and marked up Quick rough trim And a hole in the middle Bolt them all together And a spin in the lathe to achieve circularity Requirement 2 Chamfered edge to avoid scraping Back in the lathe one at a time To change the edge from this To this Requirement 3 Counter sunk screw holes to mount them with, now I figured if the edges were chamfered to stop scarping the screws would need to be flush or lower than the surface of the discs, this is not that easy with only 3mm to play with, so some test countersinks were done When I had it just right I set the bump stop on the Mill (I Use it as a drill press as well ) The resultant counter sink gives flushness But after drilling they look like this A quick clean up and degrease Requirement 4 – There was no requirement 4 so I took it upon myself to go one step further A quick trip through the powder coat oven And I added a fitting kit I’ll get them in the post for you tomorrow mate I would like to dedicate this post to my recently departed angle grinder as it spun it’s last today ☹ Probably the hammering I gave it on all my bad welding Don’t worry I keep spares Be Safe Keyser


-
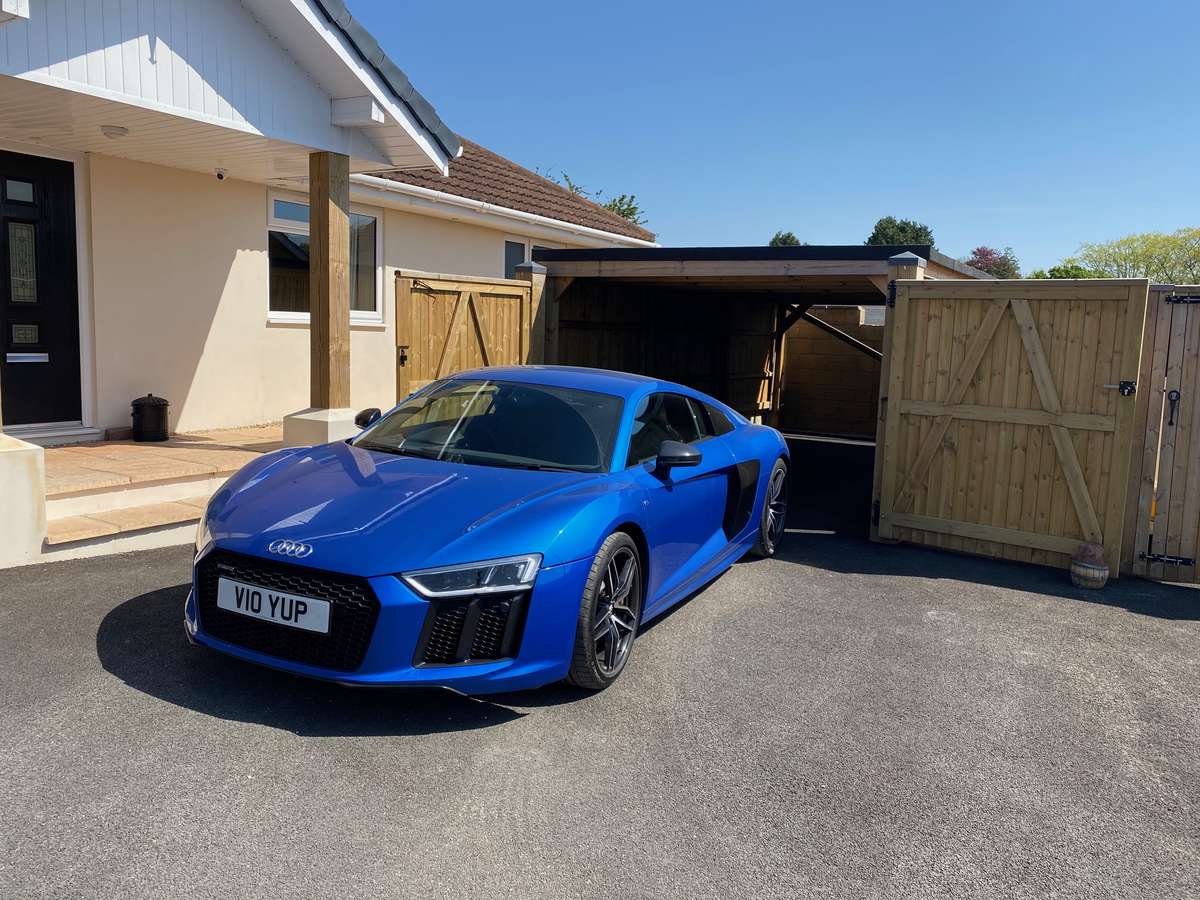
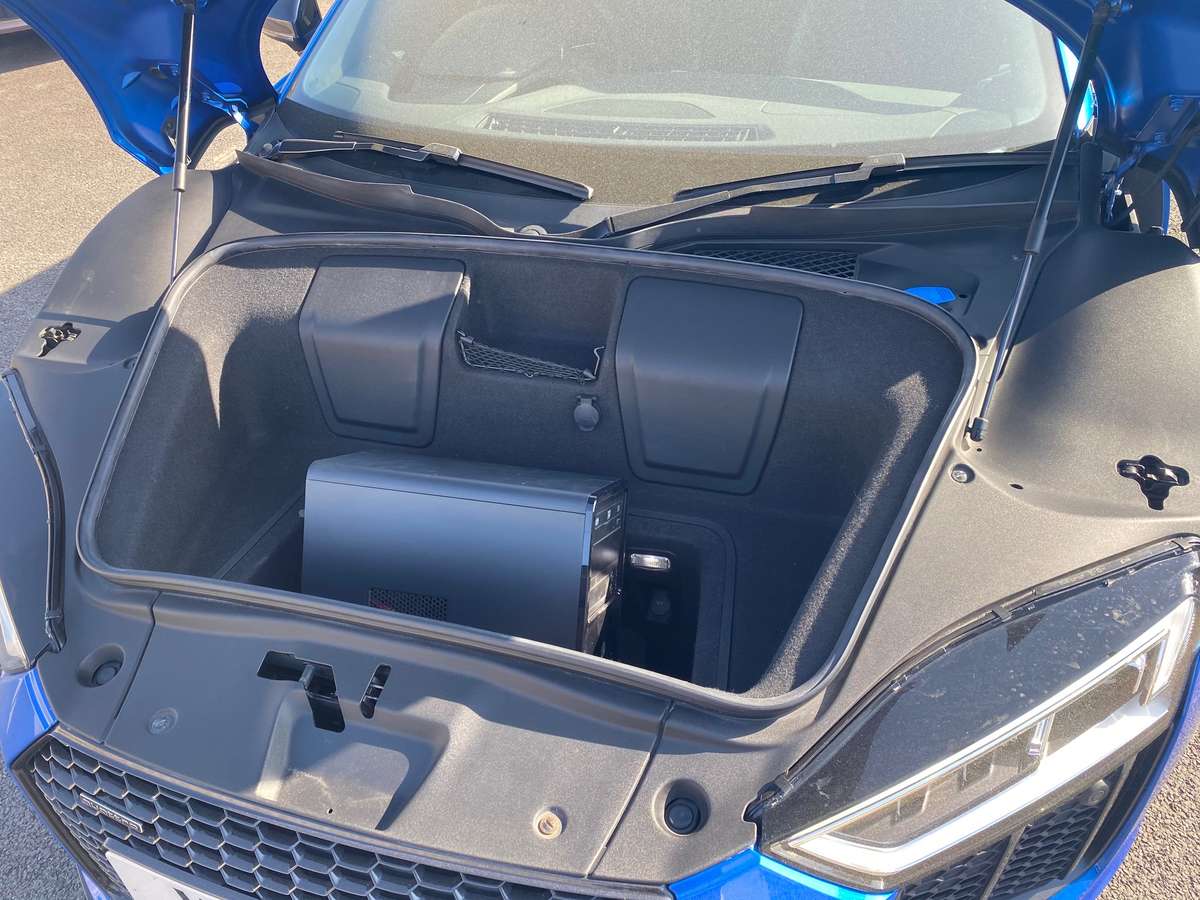
I wish I think this does 50mph downhill with a strong tail wind - but we live in hope Just got back from my call out - It was an emergency call out so I took the fast response vechile Please note my new number plate - People always as Is that the V10? and I say YUP I really need to get a life But a PC fits in so completley justified me driving her today Have a good one guys n gals Keyser
-
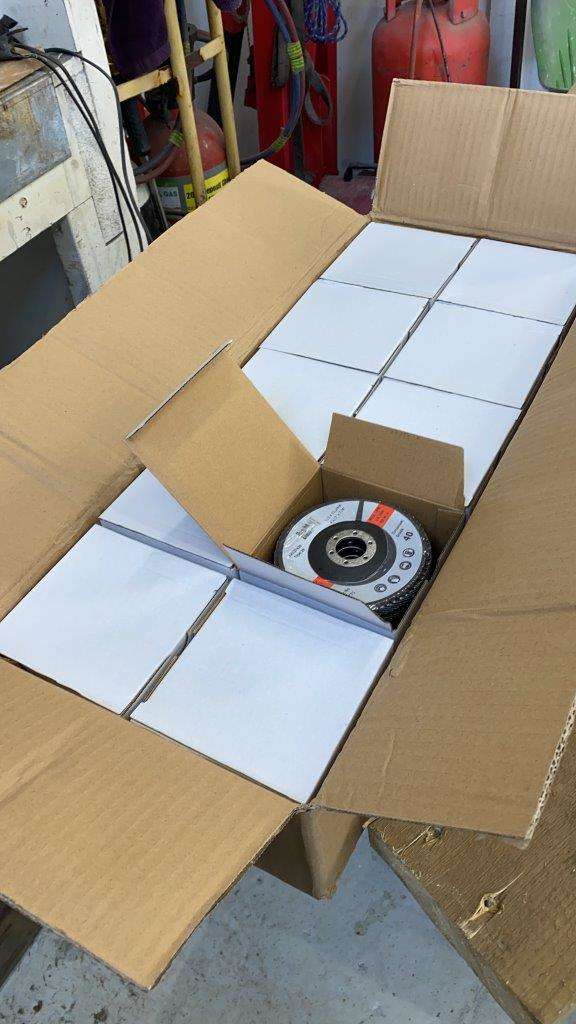
I found the use of a G-clamp helped hold the shape ready for a quick weld Getting there First weld on Then onto the other side same thing again Back to the bench for the stich up and sand Back on the frame to test the fit The inside looks great And a delivery of sanding disks arrived (I buy in bulk to save money) That’s as far as I am going with the floor pan at the moment, I want to look at the next part of the project before I fine tune the back edge. I have just had a call out for a server fail so there may or may not be another post today – I’m actually going to work for a while Be Safe All!! Keyser - “I don't want to be alone, I want to be left alone.” ― Audrey Hepburn

-
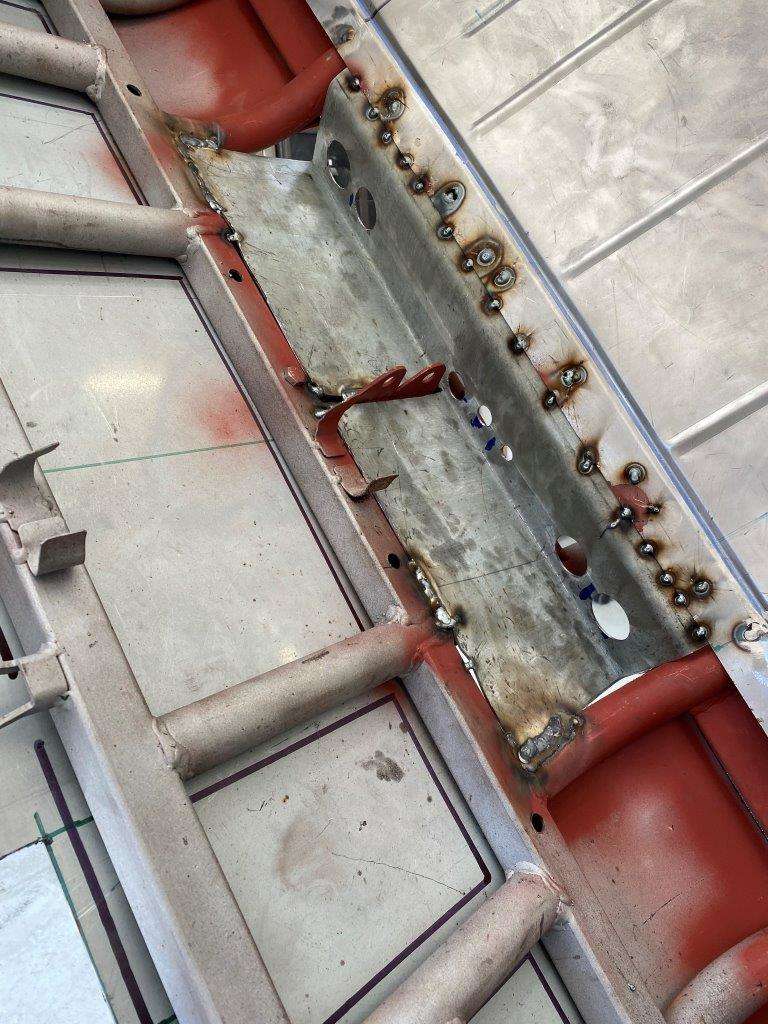
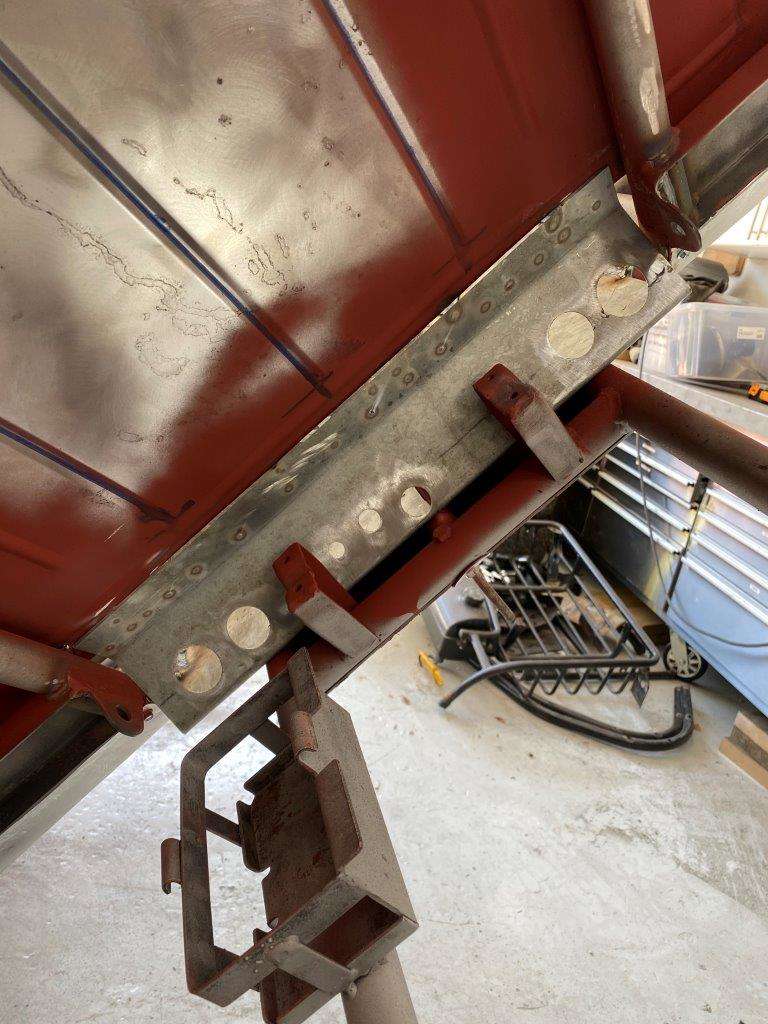
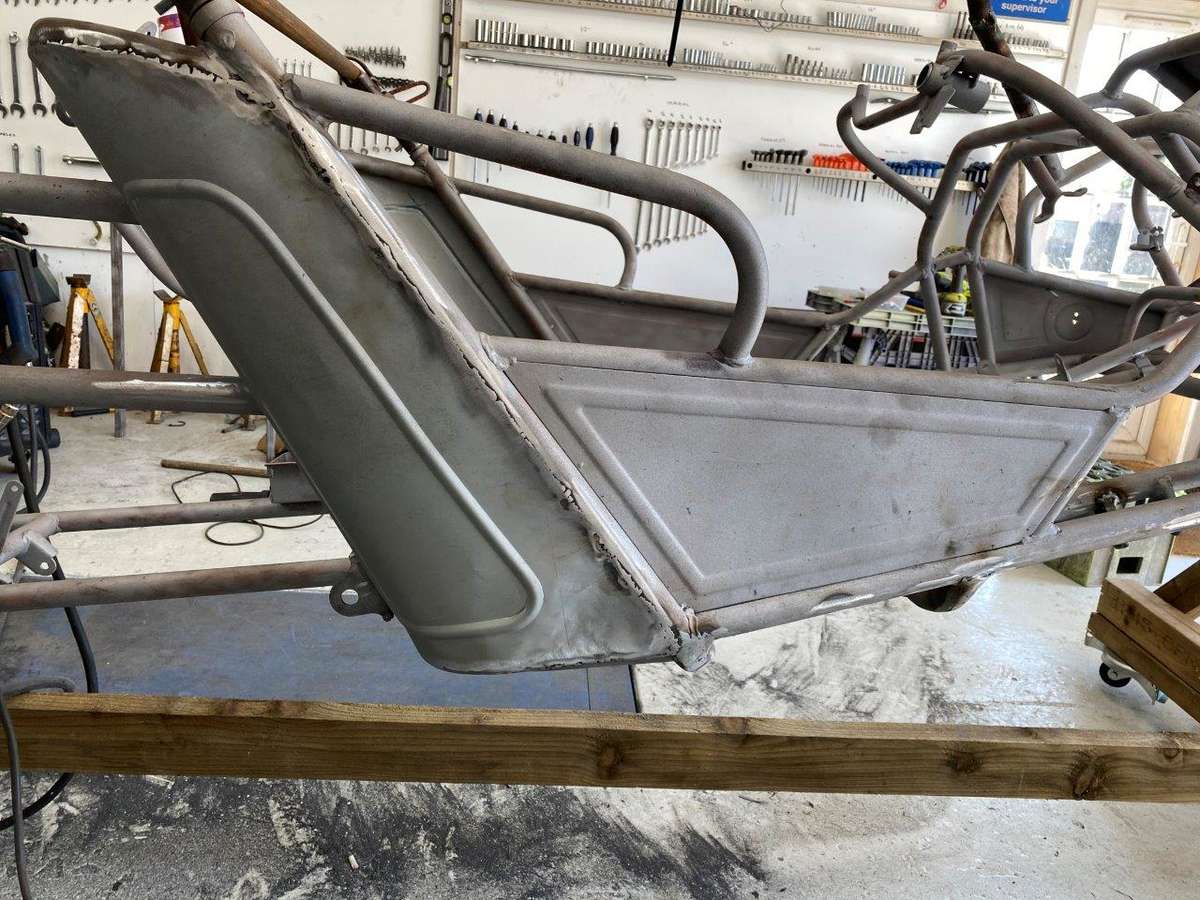
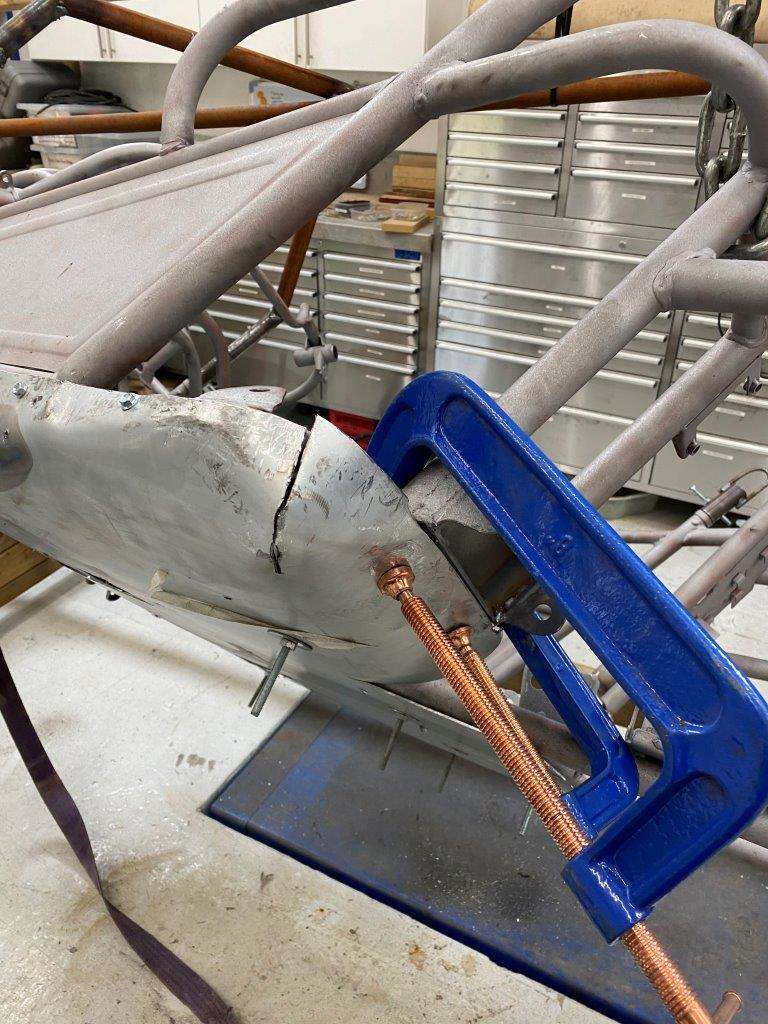
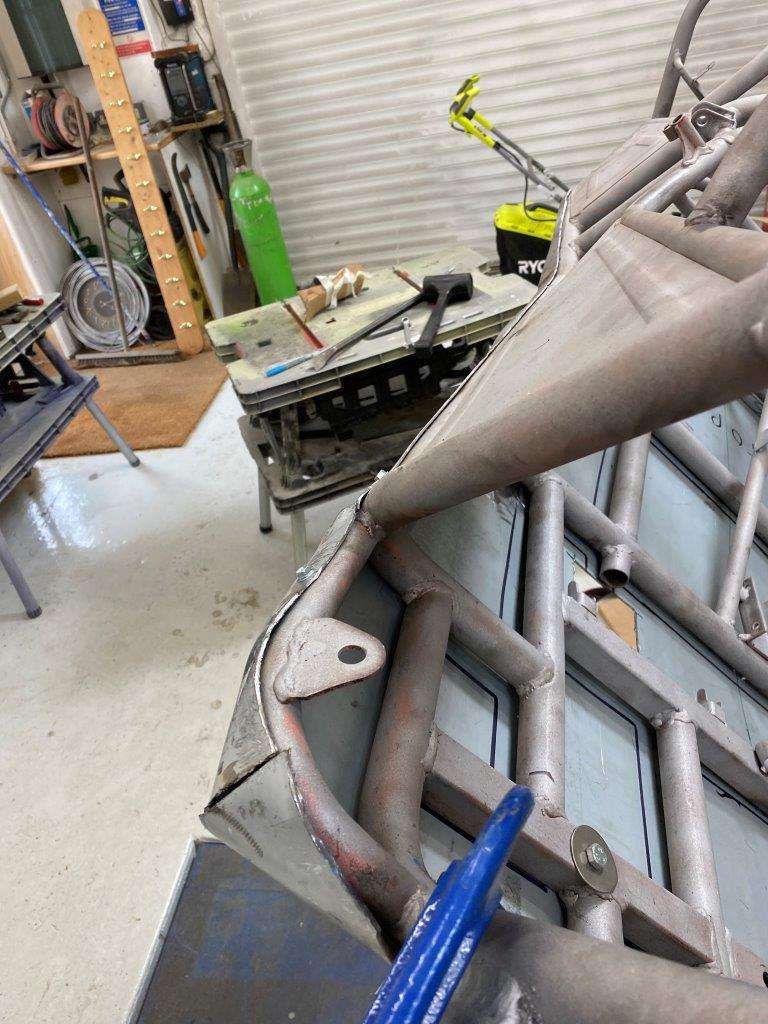
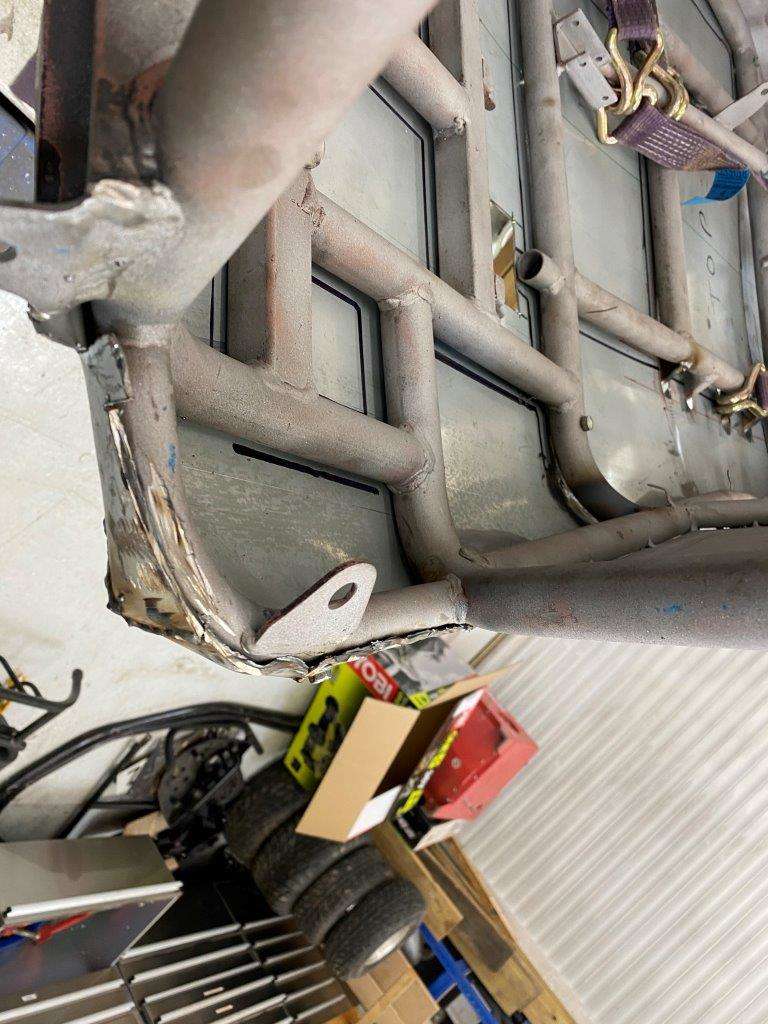
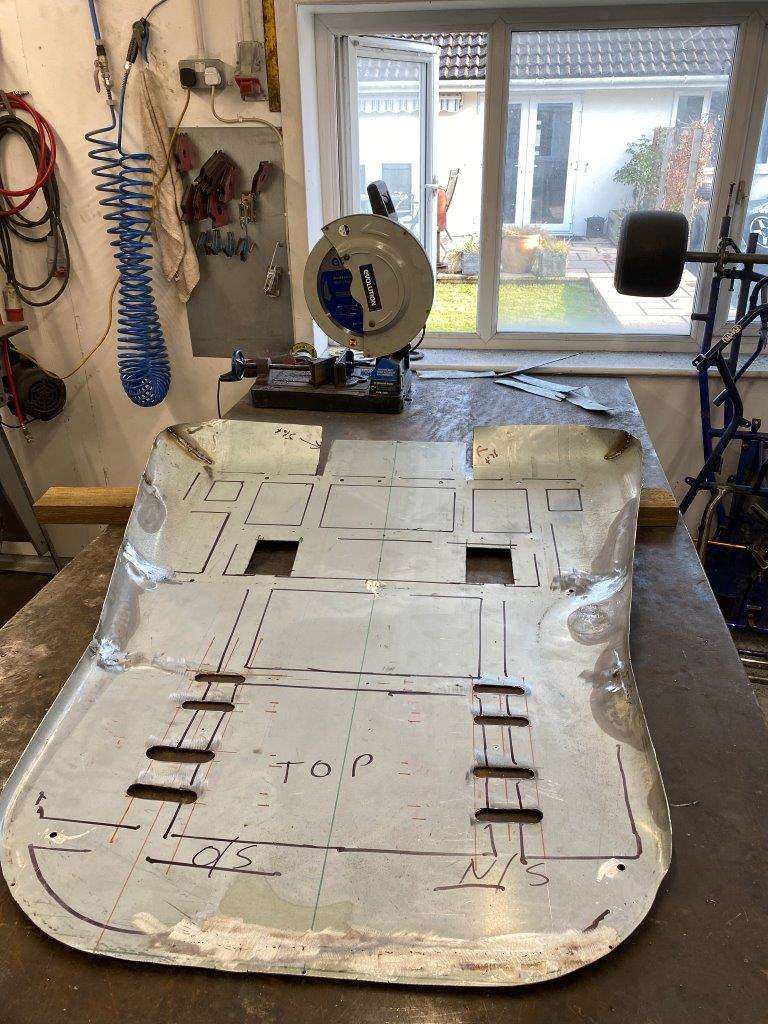
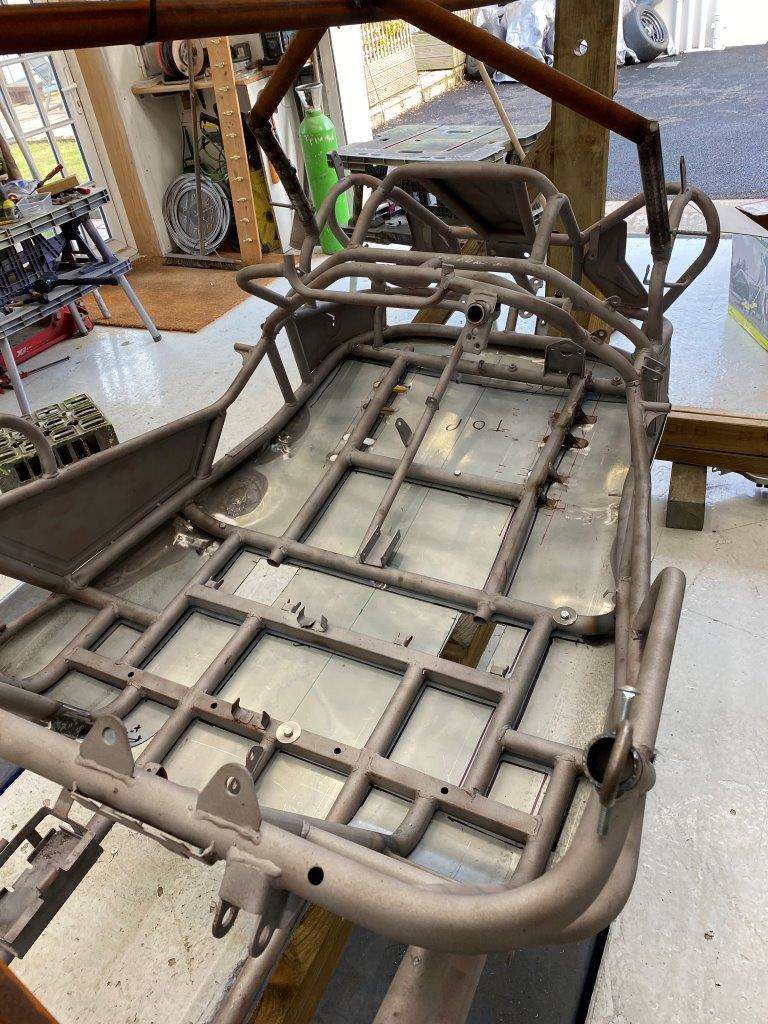
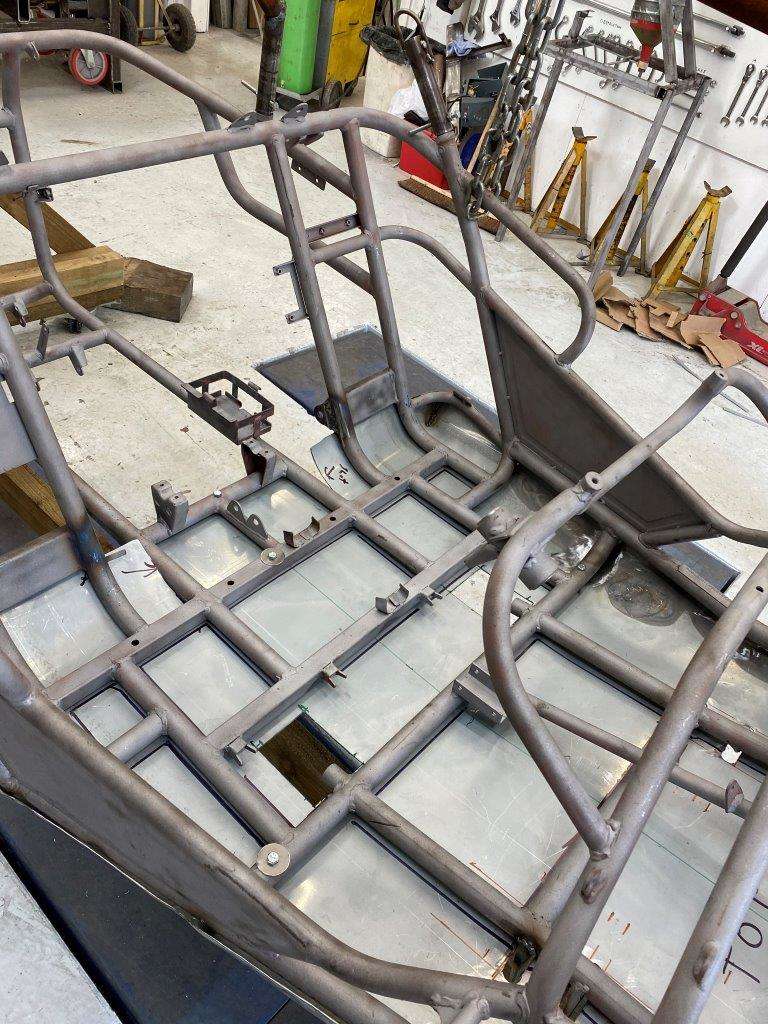
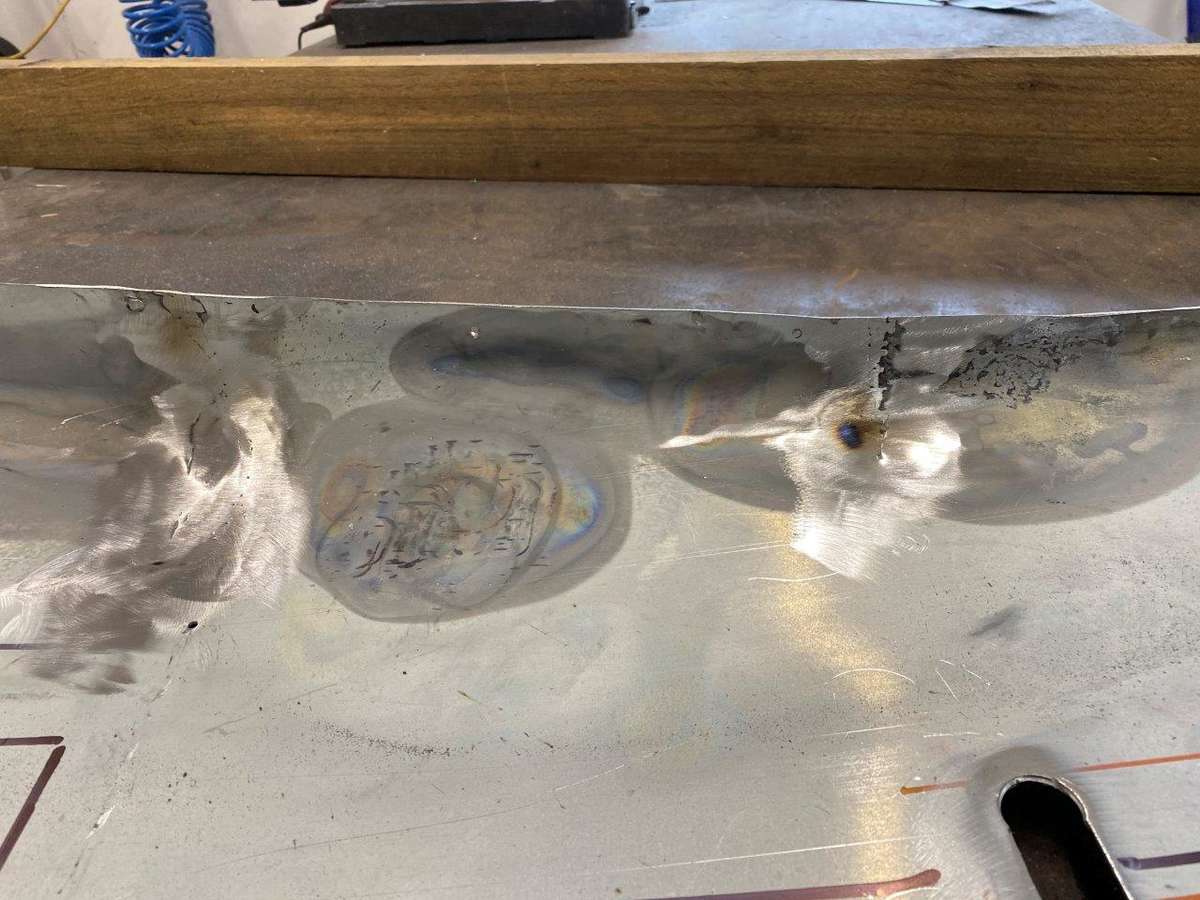
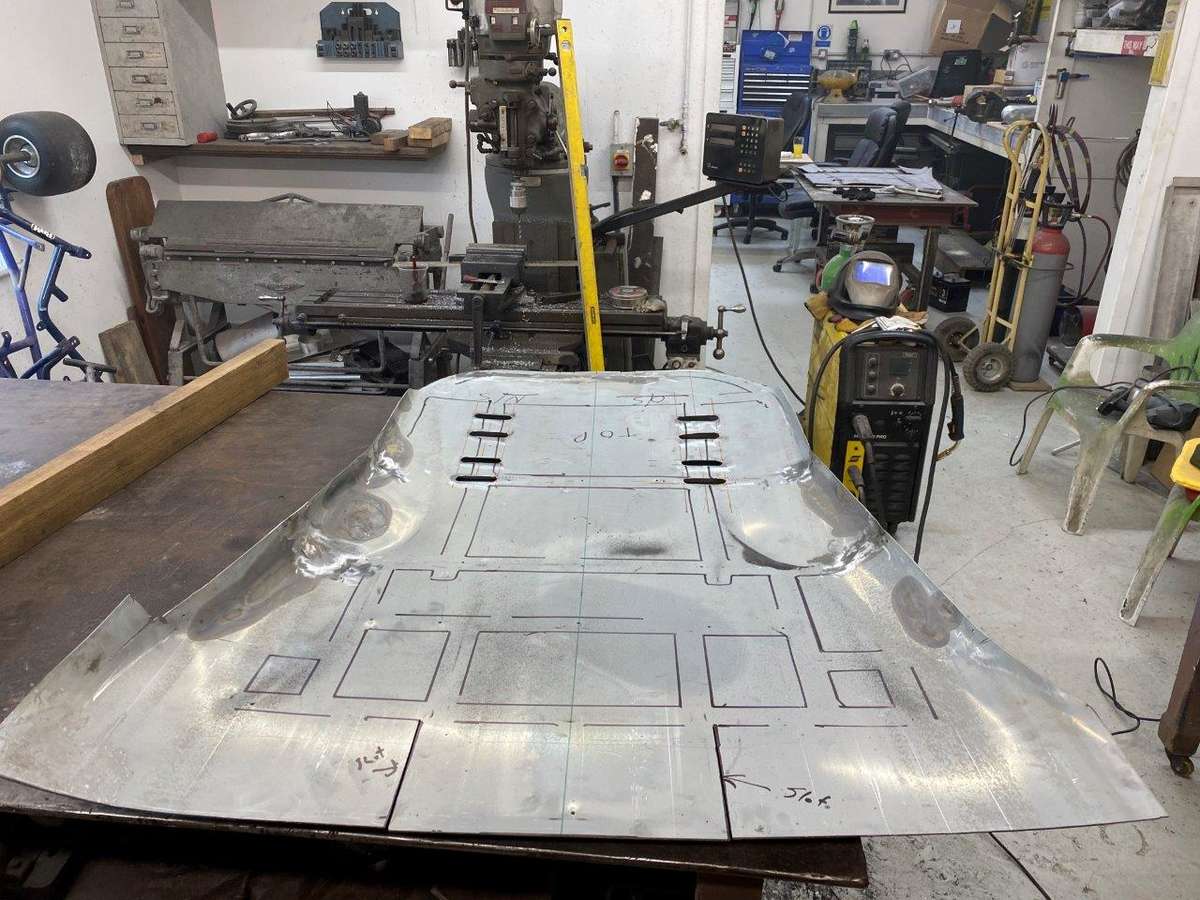
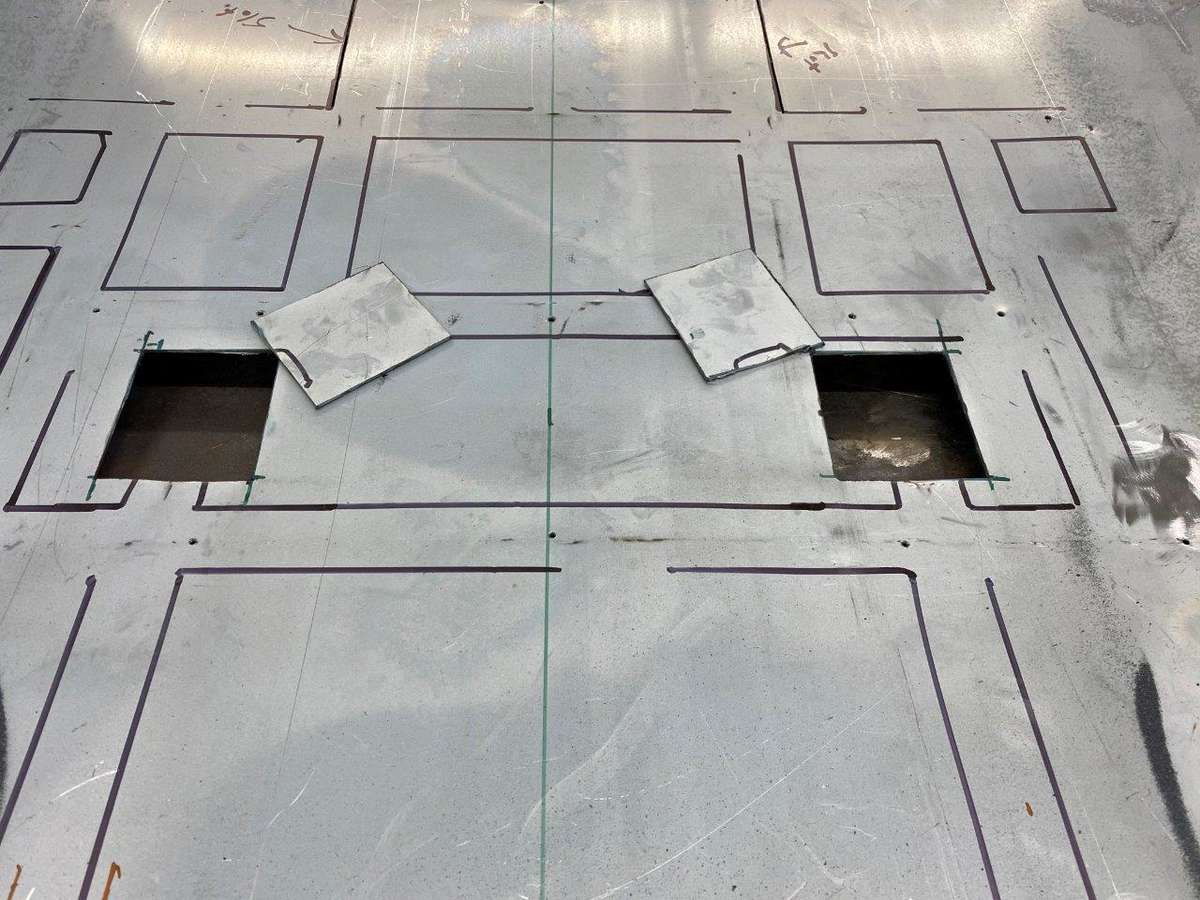
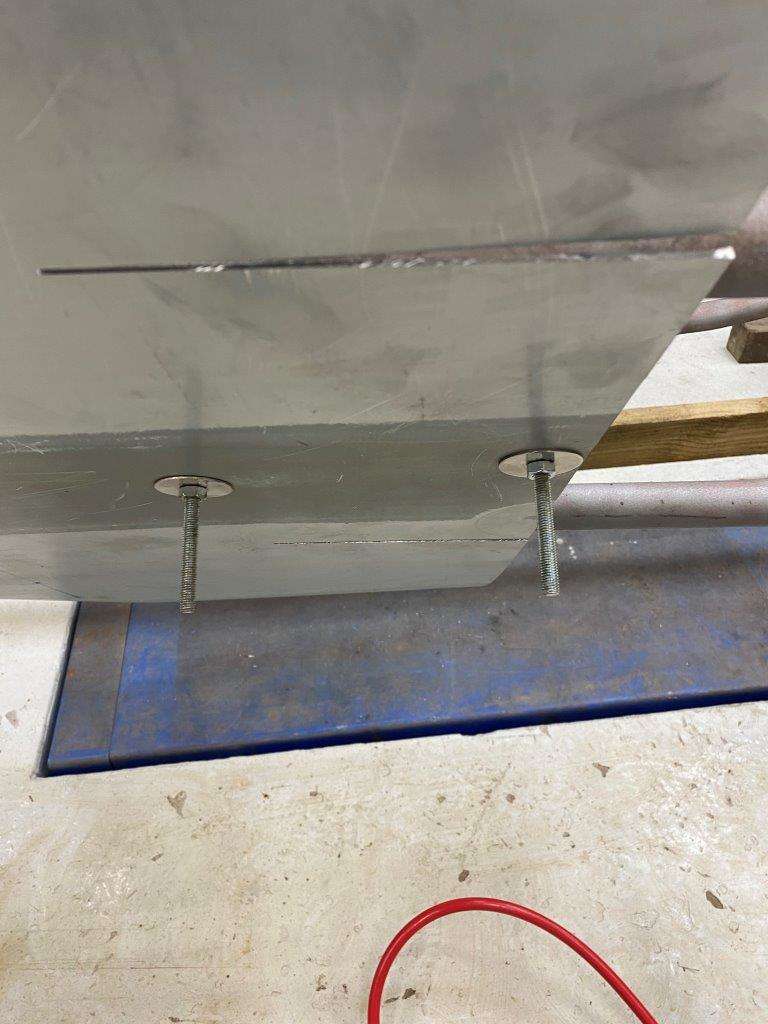
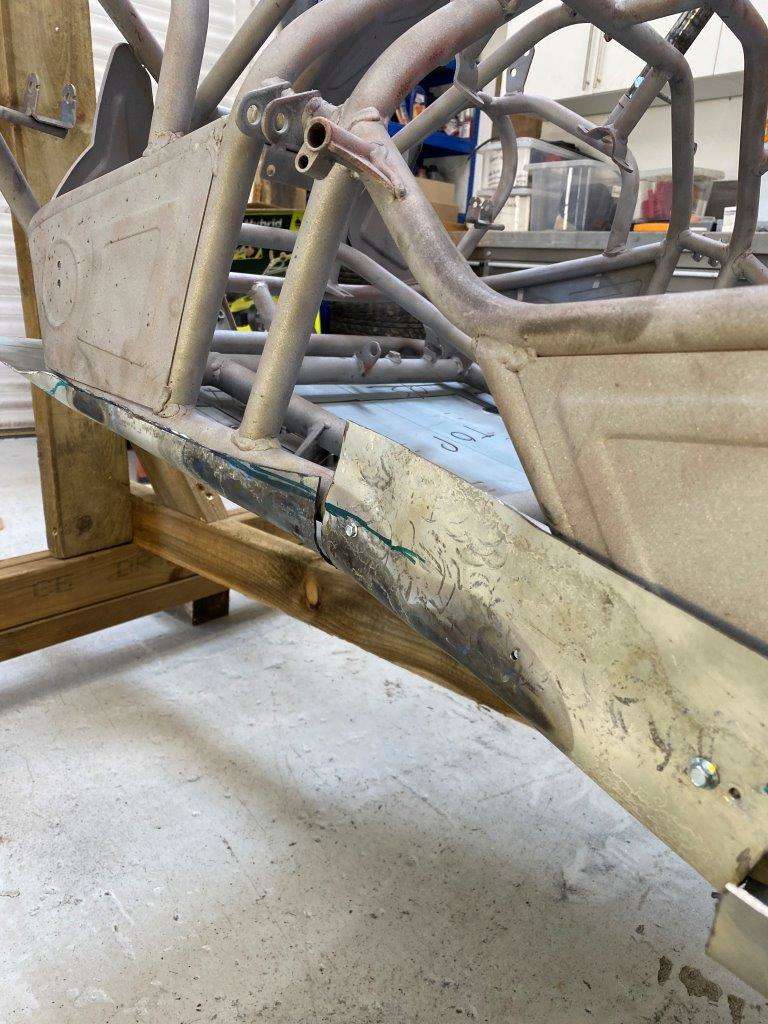
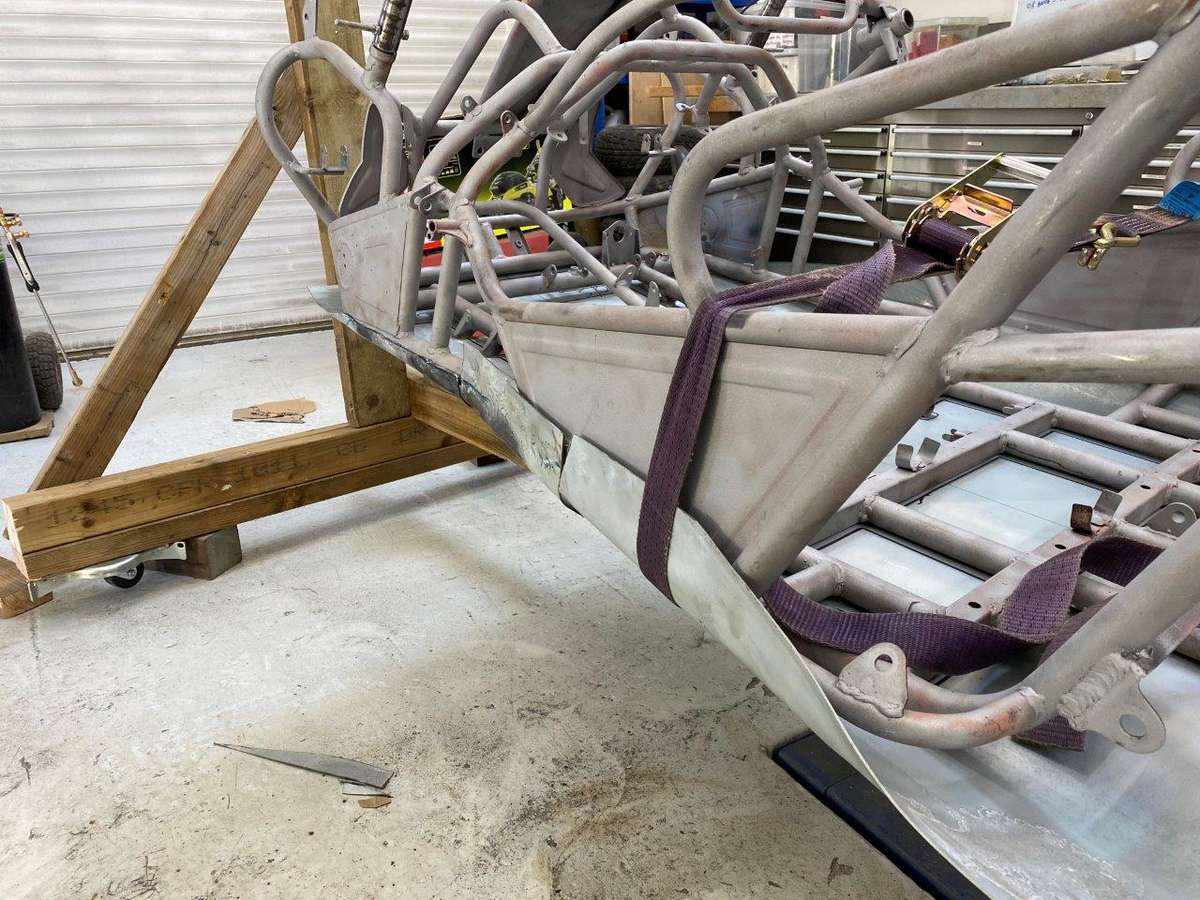
Looking out of the window it looks like another fine day, my work diary has 1 job in it so I’ll be out in the garage this afternoon again, I did about 6 hours yesterday I only had 1 call out and about 3 calls all day – it is ridiculously quiet at the moment! On the plus side I did 6 hours in the Zed Shed yesterday Another long post today but we are still on the floor plan, I did say it would be a major undertaking to try and do this…………………. I took the undertray off to carry on with the trimming and shaping, the first job was to trim the front edge to length now I had decided how it was going to fit That line you can see about 4cm back from the front is where I got 2/3 of the way through the cut when I realised I was cutting the wrong line so I had to weld that back up again – what a muppet! Anyway did some more stich welding Its really taking shape now I cut out 2 holes in the base – I’ll come back to those later in the project when I have a whinge about a design feature. I also made a decision to make the complete floor pan removable, this is mostly due to paint, there is no way I can get good coverage on the underside of the frame work around the front end with the undertray on. My original idea was to spray the underside then weld the floor pan in and paint again, but that means welding onto painted sections or paint grind and repaint and whichever way it goes I will have badly covered areas, as this is both roofless and designed to get muddy off roading good coverage is a must! It also means maintenance is easier although I can’t see many reasons to remove the floor pan for general maintenance, but I’m on my own and that’s what I decided after discussing options with me So to facilitate the removability (big words) I tweaked the slots And then drilled some holes and used my “too long” bolts – new stainless shorter bolts are on order – Bit more massaging of the armour plate with a hammer and the sides are getting close Onto the back corners No choice other than to cut and shut this - no amount of beating with a hammer will shrink that much metal down and I don’t have a 1000 ton press so More on it’s way ………………………………


-
Well the old undertray was heavy weight steel so it’s only a small weight gain and it adds some safety not to mention we can bounce it off rocks without worrying to much the next one will have a bigger engine though
-
you can’t blame Kim it’s your fault, where were you when sane rational advice was needed
-
@veeg33 - Trust me 15 - 20k steps a day lots of sweat and tears it's like a gym a sauna when the welders going full chat @SuperStu - Thanks mate glad you like it as long as a few gus n gals are following along and enjoying it I'm happy to write it up - I only take the mick in case I later find out no one even reads it - That way I'm covered - This lock down does have a lot to answer for if this is the high point of your day I jest of course, I'll keep it coming (Think more Santa's sled than boat ) @hicksi - I thought that was Huw's speaciality - He is the best destruction / crash test dummy I've seen in action
-
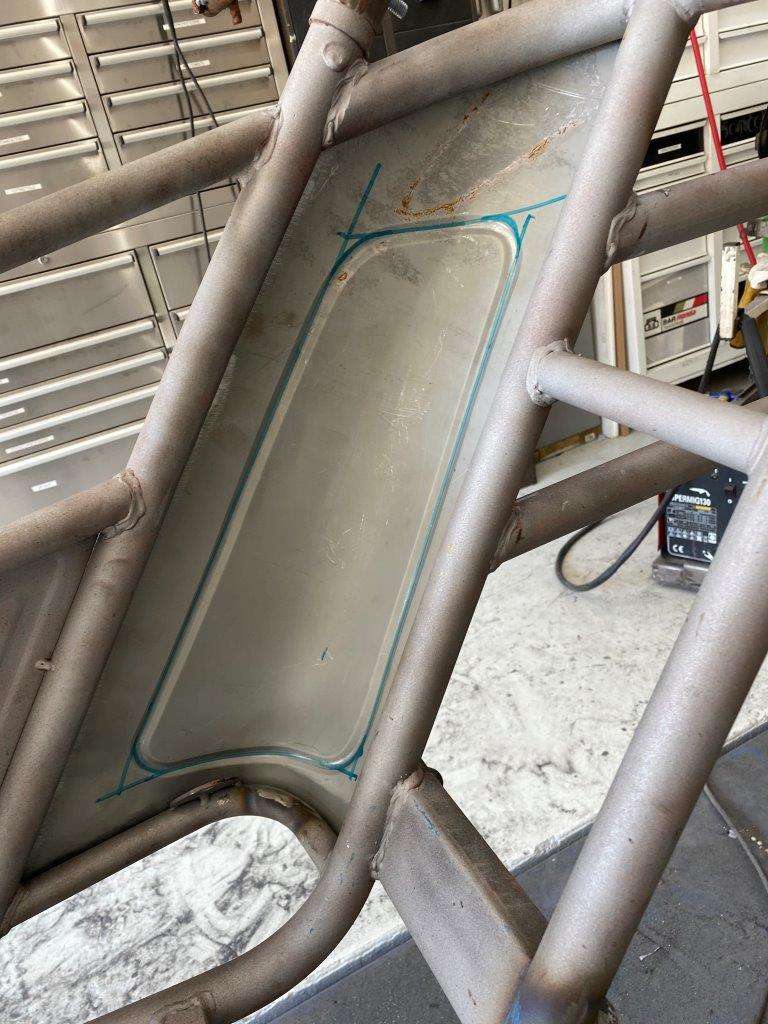
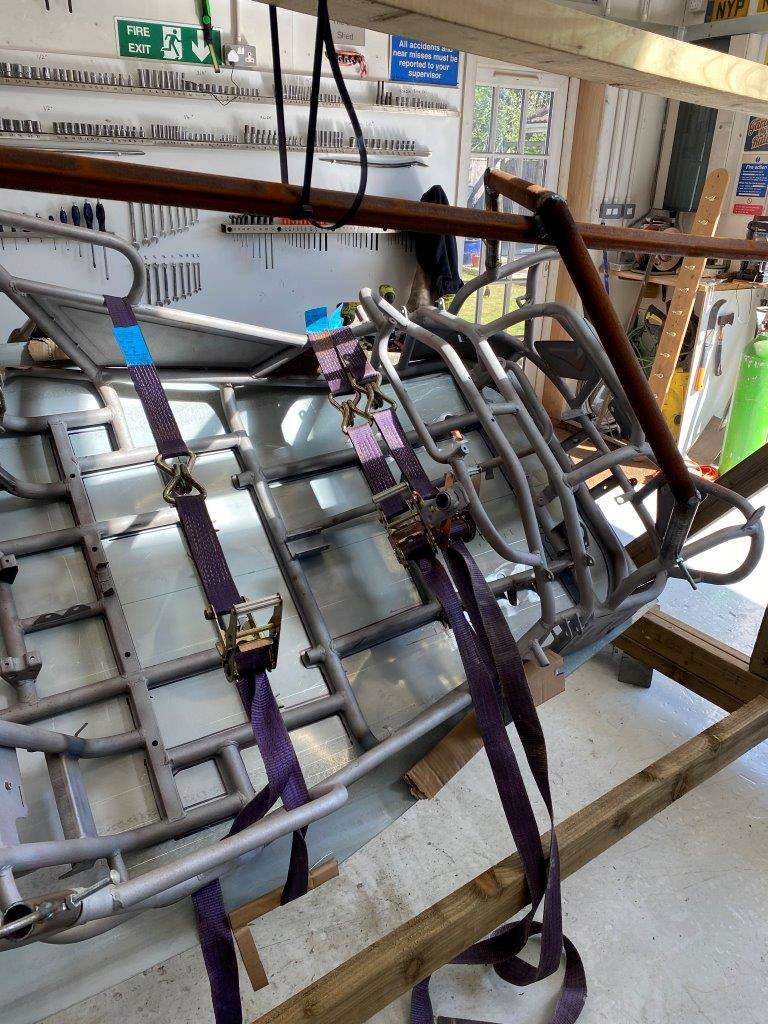
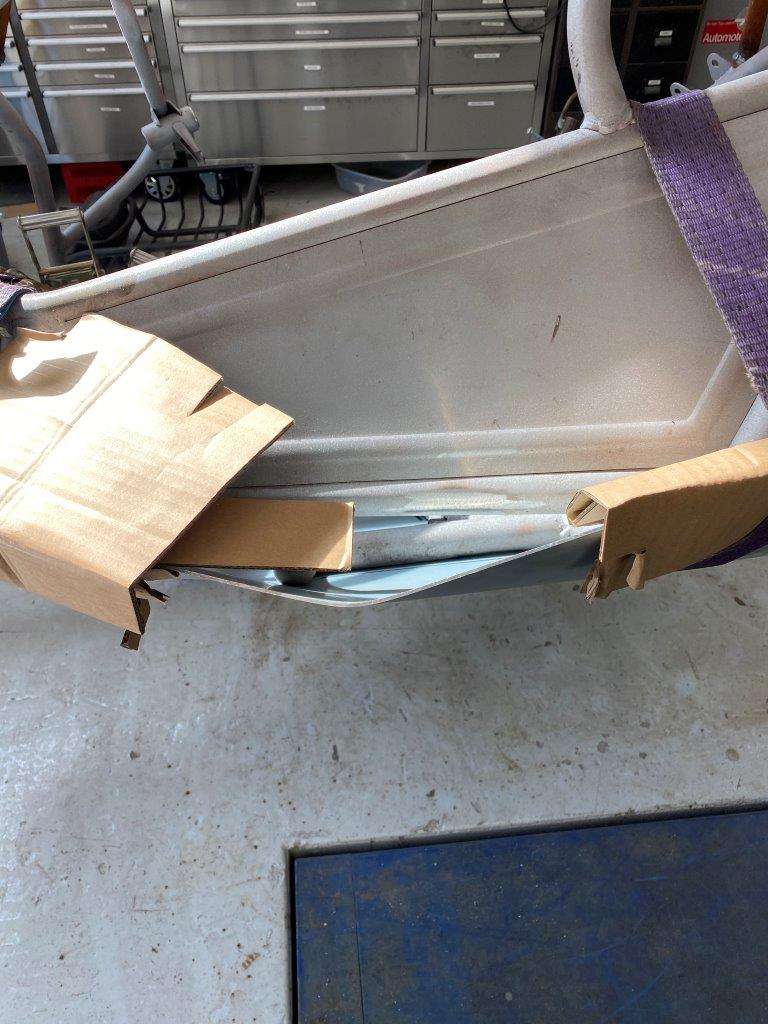
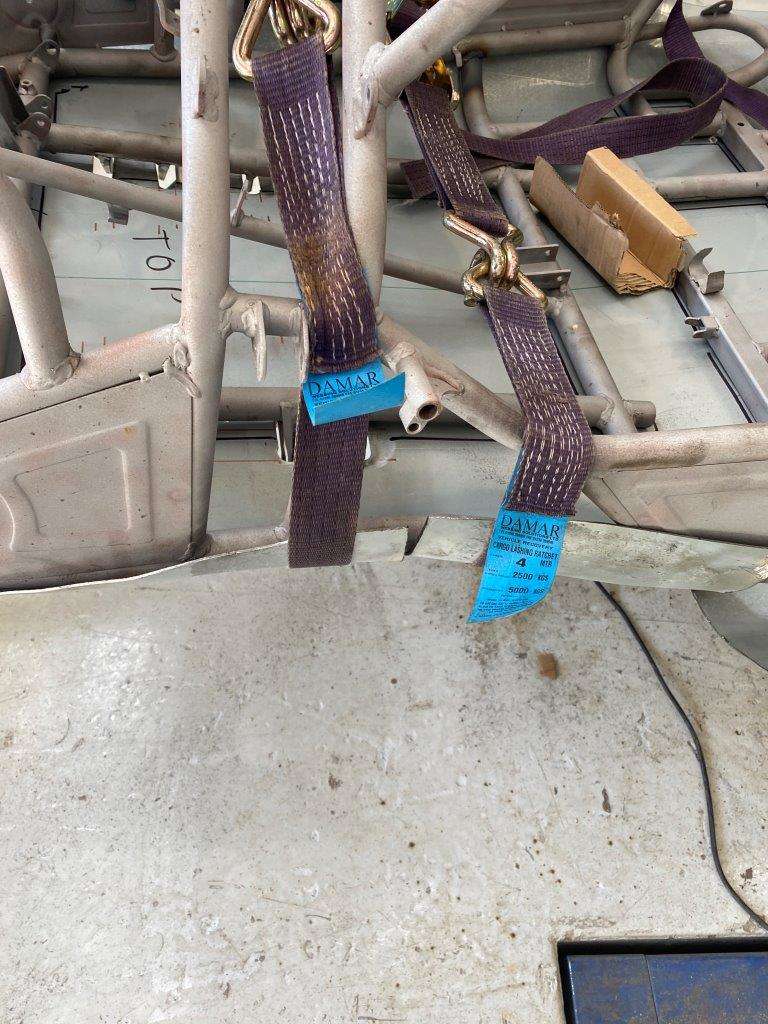
At this point I realised the error of my ways, this is 3mm steel, this is less like panel beating and more like armour plating!! I mean how the F**K am I supposed to bend this stuff into a nice uniform snug fitting shape Pleas note the following is not a lesson in panel beating and should probably not be tried at home, It’s just what happens when I’m left alone with a bit too much time on my hands and decide to try and attempt something that sane people would just not even contemplate. Ratchet straps!! Please note I had to upgrade the bolts holding it in place the small ones were snapping under the pressure You may also note I had 2 sizes of bolts too long and too short I went with too long After a lot of pressure was applied it started to see things my way (judicious use of hammers may have been involved) I did have to cut some reliefs into each side, only about 6 in total but all that metal has to go somewhere! Then some fine tuning – I had to roll out the oxy acetylene and apply heat in a few places Then back to the straps and hammers The inside is snugging up Back to the bench Trim off the excess weld the relif slots up and angle grind smooth That’s it for now, more on this tomorrow – I’ve done enough typing for one morning Stay Safe Keyser - “Laugh and the world laughs with you, snore and you sleep alone.” ― Anthony Burgess


-
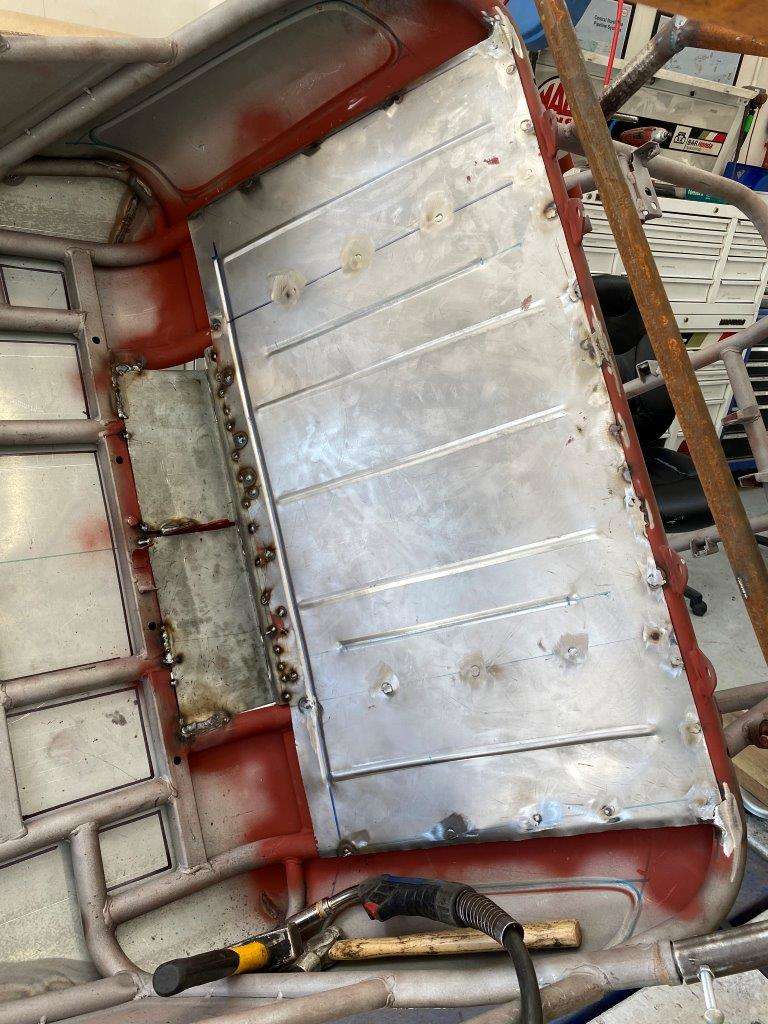
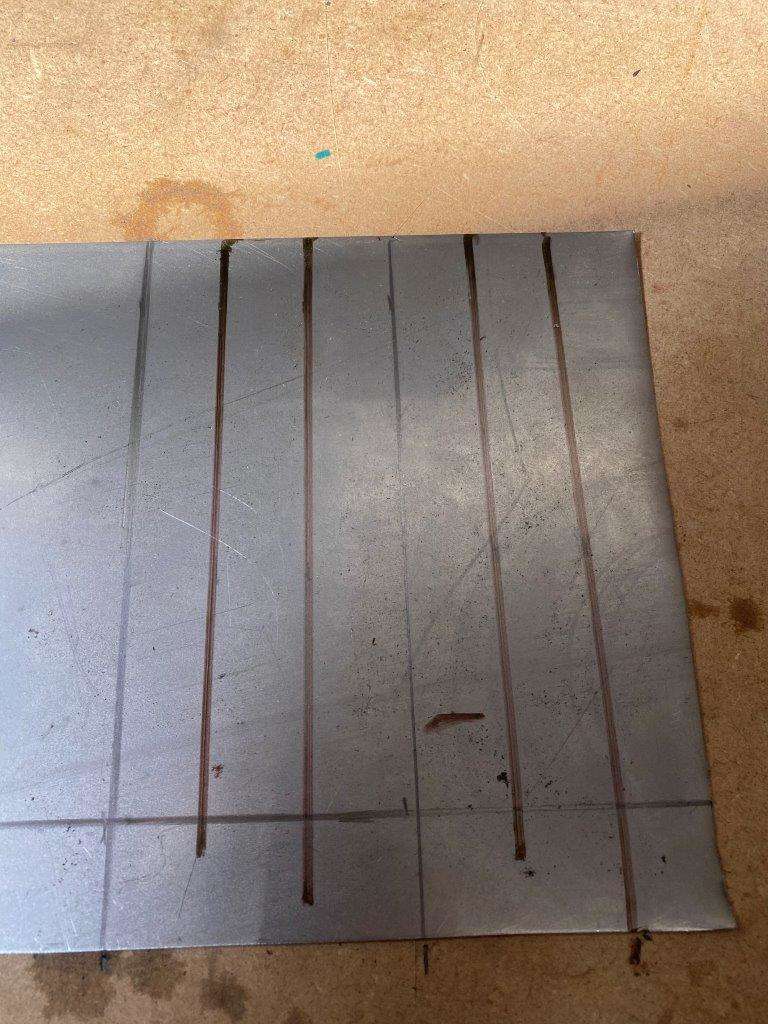
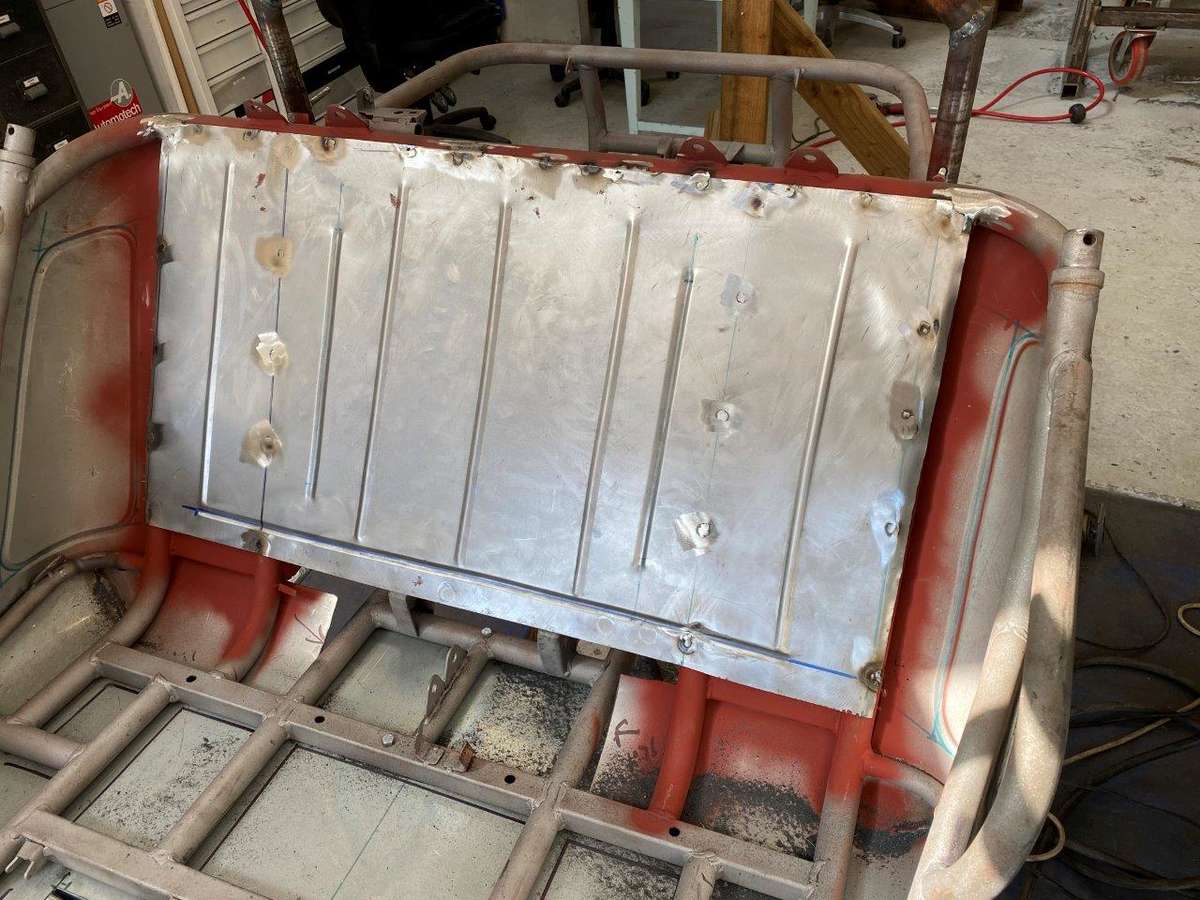
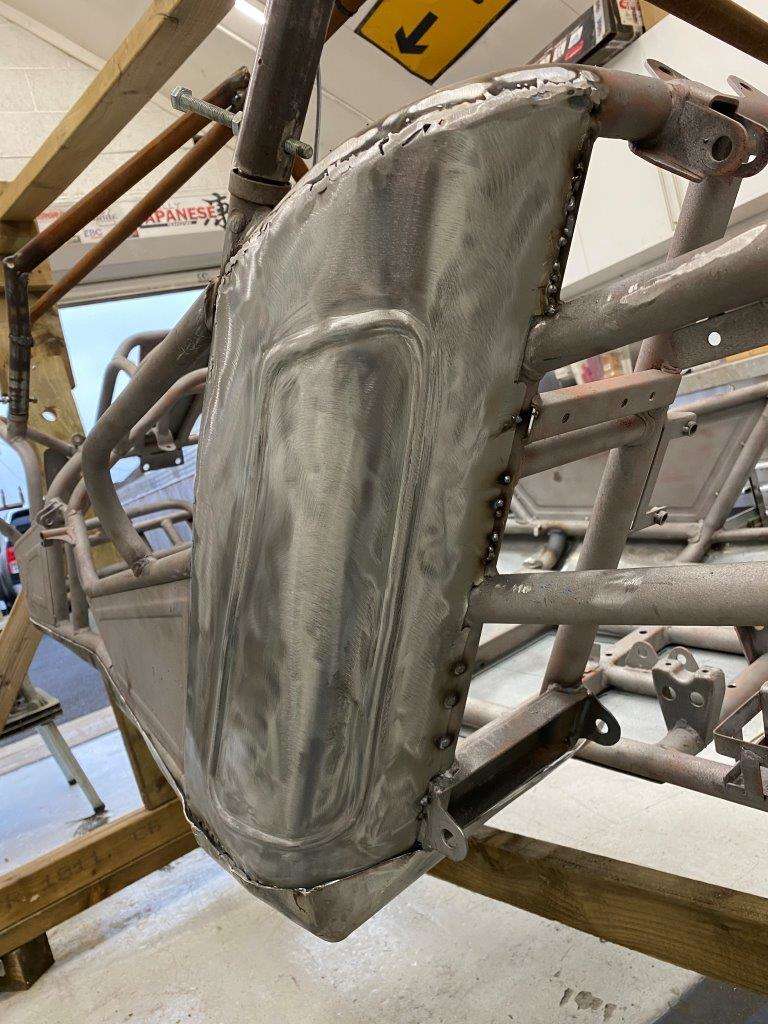
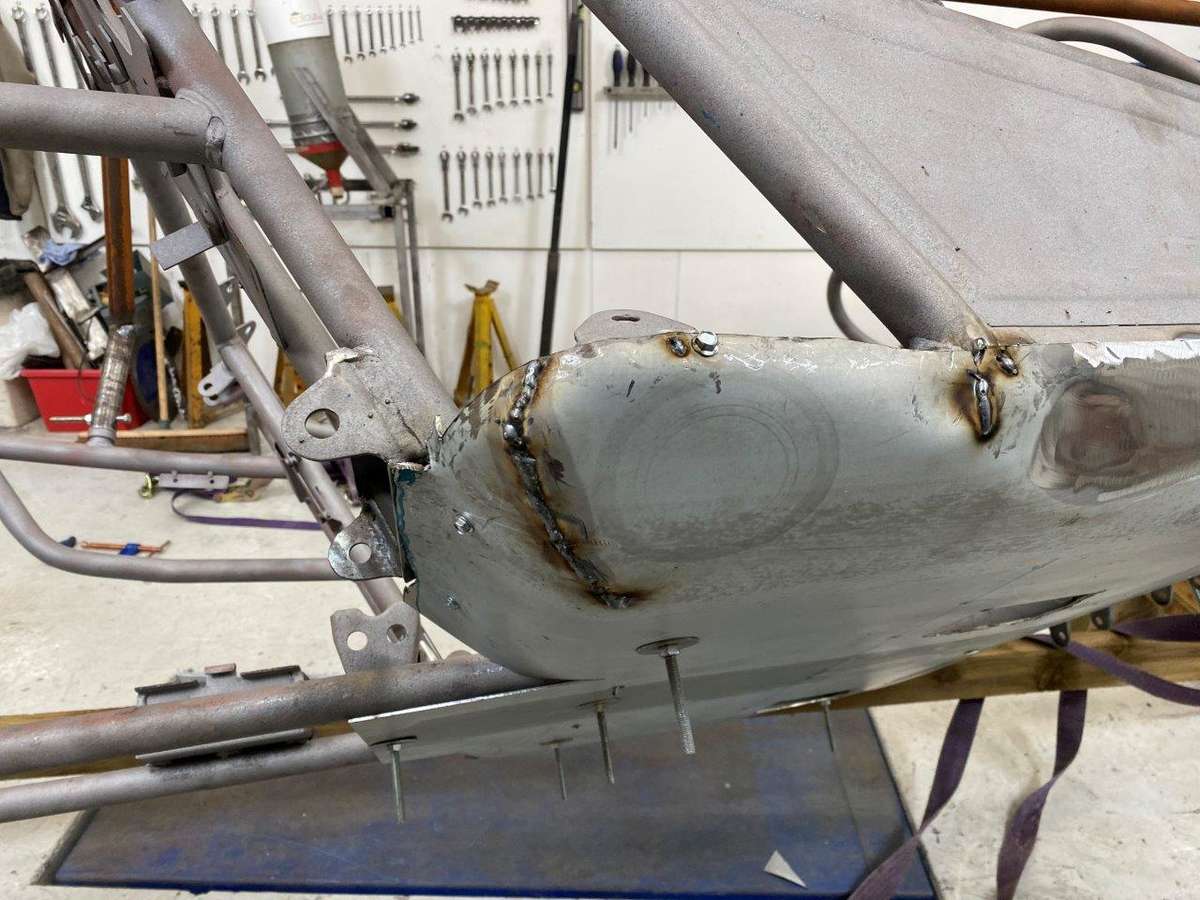
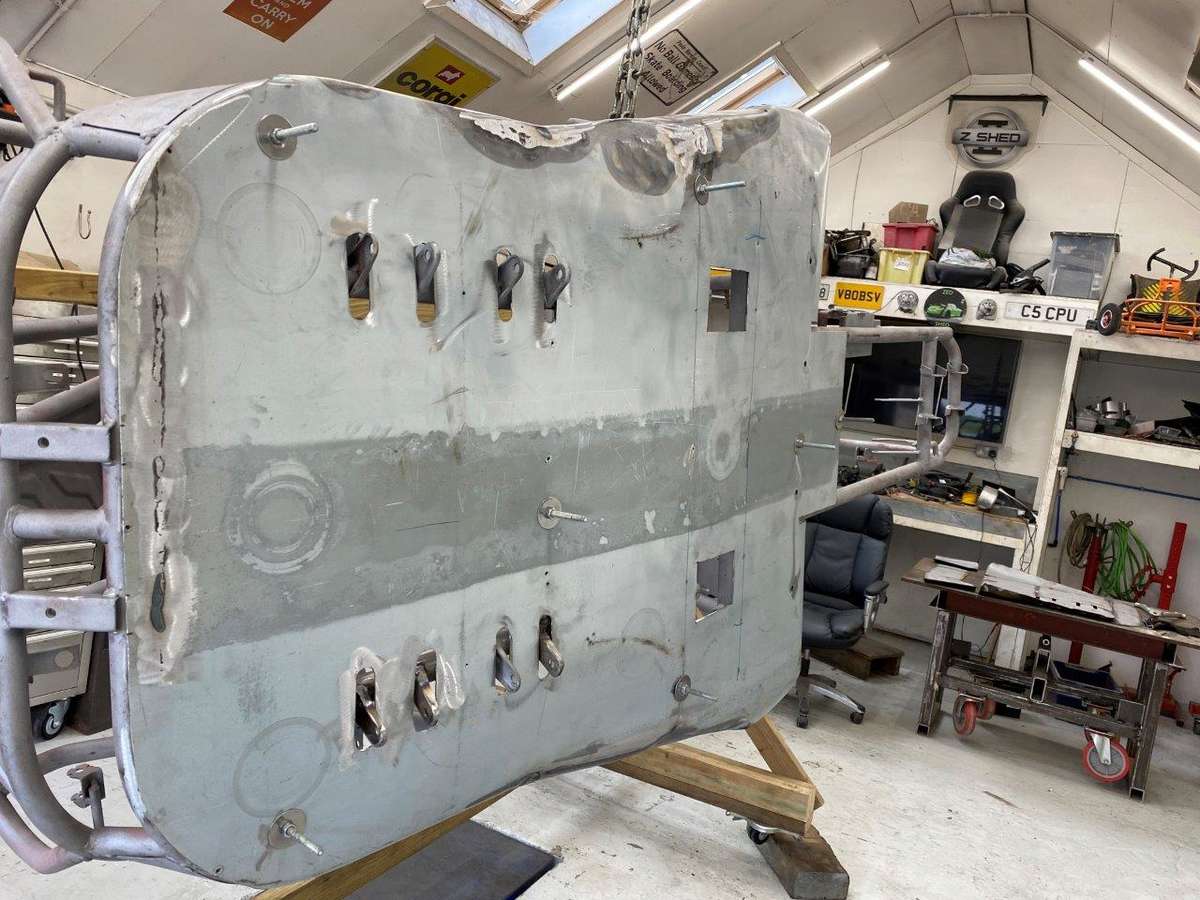
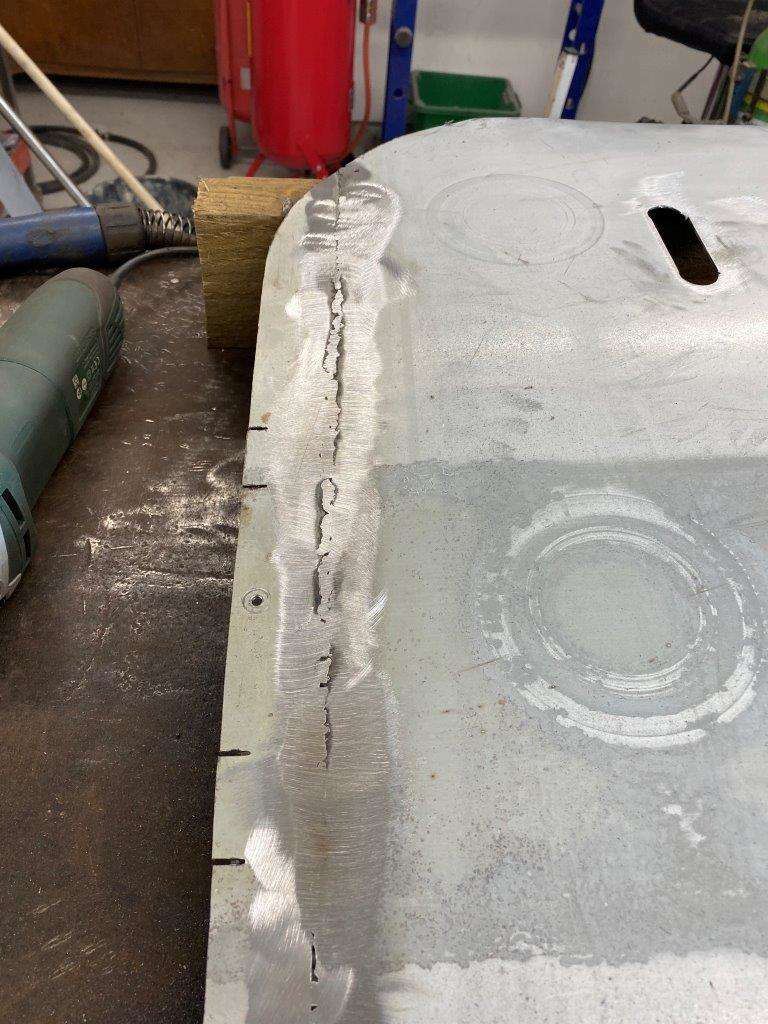
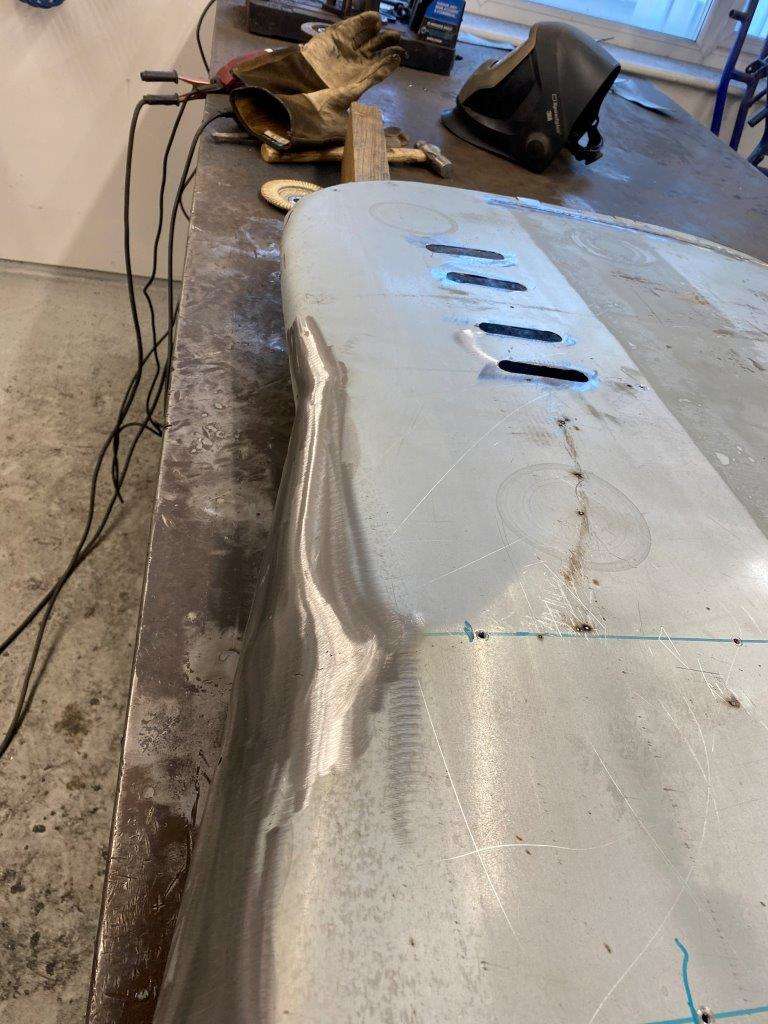
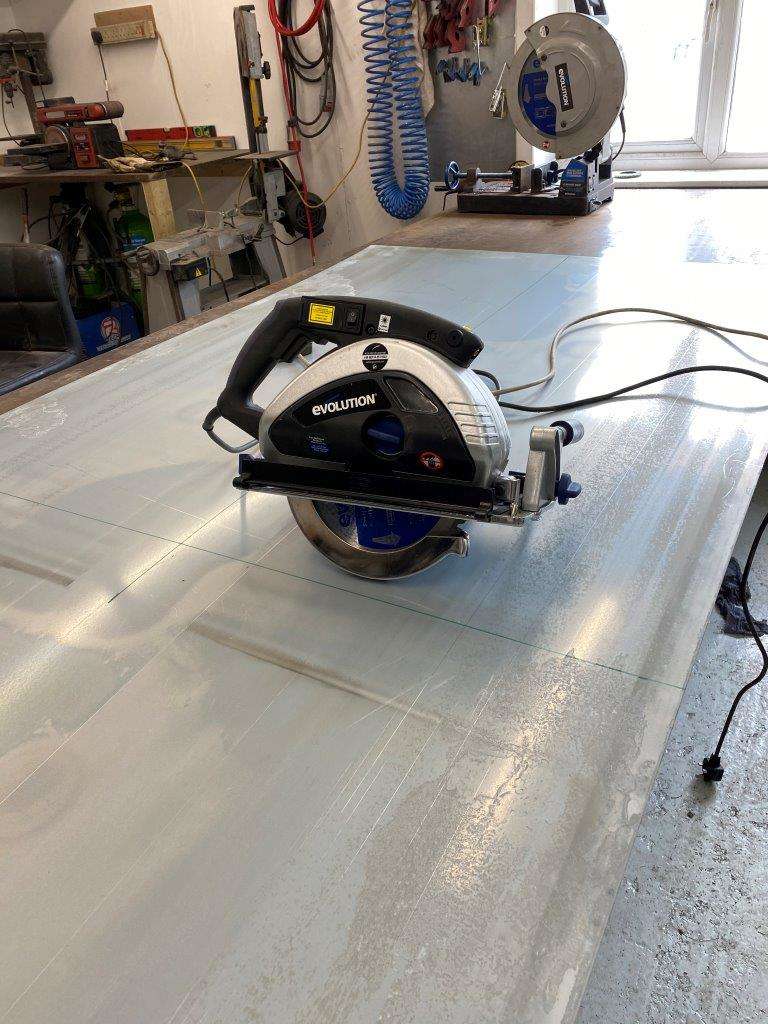
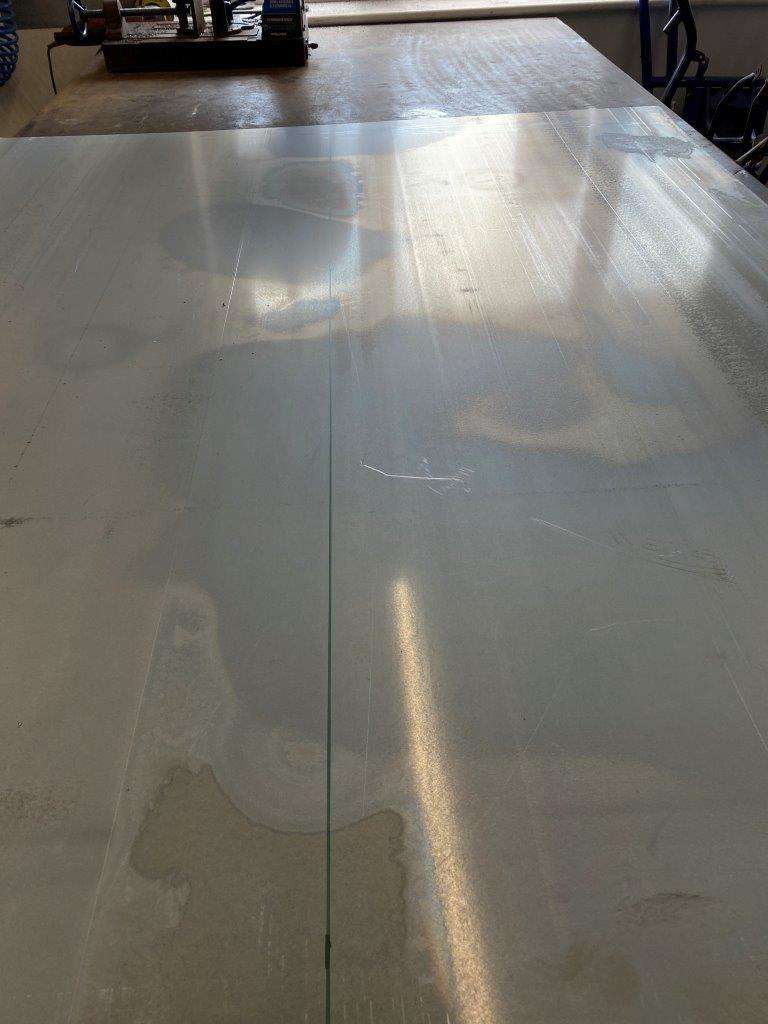
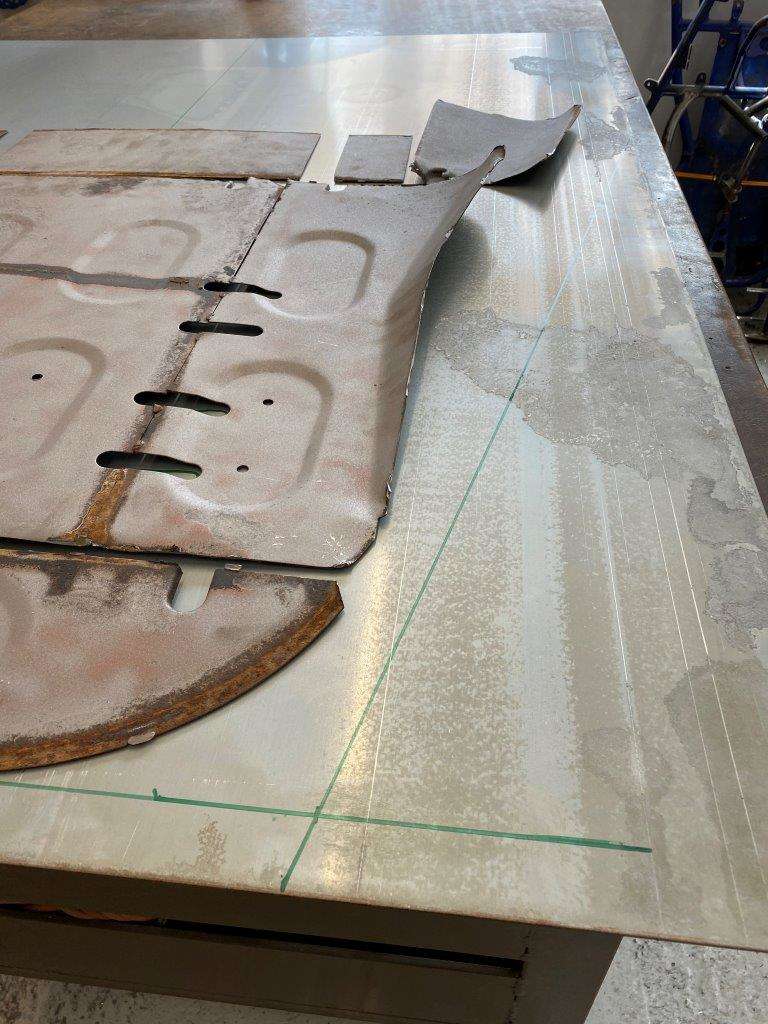
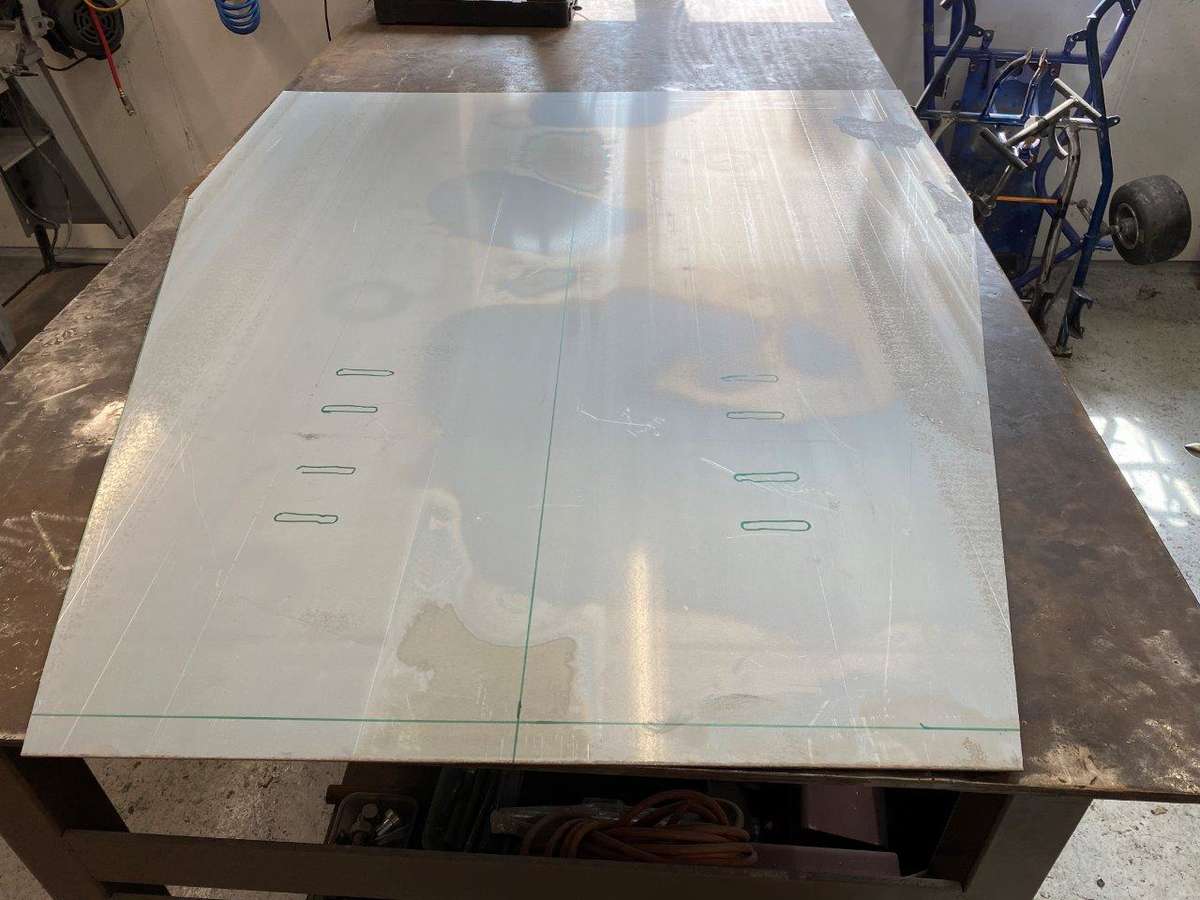
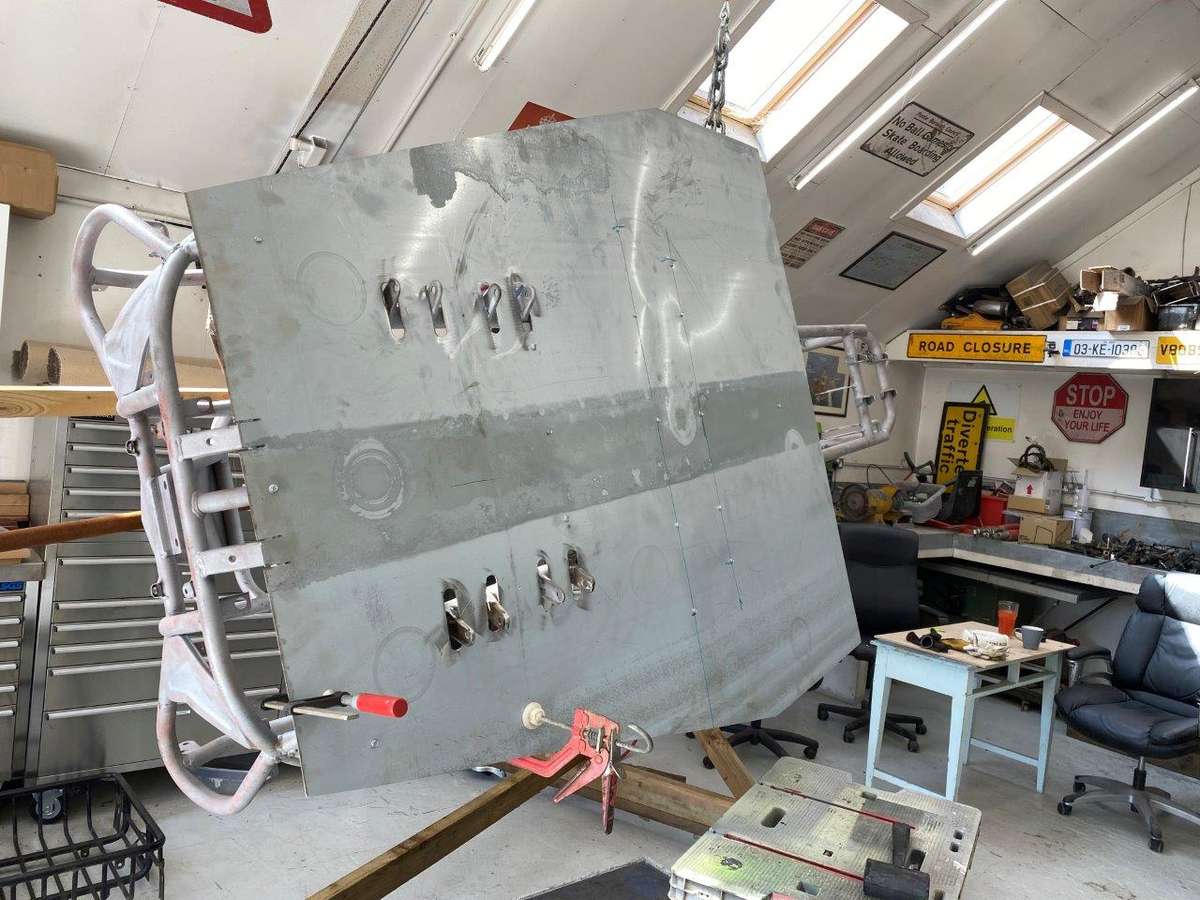
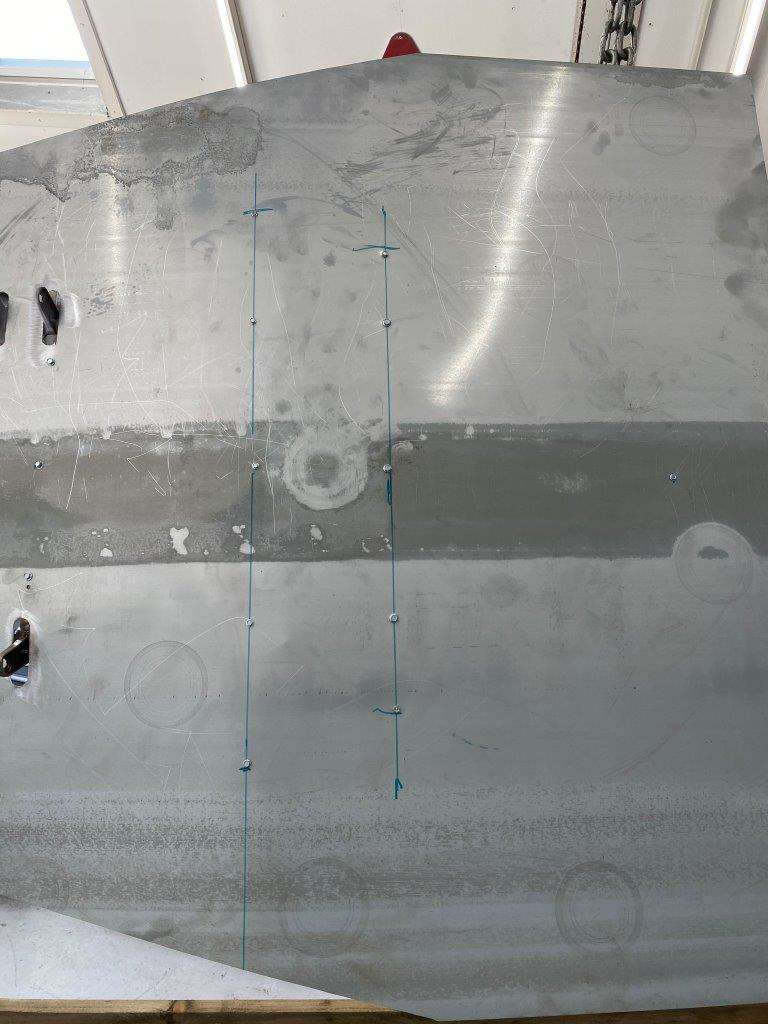
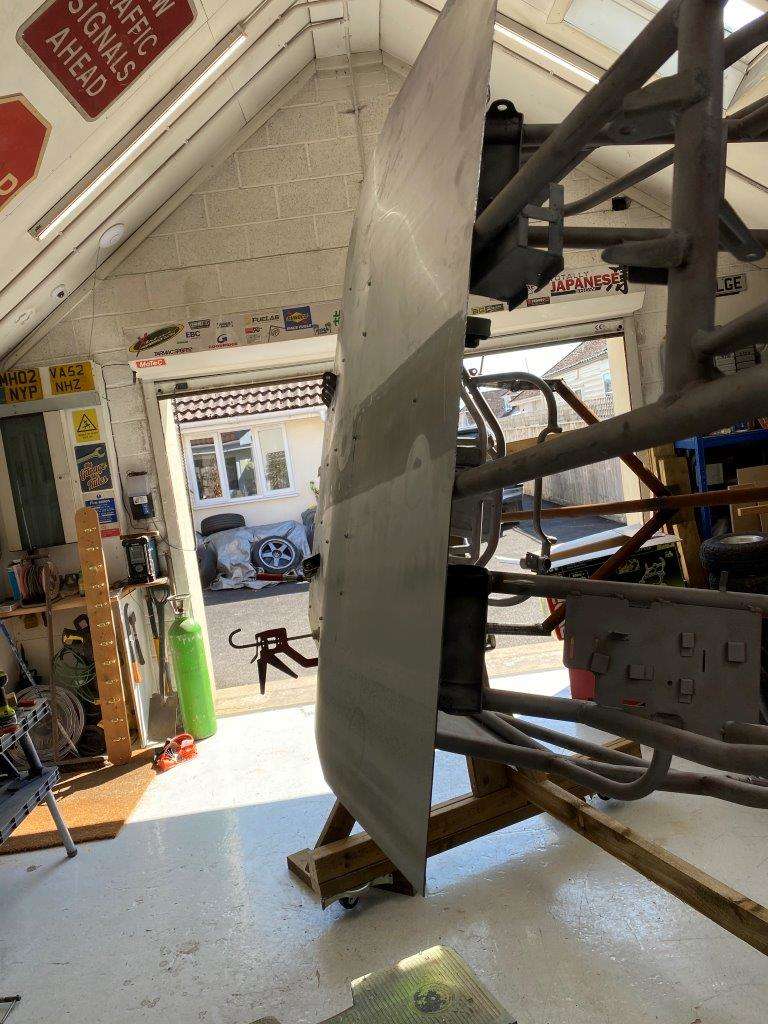
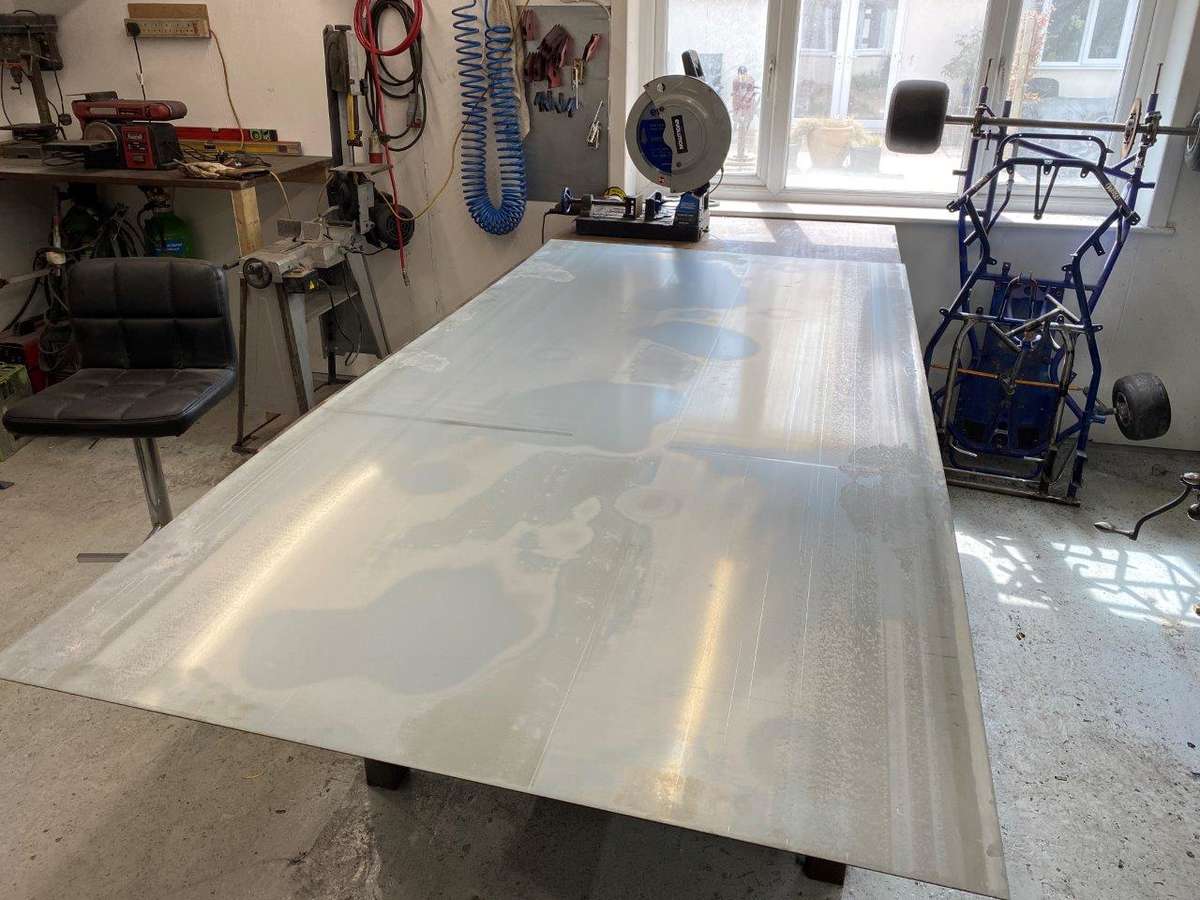
I went to my scrap pile – it always surprises me that no one has ever asked exactly how big my scrap pile is, I call it a scarp pile, its more of a stockpile but I acquired it over time at the best price FREE!! You may be surprised just what I can dig out from it when needed Anyway as I was saying I went to my scrap pile and found this Yes I’m going there!! It’s the best thing really That’s a 1.2M x 3M 3mm thick sheet of zircotec coated mild steel (zircotec is like galvanised but different Goggle it if you need more info) that however is why it isn’t rusty. After roping Mrs K to get it into the garage I got out another one of my toys to start trimming it down Add a centre line Get a rough idea of dimensions from the original tray Now some measurements and marking out Then I started by drilling some holes Joined the dots and test fit, as this is one piece some fettling was required to allow enogh wiggle to get it on Out with the air grinder To give Now it fits And from inside At this point I had to come up with a way to hold it in place for shaping but I need to be able to take it off for both the shaping and for paint later. I used these they are for roofing sheet but with a pre-drilled pilot hole they work fine. That gets us to here More coming I said this was big!!!.........................................

-
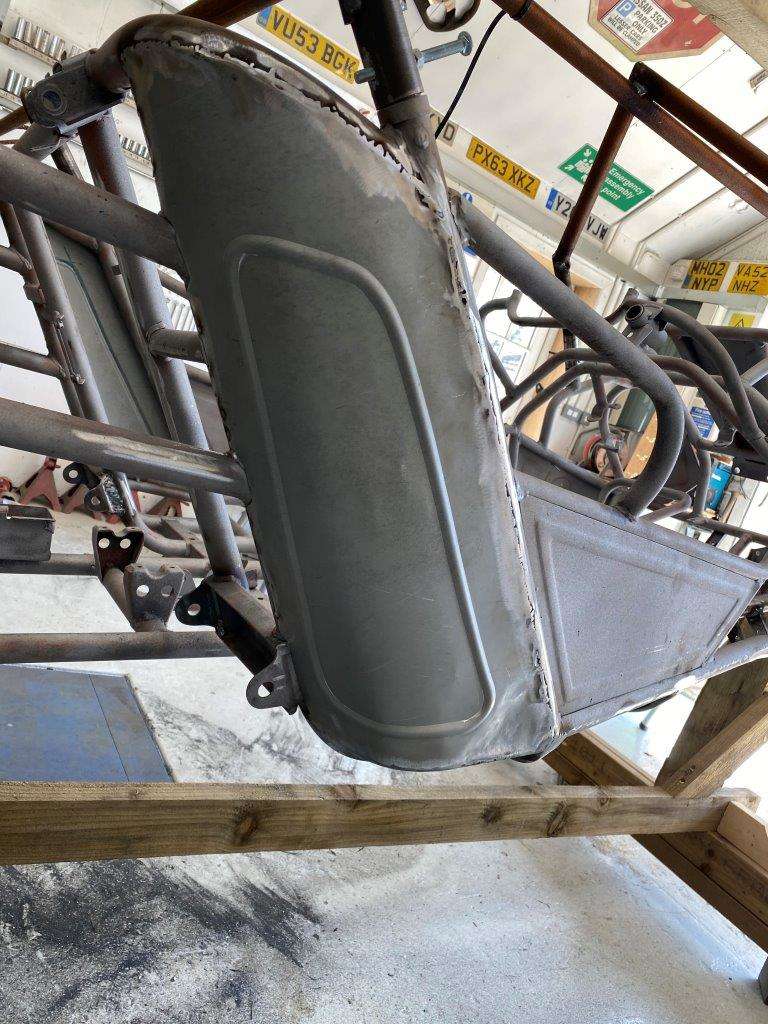
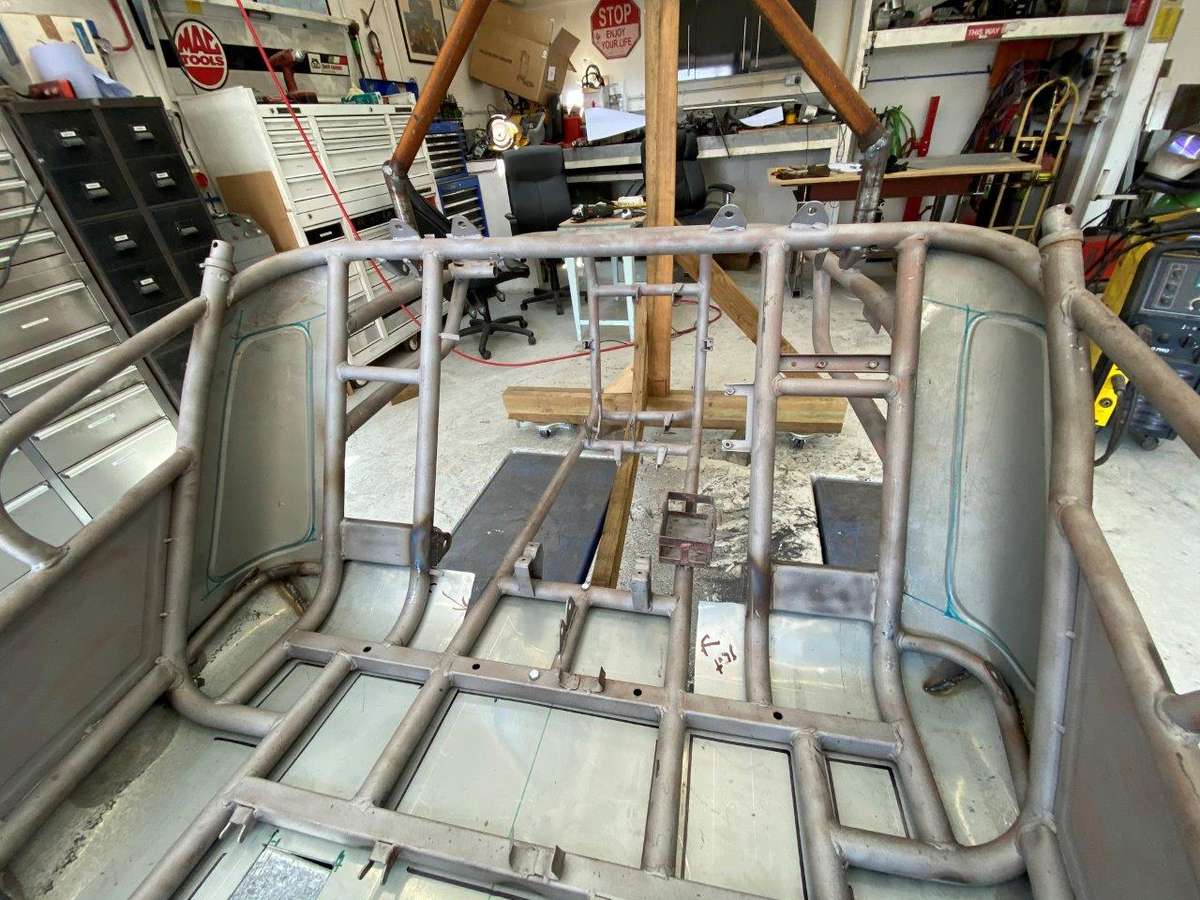
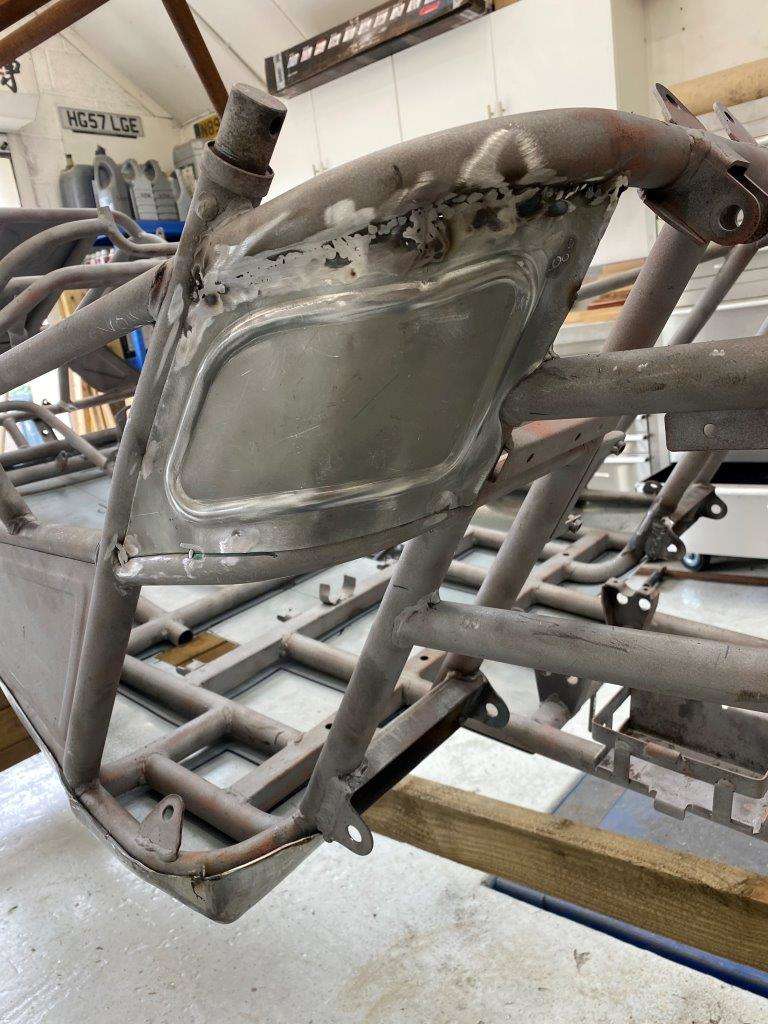
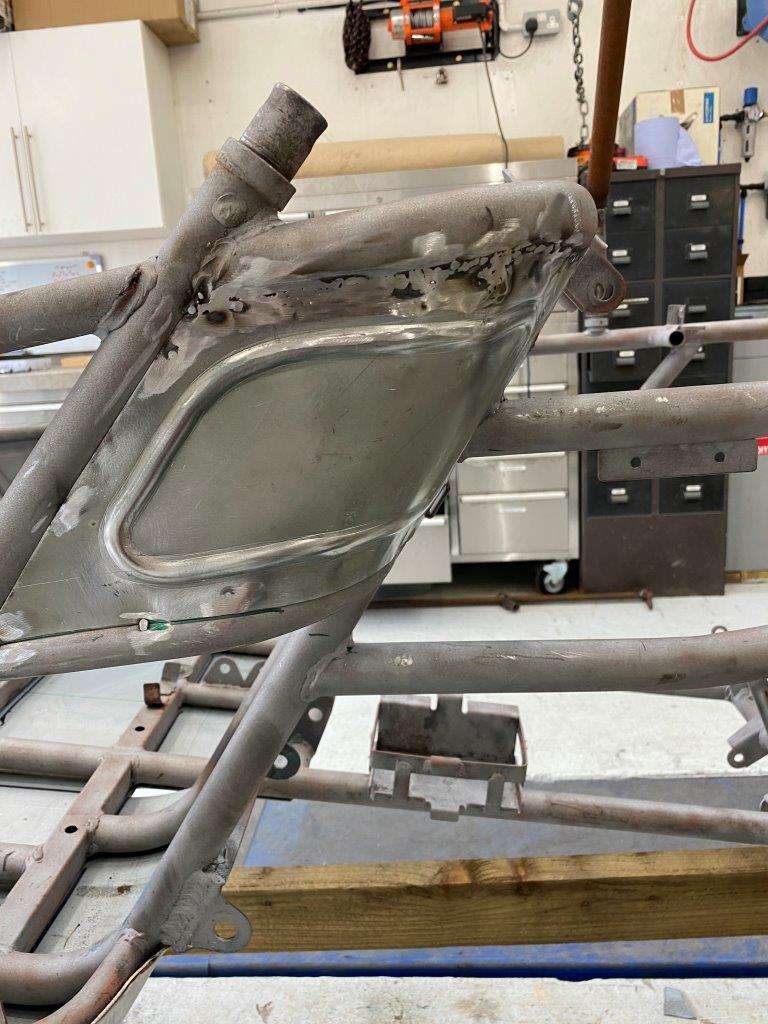
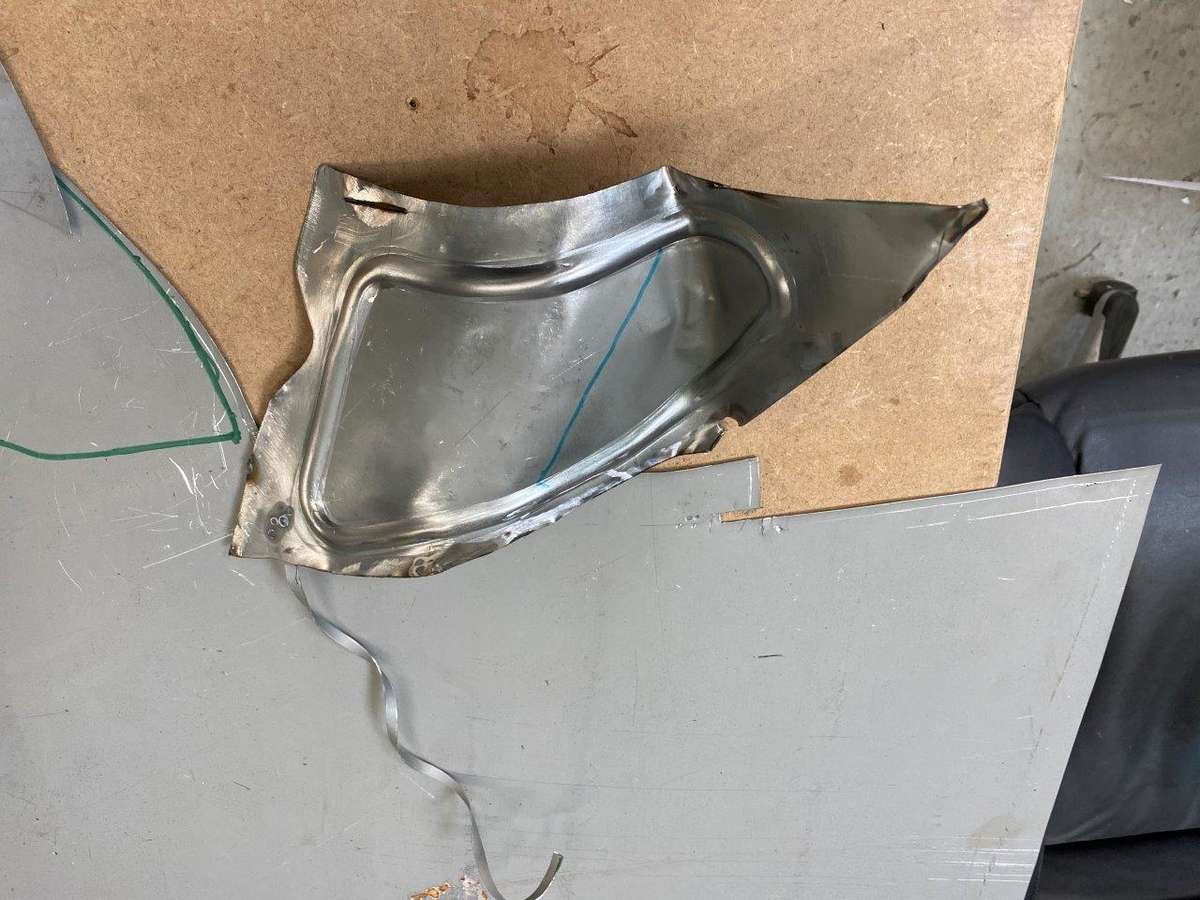
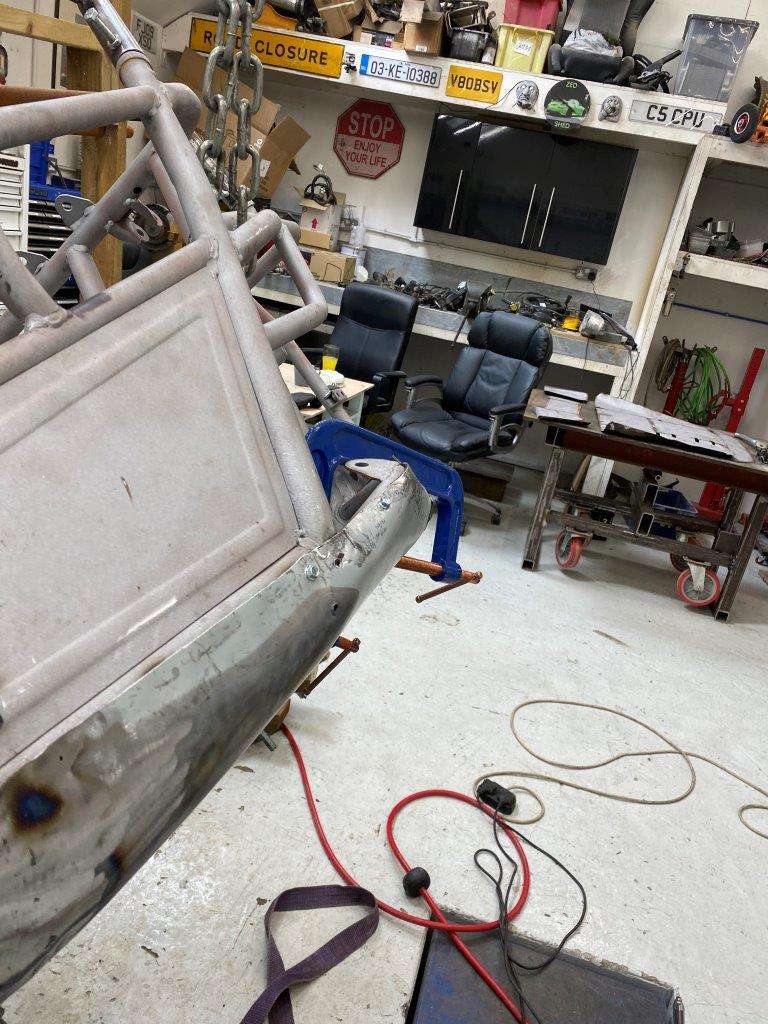
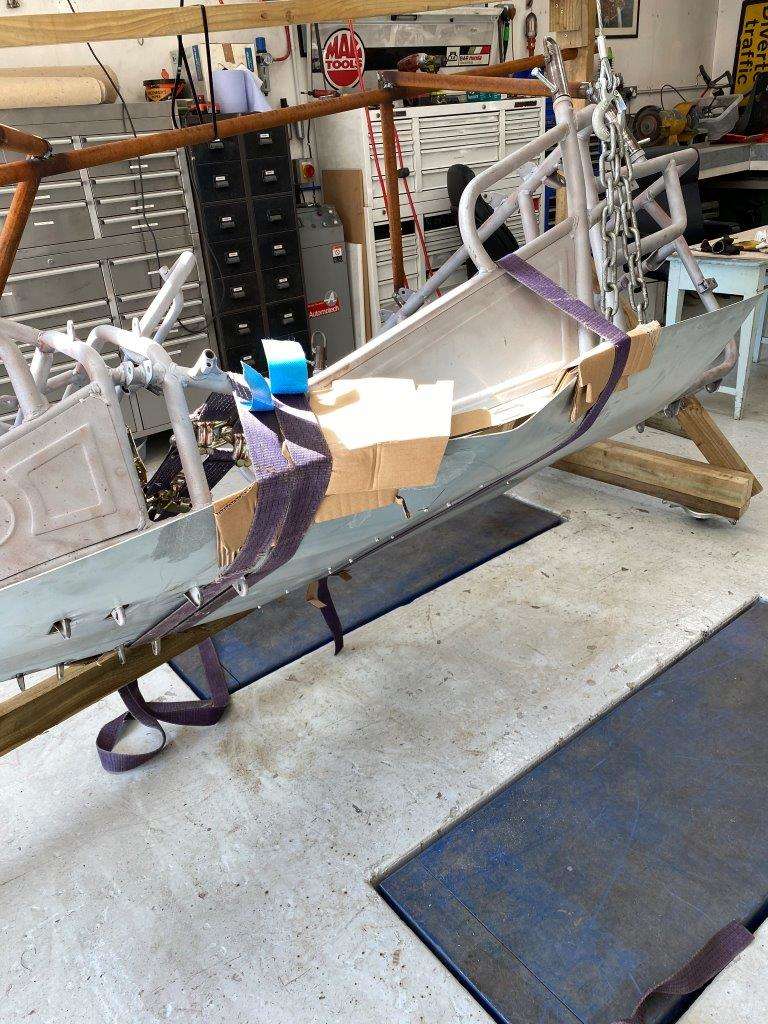
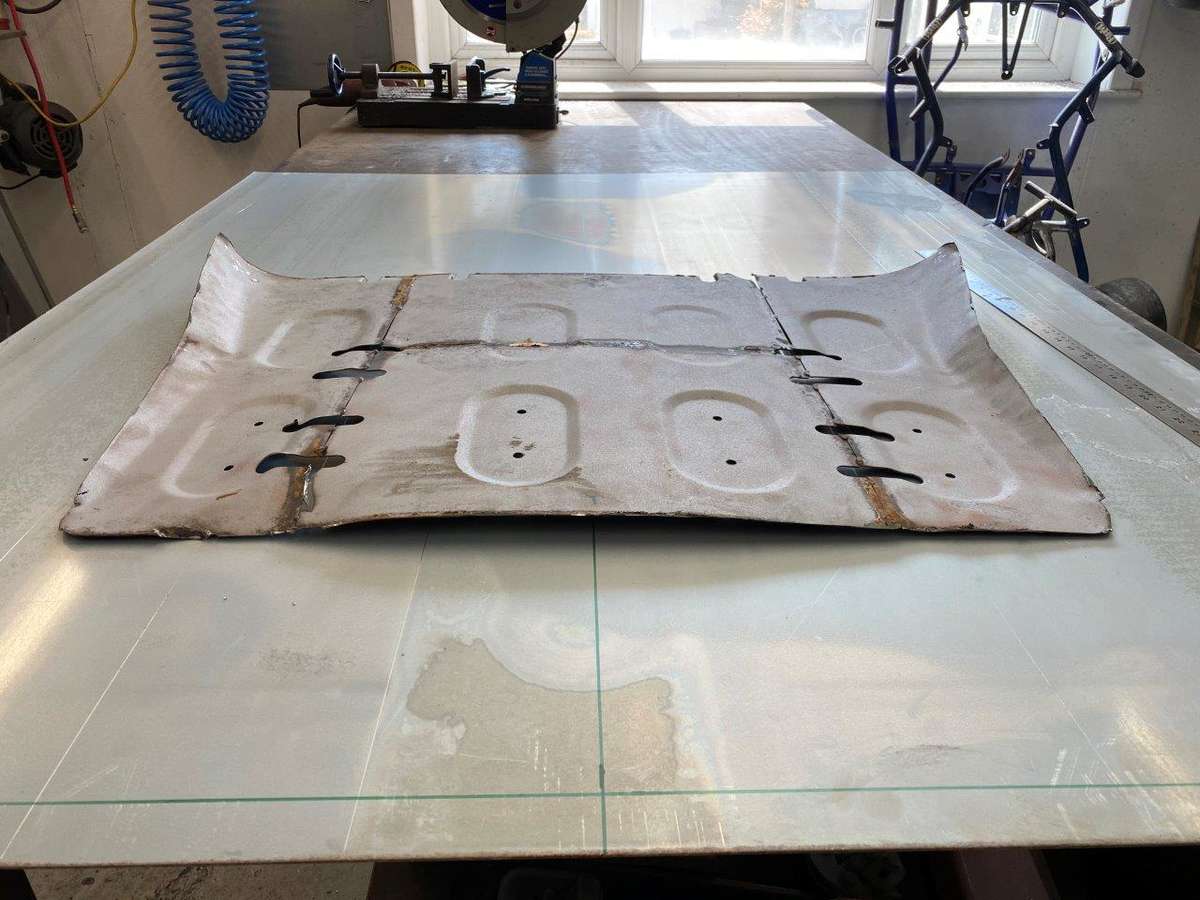
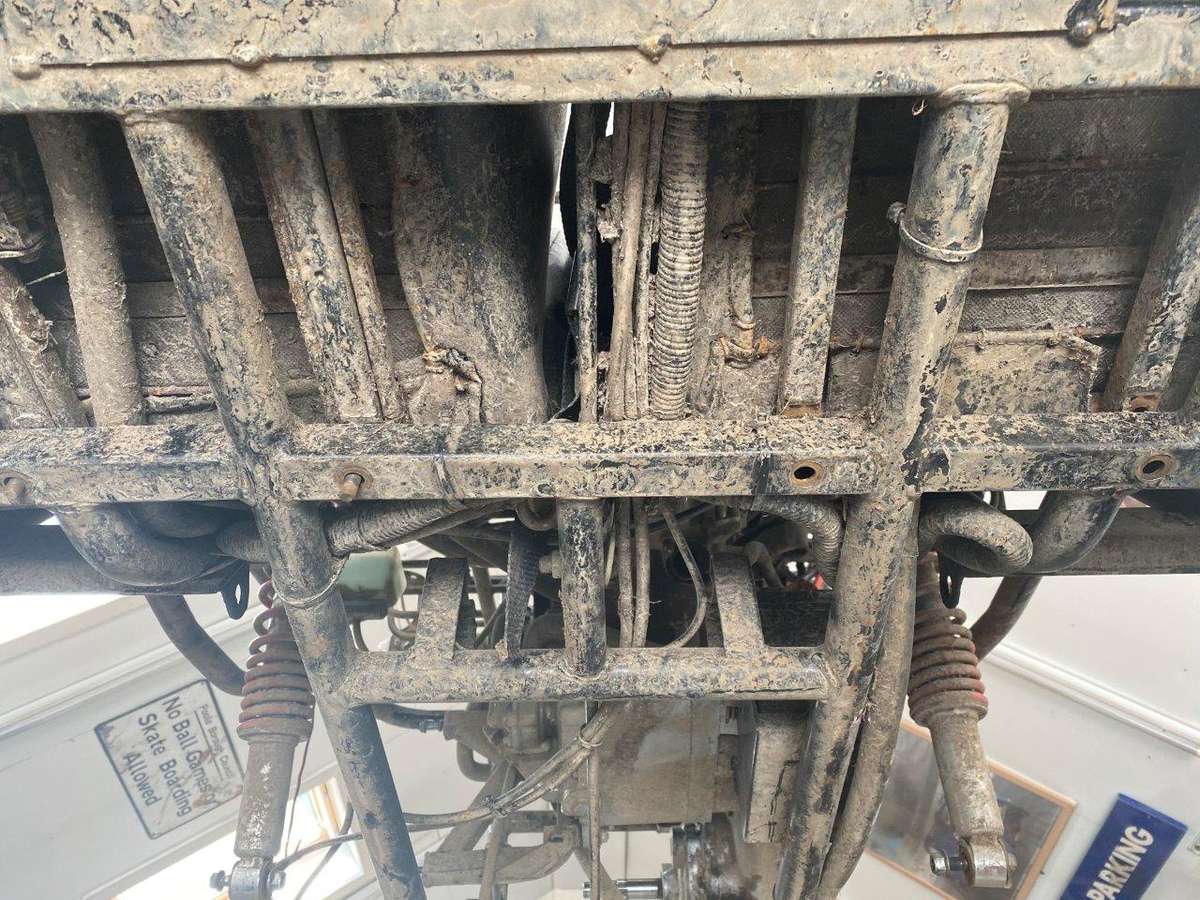
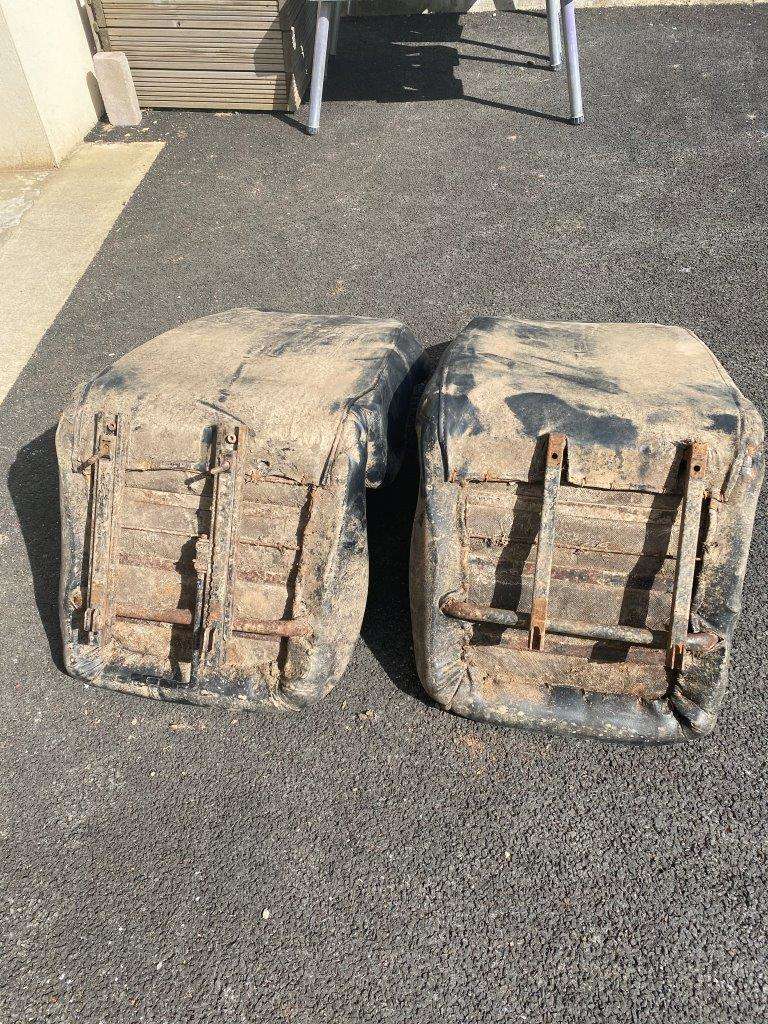
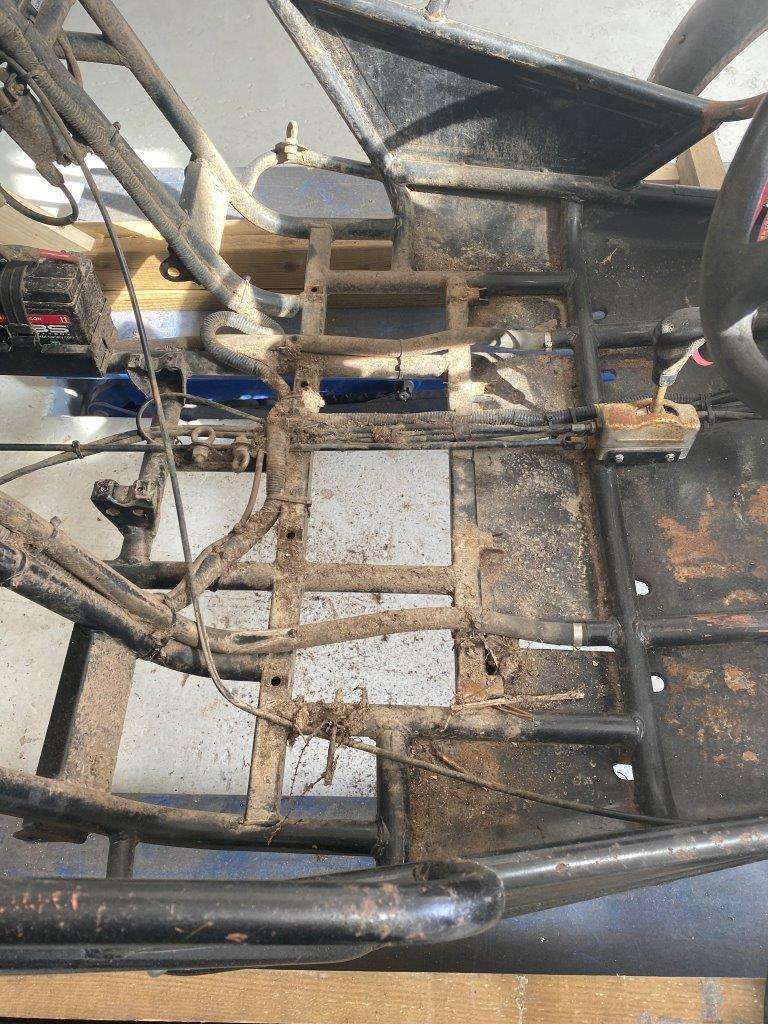
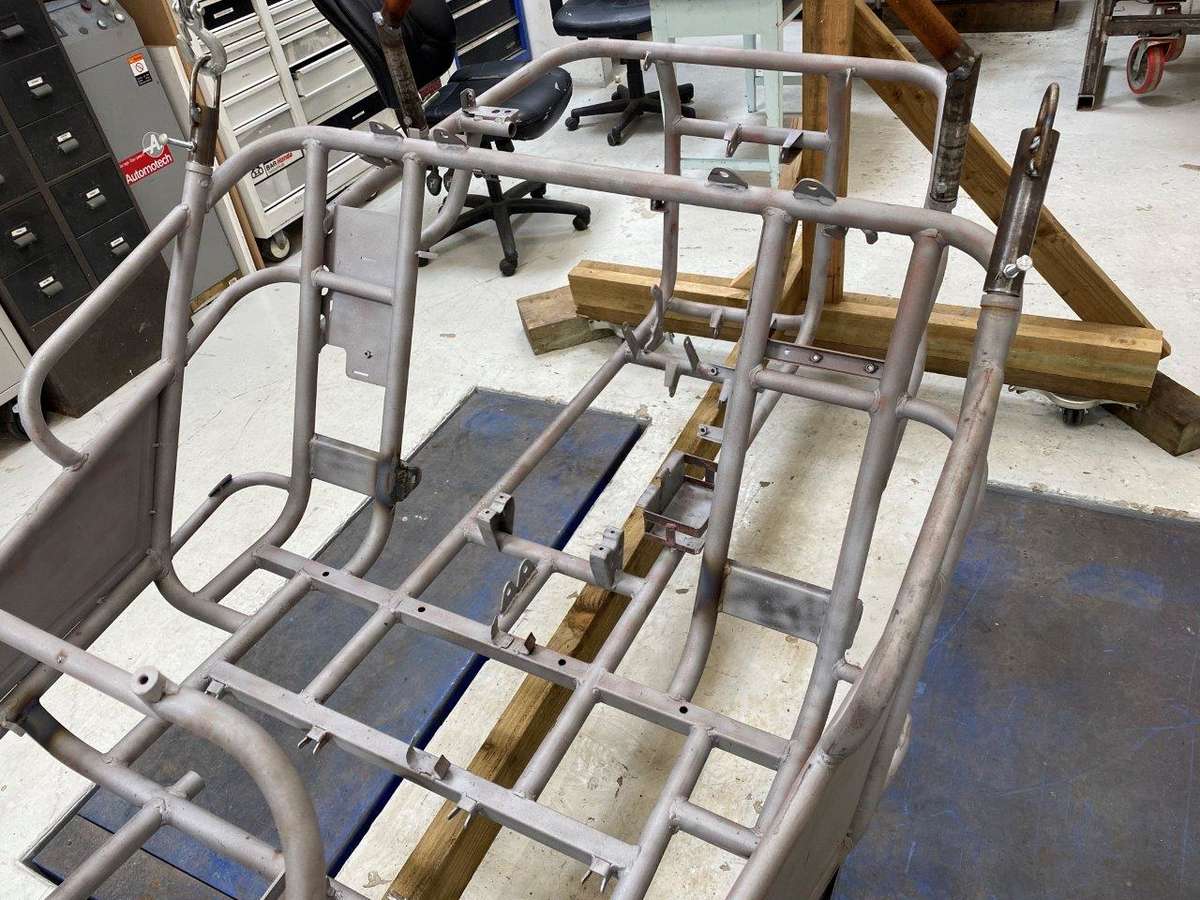
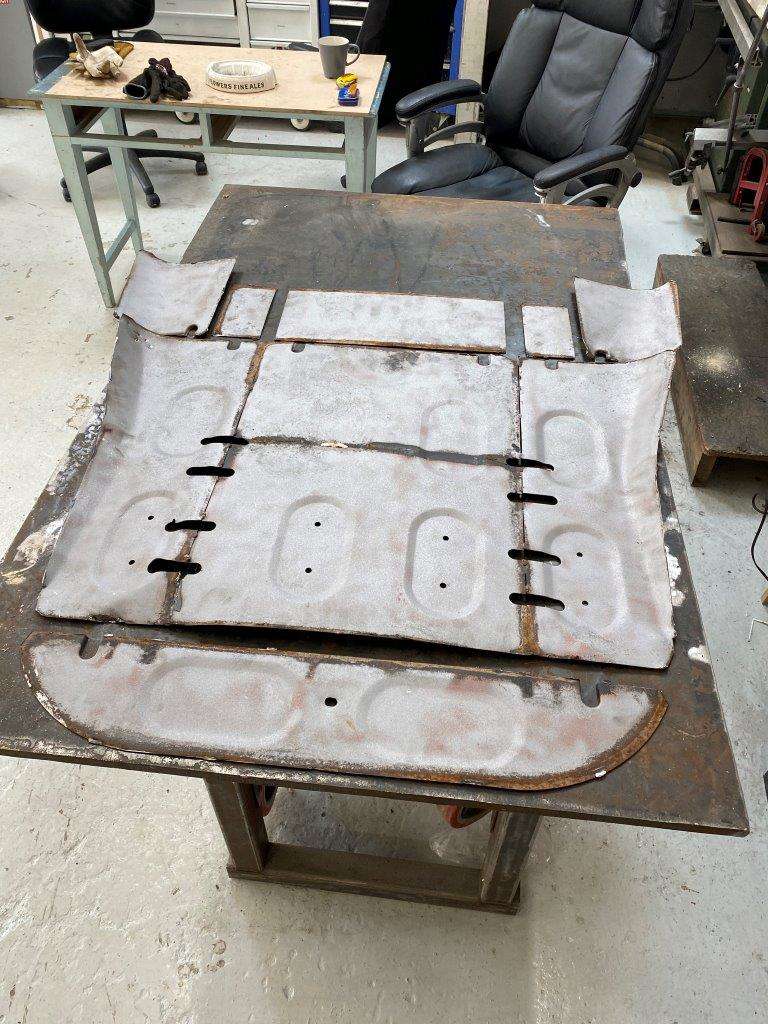
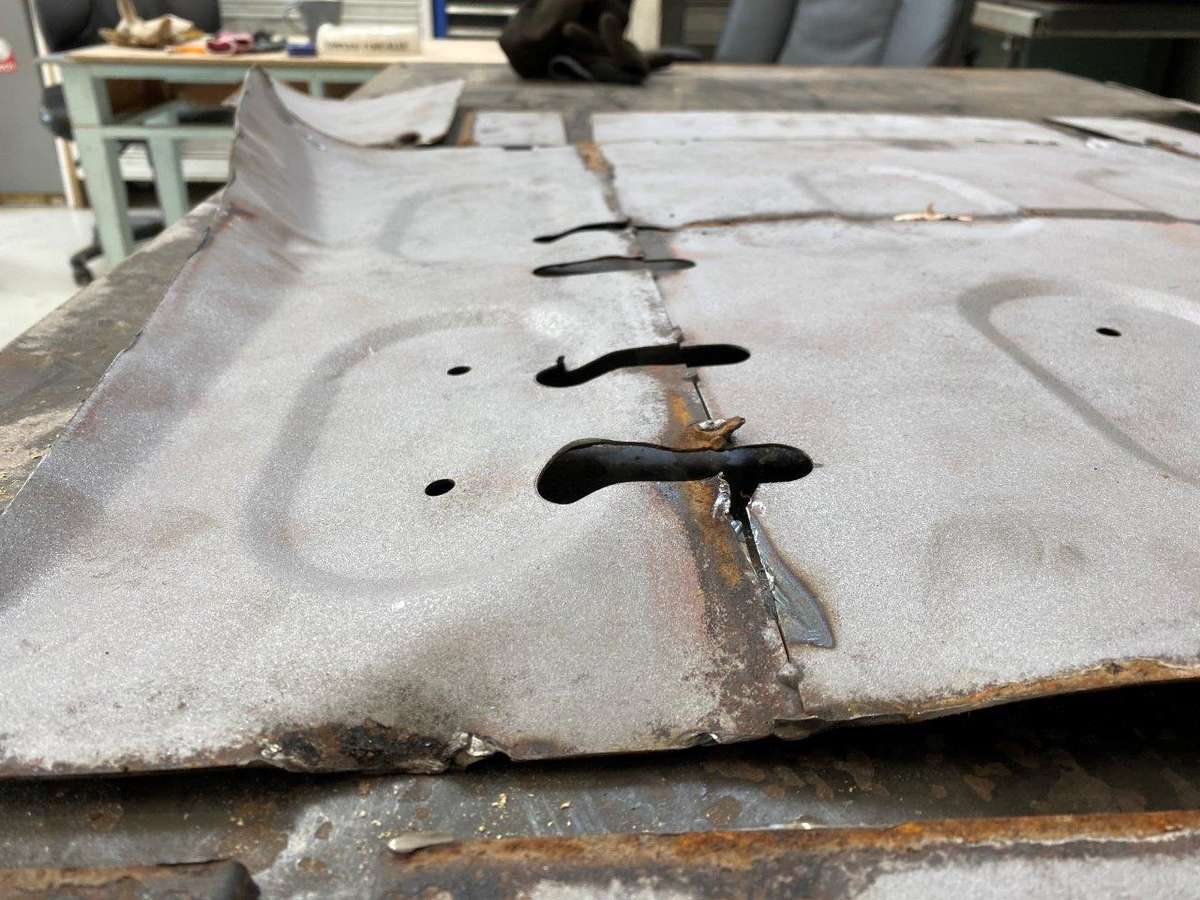
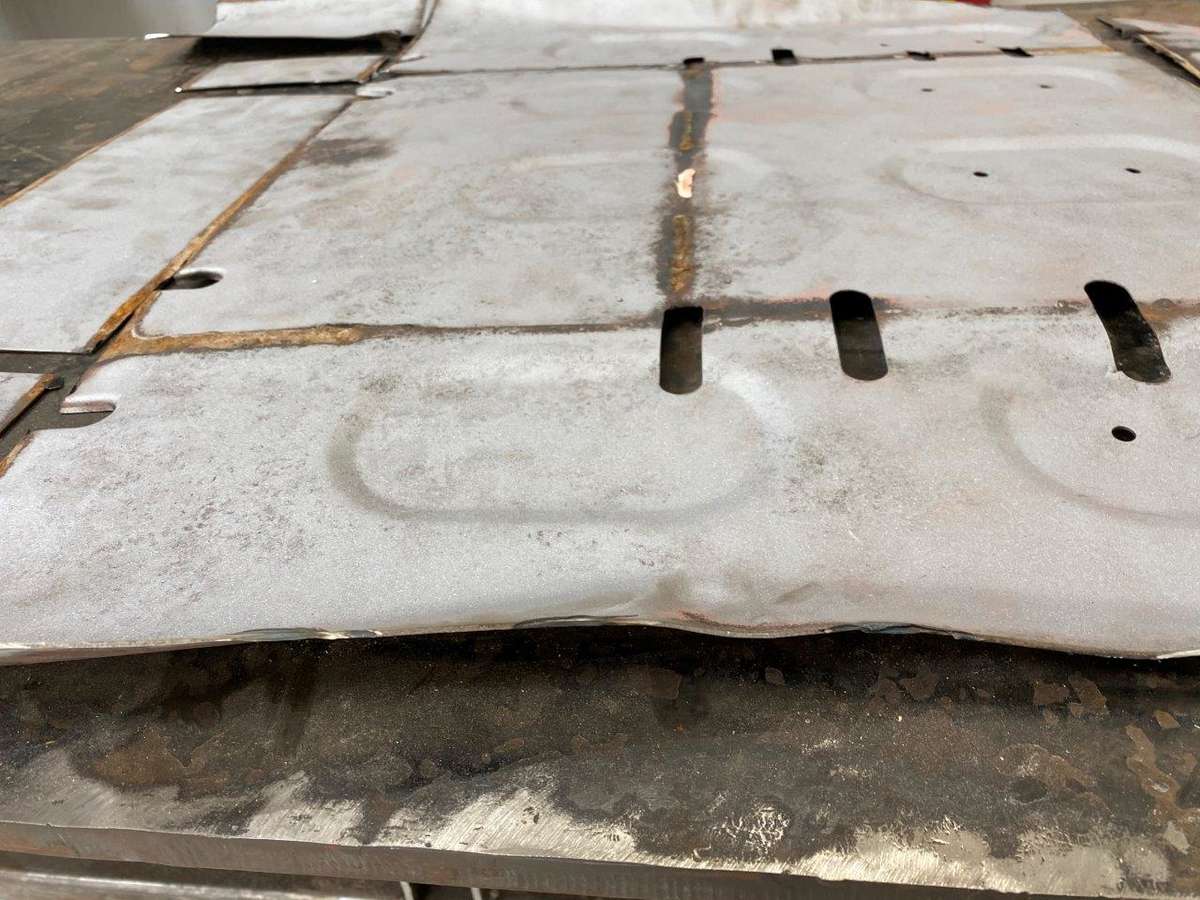
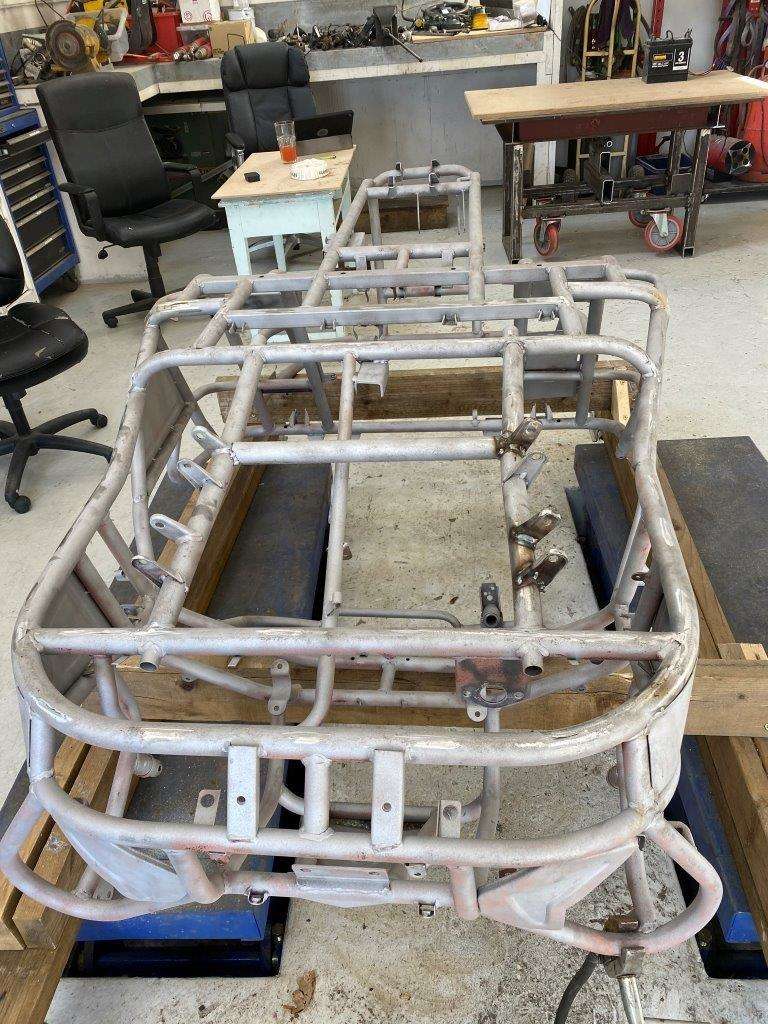
Morning my avid followers I’m sure you can hardly wait to see what I’ve been up to on The Bug, or more likely are climbing the walls due to lock down and this is almost better than watching paint dry Well strap in this is a BIG one, let me start by setting the scene; When we first got The Bug and I was underneath it you could tell the previous owner broke it while having some fun in the mud, fair enough that’s what its for, but it looked like this underneath That’s the bottom of the seats not the skid pan they looked like this underneath And removed the bottom from The Bug Now two things struck me about this, firstly, surely it would be sensible to have at least a splash guard under the seat just to keep the crap of and secondly, somewhat more worrying if you happen to go over something sharp and pointy, you know like a stick, when off roading the only thhing protecting your backside is a piece of foam and a thin layer of faux leather – I don’t like that idea! So it was always planned to extend the undertray/skidpan back to give the driver some protection as well as making the buggy more rugged, Now I have stripped the buggy completely so the frame looks like this, This is the removed skid pan As you can see it is pretty beat up and made in lots of sections and has gaps in it, so I had to consider the best way to improve on it. In a perfect world the complete under tray would be one big sheet and extend all the way to the back of the cockpit area, this would be a major undertaking though and you would need a large piece of heavy weigh steel I’m not sure I want to go there! Much pondering and coffee drinking took place as I considered my options – More coming …………………………………..
-
Of course it was just for you I mean, after all, I'm just doing "what I'm Good at" Just need some doughnuts now
-
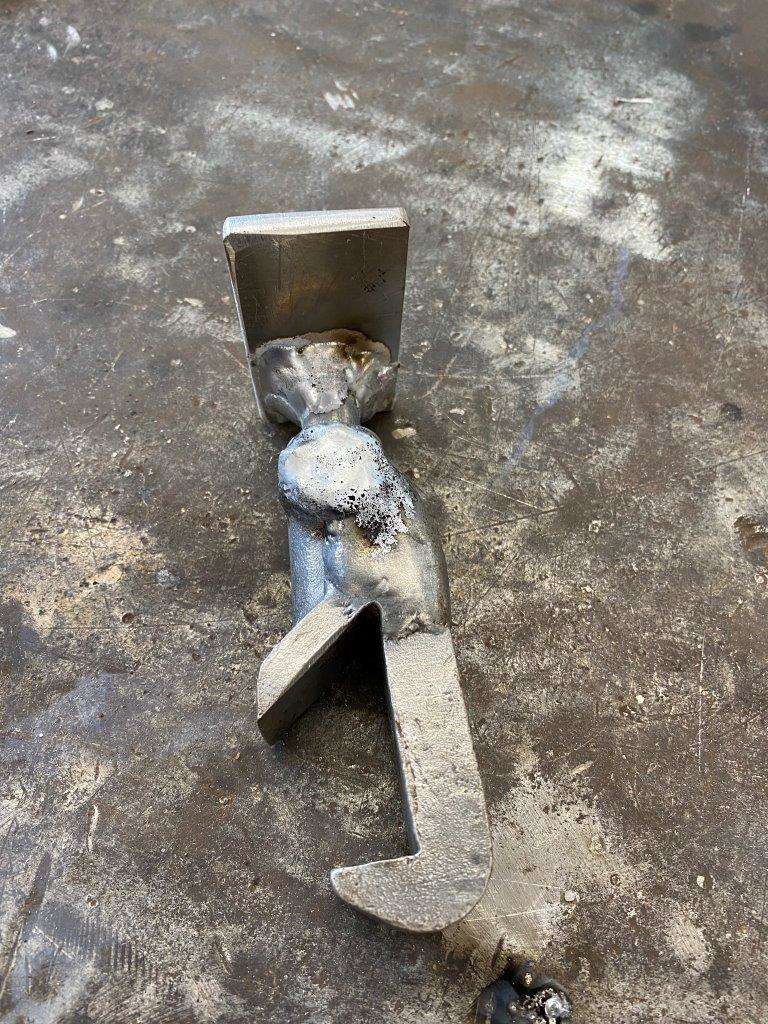
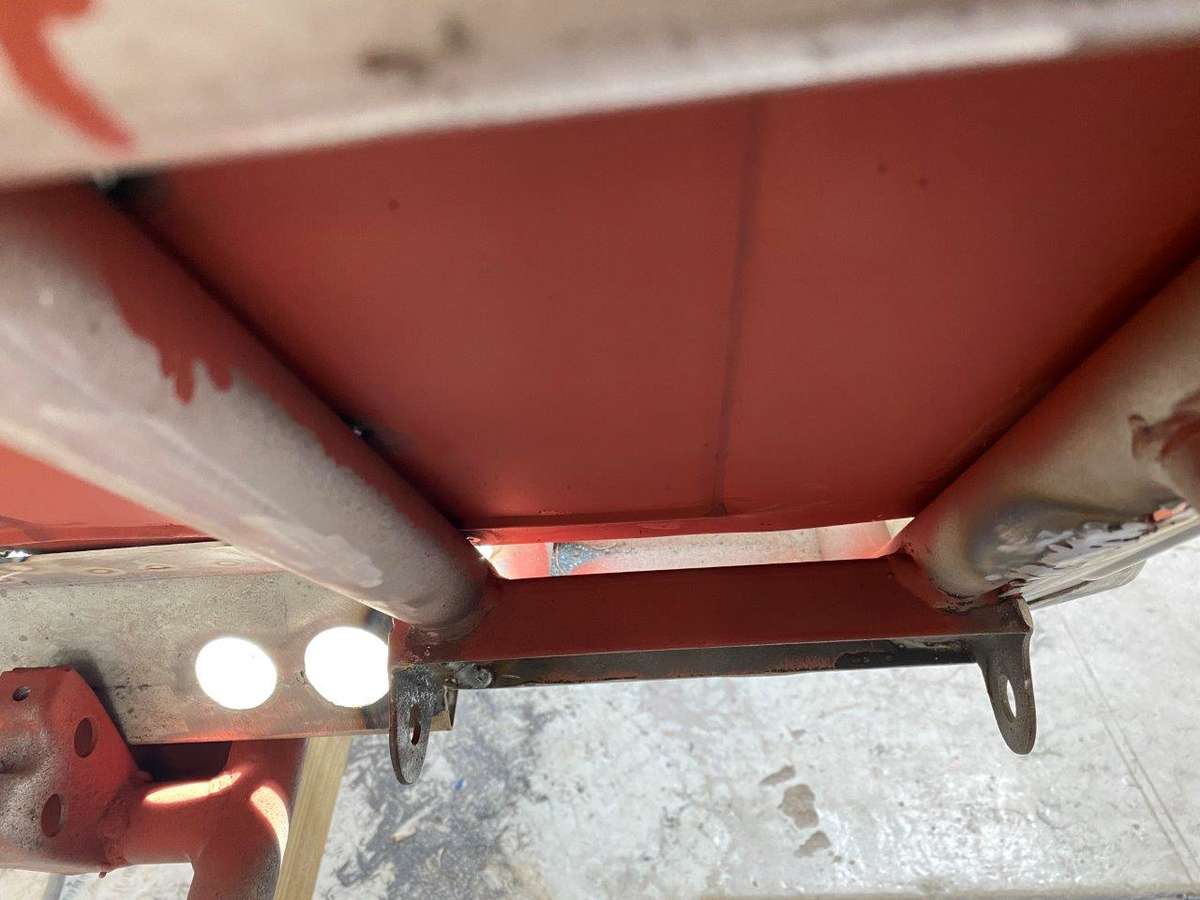
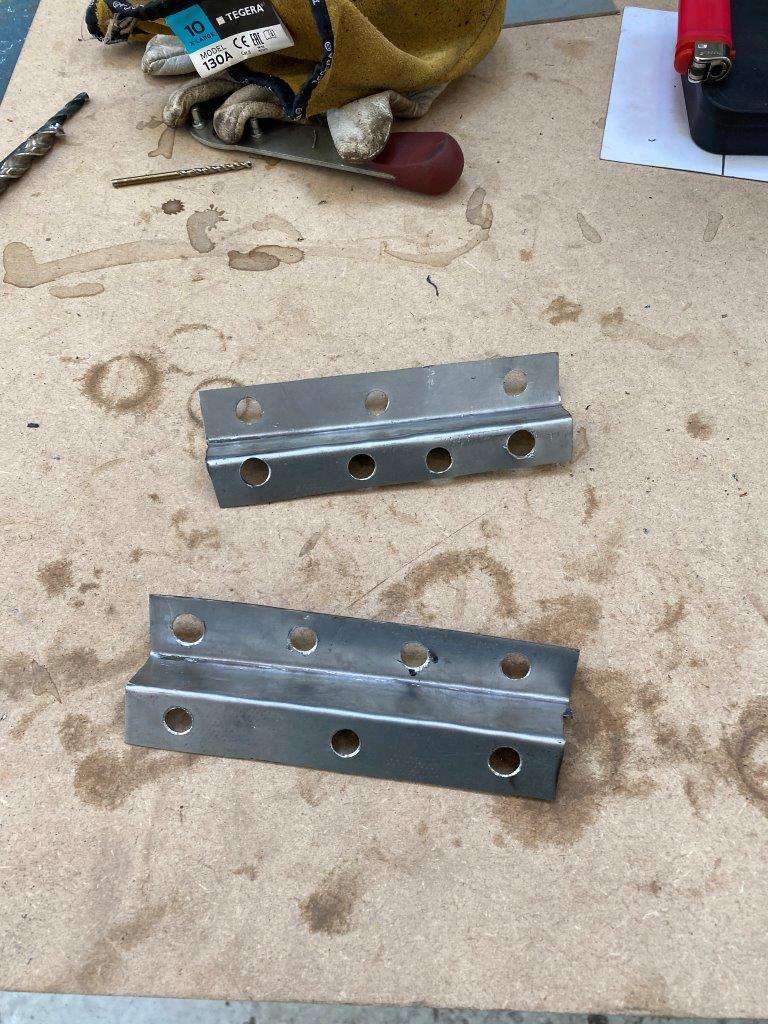
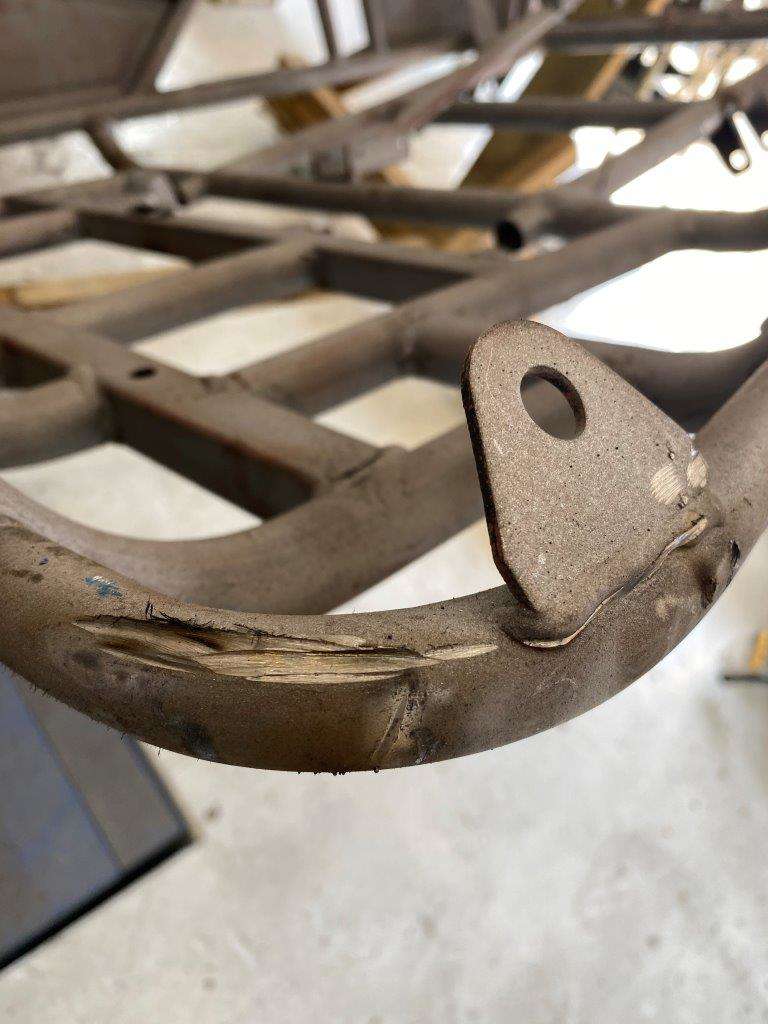
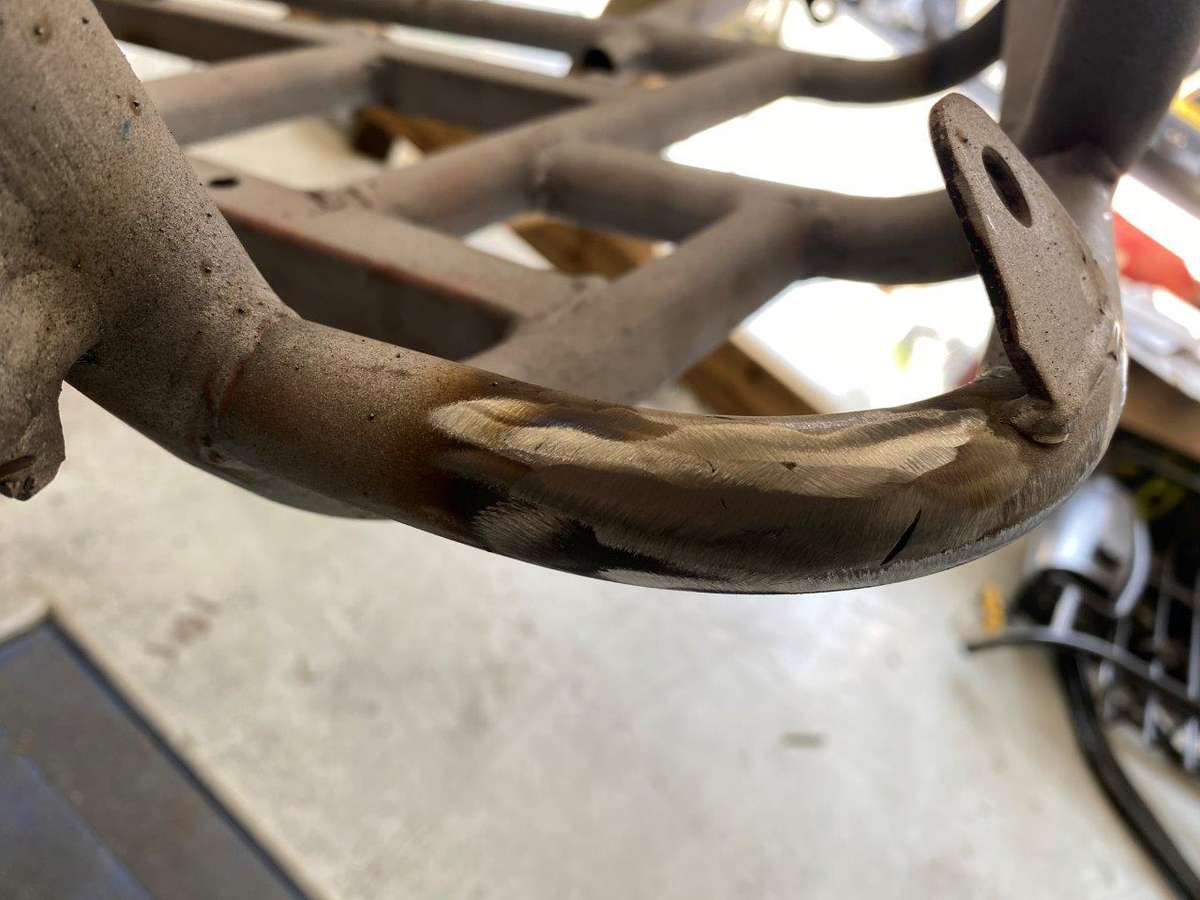
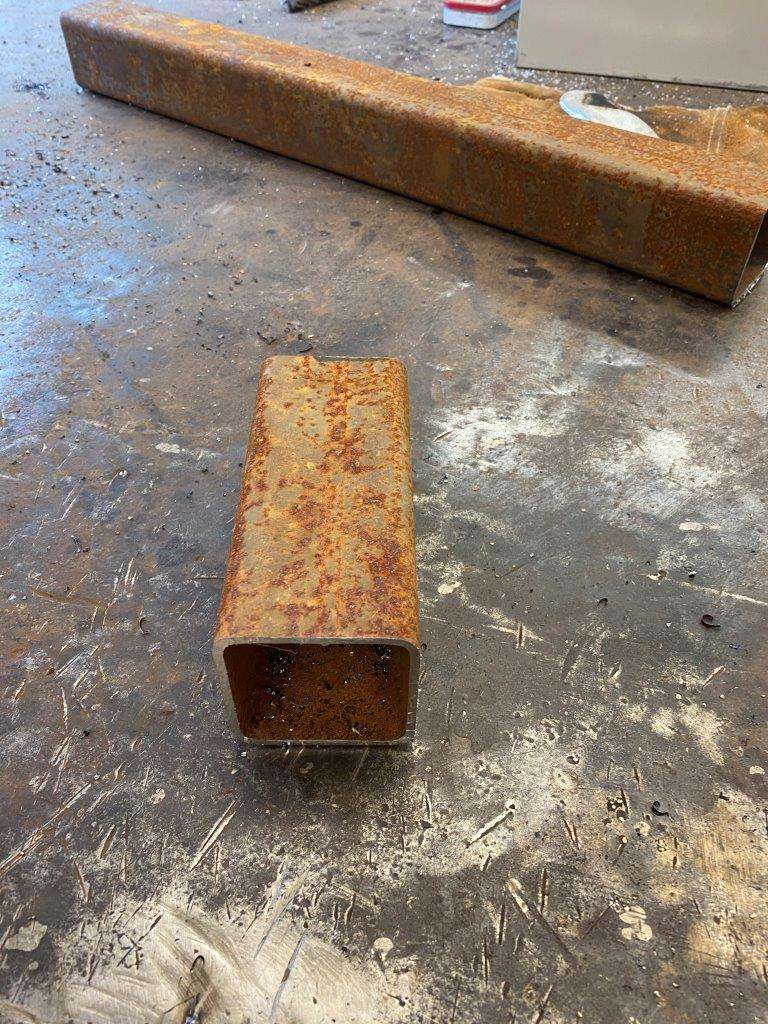
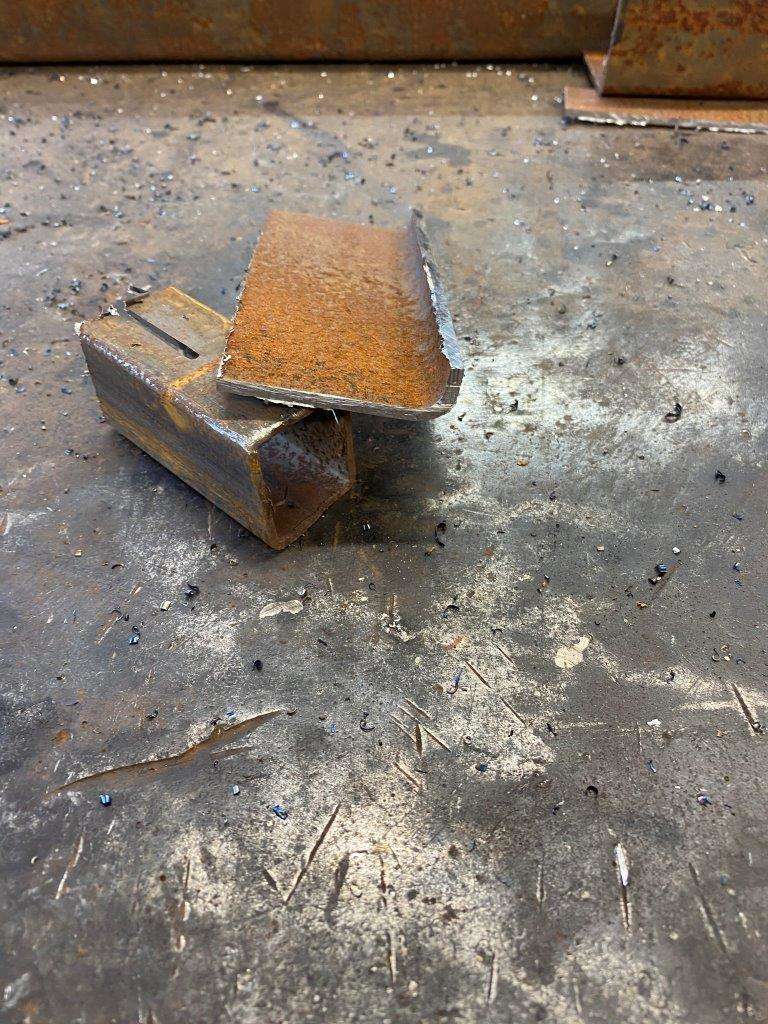
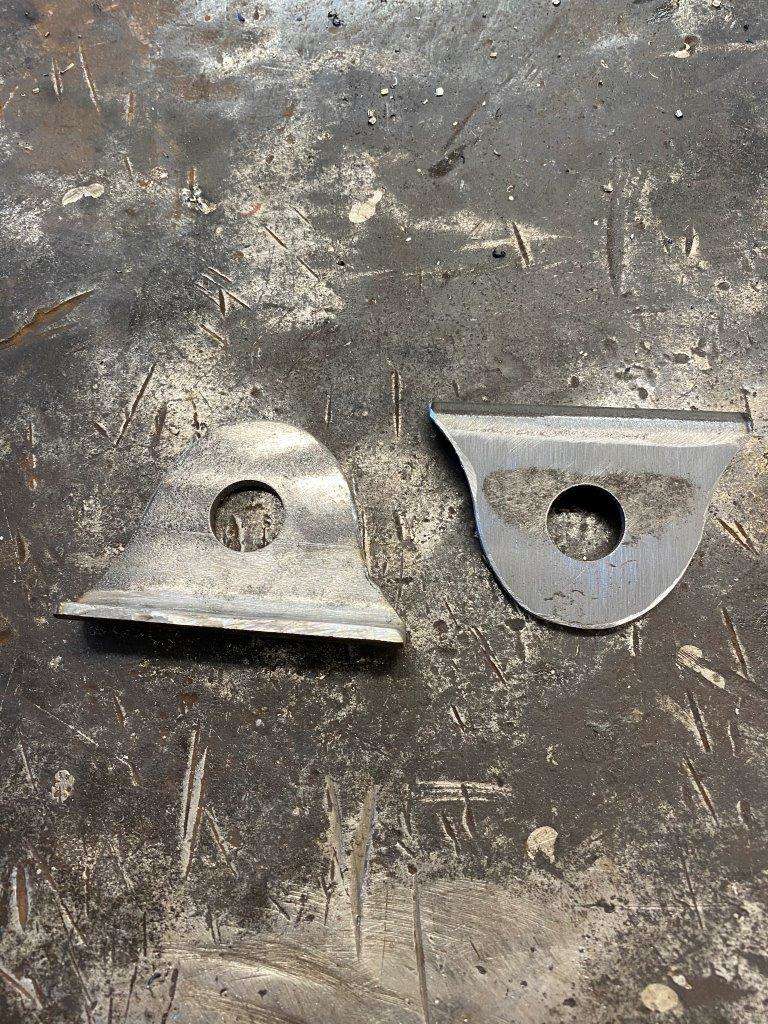
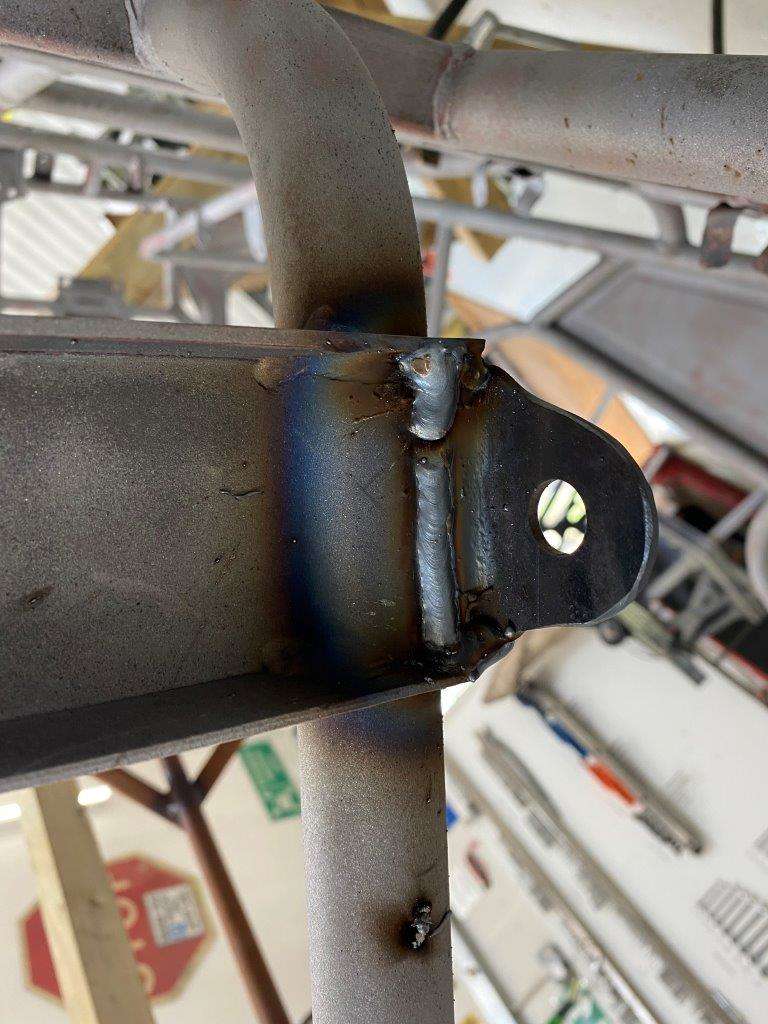
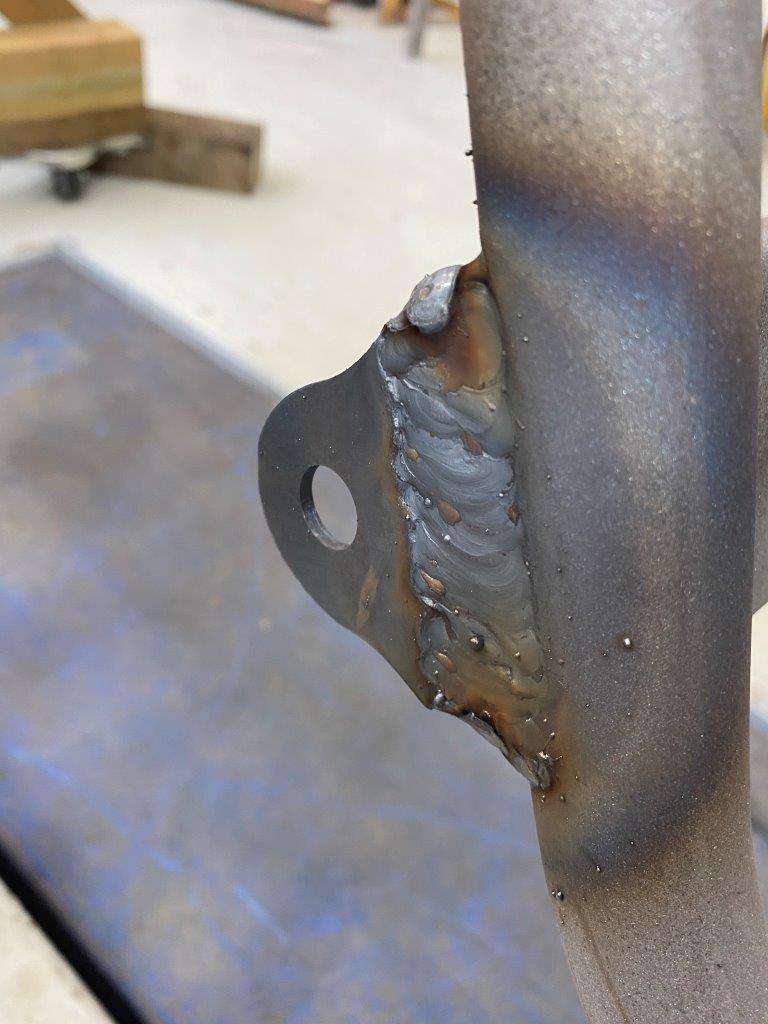
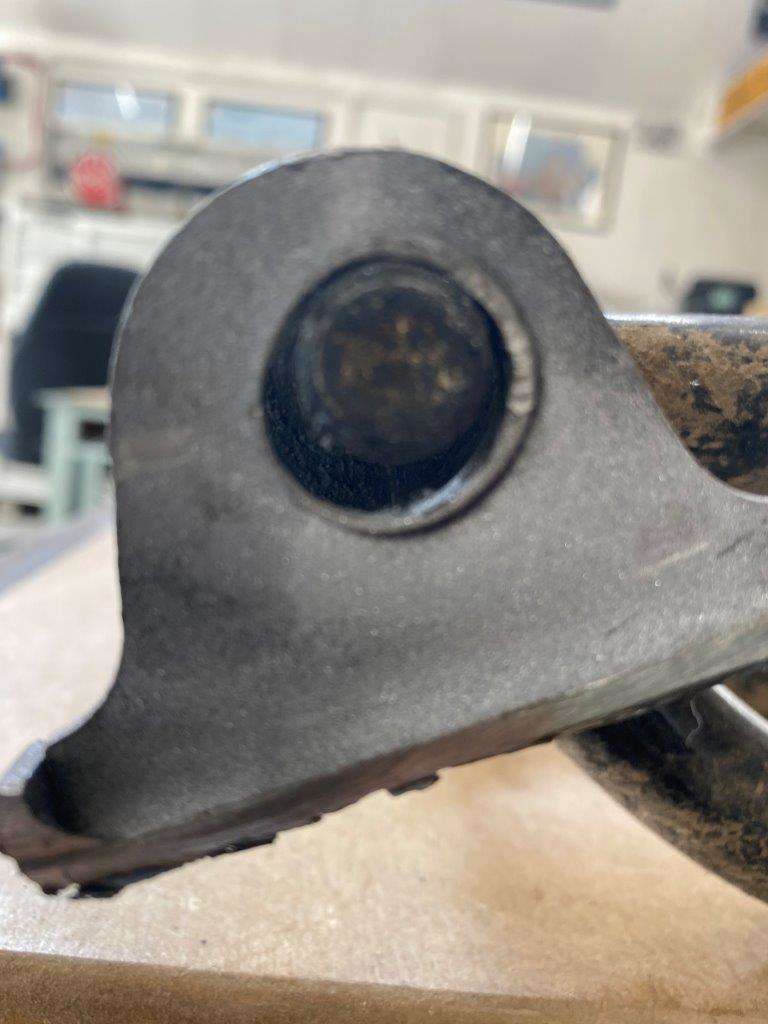
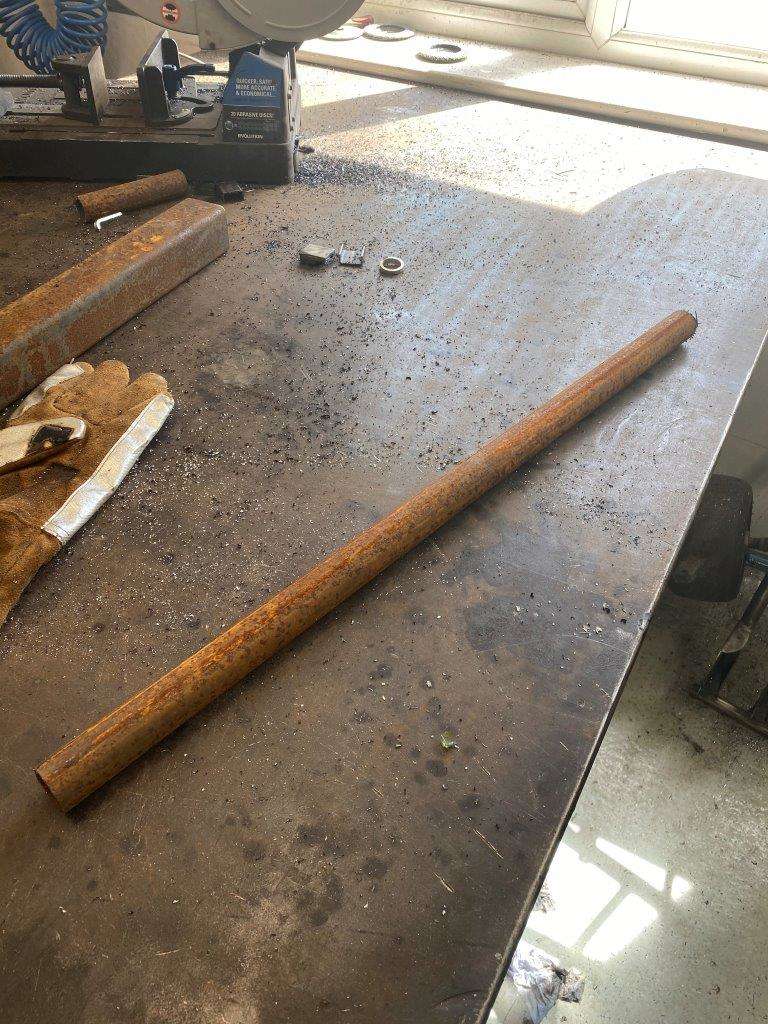
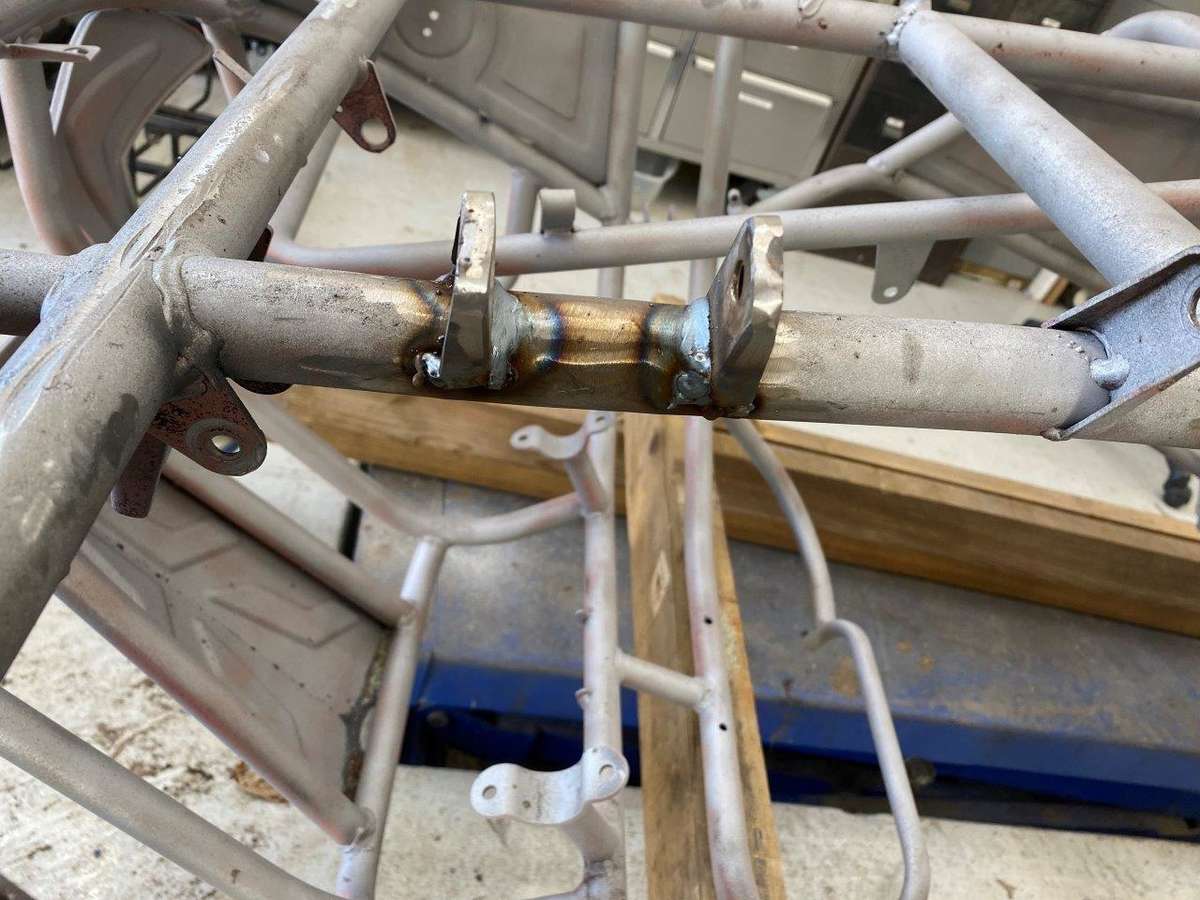
Morning folks, Another weekend in lockdown over then I spent most of mine in the Zed Shed obvs. I did have to give Mrs K an assist with a bit of painting but she has nearly finished now Yayy The next eagerly awaited ???? update is below for your enjoyment; this is another actual repair! From The MOT fail list – Suspension arm pin or bush excessively worn Nearside Rear (trailing arm) Suspension arm pin or bush excessively worn Offside Rear (trailing arm) The bush is fine, the pin is fine the hole said pin goes through on the other hand is the size of an Easter egg – one of those big overpriced Easter eggs!!!! The huge amount of play in the hole is what makes the trailing arm wobble really badly, when you look at the design and see that it is nothing more than a flat bit of 3mm mild steel it’s not really surprising it has worn out. Anyway I used the bar trick to check alignment and also took some measurements, it’s 201mm wide if anyone cares. I only had 12mm bar and it is a 14mm pin so You also start to get an idea of the wear here I considered options, one was to weld a washer on the outside face but that’s only about 1mm thick and would not last long, another was to weld a plate on the outside, an easier option but the bolts don’t have much spare thread on them when done up and I don’t want them coming off! I decided the best repair was to replace them completely so I cut out the bad bits - As seems to be a thing at the moment a bit of old box from the scarp pile has the right, actually slightly thicker, steel sides with the advantage of a built in “L” shape to make fixing it easier and I should get a stronger weld. Cut out the bit I want Drill to 14mm then cut roughly to shape and clean them up with the sander Then using the bar and a steel rule to get the alignment I spot welded those on After double checking both alignment and gap to be sure the trailing arm will fit back in I put a proper weld down each side. Inside Outside Fairly simple repair but it looks OEM and should last another few years This is the old carrier on the bolt, it shows the amount of play they had! Stay safe guys n gals Keyser - Ordinary men hate solitude. But the master makes use of it, embracing his aloneness, realizing he is one with the whole universe. Lao Tzu


-
Wanna see the video? I uploaded it for your amusment
-
We can call it the BugRocker instead of a BugRider Mrs K said it looked like some wierd Ski lift she even took a video to show everyone what happens when I have to much time in the Zed Shed
-
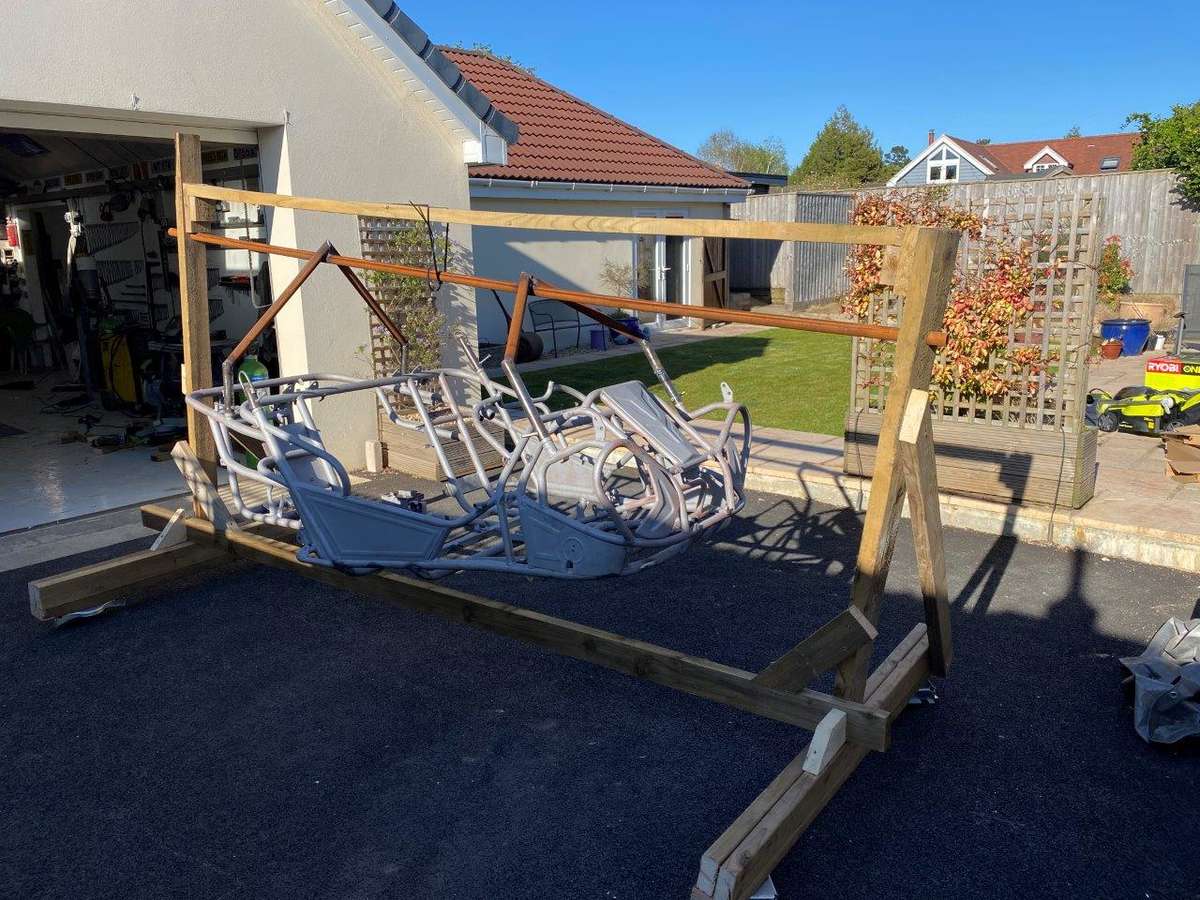
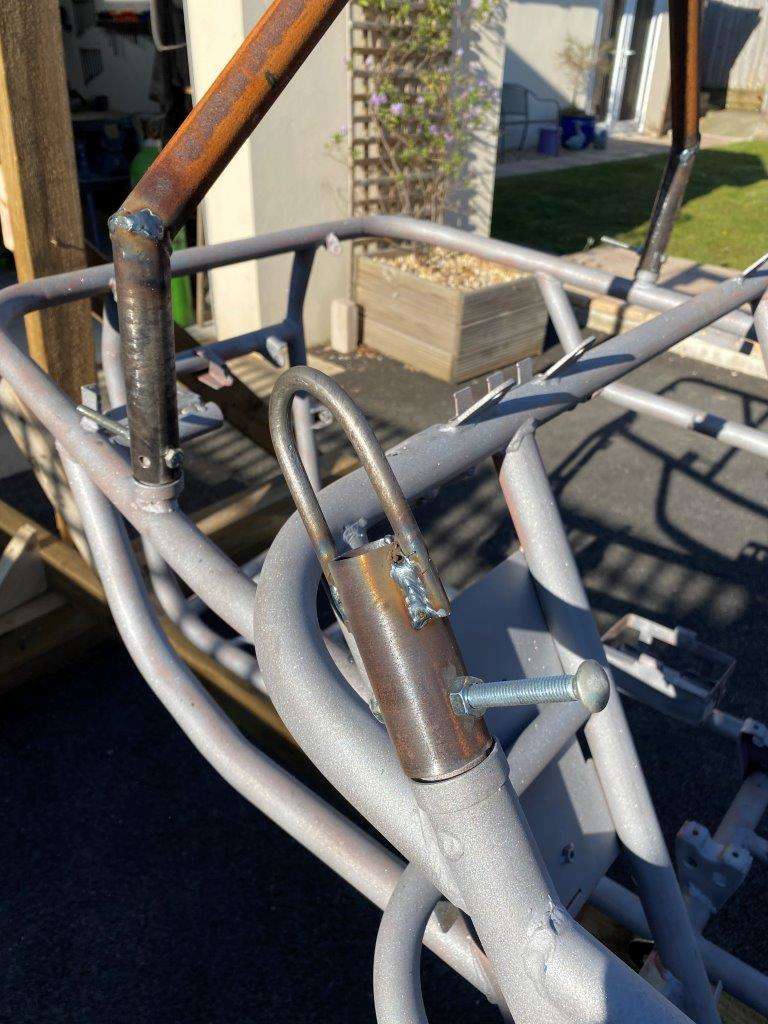
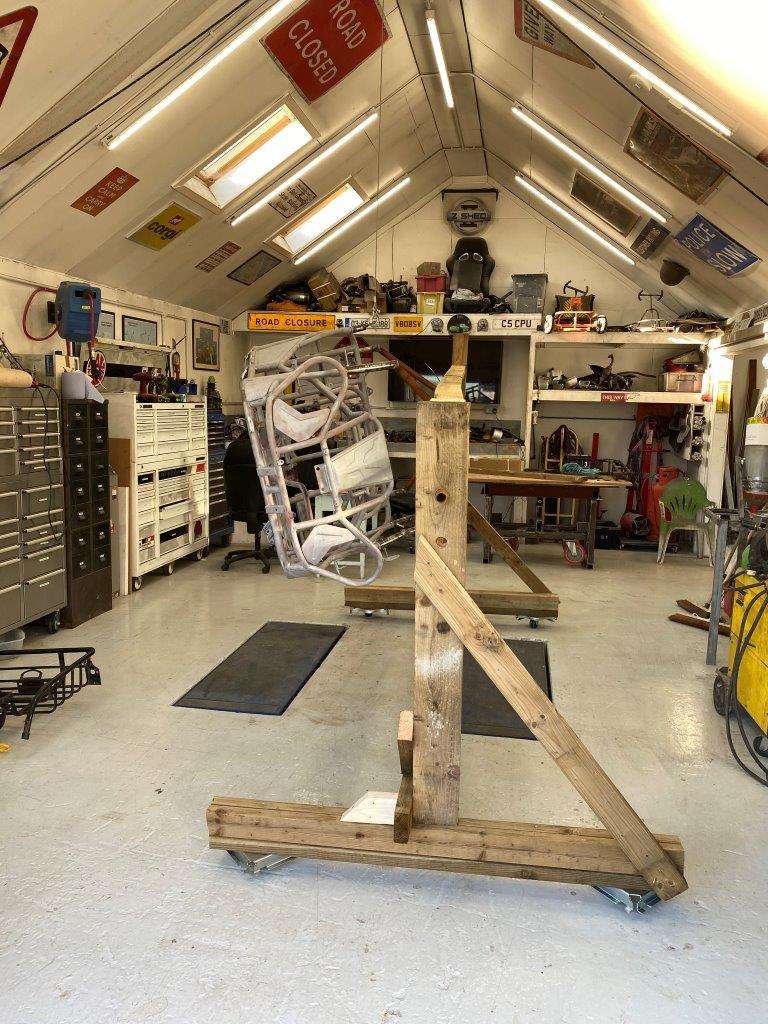
Covid 19 Log Star date 1123456009 – Supplemental. So quick side project, as I sat there surveying my handy work, thinking about what else I needed to do and drinking one of the many cups of coffee I have per day to help me stay sharp (that doesn’t work as I switch to decaf after 2pm ) I was contemplating how to paint the bloomin thing, so much to consider, and that’s without the undertray getting in the way. I know paint is a way off, but I do like to think ahead on a project, so I have a chance to go through things in my mind before I get to them, hence pondering the paint issue. Then it came to me the only way to paint this in one go is to suspend it somehow, I could use the winch but then it would swing about and it’s quite big! So I came up with this – and it’s funny …………….. Some old metal from the scrap pile Cut, cleaned and drilled And some wood work to make …………………………. Then I added these They hook to the winch and it now does ninety degrees each way (well nearly ninety) It works and it made me laugh Keep Safe guys n girls Keyser - Testing oneself is best when done alone. Jimmy Carter
-
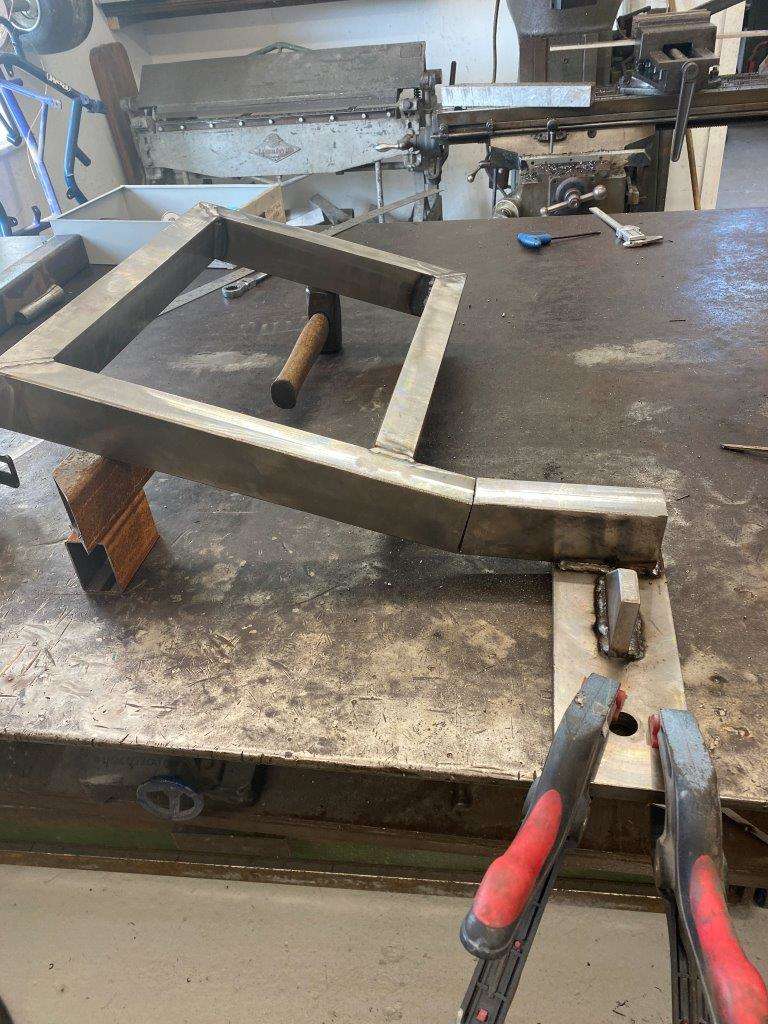
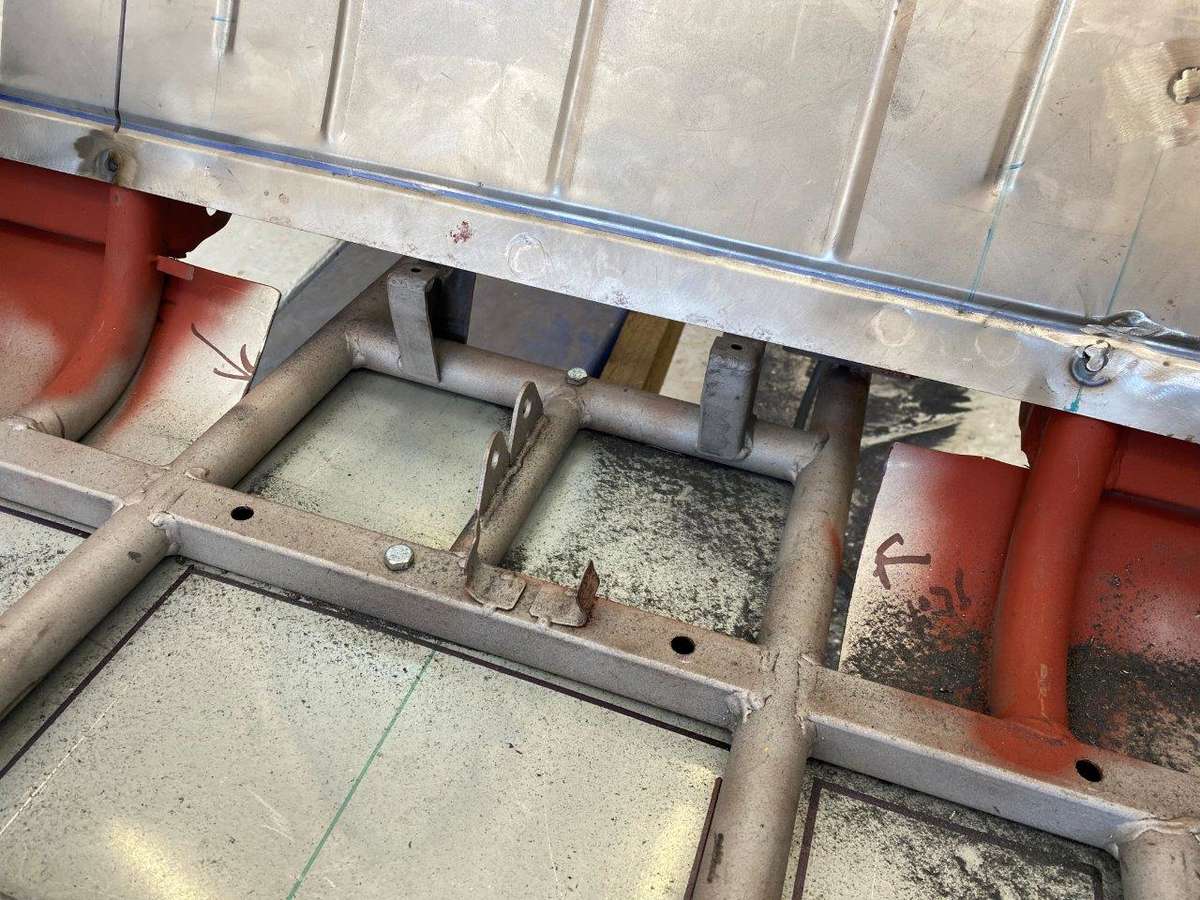
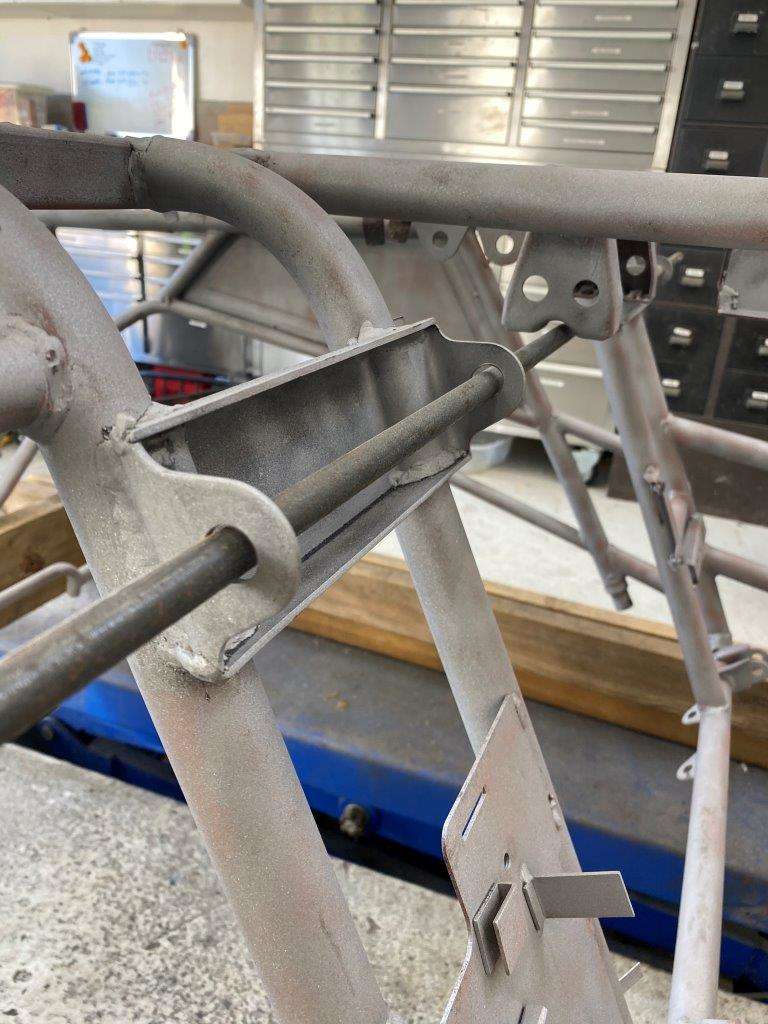
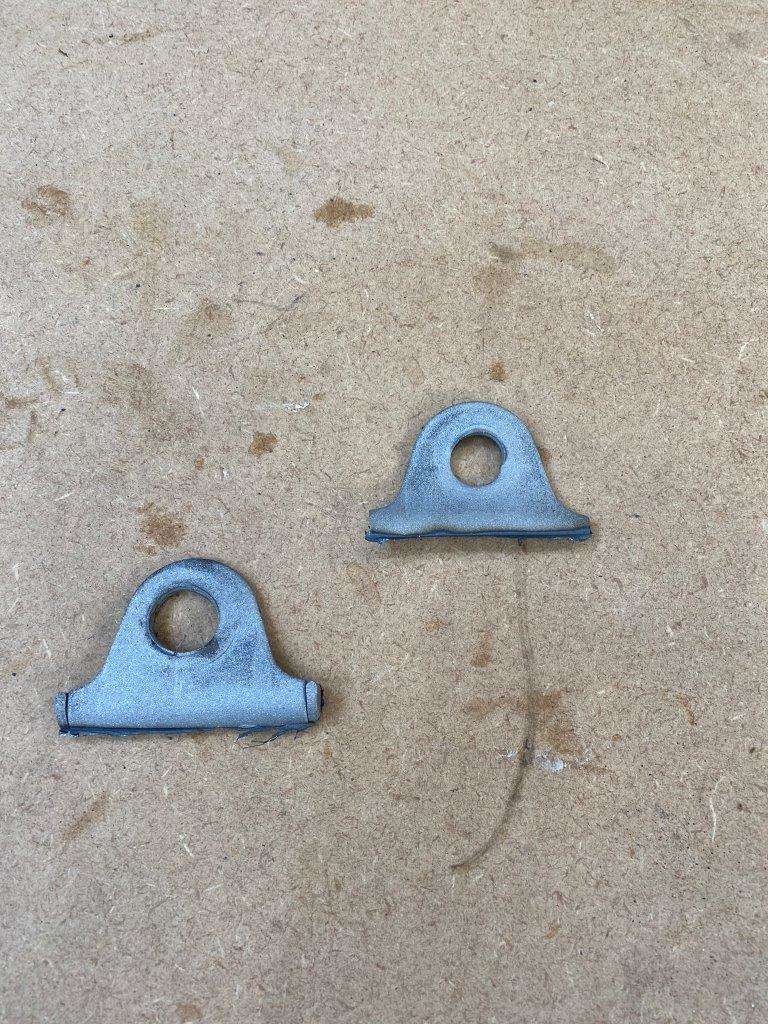
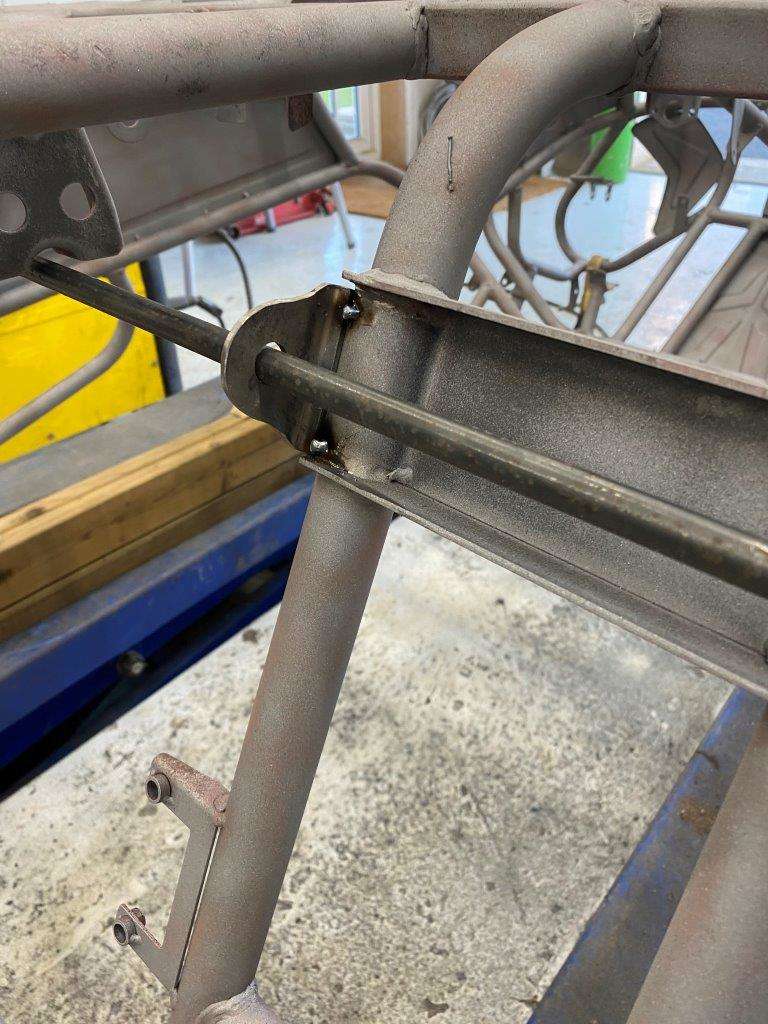
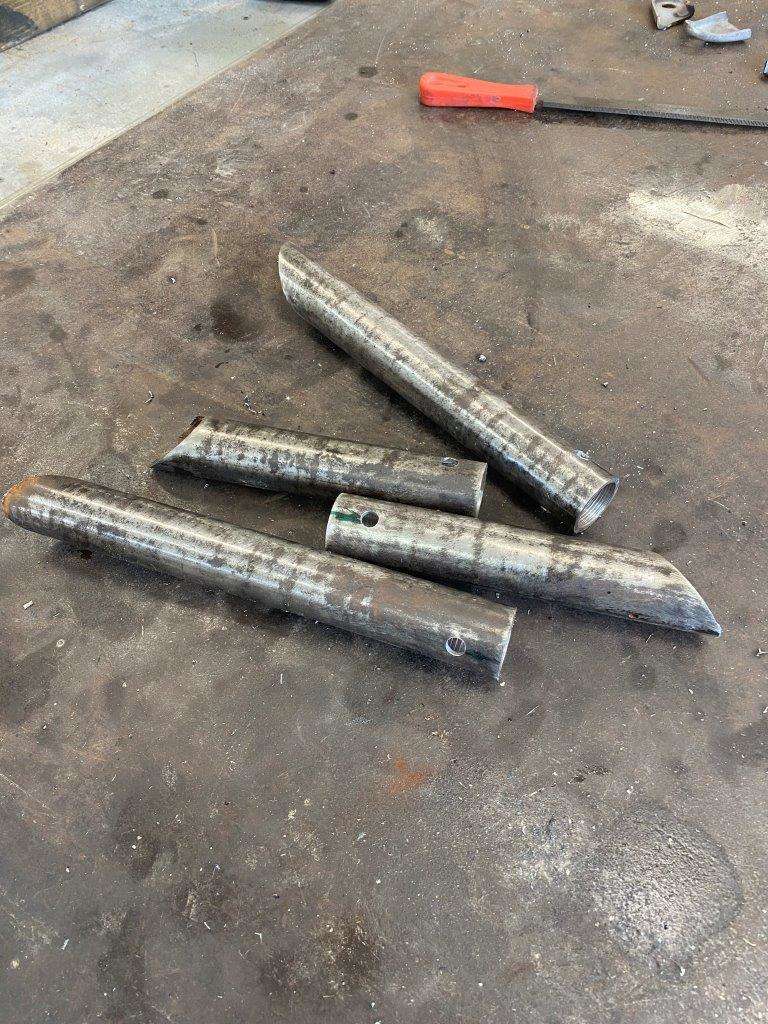
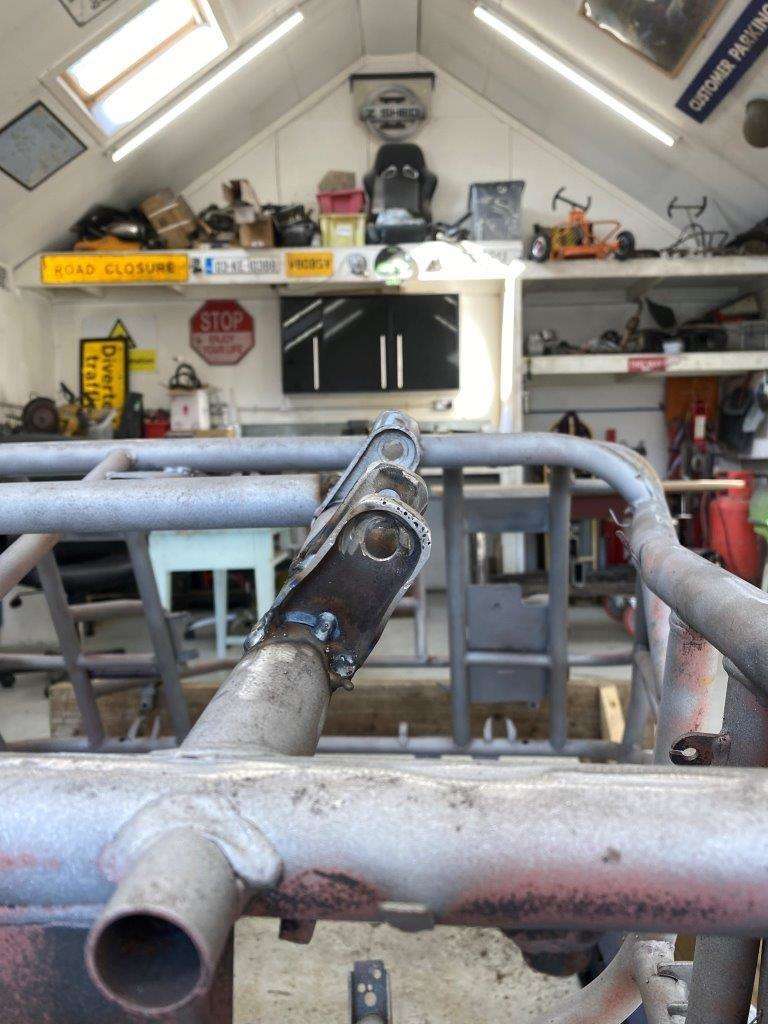
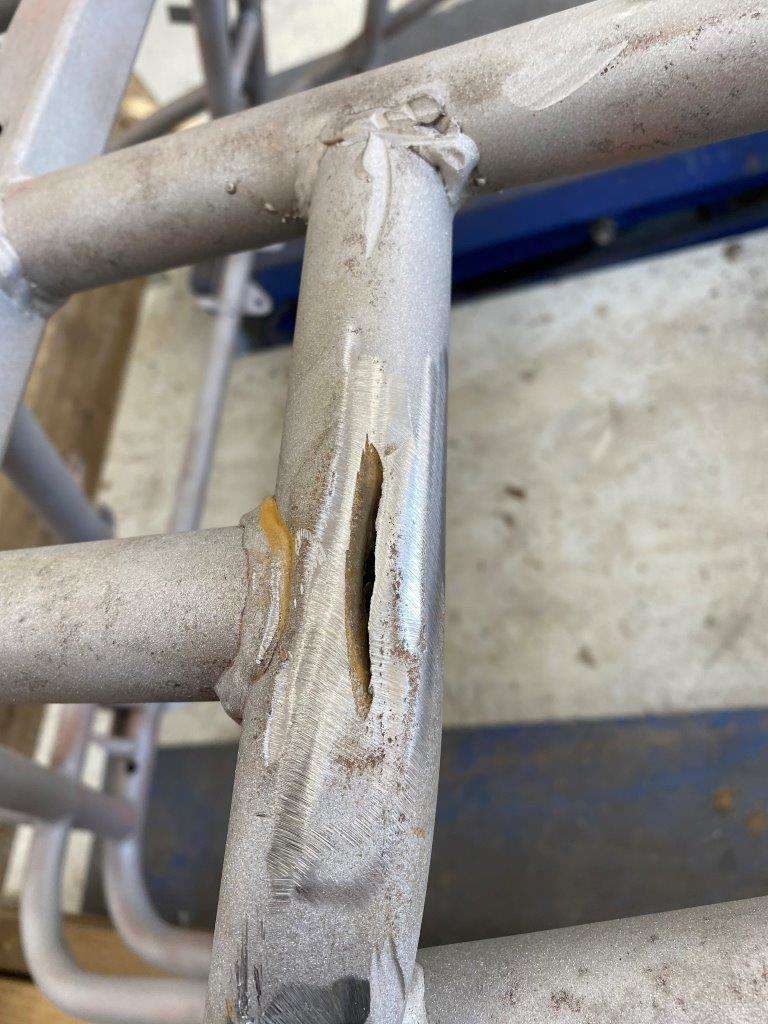
Covid 19 Log Star date 1123456009 – Day 25 No sign of change fleet command have ordered us to remain on station for 3 more weeks!! As promised the fitting of my lovely new brackets, (brought to you with hardly any sarcasm) So I cut off three of the four brackets as the last one looks OK and a reference point is useful Now I need to line the little beggars up again and I came up with this – not sure it is up there with a Hunter laser alignment system but given how this thing is thrown together it should be good enough I used a 10mm bar that I just happen to have laying around Took a load of measurements, then I used another and created a mirror image Used the wishbone for the gaps ant spot welded it in place Took the bar out and welded it all up Looks fairly straight now Before After I also sorted out the issues I created with some over zealous angle grinding to remove the undertray Bit of weld and an angle grinder You’d never know Be safe, Stay safe!! Keyser - If you make friends with yourself you will never be alone. Maxwell Maltz
.JPG.e968b740ffcbbc72d57097bc73293d79.JPG)